ccoyle
-
Posts
10,545 -
Joined
-
Last visited
Content Type
Profiles
Forums
Gallery
Events
Everything posted by ccoyle
-
 Congratulations on completing your first model! It's a great achievement.
- 89 replies
-
- 2
-

-

-
- Enterprise
- first build
- (and 2 more)
-
Bummer! But at least the damaged pieces are made from wood -- wood is pretty straightforward to rebuild.
-
I'm thinking that USS England will be moving back to the front burner in the not-too-distant future.
- 98 replies
-
- 11
-
-
-
Welcome aboard! Be sure to click here for some tips on how to navigate our site.
-
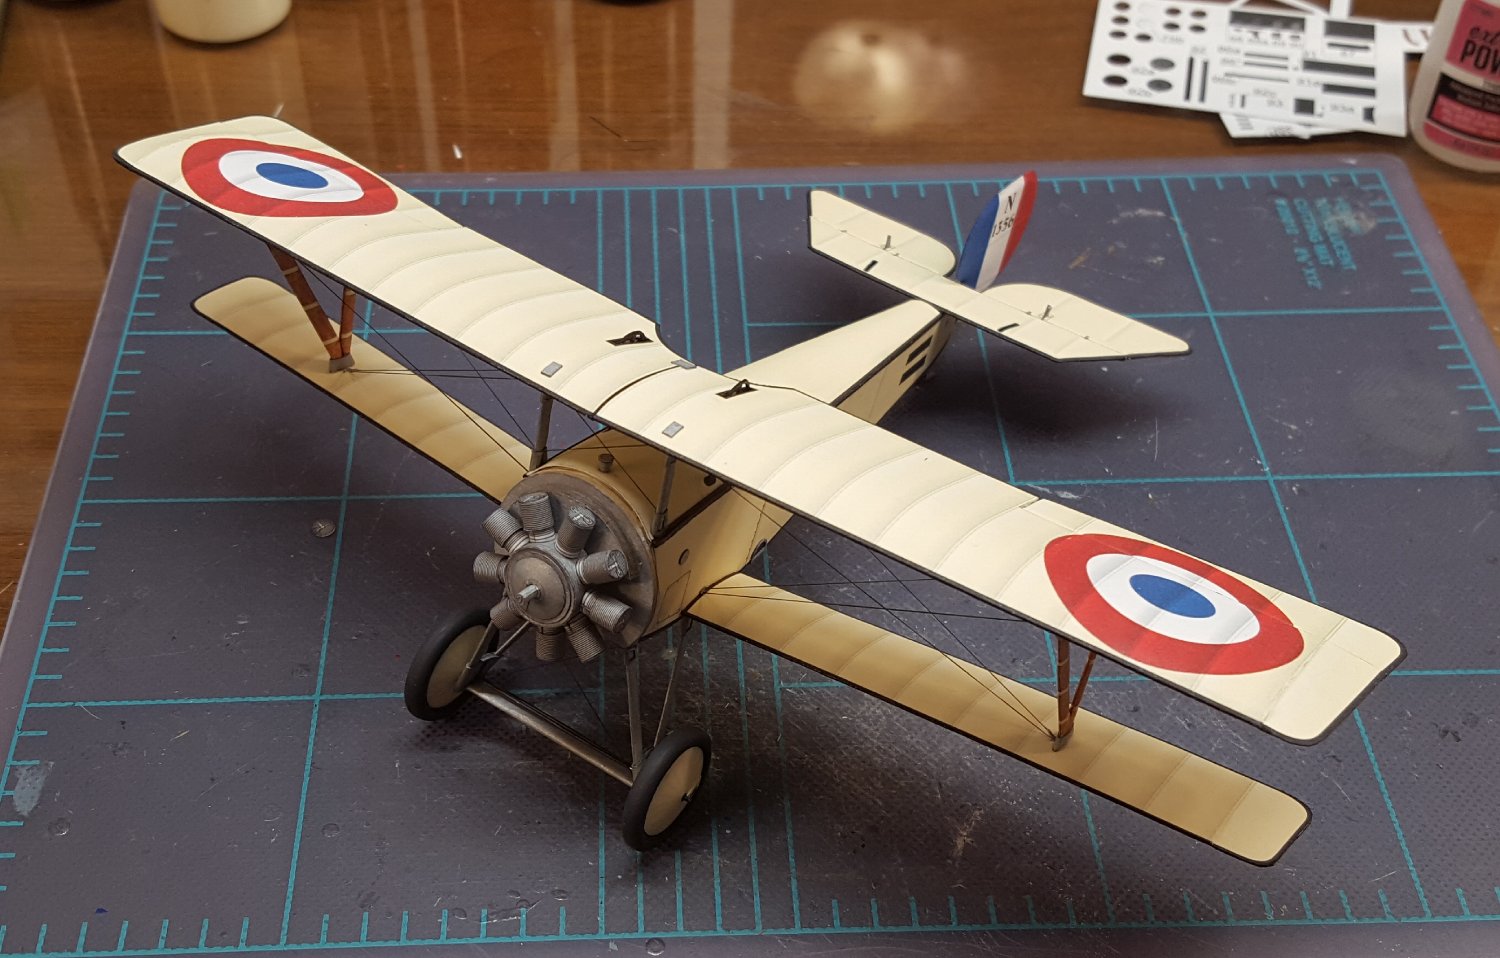
Update: engine, cowl, and propeller completed, but will leave the final installation for later. Struts for horizontal stabilizer added, but no control wires yet. The last significant assembly to do will be the Lewis gun.
- 98 replies
-
- 23
-
-

-
That's part of why I like the KK kits so much. They've a good amount of detail without being insanely difficult to build.
- 98 replies
-
- 11
-
-
It's mostly paper tubes and not particularly difficult -- nothing compared to an 18-cylinder, twin-row radial in a Halinski kit.
- 98 replies
-
- 15
-
-
Nice work!
-
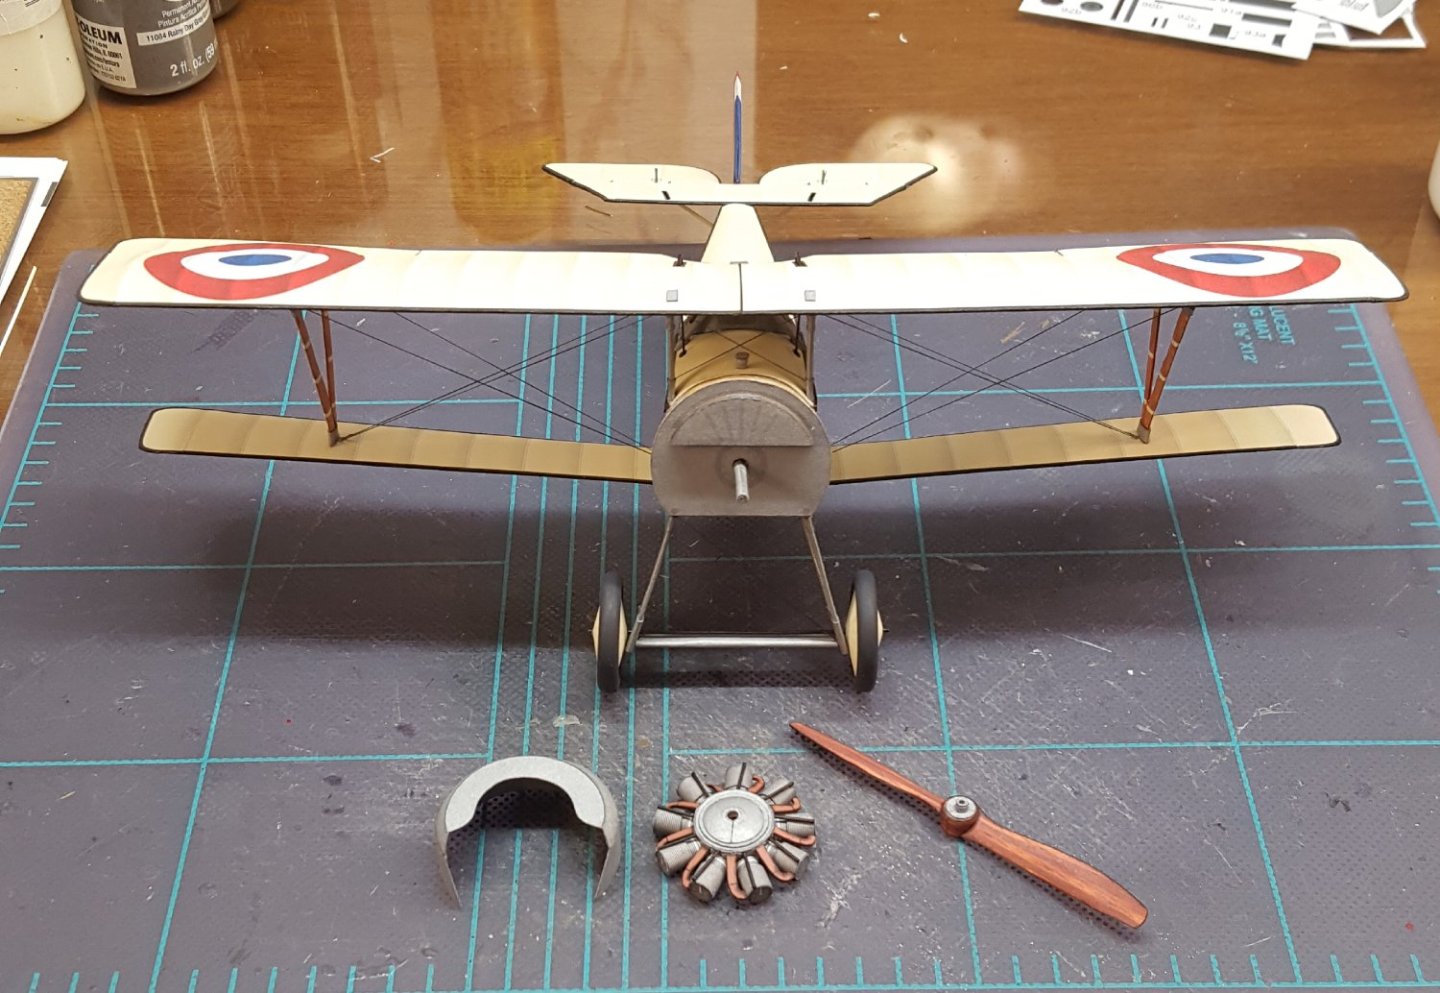
Last update for today. The empennage is on, but not braced. The engine is only test-fitted for this shot -- it's still incomplete.
- 98 replies
-
- 20
-
-
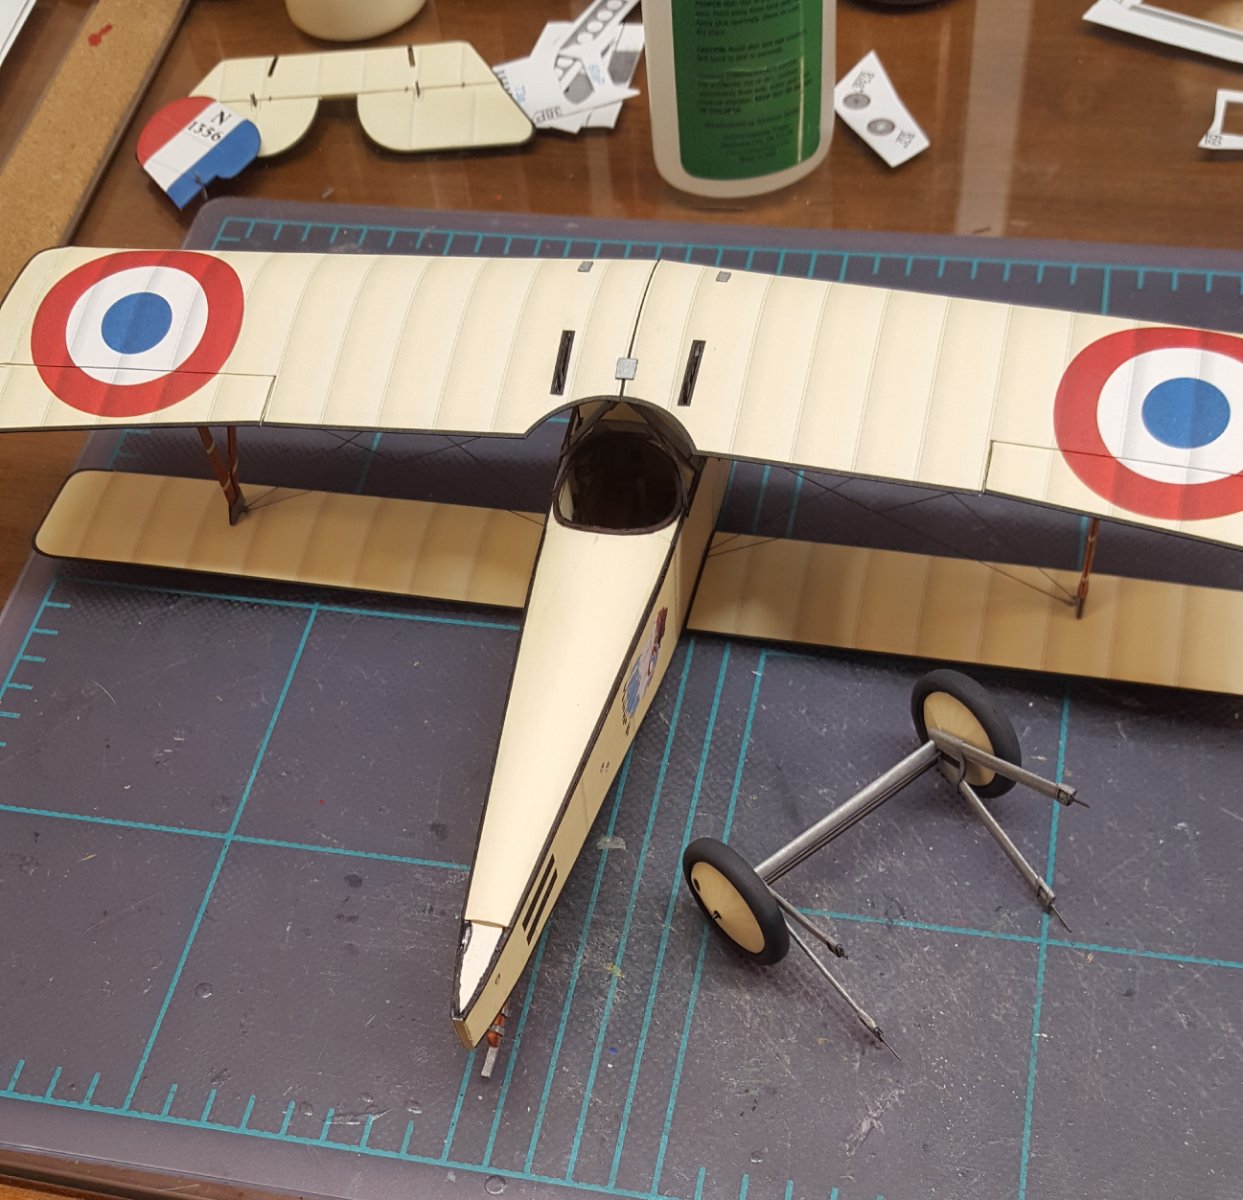
The landing gear are now complete and sitting overnight to dry thoroughly. I will rig the bracing between the struts before attaching the gear to the fuselage. In the background you can see the completed horizontal stabilizer -- the empennage will go on after the gear have been attached, because I still have to turn the model upside down to do some work.

- 98 replies
-
- 17
-
-
-
Great result!
-
I know, I know. I'm getting too accustomed to spending $20-30 for a complete airplane combo (kit, frames, canopy). But it is something compared to a typical card kit. But -- it is an extremely nice kit and accessories, and that much is certain. I'm gonna have to try one someday.
-
You must have gotten me confused with another staffer. I don't handle NRG issues.
- 179 replies
-
- 2
-
-
- Second Build
- Pinta
- (and 2 more)
-
Gee whiz, Craig, slow down! Take some time to enjoy the build! 😉
-
We have two finished build logs for this kit which you will find listed here. Perhaps these will serve the purpose?
- 1 reply
-
- 1
-
-
Welcome aboard, John! Those are popular kits, and we have numerous finished examples here in both the gallery and build logs section to inspire and help you through your projects. Cheers!
-
Yeah, those are a new thing. I just read about them yesterday in my FB feed. They also sell separate sets for blocks, yards, and sails (with an additional set for studding sails). The blocks set is the one that will put a dent in your wallet, and if one buys all of the available detail sets, the total price really ain't cheap -- but at least it's an option.
-
Both the upper and lower wings have locator marks. The struts are wrapped around lengths of wire. I punch holes in the locator marks and trim the wire so that a locator pin is left -- just like a plastic model. 😁
- 98 replies
-
- 12
-
-
-
I should clarify. It doesn't grab well when under tension, so I can't anchor one end and then attach the other with canopy glue. But it does work well when attaching the first, non-tensioned end. It takes only a minute or so to set, but I usually brush a little bit extra onto the joint as a precaution and then let it set for several minutes while I work on something else.
- 98 replies
-
- 13
-
-
-
Interplane struts, bracing wires, and top wing added. The bracing wire is done with EZ-Line, an elastic polymer that was originally designed for model railroaders to replicate utility lines. EZ-Line's saving grace is that you can glue one end, cut it just shy of the other attachment point, then stretch it to make the connection, after which it stays "taut" without actually exerting much tension force anywhere. Its downside is that it is very fussy about glues. I often have a devil of a time trying to get it to pick up just a tiny drop of CA to make a bond -- it just doesn't adhere well. Fortuitously, I discovered that, yet again, Evergreen Canopy Glue works well for the task. So, I have been using Evergreen for point-to-point connections and CA wherever I can wrap the line around its attachment point. For this construction sequence, I first glued the V-struts to their lower wings, then glued the lower wings to the fuselage. Next I added all of the interplane bracing, which is a much easier method (though not entirely pain-free) than doing it after the top wing is on. Once all the bracing was done, the top wing was added and voila!
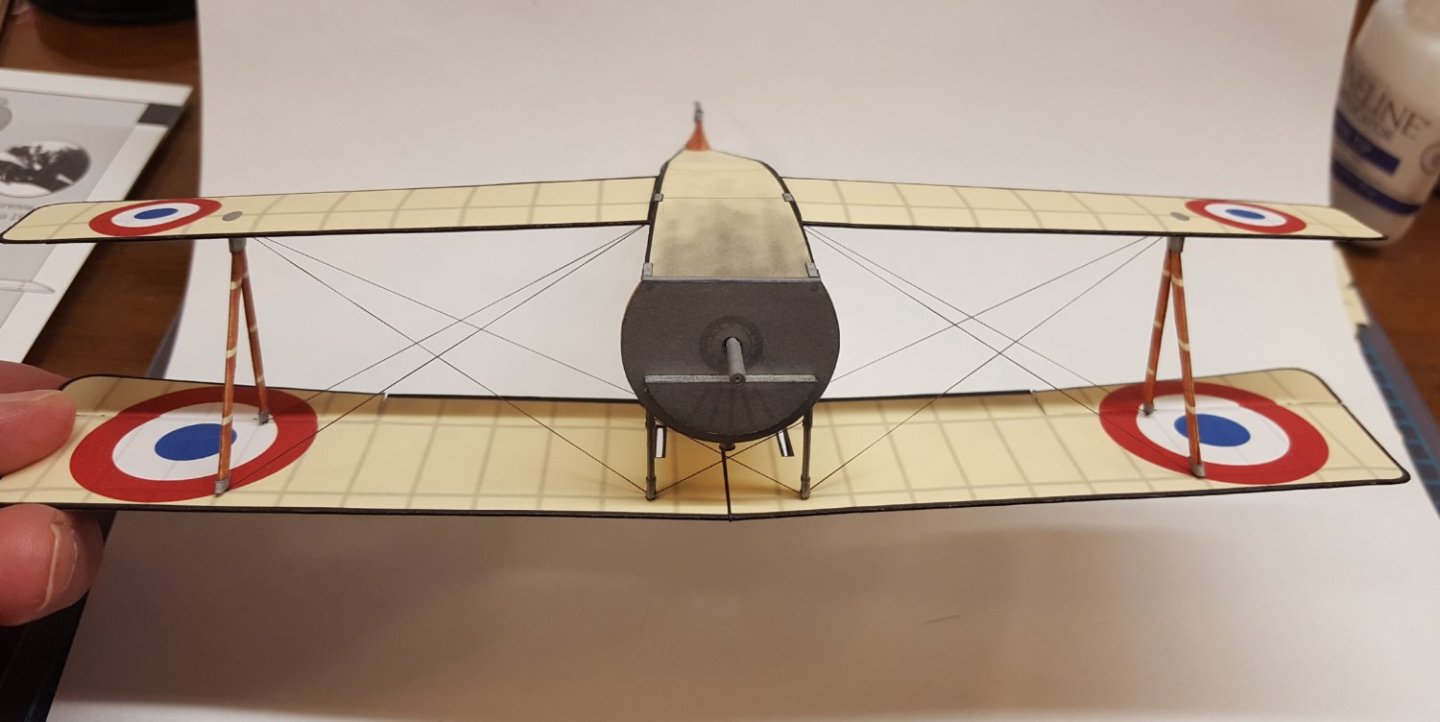
- 98 replies
-
- 21
-
-
-
-
I'm finding that canopy glue has many useful qualities for card models -- grabs quick, dries clear, and can be touched up with a damp brush or fingertip. The one fault I find is that it remains somewhat flexible after curing, so it is not entirely suitable for joints that require rigid connections. I used to use thinned PVA quite a bit, applied with a brush (messy!), but I've really taken a shine to using the canopy glue and applicator.
- 98 replies
-
- 12
-
-
Probably have more collector value. How much more I can't say.