ccoyle
-
Posts
10,601 -
Joined
-
Last visited
Content Type
Profiles
Forums
Gallery
Events
Everything posted by ccoyle
-
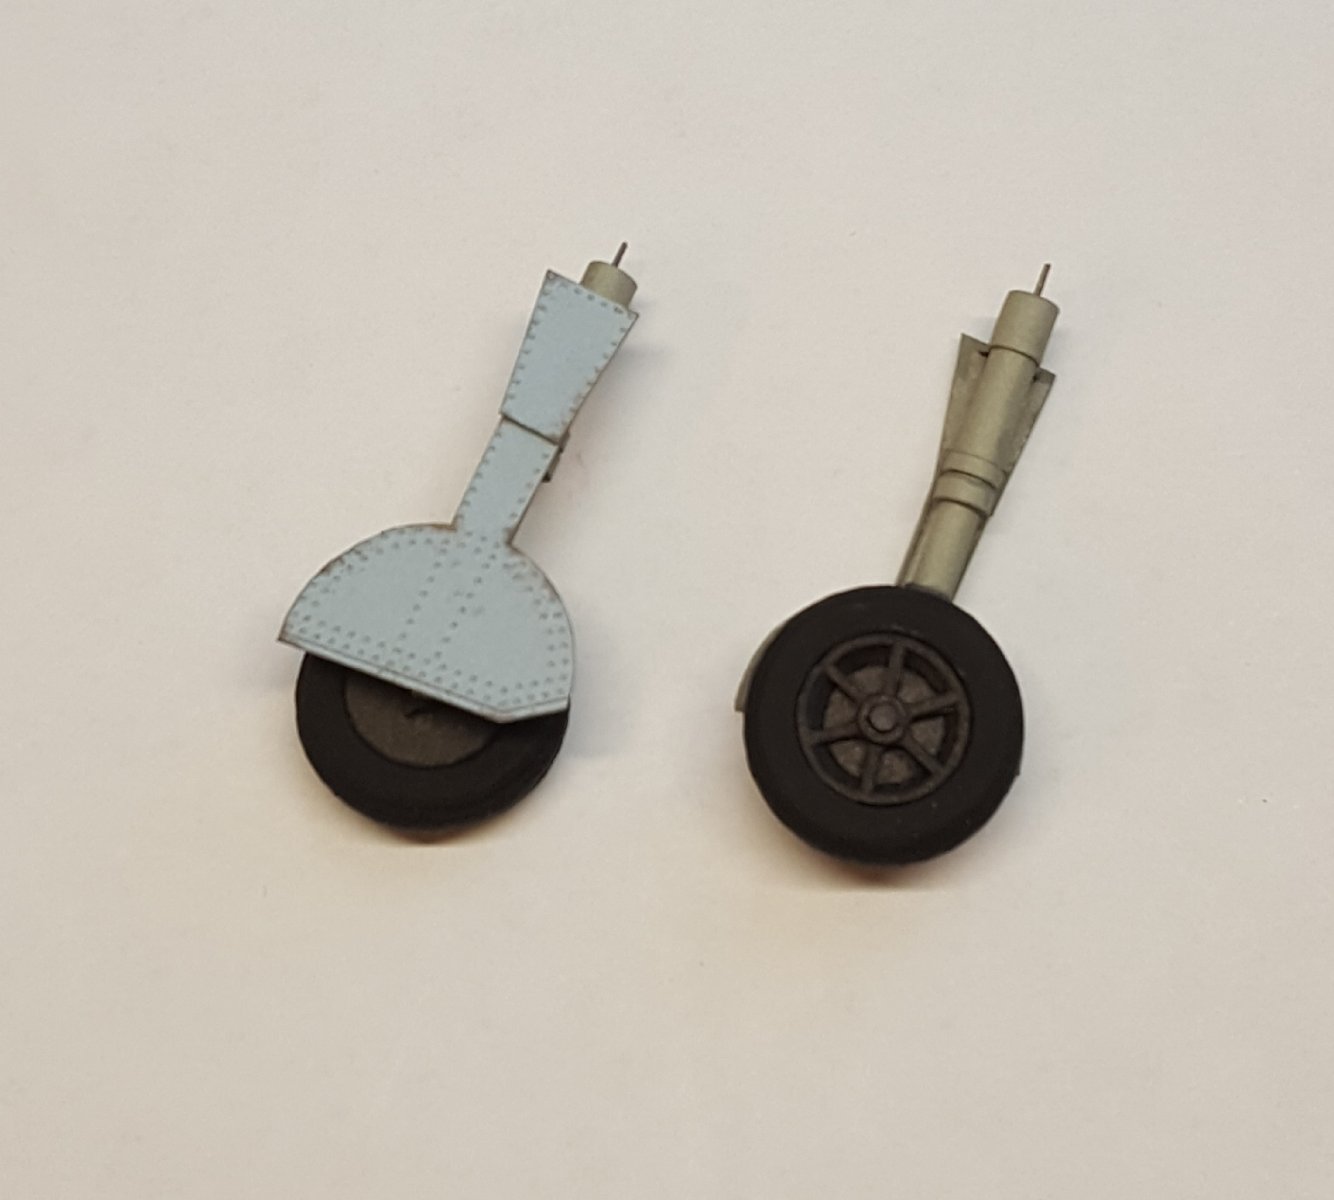
 Landing gear under construction. First are the main wheels -- 20 parts each. Wheels mounted to struts and gear doors. And finally main gear mounted to fuselage. My goal is to finish this by the 4th, to make it an even two months since the start of construction.
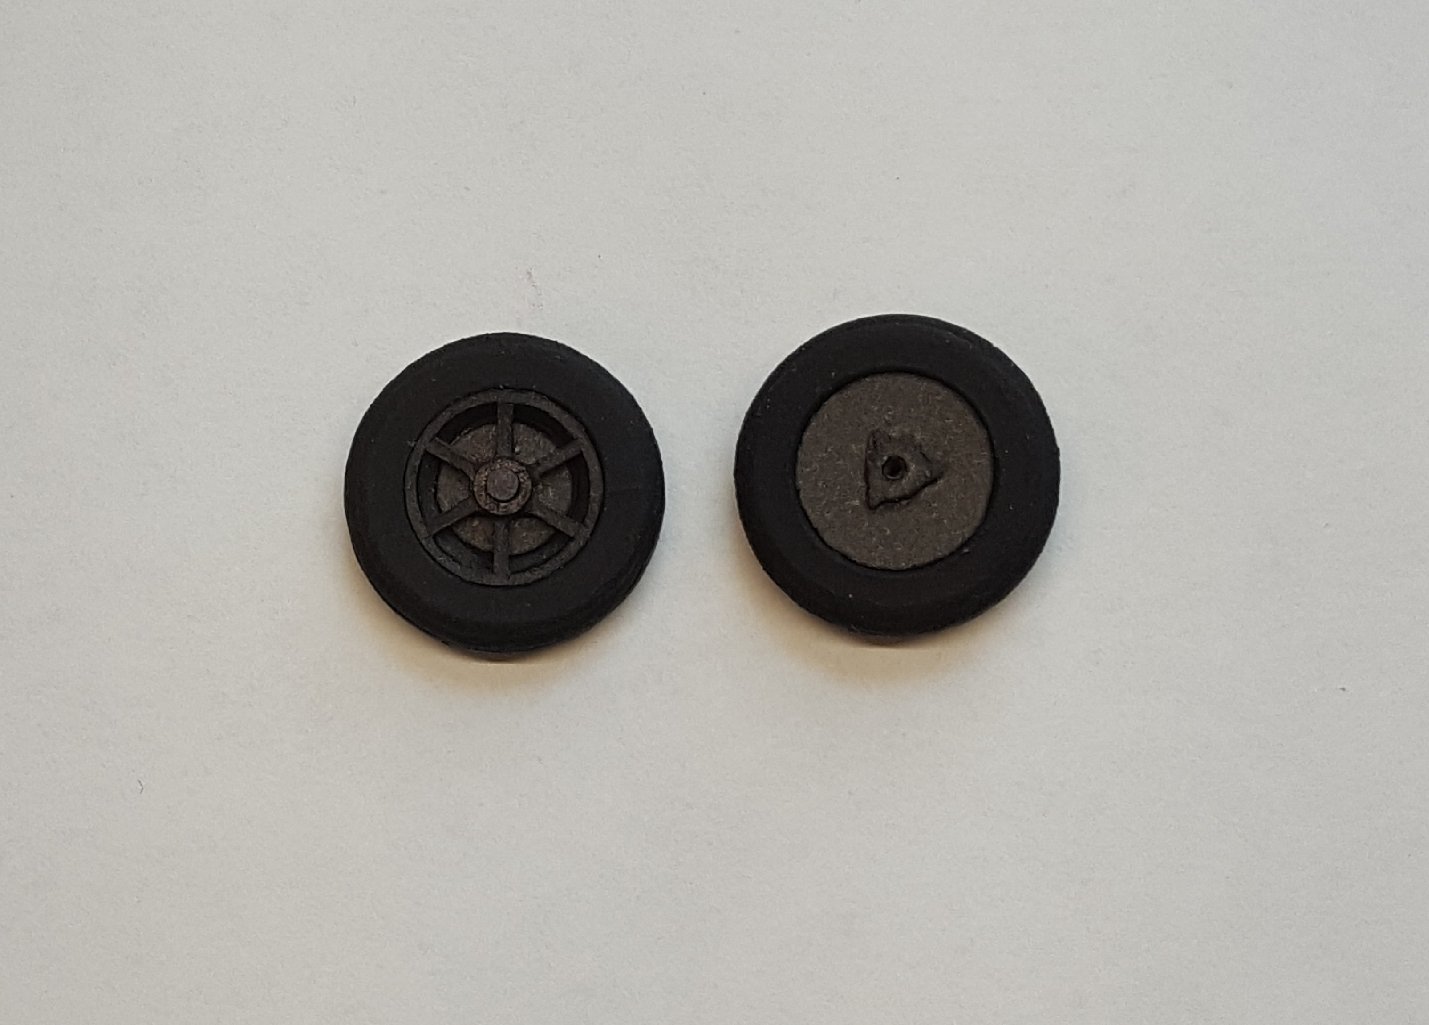

- 165 replies
-
- 16
-

-
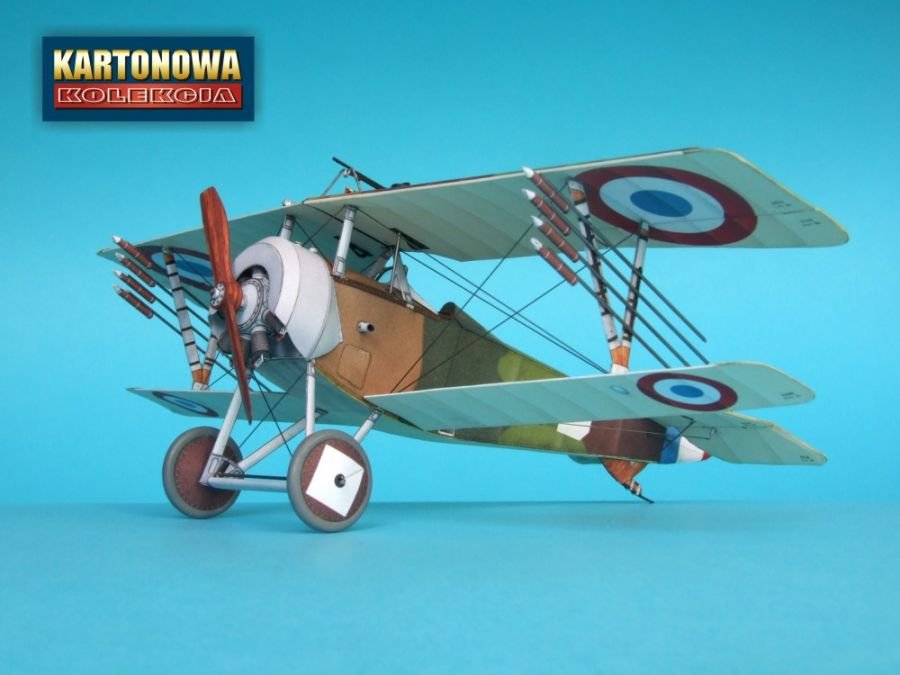
So, I recently decided to suffer the injustice of high postage costs from Poland and ordered a batch of kits. The VERY NEXT DAY I learned that Kartonowa Kolekcja, my favorite publisher, just published a new kit. It's a Nieuport 16c.1, complete with Le Prieur rockets. The Nieuport 16 was an updated Nieuport 11, so this kit amounts to a repaint and slight modification of the older release. I was hoping that the next kit might be a SPAD, Albatros, Swordfish, or Fokker DVII repaint, but no joy. Still, this kit is a nice addition to the KK catalog

- 98 replies
-
- 11
-
-
Getting the rigging done on these is a combination of getting a general idea of how biplanes are rigged (comes through practice), learning to read and interpret rigging diagrams (also comes with practice), and scouting images on the internet (yep -- practice . . . nah, just kidding on that one).
- 93 replies
-
- 10
-
-

-
Welcome, Zac! I actually think a well-motivated beginner might be able to pull off the Endurance. Having no guns and being square-rigged on only one mast, it lacks some of the elements that can make a first build particularly difficult. The photo-based instructions should also be very helpful. Be sure to create a build log when you get started, and you should be able to get lots of advice along the way. Cheers!
-
Not really. These days I'm using mainly Evergreen Canopy Glue, but I have used lots of others over the years. I still use CA (thin & medium), Aleen's Clear Tacky Glue, and contact cement for various tasks.
- 165 replies
-
- 10
-
-
Great! I'd be interested to see pictures of that kit when it arrives. The only photos I've seen of the printed parts were taken it what appeared to be poor lighting. I went ahead and pulled the trigger on the two Answer kits I spoke of earlier, the Nimrod and the Nieuport 28 -- they're both incredibly nice-looking biplanes -- I couldn't resist (don't tell the missus)! I also added a Stearman PT-17 Kaydet to the order and laser-cut frames for all three kits, plus resin wheels for the Nimrod and some frames for a Fiat G.50 Freccia I have in the stash (the desert camo on that kit matches the livery of my CR.42 Falco).
- 165 replies
-
- 11
-
-
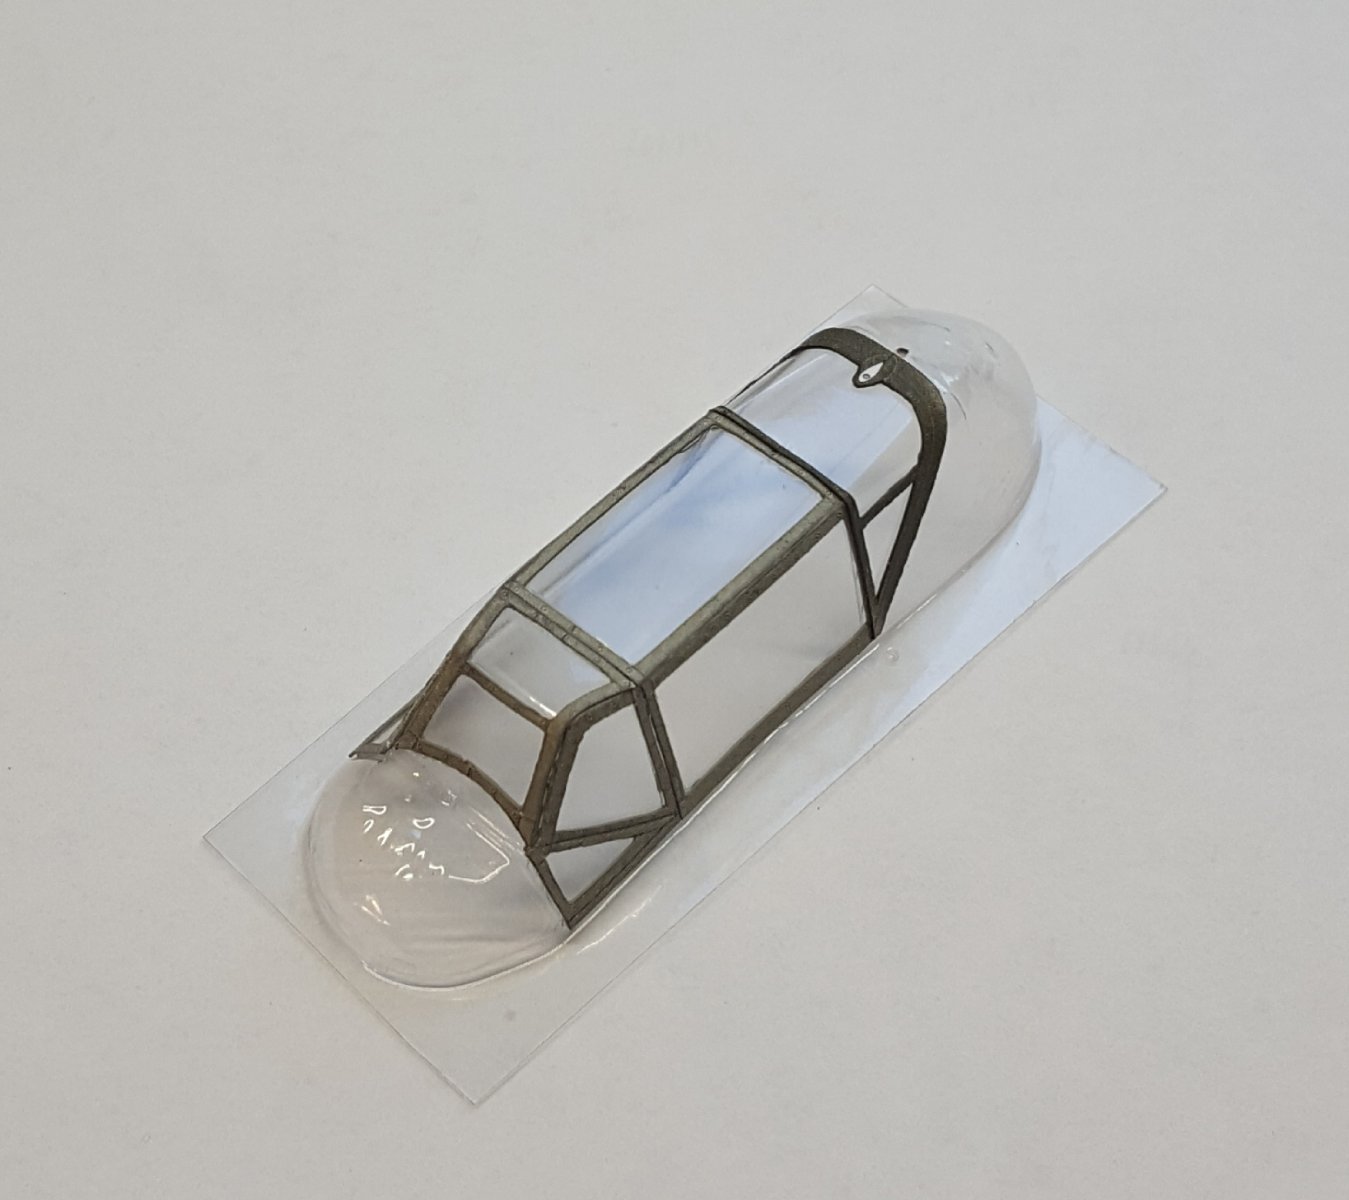
Okay, as you can see in this photo, I had to abandon the plan to install the canopy as a single piece -- it just wouldn't fit properly. Instead, I had to cut the canopy into five pieces and juggle them around a bit. One of the reasons I like biplanes is the general lack of canopies on them!

- 165 replies
-
- 17
-
-
I'm sorry to see that -- your work looks great to that point. I hope it finds a good home!
-
The dollar is trading high versus the Polish zloty as well, which makes it a great time to order card models, but the shipping is where you really take it in the shorts. 😬
-
Very nice -- congratulations!
-
Hello all you friends who model other things besides ships! You may have noticed that a number of topics in this section have been tagged with the word 'done'. Yes, that tag means exactly what you think it means -- it indicates a project that is finished. If you wish to see a list of all the finished projects in this sub-forum, simply click one of the 'done' tags and they will come up in a list (all 316 of them as of this writing). A reminder: Why have we used the word 'done' in this section and not 'finished' like everywhere else? Because MSW is first of all a ship modeling forum, and we want people who click a 'finished' tag, hoping to see only ship models, to in fact see only ship models. We will reserve 'done' for non-categorized builds, thus keeping the two groups -- ships versus everything else -- separate. You can add the tag 'done' to your completed projects or have me tag them for you. As always, I will be watching out for your 'done' projects, but some folks are less effective than others about alerting members to the fact that their done projects are indeed done. Another reminder: Other than indicating projects as 'done', we DO NOT use any other tags in this sub-forum! I had to expunge a few recently. Again, this is so that ship modelers don't get non-ship results in their searches. So, got that? Clicking a 'finished' tag will return ONLY finished ship models. Clicking a 'done' tag will return ONLY finished non-ship projects. Thanks and enjoy!
-
Hi, Steven. I'm the guy who wrote the "Cautionary Tale" post. I have seen beginners take on very difficult models as first projects and complete them, but one of the things that I pointed out in my article is that such accomplishments are quite rare. Based on my many years of moderating this forum, I don't think that it's a stretch to say that about 90% of beginners who attempt large men-of-war like Victory eventually give up on the attempt. To back up my assertion, I invite you to check out this link, which lists all of the build logs for HMS Victory on our site that include the words "first build" in their titles. As you will see, the one thing that all of those build logs have in common is that not a single one of them is tagged as being finished, even if a few of them did reach advanced stages of construction. So, the cautionary is exactly that -- a cautionary tale. No one is saying that you can't attempt Victory on the first go at this hobby, but if you were to complete it, it would be an extraordinary feat. Kind regards,
-
Nice work, Richard!
-
Beautiful work!
-
Great-looking model!
-
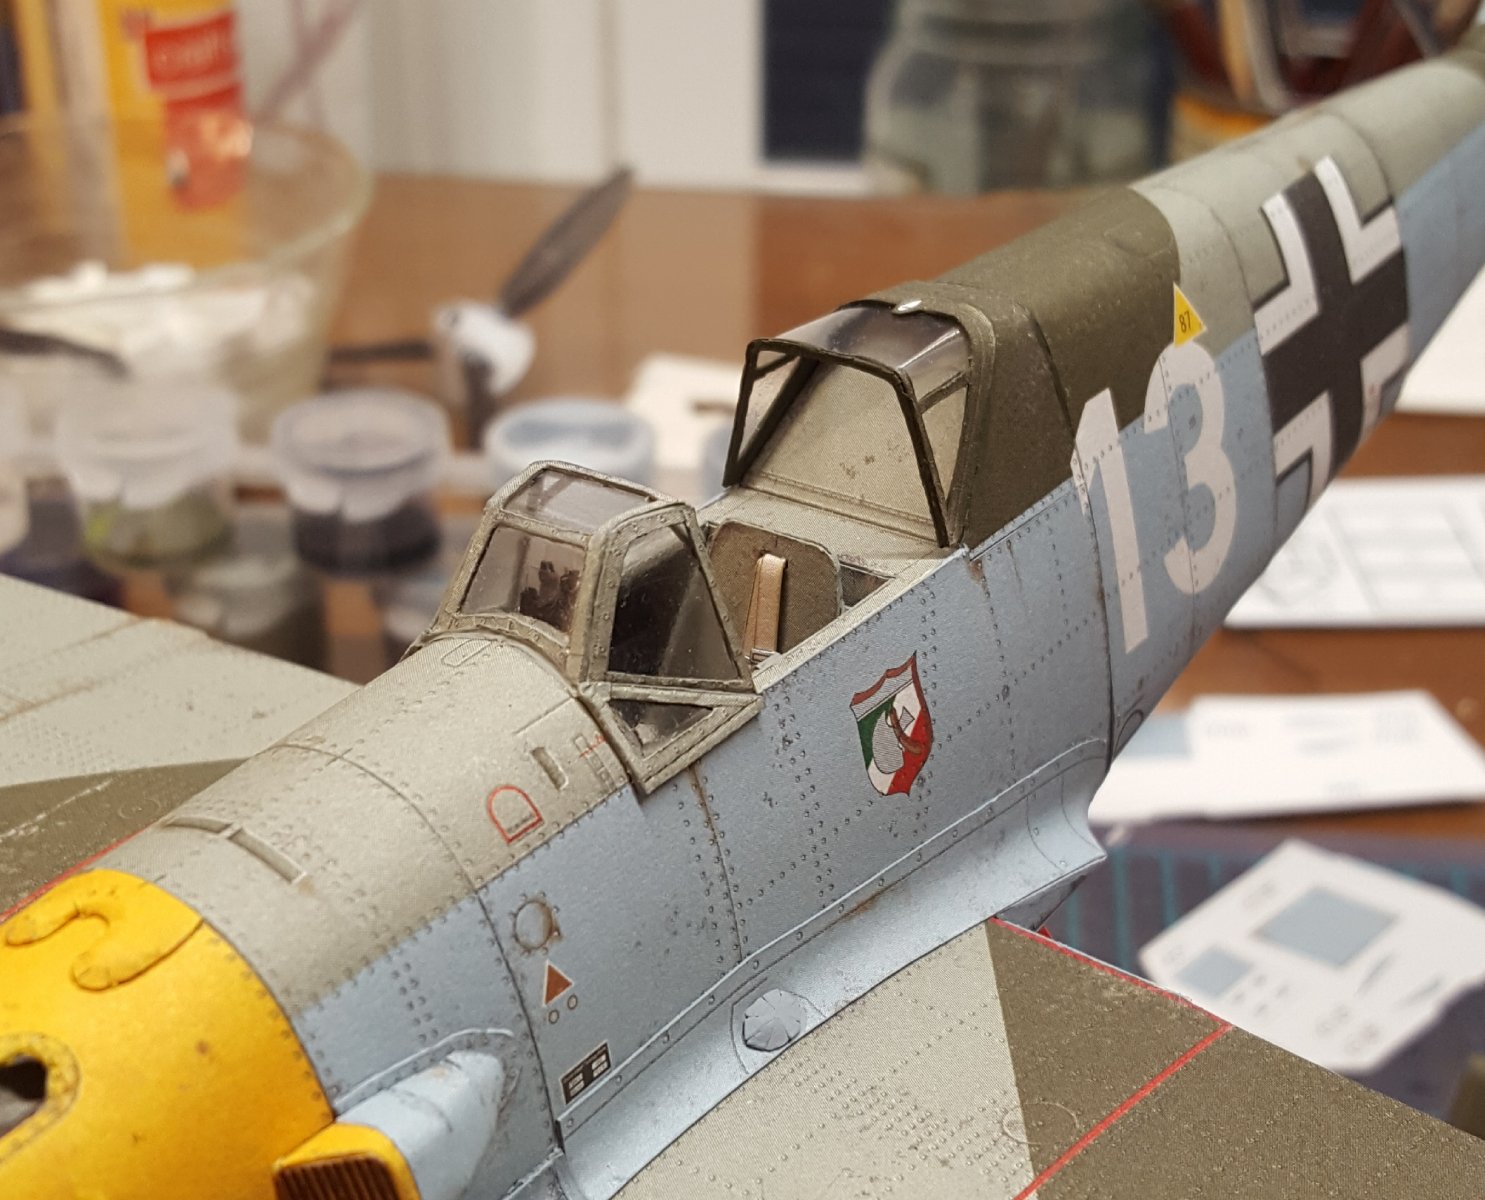
Next we move on to the canopy. I do things a little differently than called for in the diagrams. First, I tend to not use the internal framing, for a couple of reasons. The 'glass' of the molded canopy is not the correct scale thickness, and adding two layers of framing seems to make that fact more noticeable, at least to my eye. Also, I find it nearly impossible to get the internal and external frames to align correctly. To disguise the fact that I'm only using the outer layer, I paint the back of the frames with the correct internal color; when seen through the canopy, it is difficult to see that the internal frames are not used. Second, the canopy framing comes in three pieces. I find it much, much easier to work with the parts after cutting the framing into smaller sections -- seven in this instance. The framing is glued with canopy glue. I'm getting better at this process, but I still had a few minor smears to clean up. Here is the canopy with its framing: I did not notice until AFTER I had completed this work that I had got the main left- and right-side panels swapped. 😬 There is a very slight difference between them, which hopefully will not create a fit issue later. The canopy glue requires 24 hours to fully set, and I will give it the full cure time before cutting the canopy free of the surrounding plastic, otherwise the bending and flexing that inevitable occurs during that task tends to work the frames loose. Oh, almost forgot to mention that I plan to complete this model with the canopy closed, not because I wish to hide the cockpit detail, but because of the 109's odd distinction of having a hinged canopy that swings open to one side instead of sliding back on rails. Displaying the canopy open would inevitably create a part that just begs to get knocked loose. Cheers!

- 165 replies
-
- 20
-
-
Добре дошли в нашия сайт! Моля, обърнете внимание, че това е форум само на английски език. Можете да използвате онлайн преводач, за да създадете вашите съобщения. С искрени поздрави, Chris
-
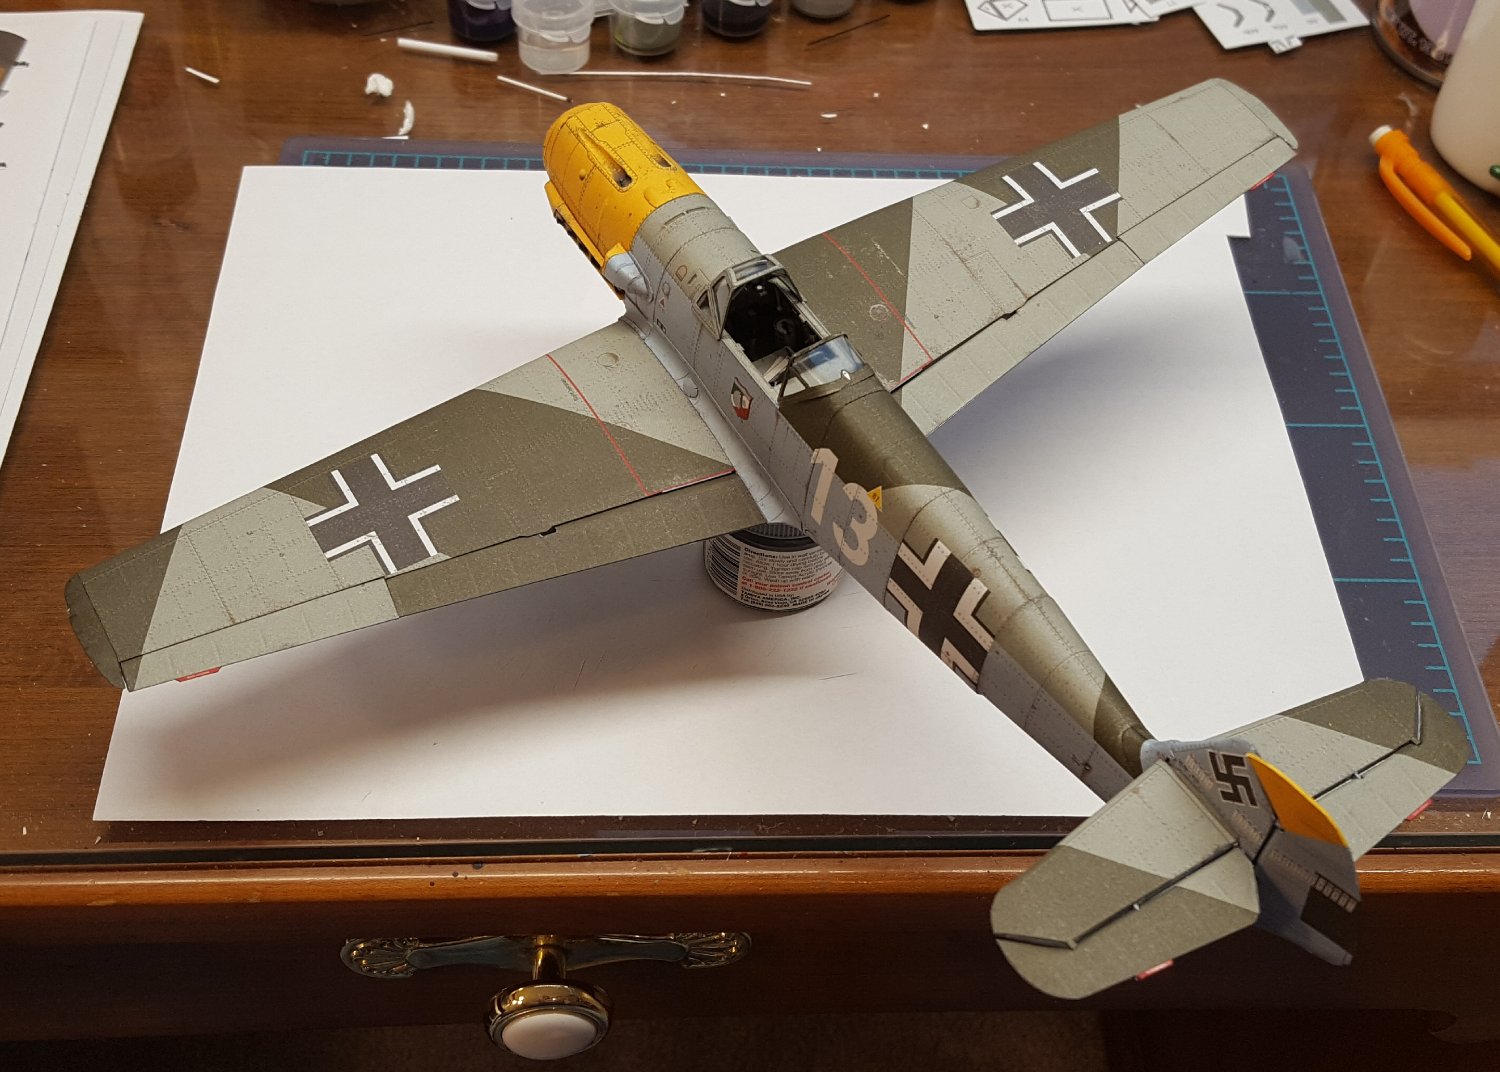
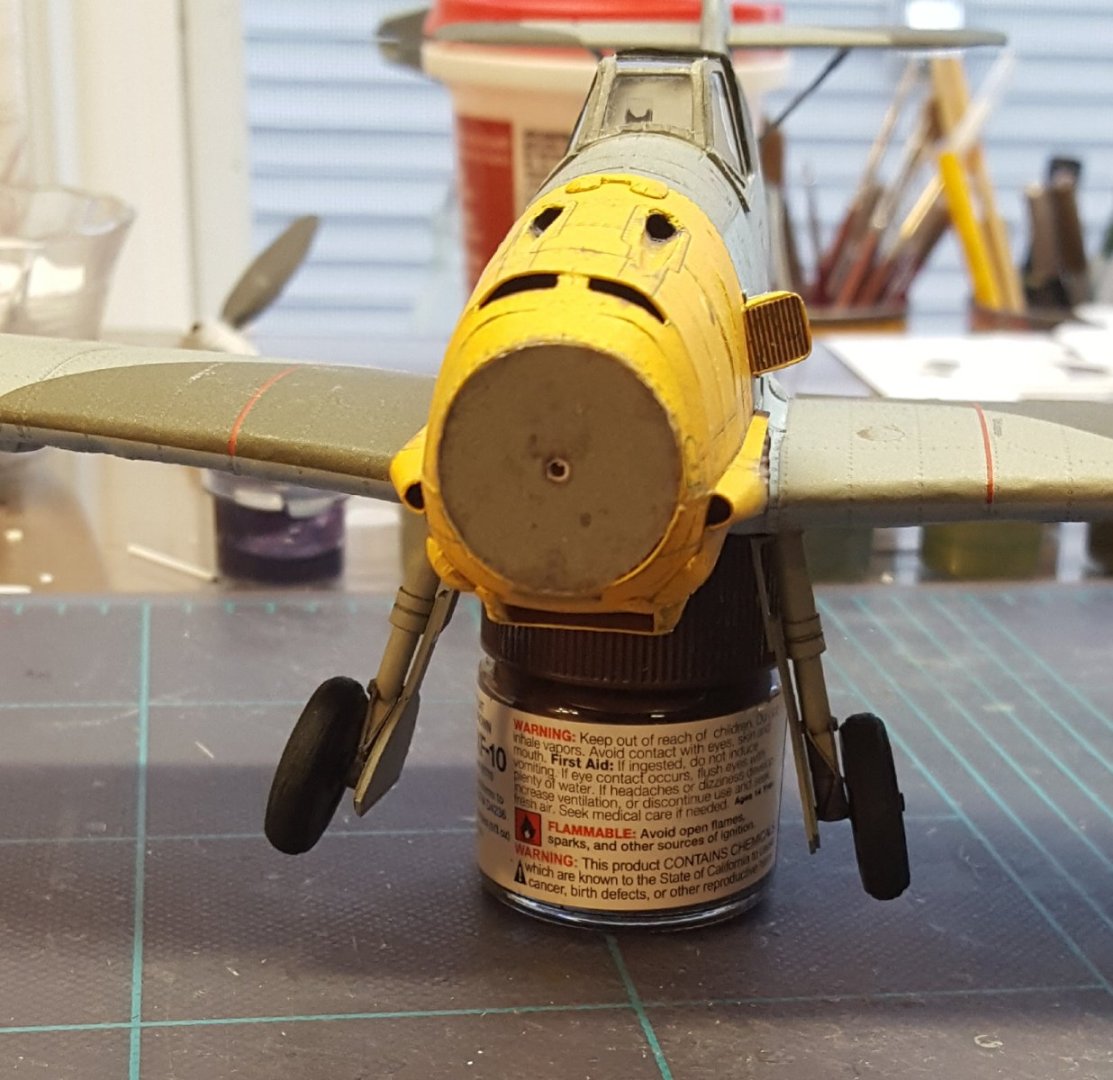
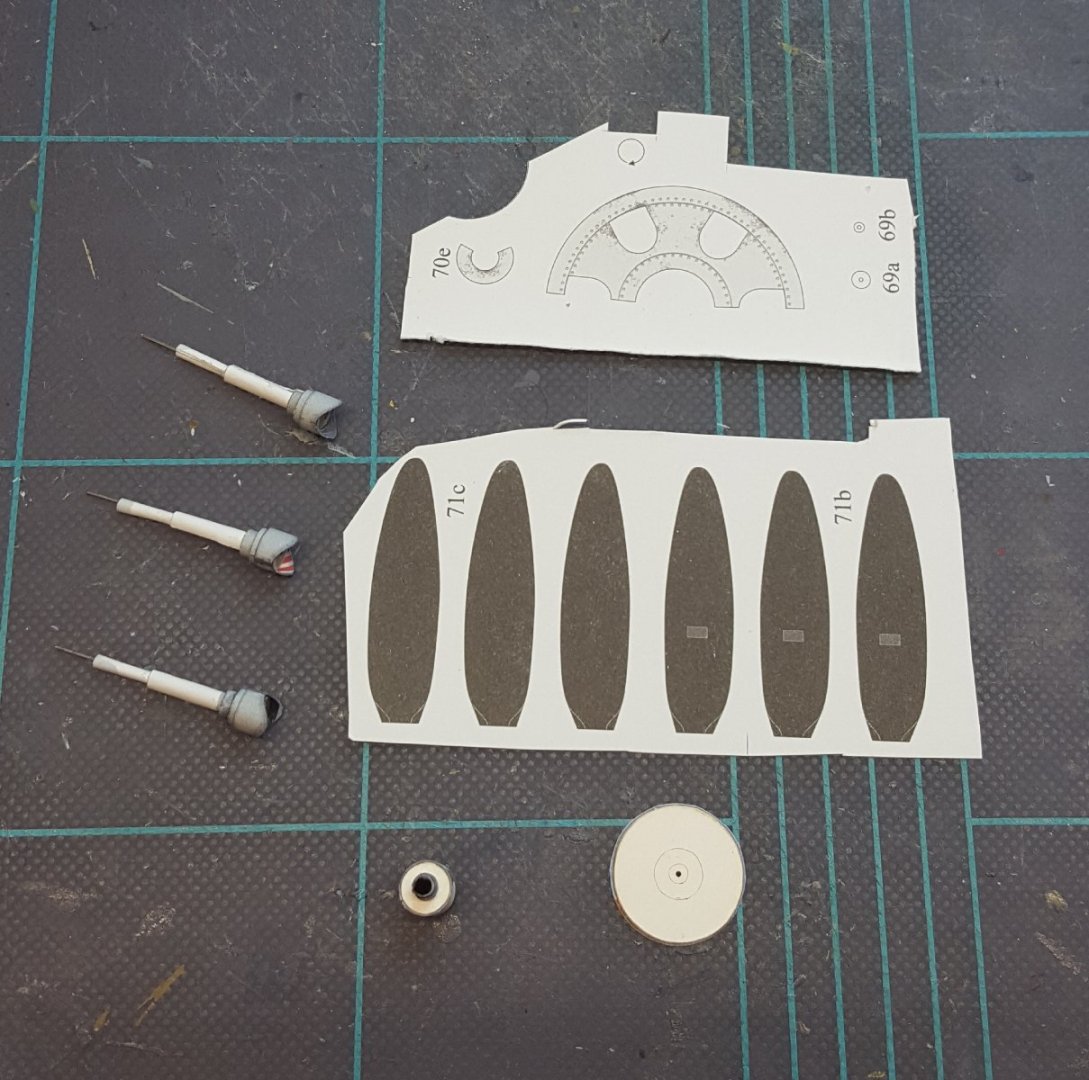
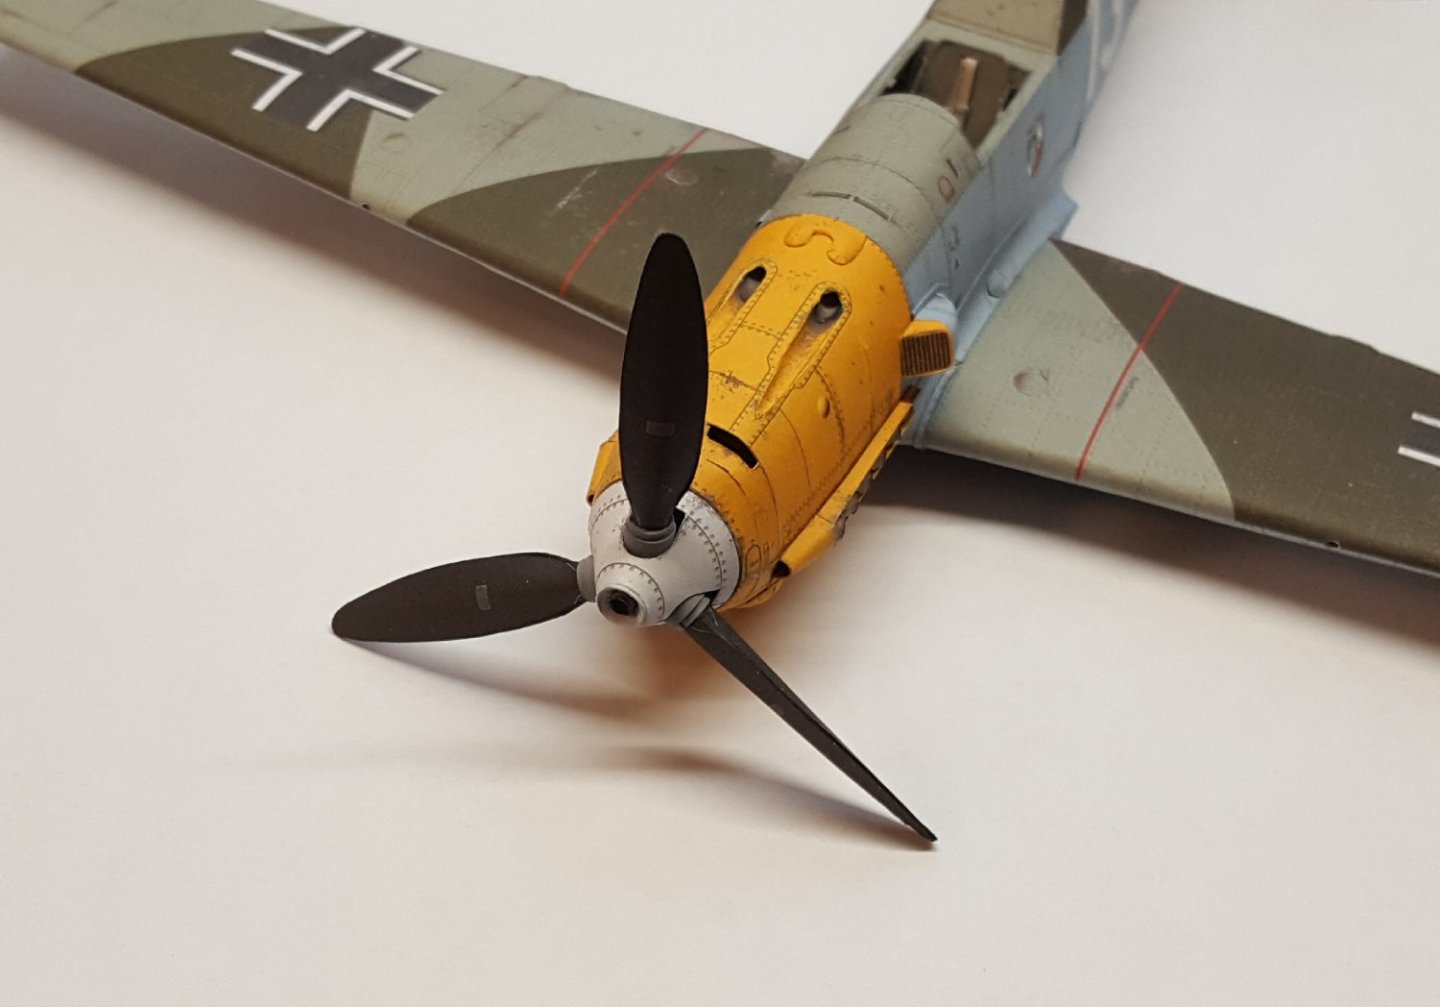
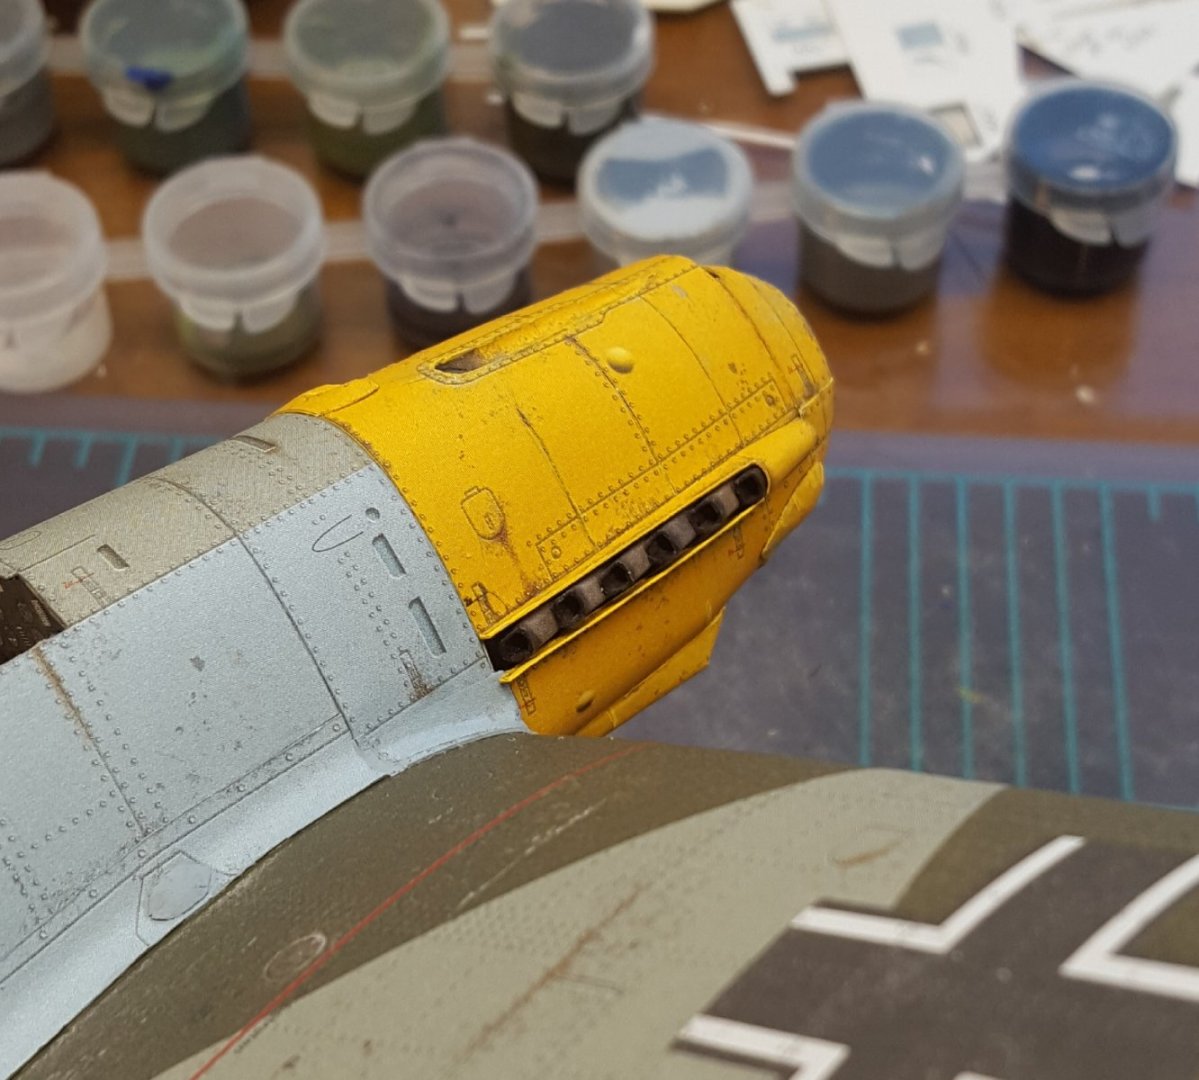
Getting the nose done . . . The air filter (port) and a small scoop (starboard) finish off the last of the lumpy bumpy features. To mix things up a bit, I decided to build the propeller. Here are some of the parts and sub-assemblies. And the finished propeller dry-fitted to the fuselage. Basically we are now down to the wing control surfaces, landing gear, canopy, and a few odds and ends. Cheers!

- 165 replies
-
- 23
-
-

-
It was actually a license-built Nieuport 24 -- my bad!
-
I'm not personally familiar with either of those kits, but the Ko-3 was a license-built Nieuport 11, so take a look at my build log for that one and imagine it in Japanese markings. 😉
-
Okay, got the other side done -- with the proper number of pipes on the first try, too! Craig, I have built two kits from Orlik and have two more in the stash. The two I have built were both designed by Lukasz Fuczek. They weren't the easiest builds, but they both turned out okay. I have three kits from Answer, two designed by Krzysztof Fiolek (one completed) and one by Lukasz Fuczek (wound up on the Island of Misfit Models). So, the quality of the model kind of depends on the designer. Generally, the print quality on all of them has been good to very good, but diagrams not always the best. Answer has published a couple of models recently that I would very much like to get my hands on (Hawker Nimrod and Nieuport 28), but the shipping from the only Polish company that has both of them and their laser-cut frames is really a tough pill to swallow these days. Which models are you interested in?
- 165 replies
-
- 12
-
-
Speaking as the guy who does most of the editing on build log titles, I would like to say THANK YOU for nailing the proper format and tags on your first try! And your model looks great, too!