DONATION DRIVE - SUPPORT MSW - DO YOUR PART TO KEEP THIS GREAT FORUM GOING!
×


ccoyle
-
Posts
10,520 -
Joined
-
Last visited
Content Type
Profiles
Forums
Gallery
Events
Everything posted by ccoyle
-
 The Nieuport 11 gun mount allowed the gun to be pivoted downward to allow for changing the ammo drum. Later, the Foster mount was adopted. I'm virtually certain that the gun was fired by a cable.
- 98 replies
-
- 13
-

-
Yes, but these are actually rather easy to do. The trick is to carefully slice open the ends of the control horns. Once the forward end of the line is tacked to the fuselage, I put a dab of glue on the control horn and stretch the line across the cut end, then pinch the cut closed. Not historically accurate, of course, but it works.
- 98 replies
-
- 15
-
-
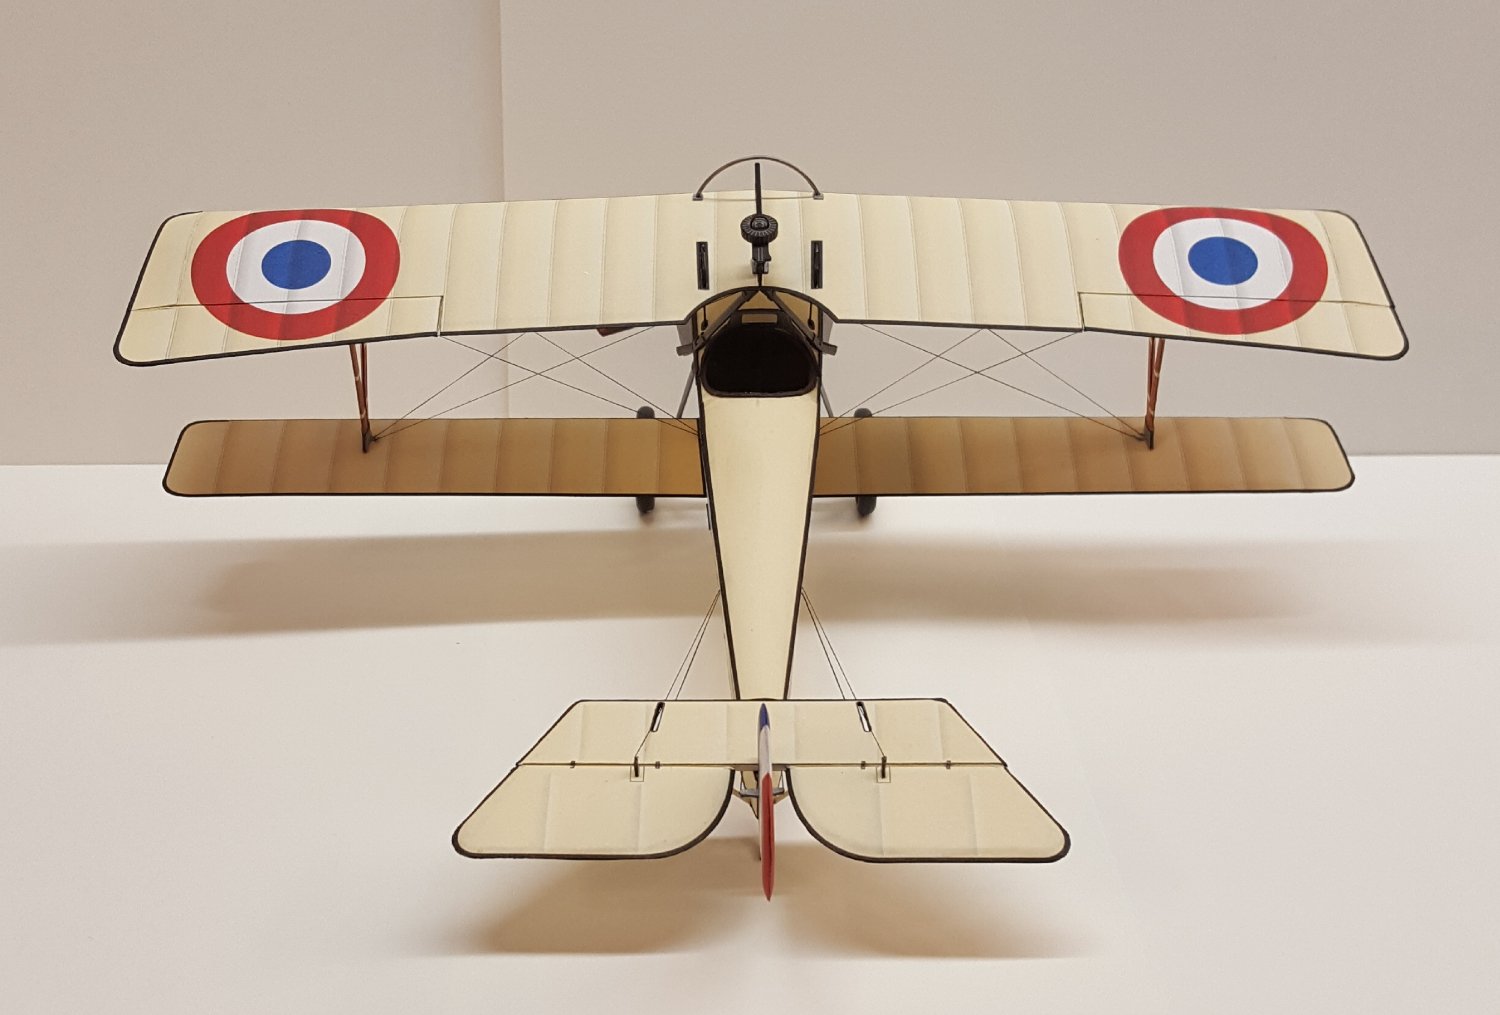
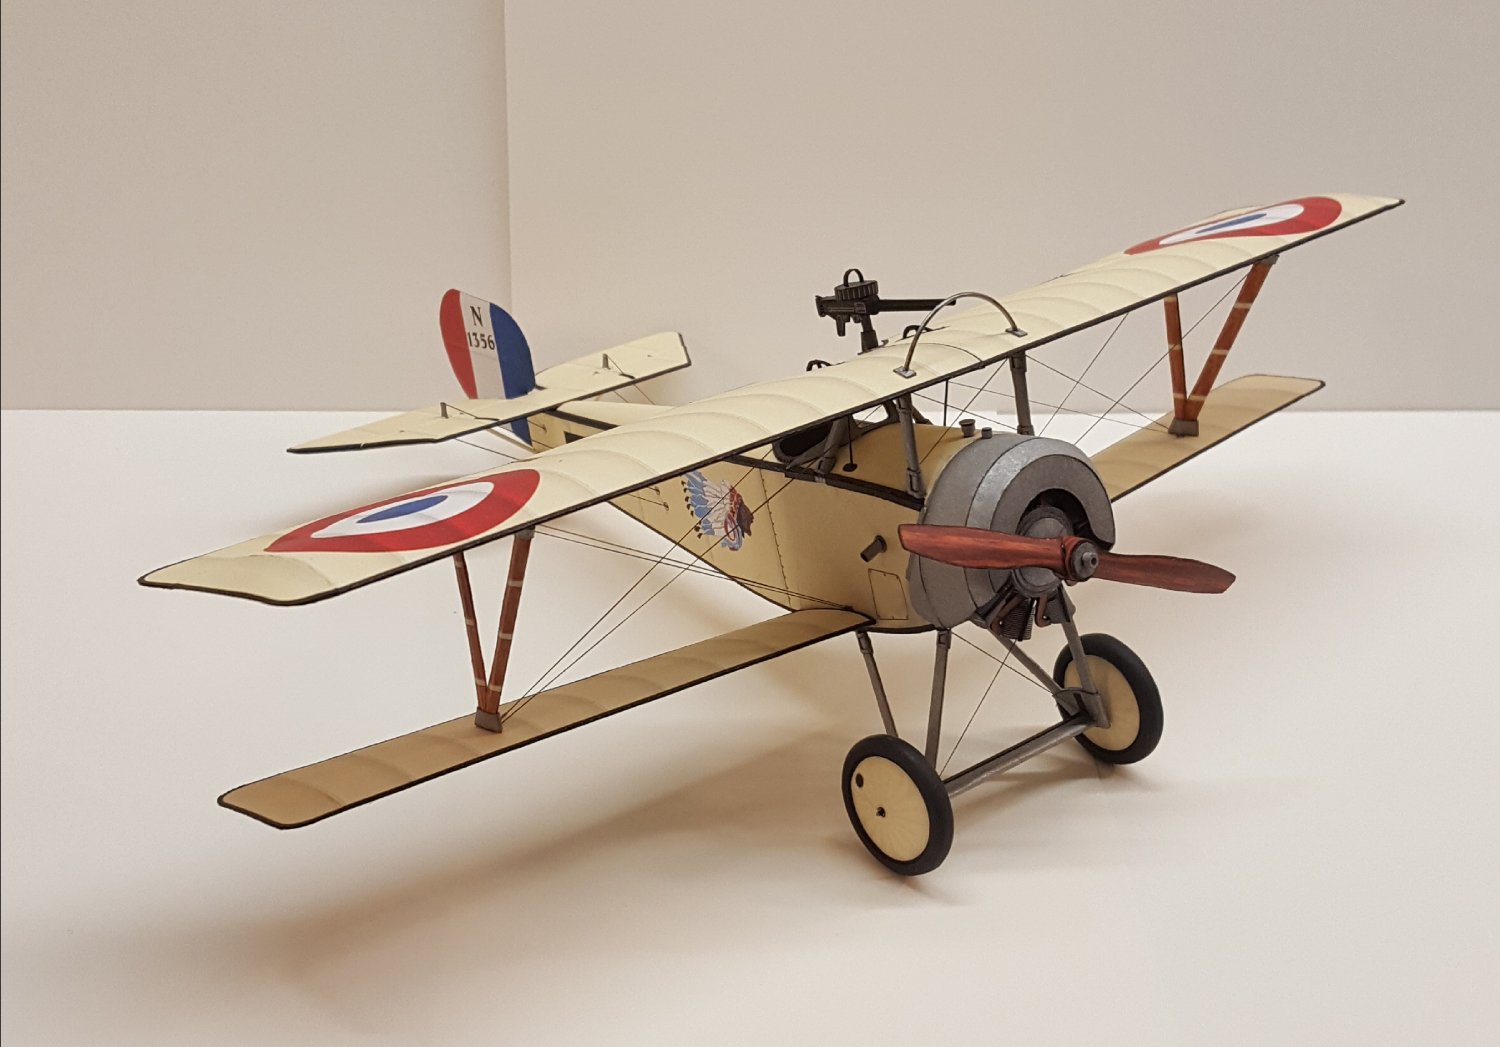
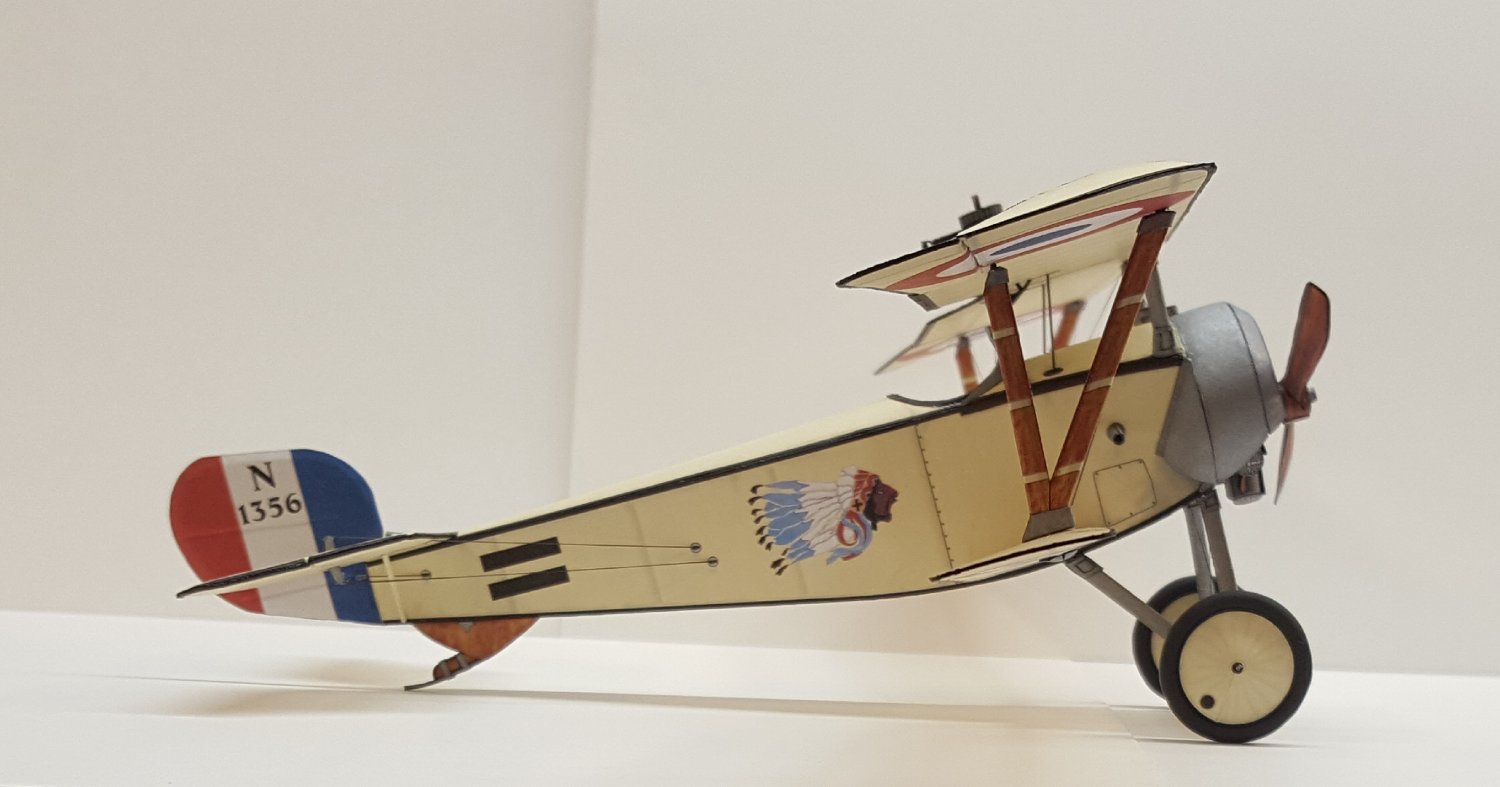
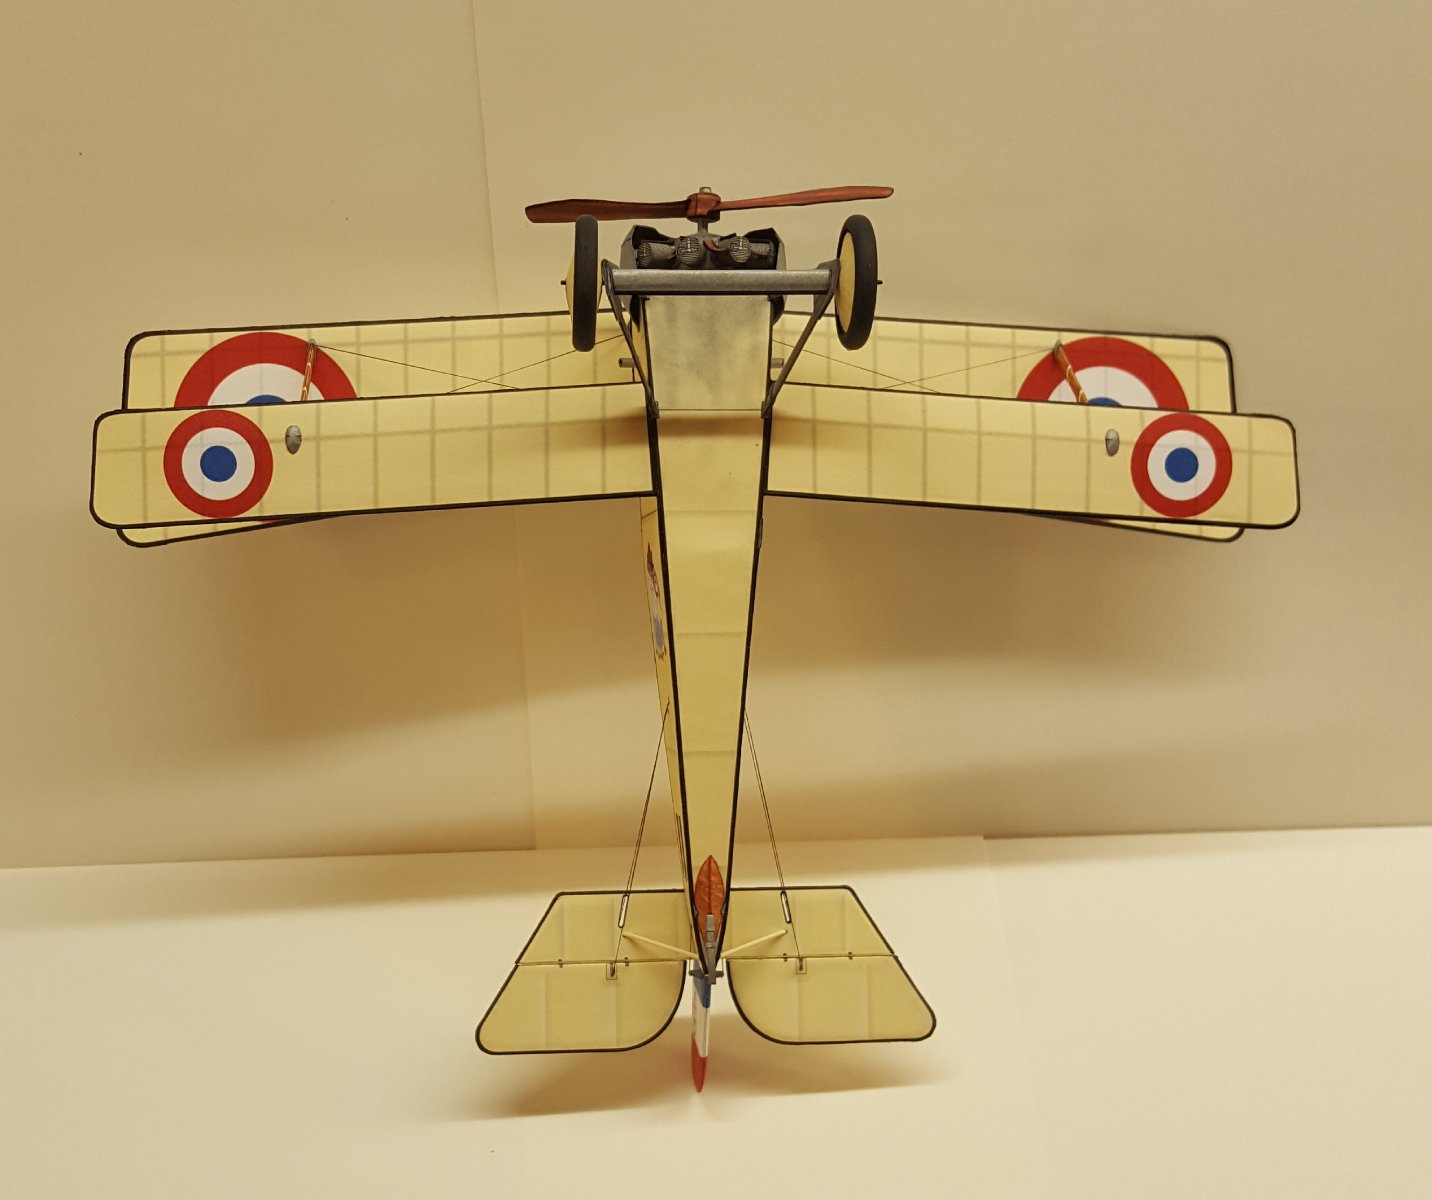
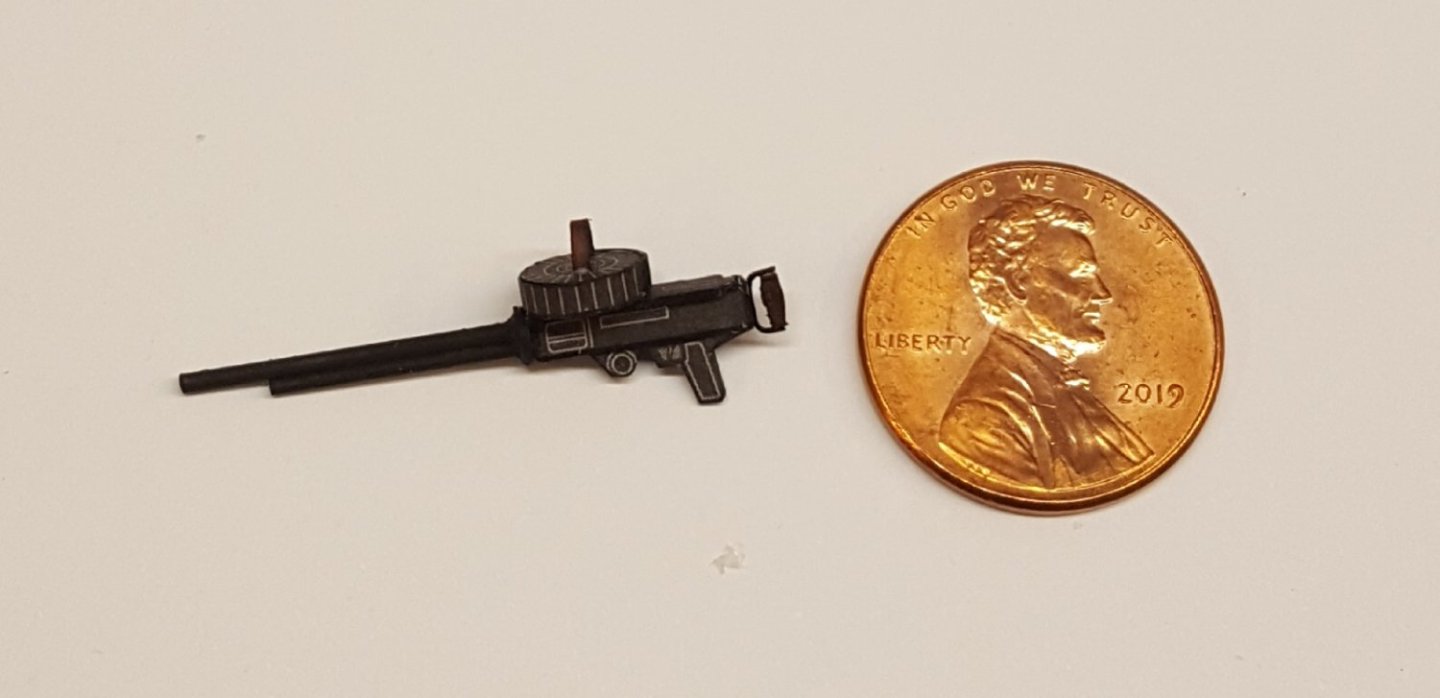
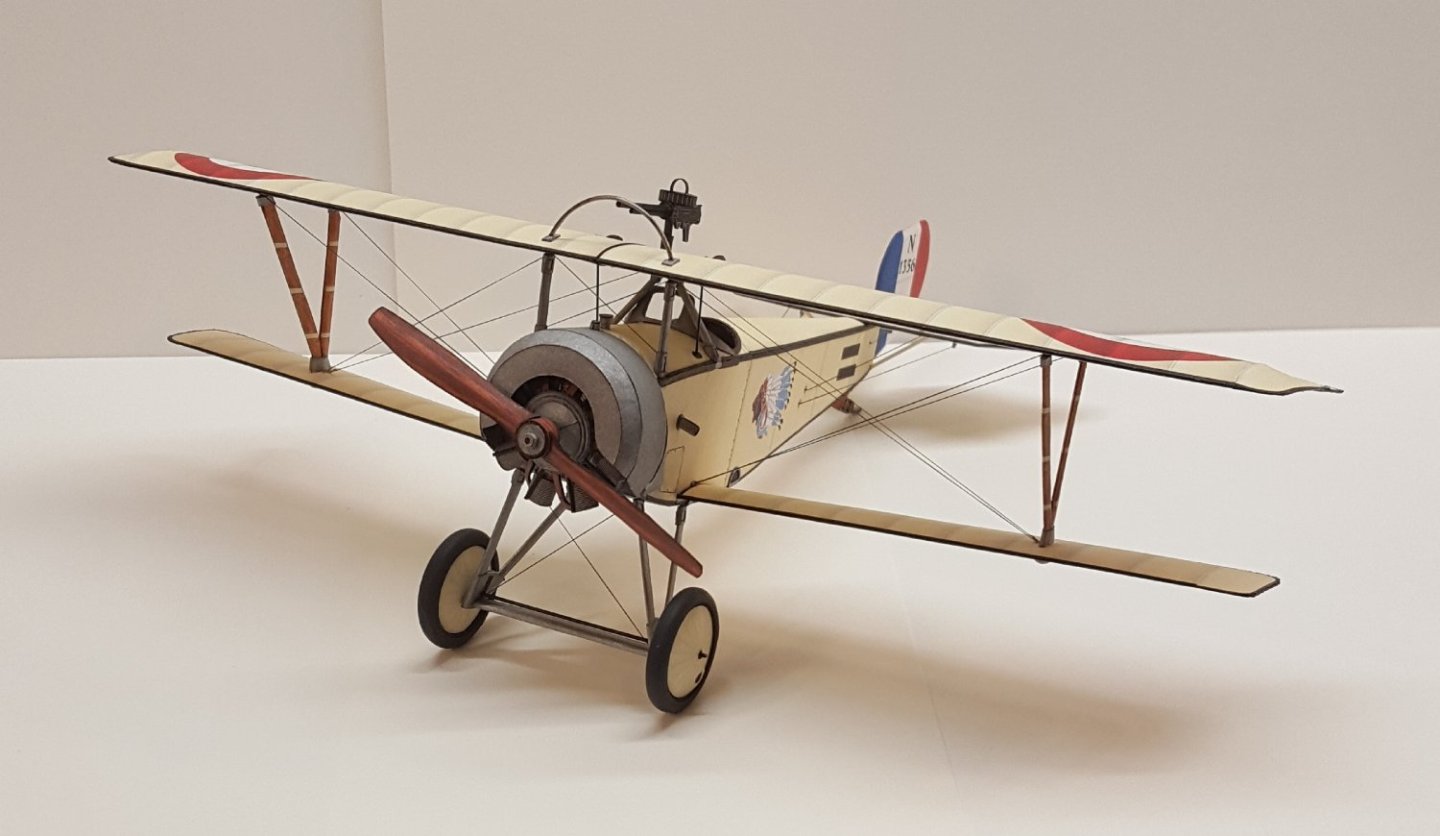
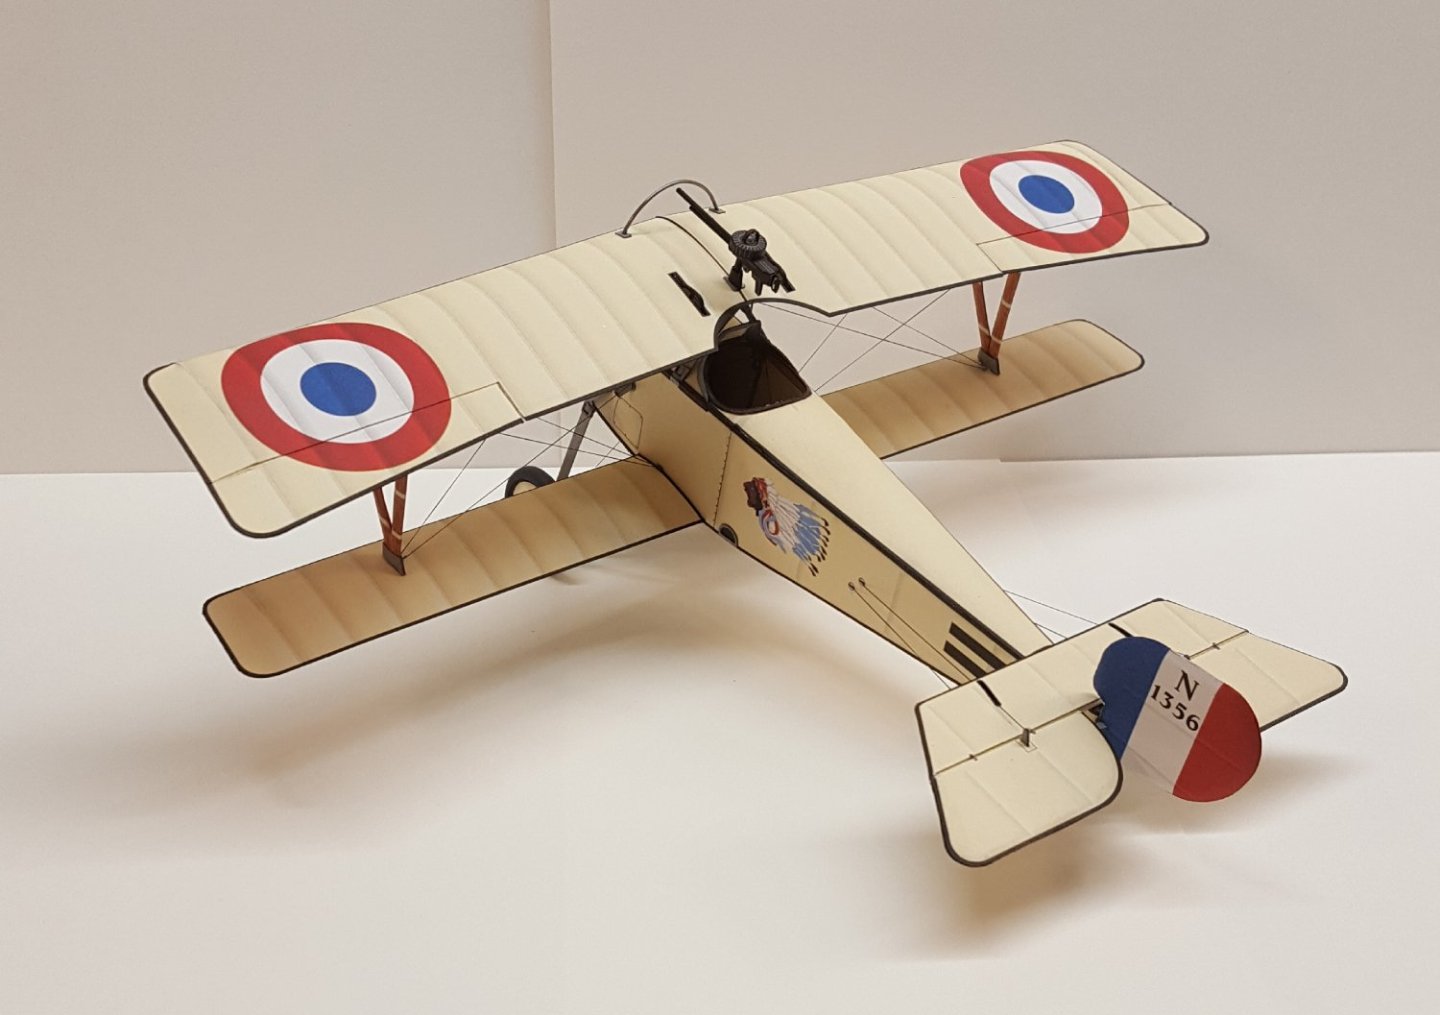
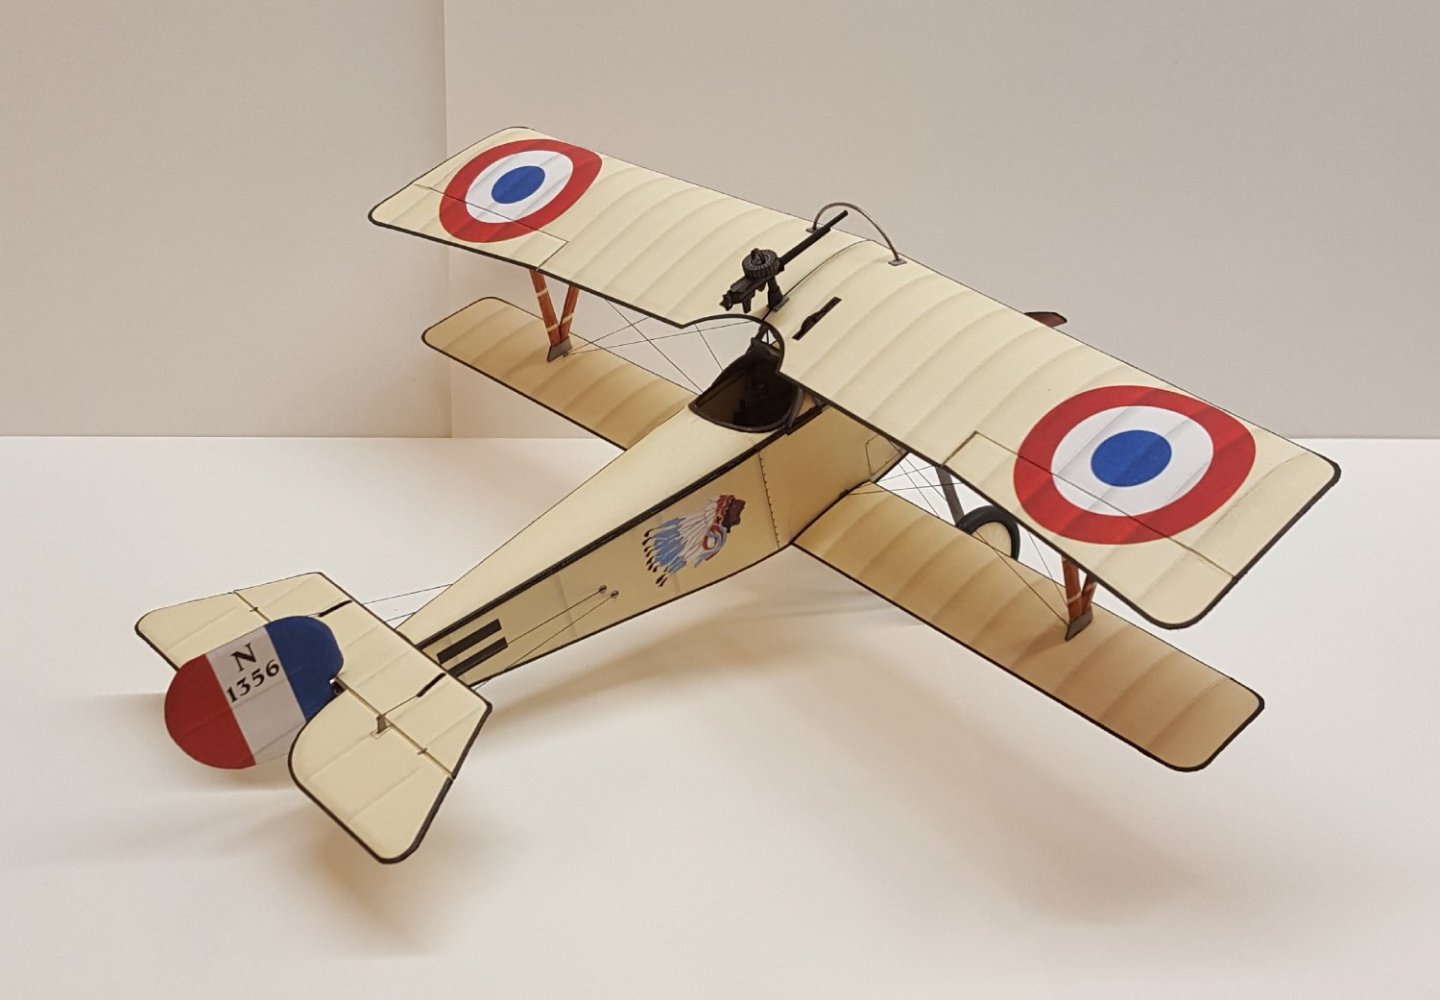
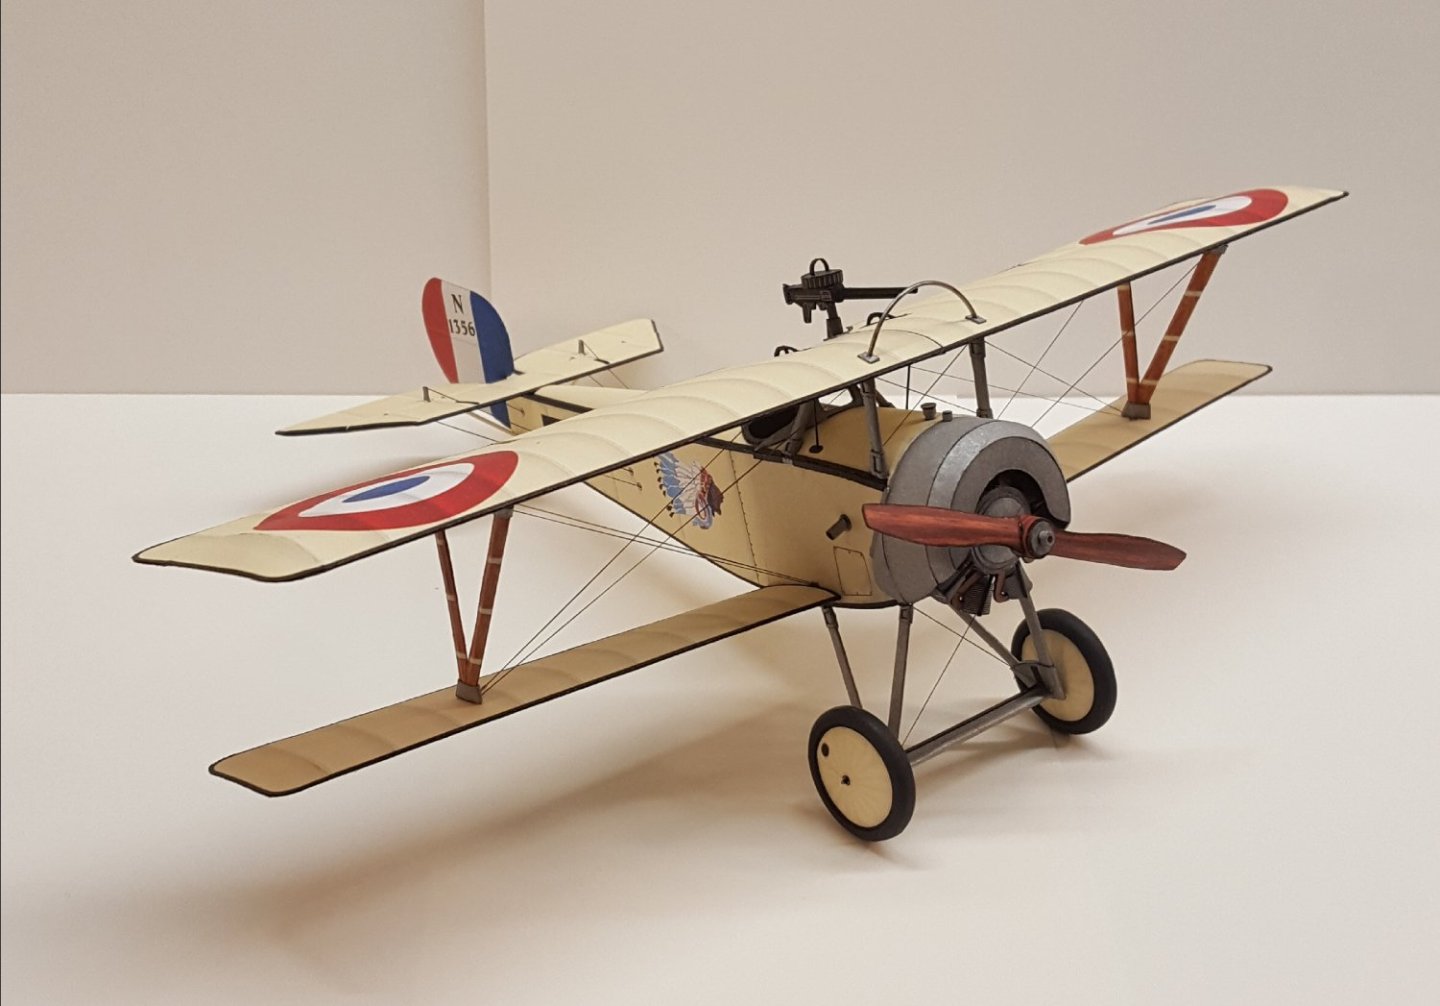
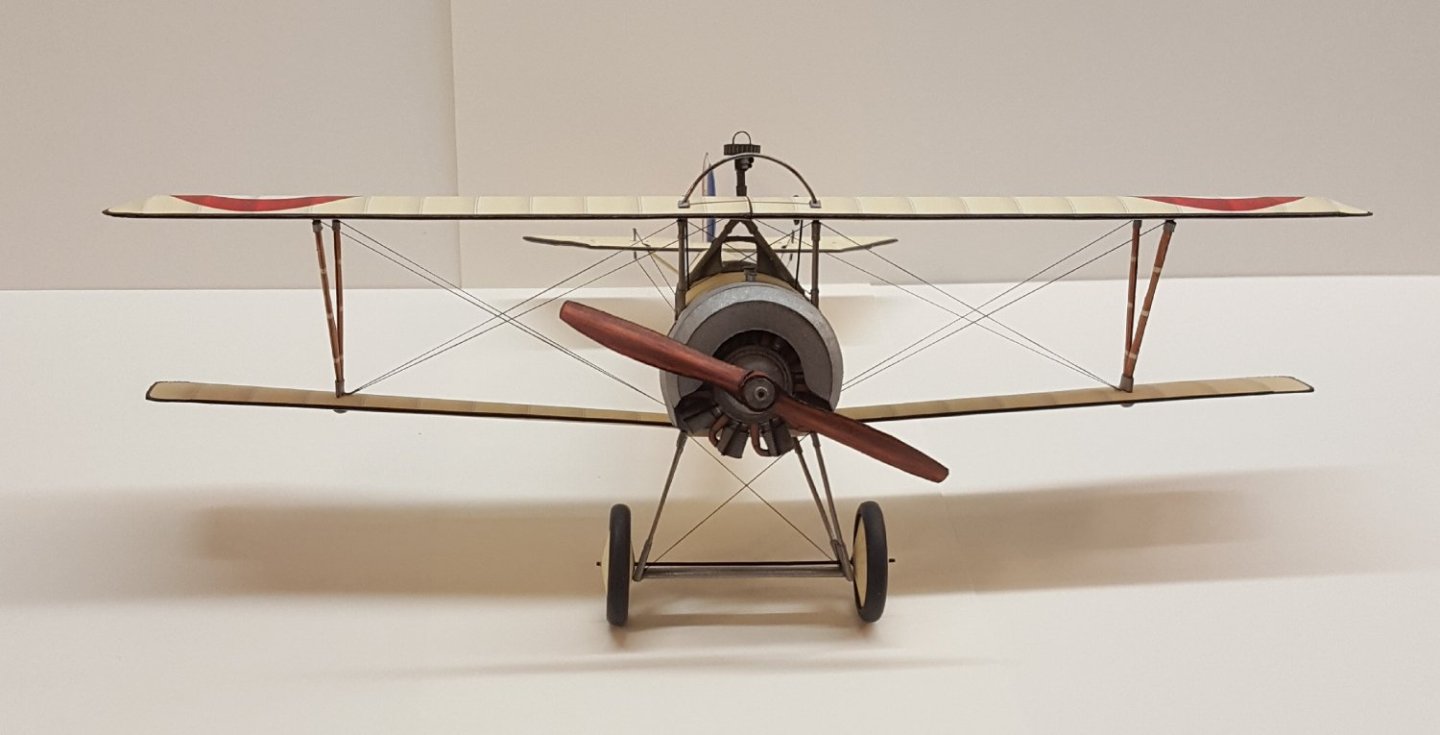
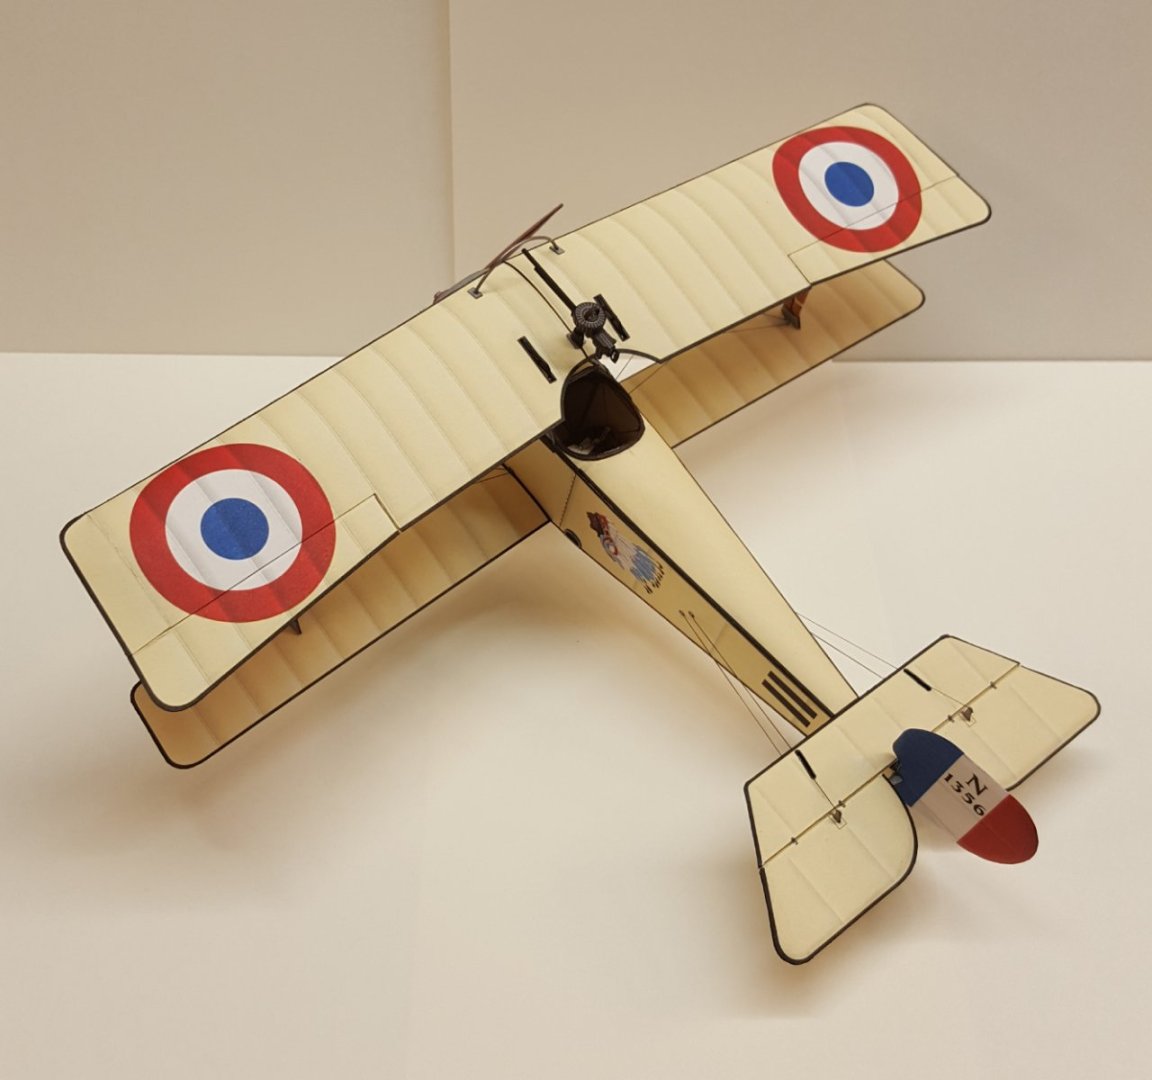
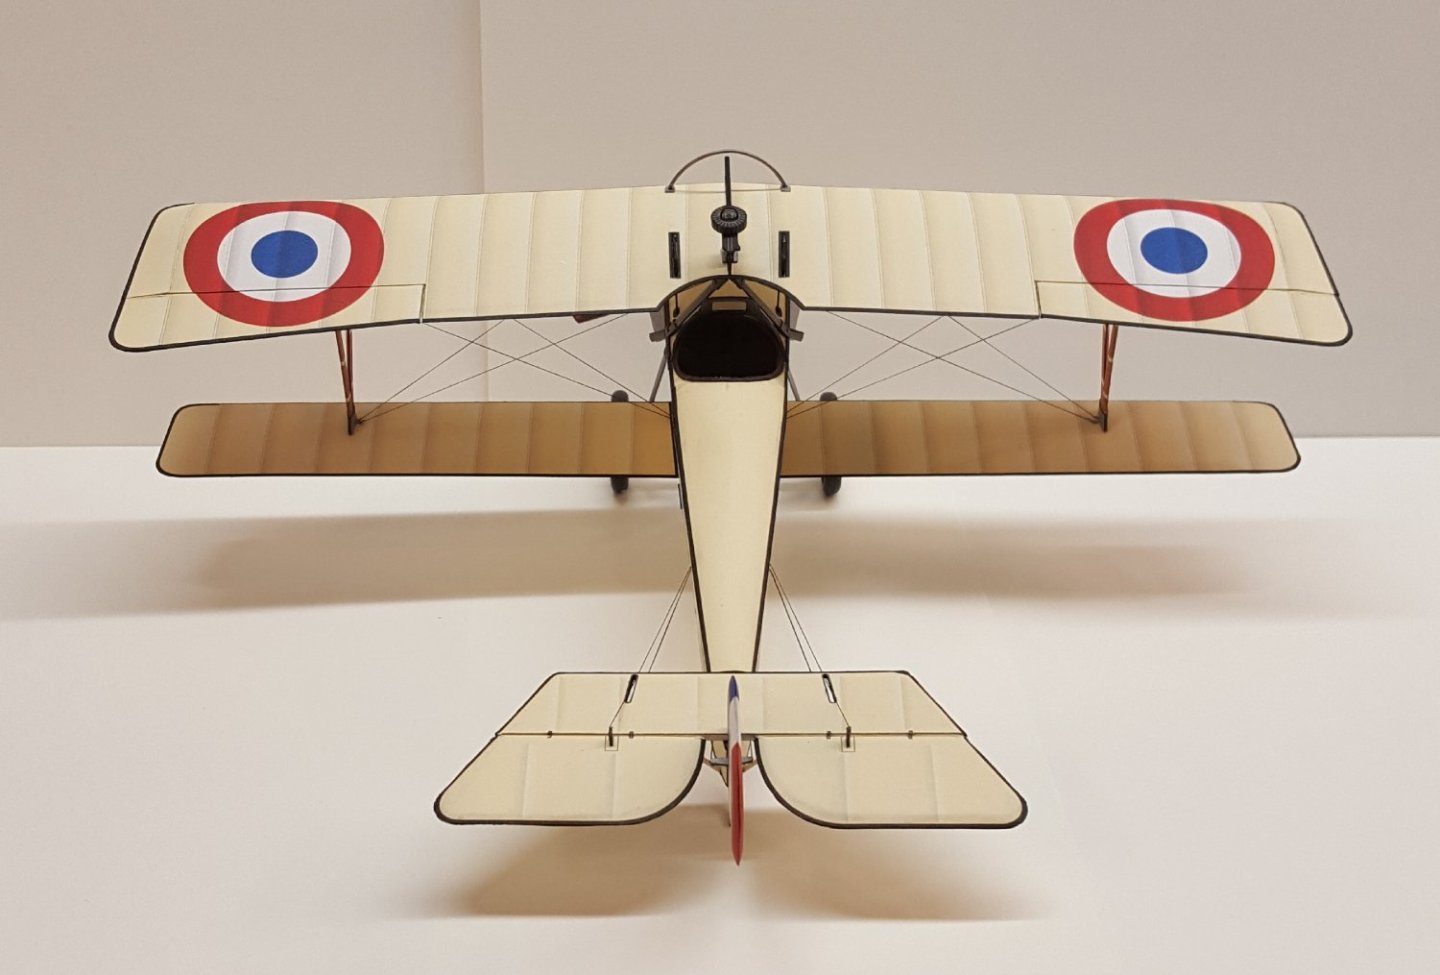
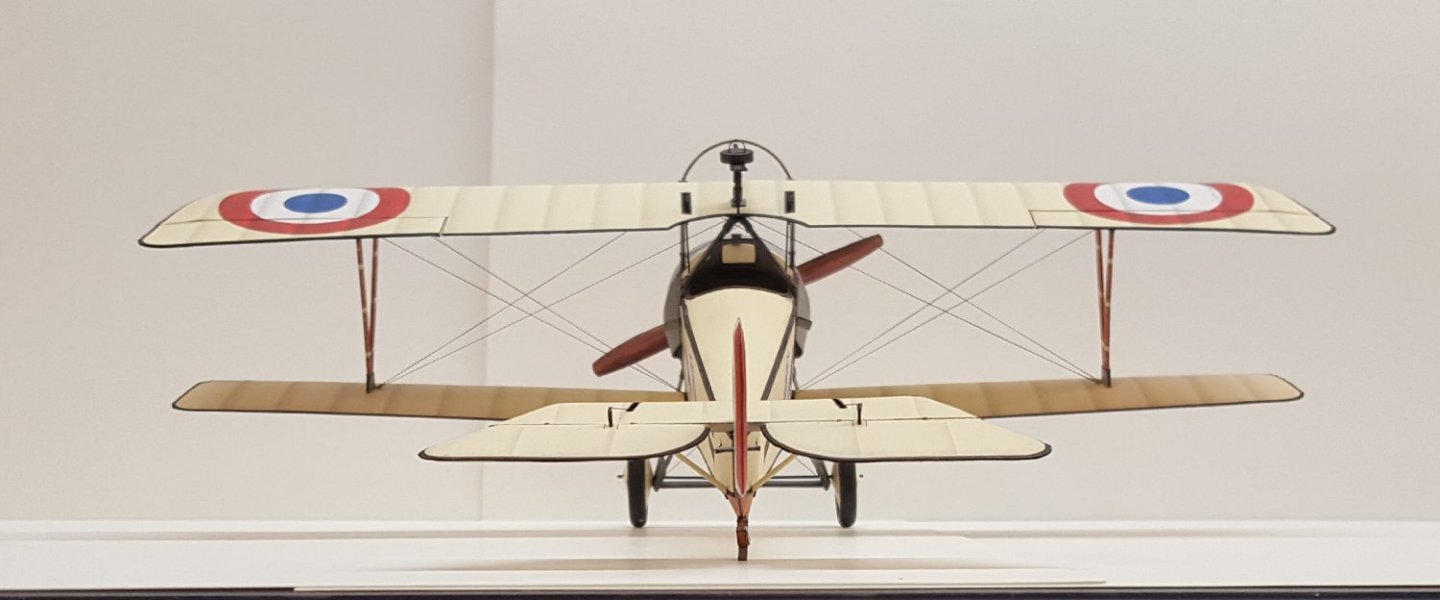
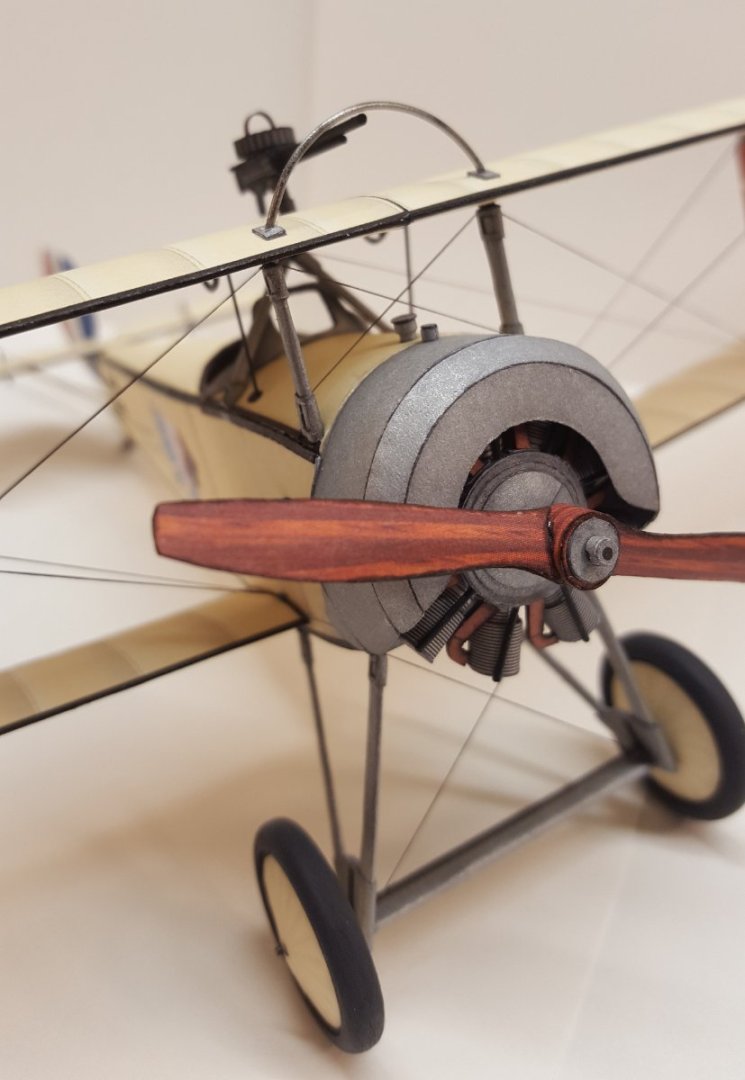
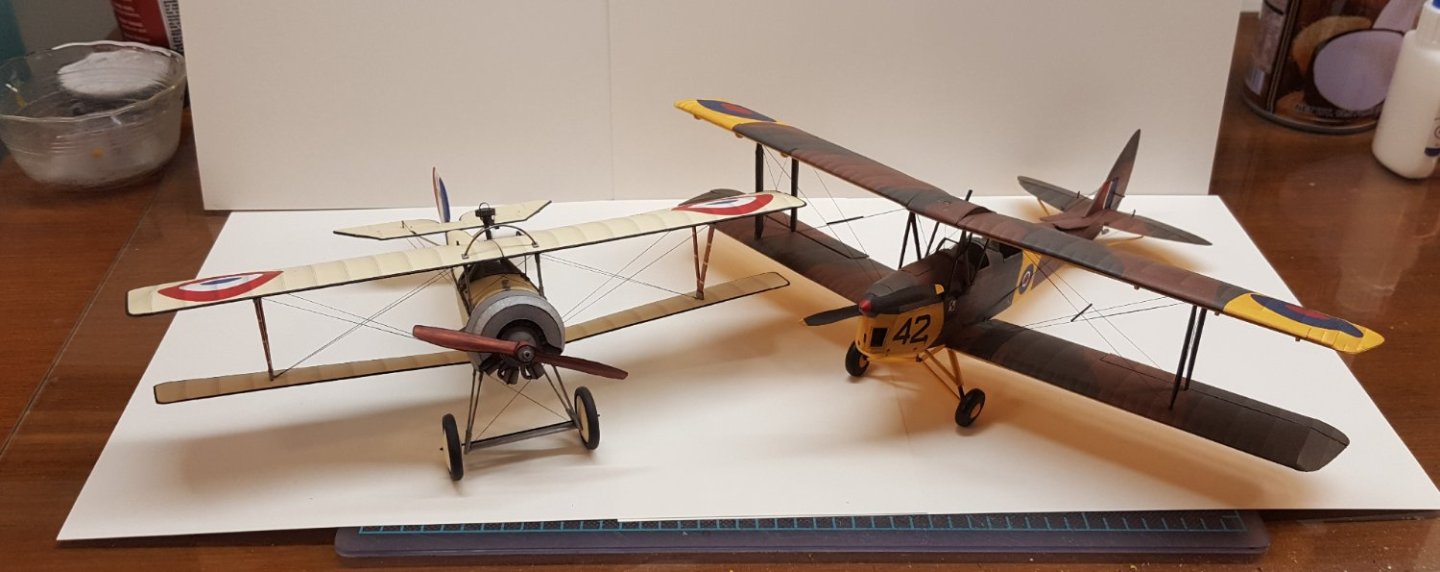
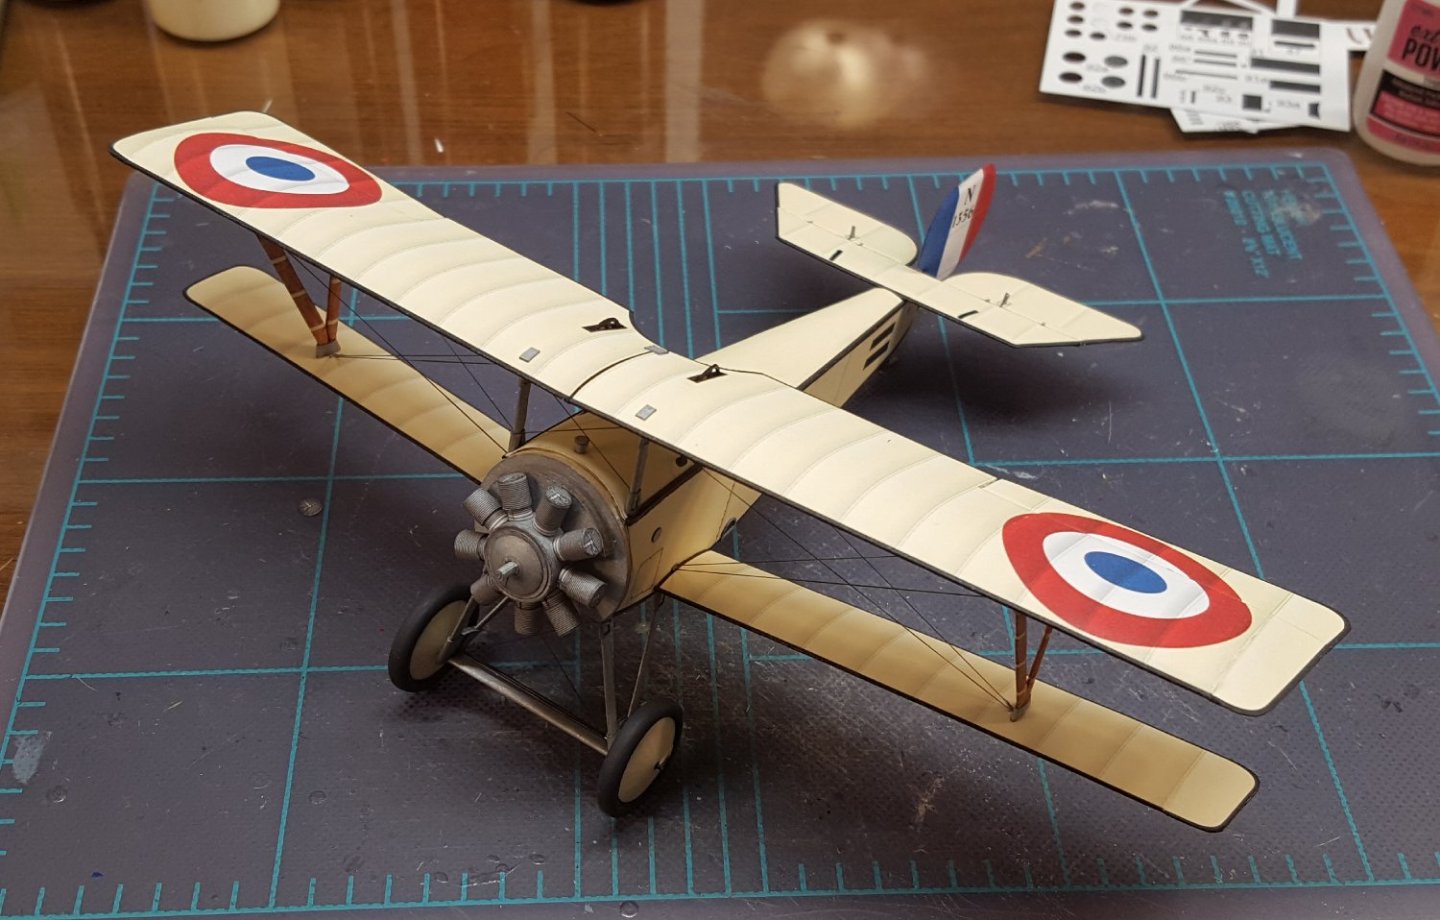
The Big Reveal! The Lewis gun took about three hours to build, but now she is all done. I really enjoyed this build -- quite refreshing after the struggles with the GPM Hellcat. I can't recommend the Kartonowa Kolekcja kits highly enough -- try one! Now, enjoy the pictures! First, the Lewis gun. The Allies didn't have synchronization gear at this point in the war, so the Lewis gun was mounted to fire above the propeller arc. And now for the glamour shots! And lastly, a family photo of the two KK kits together, the Nieuport and the DH.82A. Thanks for looking in!


- 98 replies
-
- 35
-
-

-
Congratulations on completing your first model! It's a great achievement.
- 89 replies
-
- 2
-
-

-
- Enterprise
- first build
- (and 2 more)
-
Bummer! But at least the damaged pieces are made from wood -- wood is pretty straightforward to rebuild.
-
I'm thinking that USS England will be moving back to the front burner in the not-too-distant future.
- 98 replies
-
- 11
-
-
-
Welcome aboard! Be sure to click here for some tips on how to navigate our site.
-
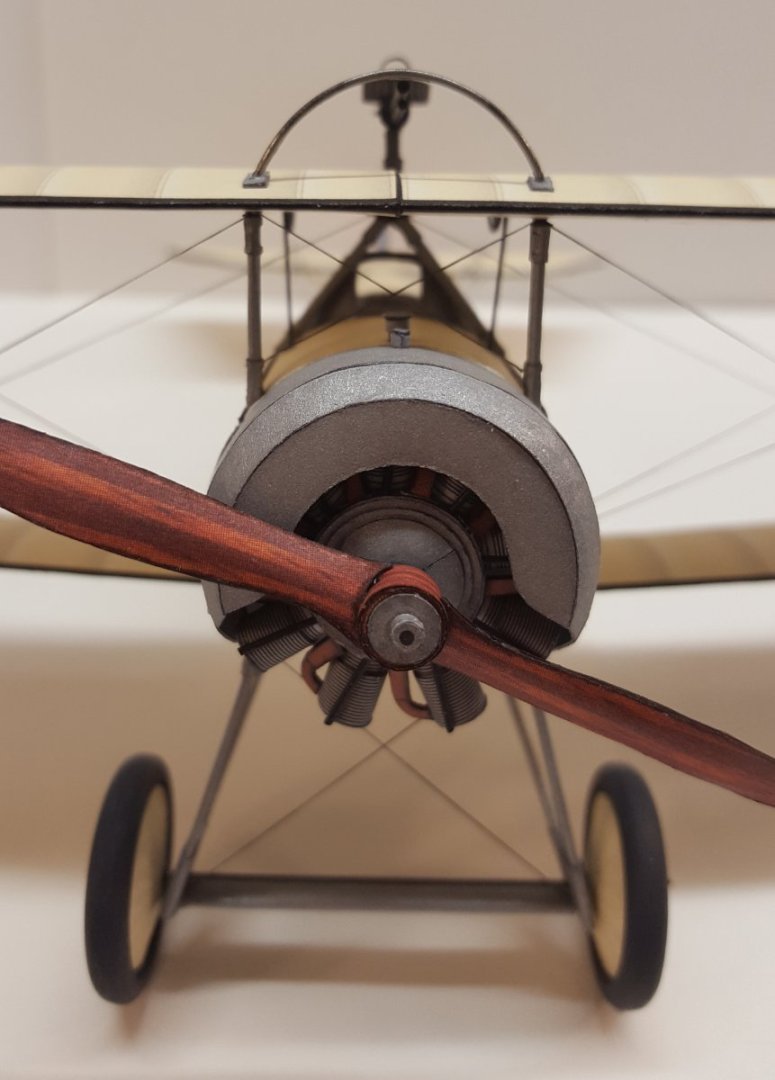
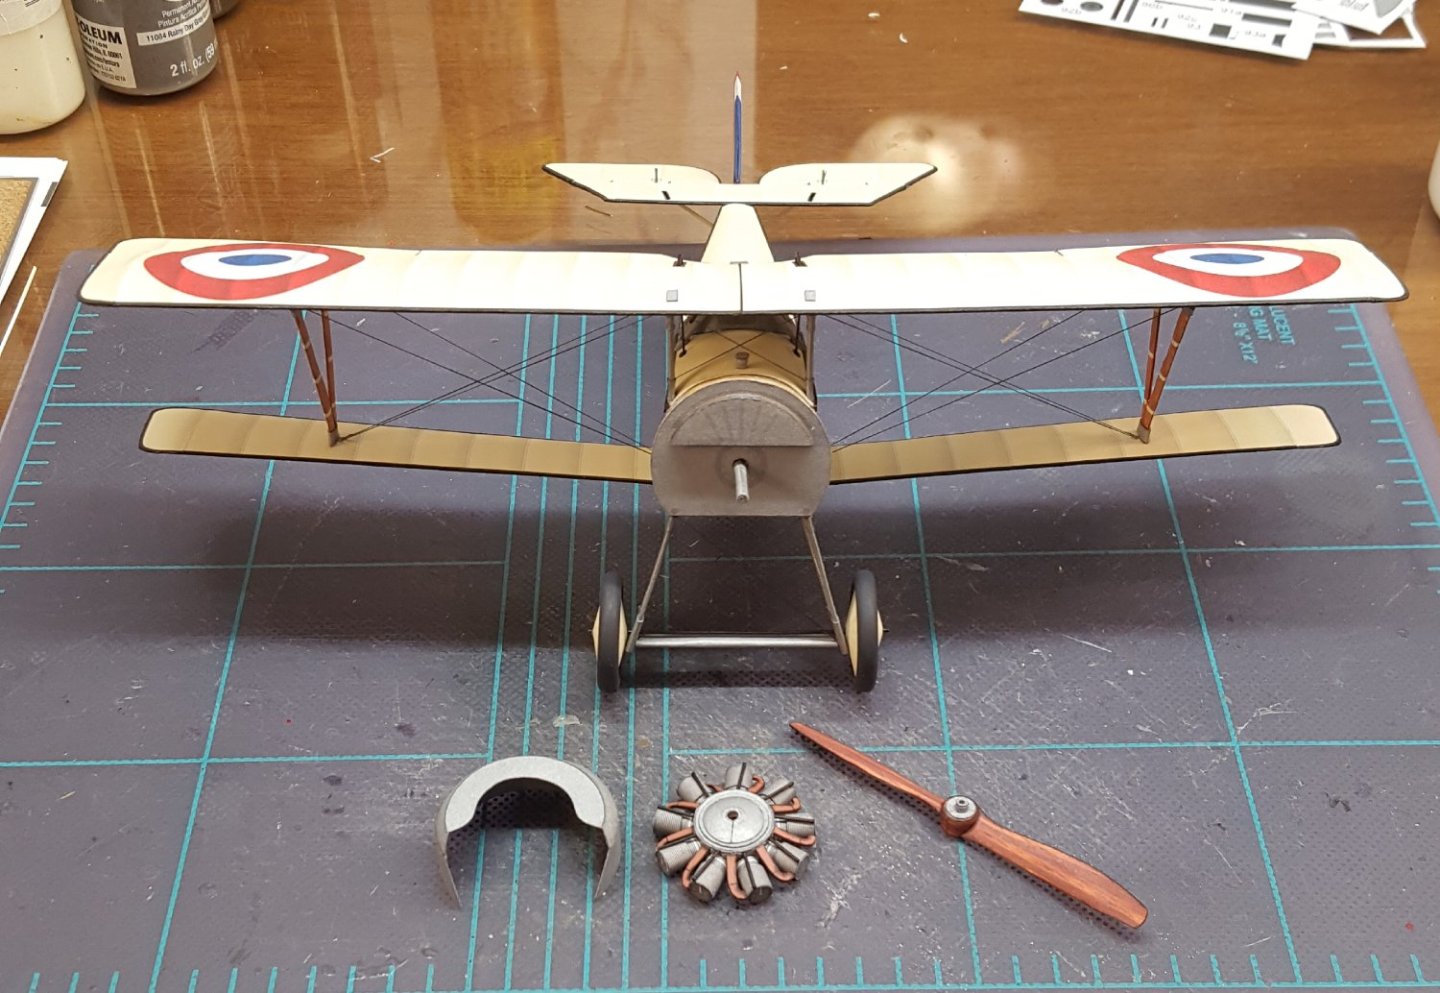
Update: engine, cowl, and propeller completed, but will leave the final installation for later. Struts for horizontal stabilizer added, but no control wires yet. The last significant assembly to do will be the Lewis gun.
- 98 replies
-
- 23
-
-
-
That's part of why I like the KK kits so much. They've a good amount of detail without being insanely difficult to build.
- 98 replies
-
- 11
-
-
It's mostly paper tubes and not particularly difficult -- nothing compared to an 18-cylinder, twin-row radial in a Halinski kit.
- 98 replies
-
- 15
-
-
Nice work!
-
Last update for today. The empennage is on, but not braced. The engine is only test-fitted for this shot -- it's still incomplete.
- 98 replies
-
- 20
-
-
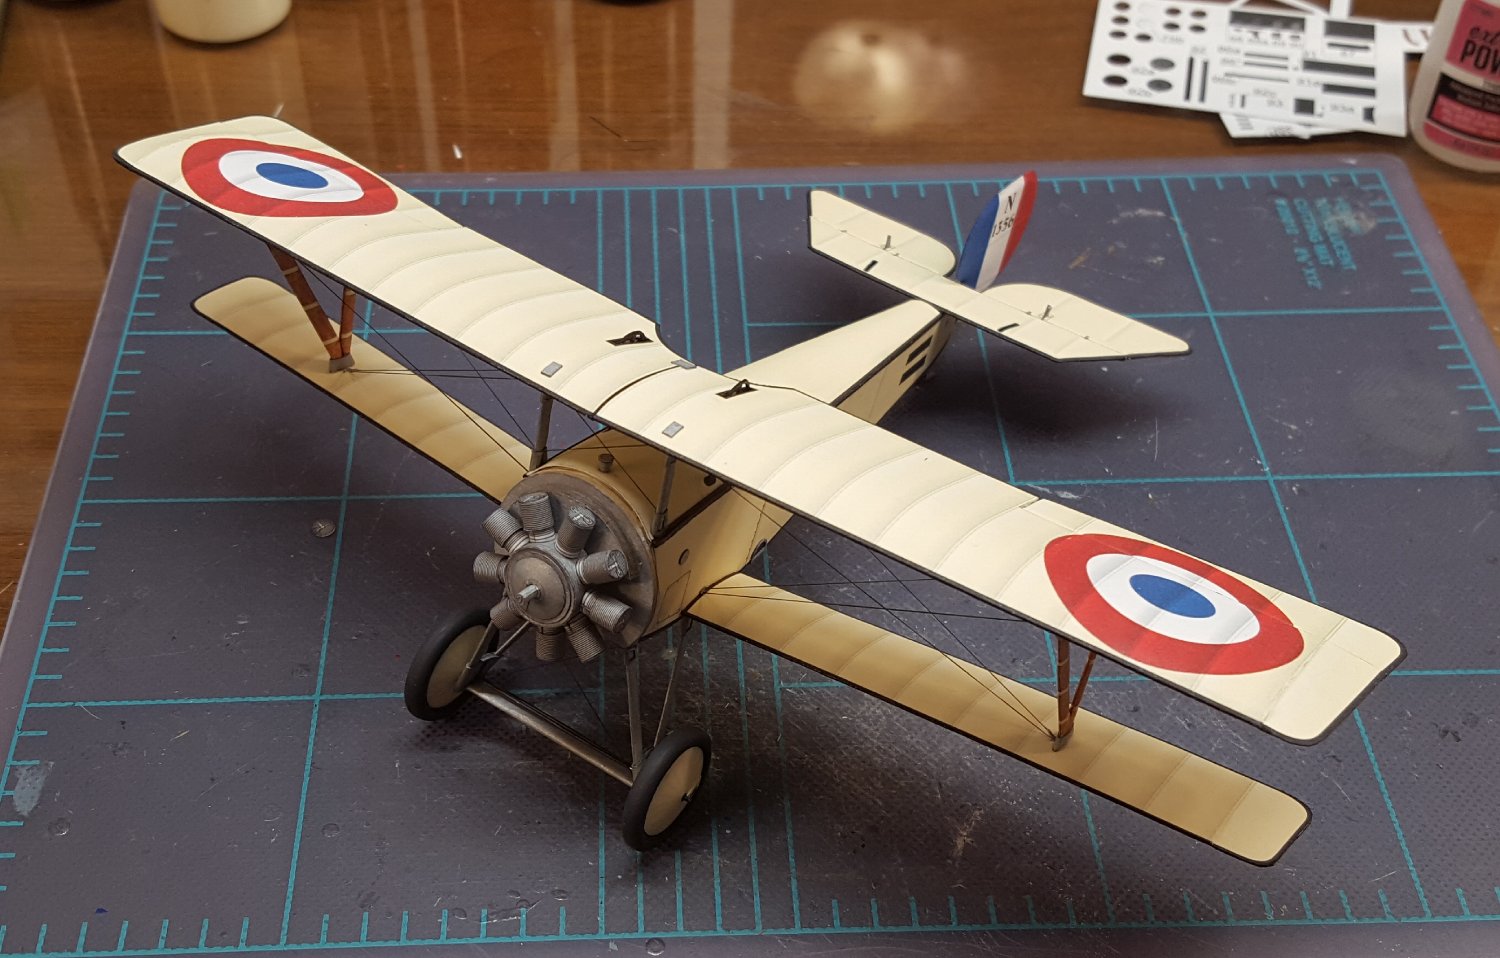
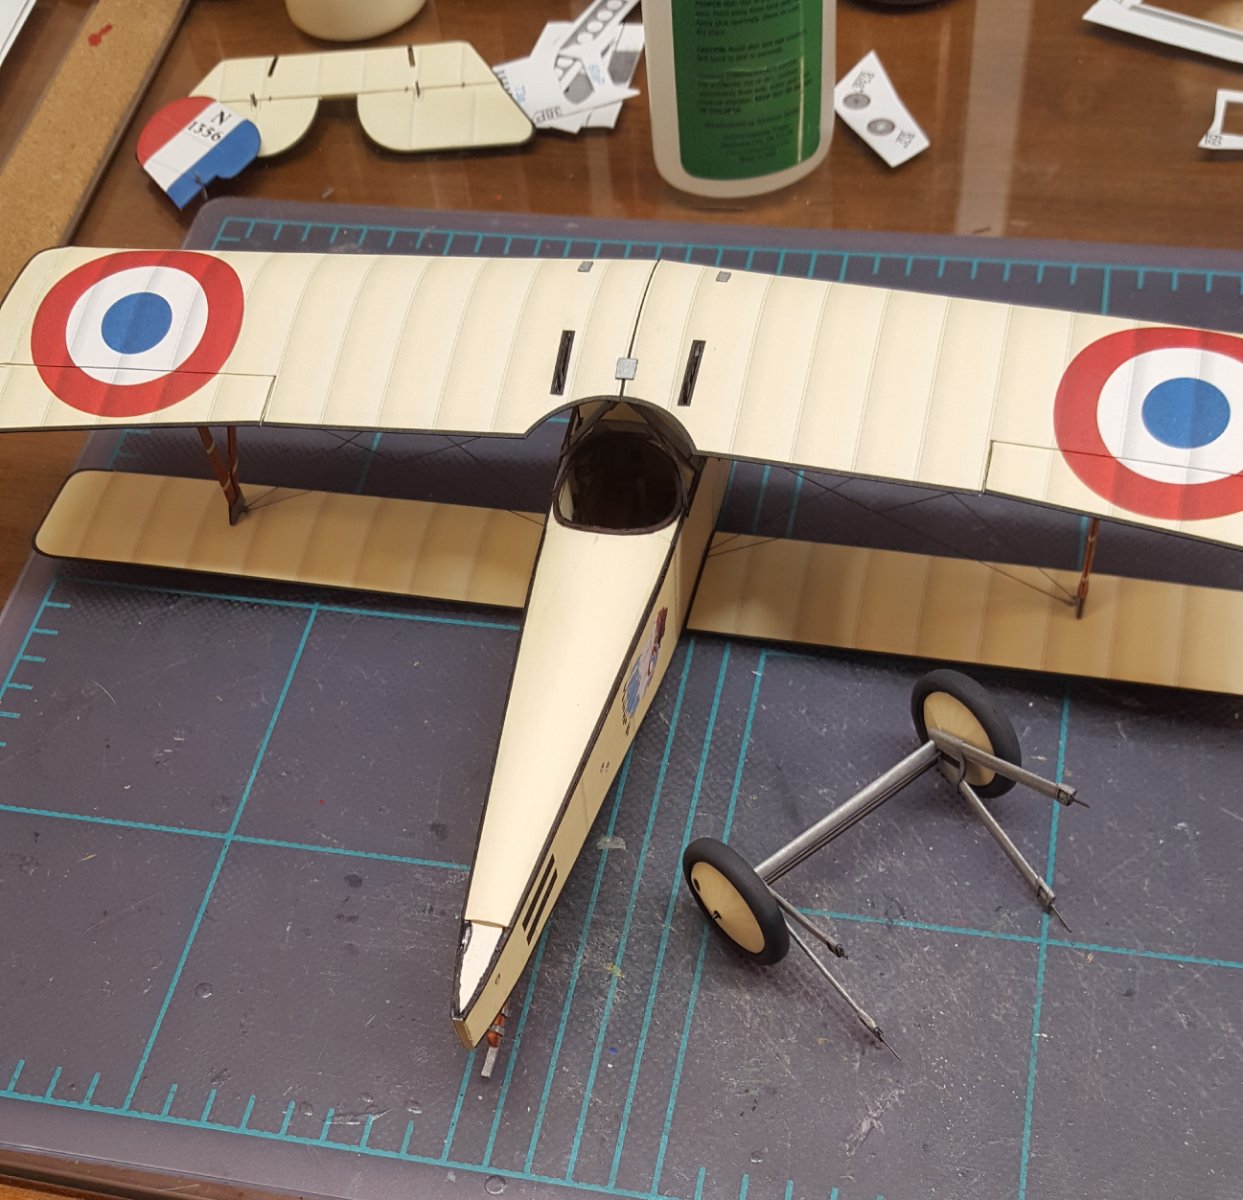
The landing gear are now complete and sitting overnight to dry thoroughly. I will rig the bracing between the struts before attaching the gear to the fuselage. In the background you can see the completed horizontal stabilizer -- the empennage will go on after the gear have been attached, because I still have to turn the model upside down to do some work.

- 98 replies
-
- 17
-
-
-
Great result!
-
I know, I know. I'm getting too accustomed to spending $20-30 for a complete airplane combo (kit, frames, canopy). But it is something compared to a typical card kit. But -- it is an extremely nice kit and accessories, and that much is certain. I'm gonna have to try one someday.
-
You must have gotten me confused with another staffer. I don't handle NRG issues.
- 179 replies
-
- 2
-
-
- Second Build
- Pinta
- (and 2 more)
-
Gee whiz, Craig, slow down! Take some time to enjoy the build! 😉
-
We have two finished build logs for this kit which you will find listed here. Perhaps these will serve the purpose?
- 1 reply
-
- 1
-
-
Welcome aboard, John! Those are popular kits, and we have numerous finished examples here in both the gallery and build logs section to inspire and help you through your projects. Cheers!
-
Yeah, those are a new thing. I just read about them yesterday in my FB feed. They also sell separate sets for blocks, yards, and sails (with an additional set for studding sails). The blocks set is the one that will put a dent in your wallet, and if one buys all of the available detail sets, the total price really ain't cheap -- but at least it's an option.
-
Both the upper and lower wings have locator marks. The struts are wrapped around lengths of wire. I punch holes in the locator marks and trim the wire so that a locator pin is left -- just like a plastic model. 😁
- 98 replies
-
- 12
-
-
-
I should clarify. It doesn't grab well when under tension, so I can't anchor one end and then attach the other with canopy glue. But it does work well when attaching the first, non-tensioned end. It takes only a minute or so to set, but I usually brush a little bit extra onto the joint as a precaution and then let it set for several minutes while I work on something else.
- 98 replies
-
- 13
-
-