ccoyle
-
Posts
10,545 -
Joined
-
Last visited
Content Type
Profiles
Forums
Gallery
Events
Everything posted by ccoyle
-
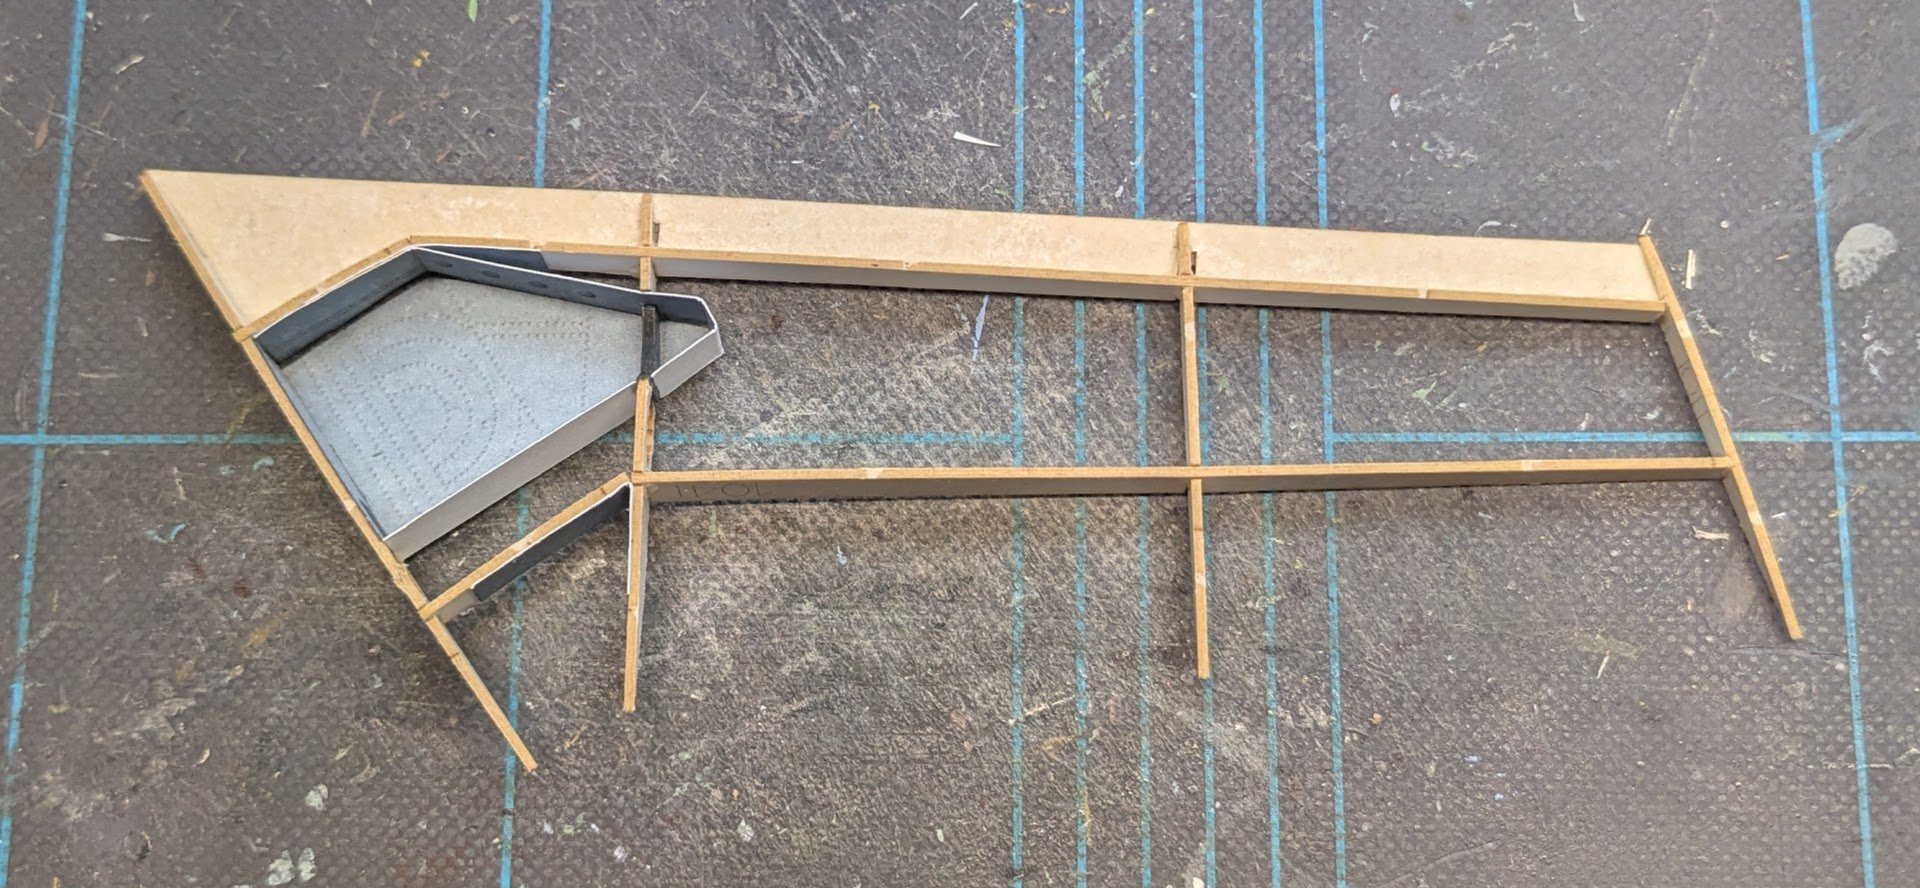
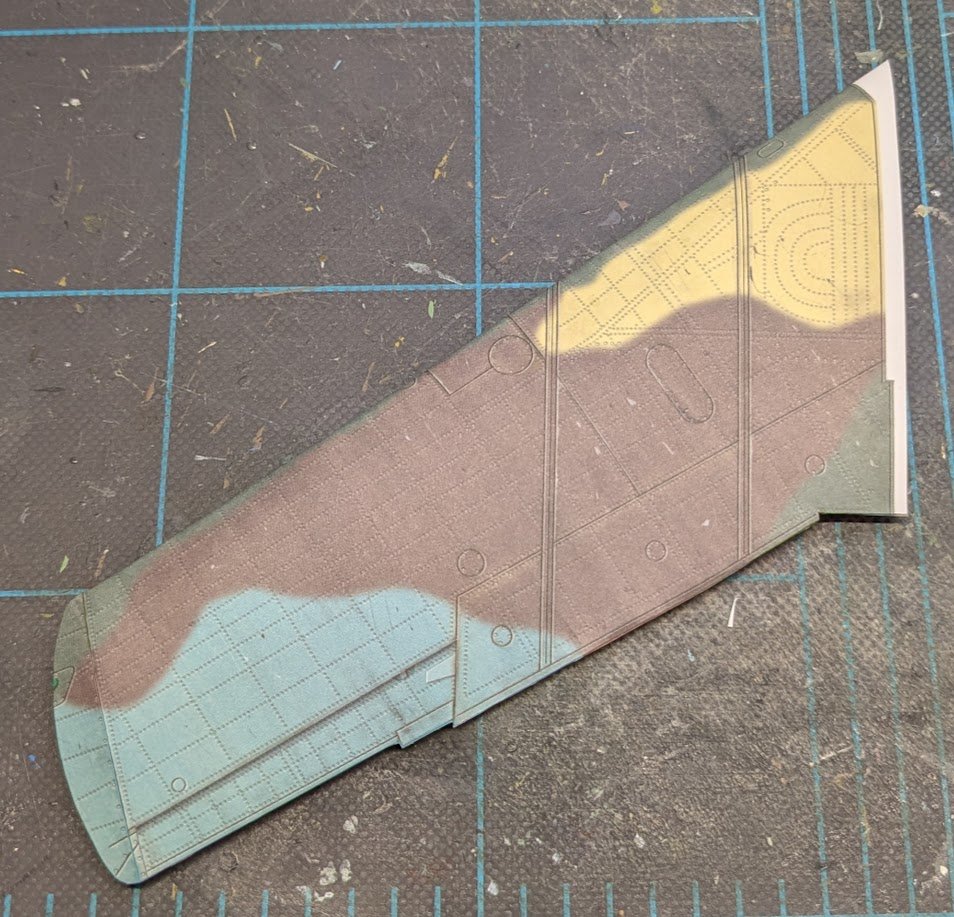
 On to the wings. The kit provides two sets of spars, one for the complete wheel wells option and the other for w/o wheel wells. For parts that will only be partially visible on the finished model, like #108, I use only the visible portion of the printed part. The English directions are a bit cryptic. The upper part of the wheel well doesn't fit the interior framing exactly, so I tinted the surrounding areas of the wing skin that might show around the edges of the well. Note that I have added joiner strips to the trailing edge -- these aren't included in the kit. The interior framing is a little wobbly. I suggest putting as much of it together as you can before gluing. (EDIT: There's actually a rod, part #59, that fits inside the framing and will help align things as well.) The leading edge piece is the key to getting everything aligned properly. Notice that no spacers are provided around the wheel well. Test fit the framing inside the folded wing until you get the wheel well positioned properly, then mark the inboard edge of the framing -- it doesn't sit flush with the wing sheathing. Once you're satisfied with the location of the interior framing, you can tack it to the topside skin. Once the glue has set, you can glue down the bottom skin, but don't try to do it all at once. Do the inboard stringer and wheel well surround in one go, then zip up the trailing edge separately. After that you can add the wingtip piece and close up the wingtip. That's one wing down and one to go!
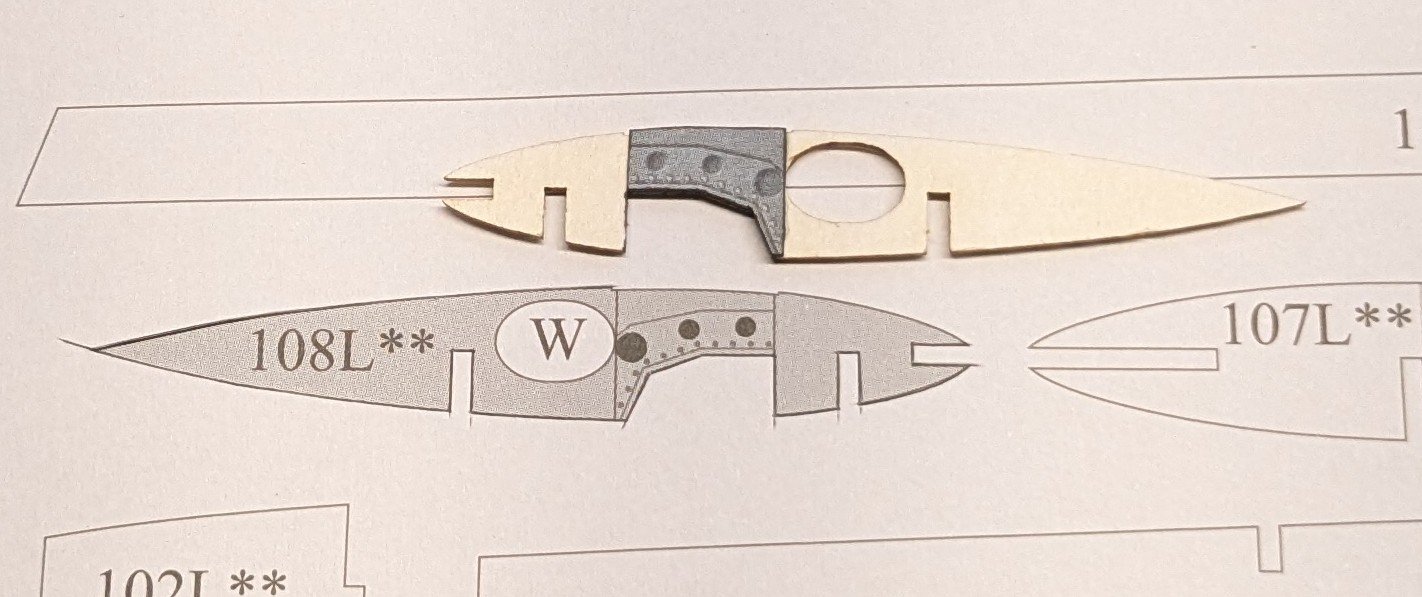


- 66 replies
-
- 13
-

-
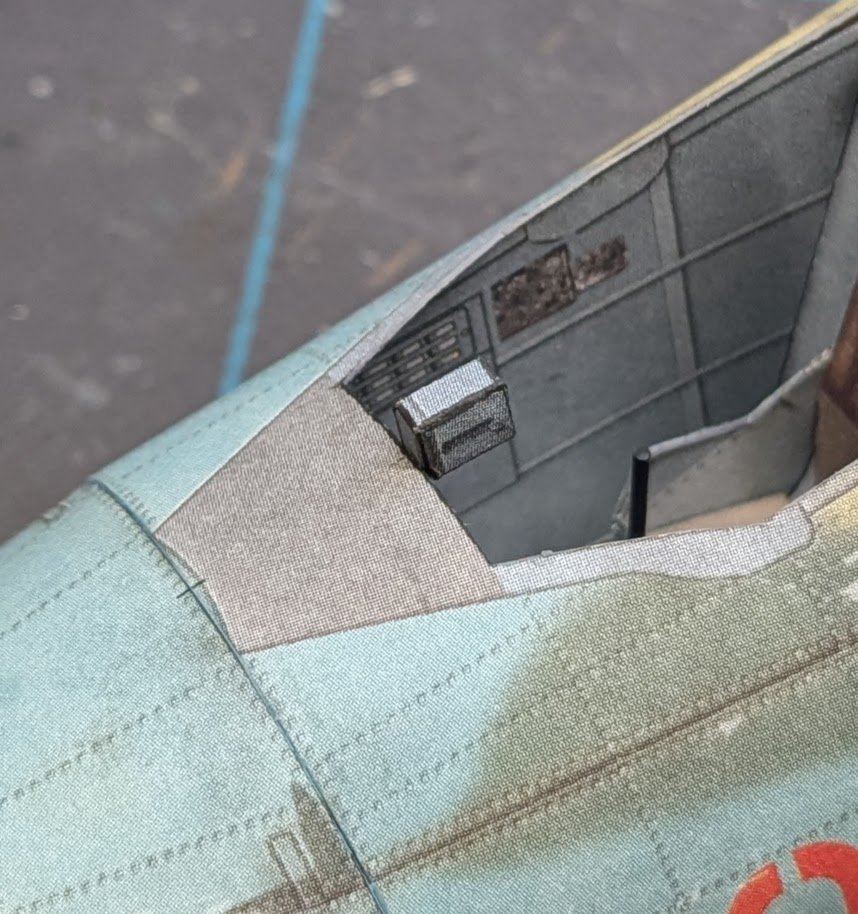
Time to install the canopy! But wait -- don't forget to add the gun sight first! Then you can install the canopy!

- 66 replies
-
- 15
-
-

-
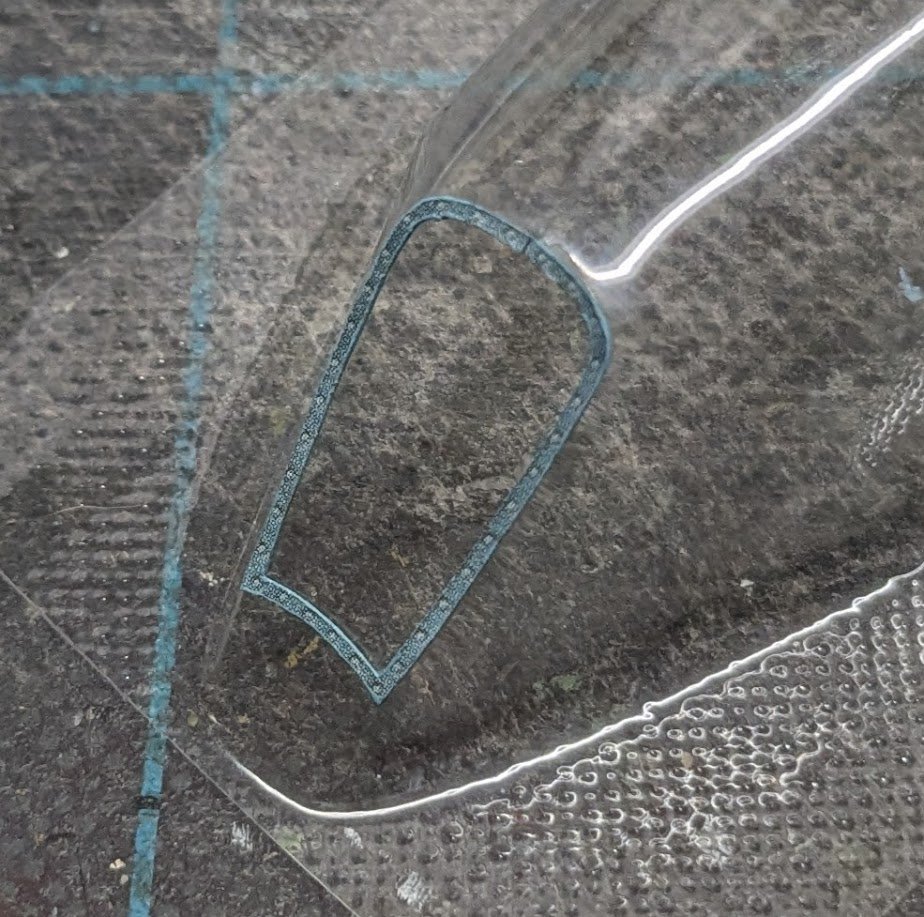
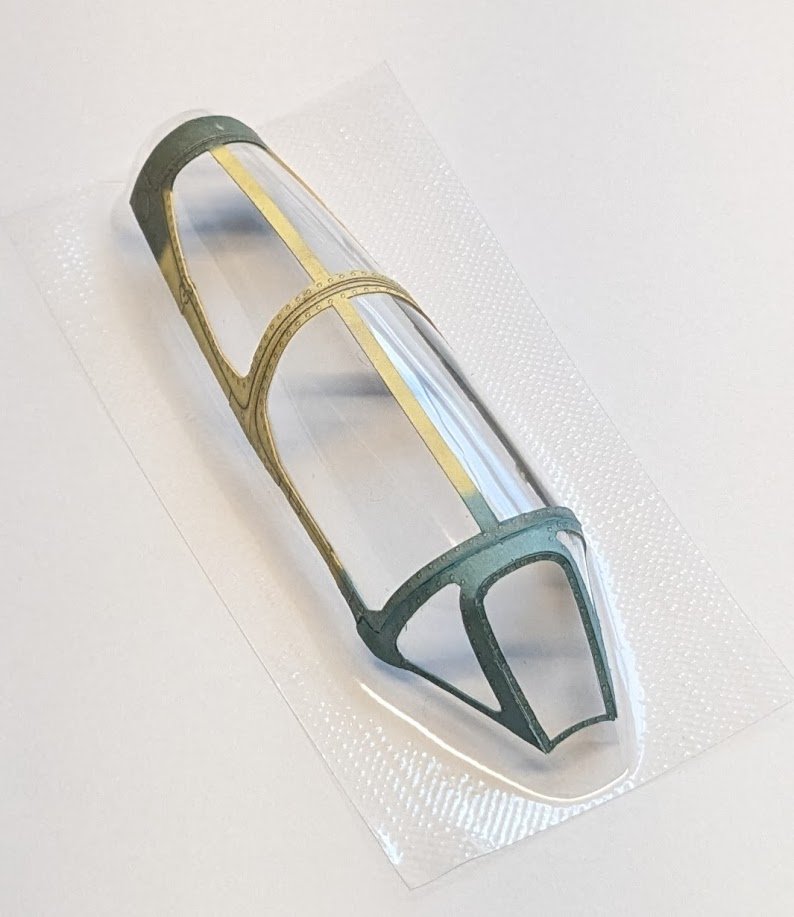
Time to frame the canopy. A couple of tips may be helpful. First of all, I usually do not attempt to glue an entire frame piece in one shot -- it's messy, and the glue I use (Evergreen canopy glue) doesn't give a lot of working time. Normally I tack one part of the piece in place and then do the remainder as several small sub-steps. Second, do everything you can to make sure the first piece is aligned on the canopy correctly -- it acts as a kind of keystone for the remaining bits, and if it is off-kilter, then what follows will be off as well I opted to start with the front panel, because its location on the molded canopy is fairly obvious. For the next piece, you can see how I tacked the top section, making sure to align the tic marks on both pieces. BTW, on the aft portion of this piece there are two stub pieces of framing. The closed canopy should fit inside these pieces, but I didn't discover that fact until after I had already glued them down. That made it necessary to trim the next piece slightly to accommodate the stubs. Make sure you allow plenty of time for the glue to set. If the glue is still white instead of clear, as seen here, you're not ready to move forward. And here's all the framing attached. Let the glue cure well -- some flexing will occur when the canopy is freed from its sheet, and improperly cured bonds may pop loose as a result. That's it for now!

- 66 replies
-
- 14
-
-
-
This is actually a rather generous description of the instructions -- the translation is very obviously not the work of a native speaker. I'm happy to see this one under way. Best of luck!
-
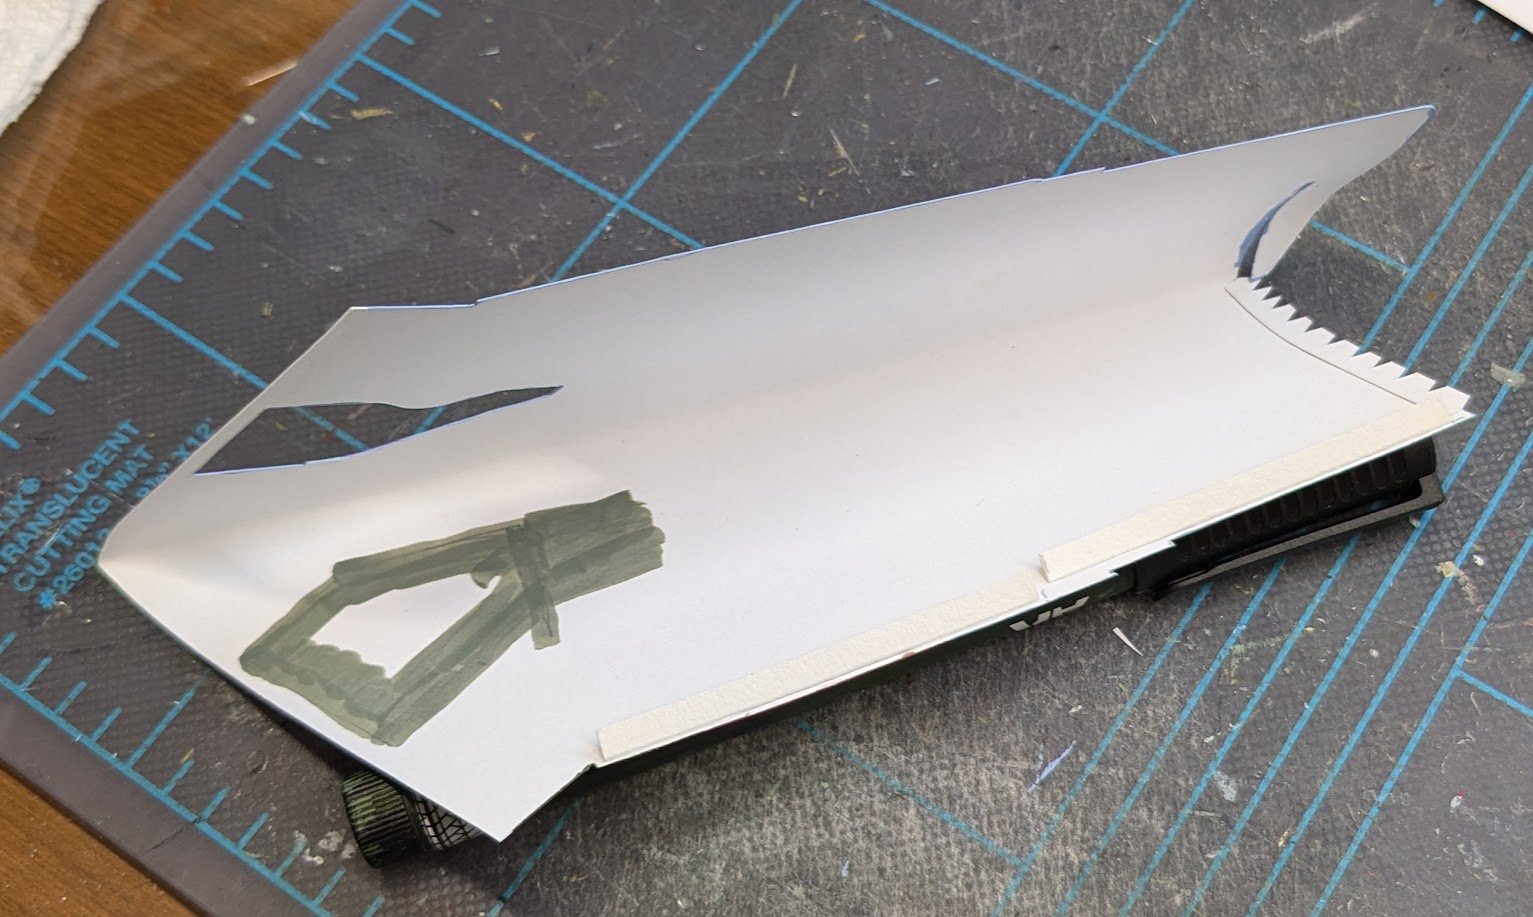
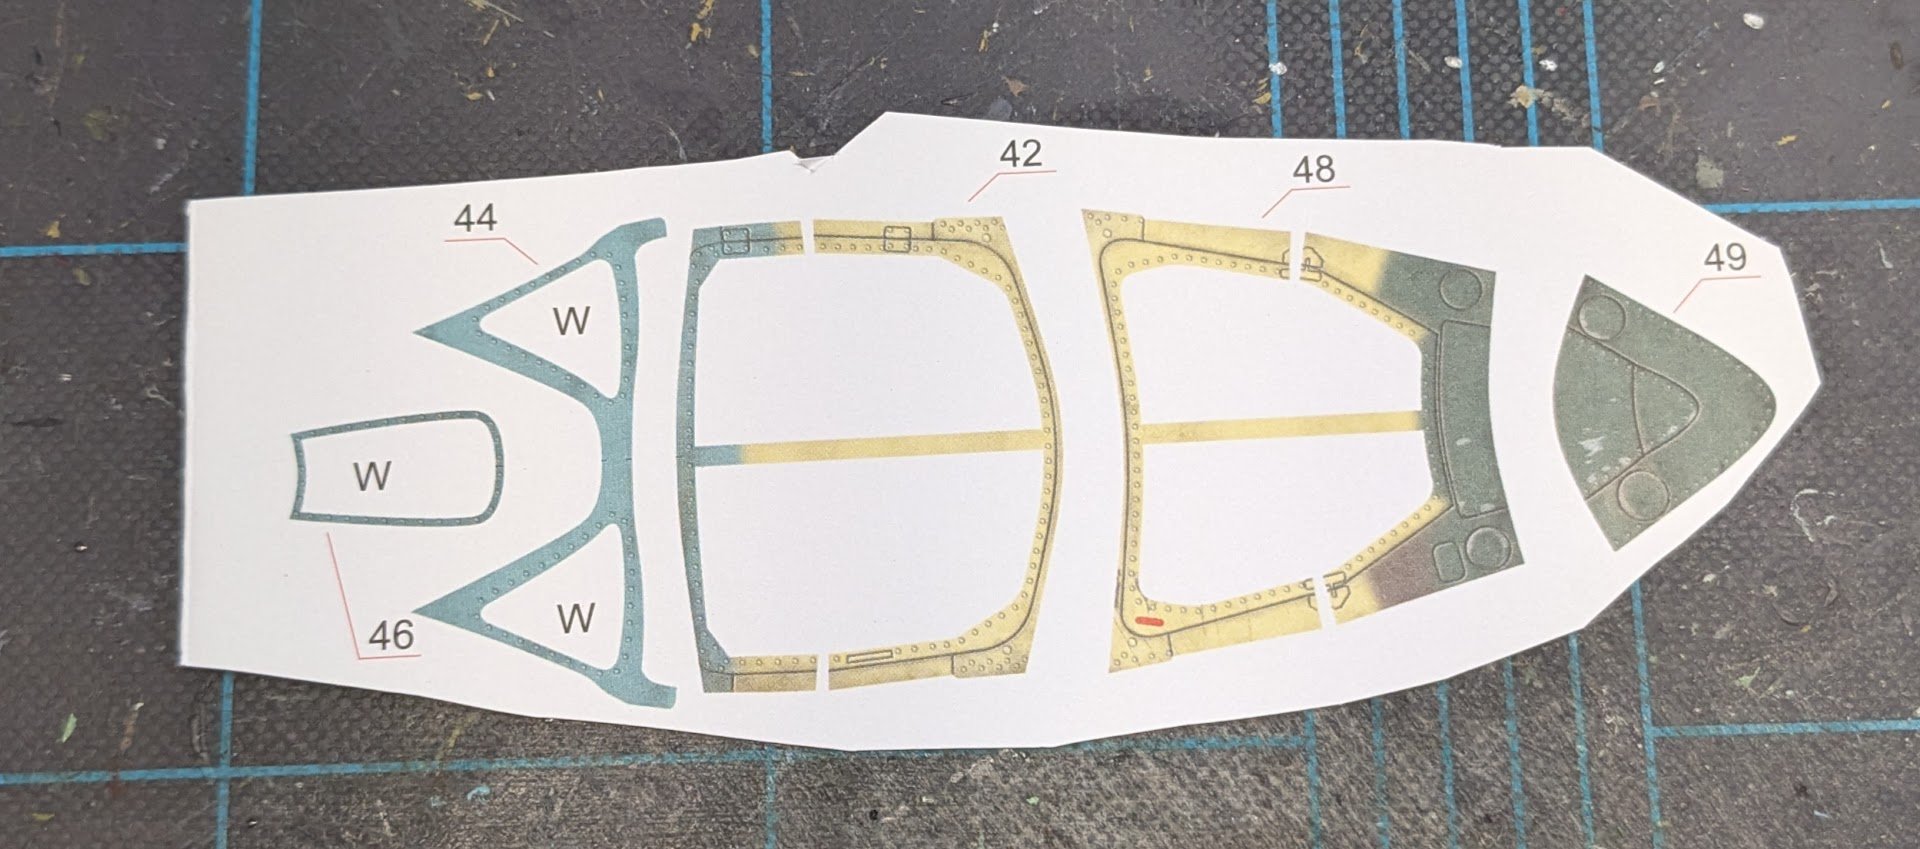
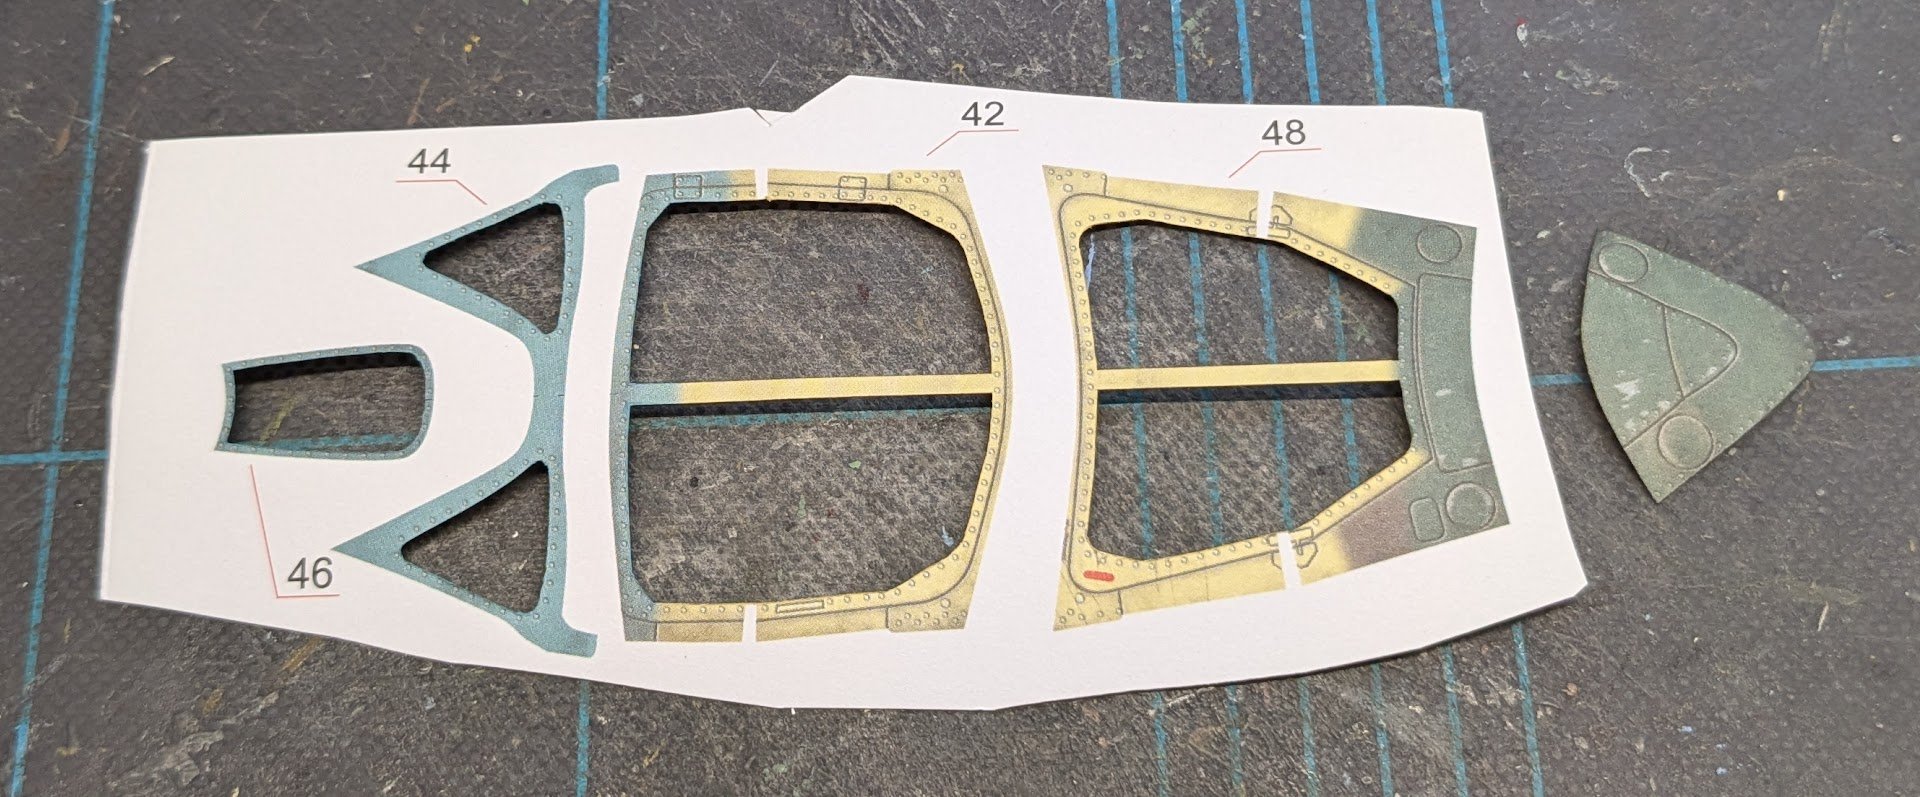
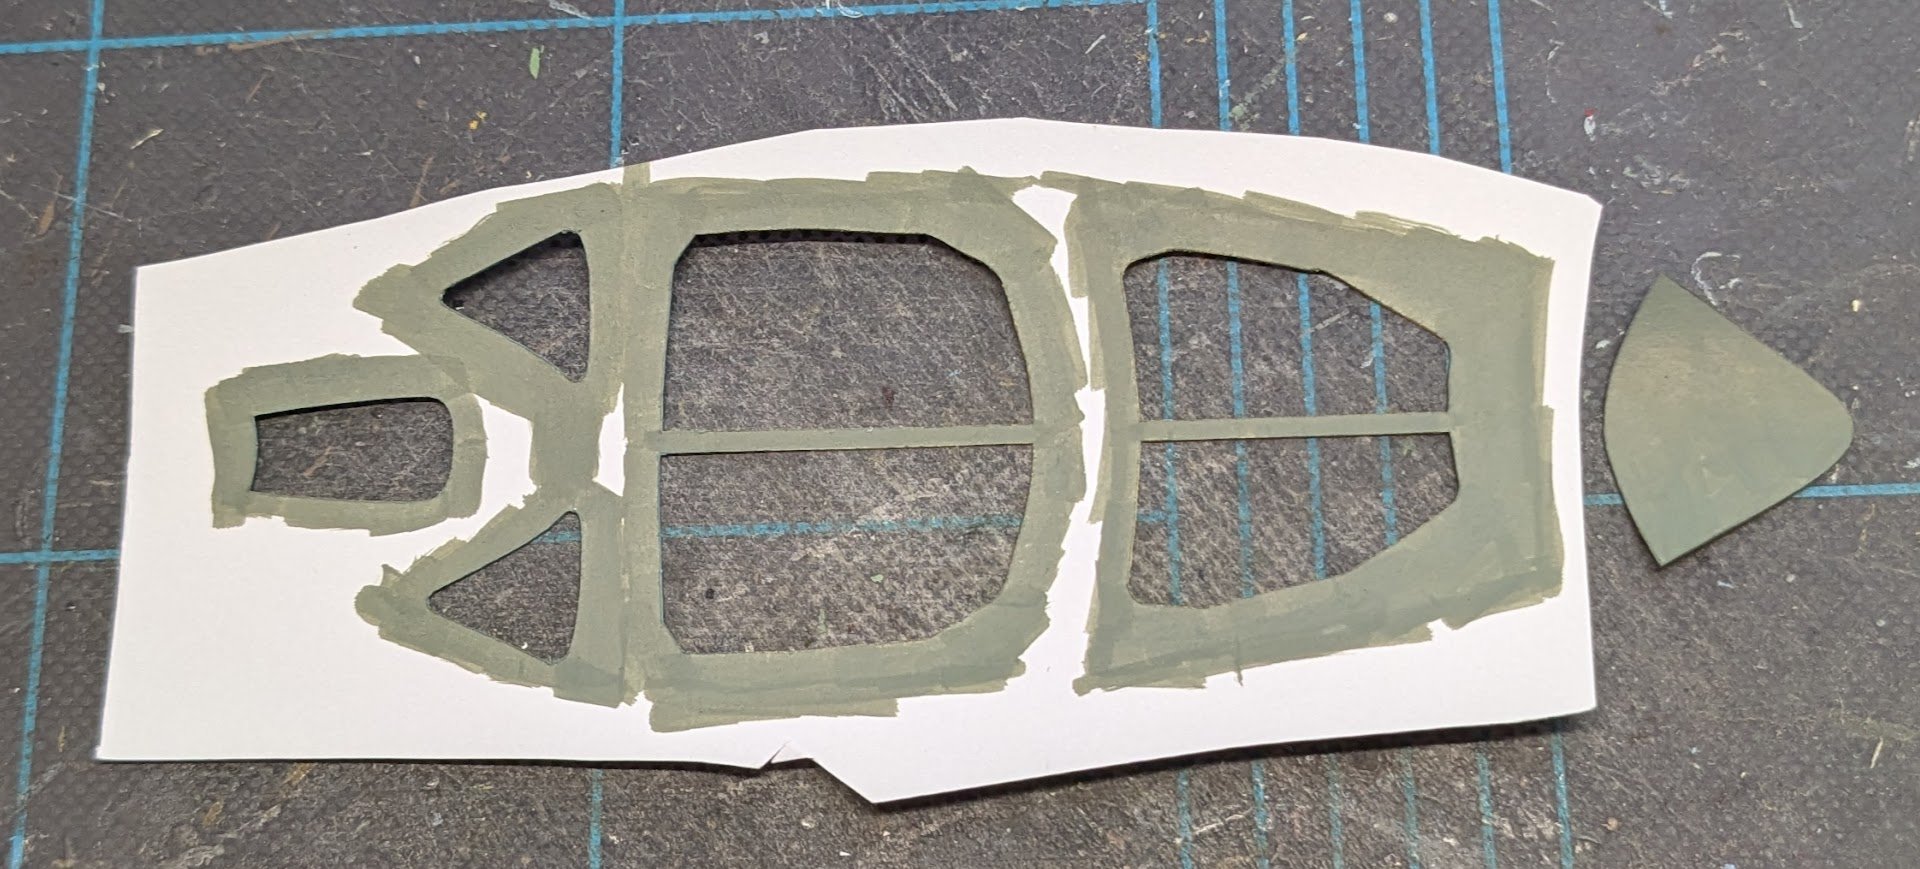
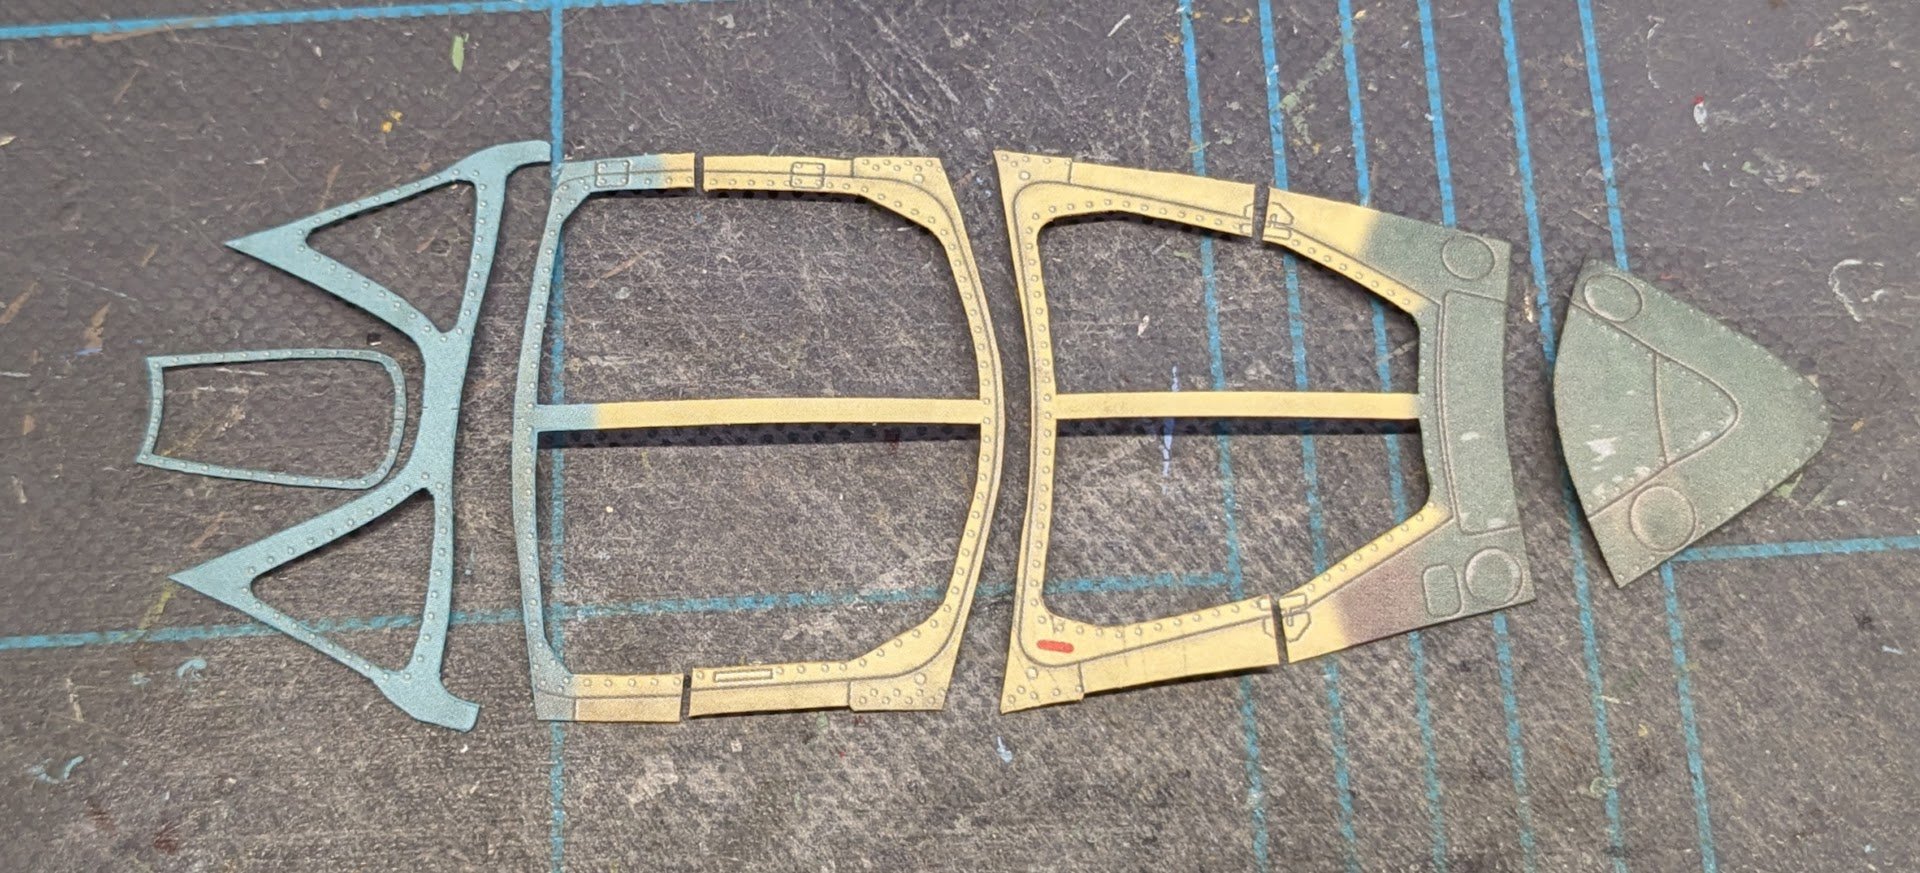
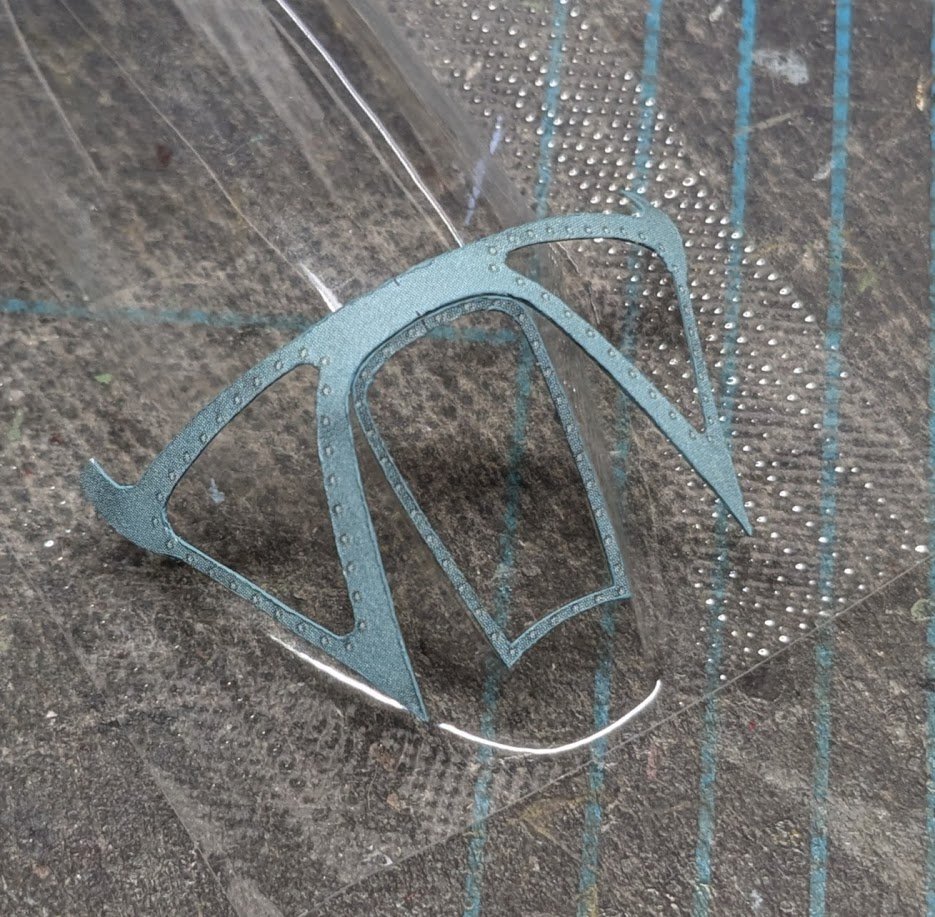
Armament installed, plus shell case ejector ports. Nothing special to watch out for here -- just fiddly parts. Use something like styrene rod to help roll the gun shrouds. The kit includes paper barrels, but it's wise to substitute styrene rod for these, too. Also, pay attention to the orientation of the ejector ports. I glued one on backwards and didn't notice it until the following day. 😑 Moving to prepping parts for the canopy. If you chose not to add the cockpit interior, then you'd use the opaque windscreen parts provided in the kit. I'm using a molded canopy, so the framing parts will need to be cut out and edge colored. Start by cutting out the interior portions of these parts. Don't cut the parts all the way out just yet. Leaving them like this makes coloring the interior edges easier. The backsides of the frames will be visible, so they need to be painted. I made no effort to match the cockpit interior gray -- I just used the closest AK color in my set. The main thing is that the backs are not white. Now we can cut the parts all the way out and color the exterior edges. In the next installment: Framing the canopy! 😬


- 66 replies
-
- 12
-
-
-
The Mossy Shipyard by Bryan Woods - 1:1
ccoyle replied to Bryan Woods's topic in Non-ship/categorised builds
1/1 scale boat? 😉 -
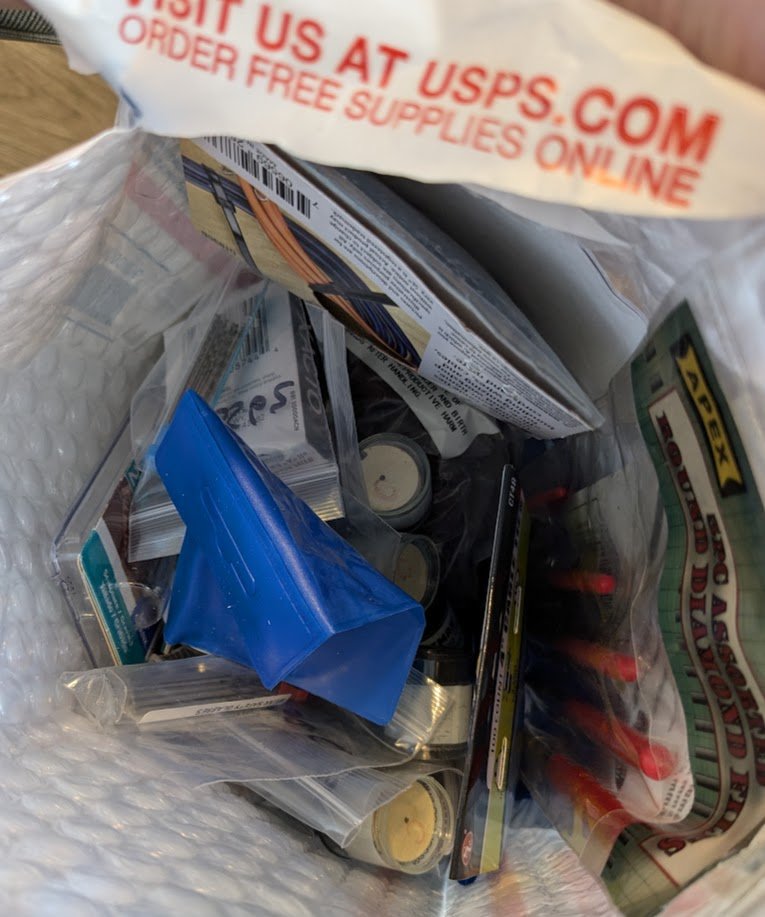
BTW, I just received an order from Widget Supply. The owner is retiring and selling off his inventory at deep discounts, limited to stock on hand. I was able to snag a whole bunch of goodies: knife blades, sanding disks & drums, drill bits, Dremel bits, mandrels, needle files -- even zip ties. You should check them out!
-
Thresher & stable engine by RGL - FINISHED - Plus Model - 1/35
ccoyle replied to RGL's topic in Non-ship/categorised builds
Yes, I missed the finish of this one, too! Great-looking result, Greg! -
I believe this isn't the kit that was referenced. Amati did indeed produce a kit of Prince way back in the day, but if I recall correctly, they were having Chris Watton work on an updated 1/64 scale version. Just another of the Amati projects that never saw the light of day.
-
The key words there are "from here"! 😅
-
Welcome aboard!
-
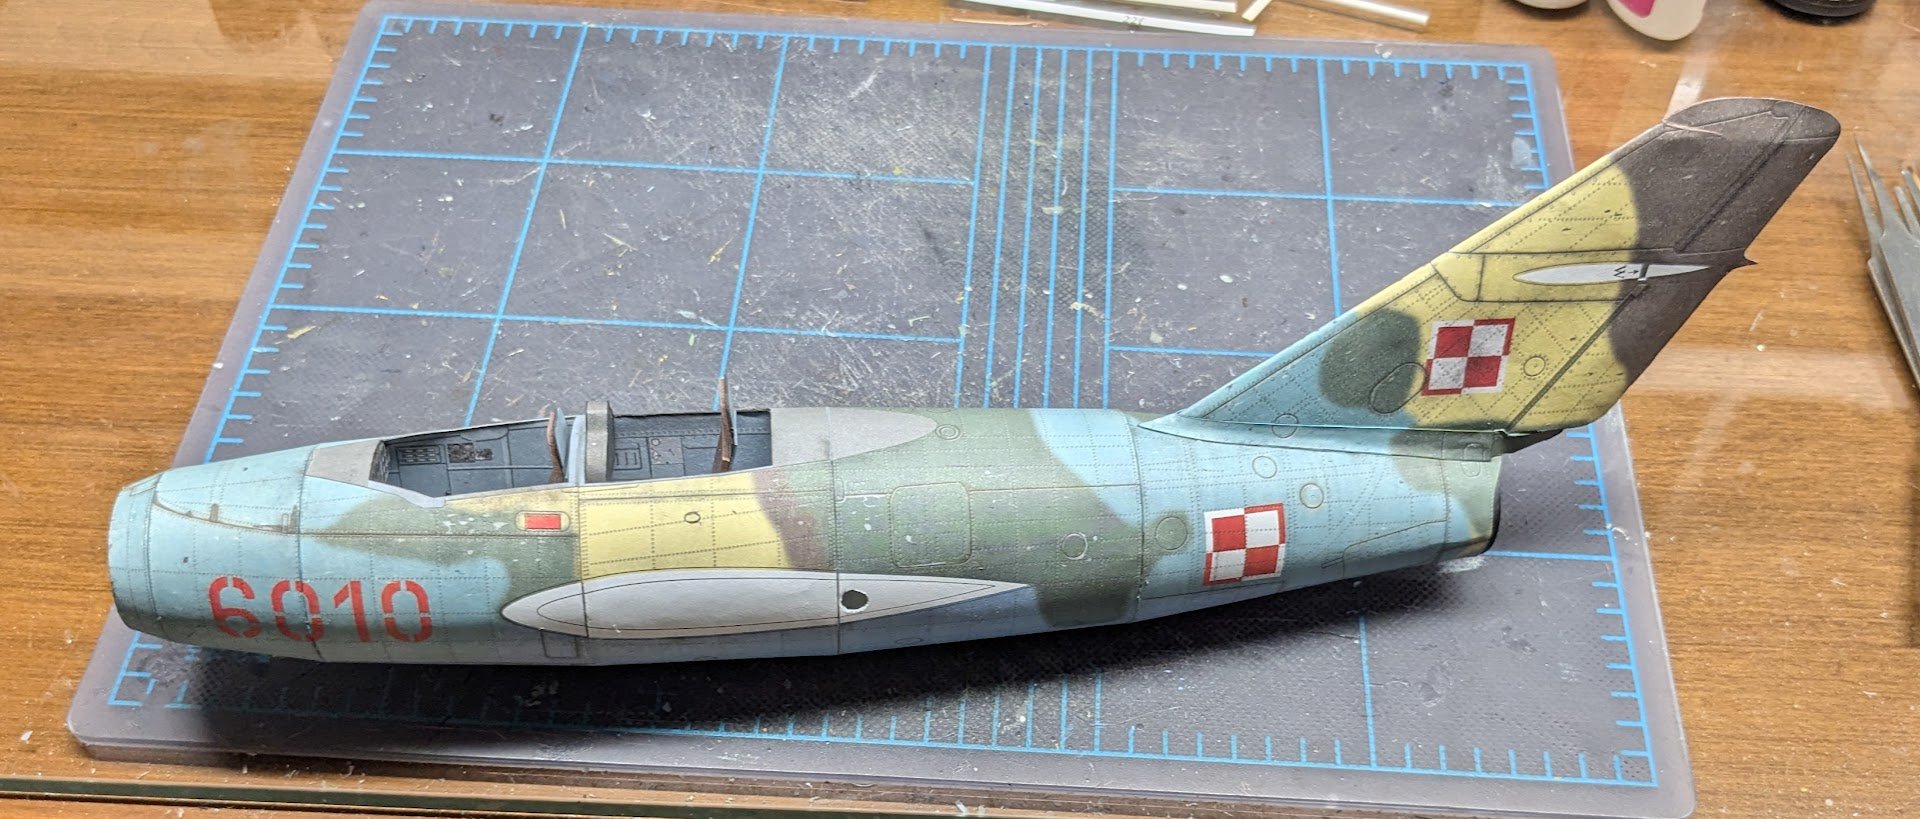
A Tale of Woe . . . Before adding the vertical stabilizer to the fuselage, I first added a strip of scrap card to fit inside the stabilizer -- recall that the stabilizer's framing doesn't sit on the fuselage. This gives some more gluing area. After this, the stabilizer was added. And here's where I ran into some problems. Sometimes the little parts of a model can cause the most trouble. On the MiG-15 and its derivatives, there is a small projection of the fuselage that juts out past the exhaust outlet and forms the base of the vertical stabilizer. Here's the parts for that bit: At first I thought the little joiner strips were supposed to go from this structure to the insides of the stabilizer. I also thought it was weird, if that was the case, to not glue the joiners to the stabilizer first. So I went ahead and did that. Whoops!! I later determined that the joiners were supposed to mate the aft structure to the stabilizer fillets, i.e., they go on the outside of the stabilizer! Since I had already glued the kit parts to the wrong area, I had to make new joiners from scratch. I also needed to trim the cone-like tail structure to get it to fit in the gap between the exhaust outlet and stabilizer. Then I added the fillets -- or rather fillet, singular, since the two sides are all of one piece. The finished assembly is not particularly tidy. And here's where we are now. Until next time!

- 66 replies
-
- 17
-
-

-
Auf englisch, bitte!
-
I'm using some 3D-printed parts from Model -Hobby for my Halinski A6M5a build (link in signature).
-
New here - help with Graupner Fish Cutter Elke kit please!
ccoyle replied to ajcooper4's topic in Wood ship model kits
AFAIK, this kit has been out of production for a long time, so finding kit-specific instructions for it will be challenging. 1960s kit technology also leaves a lot to be desired. All in all, I think this kit is likely to produce only frustration for a beginning modeler, despite being a freebie. As was stated in the previous post, there are far better options for beginners these days. -
At scale viewing distances, most wire rigging is nearly invisible.
- 32 replies
-
- 3
-
-
- St Louis
- 3D Printing
- (and 2 more)
-
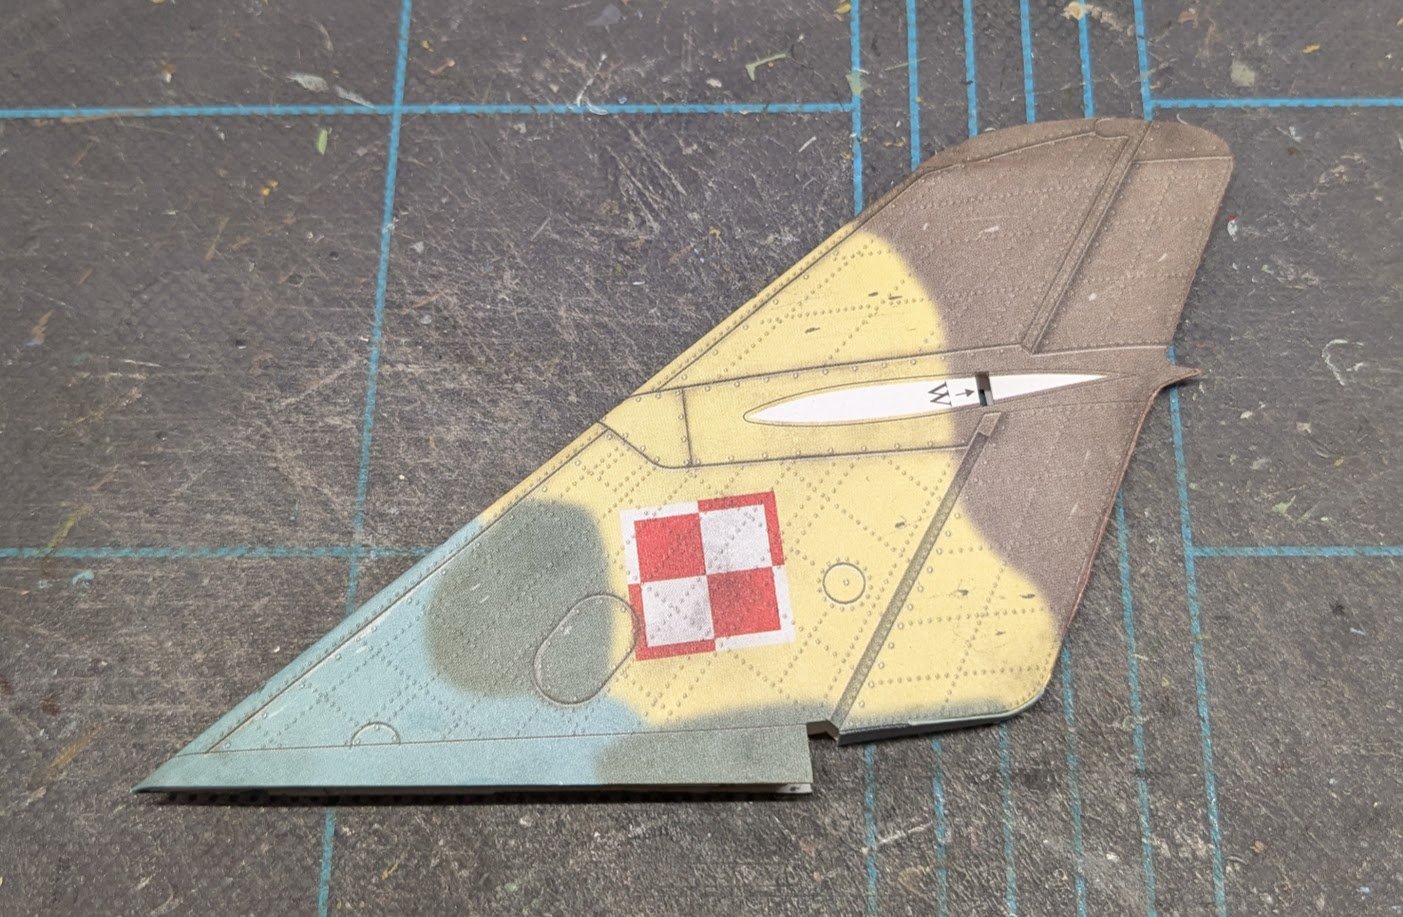
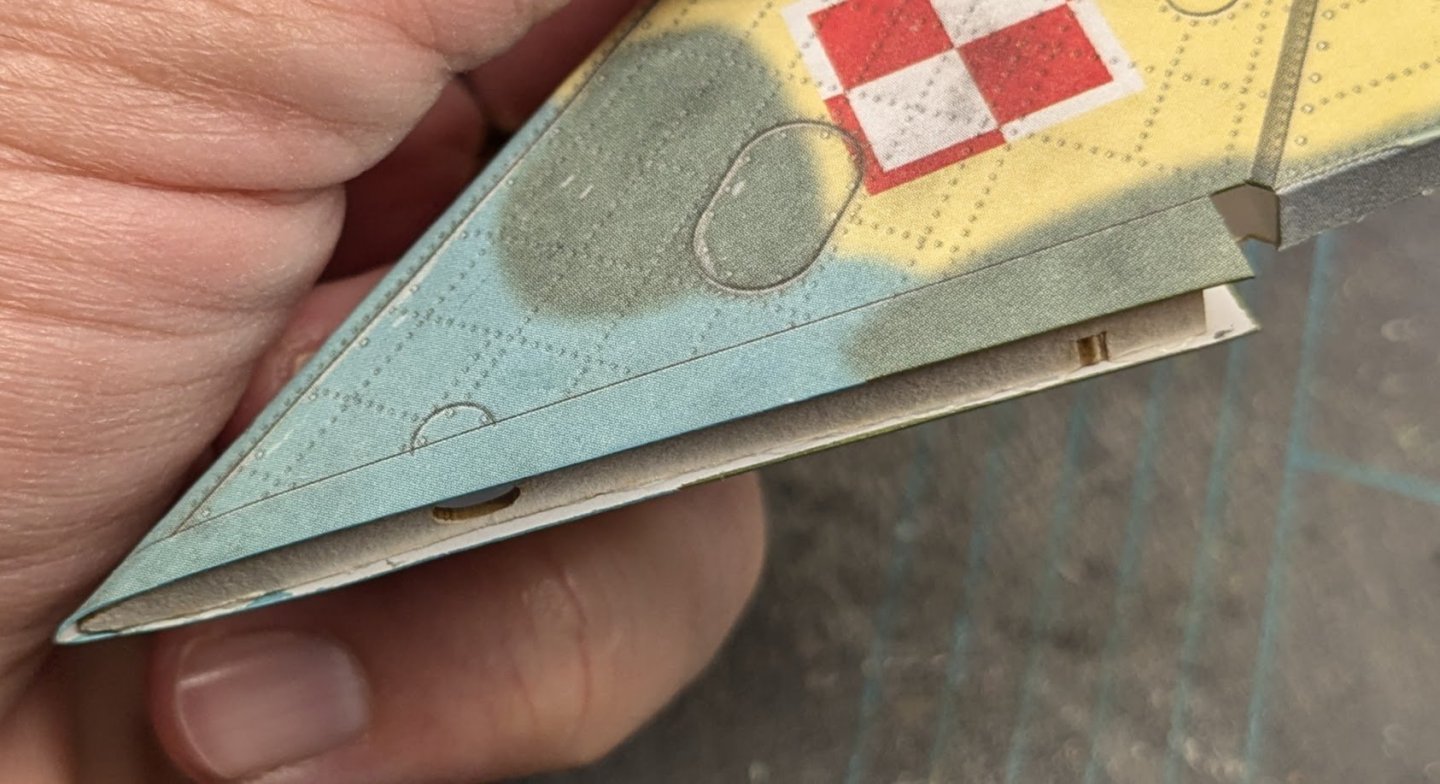
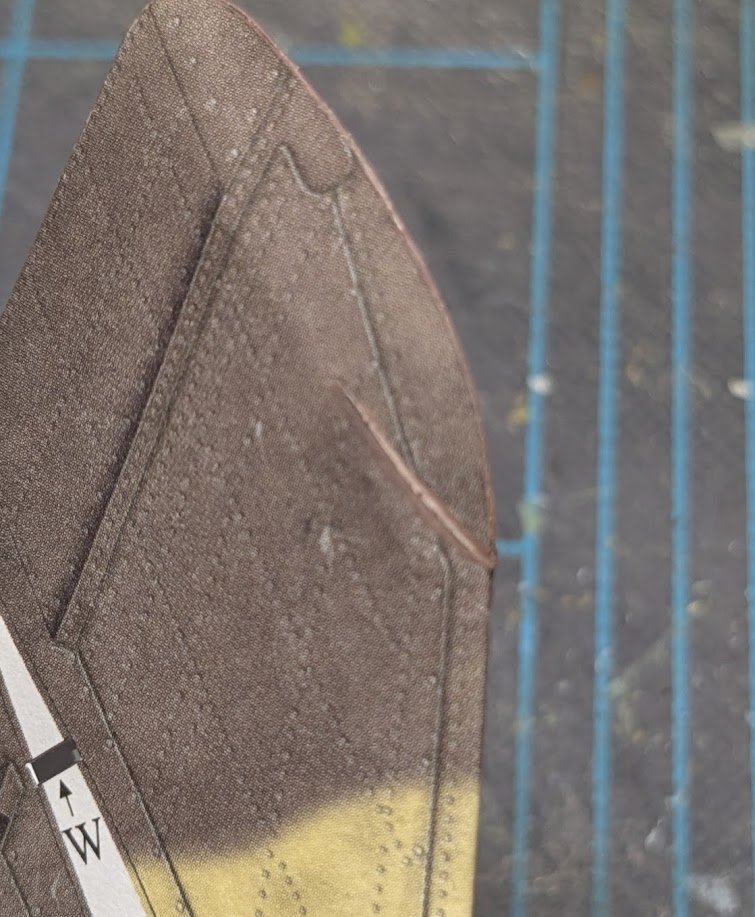
Continuing on with the vertical stabilizer. After prepping the skin and folding it (don't make a hard crease -- it should be slightly rounded at the leading edge), one side of the frame was glued in, then the remaining side was glued down separately, making sure to align the slots for the horizontal stabilizers. There's a couple of things to look out for. First, for whatever reason, the lowermost frame is supposed to be 0.2 - 0.5mm shy of the edge of the skin. In fact, none of the framing is flush with any edge, which makes positioning the frame a judgment call. Second, there is a dart to cut out near the top of the stabilizer. Frankly, I'm not 100% convinced the dart was necessary for the design, but it's there, so it needed to be removed. The resulting seam is supposed to lie along the uppermost framing piece, but for the life of me I couldn't get the framing and skin aligned in that fashion. This negatively impacted shaping the skin somewhat, and coupled with the fact that I didn't bevel the upper frame enough (it needs beveling, which isn't mentioned in the instructions), the resulting seam is not the best work I have ever done. That's it for now!
- 66 replies
-
- 13
-
-
These are the words that precede many creative alternatives in our hobby!
- 121 replies
-
- 1
-
-
- Lucia A Simpson
- AJ Fisher
- (and 1 more)
-
Tilt Top Table by kgstakes - 1/12th scale
ccoyle replied to kgstakes's topic in Completed non-ship models
@kgstakes, Please read the following post: I've moved and edited this one for you. -
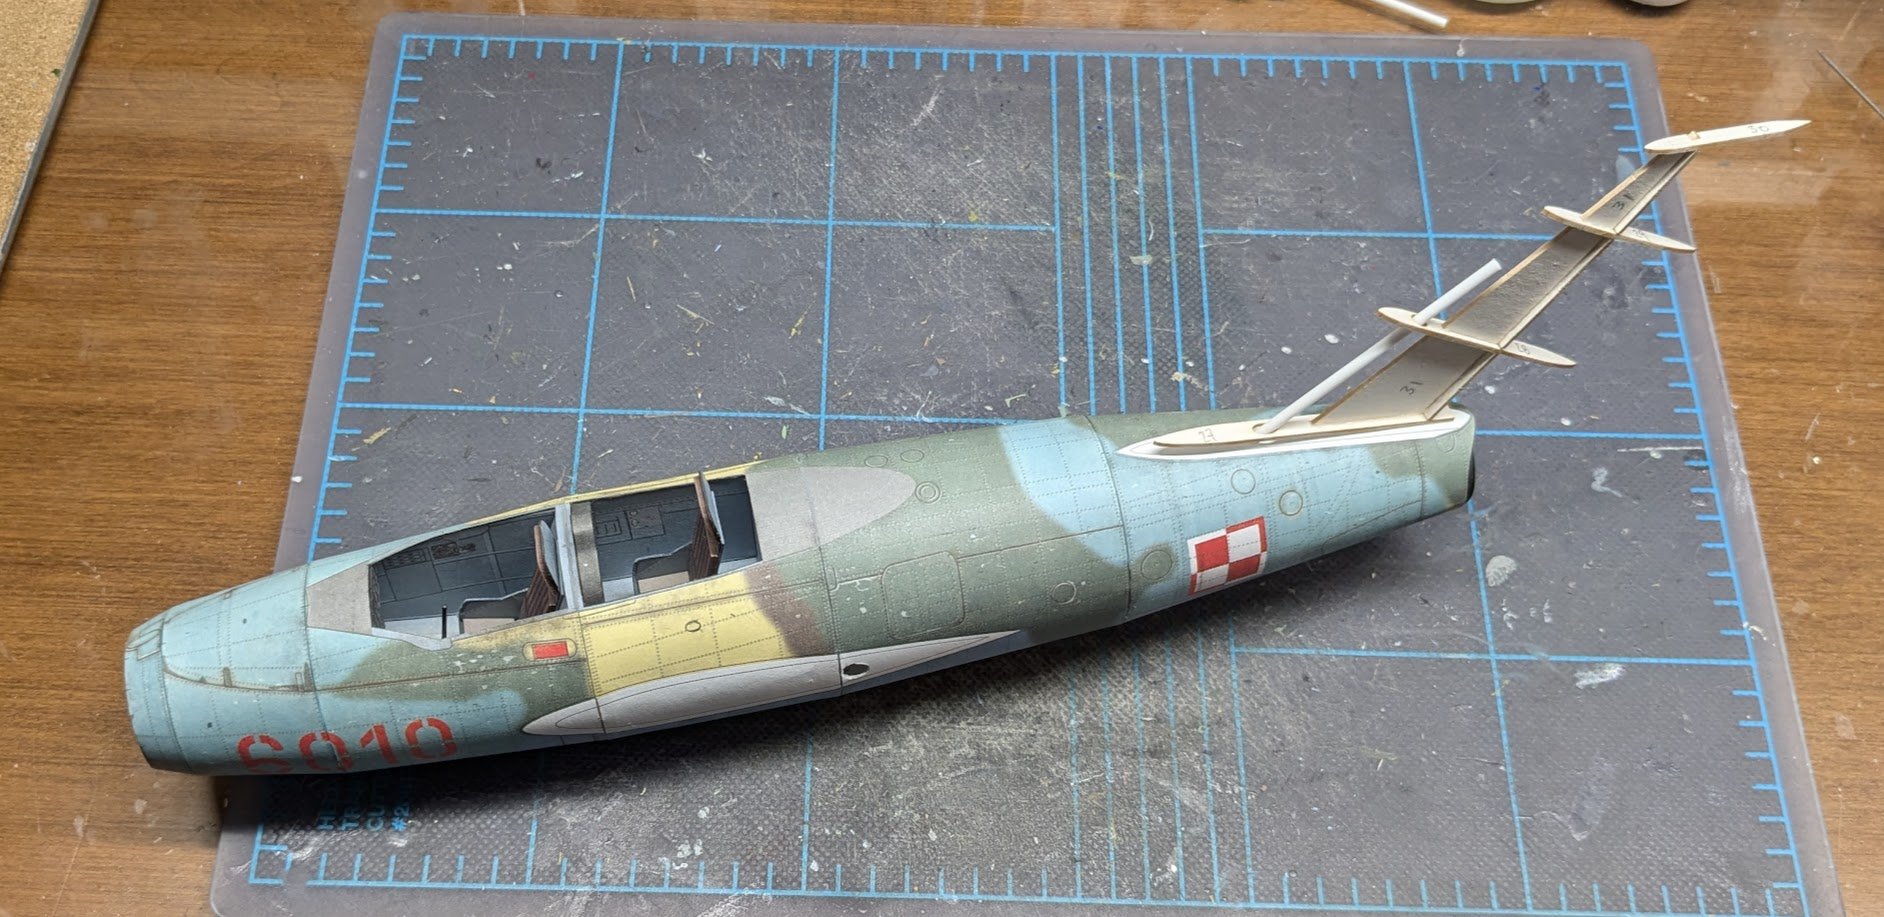
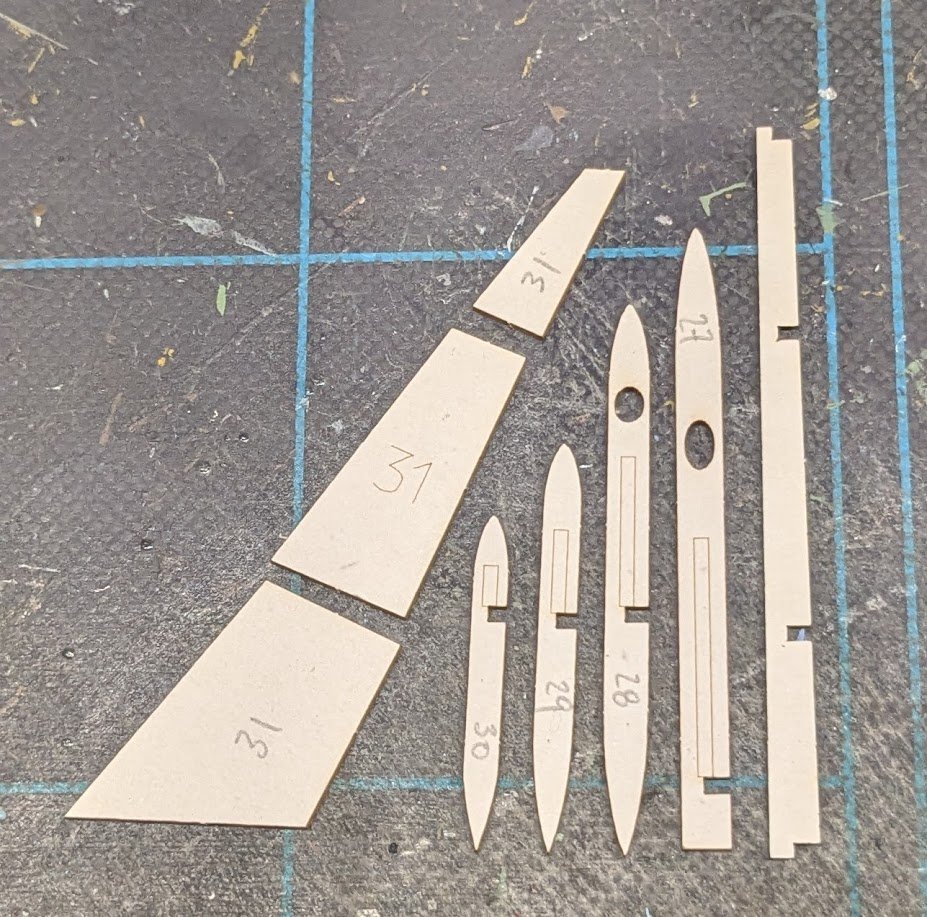
The framing of the vertical stabilizer is not difficult. It consists of a number of laser-cut elements and a length of 2mm styrene rod, which fits down into a hole in one of the fuselage bulkheads. This is just a dry fit for now.

- 66 replies
-
- 14
-
-
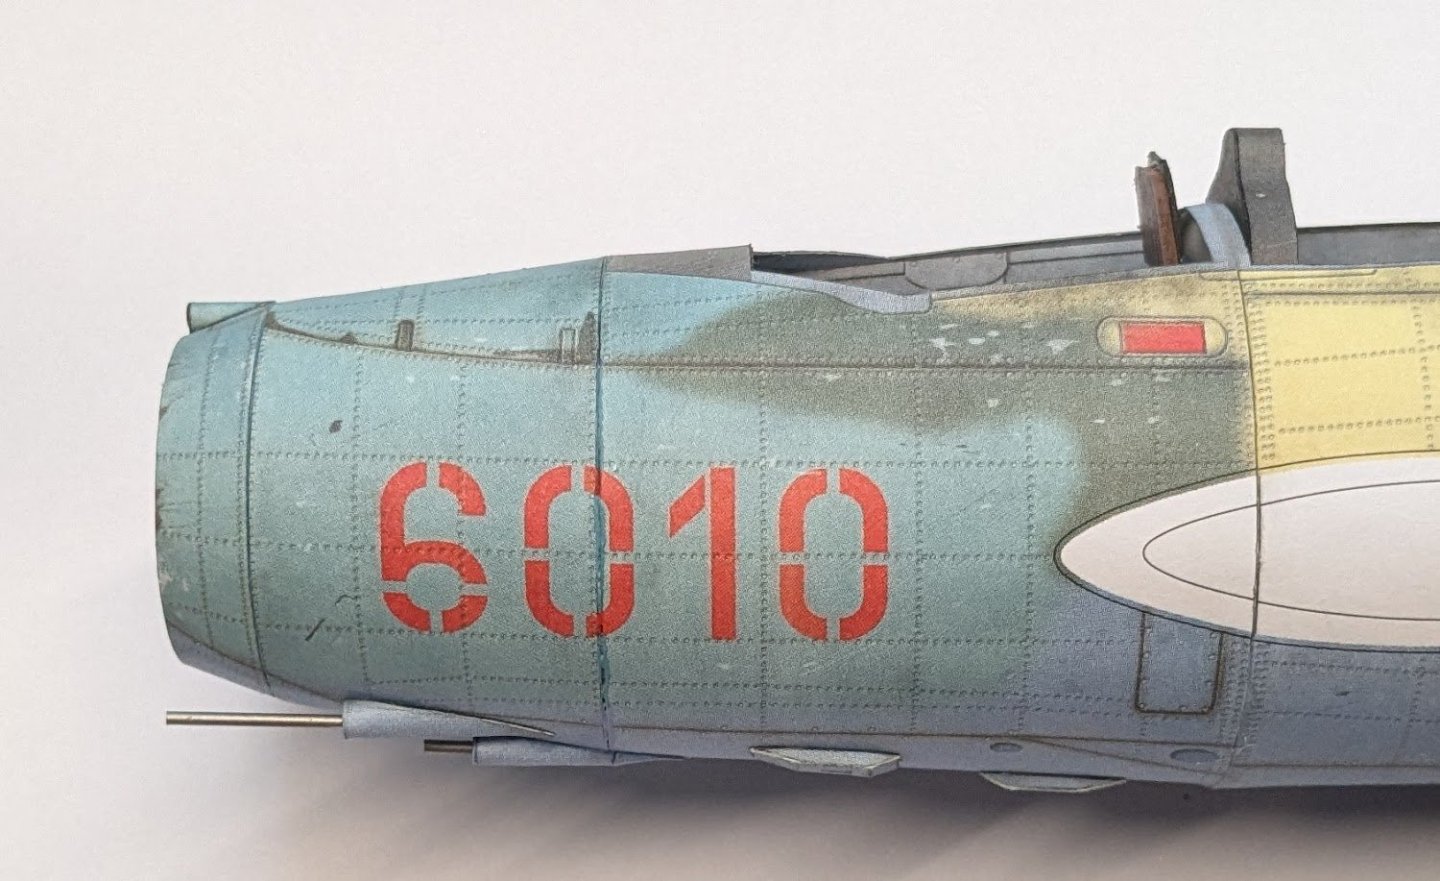
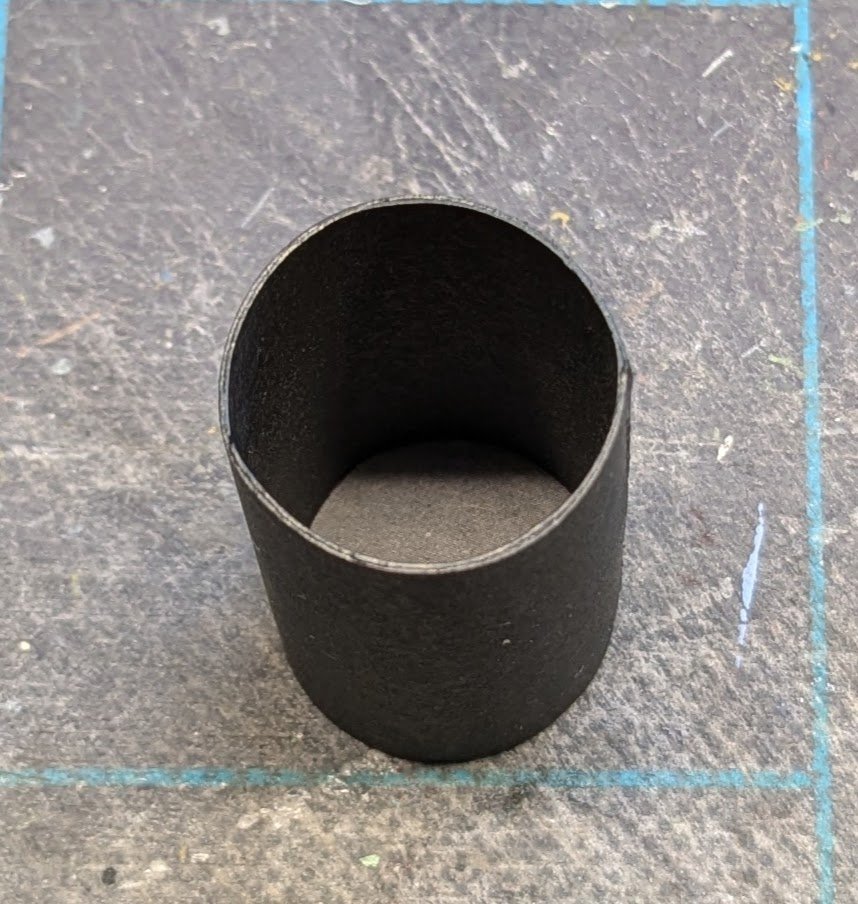
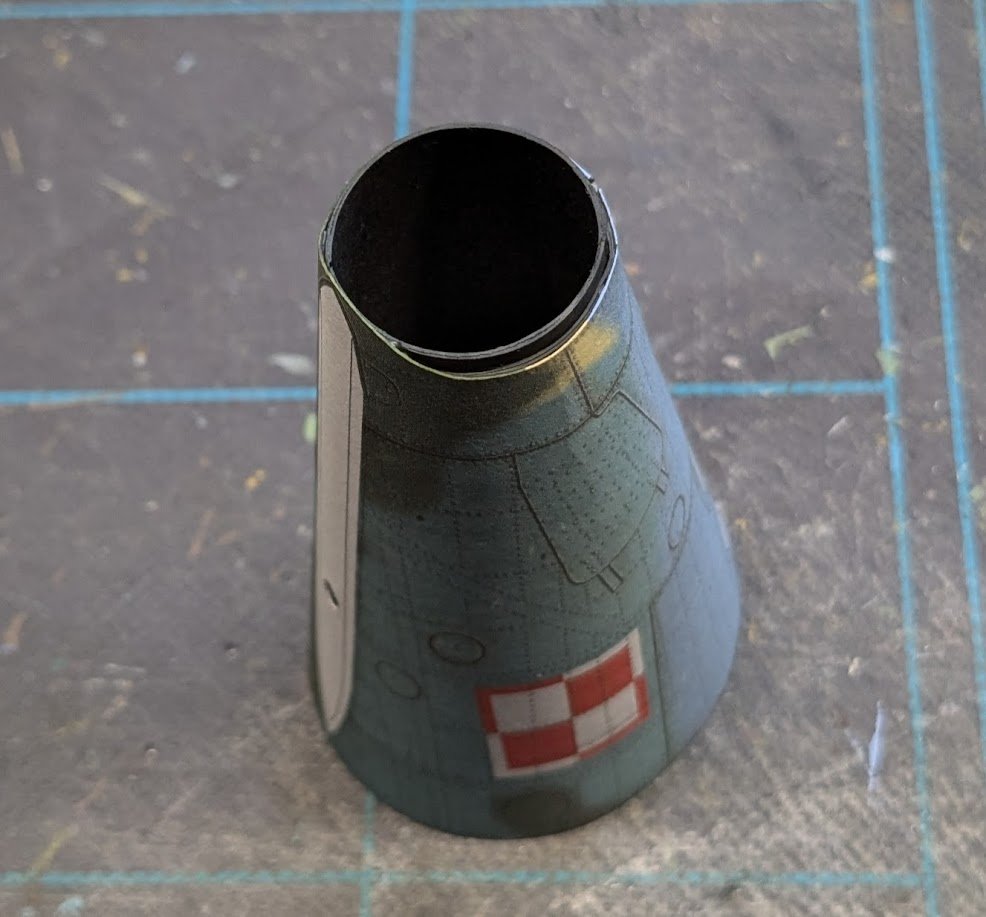
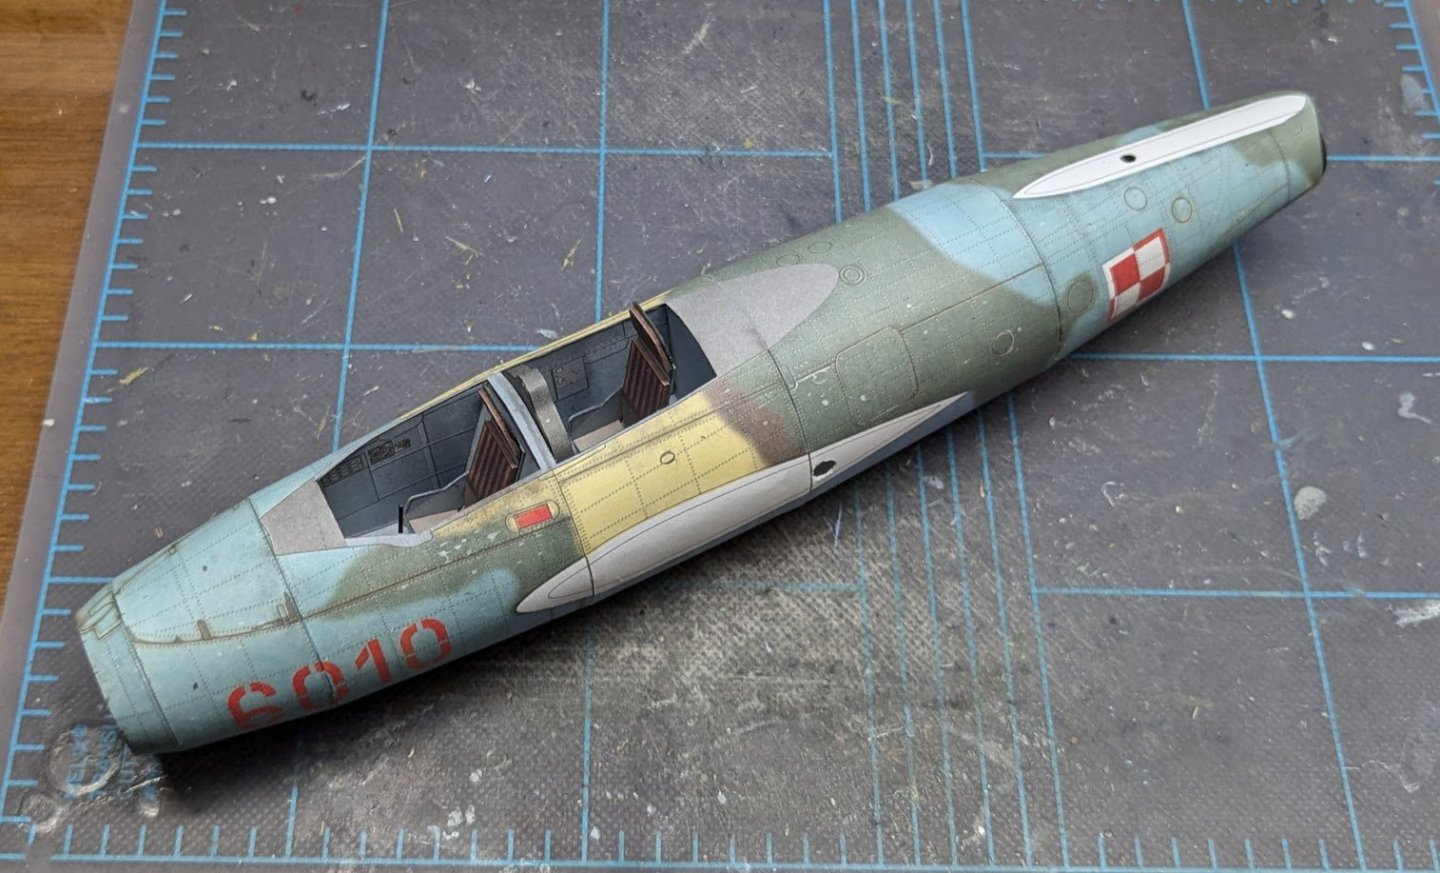
Now for the last fuselage section. It begins with the engine exhaust nozzle, a rudimentary structure consisting of four concentric rings and a bulkhead. Warning: the inner nozzle piece was too long and ended up forming a cylinder with a diameter too large to wrap the outer piece around. I fixed this by forming the outer cylinder first, adding the bulkhead, and then trimming the inner cylinder to fit inside. This finished basic cylinder gets wrapped with a pair of spacers. The last fuselage section is a simple conic section with a joiner strip. After that is glued and has had time to dry, the faux exhaust nozzle is added from the front and the spacers (not the cylinder!) are aligned with the end of the cone. Yet more drying time, after which we can glue the last section to the rest of the fuselage. With that, the fuselage (except for the canopy and gun sight) is done! Next we'll move on to the empennage.
- 66 replies
-
- 12
-
-
-
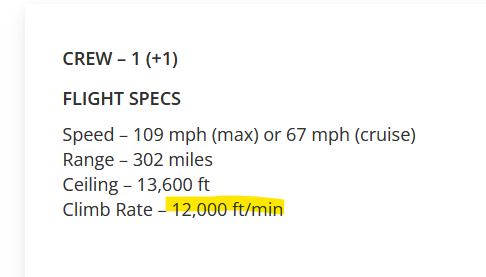
According to this website, the last Tiger Moth landing on a carrier was in 1967, and Tiger Moths were in service until the early 70s. Of course, that same website claims the Tiger Moth had a 12,000 ft/min climb rate -- whoa!! 😮
-
No, the treatment is an idea that popped into my head while pondering the fact that the seams appear much darker than the surrounding print (but I'm sure I'm not the first person who ever thought of this). I created a thin wash from very dilute white glue and light gray paint. The hope was that the wash would tone down the edge coloring without completely covering it -- kind of like looking out a window covered by gauzy curtains. The wash is thin enough to wick into the offending seams.