


wernerweiss
-
Posts
197 -
Joined
-
Last visited
Content Type
Profiles
Forums
Gallery
Events
Posts posted by wernerweiss
-
-
3 hours ago, Rokket said:
Really nice. Great detail and workmanship.
Thank you very much!
-
Thank you very much for your likes!
-
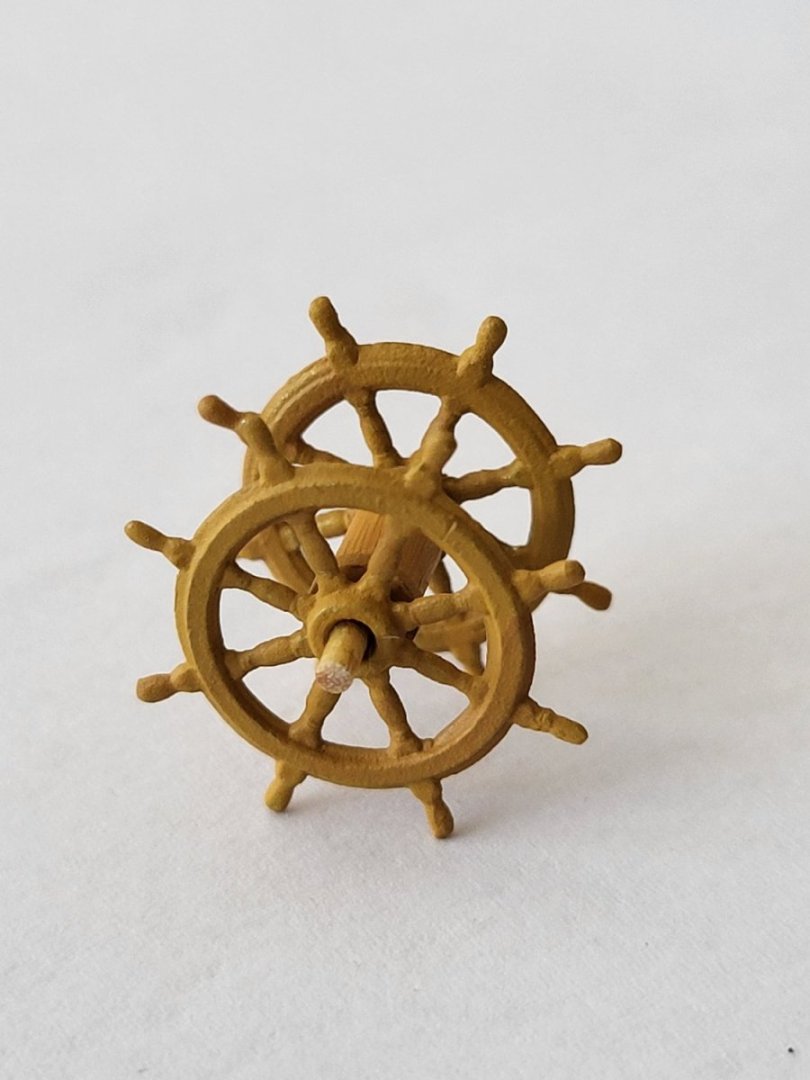
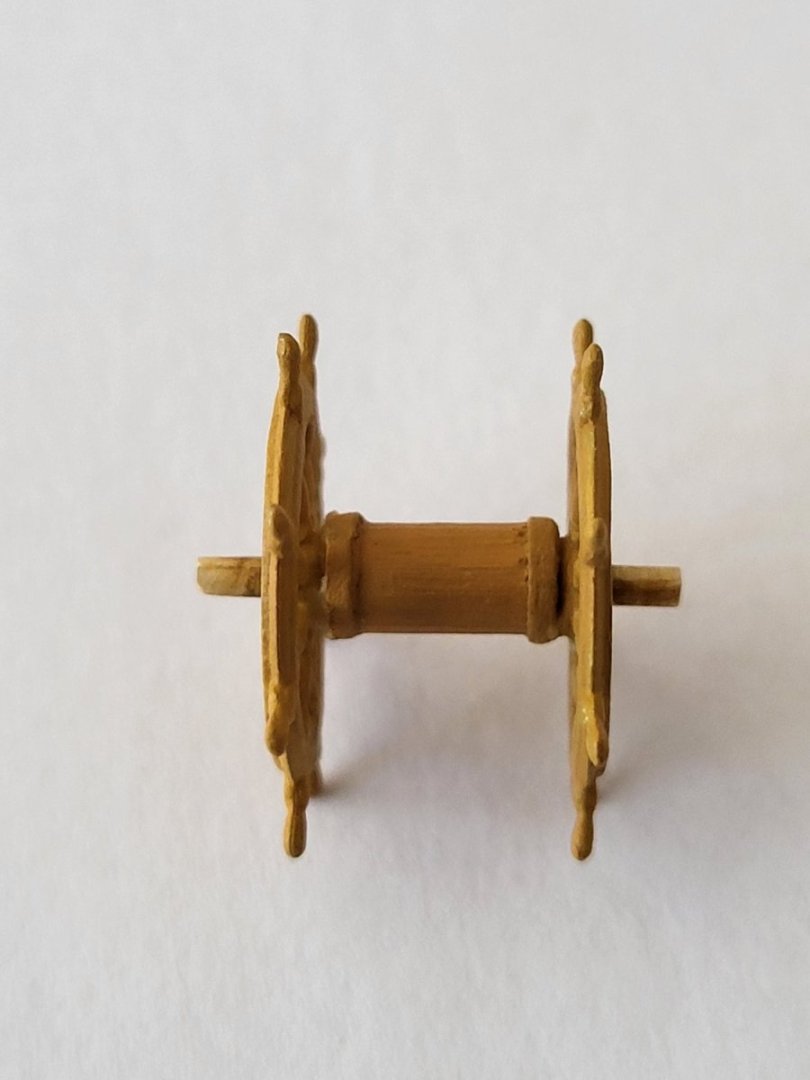
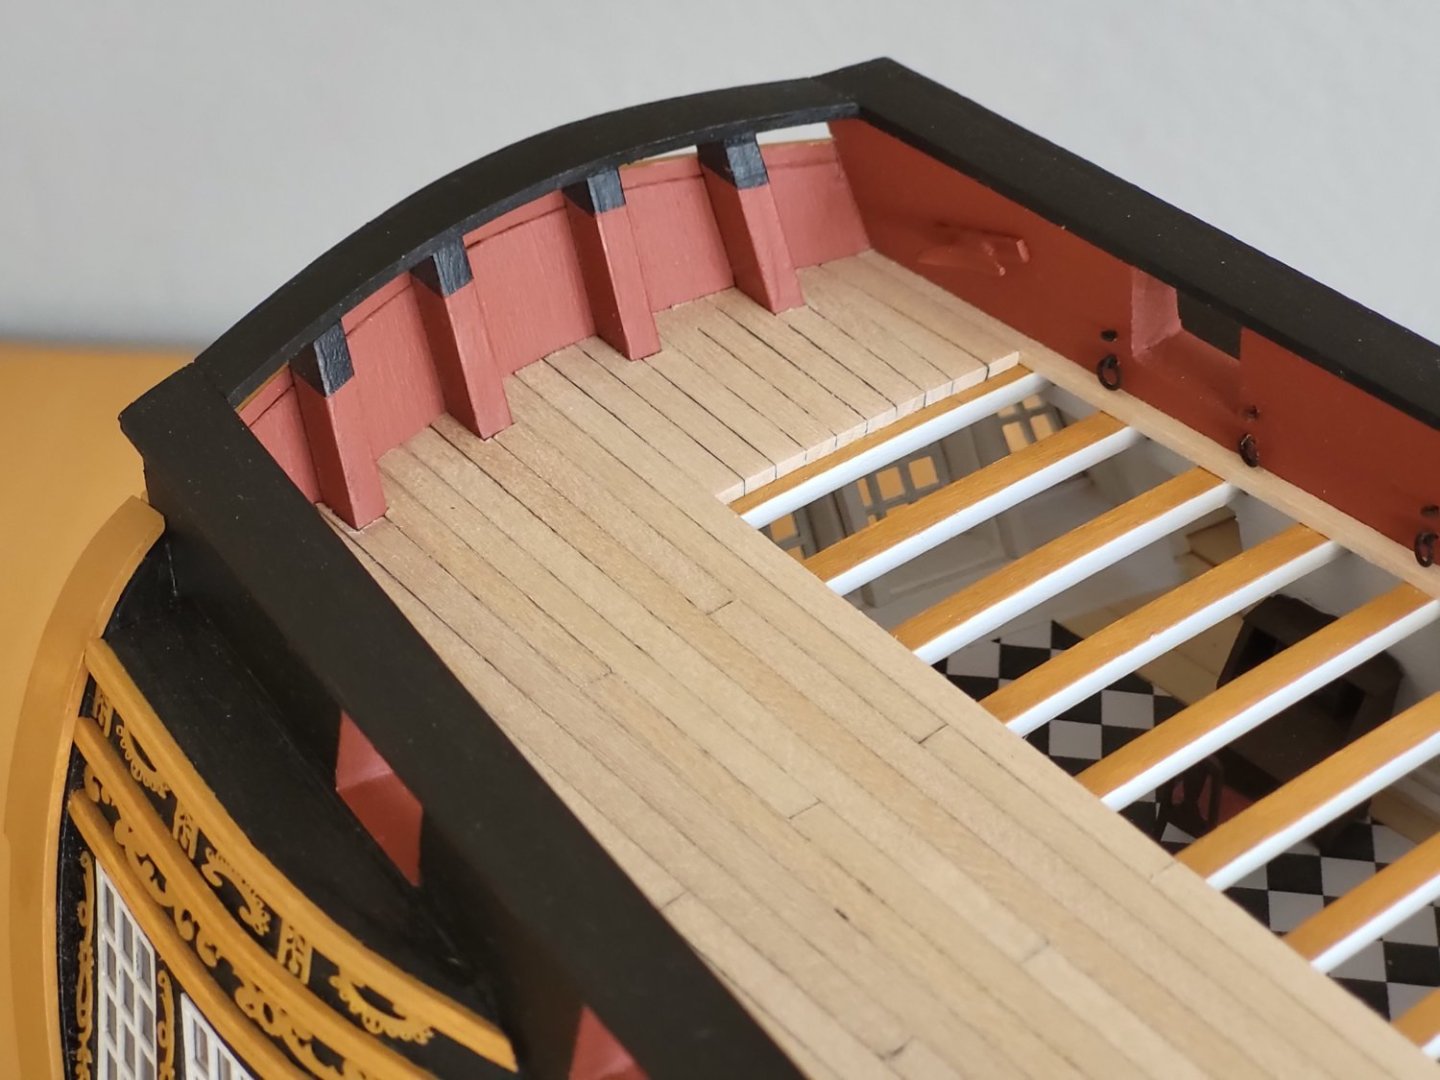
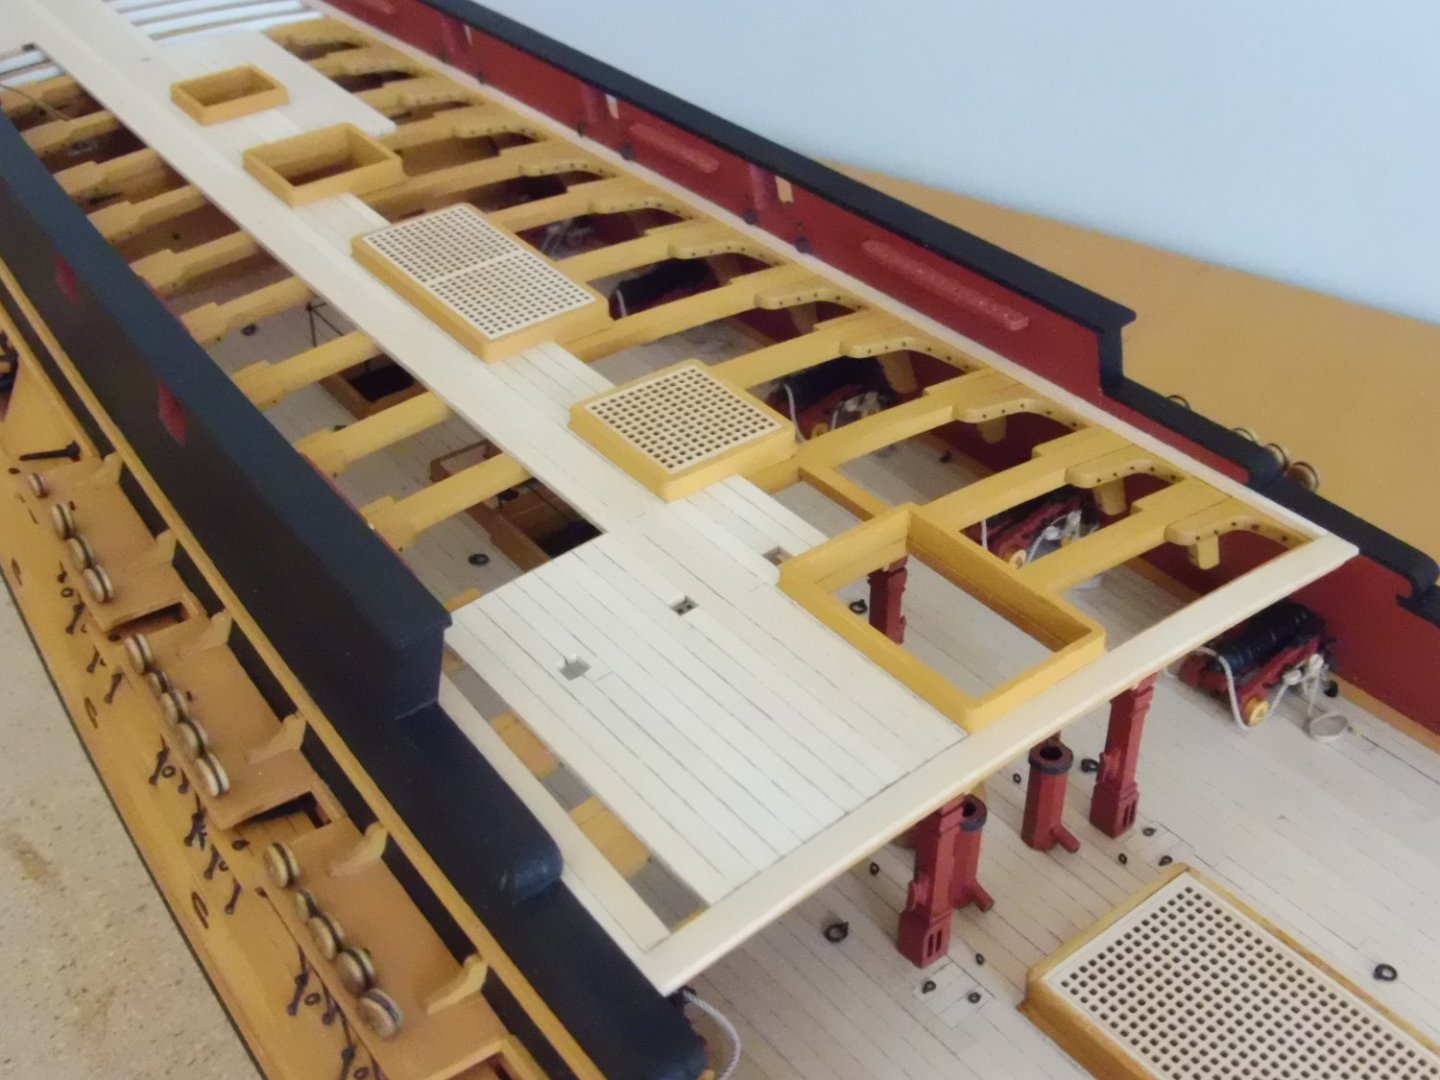
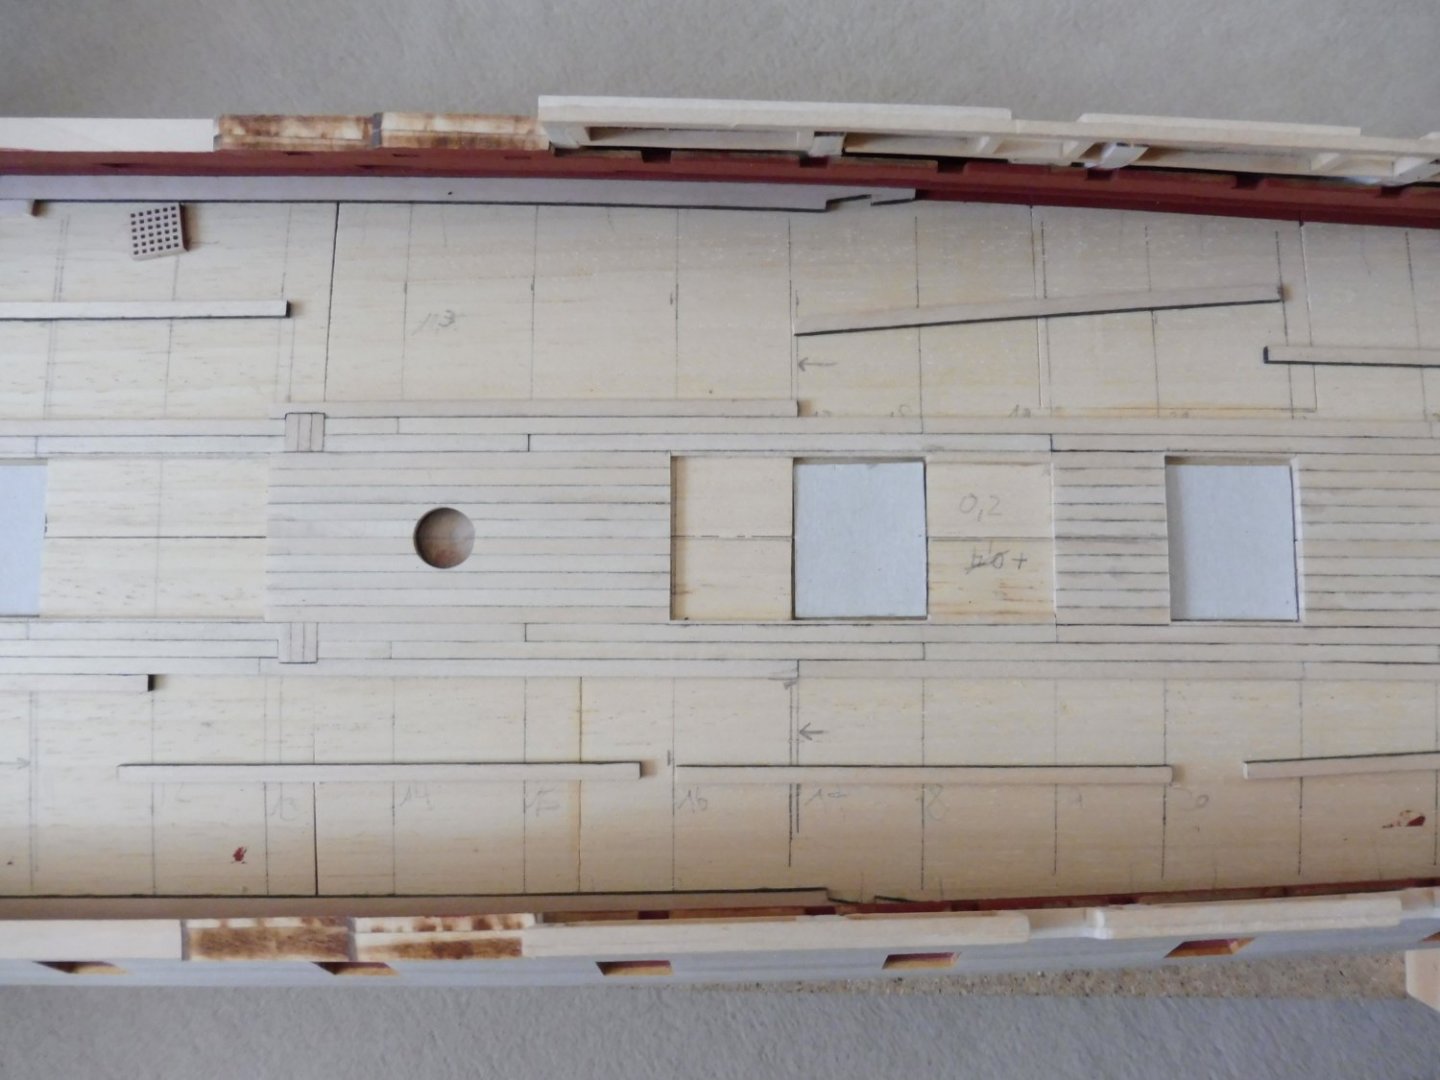
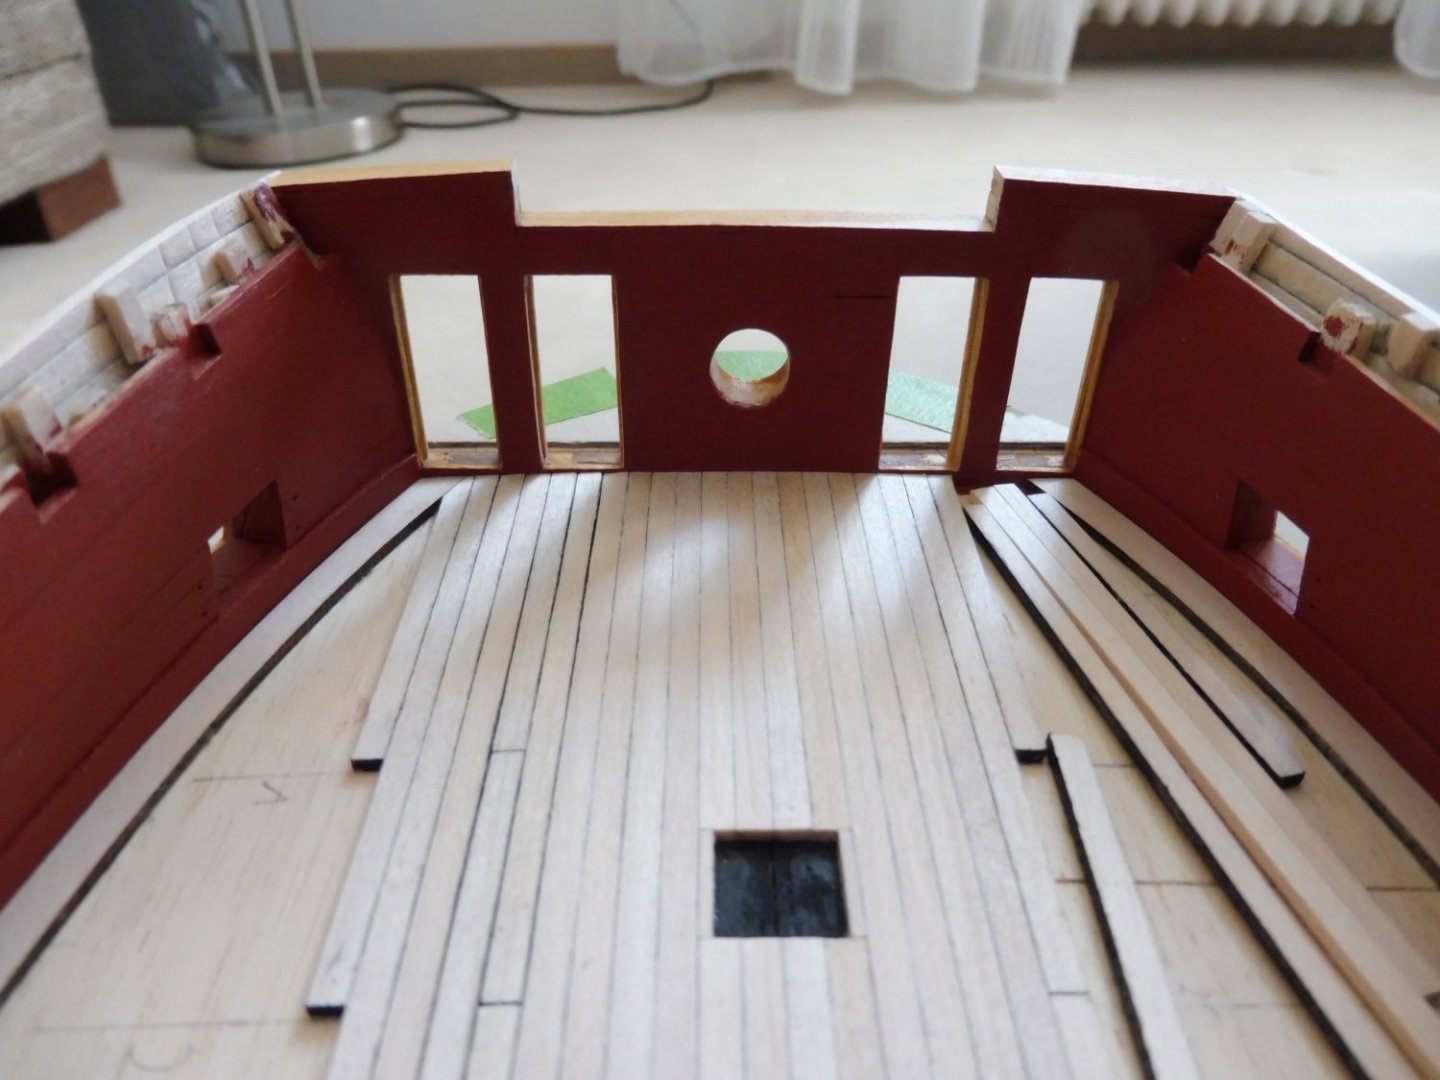
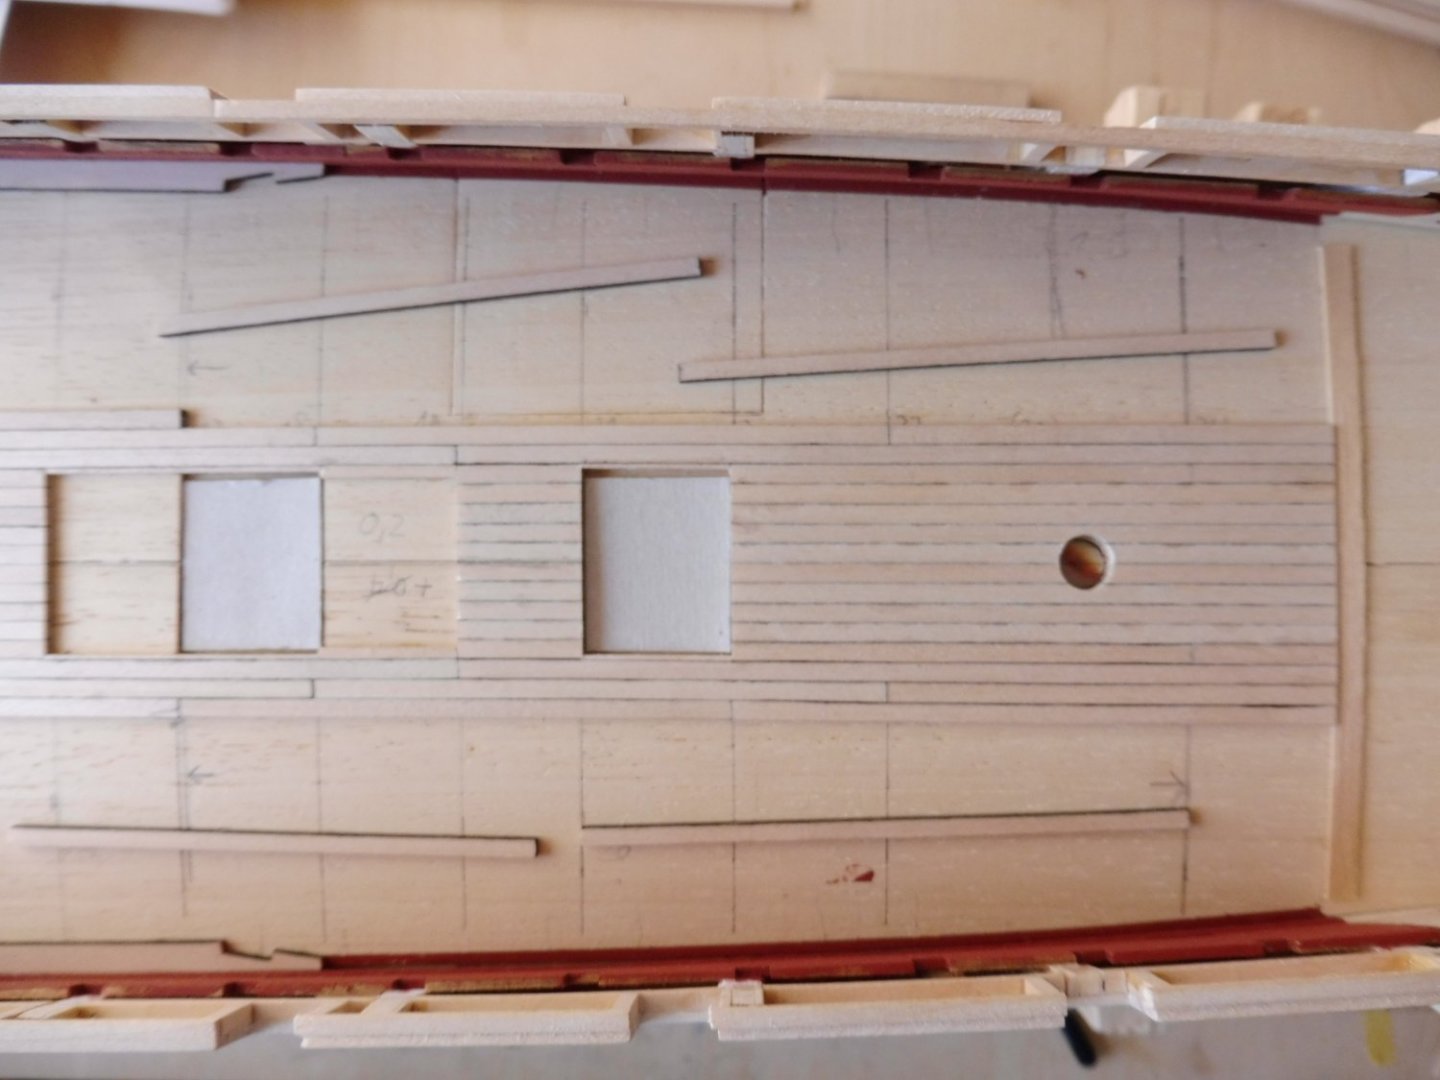
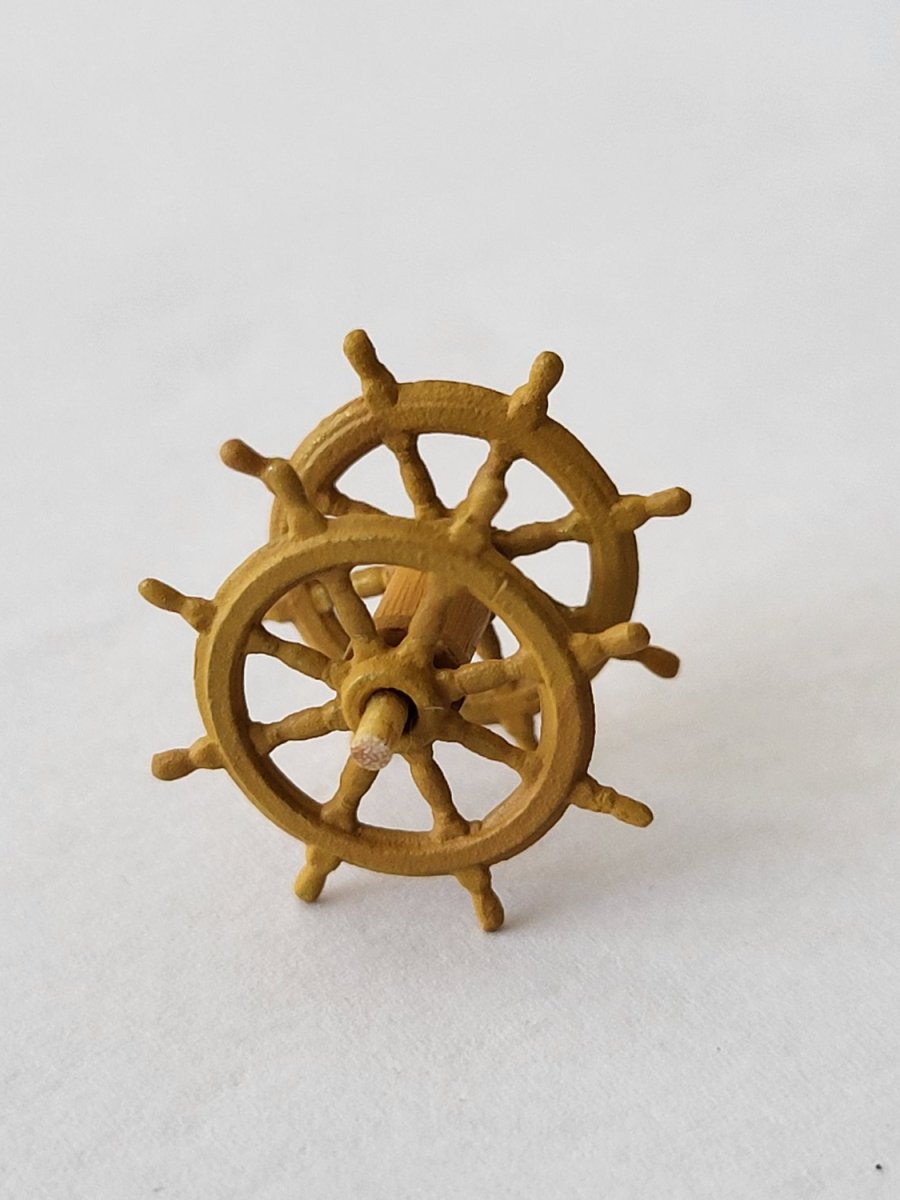
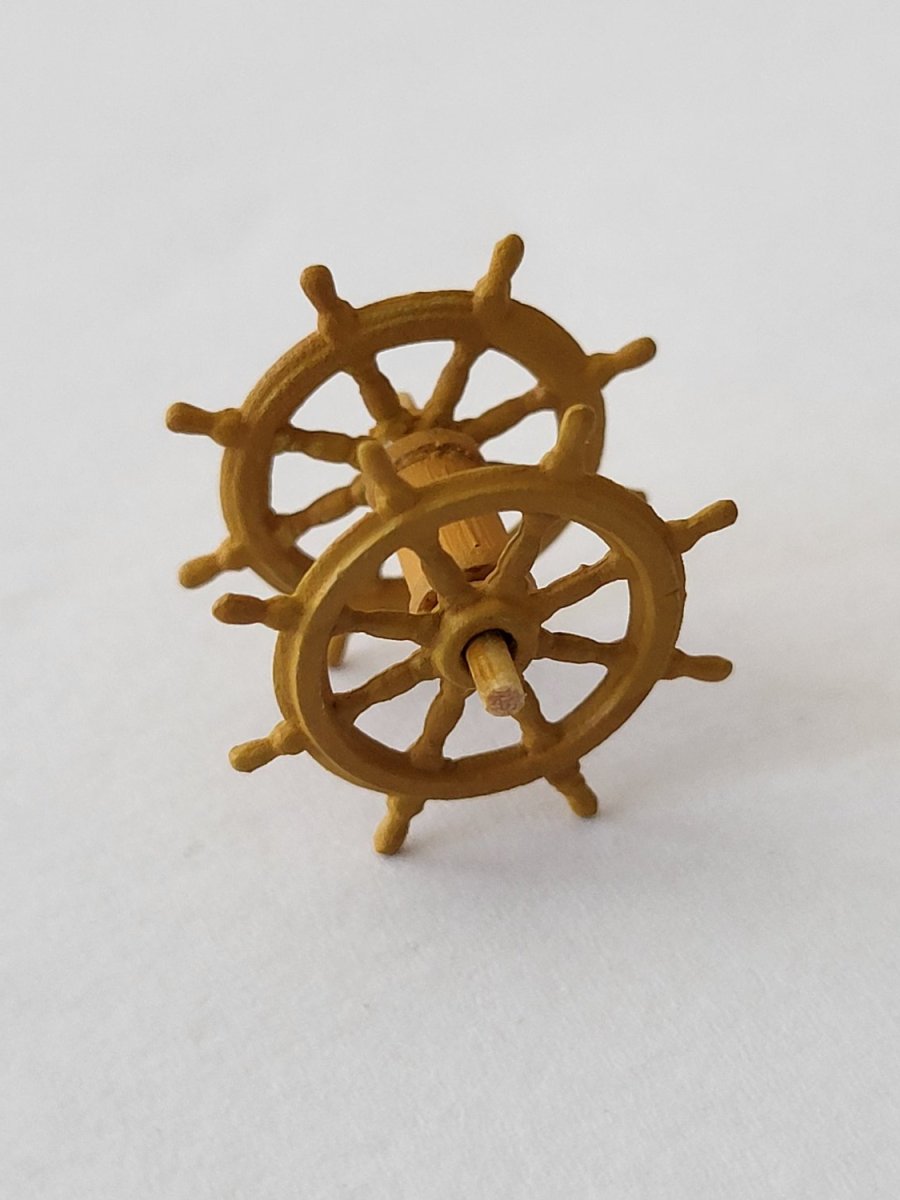
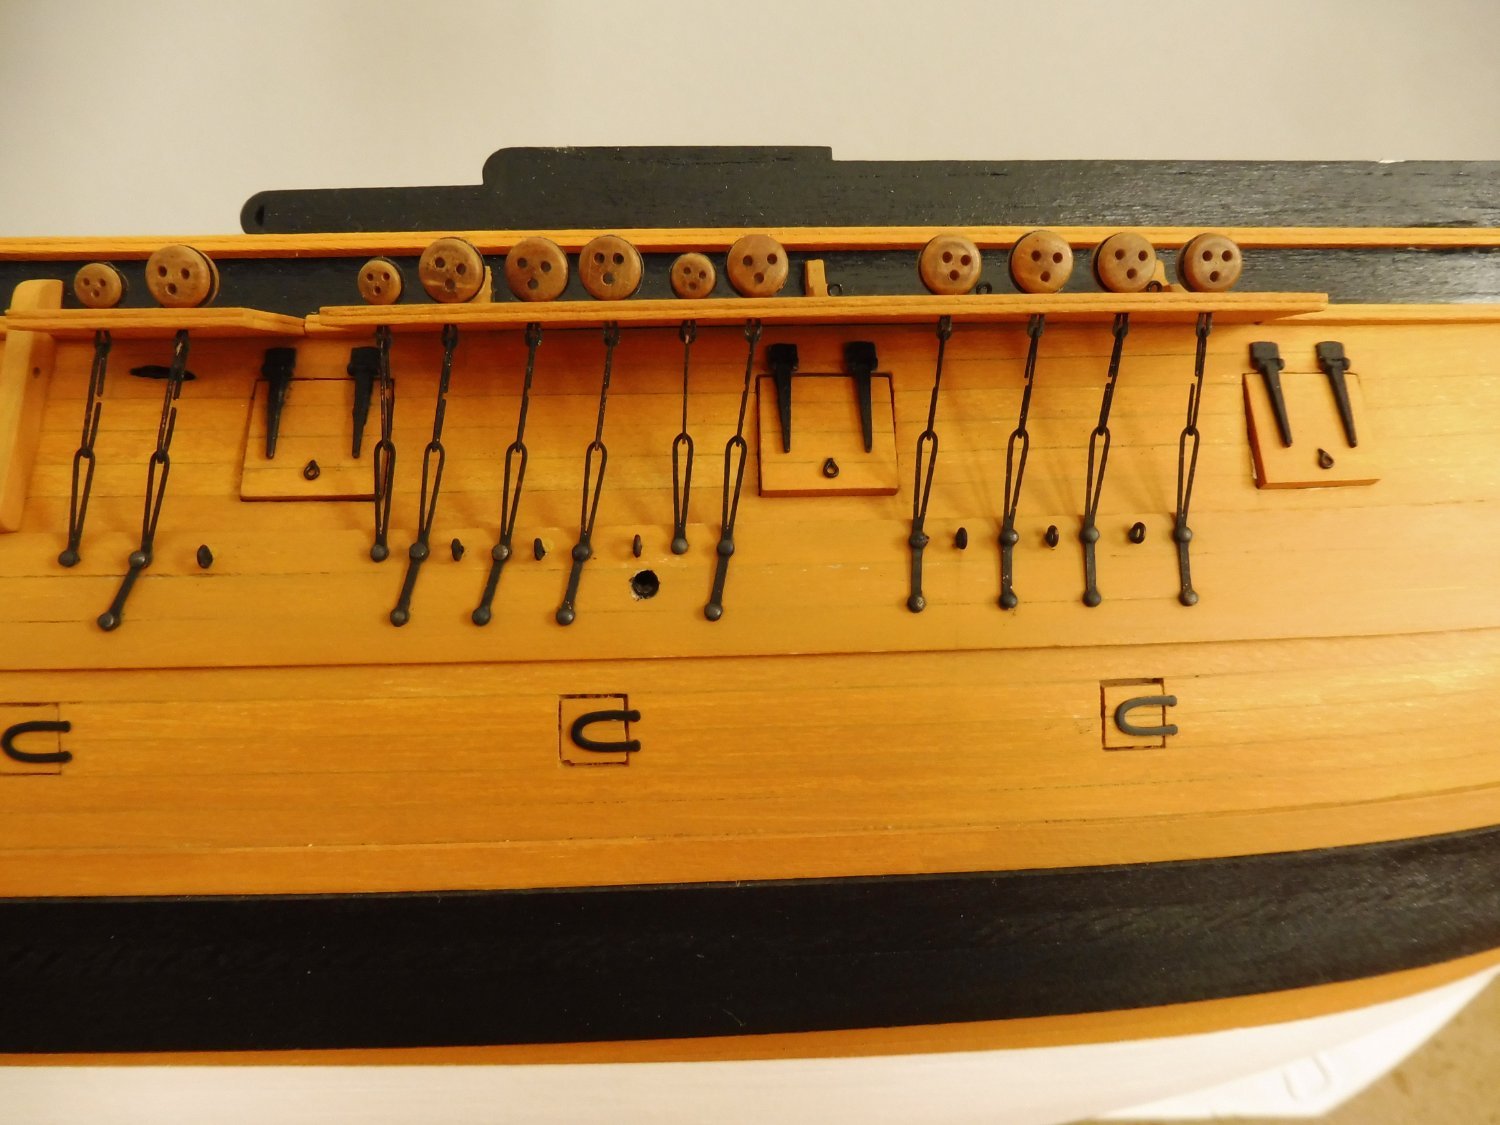
Hello modelers,
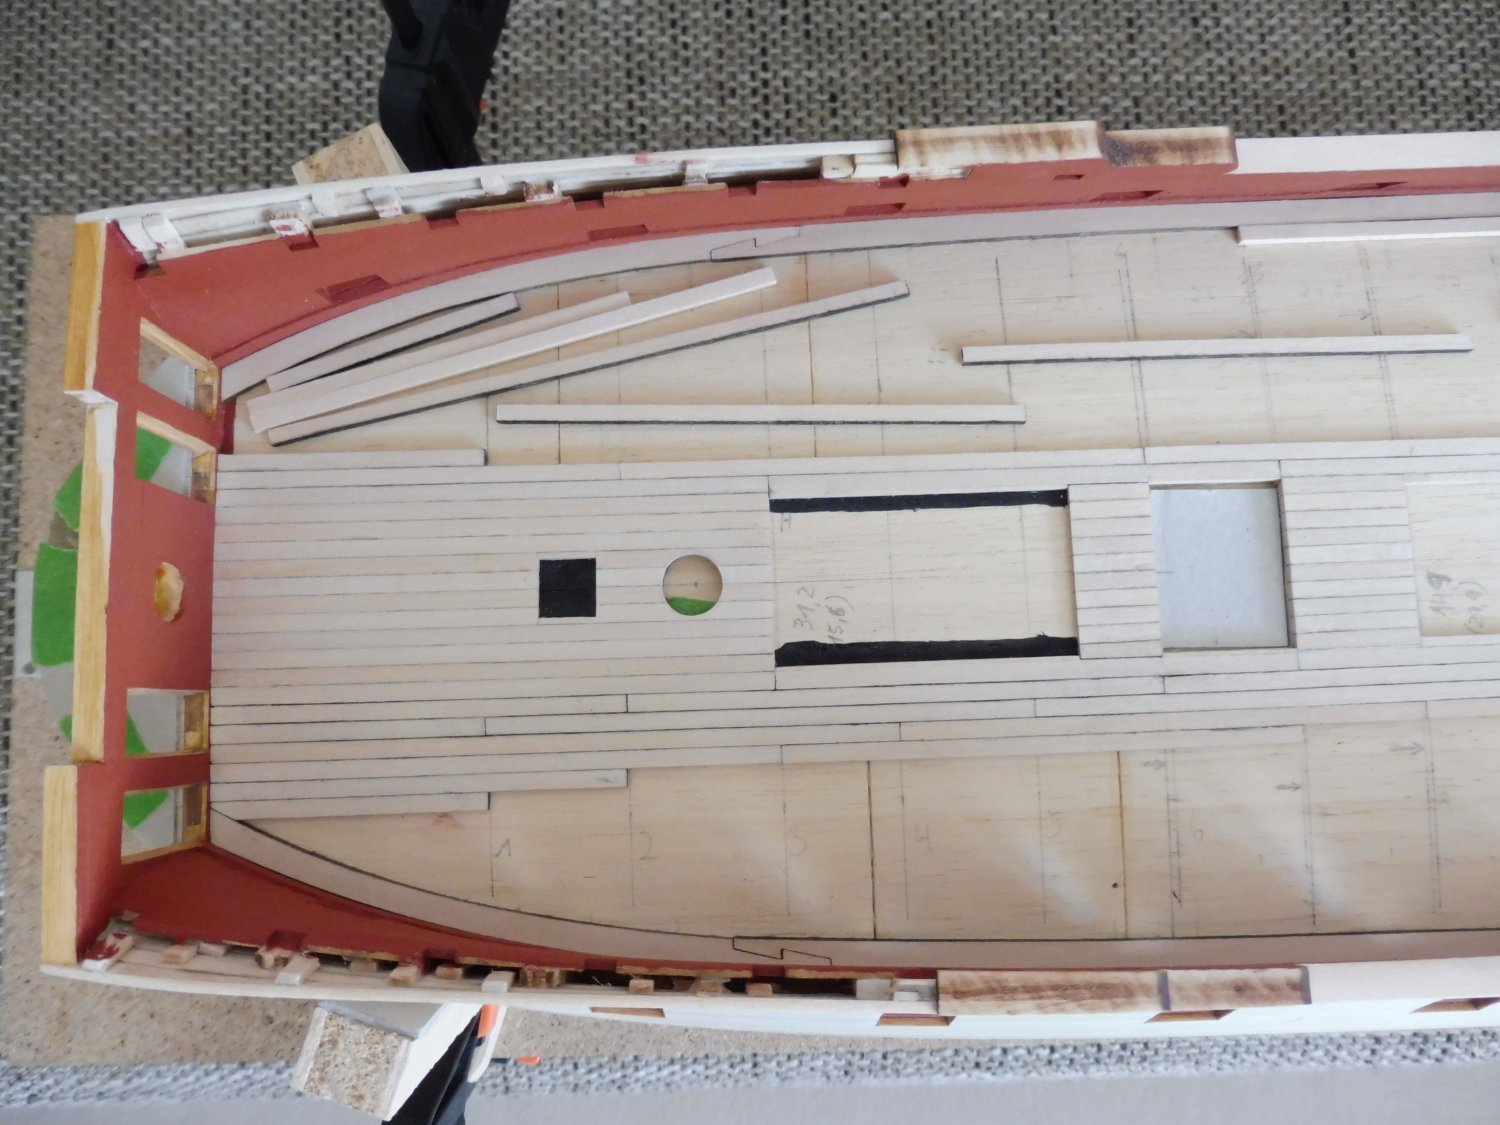
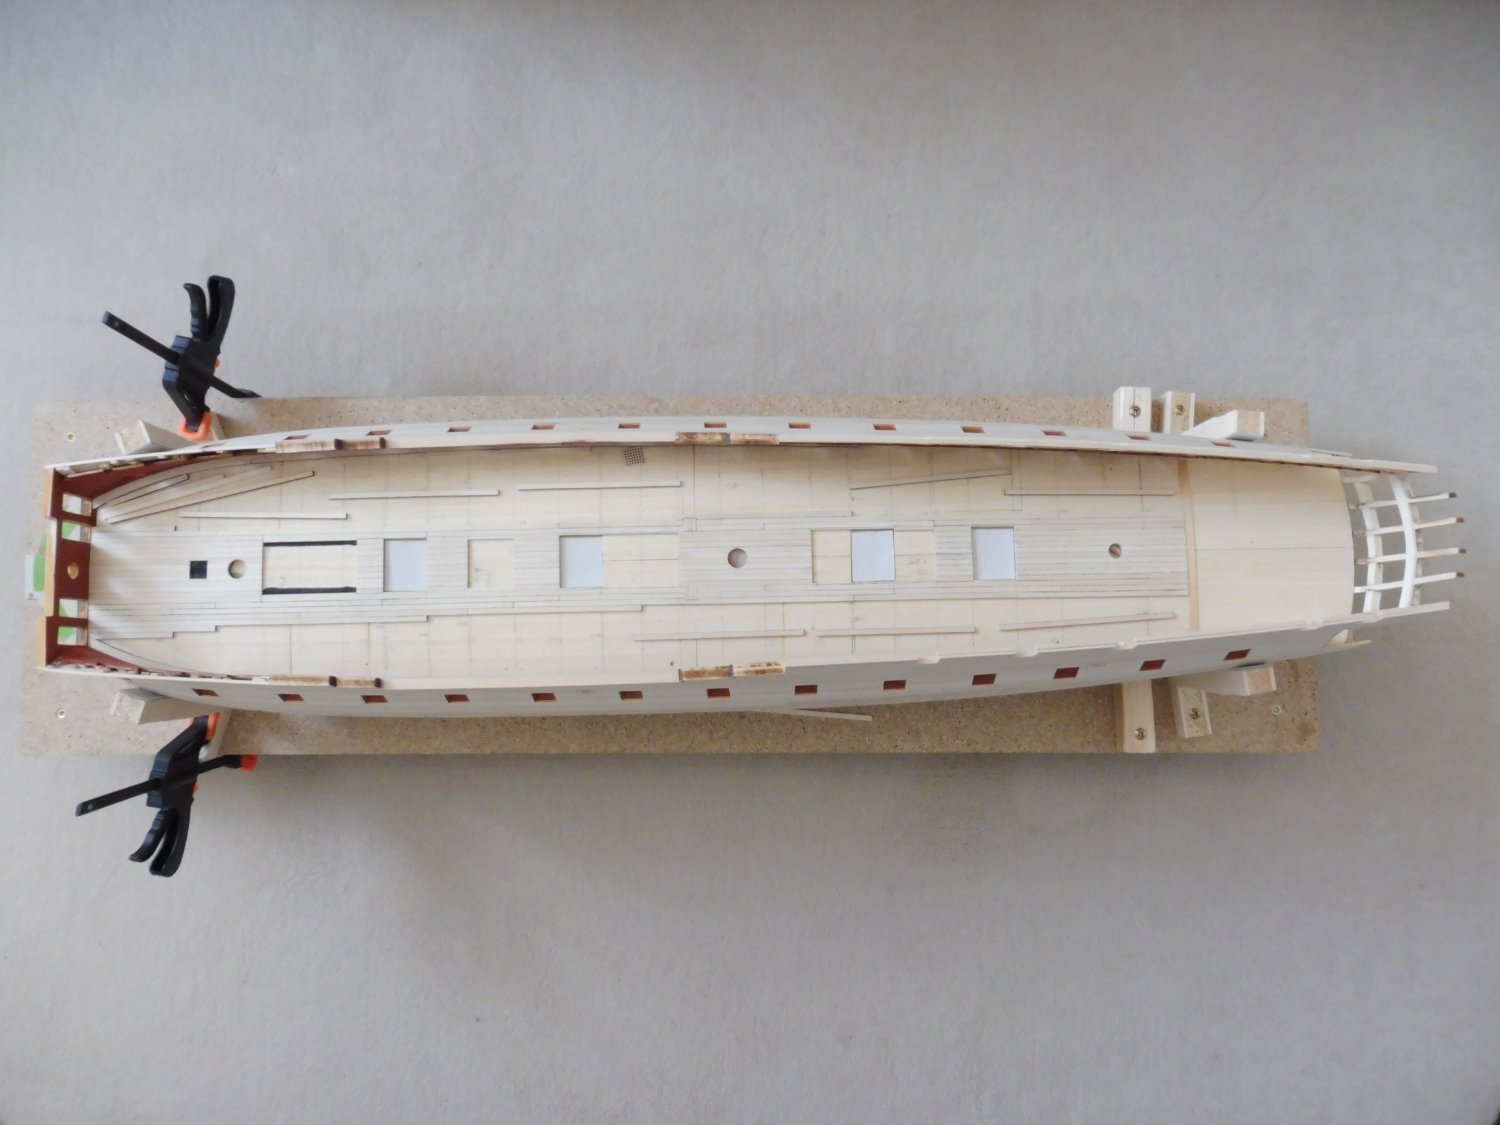
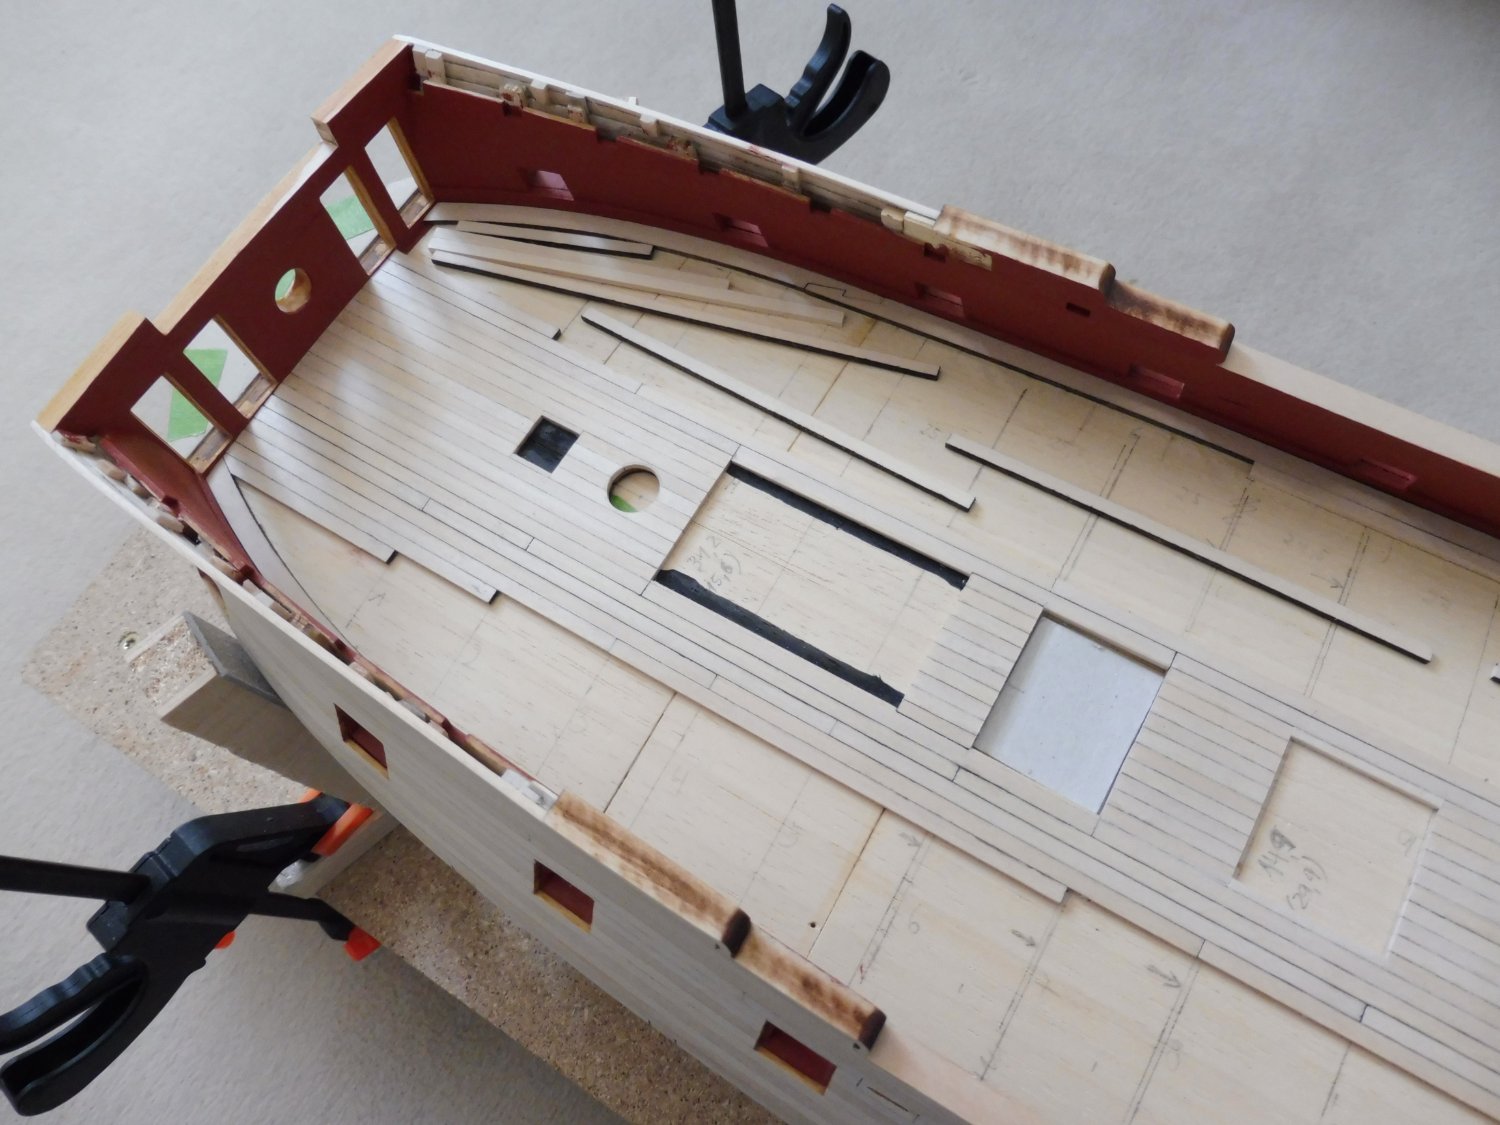
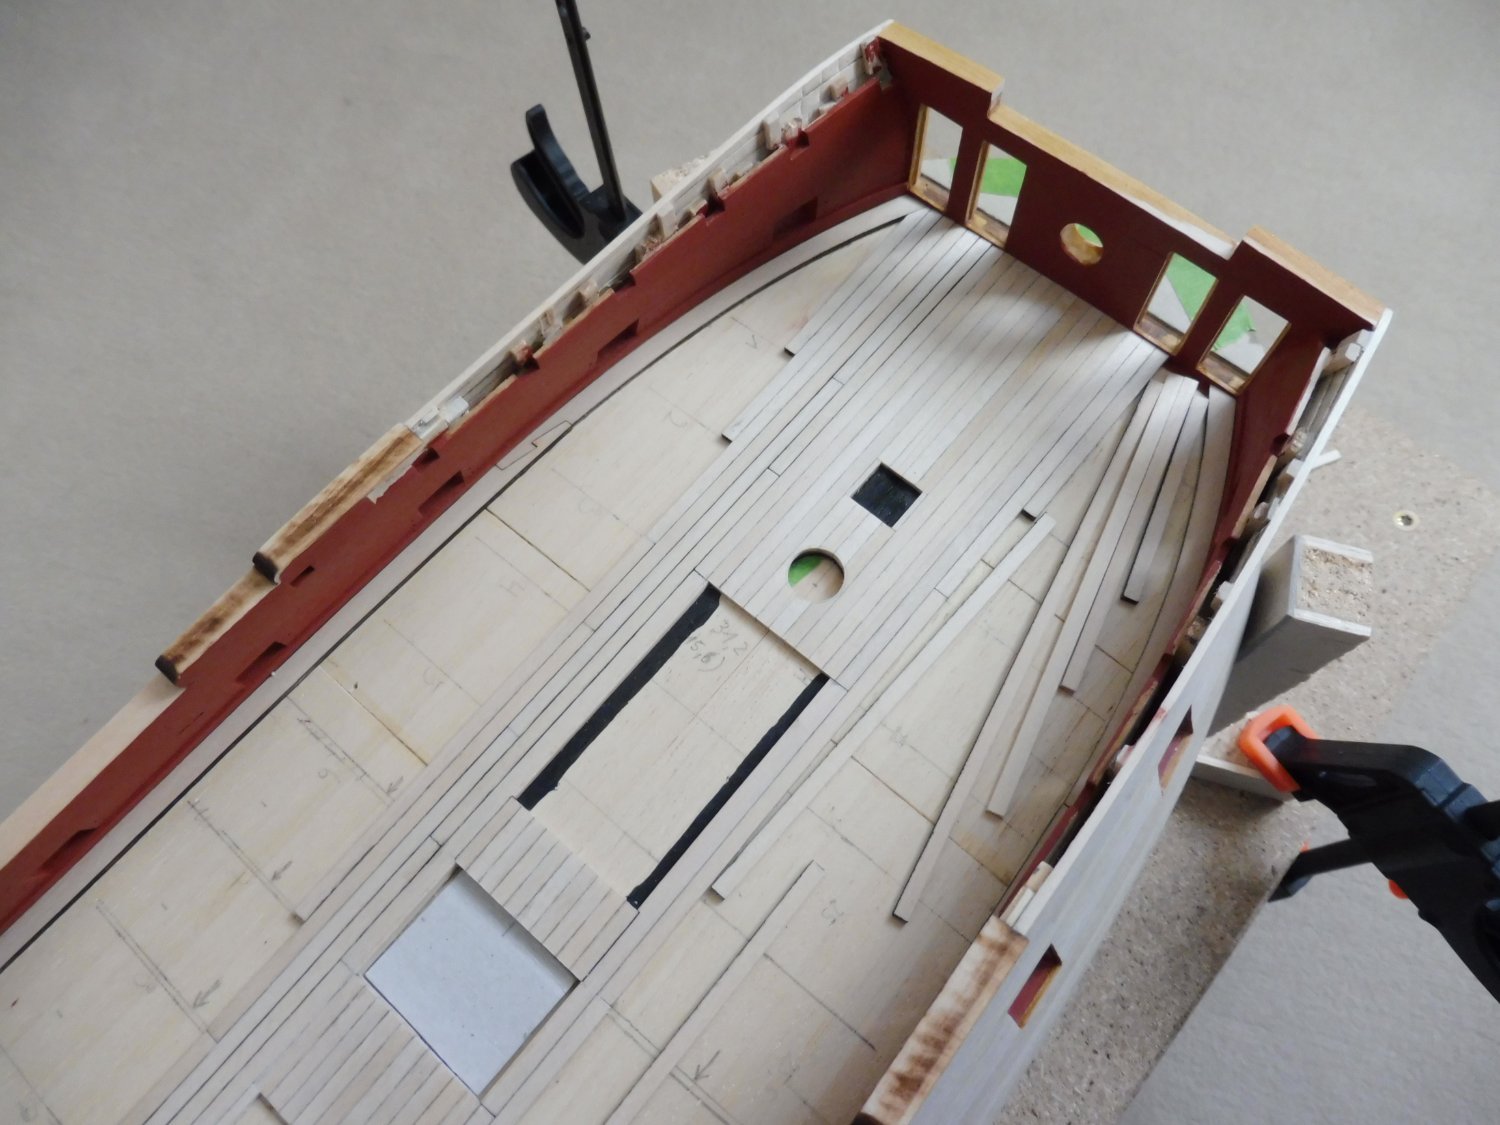
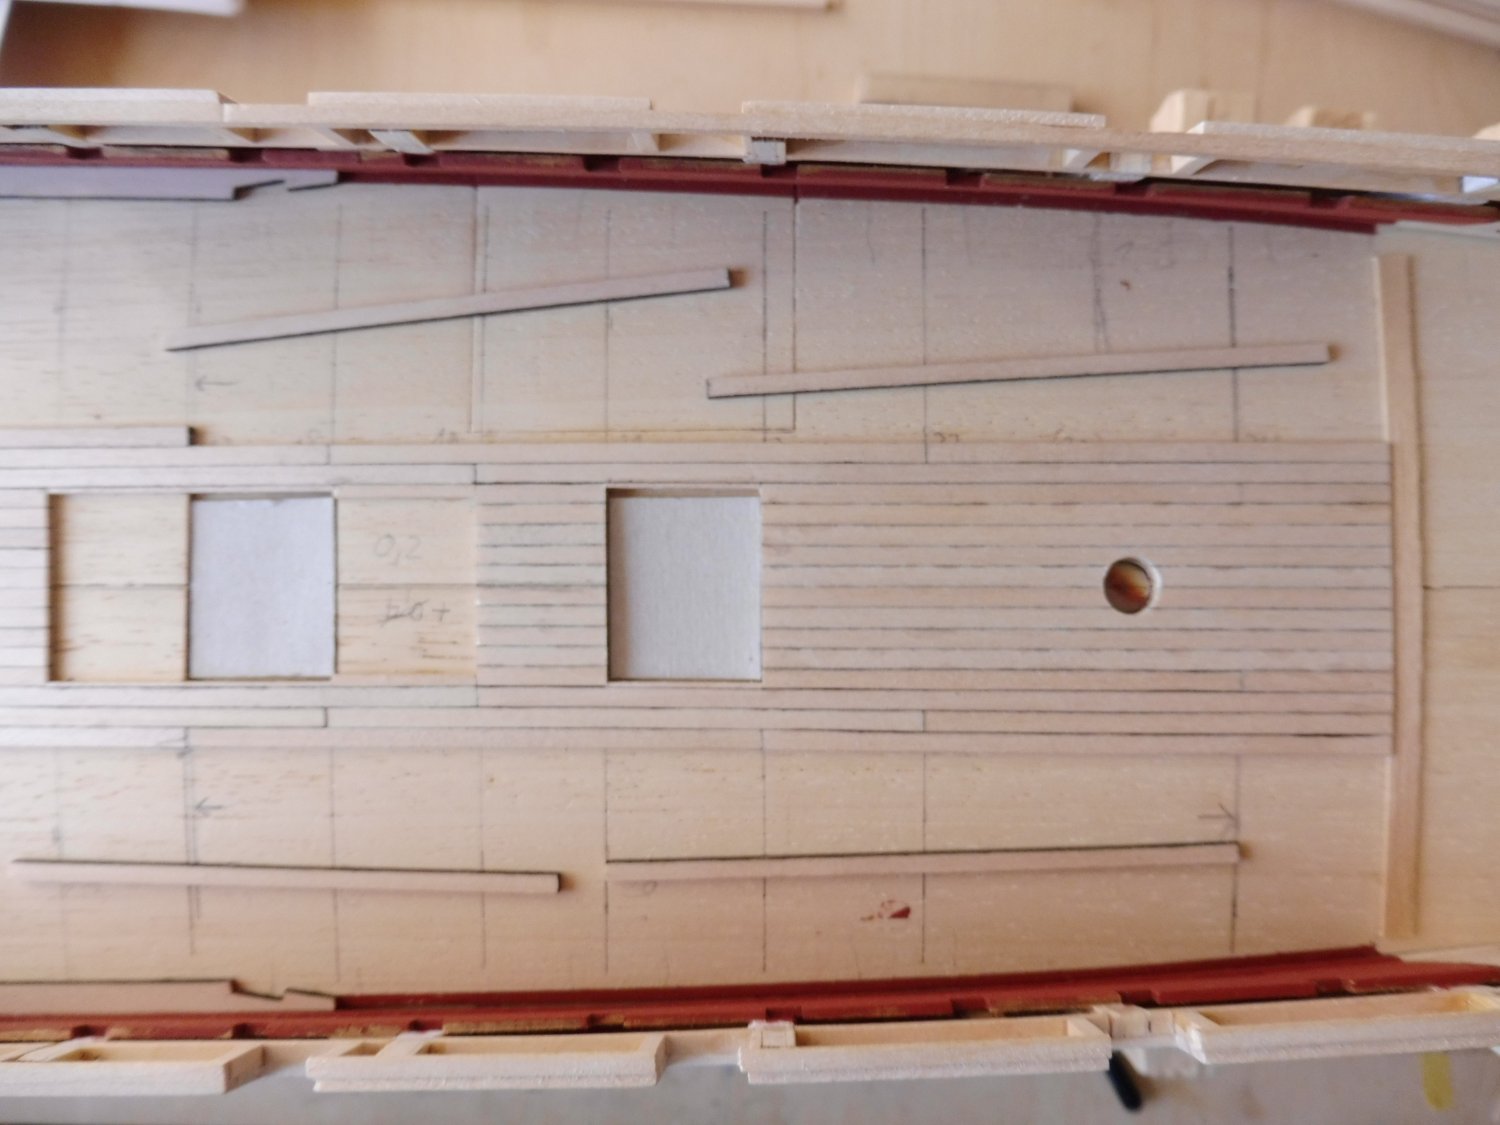
in the past weeks I have been busy with building, but not before today I took the latest pictures which I would like to show. The planking of the quarterdeck is finished, and the quarterdeck fittings like the speaking tube, the steering wheel, the binnacles, the coamings etc. are in progress. There is still a lot of work to do.....
Greetings
Werner

.thumb.jpg.5c44799de9d809fef5143ae480a9e55d.jpg)
.thumb.jpg.ec248fee6e3aecee147fd025e516189d.jpg)
.thumb.jpg.33471af5ca3ad5ceb2088d6dc8151ee0.jpg)
.thumb.jpg.f1bca7c123d768be9fdbf3bbb9c2ac49.jpg)
.thumb.jpg.5e5c48761b74dd42a6bb2447cbcdcc23.jpg)
.thumb.jpg.a0ef8ddd3838e11365204559913e7098.jpg)
.thumb.jpg.f15d3ccf4bf82a423ab93c82989cae15.jpg)
.thumb.jpg.2277f5ccbb296d5ff5064f45844202ad.jpg)
.thumb.jpg.e95757a933c0cd3b967e24055da075d6.jpg)


- KennyH78, mtaylor, GrandpaPhil and 9 others
-
 12
12
-
Hello Harshil,
Clean and accurate work as always!
Some remarks:
1. The different tone of color of the middle and side parts of the cap rail is the result of the different kinds of wood - the middle part from a stripe of basswood, the side parts from laser cut plywood. On my model, this did not occur because all wooden parts except the deck planks are painted with acrylic.
2. I looks as if there will remain a gap beneath the bottom white plank, but anyway you are perhaps going to use a kind of "washboard" along the deck edge.
3. To make the carvings yourself is very ambitious, and I wish you success!
Werner
-
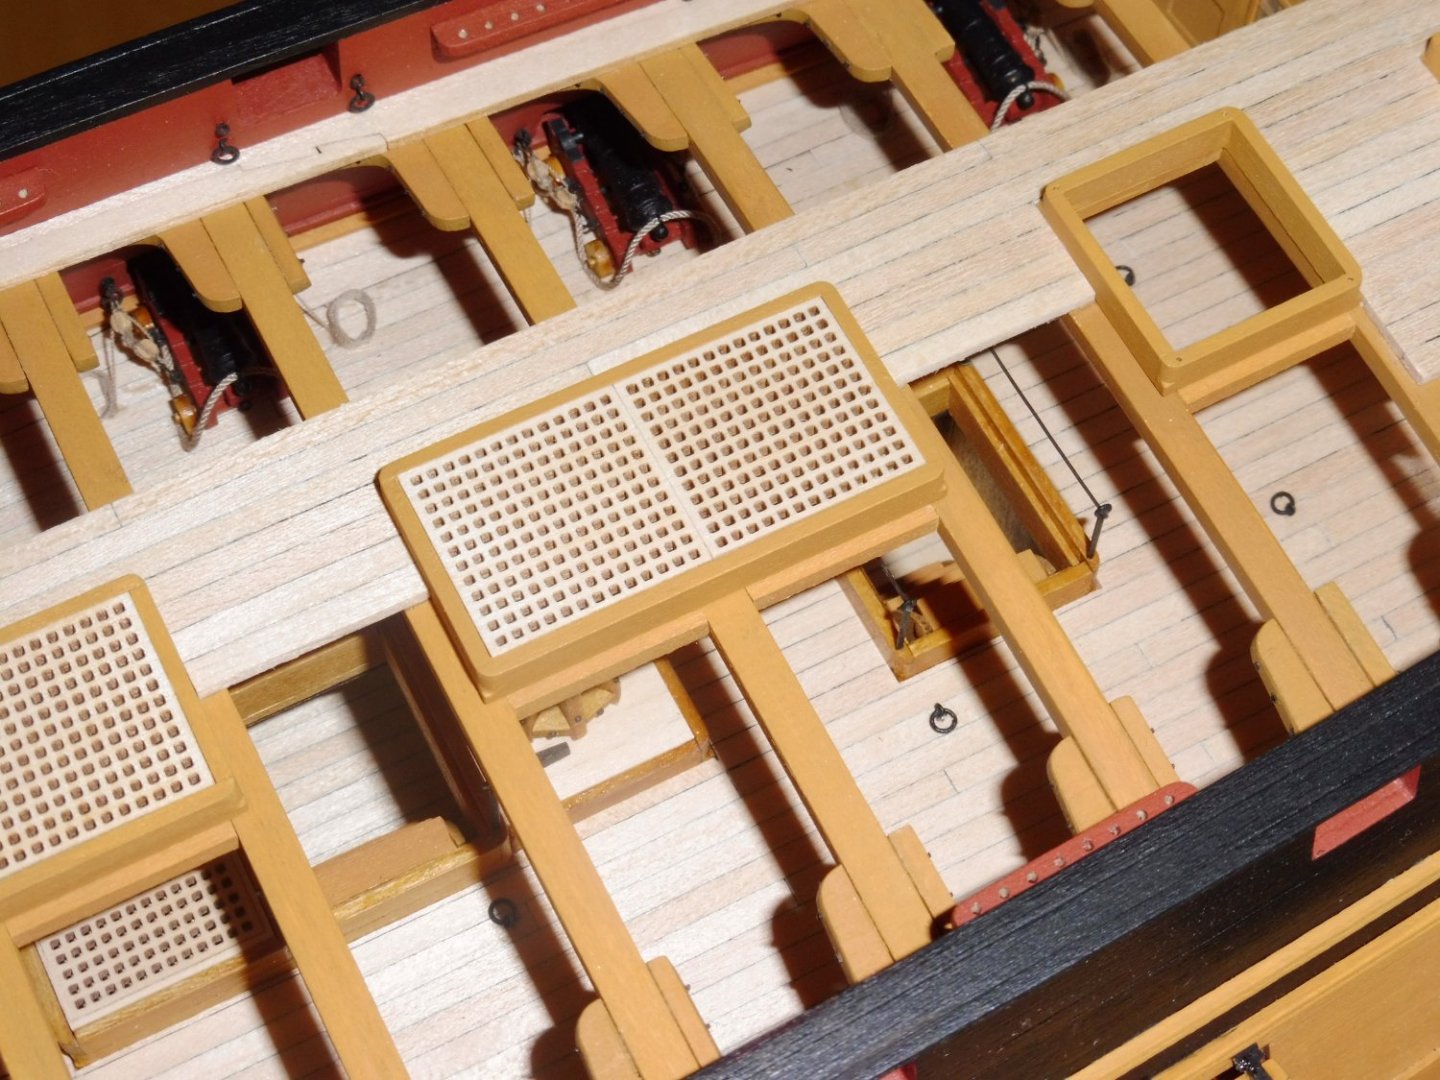
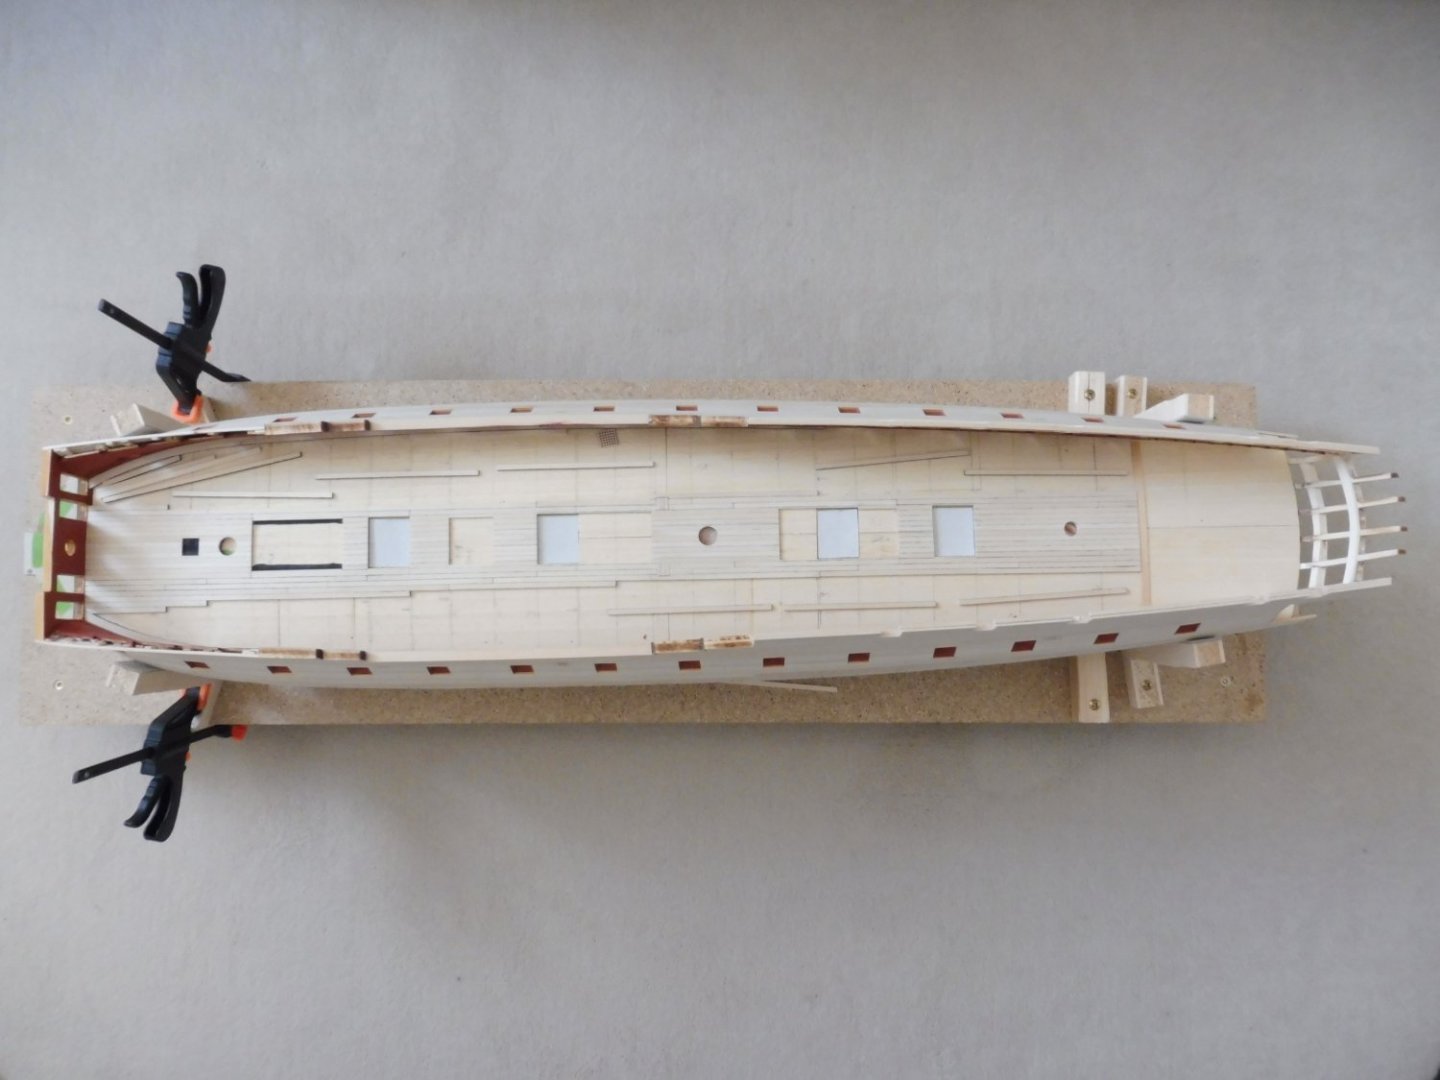
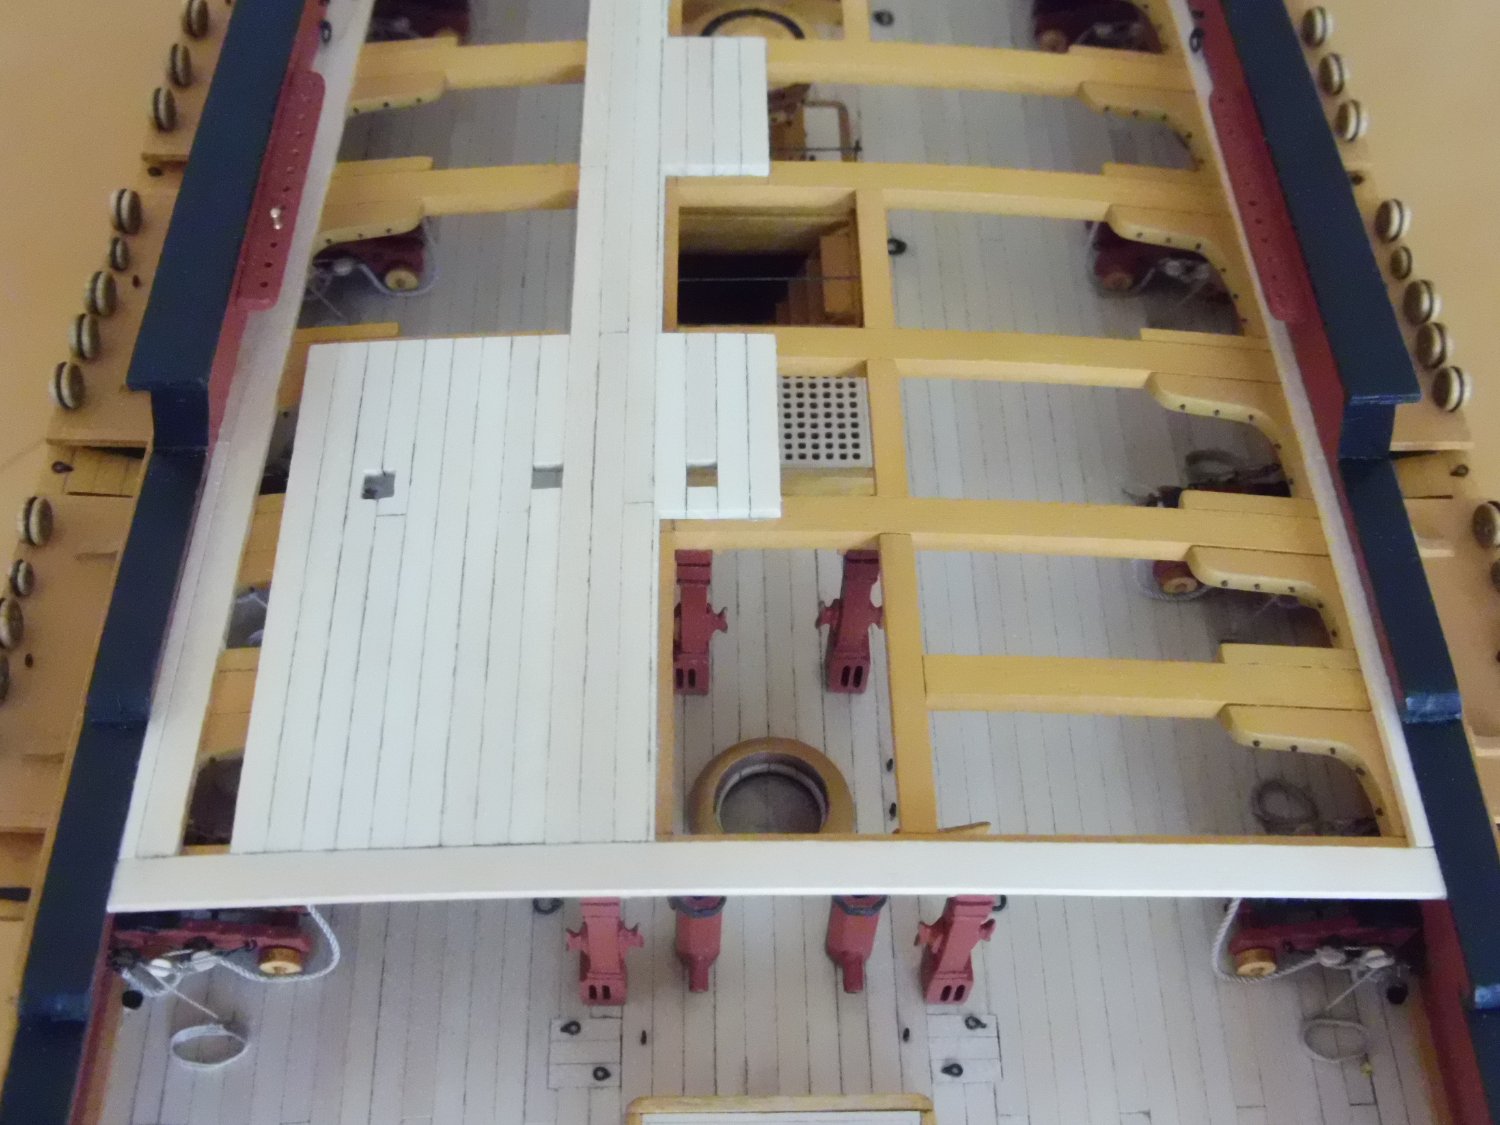
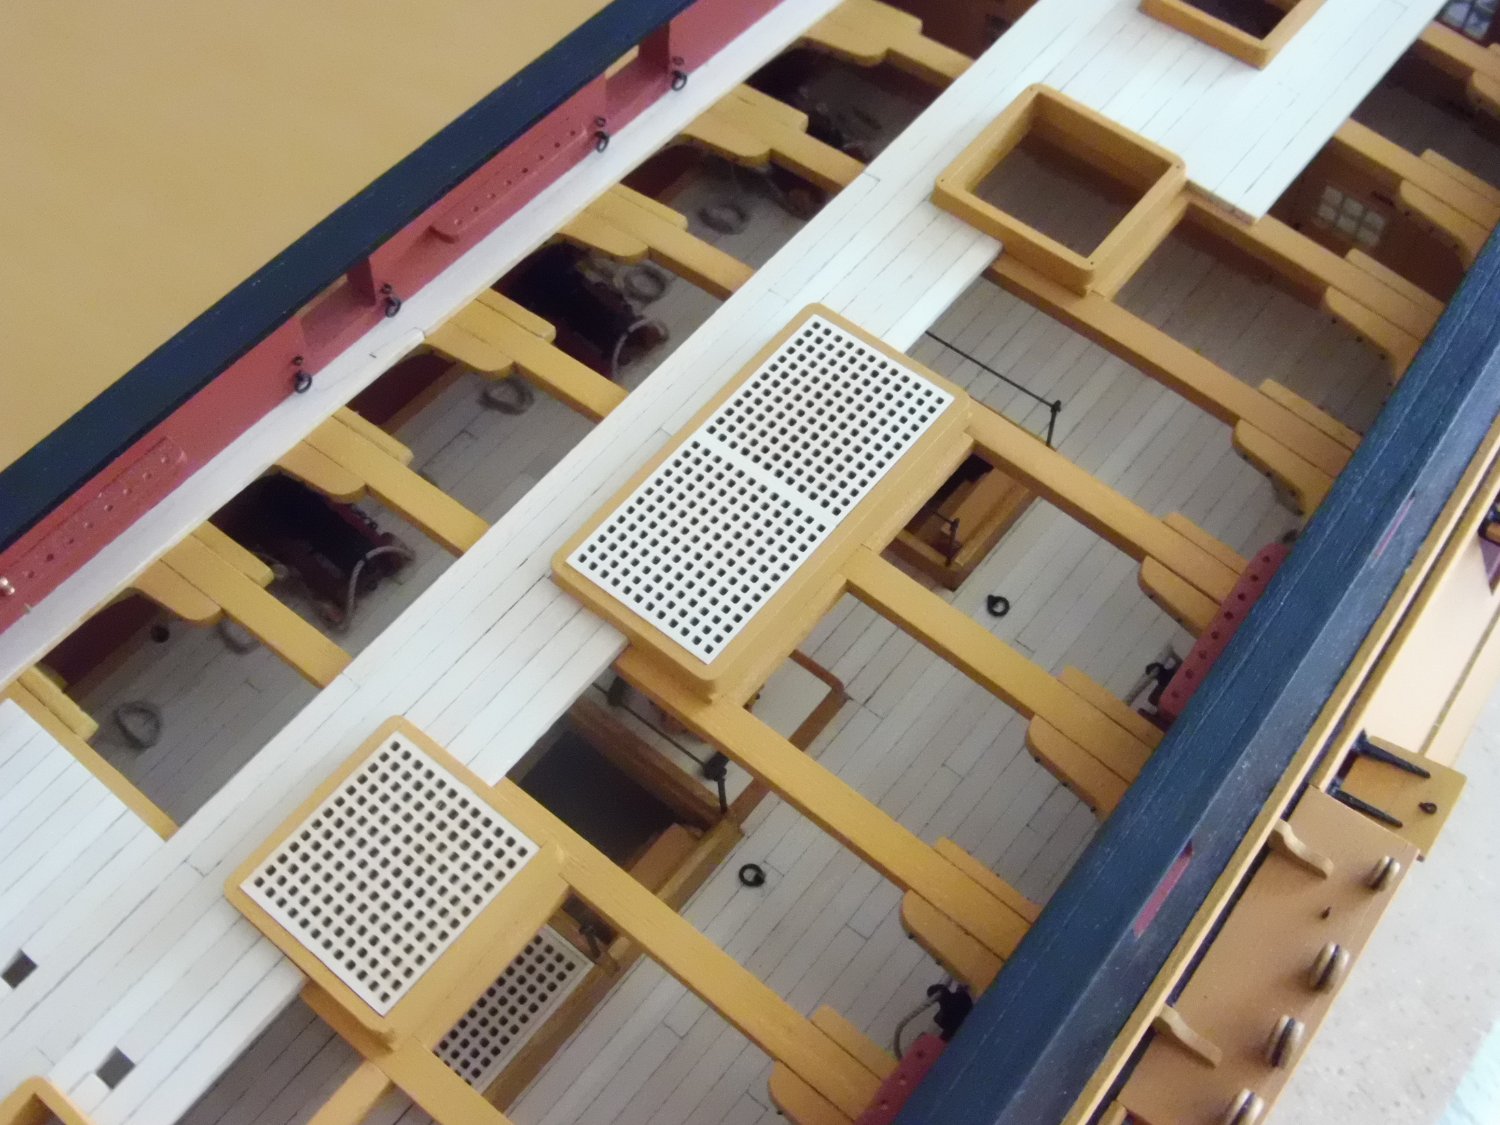
With the following pictures I go back in time .....some pictures of planking the gun deck.


-
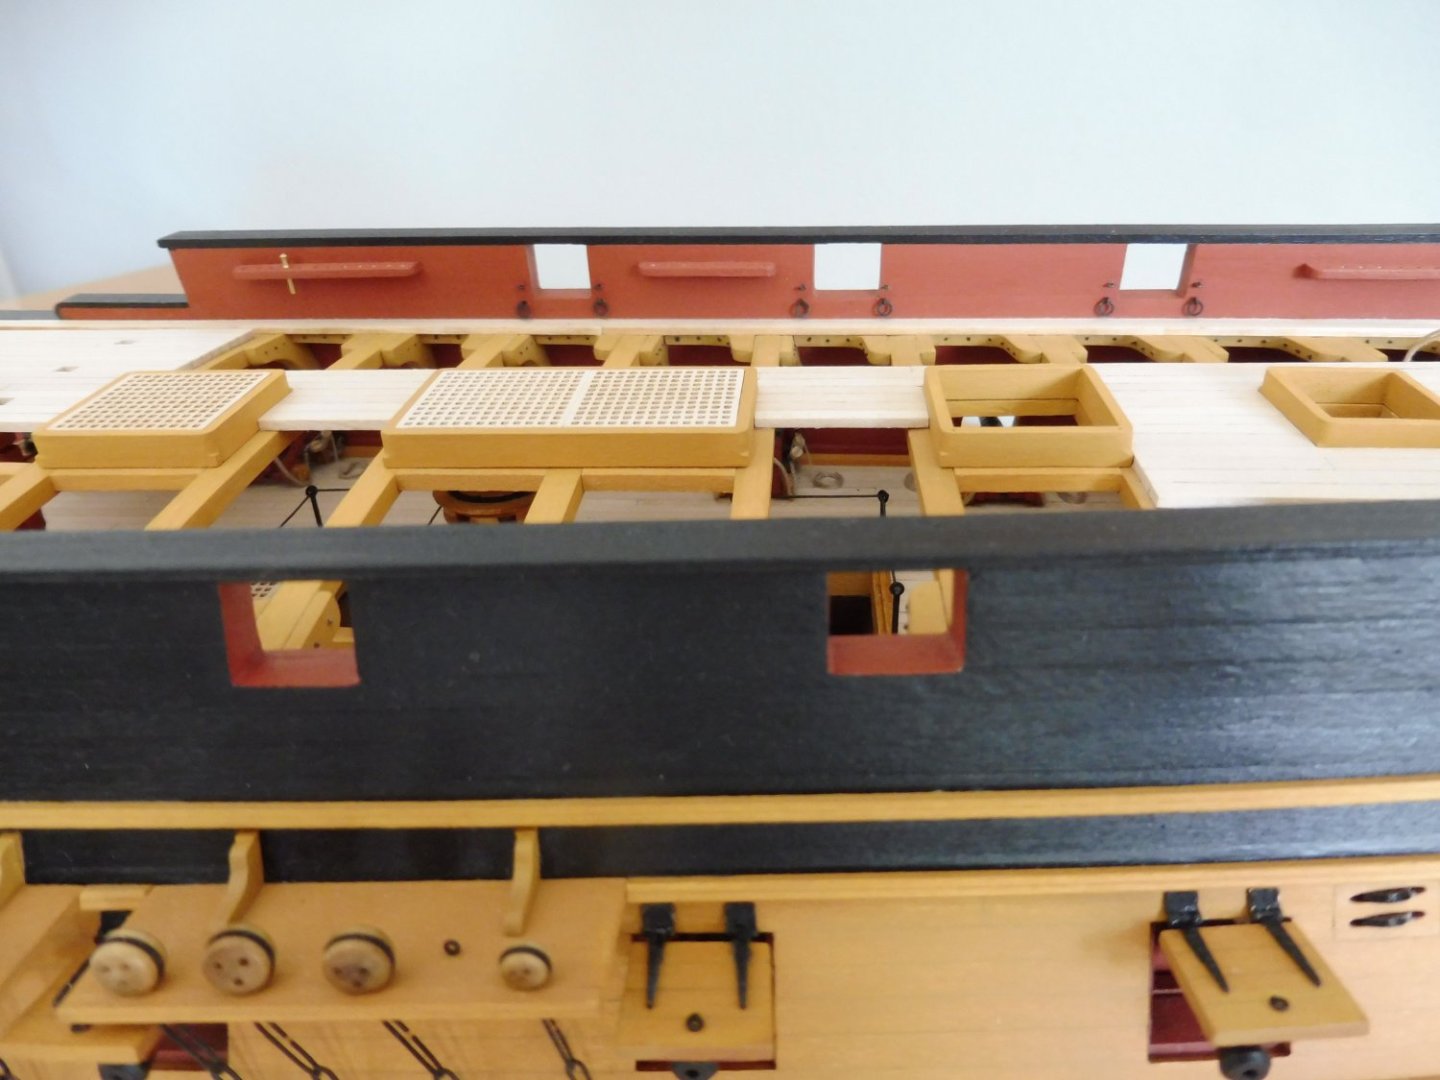
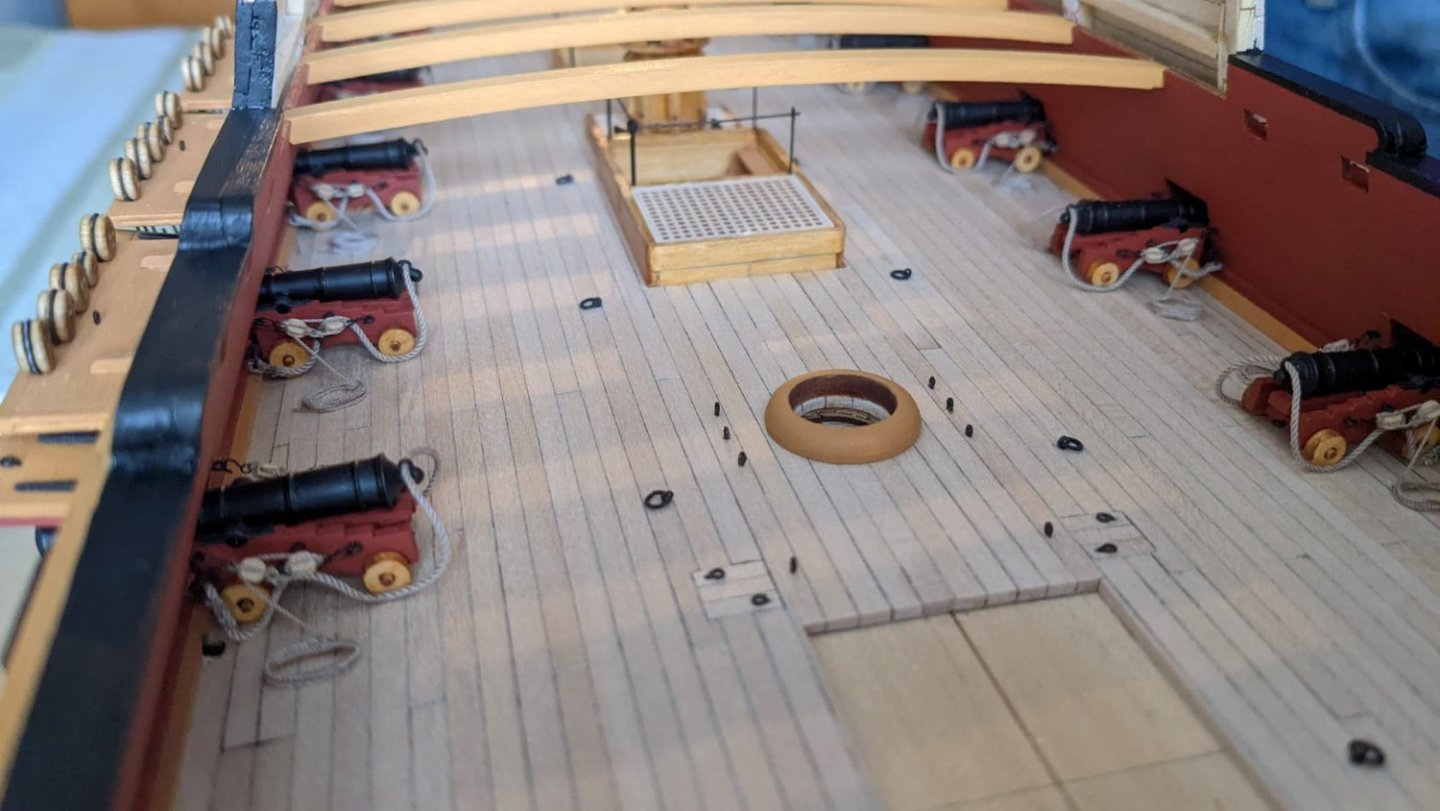
Hello modelers,
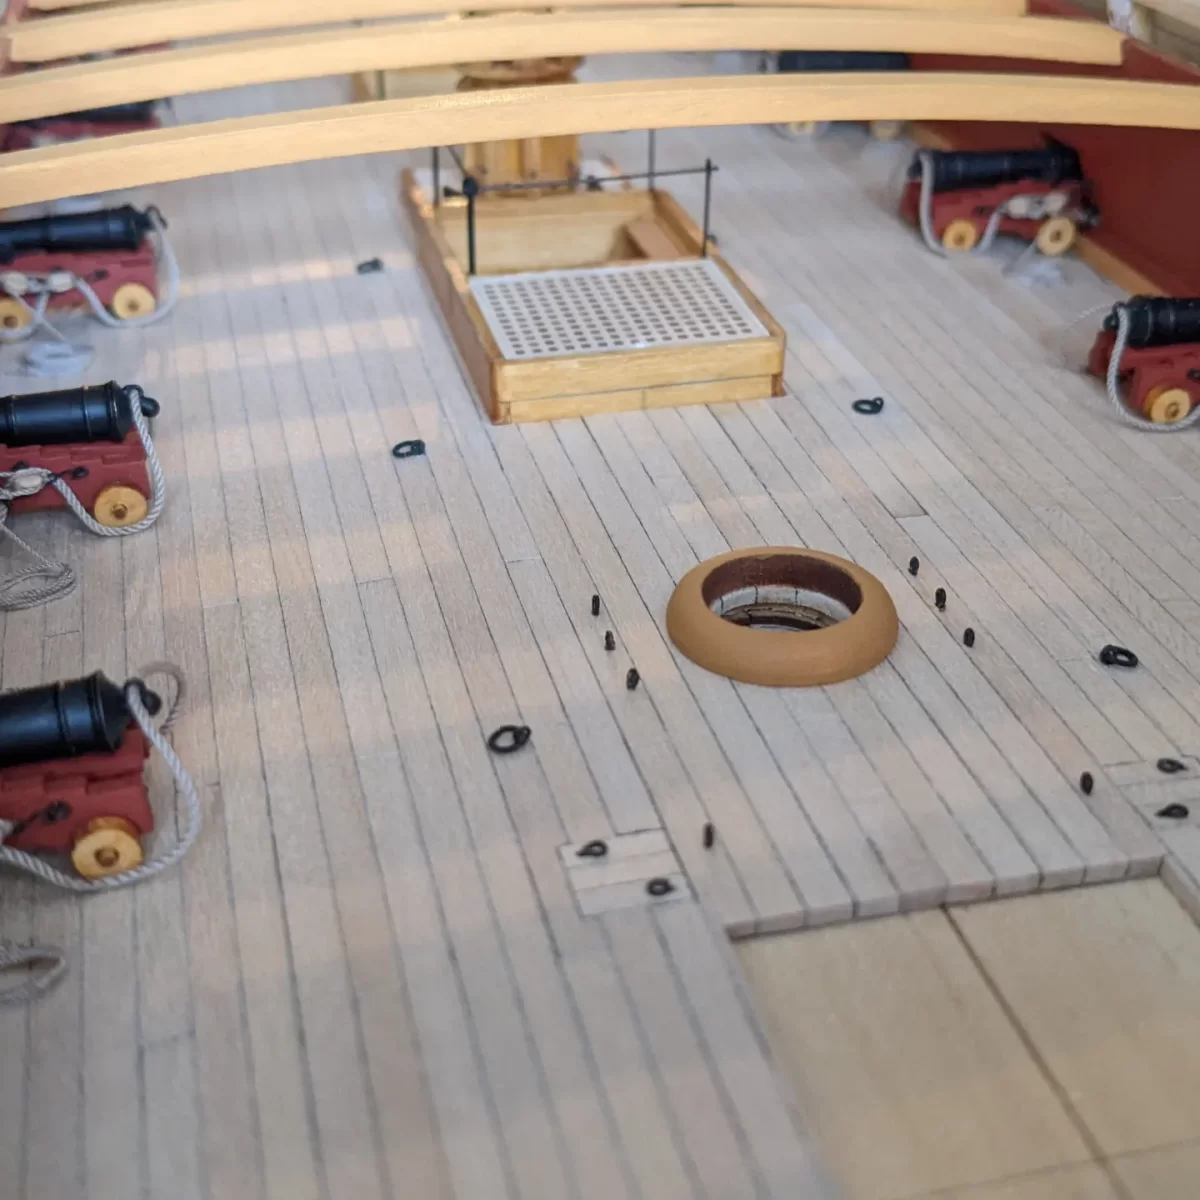
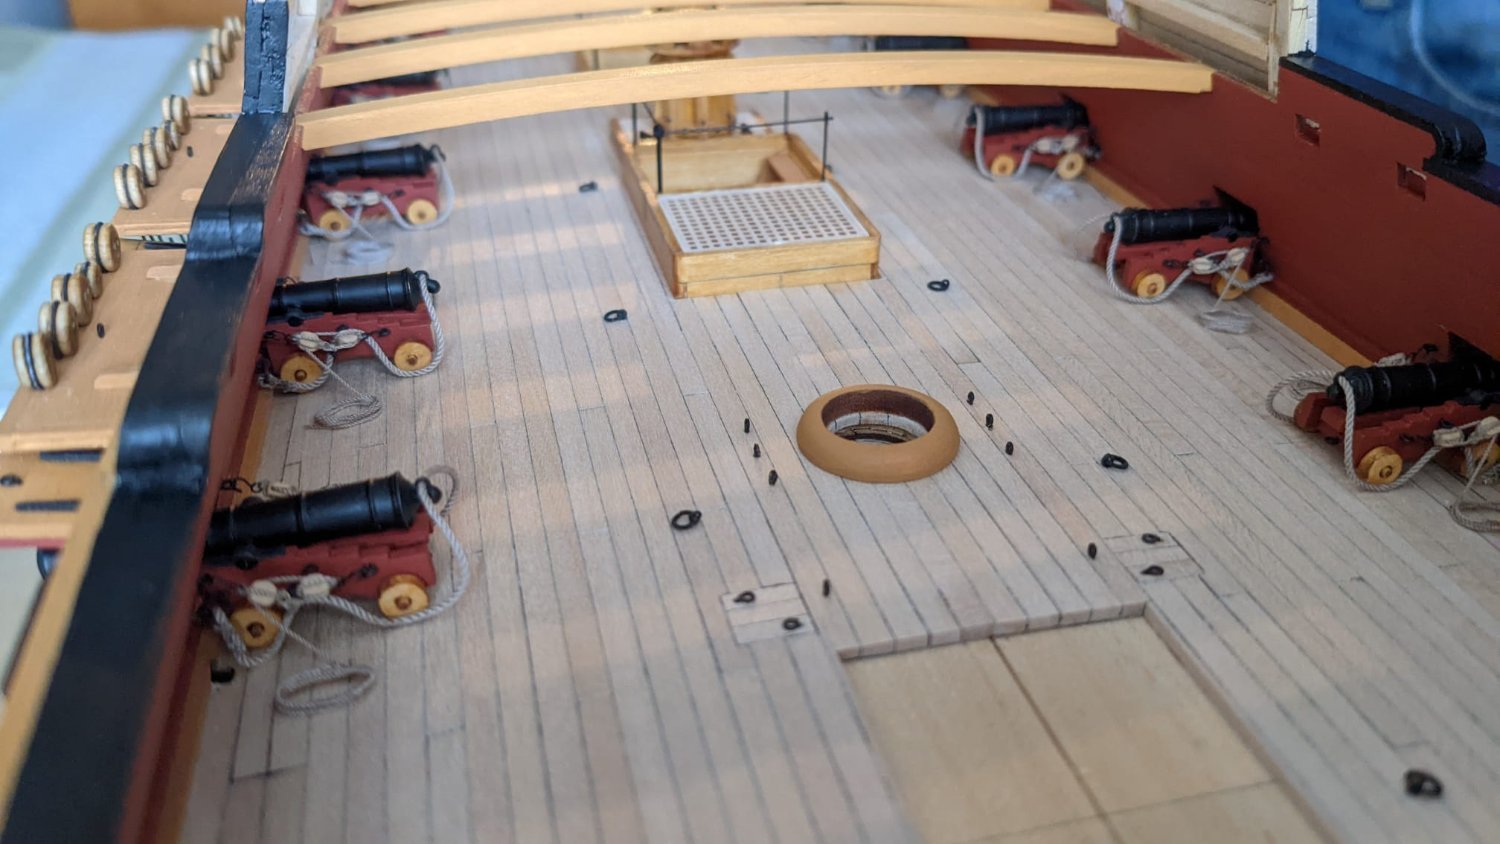
some impressions from the "dockyard" as handy-snapshots about four weeks old. Meanwhile all deck beams and knees of the quarter deck are glued, and in the moment I´m planking the bulwarks of the quarter deck.
.jpg.14d9e691c90043638e26c22304815d87.jpg)
.jpg.31909e4745b4b728cefc6f9fd8be89fd.jpg)
.thumb.jpg.f31681be578f27a402405d705e6f0b79.jpg)
.thumb.jpg.40da1142fdfe3243810742468afc7ea0.jpg)
- ccoyle, Montaigne, Ryland Craze and 6 others
-
9
-
It is always a pleasure to follow your log and to see how you deal with the challenges of the details.
One point before planking the gun deck.....close the gap between the false deck and the stern lights with another white plank. I think the deck planking will be too flat (just 1/16) to close the gap.
-
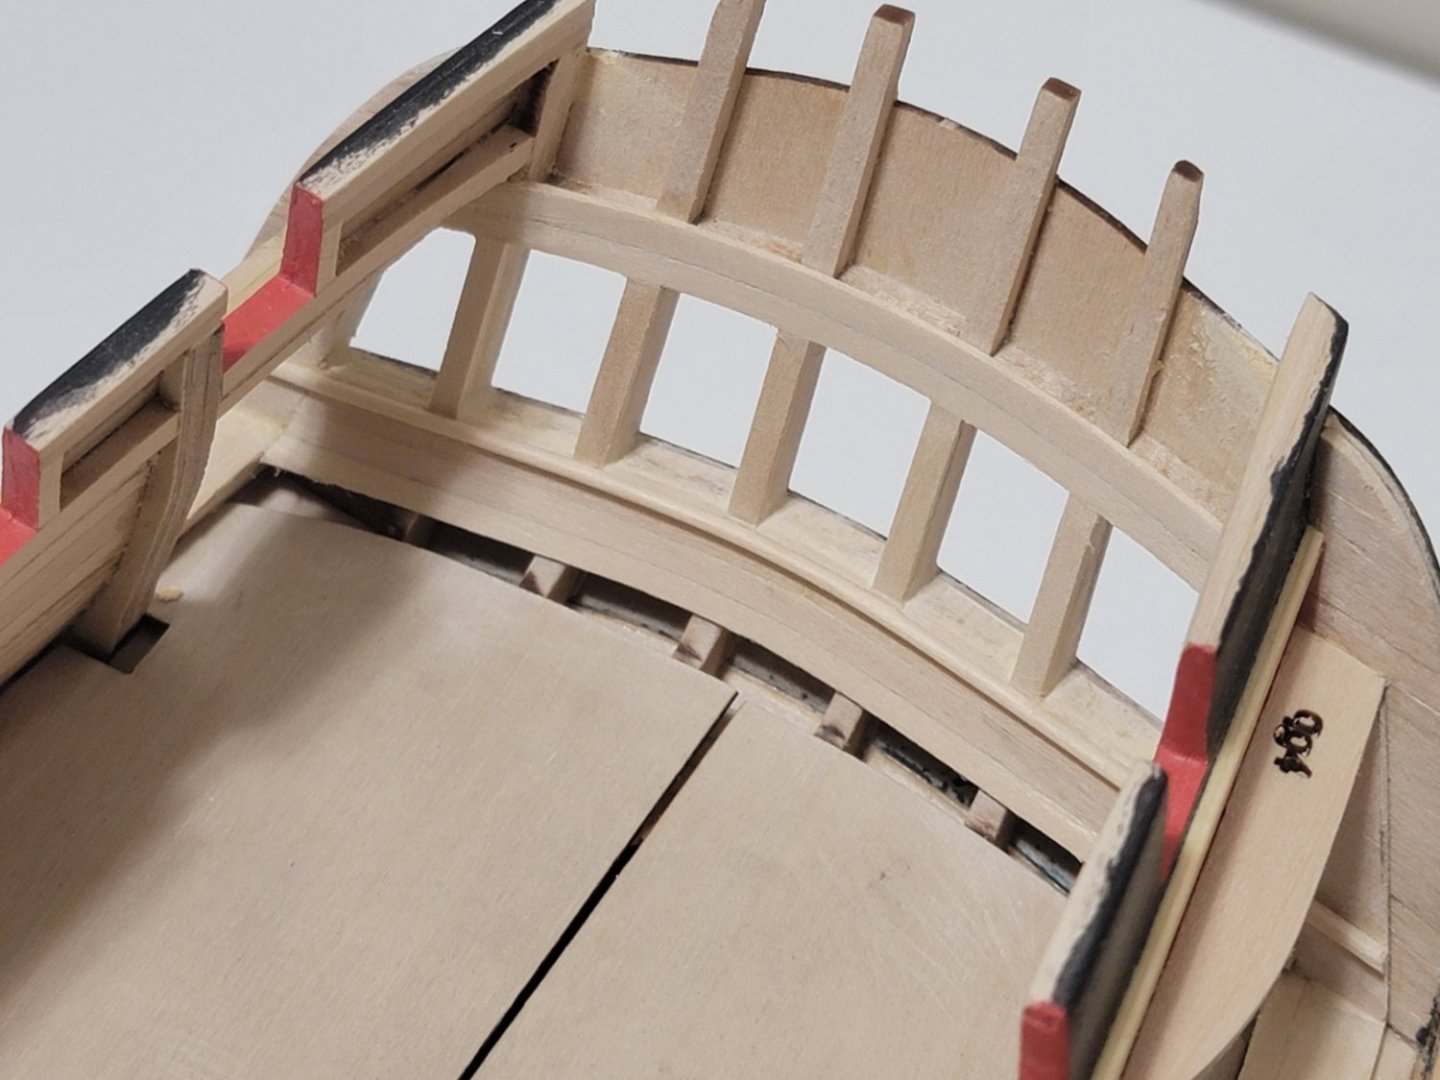
Hello Harshil,
the point is that this support is not mentioned in the instructions. To fix the problem I suggest the following: Carefully cut out both sides of the false deck along the fore edge of frame F and both sides of the bulkhead former. Then glue new supports in appropriate height along the fore edge of frame F, both sides of the bulkhead former and additionally on the beakhead bulkhead. Then you can glue the parts of the false deck on again.
If you regard it necessary you can repeat this procedure between the frames F and E only on the port side. The gap between the false deck and the spirketting plank should then be disappeared.
-
Hello Harshil,
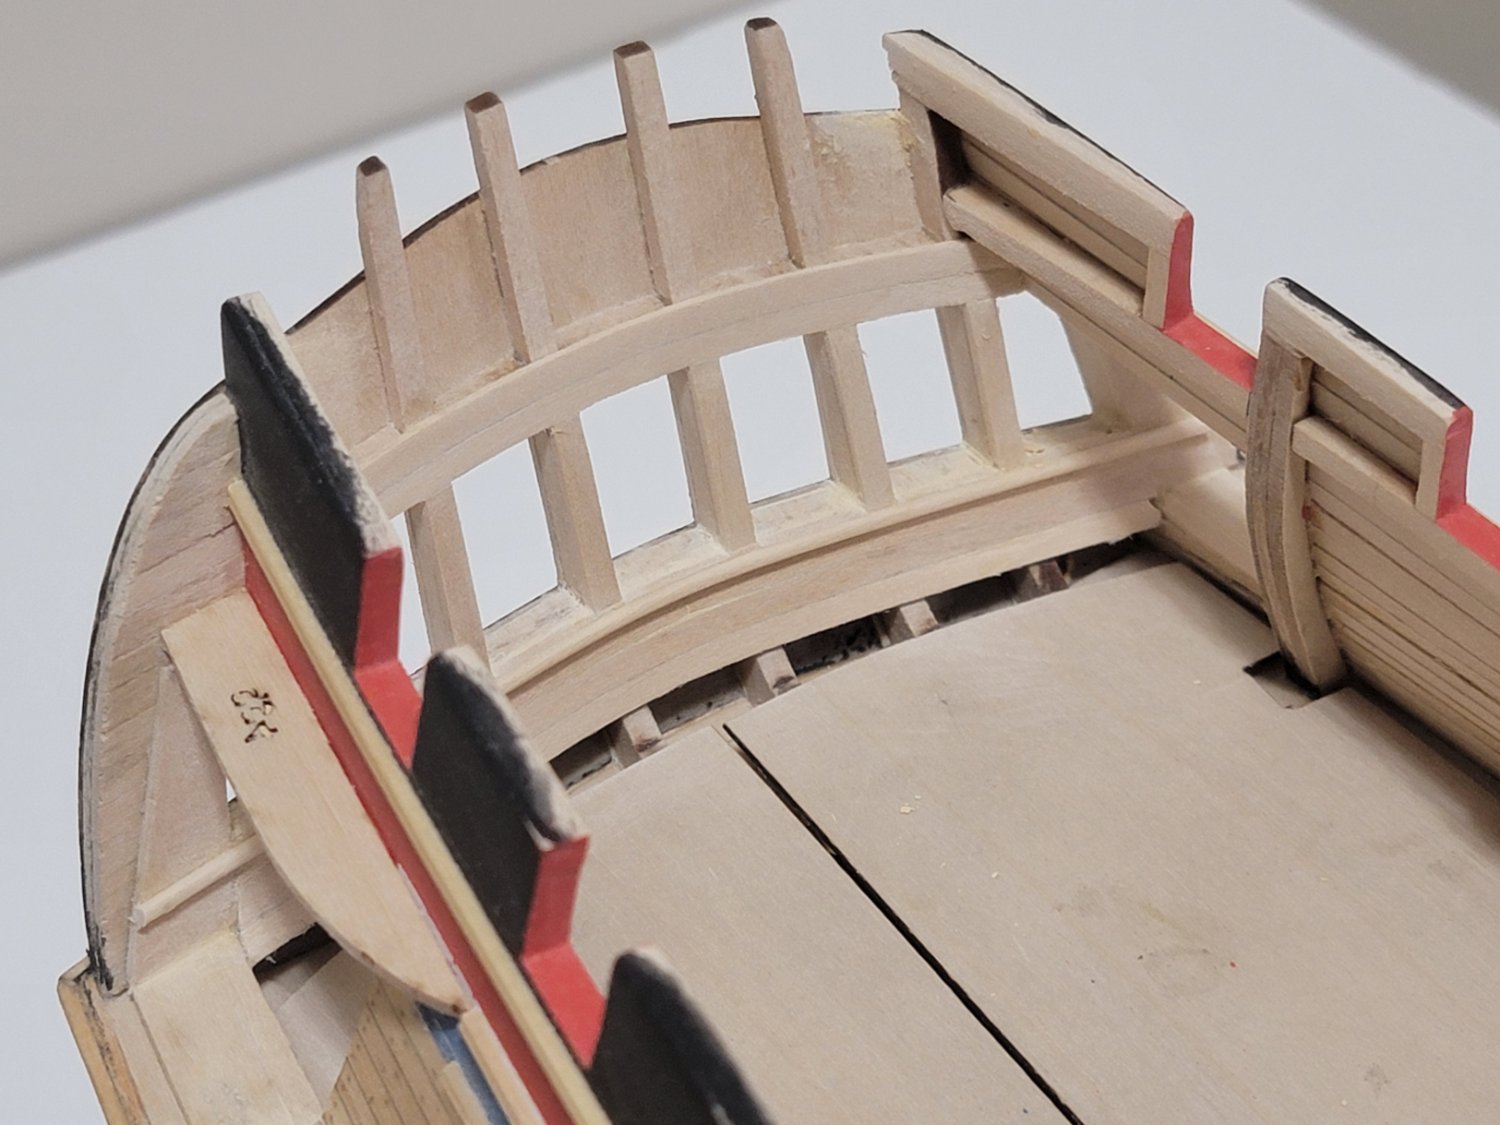
no, I don't have photos of the unplanked gun deck with the veneer pieces as a second layer in the "dips". I suggest to glue pieces of veneer reaching a bit over the "dips" and sand them down until you get a smooth transition to the original false deck. One question regarding the bow area: Did you glue a beam on the backside of the beakhead bulkhead as support for the fore edges of the false deck halves?
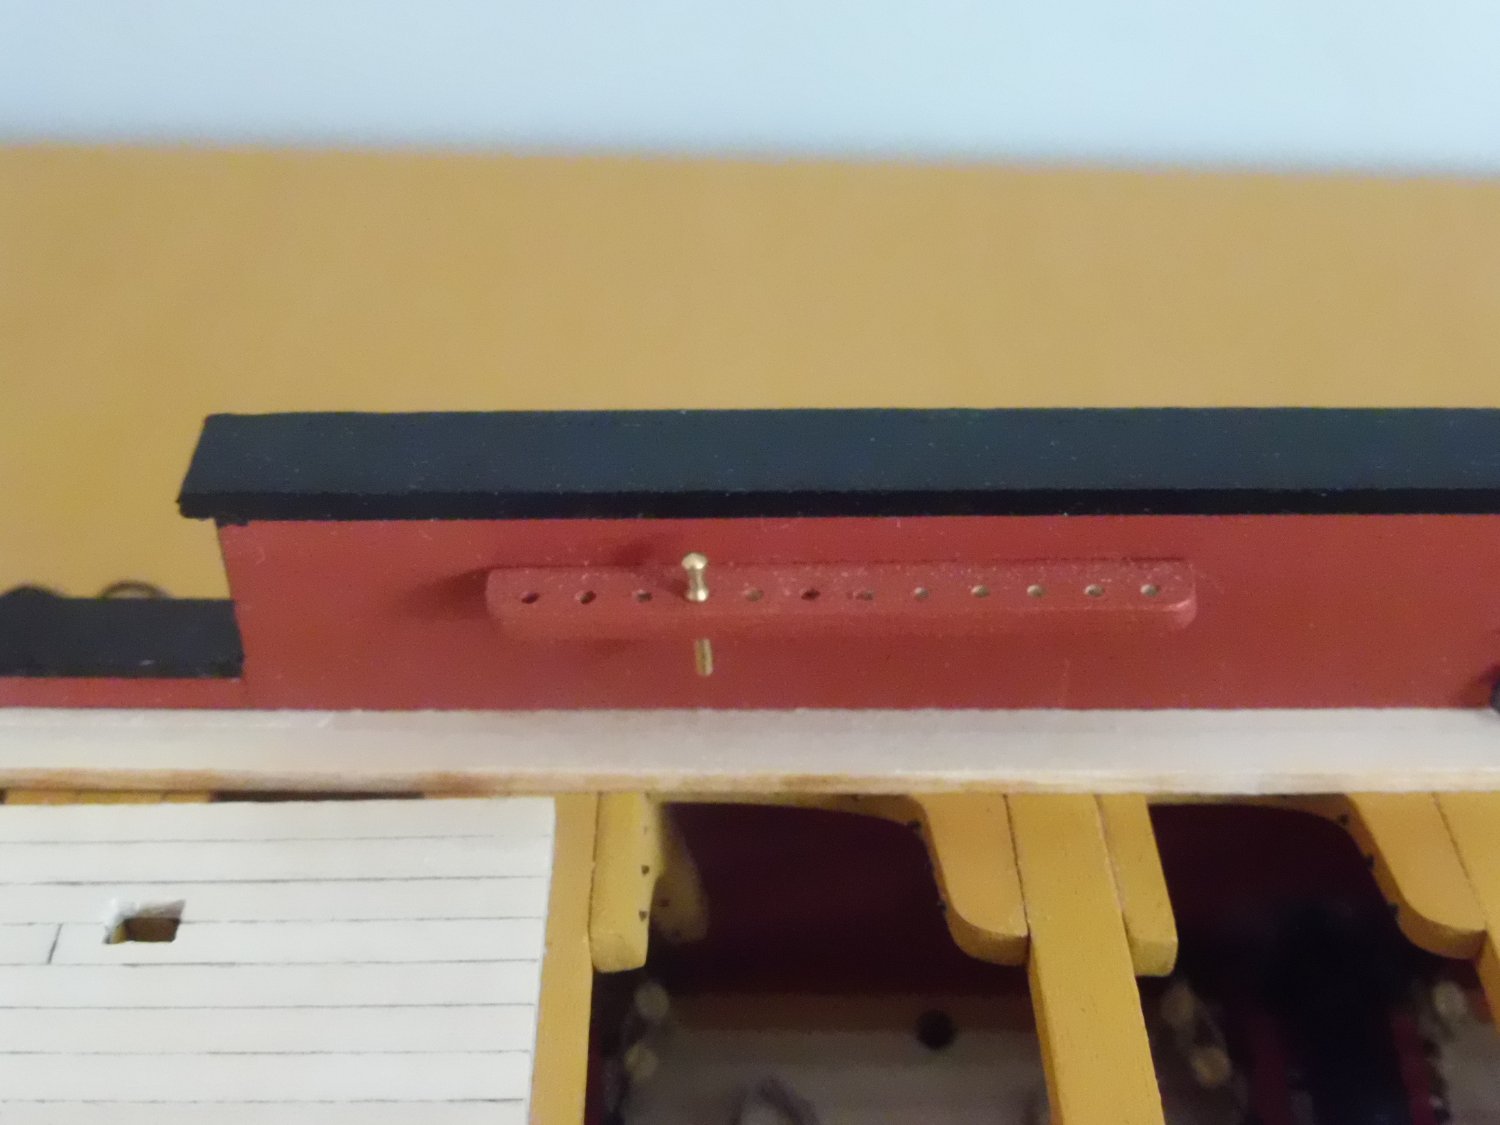
I attach a photo of how I made the drill template. Just copy the area of the provided sheet and cut out according to the red line. So all you have to do is to put this template "over" each gun port and stitch through the middle of the depicted eyebolts. The bottom edge of the template just "sits" along the spirketting plank.
-
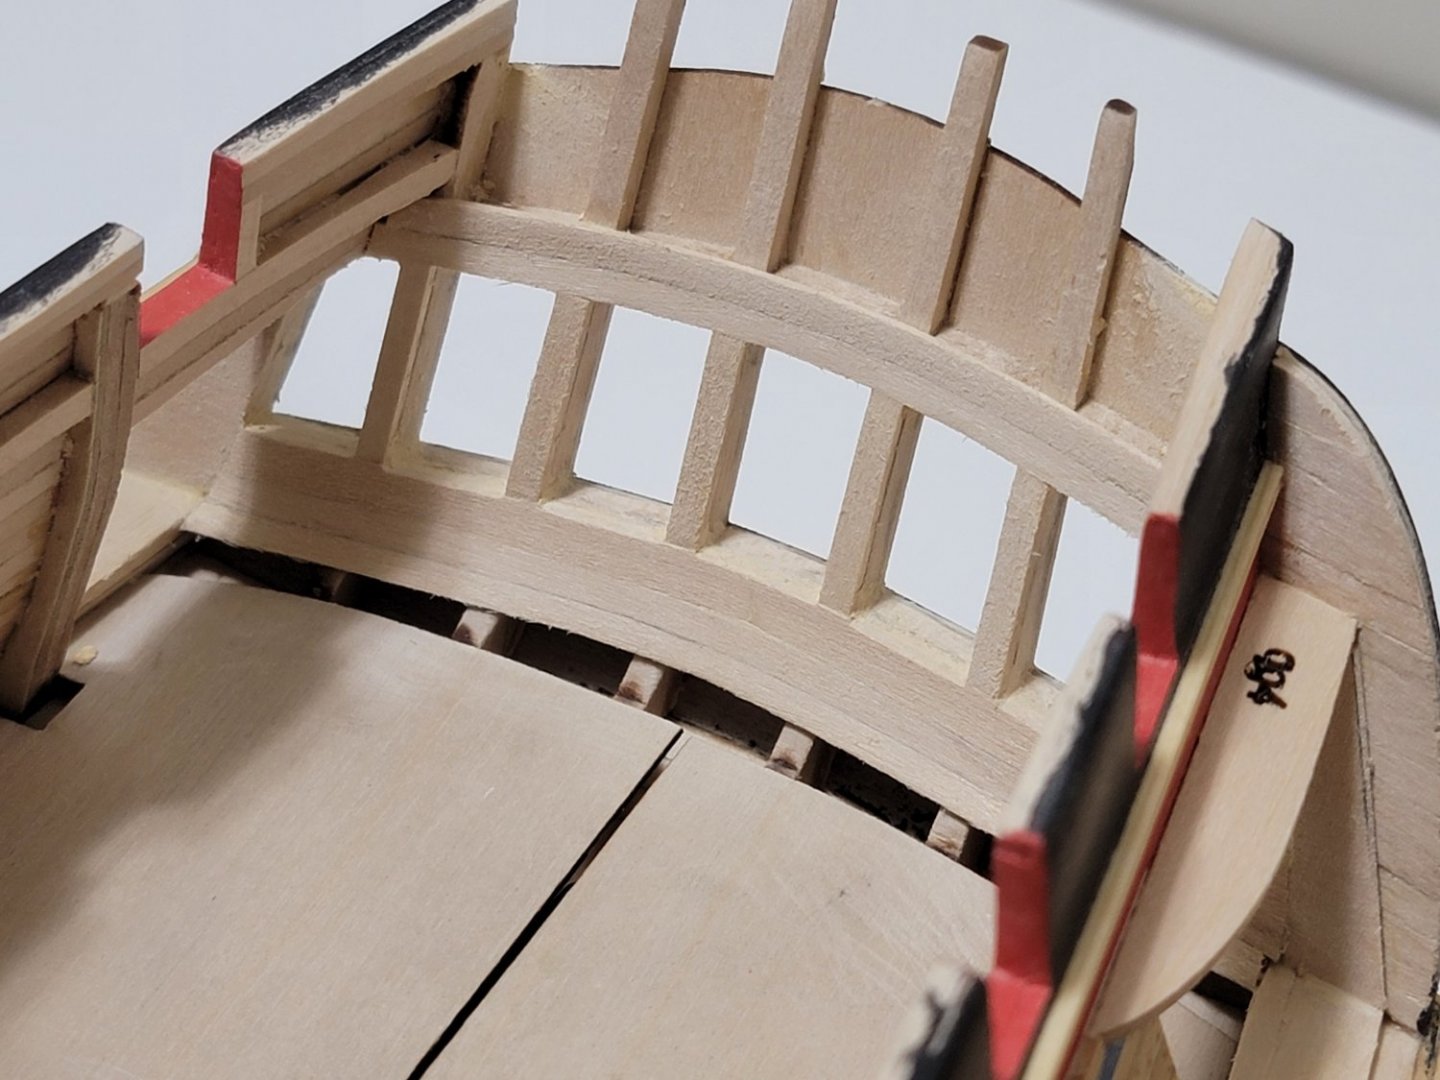
Hello Harshil,
You make good progress with your model, and I would like to make some remarks regarding your pictures.
1. A good run of the spirketting shows the ups and downs in the run of the false deck especially at the edges. This was also the case with my model, and I adjusted the "waves" using appropiately downsanded 1,5 mm veneer as a second layer on the according areas of original false deck. (This is time consuming but worth the while because the waves will not disappear with the deck planking).
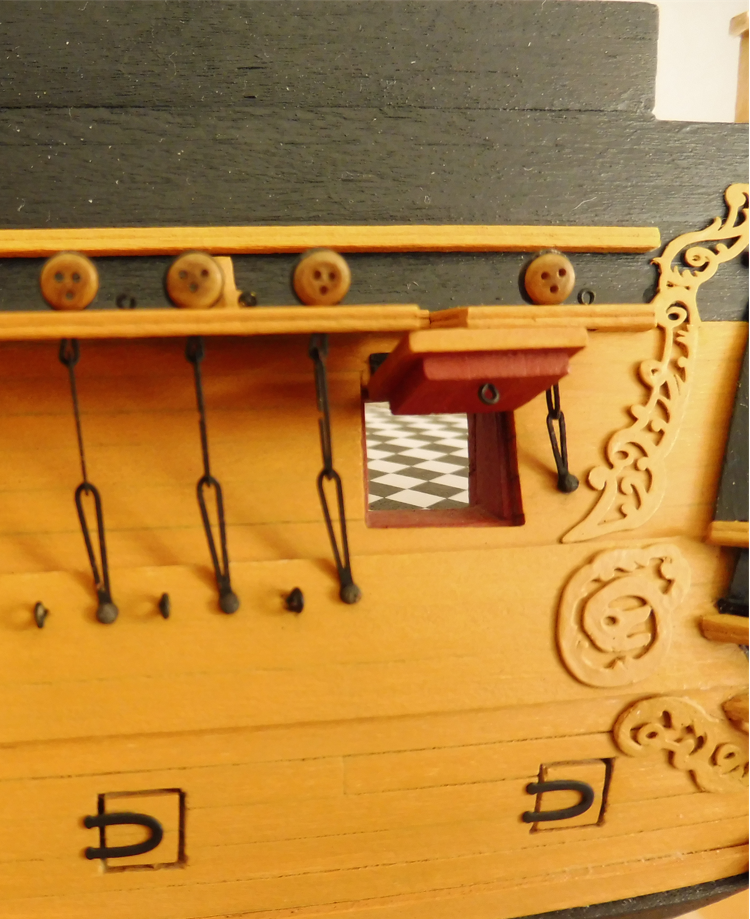
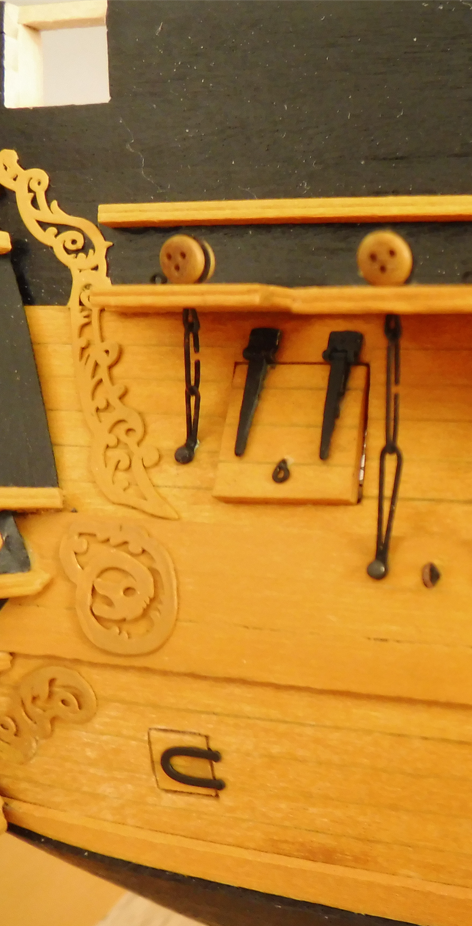
2. Before you paint the bulwarks I recommend that you drill the holes for the eyebolts for the gun riggings, that means 4 holes on each gun port. A selfmade drill template is very helpful.
3. I also used the provided shells, it works with a little trimming (but not on the aft edge because the space is needed for the decorative etch strip)
Regards
Werner
-
On 3/1/2022 at 3:34 AM, WalrusGuy said:
The stern area is now planked and sanded smooth. Glad I did it now than later on since I felt very cramped holding the planks in place. The opened area on the sides were very helpful to get a grip of the planks and for easy access to sand them.
Also, I had to edge-bend the planks before gluing them since there are two axis that each planks bend in for them to match the light sills. I used filler wherever I saw some gaps between the frames and the planks.
The molding strip was added next. The edges were first softened. Then, I glued the center part first and waited for the glue to set before bending and gluing the rest of the strip.


I was first considering to continue on with the quarter gallery. Now after thinking for a bit, I am considering completing Chapter 9 to plank all the bulwarks. IMO, it seems to be the logical option as it would be better to finish the "messy" work before moving on. I know sanding the planks smooth will generate a lot of sawdust and it might be difficult to clean up from the lights. Once I finish planking, I'll paint the planks in the stern area white, and the rest red.
I wanted to also note, the supplied shells for the quarter gallery do not fit my model at all so I will need to scratch build them. Something I need to think about while I plank the inside of the ship.
Hello Harshil,
Excellent work so far, and I look forward to the pictures of the finished model!
With the "shells" do you mean the "drops" below the quarter galleries? On my model, these parts also did not fit at all....the angle of the topside to be glued under the bottom of the galleries is wrong. However, I used these parts after correcting the wrong angle with putty.
Regards
Werner
-
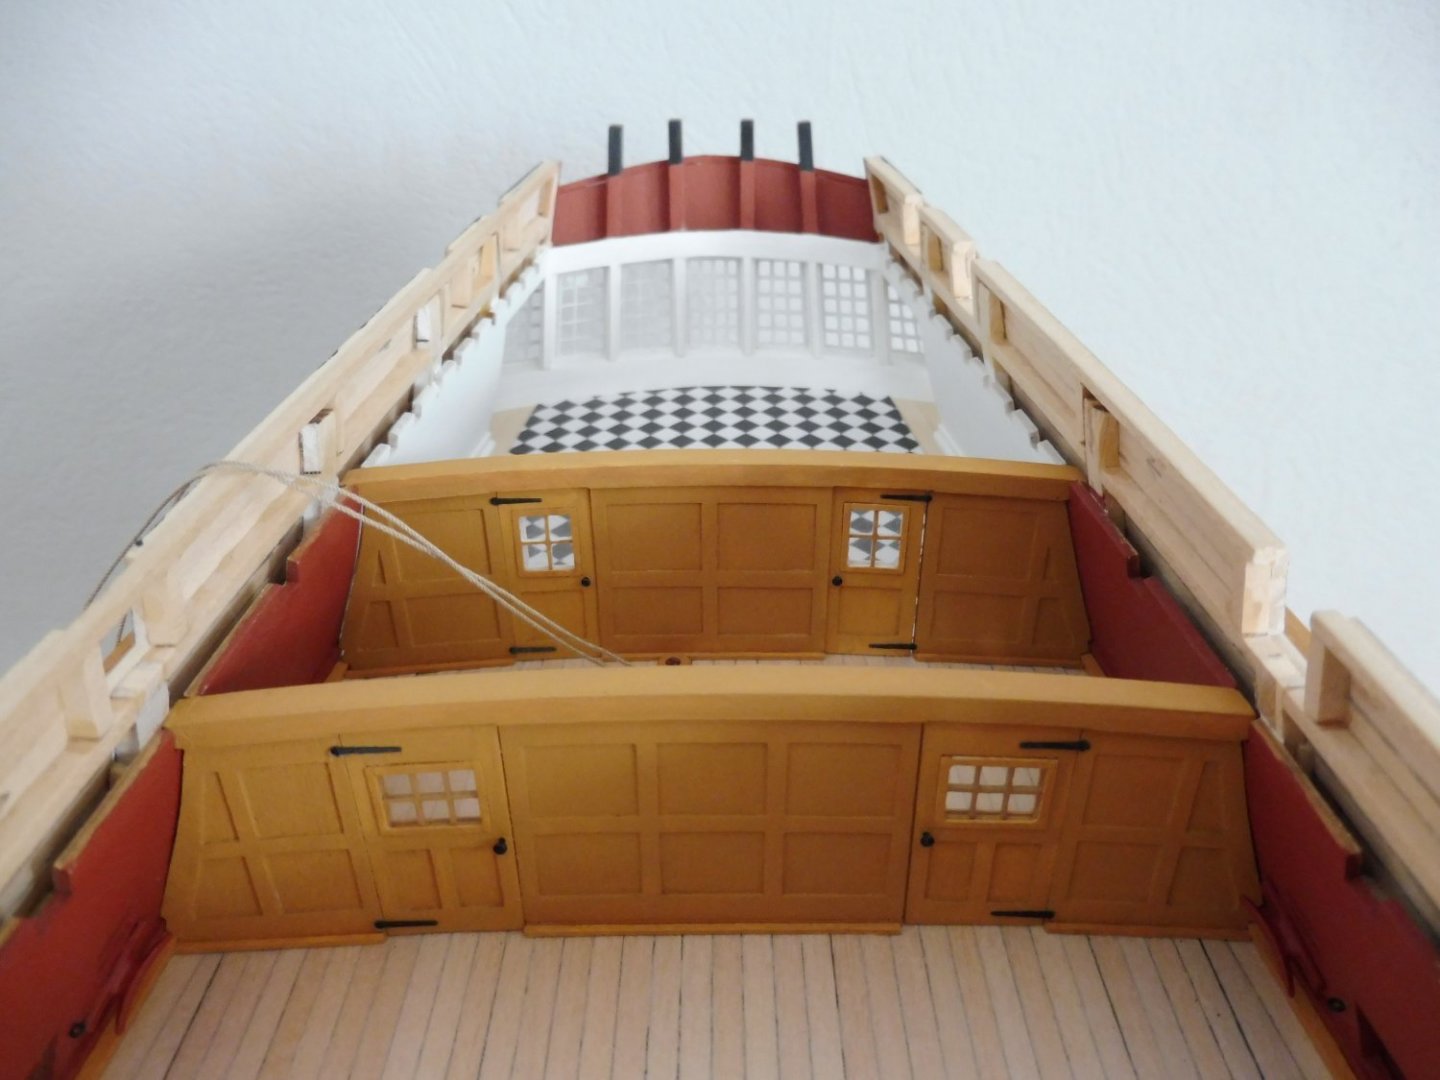
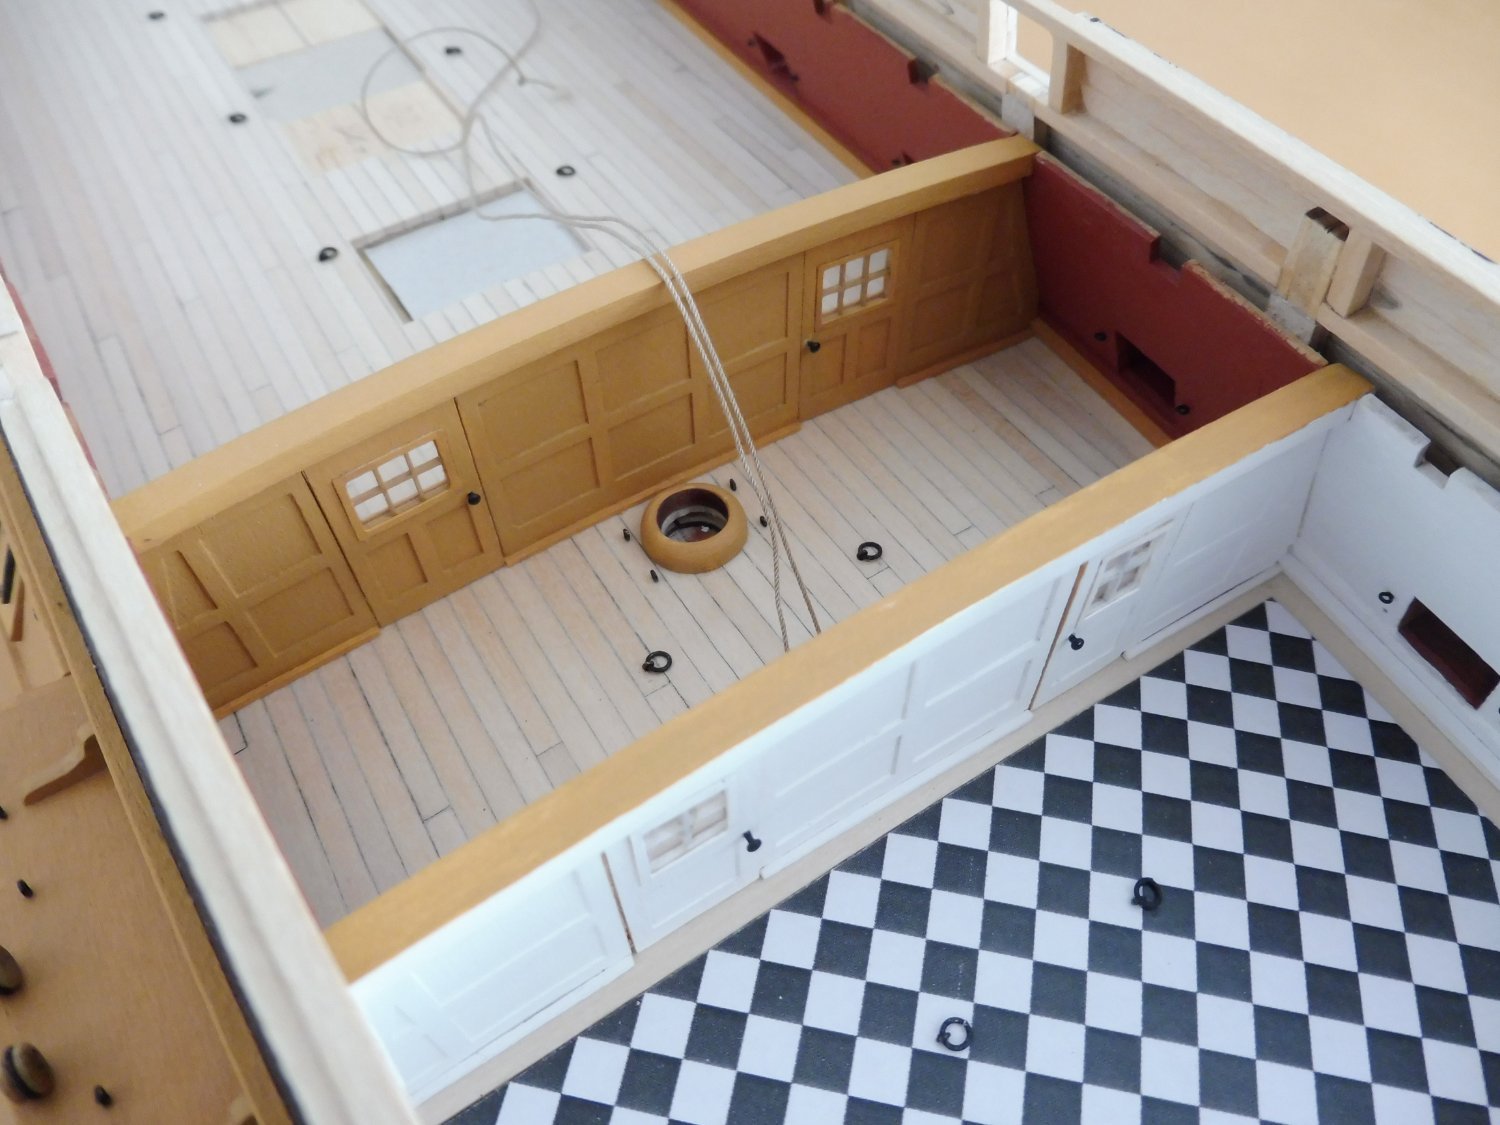
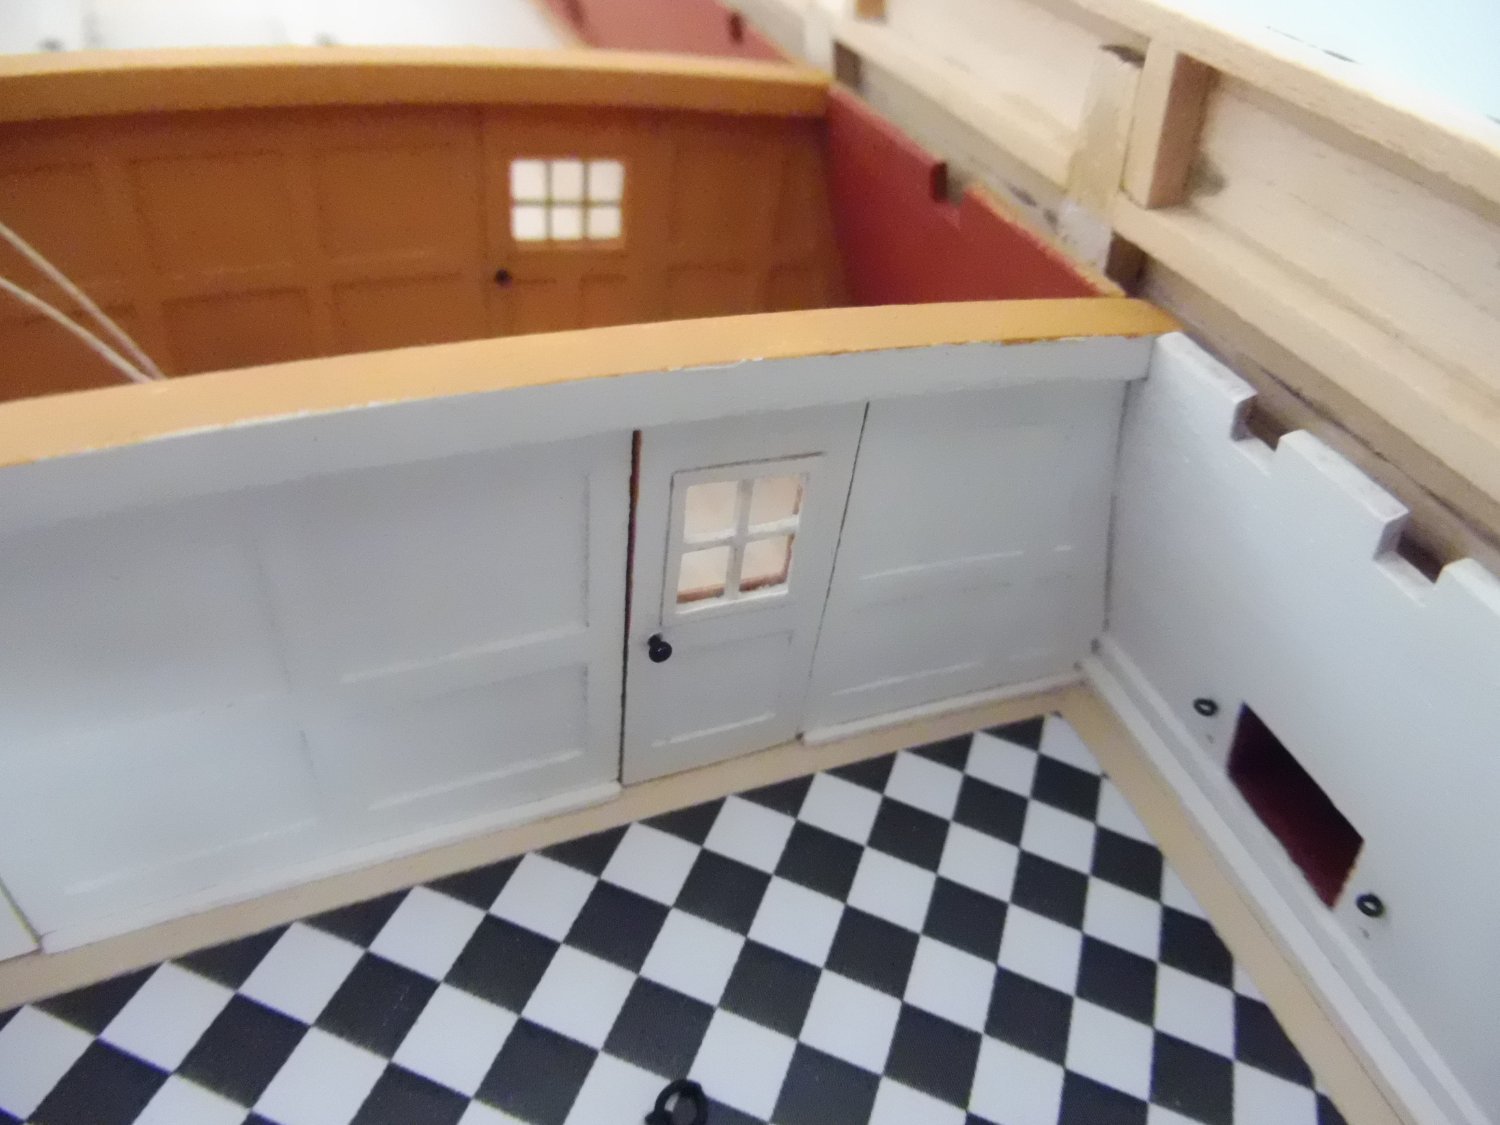
Hello Harshil,
your gallery counter and the painted-on ship´s name are excellent work!
Let me draw your attention on the picture above (4th from the bottom) where you show the inside of the bulwarks on the port side of the bow area. What caught my eye is the shape of the gun port sills and lintels, the gun port uprights and the frames. Imo they are too much sanded and show a too deep concave curve, viewed from inside. Furthermore I think you tapered the frames too abruptly from the gun port lintels upwards, they should be tapered more gradually beginning on the deck level.
-
-
Hello Thedosius,
thank you very much! I got the idea for the miniatur-furniture when I saw corresponding pictures of another modelbuilder....I thought it might look fine in my model and searched the net; what I found you can see in the links below
https://3dwarehouse.sketchup.com/model/8f92d42bca234b7c470412e9b69c8933/Secretary-desk-small
https://www.thingiverse.com/thing:13391https://www.thingiverse.com/thing:15479
A friend of my eldest son had a 3d-printer which could make this furniture in 1:60 scale, which is not far from 1:64, so I was happy when he had them ready for painting....
-
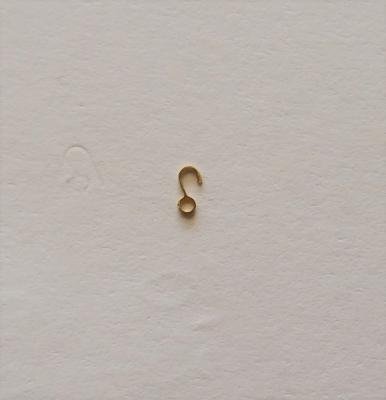
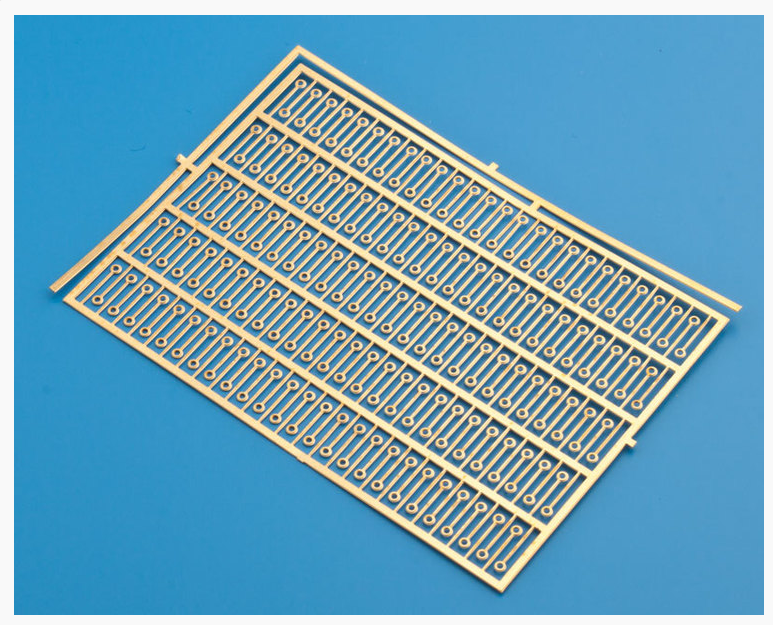
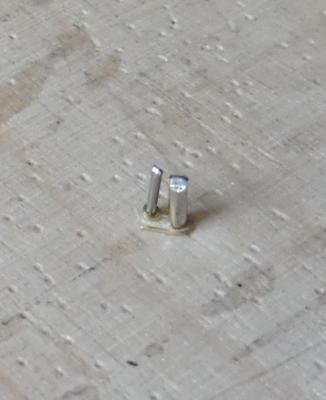
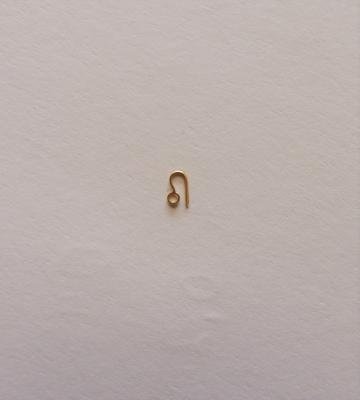
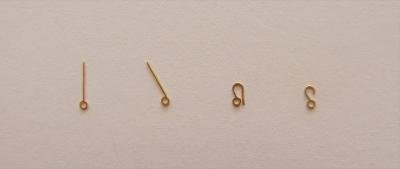
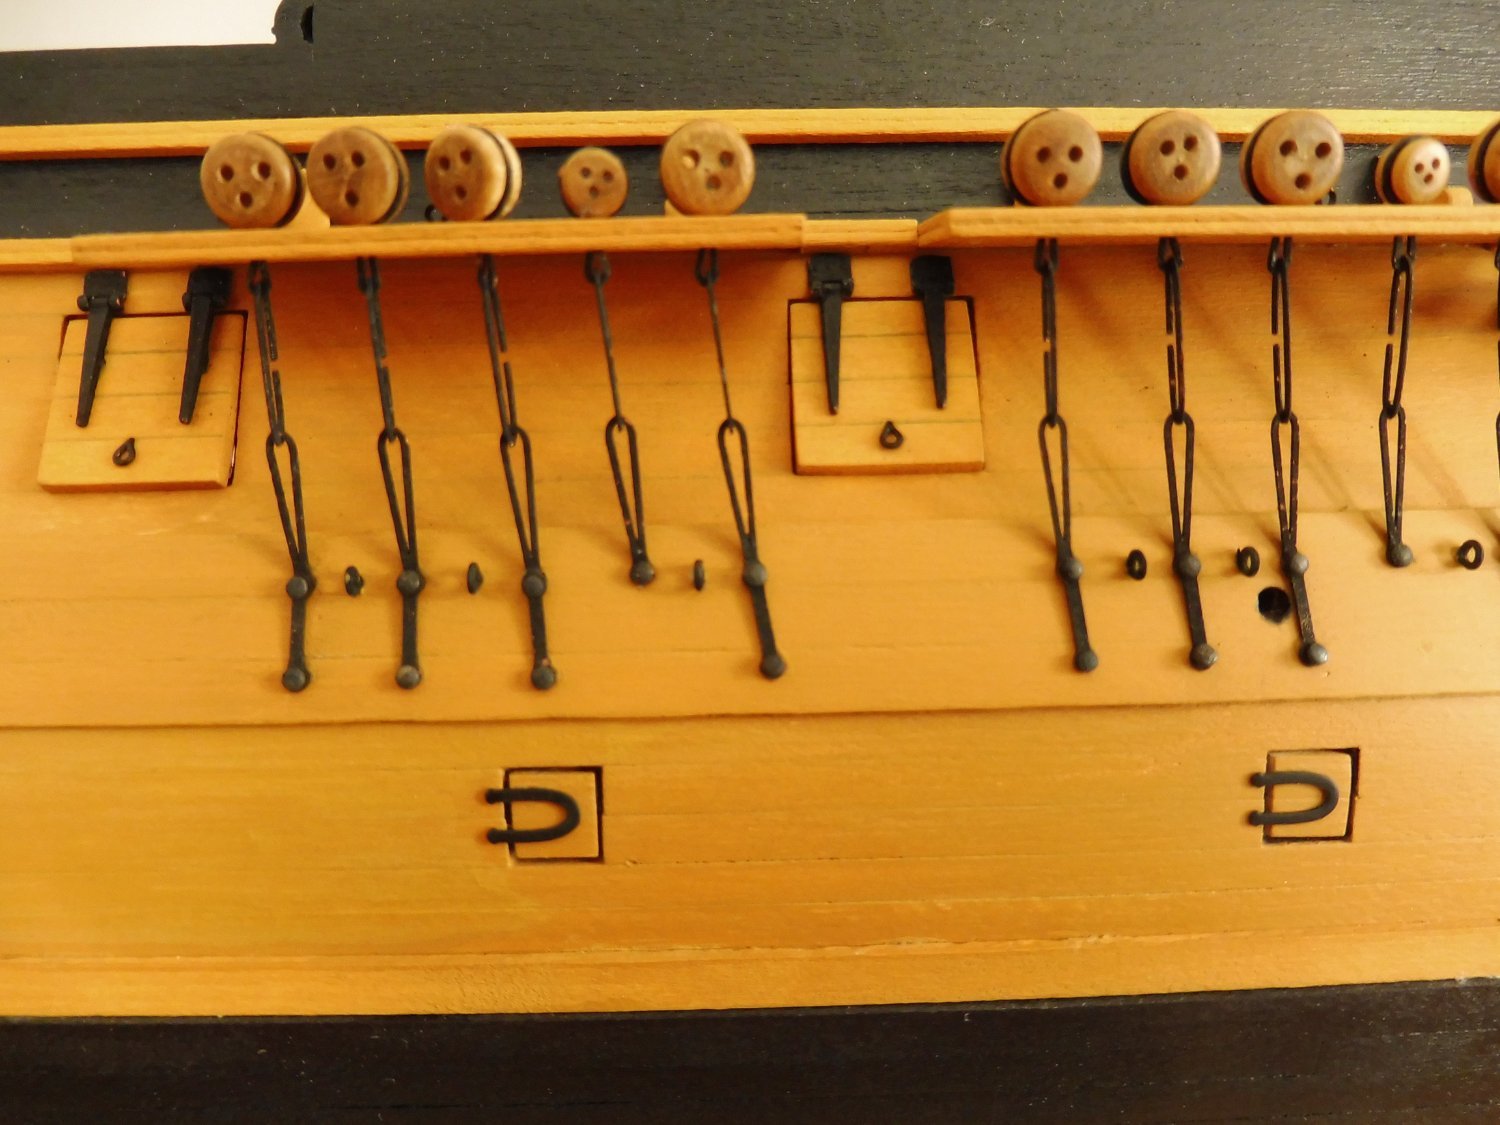
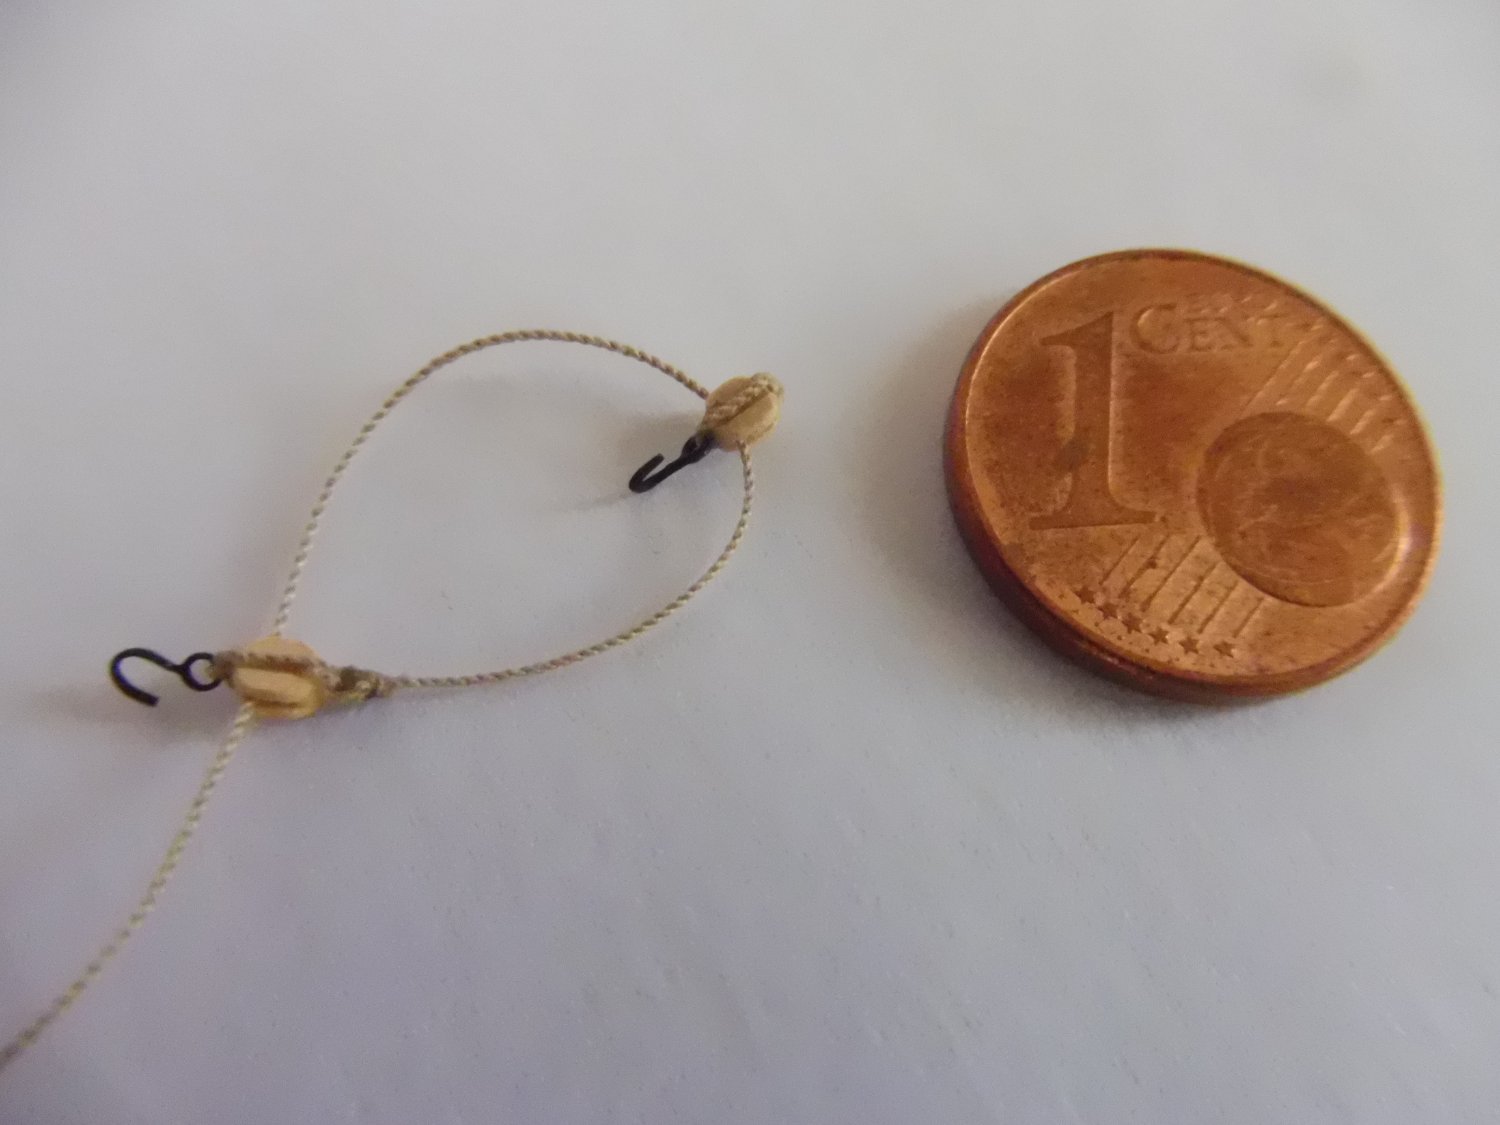
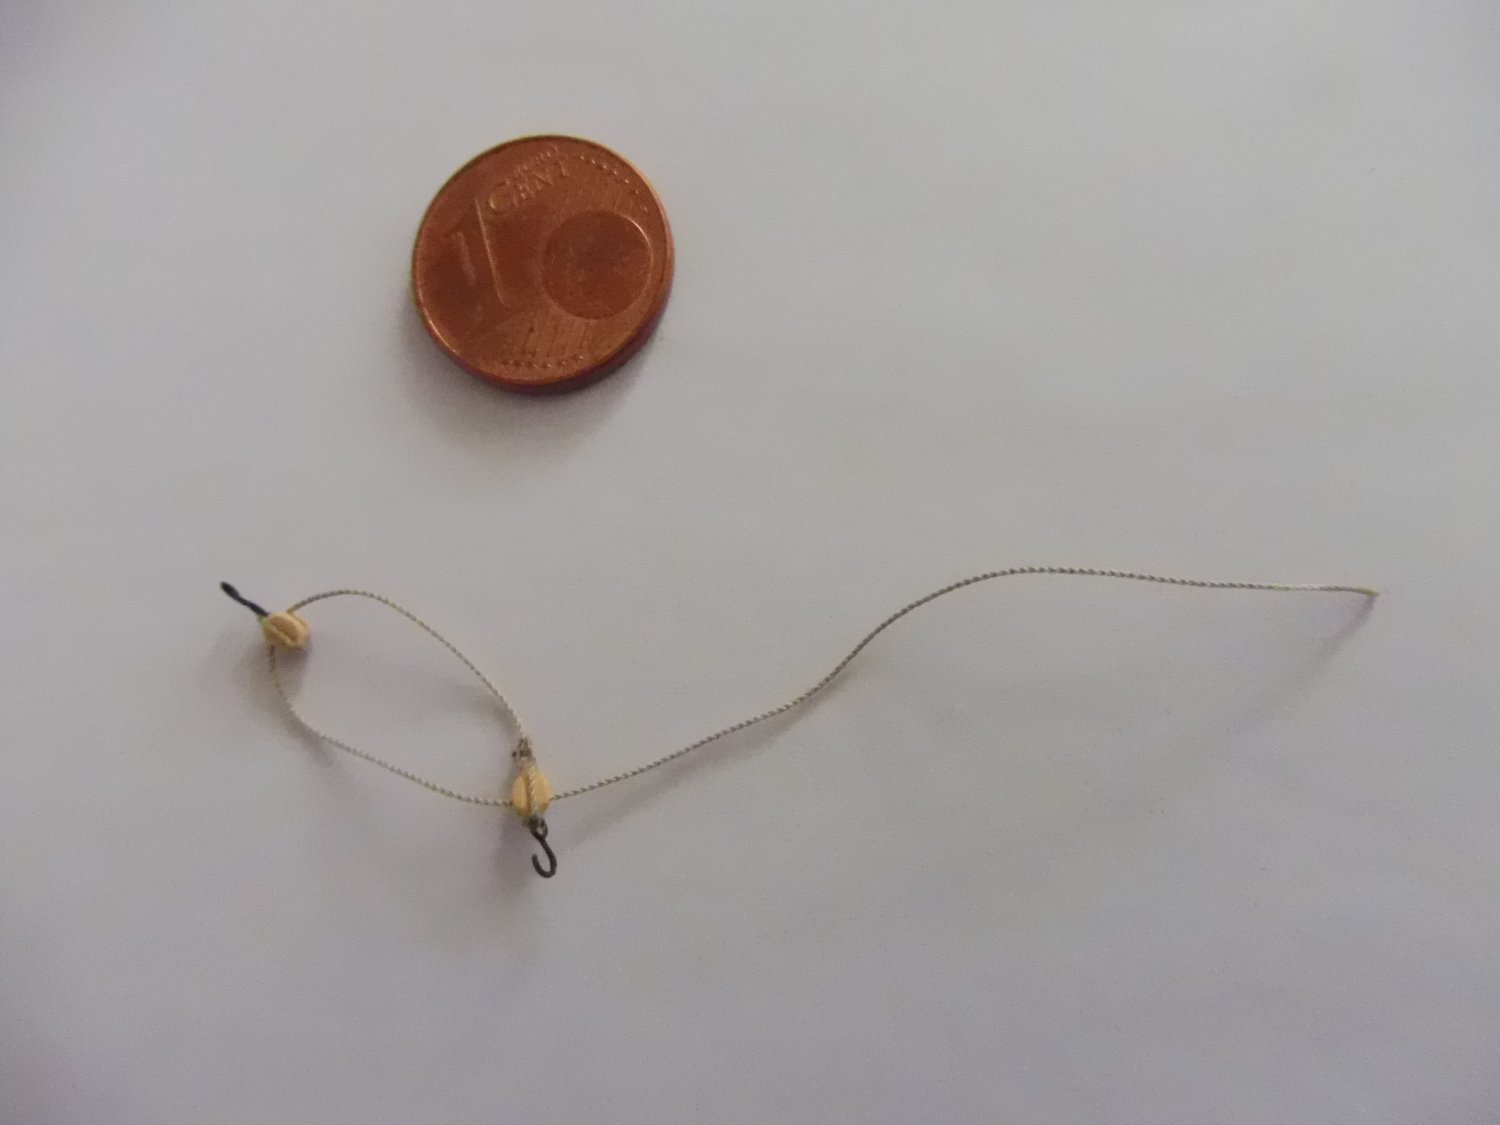
Here some pictures from the making of the hooks for the blocks of the gun tackles with the help of a simple bending jig
.png.13e0684d29e552868051853af255a527.png)
- mtaylor, WalrusGuy, GrandpaPhil and 4 others
-
7
-
Hello Walrusguy,
in a ship model kit many details are simplified, and so are the letters of the ship´s name. They come as etched brass parts which have only to be painted and glued on. This is the simple way and I did so.
I admire you for choosing a more ambitious way and trying to have the ship´s name painted on, and I think with your tries you are on the right way. I guess you have the model of Harold M. Hahn as your example?
(I turned the picture, the original is upside down)
.thumb.png.dcfc74240013806488902021f051133e.png)
- michael mott and WalrusGuy
-
2
-
And here the next series of pictures....uploading as screenshots works very well
.png.90727a52c55030a5eaa7e285ba82135c.png)
.png.987ad8f1bc828af300afa2ff9445925f.png)
.png.f85904a4257143676eddebc0e64906d2.png)
.png.26c7bd36ceb0a25b23dcefc3c7d84f2d.png)
.png.62782be103fff9dde231917492387d6c.png)
.png.f21229accfedc48ecb297272ed82279d.png)
.png.46b103a38230ecdfdbb0afe4629b3413.png)
.png.44d2ac5f836cbfe7eb319762bf158369.png)
.png.7d3d9504b3a76ebde38d71b7d7ab780b.png)
.png.7c4ad5b24ffc342b3f1337a9f1886d74.png)
- GrandpaPhil, Ishmael, WalrusGuy and 5 others
-
8
-
Thank you!
When I was looking for functioning hinges I discovered a modeling manufacturer in Switzerland, sse the link below
https://www.mbapiro.ch/produkte_detail.php?grp_id=1&content_id=12&produkt_id=162
Regrettably the item is actually not available, and it is not very cheap.
-
-
And here the next pictures......


- WalrusGuy, captain_hook, pjofc4 and 9 others
-
12
-
-
-
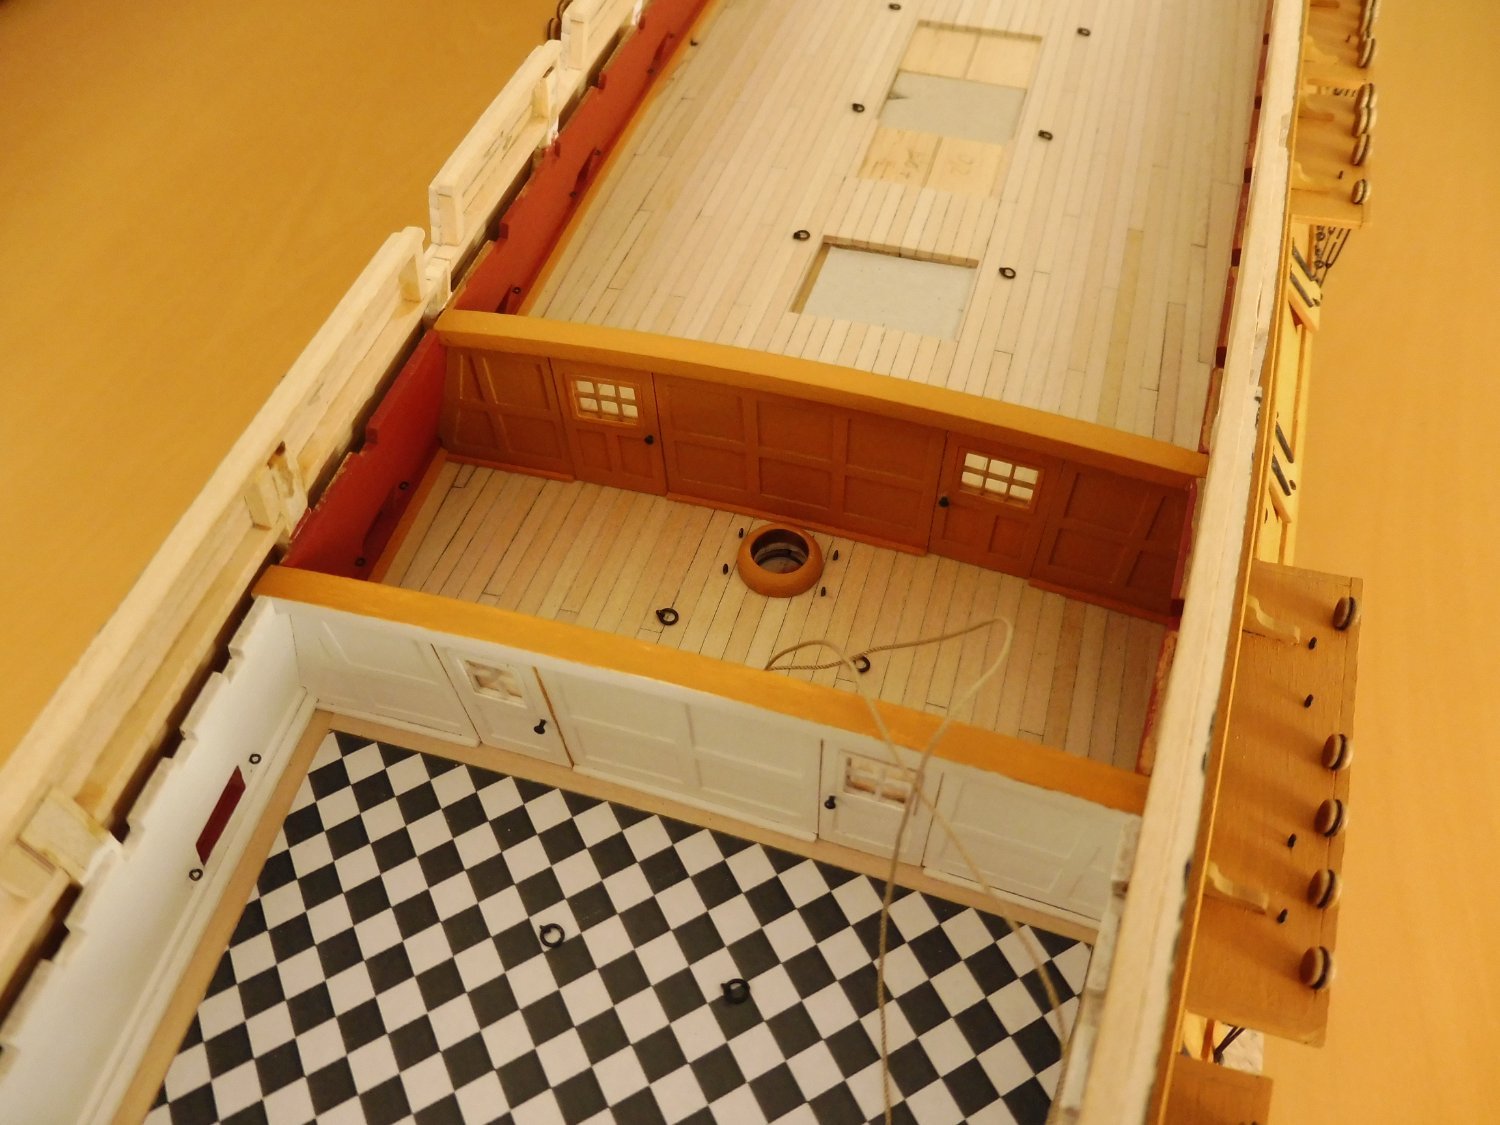
So, after redoing the pictures as screenshots, it works.....
The pictures show the furniture in the captain´s cabin, made on a 3D-printer - in the right scale! - and painted
.png.aaaca7d971457722080e5e075c3cf0a3.png)
.png.07fdf3f2e414c80a4c54aa8f6f333052.png)
.png.12de822b9d36abdbbfbd2eef070b2ea8.png)
.thumb.png.baaf5e4b5d958fcbc72b3a1f24d7f0fc.png)
.png.1c3a06e2516fae7be8f8d6135cdade1a.png)
.png.201eaec66bda02f64e4b500d8498f8a3.png)
.png.d32a623e0677b806e4efdd8996cdf8a5.png)
- Duanelaker, Ryland Craze, WalrusGuy and 6 others
-
9
-
Thanks, so I´m not alone with the problem....I will go on trying

.jpg.d626454e2a402a8ac0755db13c9eb9df.jpg)
.jpg.9e68f06021d1319a2413e699a8182aa3.jpg)
.jpg.d3a5fcb81d1f3ca3901299e8ce48e769.jpg)
.jpg.ffe82a5d934813ab355a44cb5d3cbcce.jpg)

.jpg.72bbf870c47eddabfafaa01745e9baed.jpg)
.jpg.28507959e69e62ee96c999a7d6cdeaa6.jpg)
.jpg.78f57d83df47cfaa7419cf705f5bd09d.jpg)
.jpg.d0d7cb28a12b9c3a93eca02c4db959a3.jpg)
.jpg.8d2fb4a0af7825e1df112a5e37757c1f.jpg)


.jpg.f476aeabc094a87c9dd68dfab6d50895.jpg)
.jpg.16ee7df47e2249aea8875fcbc0bc0b41.jpg)


.png.8decf8d36123455096df83cc75ad08cc.png)


.png.03366edcd657b231fa32681fda201d77.png)
USF Confederacy 1778 by wernerweiss - FINISHED - Model Shipways - 1:64
in - Kit build logs for subjects built from 1751 - 1800
Posted
Hello Steve,
Thank you very much, and there will be an update soon with all guns on deck and more deck equipment.....
Greetings
Werner