HOLIDAY DONATION DRIVE - SUPPORT MSW - DO YOUR PART TO KEEP THIS GREAT FORUM GOING! (Only 24 donations so far out of 49,000 members - C'mon guys!)
×


toms10
-
Posts
929 -
Joined
-
Last visited
Content Type
Profiles
Forums
Gallery
Events
Everything posted by toms10
-
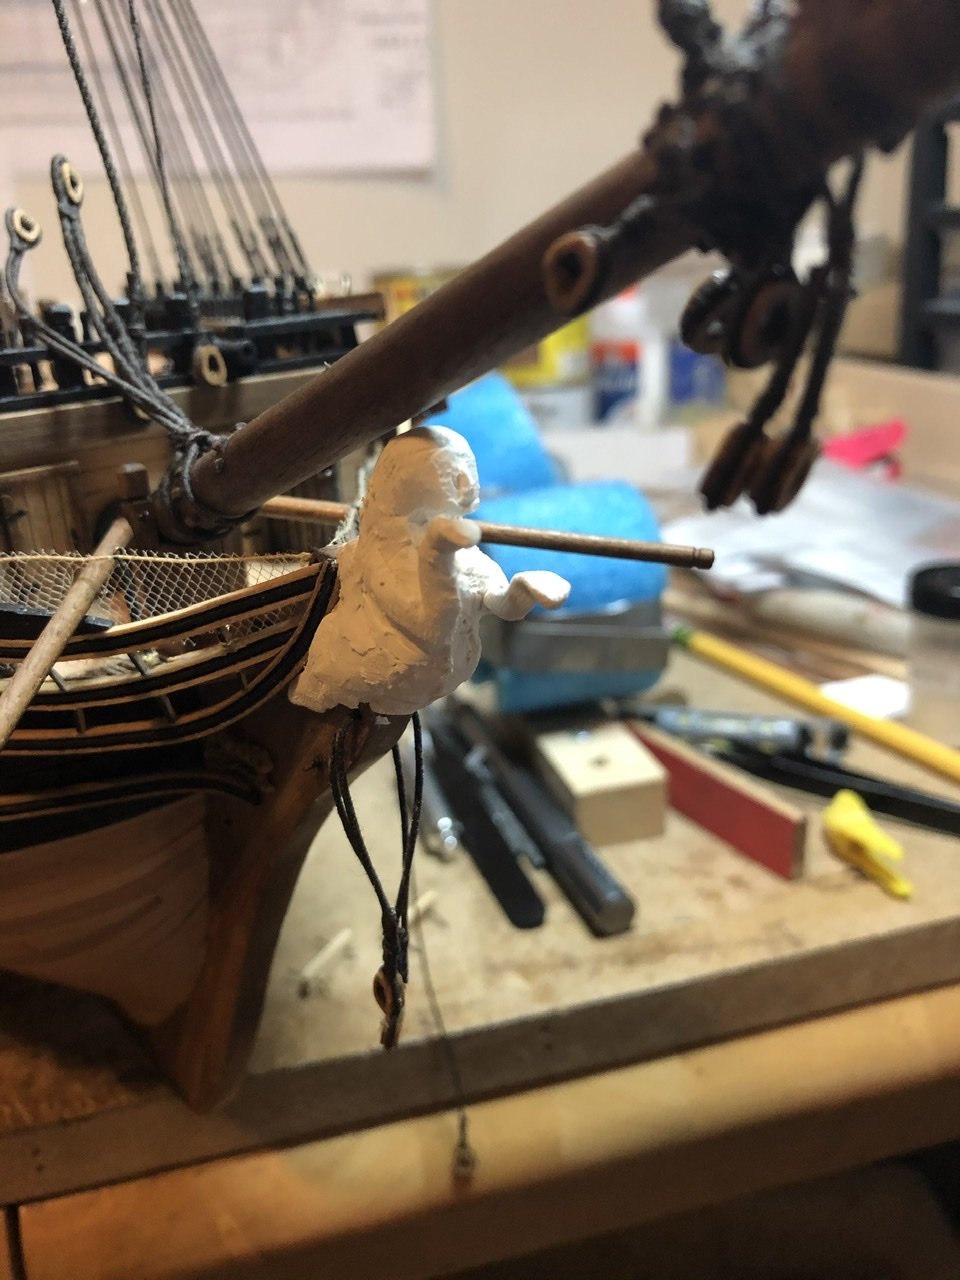
 So here is my figurehead as it stands today and probably forever. It is not glued on yet so I have time to think about it. It is not terrible i am am actually okay with it. I don’t see it winning too many sculpting honors but I don’t think I will be losing much sleep. 😜 Suggestion are always welcome. Tom
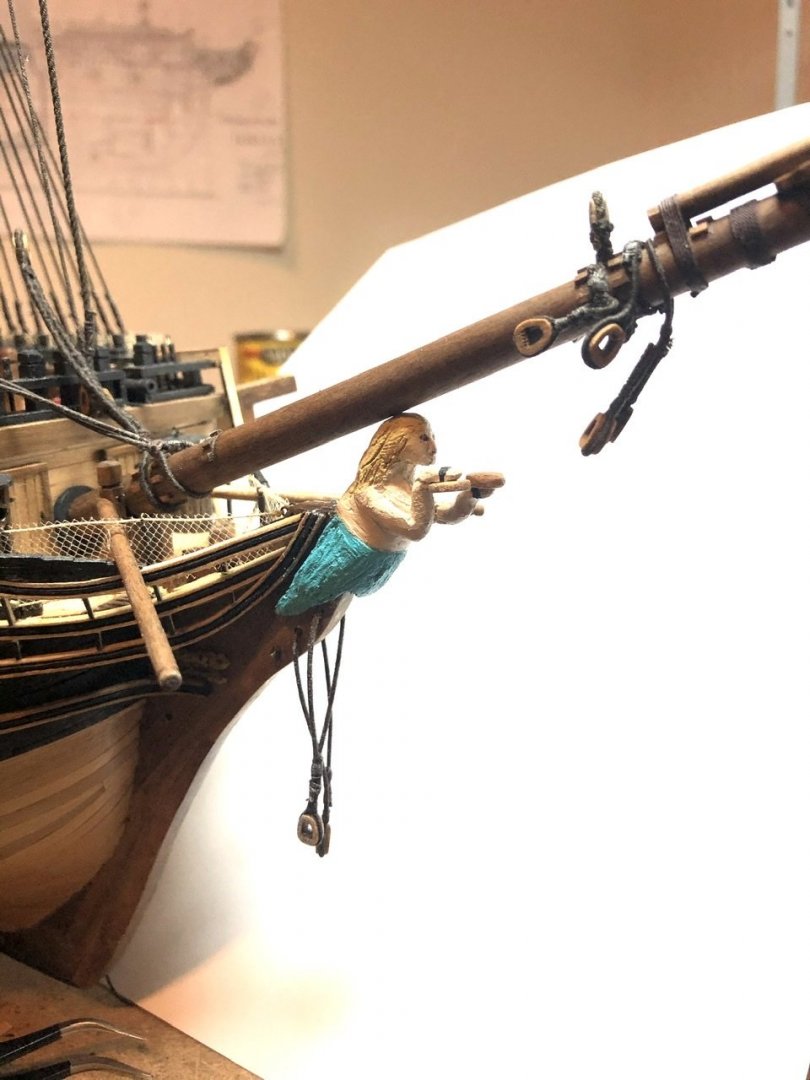
-
Thanks everyone, looks like I am going with my original gut feeling, the subtle color theme. Siggi, it is intended to be the 1790 version ... at least to the best of my abilities. Tom
-
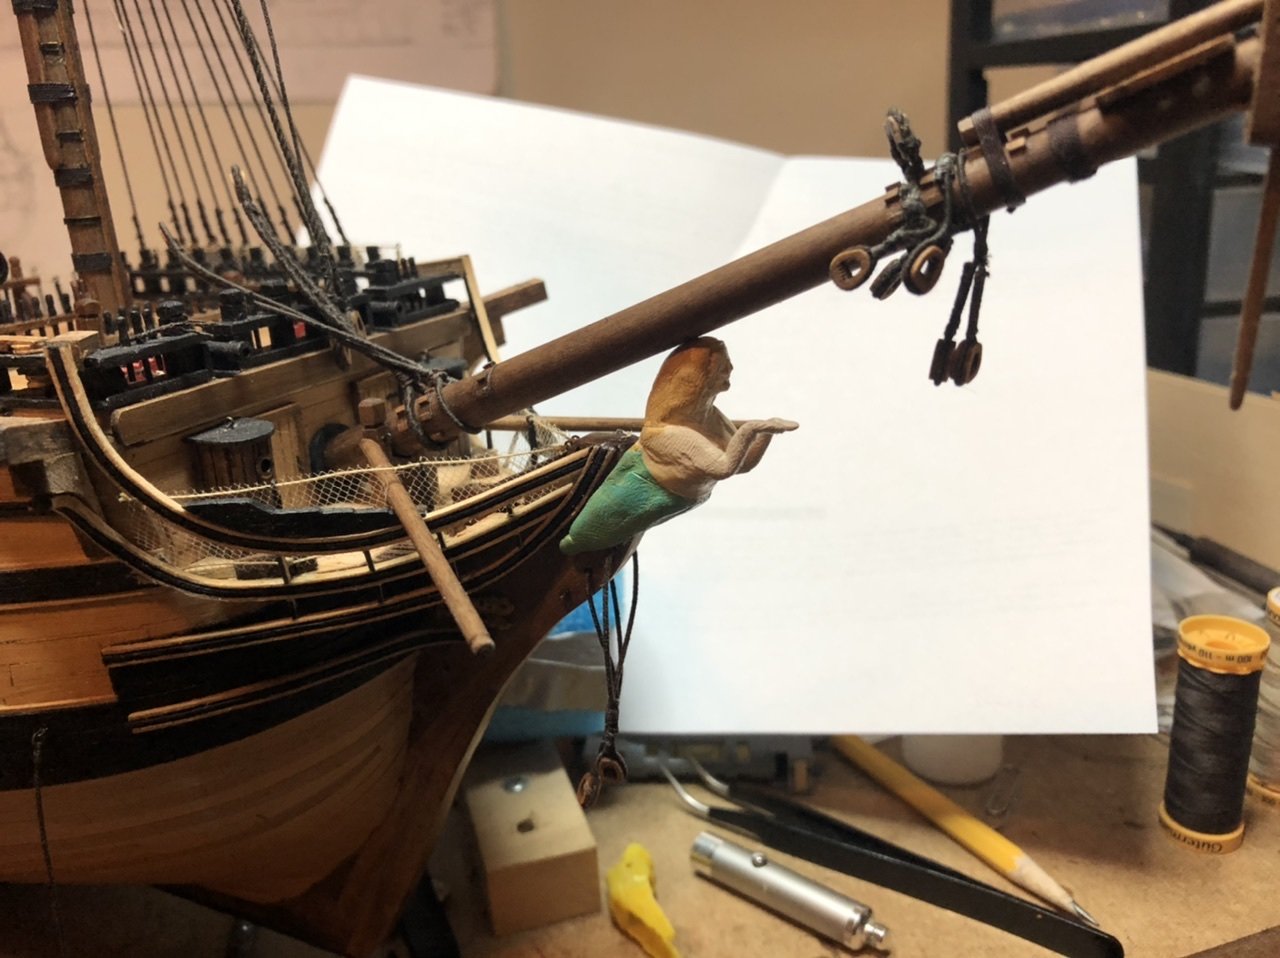
Hi MSW I need an opinion on the color of my figurehead. I could go all one color with antique gold. or I could go with antique gold hair, a buff color for skin and a sea foam green for the dress. I think if I went with the green I would darken it just a bit. I like the little splash of color. It brings a focal point to the overall model. Bear in mind the final sculpture is much better than this one in my opinion. This one is one of my earlier attempts and practice working with Sculpey clay. Just using it to play with for now. What does everyone think color wise? Does anyone have a different idea? Remember I am not an artist! Tom
-
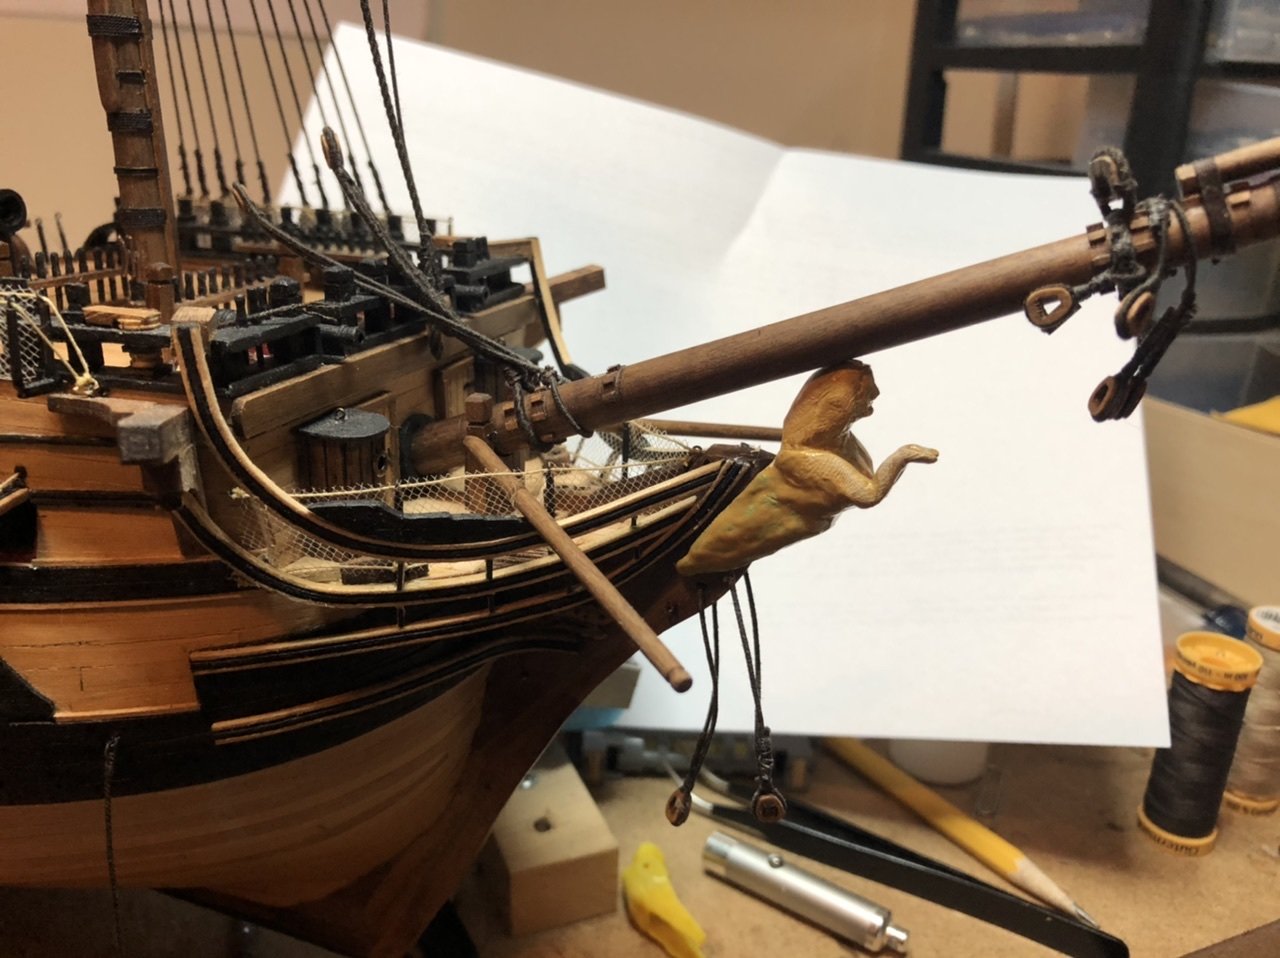
Okay. So in these troubled times I figured everyone could use a chuckle or two. Here is a very rough outline of my first attempt at sculpting my figurehead. It’s okay to laugh; I did. It would still need a good bit of sanding and filing after baking but then again I have a whole 1 hour of experience. This could take a while. Good thing I have enough Sculpy to make 20 more! Then i can pick and choose. In reference to my previous post, Michael Angelo... your job is safe. Smile and enjoy. 😁😜 Tom

-
Hi Jim The rats nest hanging from the fore top looks a lot worse than it is. As for the sand castles... the tide came in 😭. I have been snooping and know you are doing a Leopard cross section. You just can’t get enough of this boat can you! 😁 Tom
-
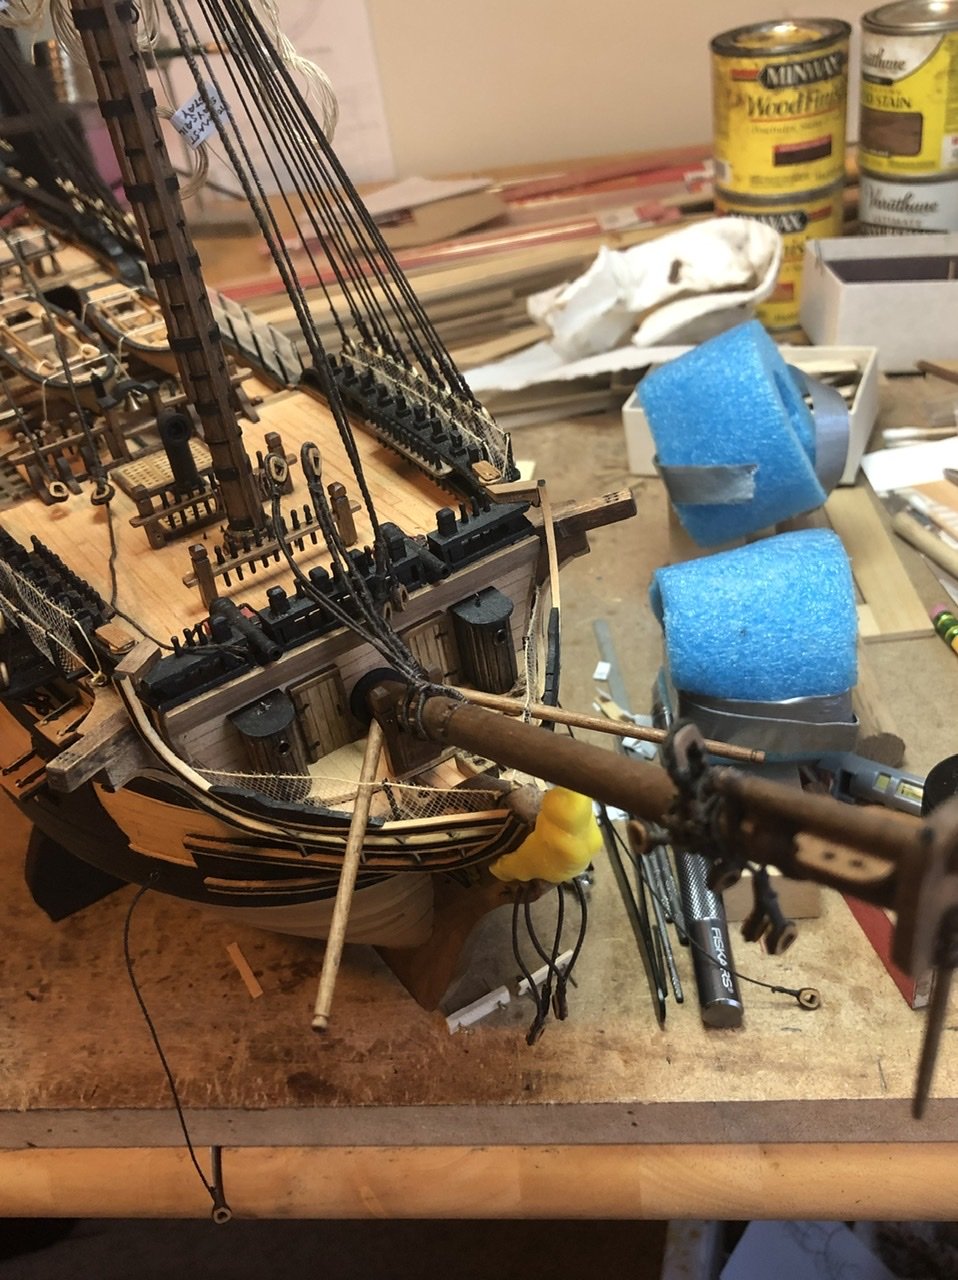
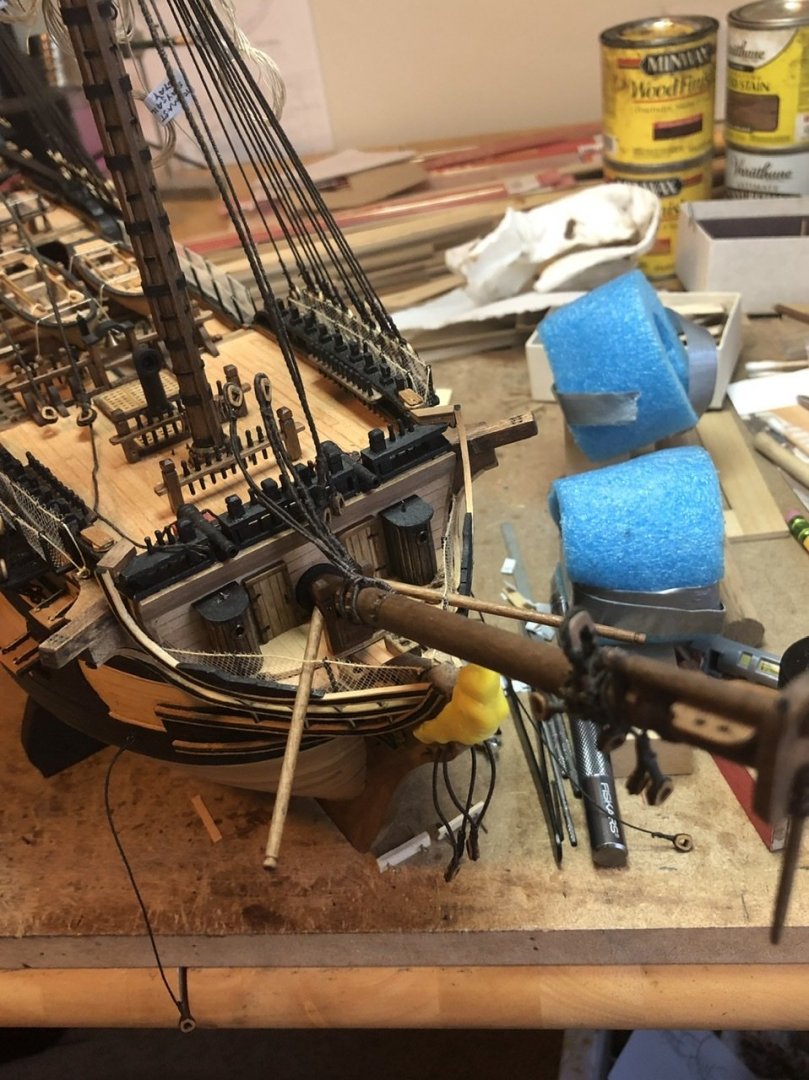
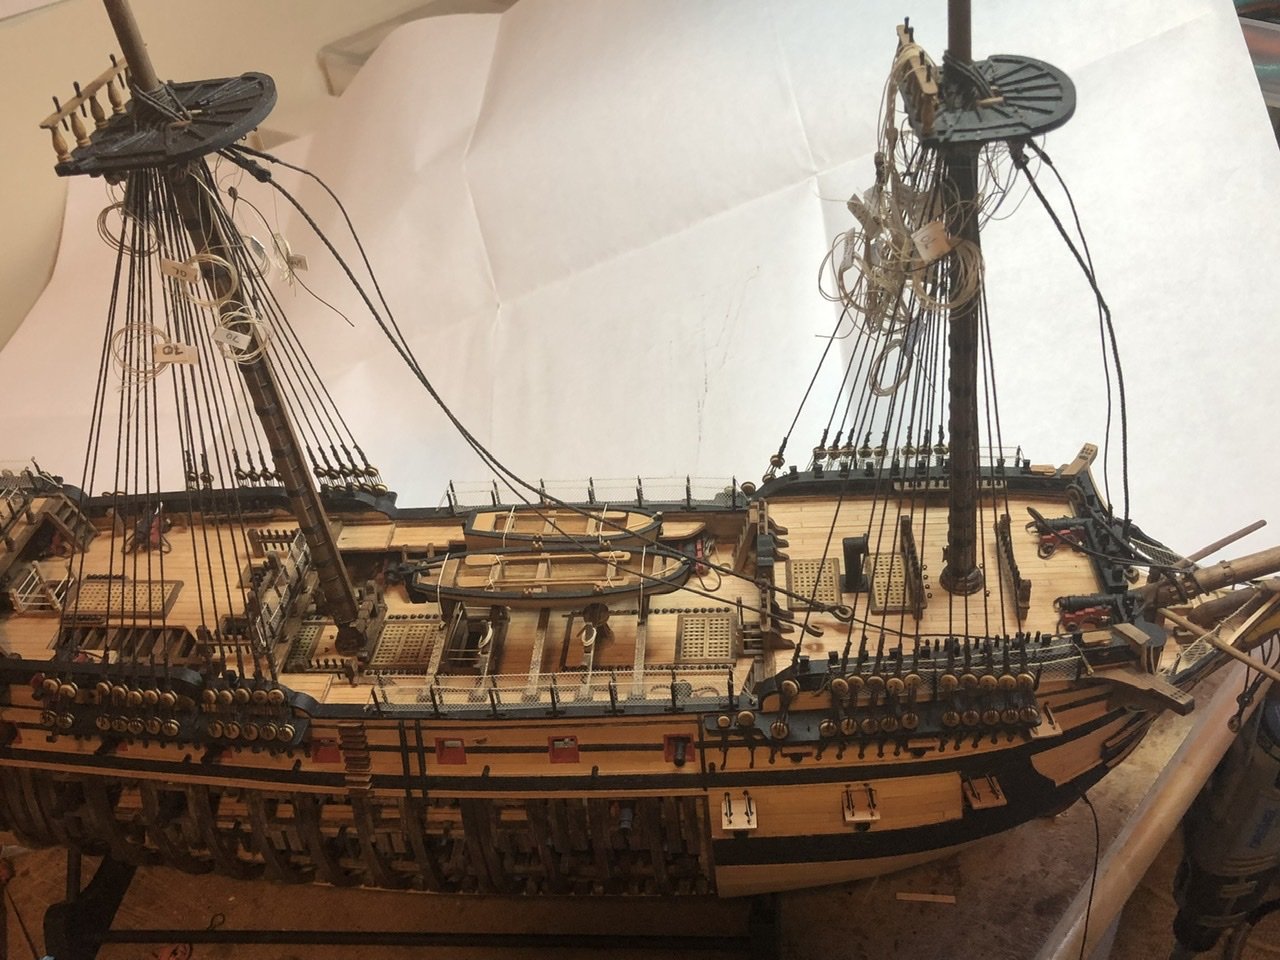
Amidst the C-19 chaos I managed to get in a little modeling. I got the lower shrouds for the main and fore masts installed. Also have the main and fore stays and preventers made. Just need to tie them to the bow sprit and then snake them. That should be fun. I also managed to get the bow sprit glued in and attached the hearts for the stays and other standing rigging. Boomkins are dry fit for now. I think it is time for me to put on my sculpting hat and get the figurehead completed. Right now there is just a rough 5 minute attempt out of play-doh for spacing. My sculpting endeavors are not all that extensive unless you count the sand castles 🏰 at the beach! This should be fun. Michael Angelo move over - there’s a new kid in town. 😜😁. Below are some progress pics. Stay safe everyone and happy modeling! Tom
-
I am half Hungarian so when I saw the title of this thread I got all excited. There are some amazing models shown but I did notice only one sailing ship. Okay I know, being a land locked country probably hampered their quest to build a formidable armada. They could have built one first rate and just anchored it in the Danube? Ha ha ha. Tom
-
Hi Learner, Thanks for feedback. I am way past the lighting stage. That needed to be completed before the hull was closed up. To your point though, there are only a few yellow lights to somewhat illuminate the lower decks. They actually look like candle illumination. You can't see the LED bulbs, they are hidden behind walls and I am bouncing the light off of the surfaces to tone them down. Tom
-
Thank you everyone for your input. As always, I learn from the MSW site. It seems to me that the majority of information points to putting it at the top of the gaff. That doesn't make it right as Druxey points out only a time machine would settle the point. I just happen to notice this situation as I am getting ready to make all the yards. I intend to put sails on her so she would be out to sea. Based on all the info above I am thinking about going with the ensign at the gaff peak. I am still a ways off from this point in my model construction so I will have plenty of time to change my more than once.🙂 Tom
-
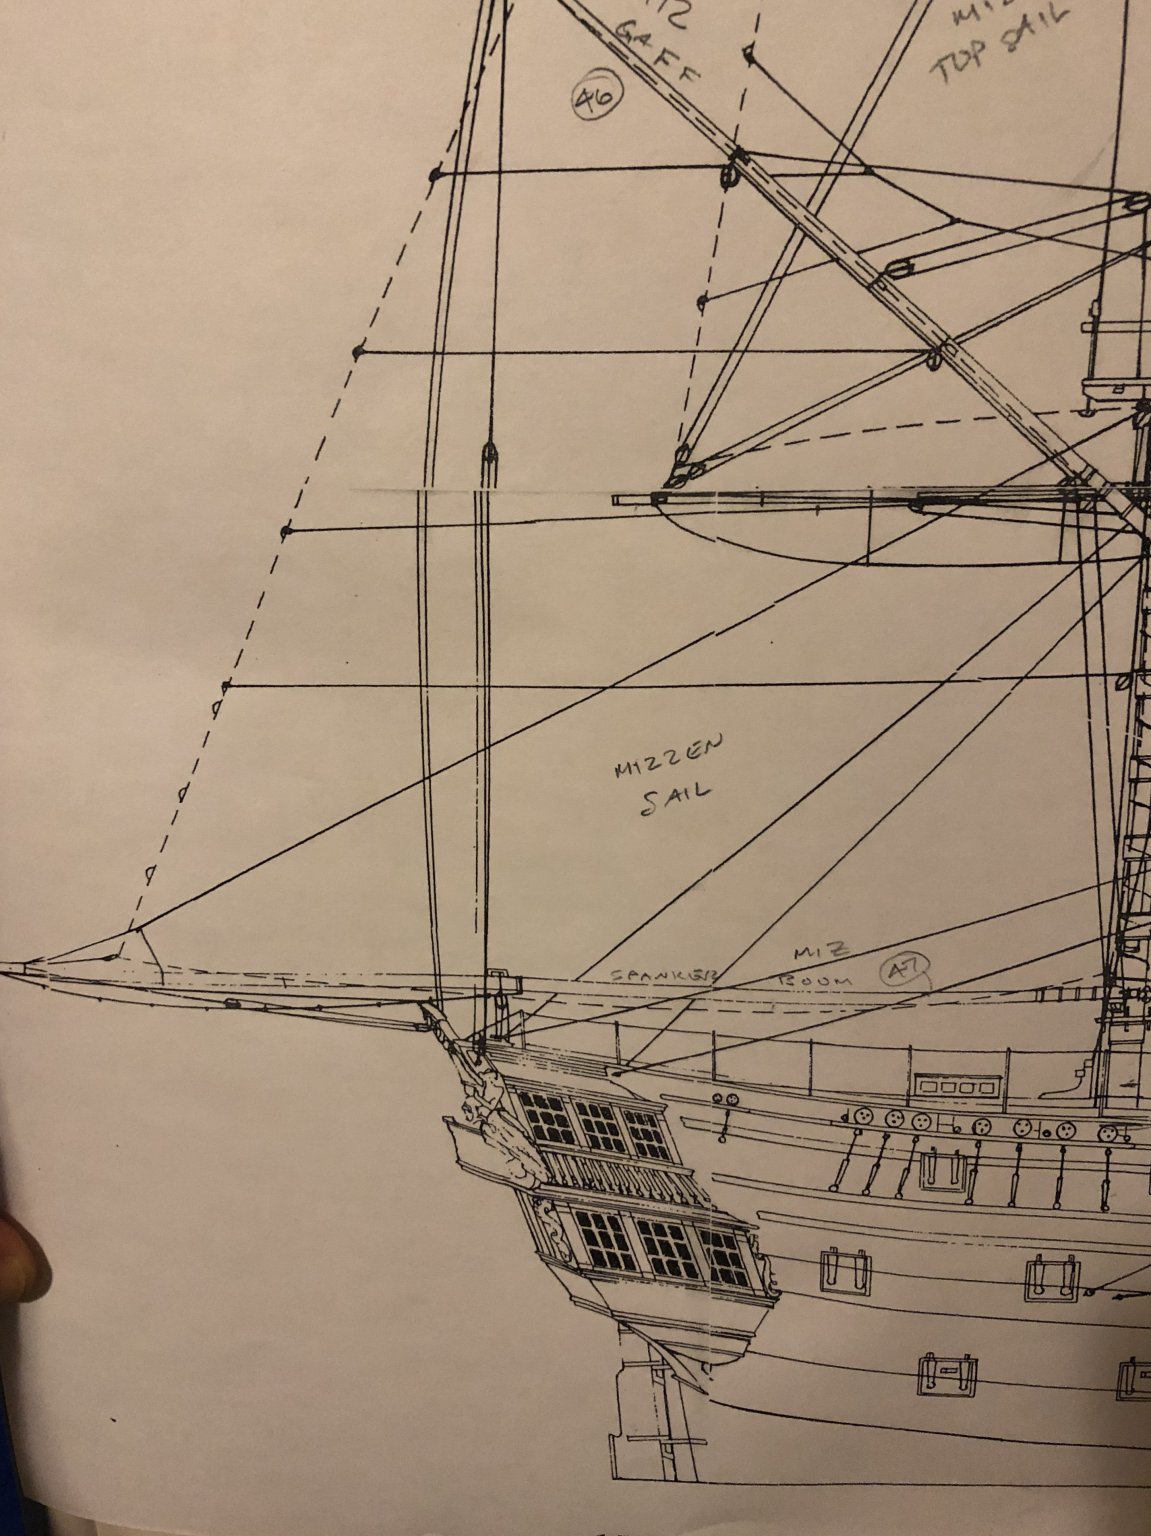
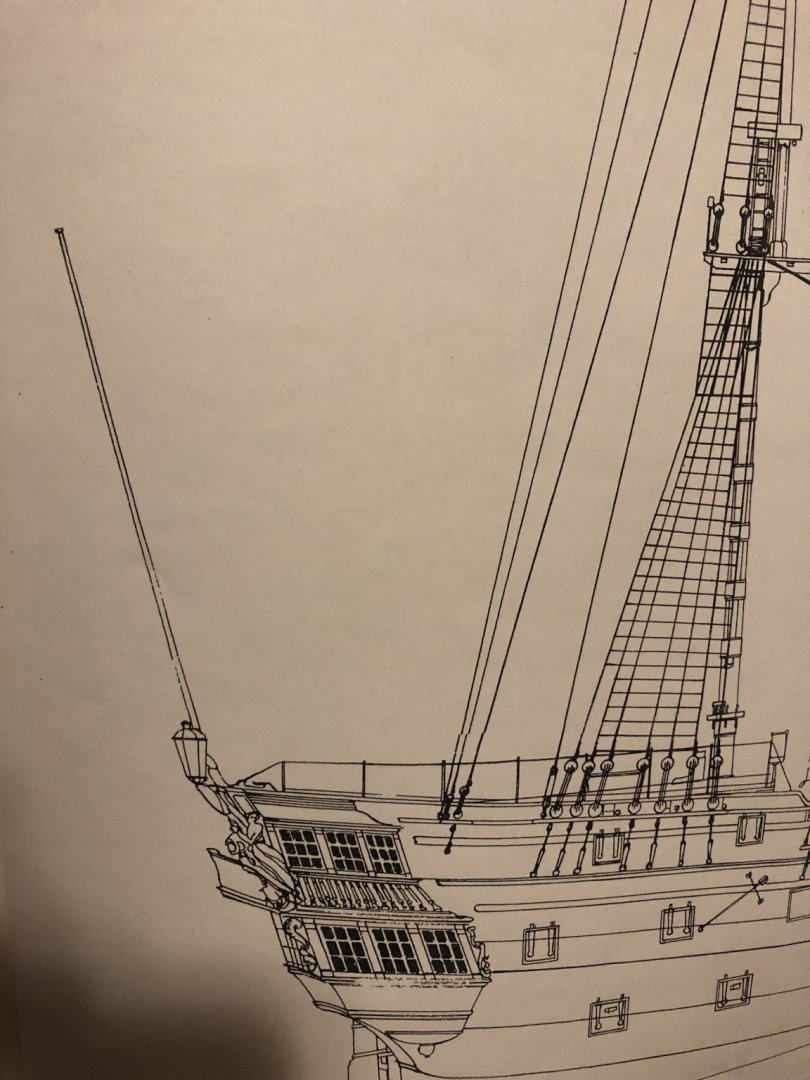
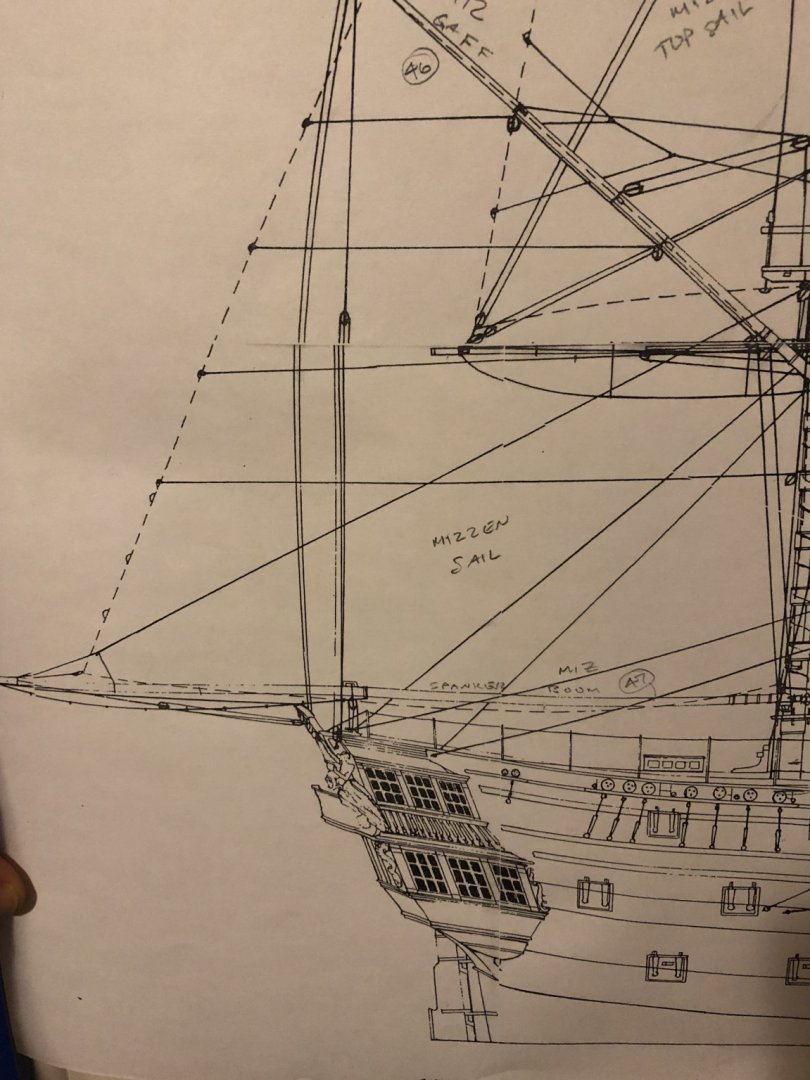
I have a question regarding the stern flag pole on my HMS Leopard rigging plans. The standing rigging plan shows what I believe to be a flag pole mounted to the stern. Seems reasonable until I look at the running rigging plan and see see that the spanker boom runs out past it. How does the spanker boom go past center when rigged to the port or starboard side? Far from a rigging expert, what am I missing? Standing rigging plan running rigging plan Any help would be appreciated. Tom
-
Just received my copy. Looks like it contains some useful and practical info on how certain tasks were accomplished by this particular scratch modeler. Looks like I have some decent reading material for those rare times when I actually take a lunch hour😁 Thanks again for the recommendation Bob. 👍 Tom
-
Roter Löwe 1597 by Ondras71
toms10 replied to Ondras71's topic in - Build logs for subjects built 1501 - 1750
Ondras, Very nice work on this model. I have this on my list of possible future builds. Your work is pushing this model higher up on my list. Keep up the great work and keep sharing pics. Tom -
Just put my order in. Thanks for the insight Bob. Tom
-
Hi Jim I don’t know about the final stages. I still need to make the figurehead and various other items as well as all the yards not to mention all the sails! I have been jumping around a bit to cut down on the repetition of some tasks. Still a long way to go. I made my own belaying pins. As you mentioned, the purchased ones are a bit out of proportion. I made 2 small jigs that consisted of a small strip of wood with 2 nails set at the distance I wanted the dead eyes to be apart from each other. I put one pin through the fixed deadeye in the channel and the other in the deadeye that was temporarily seized into the shroud. Once the shroud was pulled taut to the correct length I finished seizing the deadeye to the shroud. There is a bit of putting on and taking off of the shroud to get completed but it works for me. You are right regarding the pin rails. With a full set of sails I need way more than what is shown on the plans. Tom
-
Had to do some business travel last week so things are going a bit slow. Started to work on the lower main mast shrouds. This is going to take a while. Made all the rope for the shrouds for the three lower masts. Still have to get them sized to length and served as I mount each one. Hey there are only 58 lower ones with 12 done already! I’m practically done! Okay I know what everyone is thinking... just don’t pop my bubble😜😁 Tom

-
Hi Jim, I do plan on having a full compliment of sails including the stay sails between the masts, but not the studding sails. As I said I spent the better part of 2 weeks just planning out where all the lines will go. With a full set of sails comes a lot of lines which is why I have so many pins. I did remember to hang the block under the main and fore tops for the nave lines. Thanks again for the heads up. I will be making the various size shroud ropes tomorrow and start looking into installing the lower ones. Then I am off to Philadelphia to visit my daughter for a couple of days. The model seems to be taking a back seat again... darn life getting in the way again!🙂 Tom
-
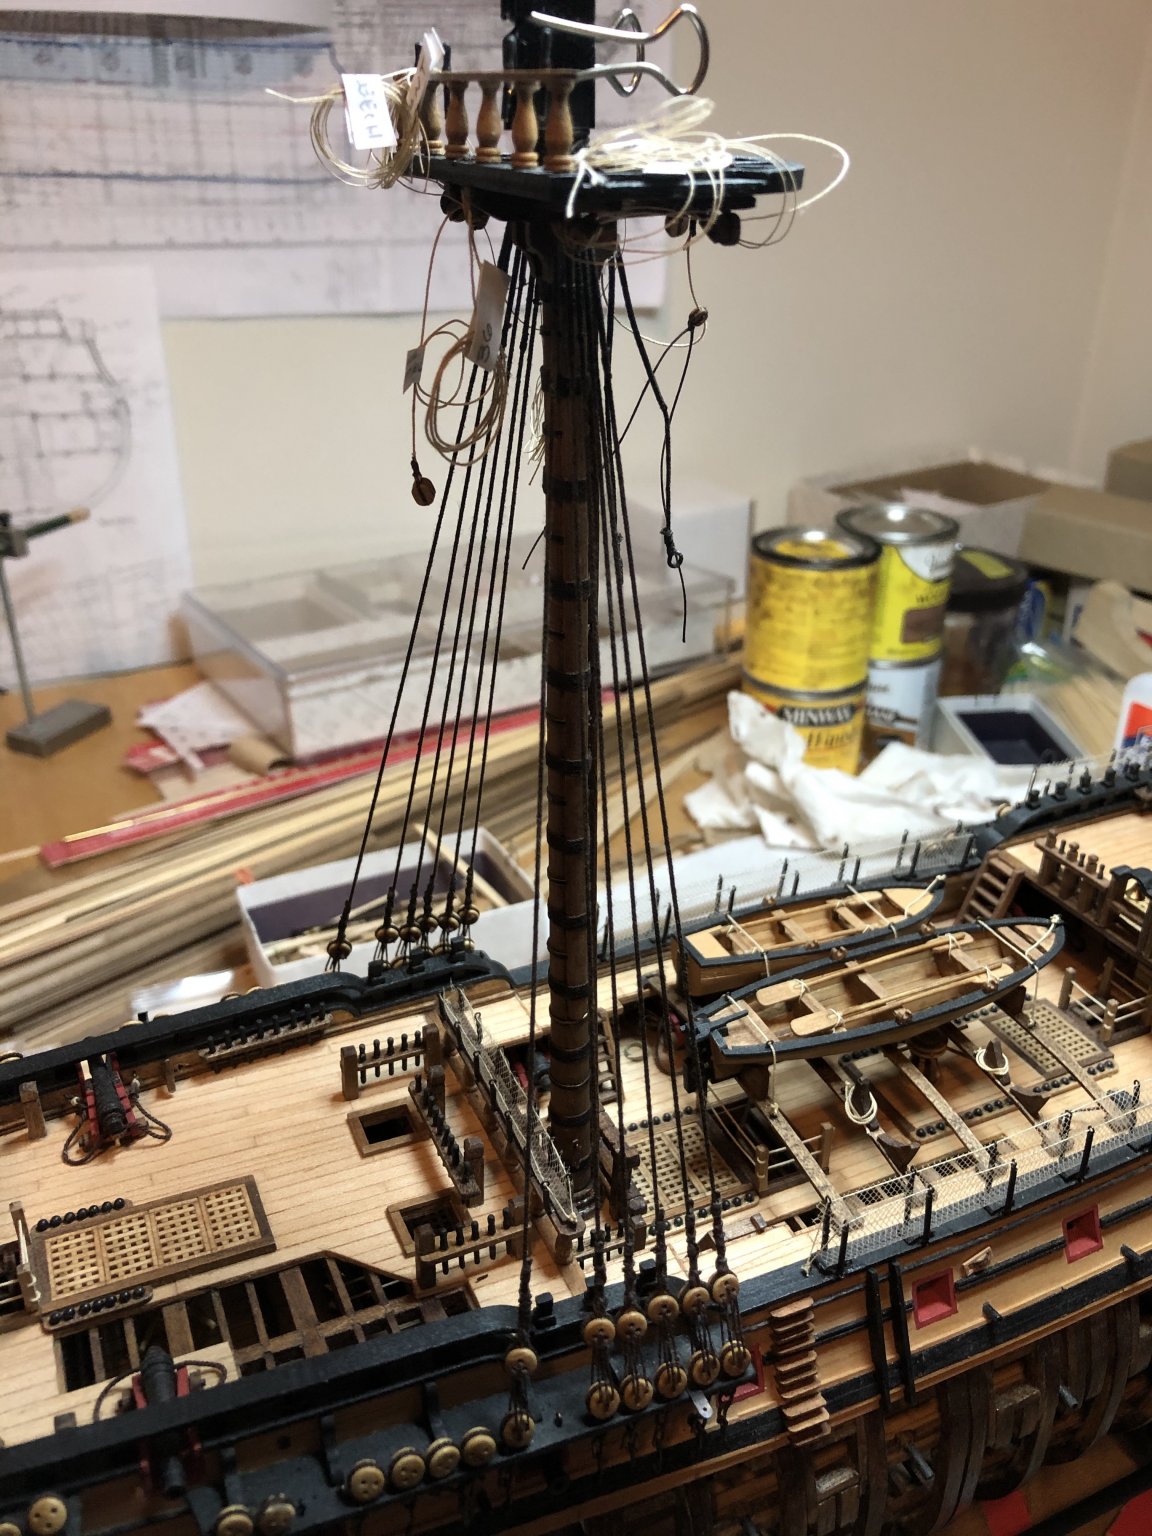
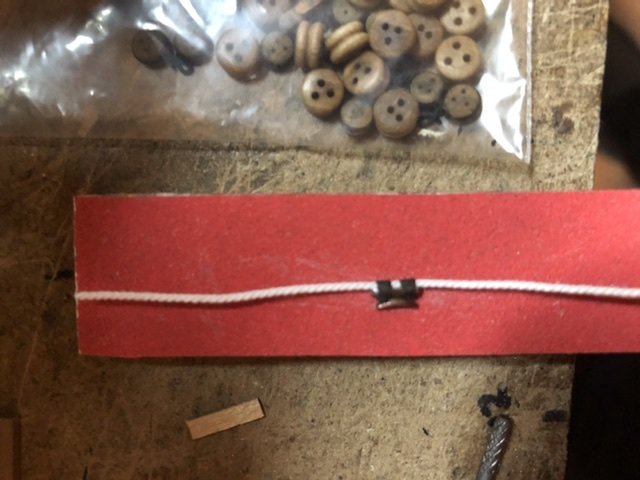
Slow progress report. I spent the last few weeks pouring over books about rigging this beast. I also spent a week layout out the belaying points for all the lines. That was quite the project. I also put in some extra belaying pins based on what I learned from the books and what Jim (Bluto1790) told me about his experiences. I started to attach lines and blocks to the “hard to get at” areas while things are yet glued into place. I also practiced tying a cleat onto a shroud. My shrouds won’t be white on the model. I made a white one so I could see what I was doing or trying to do. ! On another note, I attended the monthly meeting of the CT Marine Modelers Society (Thanks Ron aka Hollowneck). I will be becoming a new member so now I guess I am now officially insane. 😁😜👍 Tom
-
I also have used this site. Great service and response. Tom
-
Hanging and taping lines in loops until used
toms10 replied to jgilchrist800's topic in Masting, rigging and sails
John, While reading your reply I thought maybe paper clips could work. Less bulky than clamps/clothes pins. I am not sure I have never tried it. Tom -
Hanging and taping lines in loops until used
toms10 replied to jgilchrist800's topic in Masting, rigging and sails
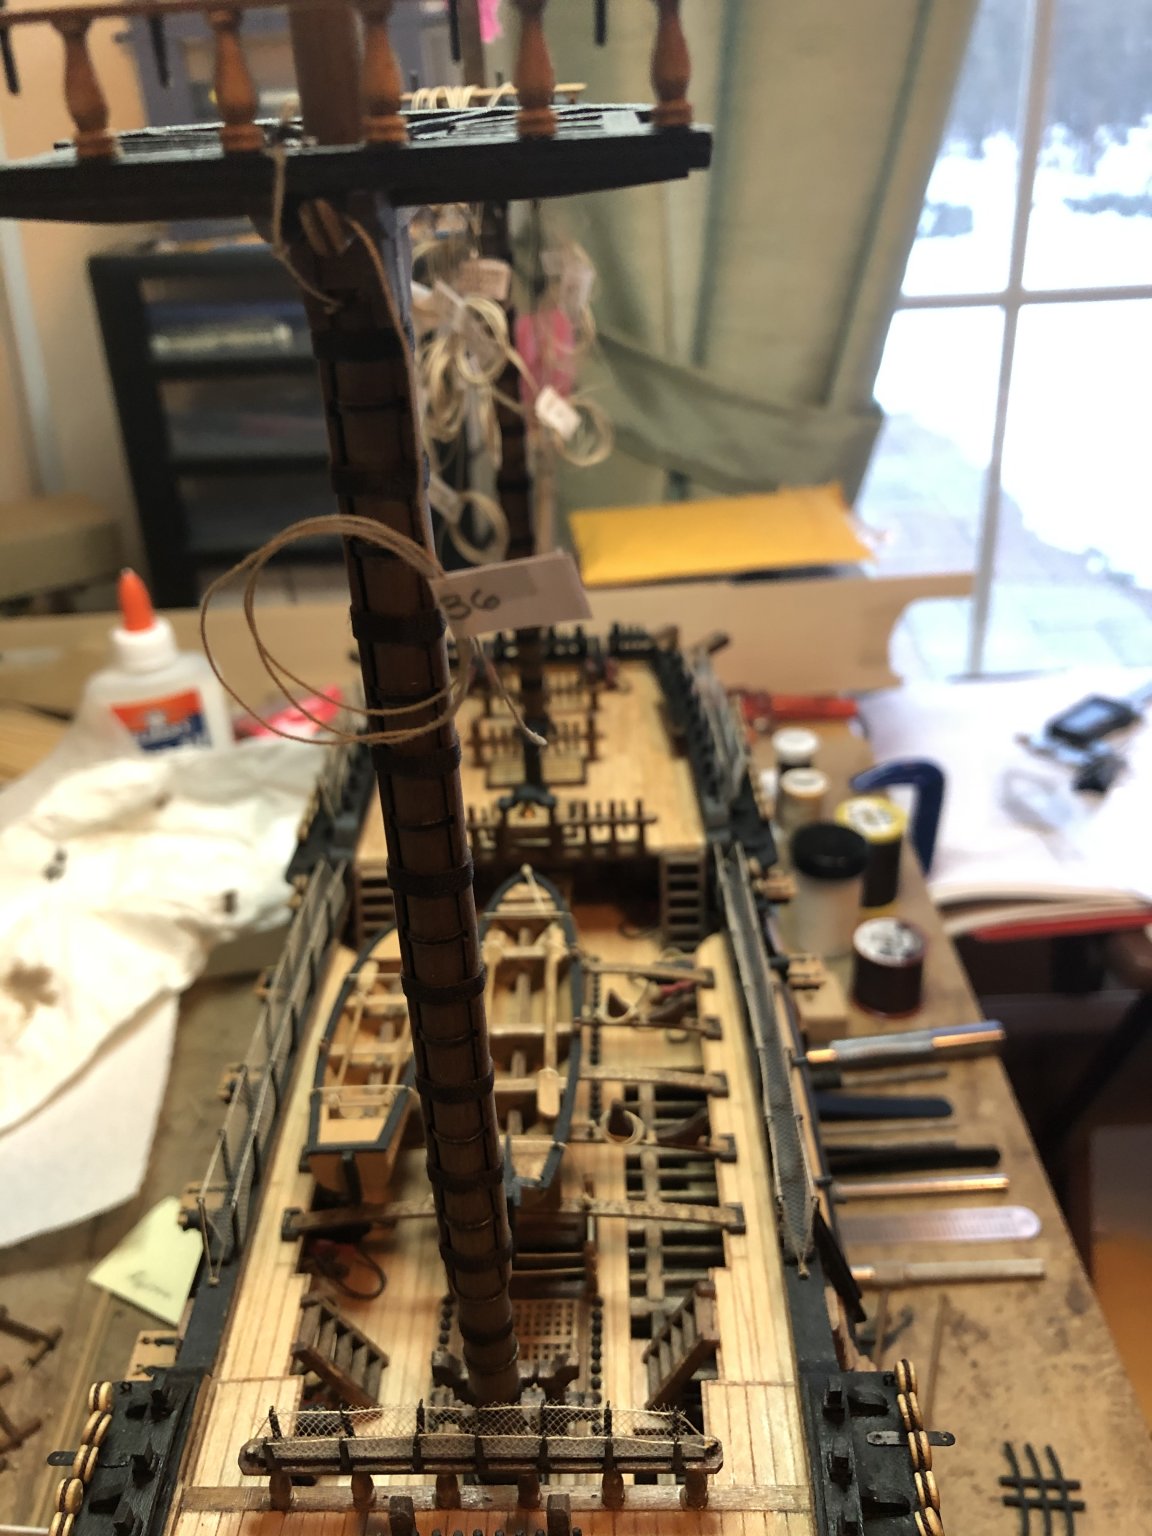
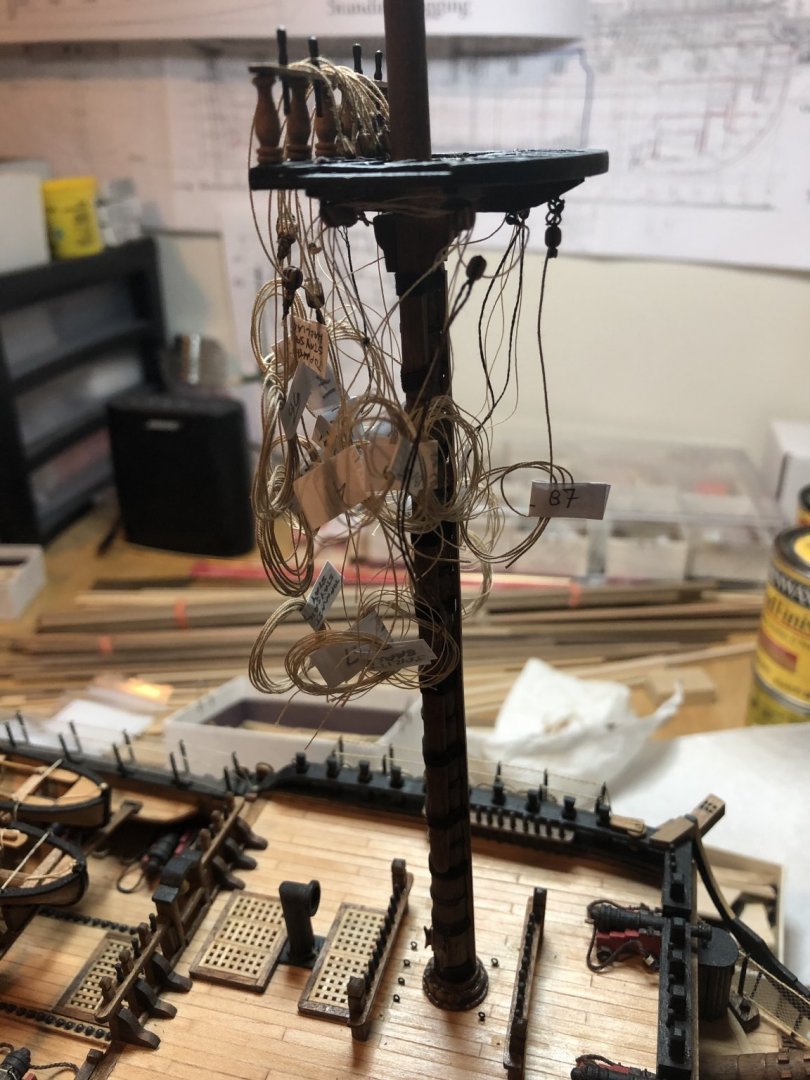
John here is a pic of what I do with the sticky note paper to keep my lines somewhat organized. There are a bunch hanging from the top on the foremast in the background Tom
-
Hanging and taping lines in loops until used
toms10 replied to jgilchrist800's topic in Masting, rigging and sails
Hi John I have not yet had this problem. I just press the paper around the coiled rope and it seems to hold. I will try to post a pic when I get home tonight. Tom -
Hanging and taping lines in loops until used
toms10 replied to jgilchrist800's topic in Masting, rigging and sails
Instead of using tape, I use the little yellow sticky (memo) pads. I cut the parts with the adhesive into little strips long enough so that when I fold it in half over one side of the rope loop it sticks to itself. I can even write on it so I can reference what line is what. That is important to me as I am still learning all the aspects of rigging. Just my 2 cents. Tom -
Hi Jim I drafted it myself using Solidworks. I don’t remember the exact book but I do remember looking up room and space information and just started laying them out using one of the center section planes on the plan and working from there. Probably not totally correct but at the time with my limited experience it seemed to work. Tom
-
Hi Jim You’re a funny guy. Actually haven’t touched it. Have to get all the Christmas shopping done first... oh yeah, and maybe a party or two... or three. 😁. Hopefully next week during the holiday week I can put some time into them. Happy holidays to you and your family. Tom
-
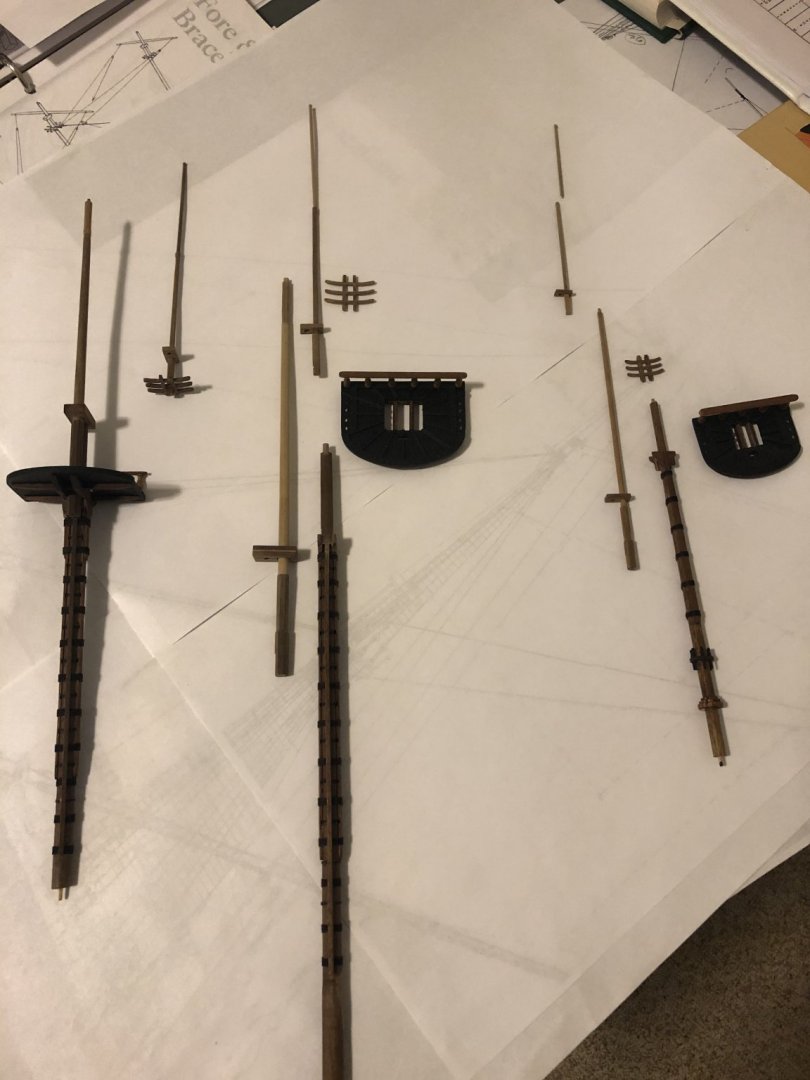
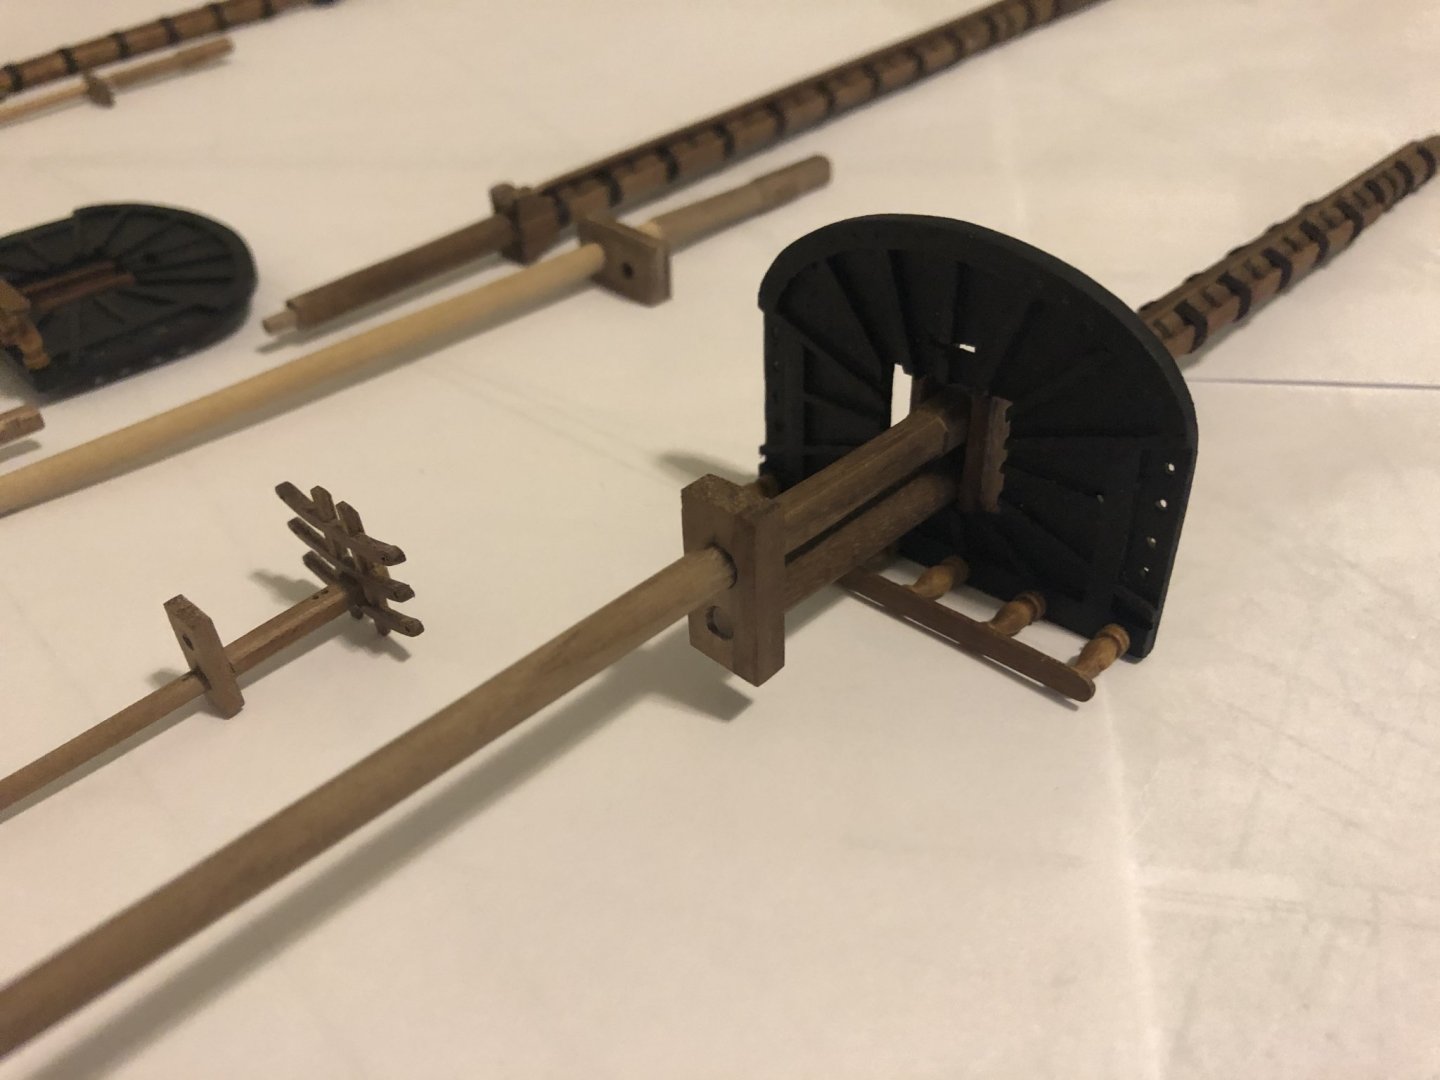
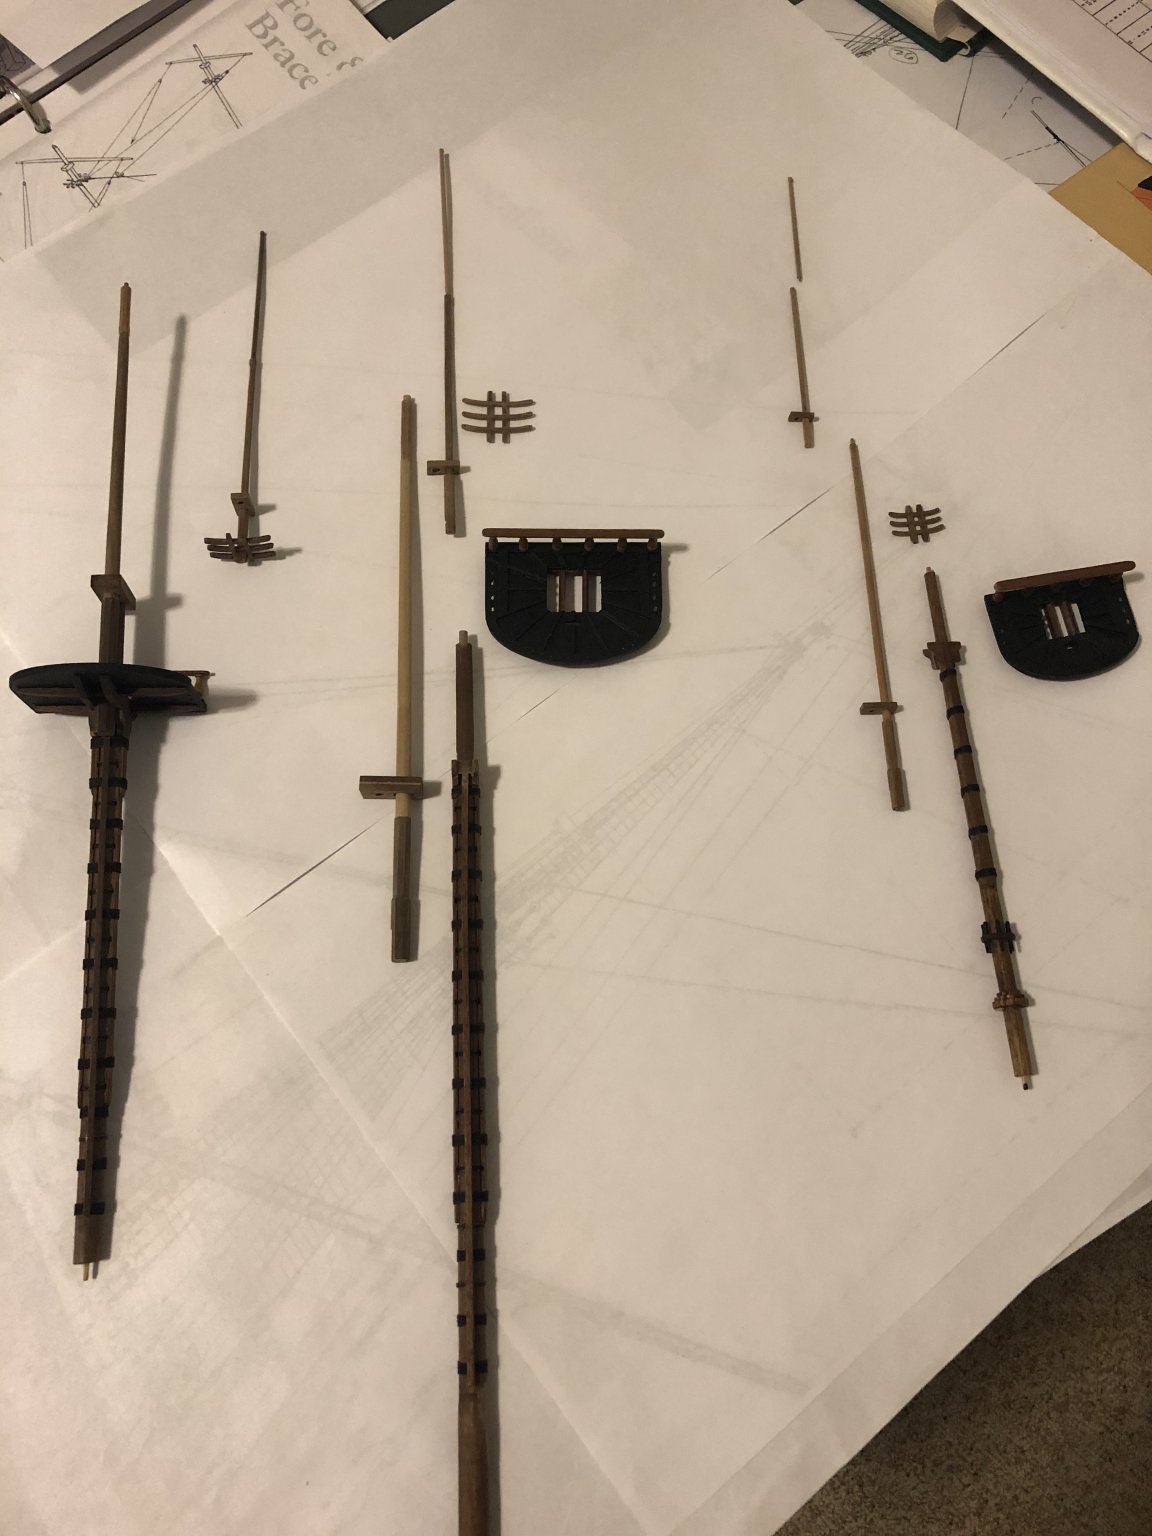
It’s been a bit since I posted but I managed to get all the mast components completed. Still need to stain the upper components to match the lower ones. There was a lot more work making them than I originally thought but all came out pretty good for my first scratch build. Everything is still in the dry fit stage until I can go through the rigging plans to determine what blocks go where on the tops, crosstrees etc. Tom