HOLIDAY DONATION DRIVE - SUPPORT MSW - DO YOUR PART TO KEEP THIS GREAT FORUM GOING! (Only 24 donations so far out of 49,000 members - C'mon guys!)
×


toms10
-
Posts
929 -
Joined
-
Last visited
Content Type
Profiles
Forums
Gallery
Events
Everything posted by toms10
-

DN Iceboat by MikeR - FINISHED
toms10 replied to MikeR's topic in - Build logs for subjects built 1901 - Present Day
Hey Jack, Another ice boat... you are a trend setter! Tom -
MD1400CS, I have tried nail polish remover and rubbing alcohol without much success. Earlier on this thread Mark mentioned using acetone which I have not tried yet. Jim, I am going to try some cellulose thinner. Just dipping the parts in a solution is a whole lot easier that the flux paste method with one part at a time, especially if you are doing a lot of homemade brass hooks and eyes. Tom
-
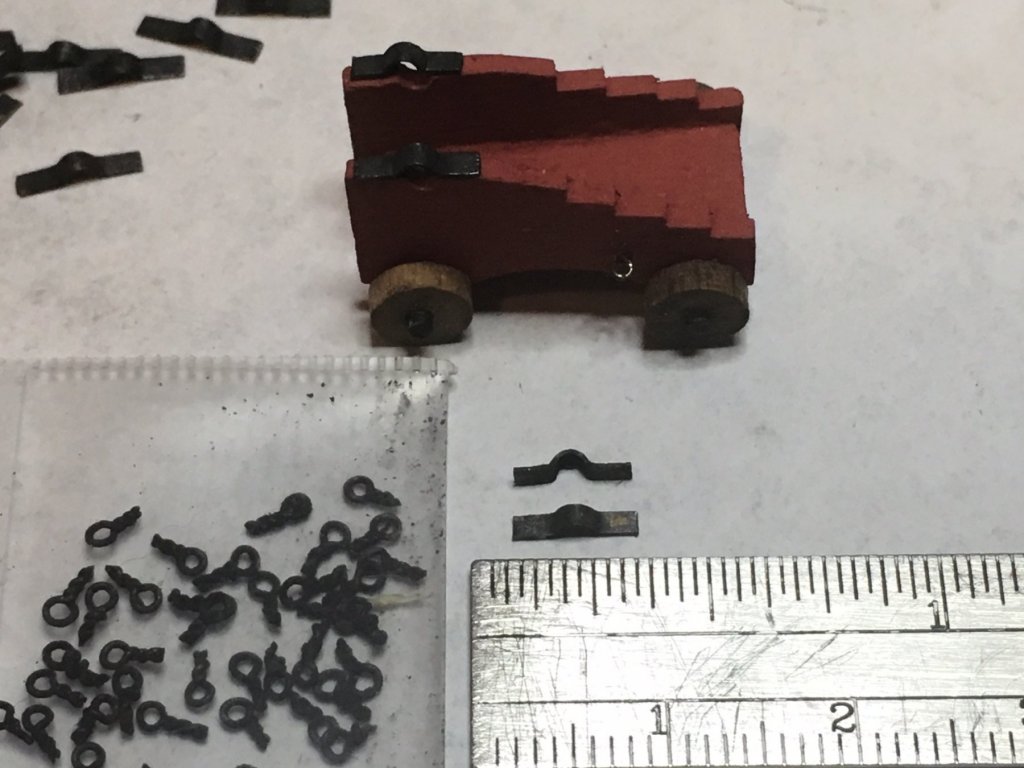
Just a small update. I haven't work in the shipyard for several weeks now... just too much other stuff going on. But I did want to share an idea I had. I was having quite a difficult time getting these little brass pieces clean enough to blacken properly. They are too small to hold and rub with steel wool or anything else. I tried soaking in vinegar, nail polish remover and various other cleaners. The parts would get coated in a black powder but not do much with regard to actually blackening the metal. The powder would just rub off and leave me with a splotchy mess on the part. I then tried using flux paste that you would use for soldering copper pipes. I dipped the part in the paste while holding the edges with an old pair of junk tweezers then quickly burned off the flux with a small torch... about 5 seconds. I then just tossed the part into the blackening solution (Birchwood Casey). After repeating this 30 times (once per item) I let them soak for about another 5 minutes I took them out. The results were very good. The parts looked like blackened iron. This is probably old news to some but thought I would just share. Tom
-
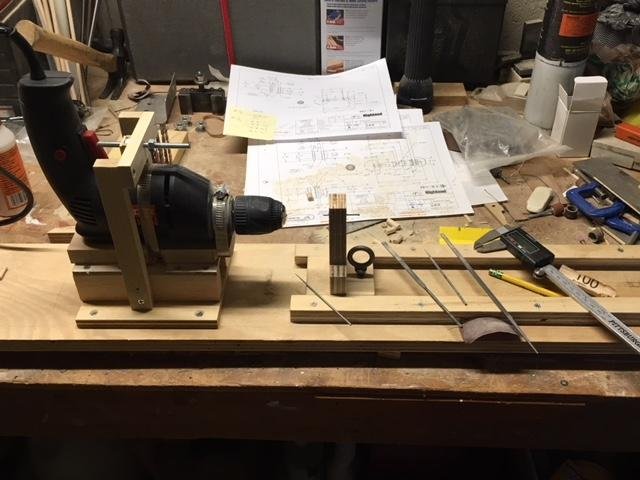
Hi Jim, I love your lathe. As you said, it is fine for the amount of turning that we do. I plan on putting a small electrical box with an outlet and on/off switch on mine so I can plug the drill into it directly and just use the switch to turn it on and off. Right now I have the drill plugged into the wall and turn the threaded rod to push down on the trigger to get the right speed. To shut the drill off I have to unscrew the rod to release the trigger. Kind of a pain. With the switch I can adjust the speed with the threaded rod and just leave it there. Tom
-
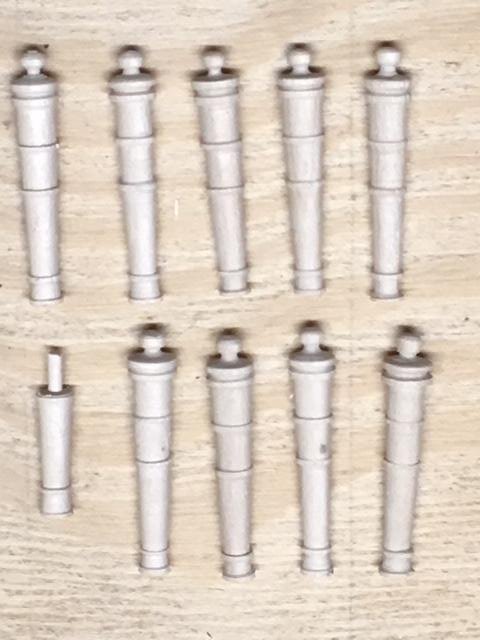
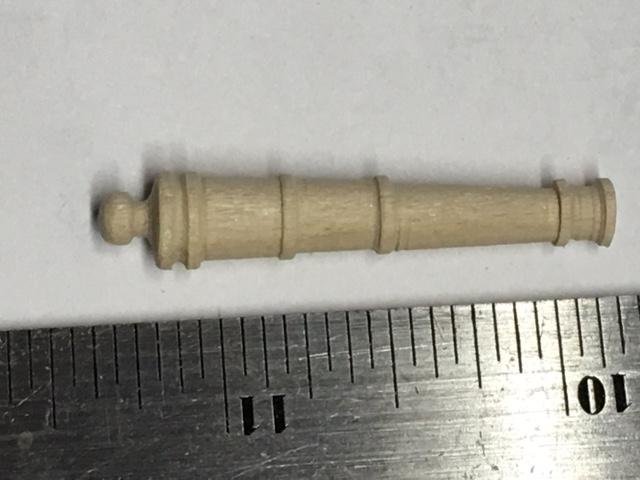
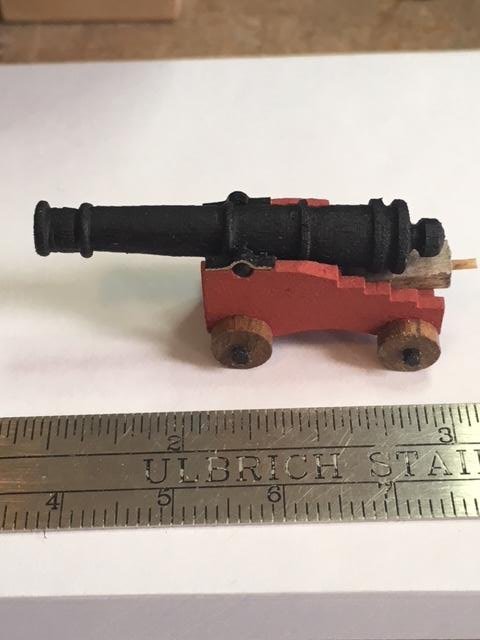
Hello everyone, I am back on my feet again with a new job. I have started up work again in the shipyard. I made the 24 pounder cannons on my home-made lathe. Basically just mounted a $15 drill from Harbor Freight to a board, made some dovetail guides and a matching tailstock. Filed down some hardwood dowels from Walmart into the shape I was looking for and had a cannon barrel. These pics are my first attempts so hopefully my skill set will improve. Couldn't justify spending $500+ on a mini lathe for what I want to do with it. This seems like it will work out... at least for now. The 54 cannons I will need will end up costing me about $5 plus $15 for the drill. Glad to have life starting to get back to "normal". Tom
- 385 replies
-
- 13
-

-
Thanks everyone for the support. I will get through this and will be making saw dust again in time. Tom
-
Hi all, Fell victim to corporate world decision making last Thursday. "Due to restructuring" I lost my engineering job of 39 years along with many others. Evidently the engineering department doesn't need a manager anymore. Sounds like they just wanted to get rid of higher salaries and just get by with splitting up the work. They got rid of the experienced and a token few younger to keep the lawyers happy. Anyway, my ship modeling has come to an abrupt stop until I can get back on my feet with something else. Brings new meaning to stress and anxiety so I don't want to mess with the boat now. Just not the right frame of mind and there are now other priorities I must attend to. Probably won't be posting much progress for a while but I will be checking in on everybody else. Moderators, if this is inappropriate I apologize in advance and please remove it. Sorry, just had to vent a bit with my modeling friends and let them know the shipyard is temporarily closed "due to restructuring"... my life. Tom
-
Thanks everyone for all the likes. Mark, as for the type of wood, I did make a test one on a lathe available where I work out of walnut and it actually came out pretty good for a first attempt. I was using it as a template piece on one of my 24 pounder carriages to verify the gun port and deck height relationships. That is when this wooden cannon idea clicked. I plan on trying just ordinary hardwood dowel you can get at Home Depot or Walmart. I think it is maple. Oak would definitely be too grainy and pine would probably be too soft and stringy. I guess I will just have to "play" a little once I finish building the lathe. I am hoping that will be this weekend. Tom
-
Thanks Mark for toasting my "pile of sticks". I was originally going to make the cannons out of brass and then blacken them but thought more about it and decided to use wood and flat or satin black paint. Not sure what the benefit of using brass is if it all ends up black anyway. I did try to blacken the rudder hinges and nails with Casey but they came out pretty lousy. Maybe the metal was not clean enough although it was freshly steel wooled and dipped in alcohol prior to putting them in the blackening solution. In the end as you see in the picture they were painted flat black. When the parts came out of the solution they were perfectly coated and looked good. Then most of the oxide just wiped off when you touch the parts. The color became very inconsistent. On the other hand, the problem with paint is it comes off of the brass rather easily. The paint will have no problem adhering to cannons made of wood. I will make one and see how it looks. If I don't like it at least I will have a DIY wood lathe to play with that cost me next to nothing. Many people ask me about this hobby and I tell them that it's basically making little stick out of bigger ones. Learning and trying things as I go...just keep telling myself that the journey is most of the fun. Tom
-
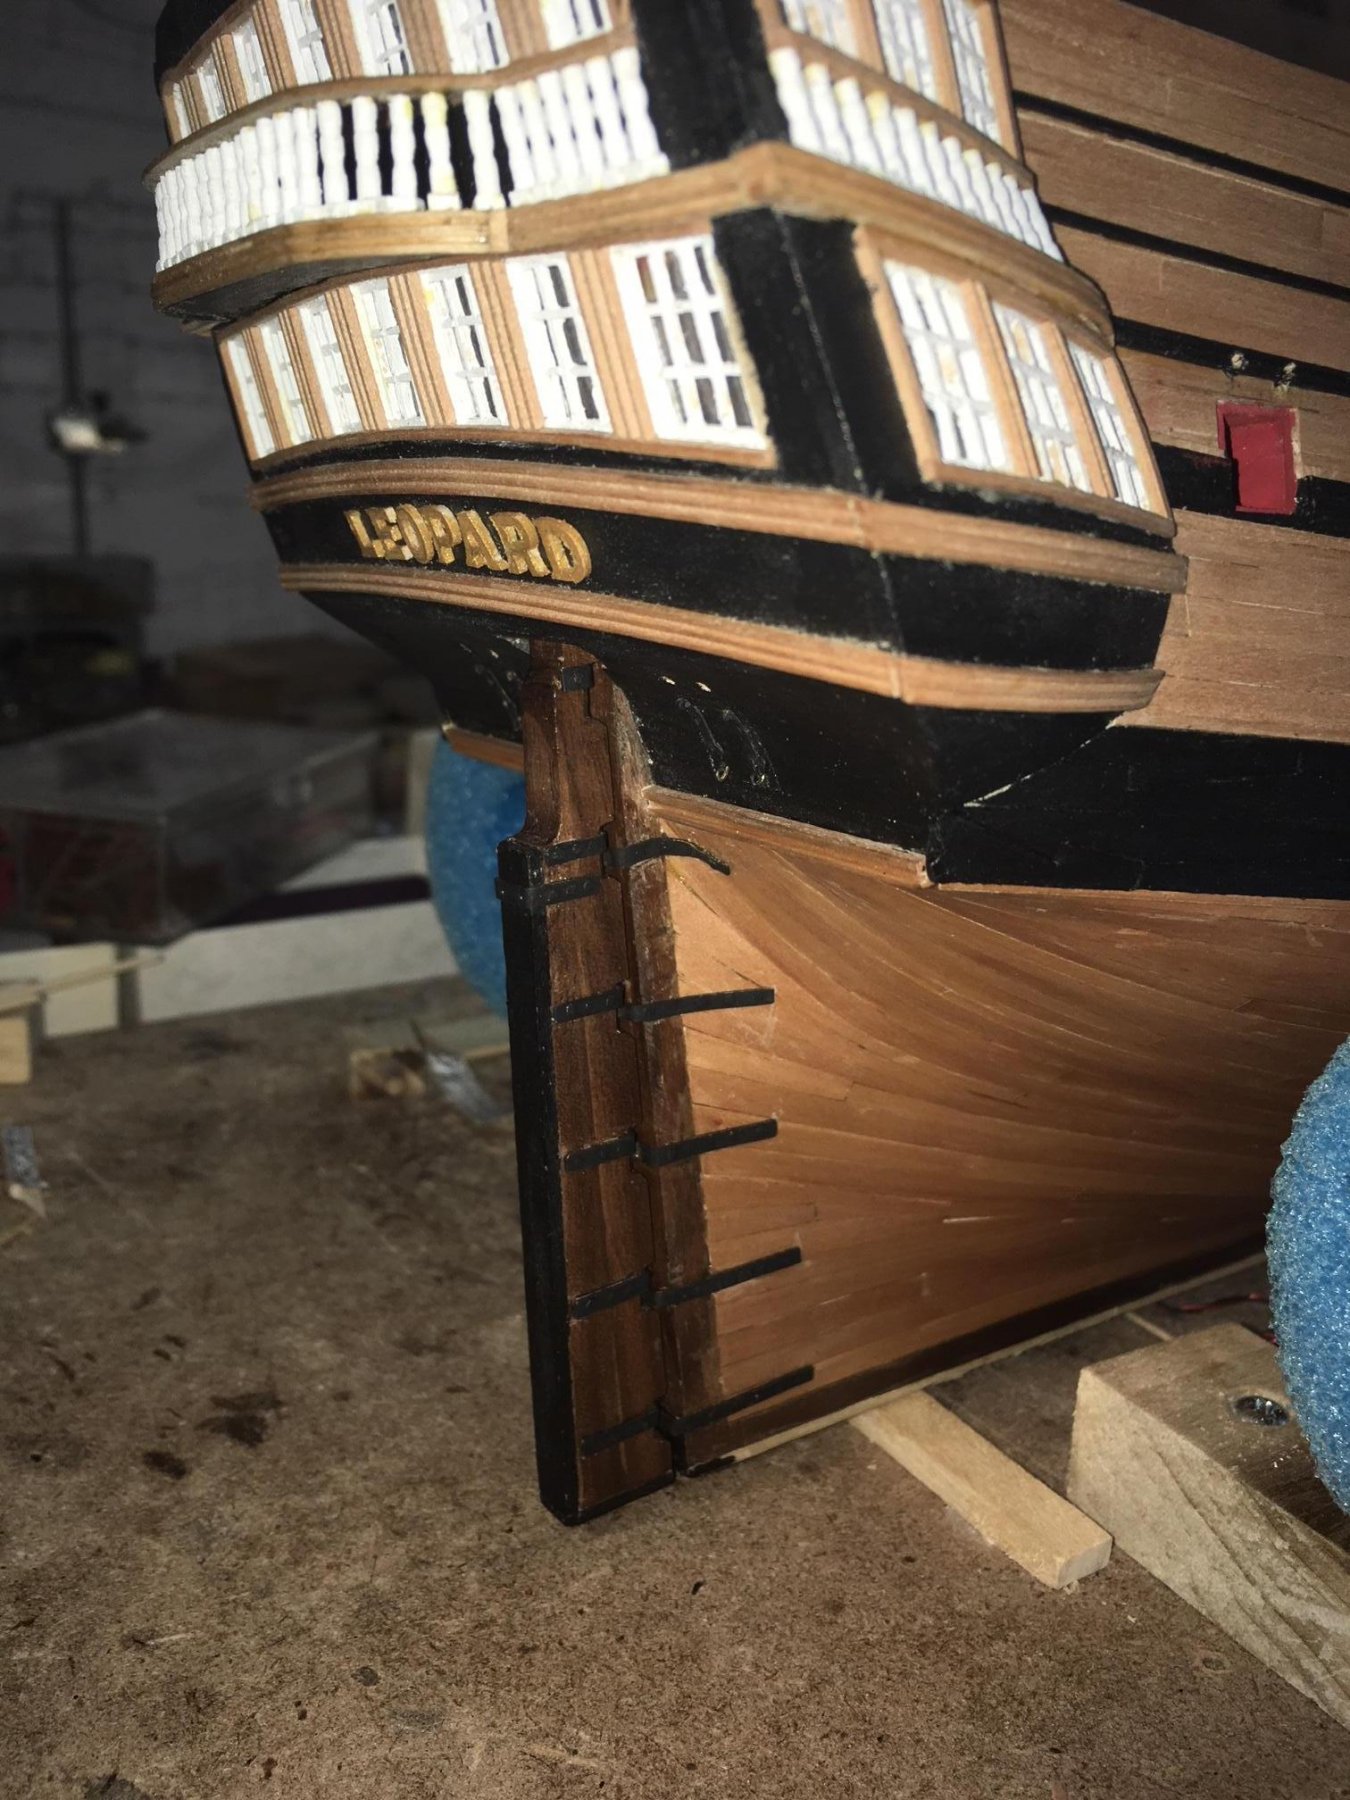
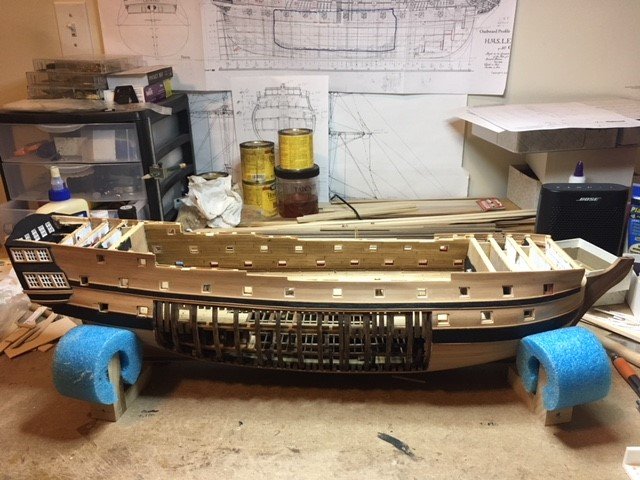
Did a little bit more. Assembled the rudder to the hull. I am going to try to build a small hobby lathe to make the wooden cannons. It will give me a slight break and change of pace. I will post some pics once I get it built. My plan right now is to use a corded drill as the motor and chuck. If it works for my purposes I will change out the drill for a motor and attach a drill chuck to it to make it a bit more "professional". I use that term very loosely. Here is a pic of the rudder attached. Tom

-
Pandora by marsalv - FINISHED - 1:52
toms10 replied to marsalv's topic in - Build logs for subjects built 1751 - 1800
This is so good it is becoming silly... if that makes sense. Tom -
Surprisingly good tweezers...
toms10 replied to monkeysarefun's topic in Modeling tools and Workshop Equipment
Just received mine. Way better than what I have been using. Thanks for link monkeysarefun! Tom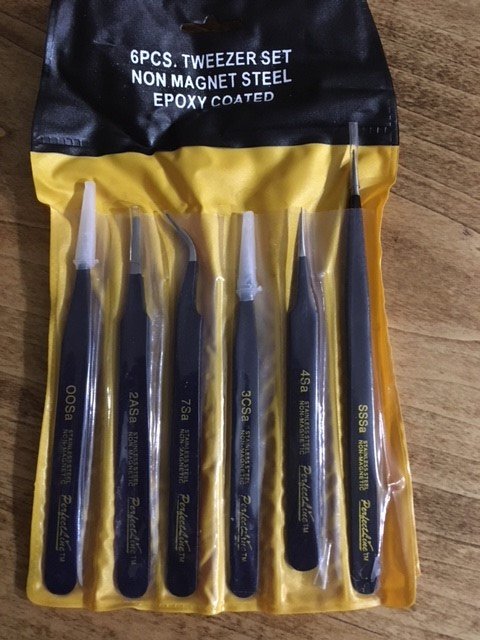
-
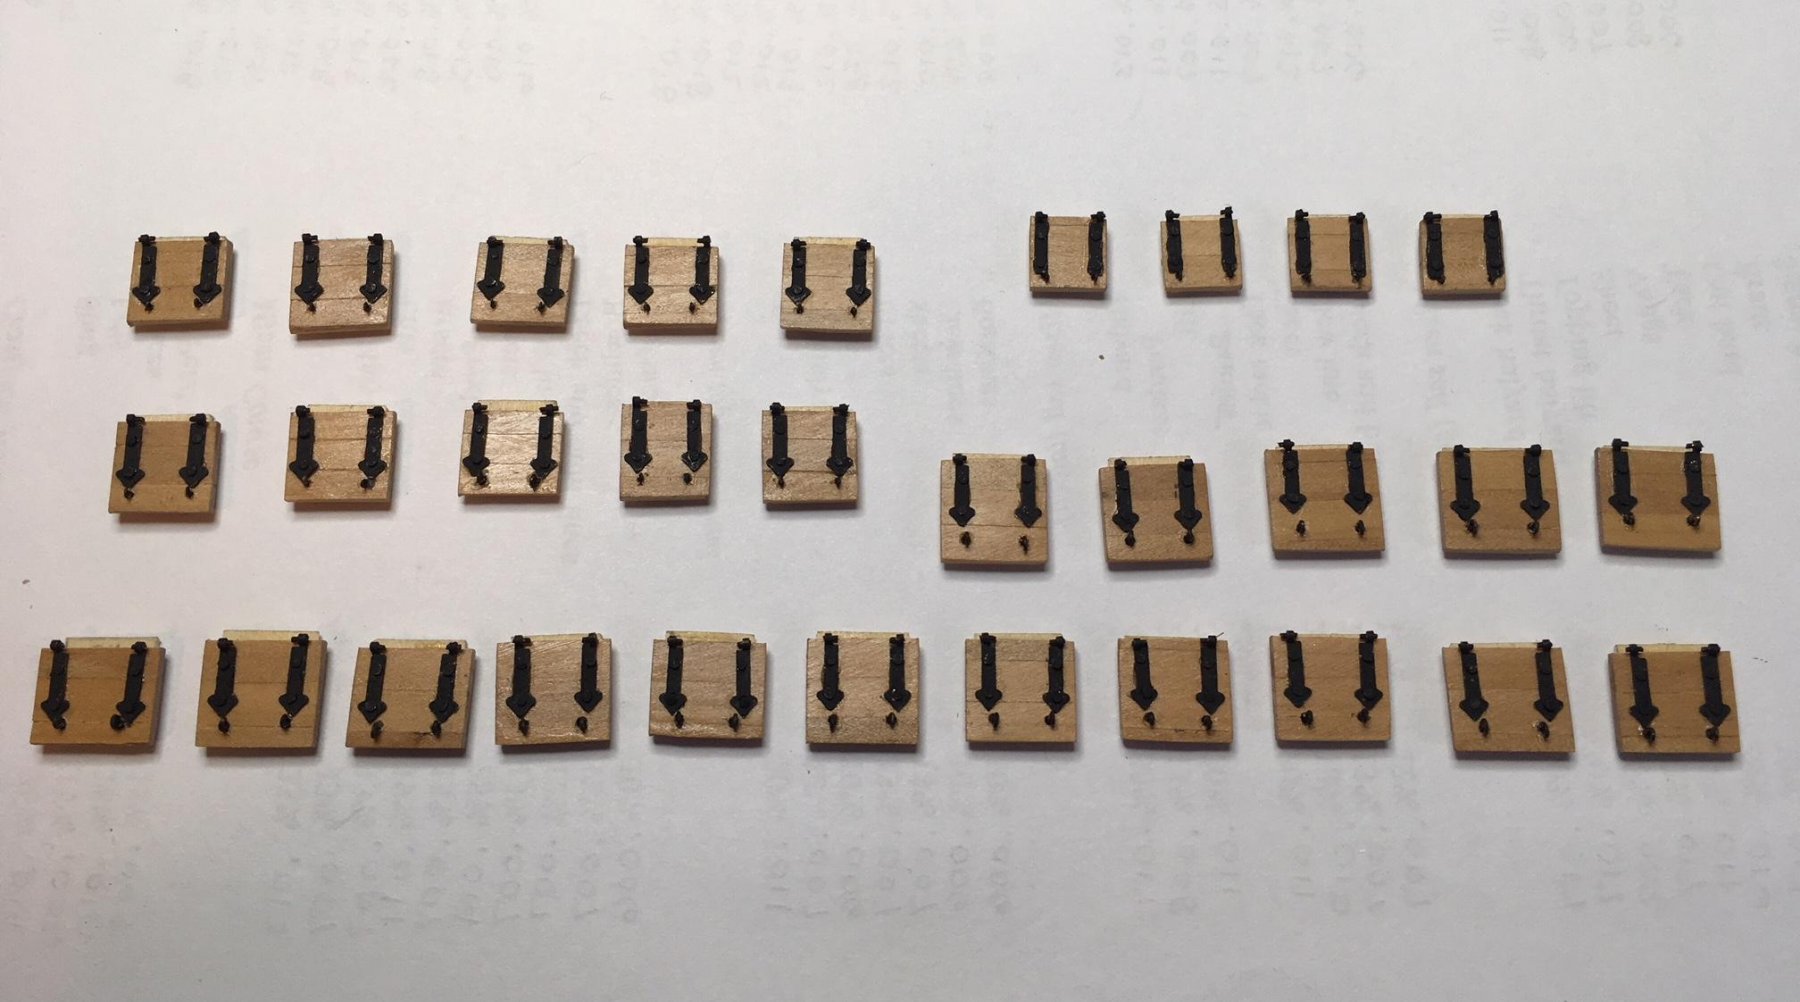
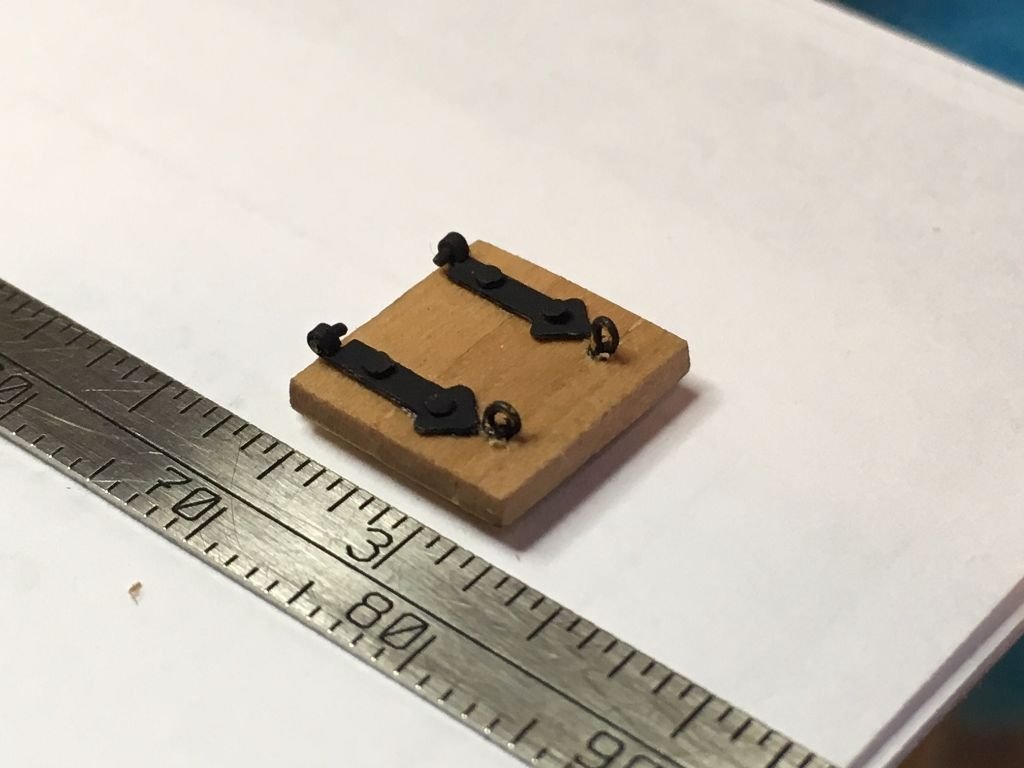
Hi all, I've been busy working on gunport lids, hinges, nails and eyes. I thought the little brass brads I had left over from my Constellation build would be fine. Unfortunately, the heads looked gigantic on the small hinges. So I ended up filling down 120+ nail heads from 1/16" diameter to .040" and the head height from .060 to .015". Not the most exciting thing I done. I made the eyes using .010" diameter wire with a .015 inside diameter for the 6 and 12 pounders and .015 wire with a .020 inside diameter for the 24 pounder. Above is a close up of one of the 12 pounder lids. Along the same lines I need to file down about 100+ nails for the rudder hinges. That sounds like what is next on the agenda. Tom

-
Beautiful work. I especially like the pictures through the magnifying glass. Tom
-
JIm, Your perseverance has paid off. She is coming along nicely. And as an added bonus, you can work at the circus with your newly acquired juggling skills. I know what you mean about taking time off. If it starts to seem like a job more than a hobby it is break time. Tom
-
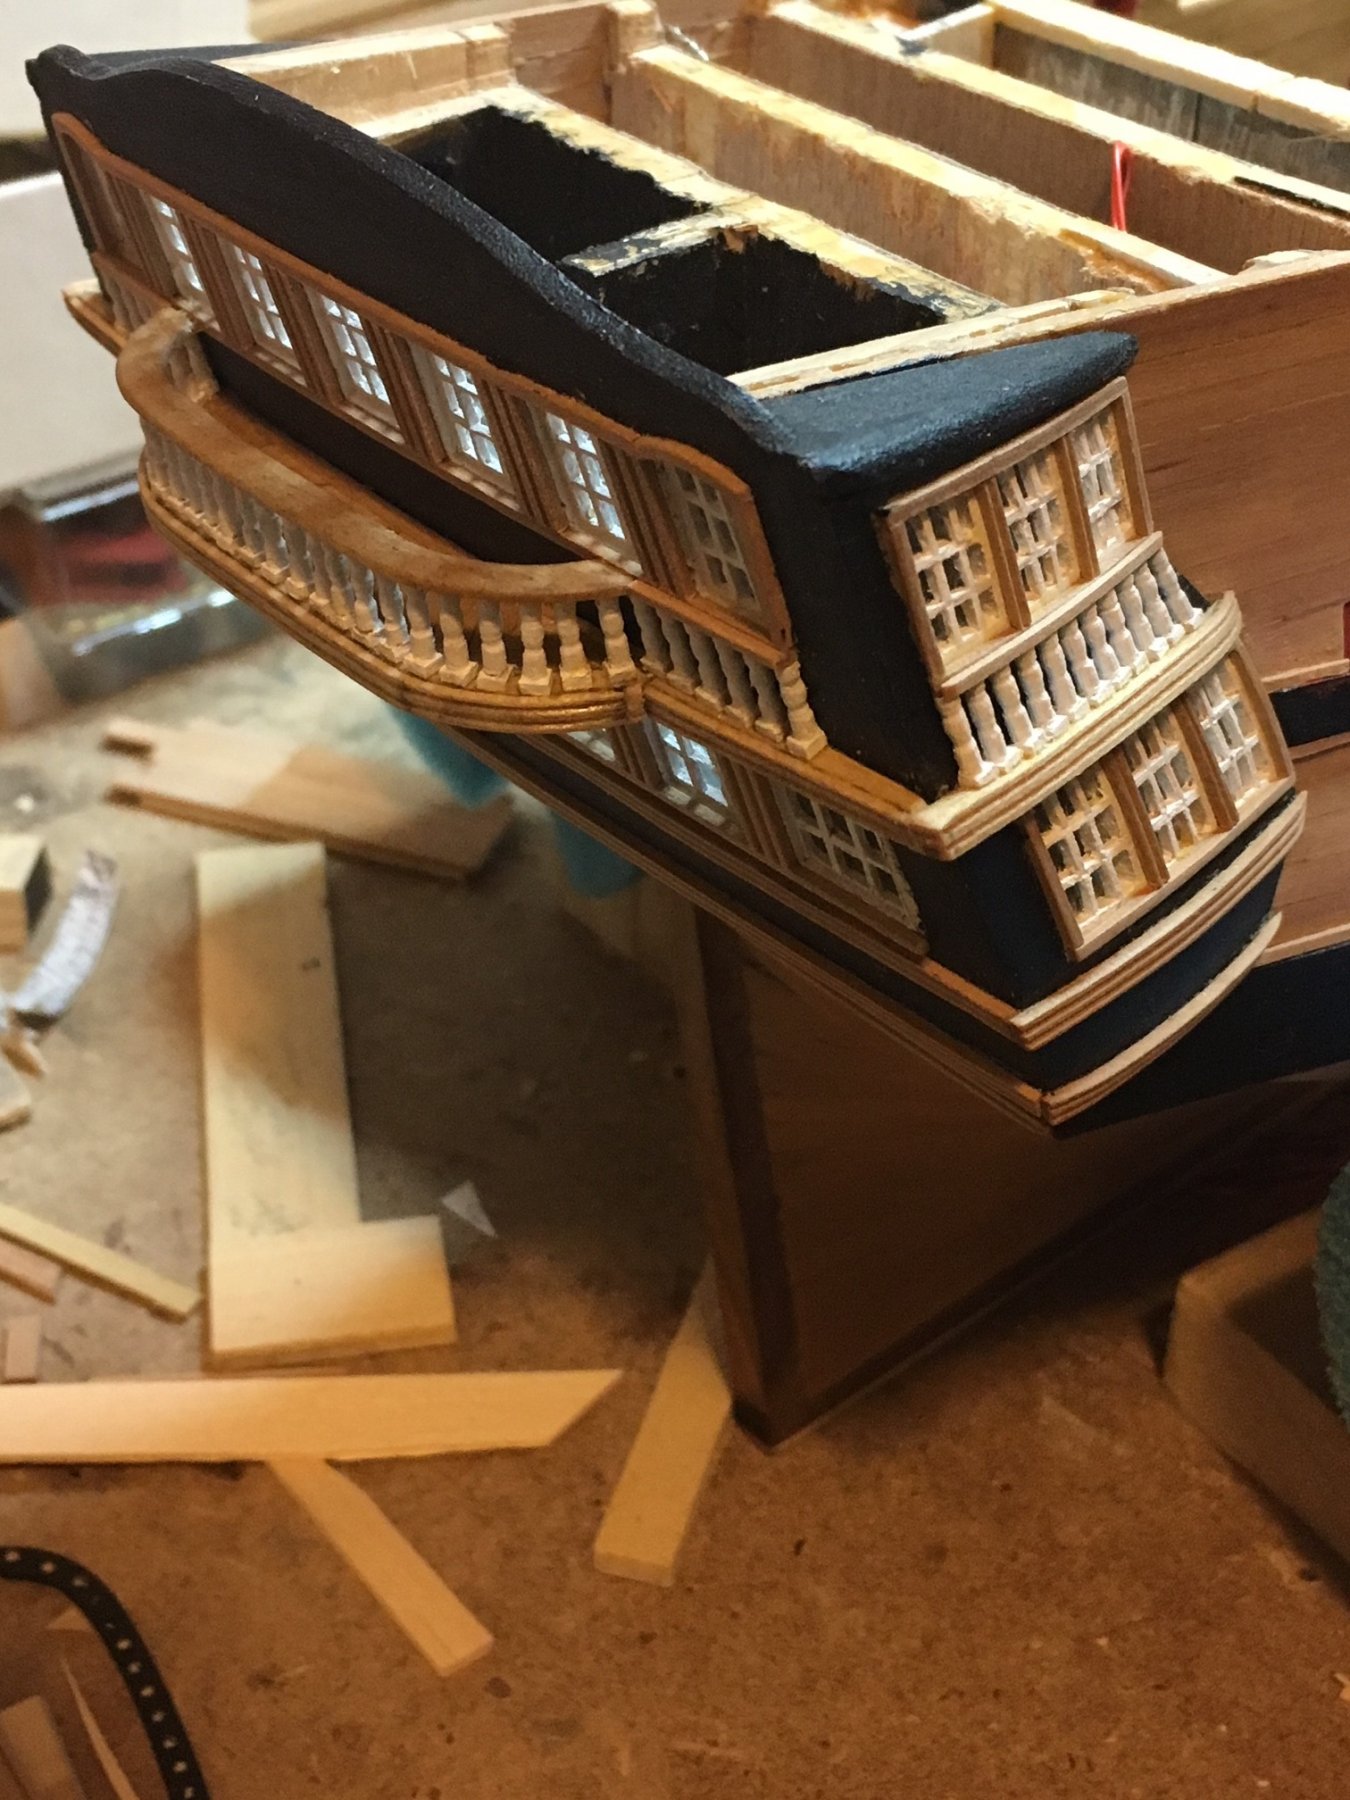
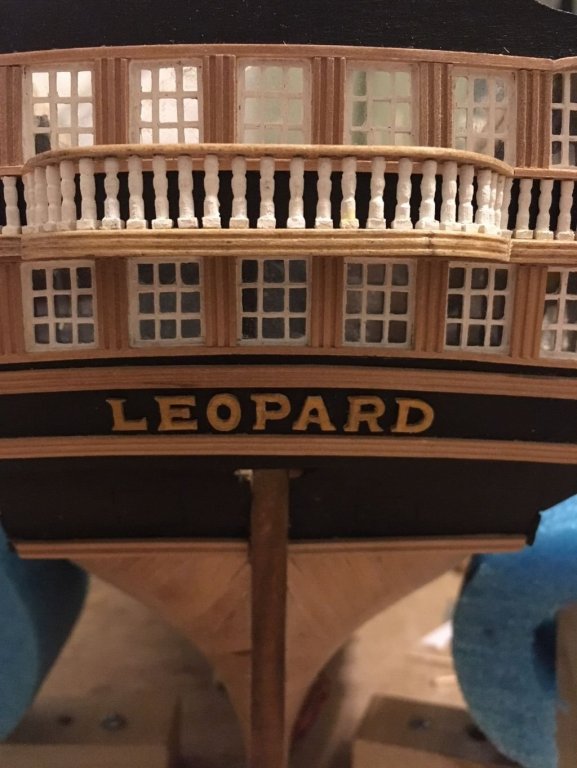
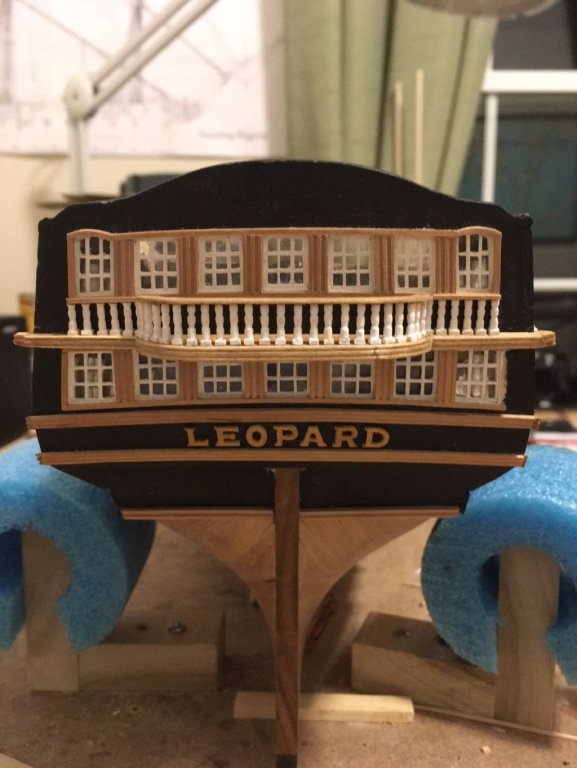
Managed to carve out the stern lettering. I am glad the name is short! That may be one of the requirements for any future builds. Tiny little guys, they are about 6mm high by 0.8mm thick. Tom
- 385 replies
-
- 10
-
-
I mounted the stern balcony and added the spindles to the side windows. Ended up making 60 spindles in all. Pretty much just have the carvings left for the stern cabin. Saving those for another day. I need to get back to the lower gun deck and make some cannons so I close that deck up and move on to the upper gun deck. Happy new year to all my fellow modelers! Tom

-
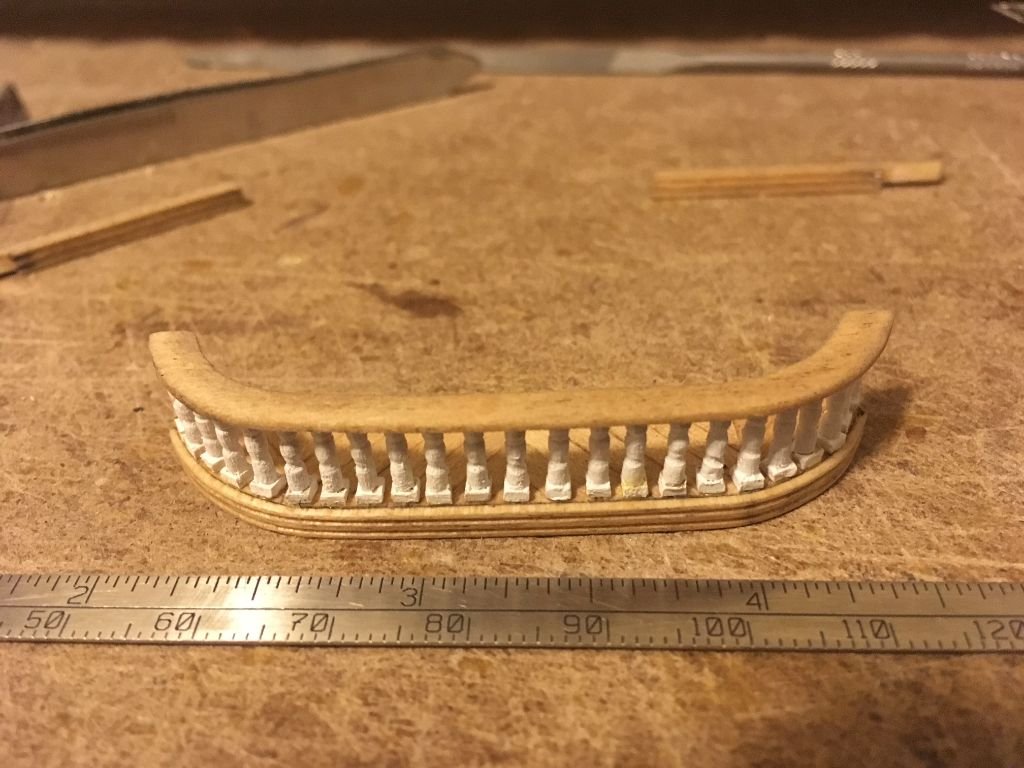
After several attempts I finally have a stern balcony... at least the center section. The ends and side spindles just attached on the side windows should be much easier, at least that is what I keep telling myself. Just need to mount the balcony to the stern, sure, that should be easy. Tom, Hope everyone has an enjoyable holiday season!
- 385 replies
-
- 11
-
-
Is Warner Woods West still in business ??
toms10 replied to Teakfreak's topic in Masting, rigging and sails
Ed, Try Chuck from Syren Ship Model Co.. He is one of the MSW sponsors listed on the right side of the home page. I have seen his work and it is top notch. Just search around the MSW sight and you will read nothing but good reviews. Tom -
Hi Jim, I actually planned on using purchased rudder hinges when planning out the build some eons ago. I tried to buy what ever components I could but most of the time they were too big for the scale I am building as was the case with these. I will throw them in the "extras" box for another day. Tom
-
Pandora by marsalv - FINISHED - 1:52
toms10 replied to marsalv's topic in - Build logs for subjects built 1751 - 1800
Marsalv, I have been following your build log for a long time and I must tell you, I use the high quality and precision of your work as something to aspire to. Don't know if I will ever get to that level but it is fun trying. Thanks for sharing your build and inspiring me. Tom -
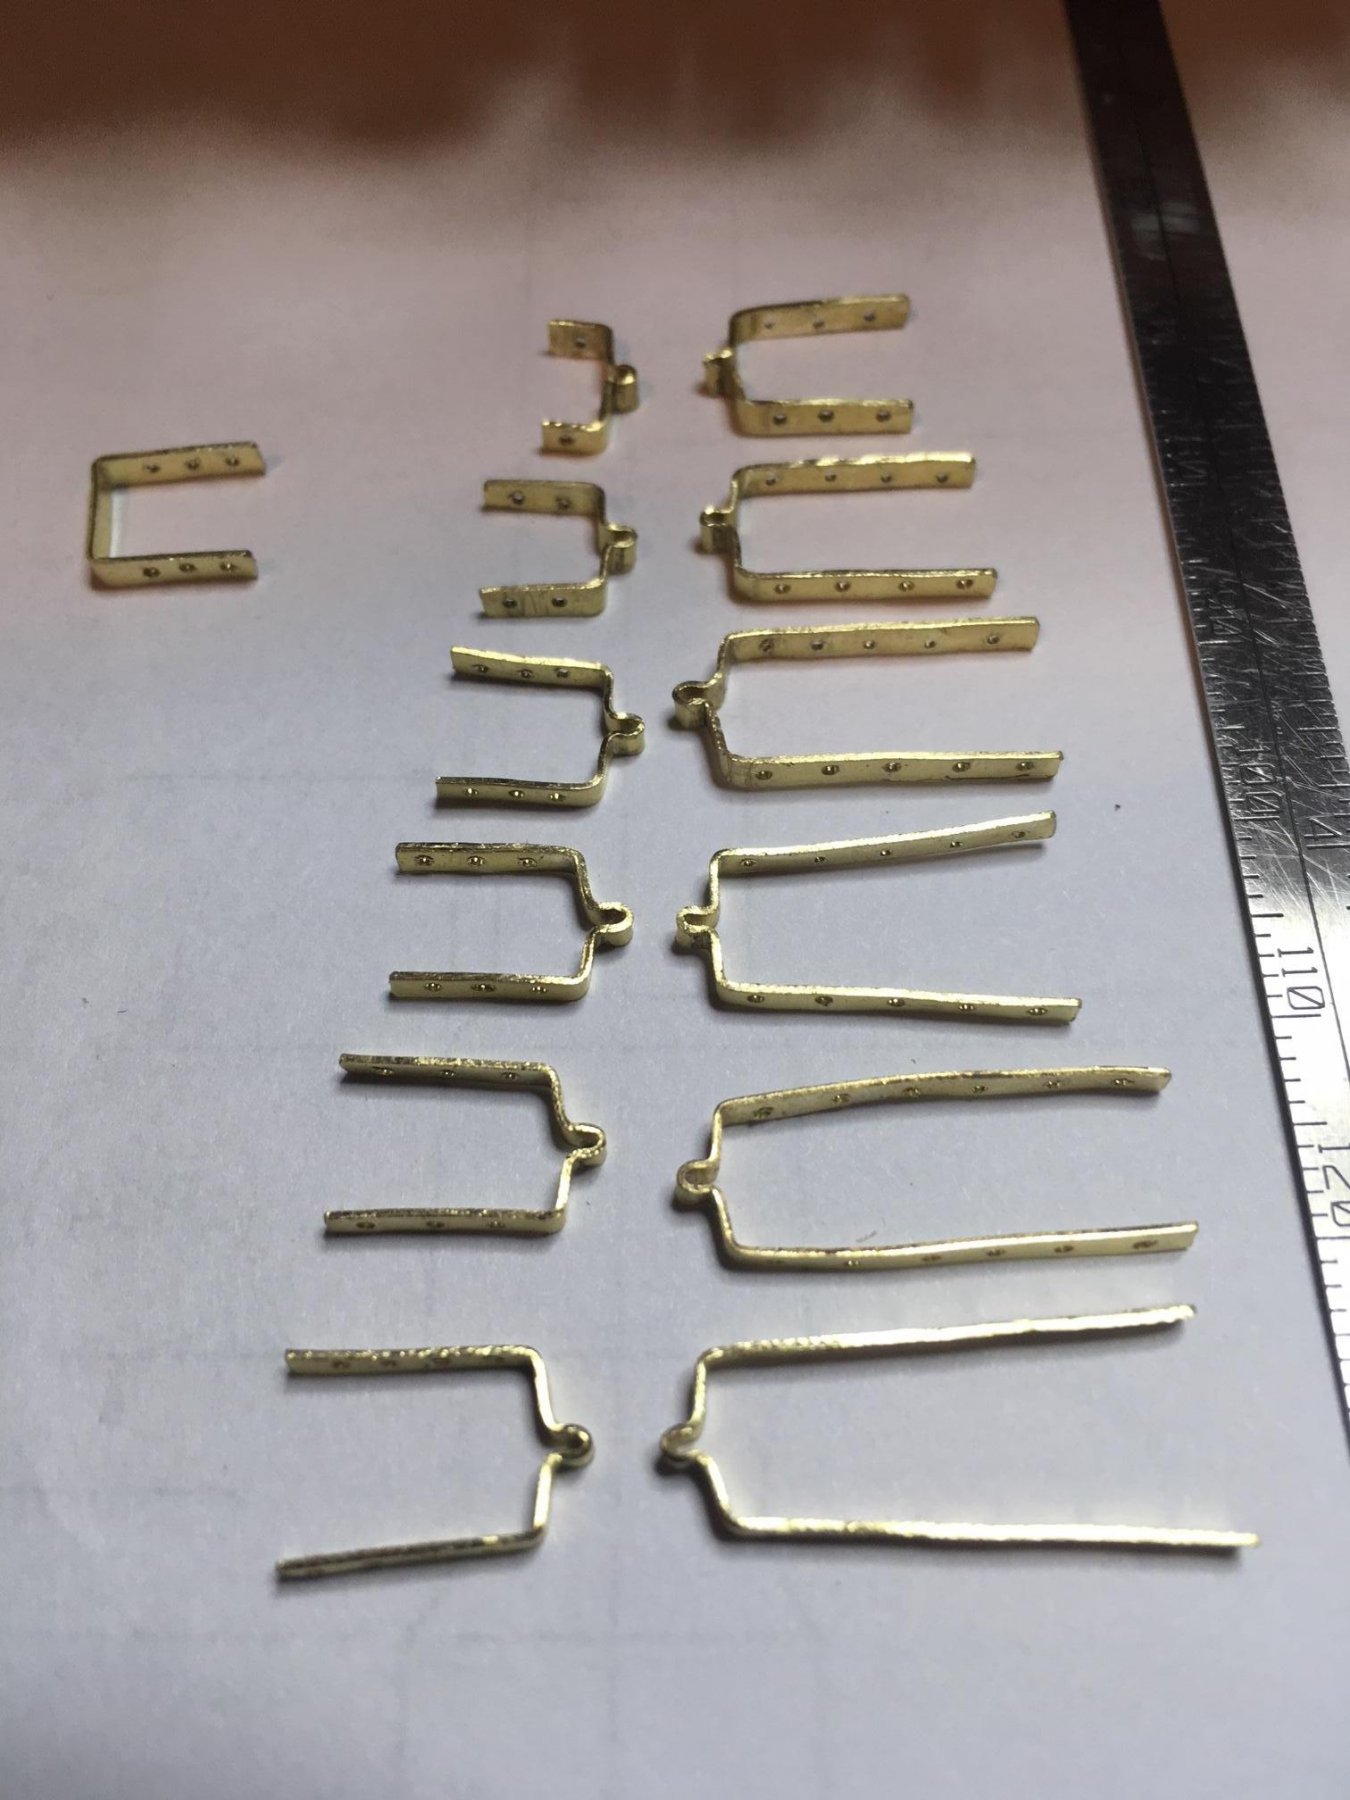
Hello all, Worked on the rudder and hinges this weekend. Made the hinges from scratch from 1/64" x 1/4/" brass strip. Cut the strip into .080" wide strips, marked and drilled 96 holes with my pin vise using a #70 drill. What a great way to develop carpel tunnel issues!!! I still need to blacken the brass hinges, pins & nails but will wait until I am ready to install them. Tom

-
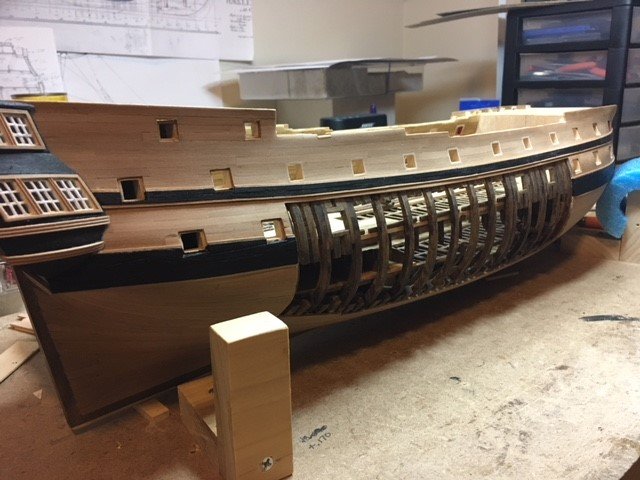
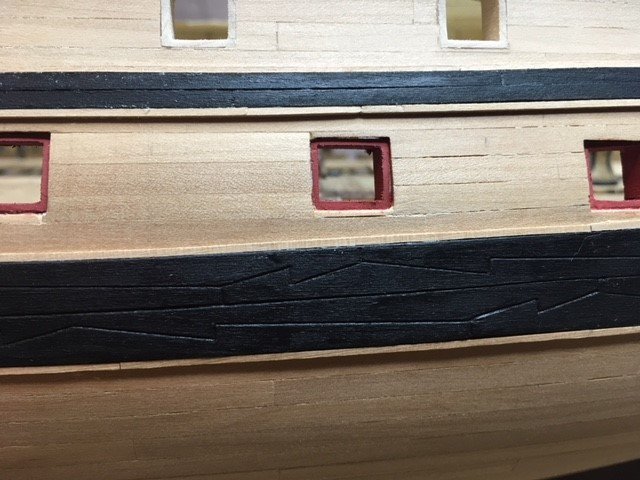
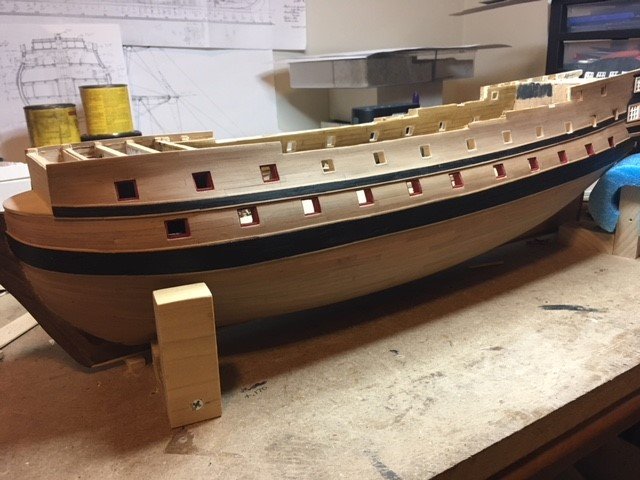
I finished both the lower and upper wales but still need to finish painting the cannon port liners. I am not sure what I will be working on next. There are so many things but I think I need to make the 24# cannons for the lower deck next. Then I can place and rig them and close up that deck with the installation of the upper deck. I am planning on turning them up from wooden dowels and then painting them black. We will see how that goes. Will need to spend some late nights at the shop since I don't have a lathe at home.... yet. Ho Ho Ho, I smell a Christmas present opportunity. Tom
- 385 replies
-
- 10
-