HOLIDAY DONATION DRIVE - SUPPORT MSW - DO YOUR PART TO KEEP THIS GREAT FORUM GOING! (Only 24 donations so far out of 49,000 members - C'mon guys!)
×


toms10
-
Posts
929 -
Joined
-
Last visited
Content Type
Profiles
Forums
Gallery
Events
Everything posted by toms10
-
 Happy new year John. Glad to hear you have the sail layout figured out. I am looking forward to seeing her with full sails. I know the feeling about the research thing. That is basically all I have been doing the past month. The Vikings had the right idea, one sail in the middle of the boat! Keeps it very simple. 😃 LOL Tom
 -
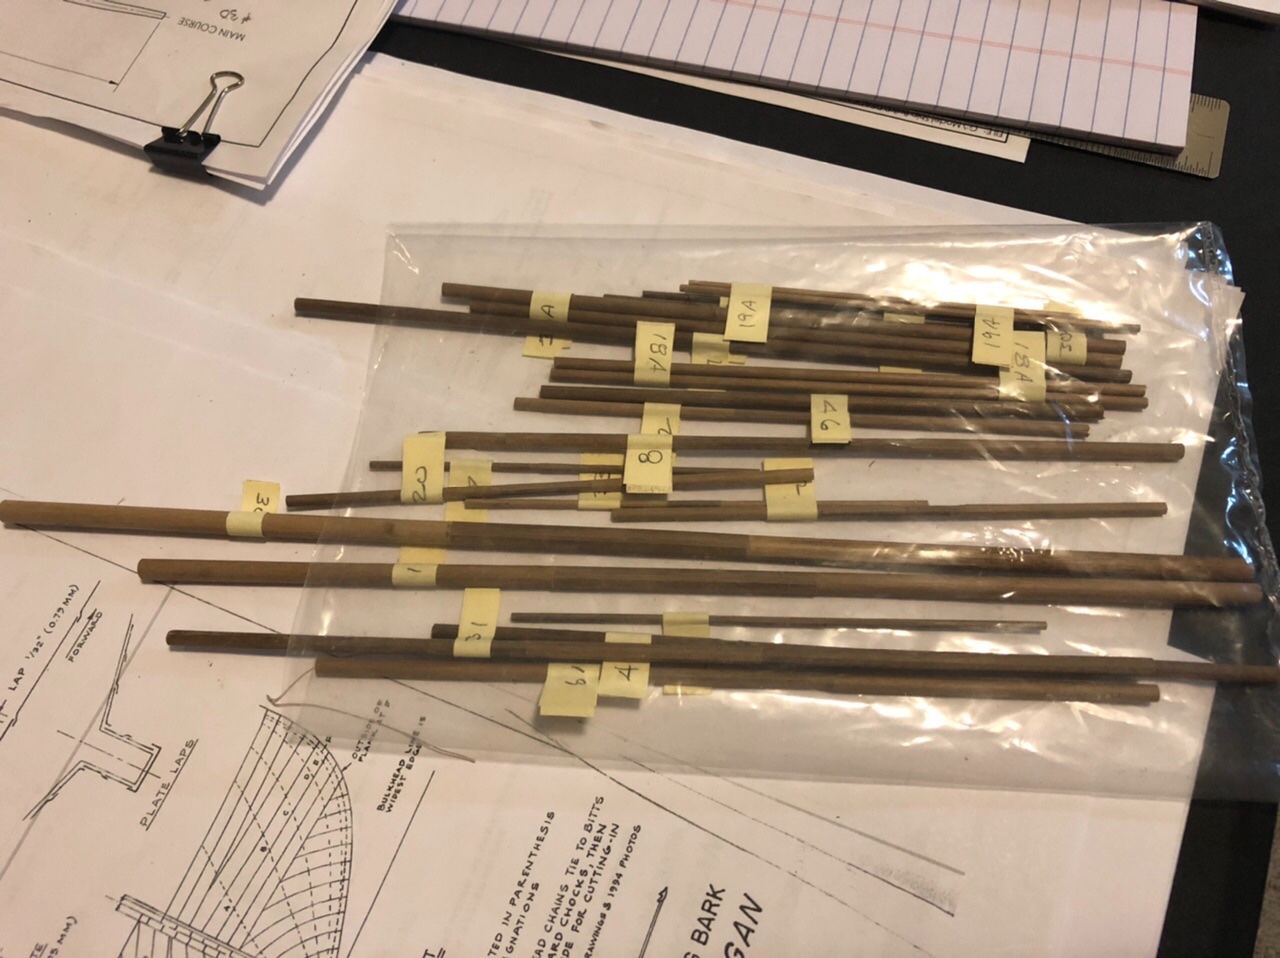
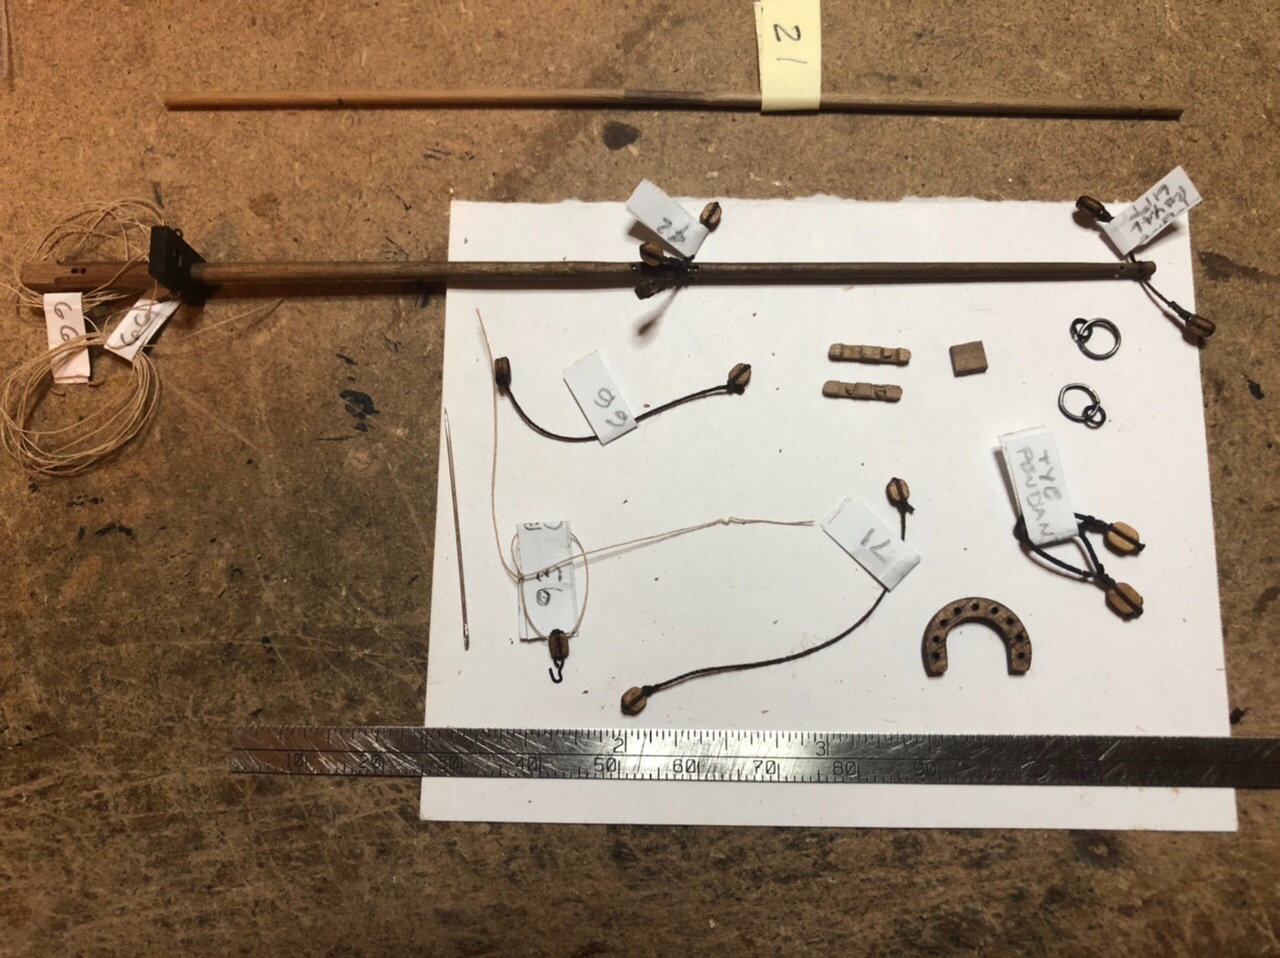
Hello all I haven’t posted anything in a while but I have been busy. A great deal of reading and studying various rigging books and chipping away on the yards. Seems I am putting in time but not seeing much progress right now but I am gaining more knowledge on running rigging! 👍 I am in the process of tying the various blocks to the yards. Will most likely need to put an order in with Chuck as I don’t have enough to complete the job. No rush though, I still need to make all the sails. I plan on trying Ron Neilson’s method that he outlined in the 2018 winter NRG Journal (vol #63) Here is where I stand today with the yards. Tom

-
Jeff, As Glenn mentioned and I forgot to... After the lines were tied and everything was the way I wanted it, I took a cheap paint brush and brushed over all the knots with some diluted Elmer's white glue (50% water/50%glue). It not only locks the knots in place but also stiffens up the whole assembly of lines. Tom
-
Hi Jeff, Post #279 of my Leopard build log has a picture of what Wefalk is describing. I used this method with good success. Just click the link in my signature to find the log. With some quick math, I figure I ended up with 2,918 clove hitches... but who's counting!🤪 Good luck, Tom
-
Nice John, So what was more fun? Making the rope coils or watching the paint dry. 😂 Tom
-
Hi Mark I just found out what “splicing the main brace” means. Page 296, last paragraph in Harland’s book Seamanship in the Age of Sail. I feel a bit silly now but am more educated. Thanks. Yo ho ho and a bottle of rum! Tom
-
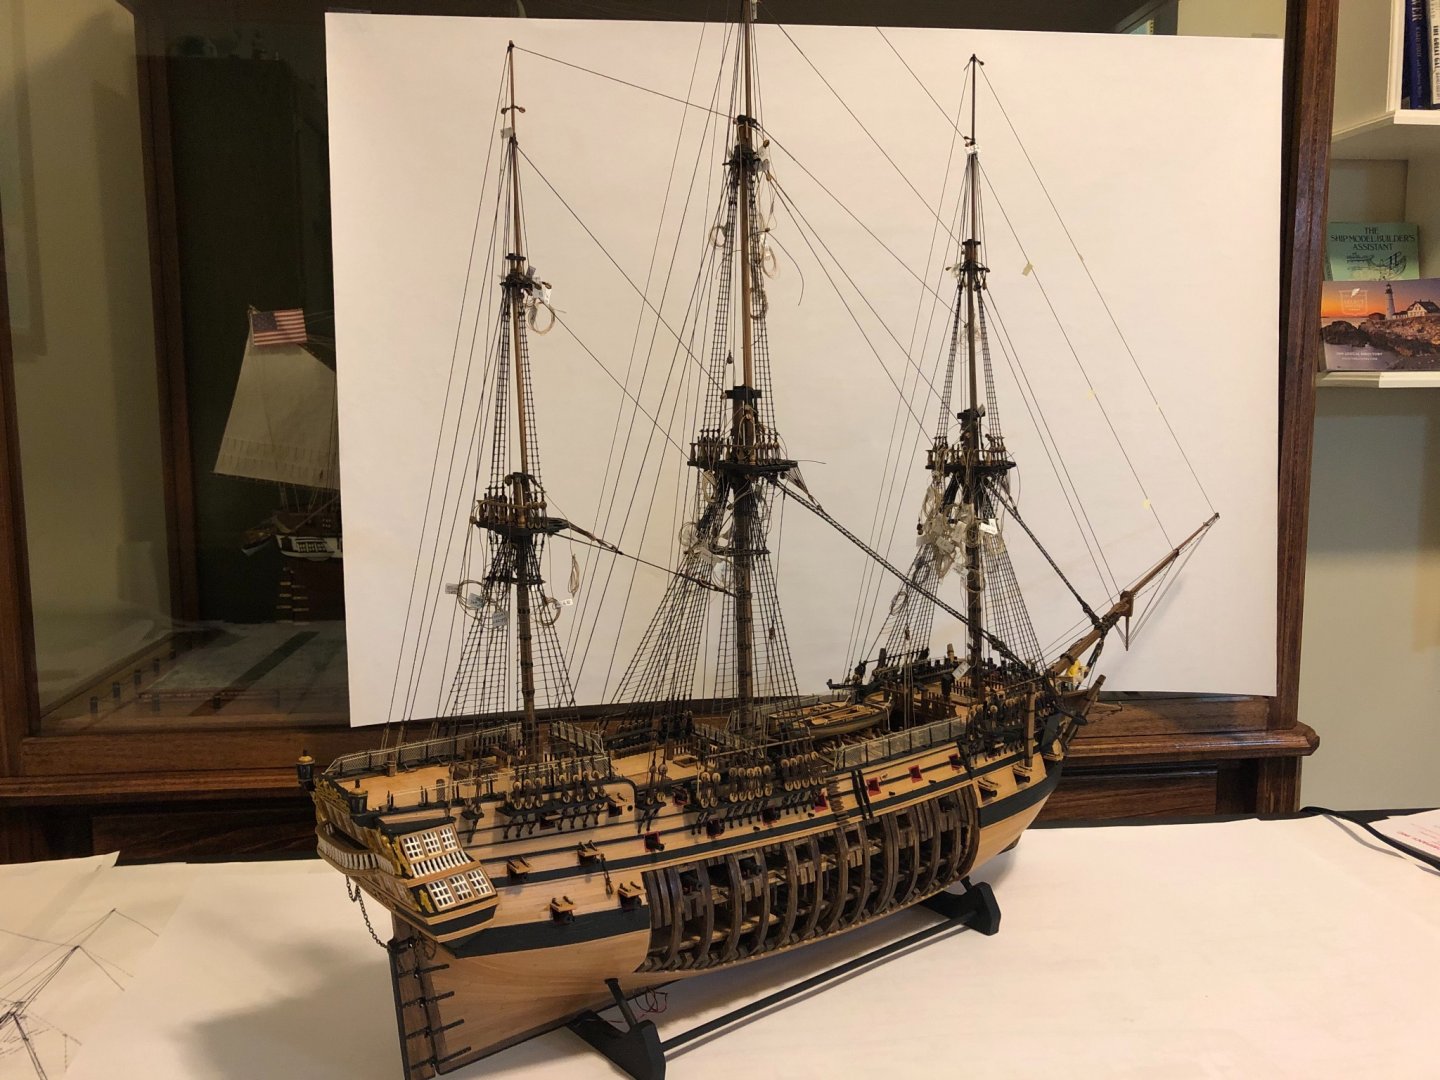
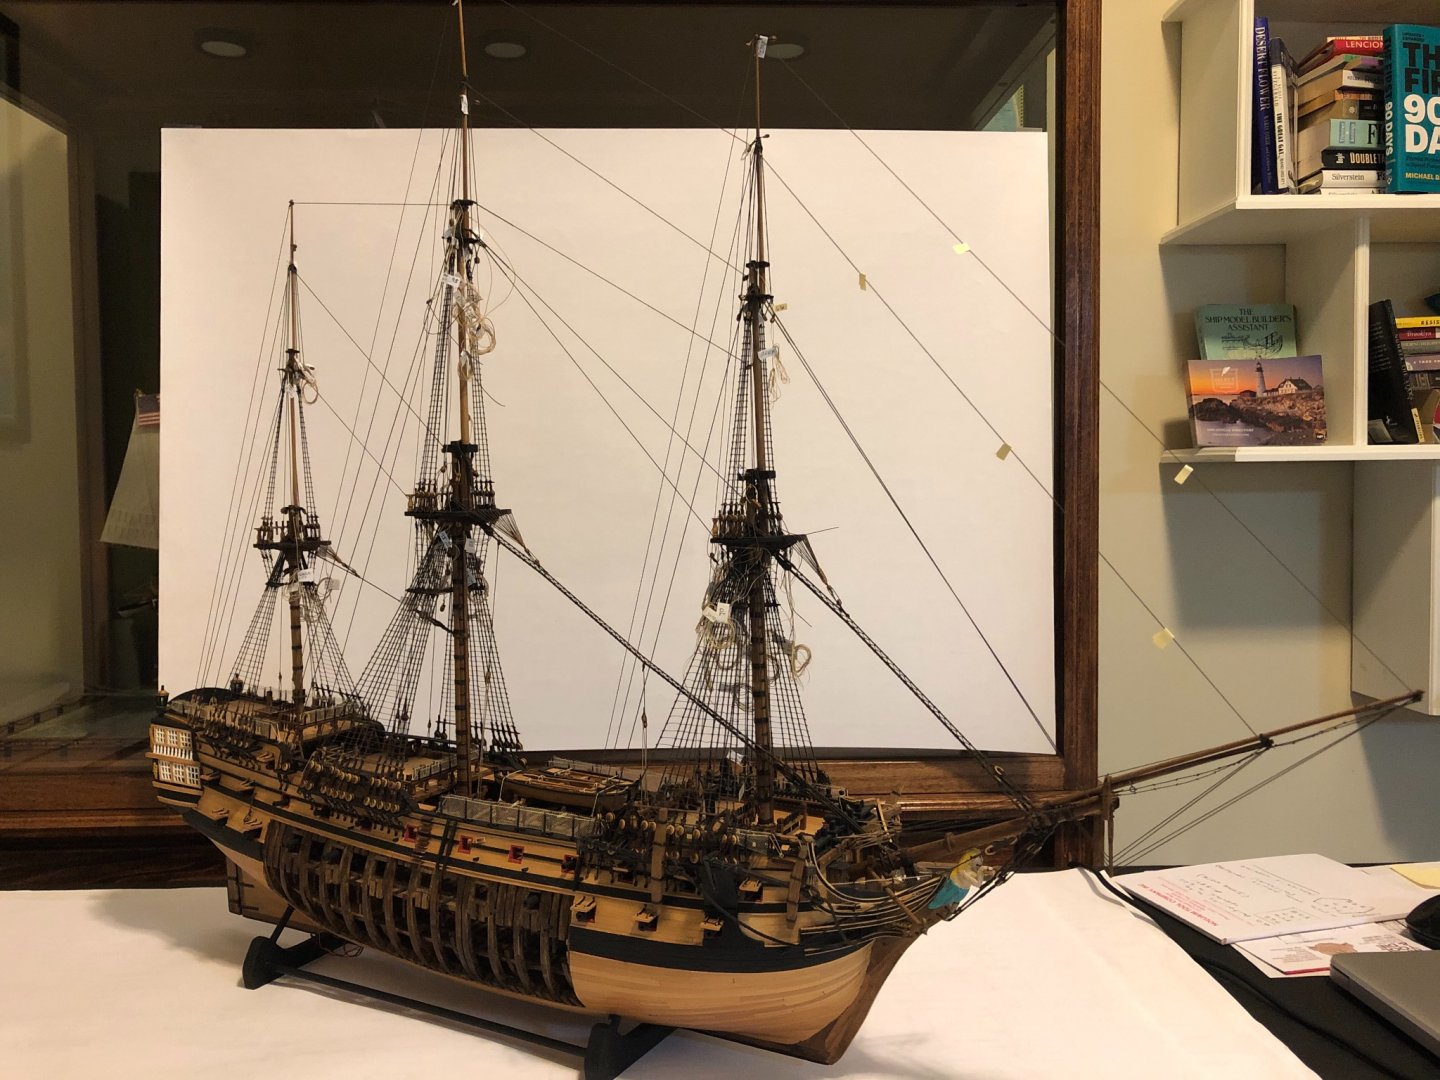
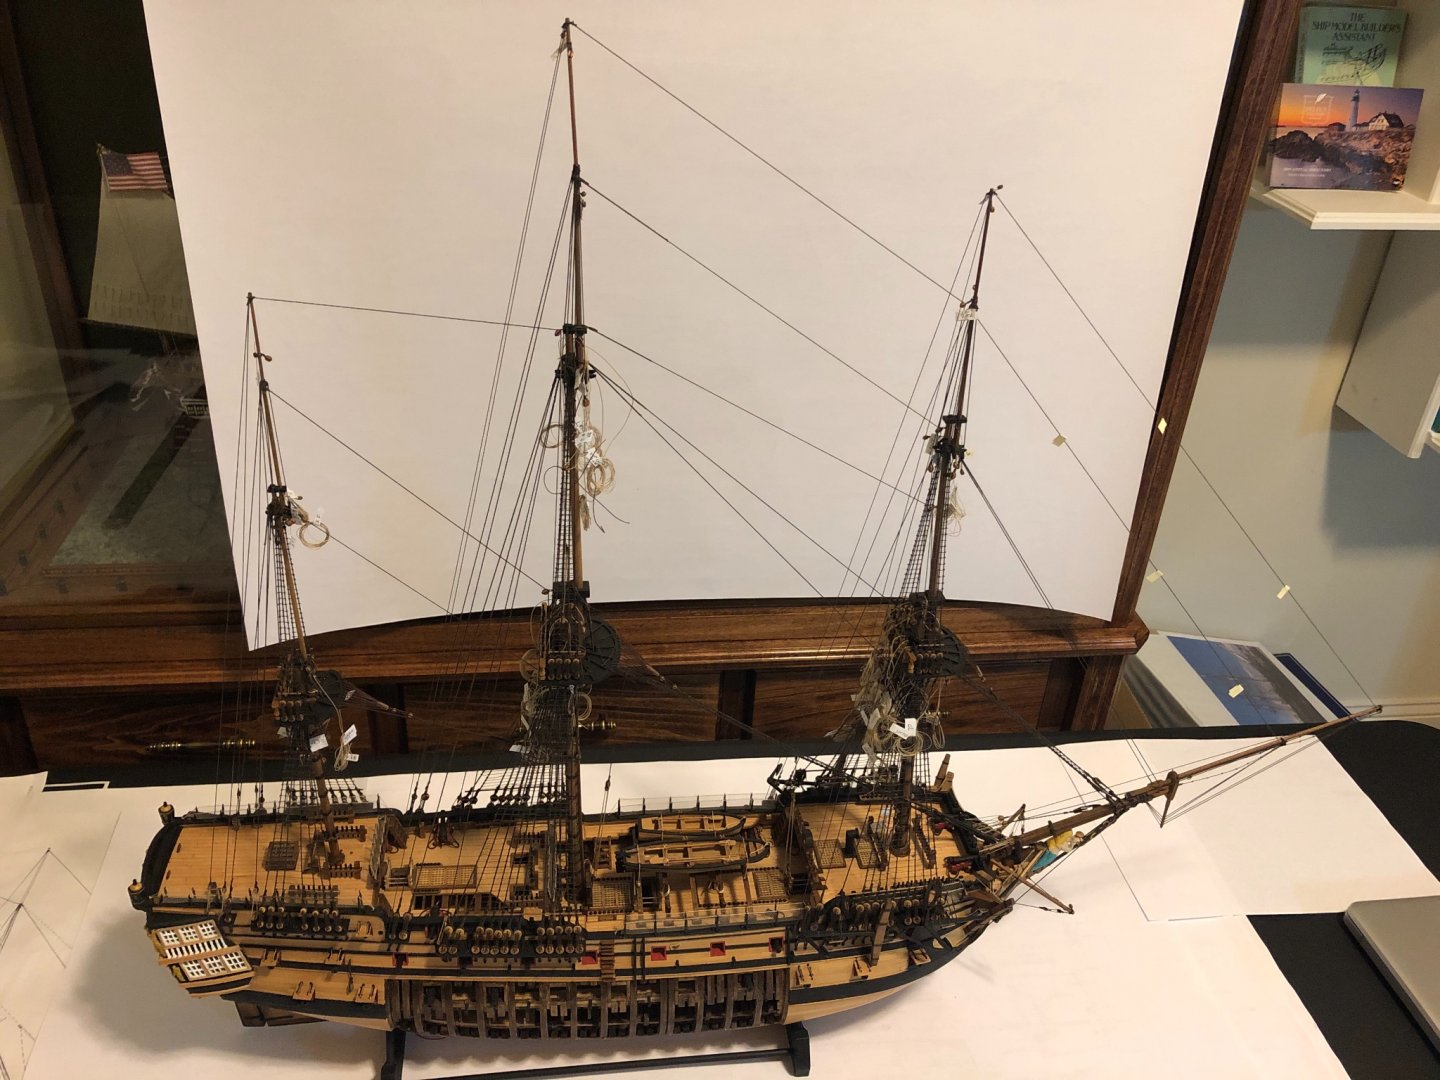
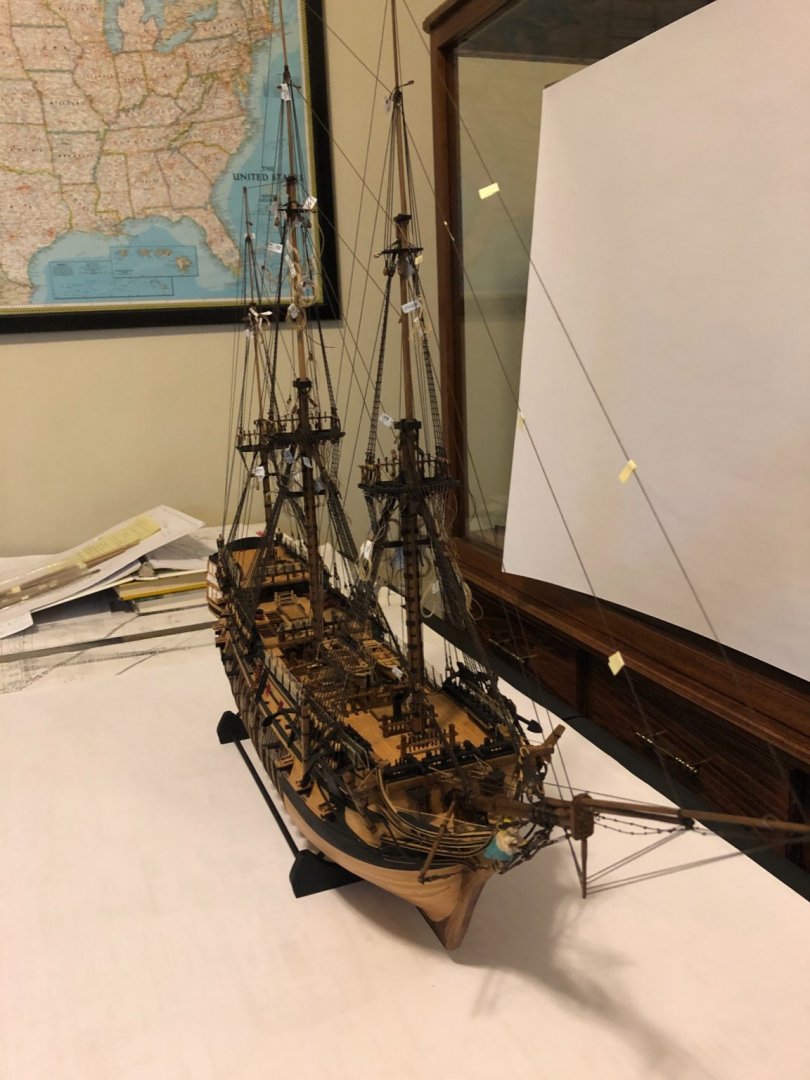
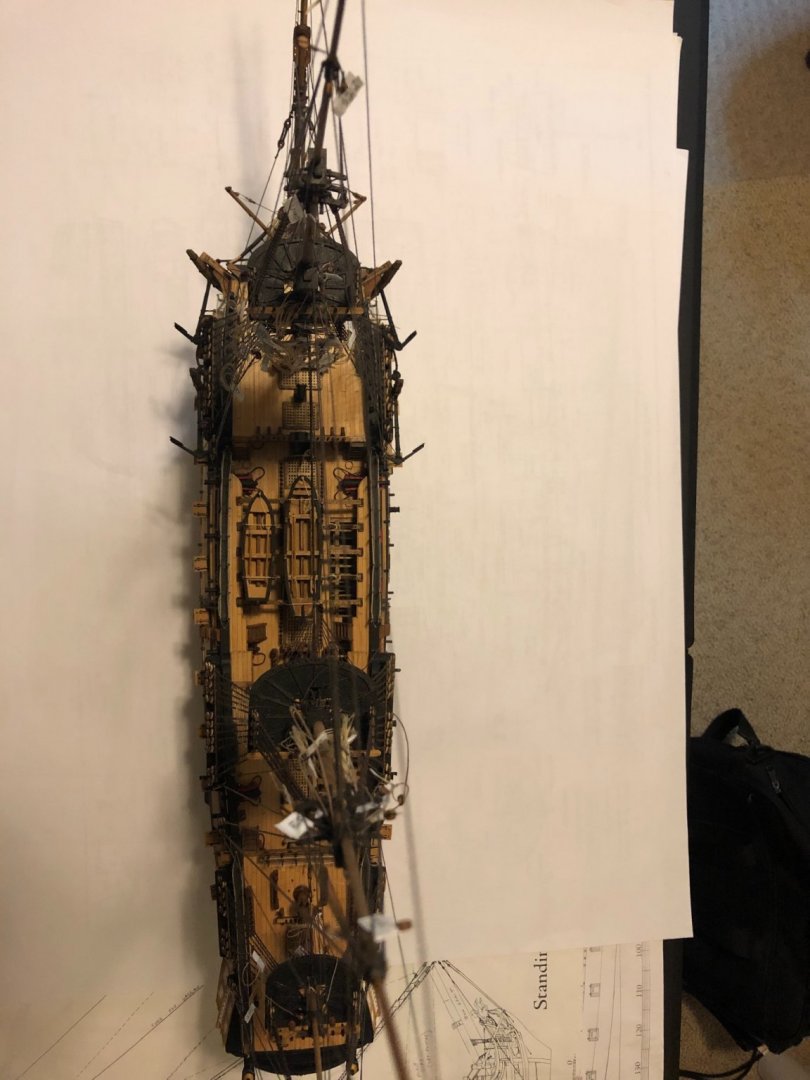
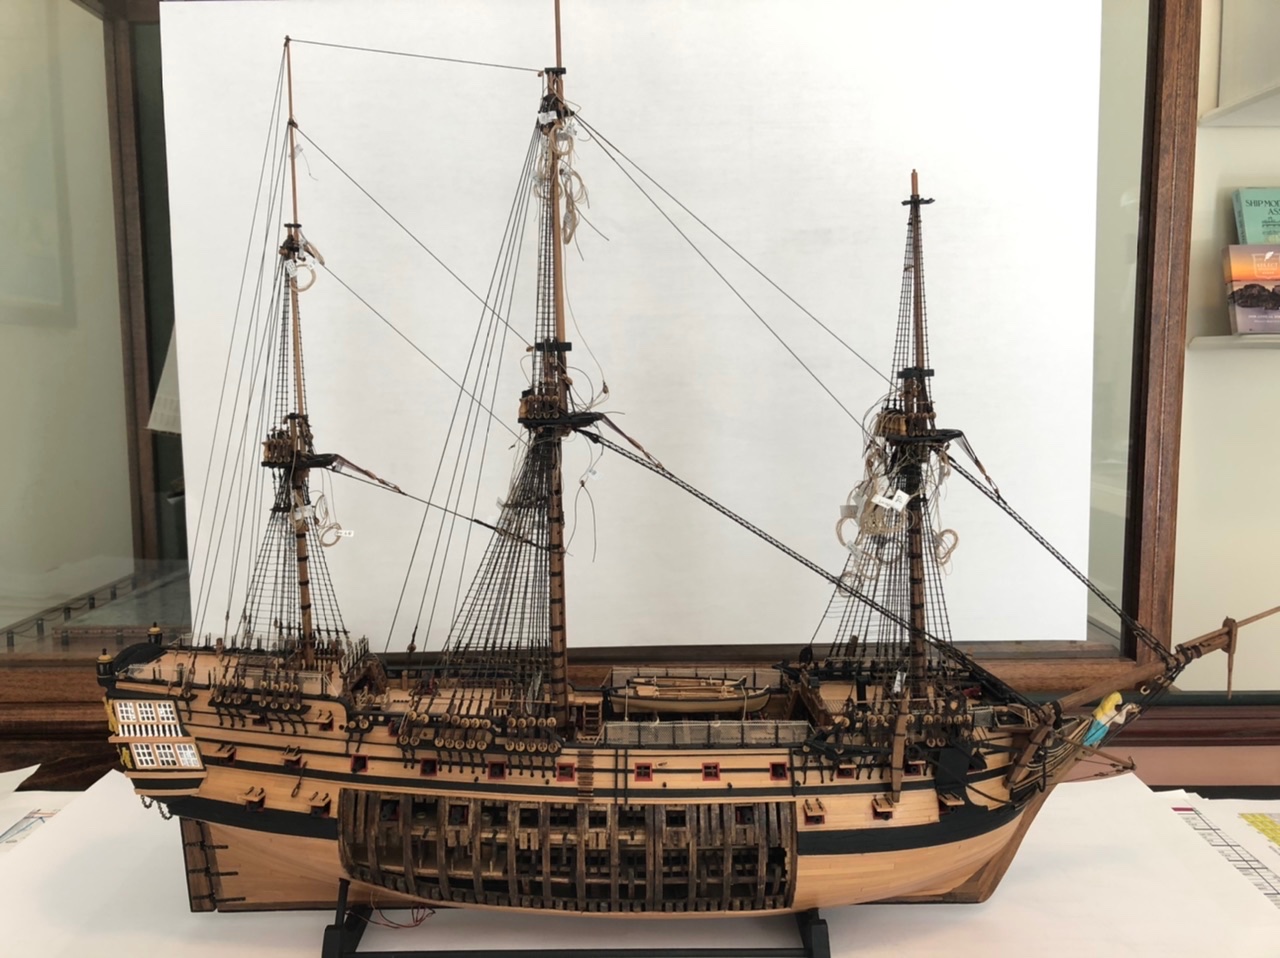
Time for an update. I reached another milestone today in that the standing rigging is complete. At least I think so. 😁 and one view from the seagull. Now I need to finish up the yards that I started a while back then on to the running rigging. Stay safe everyone. It gets harder and harder every day. Tom
-
Jim Are you sure these are not pictures of a real ship!? Excellent work on the mast wedges. I like you don’t have any fancy machines so I can appreciate the ingenuity needed to make some of the pieces. Well done. Tom
-
Well done Jim. With regards to the “made mast” I used a similar technique to create the octagonal shape in the center area of the yards. I am really enjoying following this build. Great work. Tom
-
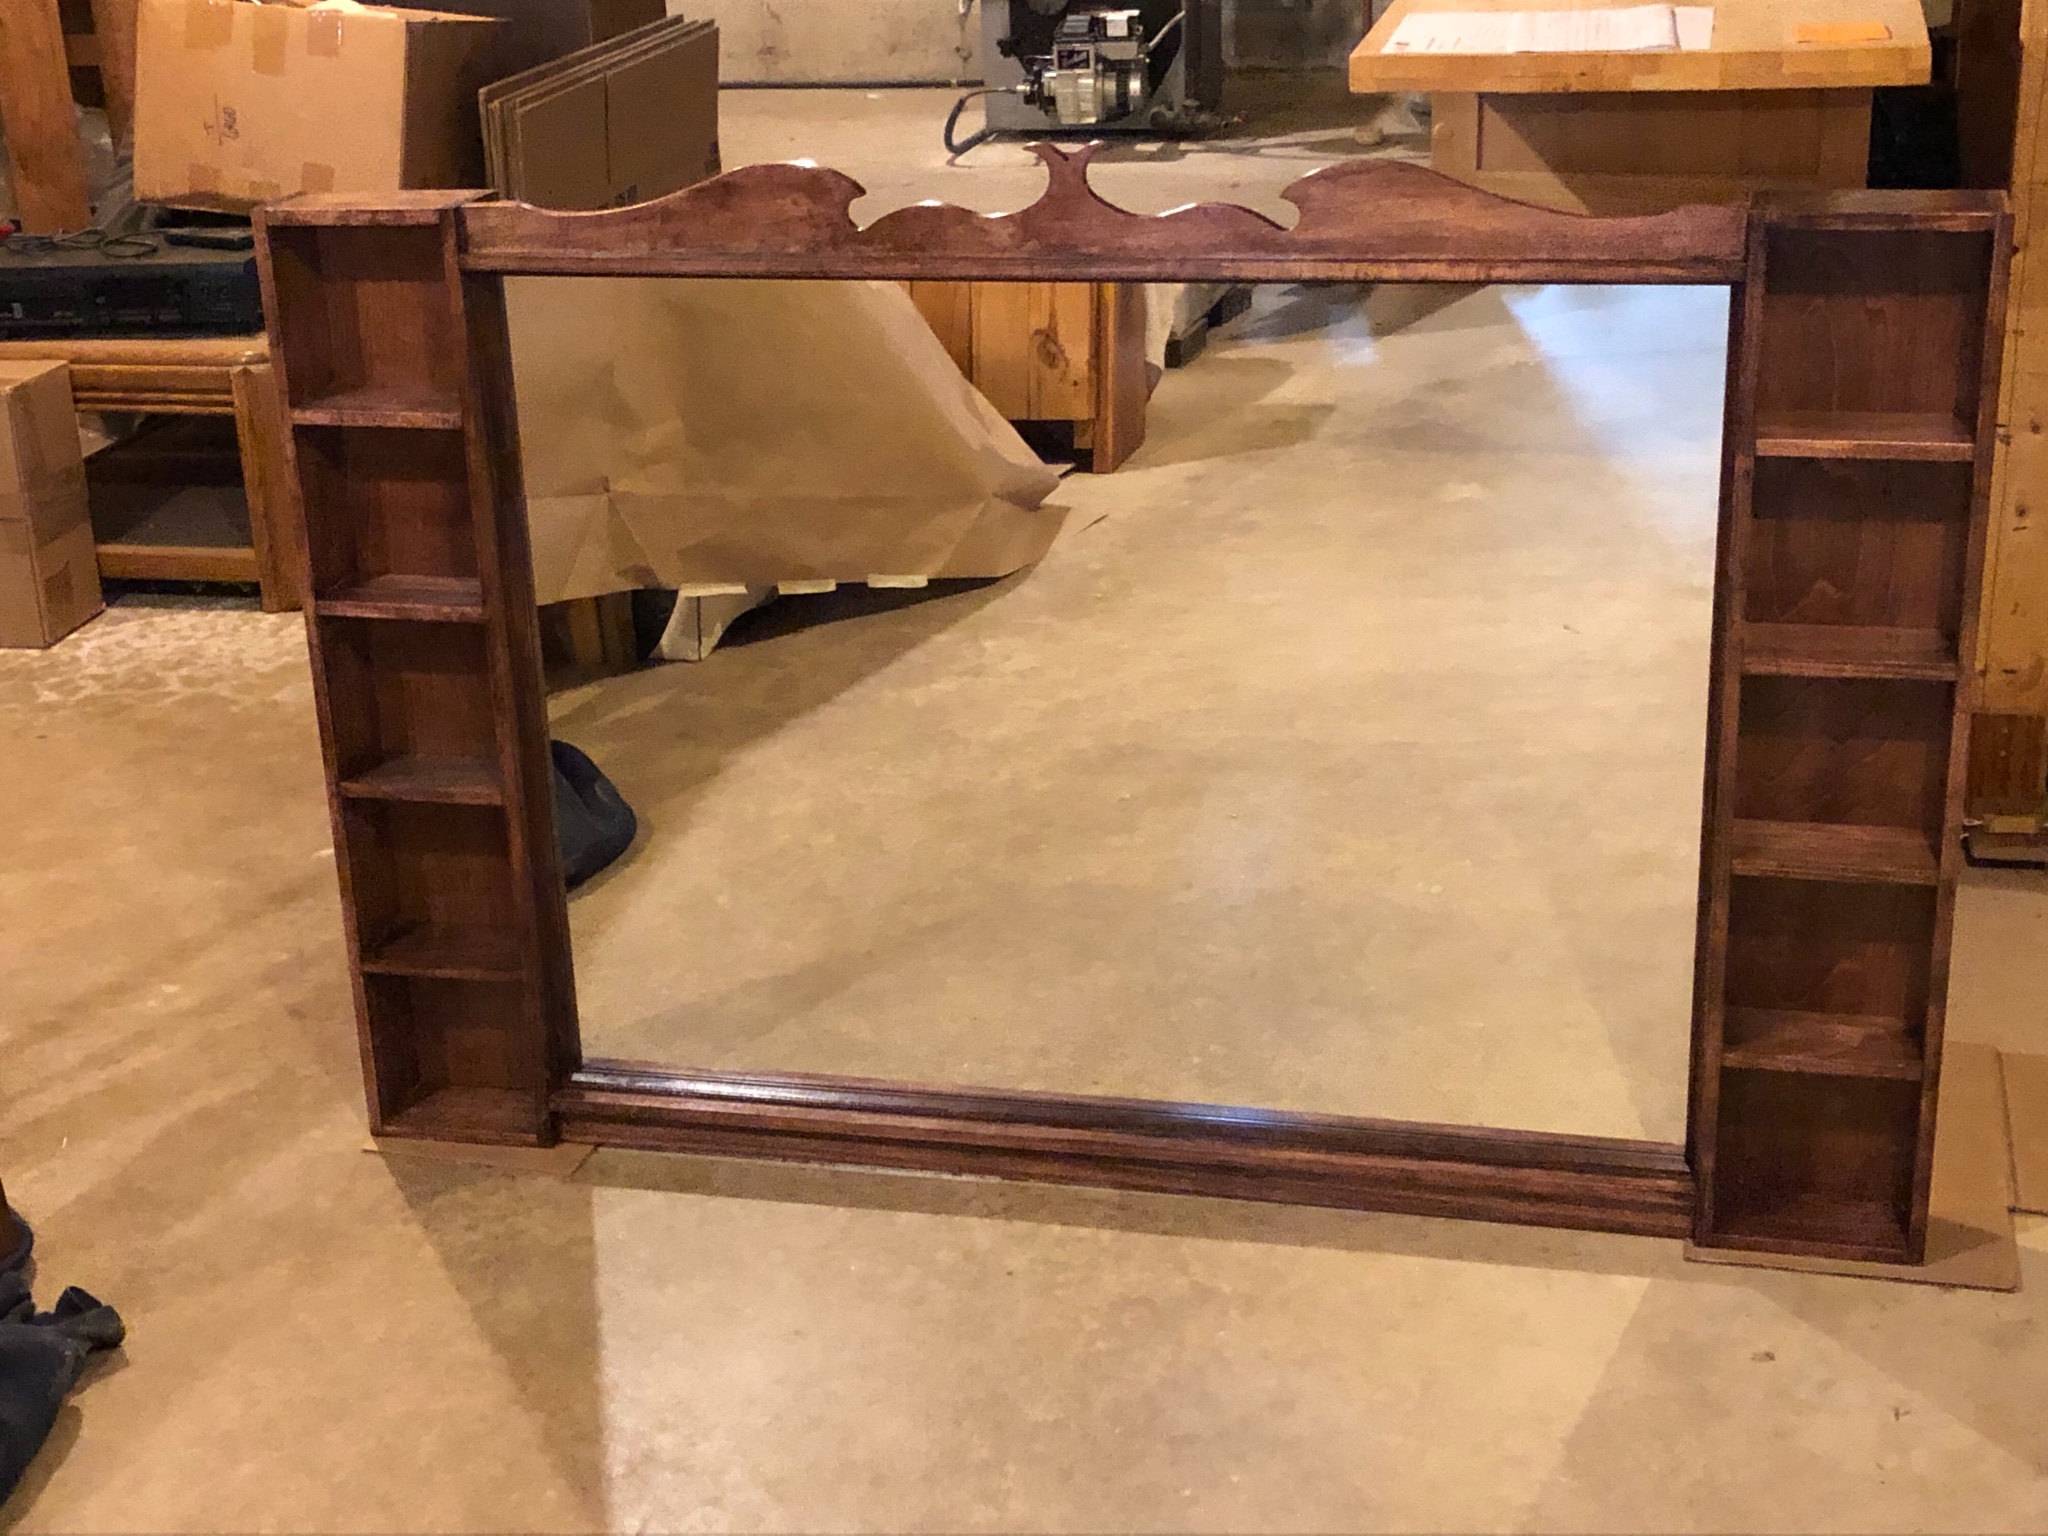
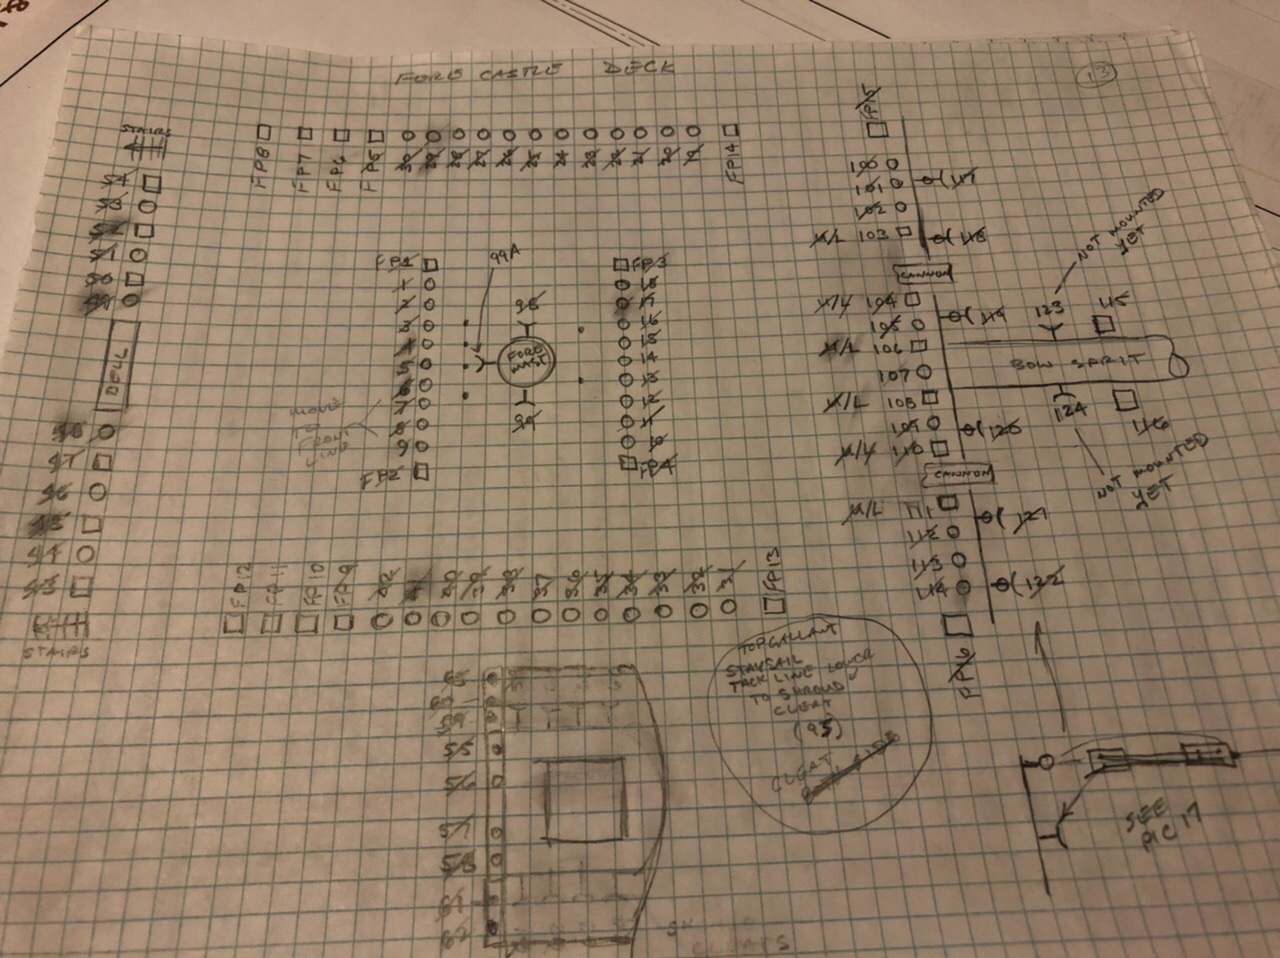
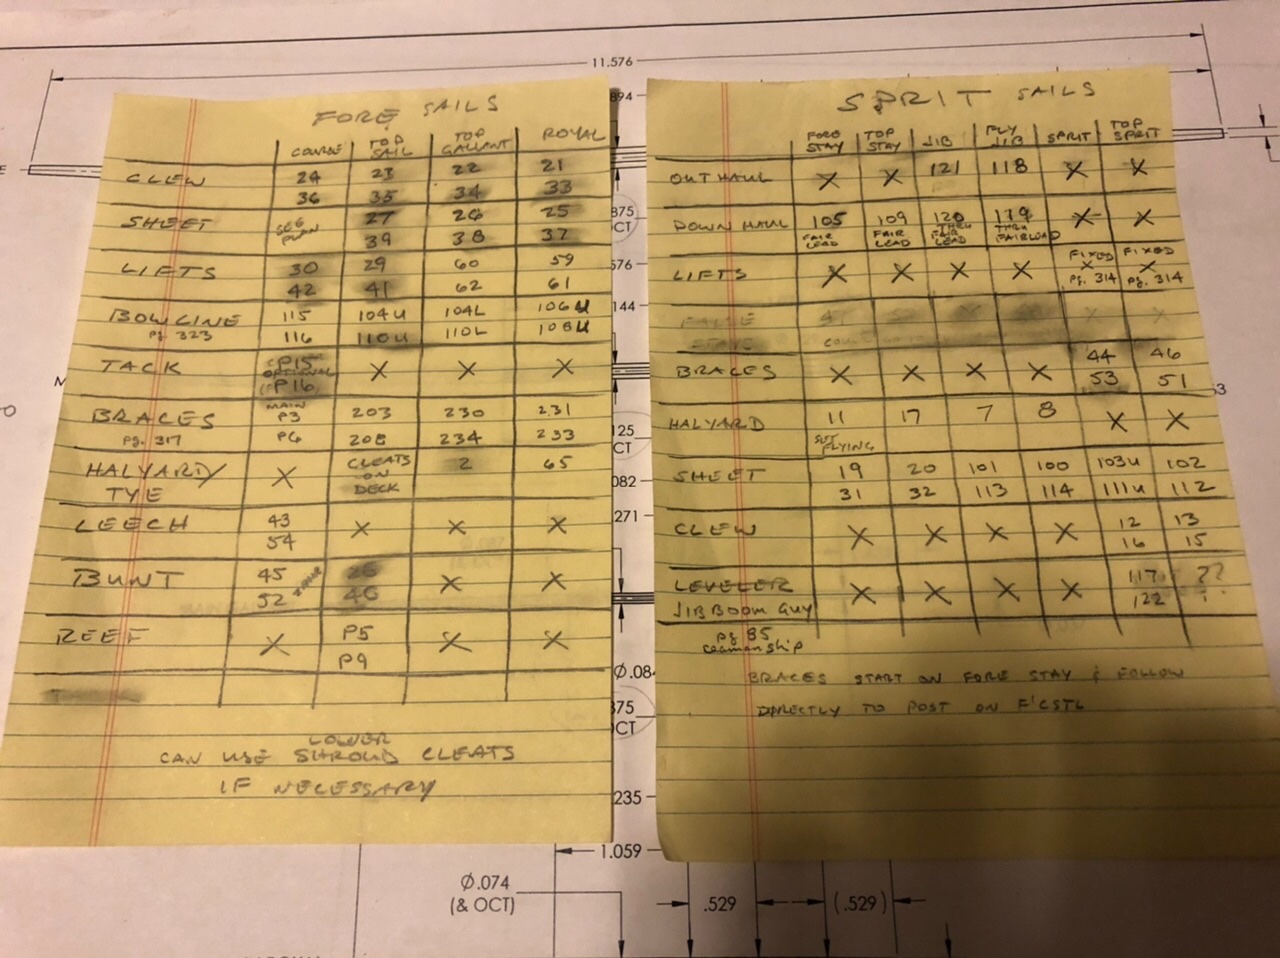
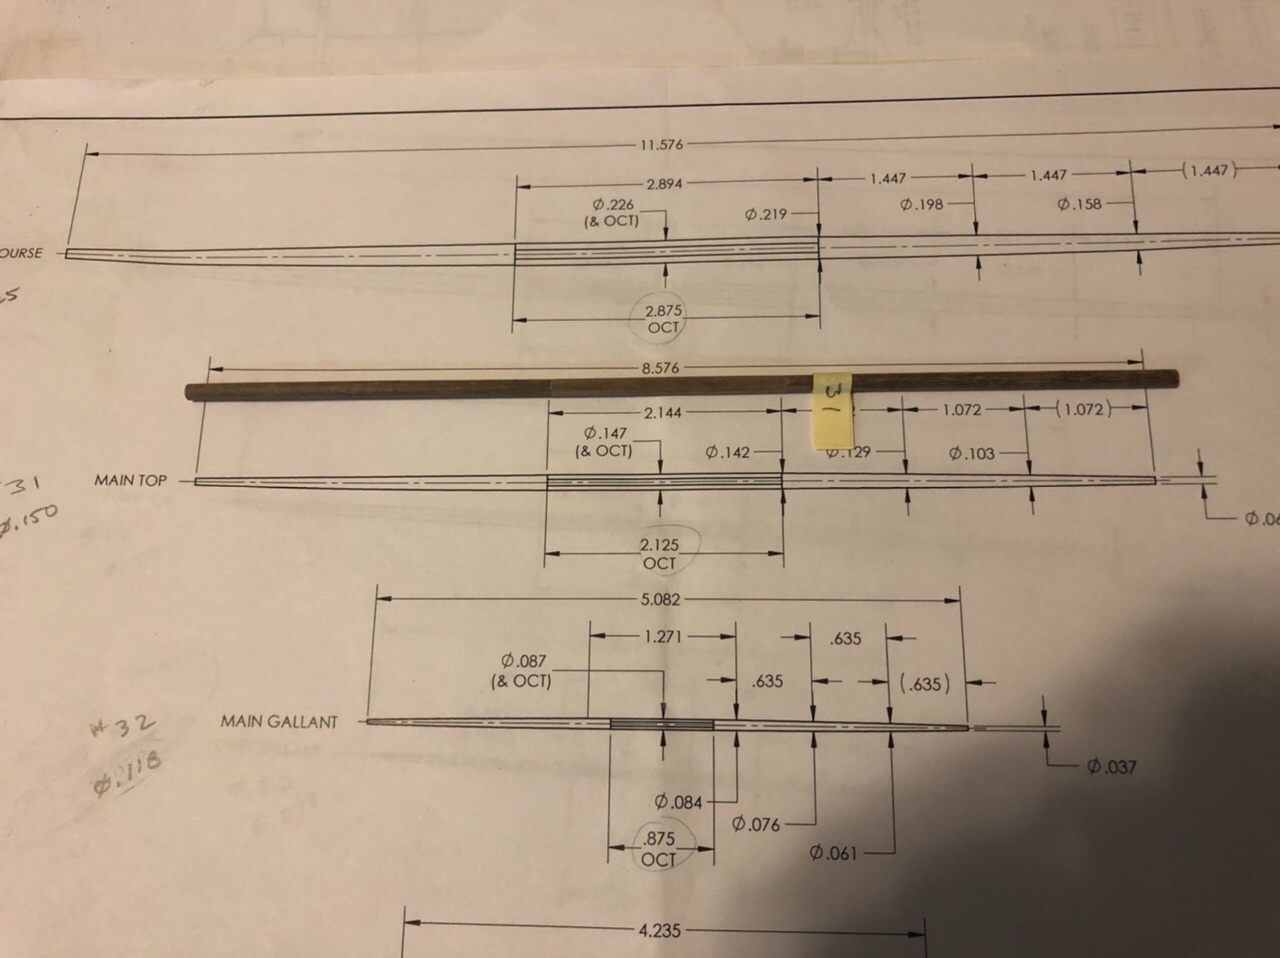
Hi everyone, I “had” to take a two week hiatus from modeling to build a mirrored wall shelf (33 x 53 inches!) for my daughter (just can’t say no when they ask 😉) I am back at it. I reviewed my pin layouts I made a while back. I sketched out a schematic for each mast area and developed a key as to where all the lines will be tied off. I also have been working on the yards. I have them rough cut to length and finished the octagon area on all of them. Finishing up some of the odds and ends to finish the standing rigging and get them installed as the masts are being assembled. There are quite a few things to think about when trying to anticipate what is coming up. I am working very hard to understand the rigging and when it will be the easiest to install. I am probably overthinking the whole thing but that is the engineering in me. 😜 Comments and suggestions are always welcome. Tom

-
Hi Roger The AL Constellation was my introduction into model ship building. I was able to get the kit for $120 on EBay. A small price to pay to try something I have always wanted to do but never really had the time. I also assumed the kit would be somewhat realistic and would be something I could be proud of. As it turns out it was a nothing more than practice for my current scratch build which is not a bad thing in itself. Knowing what I know now (scratch building is certainly an eye opener and learning opportunity), it is just disappointing finding out iwhat you worked so hard on is nothing more than a trinket that looks great but only to people who don’t know what they are looking at. For the prices charged for some kits versus the quality and the disappointment I now feel, it was enough for me to give up on kits and try scratch. I know there are some great kits that are done well (Syren, Watton) but the big name mass produced ones left a sour taste for now. Sorry for venting but sometimes it just feels good! I am sure I will build kits in the future but will do more research before building and be prepared to do some kit-bashing. Tom
-
Hi John, Finishing the standing rigging is another milestone in the rear view mirror. Excellent job. 👍 Tom
- 204 replies
-
- 1
-

-
- marine model company
- charles w morgan
- (and 1 more)
-
Hi John, It’s coming along very decent! I have found that I am by far my worst critic. So following that logic, if you think it is pretty good it must really be fantastic! Keep up the good work. Tom
- 204 replies
-
- 1
-

-
- marine model company
- charles w morgan
- (and 1 more)
-
Hi John, It's coming along bit by bit. It is amazing how many little details need to be done. Hopefully most of them don't go unnoticed by "normal folk" or should I say non-ship modellers. I say that because I don't consider us (model ship builders) to be anything close to normal. Anybody that does this type of work, to the detail level we see on this site definitely does not fall into the mainstream norm... whatever that is. 😀 Keep up the good work. Tom
- 204 replies
-
- 2
-
-
- marine model company
- charles w morgan
- (and 1 more)
-
Hello all, I finished some of the standing rigging on the back half of the ship. Now I need to find out more about the bow sprit rigging and what attaches to the fore masts along with the connections between the main and fore masts. I spent the better part of the last month learning the rigging. One step at a time. I can't believe how many blocks I will need to fully rig this ship with staysails. I am sure Chuck will be getting another order soon. Tom
-
Jim, It just keeps getting better and better. I remember wiring the pico lights in my Leopard, especially the stern lanterns. Those are some pretty tiny lights!💡💡💡 Tom
-
Hi Jim The furniture is absolutely incredible. Next thing your going to tell me is that the draws have actual scaled clothing in them. 😜😁 I think a pair of shoes next to the dresser would be a nice touch. 😜😜😜😁 Truly an exceptional job on this cross section Tom
-
“Feels like she has a long way to go. However, looking back there are a lot of accomplishments. Hours spent now stand at 344. Began this Journey back on January 21st 2020. Seems like so long ago...” John, 7 1/2 months... are you kidding!? I’ve been plugging along on my Leopard for 3 1/2 years! Your Morgan looks absolutely great. I hope mine comes out as good when I get to it. Tom
- 204 replies
-
- 1
-
-
- marine model company
- charles w morgan
- (and 1 more)
-
Thank you Bob, popeye2sea and spyglass. Once again I learn from MSW! Now that I understand what “set flying” is that is the path I must follow. Especially since the false stay is prior to the Leopard. I did not realize that when I originally came across “false stays”. Thanks again everyone, Tom
-
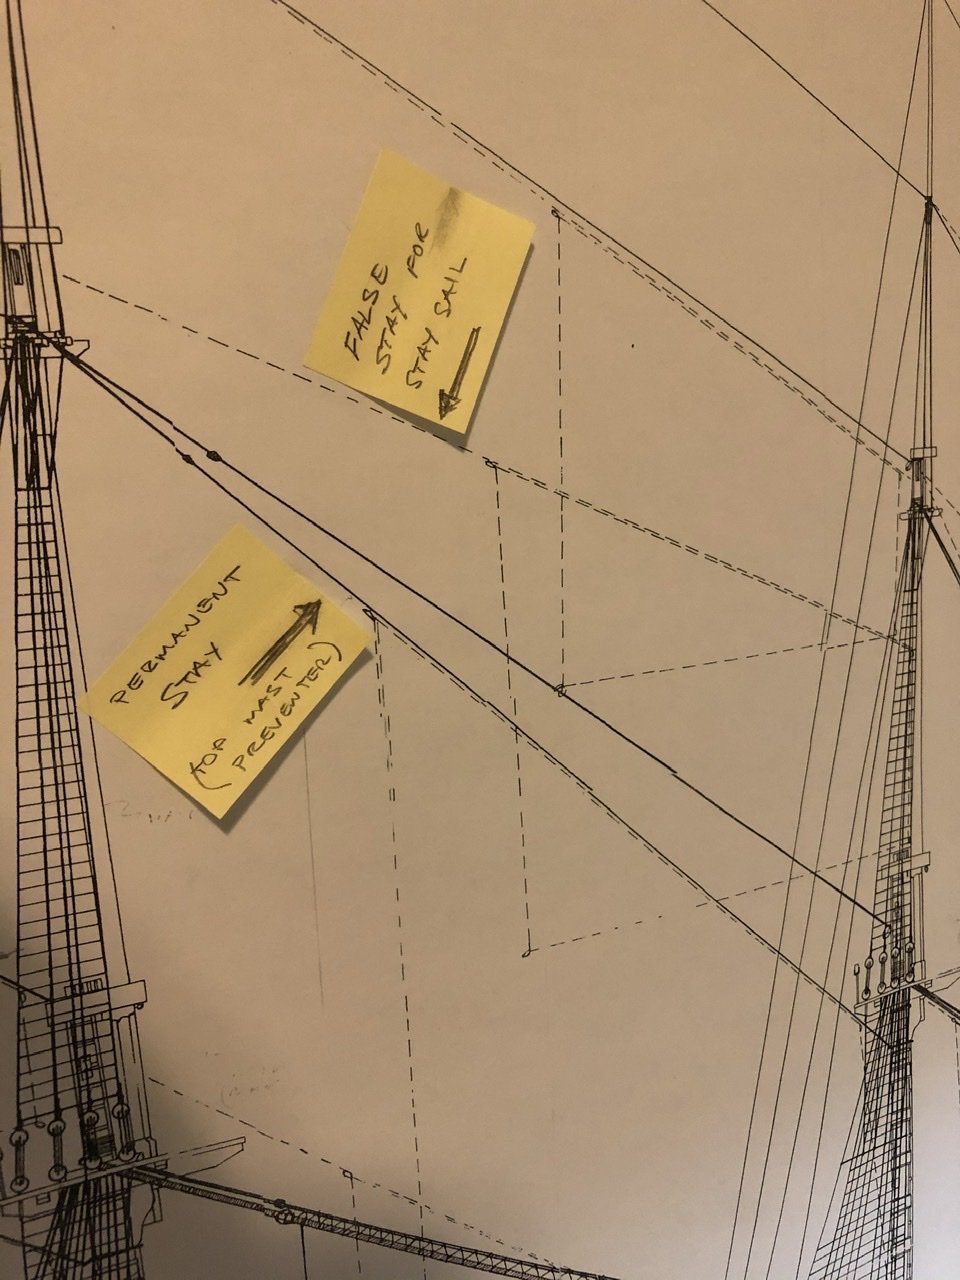
Spyglass The plans came from Winfield’s book on the 50 gunship. I read somewhere (I just can’t remember where... read so much lately) that false stays are stays that are only put up temporarily while the staysails are being used. When not in use they are taken down. I am thinking that Bob’s thought about “set flying” might be correct I will need to look into that. Two of the jib sails are also shown the same way. Tom
-
I am still searching for more information but coming up empty. Looks like it would make sense to serve and "tar" the working area and leave the section at the lower end that goes through the block and ties of to a cleat without serve and tar. Anybody? Tom
-
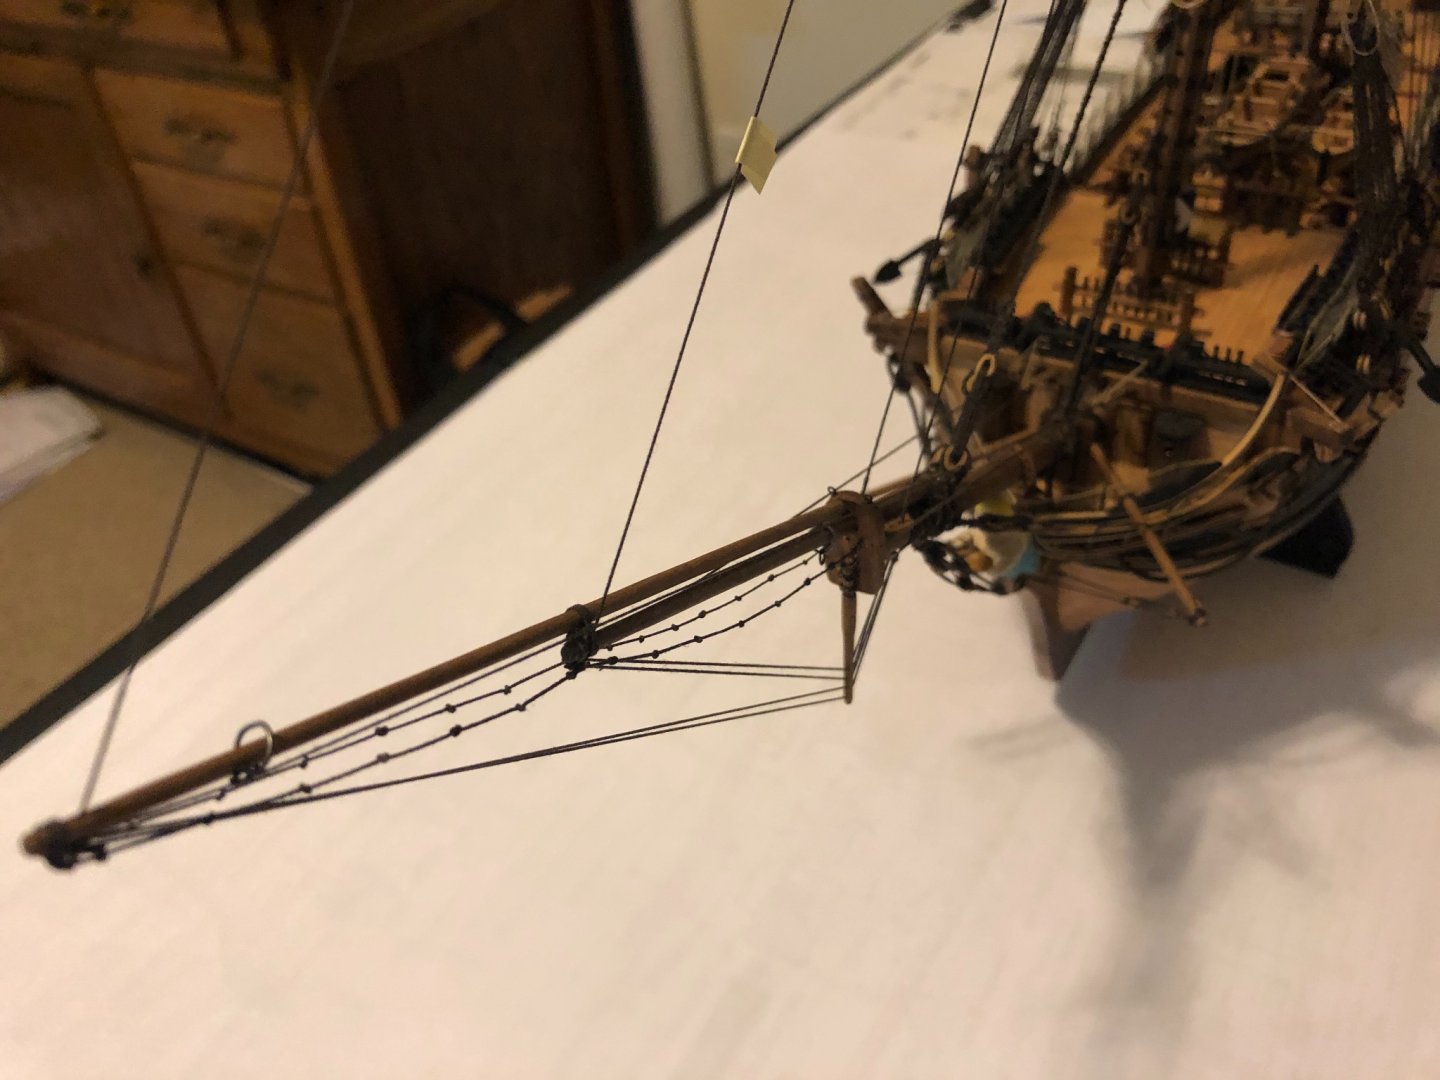
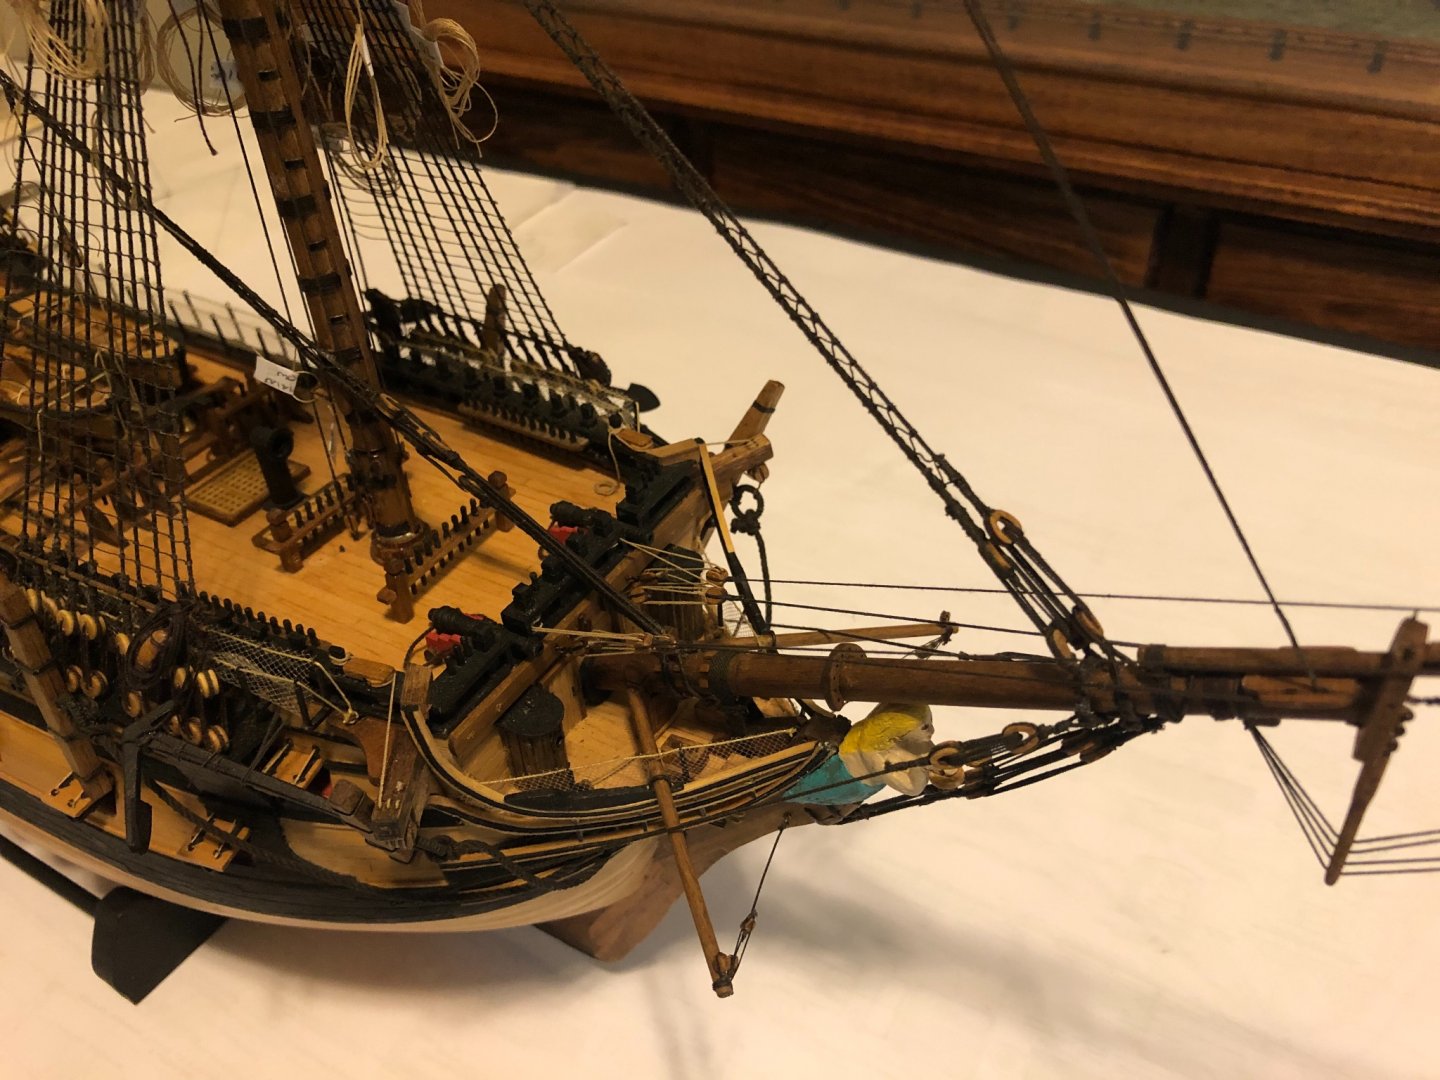
Hi MSW, I have a couple of questions regarding the false stays used to attach the staysails to on my Leopard of 1790. I would like to put the main and mizzen staysails on the model. Not sure if I will furl some (probably) but anyway. I have attached a picture of a piece of my standing rigging plan to help illustrate. As the plan shows, the main top mast staysail rides on the fixed and permanent top mast stay preventer. Being permanent standing rigging this would be a tarred rope. Since the hanks will be sliding up and down this rope should that working length be served? I would imagine the same answer would apply to a false stay as shown in the picture with the top gallant staysail. Served and tarred even though they were sometimes taken down. Tom

-
Treating rigging blocks prior to installation
toms10 replied to WalrusGuy's topic in Masting, rigging and sails
I agree with darker blocks. I stain mine with walnut colored stain before using. Tom