HOLIDAY DONATION DRIVE - SUPPORT MSW - DO YOUR PART TO KEEP THIS GREAT FORUM GOING! (Only 24 donations so far out of 49,000 members - C'mon guys!)
×


toms10
-
Posts
929 -
Joined
-
Last visited
Content Type
Profiles
Forums
Gallery
Events
Everything posted by toms10
-
 Nice job Jim. The three beam side looks “more righter”😜. There is a bit of grammar to push my wife the English major over the edge. 😁 But as you said, it is all going to be covered anyway. Great practice and a chance to learn though. You are a better man than me. I would have left it out all together if it is going to be planked over. Tom
 -
Hey Jim you made me double check (I have some OCD issues 😜) just for fun and low and behold I did do a math error when multiplying. It is actually 2,918! Ridiculous!😃 Really like your cross section model! Tom
-
My thoughts exactly. 😁 Tom
-
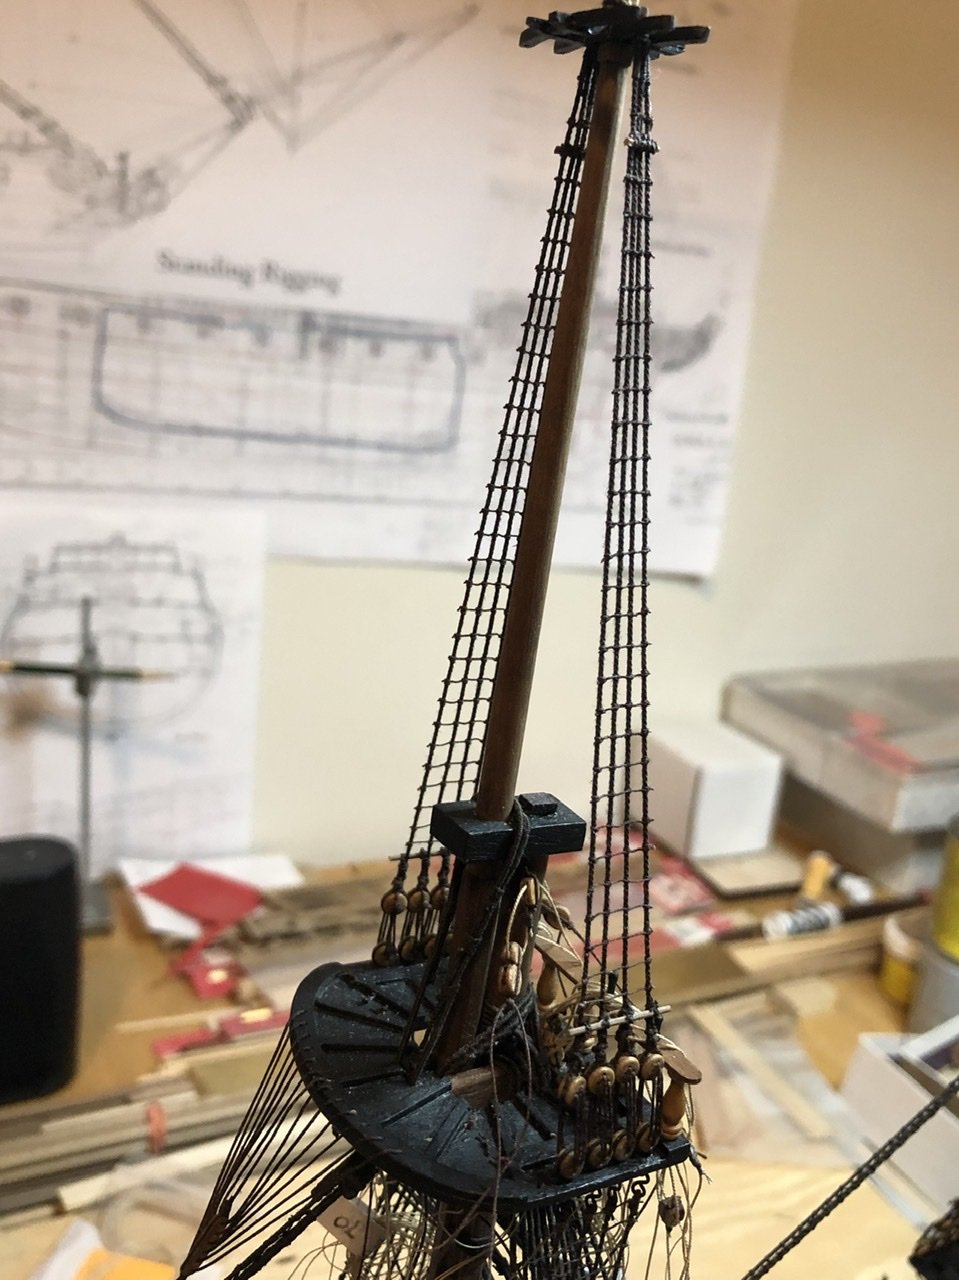
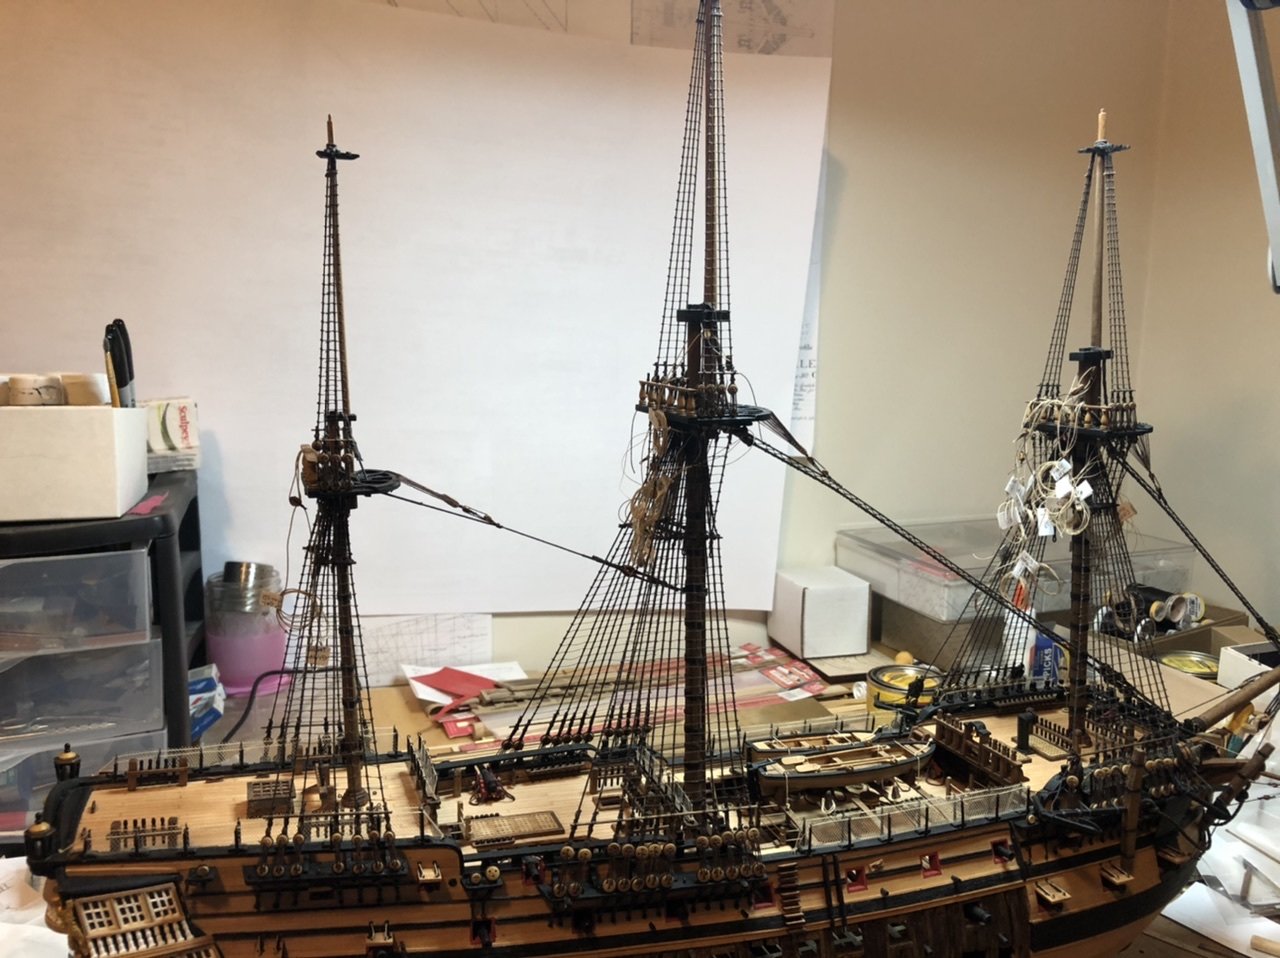
Hi all reached another milestone today. After 2,852 clove hitches, all the main, top and futtock shroud ratlines are complete. Now I will start to work on the forestays and backstays for the top masts. Then on to the top gallant masts and rigging and finally the royal masts. Working my way through the standing rigging. At least that is the plan for now. Also still have a decent amount of work to do on the bow sprit. Really starting to enjoy the results with some of the rigging in place. Brings the model to life a bit. 👍😁 Tom
-
If I am interpreting all this correctly someone still had to get up there to furl the royal sail before before bringing the mast down or as popeye2sea mentioned everything would get fouled up. I am starting to think that you may be correct that many models just leave out the knitted rope or ladder. I am thinking of just putting a knotted rope from the base of the royal mast down to the crosstree below. Very small detail but seems to fit. I still have plenty of time to look into this as this can be added at pretty much anytime. thank you Michael and Popeye for your help in helping me to understand. Tom
-
Hi Michael that makes sense. My question was geared toward the royal yard on my Leopard build or any other ship of the time period for that matter. Knotted rope or rope ladder seems logical at this point. Tom
-
Justin, yes it is my current build the Leopard circa 1790. I should have mentioned that in my question. Chris, thanks for clarifying and mentioning the book. Now of course I have to get a copy and read it in my spare time. Maybe an audio book to listen to while I model. 😁 Popeye2sea, a rope ladder is something I did not think of. It makes sense otherwise you would need to shimmy up the shroud line. Nothing I would prefer to do. 😜 Do you know of any pics showing one? Thank you all for the help. Tom
-
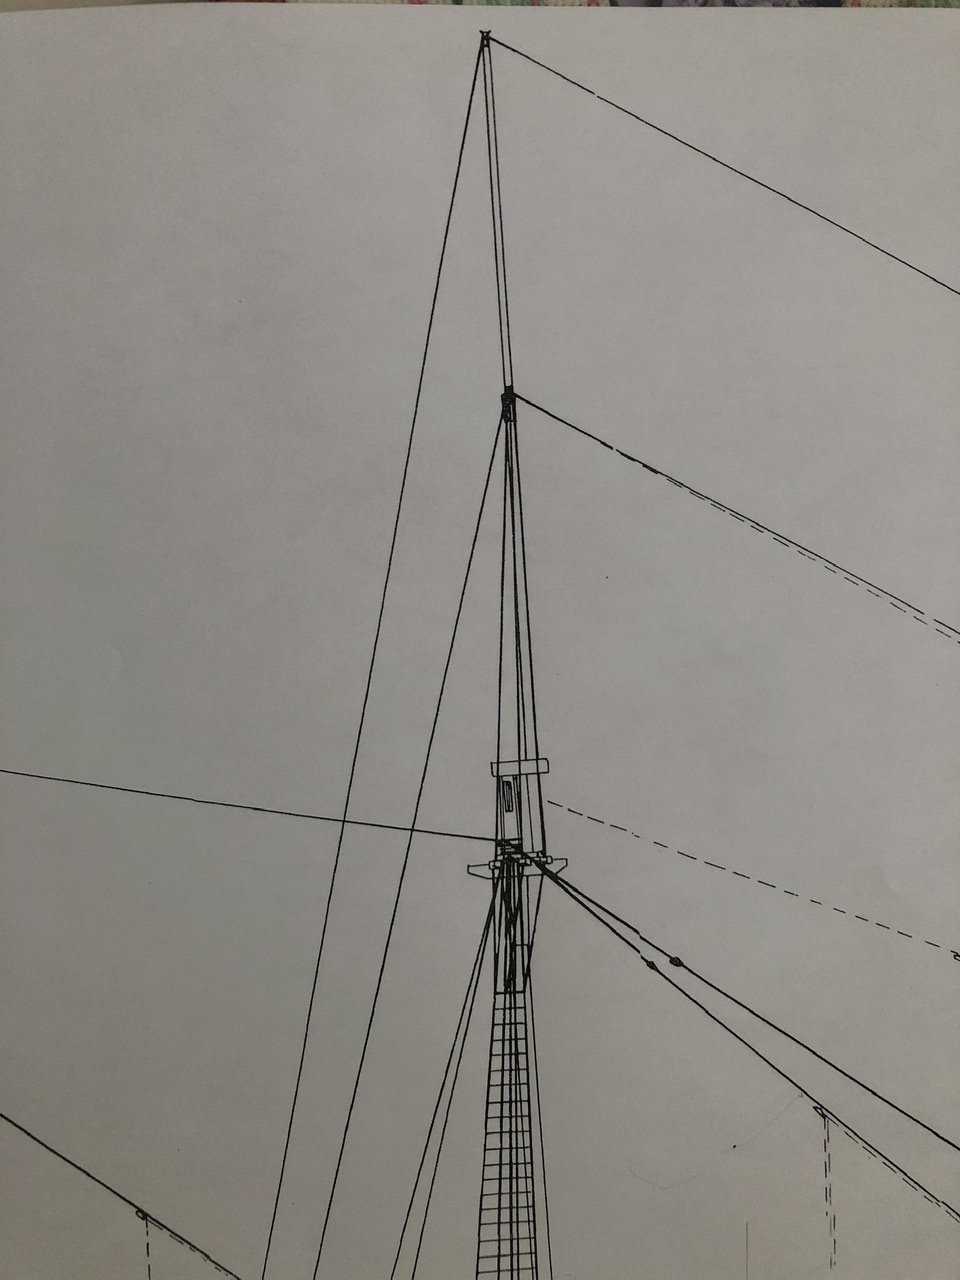
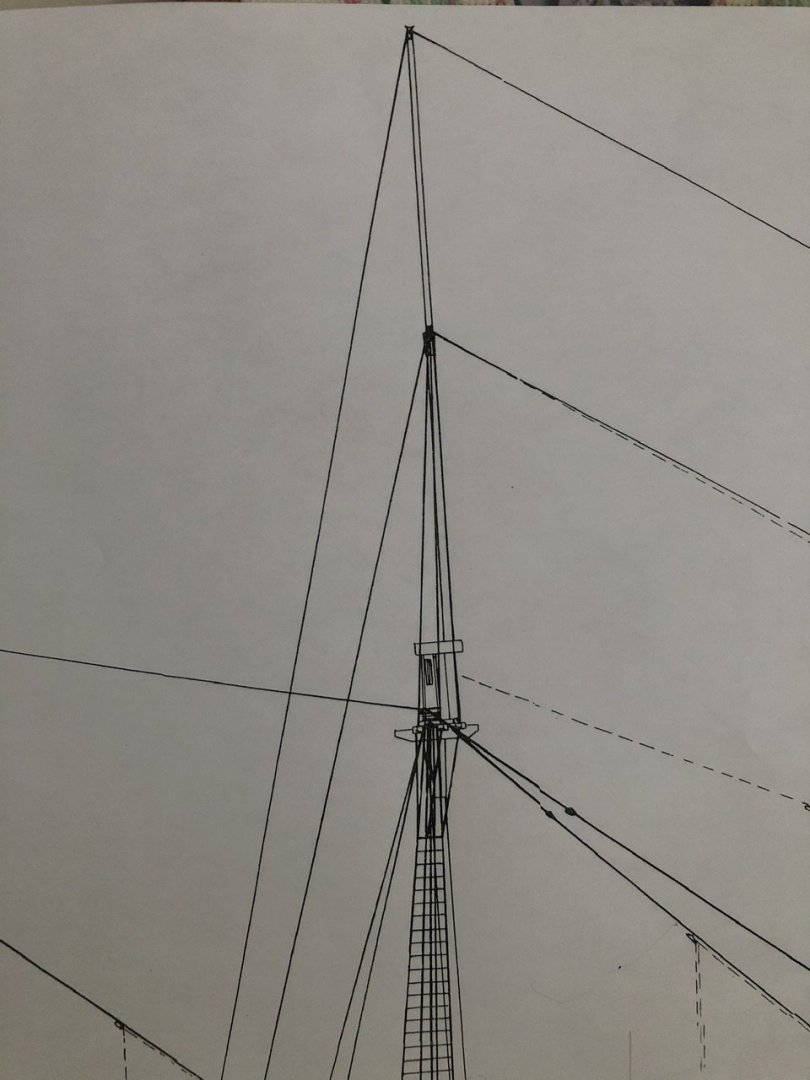
I have a question about the shrouds on the top gallant masts. I noticed there are 3 shroud lines but no ratlines. If one were to lower the royal yard how do you get to it if need be? I would have thought ratlines would solve the problem but there are none shown on the plans. Understand I don’t want to tie more ratlines but it does not make sense to me. 🤔. Below is a pic of the standing rigging for the main top gallant mast. The same is shown for the fore and Mizzen masts. Any insight would be helpful. In the meantime I will look again in my limited library for any answers. Tom
-
Little more progress. Finished the fore top mast shrouds and ratlines. I have a question about the shrouds on the top gallant masts. I noticed there are 3 shroud lines but no ratlines. If one were to lower the royal yard how do you get to it if need be? I would have thought ratlines would solve the problem but there are none shown on the plans. Understand I don’t want to tie more ratlines but it does not make sense to me. 🤔 Tom

-
A DIY thickness sander
toms10 replied to Kris Avonts's topic in Modeling tools and Workshop Equipment
Wefalck, as a tooling design engineer I agree with you. Simpler is always better. Less moving parts with fewer critical dimensions means less that can go wrong. I often ask myself after I complete a design “Why did I make this so complicated?” Kris, with that being said, I am enjoying following this DIY sander. It is way better than the one I came up with. Oh wait I did come up with one. 😜. I like watching ideas come to life. Thanks for sharing. It is how we all learn. Tom -
Jim Those louvers came out really nice. You are making me want to do a cross section model! I love all the details that are not normally seen in a model ship. Very interesting and educational. Keep up the fantastic work. Tom
-
Hi Bob thanks for helping out with the canvas explanation. It sure does explain a lot. Learning as I go. Tom
- 204 replies
-
- 1
-

-
- marine model company
- charles w morgan
- (and 1 more)
-
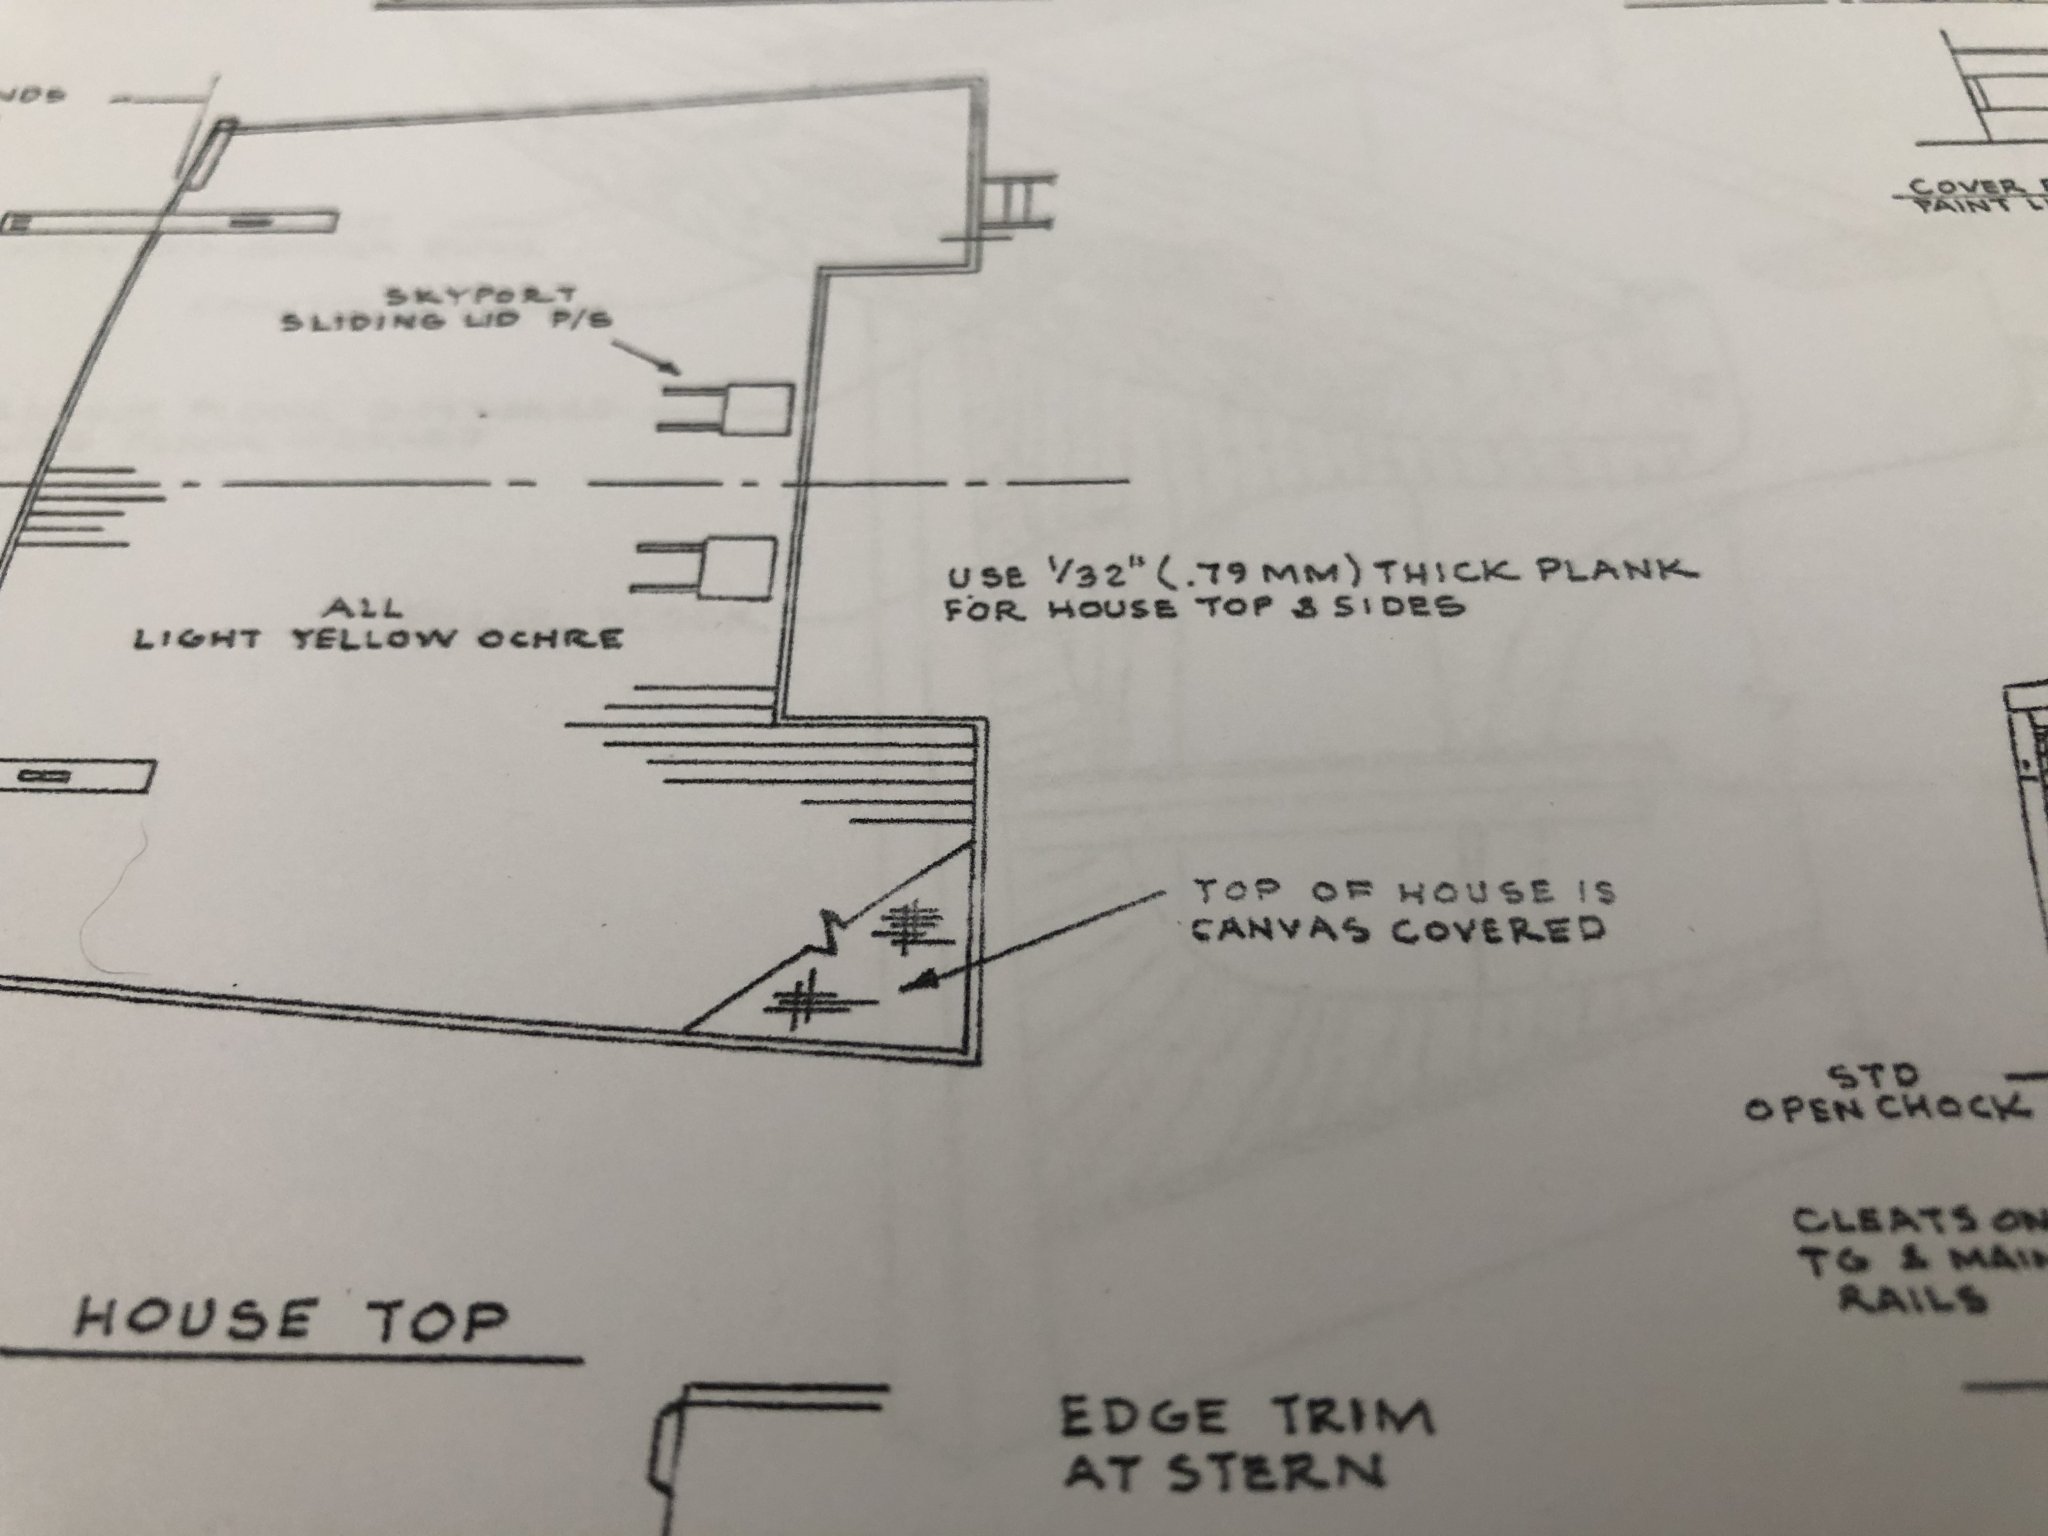
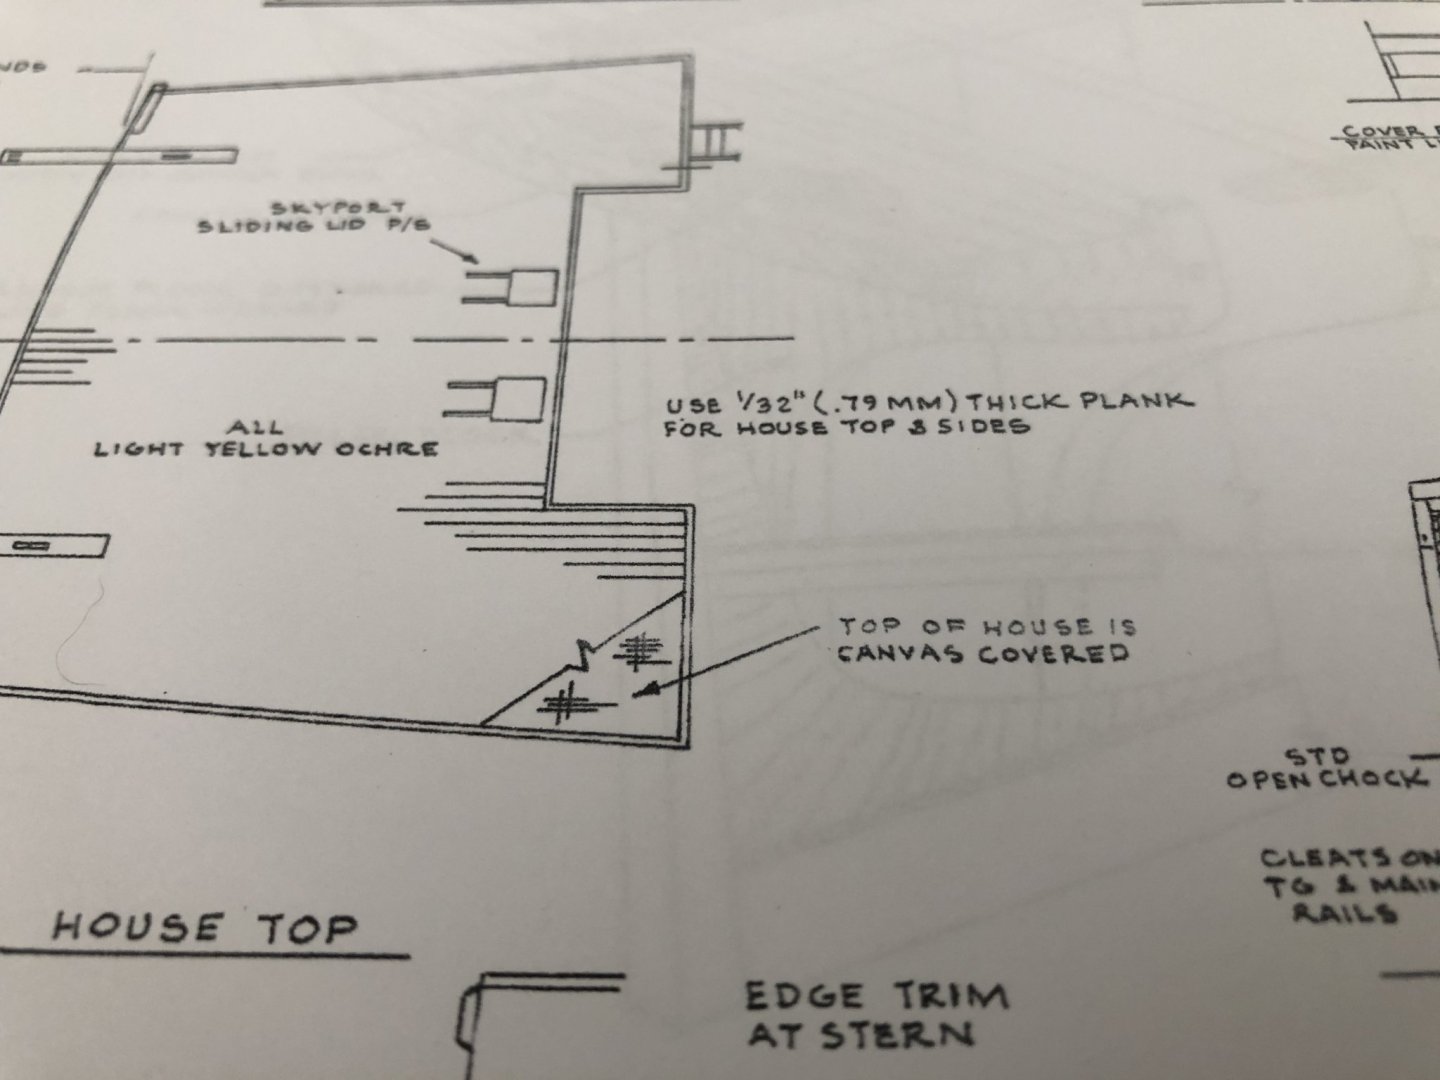
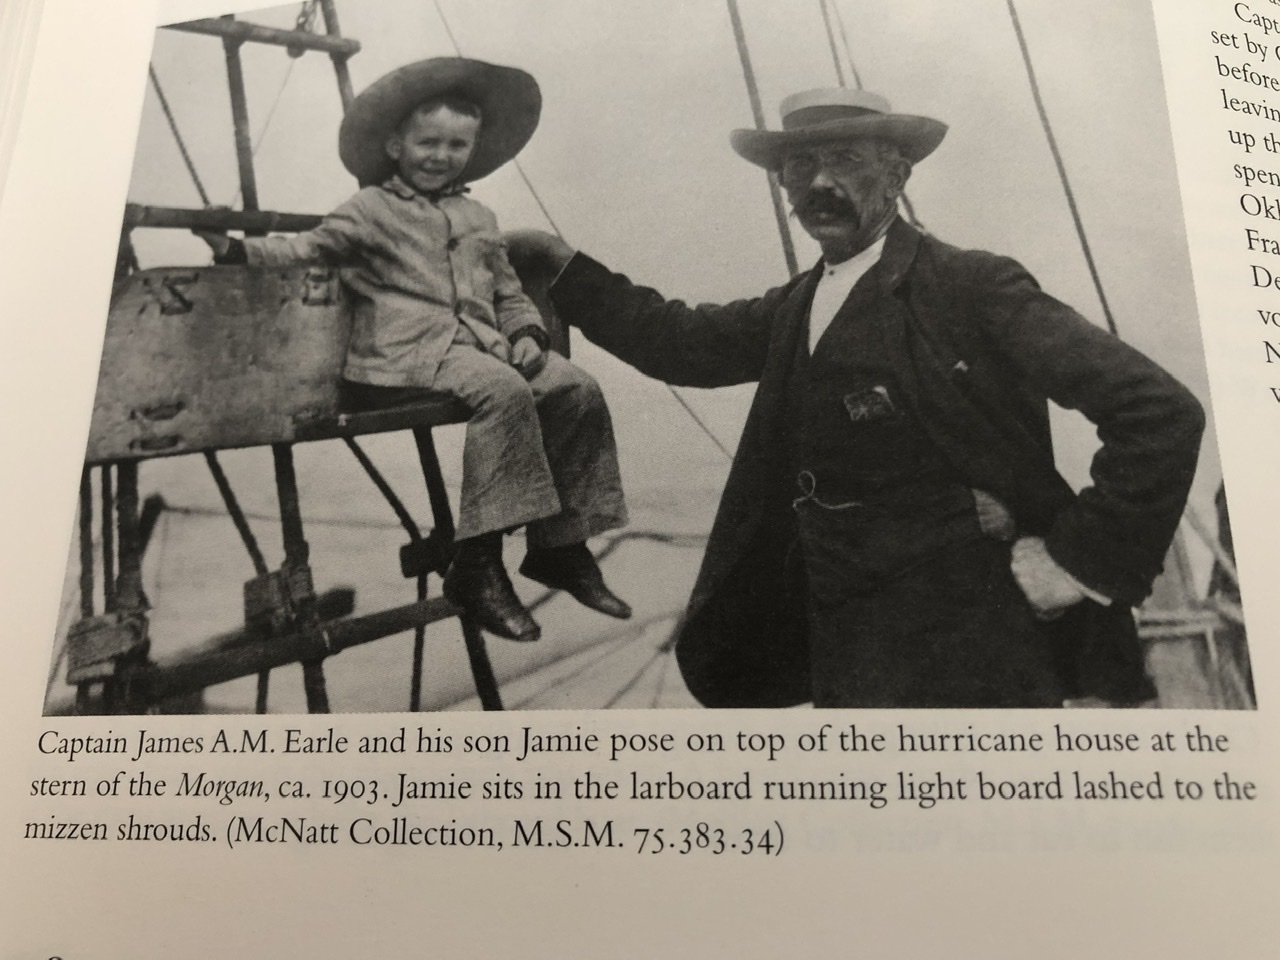
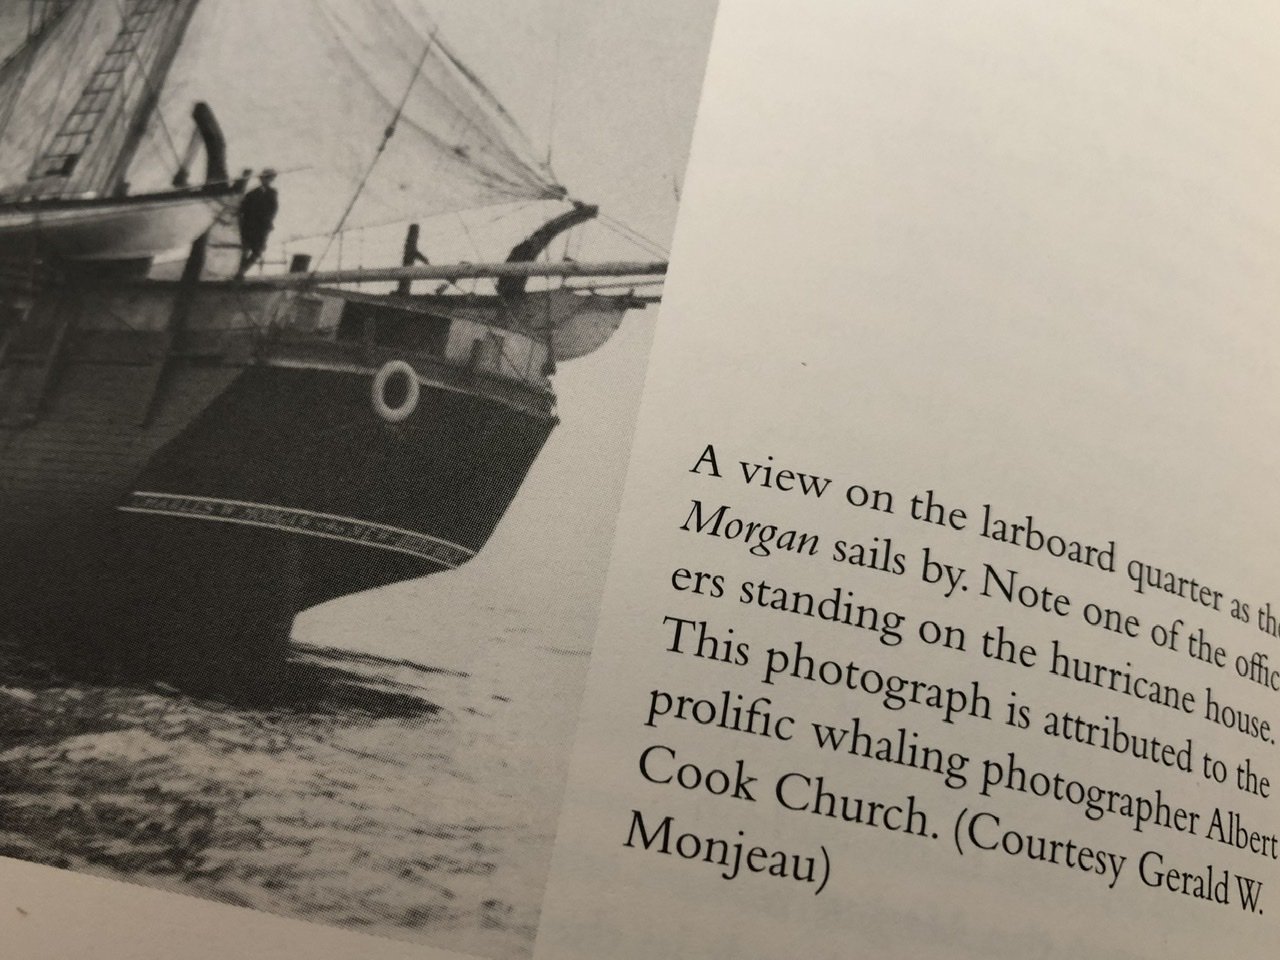
Hi John i did some checking on the canvas roof for the hurricane house. As ragove mentioned in his post theModel Shipway plans say to cover on canvas. I am not sure off the top of my head but I believe the Shipway plans are from about 1939. Unfortunately when I was aboard her last summer I did not get a good pic of the hurricane house and I don’t remember what the roof was made of. I also checked in the book “The Charles W. Morgan” by Leavitt. I could not find any reference to the roof material however, I did see a couple of pictures that lead me to believe it was not canvas. Below is a picture taken in 1903 on top of the hurricane house. Look below the kid’s left foot and you will see there are wooden planks. In another undated photo presumably after 1903 as it comes slightly later in the book, a man is photographed standing on the roof. If it was canvas I doubt he would be up there even if he were just walking on the framing. Hmmm. When did the canvas come into the picture if it did at all. It must have around 1939 or why would the put it on the plans as this does not seem to be the norm? I am not sure what my plan is going to be yet. Build her as she sits in Mystic or as close to “as built” as I can get. If it is “as built” there was no hurricane house so the question goes away. I will also need to get the correct plans from Mystic. I am heavily leaning towards as she sits today. Looking forward to comparing your plans with the Shipways plans I have. part of the fun in this hobby is the research. 😁 Tom
- 204 replies
-
- 2
-
-
- marine model company
- charles w morgan
- (and 1 more)
-
Hi James, Welcome. I am CT yankee... at least until I retire in 8 years. This is a great site where everyone helps everyone. I have learned tons here. Tom
-
Nice job John. I just finished tying 2100 clove hitches on my lower and futtock shrouds for my Leopard. With the Morgan being my next build, those battens are looking pretty good. Tom
- 204 replies
-
- 1
-
-
- marine model company
- charles w morgan
- (and 1 more)
-
Hi Jack, Just catching up on your build. It's coming along great. Sorry to hear about your helper. Tom
-
How to narrow planks?
toms10 replied to Brewerpaul's topic in Building, Framing, Planking and plating a ships hull and deck
I use either an #11 exacting or more often just a paint scraper that fits a razor blade. Chop it with the razor blade close then use a sanding stick to bring it to size and the correct shape. Tom -
Havelock, It is Jim (Bluto 1790) that is doing the jaw dropping work. I am just as blown away as you.! Tom
-
Nice recovery John. If you don’t fix (redo) things along the way it can only be for two reasons. 1) Your perfect. 2) You just don’t care. if your human like me number one just plain doesn’t apply. Again if your anything like me, number two is not an option either. If we didn’t care about doing things right (otherwise known as OCD which all modelers need and have) we would not last very long in this hobby. Enjoy the journey. 😁 Keep up the nice work. It is a beautiful model. When I get started on mine I hope I can make it as good as yours. Tom
- 204 replies
-
- 1
-
-
- marine model company
- charles w morgan
- (and 1 more)
-
Charles W. Morgan
toms10 replied to shortgrass's topic in Building, Framing, Planking and plating a ships hull and deck
Hi Shortgrass, I am starting to plan my next build which will be a scratch built Morgan. Fortunately for me I only live about an hour away from Mystic, CT where she is docked so I can take a lot of pictures for reference to augment the plans. If you do a search on this forum you will find some nice build logs of the Morgan. Looking forward to seeing your build. Tom -
Jim, I am just catching up on your build log and it is really coming out nice. It is amazing how many miscellaneous things aside from the normal model build stuff that needs to be considered when doing a cross section build at the scale you are doing. Excellent job, thought and research on your part. Tom
-
Hi Jim Good to hear from you. Hope all is well. Top mast rat lines will be a breeze compared to this past marathon. 😜 Thinking more on it, I think I will continue on with the standing rigging. Futtock shrouds next to get the top mast dead eyes secured. Then I can put in the top mast shrouds and finally the last sets of rat lines. Of course, all plans subject to change without notice. 😁 Be safe Tom
-
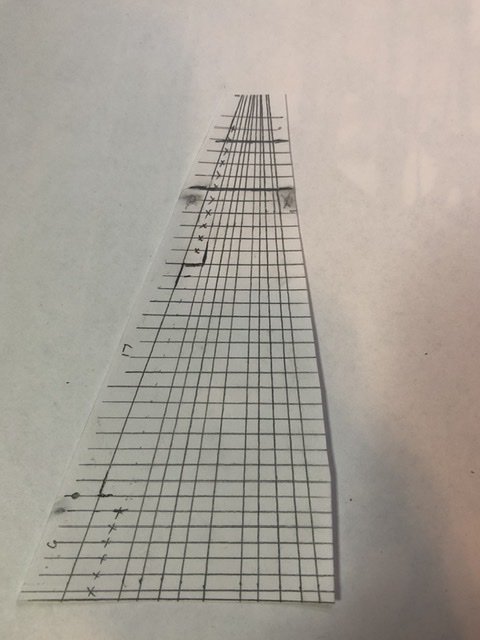
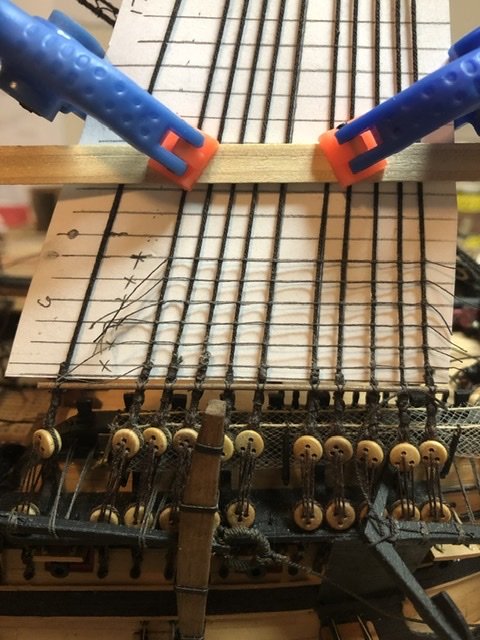
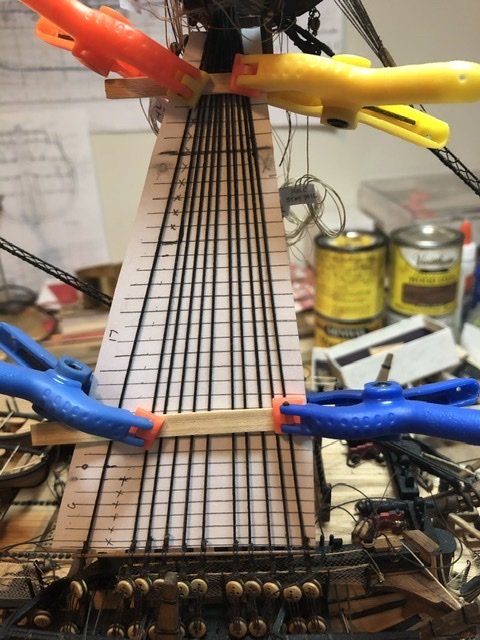
Major milestone tonight. Finished the rat lines on all the lower shrouds. I said I would count them but I couldn’t help myself... 1,392 clove hitches. I used the “draw the actual shroud position on paper” technique to keep the lines properly spaced and the shrouds straight. Here is the finished product. Maybe not a “10” but looks pretty good to me. I used 50 wt thread to keep the scale and keep the knots from being too bulky. Not sure what I will work on next. Definitely something without clove hitches. The yards seem to be calling. Those are pretty much the last wooden pieces that need to be made. Tom


- 385 replies
-
- 12
-
-
As Jaager already said the spine should be straight and true or you will fight it the whole way during the hull build. Would it be possible to glue another 1/8” piece opposite to each other to the sides of the bulkhead that is off. That would put wood where it is supposed to be for planking, treenails or whatever else might need the edge of the bulkhead to be in the correct place. Seems to me the simplest way and nobody will ever know but us and I won’t tell 😁 Tom
-
I am tying ratlines right now... about 2000 clove hitches. I don't see any advantage with this. It would seem that it would be more difficult to attache the whole thing to the model and have it fit properly. How to you keep everything straight and aligned if the shrouds are not in place yet. Definitely seems more trouble than it's worth. Just my 2 cents. Tom