HOLIDAY DONATION DRIVE - SUPPORT MSW - DO YOUR PART TO KEEP THIS GREAT FORUM GOING! (Only 53 donations so far out of 49,000 members - C'mon guys!)
×


toms10
-
Posts
929 -
Joined
-
Last visited
Content Type
Profiles
Forums
Gallery
Events
Everything posted by toms10
-
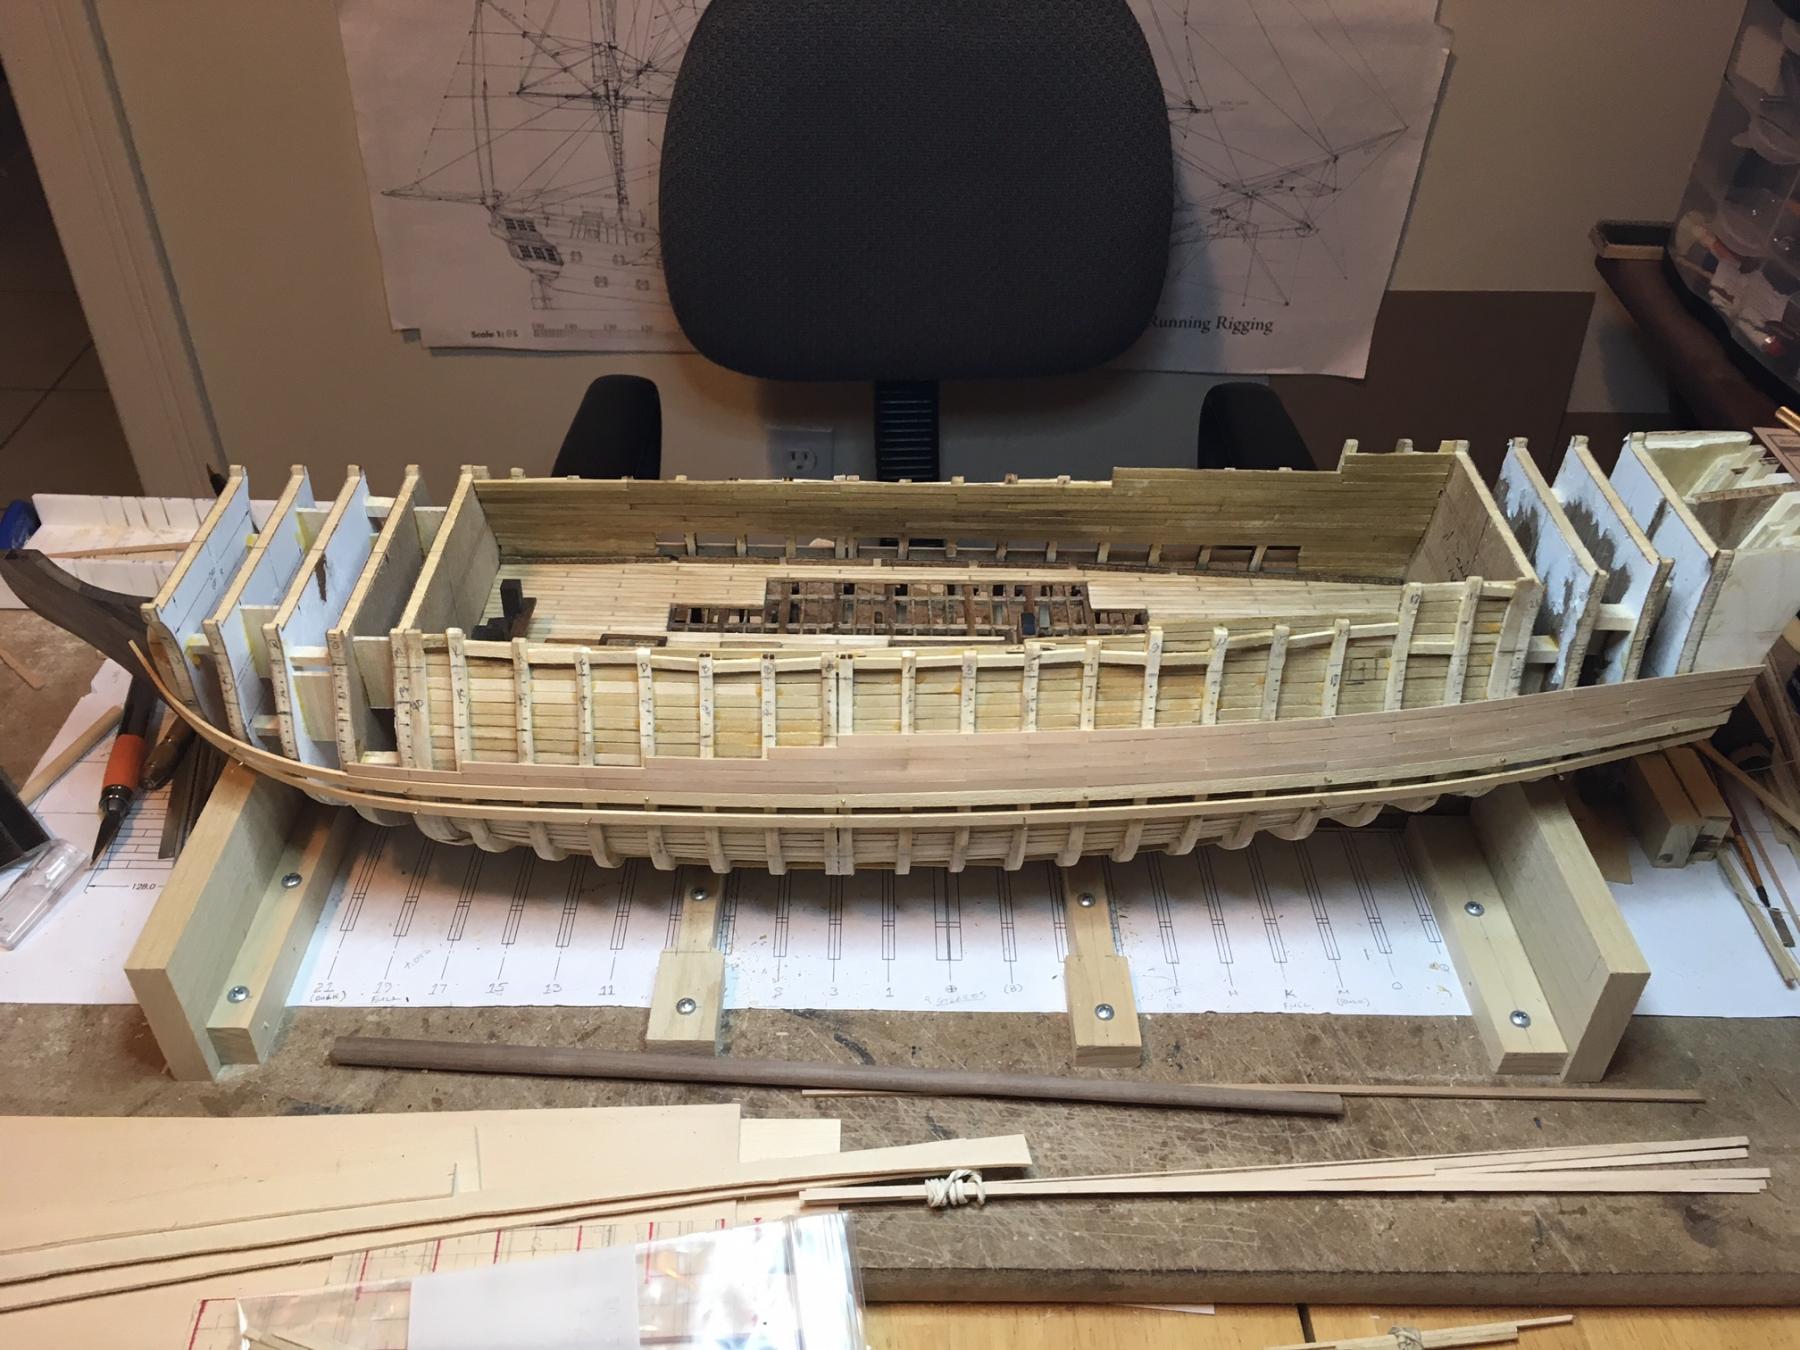
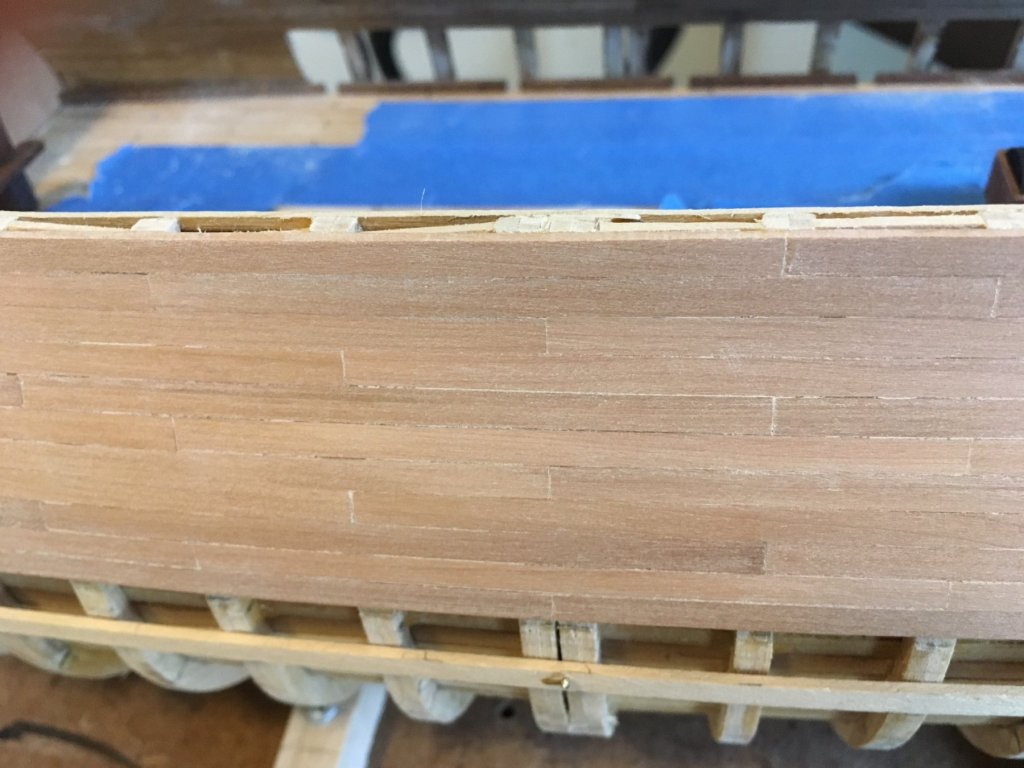
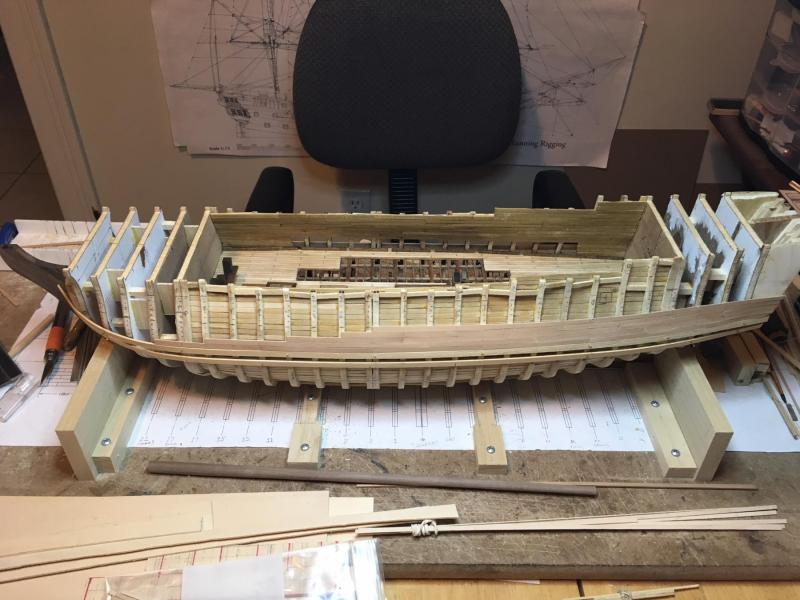
 I finished the planking above the wales... finally. Still need to do some final sanding but the hard work is done at least for the top half. I think I will start back on the decks and work to dry fit the upper gun deck to make sure all my cannon ports will line up correctly. It will also break up the time spent planking and allow me to continue to use my current jig to hold the hull upright and square for as long as possible while working on other things. I picked up a nice little tip from our own mtaylor if I remember correctly about using painters tape to cover up all the grates and other holes on deck to help keep the sanding dust from going to the below decks. Thank MSW and mtaylor!! Enjoy the pics, Tom Tom
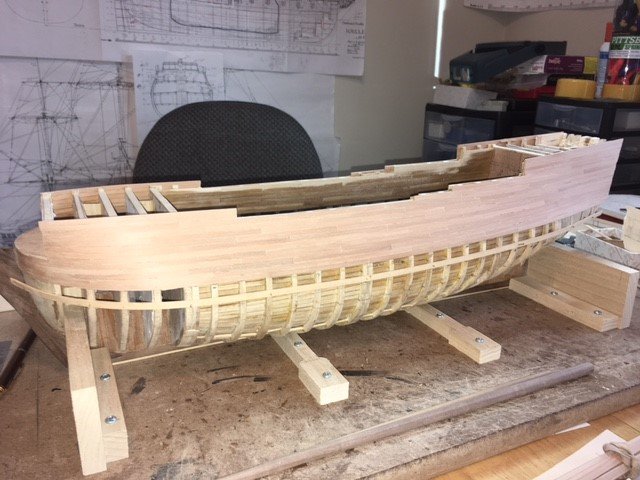
- 385 replies
-
- 14
-

-
Pandora by marsalv - FINISHED - 1:52
toms10 replied to marsalv's topic in - Build logs for subjects built 1751 - 1800
Marsalv, perfect rope for the perfect build! Tom -
Hi Jim, My planks are 1.5mm thick which leaves plenty for sanding for single planking. Scaling the plan they seem to be about 3.2 mm wide. My plank blanks are 4mm wide which is a bit on the wide side (about 14" at full scale) but the widths are always being sanded down a bit to get the fit (spiling) right so they end up a bit smaller. I am playing around with the upper wales right now trying to decide if I should make 2 rows of strakes or leave just one. With the slightly wider planks I am somewhere in between. One is a bit narrow and 2 is a bit wide and will run into the lower half of the upper deck cannons near the stern. I need to layout the exact position of the upper deck and then locate the gun ports to see where they end up. The deck heights seem to be pretty close to the plan so far so I should be in pretty good shape either way. Tom
-
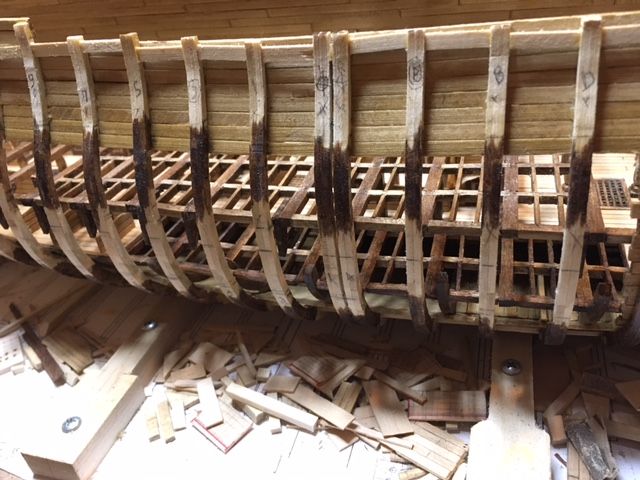
Just an update albeit a small one. I am still working on (and will be for a while) the outer planking. Since this will only be a single planked hull, I am taking my time with each piece. I am following the "make a few - scrap one" procedure. I thought I did a pretty good job fairing the frames and for the most part they came out fine except the upper halves of the bow. I am doing some resanding and adding little spacers in some small gaps so the planks have something to glue against. Ran into a clinker issue with a couple of planks but have resolved it. Whoever invented sandpaper should get some type of award. It seems to be my best friend lately. Here are a couple of progress pics. The hole thing still needs to be finish sanded but it is coming along a piece at a time.... literally. Tom
-
Jim, I enlarged my plans to the scale that I am working to. I work in an engineering office so I have access to large format copiers. I am going to give the hook and butt a try for the wales... at least that is the plan. Tom
-
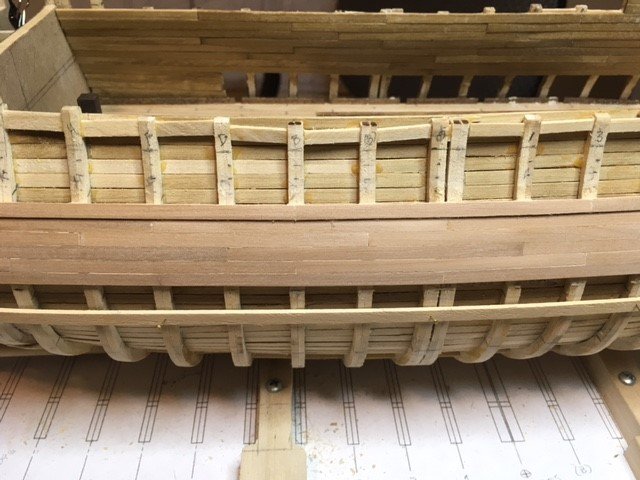
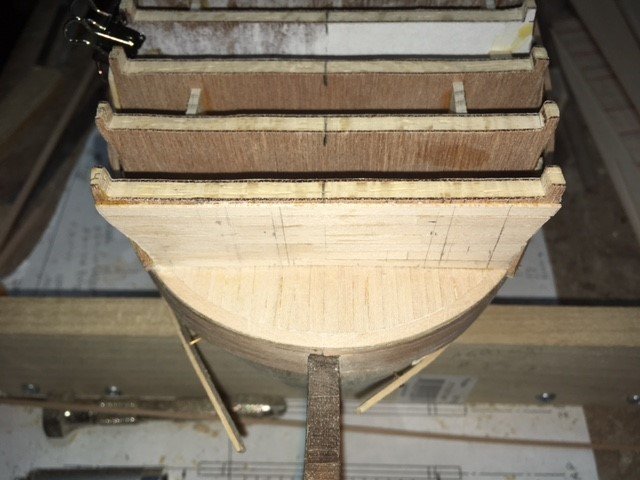
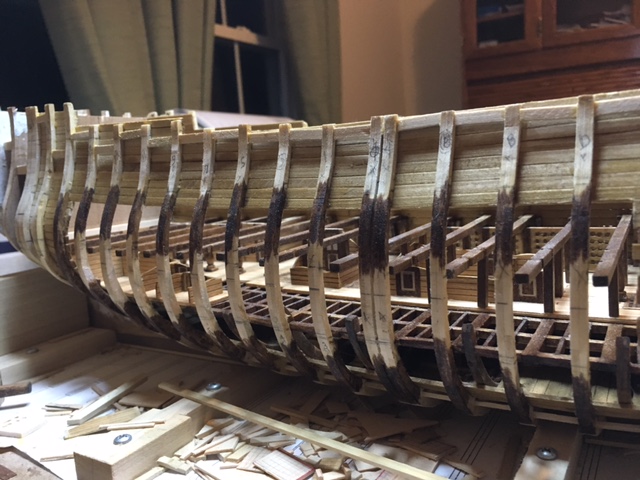
Had a pretty good snowstorm today... about 15 inches in 10 hours. Just couldn't make it to work today so I had to make the ultimate sacrifice and stay home and work on the Leopard. Hey somebody had to do it. I put down some temporary strakes on both sides that locate the wales and started to plank the hull using Swiss pear. It is my first time using this wood. It seems pretty friendly but I haven't made any severe bends with it yet. Unfortunately I had to go out and clear away Mother Nature's mess which only took about 3 1/2 hours. Here is what I managed to accomplish. I am going to plank above to wales first to locate the gun ports with respect to the decks. I will also be able to keep the hull in the fixture for a longer period of time while working on the various things. Tom
-
With results like that let it take as long as it wants. You are creating a really nice looking model. Tom
-
Hi Jim, Yeah, I keep thinking about those carvings. That is the one task I have not figured out yet. I have never carved anything before except for maybe a holiday turkey. Tom
-
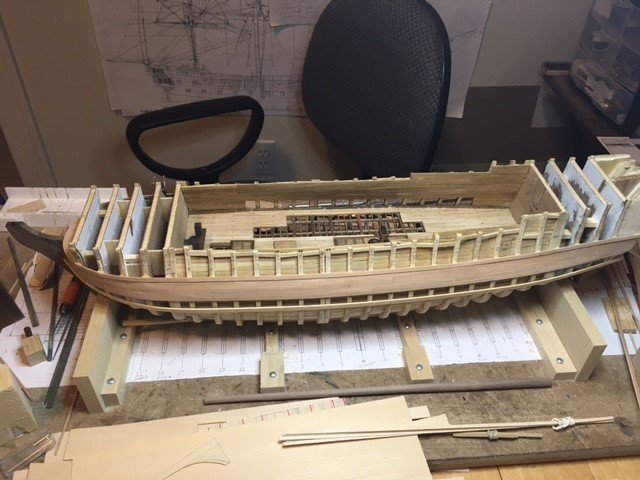
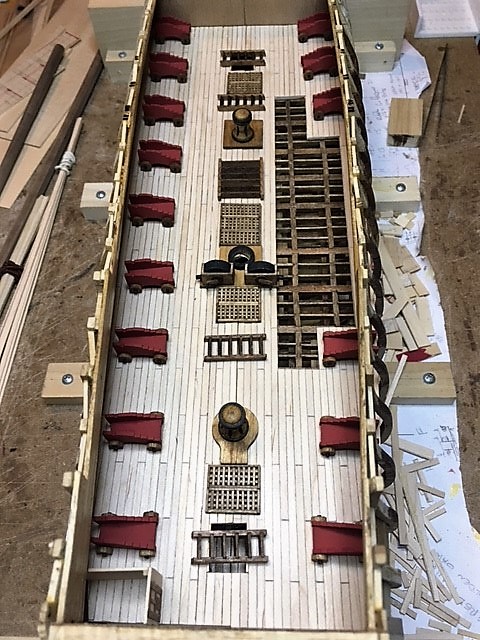
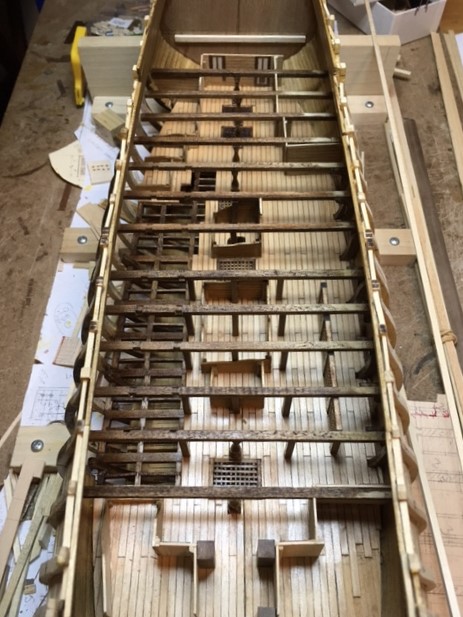
Hello all, Thanks for the likes and comments. I have been working on the lower deck items for the past 2 weeks (on and off) as well as planking and fitting the deck. The deck still needs to be stained and urethaned so everything is just dry fit for now. I am pretty happy with the way the cut out area is coming along. Once the framing in that area is cut away it should open up and allow the inside details to be easily viewed. The open areas of the orlop and lower deck and future upper deck really let in the light to help make things visible. I will (with some help from my toolmaker friends) be making the cannons soon to finish off the carriages. For now I plan on using just a wooden dowel pin mounted in a carriage to help locate the centers of the gun ports. I think the next step is to finish the lower deck and install it without the components and then cut the gun ports on the inside planking. Next, make the gun port liners and finally plank the outside. After that I am thinking the next step would be to work on the stern/galleries. Once the outside is planked and the stern completed, then I can install the lower deck items without fear of breaking them off while doing all the hull work. Sounds like I just planned out the next few of months of my life. I was just thinking that isn't it odd that it takes as long if not longer to make the model versus the real thing. Granted we don't have a work force of hundreds nor work on it for 10 hours a day! There is that "life gets in the way" thing again... it keeps popping up. Here is a pic of the lower deck today looking from the stern. Tom
-
Jim, I know what you mean about the "super builds". I don' t mind building at the 1:85 scale. I think it is pretty manageable especially if you are looking for a place to display it. My previous build was 1:82 and with the display case it fills up a sizable area of our family room. What I meant about a larger scale was it would also increase the size of the viewing hole in the side of the hull. This would allow more light inside an might make it easier to view the inner details. I thought about wiring up some small LED lights at the ends of each deck but I didn't want to go completely crazy. Just want to focus on ship building for now. Tom
-
Jim, it is good to get scared every once in a while. It lets you know you are alive! Yeah I can't believe how much more I have to build just because I thought it would be a cool idea to put a hole in the side to see inside. Hopefully it will be worth it in the end. I think if I were to do it again I might choose a slightly larger build scale, maybe 1:64. Well there is always next time. Tom
-
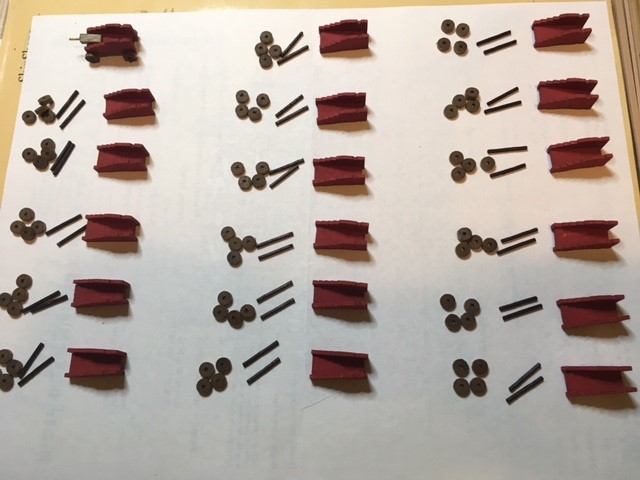
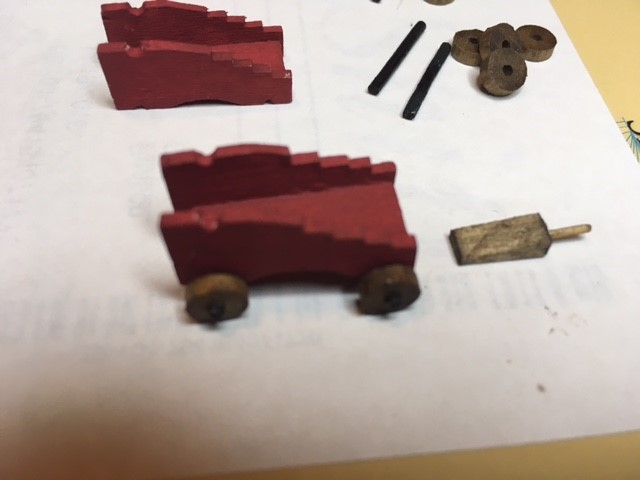
Just a quick update. I took a break from working on the actual lower deck and decided to make the 24lb gun carriages that will be seen for the lower deck. I will also use them to help layout everything on the lower deck and get a real time idea of where the gun ports on the hull will be located instead of just seeing them on the plan. Still not sure if I am going to put guns in the area of the lower deck that has the cut out in the hull. There will not be any inner side wall to attach the rigging to so I will probably omit the rigging for these few cannons instead of just leaving it there in a pile along side the carriage. I am leaning towards just putting the carriage/cannon in a ready to fire position where the gun port would be located. I think it might look better and all the cannons showing on this level would suggest to the viewer what the profile of the hull looks like on the cut out side versus just looking at a hole in the hull. Decisions, decisions... Next step is to get the cannons made. Tom
-
Hello fmartins, Welcome to my log and MSW. The wealth and sharing of knowledge here is incredible. You really don't need to have 3D CAD software to draw up frames. Any program that has the capability to draw arcs and lines or even better splines will be able to make a template that you can print out. Once they are drawn to any scale you can print them out to another scale if you so choose. If you have a set of line drawings for the project you can also make copies of a different scale on a simple office copier by just playing around with the scaling options. Tom
-
Pandora by marsalv - FINISHED - 1:52
toms10 replied to marsalv's topic in - Build logs for subjects built 1751 - 1800
Marsalv, That figurehead is amazing. Is it carved in wood or sculpted in clay... or maybe something else? Tom -
Jim, Nice job on the hammock cranes and channels. She is really coming along nicely. Keep up the good work and keep the pics coming. Tom
-
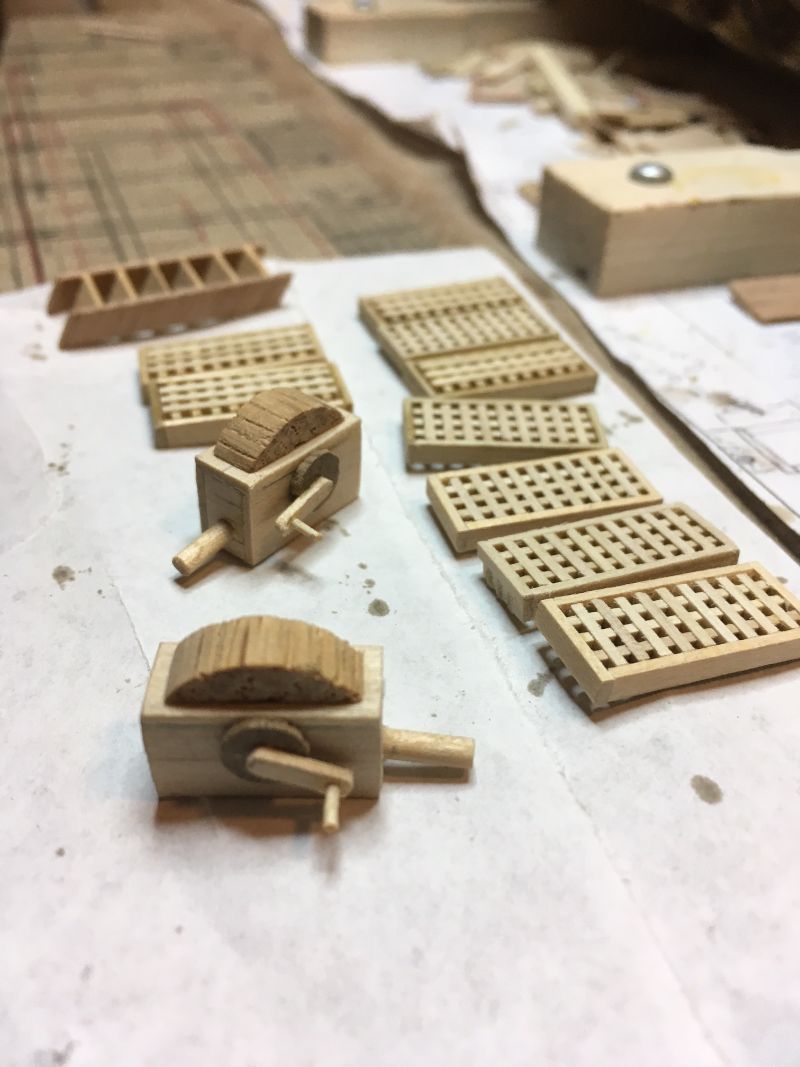
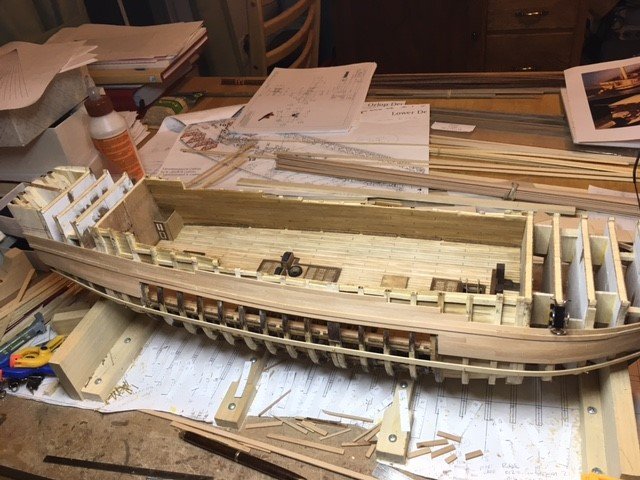
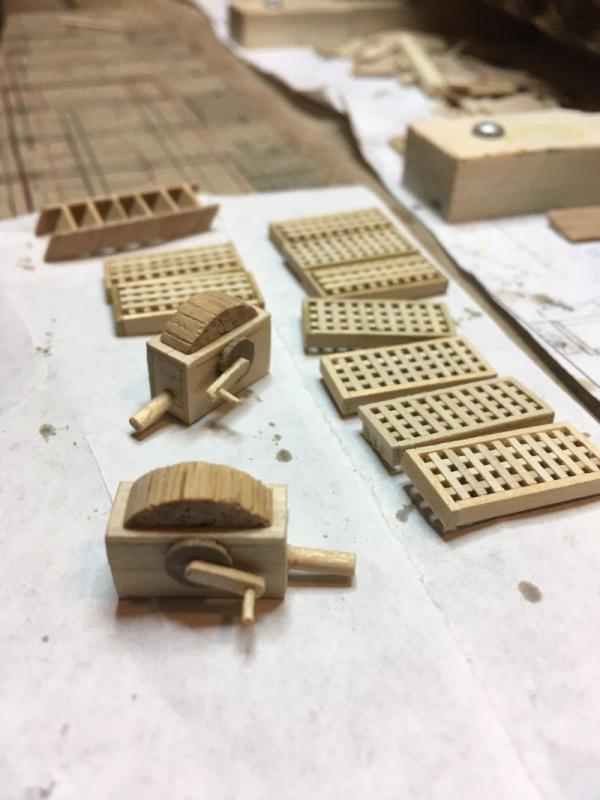
Little more work done over the holiday. Finished the lower gun deck beams and timbers for the opened area of the deck. Next step is to cut and plank the deck itself. Here are a couple of items for this deck I built as well; the two pumps, grates and one of a few ladders. Still have a couple of capstans, the cannonsand a few rooms. Tom

- 385 replies
-
- 11
-
-
Bear, I don't think Pickles is "feelin the spirit" by his/her expression. Probably hoping this pic doesn't go viral. Merry Christmas and Happy New Year to all at MSW. By the way, I have only completed one build and I did use CA on some of the rigging. I did fall victim to lines breaking, especially the strops around the blocks if they were twisted or bent in a direction other that how it dried. I will try some watered down white glue or fabric stiffener to secure knots if need be on my current build. Tom
-
Man I hope so. We have a saying in the design & manufacturing world, "With enough time and money we can do anything." We should probably also add patience to that. Tom
-
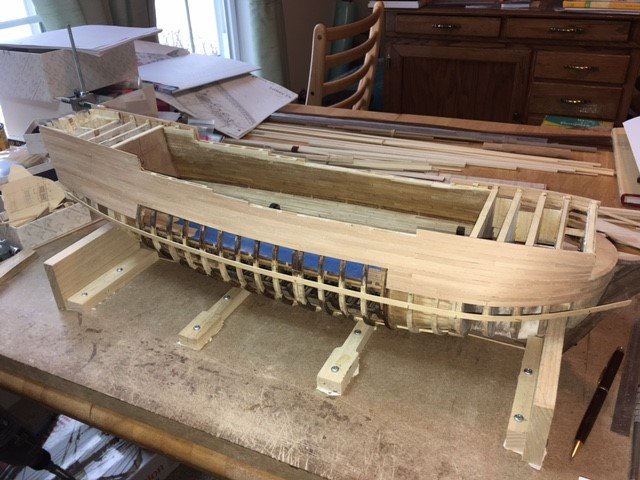
So I started plotting and planning the lower gun deck and put in the beams. I am laying out the deck on a piece of cardboard to see where the timbers will be seen and what will be planked. I plan on planking the entire port side and center and leaving the starboard side open similar to the orlop deck. I would like to put the cannons in place on both sides (plank just enough underneath them on the starboard side). My thoughts are that this would allow enough light through the top to better illuminate the orlop and hold. The plan is to also eliminate the frames from the side hole in the hull once this deck is in place. The upper gun deck will be above the cutout. It is also planned to have some planking removed similar to the other decks... at least that is the plan right now. Thanks for all the support I am getting from MSW. Tom
- 385 replies
-
- 13
-
-
Seems simple enough to try. Anything that makes tying ratlines easier is worth a try. Thanks for posting. Tom
-
Pandora by marsalv - FINISHED - 1:52
toms10 replied to marsalv's topic in - Build logs for subjects built 1751 - 1800
I don't even know what to say. I am speechless. The quality and precision of your work is something to behold. Tom -
Glad you are back up and running... or at least jogging. Also glad you opted for sails. I am a sails guy too. Tom