toms10
-
Posts
935 -
Joined
-
Last visited
Content Type
Profiles
Forums
Gallery
Events
Everything posted by toms10
-
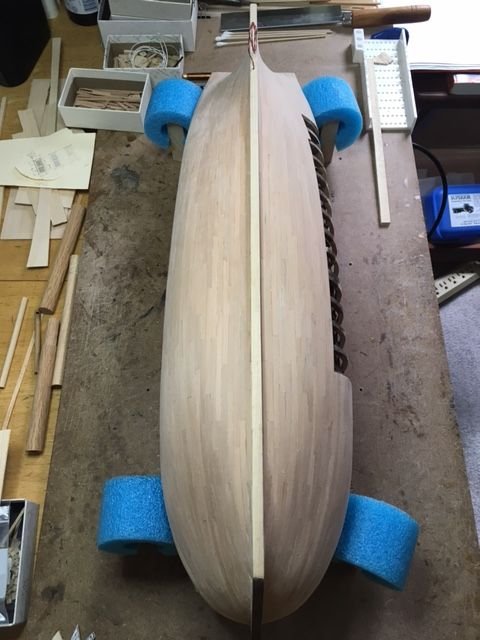
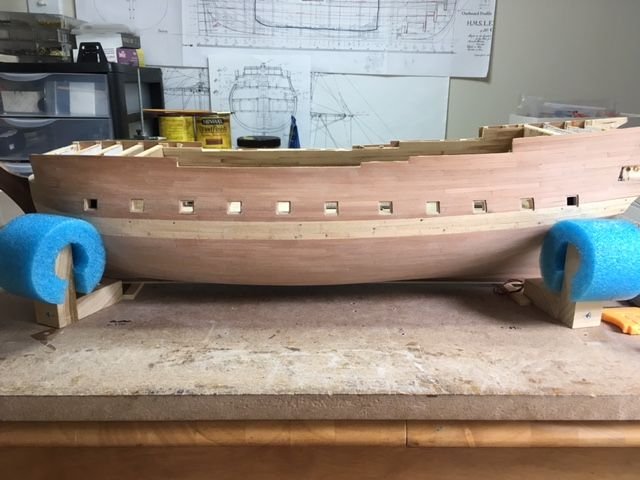
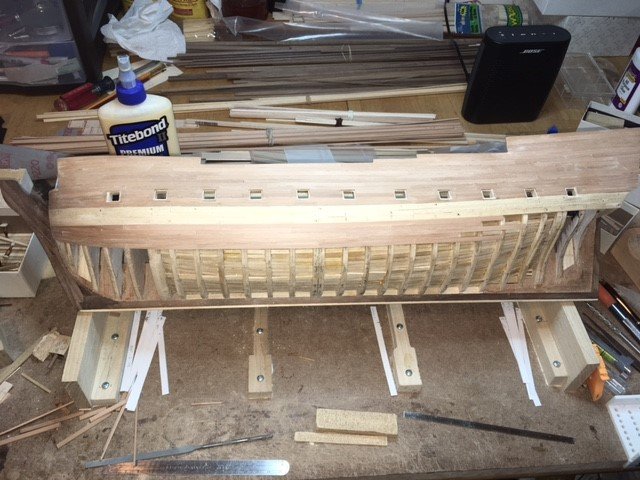
 Hello everyone, Planking is now complete... more or less. I am relatively pleased with it especially being my first POF with single layer planking. The Swiss pear was nice to work with. The wales planking with all the interlocking pieces will actually be a second layer and painted black. I think my next step however, is to locate the next level of gun ports and get those cut out. I also had to change my fixture for holding the hull now that the planks are in place. Tom
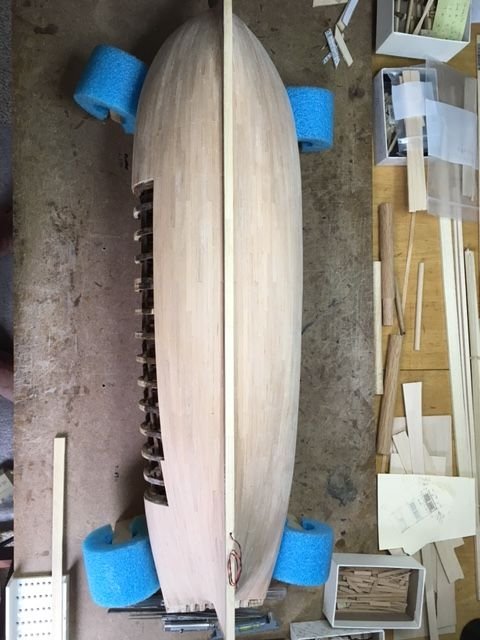
-
Hi Jim, She is really come to life with the addition of the masts. Glad to hear you are feeling better. Keep up the good work. Tom
-
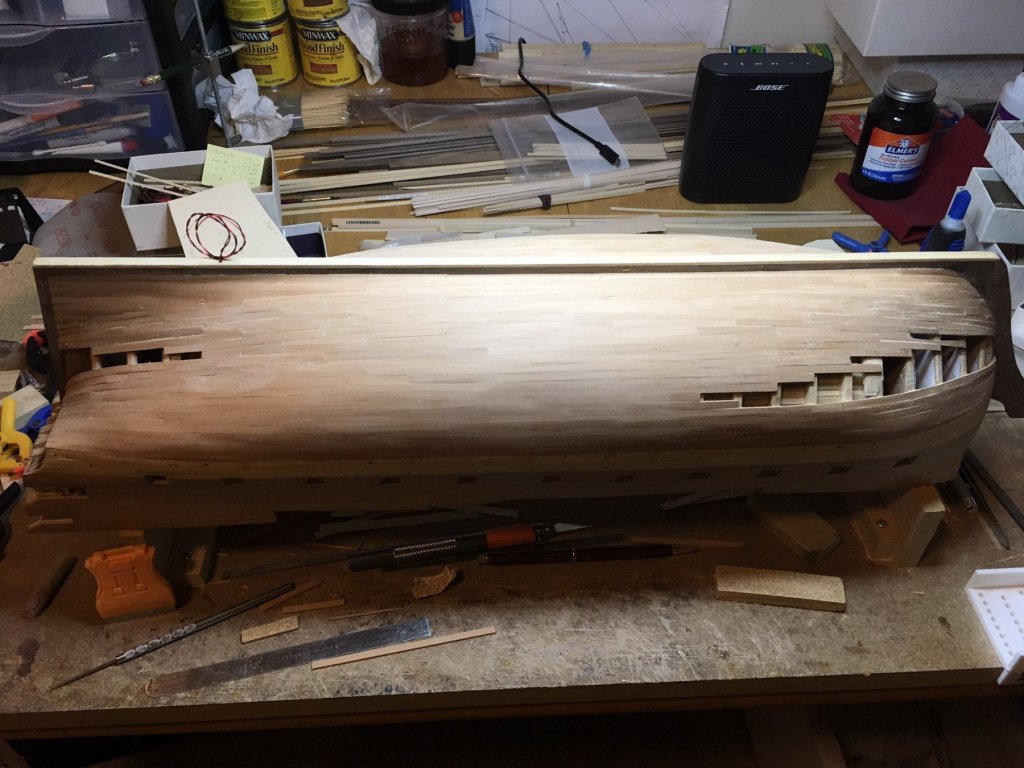
The dim light at the end of the planking tunnel is getting brighter! Pretty much just have the upper bow section on both sides then let the sanding commence. There are a couple of rough areas at the tight bends but with the planks being 1/16" thick there is plenty of stock to get everything smoothed over. All the lighting wires are now covered up. Part of me does not want to test them to make sure nothing silly happened since they were installed! Tom

-
Hi Jim, Rigging just adds another dimension to a model. Looks really good. I found in my last build that one of the fun things about rigging is as you mentioned above, there is variation in every ship as to exactly where every line needs to be. Trick is to put them all in a place where they can all "function" with each other. As for the bees wax... I found it a must. Tom
-
Hi Jim, Looking goooood. Before you know it, you will be tying the clove hitch knots for the shrouds in your sleep..... for days and days. Tom
-
Thanks Russ. I agree with you on sanding everything after all the planks are installed. My planks are .060" thick so that leaves plenty of room for sanding of which there will be a lot of. Tom
-
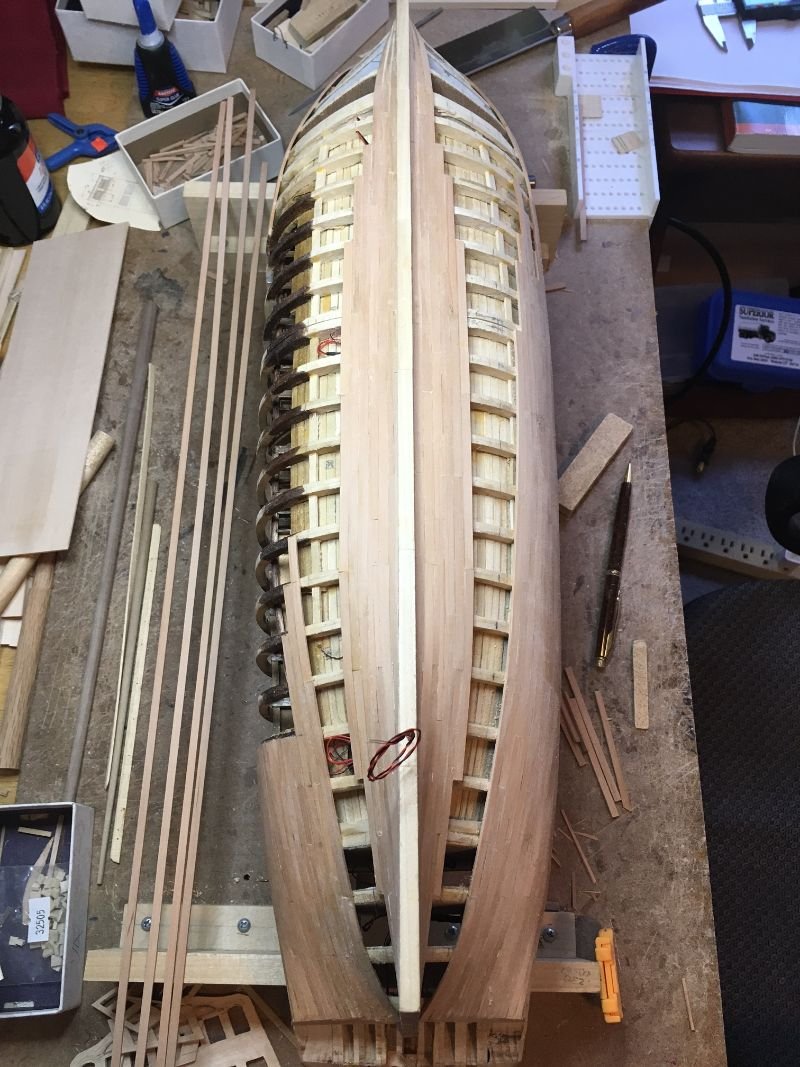
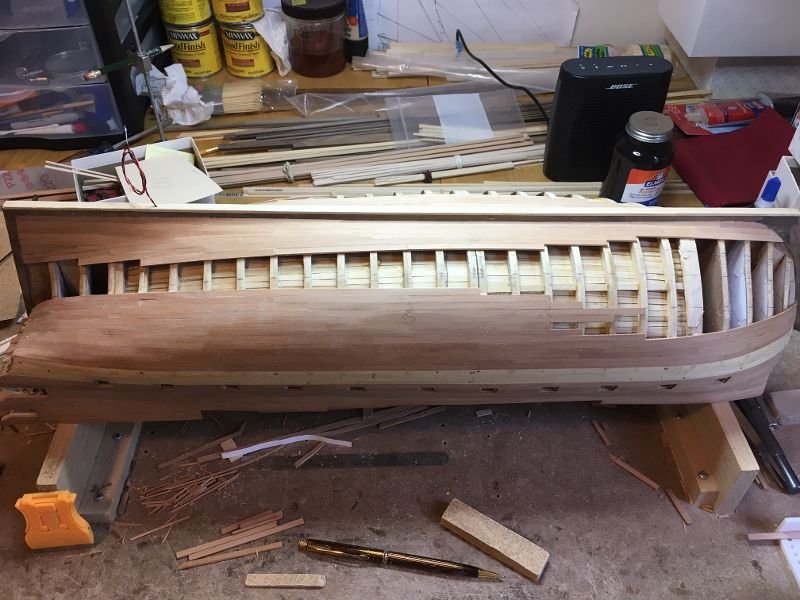
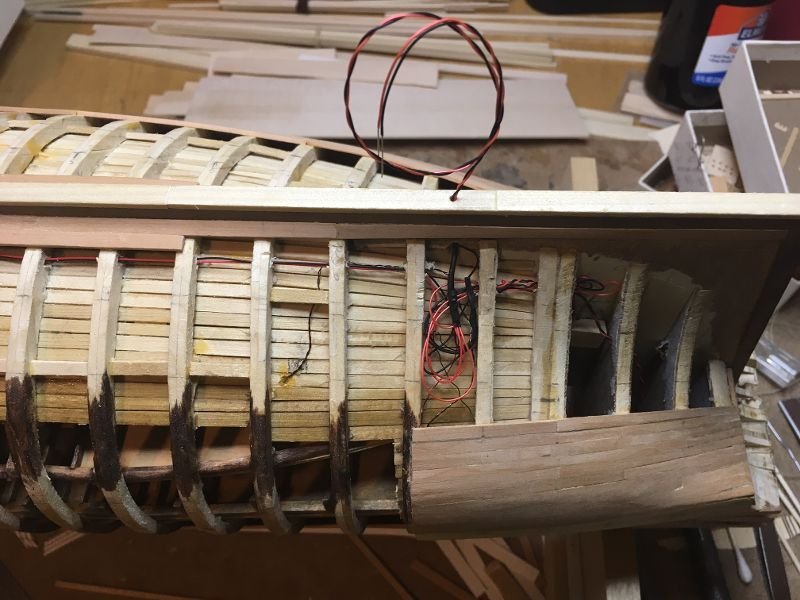
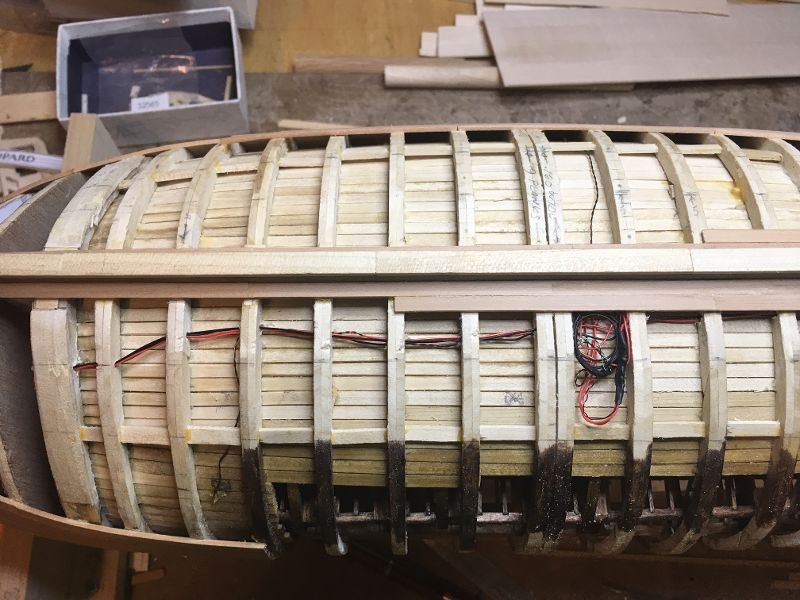
Some more progress pics on the planking. Pace is pretty slow but hey, it is summertime and this thing called "working for a living" keeps getting in the way. The electrical wires coming from the bow to midship on the starboard side all bundled and ready to get sealed in with the planking. Aft wire bundle on starboard side and the connection leads to wire bundle at midship. The single loop coming out of the keel will go through rear mounting post that will attach the hull to the display board. The wires will go through the display board and feed out through a channel underneath the board. The planking looks pretty rough but it should be fine with a little sanding. Port side planking progress. Again nothing has been sanded and shaped yet. Starting to see a dim light at the end of the planking tunnel!! Tom

- 385 replies
-
- 10
-

-
Sorry to hear about the treatment your package received. Looks like the old American Touristor luggage commercials also applied to customs agents as well as baggage handlers. Tom
-
I hadn't noticed that the MacAllan had sneaked into that photo! As for daunting, yes! - - - when I first got the Lennarth Petersson book I remember looking through it and being completely bewildered. BUT - I'm slowly finding my way by trying just to concentrate on the particular part of the rigging I'm working on at any one time. Jim, you are going along very well. What you said above pretty much nailed it on the head. Don't try to eat the entire elephant in one bite. With small bites and some time it can be done. Nice job and enjoy Portugal. Tom
-
Hi Mark, Yeah the wiring kind of messed up the order I was going to do things. Now I need to build and attach the stern windows to make sure the lighting comes through properly before I finish up the outer planking so I can get the wires out the bottom of the keel. One step forward, two steps back and the beat goes on... Tom
-
Hi Jim, I am a ways from lighting stern quarters... haven't even started looking into building them. For now I can only lay in the rough wiring. If the summer weather remains as it is now I may never get to them! It is hard to stay inside when it is nice out. Who knows though, this is New England so it is quite possible that the weather tomorrow will change from 80 and sunny to 40 and rainy for the next few days. Then I can make some serious progress! Tom
-
Pandora by marsalv - FINISHED - 1:52
toms10 replied to marsalv's topic in - Build logs for subjects built 1751 - 1800
Marsalv, If your next post shows smoke coming out of the chimney I quit! I am no expert (very far from it) but it doesn't really take one to see that this is a very exceptional build. Tom -
Amalio, Your craftsmanship is at a level all its own. The only problem I see is THERE IS NO ROOM FOR IMPROVEMENT! Thanks for showing us the possibilities of ship modeling. Tom
-
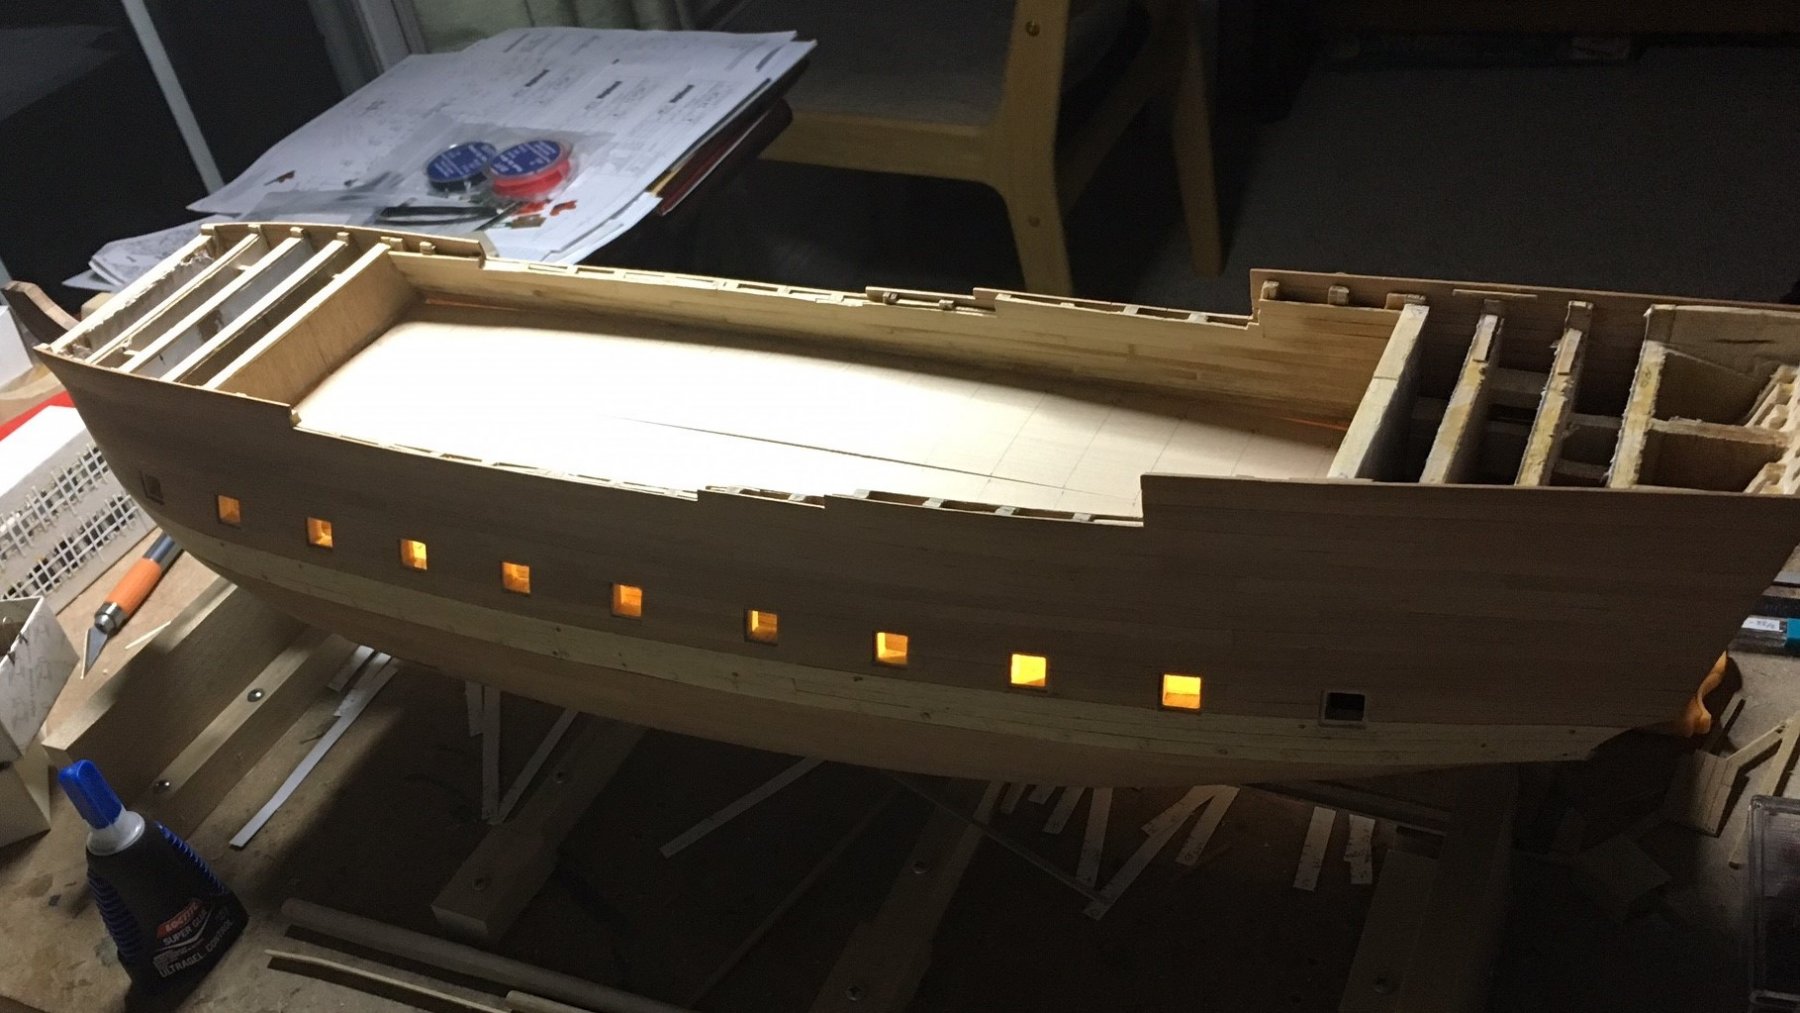
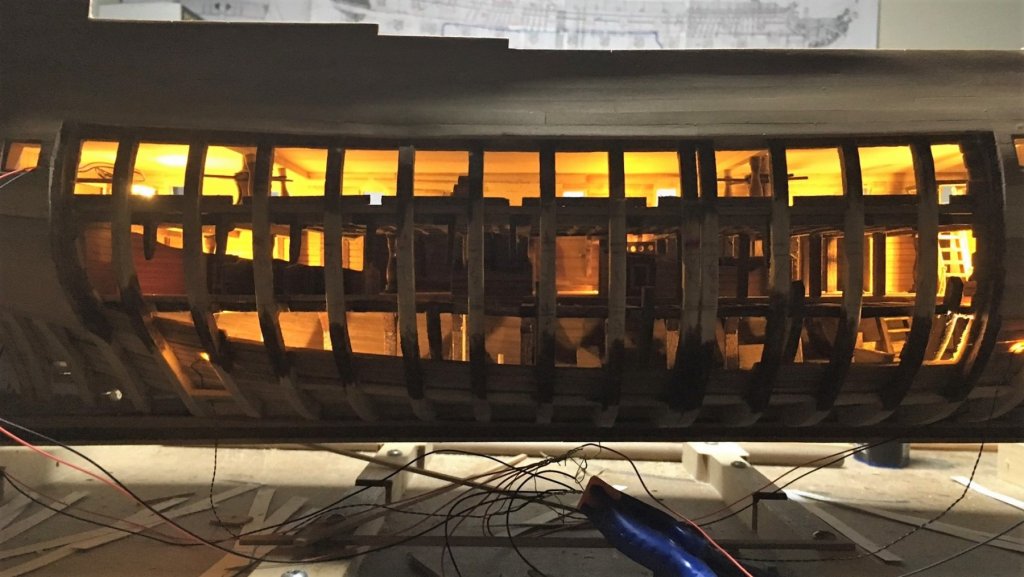
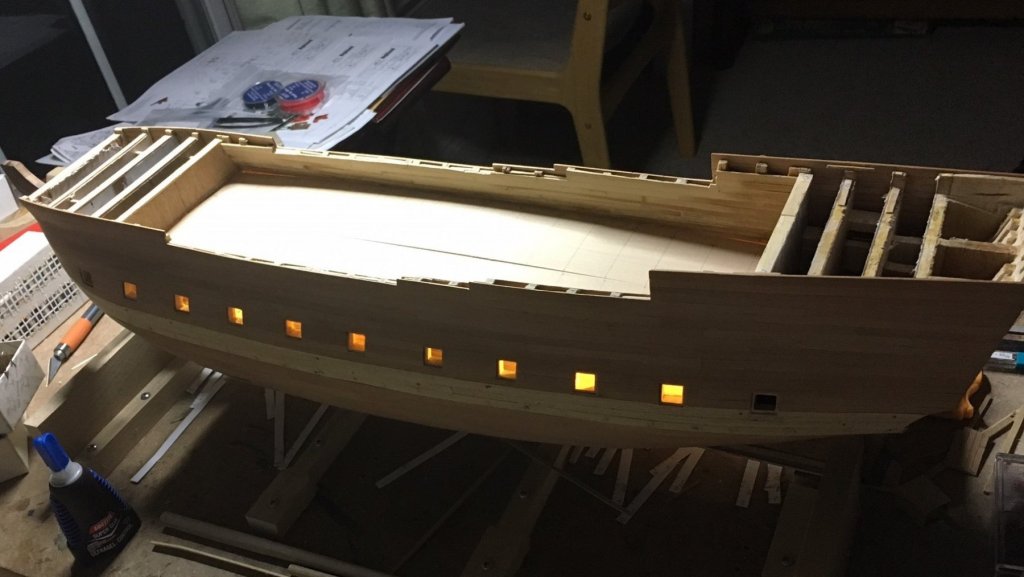
Now that the summer weather is here progress will slow for sure but I have been playing with some LED lights and started putting some in to illuminate some of the visible details of the lower decks. I drilled a lot of holes for the wires to snake through the frames. The idea will be to have them joined between the frames just above where the rear display pedestal will be located. A single set of wires will come out through the keel and through the center of the pedestal. I will figure out how to hide these in the case when I start building that in a few years. Right now just for testing the positioning and intensities the wires are just dangling all over. Can pretty that up later. The light on the left of the uppermost deck shown (lower gun deck) is not fixed in place yet so the camera picked up the glare because the bulb are still visible. I will position it in the aft corner on the starboard side so it won't be visible when looking in. Here is the portside without the cannons coming through the gun ports yet. Looked kind of neat so I thought I would share the picture. The final plan is to have the stern galleries lit up as well and the 2 stern lights. It is going to be a lot of work and time... uh, I mean fun... but worth it in the end. Tom
-
Daniel You definitely have your work cut out for you and with a time constraint no less. Now it is a JOB not a hobby. I just finished this model about a year and a half ago. It was tricky build if it was not done in the right order. Tom
-
Nice and simple. Thanks for sharing. Tom
-
Jim, You are becoming a mast master. As mentioned earlier, I like your idea with the eyebolts. Tom
-
Hi Jim, Nice pictures. Looks like it was a fun day. I know what you mean about the low ceilings. When I was laying out where the decks would be on my model I had to triple check because they were measuring up less than 6 feet. I thought if that is correct, then the navy was pretty much out of the question if you were 6 ft plus. Evidently my measurements were right. As for the hammocks, I guess temperpedic, thermomassage, adjustable position hammocks were only available on the first rate ships! Thanks for the pictures. On another note, I went ahead and ordered the LED lights. I bought enough with the thought of not only lighting up the lower deck to see the detail but also the stern galleries and lanterns. Not sure if all of that will happen but that is the goal at this point. Problem with lighting up the stern windows is now you will be somewhat able to see inside so just painting all the framing black might not be an option. I might have to clear some framing out and put in a bit of flooring and a table/chair at each level to make it look like a room. I will make a rough model of the stern galleries out of cardboard after I wire up a few lights to see how well one can see inside and if it is worth all of the extra detail. My original thought was that it would look nice with the windows lit up but as with everything else, nothing is as simple as it originally seems. Tom
-
Jim and Sam, Thanks for the advice. I am going to follow it because it makes sense to me and I know I will think about it later and wish I had done it. Jim, hope you enjoy your trip, post some pictures!.
-
Haven't posted in a while because progress is pretty slow with hull planking right now. The "to do" list for outdoor work is pretty long right now. I did manage to get the garboard strakes on and a bit more planking but I am going to take a step back and finally decide if I am going to put some LEDs at the ends of the lower decks to get some more light inside to better see the inside detail. I have been going back and forth with this idea in my head for quite a while and I have gotten to the point where I need to make a decision. Once the hull is fully planked it will be too late. I am thinking I probably will put them in because I am still thinking about it after all this time. I just need to work out the details of where and how to get the wires to snake through the keel and come out of the display board unseen. A quick check on costs tells me I can do this for less than $50. Seems worth it to me. Gee, this is kind of like work. Add more features, keep costs down... The only difference is at work the deadline doesn't get extended. The word, "deadline" is not in the hobby world dictionary. A subtle but very important difference!!
-
Pandora by marsalv - FINISHED - 1:52
toms10 replied to marsalv's topic in - Build logs for subjects built 1751 - 1800
A real first class job! -
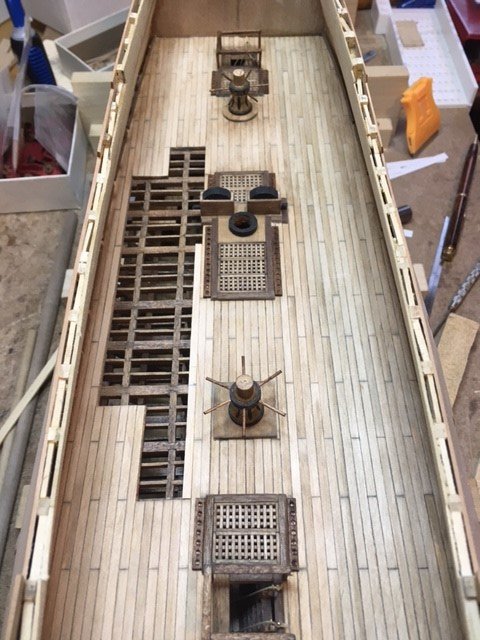
Hi all, Managed to pick away at a few things while being preoccupied with life's events. Attended the Northeast Model Ship Builder's Conference this past Saturday in New London, CT. Definitely an enjoyable day looking at all the displayed talent and meeting many of you from MSW. Here a a couple of pics of the limited progress but progress none the less. Lower deck capstans and cannon ball holders and some railings around the hatchways. Don't want any sailors going down the hatch unexpectedly!! Also started planking below the wales just for a change from working on the decks. I actually enjoy planking... do I need to seek professional help??? Tom
-
Hi Jim, Now the ship will really come to life with the addition of the masts. Nice job. Kind of pain in the cheeks about the 1/2 size plans. Can you bring them to an office supply store that has copier services and have them copied at 2x scale? Might make life a bit easier and every little bit helps in that regard. Keep up the good work. Tom