HOLIDAY DONATION DRIVE - SUPPORT MSW - DO YOUR PART TO KEEP THIS GREAT FORUM GOING! (Only 13 donations so far - C'mon guys!)
×


russ
-
Posts
3,086 -
Joined
-
Last visited
Content Type
Profiles
Forums
Gallery
Events
Everything posted by russ
-
Thanks guys. I realize that it is not the best looking work around here, but, believe it or not, when you stand back and look, it passes the "five foot" test. Russ
-
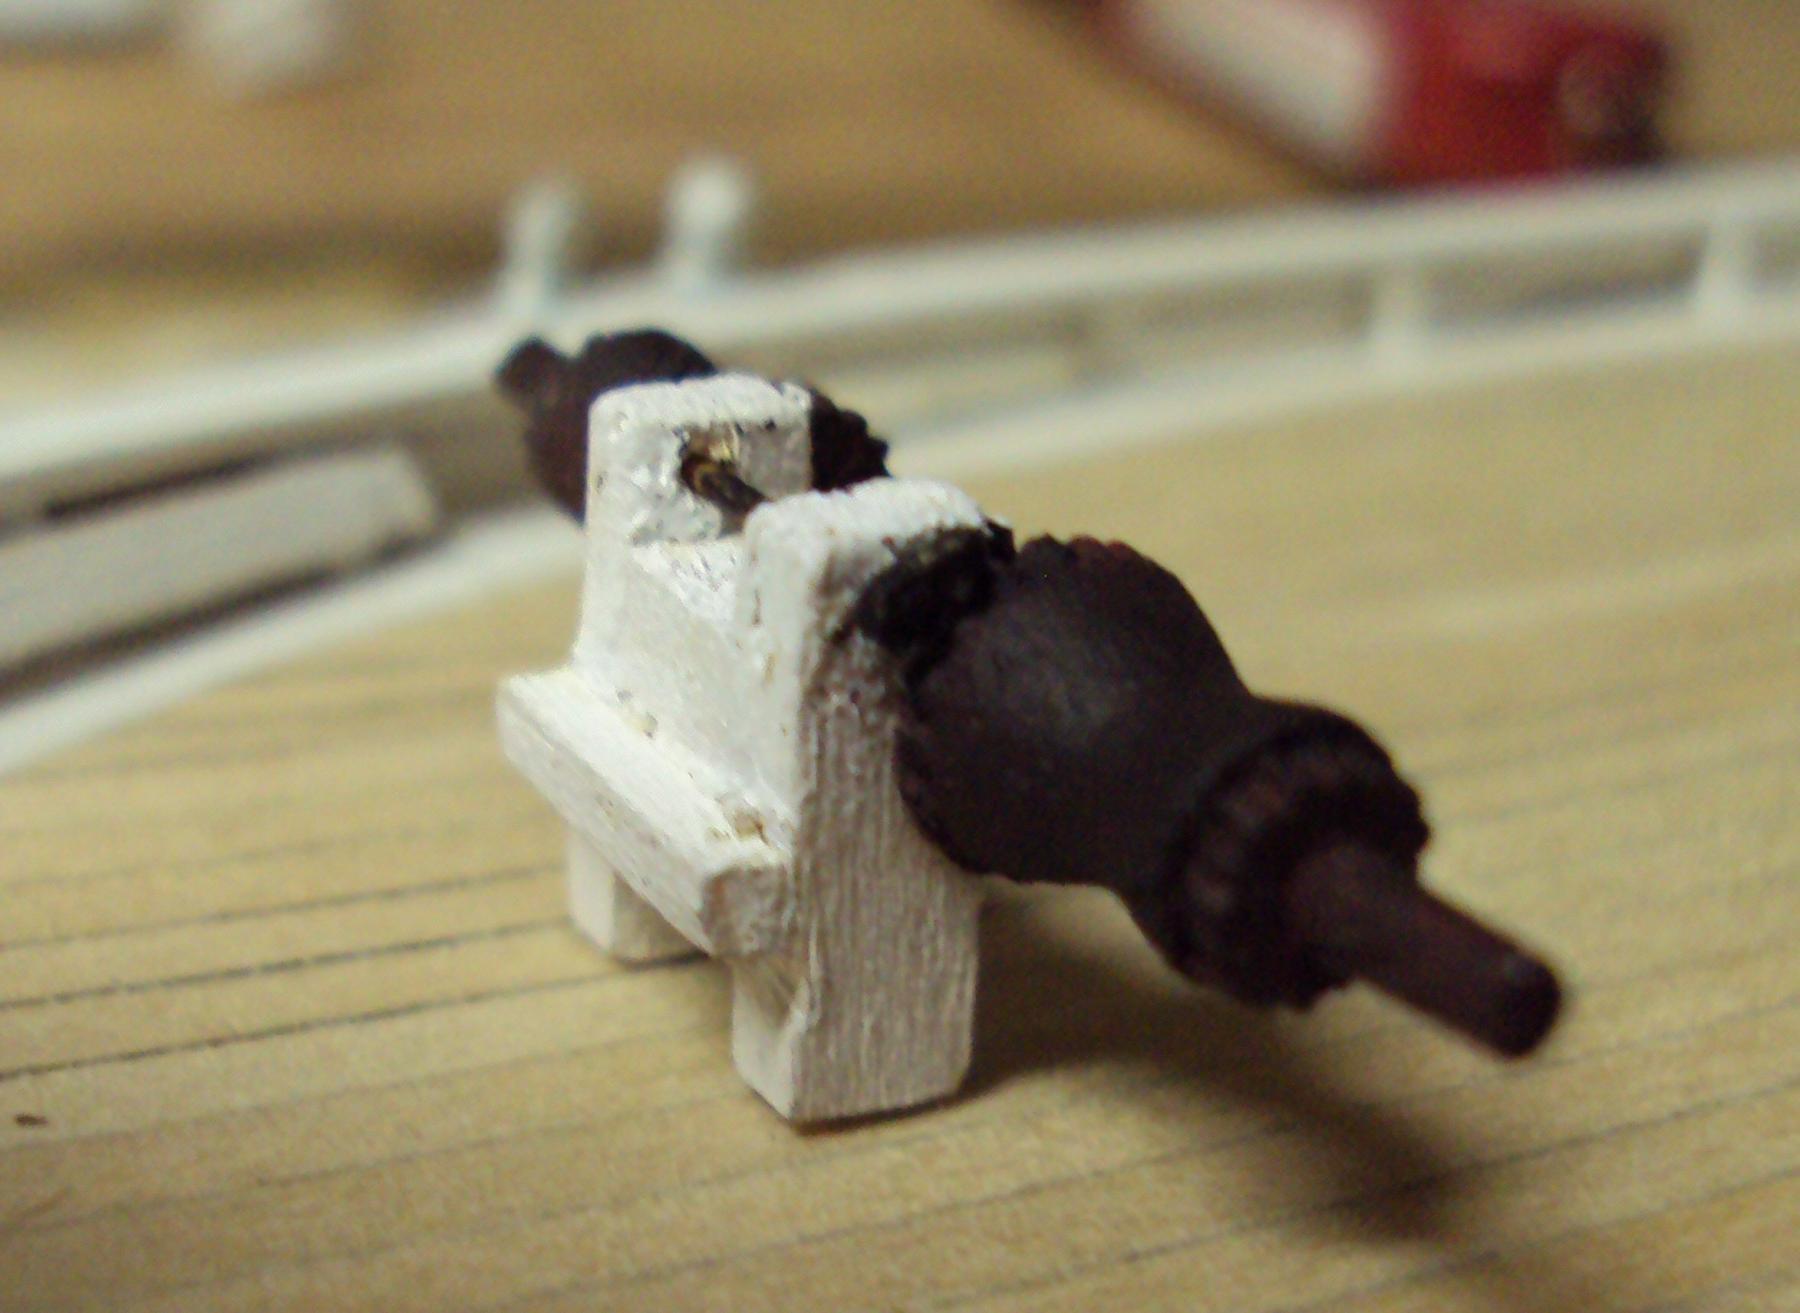
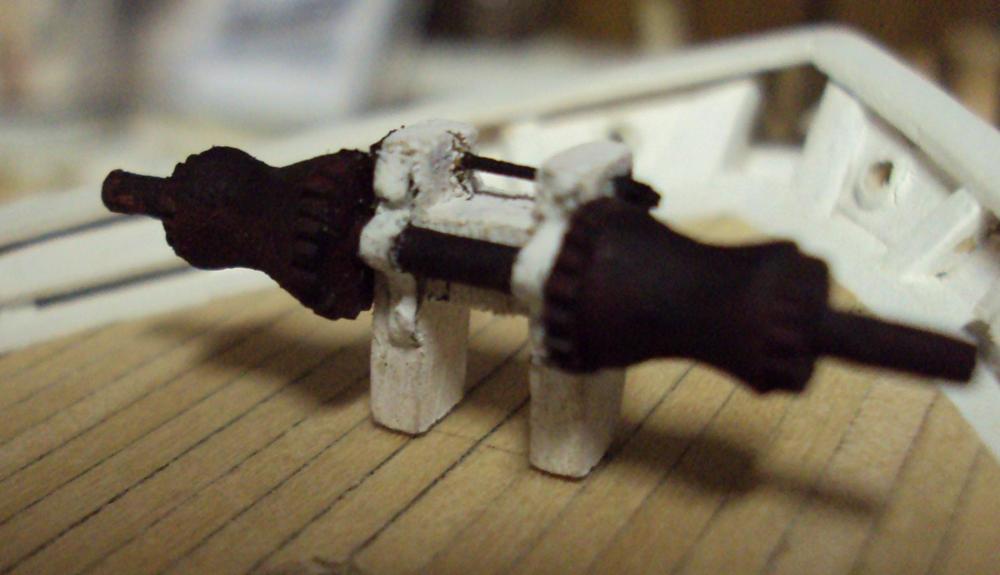
Here is a look at the completed windlass. Still needs a bit of touch paint here and there, but considering scale and skills, not that bad. I am off to give the last make up exams and the final exam tonight. Later. Russ

-
Thanks for the kind words. I am pretty sure they led the shroud through holes in the outer edge of the spreaders. There is no indication of eyebolts in that photo, although that area is rather obscure. I will go with the holes. Russ
-
I just found your log. Very good work. Enjoy the new shipyard. Russ
-
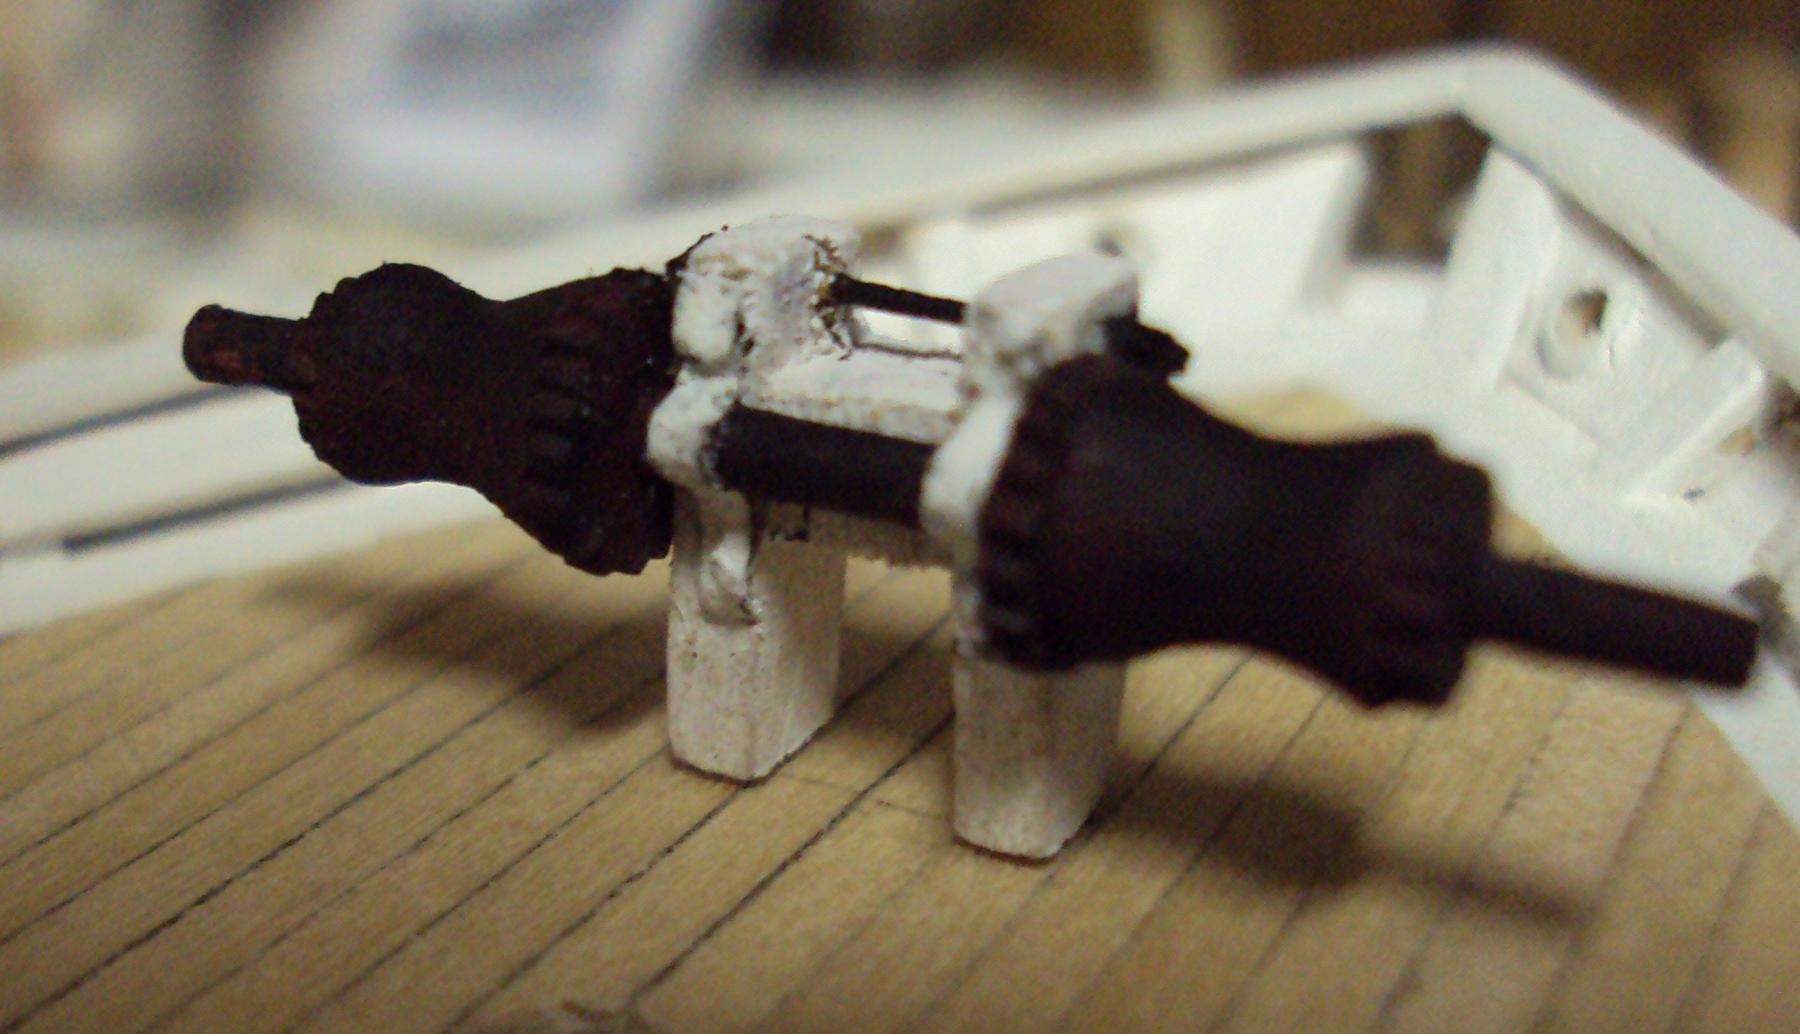
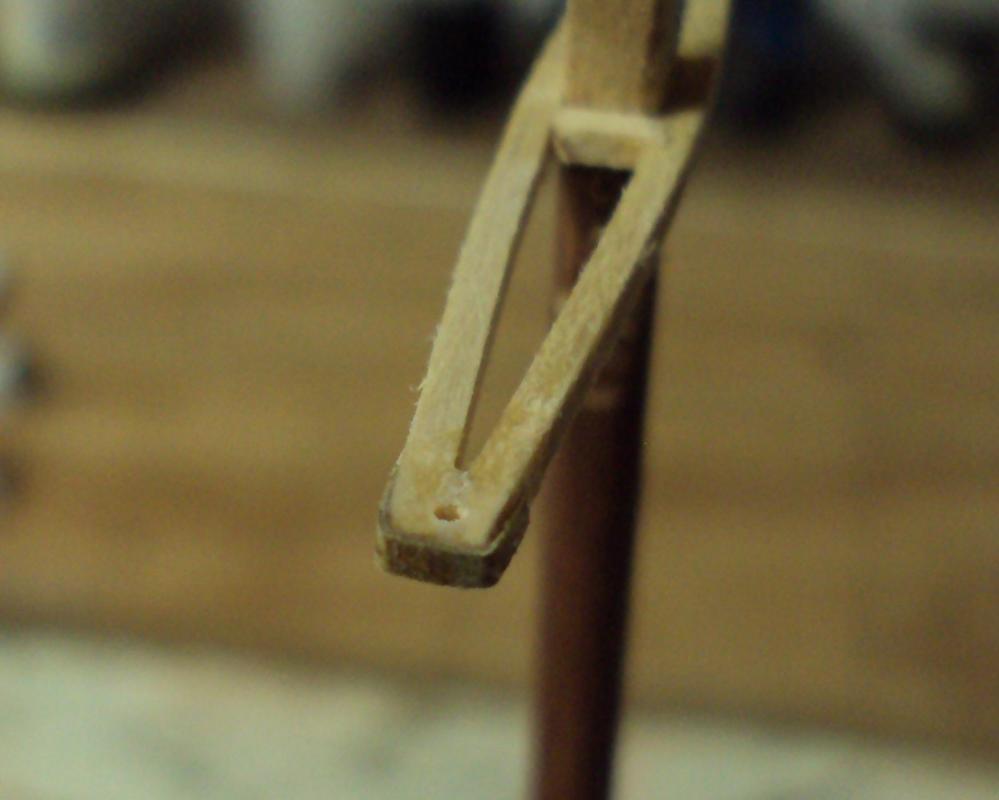
Here is the spreader with the bands on the ends and the holes drilled for the topmast shroud. Everything will be painted white once I am done sanding and cleaning up the piece. Still just a tad rough. The spreader is not yet attached to the mast. It is just in place for fitting purposes. Russ


-
Popeye: Thanks for the kind words. I used Paintshop Pro. I created the image in CAD, and then saved it as a pdf, copied that as a jpeg and brought it up in Paintshop Pro and used the negative image function to reverse the colors for the black ribbon. I painted out the black areas around the ribbon a bit and then printed it on the white decal paper. I sprayed it a couple of time with the Clear coating, let it set over night and then applied the next day. The spreader will get sanded down just a bit. It is almost right on scale or about 3 inches square, but just a little work will make it look a little lighter. Not much is really needed. Russ
-
Ken: I love those little details. Russ
-
Your hull planking looks very neat. Nice lines. Russ
-
Jack: Great work on the deck and the hull. These work boats make great looking scale models. Yours is coming along well. Russ
- 250 replies
-
- 3
-

-
- willie l bennett
- model shipways
- (and 1 more)
-
Gerty: Thanks. Russ
-
The deck planking looks very good. Nice nibbing. Your model is coming along really well. Russ
- 481 replies
-
- 1
-
-
- rattlesnake
- model shipways
- (and 1 more)
-
Elia: Thanks. It was not as difficult as I thought. It will improve with experience. Russ
-
Pat: Thanks for the suggestion. I sealed them with a clear layer after they dried. I used to build plastic kit models back in the day as well. Russ
-
Michael: Thanks for the kind words. I appreciate it. I am glad that there is as much photographic evidence for fittings like that from this area. Russ
-
Dave: Thanks for the too kind words. She has a ways to go yet and many things I should have improved upon. Thanks for looking in. Russ
-
Pat: Thanks. I am fairly pleased with it, especially since it is the first time I have tried making decals. I think it will work okay, but I hope to improve on a larger model and scale. Russ
-
Hamilton: I agree that practice with tools makes a lot of difference. Also, the right tool for the right job. So, a few different blades and some practice will be a great idea. I have to do this a lot. It is par for the course. The joint in the profile former is something that many of us deal with. It just needs some fine tuning. The key is to not remove too much material at once. Go slow, measure a lot. Russ
-
Good job. They look great. Russ
-
John: I am constantly amazed by your work. I never know exactly how to phrase my amazement. She looks great. Russ
- 745 replies
-
- 2
-
-
- francis pritt
- mission ship
- (and 1 more)
-
She is looking good. Your barrel looks great. I have used masking tape painted black in the past with some decent results. I will have to try the blackened brass some time and see how it works for me. Russ
-
Sam: LOL. Russ
-
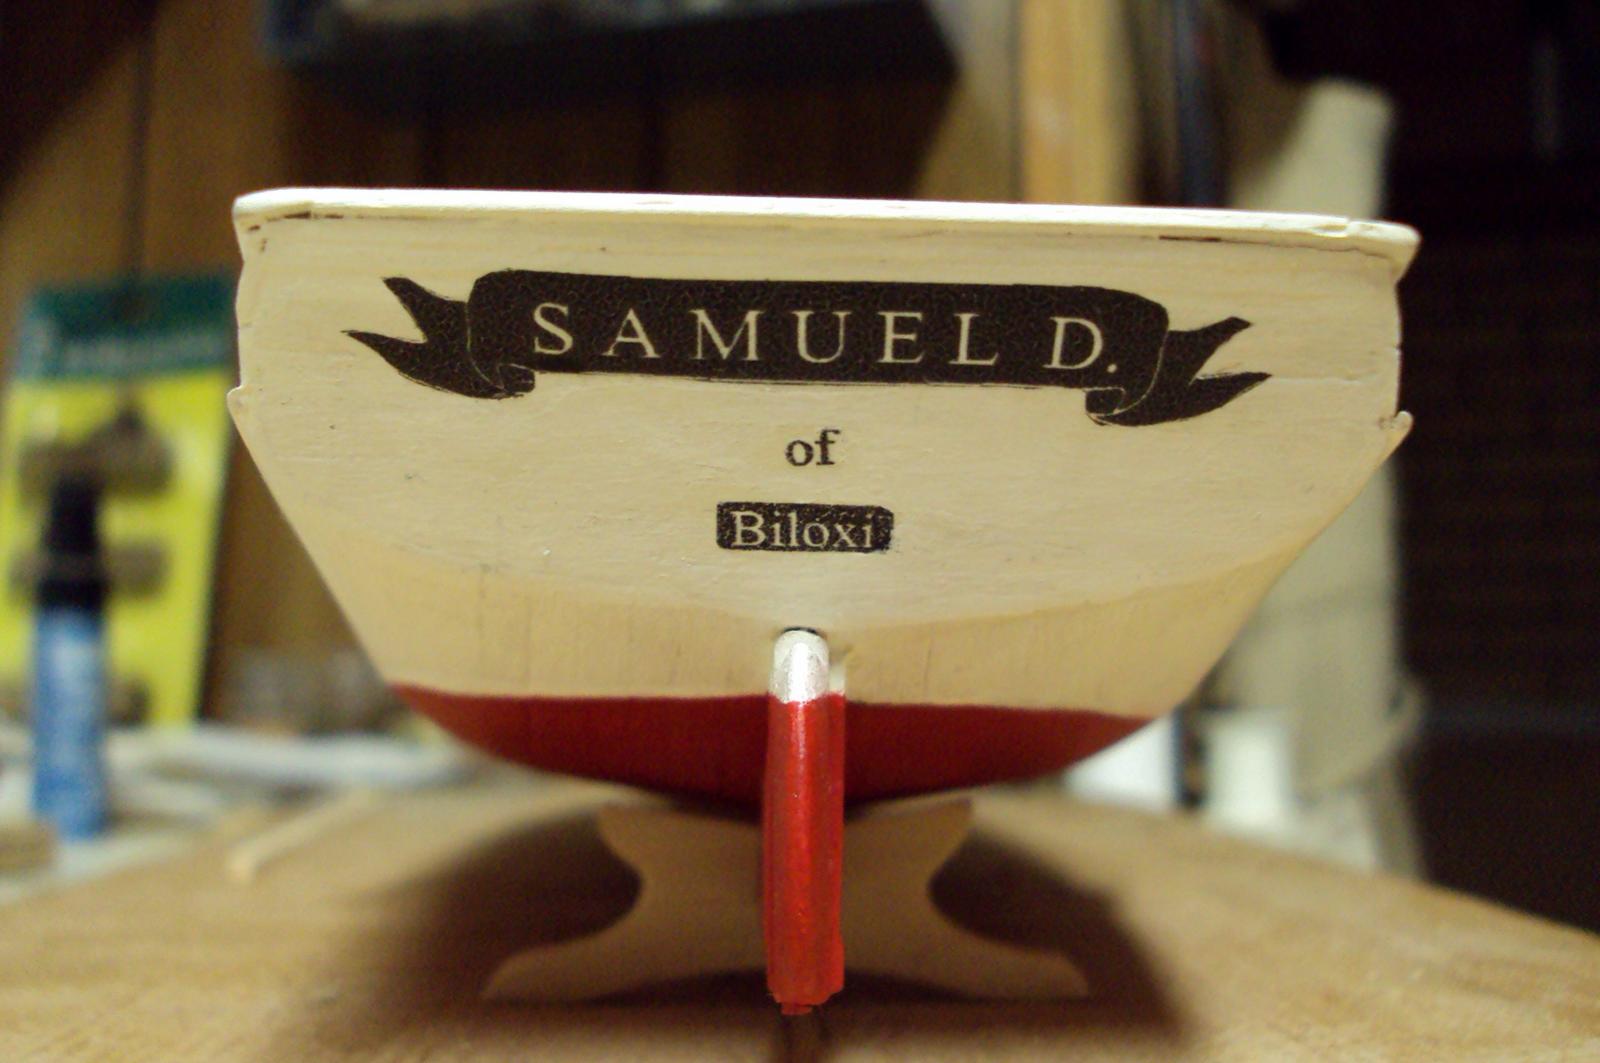
Sam: LOL. Thanks. This model is intended as a surprise gift for a friend of mine (if I ever get it completed) and the name is his first name and middle initial. Russ
-
Here is the completed name and hailing port on the stern. Not perfect by any means, but I think it will work. Next time will be better. Russ