NMBROOK
-
Posts
2,305 -
Joined
-
Last visited
Content Type
Profiles
Forums
Gallery
Events
Everything posted by NMBROOK
-
 Your hinges are great buddy !What are you making them from?I enlarged the pic and it looks like the real rudder sat on a 30ft high book!!! Kind Regards Nigel
 -
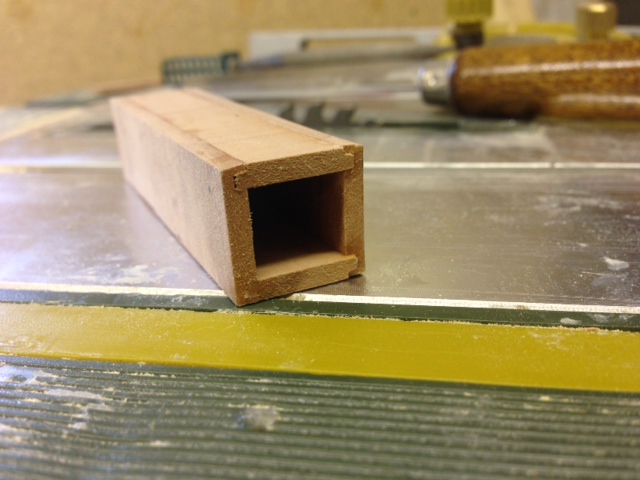
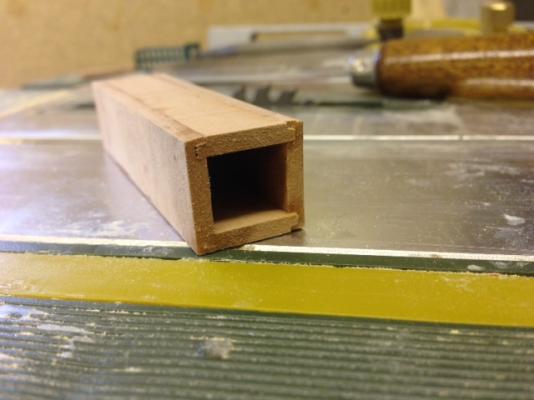
That looks great mate!The cross section looks like it would come in handy if you were fitting out the interior.I hope your rudder doesn't get eaten by the dog like mine did for Caroline I don't think you have a dog so that reduces the odds considerably Kind Regards Nigel
-
Thank you very much indeed Patrick,Admiral and Matti I wanted something that the inside dimension would be fixed by the milling work ensuring consistency and also wouldn't rely on a jig for accuracy.With these I just applied glued and squeezed the assembly together in the bench vise.Hardest part is making sure I got all the excess glue off the inside . Kind Regards Nigel
-
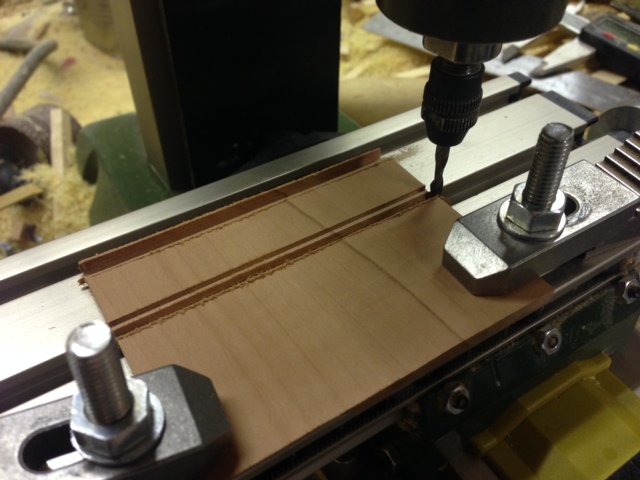
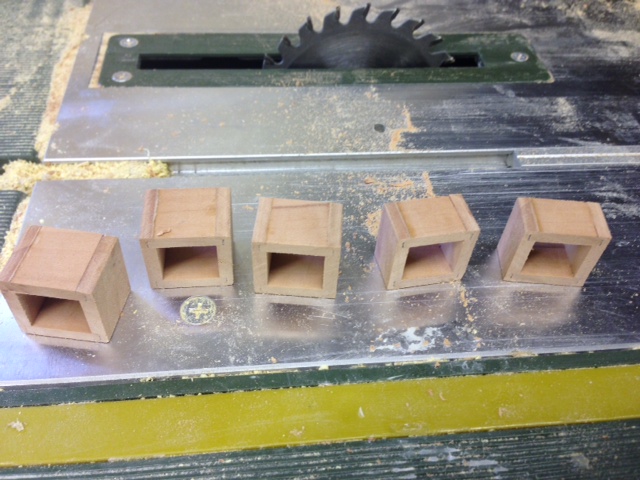
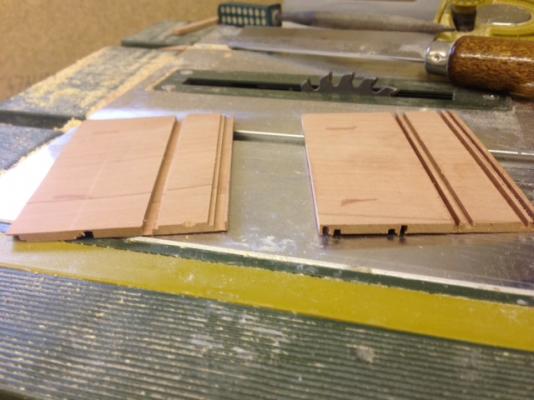
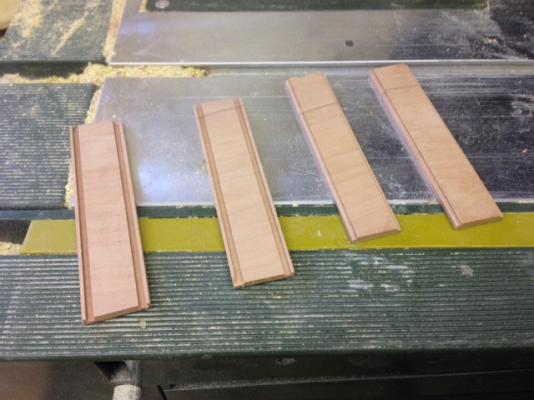
As I am waiting both for glue to dry and a timber delivery to arrive,I thought now may be a good time to make some linings up for the ports of the main gun deck.I had come up with a simple design that through its shape would ensure consistency of size.This profile was machined on the MF70 out of 3mm Pearwood.The thickness will be hidden under the planking so I could afford to make something substantial.The idea being to machine the profiles,glue together and slice the box up into lengths sufficient to allow for the tumblehome.These will be glued in place and the inside and outside face shaped flush with the hull structure.the sequence of pics explain it better than anything. Kind Regards Nigel


-
The only other thing that would come in very handy if you don't have some already is some digital verniers.They do come in helpful when you are trying to avoid accumulative errors.Very handy for sorting your batching of planks.Mine are a comparatively recent addition to the toolbox and I kick myself for not investing in some earlier.They are fairly cheap at about 20 quid,just get plenty of batteries,I am forever leaving mine on Kind Regards Nigel
- 1,039 replies
-
- 1
-

-
- ballahoo
- caldercraft
- (and 2 more)
-
Hi Eamonn as long as it is symmetrical to whichever line you set the king plank to that is all that matters,I can't think of anything else buddy apart from that.For me glue away providing everything is ok and symmetrical.I know I keep diving in with these suggestions,but when you have built a few it becomes instinctive to check certain things whilst you work I know of the thread regarding measurements and not everything has to be perfect or close,but there is one or two things that if they aren't done accurately will stand out a mile Trying to get you plank nibs identical on either side can be an uphill battle anyway if the planking material width varies,but if the margin isn't equal both sides it can become next to impossible.Don't let me scare you away from doing it It is straightforward providing you just keep measuring as you go. Kind Regards Nigel
- 1,039 replies
-
- 1
-
-
- ballahoo
- caldercraft
- (and 2 more)
-
Excellent work Mark She looks fabulous.I have to agree Chuck's rope is something special and adds greatly to the model. Kind Regards Nigel
-
Looking good Buddy If you haven't already,it is handy just to check symmetry to the centreline form the inside of the margin planks.As you a joggling the main planking into the margin any error can stand out in the pattern.It is easier to check now than to try and fiddle later Kind Regards Nigel
- 1,039 replies
-
- 1
-
-
- ballahoo
- caldercraft
- (and 2 more)
-
Thanks mate I am hoping to get the joints as tight as possible on the model.I foresee some sort of wedge setup on the horizon,just like laying a hardwood floor Kind Regards Nigel
-
Simulated caulking
NMBROOK replied to Nirvana's topic in Painting, finishing and weathering products and techniques
Lol I elaborated more in the correct thread Kind Regards Nigel -
Simulated caulking
NMBROOK replied to Nirvana's topic in Painting, finishing and weathering products and techniques
Apologies Chris,I did not read your post properly,if you choose to depict your caulking as brown rather than black as an aesthetic choice ,then why not.Steve's caulking does look nice with the brown tones.I was striving for Jet black as the model will be boxwood and ebony i.e. yellow and black.There will be a smattering of pearwood but those are the basic colours., Kind Regards Nigel -
Simulated caulking
NMBROOK replied to Nirvana's topic in Painting, finishing and weathering products and techniques
Hi Chris I think the 1/36 vs the 1/32 is a lot to do with the easy conversion from 1/48 .1/48 is easily converted to 1/72 or 1/36 whereas 1/32 is out on a limb and requires a little more work.I only recently bought Frolich's book as Ancre's marketing makes it come across as dictatorial.However upon reading it is very much the opposite of what they say.He states himself the book is only a demonstration of how he chooses to do things,not a definitive point of reference.I wish you all the best searching for your style Chris,this is the fun bit.Mine is still somewhere between Contemporary dockyard and Russian Palace Apologies to everyone for wandering off topic somewhat. Kind Regards Nigel P.S I would of bought that model,subject to winning the lottery but it has recently been sold for a tidy sum,but a little less than Dr Mike's going rate,so someone got a bargain -
Simulated caulking
NMBROOK replied to Nirvana's topic in Painting, finishing and weathering products and techniques
I fully understand what you are saying Chris.I think a part of this hobby is to take on board what everyone says and use whatever you are comfortable with.I never used to caulk planking originally when I started then just used pencil from then on.Everyone has a different idea as to how their model should look.This doesn't necessarily mean following someone's lead,more follow your ideas.Over the years I have studied the works of many master builders and picked up snippets from many of them.I deliberately will not pick one and reproduce their techniques because then it is not my style of modelling.I would much rather look outside the box and think of how the model should look as I want it.I may have started this hobby at a relatively young age and been doing it for over thirty years,but I wouldn't regard myself as a master by any means,just further down the road than some,but not as far as others. In essence Chris,do what ever YOU want to do with the model.I post on here because I want to illustrate my way of doing things,if someone chooses to use one of my techniques,then great,not then fair enough.I certainly don't want people to think that I believe my way is the only way.Like they say 'There is more than one way to skin a cat',sorry not very PC. Your post popped up before I could post this LOL In answer to your question all I will say,I have seen the deck caulking being done on the Cutty Sark refit and it was black tar.I have stood on the deck of Victory and Warrior and it is black tar.It does actually look like black mastic,but I am confident it isn't Kind Regards Nigel -
Simulated caulking
NMBROOK replied to Nirvana's topic in Painting, finishing and weathering products and techniques
You are correct Chris,I agree perfect model.He obtained plank definition by blunting the corners of the planking,at 1/36 this is more easily done than at smaller scales.Interestingly someone asks the question in the text.I am not arguing the point,each to their own,my favorite model also doesn't show caulking,interestingly by the builder who was discussing the issues with using paper: http://www.shipmodels.com.ua/eng/models/elite/le_ambiteux/index.htm There are many other details that could or could not be depicted on a model,again all down to the builder's discretion. -
Thank you very much Eamonn Yes markers do work well as long as there isn't any bleeding issues.I was wanting something I knew would take any finish I wanted later down the line.On this build I will use tung oil on the carvings and tung oil or shellac on the rest of the build.I won't be using poly as there will be no and I do mean no paint on this build You read it here so rollickings welcome if you hear the 'P' word Kind Regards Nigel
-
Simulated caulking
NMBROOK replied to Nirvana's topic in Painting, finishing and weathering products and techniques
I think your point is a very valid one Chris,I think much is down to the modelers personal preference.I did consider no caulking on Mordaunt,the main reason I went ahead was my choice of timber.Boxwood is very monotone and if I applied no caulking the result would almost look like a solid block of wood.Regarding the museum models,the many photos I have relevant to English vessels of my prefered period,the correct hull planking is not even adhered to.Strakes of pear are used several planks wide and the treenailing is a true mechanical fixing that holds these strakes on.On some models the hull plank lines have been drawn on with pencil! Kind Regards Nigel -
Thank you very much indeed Richard: I agree bonded to a subdeck,the strength issue is off limited importance.I think the bond has alot to do with paper density,the shop I got the tissue from shows black paper of 84g/sqm on their website, which is the lowest I found on the net.My local branch doesn't carry it which was when I found the tissue.I found a mere smear of alaphatic and whipping it off so only leaving a trace was ideal,too much and it soaks right through.The trial planks were glued to the tissue on a glass sheet just in case.I wouldn't like to try and split a bundle of planks,I think you may get a little tearout on the paper.I think it is preferable to leave a little stuck up and clean it off when scraping the deck.I scraped and sanded with P60! on this trial piece just to be sure it was well and truly secure.Even the deck planking will be spilled on this model as curved deck planks are correct for the period,so tissue will have to be applied to each plank separately . The Falmouth is a very nice vessel,it was only for my love of late 17th century vessels and my fondness of the works of Van de Velde that I chose Mordaunt.I think the beauty with all the Euromodel kits is that the only limitation as to how far you go with them,is your imagination. Kind Regards Nigel
-
Thank you very much indeed Nils for your very kind words ,I am pushing myself and pulling out all the stops on this one in the hope to create something a little bit special Kind Regards Nigel
-
Thank you very much indeed Patrick I was actually searching for the thinnest black paper I could find but came across this in the present wrapping section.It cost 75p (probably about $1 in your money for 5 sheets two foot square!!!).With the bleed resistance as well,it seem ideal.I am back in town Saturday so will pick up several packs!!!! Kind Regards Nigel
-
Simulated caulking
NMBROOK replied to Nirvana's topic in Painting, finishing and weathering products and techniques
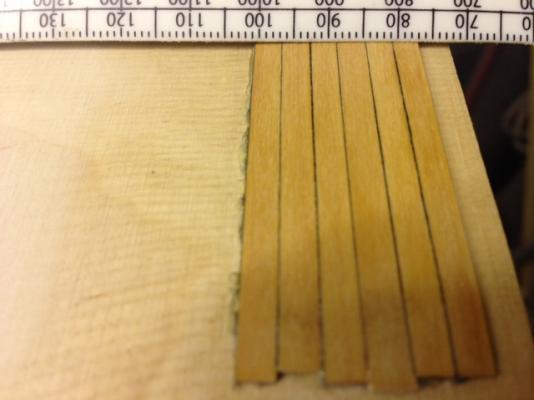
My trial with black tissue paper has been a success.Using a similar technique to Steve,the tissue was glued to the plank edges first,trimmed back and then the planks laid in the normal way.The glue fully penetrated the tissue so there was no issue of it 'tearing out' when sanding.The glue penetration was an important issue for me as this will be used on the hull planking and keel scarph joints as well as the deck.Having used a pencil for many,many years,I do feel that this gives a superior look that is jet black without the greyish tinge you get from graphite.The picture doesn't really do it much justice and the planks were rough cut for the test(I didn't even put a fine blade in the table saw) Kind Regards Nigel
-
Some great work and some fabulous planking Nick Spiling the planks and laying in a contemporary model style will always look the nicest.Yes it is a lot of work cutting the planks out but the results are well worth it.I found the hardest bit to get to look right was the bow end of the garboard plank.You have to stand the model right way up and looking from the horizontal,try to get the end so it looks like it flows in a sweeping curve from the side.This dictates the radius you cut on the end.It took a couple of goes on Caroline to get this to look right. Kind Regards Nigel
-
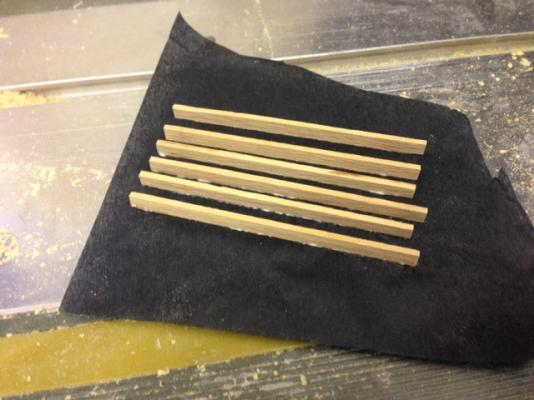
Not a very exciting update today,however my experiment has been a success.I have been debating about caulking techniques and despite using a pencil for longer than I care to mention,it never looks as good as the black paper route.However after watching Dr Mike's dvd explaining that black paper prevents proper glue bond strength,himself using cheap white paper and dying it black,I wanted to find an alternative with a bit less faff Having to visit town today for other reasons I did stumble upon black tissue paper.I thought this would still allow proper penetration of the glue,but would it be easy to work with?I adopted worse case scenario for the test and cut some planks roughly(not even changing to a fine blade )on the table saw.Smearing one edge of these with alaphatic and placing them on the tissue edge on.Having left to dry for a hour(would really leave overnight in practice) and then cutting the tissue with a new scalpel blade close on the underside and a little above the face side,separated the planks.These were then glued to a sheet of ply.Two hours later this was scraped and sanded back.Again I would leave overnight but I was being deliberately rough for the trial.Anyway complete success.No issue with the tissue paper wanting to drag out of the joints as it was fully impregnated with glue and razor sharp black(not greyish you get with the pencil) lines.The only imperfections are from the rough edges of the planks.In reality these would be smooth .I wanted to crack this dilemma as this technique will be used on the whole build which includes the scarph joints in the keel and the hull planking so strength is important.A couple of pics but the difference between this and pencil isn't truly conveyed with my iphone camera. Kind Regards Nigel

-
I think Matti you may be better of making something temporary like a light softwood frame and even just covering that in clear plastic film stapled on.You will have to lift it on and off many times so something a light as possible but still offers protection from dust is adequate.I know it won't look glamorous but it will keep the dreaded dust at bay while you are still working on the model. Kind Regards Nigel
-
Excellent work mate!!I bet you feel a sense of relief that stage is behind you now Kind Regards Nigel