NMBROOK
-
Posts
2,305 -
Joined
-
Last visited
Content Type
Profiles
Forums
Gallery
Events
Everything posted by NMBROOK
-
 Fabulous work Nils!There is a real myriad of detail for the eyes to feast on The figurehead casting is of amazing quality,definitely worth the extra work outsourcing it as resin wouldn't have cut it with chosen colour scheme. Kind Regards Nigel
 -
Thank you very much indeed Nils There is a concave aspect to the bow that has more in common with a PT boat than a 17th century warship! Kind Regards Nigel
-
AL's CNC Wood Milling Machine
NMBROOK replied to dewalt57's topic in Modeling tools and Workshop Equipment
Thank you for the video Al,that is seriously impressive!You possess some serious talent building a machine like this from scratch!I really would know where to start on the software side of things myself Kind Regards Nigel -
Hi Nils The infill is my own addition.The kit is open bulkheads and double planking.I am using single planking of scale thicknesses due to the exposed framing on the upper hull.The planking will be spliced at the waterline,Ebony above and boxwood below.The bulkheads would not provide the necessary support for this procedure with single planking .I would have probably infilled anyway as it is my own preference but also there a many complex curves to this hull and to ensure everything is faired properly this is easier in the long run. Kind Regards Nigel
-
Thanks mate yes soldier course it is You enjoy your weekend buddy,I am planning on spending all of it in the workshop,gave up being sat in a traffic jam on Bank Holidays many years ago Kind Regards Nigel
-
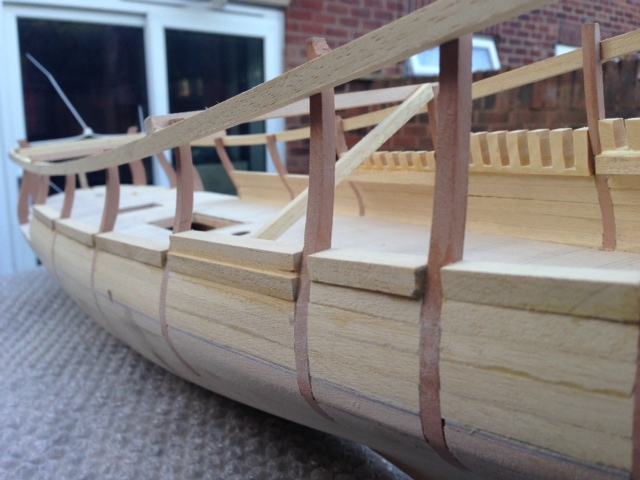
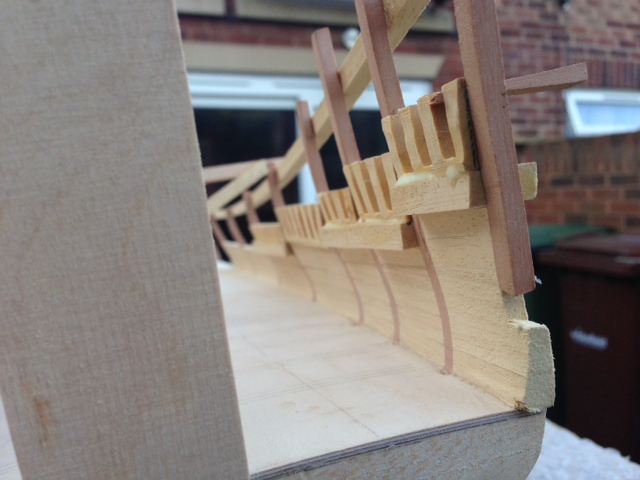
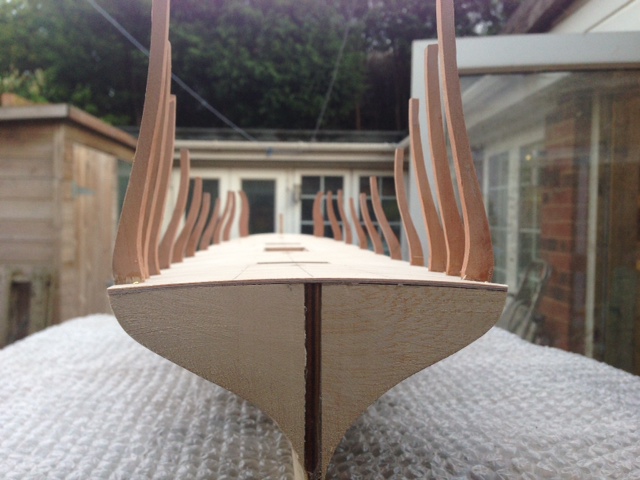
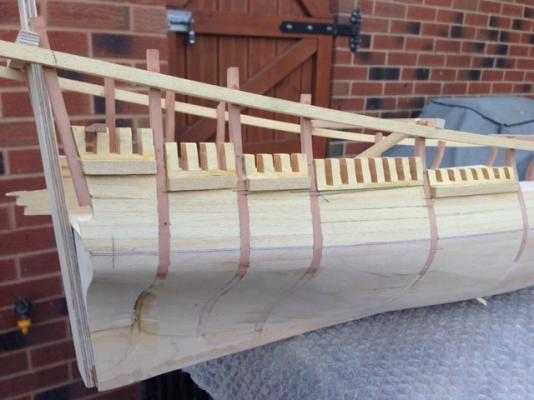
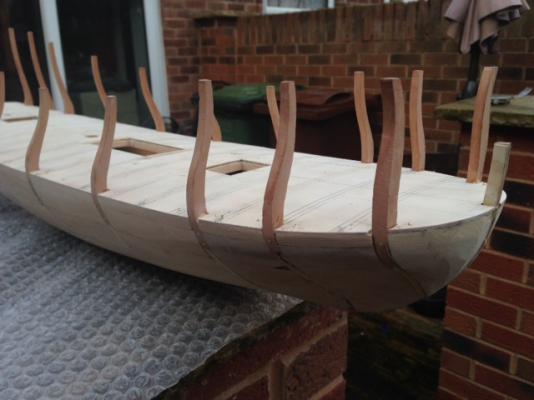
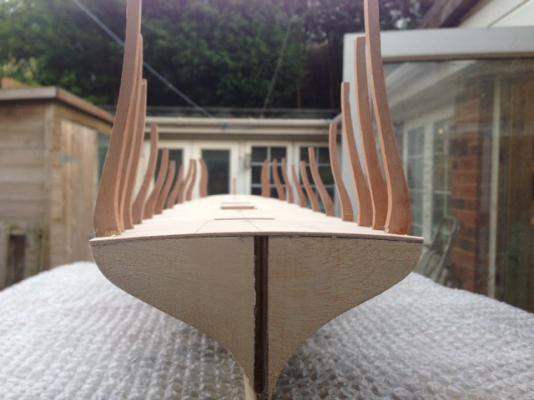
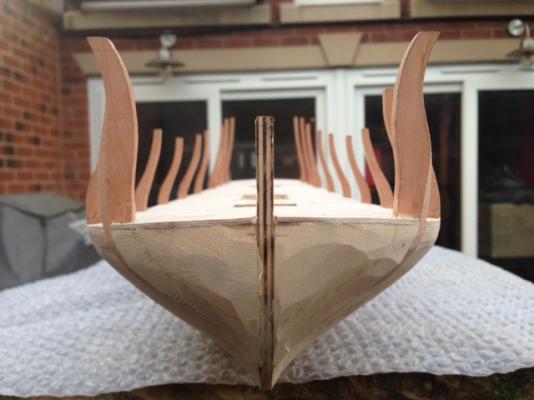
Things are getting interesting now I have tack glued some temporary stringers to keep all the frames plumb and true and placed a couple of key braces to keep things following the centreline.I had come up with a fancy jig design but sacked that as to be honest it was unnecessary and would only restrict access.The hull was then infilled from the gun deck upwards partway using Obechi simply because it is easy to sand and shape and the local modelshop happened to have some 1/4 inch sheets..These followed the shear,but the tops were then trimmed down so that they a parallel to the waterline below the top of the first upperwale.I won't call this a chainwale as the channels sit above this according to photos of the builders model.Some extensive draughting was required to sort theTransom side timbers as there is no frame here in Euromodels design,simply fresh air.The transom is still a flat block as this permits easy measuring and marking out.There is a 10mm arc in the transom face which will be added later,but is why there doesn't appear to any overhang of the stern counter at the moment.I want to fill the gaps between the frames to coincide with the top edge of the upper wale.The futtocks would have in reality finished lower down,but I am doing this for asthetics and then there won't be unsightly holes.The visible section of the upperframes and gunport linings will be in Pear to provide an interesting contrast to the boxwood.The 'combs' that provide an anchor for the upperframe sections and fill the gaps I chose to make from European boxwood to further highlight this detail.Rectangles that are horizontal and follow the centreline were cut form box making sure there was enough material to allow contouring to the hull lines later.These were then milled on the MF70 with 5mm wide slots to accomodate the upper frames.The slots are deep enough to ensure the base of the frames lie below the top of the wale and the top of the blocks are high enough to go above it.The idea being that once they are all in place,temporary wales will be attached and the shear marked and trimmed on the top of the combs.The rectangular blocks had the bulk stock removed after milling prior to gluing in place.Final shaping will be done when they are all inplace.I am concentrating on the aft section of one side as there is a temporary upright holding things true at the stern.When this section is complete,I can fit another upright the otherside of the centreline then remove the existing one.This will give me the access to work on the inside of the hull at the inside.I am trying to avoid fitting the transom framing until later as it will make sanding the inside much more awkward. Kind Regards Nigel


-
AL's CNC Wood Milling Machine
NMBROOK replied to dewalt57's topic in Modeling tools and Workshop Equipment
WOW Al!! That looks at fantastic piece of kit.My imagine is already running away with me thinking of all the jobs I could do with something like that Do you use it just for sheet material,or have you had a go at more complex 3D shapes? Kind Regards Nigel -
A great start Ulises It is nice to see a kit with a decent number of bulkheads,instead of the 80mm spaces you see in some. Kind Regards Nigel
-
Xebec by mij - FINISHED - 1:60 scale
NMBROOK replied to mij's topic in - Build logs for subjects built 1751 - 1800
Great work Mij and some nice carving Kind Regards Nigel -
Fabulous work Ersin on a very unusual build What are the dimensions of the model hull?All the pics I have seen both here and on your group make this model look really large. Kind Regards Nigel
-
Looking good mate Personally I would say yes to a canvas collar over the hole in the deck.I know Caroline has one (according to the AOS book anyway)but I would think this would be common practice otherwise a ton of water would poor in,in rough conditions and decks awash. Kind Regards Nigel
- 1,039 replies
-
- 1
-

-
- ballahoo
- caldercraft
- (and 2 more)
-
Clamping down the deck to frames
NMBROOK replied to Captain Al's topic in Modeling tools and Workshop Equipment
Looking at the picture the second frame from the stern(the one with the weight on top to the right in pic)needs trimming down.On Bounty the sheer is a smooth arc with the dip amidships.Your deck is dipping,but is wanting to bend the other way when it reaches the offending frame.Trimming down by 1 to 2mm(a guess looking at the pic) will make a massive difference.Best way to tell is to take the deck off and get a piece of square timber say 5x5mm and sit it on the top of the frames.Push the middle down so that it touches the frames and you will see if this frame top is the odd one out.There should be a smooth arc from bow to transom with no high or low spots. Kind Regards Nigel -
The stern looks tremendous mate!!(sorry but struggling to come up with a superlative I haven't used before )Are you going to fit four swivel guns in the round ports like Michael has,or are you leaving them blank?Just thought I would ask as they do add a little extra to the model. Kind regards Nigel
-
Don't worry mate,once you get into it,you will probably enjoy it It makes a big visual difference and at no financial cost.Just take your time buddy,I think it is one of those chip away at it jobs,best done over a few short sessions rather than all at once as it will then test your patience,If you are unsure,then draw it all out first,on the deck or on a sheet of paper before committing to the blade Kind Regards Nigel
- 1,039 replies
-
- 1
-
-
- ballahoo
- caldercraft
- (and 2 more)
-
Give me joggling over jogging any day of the week Sorry folks a little off topic,but I just couldn't help myself Kind Regards Nigel
- 1,039 replies
-
- 1
-
-
- ballahoo
- caldercraft
- (and 2 more)
-
Exceedingly sharp paintwork Eamonn Great work my friend.I take it the Tamiya masking tape met your expectations. Kind Regards Nigel
- 1,039 replies
-
- 1
-
-
- ballahoo
- caldercraft
- (and 2 more)
-
Thank you very much indeed buddy Yes she is quite substantial now ,so much so,i was able to use a normal joiners hammer to pin the deck in place!!!!The five cut beams was a definite no no,I could have followed the drawings but then the beams would not be under the cannons .Not only that,but further down the line,adding hanging knees would cause fouling issues with gun tackle.Have now developed another 'cunning plan' to ensure consistent transition of hull wall thickness(the frames are overwide to compensate for fairing both sides)All will be revealed in due course Glad you like the tape,it really is the biz.There is another make I use,but can't remember the manufacturer .I use this for really awkward masking as they make it down to 1/16th inch wide. Kind Regards Nigel
-
Stunning work Bob I am glad I am not the only one who 'jumps about' on the building sequence for a little variety Kind Regards Nigel
-
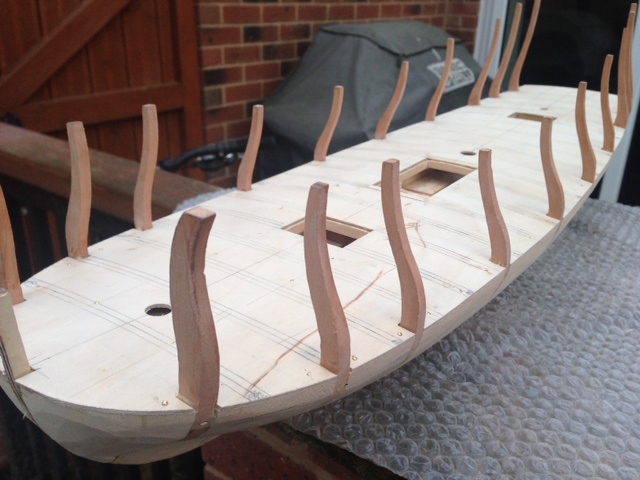
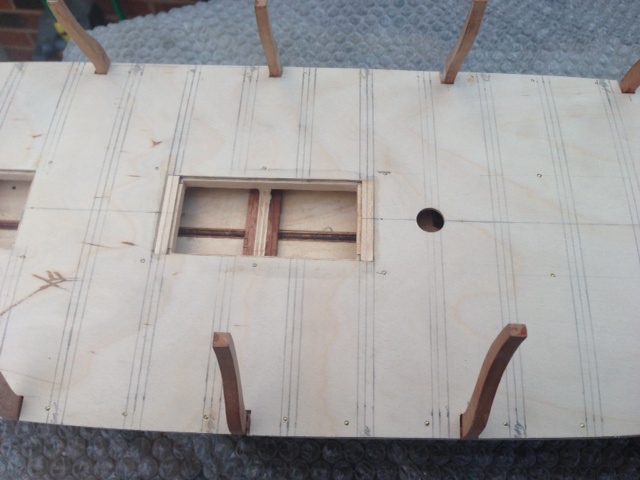
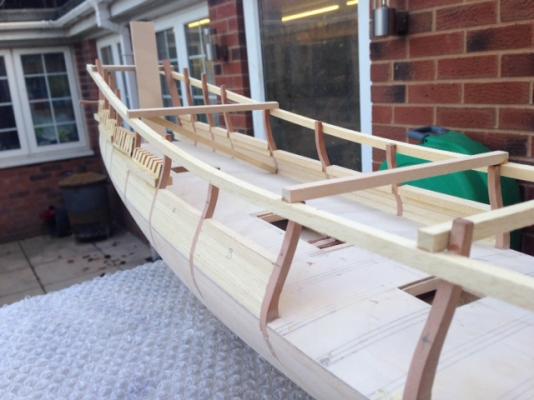
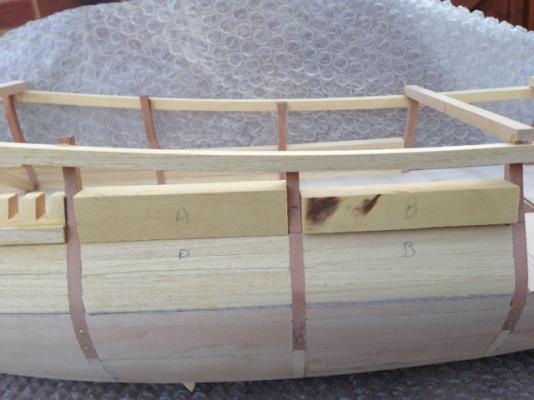
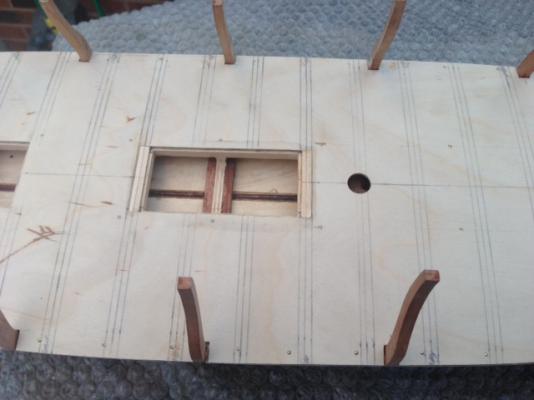
Ok update time After sorting the remaining deck supports I preceeded to mark the subdeck out on a piece of 1/16th ply.After cutting out,I began to establish the deck beam positions in order to mark where plank butts treenails etc would be.Refering to 'Restoration Warship',Richard Ensor states that common practice was to have one deck beam central to each gunport and one inbetween.I drew out the gunport positions of the gundeck and marked the beams then marked the other beams halfway inbetween.This design is completely different to that portrayed on the plans,sorry Euromodels but the internal structure just doesn't ring true.Yes I am still working to the plans for the internal layout,just not the beam placement.Another issue came to light in the fact that the long grating and main mast resulted in 5 consecutive beams being split.There is no way this would happen,so I have shortened the gratings to allow two beams to run right through,hence the deck infill at each end.After one or two trial runs and a little trimming,making sure nothing was tight on the pear frames,the deck was glued in place.I did remove the temporary ties across the frame tops to allow this and the deck had to be bent ALOT to get it to 'spring' in.There is still lots of shaping to do to the lower hull especially the stern which is simply a block at the moment.Thorough checks on symmetry will be carried out as the work progresses. Kind Regards Nigel

-
For me personally,I would be tempted to fit one mate,if only for aesthetic reasons.Whether or not it had one historically,I don't know,but it would not only make the job easier and neater,as you may encounter planks that need notching beyond what was normal practice to fit around the uprights.With the margin plank you are guaranteed not to have any 'dodgy' narrow pieces next to the uprights
- 1,039 replies
-
- 1
-
-
- ballahoo
- caldercraft
- (and 2 more)
-
That is really interesting Matti !The reconstruction work on the original and the museum plans both agree with Billings plans but not the museum model ?All I could suggest is that the cannon is angled forward as it is fairly close to the bows? Kind Regards Nigel
-
Thank you Brian Kind Regards Nigel
-
Looking at the museum model,the first three deadeyes should be further forward as the most forward chainplate lands above the next gunport,whether this means a longer channel,it is hard to tell from just the one view of Billing's drawings. Kind Regards Nigel
-
Hi mate Yes I realise it is Caldercraft's design of the skeleton that causes the voids.In reality they would have been the 'ears' of the stern upright(Even I don't know what this pieces proper name is without looking it up ) and tight in the corner,but as this is a POB kit,they have chosen really the only route possible.without making the kit too complex as this piece would be shaped in two planes. Kind Regards Nigel
- 1,039 replies
-
- 1
-
-
- ballahoo
- caldercraft
- (and 2 more)