NMBROOK
-
Posts
2,305 -
Joined
-
Last visited
Content Type
Profiles
Forums
Gallery
Events
Everything posted by NMBROOK
-
 Most people write their shifts on the calendar Eamonn Sorry couldn't resist mate Hope it all works out ok,but at worst it will only mean recutting the odd piece? Kind Regards Nigel
- 1,039 replies
-
- 1
-

-
- ballahoo
- caldercraft
- (and 2 more)
-
Simulated caulking
NMBROOK replied to Nirvana's topic in Painting, finishing and weathering products and techniques
I was wanting to try the black paper technique shown in Frolich's book on my Mordaunt build.After seeing Dr Mike's dvd and the fact he explains in great detail that normal black paper is too good a quality to still provide a structurally sound joint with glue.He chooses to use cheap paper and dyes it black with permanent ink.Determined to find a solution not as long winded as this,I stumbled across acid free,bleed resistant black tissue paper in town.I intend to carry out a few trial runs to see how this turns out,but it should still allow the glue to penetrate the timber. Kind Regards Nigel -
I would give consideration to adding the railing Matti until much later.Having seen how thin it is,personally I would leave it off for a long as you can.You could make it up on the model while you have plenty of working room to be fitted later on.If it is feasible to install the completed railing after rigging I would do it then,but how easy it would be to feed in with the ropes in place I don't know.One thing is for sure,it would probably the first thing a thread would want to wrap around during the rigging stage.Threads may want to get tangled on your gunport lids but it is a fairly easy job to make something to prevent this,the railing not so. Kind Regards Nigel
-
I need advice on a rotary tool
NMBROOK replied to jdiven's topic in Modeling tools and Workshop Equipment
I have used a Dremel for many years,but having been diagnosed with HAVS(hand arm vibration syndrome) I have changed to a Proxxon IB/E.The difference is night and day.The smoothness of operation is miles ahead of the dremel which is 'agricultural' in comparison.There is not a vast difference in price but the difference in quality is massive.The added bonus is the speed switch is independant from the on/off switch so comes in handy when doing repetitive tasks.Size and weight are virtually the same,but the Proxxon's design is much more ergonomic and comfortable to hold. Kind Regards Nigel -
Thank you very much indeed Bob I had several possible strategies but went with the one that I felt was the least work without compromising strength.I could have framed the top half completely,but aside from the ton of work,it would be extravagant for such a small area of framing on show.I am hoping this exposed framing will tie in with areas of unplanked decks.The stern is a different beast altogether as this is only planked on the outside,so that will require complete and full framing.Thoughts on 'painting with wood' going mad at the moment.Frolich does not mention in his book about areas of single planking with a different colour on both sides Probably double plank,box inside,ebony outside Kind Regards Nigel
-
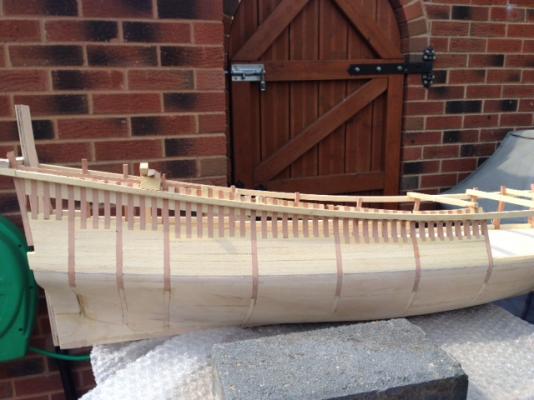
Thank you very much indeed Admiral,Matti and B.E.for your very kind words I have to say Matti I love them too!The photos on Euromodel's site in no way convey these,I knew her hull was unusual in form from the pics I have of the builders model,but it in no way fully prepared me for how this is shaping up.Now I have the rest of the infill in place(photos tomorrow when it's dry and sanded up) apart from the crazy transition of shapes below the waterline at the bow,she is very much Dutch in shape.The comparatively low beak,bluff bow and severe tumblehome made me check I was working to the right drawings Don't ask me why but the shape just reminds me of a catfish Kind Regards Nigel
-
Thank you very much indeed Sjors If you press the blue button it also does the Mayan calender Kind Regards Nigel
-
You could of used a mechanical fixing with wooden supports Nils,but I don't think that they would have looked as nice in view of all the natural brass you have on the build.I hope your supply of half round brass stretches out otherwise you may end up filing a few to shape Kind Regards Nigel
-
Great work Nils,I love the brass supports they go well with your overall colour scheme Kind Regards Nigel
-
Exemplary work mate!!She looks incredible.I did wonder what you were going to do with the plastic lids.I have only seen a pic of them in the catalogue and that shows the inside face.I wondered whether you would plank the outside face and you have answered my question Kind Regards Nigel
-
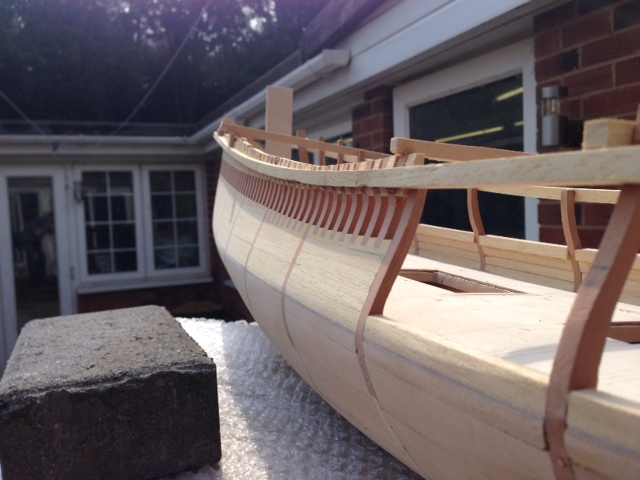
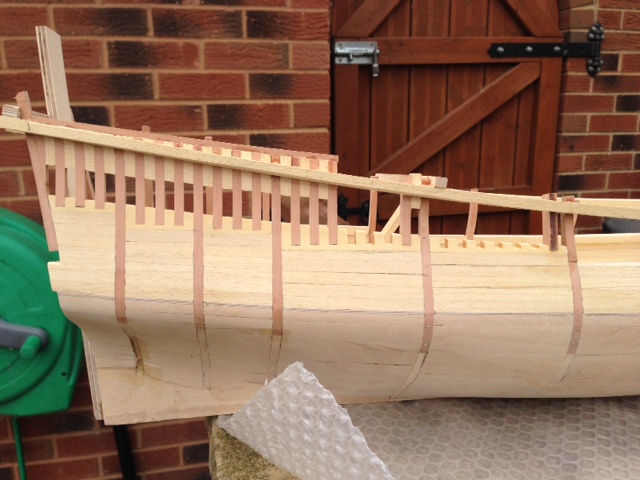
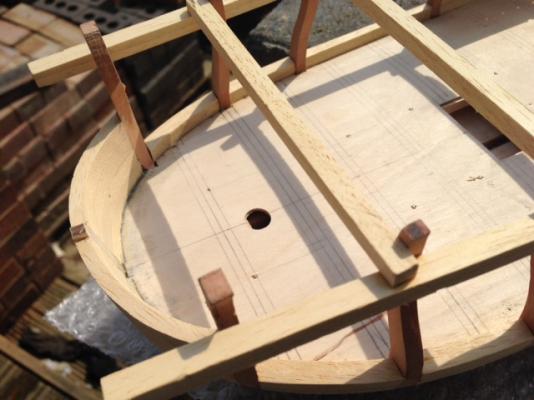
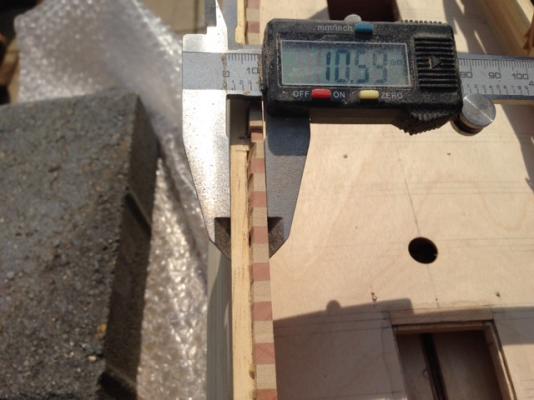
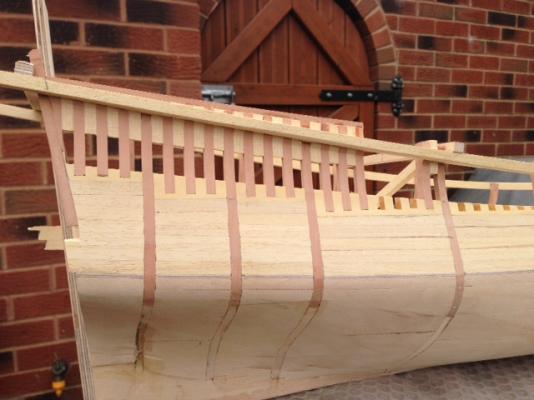
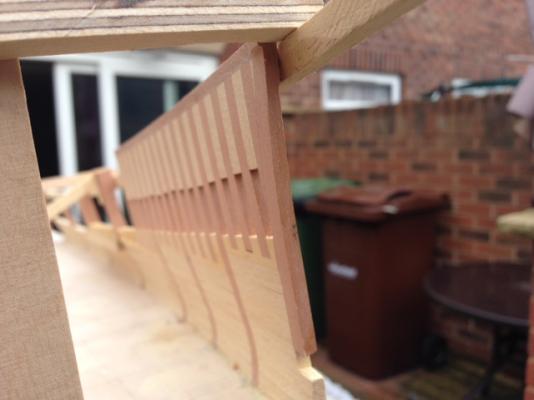
Work continues moving forward with the framing.When it came to sanding back the inside,unfortunately the 'binding' stringer that will be fitted at the top falls below the level of the temporary stringer on the outside.I measured the overall thickness including the outside temporary stringer on the thinned section on the stern using the verniers and used this dimension as my point of reference to sand down and profile the central section.Work now concentrates on completing the obechi infill.I have already started at the bow,this will need increasing in height at the sides as the hull edge flows down in an arc to meet the stem. Kind Regards Nigel


-
Thank you Sjors .If you look at post 36 on page three,there is a photo of a builder's model.I intend to leave the planking off between the upper wales like in this photo so the frames will be visible Kind Regards Nigel
-
Thank you very much indeed mate I can't help with the disappearing post She does remind me of Neopolitan icecream at the moment I don't know whether you have that in Sweden,but it is strawberry,vanilla and chocolate with the three different colours and flavours as stripes Kind Regards Nigel
-
Your skeleton is an excellent foundation for the build Patrick It is a shame regarding the lack of symmetry but I am sure you will overcomb this little hurdle. Kind Regards Nigel
-
Thanks mate!You have a good one too and hope all goes well with your Gordon Ramsey bit I have discovered there is a direct relationship between the manual thickness sander and the kettle on/off switch,I suggest you try there first Kind Regards Nigel
-
Thank you very much indeed Brian It is a lot of work for such a small detail,but I hope it will make a big difference to the model when finished. Kind Regards Nigel
-
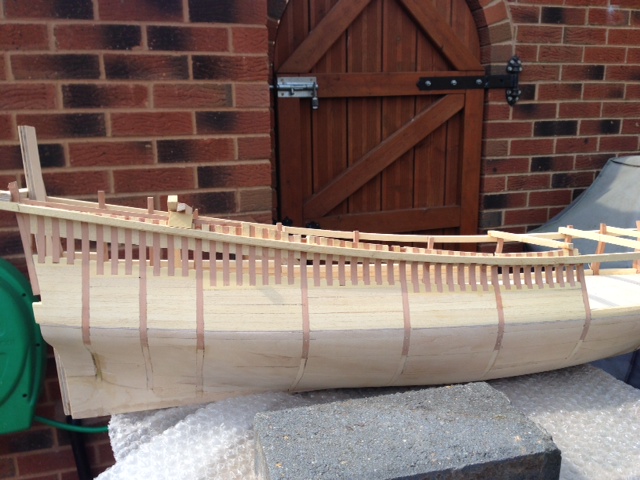
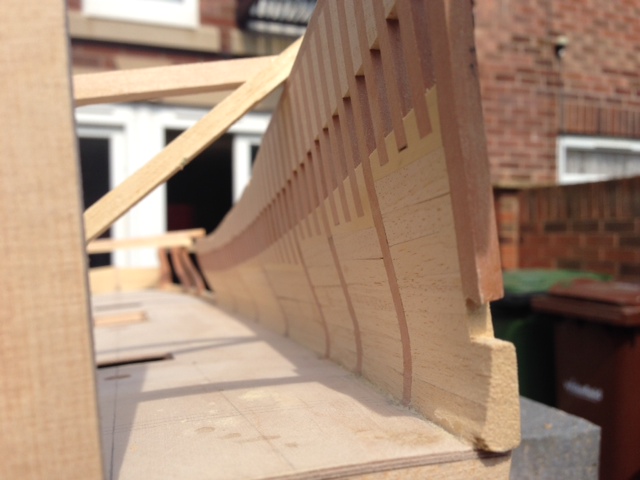
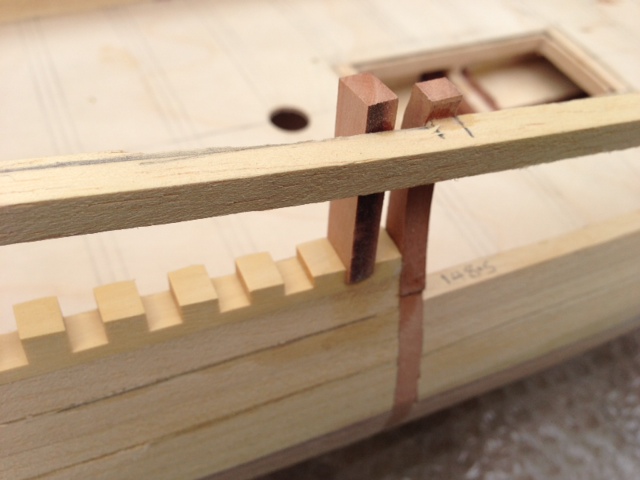
I have started to fit the upper hull starting from the stern forwards.By notching back the temporary stringers,I am able to use plain pear strip overwidth,rather than trying to develop individual shapes for each of the frame sections.There is a not very clear photo showing this.Each piece was fitted with an obechi infill individually.By using the digital vernier to check running dimensions as I went along,this avoided any accumulative build up of error.The obechi was thickness sanded(using a sanding block )to suit each location.There is variation in frame spacing due to working with the constraints of bulkhead positions,but it is so small,it unnoticable to the eye.I have set the obechi 2mm above the base of the upper trim(bottom of the ebony planking).This is to allow fine adjustment of the ends and then capping with 3mm boxwood.Doing it this way means no tool marks will be visible on the frames from shaping the ends of the obechi.This complete section has been trimmed 3mm below the cap rail so I can fit a square pear 'binding' stringer to tie everything together.I got this idea from Dr Mike and makes alot of sense to tie all these laminations together.It also provides a sanding guide for upper frame thickness.This will be pinned later into the top of some of the frames for additional strength.The length of this upper edge is overlong at present and steps down to a lower level,which will be cut back when the next section is complete.My technique just leaves a section to sand back when the temporary stringers are removed.I am considering replacing these afterwards,but bolting to the hull with M2 bolts as this area will be planked over.I am also considering using threaded rods as well to keep the upper hull the right distance apart as work progresses. Kind Regards Nigel

-
Nothing wrong with you mate,the condition can be traced back to Roman times,known as Glutonus punishmentus Kind Regards Nigel
- 1,039 replies
-
- 2
-
-
- ballahoo
- caldercraft
- (and 2 more)
-
Thanks mate!!got plenty of time to devote to her this week so the updates will be coming thick and fast
-
Hi Chris Personally I don't rate balsa,aside from the fact that it is really soft and doesn't offer that much support,the biggest issue is because of the softness it is impossible to get a nice shape to the hull.The balsa always ends up low compared to the bulkheads.Covering with filler defeats the object of added glue area.The builders foam.I haven't tried,I know Brian C uses this technique and Aussie48 has just used it on his model.I can see this working providing there is an opening for the foam to escape,otherwise the expansion will distort the hull. Kind Regards Nigel
-
Thank you very much indeed Alistair Quite a lot of sawdust The bulk removal on the hull was done with a 41/2 inch flap wheel in a grinder OUTSIDE Kind Regards Nigel
-
Thanks Brian It was essential above the gun deck as the frames work out at a scale 4mm thick!!.I could have framed the deck upwards but that would have been a mountain of work that would be enclosed apart from the section towards the top.This way I am only framing areas that will be on view and still maintaining the structural integrity. Kind Regards Nigel
-
This has to be the finest model I have seen in my lifetime.The video is of a UK TV series extreme machines presented by Jeremy Clarkson.It shows a Ferrari 312pb featuring a WORKING exact scale replica of the engine and gearbox.The thing even sounds right!!! Kind Regards Nigel
-
That's a nice production line you have set up Michael That is a LOT of parts but I am sure the result will be more than worth it in the long run.One last suggestion re the drilling jig,label it and put it in the tool box,you will probably find it will come in again I used to throw mine away,but have now learnt to save them,the small ones at least as they take no space up. Kind Regards Nigel
-
Hi Chris I think not only does it increase the glue area but also the rigidity.When I used to build on open bulkheads all the time,using kit 1.5mm first planking and the 1mm second,I used to find the hull flexed when sanding.You only have 2.5mm of material,take away the amount removed from sanding and in my opinion you are left with a very thin hull.As I mentioned earlier in the log,if the model gets exposed to increased humidity for any length of time then dries out again,this can result in the bulkheads 'ghosting through' in the finished profile.As I build models to outlive me many times over and if sold on have no control of the environment they reside in,I like to adopt a little extra 'insurance'.It is more work,but time is saved by not having to remove much material when sanding planking.Sovereign was double planked over a birch ply infilled hull,The two layers of planking over the top only needed the minimum amount of work to sand smooth.IMHO it is well worth the extra effort unless of course you are building a POF or model with many bulkheads where the planking is adequately supported. Kind Regards Nigel