bigcreekdad
-
Posts
436 -
Joined
-
Last visited
Content Type
Profiles
Forums
Gallery
Events
Everything posted by bigcreekdad
-
Nice job on the thinning. My first attempt at a build was the Phantom. I thinned too much, and ended up going right through it in many places later. Ended up as kindling for my wood stove. But a good learning experience.
-
Dos Amigos by bigcreekdad
bigcreekdad replied to bigcreekdad's topic in - Kit build logs for subjects built from 1801 - 1850
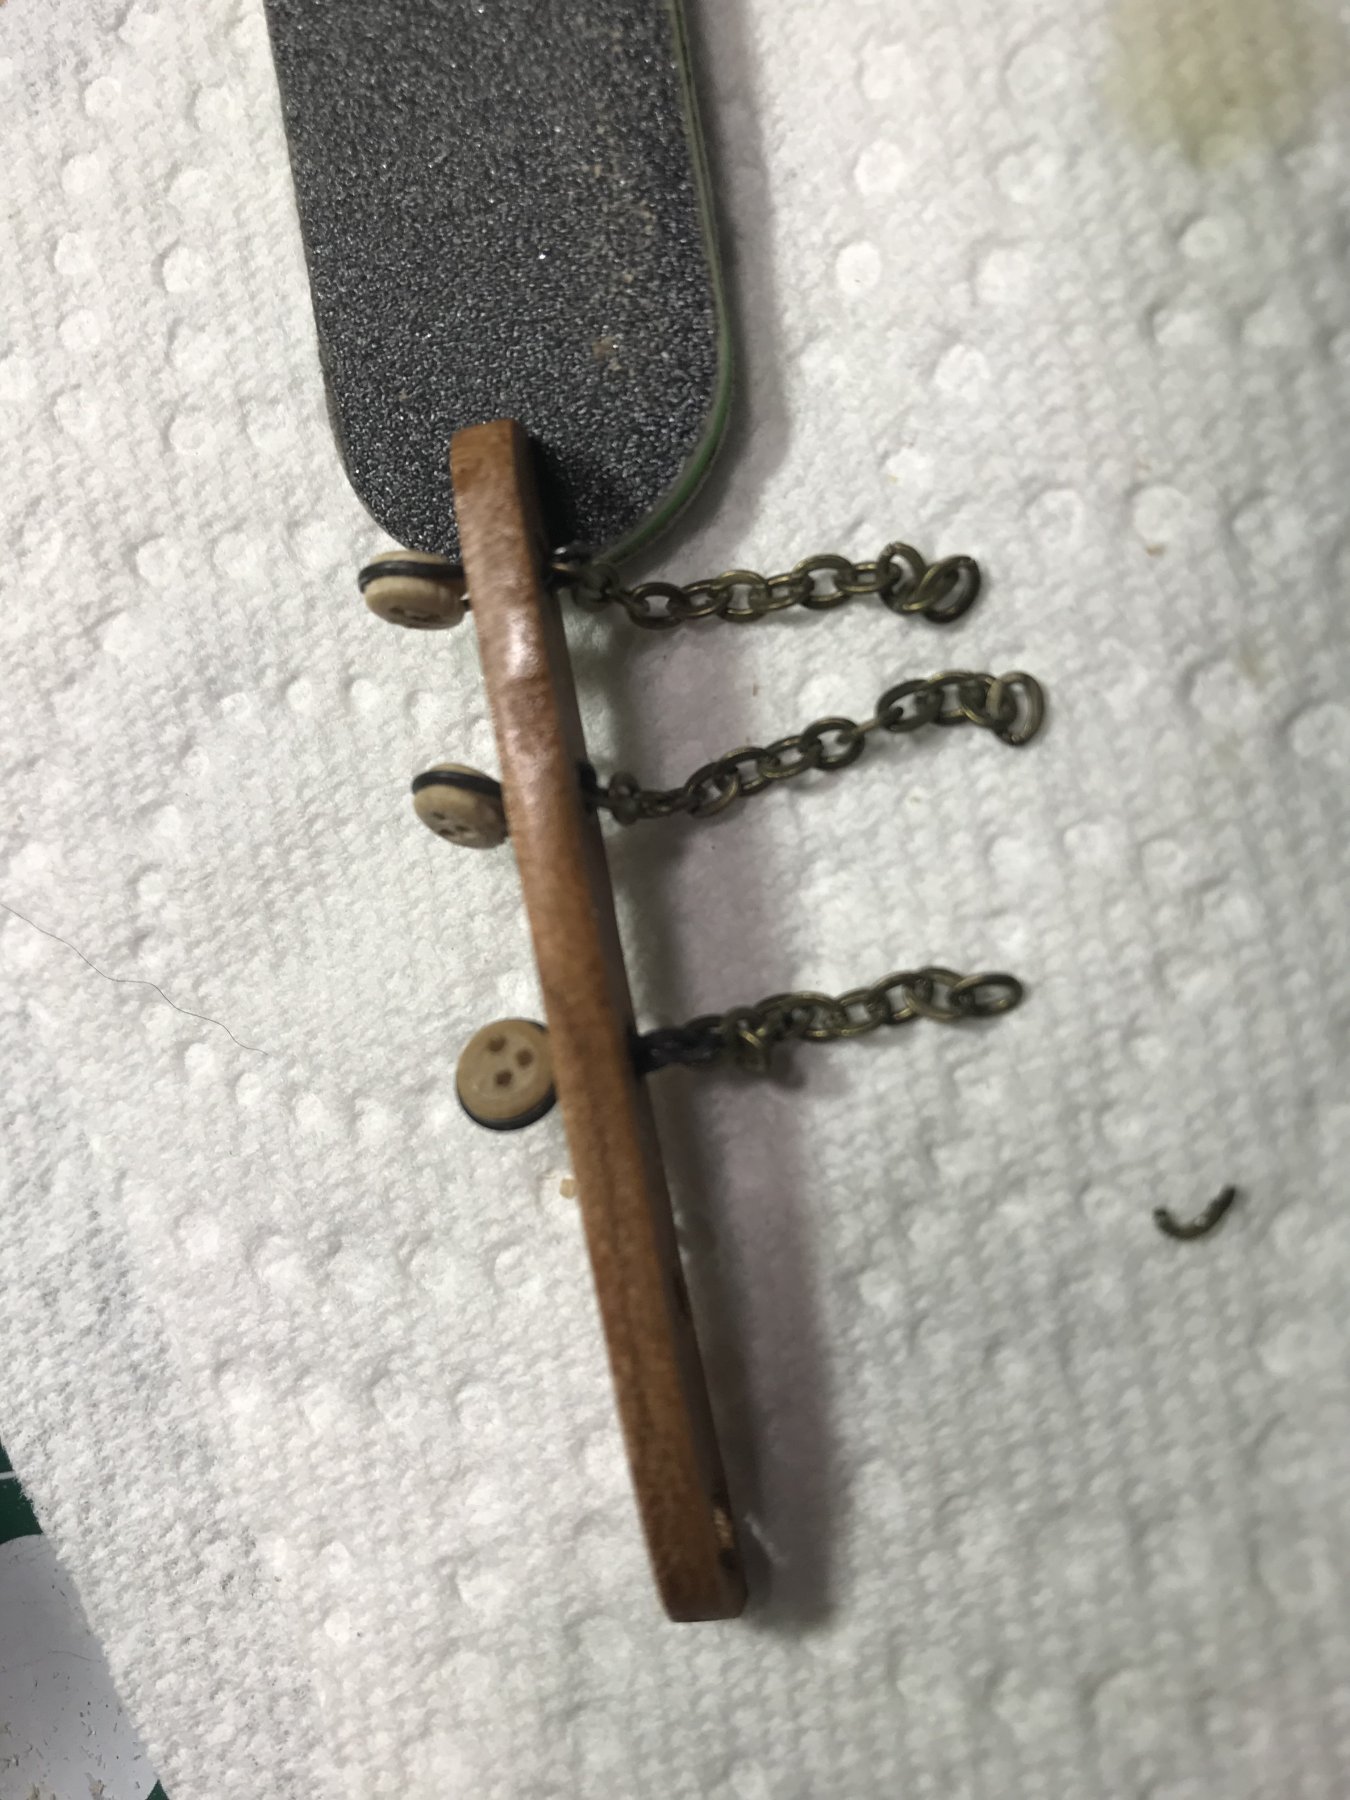
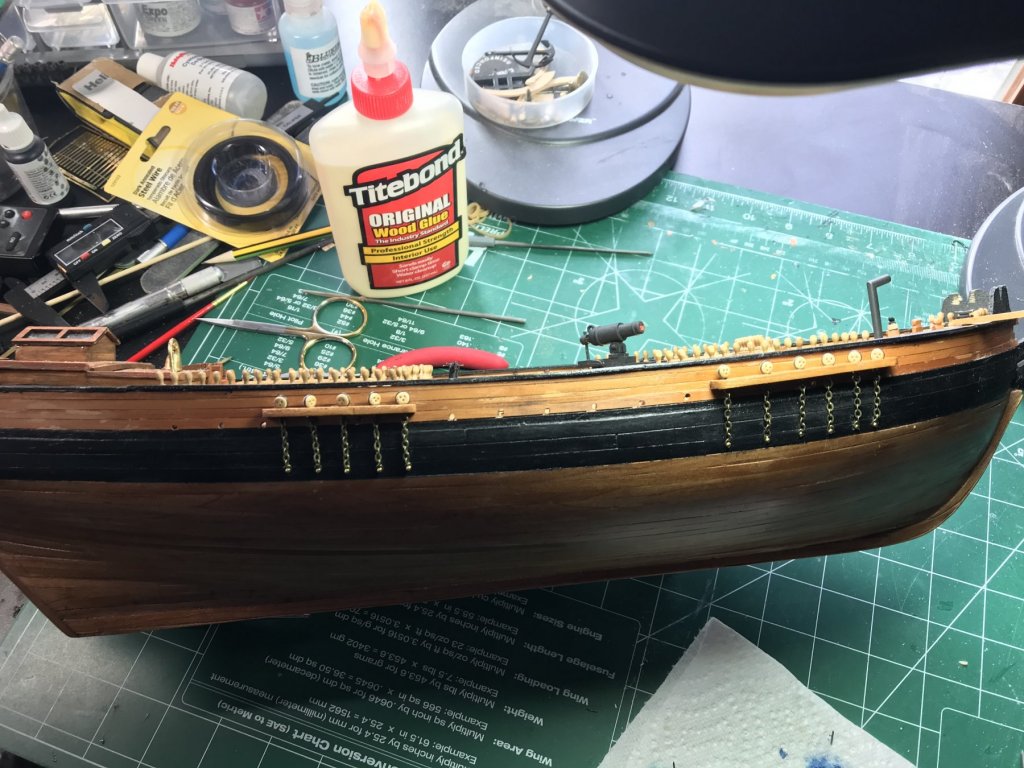
More progress on deck work, especially the 2000 (or so it seemed) belaying pins. I did not use the kit supplied pins. Also, finished stropping the deadeyes, attaching chains, and mounting on railings. I'd be curious to hear thoughts on using the chain material....positive or negative. I'm likely going to paint them black as I don't care for even the light shine they give off. This ship comes with sails, which I don't intend to use. However, the rigging plans for the sails are pretty much overlaid with the running rigging...this is going to be a real best when I get that far trying to differentiate them.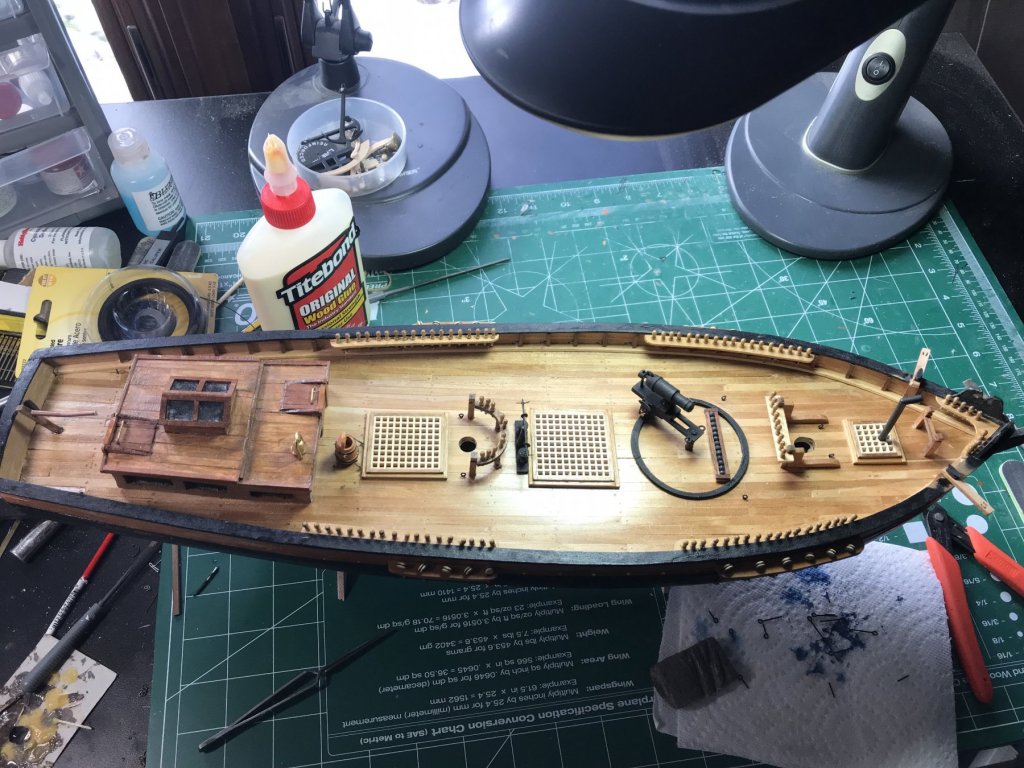
-
Bob...love following this build. Wonderful job. I have to ask...there is a blue tint to your masts and spars. It's got to be the lighting, but I actually kinda liked it.
- 682 replies
-
- 3
-

-
- halifax
- lumberyard
- (and 1 more)
-
I like your progress. Well done. you may be satisfied with the deadeyes and strops as the one above, but if you want to se another option for these go to my build log of the Dos Amigos. I ended up buying annealed #24 wire and some bracelet making chain from a craft store to do mine. However, I had terrible (IMO) wire and strops supplied in the kit. Jotika's are much better. In any case, I'll keep following your fine build.
-
Dos Amigos by bigcreekdad
bigcreekdad replied to bigcreekdad's topic in - Kit build logs for subjects built from 1801 - 1850
Thanks Popeye -
Bob I realize your fine build is not complete, but I've wondered if you've given any thought to your next build. You've kinda set the bar for yourself ya know...LOL. John
- 682 replies
-
- 4
-
-
- halifax
- lumberyard
- (and 1 more)
-
Dos Amigos by bigcreekdad
bigcreekdad replied to bigcreekdad's topic in - Kit build logs for subjects built from 1801 - 1850
Thanks for the kind words Popeye. Went to the rigging plans and the kit deadeyes are accurate compared to the kit supplied ones. I'll stick with them. I really appreciate your thoughts. I am well aware the majority of builders on this site are beyond my skills ( I ain't whining BTW...I can likely out fish most of them...oops...hope that doesn't come back to haunt me). What I'm saying is that it's good to just get some advice, critical or otherwise, for many of us. -
Dos Amigos by bigcreekdad
bigcreekdad replied to bigcreekdad's topic in - Kit build logs for subjects built from 1801 - 1850
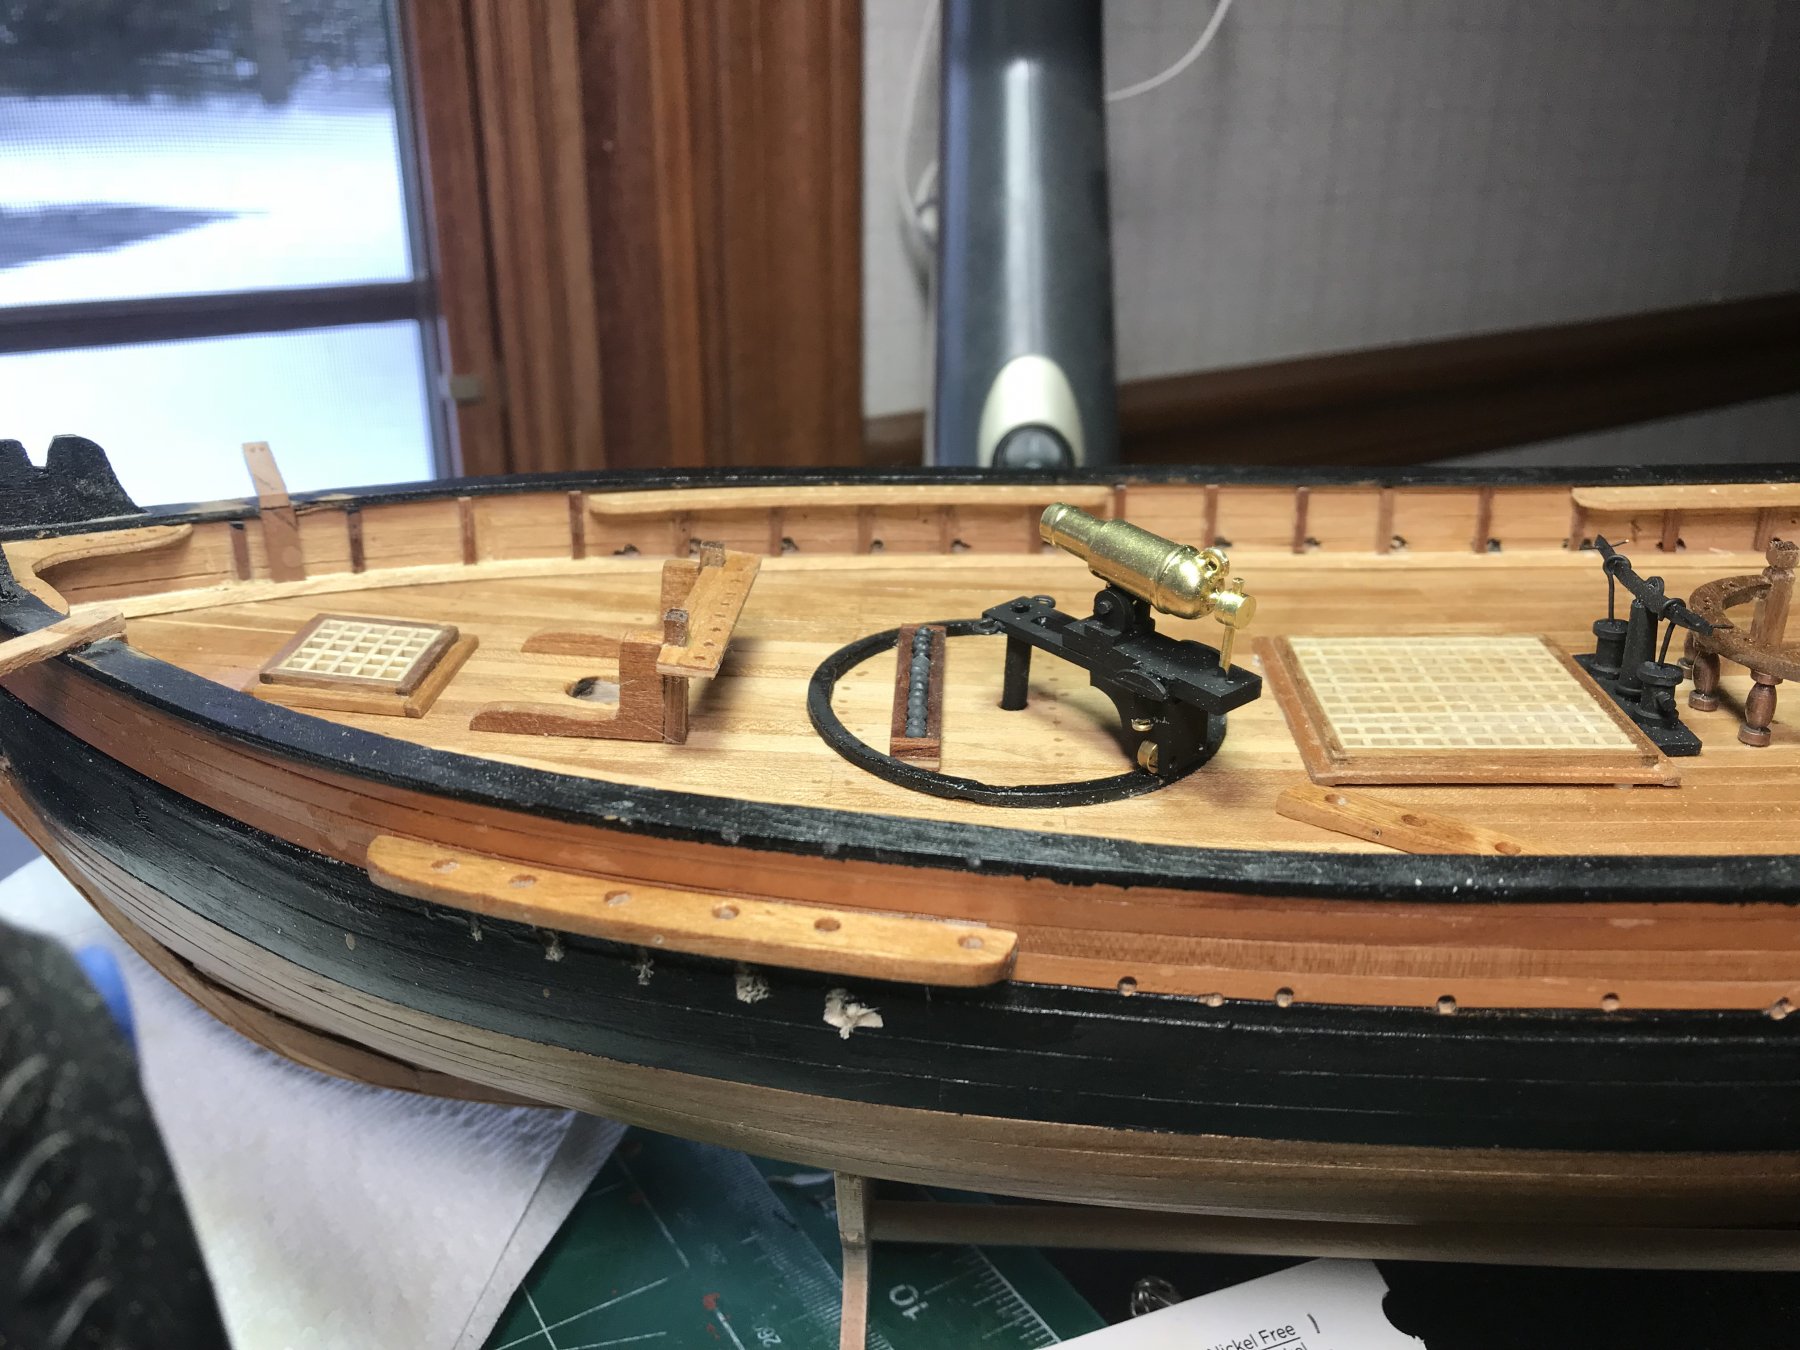
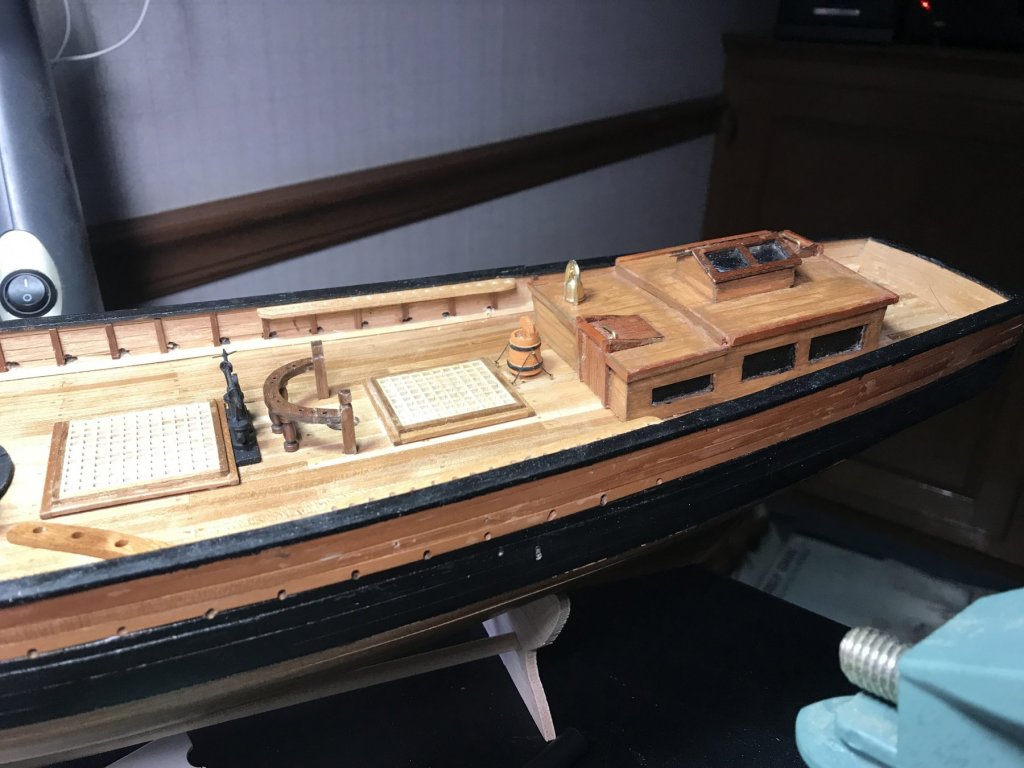
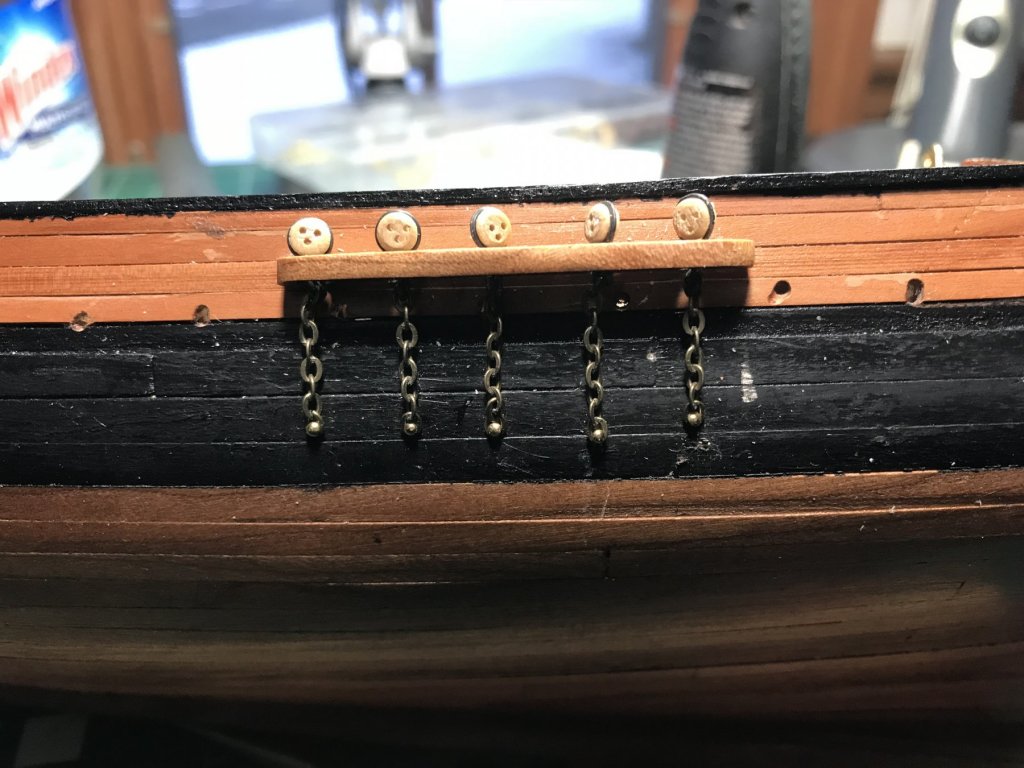
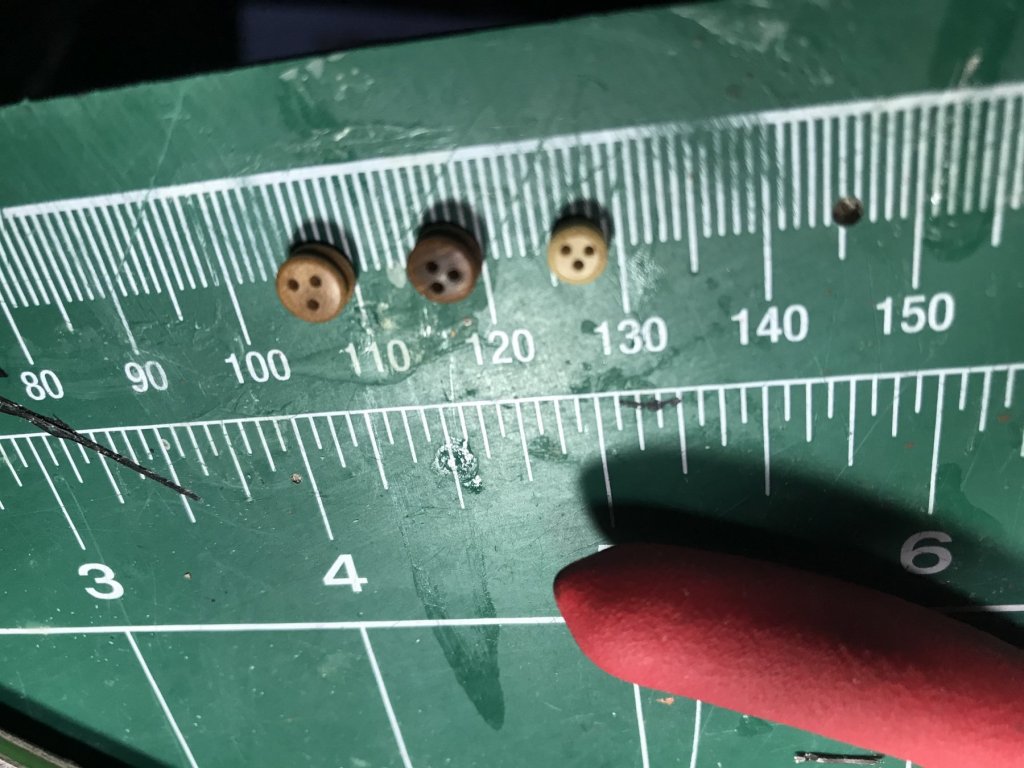
More progress. Much of the deck work finished. Aside from the hatch cross slats, the bell, the barrel, and a few parts of the pump are from kit supplied. Know I've said it before, but the wood in this kit, especially the laser pieces are, frankly, crap. Oh well, sometimes it's fun and accomplishing to make pieces yourself. I remade the rails for the belaying pins as the laser cut piece broke off on the first piece i was drilling an opening for the deadeyes in. I made new ones slightly thicker to add some strength. Great idea, and worked well, and then I dry fitted a kit supplied belaying pin and found it too short (8mm) . Ended up ordering some 12mm walnut pins from model expo (fast service I might add). The side rails for the chainplates and deadeyes were typical of the wood. It was quite thin, and after drilling the required openings I felt was got to be weak having much purchase on the planking with only glue. What was really needed was a few pins to go into the hull to add to the glue for purchase. However, the kit supplied laser parts were too thin. I made new ones, adding about 50% to the thickness out of cherry. This allowed me to drill holes and add some pins, which worked well. When I started on the chain plates and deadeyes, again, I found the kit material not to my liking.The wire to fasten around the deadeyes and attaching to the strops was pretty cheap, and the plates themselves I just didn't like (why am I so picky?). I went toYou Tube and found a vid of a guy using black 24 gauge annealed wired for enclosing the deadeyes, and chain used by jewelry makers. Looked interesting. A quick trip to Michaels Crafts and I had the wire and the chain. I had to make the rail opening a bit bigger, but I kinda like this approach. I've attached some pics and would appreciate any comments on them...good or bad. Finally, after mounting deadeyes on my first rail, it dawned on me that they looked kinda small for this model. It likely doesn't matter much, but I do have larger deadeyes....I've attached a pic of three deadeyes....the smaller is the kit supplied that I mounted. Any thoughts on these? While this build has been frustrating due to wood and parts quality, and mediocre instructions, it's been fun nonetheless.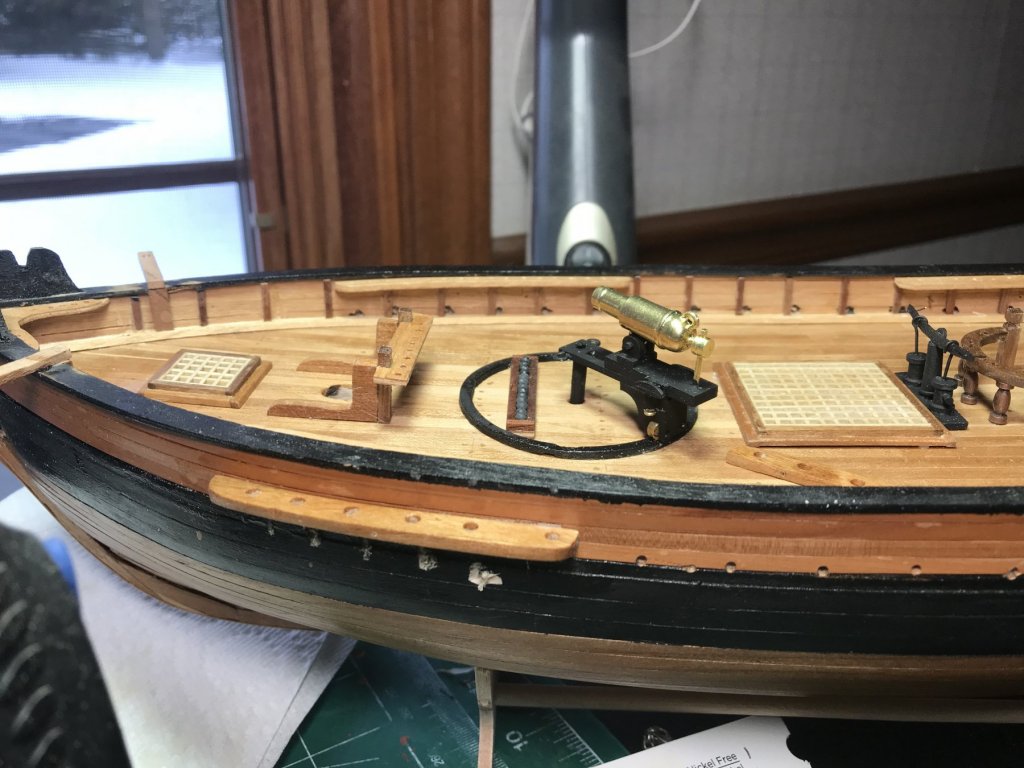

-
I was going through T Warris' Corsair build log (really nice build so far) this morning. He was using a sealing iron to quickset his hull planking. I was wondering if anyone has ever used this tool for blank bending. Chuck's method of using a hair dryer to bend planks works very good, but might you be able to do the same thing a bit quicker with a sealing iron?
-
do a search...there will be several
- 1 reply
-
- 3
-
-
I try (stress try) to use nose and mouth covering when sawing and sanding. I hook a Shop Vac hose up to my equipment. I'm just shy of 70, and my wind isn't what it used to be and I've always wondered if I am doing enough. I have a friend who has an entire outbuilding devoted to his wood pursuits, and he has a complete dust system. Obviously, I doubt if us part time modelers need such equipment, but I'm curious what others do.
-
I bought a 100 pack of #11 blades a couple years ago. I did not keep the outer package cover so I don't know the brand. They are plenty sharp when new, but dull quickly and the tips brea with ease. Is this just common, or are some better than others?
-
I built the Pickle last year. Instructions were an upgrade from Caldercraft's older selections. It was a very pleasurable build. It being a smaller craft, it does not have many carronades to rig, and has less complicated rigging than the Granado. Give it some thought. Another consideration is Caldercraft's Mortar Vessel Convulsion. Of my 4 completed builds to date, this was my favorite. Sadly, it was at my son's condo and it was dropped and the rear mast, spars, and rigging were badly damaged. It's on my bucket list to order new plans (pitched mine when build was complete...I'll never do that again) and fix her.
-
Dos Amigos by bigcreekdad
bigcreekdad replied to bigcreekdad's topic in - Kit build logs for subjects built from 1801 - 1850
thanks Popeye -
Dos Amigos by bigcreekdad
bigcreekdad replied to bigcreekdad's topic in - Kit build logs for subjects built from 1801 - 1850
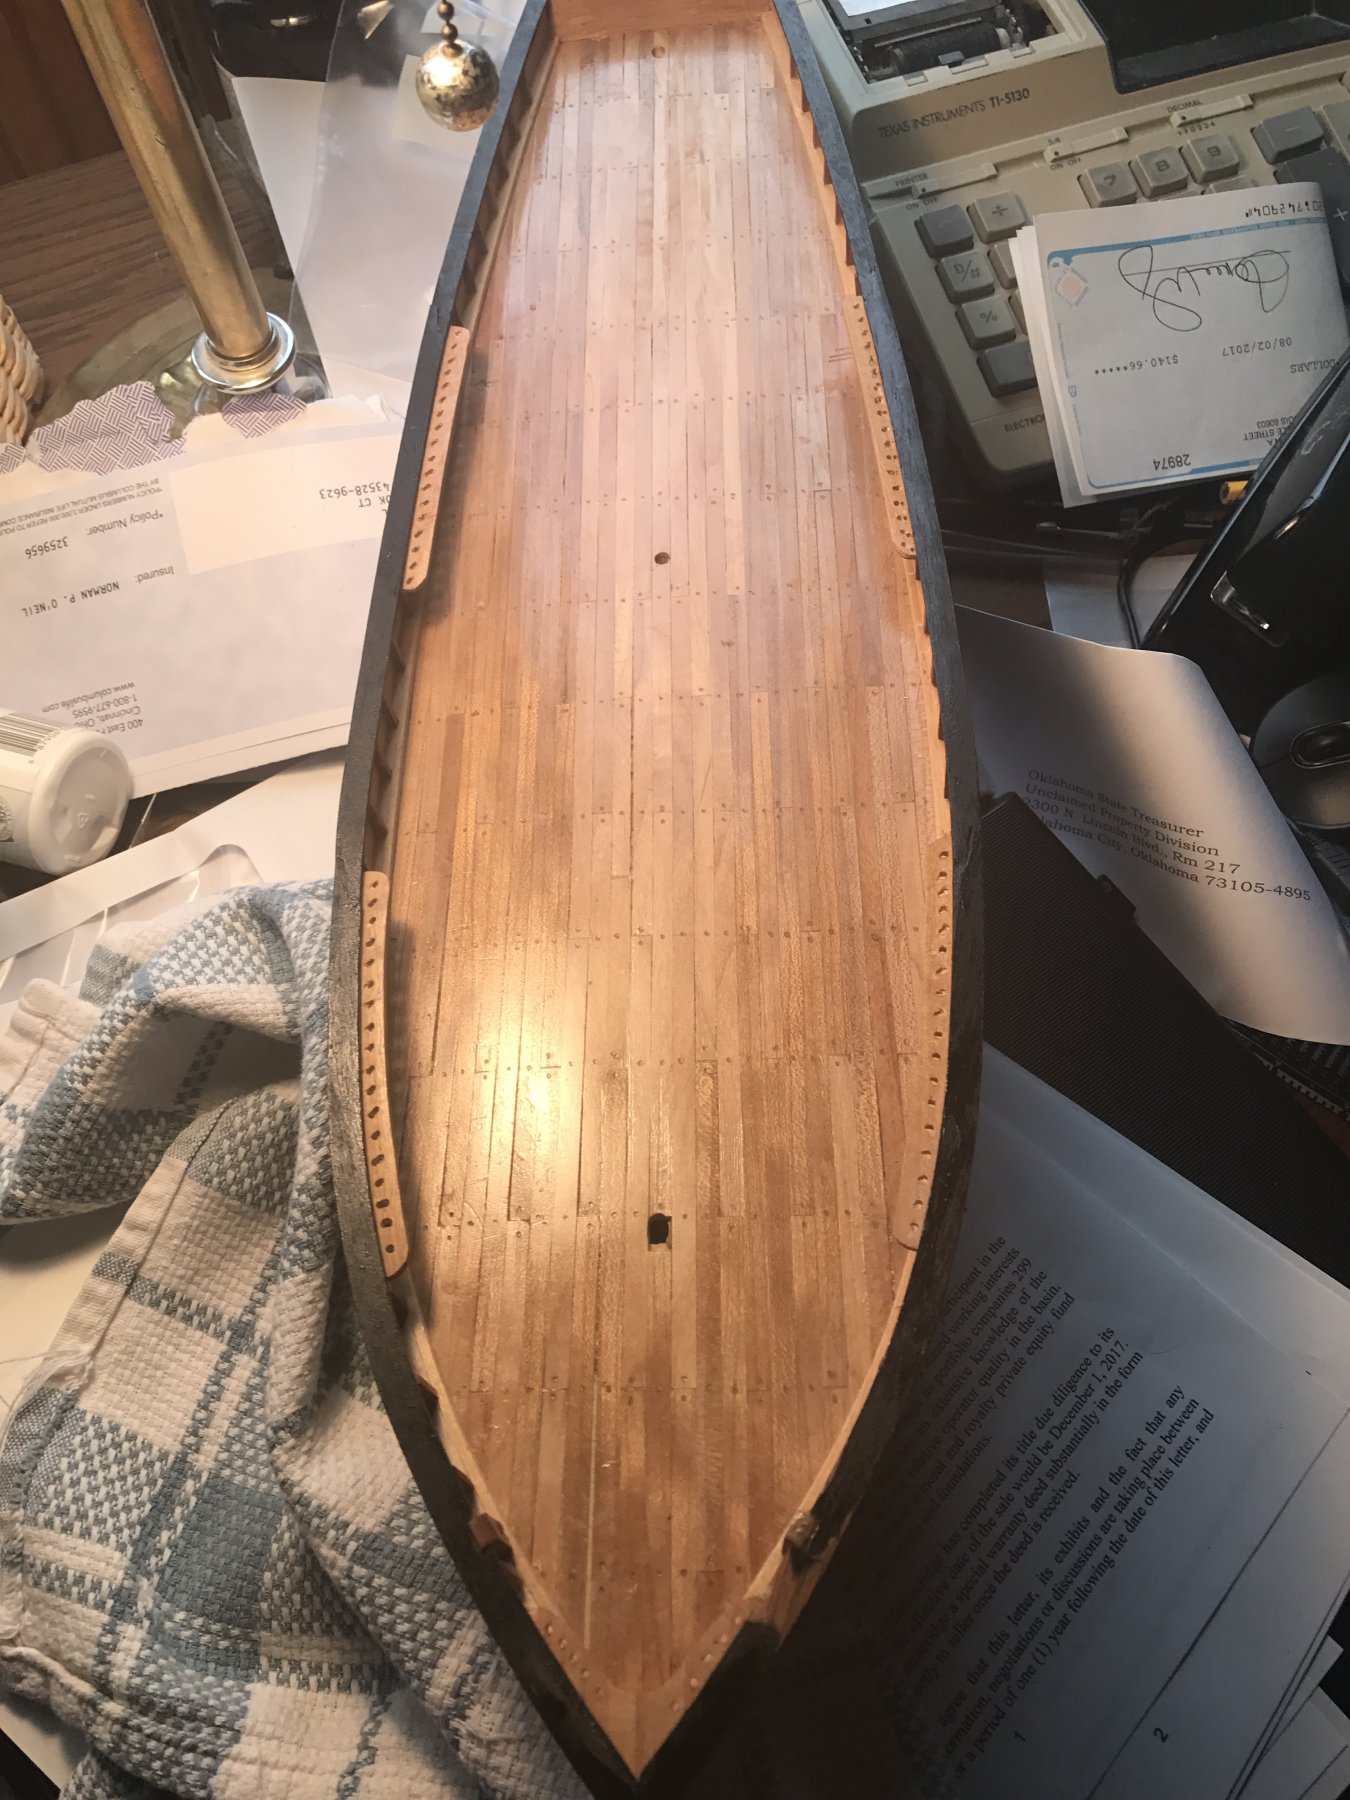
Finally finished with the hull and deck. Thinned done cherry to cover the unsightly false keel....a result of lousy kit wood and damage that I caused. Now ready for deck work. Did the cabin using the kit wood, but, again, didn't like it, so I will build that from scratch. With fishing season over, my progress should go much better.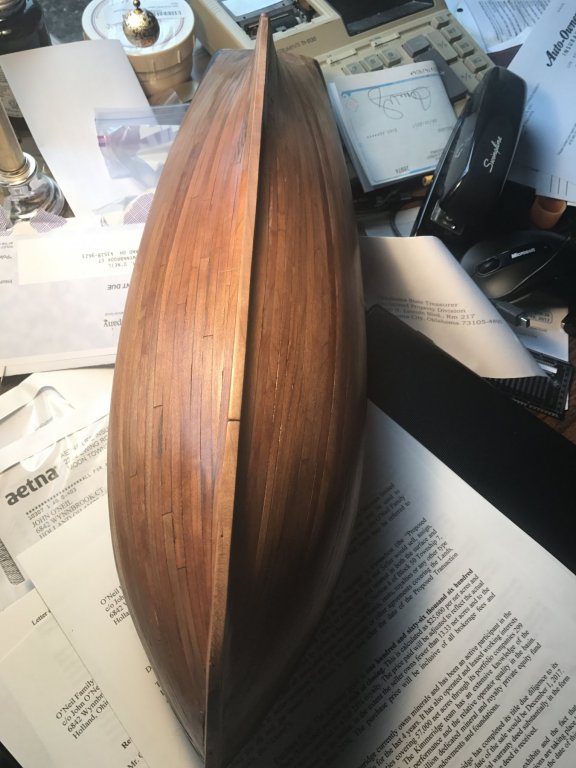


-
awesome build!!
-
awesome job!!...looking forward to more progress.
- 162 replies
-
- 1
-
-
- america
- BlueJacket Shipcrafters
- (and 1 more)
-
I'm building Ochre's Dos Amigos and the instructions are in English...but they are pretty brief. Also, the visual directions are in color. You can contact Occre....they seem very customer friendly. I lost my parts list, and they responded to my request for another in a very timely manner.
-
I've usually got several builds going at one time. It helps from getting a bit burned out occasionally by just doing something different. However, once the planking and finishing of decks and hull is complete, I usually concentrate more on that build until I get to the rigging stage. Rigging, for me, is very tedious and requires a lot of concentration. I take breaks from that and work on something else for awhile.
-
Dos Amigos by bigcreekdad
bigcreekdad replied to bigcreekdad's topic in - Kit build logs for subjects built from 1801 - 1850
Thanks Jim...I'll try the thin cherry. John -
Dos Amigos by bigcreekdad
bigcreekdad replied to bigcreekdad's topic in - Kit build logs for subjects built from 1801 - 1850
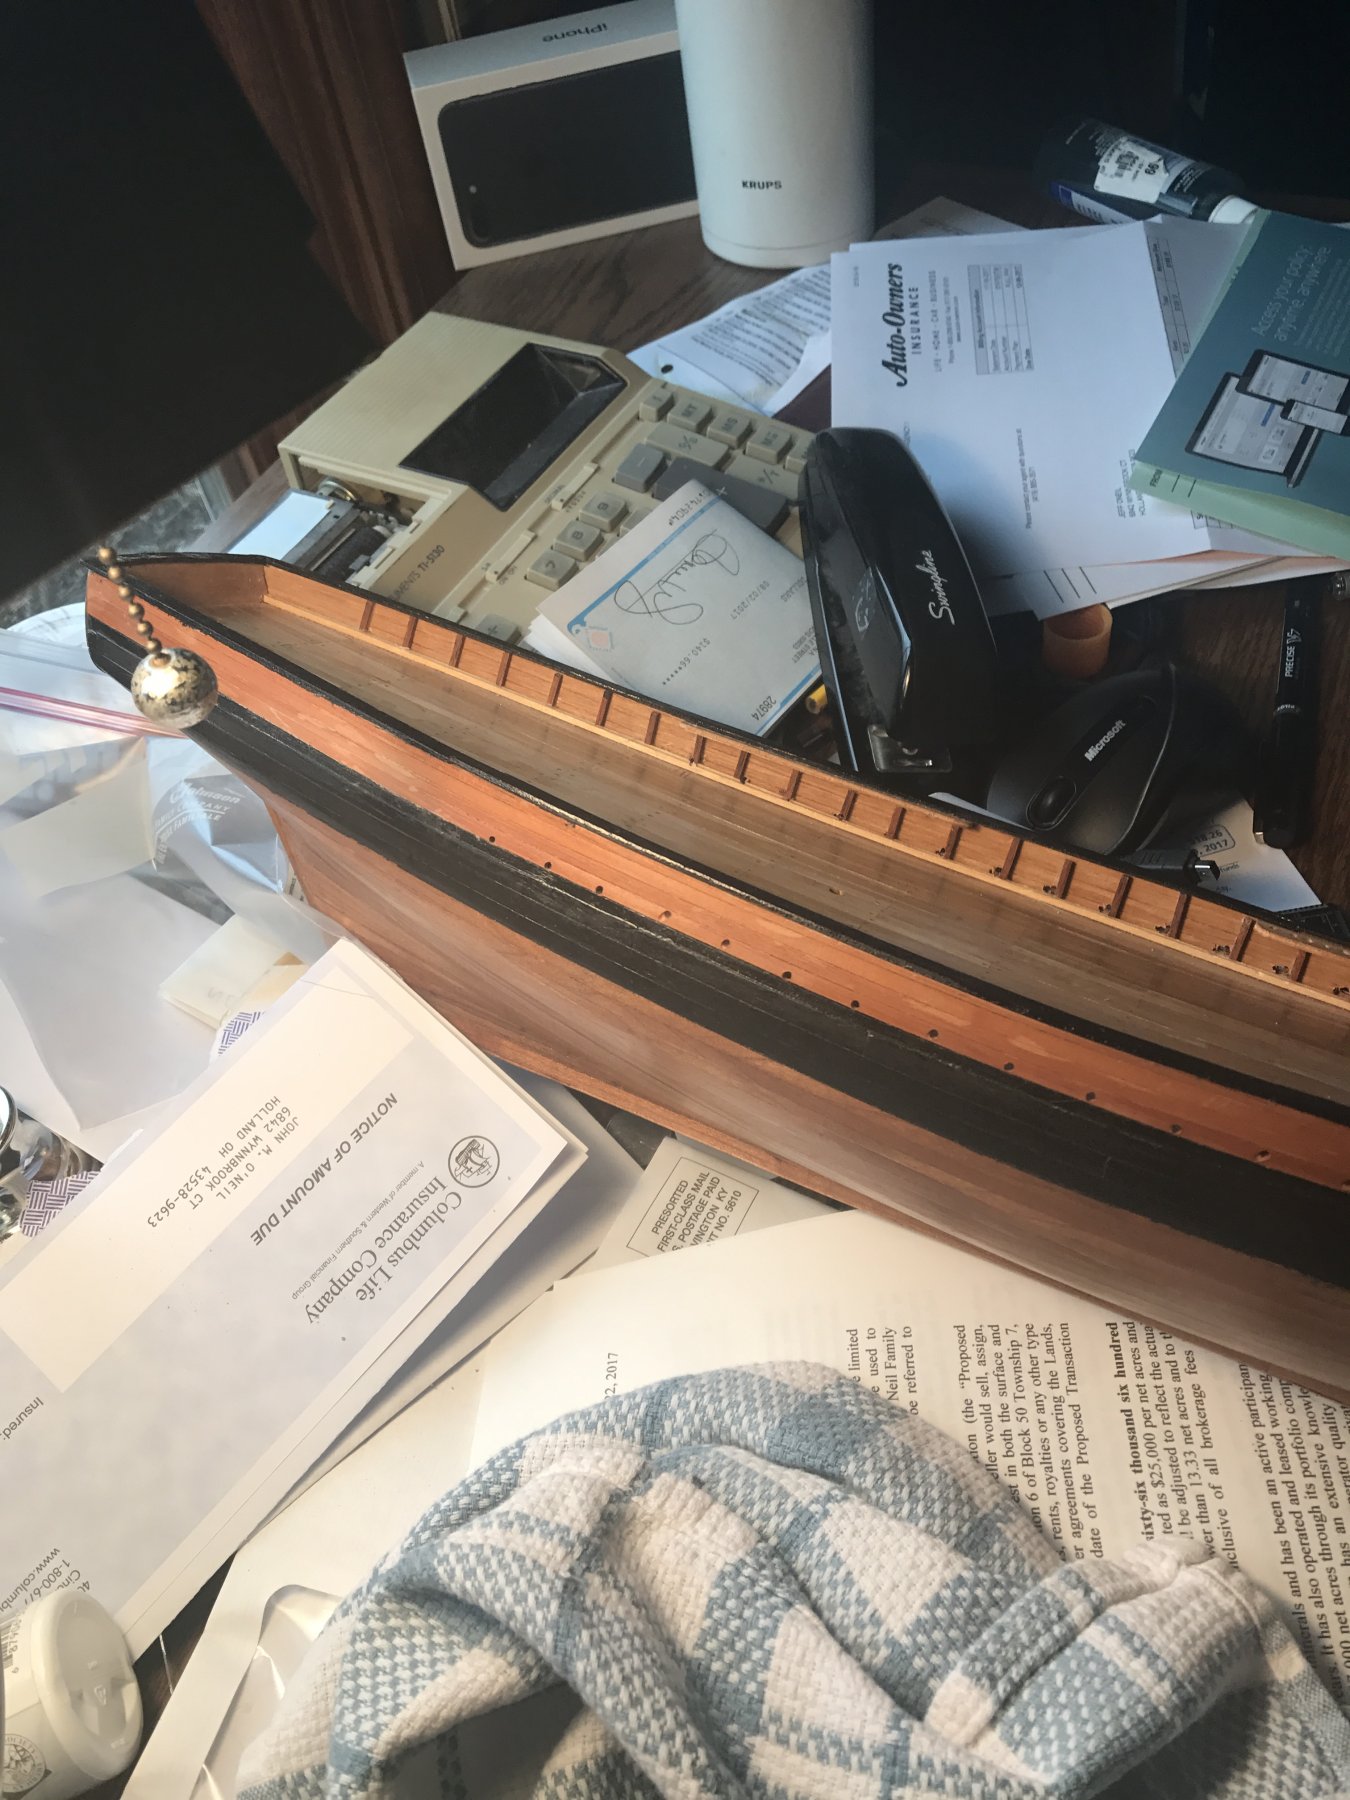
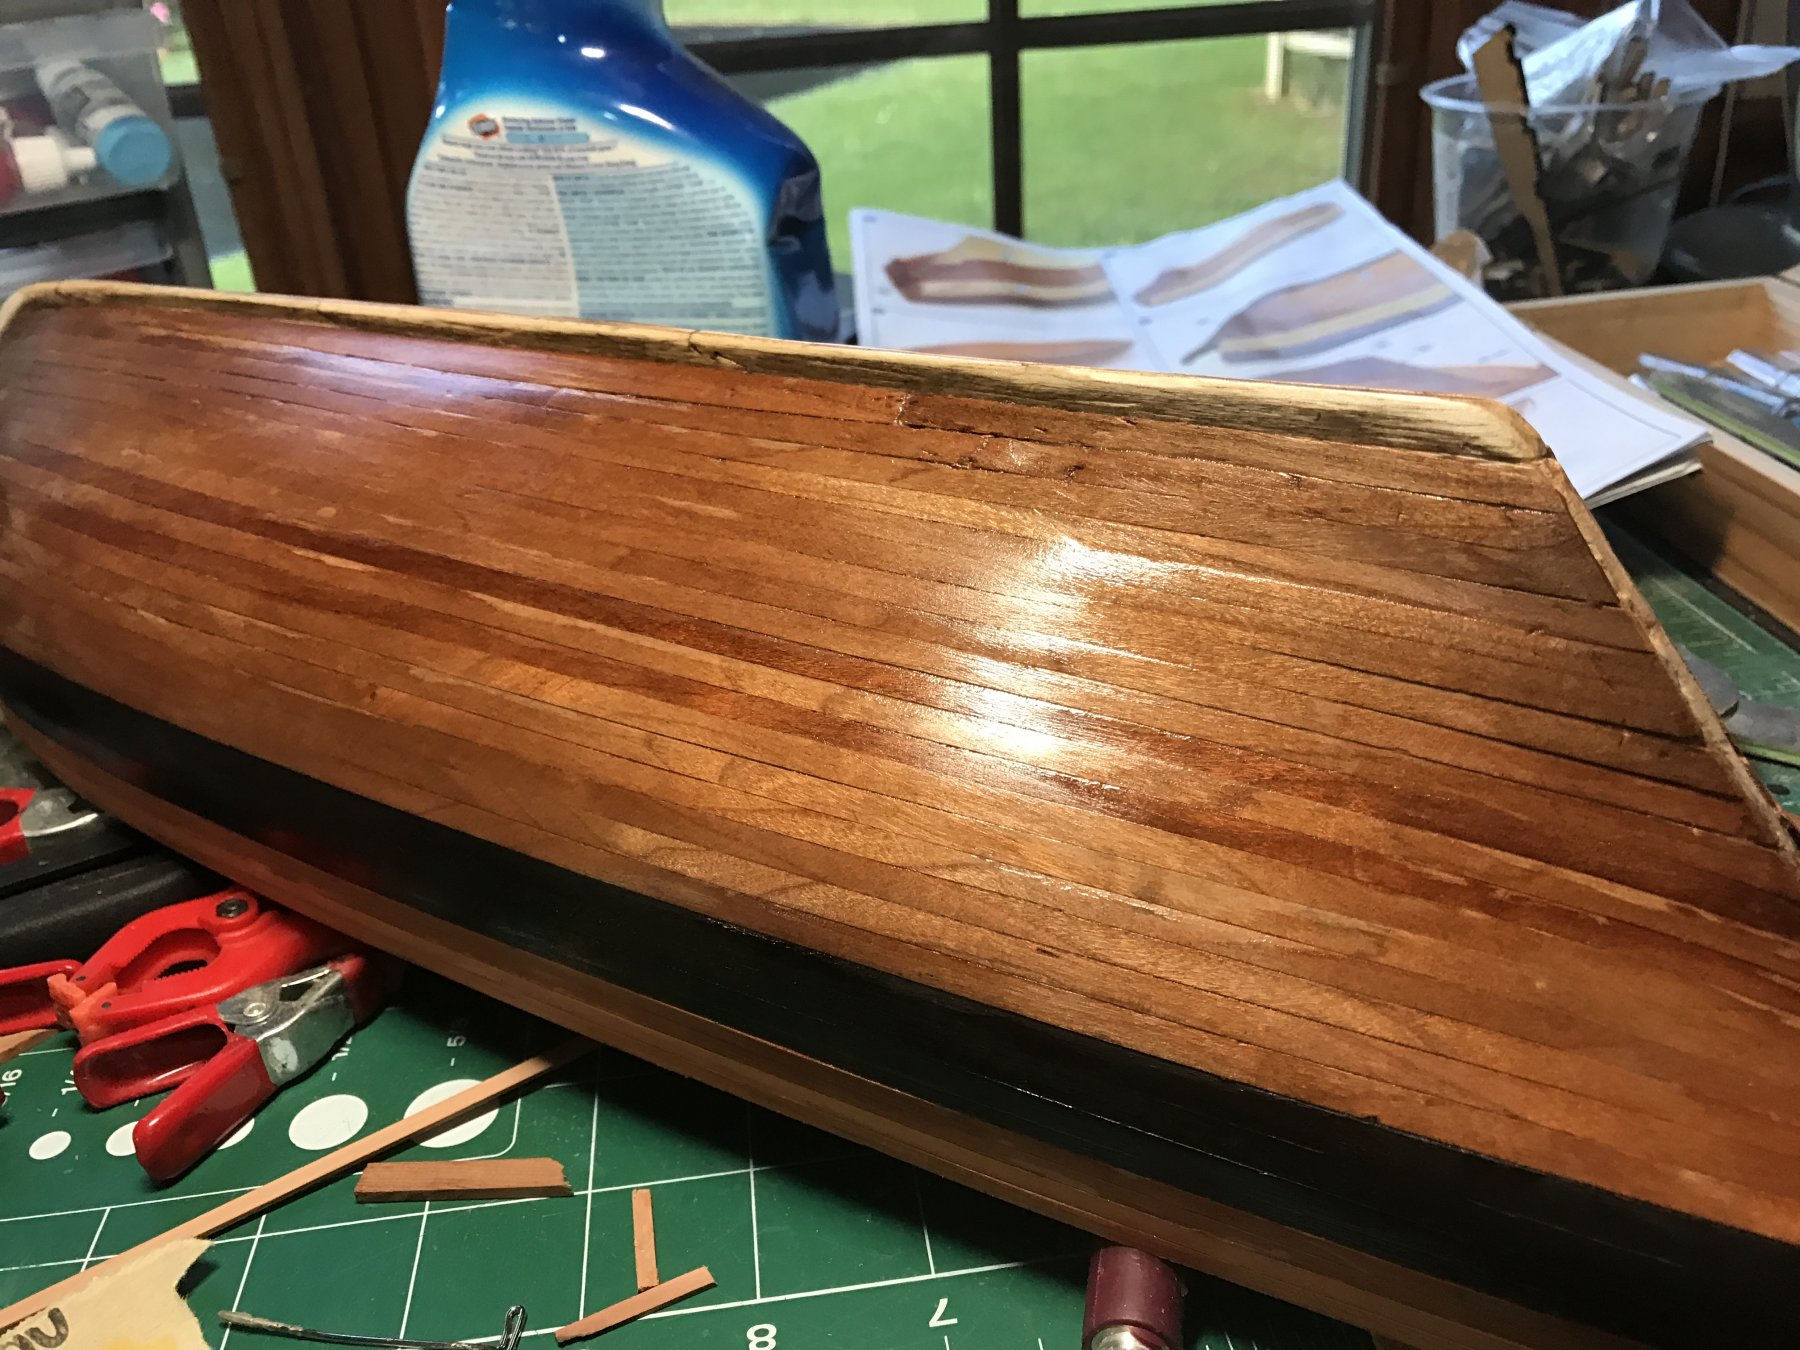
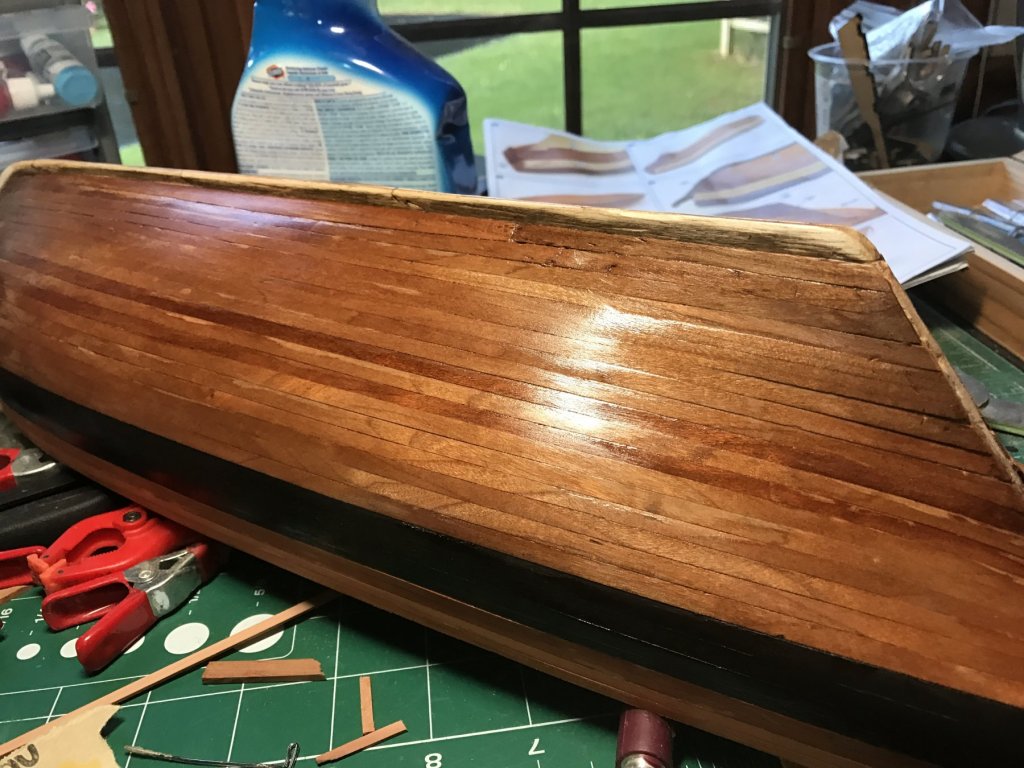
Hard to believe it's been 7 months since I last posted. Many reasons, but the biggest was the fishing season. From April til late October I'm up at my cabin as much as possible, or in Canada. Not that I don't do some modeling, but way less. In any case, last I posted I was working on the second planking. I used cherry, as explained above below the wales. I really was not happy with how it was turning out (lots of evidence if you could see close up), and replanked several areas. When I was finished I actually decided to copper it, but the more I thought about the time I put in, I just decided to live with it. Above the wales, I used the kit supplied wood, but, frankly, just didn't think it was very attractive. I took it off and used some swiss pear I had...what a difference! As you can see, the false keel needs work, The kit supplied wood for this is very soft and anytime I got close to it would chip. Not sure yet what I will do, and thought maybe this board can offer some ideas....ie paint, varnish, thin cherry planking etc. I often thought I would just shelve this build, but I love the lines of the ship. Far from a masterful planking job, but I'm glad I stuck it out.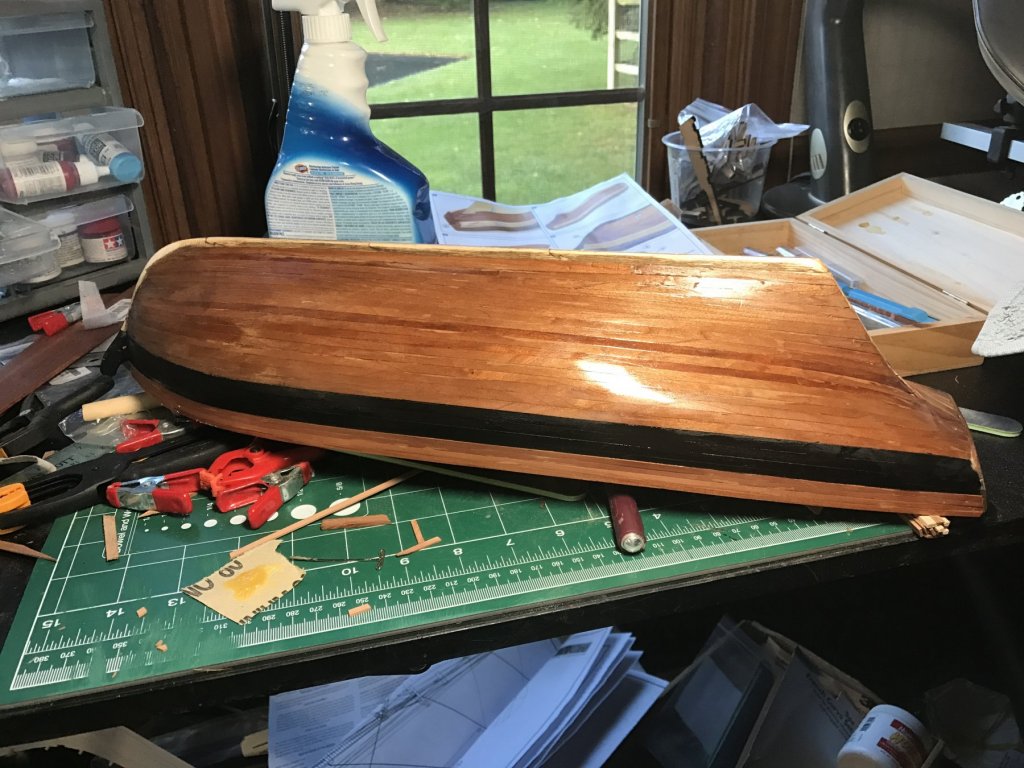
-
I have the Proxxon mini lathe, but, honestly, I find it easier to use my drill. I mounted it upside down in a vice, and move sandpaper between my thumb and forefinger up and down until I get the right diameter and taper. Double up on the sandpaper as it gets a bit warm.
-
Bob...your build makes me feel like burning all my ships. Nothing short of awesome!!
- 682 replies
-
- 5
-
-
- halifax
- lumberyard
- (and 1 more)
-
Thickness sander
bigcreekdad replied to Kurt Johnson's topic in Modeling tools and Workshop Equipment
I've used this sander for about a year. Here are my thoughts: 1) It will take many swipes to get even a 1/8 inch reduction. Don't be in a hurry and try to shorten the number of swipes by increasing the turn of the adjustment knob too much. 2) To avoid a potential injury from kickback do not position yourself behind the machine. 3) In order to prevent kickback I use both hands...pushing in and pulling out simultaneously. On the pulling out side, for safety sake, don't grasp the wood until you can get a very good grip. 4) Make sure the wood is completely flat on the platform during the entire process....especially avoid accidental lifting at the end on the pulling side. 5) After a swipe, turn the piece over and swipe it again before changing the adjustment knob. 6) Check your sandpaper occasionally to make sure there aren't uneven places across the width 7) Usea good micrometer or measuring tool. 8) Once more.....don't be in a hurry. 9) Once more...always be extra careful.