ca.shipwright
-
Posts
483 -
Joined
-
Last visited
Content Type
Profiles
Forums
Gallery
Events
Everything posted by ca.shipwright
-

Making Rope
ca.shipwright replied to ca.shipwright's topic in Rope Making/Ropewalks's Discussions about Rope Making
More Pictures- having trouble resizing Happy New Year everyone!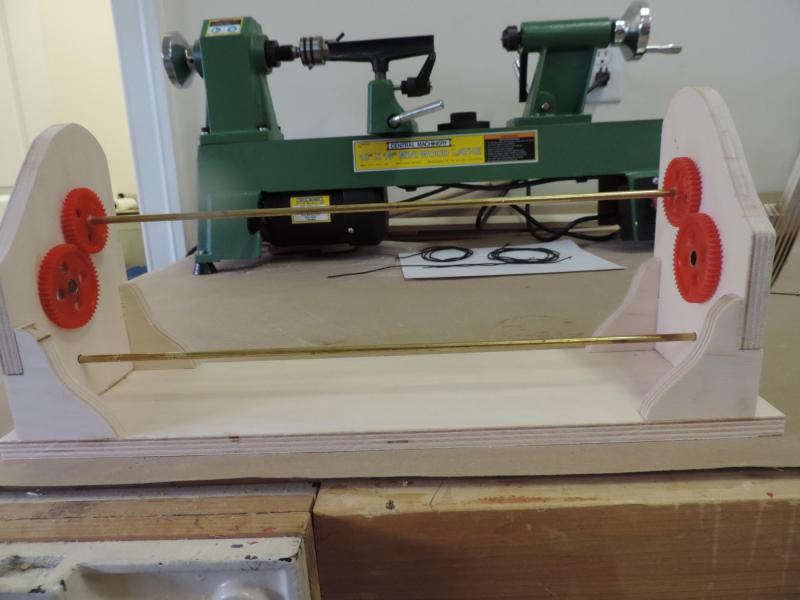
-
Making Rope
ca.shipwright replied to ca.shipwright's topic in Rope Making/Ropewalks's Discussions about Rope Making
More Pictures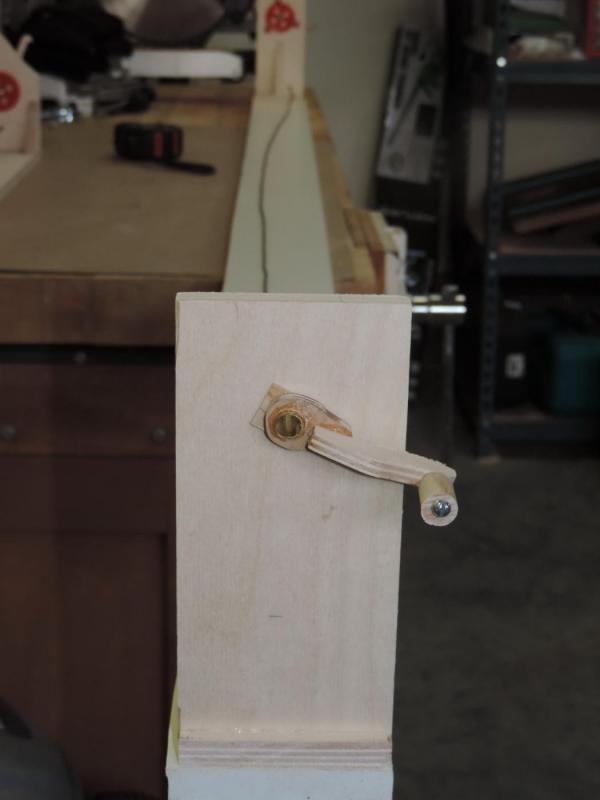

-
Making Rope
ca.shipwright replied to ca.shipwright's topic in Rope Making/Ropewalks's Discussions about Rope Making
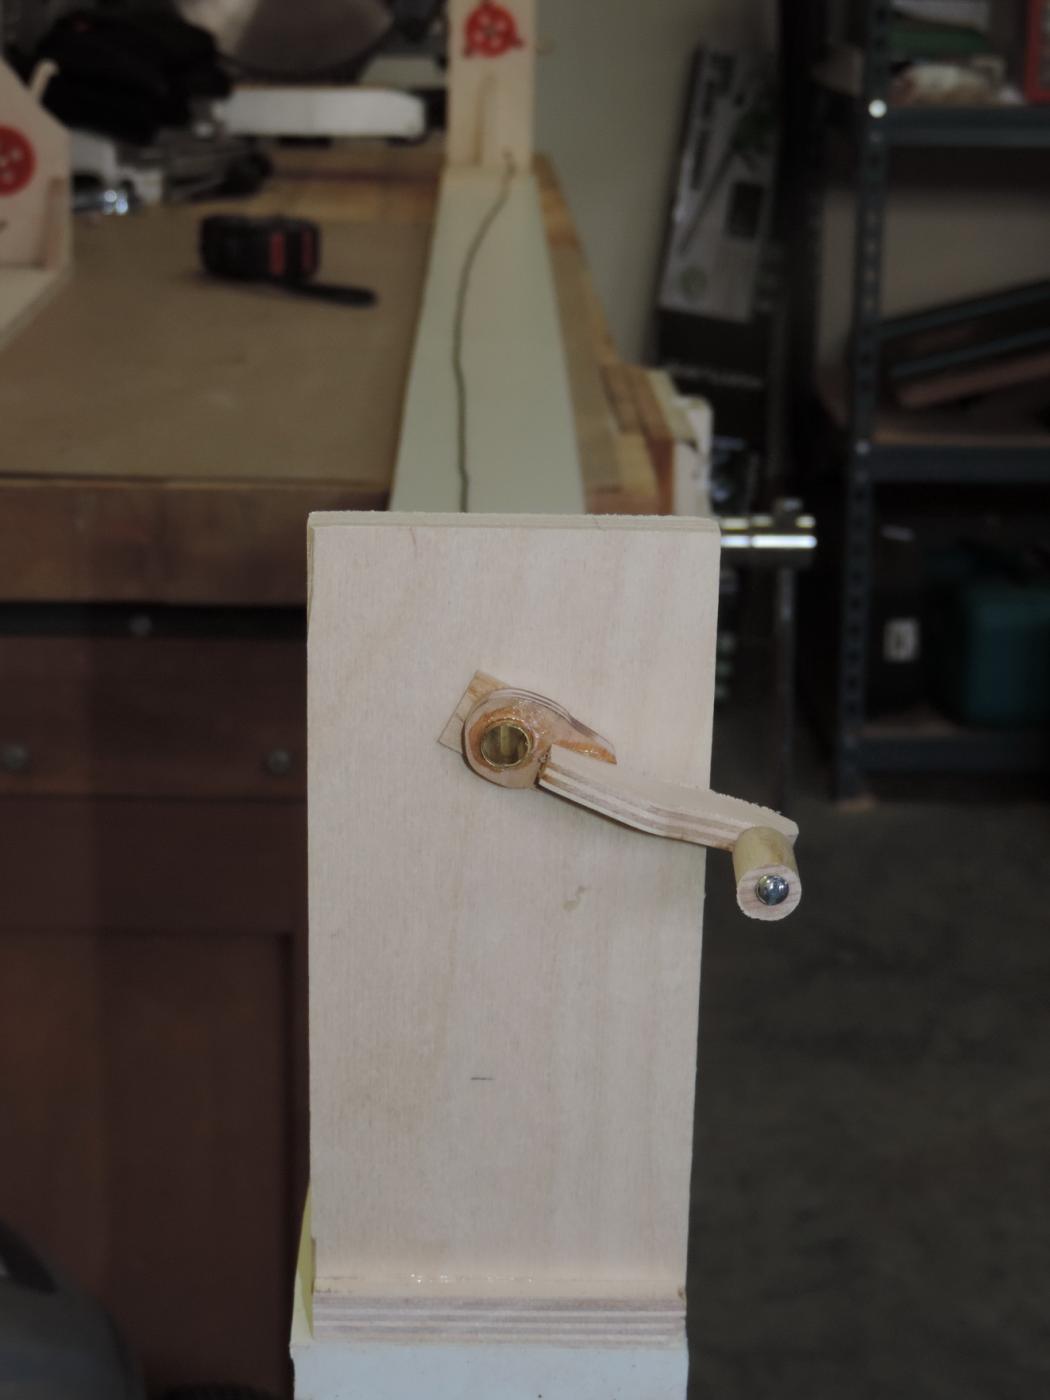
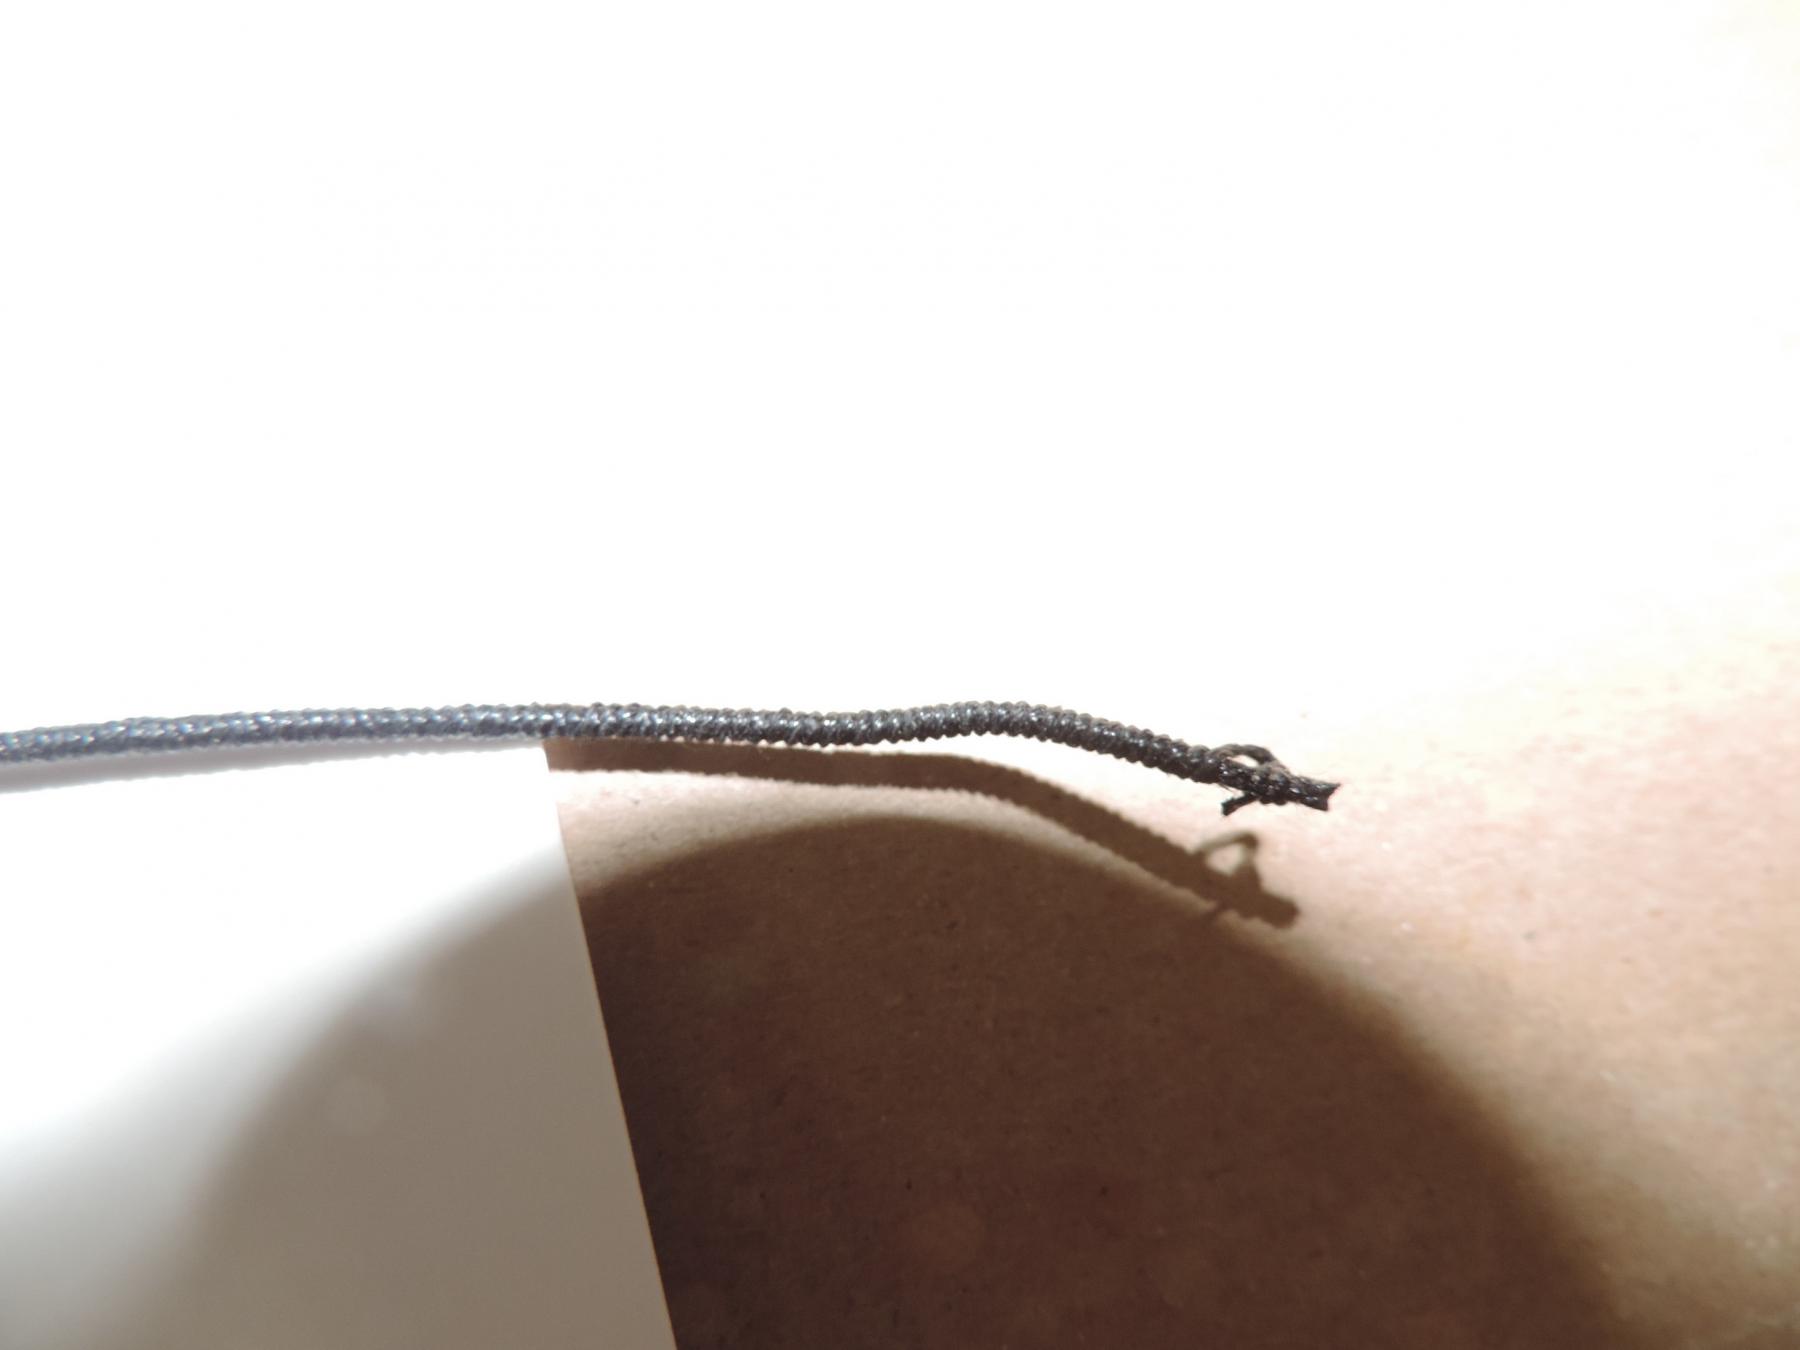
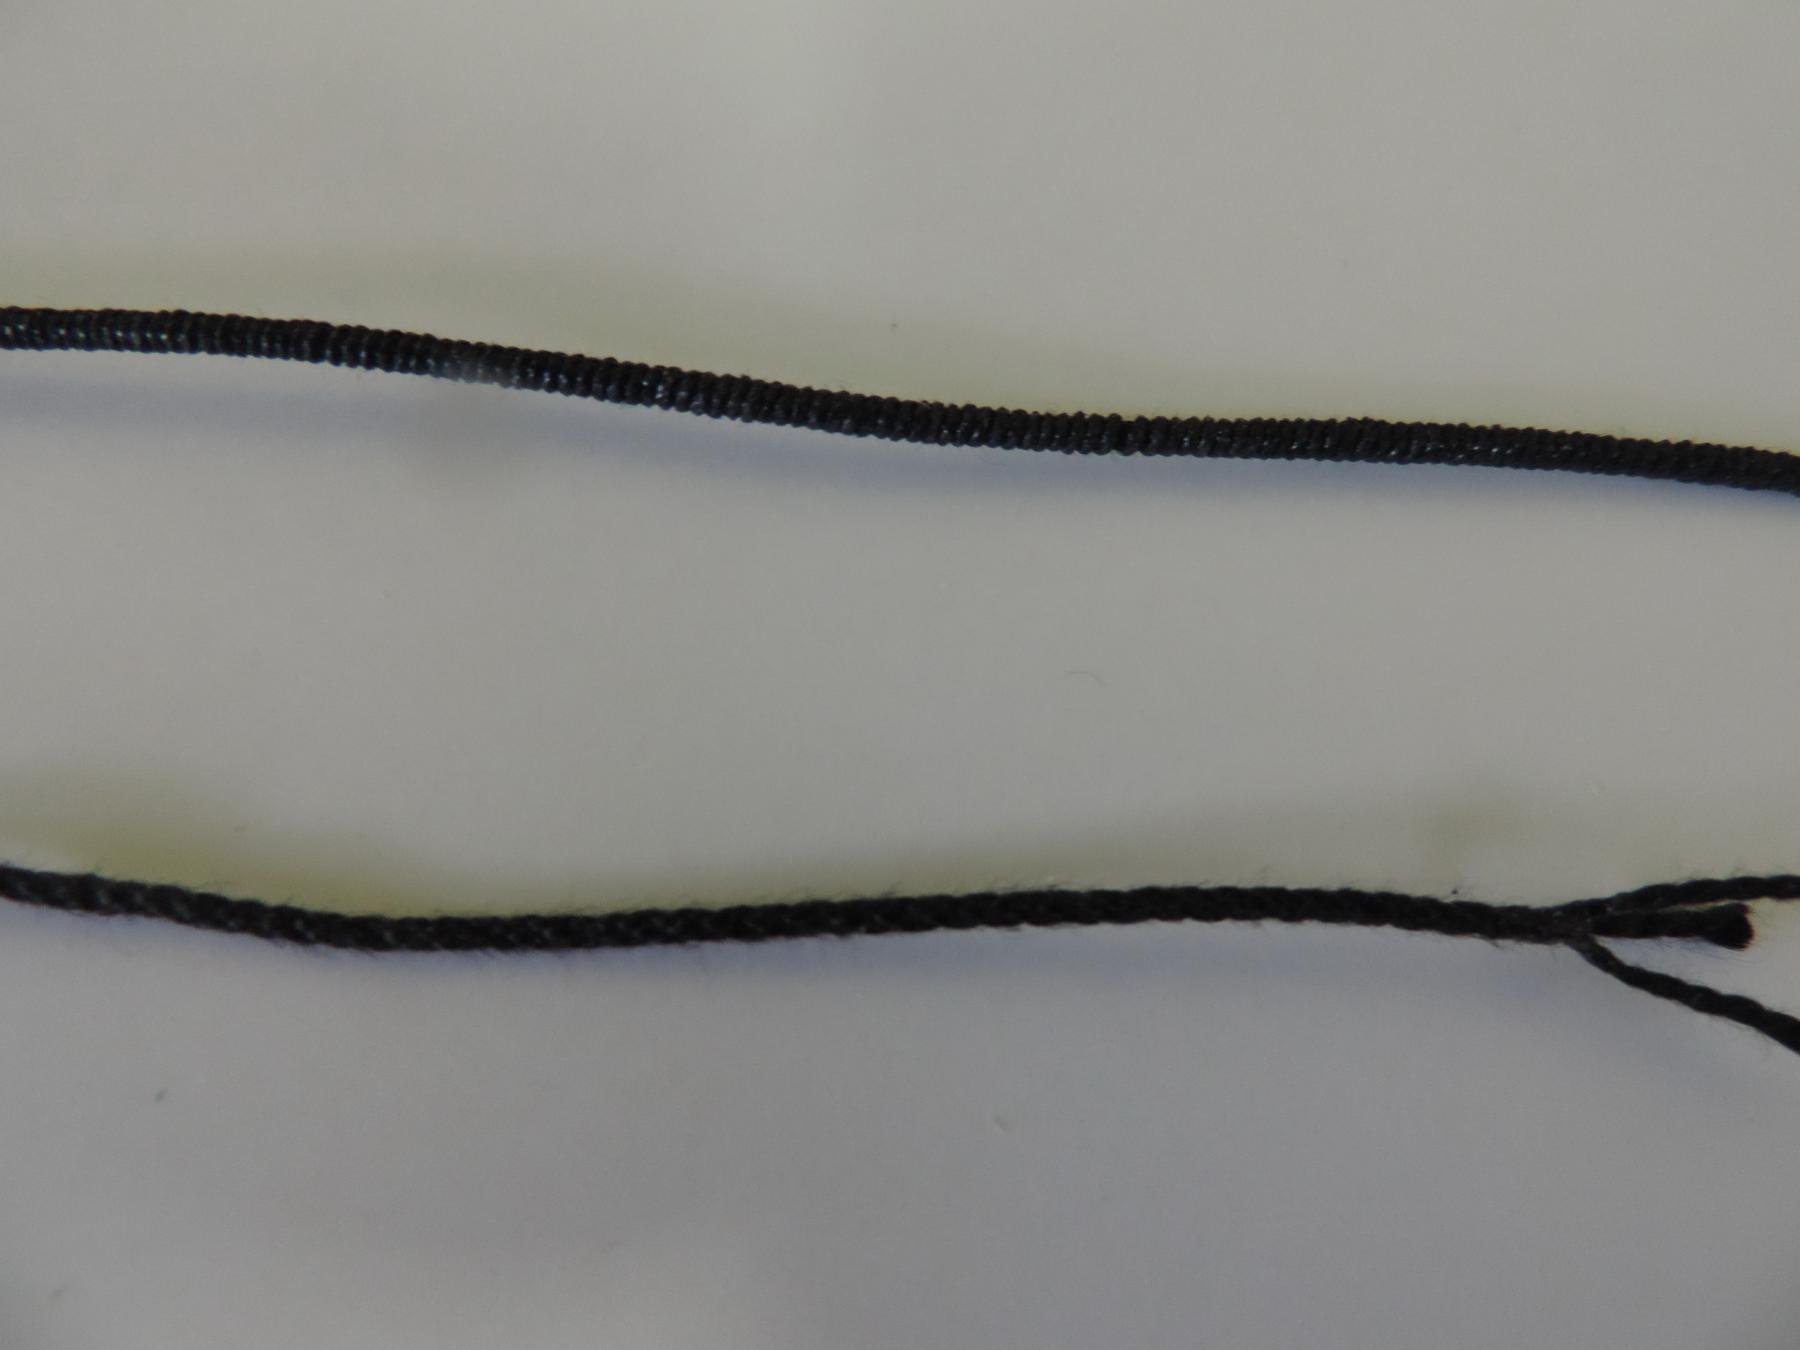
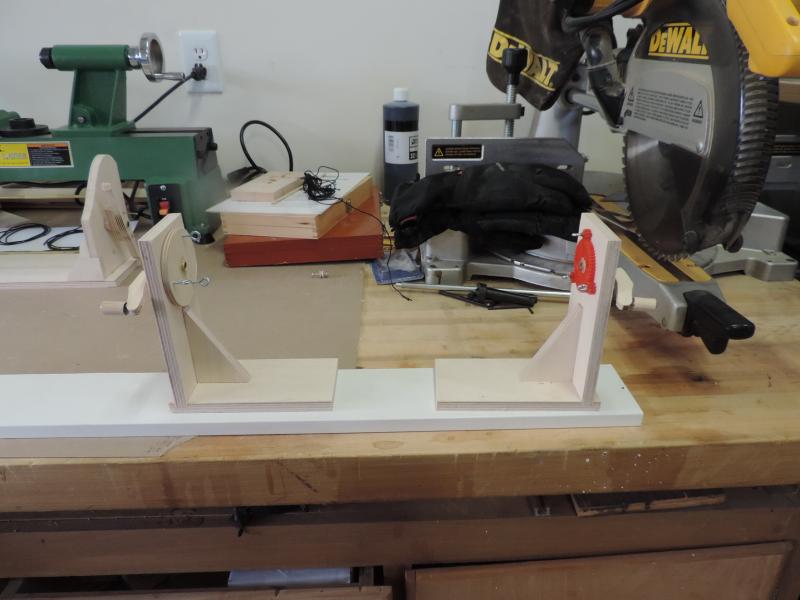
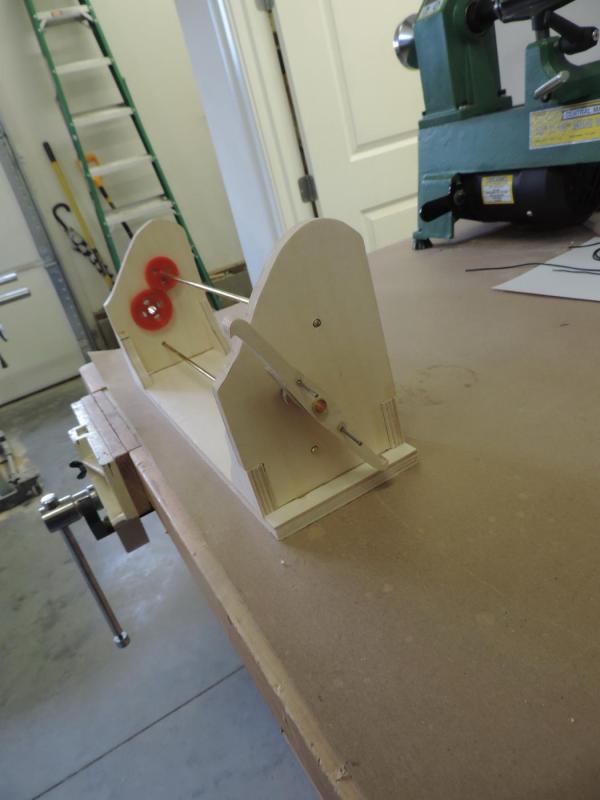
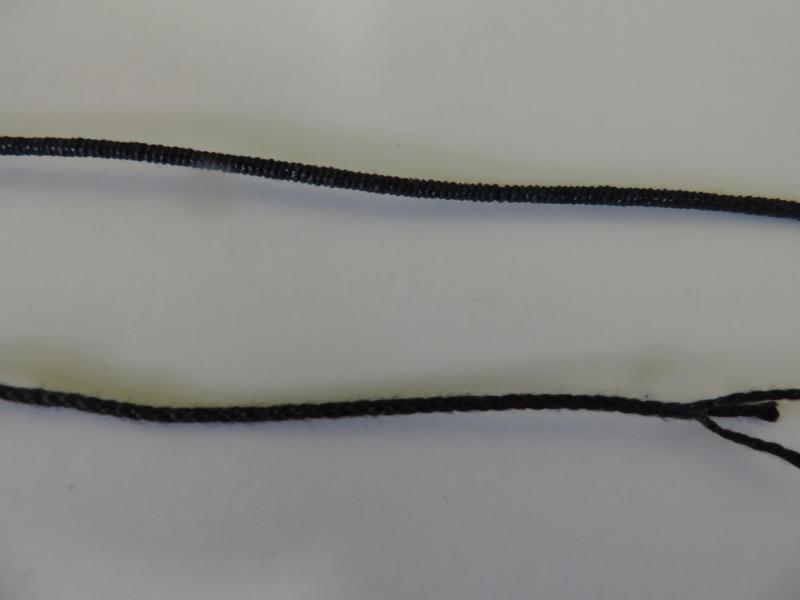
Back again; and thanks again for all your help. Well, I layed up some rope using the Model Shipways prototype. It worked just as advertised. The yield is about 80% of the original length which is what MS advertised. You are only limited in length by how far apart you put the two ends. I used a long piece of trim material- about 80 inches and got a piece of rope 60 inches. I CA'ed the ends and cut the rope free OUTSIDE of the CA. I know what you're thinking. No, I didn't cut inside. I made about 20 feet altogether in the first run. Very well satisfied with the effort. I really want to set up on the garage floor and try to do a piece about 20 feet long. Then on to the serving machine built after our moderator's design. This worked extremely well with very little talent required. I only have on complaint about this whole operation - my right index finger is about to fall off. I am going to see in I can alter the setup to motorize these two systems. Somewhere I recall someone putting a Phillip's head screw in the twist end action of a rope walk and use an electric drill to power the system and do the same for the other end since this is a one, two step operation. Another solution would be a sewing machine motor with a foot pedal. The motor attached to a shaft with a u-joint or some other shaft connector, like what Dremel uses in their tools. The same motor could also power the serving machine as well. But, I think this will have to be a belt driven pulley system to allow the line being served to pass through. As a former macro woodworker, you can probably guess that like all the rest of the world's woodworkers, I am jig crazy and will build anything I can that I think I will find useful. I wound up using some DMC crocheting cotton thread. The resulting rope is a little oversized, but I can live with this rope for the forstays while I wait for my linen from Poland. Pictures attached.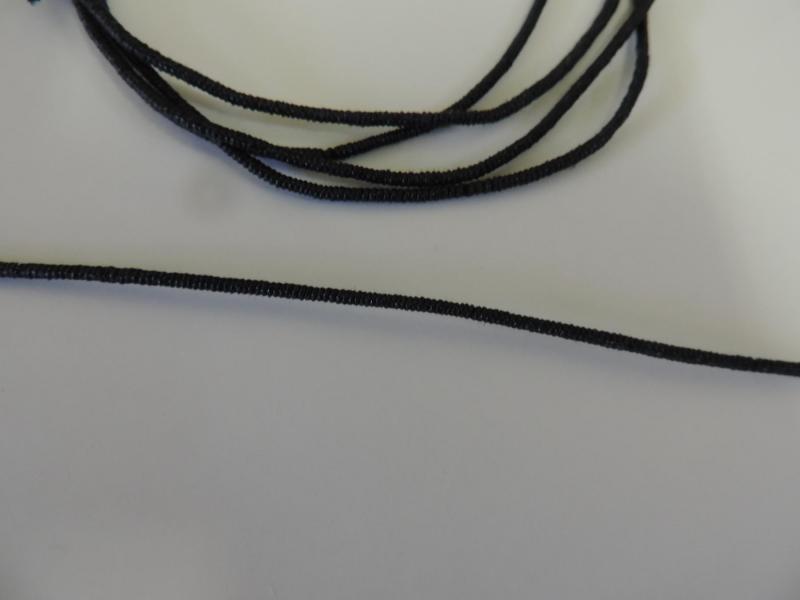

-
Making Rope
ca.shipwright replied to ca.shipwright's topic in Rope Making/Ropewalks's Discussions about Rope Making
Thanks everyone. I think I have found a source in Poland or Belgium. -
Making Rope
ca.shipwright replied to ca.shipwright's topic in Rope Making/Ropewalks's Discussions about Rope Making
Thanks Jagger, This is exactly the info I needed. What does the dot 2 indicate on your linen number? I am not familiar with linen thread. Although, I can figure out that the thinner the thread the higher the number. Regards -
I built a rope walk on the MS version to see if rope making is as much fun as it seems. The question is what size thread in a 3-strand lay will yield what size rope? Any help will be greatfully accepted. Thanks
-
Wow. This looks like a huge amount of work. CAD is something I would have liked to learn. Now too much other good stuff to do. Merry Christmas Regards
-
Jesse, When you actually punch the nails in the copper plate, aren't you punching it on the inside of the plate so the nail heads protrude on the outside surface when glued on the hull? Regards
- 1,306 replies
-
- 4
-

-
- syren
- model shipways
- (and 1 more)
-
Among all the other fantastic work on you ship. I find the door details to be just remarkable. The ship is a real pleasure to look at. It also shows what building in large scale can do for detailing. Regards
- 213 replies
-
- 3
-
-
- la couronne
- 74 gun
- (and 2 more)
-
EJ, You can buy one of those cheap plastic lazy susans. Or, you may find the bearing ring at the Home Depot or Lowes. Take off the bearing ring- it should be about 6-8 in diameter and mount this between 2 plywood discs. Drill a series of indexing holes in the top plate and one hole in the bottom and use a piece of dowel as the pin. This works very well as a turn table. Regards
- 608 replies
-
- 2
-
-
- la couronne
- corel
- (and 1 more)
-
Brian, Nicely done. Boxwood does make a difference. It does hold an edge so sharp that I have cut myself many times. I have found that if I cut a billet to the correct height of the plank, and then rip the billet to the correct width with a sharp blade, almost no sanding needed. Regards
-
Nicely done. It looks like you are coming along fine.
-
Workshop Advice
ca.shipwright replied to ChrisLBren's topic in Modeling tools and Workshop Equipment
Chris, You can build that 36x96 table with a 4x8 sheet of birch plywood and six 96" 2x4s. Put a coat of Minwax Polyurethane on it and your ready to go. Cost about $75 total. Lowes or the Depot will rip the ply to 36". The extra 12 " becomes the shelf underneath. Put the savings into more Jim Byrnes tools. If you're interested I can give you a detailed how to do this. Regards -
Workshop Advice
ca.shipwright replied to ChrisLBren's topic in Modeling tools and Workshop Equipment
Bob, I'm sorry. I was referring to my scroll saw. The shop vac is a Lowes 8 gallon, I use the bag as it keeps the blowback down compared to the filter sleeve that you also use. -
Pat, That is the conundrum. The model is no longer historically correct. I bounced back and forth between the Corel plans and the AOS. This was a huge mistake and not feasible to correct. So, now I have a ship model "representative" of the Cook voyage era. Needless to say, it has irritated me to no end. Now I pick and choose which details I will incorporate on this build. She still looks nice and since I am a long way from Down Under, I am going to but the Endeavour name on her. I don't think anyone in my area will know the difference and I know you all will forgive my impertenence.. Spent today, the whole day, rigging the steering gear. Had it all in hand and then two blocks failed on the tiller with the last tightening. As Scarlett O'Hara said 'Tomorrow is another day." Regards and thank for all your kind words and advice.
-
Workshop Advice
ca.shipwright replied to ChrisLBren's topic in Modeling tools and Workshop Equipment
It's an old Delta that I bought about 15 years ago. -
E J I don't know if you have seen this but check it out: http://www.themodelshipwright.com/high-resolution-ship-plans/sailing-vessels/french-17th-century-warship-la-couronne/ Regards
- 608 replies
-
- 2
-
-
- la couronne
- corel
- (and 1 more)
-
Greetings, I have started the rigging and it has taken the fingers a while to remember how to handle the threads. Strangely enough I remembered how to seize a block to a line and a block to something else like a yard or mast or eyebolt. This is really going to take a long time; maybe "Two years before the mast." I'll post some pictures after I have completed some more work. Regards
-
Workshop Advice
ca.shipwright replied to ChrisLBren's topic in Modeling tools and Workshop Equipment
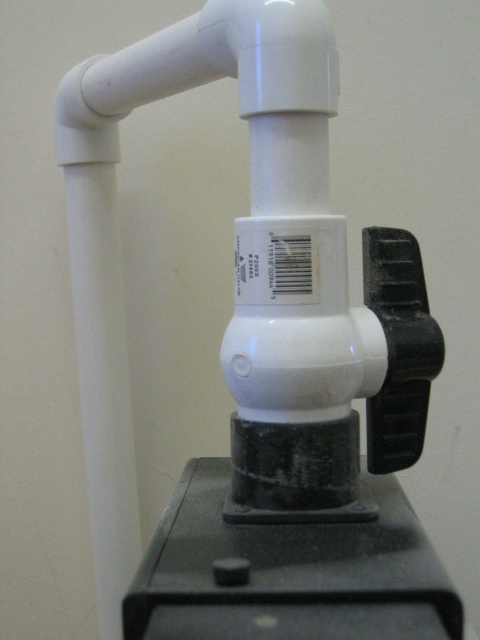
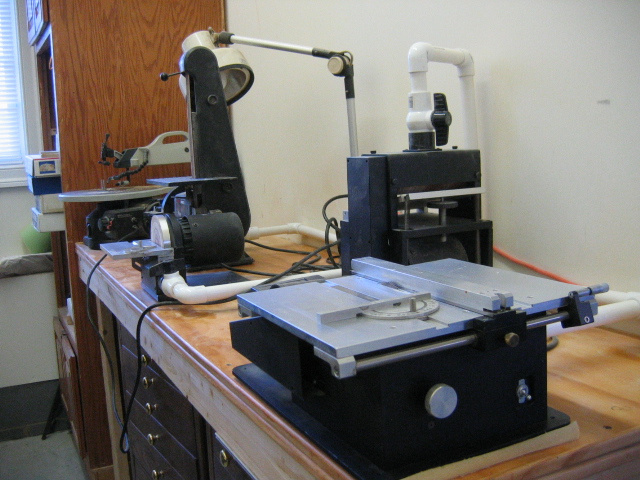
Here is my dust collection system for my shop tools. It consists of 1" PVC schedule 40 pipe, ball valves at each machine that can be opened or closed. and a 8 gallon Shop Vac. All the joints are press fitted, not glued which allows for rearrangement when needed. The ball valves on all the machines except for the one I am operating are closed. This keeps the suction in the line strong. It is no bother since I only use one machine at a time. The Shop Vac resides outside the door of the shop to keep the noise down. This is an efficient flexible inexpensive system. Hope you find this useful Regards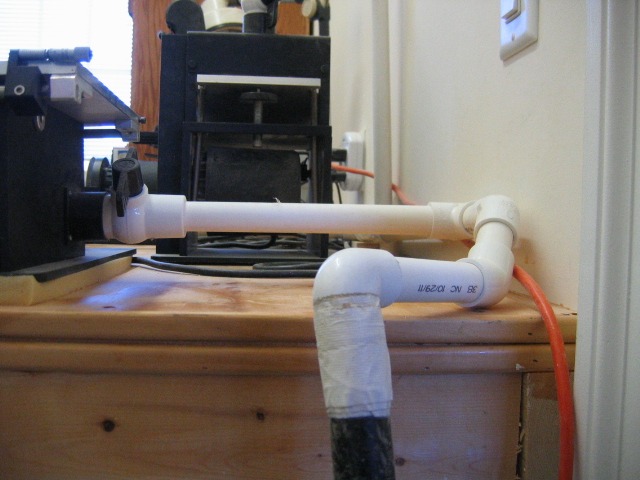
- 72 replies
-
- 13
-
-
Gentleman, I have a problem and maybe someone has the answer. Whenever I try to open one the the xxx.jpg photos embedded in the post, all I get is a white box with the "I am working wheel" turning. Actual photos show up perfectly. Do I need to do something else. Using Windows XP Home Premium operating system. Thanks
-
Fantastic clove hitches on the rat lines. I have never seen them so neatly and evenly done.
- 648 replies
-
- 3
-
-
- niagara
- model shipways
- (and 1 more)