HOLIDAY DONATION DRIVE - SUPPORT MSW - DO YOUR PART TO KEEP THIS GREAT FORUM GOING! (Only 75 donations so far out of 49,000 members - C'mon guys!)
×


ca.shipwright
-
Posts
483 -
Joined
-
Last visited
Content Type
Profiles
Forums
Gallery
Events
Everything posted by ca.shipwright
-
 Greetings, The first update. Heard back from Mantua Models today. It seems that the quote that I originally received for 65 Euros was "a fake mail." Today they quoted me 137 Euros which included 47 Euro in postage. I thanked them for their prompt response, politely declined, they refunded by PayPal payment immediately, and it was off to the wood store where I got all I needed for $41.00 Now it's time to trace and fabricate the 16 parts for the hull. Good thing I saved those templates! Not so bad, I could use some wood time in conjunction with all the Endeavour rigging to be done. Regards,
 -
Hello David, Your ships boats are coming out great. I can't wait to see the end product. I ran into a little problem with Corel. They said that belaying pins were not part of the accessory kit and had to be fabricated out of the 2x5 mm piece of walnut. I am assuming the walnut strip would be ripped to 2mm width and the blank worked from there to keep the grain running the log way for strength Other than that thought, I have no idea of how to approach this problem and, second, walnut seems awful grainy for this application. Any ideas on how to accomplish this would be a big help. I do have a mini lathe if that is a consideration. I also have some castello, American holly, orange wood and lemon wood. All are very hard and have a tight straight grain, Thanks for any input. Regards
-
E J This is probably the best out there https://www.abebooks.com/servlet/BookDetailsPL?bi=19606292744&searchurl=kn%3DMasting%2Band%2BRigging%2Bof%2BEnglish%2BShips%2Bof%2BWar%2B1625-1860%26sts%3Dt%26sortby%3D17
- 608 replies
-
- 2
-

-
- la couronne
- corel
- (and 1 more)
-
Books on ships are like tools- you can never have to many.
- 608 replies
-
- 4
-
-
- la couronne
- corel
- (and 1 more)
-
After many years, several models, and in health and in sickness, I have decided to resume the HMS Victory. This log is based on the practicum by Bob Hunt. For those of you not familiar with Bob's work, this is a total kit bash involving completely finishing the main gun deck and aft cabins and replacing kit supplied wood with exotic wood which I mill myself. The primary source is the AOS HMS Victory by John McKay. And thanks to my wonderful First Lord of the Admiralty, I am also the proud owner of Arthur Bugler's HMS Victory, Building, Restoration and Repair. as well as books by Alan McGowen, and Neppon Longridge. To make a long story short, I worked up to planking the starboard side down to the waterline where the copper plates began. Not being very happy with the result, I ripped everything out back down to the bulkheads and center keel. And, then I did it again. Needless to say the bulkheads' profiles were pretty well shot by now, and beyond salvage. Very discouraged, to say the least. My skills were just not ready to tackle this monster build. So, the Vicki went on the shelf. Along the way, I found I was hypersensitive to Ebony. This was more discouragement as all of the Victory blacking that was black was to be installed with ebony as were the rudder sternpost and stem. Ebony can be toxic both as a topical and respiratory allergen. With ebony out of the question, I tried several ways to "ebonize" wood, but, until a few days ago, nothing came out very satisfactory. I was reading on one of the wood workers' forums about using India ink, which I had previously tried with poor results. The solution- no pun intended- is to use an archival grade, acid free India ink. So I bought a jug. I took some boxwood strips, which is what I am planking with, and put two coats on with a paint brush. Let them dry, wiped them down with a t-shirt and then applied a coat of solvent based Wipe-on-Poly. This looks like it may be the solution. I will know more when I try to do the paint with wood using a glued-up split color plank tomorrow. More on this to follow. In the interim, I asked to purchase a complete set of the laser cut plywood hull pieces from Mantua in Italy. I am waiting to hear from them on Monday. If they don't want to sell me the set, I will just suck it up and cut them myself on the band saw and scroll saw and finish them on the oscillating sander. The good news is the hoarder that I am, I have all of the templates needed through Chapter 5 cut out of copies made on manila file folders. Regards to all
-
Old age, the eyes are the second thing to go, requires me to sell my kits in the smaller scales. I am selling the following: MS Brig Niagara $225 SOLD MS Syren $225 SOLD Both are Blue Boxed and mint. Actual shipping costs to be added. I am also selling the Corel la Couronne 1:100, several years old but complete with a dirty box. $350 plus actual shipping. Includes a copy of La Couronne 1636 by Vincenzo Lusci. It's in Italian but the pictures are great. SOLD Shipping will be USPS Priority Mail. I wish I could build them, but it's no longer possible.
-
The late Frank Mastini, a master modeler and author developed a chair for working high on the model Take an old wooden captains dining room chair, even the armrest all around and nail a board across the arms toward the rear to sit on. Your feet will stay on the seat of the chair. This will raise you up a good 8-10 inches depending on the chair. You can also rest you elbows just behind your knee for steadiness. Regards
- 608 replies
-
- 2
-
-
- la couronne
- corel
- (and 1 more)
-
New to the site! some pics of HMS Victory, Caldercraft
ca.shipwright replied to JJacobi's topic in New member Introductions
JJ Very nice indeed. I will follow your build with interest. I too have a Victory that has been on hiatus for several years and I am about ready to begin again as I rig my HMB Endeavour. Regards -
EJ, I can't believe how fast you are building this ship. I'm at 18 months and just starting the rigging on the Endeavour; and. the la Couronne is a much more complicated build.
- 608 replies
-
- 3
-
-
- la couronne
- corel
- (and 1 more)
-
Nicely done! It does go slow with the rigging doesn't it?
- 648 replies
-
- 4
-
-
- niagara
- model shipways
- (and 1 more)
-
Put the sides on the keel first. then the false keel bottom and sand flush to the sides. It looks better that way.
-
Al, looking at your pictures, it appears that you are going to need stealers in the area between the last bulkhead and the sternpost. You can see that the planks are starting to curve up and this will produce problems as you progress.
-
Doug, Your fix looks very good. If you are concerned about the rabbet, then you can glue a thin strip to the outsides of the keel after you mount it and after that a thin strip to the bottom, a false keel. Since the planking will tuck under the sides of the thin strip attached to the keel, this will give you a real rabbet although it is simulated. I hope this helps.
-
Making Rope
ca.shipwright replied to ca.shipwright's topic in Rope Making/Ropewalks's Discussions about Rope Making
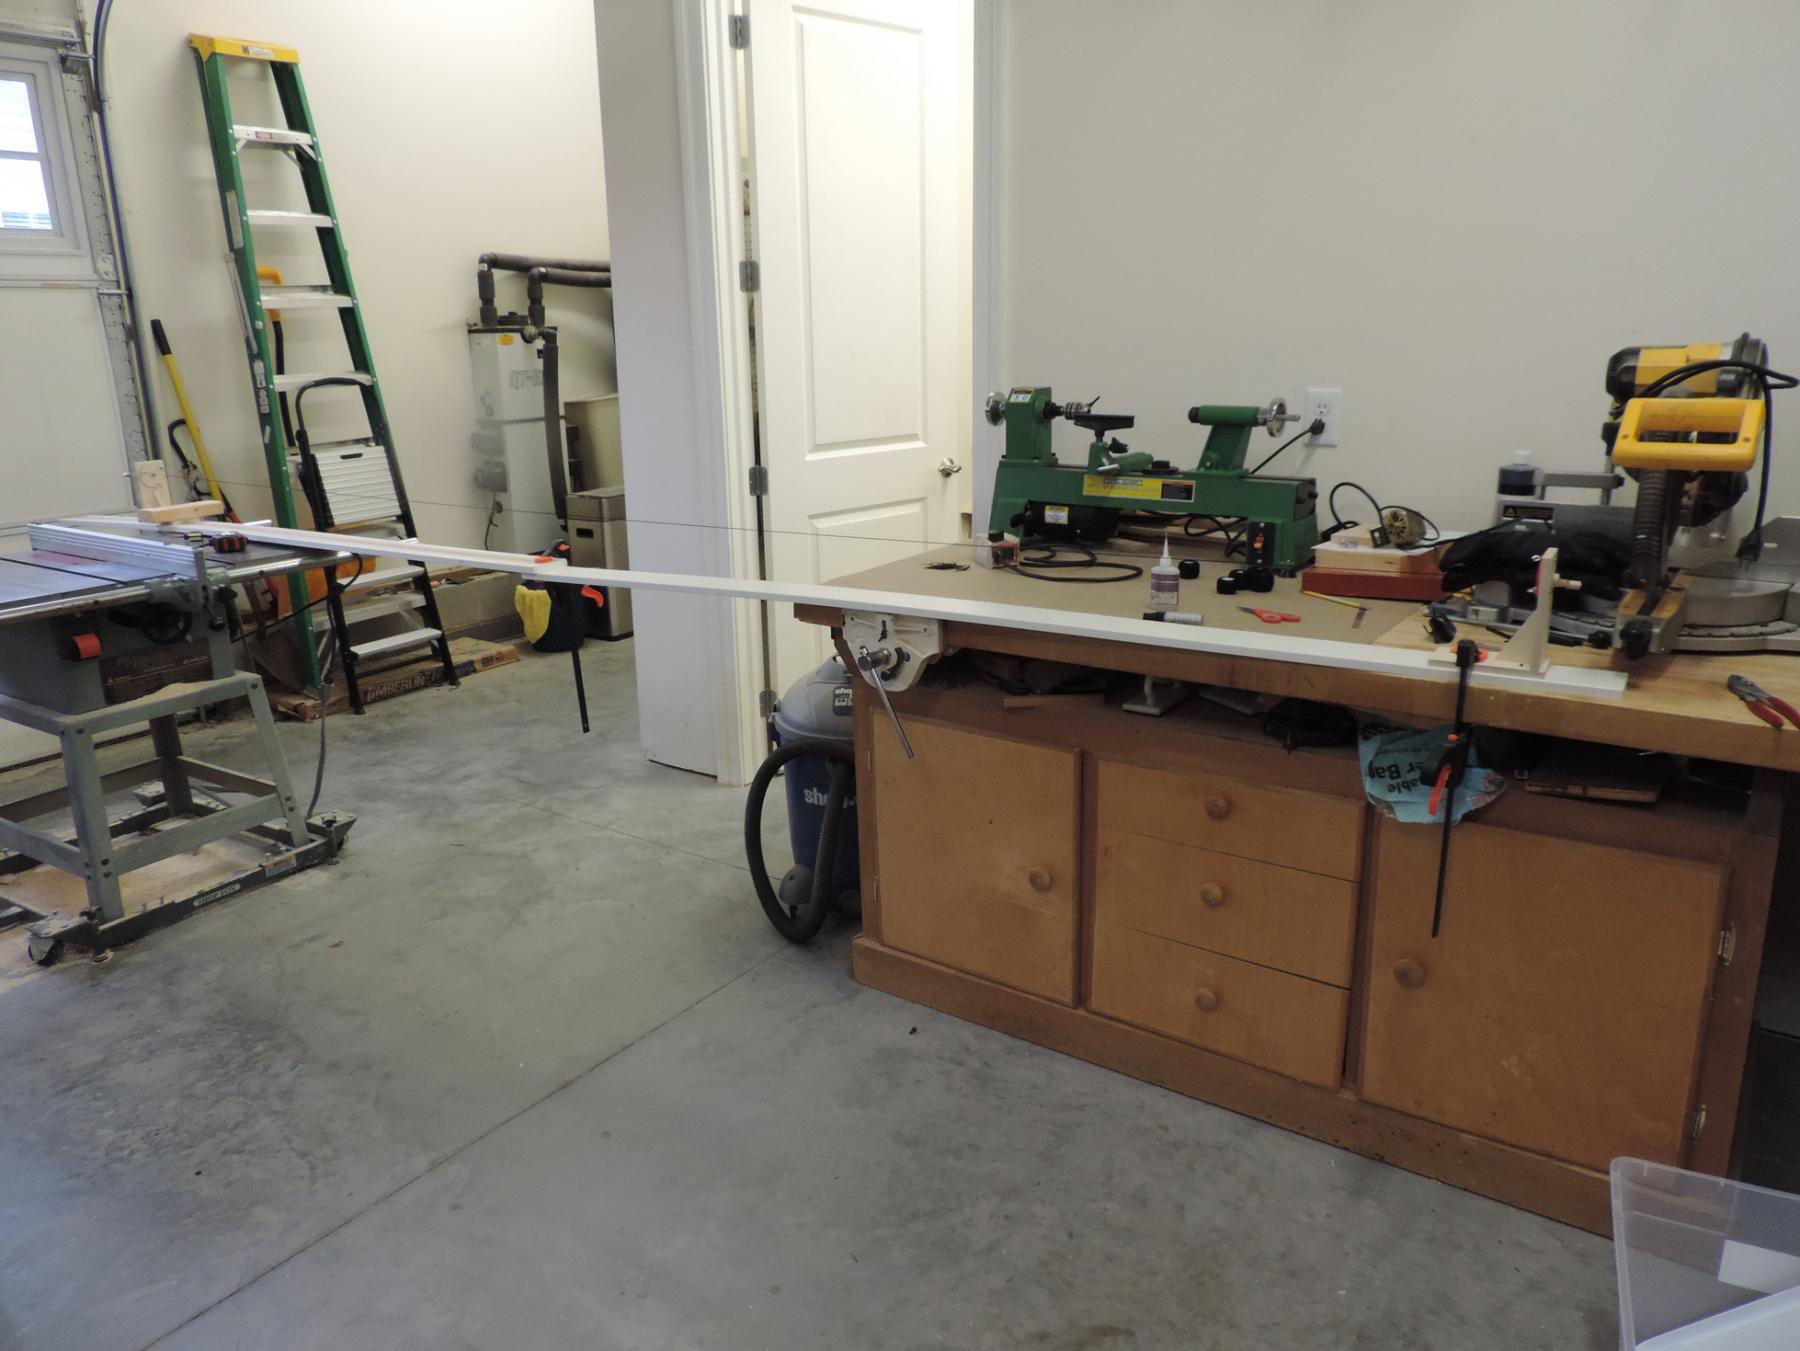
Well, I got tired of the short ropes that came out with a 8 foot board so I added some length to see what happened. I was able to get almost 90% yield out of this lash-up. The additional piece was a piece of IKEA kick board for cabinets. It has a routed groove on the back. I added a tenion to the bottom of the moving end to fit the grove. Now I don't have to run back and forth to keep it from falling off the board. And, I have one more kick board! Pictures attached. Regards


-
Workshop Advice
ca.shipwright replied to ChrisLBren's topic in Modeling tools and Workshop Equipment
Chris, You will love you new shop. Lighting and dust collection are critical as already stated. I was looking at you tool layout and have a couple of recommendations. Your Jim Byrnes tools all use the stock the long way. They should align with the long edge of the table. Using the saw against the wall will cause you problems- not enough room for the runout. Same problem will exist with the thickness sander. The run-out will go into the oscillating sander. I find like any table saw, I use the Byrnes saw from the end of my bench so I can push the stock through. The thickness sander is a pull through machine and is offset from my saw. Take a look at post #41 to see what I mean. As for buying a 10" table saw, a contractor's saw is all you need. Don't get a floor model unless you are going to use it and store it in the garage. This tool makes an awful mess; not something I would use in my boatyard. As for a thickness planer, you will only need it if you buy rough stock. If you buy S2S (surfaced 2 sides) milled lumber, the table saw will do the job of squaring up the stock. As an alternative, see if the local schools have a woodworking class and they will probably more than happy to help out if needed. A cabinet or millwork shop for the same. I hope some of this helps. Regards -
Very nice Darrell. Thanks for sharing the order in which you did all this. It will come in handy for my build. Regards
- 648 replies
-
- 3
-
-
- niagara
- model shipways
- (and 1 more)
-
Thanks Dave. This really helps. Regards
-
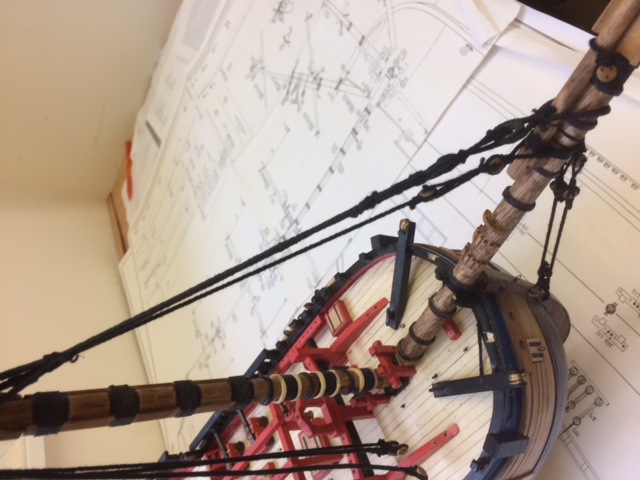
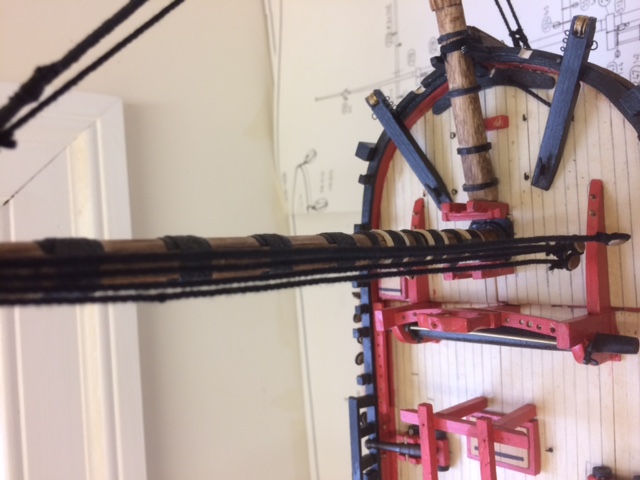
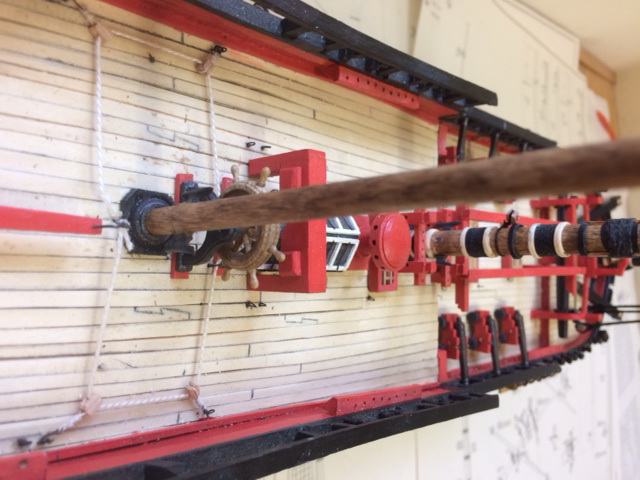
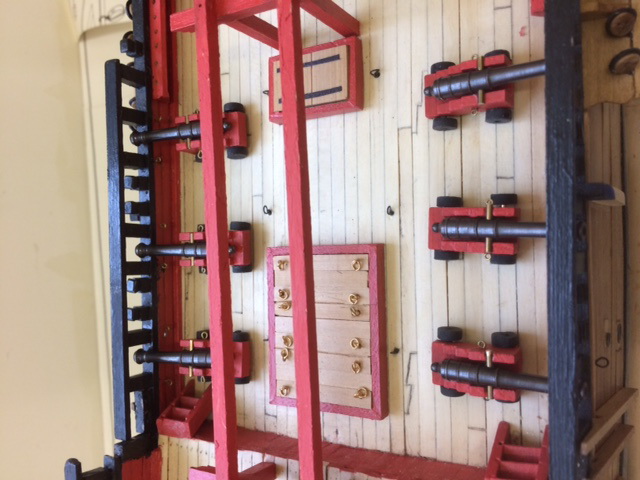
Greetings, It's hard to believe it has been a little over a month since my last update.Things are going slowly now that we are in the detail work of masting and rigging. Most of the deck work has been done. First, I am making my own rope. I gave up on trying to find a source for linen thread in the various diameters that I need after spending hours on the internet and getting no responses from several European companies. I an using crocheting thread in the sized 5, 8, and 10 for the standing rigging. Making 3-strand rope out of the 5 gives a good fore stay and serves nicely. The 8 gives a good shroud. The 10 is for seizing. I use the 8 for lashing between hearts. I know the difference between serving and worming. In the AOS, it shows the foremost shroud wormed. Which would be correct? It looks like worming at this scale would be extremely difficult if not impossible. I am serving the fore most and aft most on each set of shrouds. The interior shrouds will be left plain. I am having a lot of problems getting the seizing to slide on the served rope. Sliding opens one end of the serving and compresses the other. I don't know what to do here. Maybe painting the served shroud with dilute white glue which I use on all seizings would set the serving allowing the seizing to slide. Any ideas would be appreciated. I am planning to use the clove hitch for the ratlines in the 10 thread size I have stepped the masts and the bowspirt and installed the foremast stays and partially rigged the bowspirt. I assembled the canon and placed them on the main deck. The barrels will have to remain in the elevated position. It appears that my bulworks are too high or my deck is too low. Either way this will have to do as the fix would entail a major rebuild. I'm good with this. I am going to rig the canon with the outhall lines and breach ropes. The train tackle will not be done. I think it will look too crowded. I am using Chuck Pissaro's 2 and 3 mm hooks. They are fantastic. I also used the hooks for the rudder cable on the quarterdeck. Two questions about the mainmast forestay. It looks like it splits and goes p & s around the foremast- a loop, joins back to a single line. Is this correct? And, I can't identify where it terminates at the bow. The bompers are giving me fits. I have made them twice and can't seem to get them to work. I will get them right eventually. I am also concurrently working on the yard foot ropes and other attachments to break the monotony of repeating tasks. I have had some places where due to lack of space, or the order of assembly, seizing is not possible. In these cases I have resorted to my Boy Scout training and use two half hitches which slip down and then lock tight. I have a couple of pictures attached. Sorry, I can't get them to rotate. Regards,
-
E J, There is always an option of making additional bulkheads using the adjacent as a pattern. You can still do this by gluing the additional bulkhead(s) to the center keel and the subdeck which I believe is the white sheet perpendicular to the center keel in the picture. You really don't need a slot for this and may be a easier solution than filler blocks. Regards
-
I don't know which viscosity of CA you are using to harden wood. I would recommend using the ultra thin as it will penetrate the wood much better and make it like metal. The thicker glues tend to stay on the surface. I also find myself making the parts that will be visible and need carving out of boxwood which holds an edge very well and has no fuzziness. The clean lines of your painting are to be envied as is your copper plating. I look forward to following your build. I have the Panart 1/72 Victory on the ways but the shipyard is on strike as the HMB Endeavour continues. Regards
-
E J, My first look at your SR. Yes is a huge ship. I have the Panart Victory 738. It too is a monster. The price of the case will exceed the cost of the kit. One thing I discovered in working on a kit this size is that the constant turning it around can become exhausting. A Lazy Susan or turntable is almost a must have for energy savings. They are easy to fabricate or cheap to buy. Regards
-
See if you can locate someone doing 3D commercial printing. They can make very small items.
- 648 replies
-
- 3
-
-
- niagara
- model shipways
- (and 1 more)
-
Inexpensive powered rope walker
ca.shipwright replied to hornet's topic in Modeling tools and Workshop Equipment
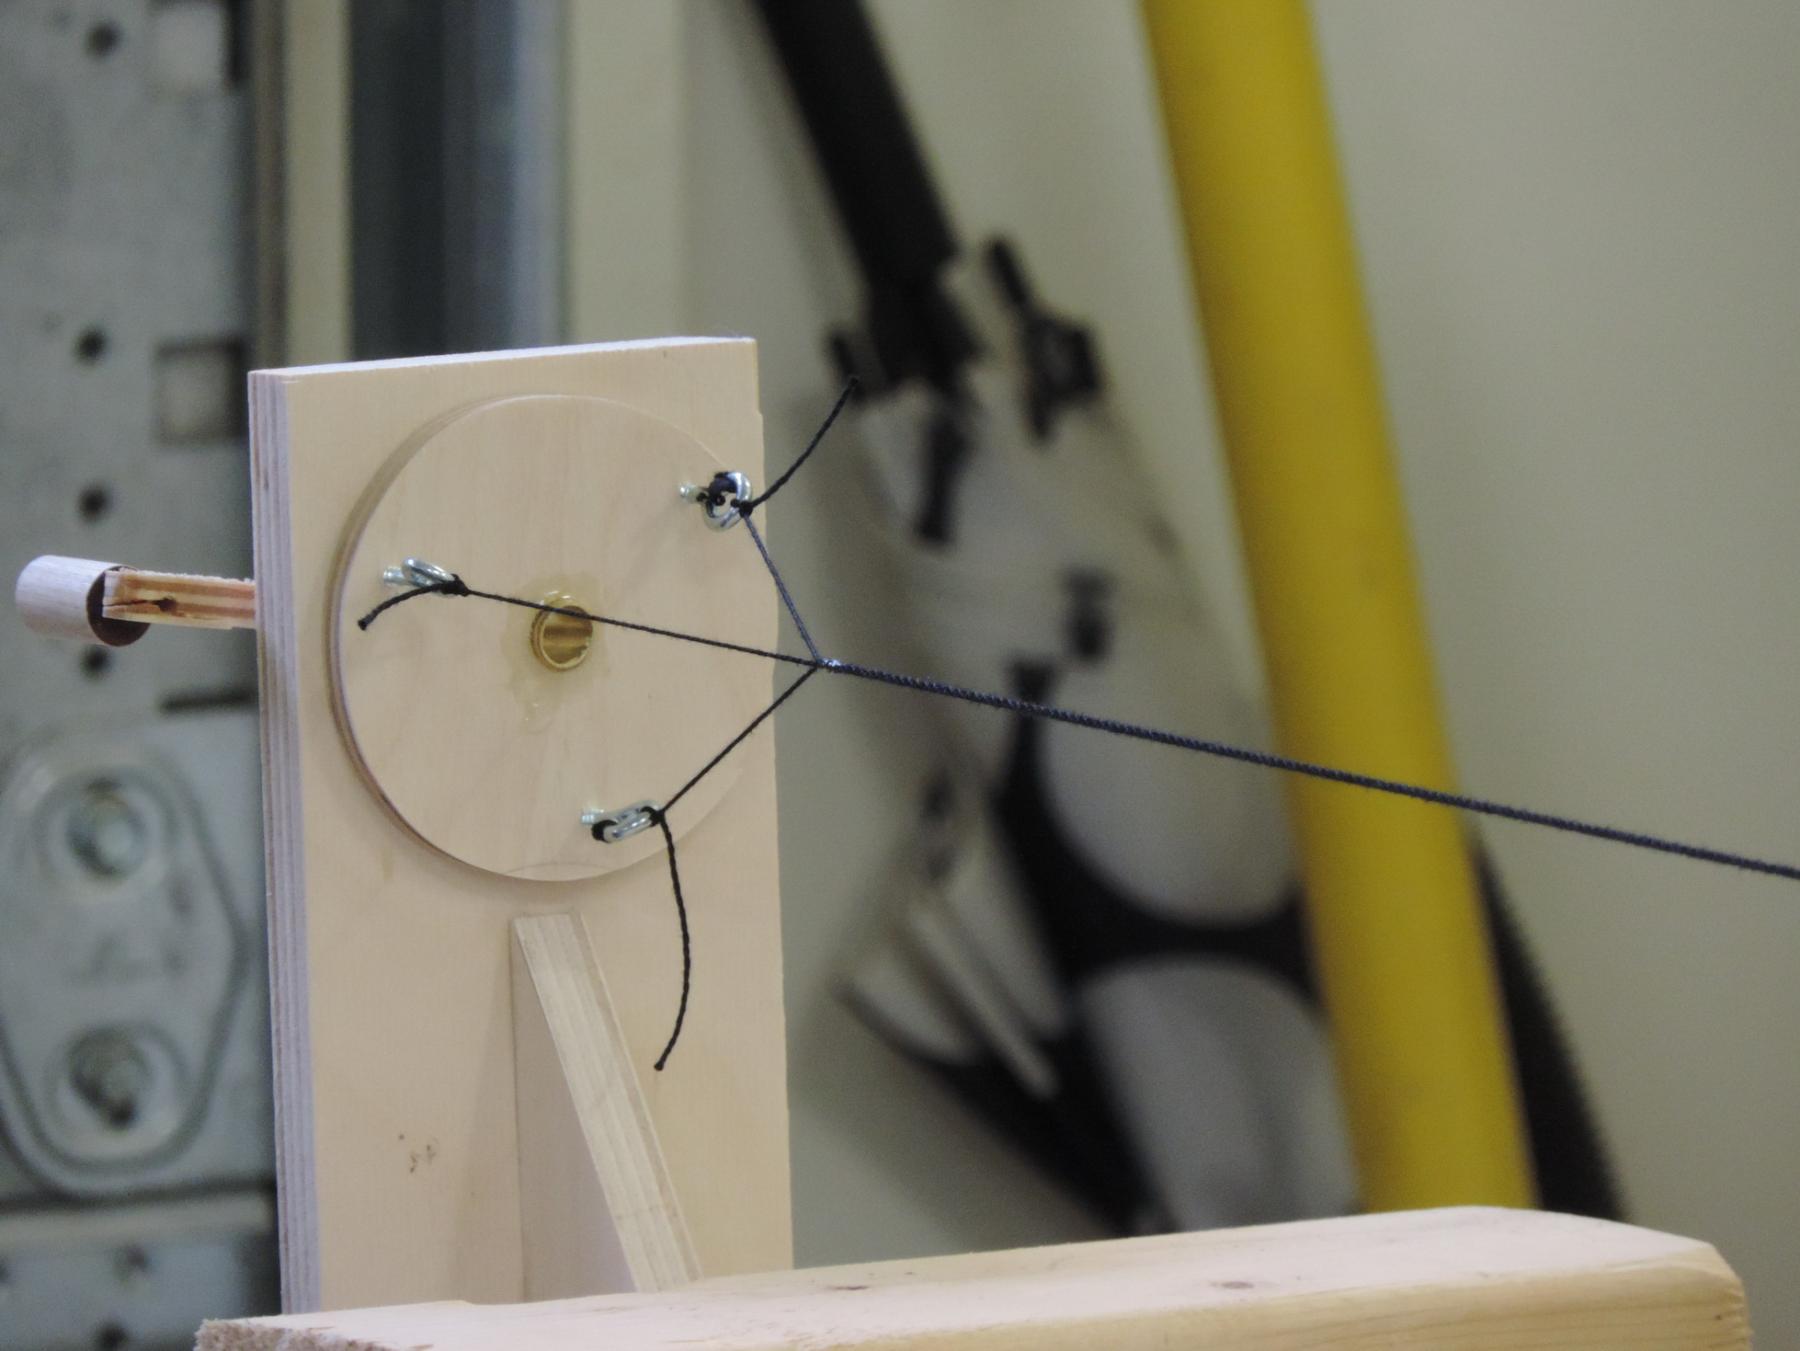
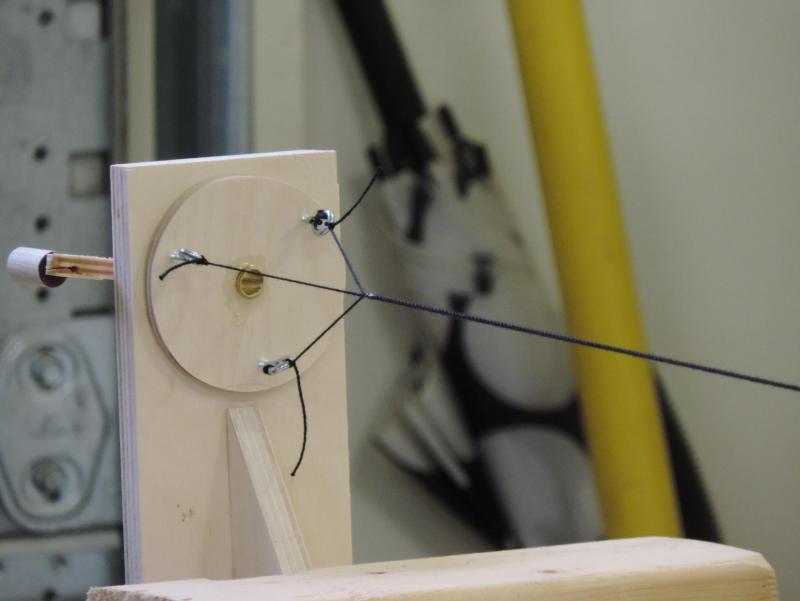
Hornet, Well you certainly answered my mechanization question completely. That is a beautiful piece of machinery. I'll have to get into my grandkids Lego box and see what I can find. I do have lots of fishing snap hooks. That rope is beautiful. Thanks for sharing. Regards -
I guess I'm a little late to the table.
-
I ran across a historical drama on Netflix entitled Admiral. This is about the Dutch in the 17th Century and theire battles with England and France with a mention of Spain. The sailing ships and battle scenes are superb. The movie is subtitled in English as most of the dialogue is in Dutch which was very easy to follow. Of course, the English speak English and the French speak French. Since Netflix has it, it must be several years old. But, I don't recall any mentions here in the US. IMHO well worth a viewing.