HOLIDAY DONATION DRIVE - SUPPORT MSW - DO YOUR PART TO KEEP THIS GREAT FORUM GOING! (Only 69 donations so far out of 49,000 members - Can we at least get 100? C'mon guys!)
×


ca.shipwright
-
Posts
483 -
Joined
-
Last visited
Content Type
Profiles
Forums
Gallery
Events
Everything posted by ca.shipwright
-
 On a previous post, you questioned why manufacturers left out so many things on the model and, if you want them, you have to fabricate them. First, Second and Third are; cost, cost and scale and difficulty. They do not want to overburden the lower level modeler. They can list the kit as intermediate rather than advanced. This, of course widens the potential market. Regards
- 708 replies
-
- 1
-

-
- victory
- constructo
- (and 1 more)
-
You have raised the bar to a place to which I can only aspire. You log is a tremendous resource on which I will surely rely upon as I go down this journey even though I am building the Panart 738 kit. Regards
-
Great job on the ships boats. I was told they are kits in themselves. Now I believe it. Regards
-
Love the idea of using a stick to set the yards. Regards
-
Oh yeah, on the friezes. Very classy.
- 269 replies
-
- 6
-
-
- Queen Anne Barge
- Syren Ship Model Company
- (and 1 more)
-
The rope walks are just as clean as the rest of the model. Great job. Regards
-
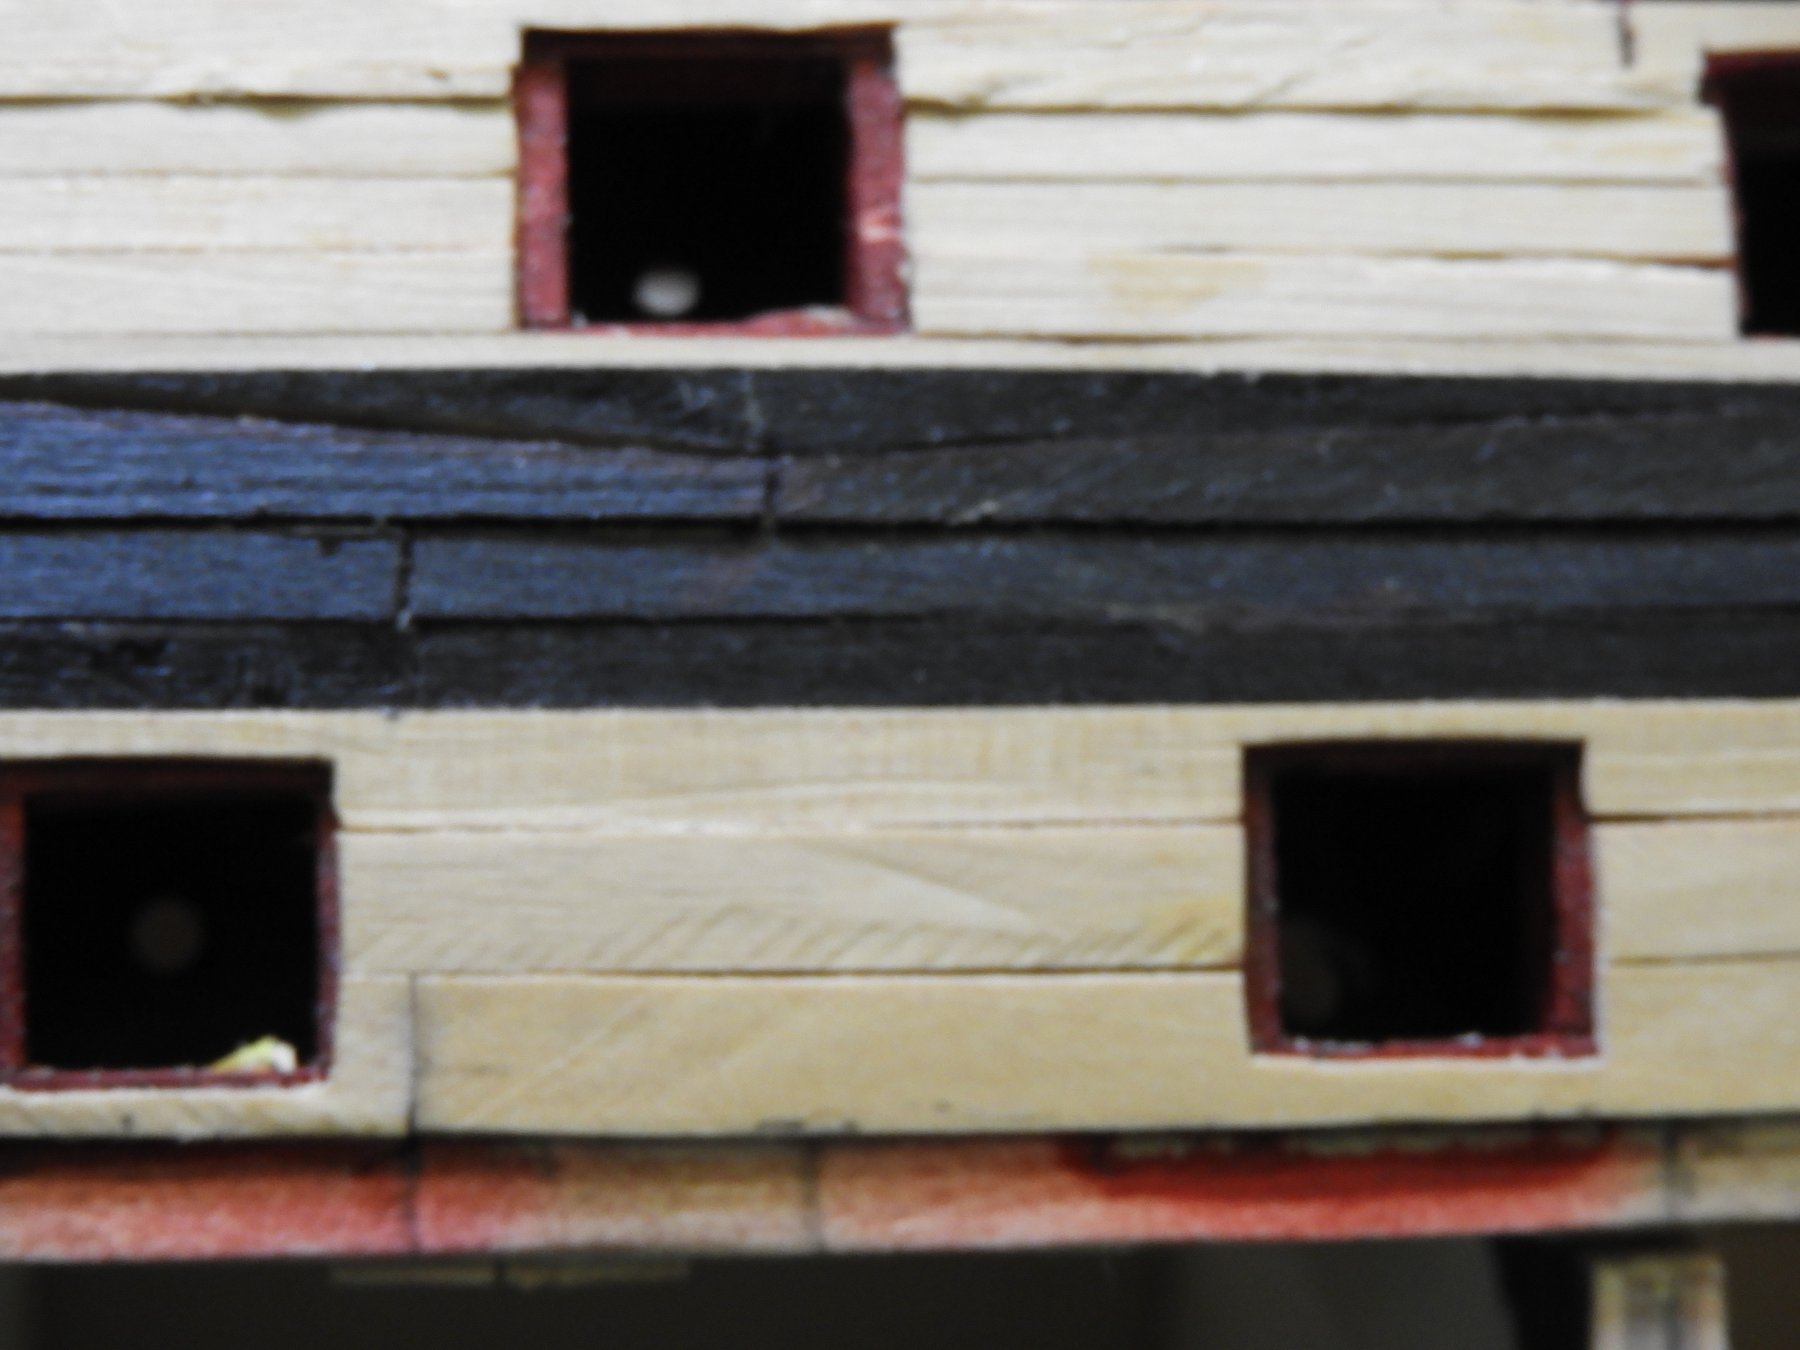
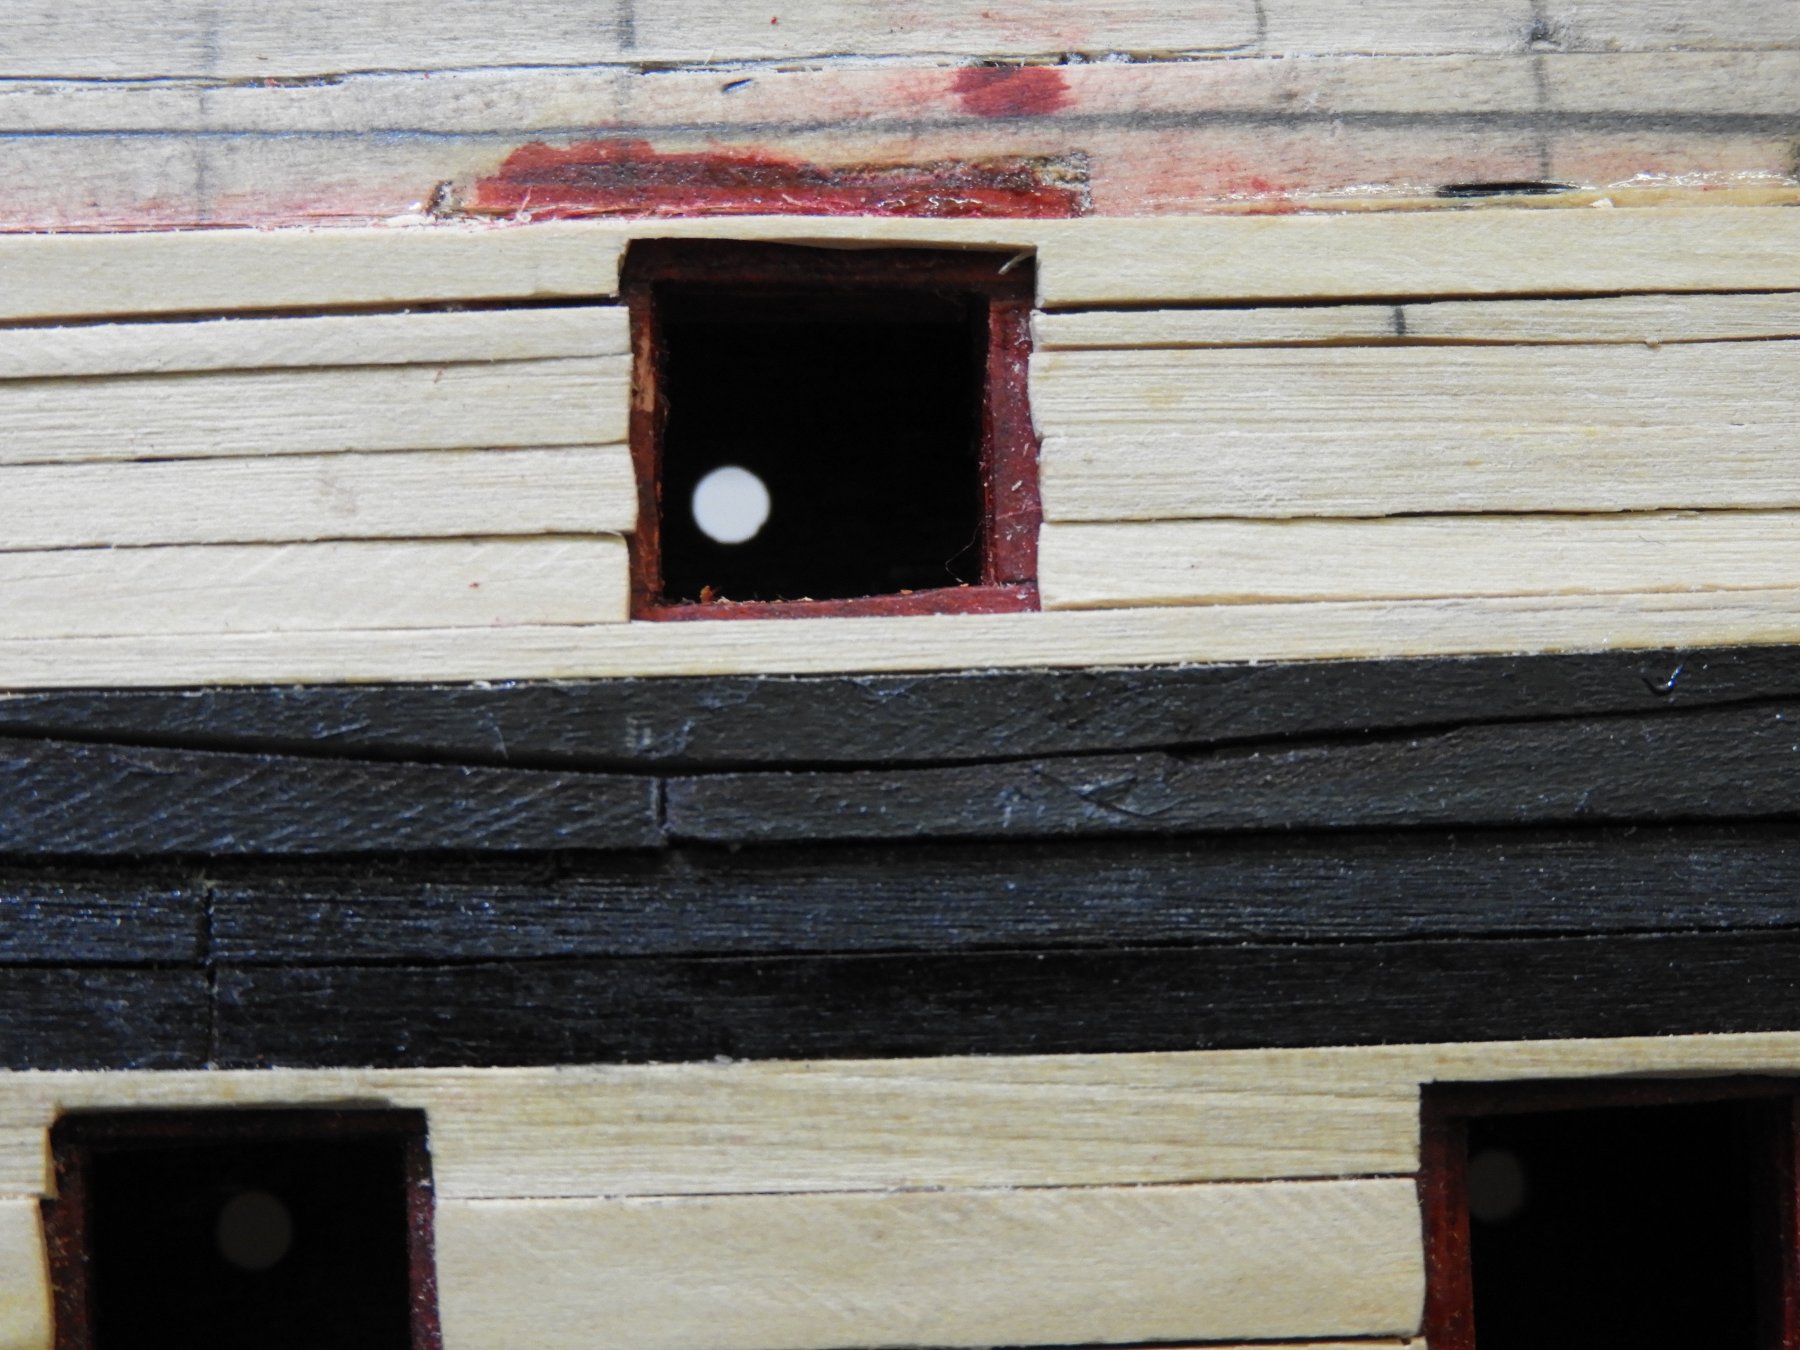
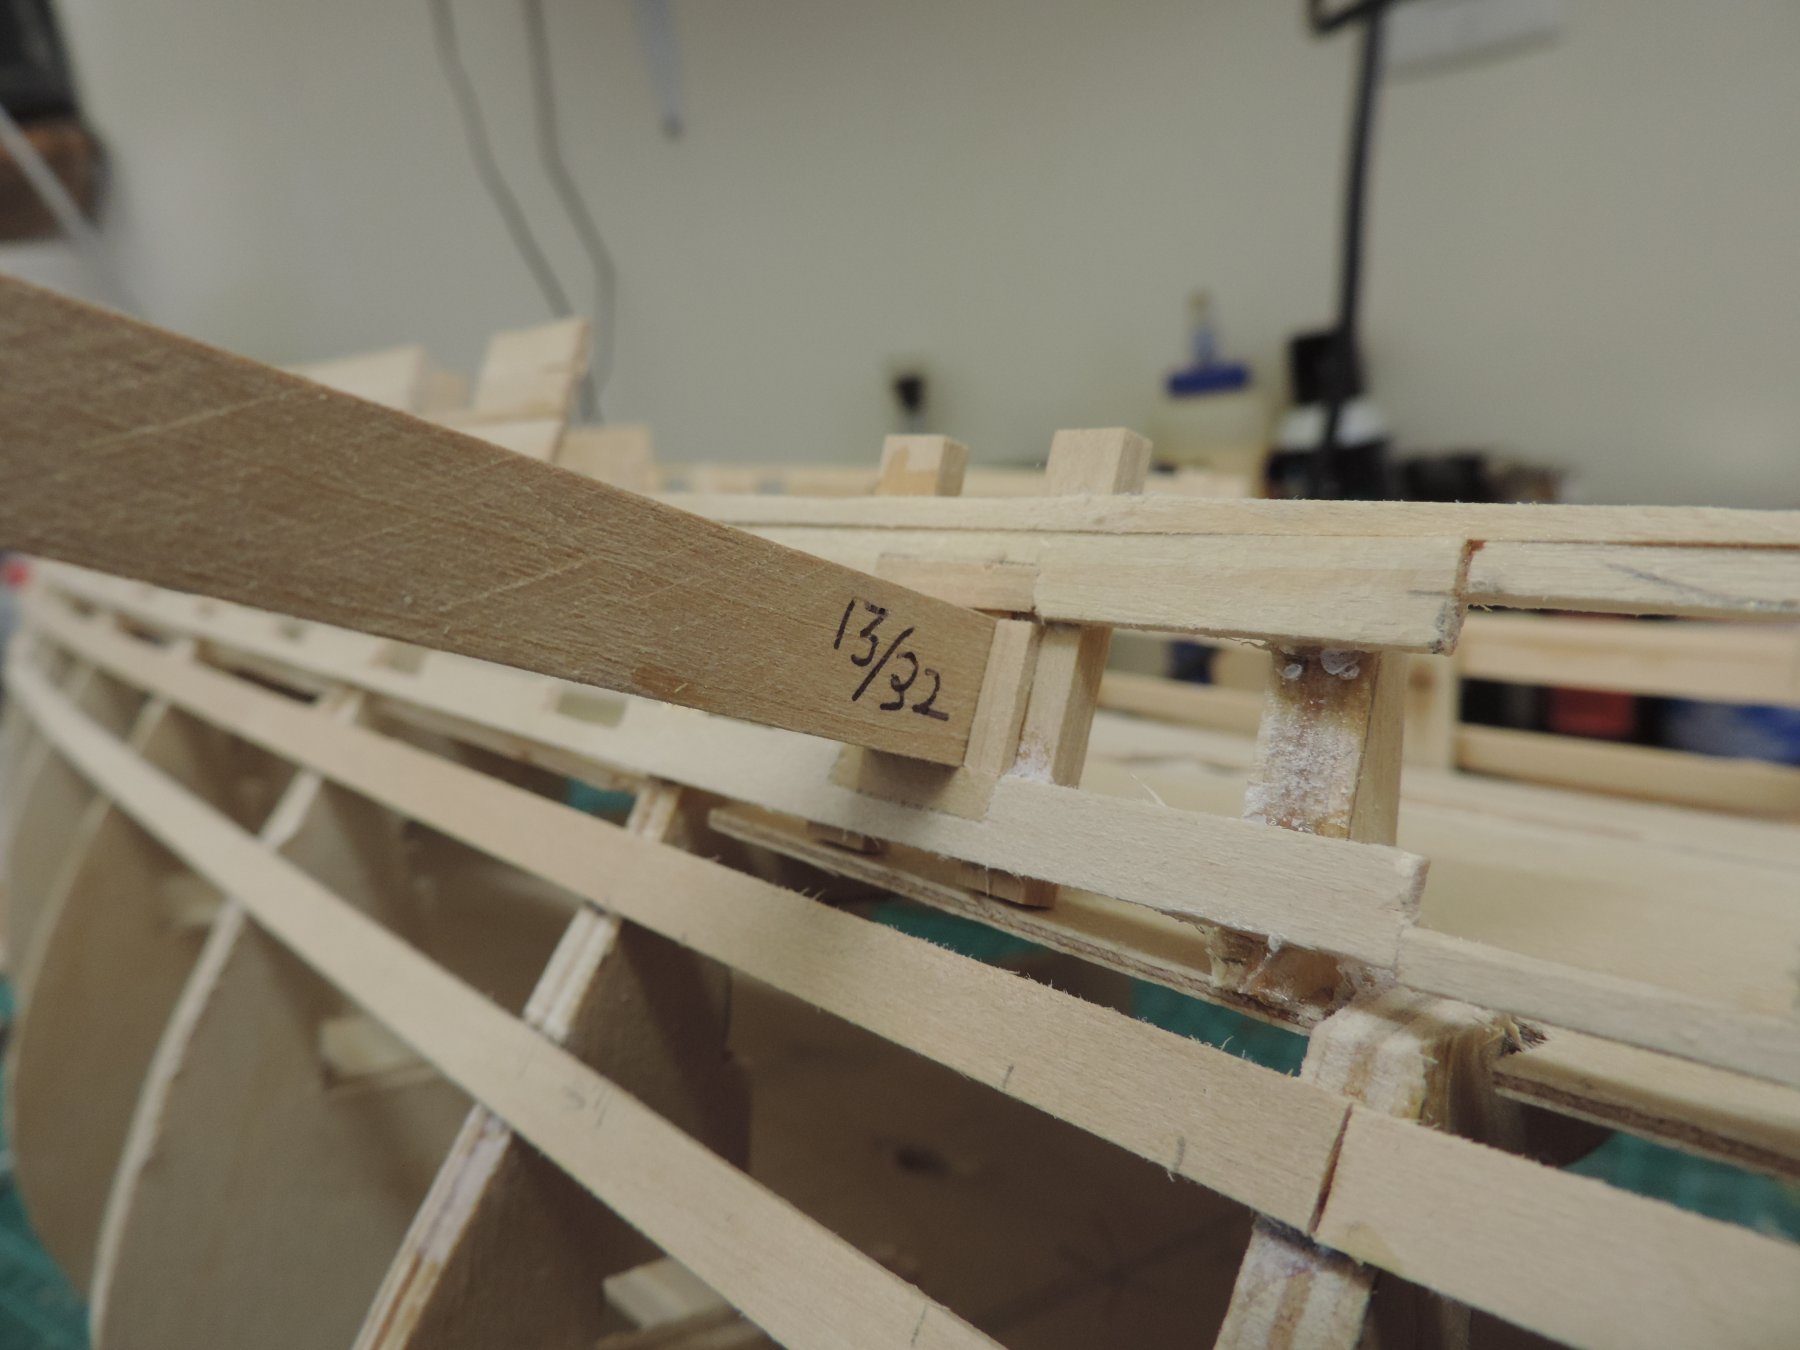
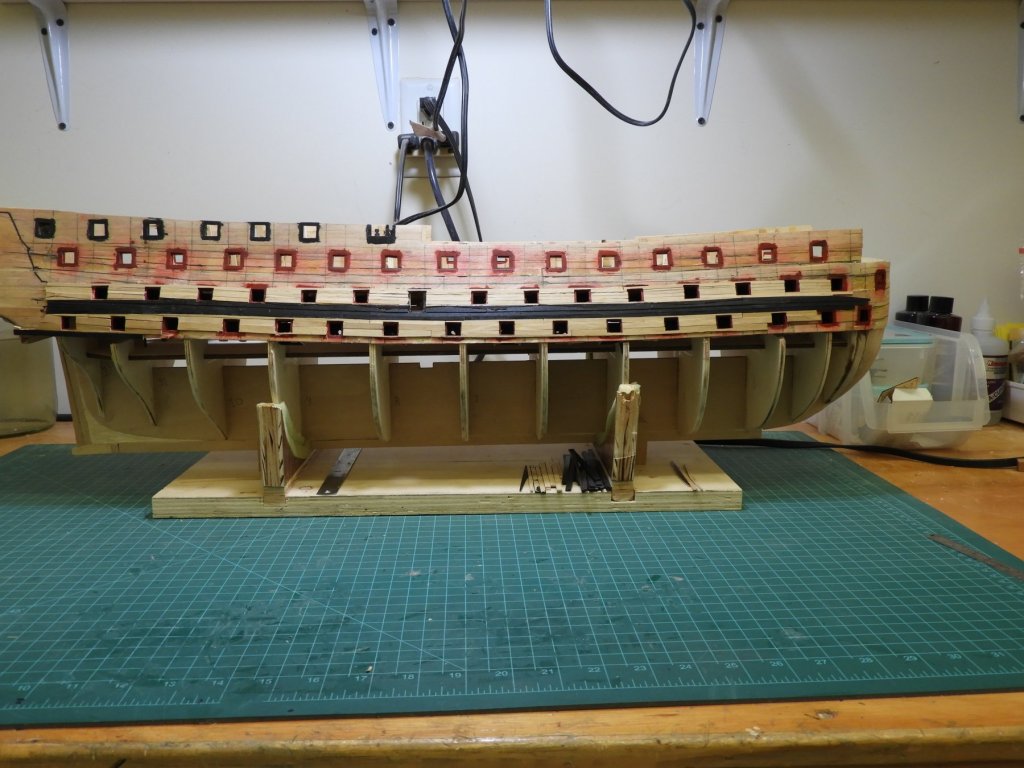
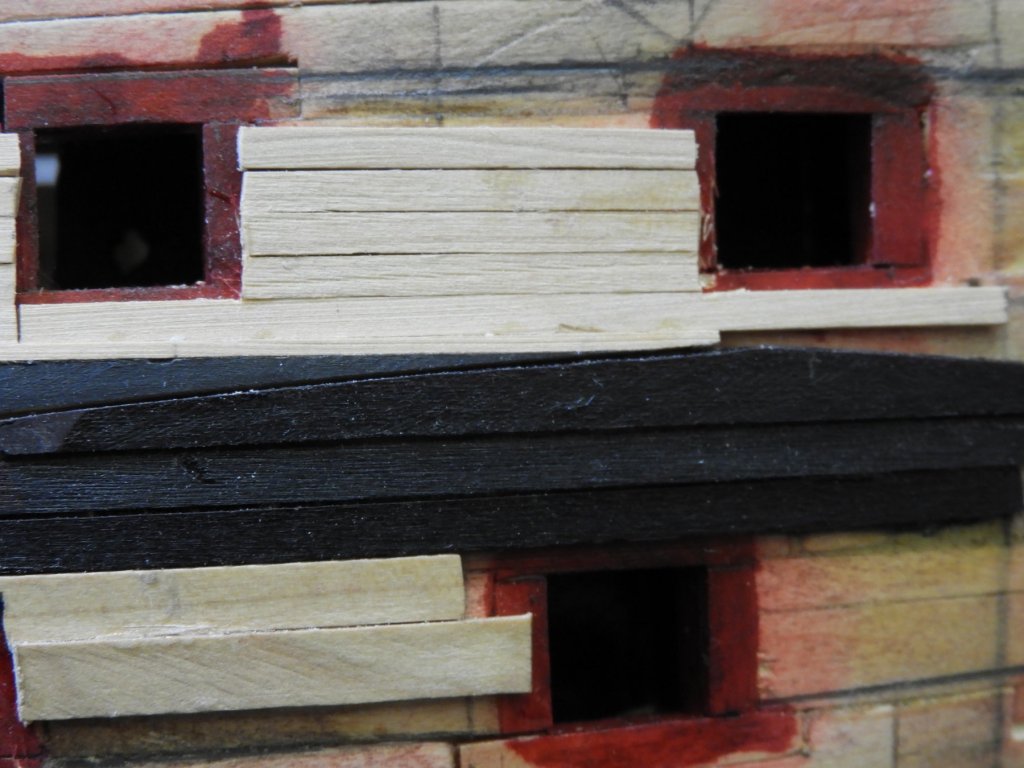
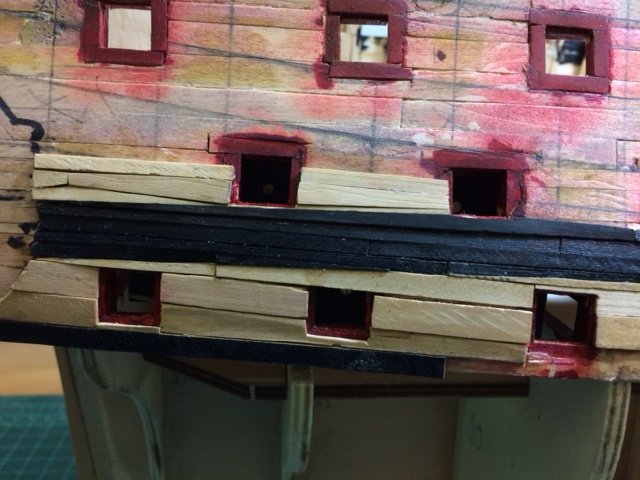
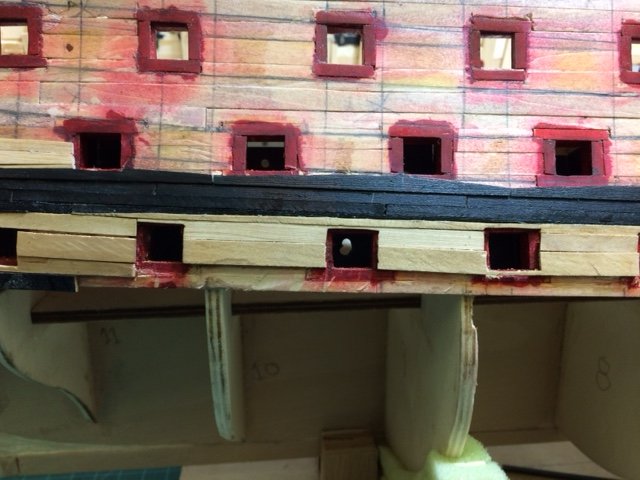
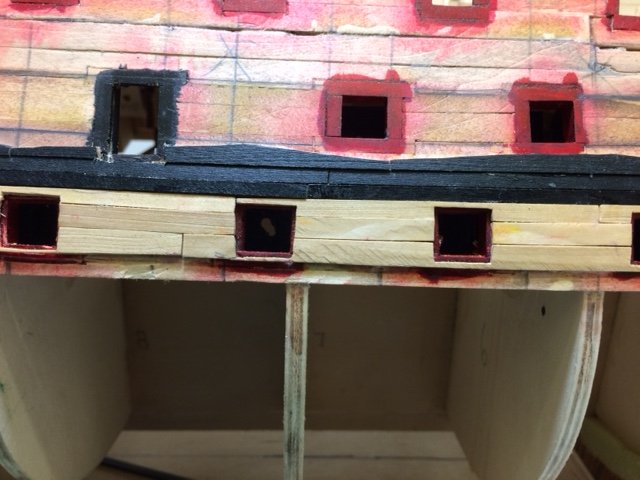
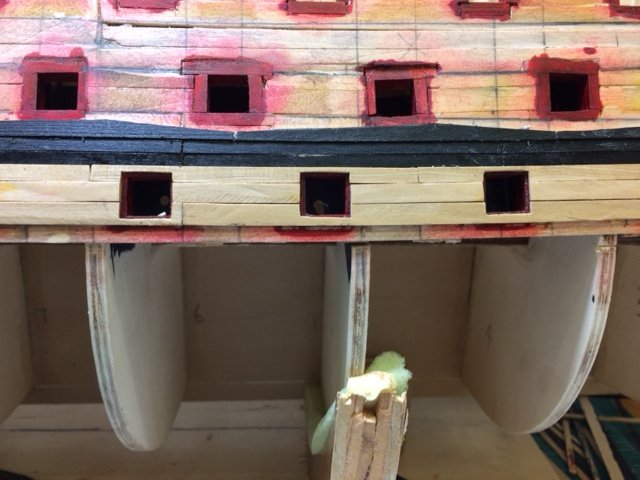
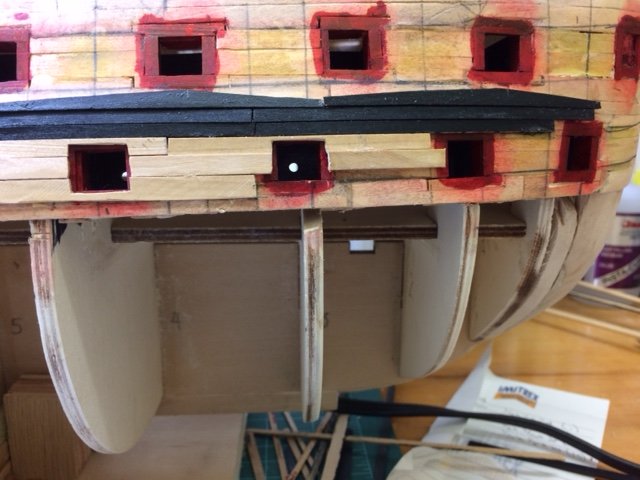
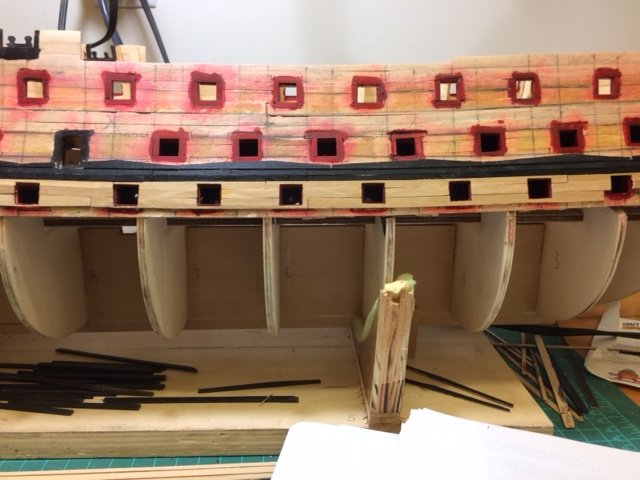
7/1 On to Chapter 6. The honeymoon is over. This is as serious modeling as you can get- it’s just short of scratch building. I read it, read it again, and read it again, and, still I did things wrong. It sometimes seems like this is one big senior moment. I installed the first partial anchor stock piece in the second row of anchor stock upside down and lost the sheer of the planks. I didn’t show up until much later. The optics of the sheer of the plank verses the straight run of the stripes gets very confusing to the eye. You really have to focus on one and when you get that in your head you can then look at the other and compare. I had to rip out a good portion of the stern planking to fix this. And, there is still some sag at the stern. I’m going to have to live with this. The black stripe is 12mm in width and it carries all the way through. The boxwood is 9/16ths and also carries through all the way through. I consider this a moral victory (no pun intended). I got one thing correct. There appears to be a little too much sheer aft of the entry way. I don’t know why because the gallery drawing is spot on. I’ll live with this also. It looks like there is going to a lot of “live withs” on the starboard side. It’s only going to be important at the stem where the stripes and wales join and at the stern to make sure the stern galleries align properly. I have another reason besides the one that Bob gave for working on one side the hull at a time. You learn from your mistakes. And, doing the second side after practicing on the first side will be a huge benefit. Of course, the first side goes against the wall. Keeping notes of the potential pitfalls will be a help when I turn around to the port side. On the middle gun deck, between the 2nd and 3rd gun port from the stern, there is piece of black anchor stock that will be carved out and replaced with boxwood to get rid of the black hump. I found that working at eye level really helps. That little box is perfect. I use an Ex-acto fine tooth saw the start the cuts for the gun port openings and then pair back to this cut from the middle with the work piece on the little box. I found that this eliminates breaking the part at the narrow place when you do this freehand. I place the work piece of the left edge (I'm left handed) with the mark up against the edge. I hold the piece close to the edge pressing down tightly. The box is up against the front of the bench turned so the saw is clear of the bench. I draw the saw DOWN to make the cut only as deep as the frame needs to be. Drawing down uses gravity to move the saw, while pushing up will break the piece. One resolution is to improve my cutting of the filler pieces between the gun ports. I have modified my technique. Now, I cut all the pieces for the gap, gang them, then sand them to length using the Byrnes disc sander. This keeps them square, and, with a little care, just sneak up of the correct length. This gives a very nice straight line.


-
Dave, What a great idea, charting the rigging before doing. You wouldn't have charts for the lower and middle masts would you? I know they would be useful to the endeavor group. As an advanced novice or low intermediate builder, I would love to know how you keep your work so neat, clean, and sharp. I fear I am getting the reputation as a building slob. Regards
-
If you are going to copper, don't waste the time or energy with going for scale planks. Just grab a pile of bass wood which bends easily and apply it as fast as can. The coppering will take longer then planking at scale. Someone mentioned that it takes close to 4500 or so to get the job done. I see a padded cell in the future after or during coppering. The final ruling-"Your ship, your rules." Regards
- 527 replies
-
- 1
-
-
- caldercraft
- victory
- (and 1 more)
-
Neat is the word of the day. Well done Regards
- 194 replies
-
- 3
-
-
- armed virginia sloop
- model shipways
- (and 1 more)
-
Absolutely stunning. It is truly amazing what you can accomplish in a large scale model. I may have to look at this for a future build. Regards
- 213 replies
-
- 4
-
-
- la couronne
- 74 gun
- (and 2 more)
-
Chris, Vicki is looking real good. So many great logs of so many great builds and so little time to read them. I have found that following logs other than the builds I am working on always gives me great ideas. Ship to ship transference is really easy. Regards
-
Dave, I would have to say that the close up of the "stay fixed to the foot of the mast" is the most realistic photo I have ever seen. I can literally feel myself looking over the rail. The detail is amazing and the photography is superb. I enjoy looking at your log and use it as the bar to reach on my Endeavour which is as likely to happen as the Big Dipper suddenly appears in the southern hemisphere and the Southern Cross appearing in the northern hemisphere. Regards
-
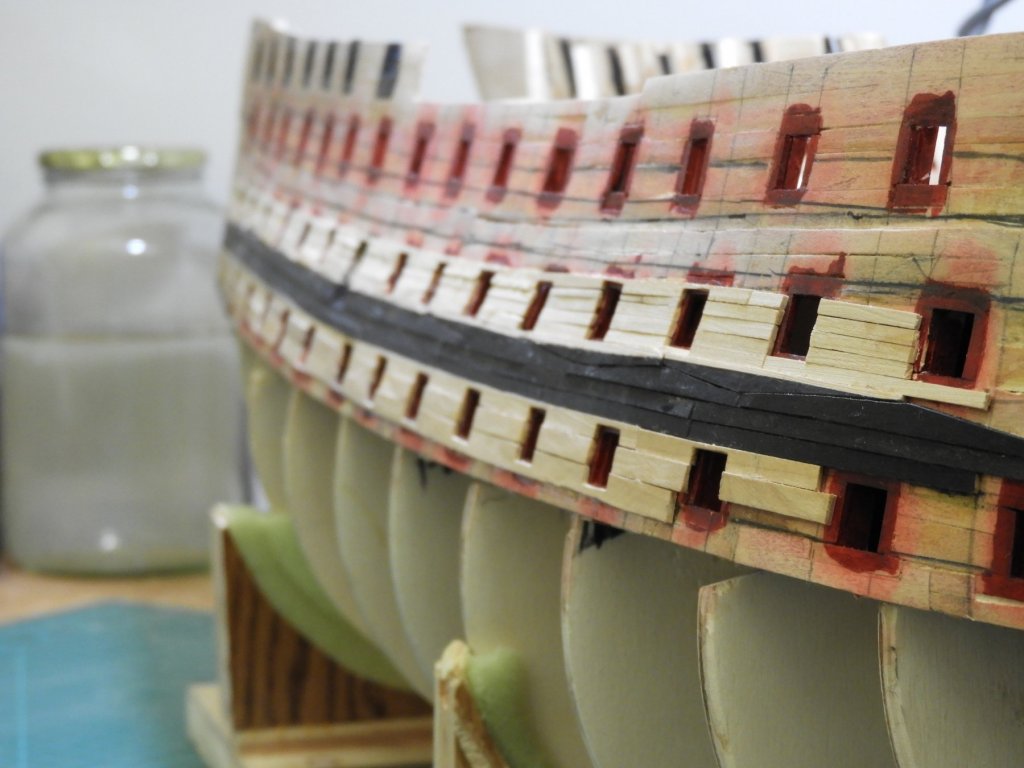
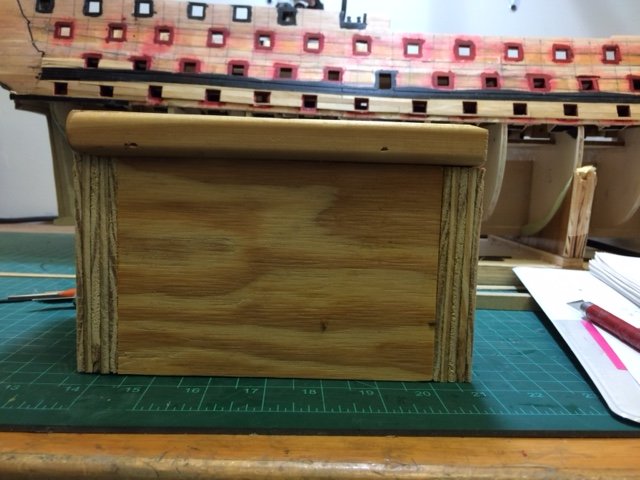
Continuing with the starboard planking. Started cutting the anchor stock pieces and got on a roll. I built the box in the first photo that raises the work piece and my hands to almost eye level. What a difference this makes with fatigue- almost none. Accuracy is much better also. After completing the lower light section, I decided to put the entire line of anchor stock on at one time and fill in the top pieces of anchor stock. Some will be split planks. Looks easy in the practicum, the explanation is very clear. I hope my skills will suffice. As an observation: As I work from stern forward, my work looks better. Do something often enough and sure enough you get better.
-
E J Looking good so far, sand and sand again. Take a look at my posts under STORY STICKs. This may give you some added help. Regards

- 961 replies
-
- 10
-
-
Kerith These look fantastic. If I ever saw a part that just begged to get knocked off or repeatedly bent, hammock cranes win by a long shot. I'm not up to this part yet, but I think I am probably going to delay hammock cranes until all of the interior deck and rigging work are complete. Regards
-
Nice job on the plating. Canons look much better with rings. Regards
-
Check out this X-Y table and others on ebay. Awesome and reasonable priced. Also fits the Dremel drill press stand.

- 13 replies
-
- 2
-
-
- dremel
- rotary tool
- (and 1 more)
-
Tools You Can't Live Without
ca.shipwright replied to Justin P.'s topic in Modeling tools and Workshop Equipment
Well I guess I am the only Bourbon or Sour Mash drinker. Scotch gives me an aweful headache. Even the $40 a shot super brand. I will pass on one tired piece of advice. Alcohol and tools, especially power don't make for a safe environment. My lovely wife knows never to talk to me while have a motor running. I just can't multitask any more at my age. After work, well that's another story. Be safe Regards -
I have the same questions about fully rigging the exposed canons. When fully rigged, they have breach, out-hall, and train tackle. This is a lot of rope to be hanging around a deck on a model of this scale. I' not sure how visually appealing this would be. I do know that installing all this in such tight quarters will drive me bonkers- and that's if my eyes and hands can still do this work. I'll probably bight the bullet and go for one fully rigged canon to check out my skills. But, I'm thinking that it wind up with just the breaching rope. Your Victory is really nice. Continue to enjoy the build. Regards
-
I look at your rigging and can understand why I am procrastinating rigging my Endeavour. Since my ship has turned into quite a lash-up, my rigging when it gets there will be a much more modest effort. RE: silver soldier I have the torch, very small pieces of silver, and a jar of flux. 1st question: Do you flux the joint, pile on the silver pieces and then heat until the silver melts and flows into the joint? 2nd question: My jar of flux is extremely viscous- more like thick paste then any thing else. Is this still good to use? Thanks for all your great postings, Regardsd