-
Posts
483 -
Joined
-
Last visited
Content Type
Profiles
Forums
Gallery
Events
Everything posted by ca.shipwright
-
Can i live without a BYRNES TABLE SAW
ca.shipwright replied to shihawk's topic in Modeling tools and Workshop Equipment
David, As a refresher, could you discuss your method in some detail. I can't seem to find the reference to which I was referring and, I know others will be interested. Thanks -
Mike If you have room, add a drop leaf to part of the front of your bench. Install it with door hinges. Let it down, or take it off when not needed. Regards
- 648 replies
-
- niagara
- model shipways
-
(and 1 more)
Tagged with:
-

Can i live without a BYRNES TABLE SAW
ca.shipwright replied to shihawk's topic in Modeling tools and Workshop Equipment
You can cut basswood 'til the cows come home. Boxwood, I get about six months out of a .030. I don't due ebony because of sensitivity to the dust- it is poisonous. But it will last even less. Thurston does have a sharpening service although I don't know pricing. There was an article on how to sharpen a slitting blade with a file somewhere. It talked about sharpening every other tooth or something like that. I just ordered six blades from Thurston and received them in 2 days. Hope this helps -
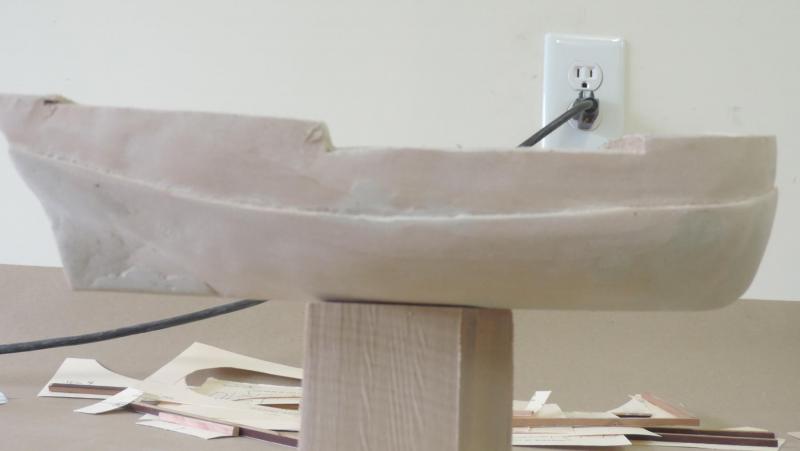
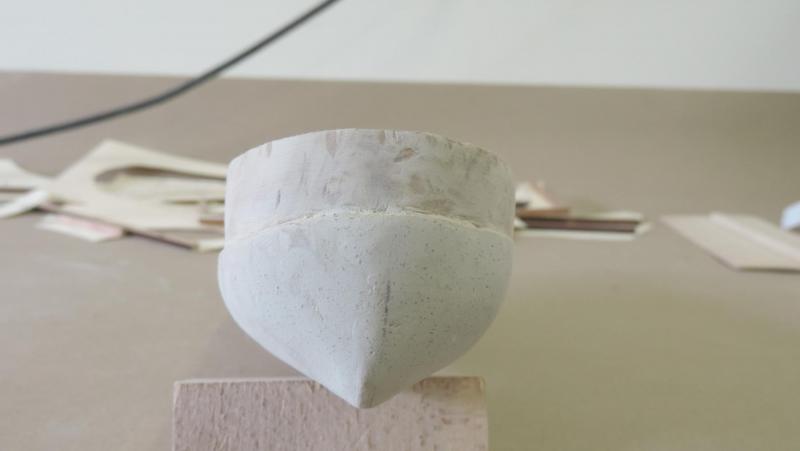
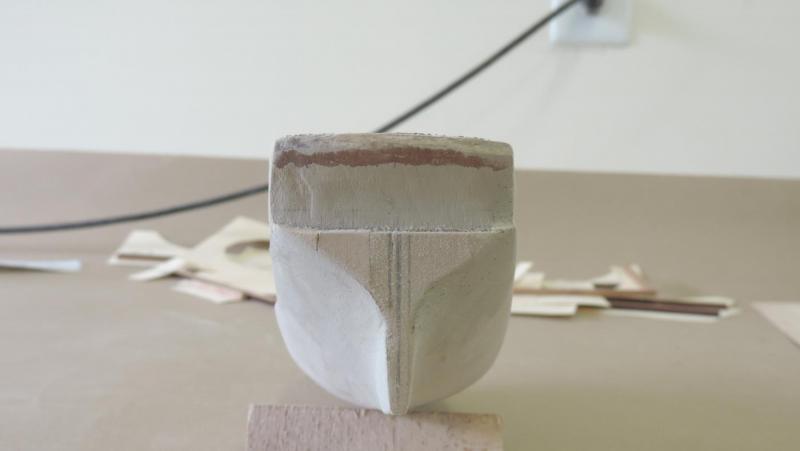
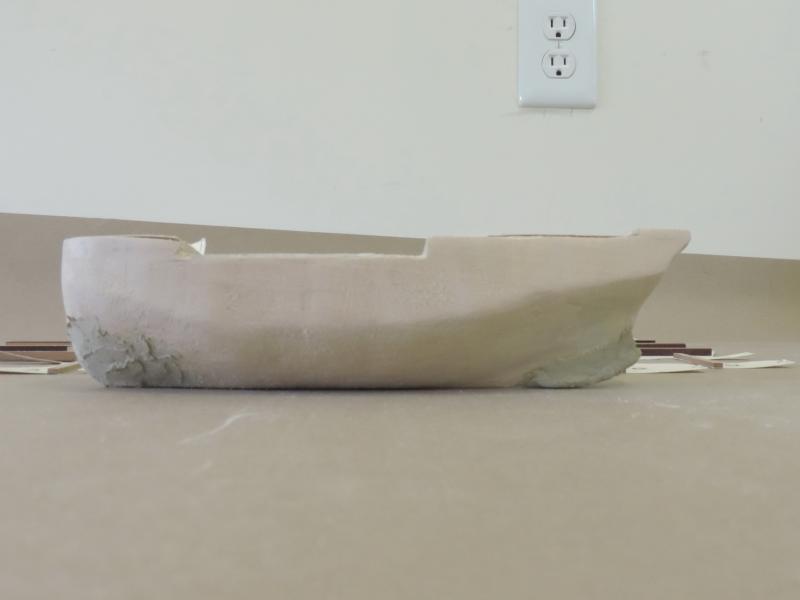
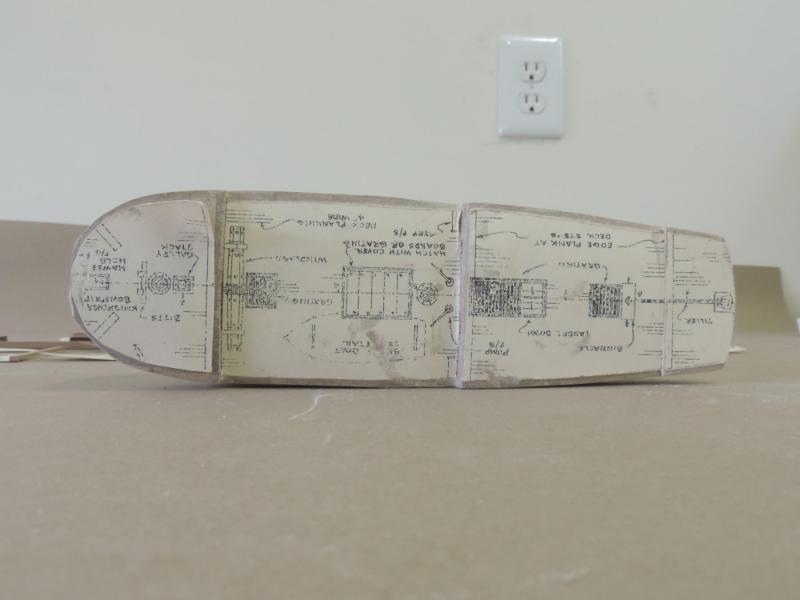
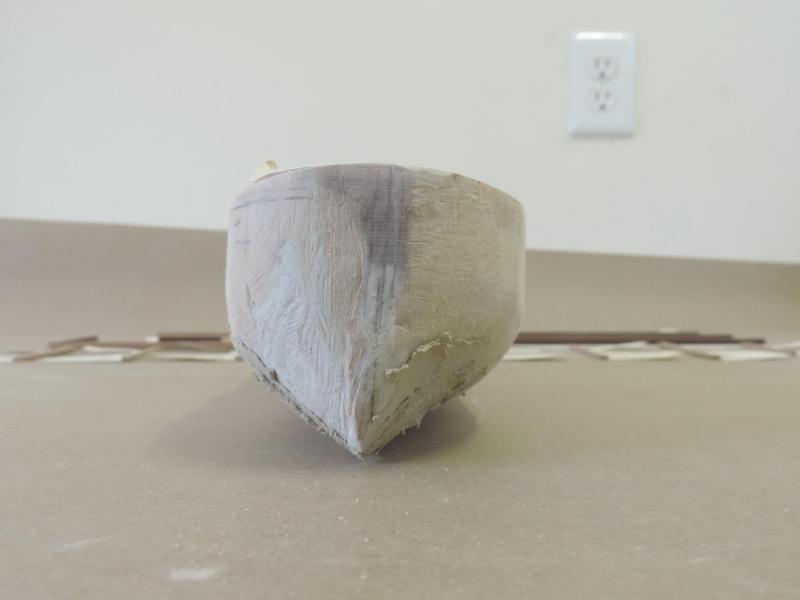
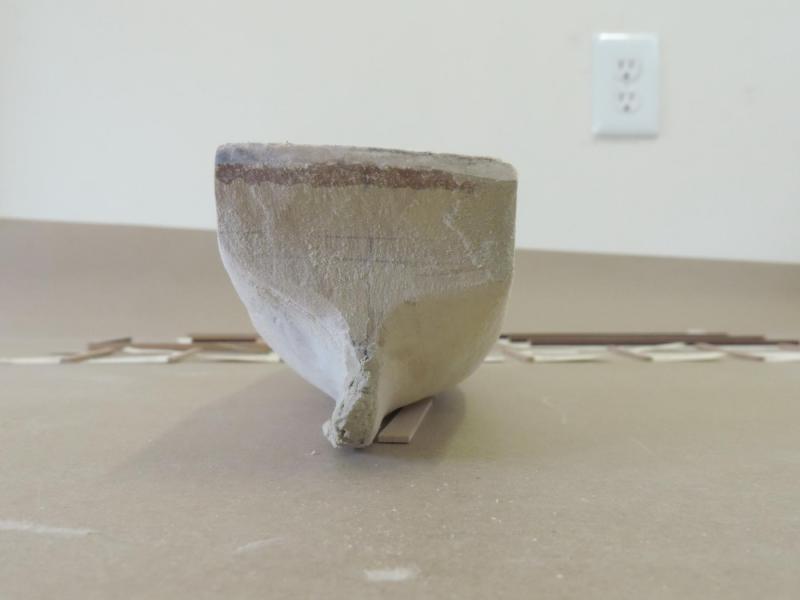
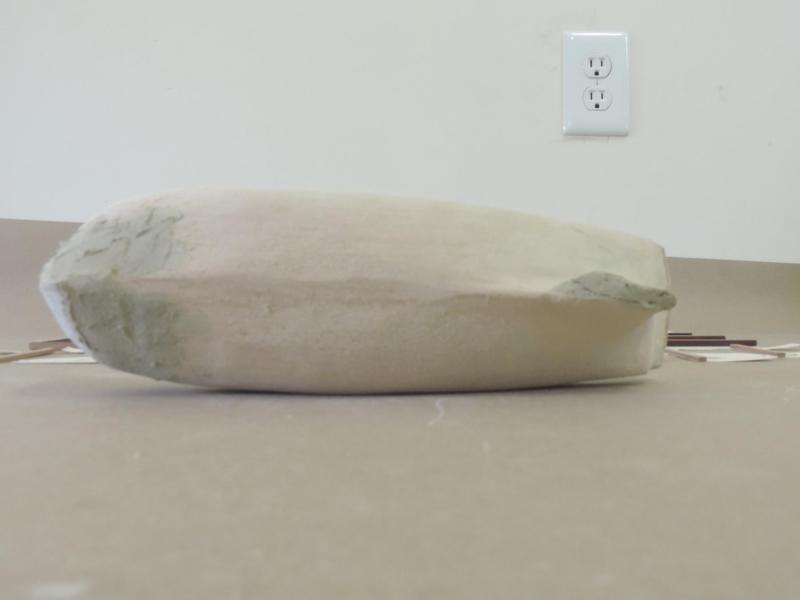
Here we are again with another update and some photos. The first thing I discovered is that it takes a lot more work then I expected to shape the hull out of a single block of wood using the ships lines and templates. It's check, carve, check, carve, check, sand,...... you get the idea. The included photos show the hull shaping almost completed. Since these pictures were taken I have put a coat of primer on the hull below the 1/16th inch rebate. This will show minor defects that need to be filled and smoothed. Above the wale line won't be as sensitive to the smoothing process since it will be planked.
-

Can i live without a BYRNES TABLE SAW
ca.shipwright replied to shihawk's topic in Modeling tools and Workshop Equipment
You can try this: Pace the veneer on the saw and set your rip fence. Then take a piece of sacrificial wood that will cover the free side of the blade for about 1 inch and rest up against the fence. Raise the blade just high enough to cut into the sacrificial wood. You should also use a zero clearance insert on the table saw. Use a push down to keep the 2 layers tight. Run the sandwich through the saw. Hope this helps -
Hervie, Take a look at the widths of the planks of the starboard side. They seem to vary considerably while the port side planks all appear the same width. Having said that, you gun port planking is great. I have a Jim Byrnes table saw that I use for the same type of cuts. One of the tricks is to use a sacrificial backer board so that you do not get and rip-out on the work piece. This is critical when working with hardwoods like boxwood. I took my Victory back down to the bulkheads and centerkeel one time because I was so disappointed in my planking. Remember your not alone in the I wish I had done........... Regards
-
Greg, Thanks for putting me on to your build log. I read it cover to cover today. Your great build log is exceeded only by your Endeavour. I was blown away by some of the photos of the rigging- the complexity. You can hardly see through to the other side of the ship. As for cats, they are incompatible with model making. They seem to have an affinity for thread with which they love to tug on and play. Here in the US, a book was actually published "101 Things to Do With a Dead Cat". I'm sure you have additional recommendations. Well done! Regards,
- 319 replies
-
Pat, Your metal work is as outstanding as the rest of the model. Do you do it freehand or use a milling machine. I have tried freehand and am getting nowhere. Regards
- 517 replies
-
- Endeavour
- Artesania Latina
-
(and 1 more)
Tagged with:
-
Hi Greg, Duplicating parts is always difficult unless you have a CNC machine. What I do is rough out the parts. Paste a copy of the part from the plans in the correct scale, gang them together, and use a 6 inch disc sander from Jim Byrnes with fine sand paper and grind to shape them. Works great for convex curves and straights. Concave cuts are more challenging. I grind as much as I can using the edge of the sanding wheel and finish by hand. If I wasn't so lazy, I would rig up a drum sander on my drill press and use that for the concave curves. To Endeavour tops: All the bottom mast tops rest on the cheeks. The top mast tops appear to rest on the hounds of the top masts. I had to take the hounds off the topgallant masts to get them through tops. Also had to pair down the foot of the top gallants to fit the top. I hope this is correct. Regards
-
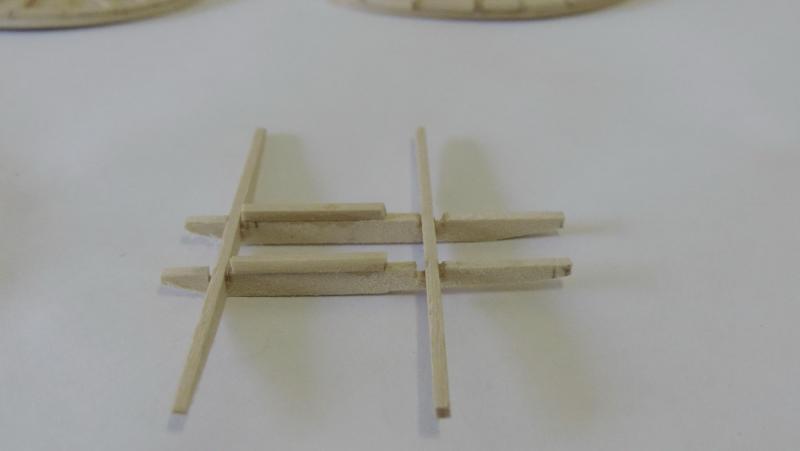
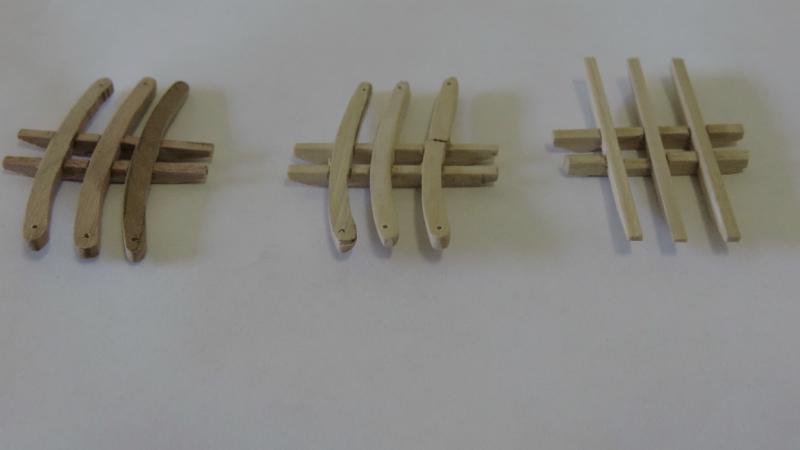
Thanks E J for your words of support. You feel as I do about this subject. Now for a update on the photos: Went to the shop this AM mumbling to myself and looked at the tops again and low and behold there was no mistake. They were all made with the same sized stock for the battens. Now for sure I really think I am loosing my mind. Back to the pictures and it looks like there was a focus difference between the shots. Photography is definitely not my strong suit. All's well that ends well. Greg Lester: the nightmare is here. Do you have a URL for you build? I am having trouble locating it. Regards,
-
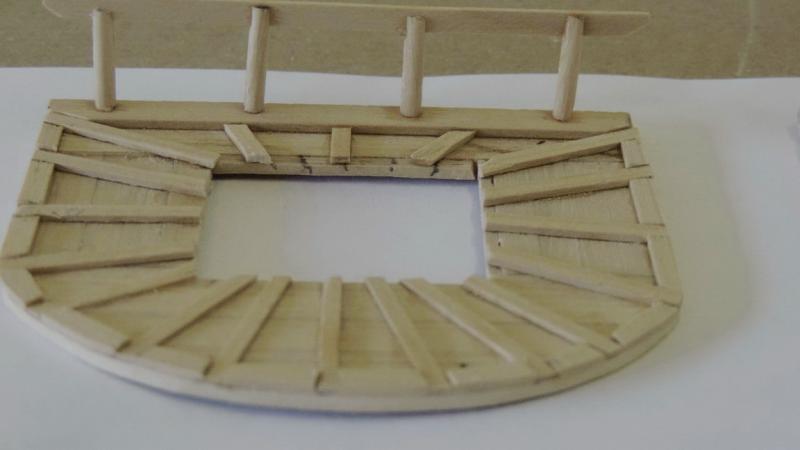
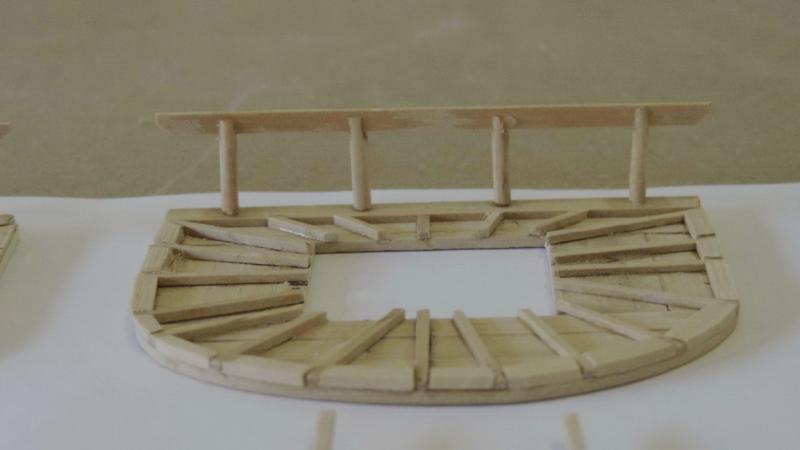
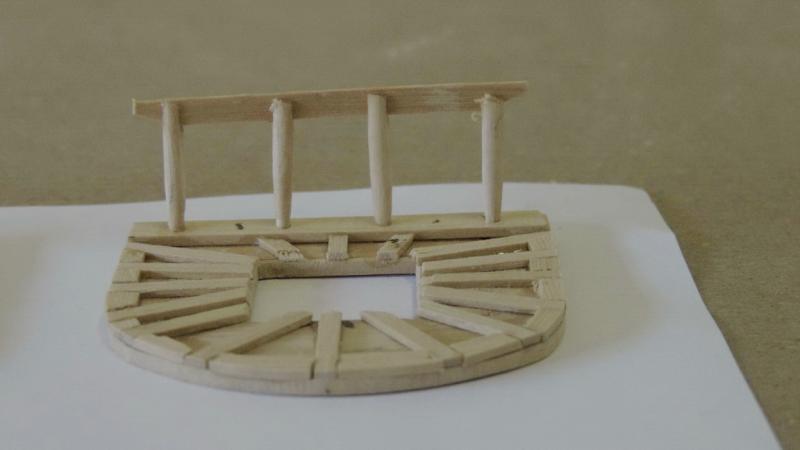
Another update Finished building the trestle trees, tops and spreaders this week. All that remains is to sand them and drill the appropriate holes. This was a much bigger job than I thought it would be. The battens almost drove be nuts. I guess this portends that the rest of the build, i.e. masting and rigging and armaments will be very challenging to say the least. I wish my skills were better, but this is a learning experience and when it's done the small defects should be barely noticeable. Flat black paint is a wonderful enhancer. Regards
-
Dave, I am relying on your build of the tops. My eyes cant get all the details in the AOS plans. Yours are superb. Regards
-
E J, I totally agree with what you are saying about adding the appropriate items as to time and building practices. But, even more, if it looks right, it's right. Regards
- 608 replies
-
- la couronne
- corel
-
(and 1 more)
Tagged with:
-
Here we are back again with an update. I carved the hull to the profile using the station profile templates. This was a much more difficult task than I had anticipated. Carving end grain is absolutely brutal even with a pair of the finest wood chisels you can buy. I wound up over carving at the bow. I thought that beginning at the bow would be the best method. Wrong. After mangling the bow I moved to the amidships area where the greatest beam lies, and worked fore and aft from there. This gave a much better result. A little over cutting here and there was expected. That’s why I purchased the large size of Elmer’s Wood Filler. One of the issues that I ran into was that I tended to lose track of the keel while I was carving. I don’t have the flat 1/16th wide strip at the bottom of the hull that is need to attach the keel. As soon as the wood filler dries and is sanded down to match the hull. I am going to install a keelson and blend this into the hull with wood filer where needed and then sand to the final profile. Once this is done. I will cut the 1/16th rebate for the blanking. The attached photos show the end product of the carving and the first sanding and with the first wood filer treatment. It's amazing what a good camera will do.
-
Hervie, I think you've got it. We all have good sides and better sides- not to worry. The small defects that you know are there are not going to be very noticeable when the ship is complete. Many of them will be under or visually blocked by something added later on in the build. Keep the faith you're doing great. Regards
-
Hervie, The frustrations you are feeling is something we all feel. The notched plank is one of the hardest things to accomplish well in building a gunboat. The method I use is not that different from EJ's. I take a number eleven blade, and, with the plank standing edge, push the blade to a depth that will get the notch to where you want it on both sides. Then I pare the plank back to the notch starting about 1/4 of the way across the opening. Do this on both sides. If you have to have a deeper notch repeat this process. Then take a sanding stick the width of the opening and smooth the cutout section. Since you are simulating the plank butts, I would do real butts on this plank so if you make a mistake in cutting, you only trash a short piece. Do the same on the top plank as well. There will be no butts between the gun ports since they all end on a frame. On the flats, where there is no bending involved, glue all of that sections planks together off the model and then trim to final length at both ends. This will give you the smoothest set against the gun port opening. I hope all this helps Regards
-
Steve, Thanks I seem to have overlooked that fact. I will probably remove the hounds and taper the mast more then reinstall them. Regards
-
Ah, leave the hoops. They look good. A little artistic license is ok. Full disclosure: I made hoops also. Regards
About us
Modelshipworld - Advancing Ship Modeling through Research
SSL Secured
Your security is important for us so this Website is SSL-Secured
NRG Mailing Address
Nautical Research Guild
237 South Lincoln Street
Westmont IL, 60559-1917
Model Ship World ® and the MSW logo are Registered Trademarks, and belong to the Nautical Research Guild (United States Patent and Trademark Office: No. 6,929,264 & No. 6,929,274, registered Dec. 20, 2022)
Helpful Links
About the NRG
If you enjoy building ship models that are historically accurate as well as beautiful, then The Nautical Research Guild (NRG) is just right for you.
The Guild is a non-profit educational organization whose mission is to “Advance Ship Modeling Through Research”. We provide support to our members in their efforts to raise the quality of their model ships.
The Nautical Research Guild has published our world-renowned quarterly magazine, The Nautical Research Journal, since 1955. The pages of the Journal are full of articles by accomplished ship modelers who show you how they create those exquisite details on their models, and by maritime historians who show you the correct details to build. The Journal is available in both print and digital editions. Go to the NRG web site (www.thenrg.org) to download a complimentary digital copy of the Journal. The NRG also publishes plan sets, books and compilations of back issues of the Journal and the former Ships in Scale and Model Ship Builder magazines.


