-
Posts
483 -
Joined
-
Last visited
Content Type
Profiles
Forums
Gallery
Events
Everything posted by ca.shipwright
-
Nice work Darrell. I'm just about where you are on the HMB Endeavour. Things move rather slow now. A? What is the purpose of the upper brass rod and gear on the Syren Serving Machine It looks like the lower gear and handles do all the work. Am I missing something? Thanks
- 648 replies
-
- niagara
- model shipways
-
(and 1 more)
Tagged with:
-
Fantastic job. I am totally entranced with your stand. Is that a map of the world from the Endeavour years? Regards
- 517 replies
-
- Endeavour
- Artesania Latina
-
(and 1 more)
Tagged with:
-
Yancovitch, The GRAND DADDY of all la Couronnes!! Awesome. Regards
- 213 replies
-
- la couronne
- 74 gun
-
(and 2 more)
Tagged with:
-
EJ, Get the Byrnes' table saw and the thickness sander. With those two, you will never again have to buy milled lumber. There is a log called "Can I Live Without a Byrnes' Table Saw." It has some very interesting comments. It resides in the Tools and Equipment Forum. Regards
- 608 replies
-
- la couronne
- corel
-
(and 1 more)
Tagged with:
-
EJ, Definitely pin them. Glueing end grain is always risky. Just think of the catastrophe when a bit comes up after you installed all those lines on the pins and are doing the last one. Regards
- 608 replies
-
- la couronne
- corel
-
(and 1 more)
Tagged with:
-
Rowan, I had the same thing. It manifested itself by my missing my mouth with the fork when eating. I had to have surgery. The problem resolved itself. A lot of physical therapy exercising the arm using a resistance band and squeezing a rubber ball brought strength back rapidly. Good luck with your recovery. I look forward to your log continuing. Regards
-
?? What size brass pulley would you use for sheaves and cathead in 1:60 scale? Thanks
- 608 replies
-
- la couronne
- corel
-
(and 1 more)
Tagged with:
-
I haven't tried it, but, it seems like starting with a fat tooth pick or a wooden kabob skewer might make fabricating belaying pins a lot easier than trying to turn down a piece of wood. I will let you know how this comes out. Regards
- 608 replies
-
- la couronne
- corel
-
(and 1 more)
Tagged with:
-
Hervie, Look up this build log and go to page 24. Scroll down and you will see a picture of a modified binder clip used to clamp planking to bulkheads. I've also used these very effectively. Sorry, I can't get the picture to paste in. Dunbrody Irish Famine Ship by Mahuna - 1:48 Sectional Model Regards
-
It just doesn't get any better than that!
- 648 replies
-
- niagara
- model shipways
-
(and 1 more)
Tagged with:
-
Snipped off wires. Wow! Some things are really complicated. Thanks Jesse
- 1,306 replies
-
- syren
- model shipways
-
(and 1 more)
Tagged with:
-
Jesse, Your gratings are beautiful. How did you get the metal corners on the rope locker grating to come out so realistic? This is probably an item that I would have never considered modeling. Way beyond my skill level. Regards
- 1,306 replies
-
- syren
- model shipways
-
(and 1 more)
Tagged with:
-
David, How did you stain your masts without getting the stain all over the tan bands? Thanks
-
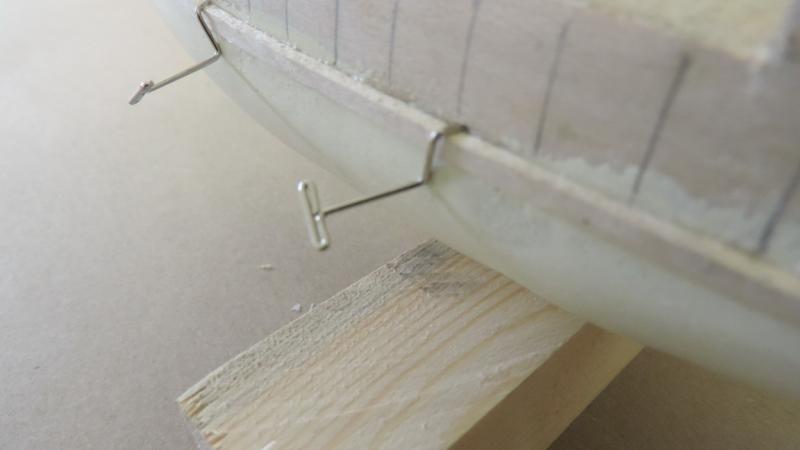
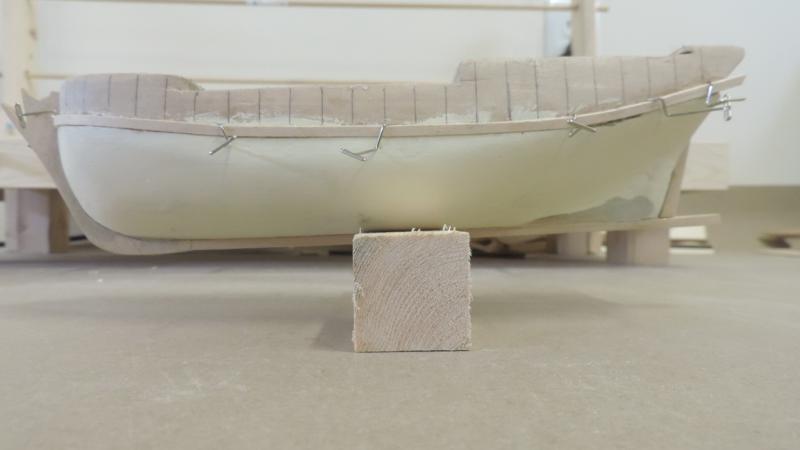
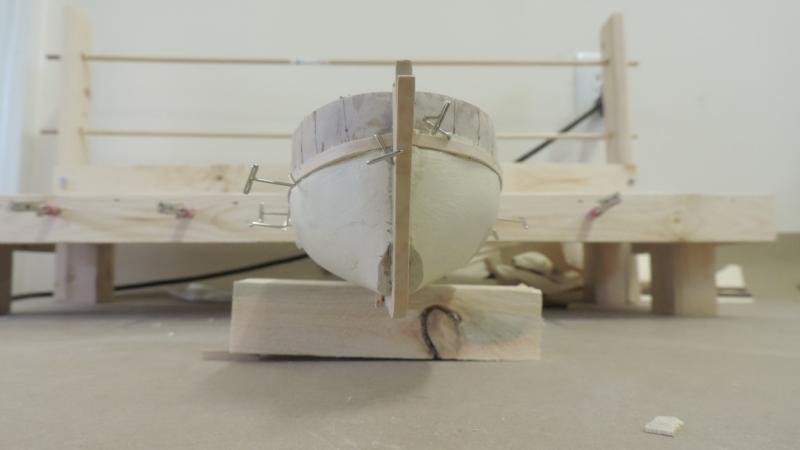
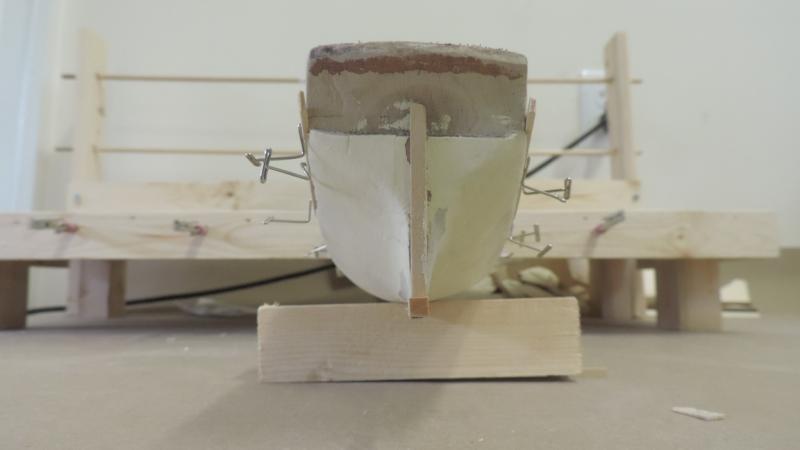
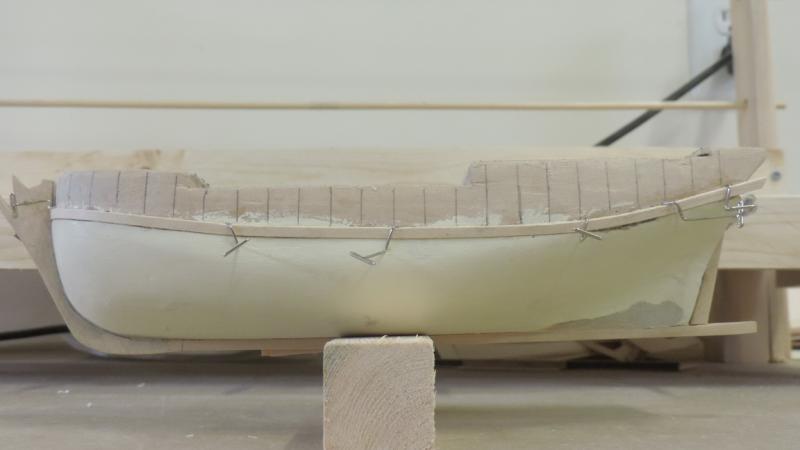
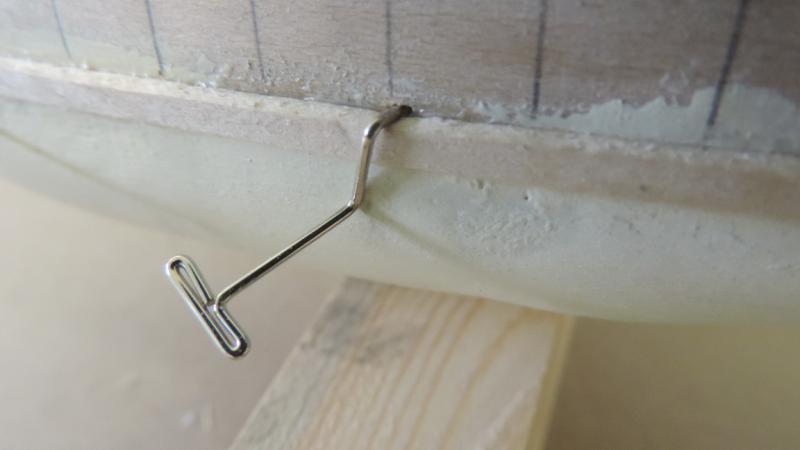
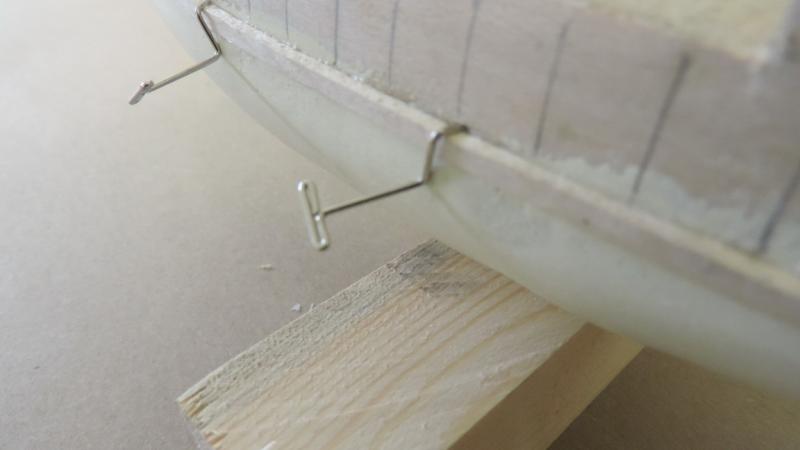
Hello again, Time for another report. Working on Sultana and HMB Endeavour simultaneously means both move kind of slowly. The last photo was the first of several wood filler corrections. Several followed and now am within 1-2 mm on the critical measurements. I’m pretty well satisfied at this point until something shows up that will not mate like it is supposed to. Carved the 1/16th inch rebate down to the lower wale. Almost got it perfect. Another small touch up job for the wood filler. Painted the hull below the rebate with an acrylic tinted to get the tallow color. Not too bad a match but I may wind up painting the bottom white. Installed the keel, stem and rudder post. I made them out of boxwood. I like the edge-holding property of boxwood more than basswood. Started bending planks using a jig. This is not an easy chore with the 1/8 x 1/16 basswood. The well soaked strips have a tendency to kink in the curve. We’ll work it out. Managed to get the first planks installed P & S; marked the planks as per John’s practicum. Again, the symmetry not perfect but good. A little filler on the seam and all will be well. I am using the bent T-pins to hold the planks down as the glue dries as shown in the photo. Very easy to do with basswood. Not sure how easy they would be on a plywood bulkhead. They work well with double planked hulls as well because you can pin them anywhere on the 1st planking. In the photos, it looks like Sultana has a little list to starboard. This is due to the slot in the stand being slightly oversized. Also it looks like there are flats near the stem and stern post. This is filler where final touch up sanded through the paint, an optical illusion.
-
Amen Yancovitch! E.J.- I also use your #2 method. I had trouble keeping the eyes the same using the rounded pliers so I switched to wrapping the wire around a drill bit of the diameter I wanted; grabbed the 2 ends of the wire in my right hand and rotated the drill bit with my left hand. Works like a charm. Either way, these are probable the strongest eyebolts you will ever need. I make 20 of these a day to warm up my fingers for the days work. Regards
- 608 replies
-
- la couronne
- corel
-
(and 1 more)
Tagged with:
-
Can i live without a BYRNES TABLE SAW
ca.shipwright replied to shihawk's topic in Modeling tools and Workshop Equipment
Thanks Kurt- I actually have those Ship Notes Vol. 1. I Purchased them at the Queen Mary NRG meeting years ago. -
A clean desk is the sign of a very sick mind.
- 1,306 replies
-
- syren
- model shipways
-
(and 1 more)
Tagged with:
About us
Modelshipworld - Advancing Ship Modeling through Research
SSL Secured
Your security is important for us so this Website is SSL-Secured
NRG Mailing Address
Nautical Research Guild
237 South Lincoln Street
Westmont IL, 60559-1917
Model Ship World ® and the MSW logo are Registered Trademarks, and belong to the Nautical Research Guild (United States Patent and Trademark Office: No. 6,929,264 & No. 6,929,274, registered Dec. 20, 2022)
Helpful Links
About the NRG
If you enjoy building ship models that are historically accurate as well as beautiful, then The Nautical Research Guild (NRG) is just right for you.
The Guild is a non-profit educational organization whose mission is to “Advance Ship Modeling Through Research”. We provide support to our members in their efforts to raise the quality of their model ships.
The Nautical Research Guild has published our world-renowned quarterly magazine, The Nautical Research Journal, since 1955. The pages of the Journal are full of articles by accomplished ship modelers who show you how they create those exquisite details on their models, and by maritime historians who show you the correct details to build. The Journal is available in both print and digital editions. Go to the NRG web site (www.thenrg.org) to download a complimentary digital copy of the Journal. The NRG also publishes plan sets, books and compilations of back issues of the Journal and the former Ships in Scale and Model Ship Builder magazines.


