HOLIDAY DONATION DRIVE - SUPPORT MSW - DO YOUR PART TO KEEP THIS GREAT FORUM GOING! (Only 69 donations so far out of 49,000 members - Can we at least get 100? C'mon guys!)
×


ca.shipwright
-
Posts
483 -
Joined
-
Last visited
Content Type
Profiles
Forums
Gallery
Events
Everything posted by ca.shipwright
-
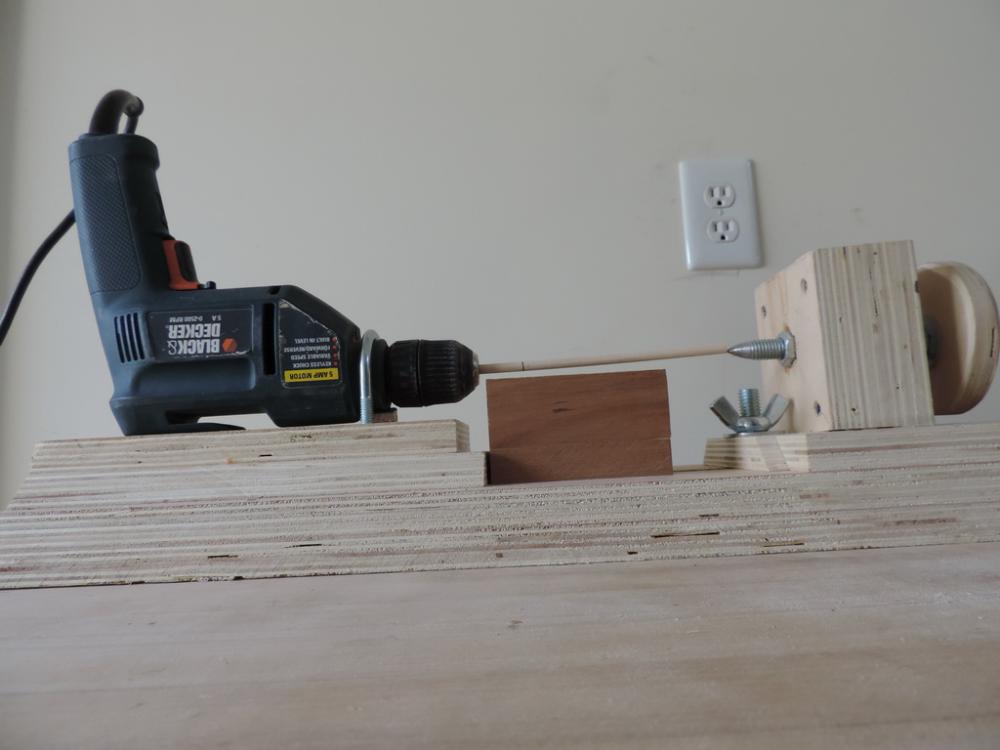
 The lathe has a problem of splitting the dowels at the tail stock end. I am going to make a bunch of blocks out of hardwood, drill holes the sizes of the dowel diameters, Insert the dowel and use this against the tail stock. As an alternative, I may just wrap the end of the dowel in duct tape and see what happens. Any other suggestions would be appreciated.
 -
E J Check this out on eBay: Mini Precision Multi Function Milling Machine x-y axis Coordinate Table Seller is hank xu $40 includes shipping I think
-
Funny, Building the platforms and tressel-trees is what I am doing yesterday and today. Yours are looking good. Did you alter the mast caps from Corel use them as supplied or make your own?. I get the pulling the top masts through the, but, the hounds get in the way. Only alternative is to bore out the round hole to a larger diameter. I don't know if the cap will take this. I may have to band the cap with wire to keep it from splitting. Any other suggestions would be greatly appreciated. Regards
-
Hi E.J. Your La Couronne is coming out great. I have this ship and I may put it in the ways next, after I complete the Endeavour. As for expensive, it's relative. You buy a kit for oh, $500. Then you spend half again to build it. Now were up to $750. Just for the h..l of it, buy $250 of new tools- you know gotta have 'em. So now were up to the magic number, $1000. So off we go, and, in 2 or 3 years or 2-3000 hours later we finish the kit. I just don't know many things I can do for 50 cents an hour. Please chime in with comments if you care to. I have an Endeavour build log and a Sultana build log. Regards,
- 608 replies
-
- 7
-

-
- la couronne
- corel
- (and 1 more)
-
Outstanding!!!
-
I am getting ready to put the starboard chain plates on my Endeavour. I took a break after the port side to do some of the masts and bowsprit. I too am getting close to the rigging. Regards
- 648 replies
-
- 3
-
-
- niagara
- model shipways
- (and 1 more)
-
Darrell, I'll give you an alternate solution that may be of use. 1. Start with a piece of wood fairly oversized as to what the finished product will be (l x w). If you are making several of this item, the thickness should be that number of the item times 2. 2. Drill your hole. 3. Finish the outside by sanding, filing or what ever else you usually do. 4. Slice off the completed parts like from a loaf of bread. Alternatively, reverse steps 2 and 3. This will give you extra pieces. We all know that many will make it to the dump. There is also a type of drill bit called a brad point bit. This is a wood working bit that has a spike in the tip that will act as a starter and has a more flat angle to prevent rip out. I find that I don't need the as much pressure when I use this bit. Hope this helps
- 648 replies
-
- 4
-
-
- niagara
- model shipways
- (and 1 more)
-
Dave, Thanks for answering. Steve's explanation is right on with some great photos to boot. See my response to Steve it you want a chuckle. Regards
-
Hi Steve, A most clear explanation. Thank you. I got as far as the bottom section going up through the cap. But what threw me was the bottom of the top mast is also square. How did the hounds get through a small hole pulling it up ? Or, did they put the hounds on after- I think not. It never occured to me to take the simplest solution of making the mast cap hole larger. You gotta love it! Regards
-
Darrell, Another way that might work is to strop the deadeye with wire, twisting the tails tight. This wire frame may give the deadeye enough support to prevent breaking while you drill it out. Hope this helps Regards
- 648 replies
-
- 3
-
-
- niagara
- model shipways
- (and 1 more)
-
Hervie, From what I remember from my plastic model days, lacquer is solvent based. That always made a mess to clean up. Also it gave a high gloss finish like on automobiles. This type of finish really doesn't look good on wooden ship models. On wooden ship models, most folks strive for a dead flat finish. At most I will finish with a coat of satin Wipe on Poly which will give the finish some luster but not gloss. Hope this helps Regards
-
Victory by ronald305 - Mantua/panart - #782/738 build logs
ca.shipwright replied to ronald305's topic in Wood ship model kits
Steve, Ronald Sorry for the delayed response. I just ran across your messages Here is the URL for the Lauck Street shipyard forums: http://www.lauckstreetshipyard.com/lssf-x/index.php?sid=cc419b0ab9863feb7ede006f4aa90152. You will have to ask him to enroll you as member. After he does this: On the index page go towards the bottom and you will see practicum forums. Under Alternate Junior Course and you will see the Victory Open the HMS Victory and you will see many builds. These are not build logs per se, they are more like q&a's. The practicum you can purchase, Bob Hunt runs specials all the time, it is like having a private tutor. It is indespensable for building this kit. Good luck with your builds Regards -
Hervie, I'm like you. I do the best I can with the hope that the finished model is a pleasing to the eye, well made with crisp lines. If I learn new skills, more the better. It still amazes me that the only thing a visitor sees, and, the first he mentions when he looks at one of my models is the rigging. For painting: A good set of brushes. Several thin coats rather than one thick coat. Sometimes I thin the paint to the consistency of a color wash. Water based acrylics clean up with soap and water; no need for solvents. Prime the hull when you finish planking. It will help show any defects which can be fixed with filler. For inexpensive paints, I go to Lowe's paint department and get the color I want in a sample with acrylic flat base. Pick any color they have on the chips in the store. Costs about $4.00 and you'll have enough to paint the rest of you models forever. I have tried air brushing and the effort was not worth it. Hope this helps Regards
-
Hello David, I am at a loss with regard to how to handle the mast caps. The bases and tops of the upper and topgallant mast sections are all squared off while the majority of the sections remain round. The Corel supplied mast tops have 1 square and 1 round hole. My thinking is that the square bottoms of the upper mast sections fit into the trestletrees. Other than cutting the mast caps in half, how do you get the square peg through the round hole? Or, am I not reading the plans correctly? Thanks
-
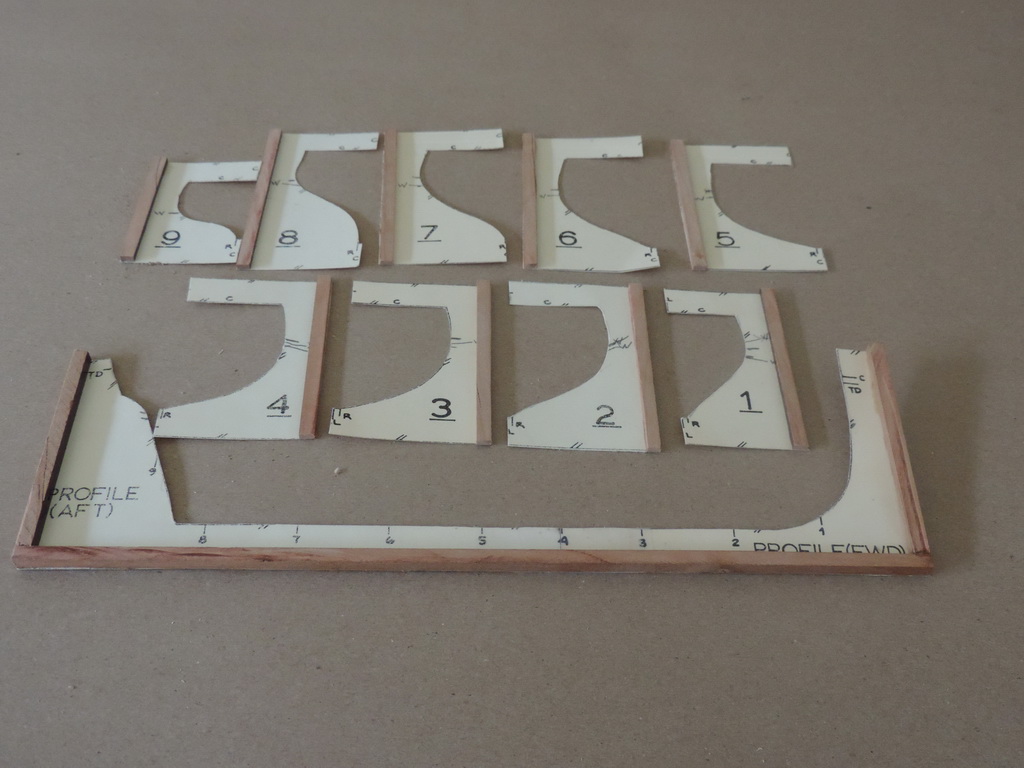
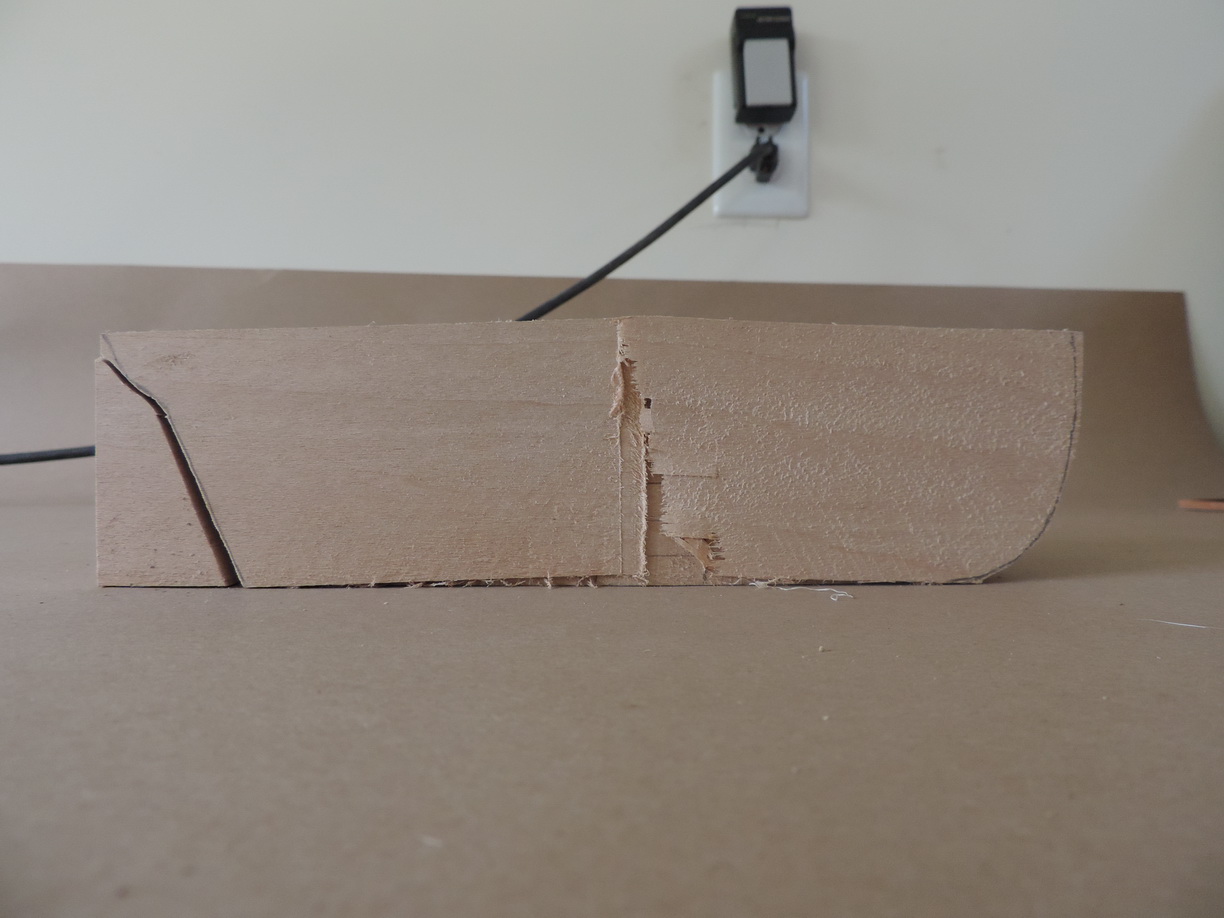
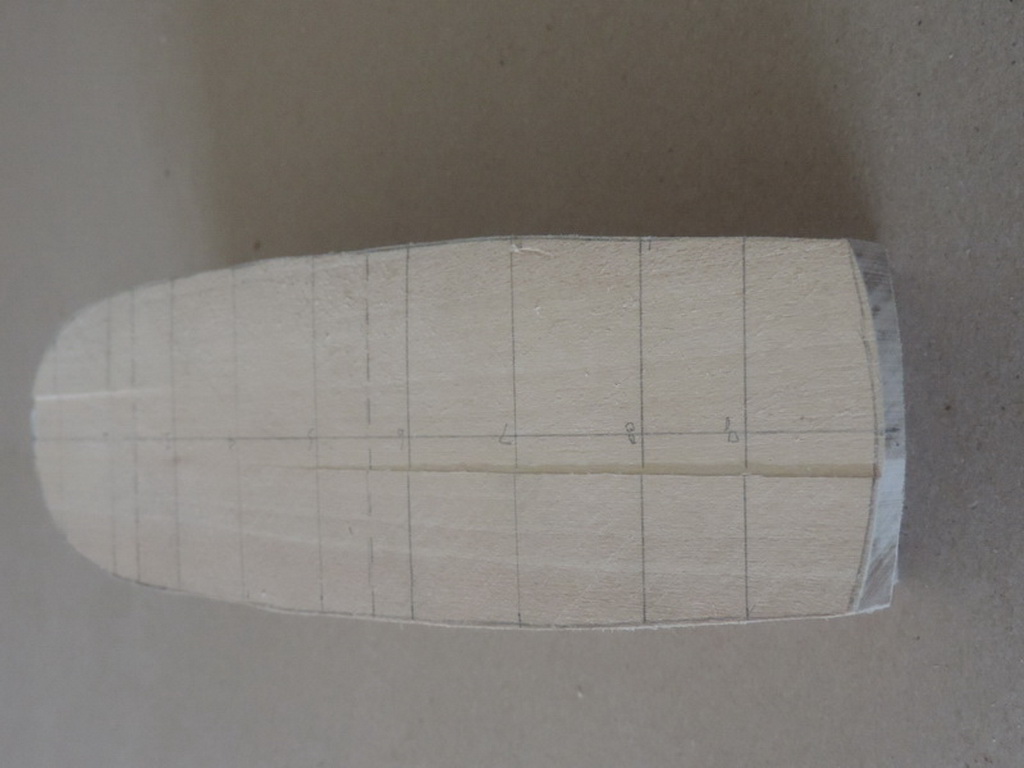
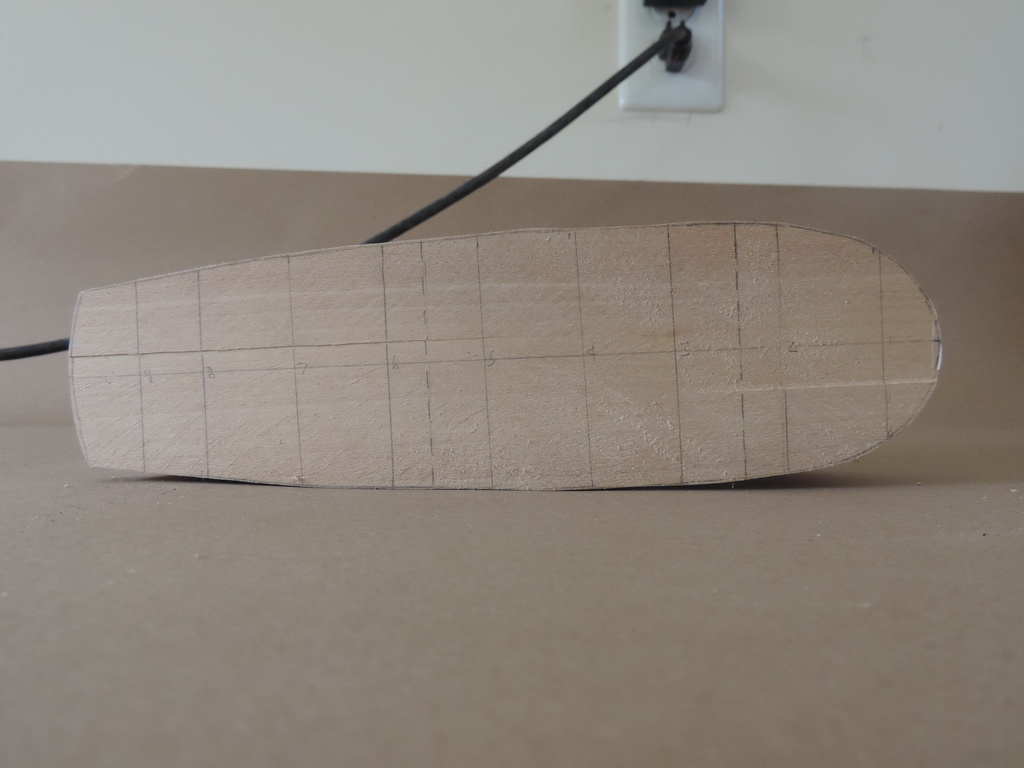
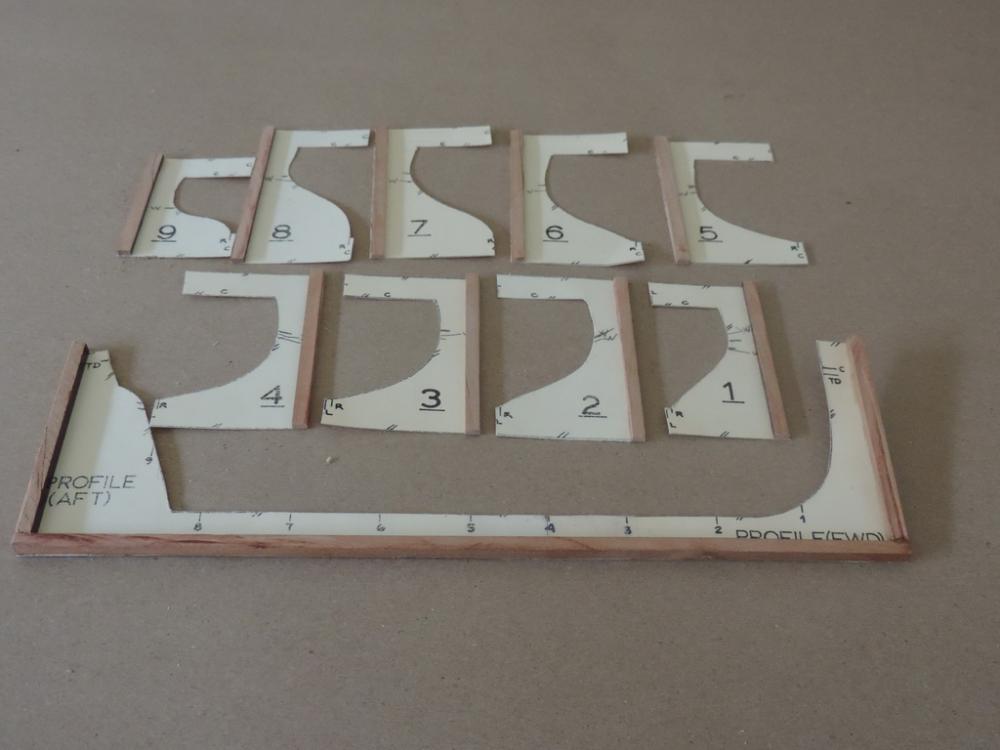
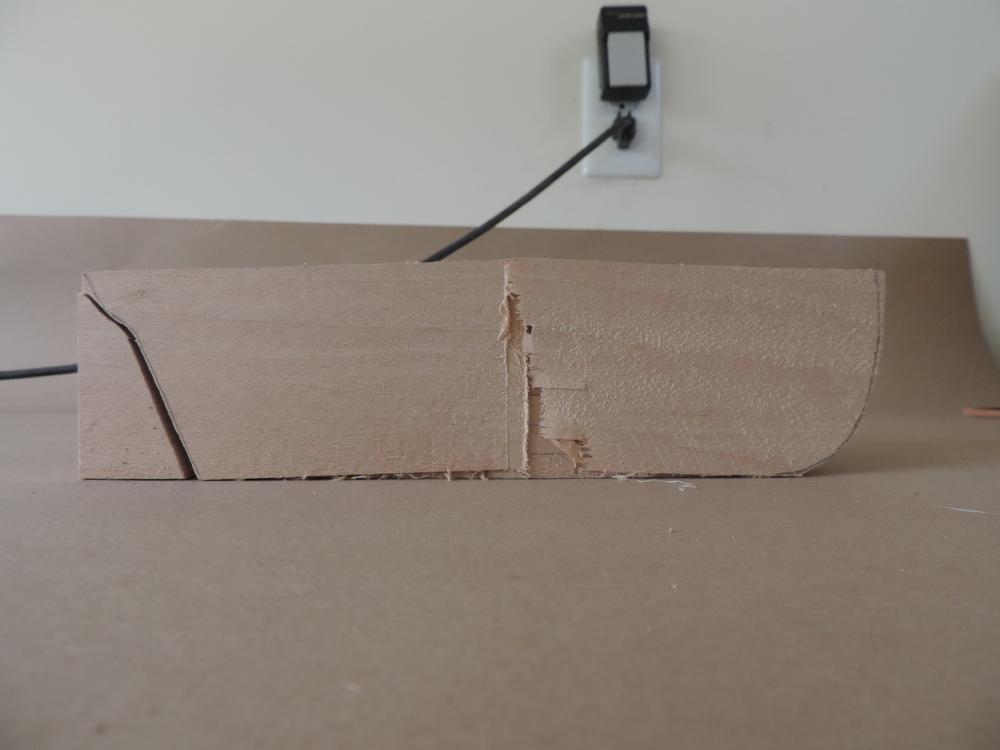
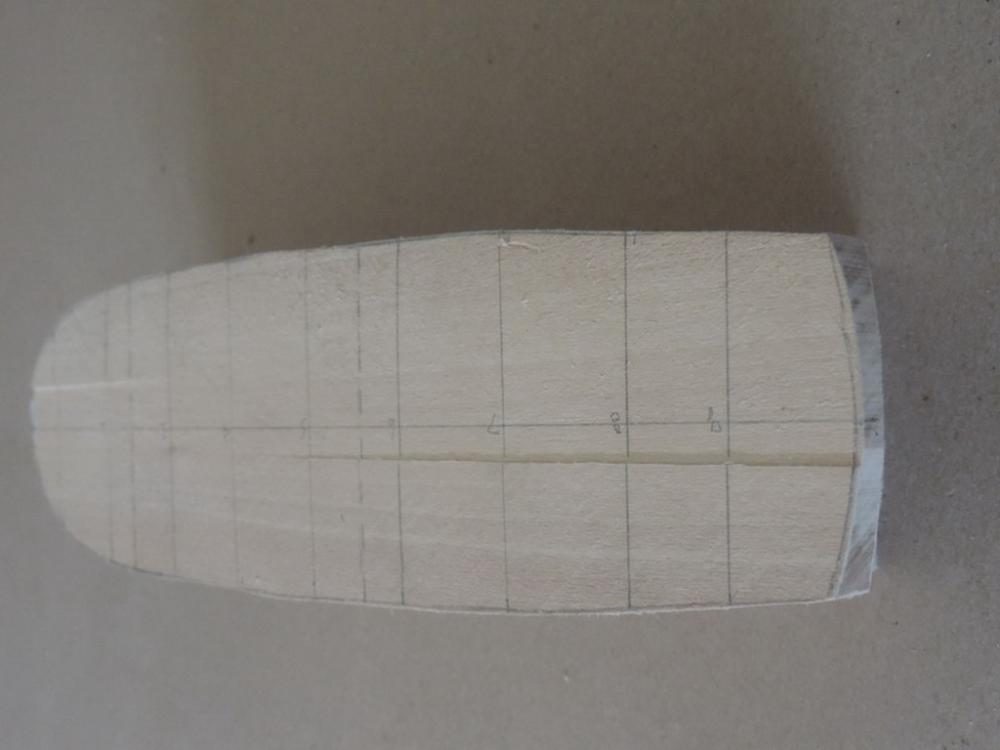
Greetings, Several years ago I bought the Model Shipways Sultana. I butchered the first hull and Model Shipways was nice enough to send me another gratis. I proceeded to butcher that hull as well So, the Sultana went on the shelf to fight with me another day. Then I went into plank on frame construction and am having a ball. I am building HMB Endeavour, 1:60, by Corel. I have a log ongoing here. While perusing the Model Ship Builder site, I discovered Charlie Zardov’s Sultana log. He is doing a beautiful job. I also found Chuck Passaro’s practicum. The juices started to flow , and, I needed a break from the masting and rigging of Eneadvour. But, I just couldn’t get myself to ask MS for another hull. So, I decided to build the hull from scratch out of a block of bass wood. As Jack Nicholson said in the movie As Good as it Gets, “I know I can do this”. Now we begin: Since I had all the templates cut from file folders from the previous attempts, I had a nice head start. I laid out the profile view and the deck plan on the block, as well as marking the center line on all 4 surfaces and the station lines. I cut out the profile first so I would have a flat surface (keel to be) to cut out the deck plan. The band saw did a very nice job. The next step was to locate the top of deck line. There is really only one reference point that is reliable for measuring the height of the ship's lines. and that's the keel. By using a combination of the profile view and the inboard bulworks view, I was able to get the top of the deck line at the edge of the deck. Then measuring the camber drop from the plans and adding this to the edge deck line, I was able to get the top of deck line on the centerline. Now, it’s time to start carving. I am going to start with the area between stations 4 and 6. This is the widest beam and the gentlest curve on the hull so there will be less wood to remove. Some photos below. Also a picture of a homemade mini-lathe using an electric hand drill as the motor and head stock. It works pretty well. Courtesy of U-Tube.

-
Dave When the model railroaders add items to the stock cars and engines they call it super-detailing. Your super detailing of this kit is utterly amazing. Regards
-
Can i live without a BYRNES TABLE SAW
ca.shipwright replied to shihawk's topic in Modeling tools and Workshop Equipment
How long slitting blades will depend a lot on what wood you are milling. Basswood, and other soft woods and the blade will last almost forever. Ebony about 20 minutes. (a note- ebony dust is toxic and you should use a mask or respirator). I mill a lot of boxwood and walnut and I get several months out of the .040 blade, less if I am too lazy to put in the .020 blade. I never have had any luck sharpening the slitting blades. I just order more. You cannot buy a better machine then what Jim makes. Period. Remember, a good tool becomes an heirloom. -
Hervie I know what you mean about the iPhone camera. I jumped onto eBay and found a Nikon P520 that was near new for about half price. Now I can get some detail in my pictures. Although, I am not sure I want to share that level of details given my skill level. Keep up the great work. Regards
-
Charlie, Great work. Watching you build your Sultana stimulated me to get mine off the shelf and give me some easier work as I do the masting and rigging of my HMB Endeavour. I have already ruined two of hulls that Marc Mosco was kind enough to replace. I am embarrassed to ask for another replacement. So, I am carving the hull from scratch out of a block of basswood. Could you explain how you transfer the plans to the program on your computer (which one), I get the scanning in part, and how you deliver it to the laser cutter. Or, better said, what you need to take over there. I knowl with about CAD. I'll put up a build log as I go. Formerly of Forrest Hills
-
I wish I had taken metal shop in high school instead of plastics. Well done Hervie!
-
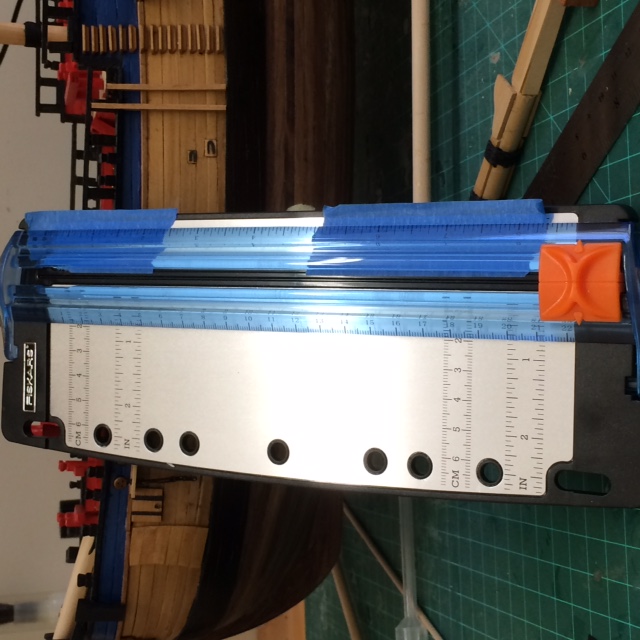
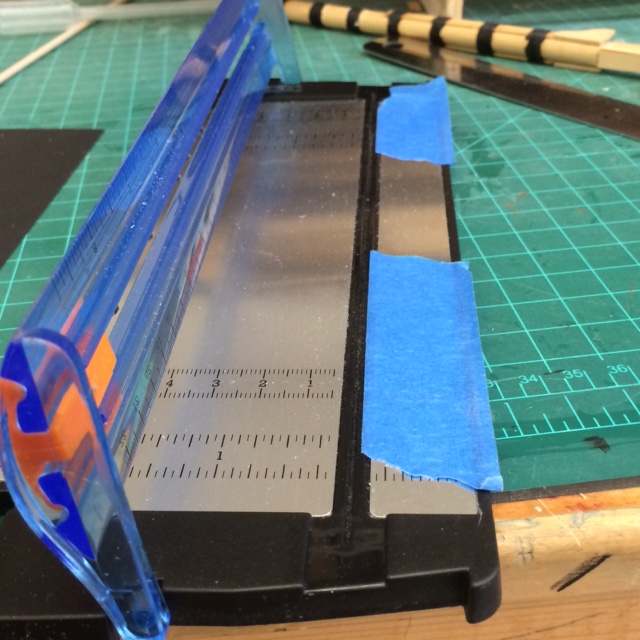
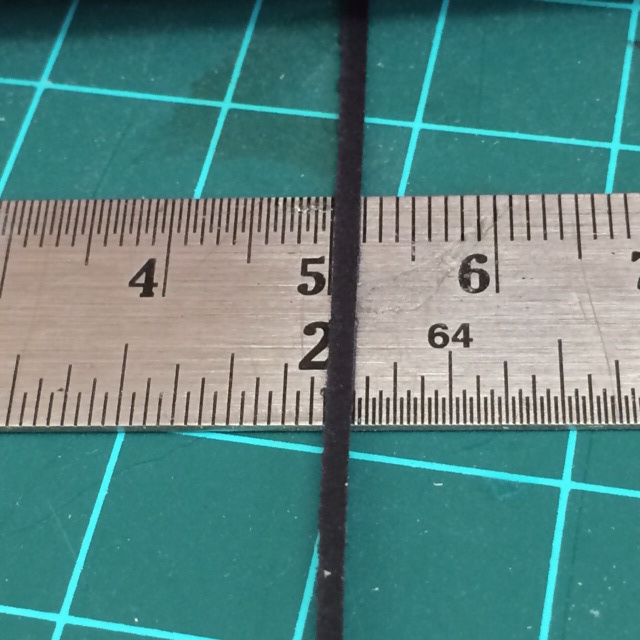
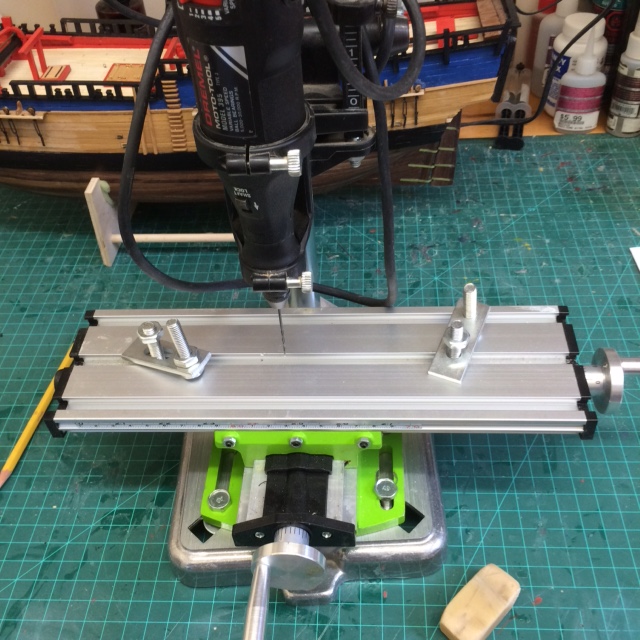
Two items that I have found useful. 1st is a rollerball paper cutter. It will cut strips down to 1 mm. The scale is too far away from the blade, so I put on a fence using masking tape. Worked like a charm. The second item is an x-y table that mounted on my Dremel Drill press. Works great for drilling a straight series of holes. Inexpensive. About $40 from eBay in China. Photos attached
-
Jesse, I used to do furniture building and other macro wood projects. I made 3 foot blanket chest with hand cut dovetails. A most rewarding project for my wife. I also find the Dremel to "strong" for freehand use. I found more use for it mounted in a drill press or some other contraption. Regards
- 1,306 replies
-
- 7
-
-
- syren
- model shipways
- (and 1 more)
-
Folks an observation: We always seem to find a few parts missing from the kits we buy. When we find them depends on where in the construction process they are needed. Then we call and wait for the part to arrive. BTW Model Expo is just awesome in filling replacement orders for missing, lost, or broken parts for their kits ( no commercial interest.............). This being said. How many of us have the discipline to inventory a new kit from the enclosed parts list before beginning to build. Or, for that matter, read the instructions start to finish to see how construction progresses. I know I would save myself an awesome amount of time and reduce my frustration level significantly if I would only follow this simple dictum. Maybe next time for the Syren. Regards
-
E.J., That's why I build masts or deck furniture when the work gets to repetitive. Ships boats are also a nice diversion. Regards
- 608 replies
-
- 4
-
-
- la couronne
- corel
- (and 1 more)