-
Posts
483 -
Joined
-
Last visited
Reputation Activity
-
 ca.shipwright got a reaction from cristikc in HMB Endeavour by ca.shipwright - Corel - 1:60
Hello everyone,
It's been a while since I posted in my own log. It seems that all the interesting stuff is happening else-ware and so are my posts.
I finally finished the first planking, filled the defects, sanded, filled the defects, sanded.....Then looking at AOS and the hull back and forth I found that the light ports were misplaced on the hull, Corrected this and filled and sanded. Seems that is my theme song. I am very well satisfied with the shape and fairness of the hull. It is nicely symmetrical port and starboard, the sheer is very good. It does have a slight twist in the stern. Hopefully when all is said and done this won't be so obvious. She does list a bit in the build board- just alittle loose
I liked the idea of putting a mortise on the thick plank just above the light ports. Cut the mortises on the table saw and glued this plank on port and starboard sided up to the bow bend. I have some timber soaking getting ready for the bow bending. This should be fun.
I am going to install the wales next with a 3/32 thick plank as the base and then do the anchor stock veneer in boxwood. This is if my test model of the wales comes out decently.
I want to lay individual planks and I think a 4 inch plank to simulate 20 feet should work. Please share any thoughts you have on any of the things I have mentioned. I want to say I am not too proud to use any of the tricks that are posted in the forum.
Here are some pictures for today.
Have a great day!
-
 ca.shipwright got a reaction from DaveRow in HMB Endeavour by ca.shipwright - Corel - 1:60
Hi Chris,
Thanks for the great collection of Endeavour photos. I will add them to my collection. She sure looks small in the drydock,
One thing that I can see from the photos assuming the replica is close to the original, is that the Corel kit has taken many liberties. Non to the better.
the stern is especially well off the replica . Corel shows a lower counter that the hull planks end at. The replica shows the planks tucking right under the counter.
I'm going to have to live with this. Too far along to rip out.
I was fortunate enough to visit the replica in Oxnard, California on it's around the world cruise. Crawled around the lower decks on my knees after hitting my head on the overheads one time too many. The sailors in those days must have been a lot shorter.
Regards
-
 ca.shipwright got a reaction from maggsl_01 in Endeavour by maggsl_01 - FINISHED - OcCre - 1:54
Max,
Superb!
-
 ca.shipwright got a reaction from Dimitris71 in Endeavour by maggsl_01 - FINISHED - OcCre - 1:54
Max,
Superb!
-
 ca.shipwright got a reaction from EJ_L in HMB Endeavour by ca.shipwright - Corel - 1:60
Hello everyone,
It's been a while since I posted in my own log. It seems that all the interesting stuff is happening else-ware and so are my posts.
I finally finished the first planking, filled the defects, sanded, filled the defects, sanded.....Then looking at AOS and the hull back and forth I found that the light ports were misplaced on the hull, Corrected this and filled and sanded. Seems that is my theme song. I am very well satisfied with the shape and fairness of the hull. It is nicely symmetrical port and starboard, the sheer is very good. It does have a slight twist in the stern. Hopefully when all is said and done this won't be so obvious. She does list a bit in the build board- just alittle loose
I liked the idea of putting a mortise on the thick plank just above the light ports. Cut the mortises on the table saw and glued this plank on port and starboard sided up to the bow bend. I have some timber soaking getting ready for the bow bending. This should be fun.
I am going to install the wales next with a 3/32 thick plank as the base and then do the anchor stock veneer in boxwood. This is if my test model of the wales comes out decently.
I want to lay individual planks and I think a 4 inch plank to simulate 20 feet should work. Please share any thoughts you have on any of the things I have mentioned. I want to say I am not too proud to use any of the tricks that are posted in the forum.
Here are some pictures for today.
Have a great day!
-
 ca.shipwright got a reaction from Cabbie in HMB Endeavour by DaveRow - FINISHED - Corel - Scale 1:60 - First Build Kit
Chris,
Anchor stock is the shape of the planks used in the wale of a lot of British ships. If you have the Endeavour or Victory AOS, the side view of the with the wale visible shows the shape and the interlocking pattern. The shape is very similar to what the wooden cross member on the anchor looks like. Thus "anchor stock".
It really looks nice if done neatly.It is quite difficult to do and raises the level of the completed ship considerably.
This is what it looks like.
Notice the peaks are not centered. They are usually about 2/3 of the width and about 2 1/2 times the width of the end which is usually half a plank width. You always need an even number of rows so you have a straight edge to continue regular planking runs.
I hope this helps
Regards,
-
 ca.shipwright got a reaction from Beef Wellington in HMB Endeavour by DaveRow - FINISHED - Corel - Scale 1:60 - First Build Kit
Dave,
You are setting a high bar for me. Your work is very impressive. The detail is awesome. I'm finally finishing up the 1st planking. Then on to the 2nd.
Regards
-
 ca.shipwright got a reaction from maggsl_01 in HMB Endeavour by ca.shipwright - Corel - 1:60
You are too kind and politically correct. They might want to rename the kit.
-
 ca.shipwright got a reaction from hamilton in Sultana by Byron – Model Shipways - Scale 1:64 - second ship build - roughly following Chuck Passaro Practicum
Hi Byron,
I also built the Sultana. It was my first wood model ship and came out just like a first usually does.. Your Sultana is very well done.
I have started the Corel Endeavour this month and have a build log under HMB Endeavour -Corel 1:60 - by ca.shipwright. You are absolutely correct when you say the written instructions leave a lot to be desired. However, after reading and following along on the plan sheets several times, I began to get the syntax they are using for English and they made a little more sense. A yellow highlighter is most useful on some of the ambiguities; as are noted in the margins, The plans are great, nice thick paper.not newsprint, and are scaled very close.
I am listing in my build log outright errors in the instructions and possible solutions,
The plans are historically incorrect. I use the Anatomy of a Ship HMB Endeavour by Marquarndt as my souorce for information. I reduce his !:48 drawings and enlarge his 1/96 and 1:72 drawings for making templates,
I'm sure all the Endeavour builders will welcome you log.
Good Luck,
Michael
-
 ca.shipwright got a reaction from Canute in HMB Endeavour 1768 by Cabbie - Artesania Latina - 1:60 - Kit Fiddle
Great looking deck. The caulking is perfect. For this item -caulking - less is more. What wood are you using for the decking and waterways?
Thanks
Michael
-
 ca.shipwright got a reaction from Anddav in HMB Endeavour by Andrew D - Artesania Latina - 1:60
Andrew,
Get yourself a wallpaper soaking tray and throw all the planks in there with water and let them soak a day. They will bend much easier especially around this blunt bow.
-
 ca.shipwright got a reaction from ronald305 in Victory by ronald305 - Mantua/panart - #782/738 build logs
Bob Hunt has opened the Practicum forums to anyone who is interested. I have his Victory practicum. I could not build the model without it.
No commercial ties etc.
-
 ca.shipwright got a reaction from Larry Cowden in HMB Endeavour by ca.shipwright - Corel - 1:60
More Pictures
-
 ca.shipwright got a reaction from EJ_L in HMB Endeavour by ca.shipwright - Corel - 1:60
More Pictures
-

-
 ca.shipwright got a reaction from EJ_L in HMB Endeavour by ca.shipwright - Corel - 1:60
Notes on the pictures (captions that didn't transfer over with pictures).
Bow blocks need a little filler at the bottom. The block of wood for carving the filler blocks was a tad short. But the came out well. You really need to keep visualize the bow curve when you carve them. The solid block is a better foundation the Corel parts.
Very happy with the symmetry and sheer of the hull
Stern view has a slight list to port. This will be corrected when we build out the covering.
-
 ca.shipwright got a reaction from Canute in Removing glued down planks (PVA Glue) question
Denatured alcohol will dissolve PVA. Soak the planks liberally and then pry then off as the glue loosens, Once you have them, off scrape the plywood to get any remaining glue off.
-
 ca.shipwright got a reaction from mtaylor in Removing glued down planks (PVA Glue) question
Denatured alcohol will dissolve PVA. Soak the planks liberally and then pry then off as the glue loosens, Once you have them, off scrape the plywood to get any remaining glue off.
-
 ca.shipwright got a reaction from mtaylor in Working Comfortably on Upper Rigging
Look for a captains chair in a second hand or Goodwill store for the Mastini booster. $5-10 tops
-
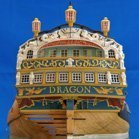
 ca.shipwright got a reaction from Siggi52 in HMS Dragon 1760 by Siggi52 - FINISHED - Scale 1:48 - English 74-Gun ship
When I visited HMS Victory, the canons in he great cabin were lined up against the outer hull.
I hope this helps
-
 ca.shipwright got a reaction from CharlieZardoz in Sultana by CharlieZardoz - Model Shipways - 1:64
David,
re: your May 10, 2015 post. I do believe you do have the template misaligned. On the aft view on the plans is a broken vertical line on the hull on what would be the rudder post. This is the centerline of the drawing. On the template, you will see a line C/L. That is also the centerline. The two should coincide. The little R on the template is the rabbet location. I would use the plan drawing only to identify to which station the template belongs. The hull shape is going to come off the template.
I know this post is a little late but hope it will cure some of the confusion.
Regards
Michael Z.
-
 ca.shipwright reacted to samueljr in Essex - Process and corrections to the new Model Expo Kit
I have been in contact with Marc at ME this week and will be sending down for production a final (hopefully) set of the bulkhead assembly.
Once these are produced and tested (again) that should be it. I'll drop them into the drawings, and amend the manual as need be. By that time I would have completed a final look over of the remaining laser parts as well.
My final submission to ME will be of a full set of laser parts. That way there shouldn't be any "cross contamination" of original and corrected files. It's up to ME to keep them straight in production. As I've said before the proto-type went together fine.
Based on ME assertions that they will be upgrading their ply I will maintain dimensions of the proto-type's 3/16" stock. I can't "chase" any future or possible stock discrepancies in dimension. That's a production issue - not design.
I have encouraged ME to maintain as high a possible standard in production of the castings and kit components moving forward. Although as with any designer I have no control over such matters.
I have discussed with ME a masting & rigging plan for the kit. It's future release is questionable. In the interim there is more than enough source material for a builder to rig ESSEX on their own.
As always I'm happy to help however I can but for now I am looking forward to my own builds, and to possibly designing future kits. Be it for ME or others.
I'll keep you posted
Sam
-
 ca.shipwright got a reaction from shihawk in Can i live without a BYRNES TABLE SAW
If you are into saving money, then buy the Jim Byrnes saw. It will pay for itself over time. Buy the thickness sander. It will pay for itself over time. If you buy it and don't feel you are using it enough, it will be easy to sell with out much loss.
It also comes under the heading of "build it and they will come"
-
 ca.shipwright got a reaction from WackoWolf in ebonizing boxwood
I have used a black jumbo waterproof Sharpie for ebonizing boxwood. I used 3 coats, letting them dry between applications. Then apply a rub on polyeurethane product. Buff out with a soft cloth. Of course, it's best if the wood has been cut and shaped to the finished dimensions before starting the ebonizing procedure. You can also do the same procedure with long pieces. You then cut them to finished size and touch up the edges. Either way worked for me.


