HOLIDAY DONATION DRIVE - SUPPORT MSW - DO YOUR PART TO KEEP THIS GREAT FORUM GOING! (Only 13 donations so far - C'mon guys!)
×


vossy
-
Posts
600 -
Joined
-
Last visited
Content Type
Profiles
Forums
Gallery
Events
Everything posted by vossy
-
 looks really beautiful. I ummed and arred about painting my riverboat hull I must say. I really like the natural timber color, but decided to paint as most of them were painted I believe, plus I have heaps of natural wood on the decks and as mine is a massive size I think the white hull breaks it up nicely. anyway back to yours, as I said, it looks fantastic. are her deck structures going to be painted, or left natural like the hull? also, for what its worth, with your trial naming decals, I actually like the bottom one the best; yes, even the dice. chris
 -
Holy!!! that boat is worth double my house! lol Can you post a close up of your glue sometime so I can maybe get a similar version down here? chris
-
hey, really cool. yes I would have definitely don't the keel first as well. so, above and below the current planking strips; does this get planked or covered as well? what sort of glue are you using to attach the wooden planks to the fibreglass hull? really looking super dave! chris
-
cant have too many of these! you gonna put people on her? chris
-
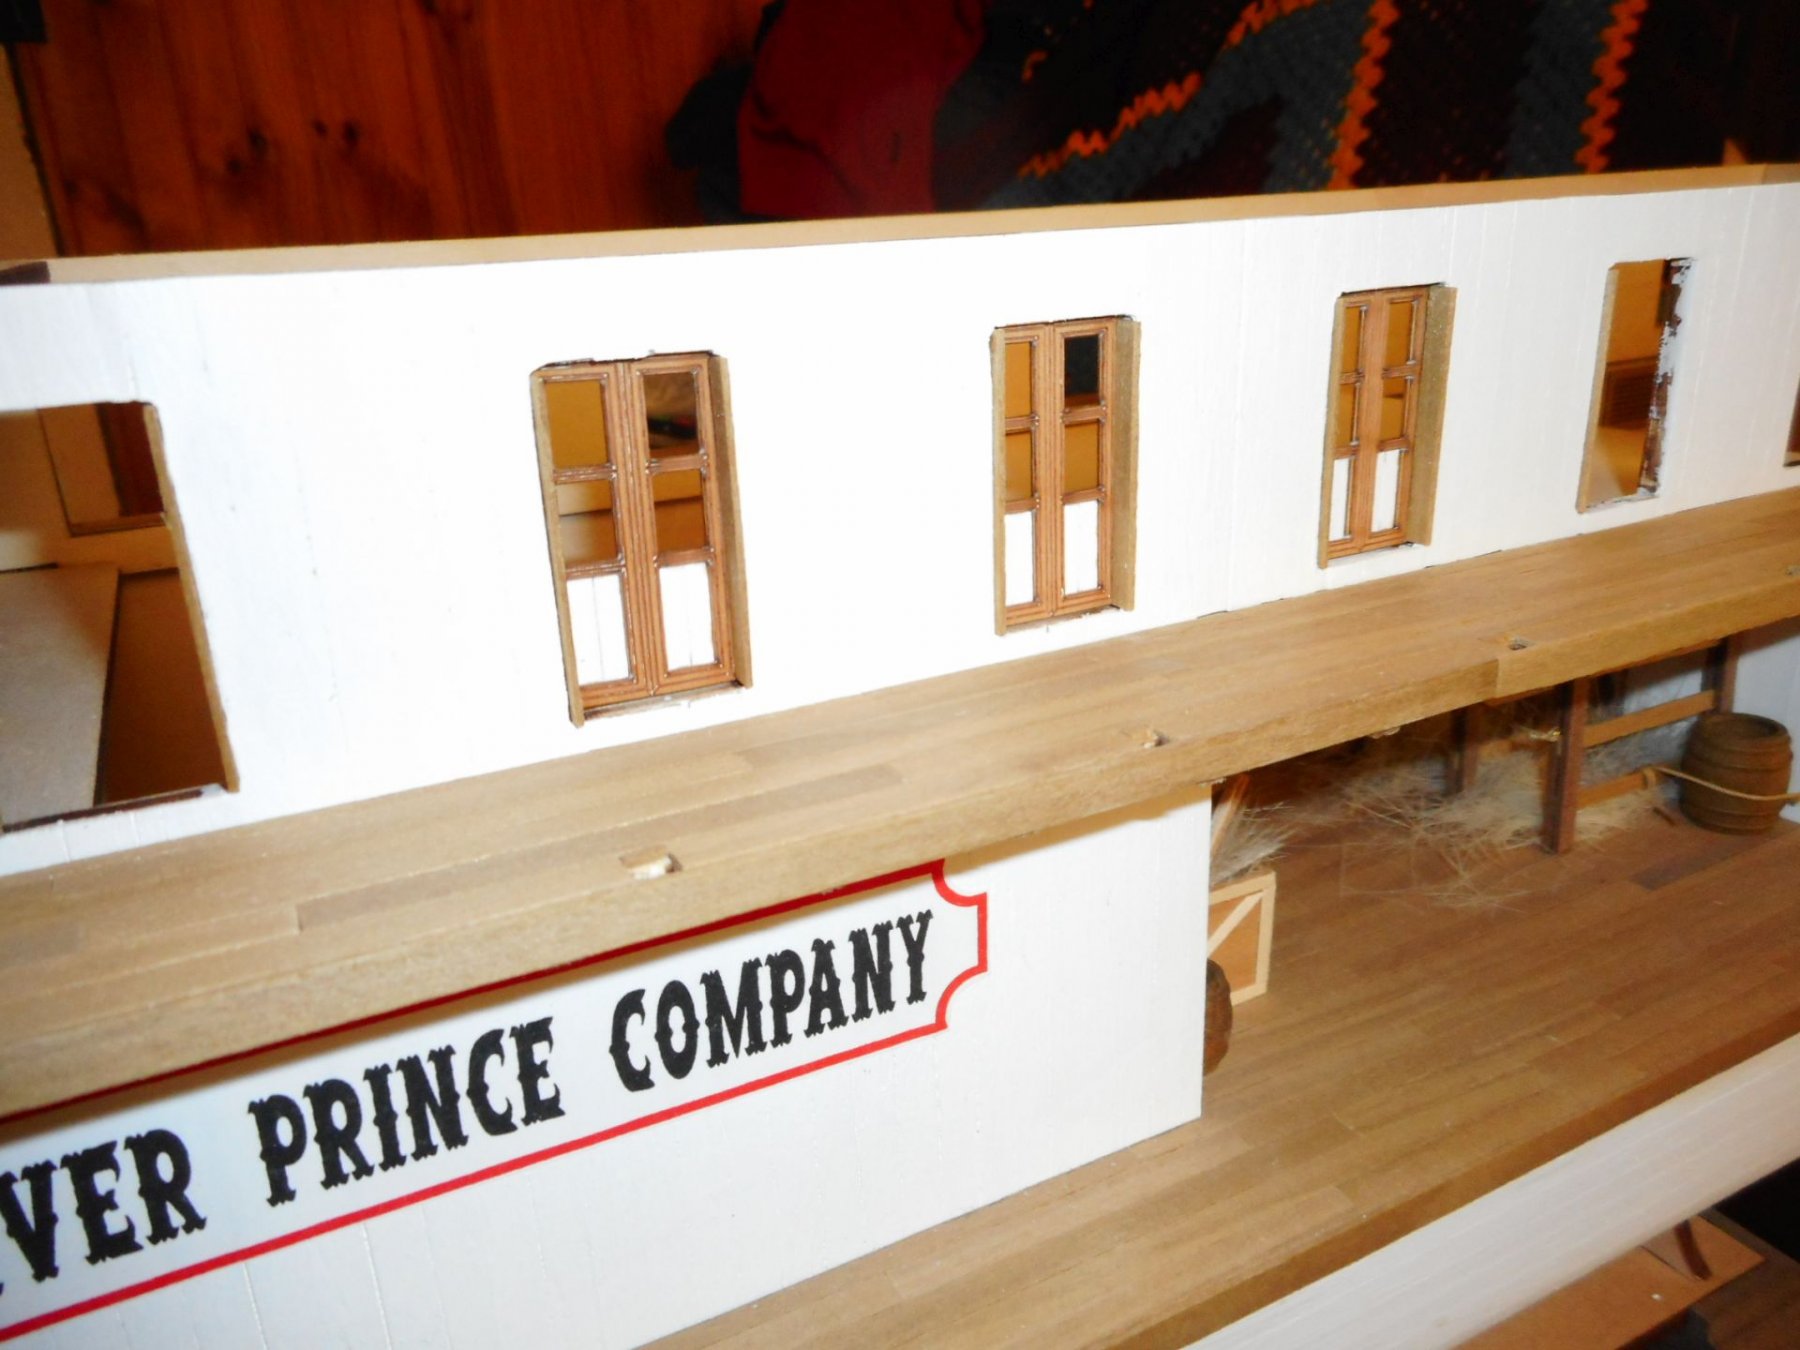
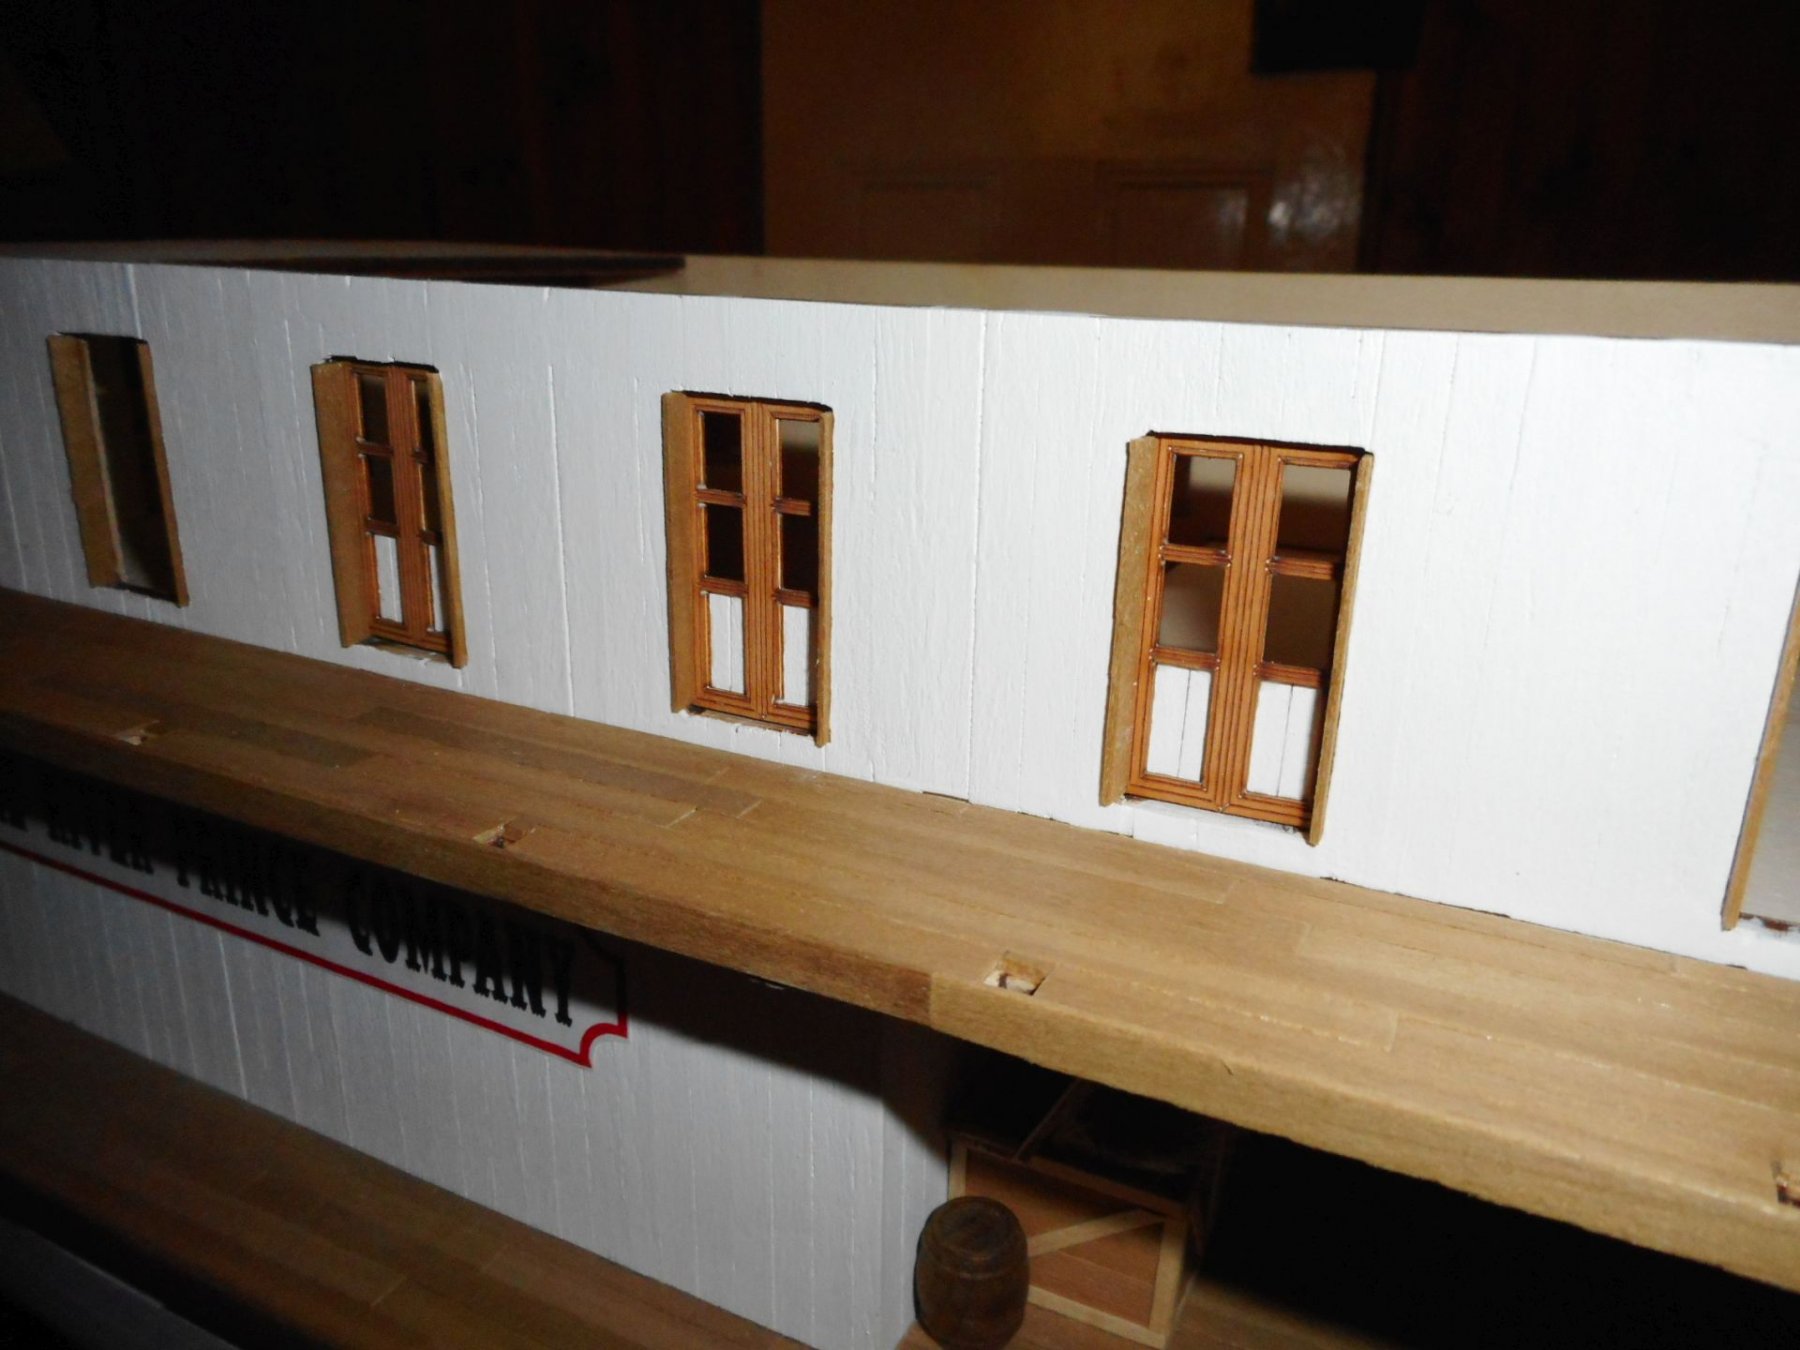
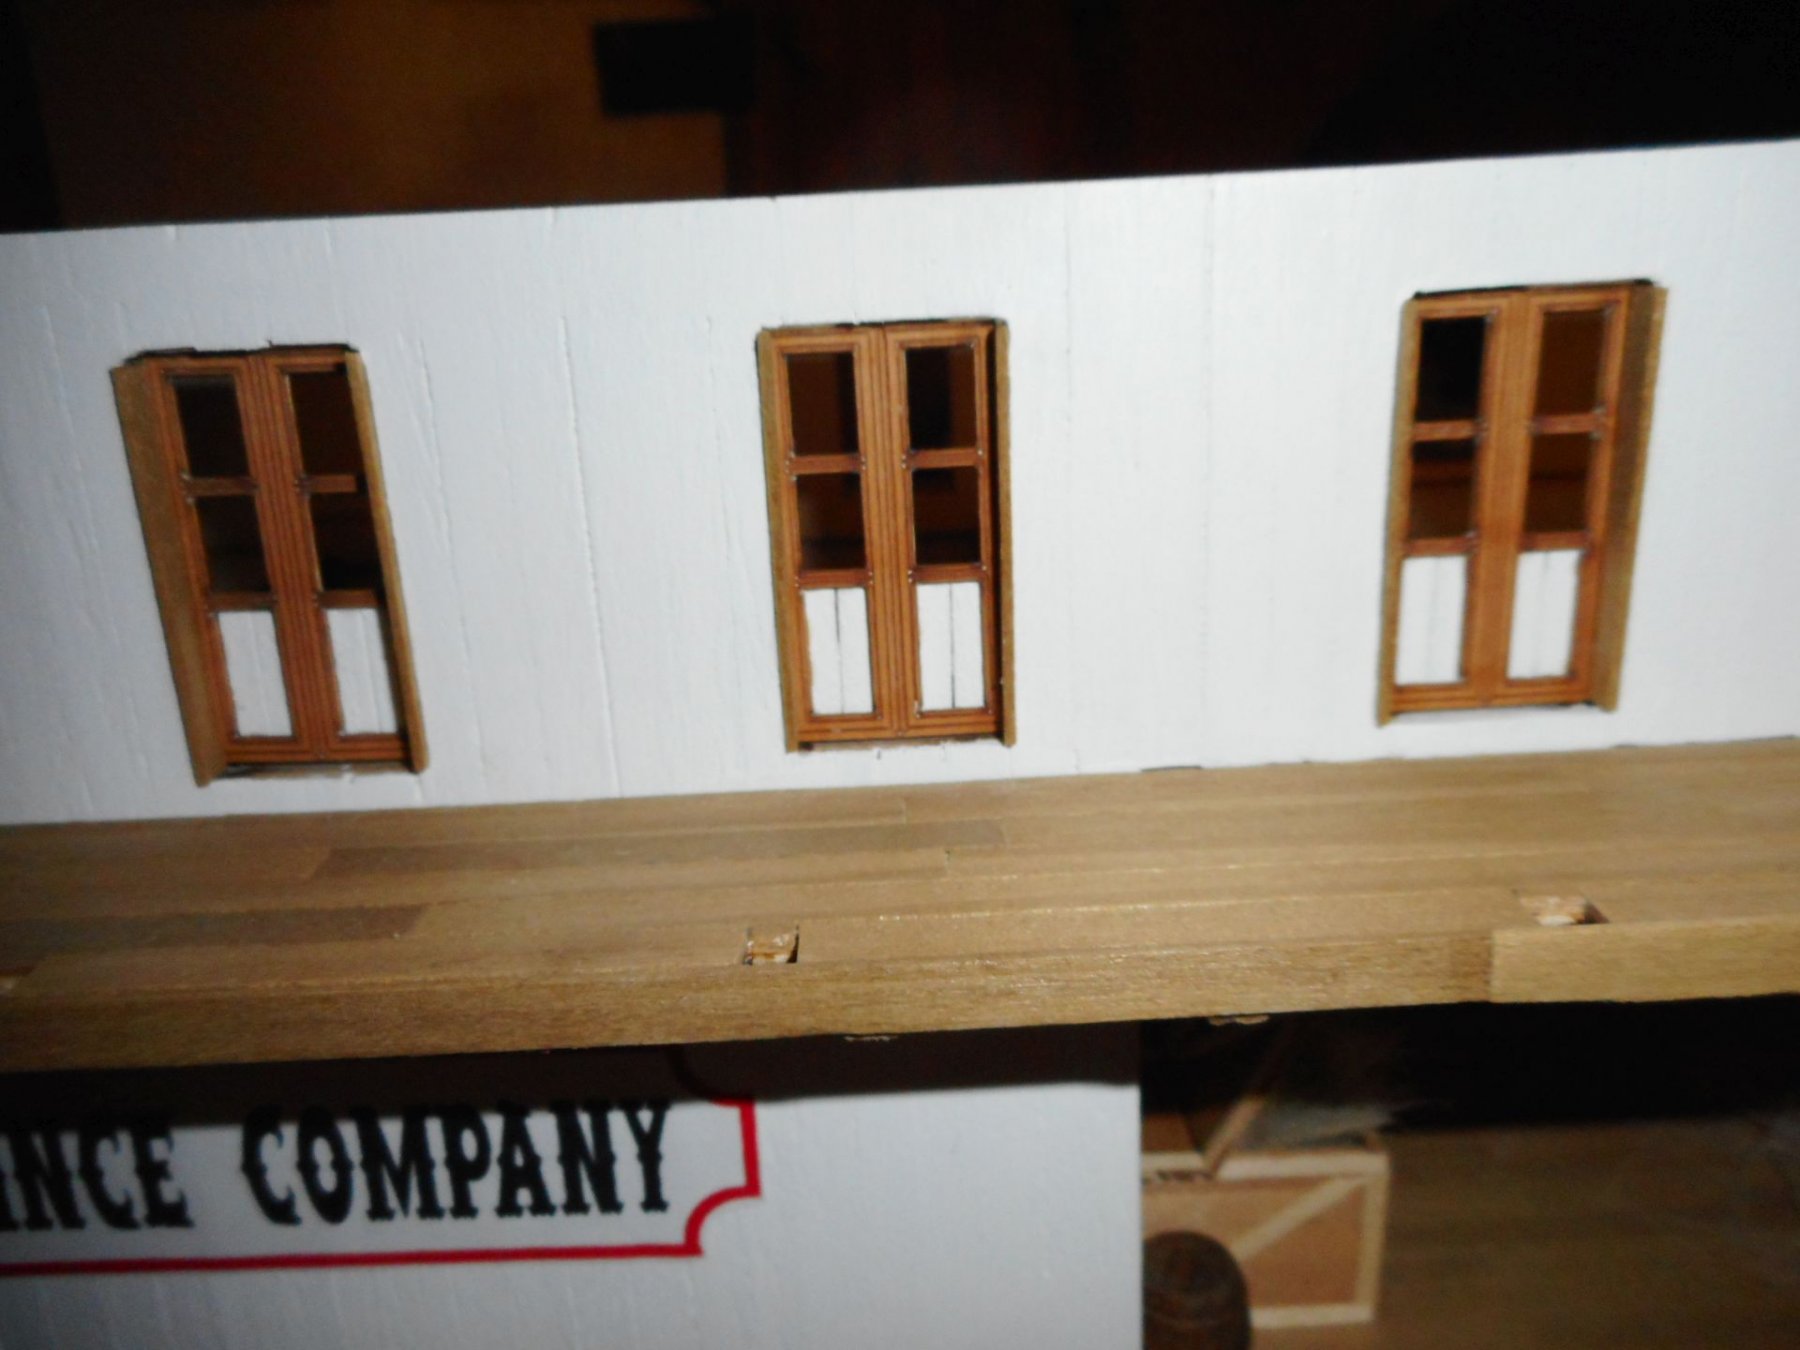
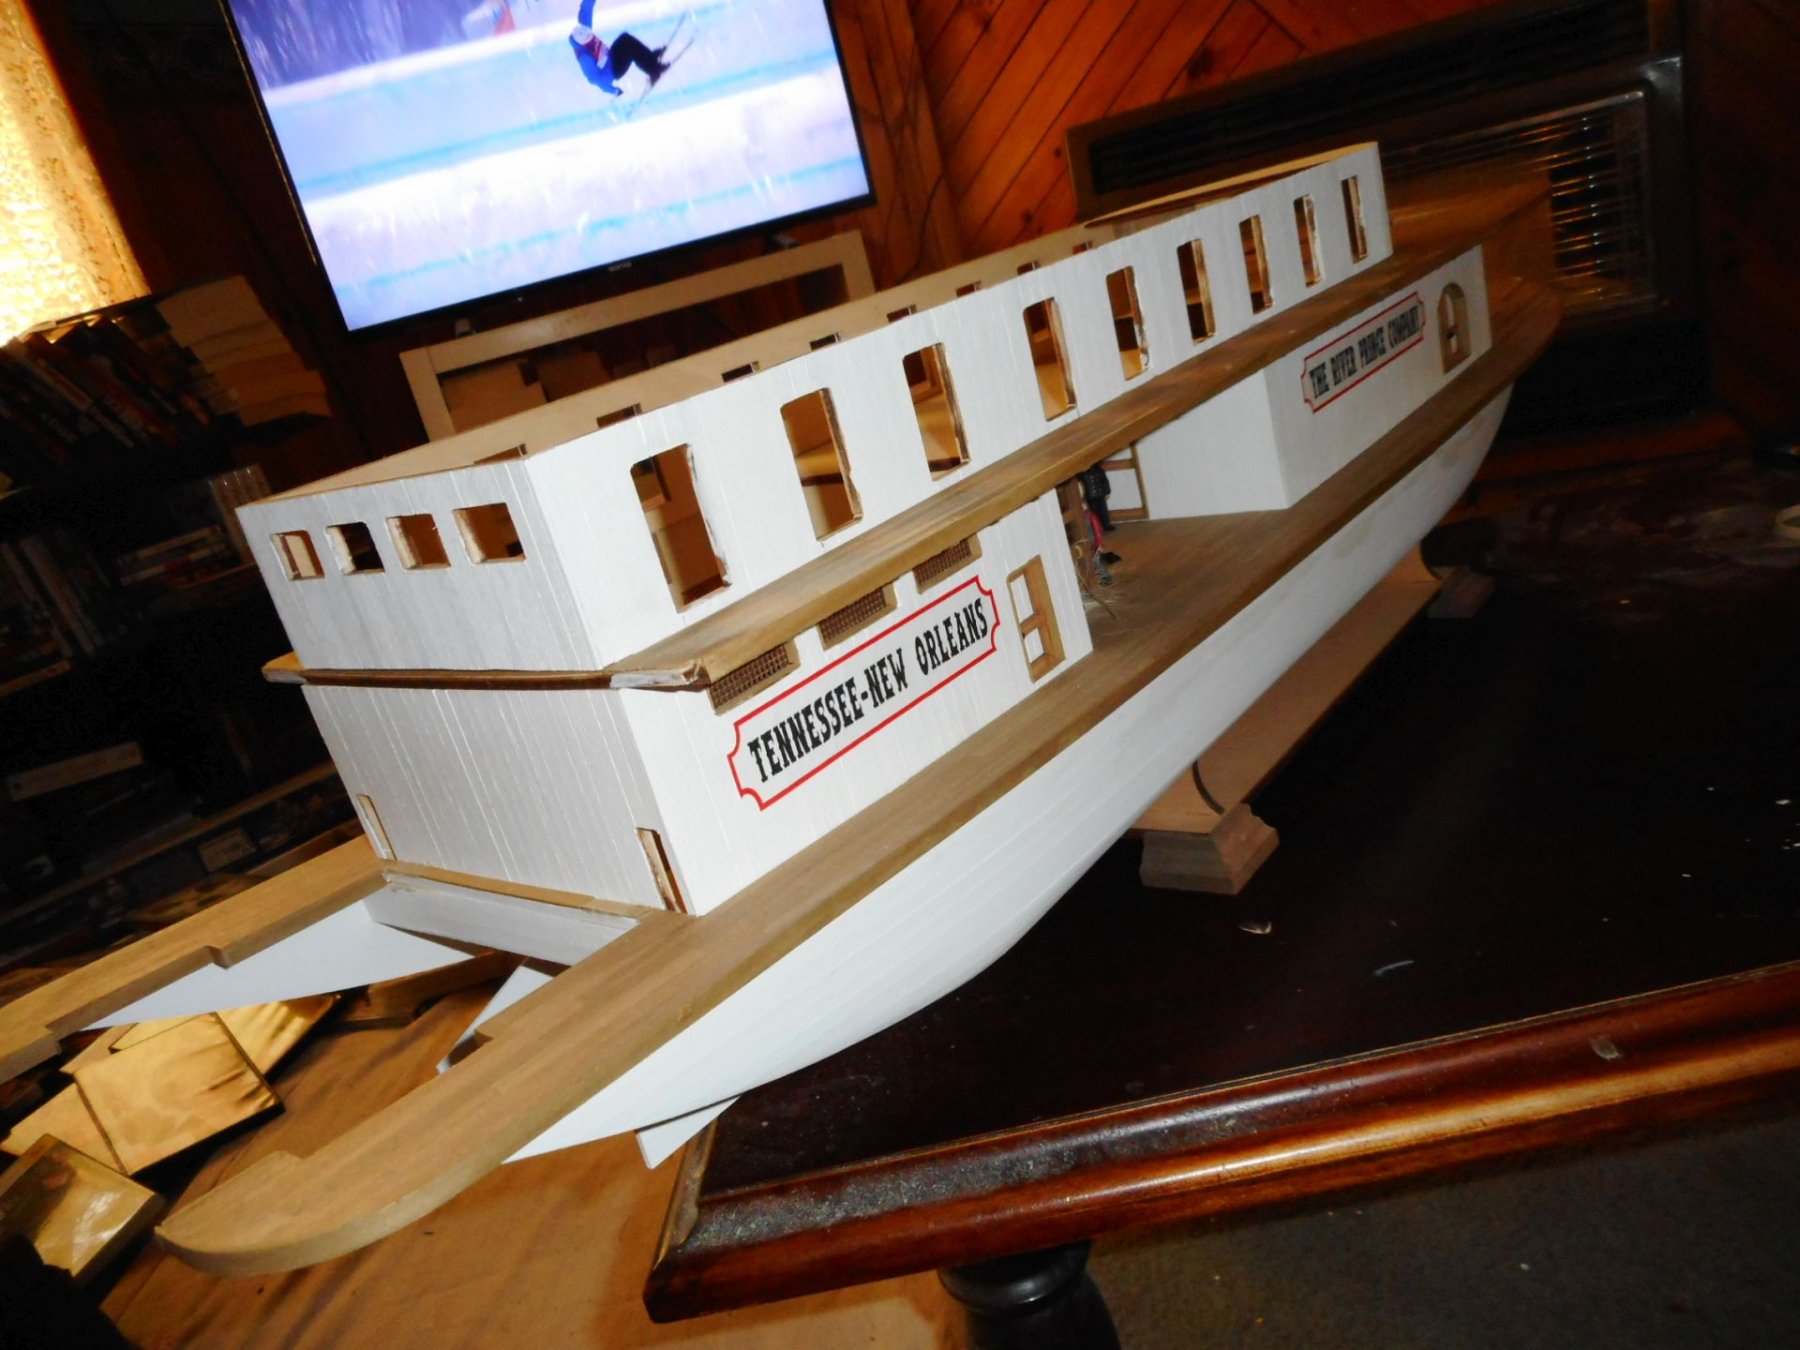
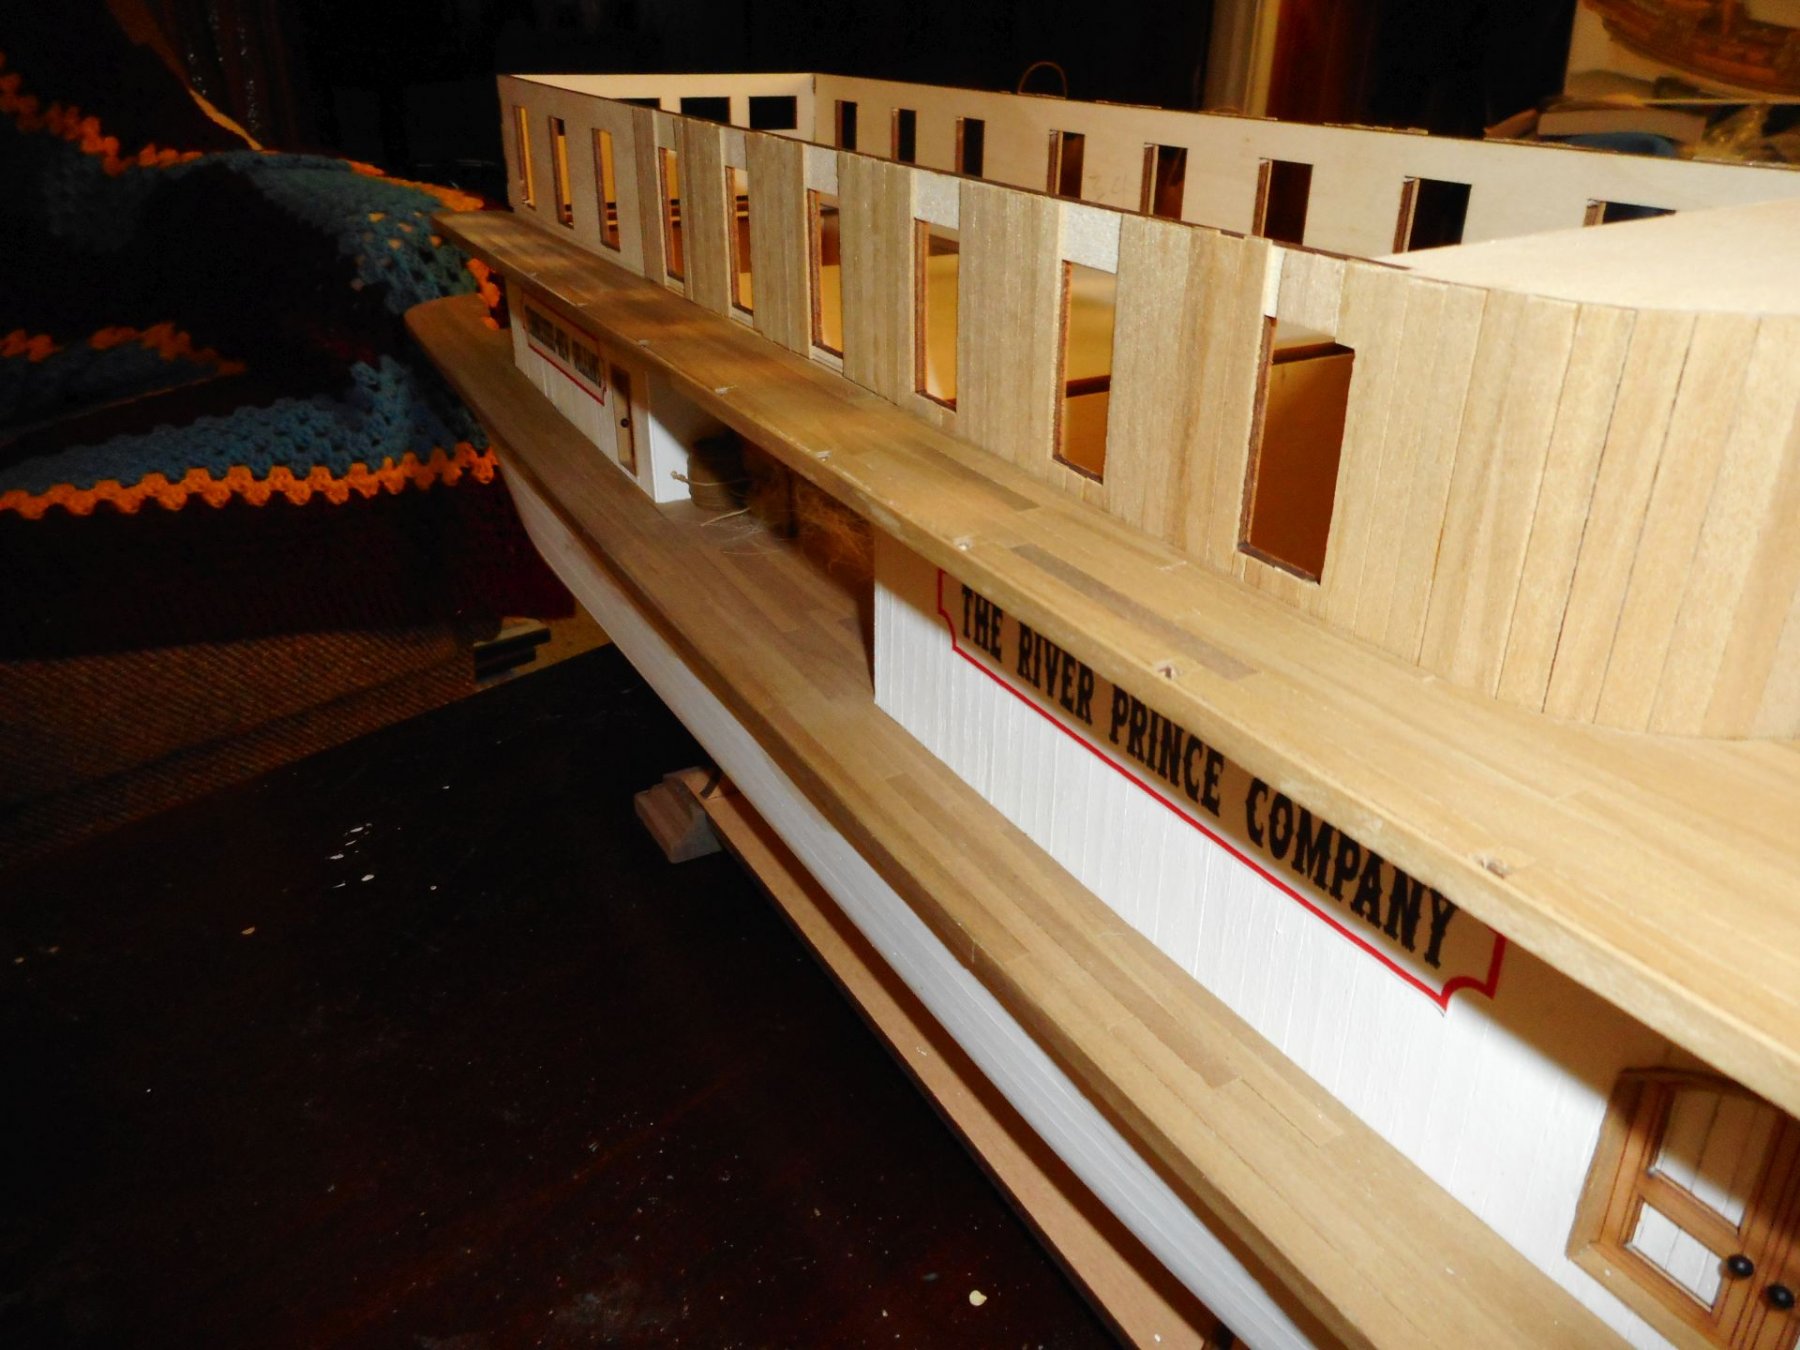
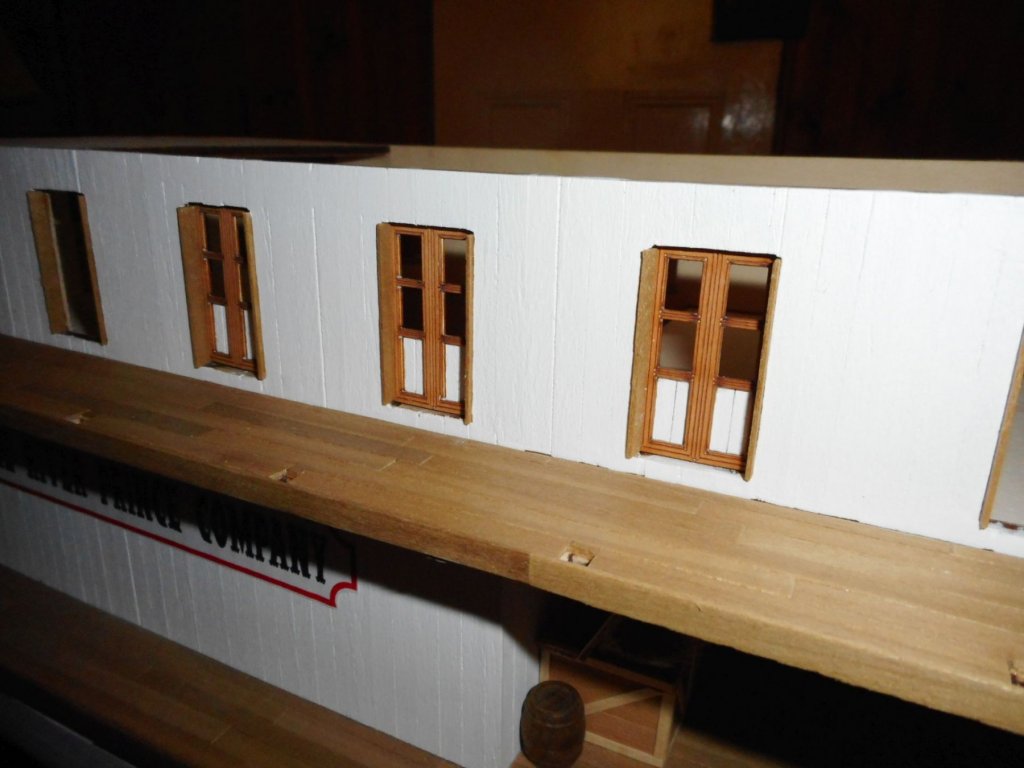
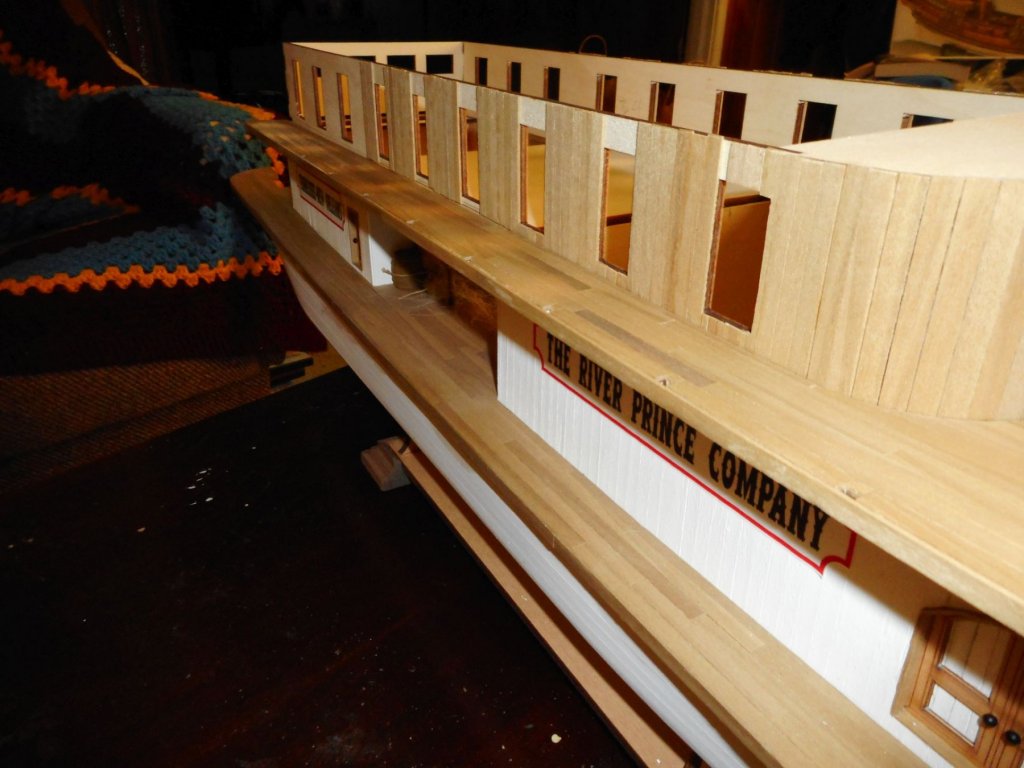
hey pop, all the window/door openings have to be framed then the windows and doors are placed in place. on the kit instructions the openings here are supposed to be doors with handles on each one. on my boat however they are going to be windows with small curtains. here you can see 3 examples of the windows dry fitted for you to get the general idea. the openings here have only been framed in the vertical plane atm. on the outside of each frame there are louvre shutters either side which I am yet to make up. at the front of the structure is the main doorway to the entrance of the structure. once all the windows and doors have been glued into place I will be able to see just how much of the interior of this space is visible once the deck is fitted on top of the structure. if it is too dark and one cant really see inside I will leave it as is. if, however it is still fairly visible, I will put in a false floor (easy to do), and try to create a scene inside the compartment. chris


-
hey cool, that ready made to fit planking is a bonus (assuming it fits like the stock photo)??? this appears to be an extremely well constructed kit however so I'd imagine you should have no problems. are you going to run the same color scheme as the stock pic? I must say I really like the blue. I will definitely get this kit one day! I reckon it looks fantastic does it have a name plate on the stern area? could you maybe give it one if it doesn't? this is really coming along a treat dave! cheers chris
-
dave, this is currently my favorite build on here! love the lighting in the main cabin. it really shows up the fantastic detail. are you coming toward the end of the build now? chris
-
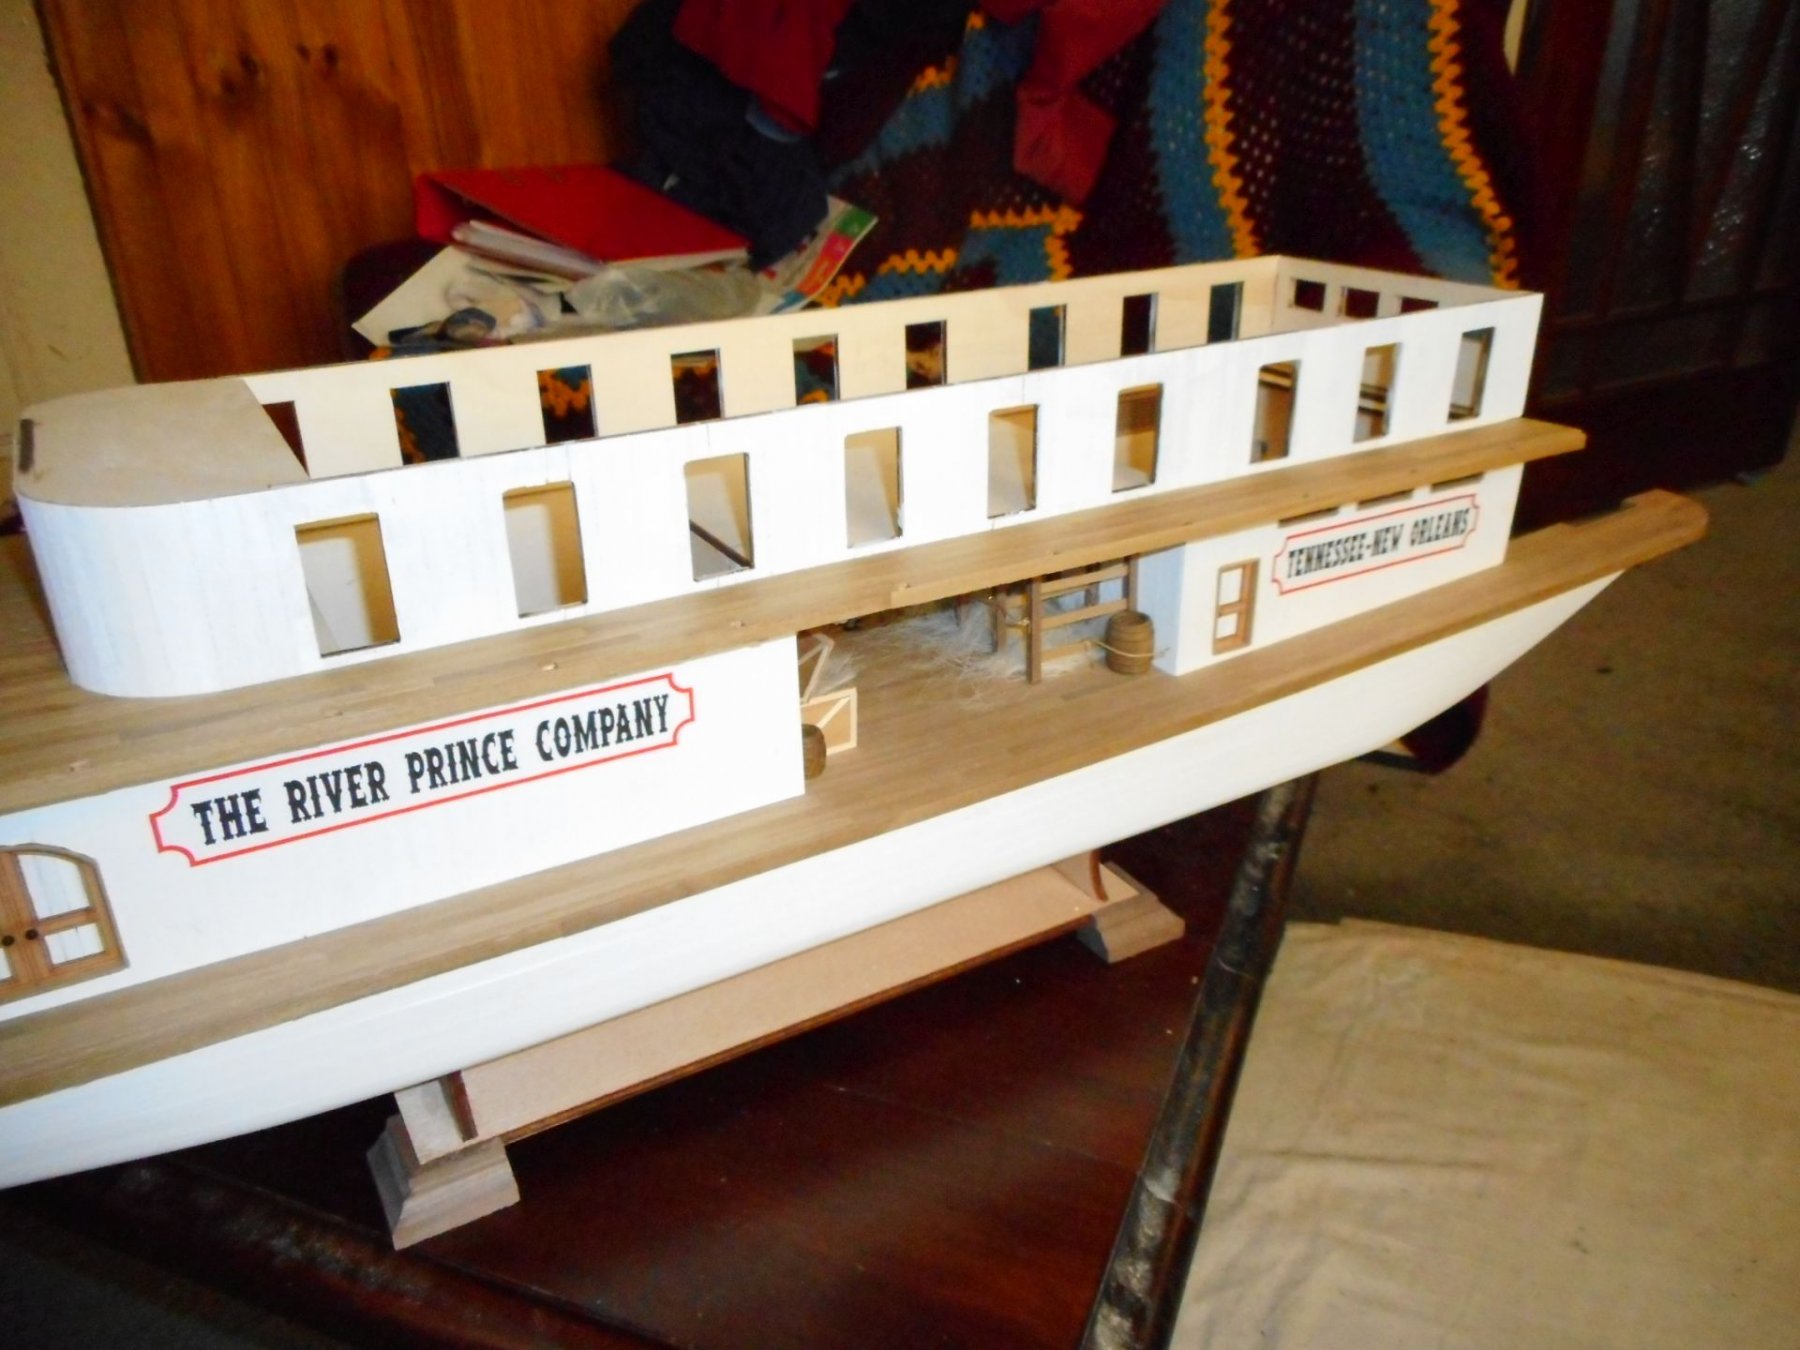
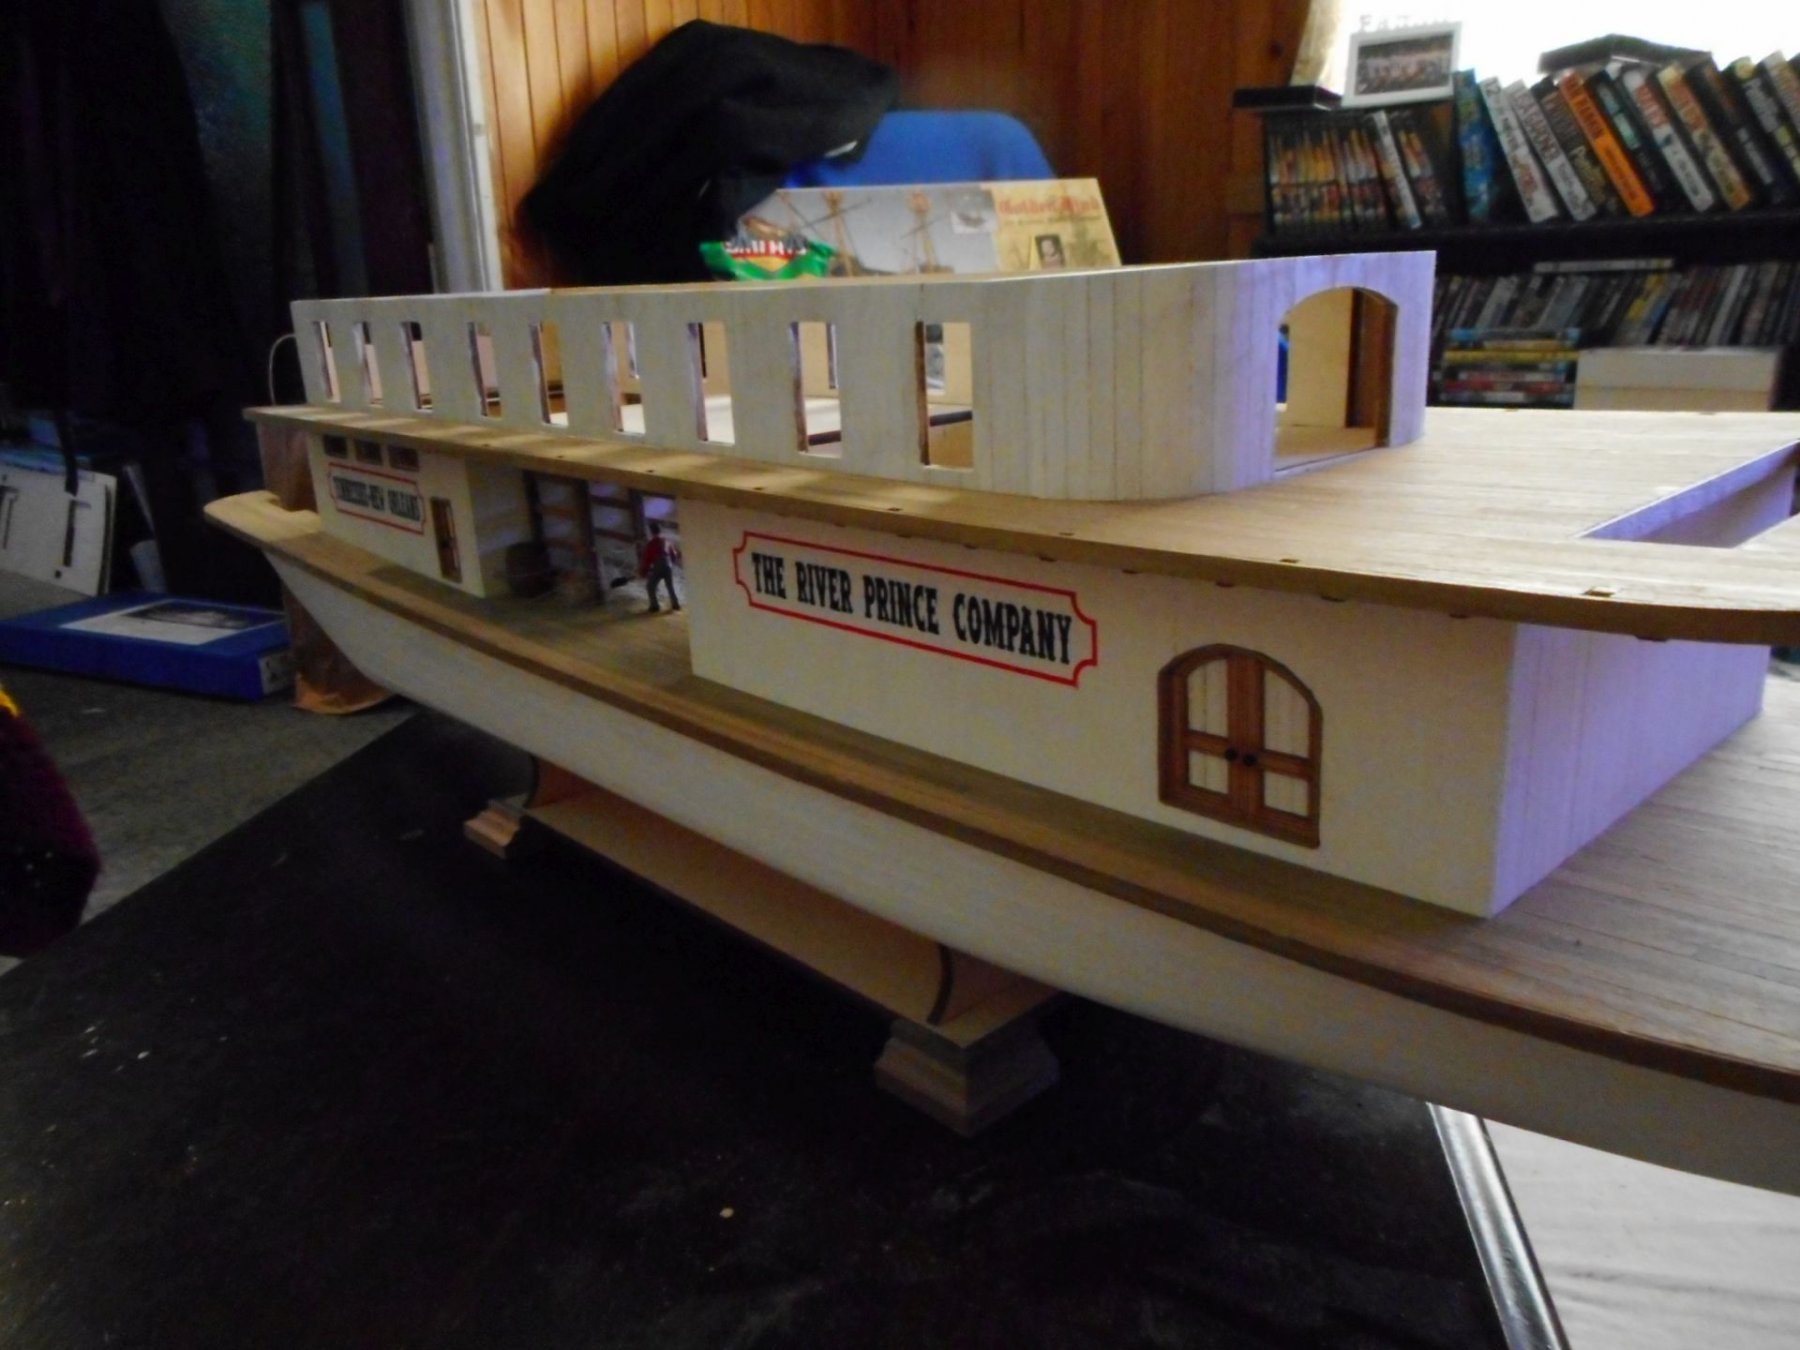
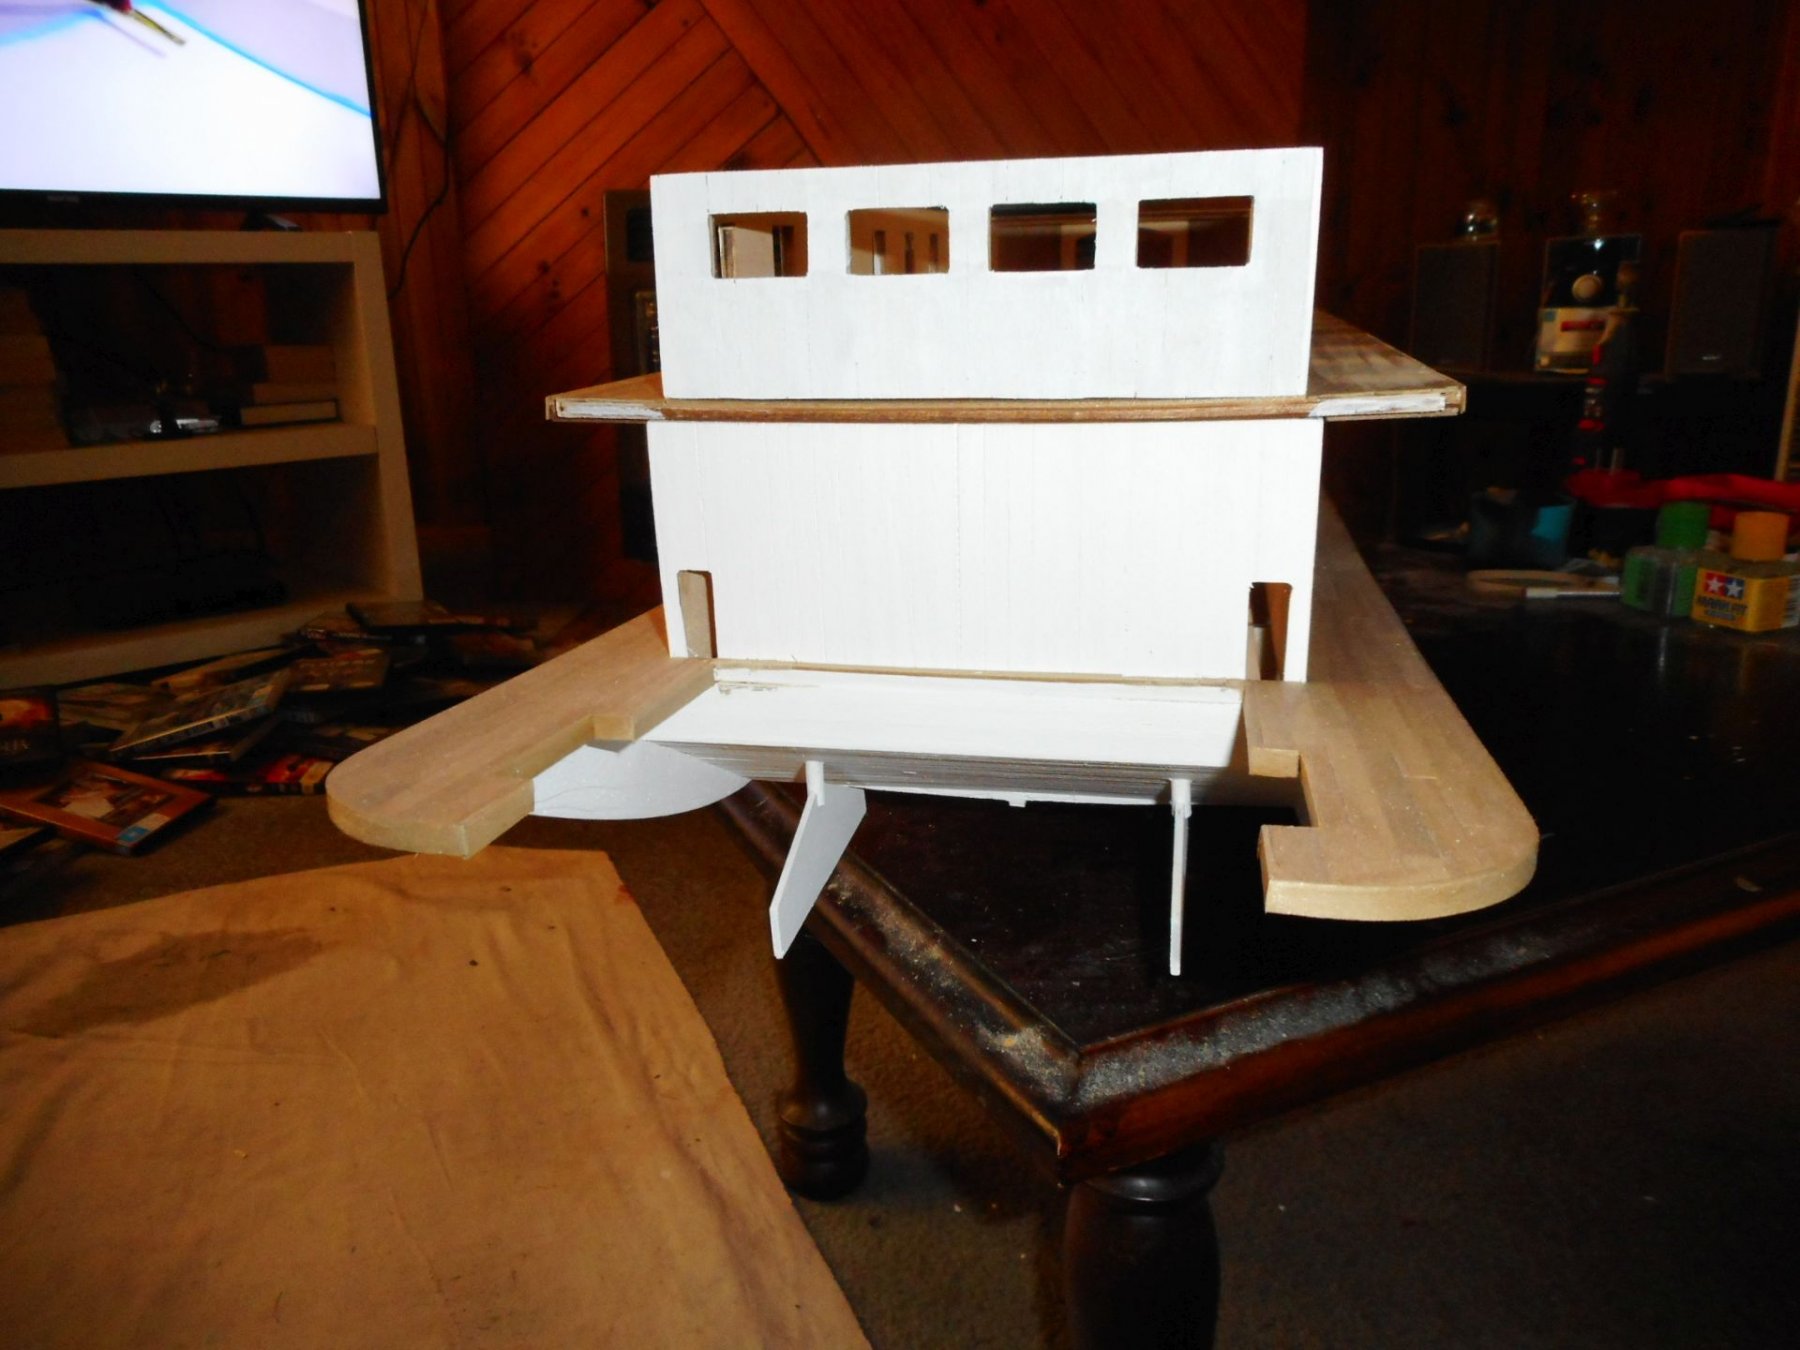
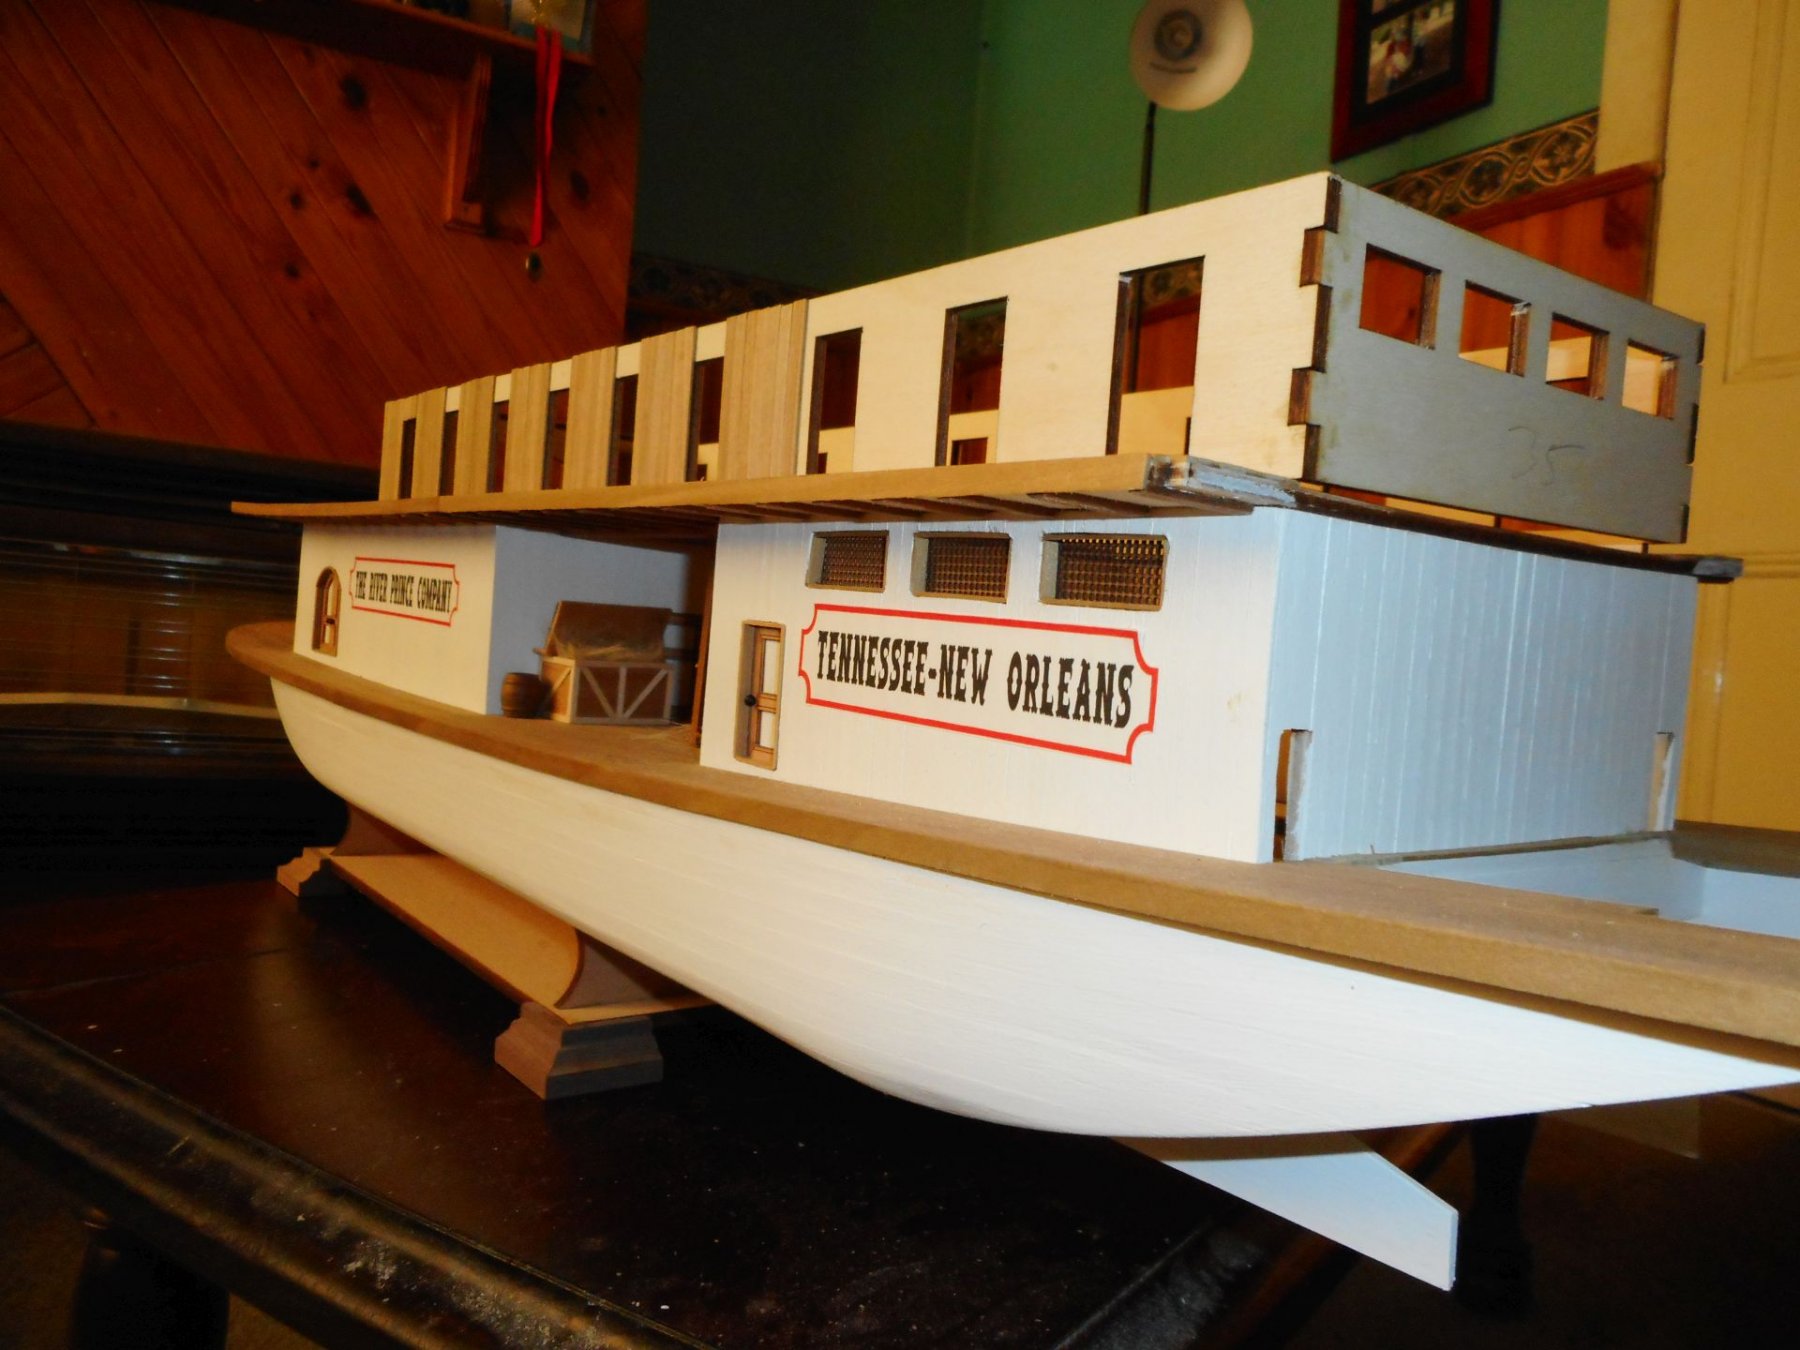
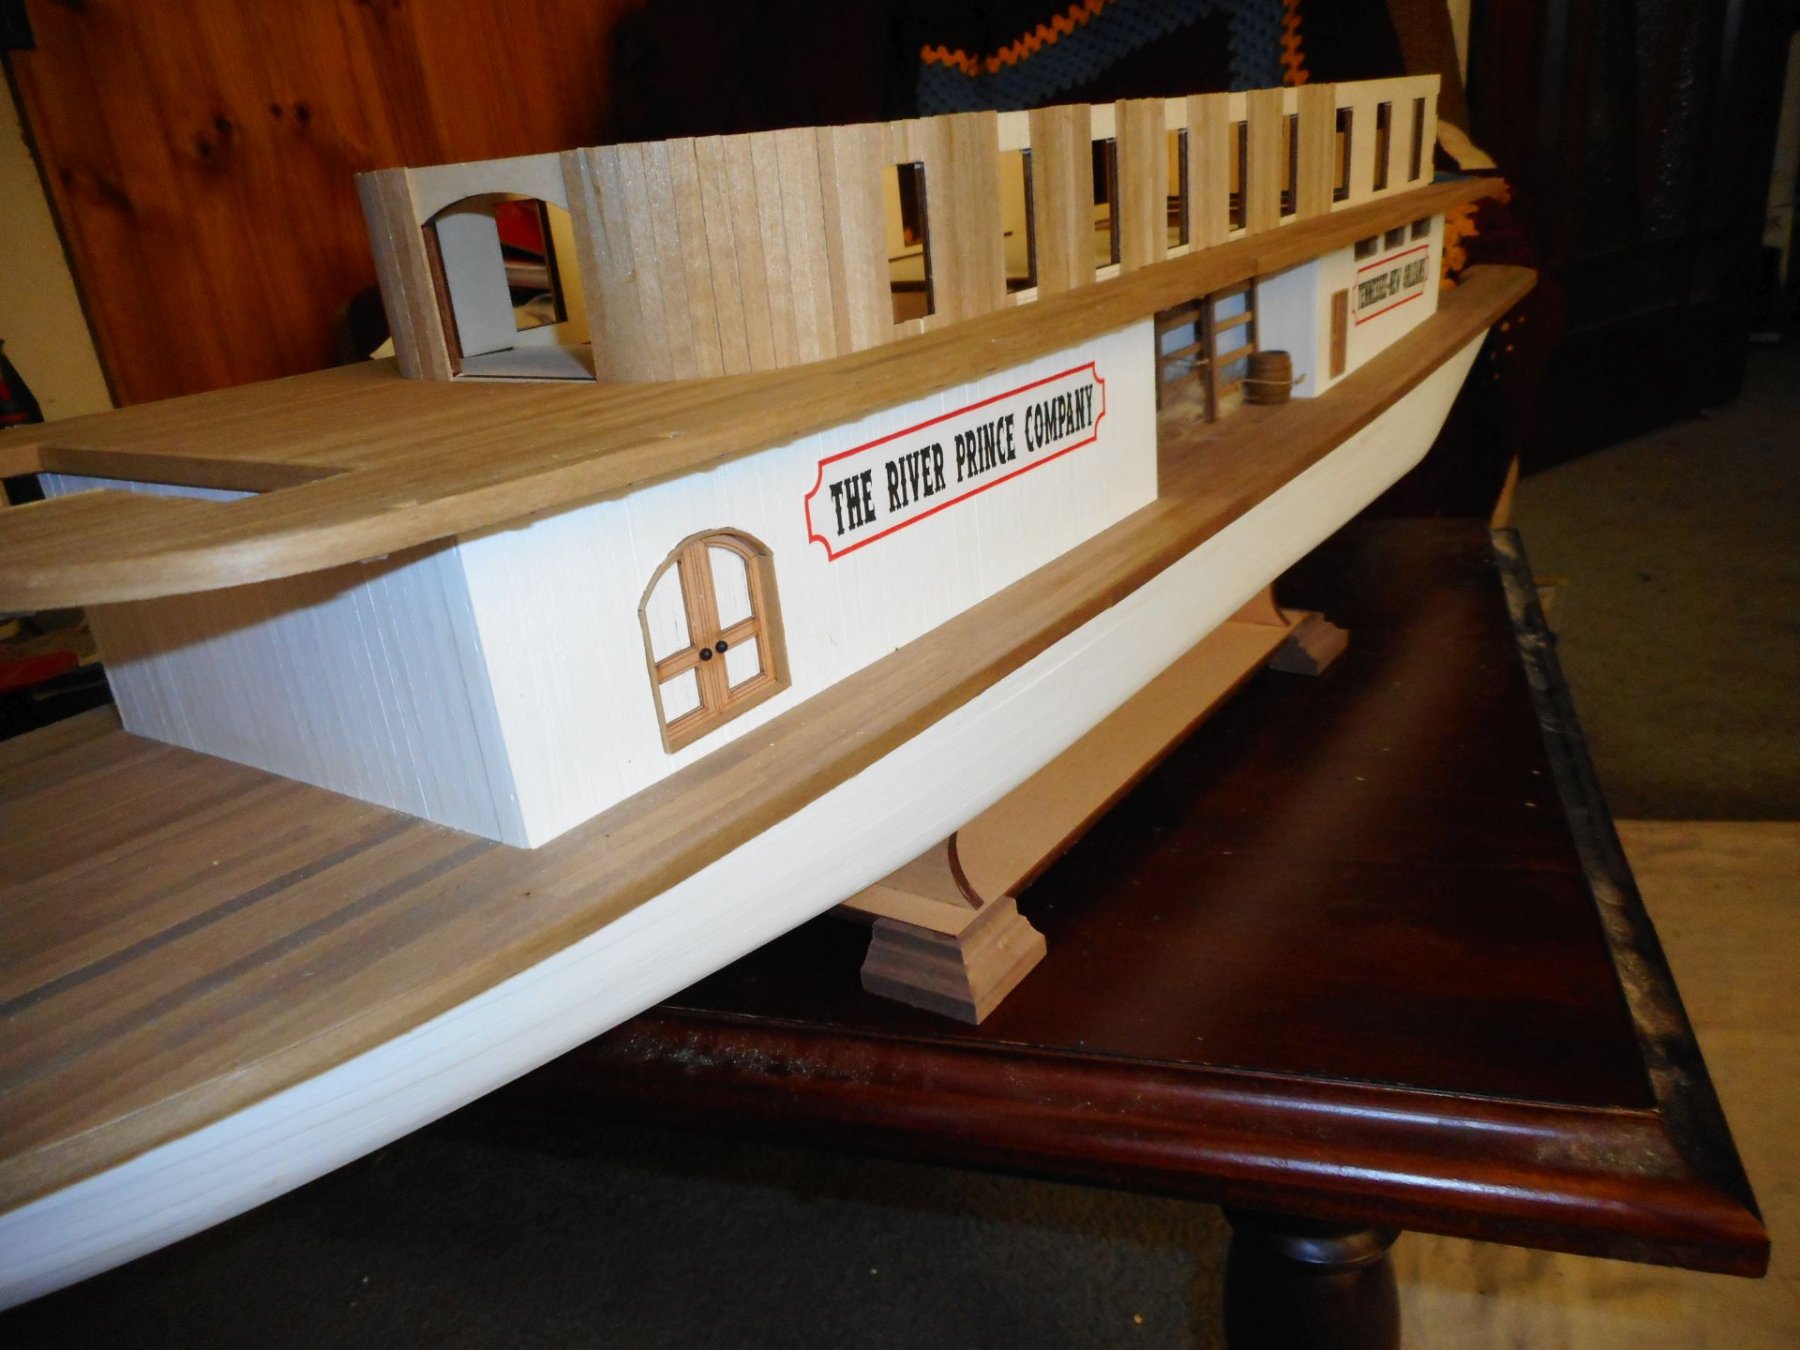
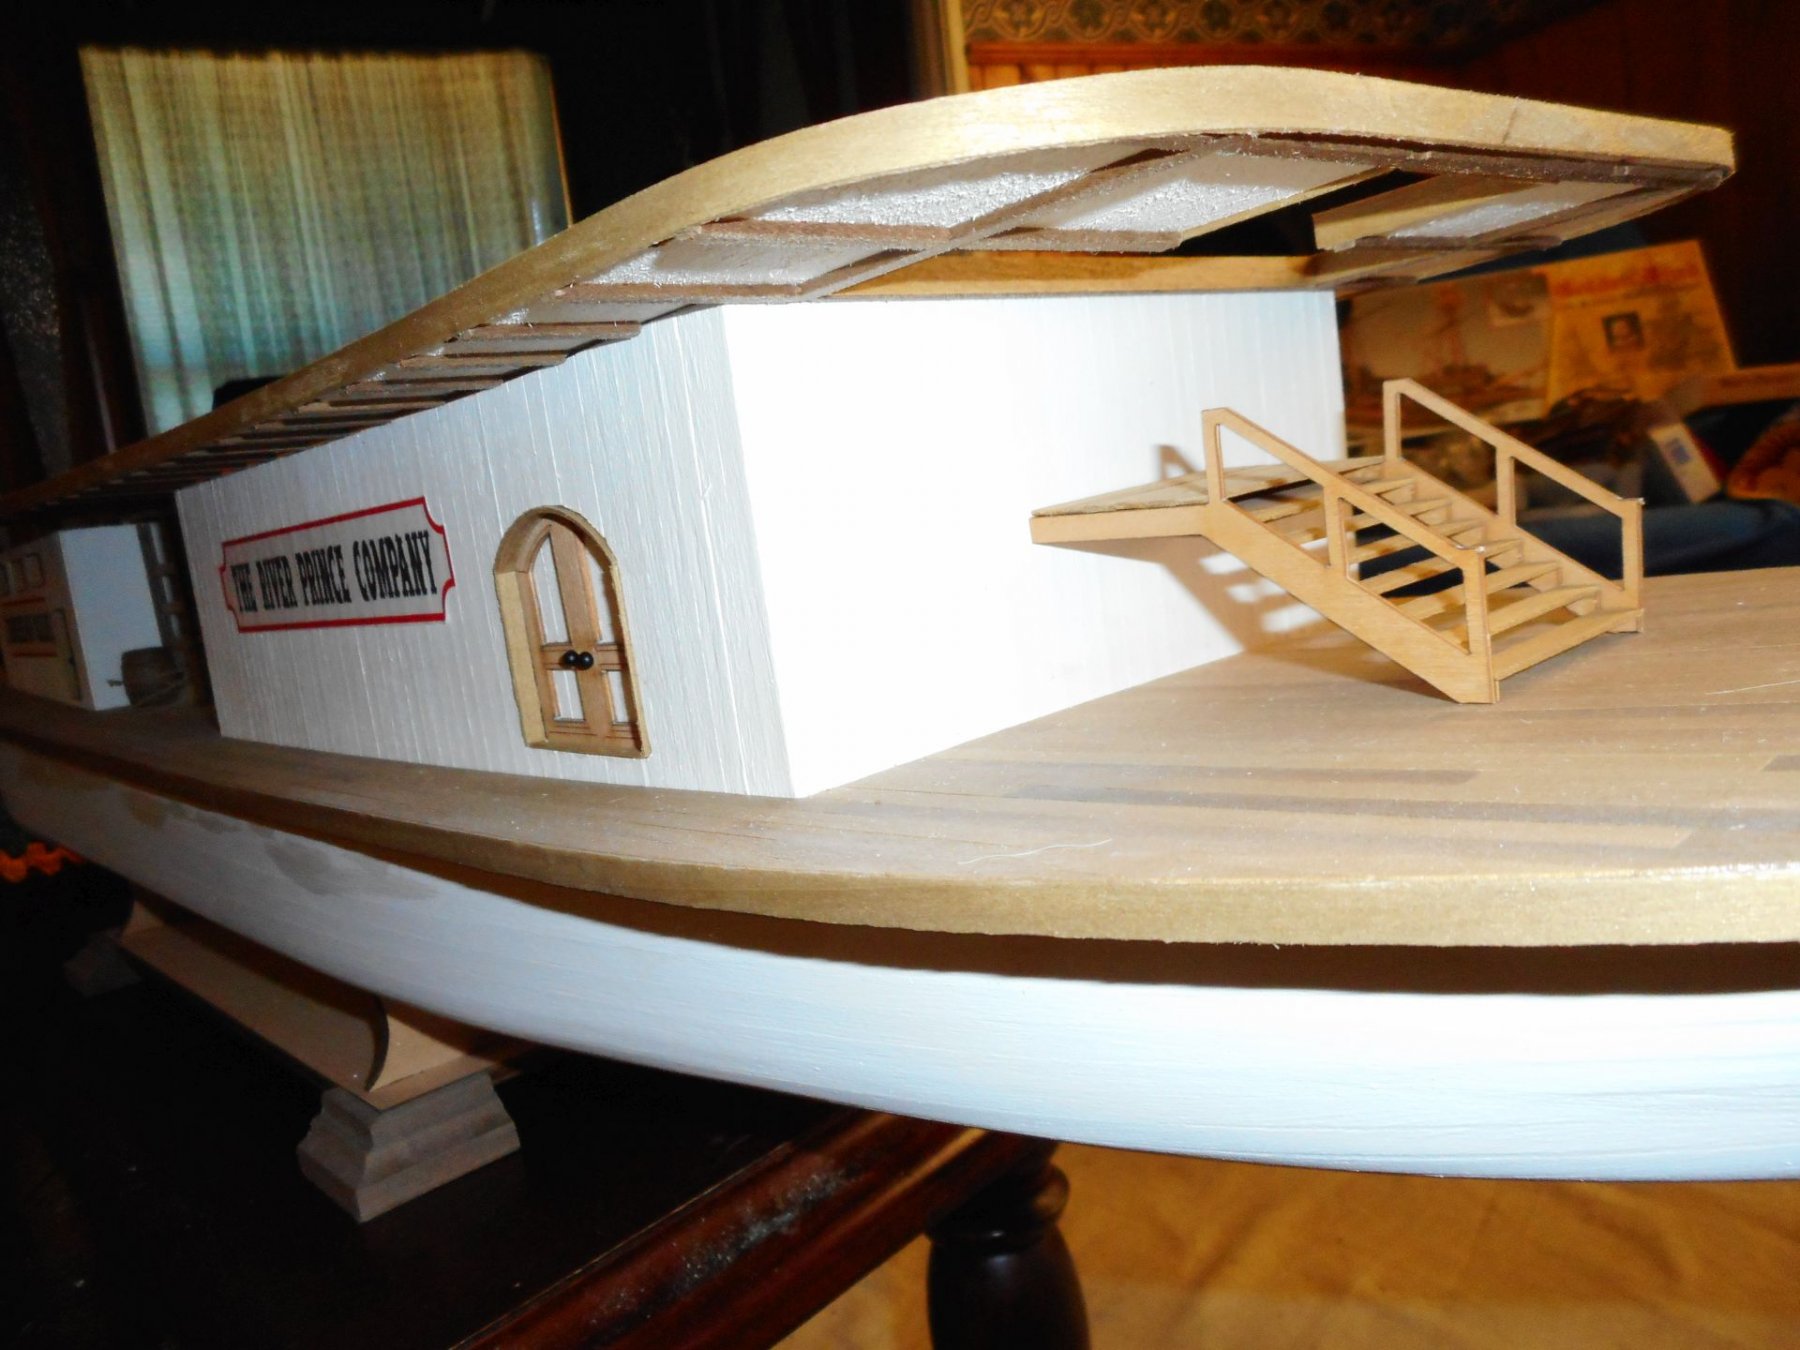
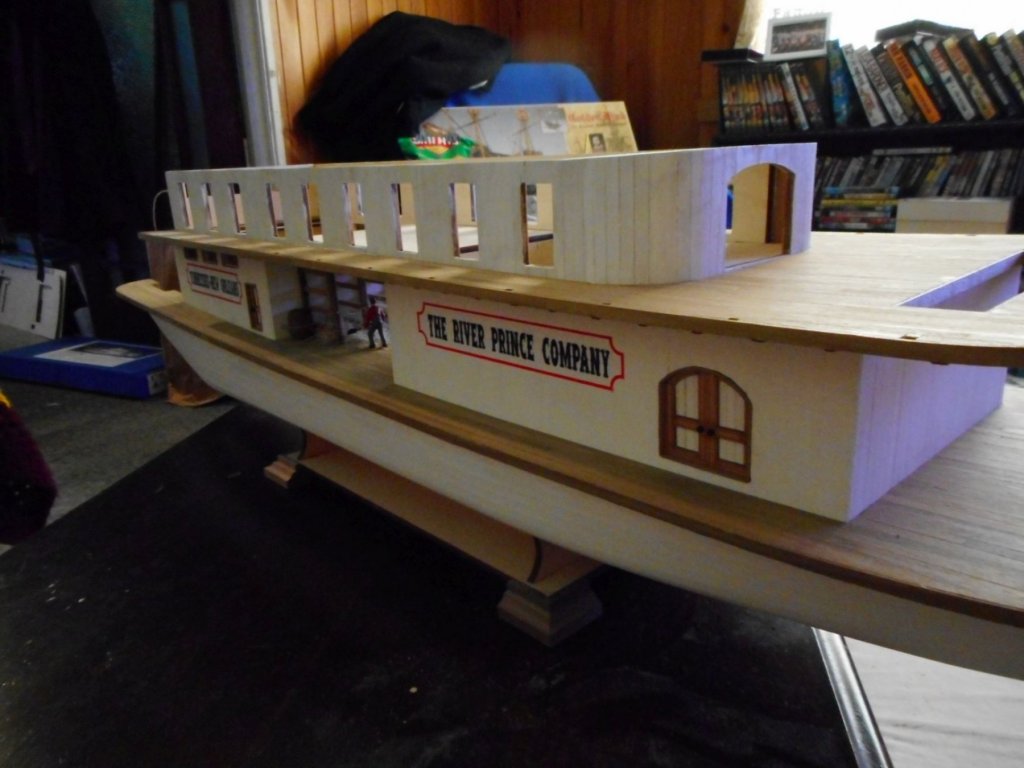
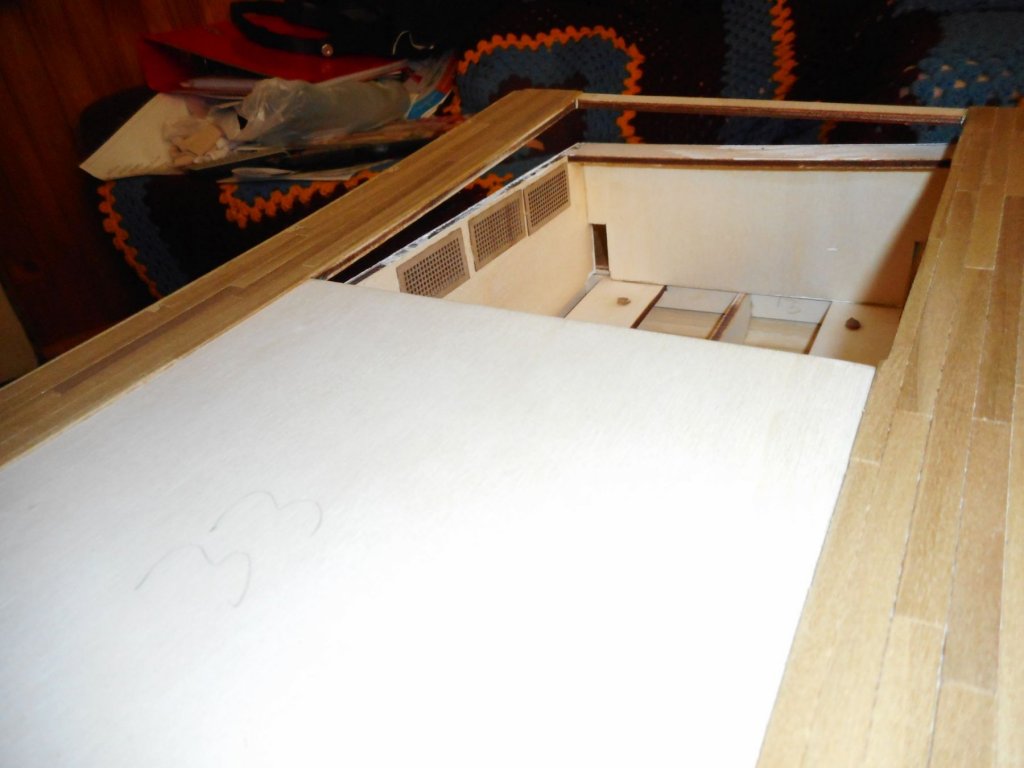
so, here is some further progress. finally finished planking and sanding out the windows and door frames of the second deck structure. at the moment it has only 1 coat of paint and is just sitting there. not glued down yet, hence its not really level in these pics, plus I reckon it will be a lot easier to place the windows and doors before its stuck in place. I need to put some fine filler between some of the planks, but I may also leave a few as I think it adds to the rustic character of the boat. also, I am brushing all the paint work to achieve a more realistic look for the period. the only medium I am spraying on this is the final clear matt coat as I finish each section. when I get the windows and doors all in, complete with curtains, I want to see just how visible the interior of this structure will be from the outside when the third deck is also attached. if I can see fairly clearly inside this space I will install a floor and add carpet, dining tables, and a gambling area down aft. cheers chris


-
really like the card dave! I must apologize to all who follow this build for the slow progress. unfortunately I have been having some health issues of late so the build has had to take a bit of a back seat. hopefully after the barrage of tests and scans I have had this past week or so, some bright doctor may finally be able to work out what the eff is wrong with me and get me back to the boatyard! chris
-
Hello! Long time admirer, first time ship owner!
vossy replied to Naiveux's topic in New member Introductions
Google The Mayflower. There will be tons of info on her. One of the most famous ships in history really. Name is on the stern. Chris- 1 reply
-
- 2
-

-
hey eric, I see your point. the doors themselves, the single ones on the side of the engine compartment, are 40mm high, but as you can see they sit slightly above the deck, so from the deck to the top of the door is about 45mm. this kit states that it is 1:50 scale, but I wouldn't bet my life on that scale being true for the whole model itself. it is more of a showboat than a true life representation. having said that, I reckon the figures look fairly plausible to scale against the doors and other objects so far. my problem was/is that the horses are 60mm high, and I just thought that was about 10mm to high. I think it makes the horses about 10 foot tall, which is a damn big horse! chris
-
size of people
vossy replied to Snow's topic in Discussion for a Ship's Deck Furniture, Guns, boats and other Fittings
its not that hard! just look at your build and use common sense. relate figures etc. to doorways and other structures that are pretty standard in our world. always remember though, that all of us already are in possession of the best calculator/convertor in the world; our brain! chris -
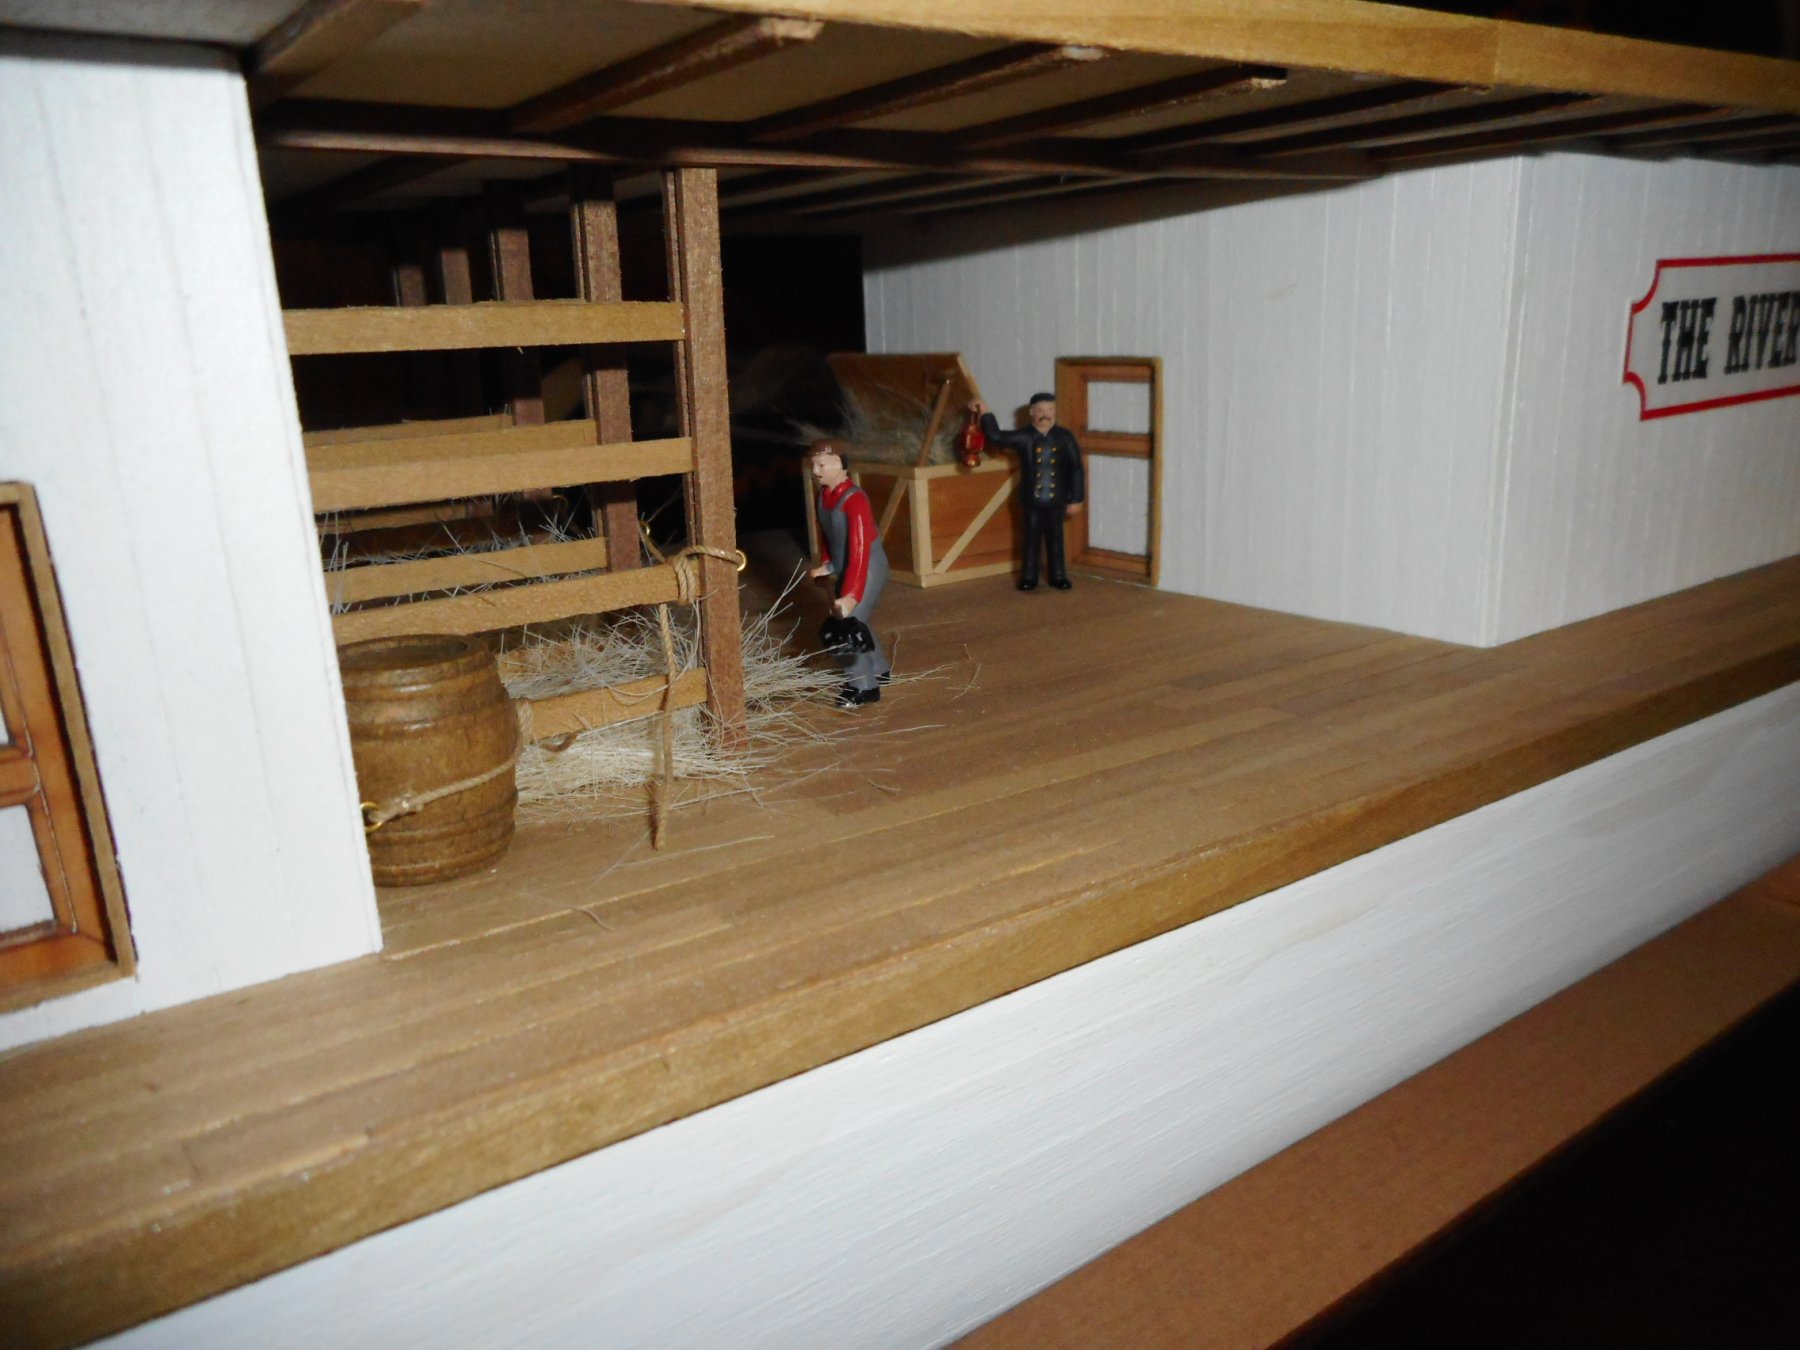
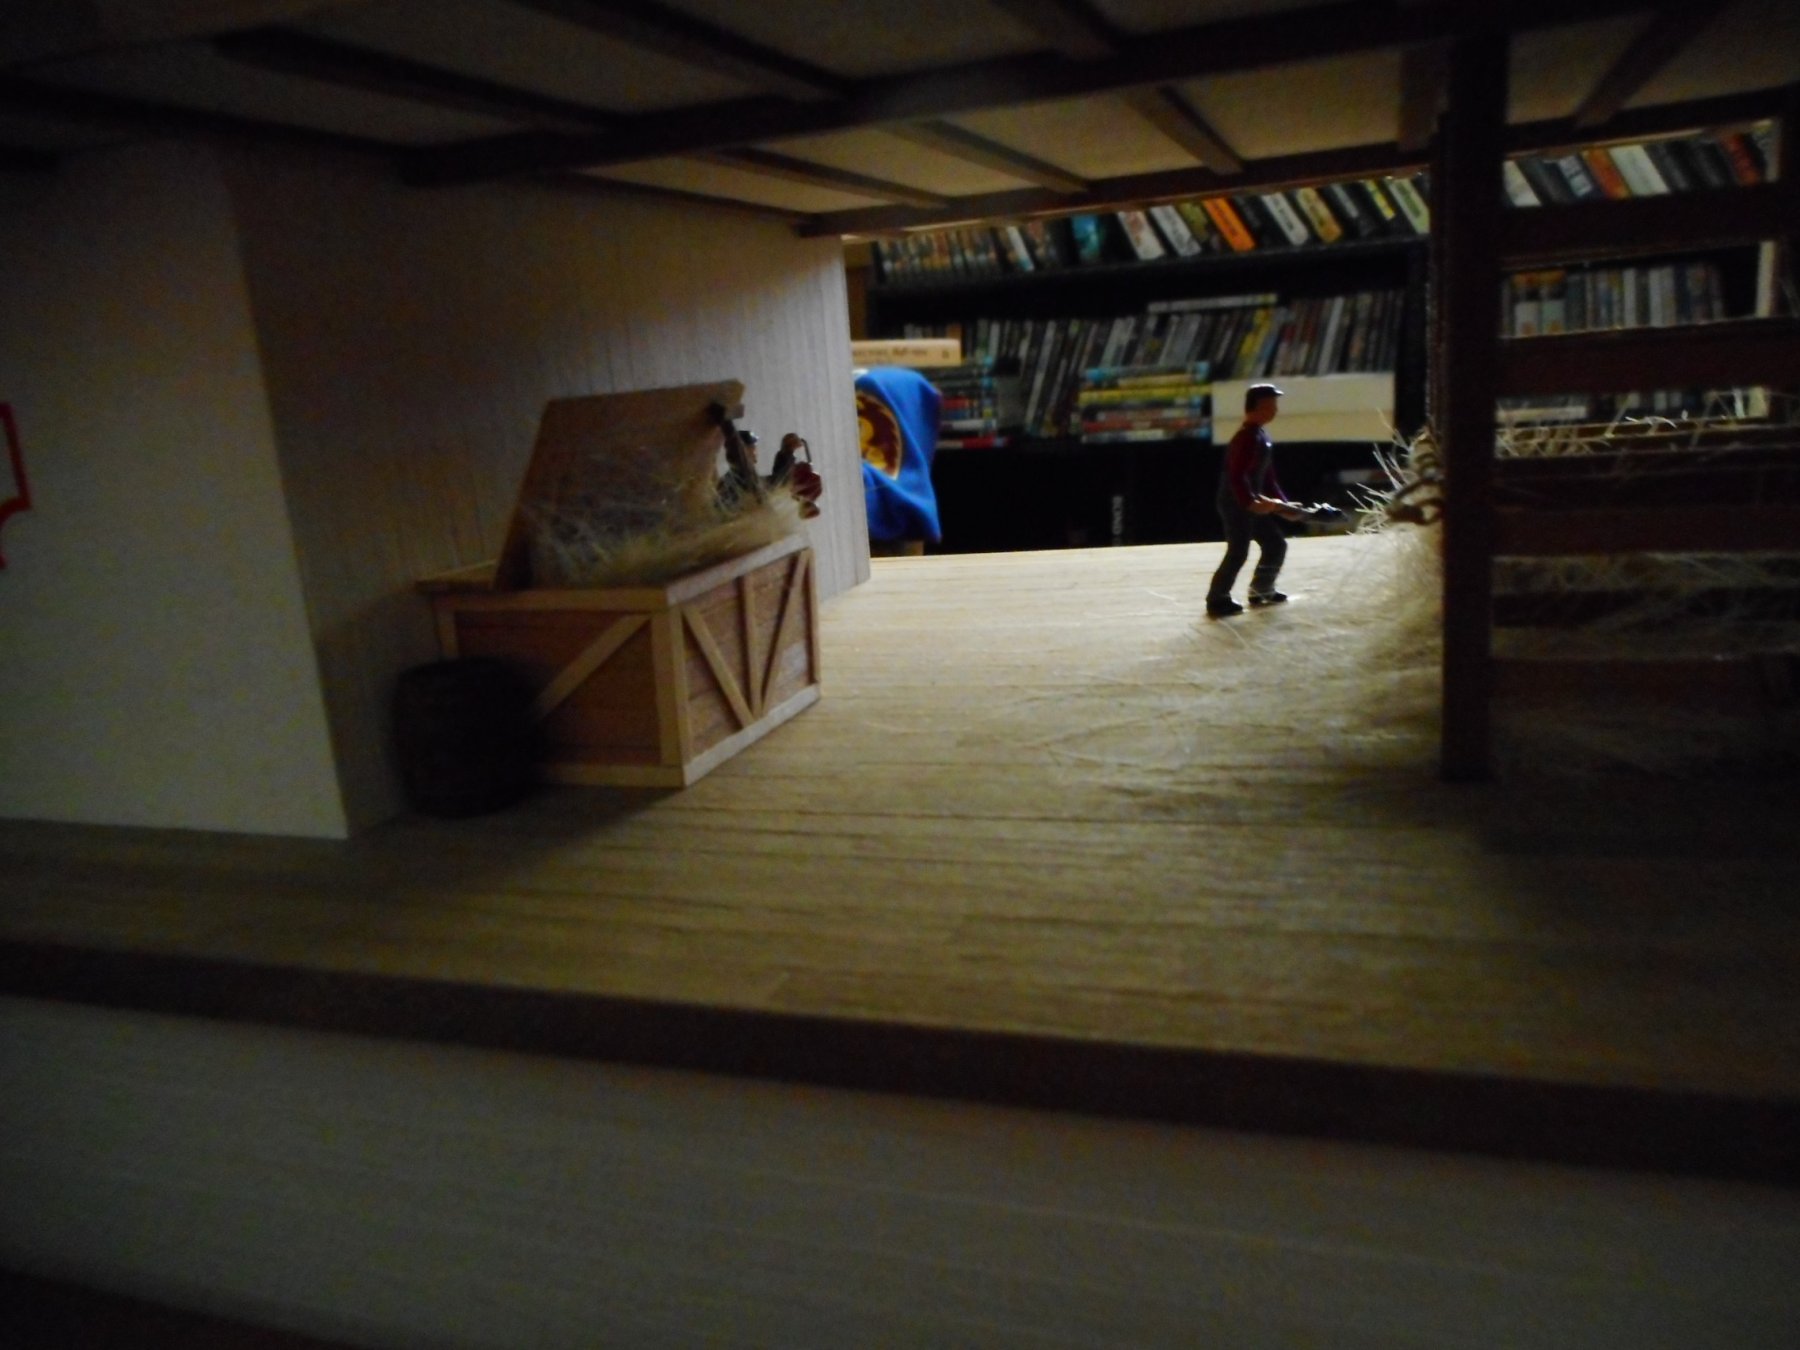
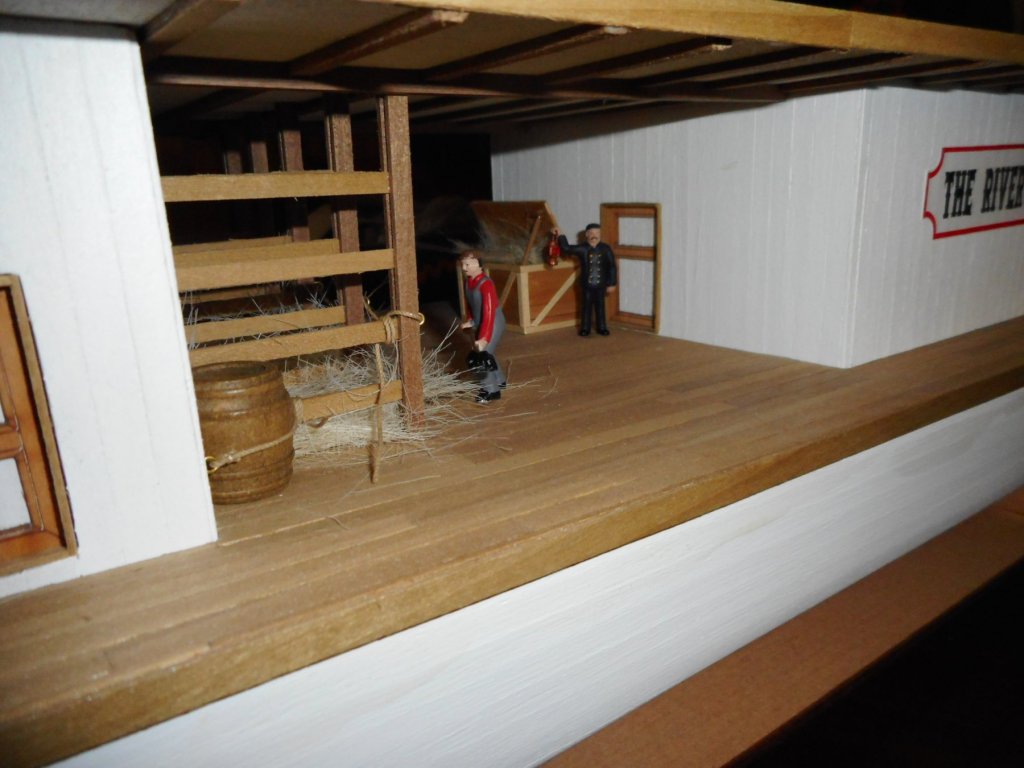
hey dave, I really like the figures myself I must say. the problem with them though is that they are actually just a little bit smaller than 1:50 scale. the figures stand 38mm tall to be exact, but they do tend to look in scale with the doors of the boat so I went with them. now the horses in the link you sent me, and thanks for doing so, are 1:50 scale and thus stand about 60mm tall. I thought maybe they would be just a little too tall in relation to the humans and thus look too out of place. having said that, I probably will get some to really make sure. it will be easy enough to place one into the stalls as the area is quite big and I can get my hand in there no problems, well at least until I put the side rails on, but this is still a fair way off. I am still looking around for something to put on/against the empty wall in the bay. thinking hay bales, buckets, maybe tools etc. again it all is a matter of finding stuff the right scale. chris
-
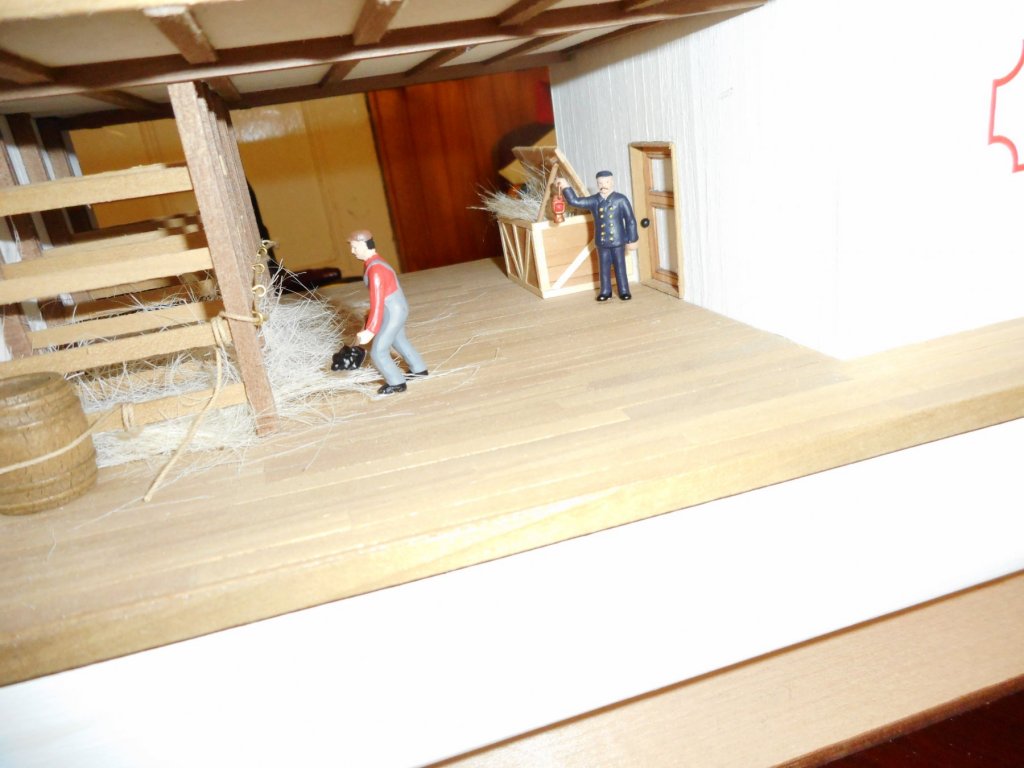
finally got some crew onboard! the chief engineer checking up on the poor bloke who has to shovel you know what! sorry about the pic quality! really bad at this! level 2 structure planking continues at glacier movement pace! chris

-
hey rob, my number 1 piece of advice is go with something you are really interested in. the first wooden ship I built was the amati santa maria. even though it is usually listed as an intermediate kit, I still chose this as I am a bit of a columbus freak! sure, it had its challenges for me, but this site was a godsend and all in all I think I turned out a really nice model. I guess the big thing to remember is that whatever you choose, it wont be built overnight. that's why I say choose a subject you are really interested in because the build can be with you for a very long time. chris
-
G'day Rob, you will love it here! You will find ships/boats of all shapes, sizes, periods, skill level etc. imaginable! What's even better though is the great friends you can make and learn off along the way. Do you have any idea of what your first build will be? Cheers Chris
-
great idea to light it up dave. would be a crime not to be able to view the wonderful interior of this boat! chris
-
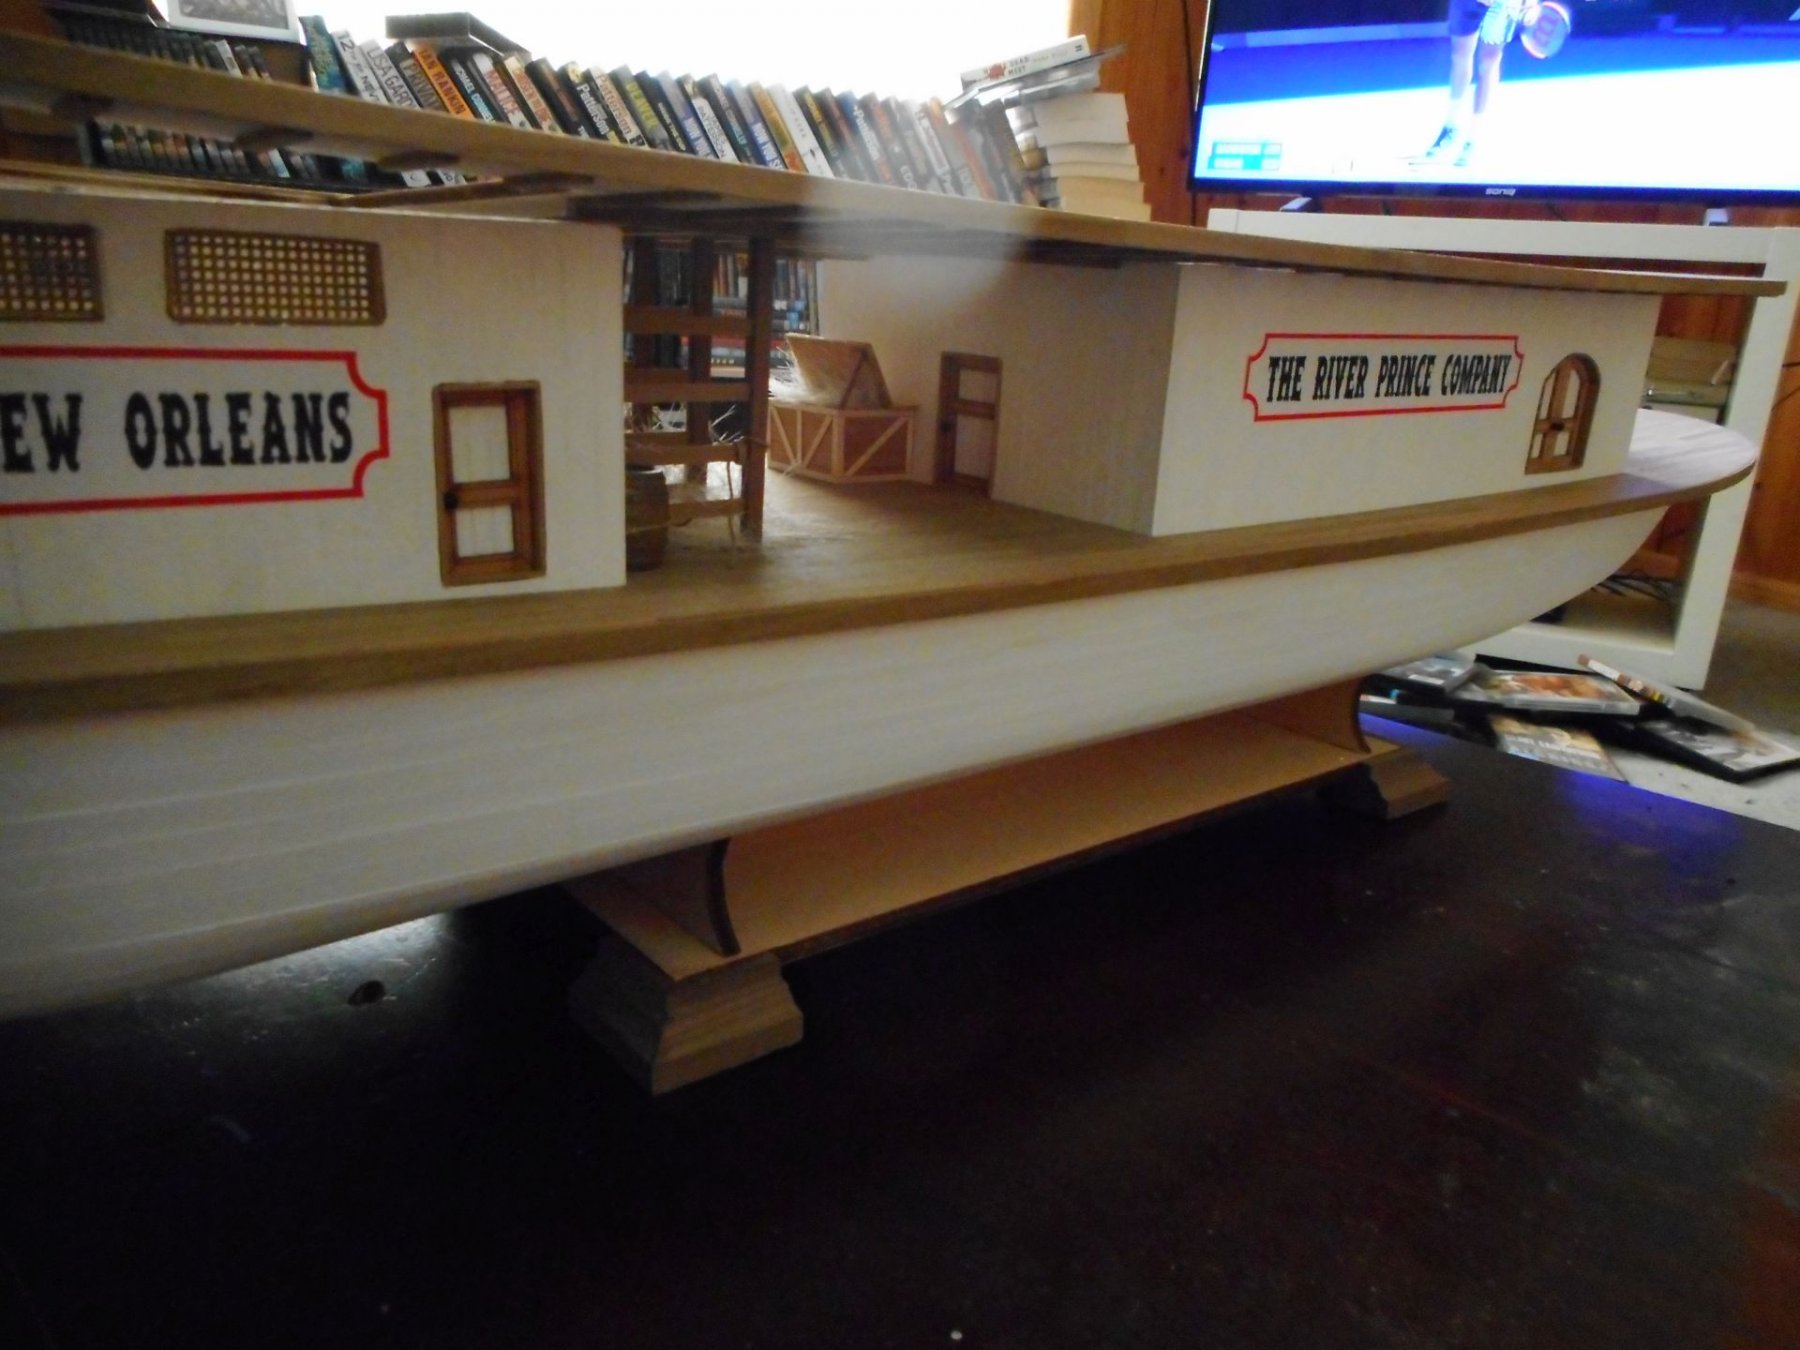
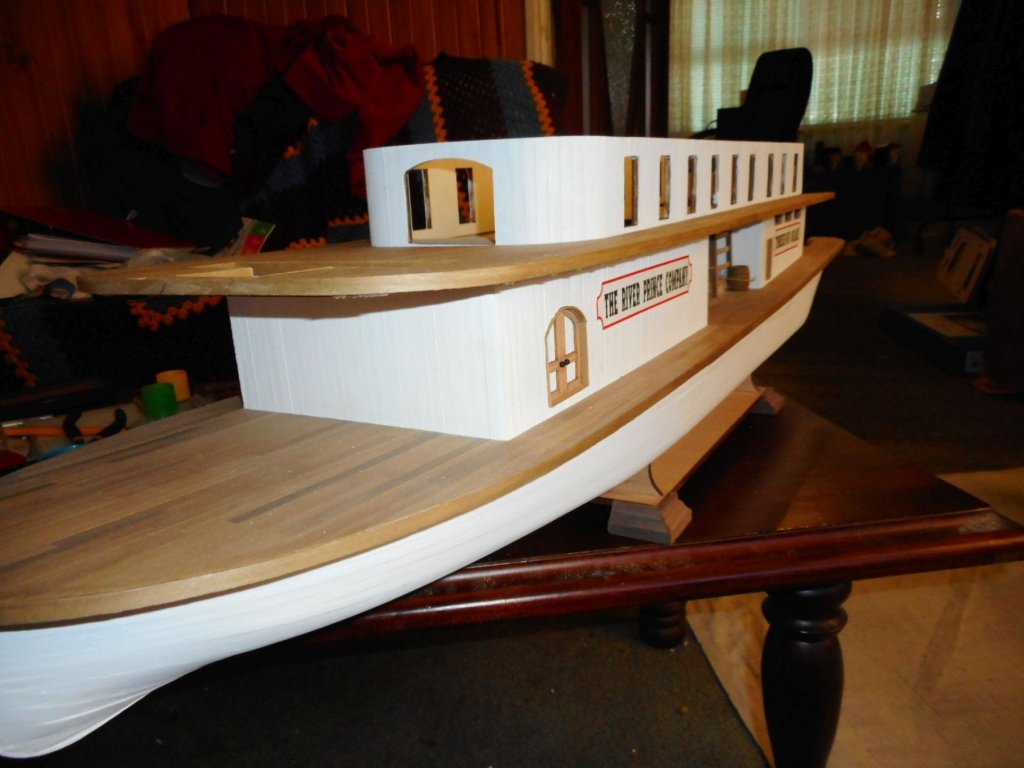
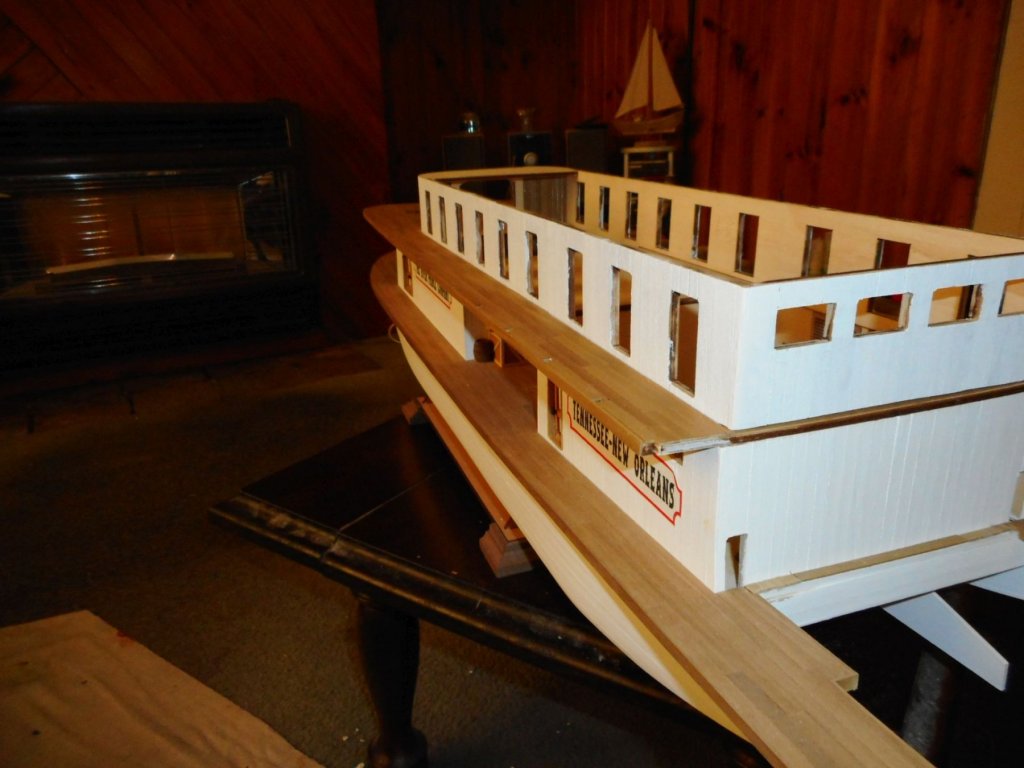
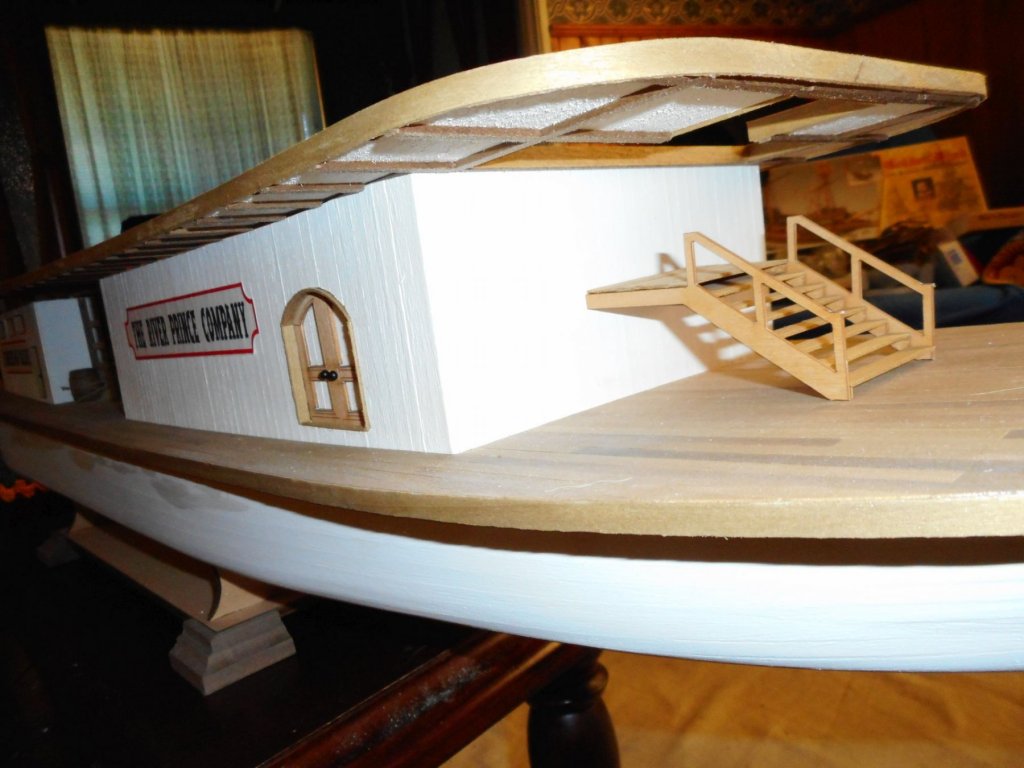
crawling along with all this planking of decks and cabin structures! finally have second deck glued down, but requires another coat of matt clear I reckon. second deck cabin structure is a slow process to plank. here it is just dry sitting on top of the deck itself. when completed and ready to mount, it will also be white, so any small gaps the camera shows up can be filled if necessary. none of my passengers and crew have been glued into position as yet, and I am still procrastinating over the horse bay area detail. anyway, sorry, not much of an update, but it is a way to bump my log up from page 5 I guess


-
this is so cool dave! love the interior! what are the curved couches made of? you could maybe even add more scratch interior detail perhaps? chris
-
hey dave, when I was in the oz navy, whenever we were abroad all the pilots were land based and came out to the ships from various boats. I cant remember a pilot (and I had a fair bit to do with them), actually being based on a vessel. I did hundreds of os deployments and cant ever remember a time we put our boat over to collect a pilot. it was always the other way around. they would come to us in a boat that was moored at the local dock until needed. chris
-
loving this build dave! after I build the countless riverboats on my list I may have to give this a shot too! chris
-
well done oliver! get yourself a good, easy sandable filler and apply a skim coat over the entire planked surface. once it has thoroughly dried, then sand the hull until it is smooth and all the little gaps have been filled with filler. remember, this version of the hull wont be visible once you apply the second planking, so it doesn't matter how much filler you use really. just make sure that it will take the final planking strips. 99.9% of them would though. you will find the second and final planking easier I reckon. the strips in this kit are thinner, and much more pliable. important: from here the look of your final hull for viewing is greatly determined by your filling and sanding at this stage. I cant stress this enough. once again, well done. chris
-
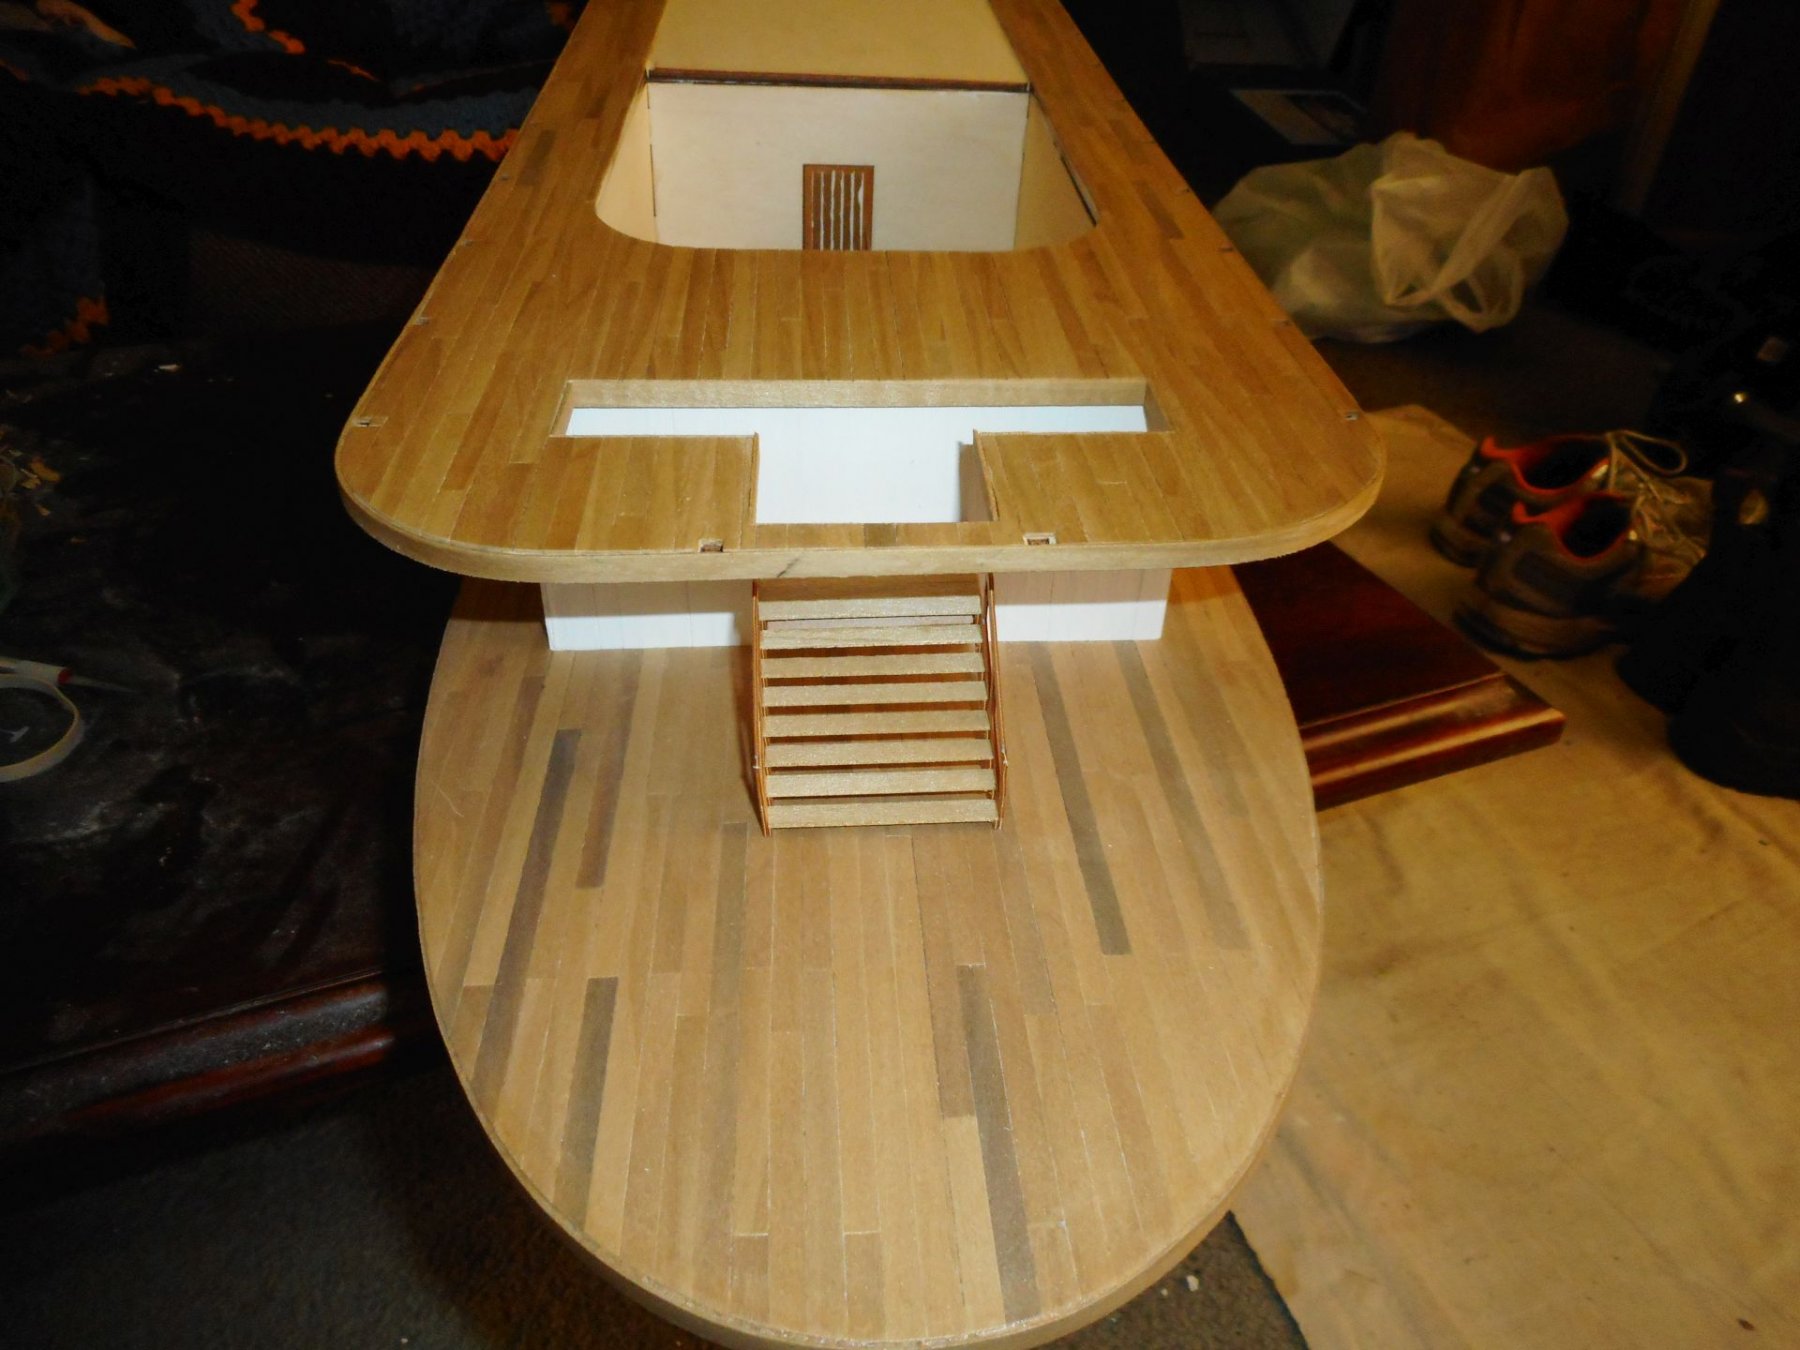
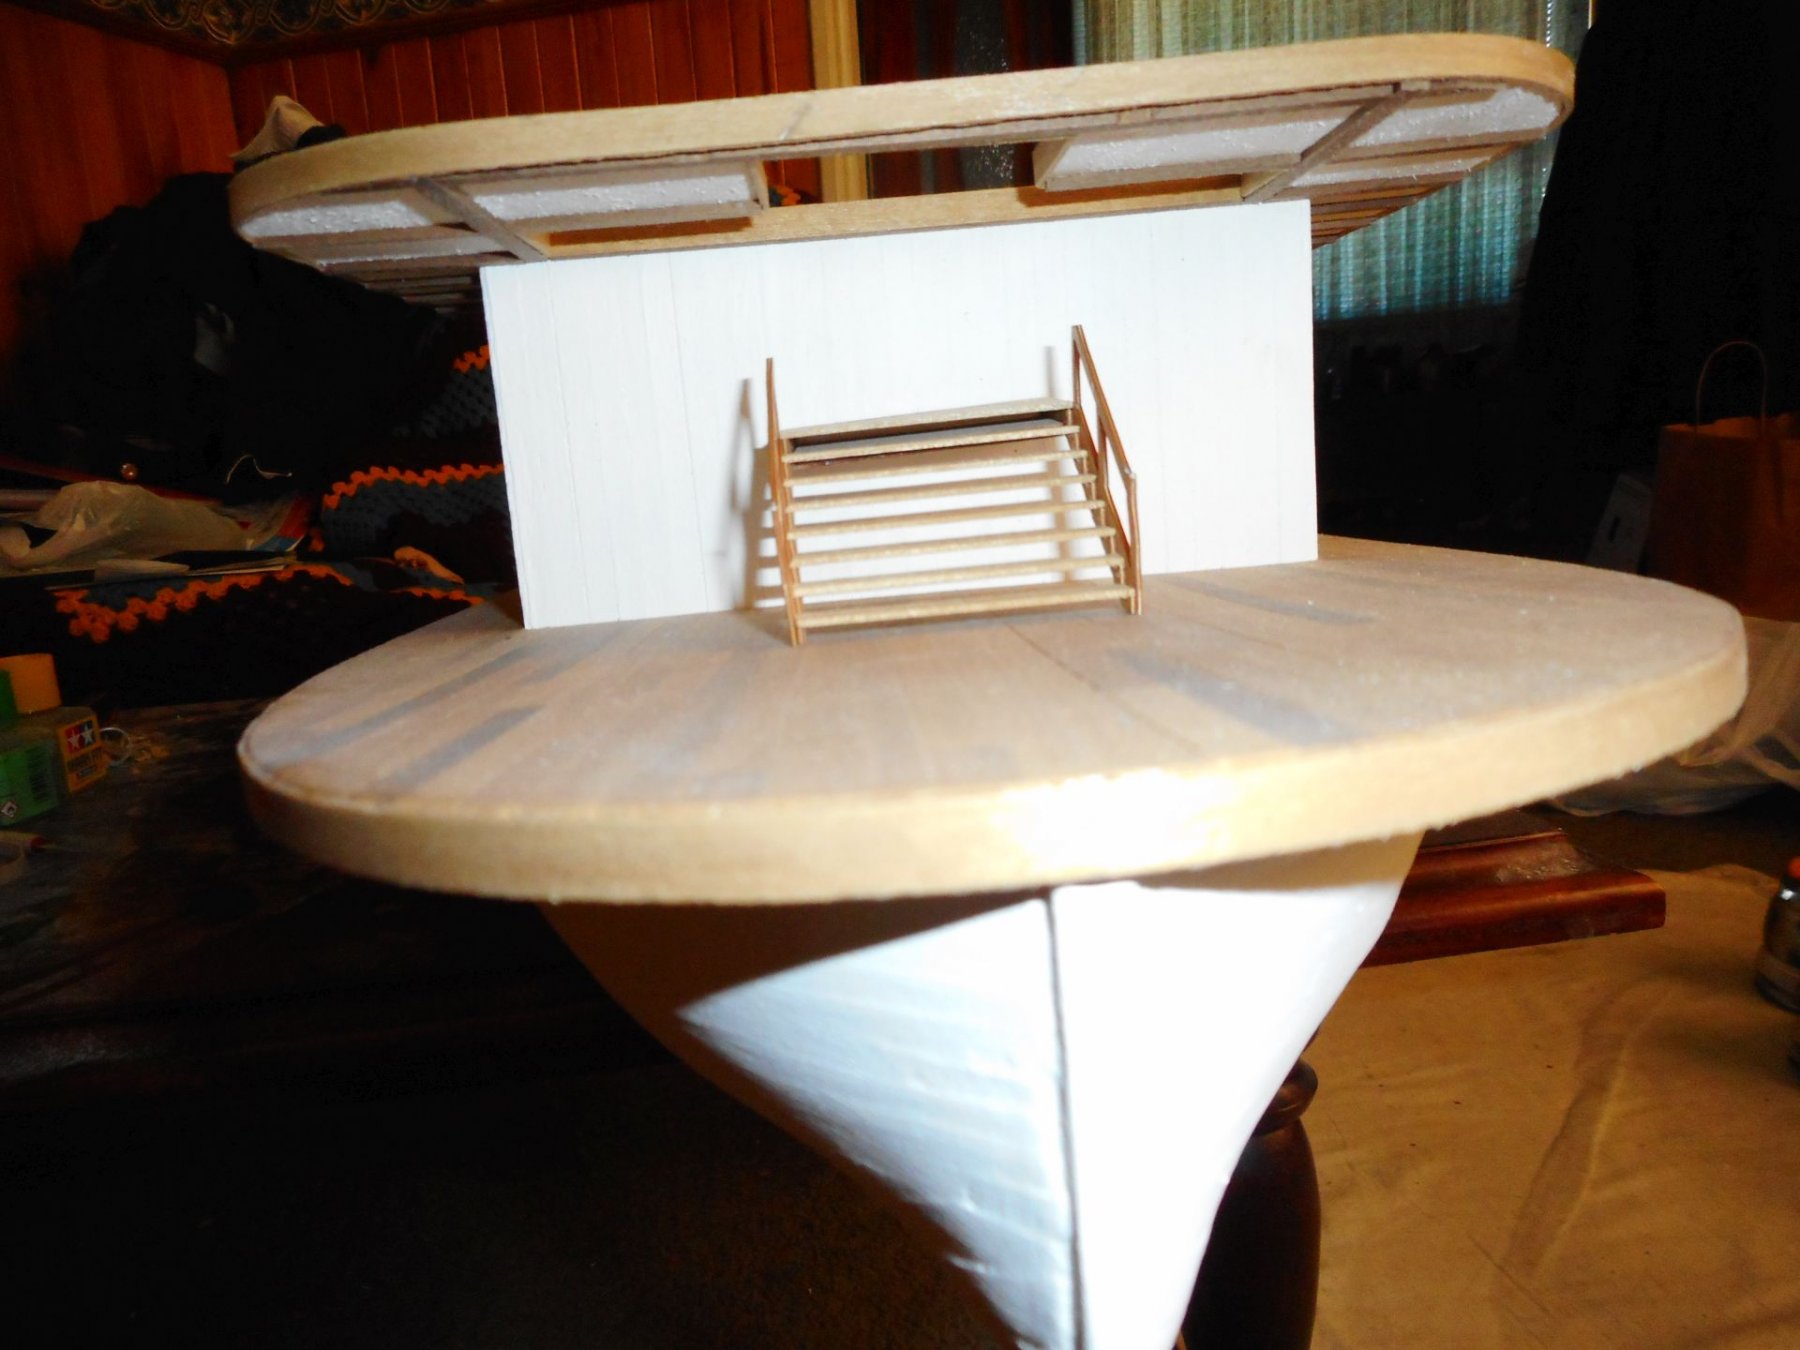
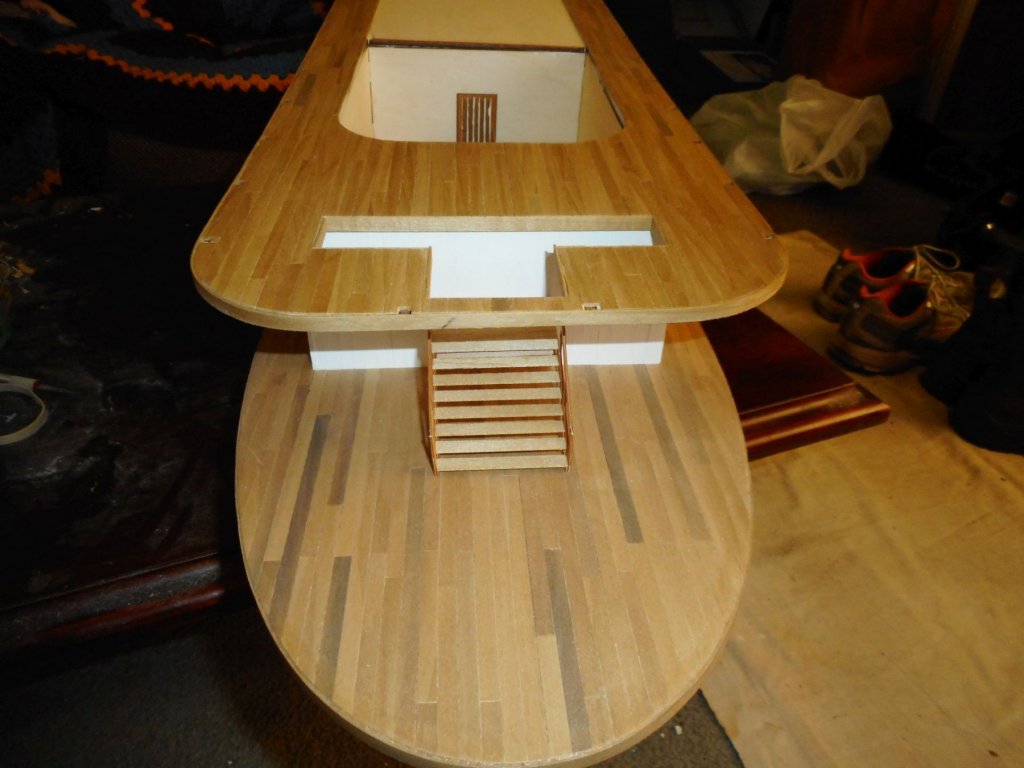
yes, the first deck is what I would call a working deck I guess. horses etc in the bay area, along with hay, water barrels and the like. no self respecting fancy lady or dapper gent would be seen dead on this level! lol the stairs do indeed go straight up as you mentioned. all around there is really nice decorative balustrades too. its a lovely kit straight out of the box, but I reckon enhanced with extra's like people, foliage etc. it makes it even better. chris
-
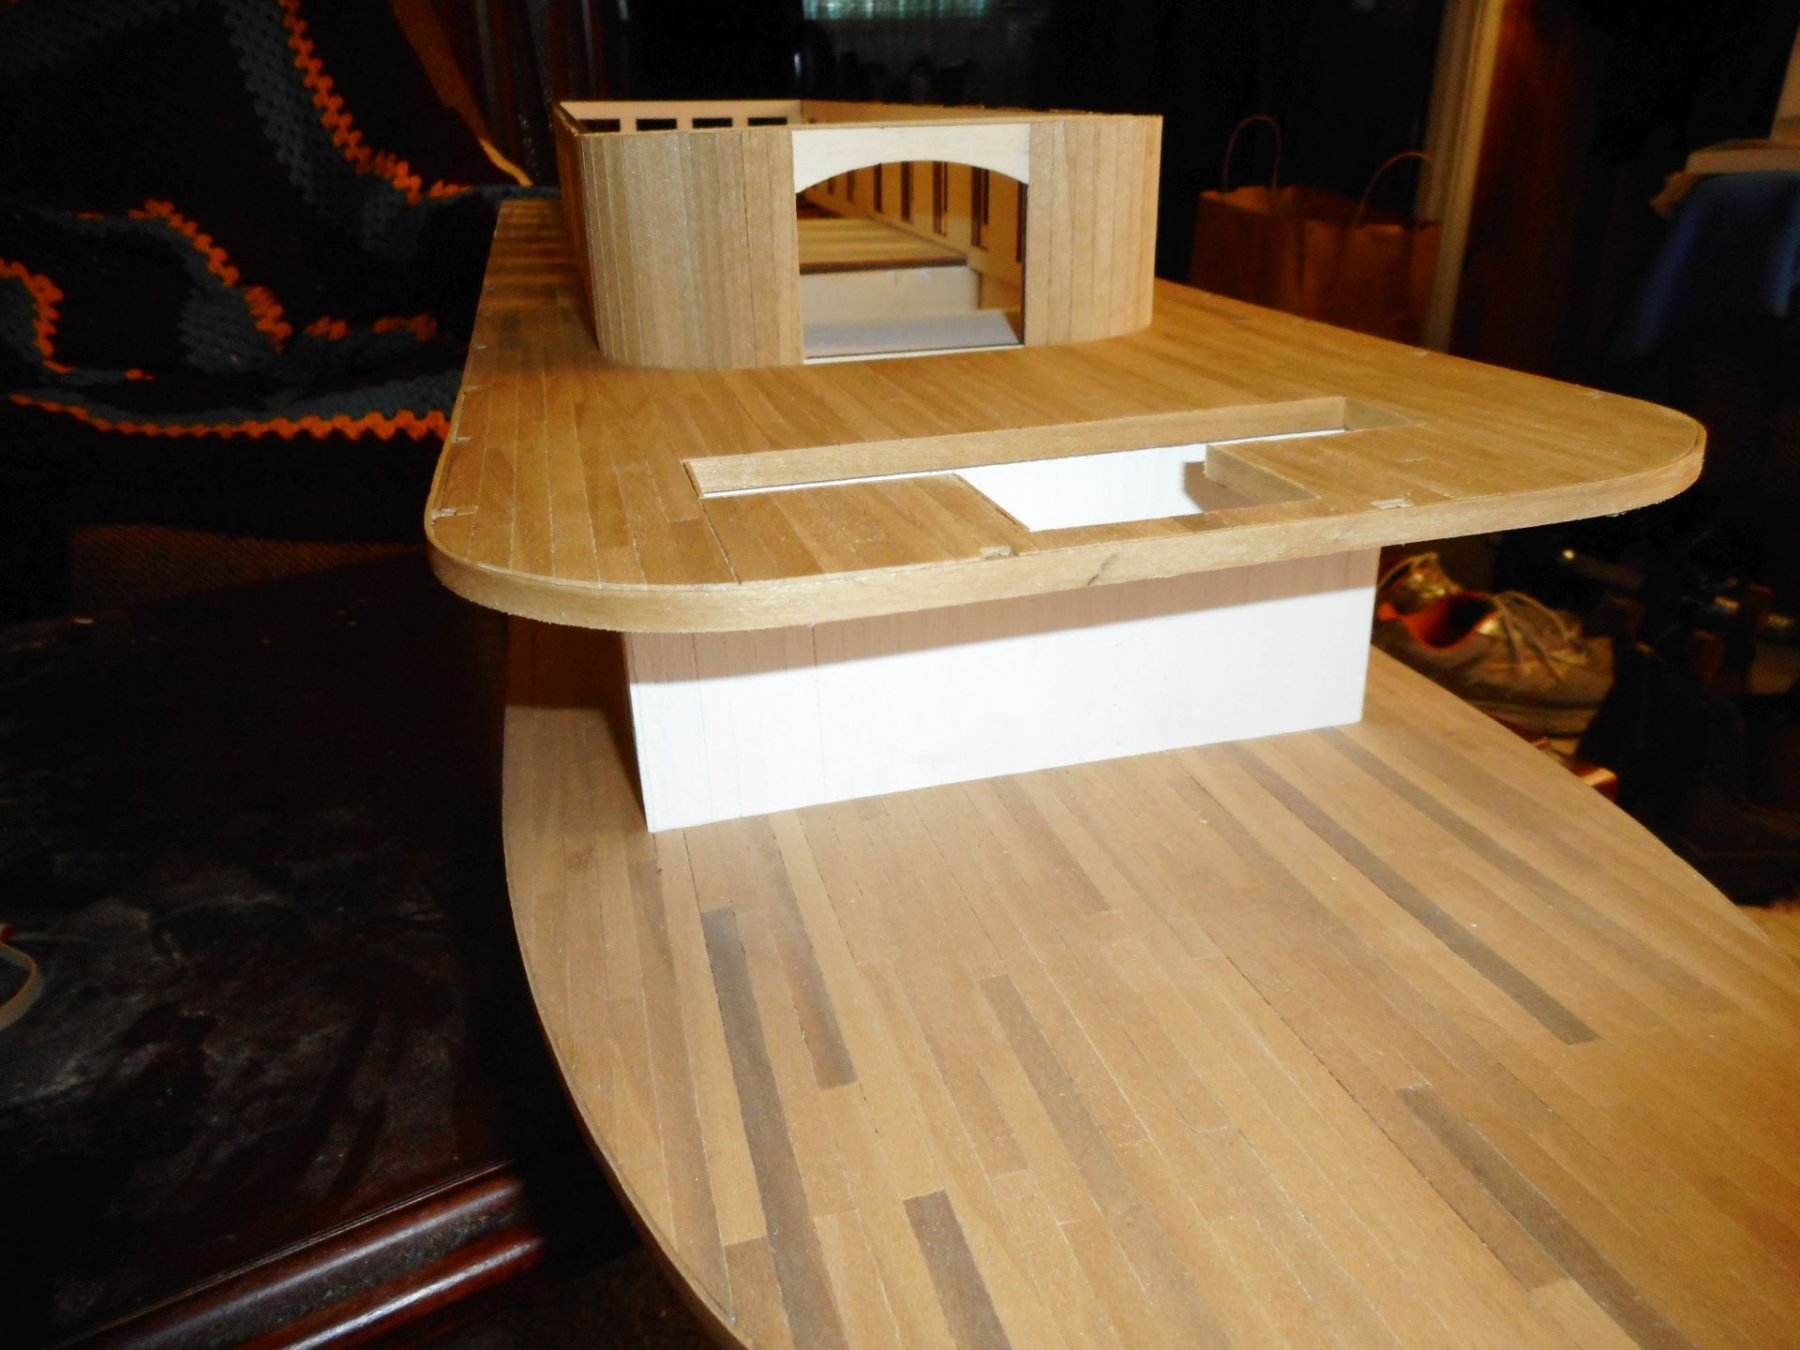
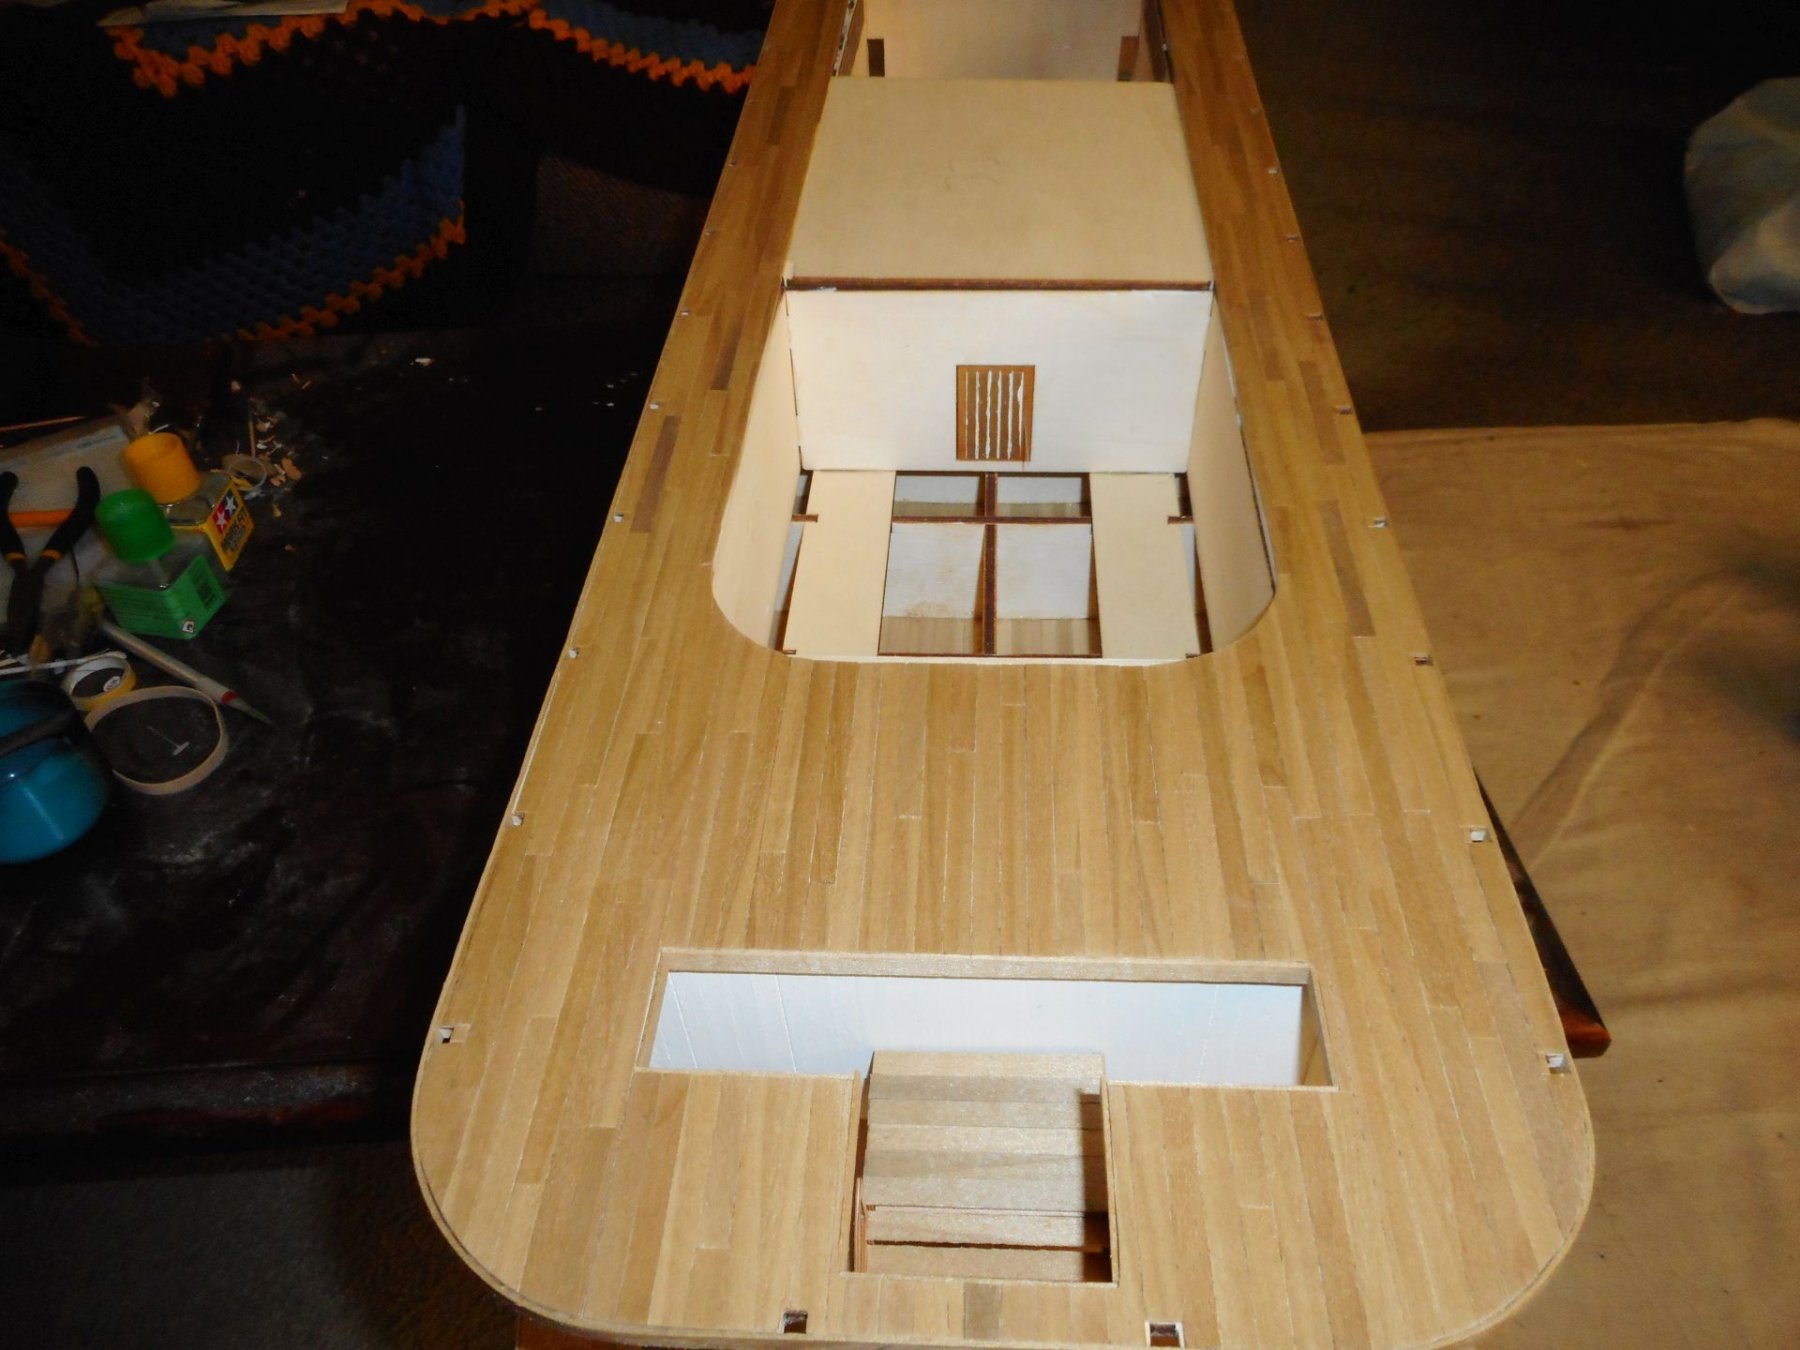
a bit of an update. the second deck and the beginning of the main staircase are just preliminary dry fittings. as you can see the second deck is quite warped. this isn't so much a problem as more than an annoyance really. it should glue down just fine. the main reason its not glued down now is that I want to add more detail to the horse bay area and it is a lot easier without the deck covering it. have searched high and low for some horses at the right scale, but cant seem to find any suitable candidates. the kit comes with a red sticker to simulate carpet (I guess) going up the main stairway. I figure my fancy ladies deserve better than that so will source some fine reddish material and cover each rung individually. to take these pics I am using a Nikon Coolpix a300 20 megapixel camera. as you can see it shows up every blemish/error known to mankind. these are not visible to the naked eye however, so at this point I am pretty happy with where I am at. chris


-
really liked the fly screen doors. looks very effective! chris