HOLIDAY DONATION DRIVE - SUPPORT MSW - DO YOUR PART TO KEEP THIS GREAT FORUM GOING! (Only 20 donations so far - C'mon guys!)
×


vossy
-
Posts
600 -
Joined
-
Last visited
Content Type
Profiles
Forums
Gallery
Events
Everything posted by vossy
-
 hi hugh, so glad you are doing this kit as well. I just love the riverboats and will definitely do this one once i'm done with Mississippi and chaperon. btw, I reckon I have searched the outer limits of the known universe for correct scale (1:50) and period figures for my build, and the only ones I can find are some of those you can see on my log. if you are planning to put people on your build, could you please let me know if you come across any that might be of interest to me? thanks, and good luck with your build. I am looking forward to following it. chris
 -
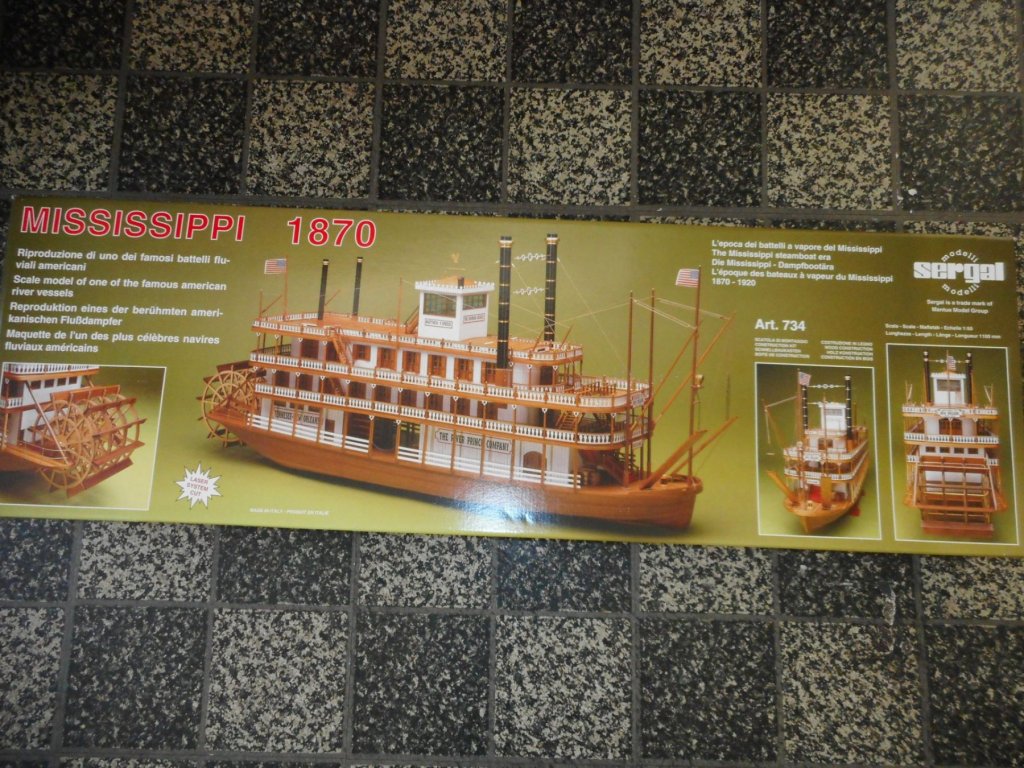
hey tom, it is a massive kit really. scale is 1:50. overall length is 1100mm, width about 240mm, height about 600mm from keel to top of main stacks. height is very approximate as there are no 1:1 scale drawings in the plans, but I reckon its about 600mm. its about 220mm longer than the chaperon and roughly twice as high, but again the height is just a guess really, it is possibly somewhere in the vicinity of 550 - 600mm actually. either way she's a big boat! chris
-
thanks dave, taking an age to plank the next deck, but should have updates in the next day or so I reckon. chris
-
hey dave, this looks like a really nice, interesting kit. I will definitely follow along. also, I finally got around to doing a build log for my Mississippi riverboat! chris
-
Really nice model mate. Did you re-plank the decks, or are they the original scribed ones that come with the kit? They look really nice. Chris
-
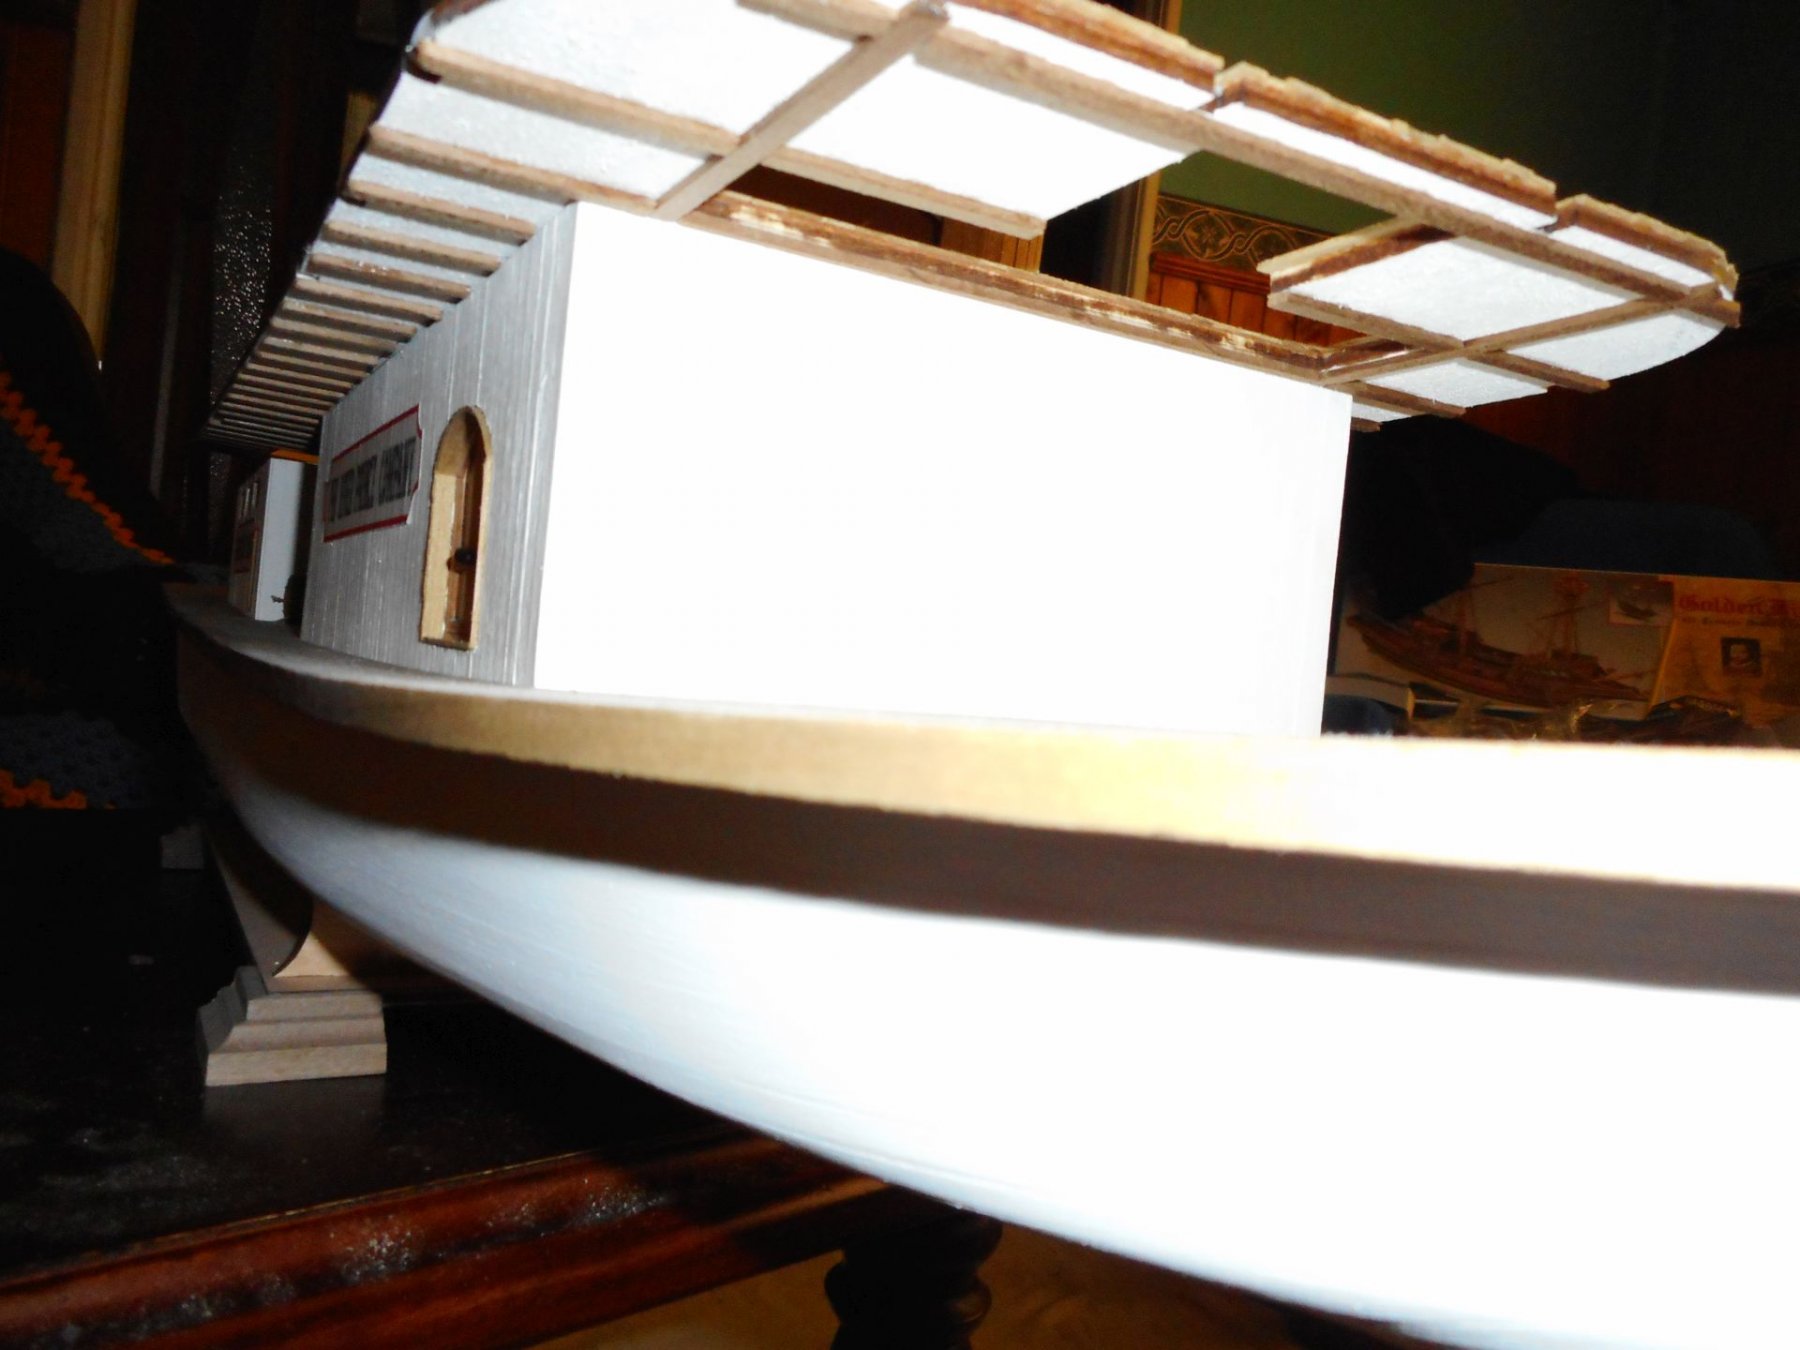
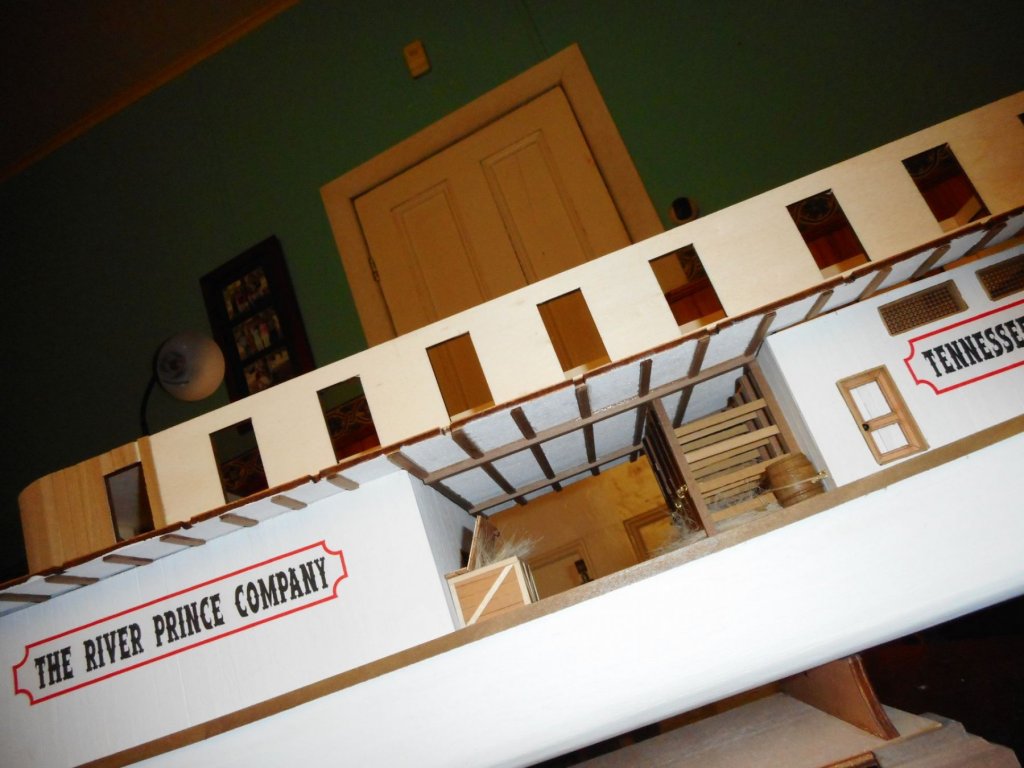
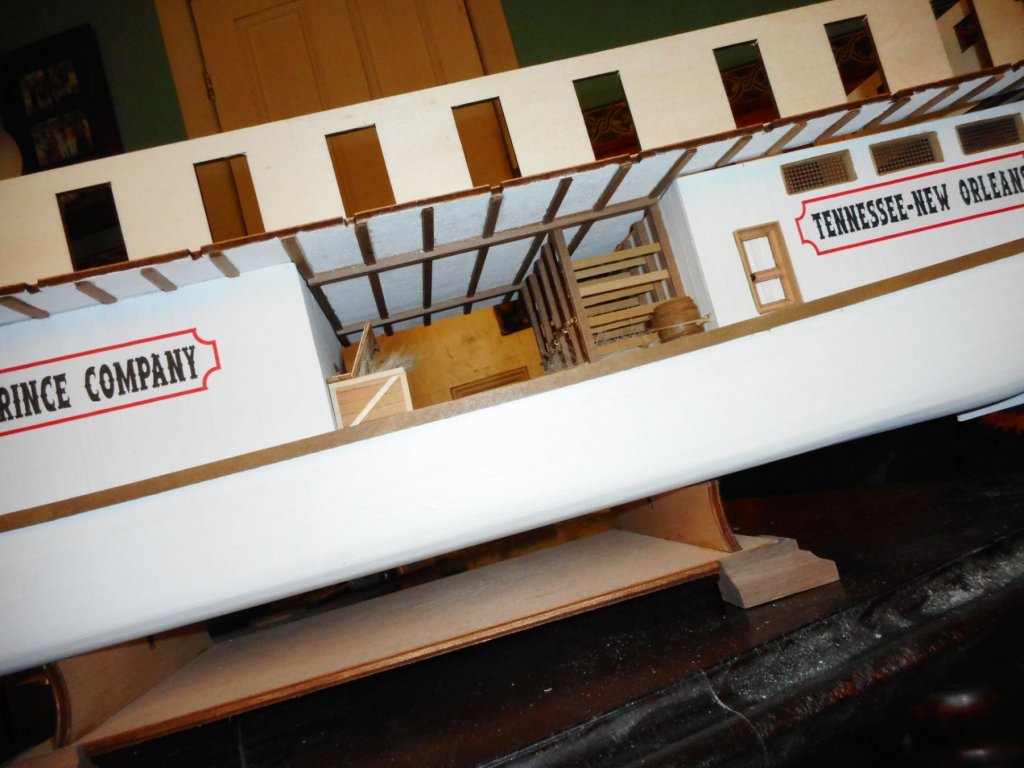
Some more views of how the underside of the second deck will look once it is glued into place.


-
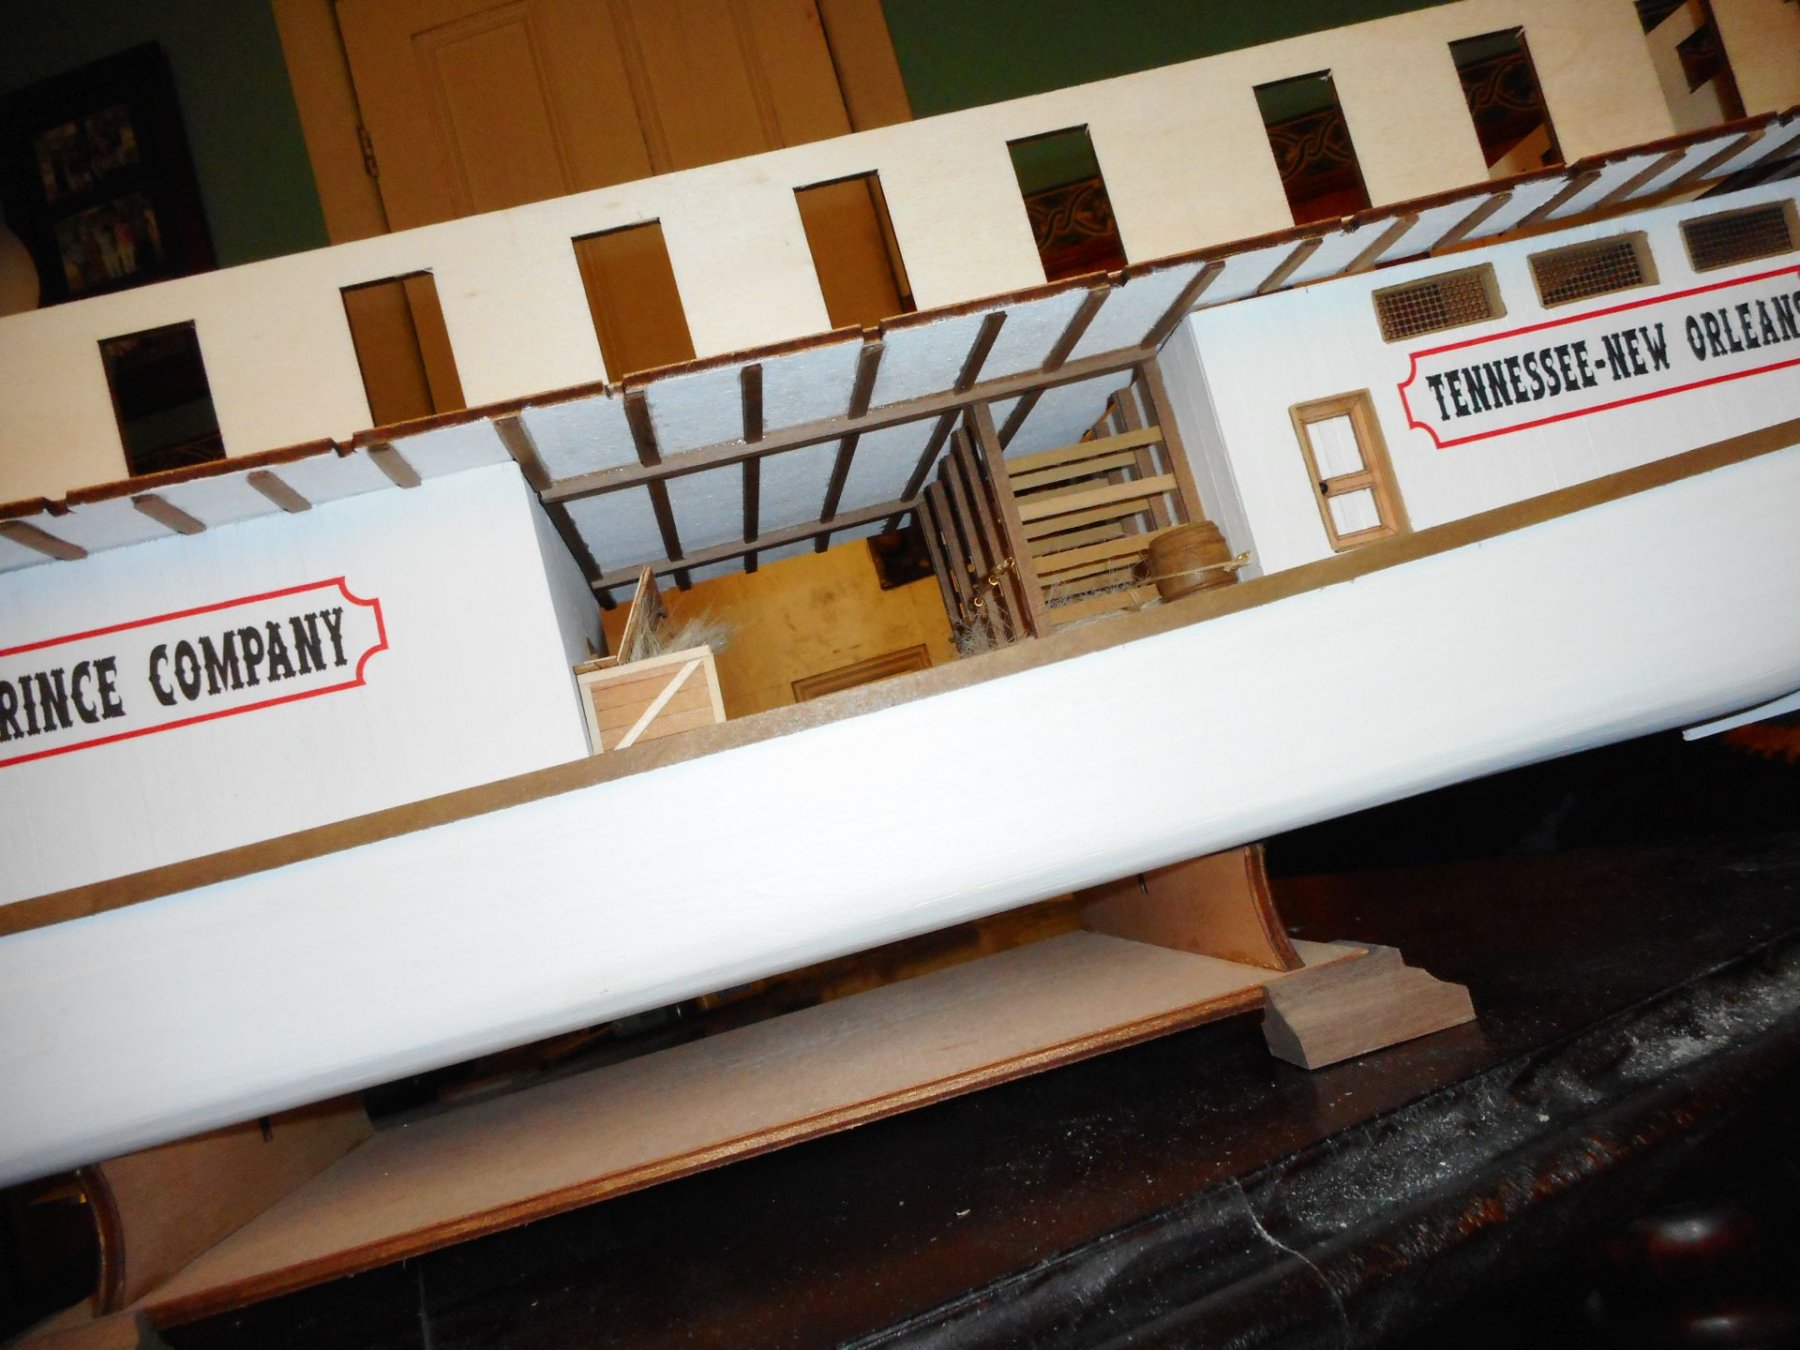
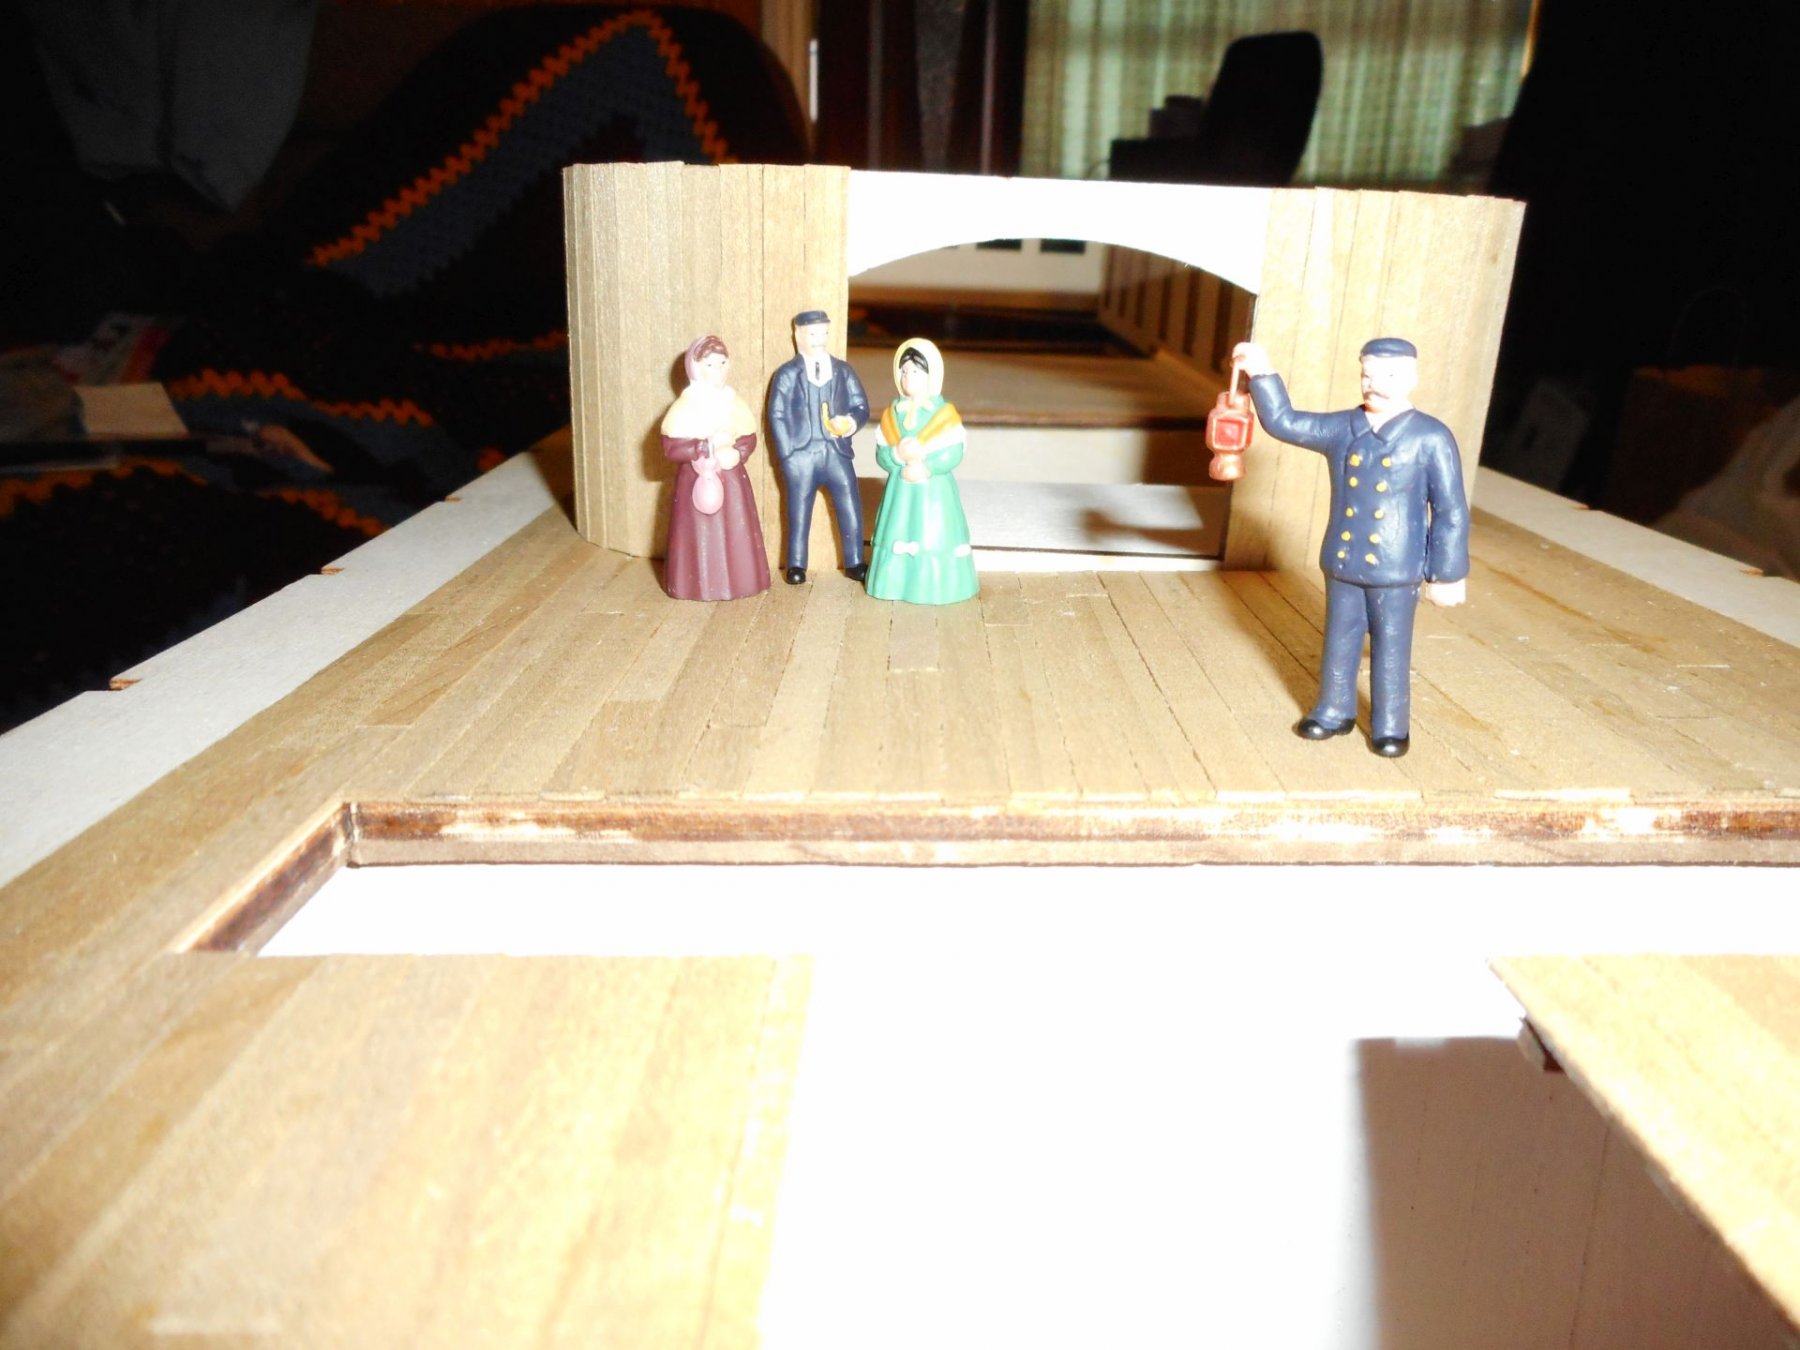
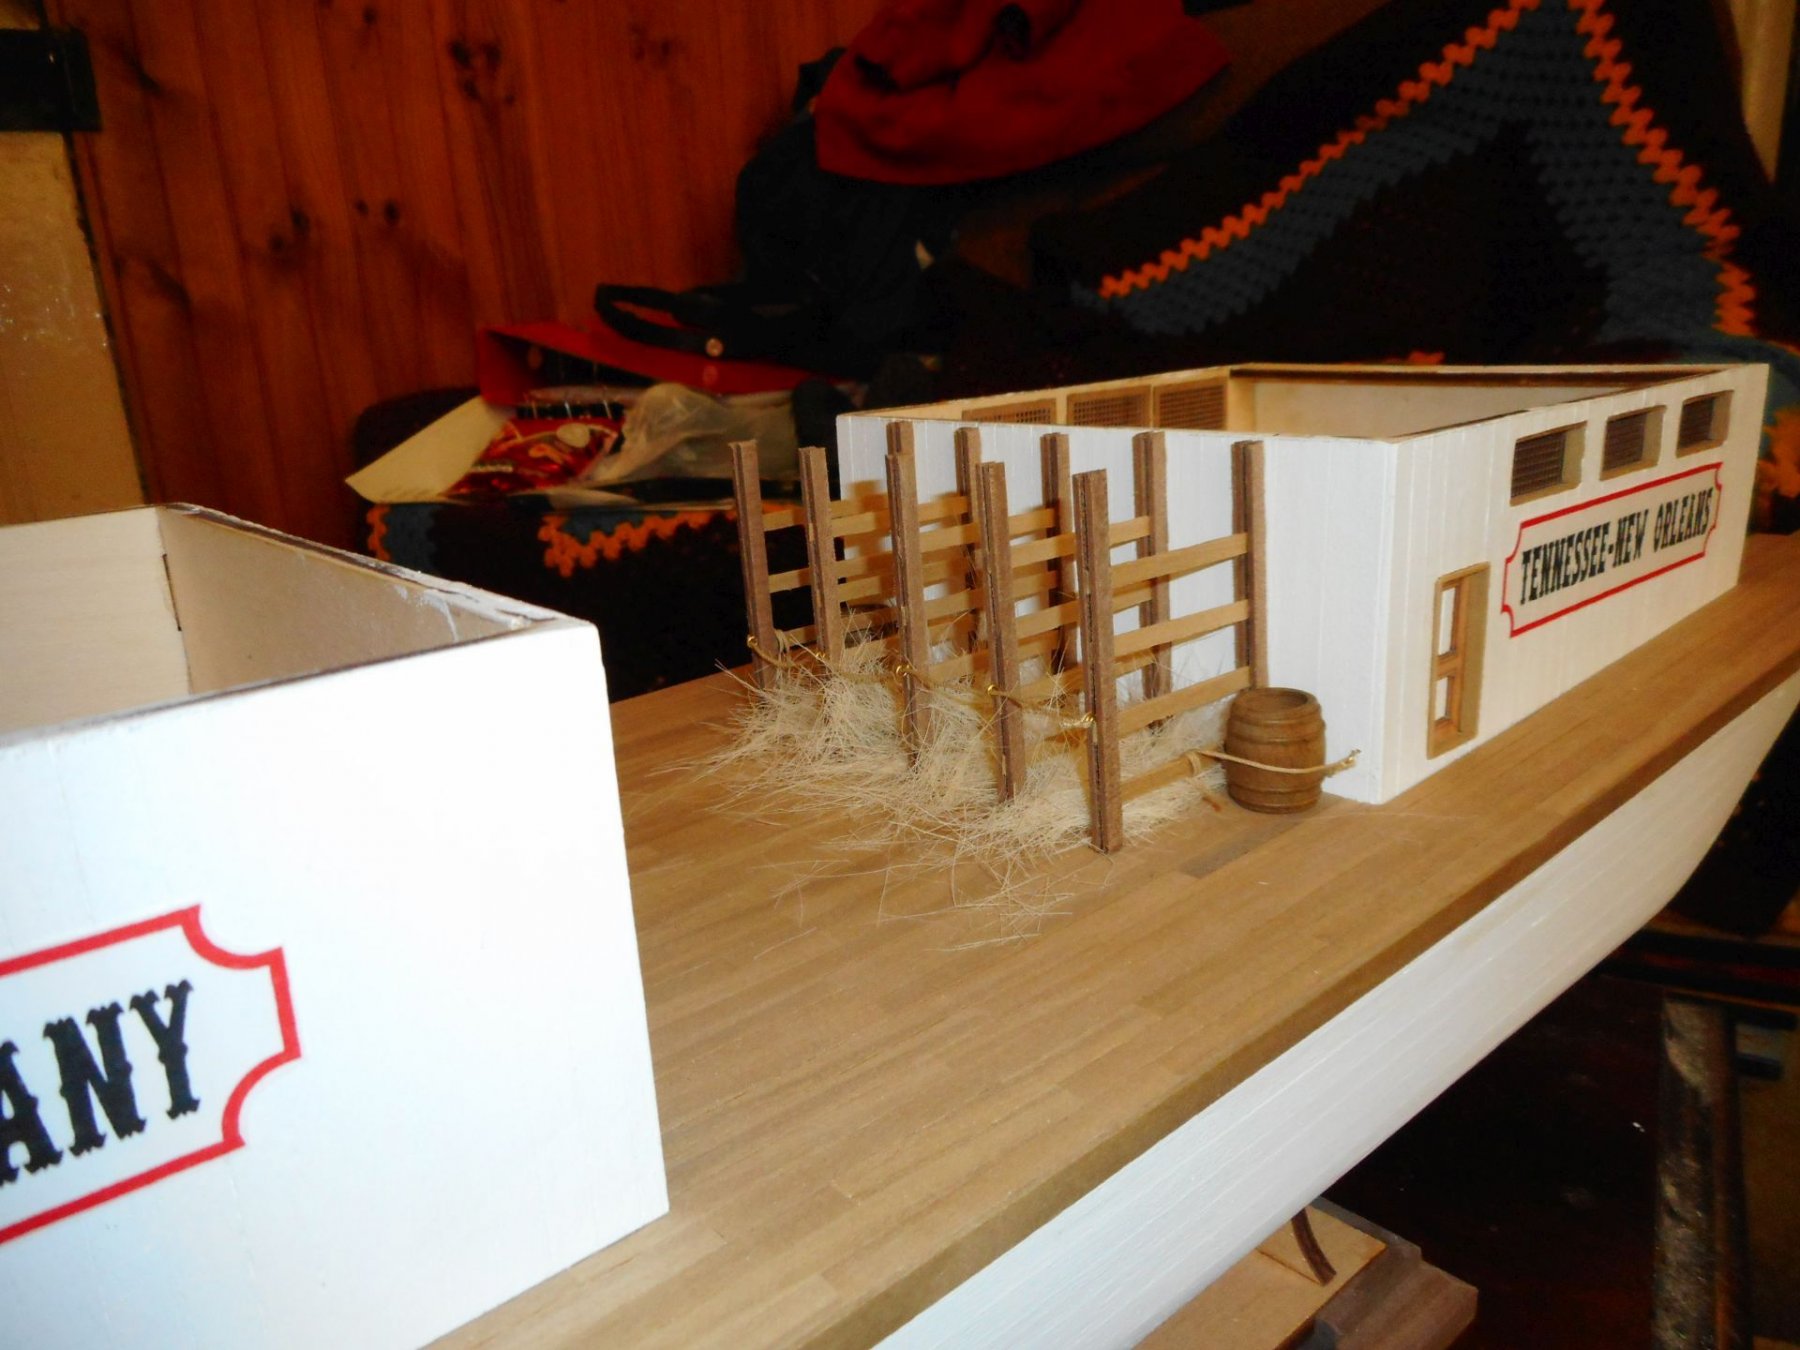
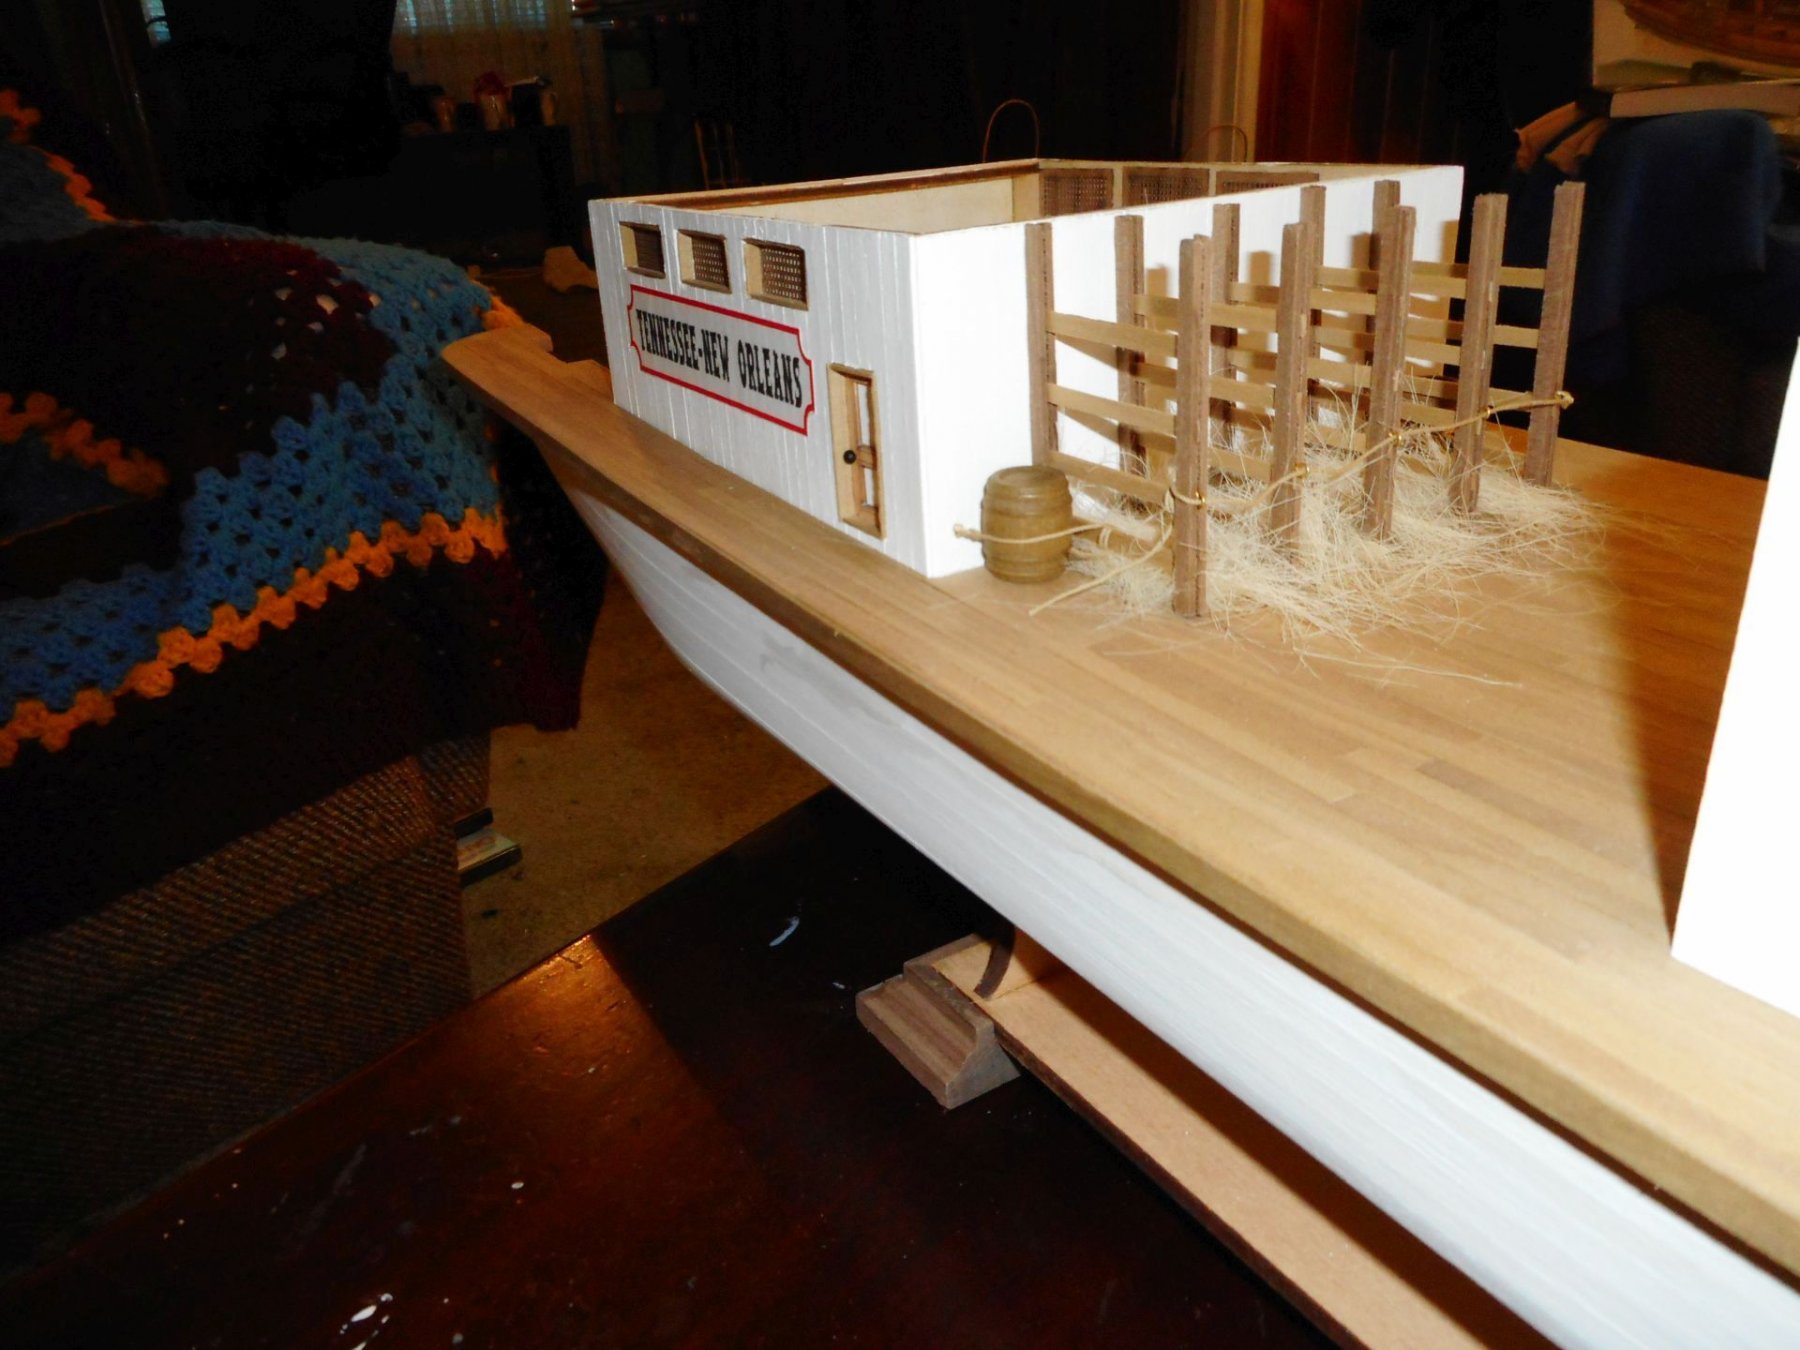
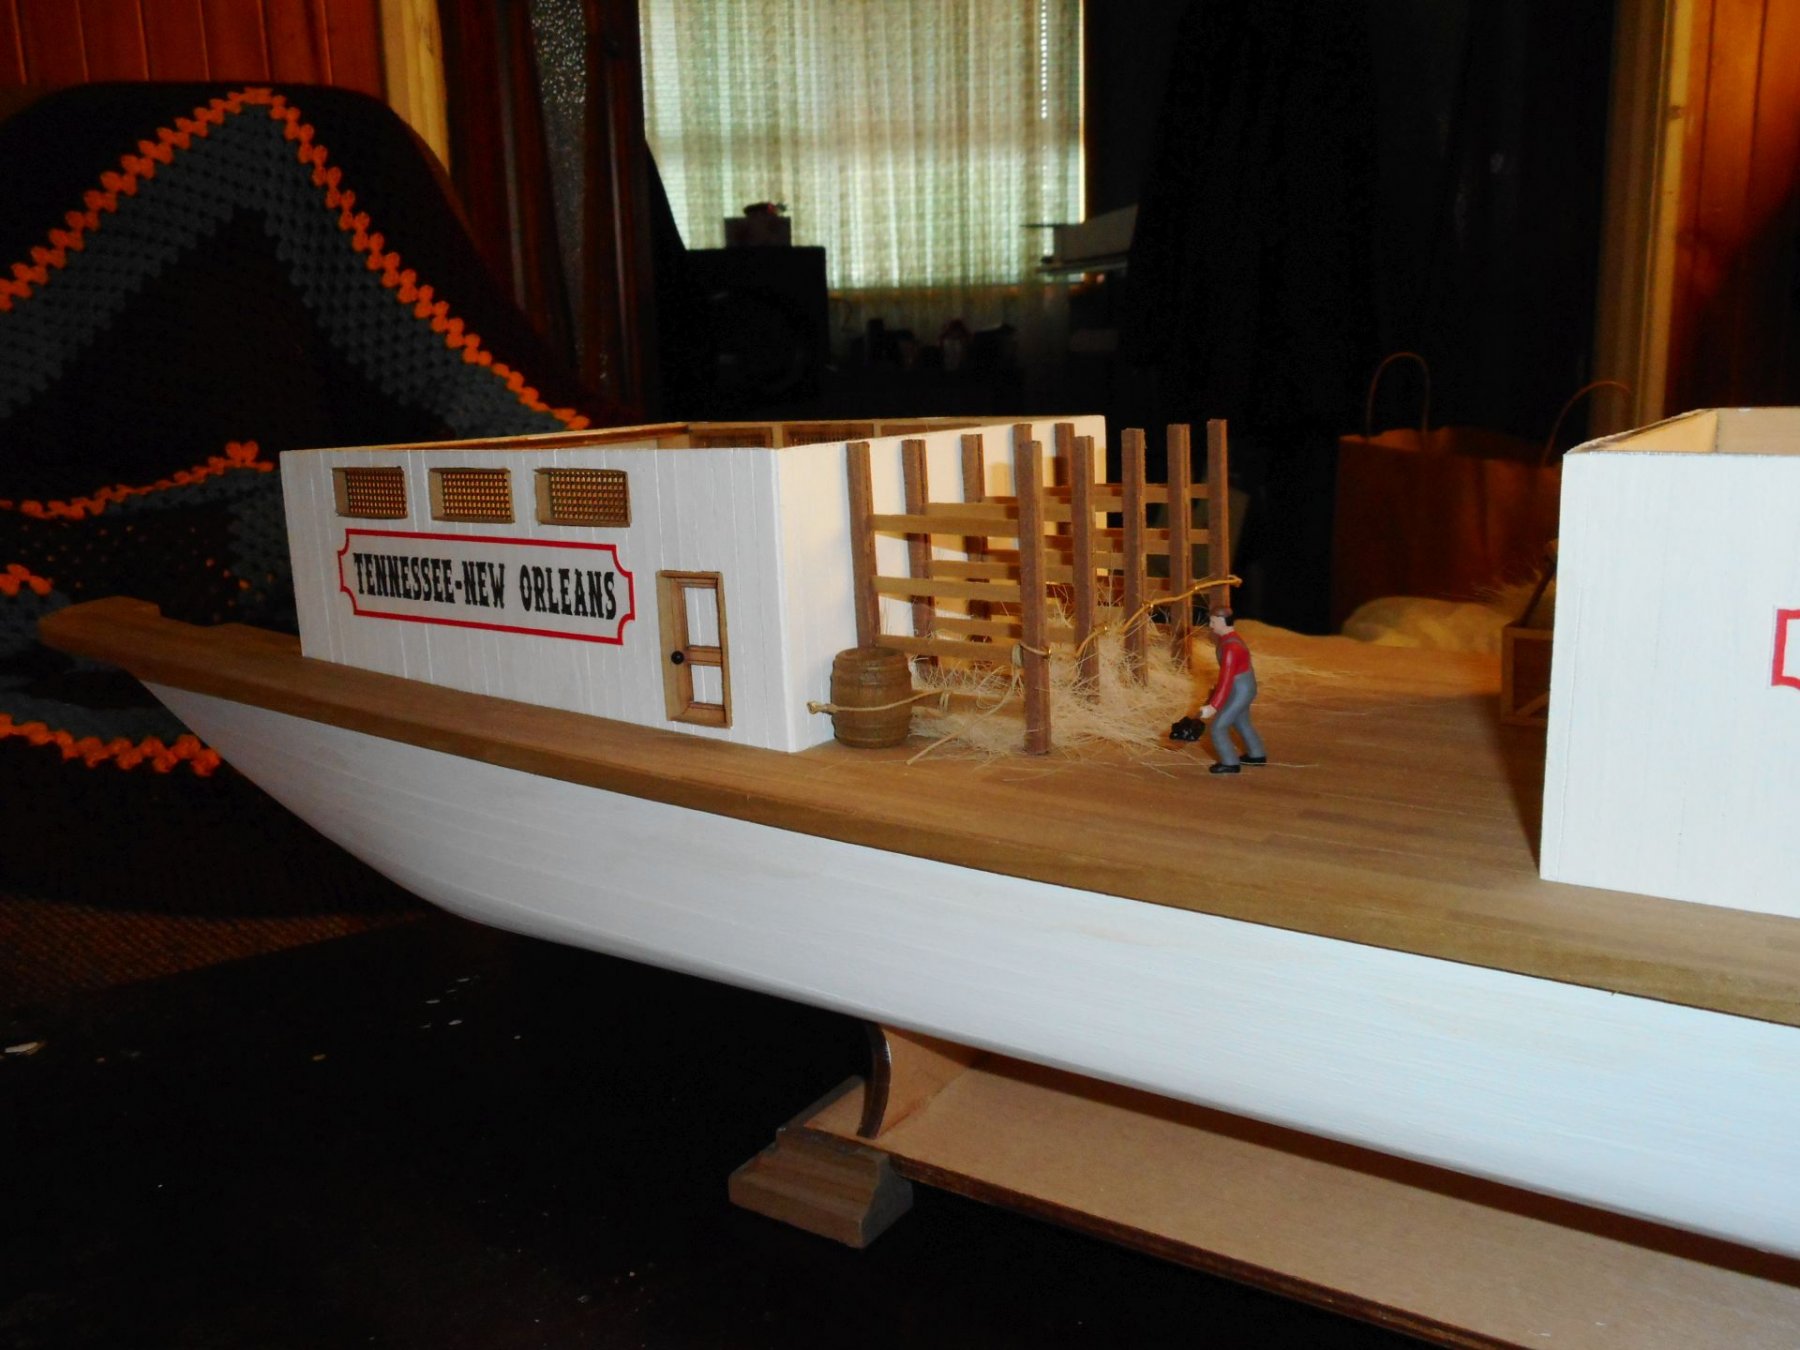
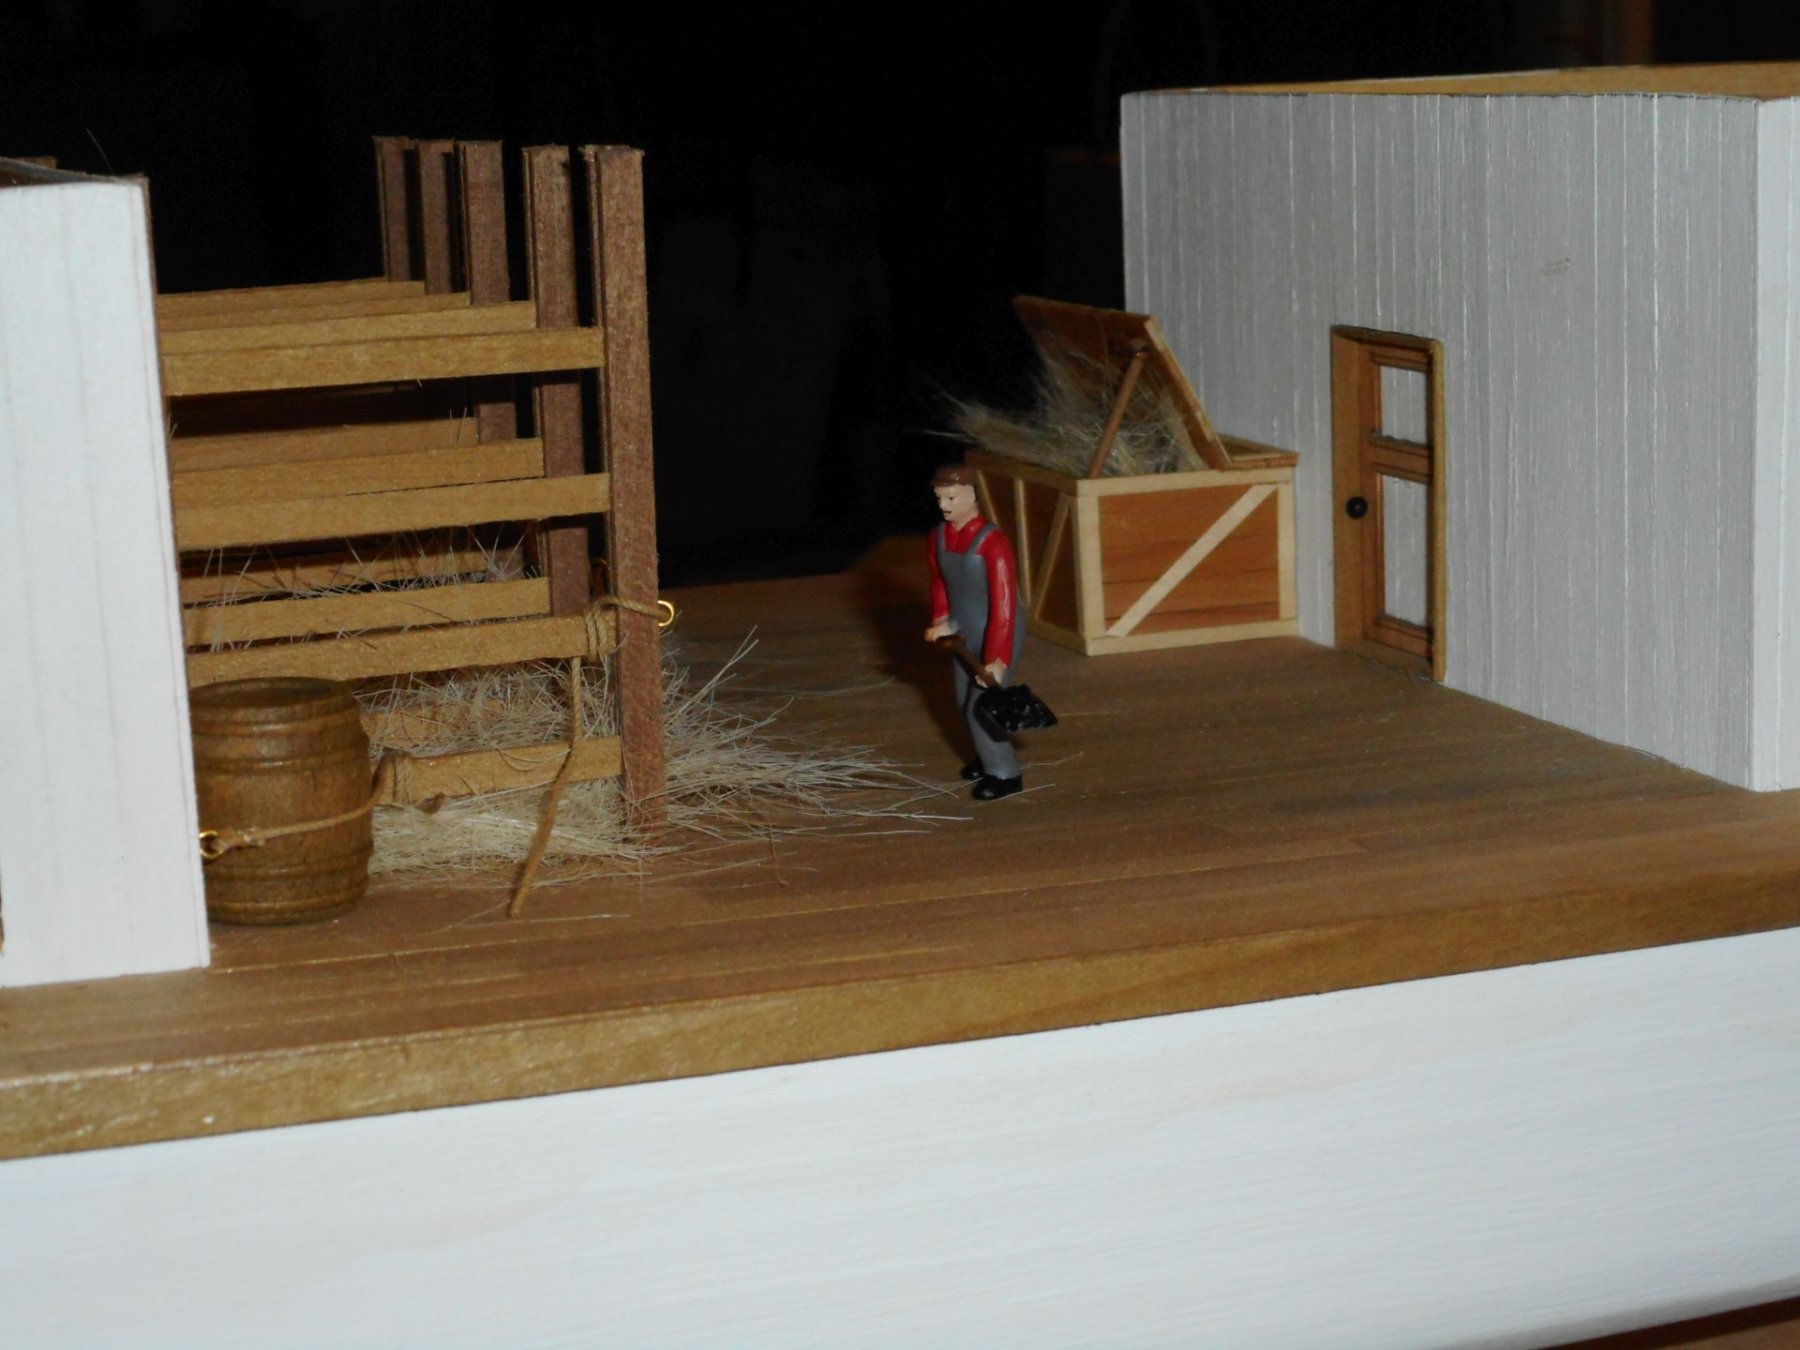
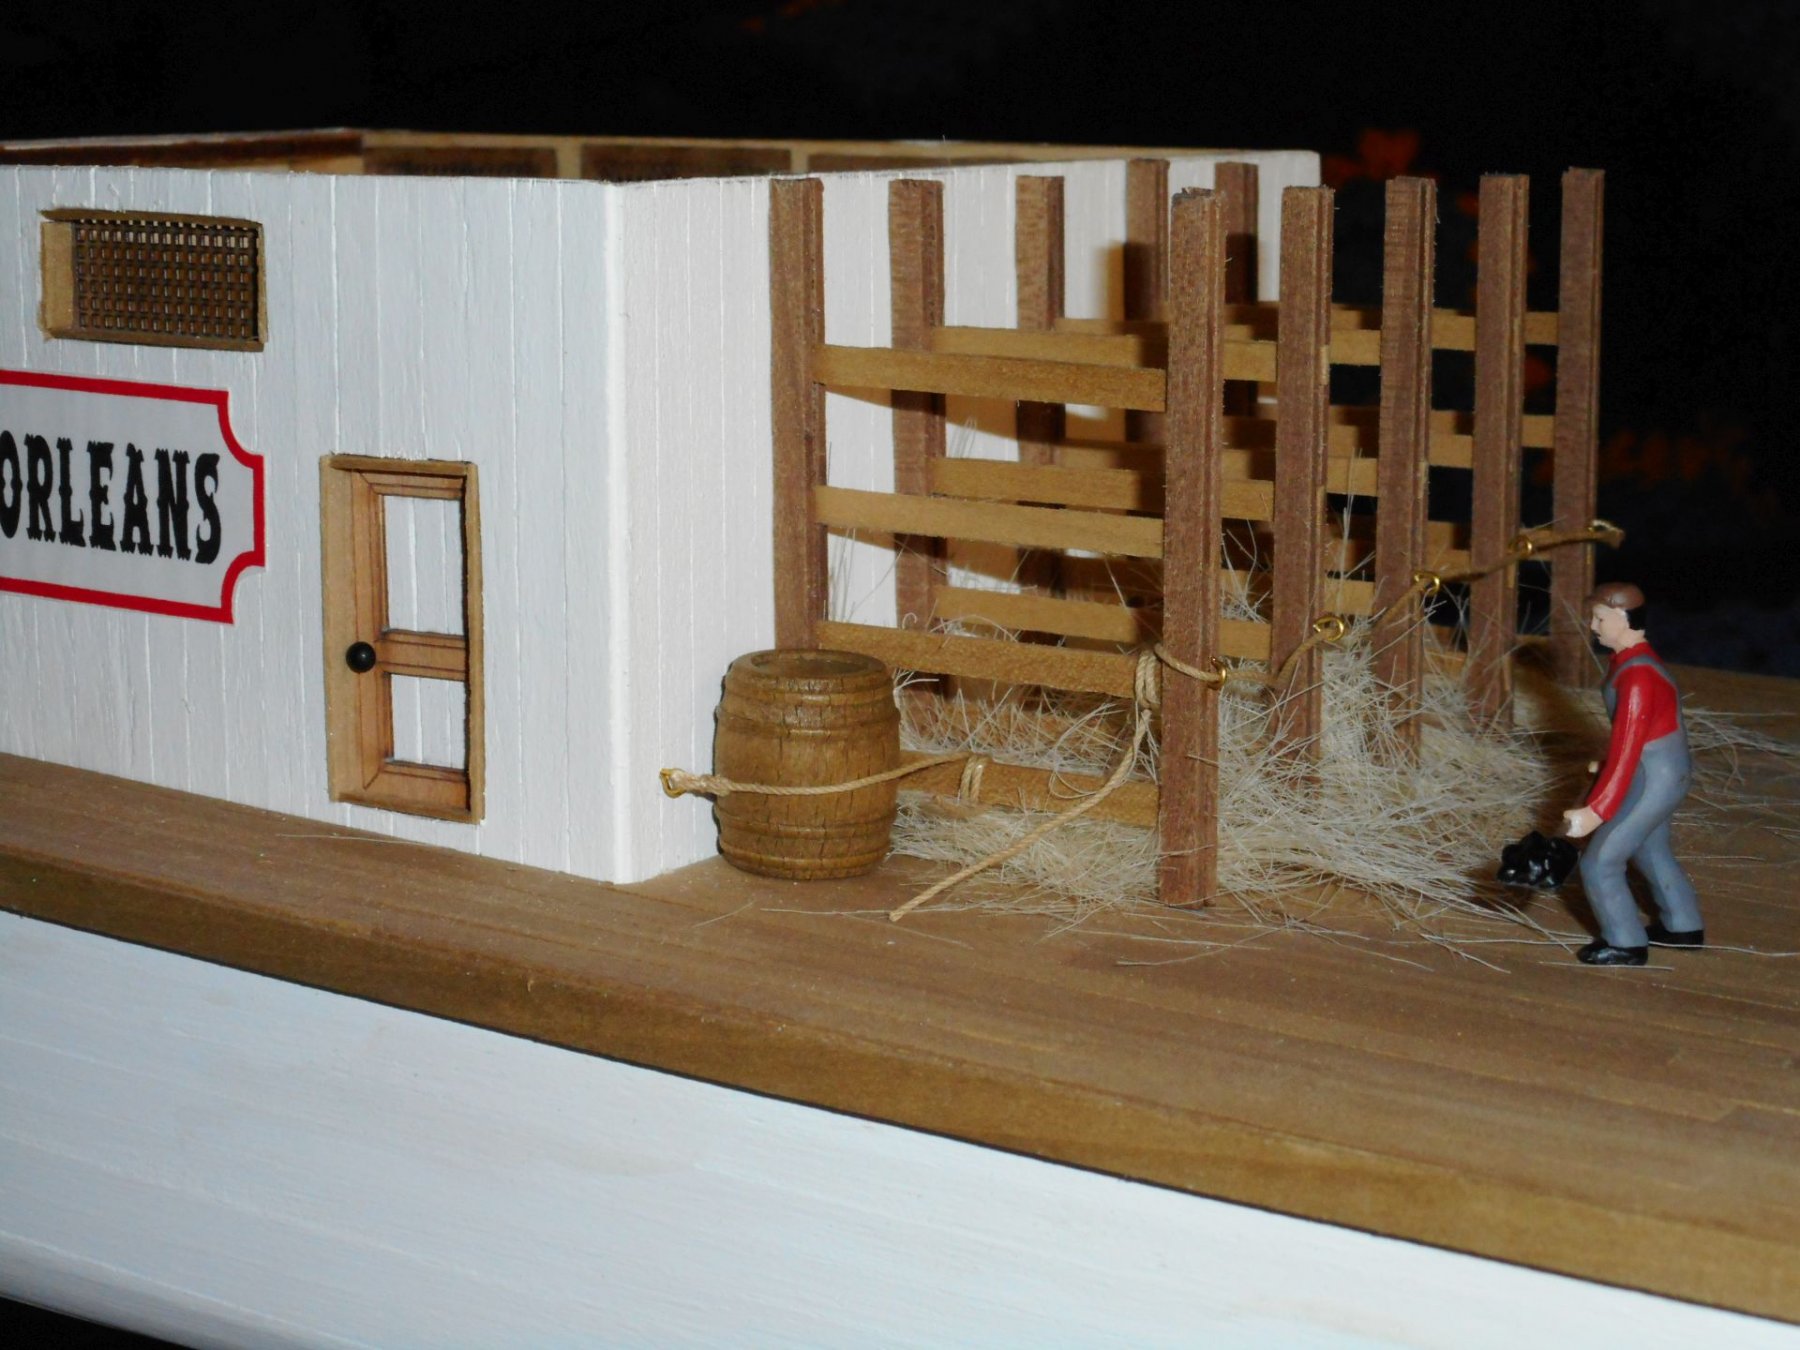
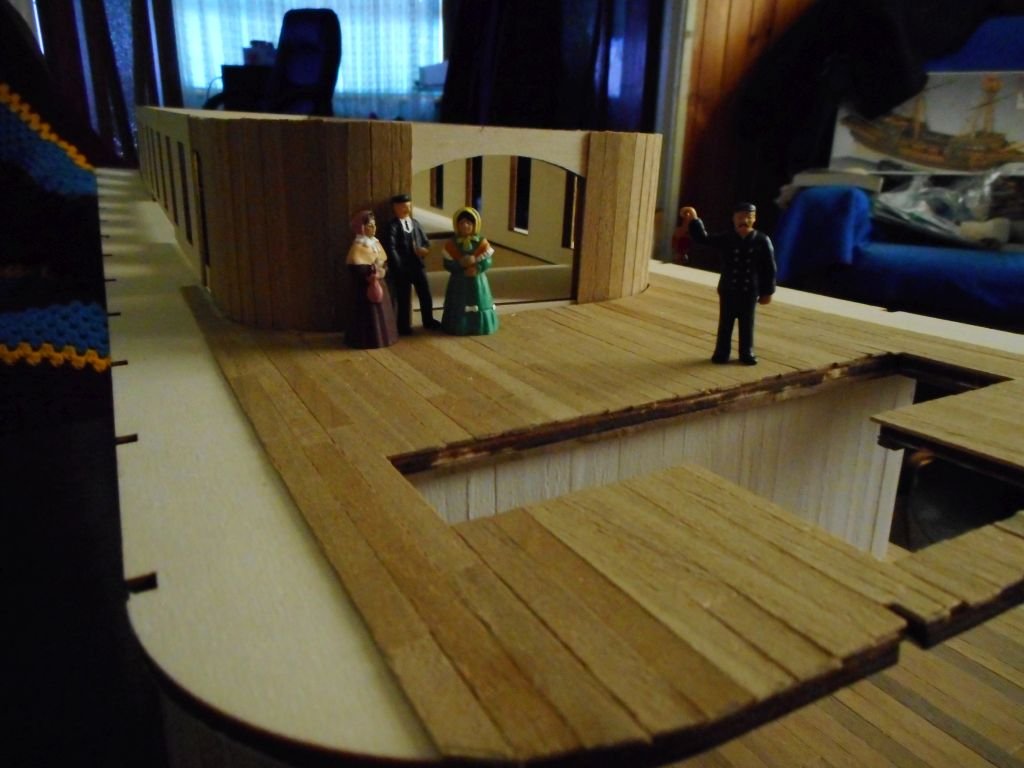
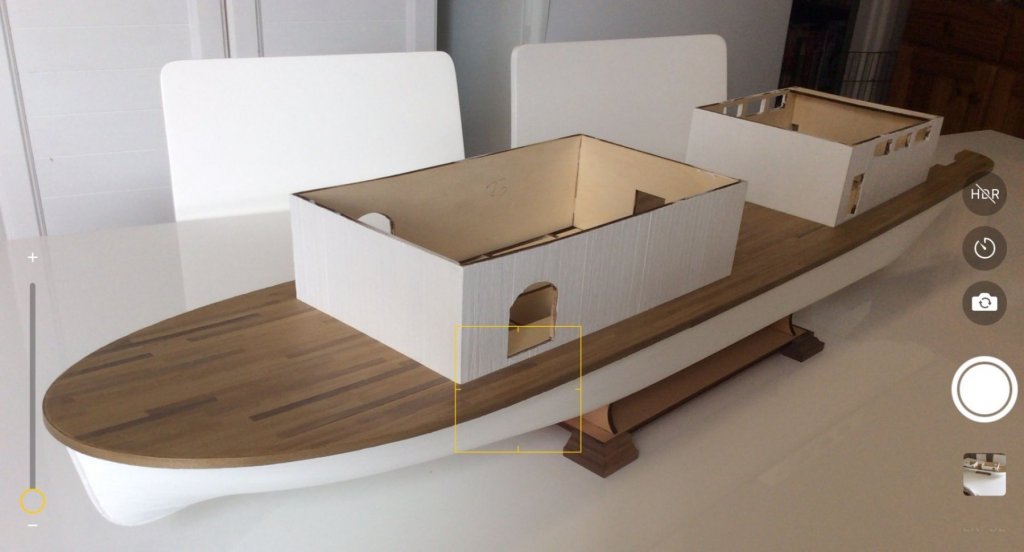
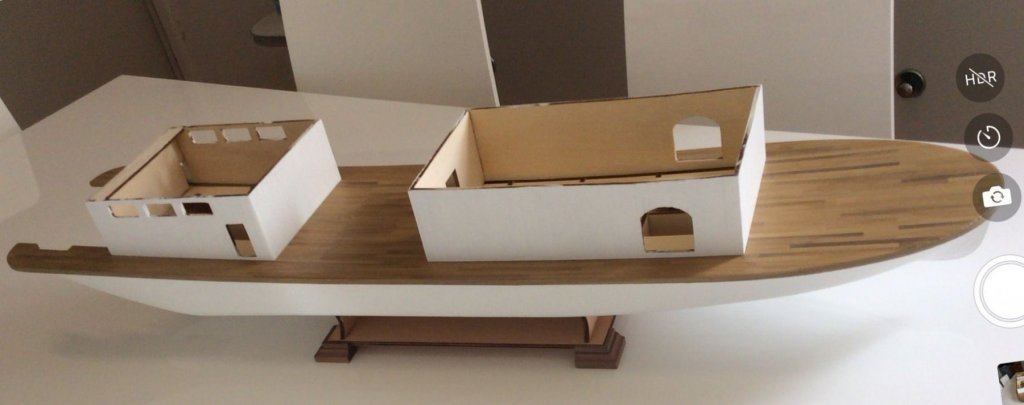
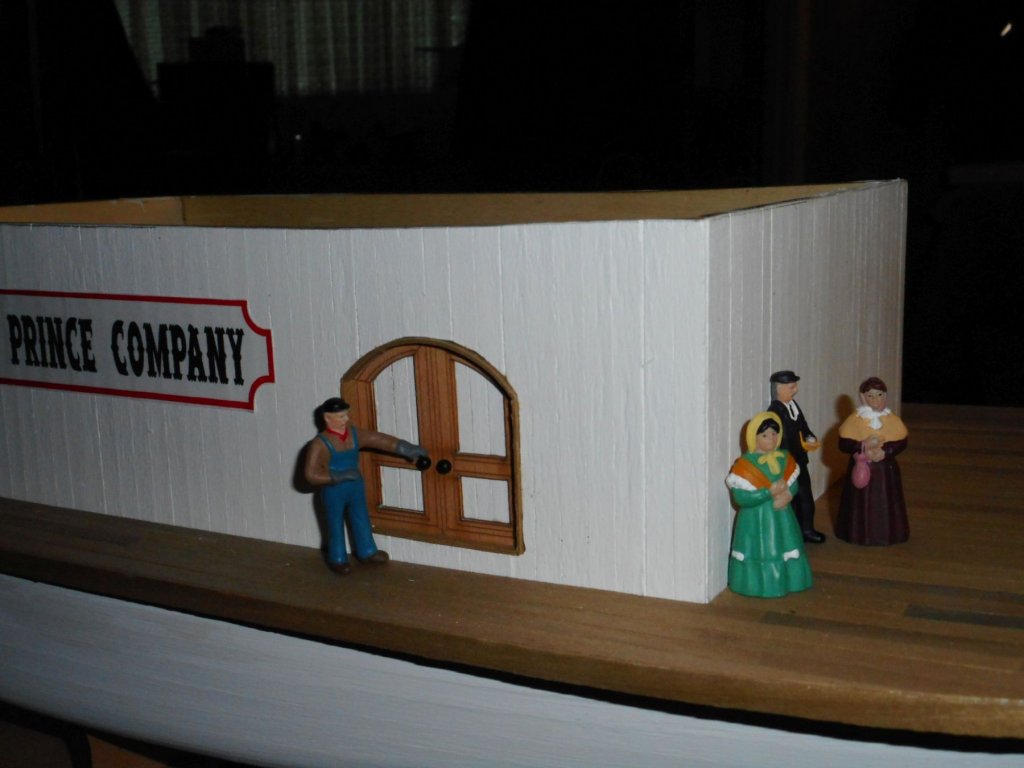
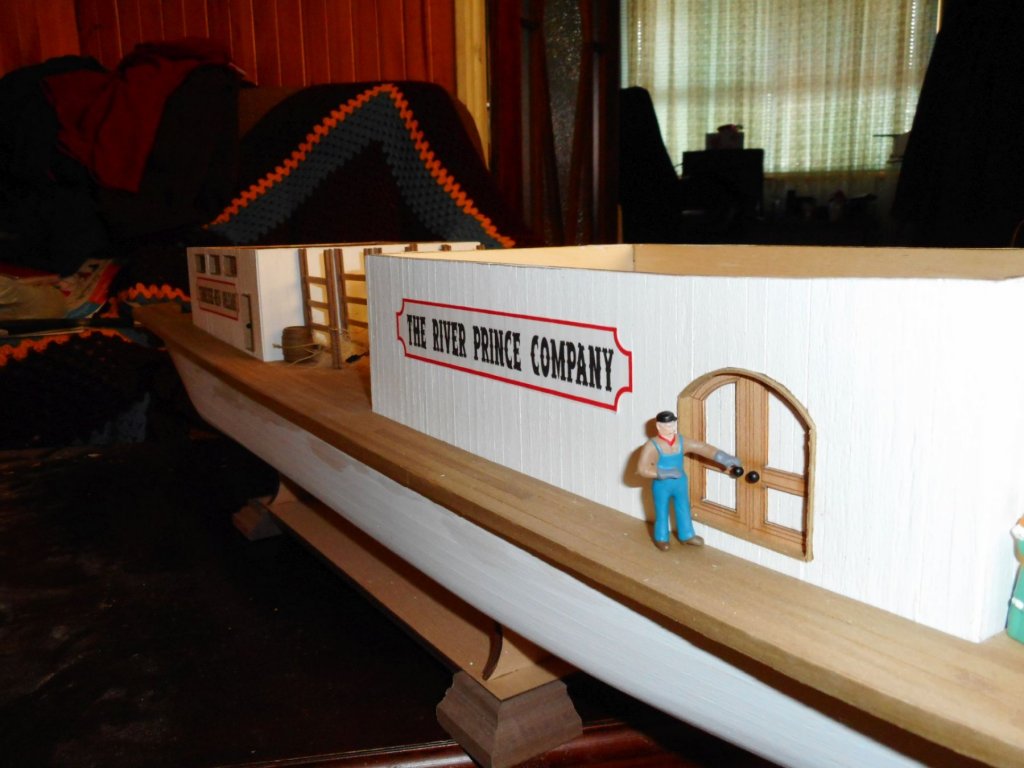
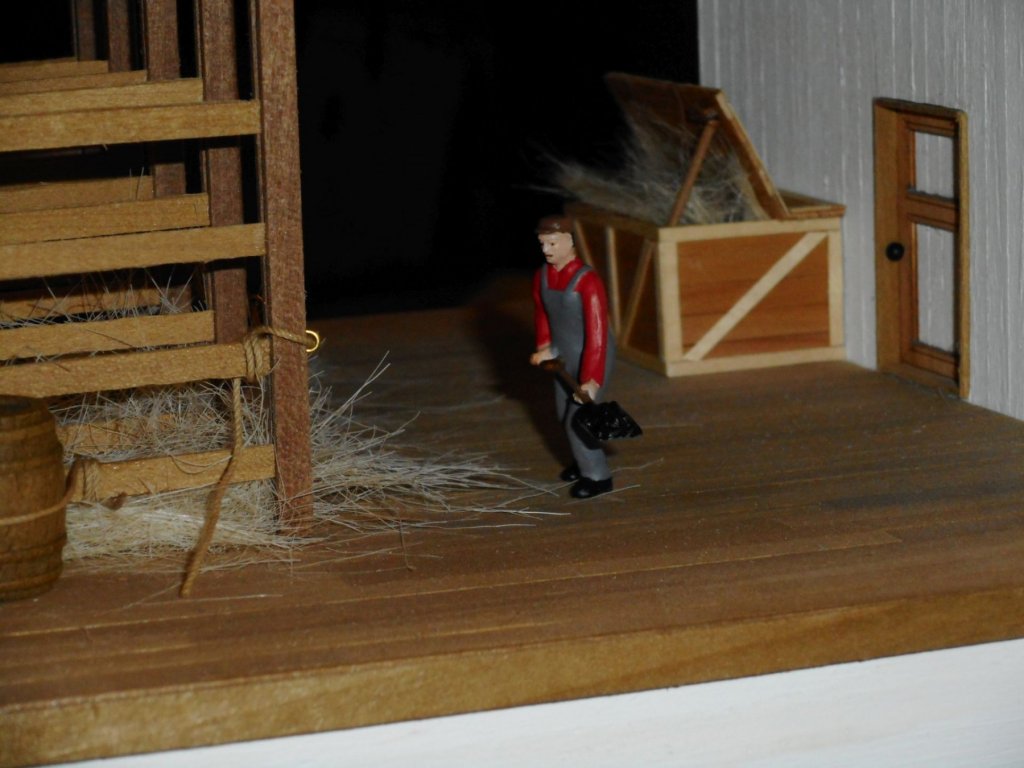
Hi all, some more pics of the progress. Nothing has been sanded, glued etc. Mainly pics to show where my passengers will end up etc. My trusty night porter will make sure the ladies get up the stairs in dim light as they enter the main dining hall. Take no notice of the out of whack second tier cabin structure. Its only there to show what I intend to happen later. Plus with all this planking taking an eternity I feel I need to show something!

-
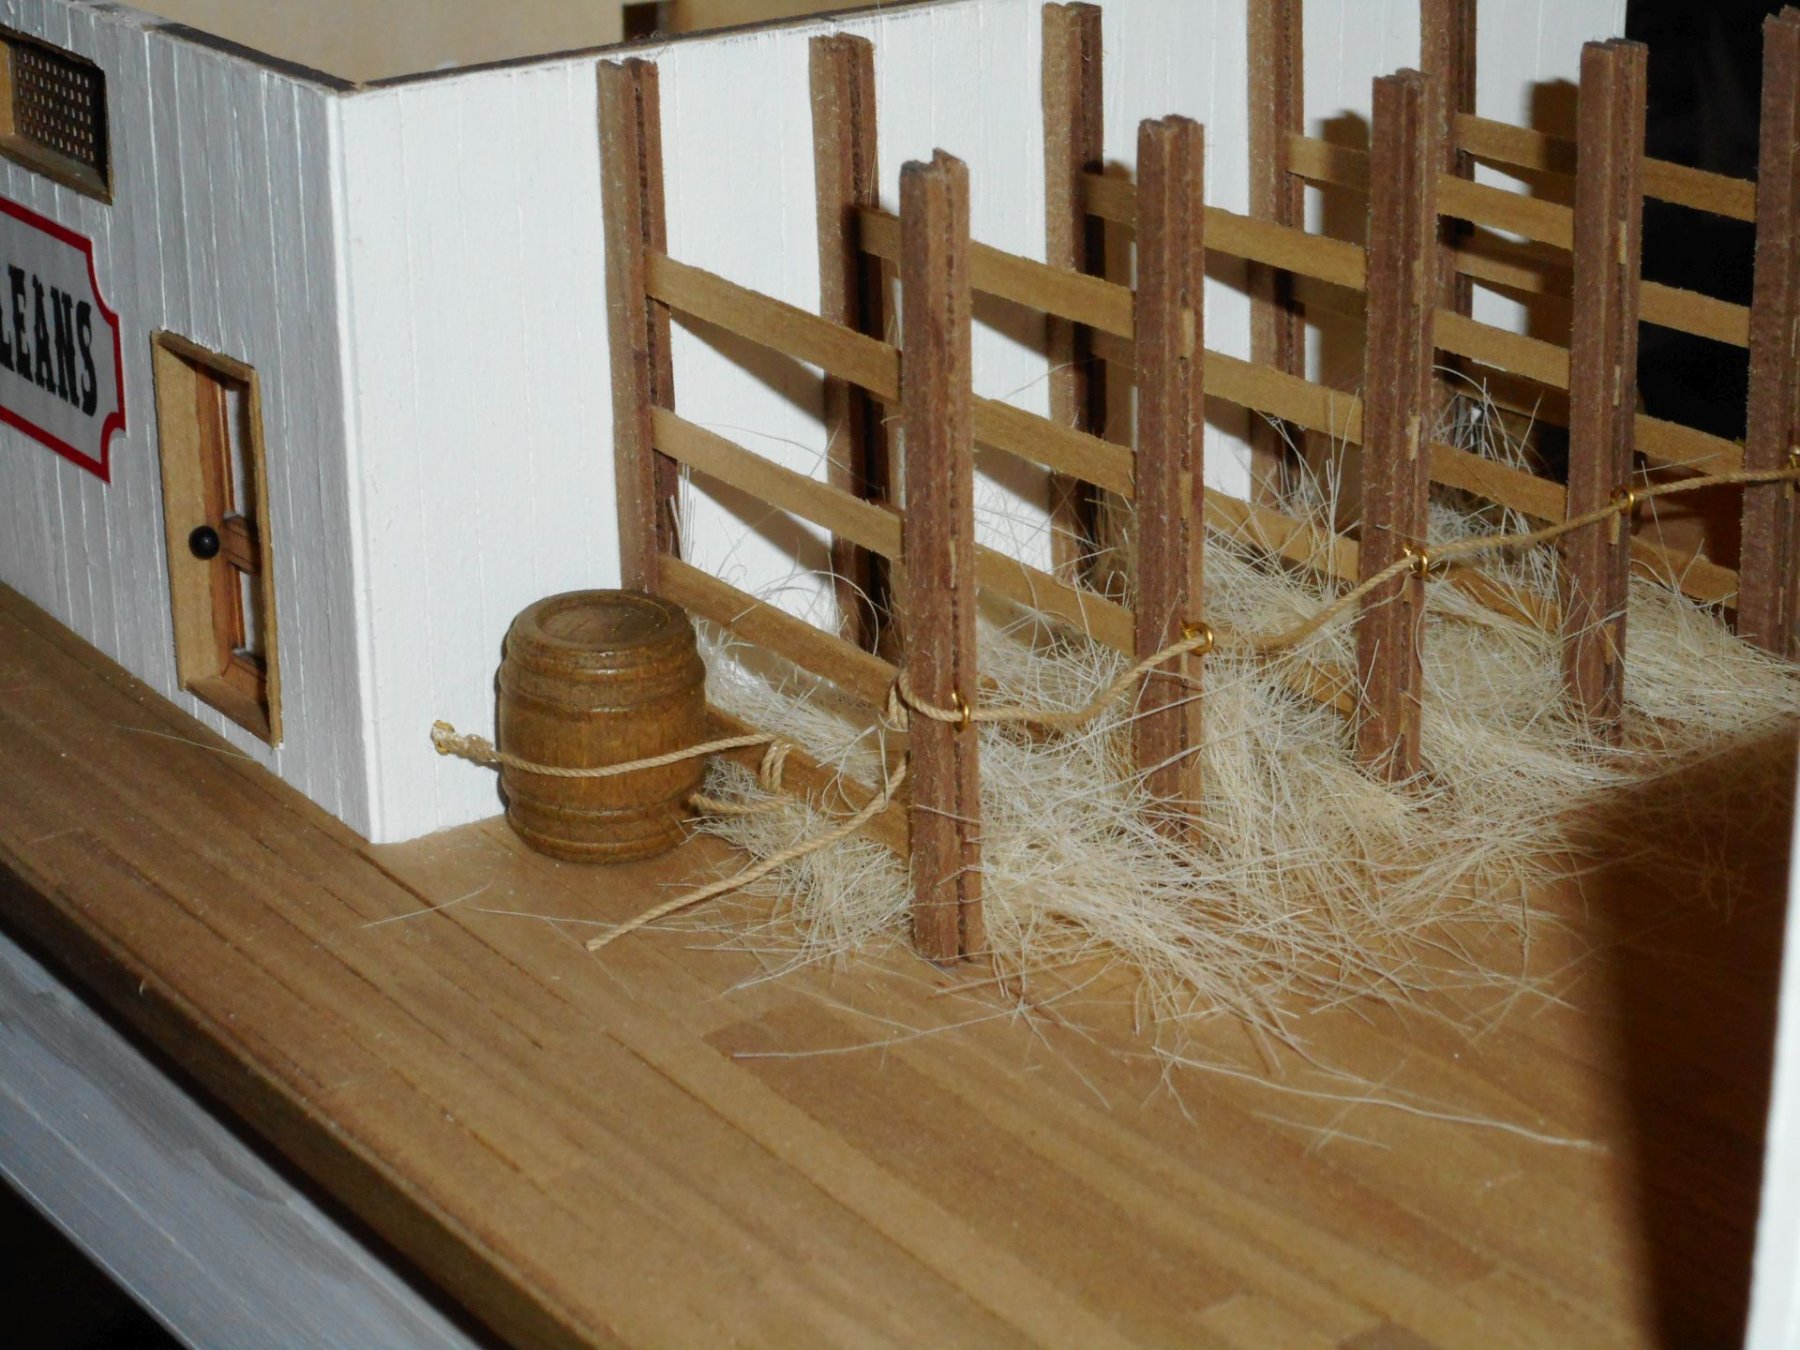
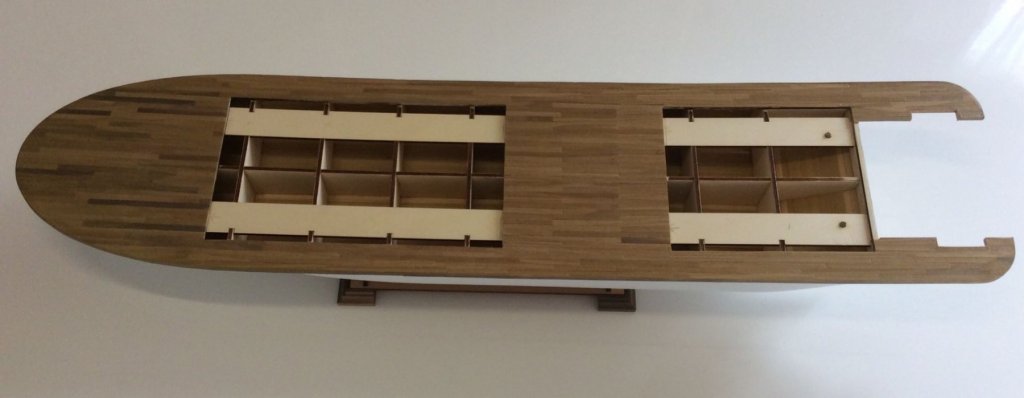
Hi all, the deck planking is supposed to run length ways like I am doing it. I cut scale 10ft and 20ft lengths and just place them randomly. I also mix the lengths of different lengths they are cut from up so as to get different shades in a random manner. It really shows up well once it has a few clear coats applied. As for the figures, they came from Walthers in Milwaukee, Wisconsin. Just visit walthers.com. These particular guys are O gauge steam era people. They are actually meant for model railway but I figure you can use them just as well on this vessel. They are just the right scale for this vessel. It is nigh on impossible to find the right scale figures of the period for 1;50 scale. These are the only 6 I have been able to find. I intend to buy at least 1 more packet and paint the ladies, especially, a different color so to have more people on the boat. Chris
-
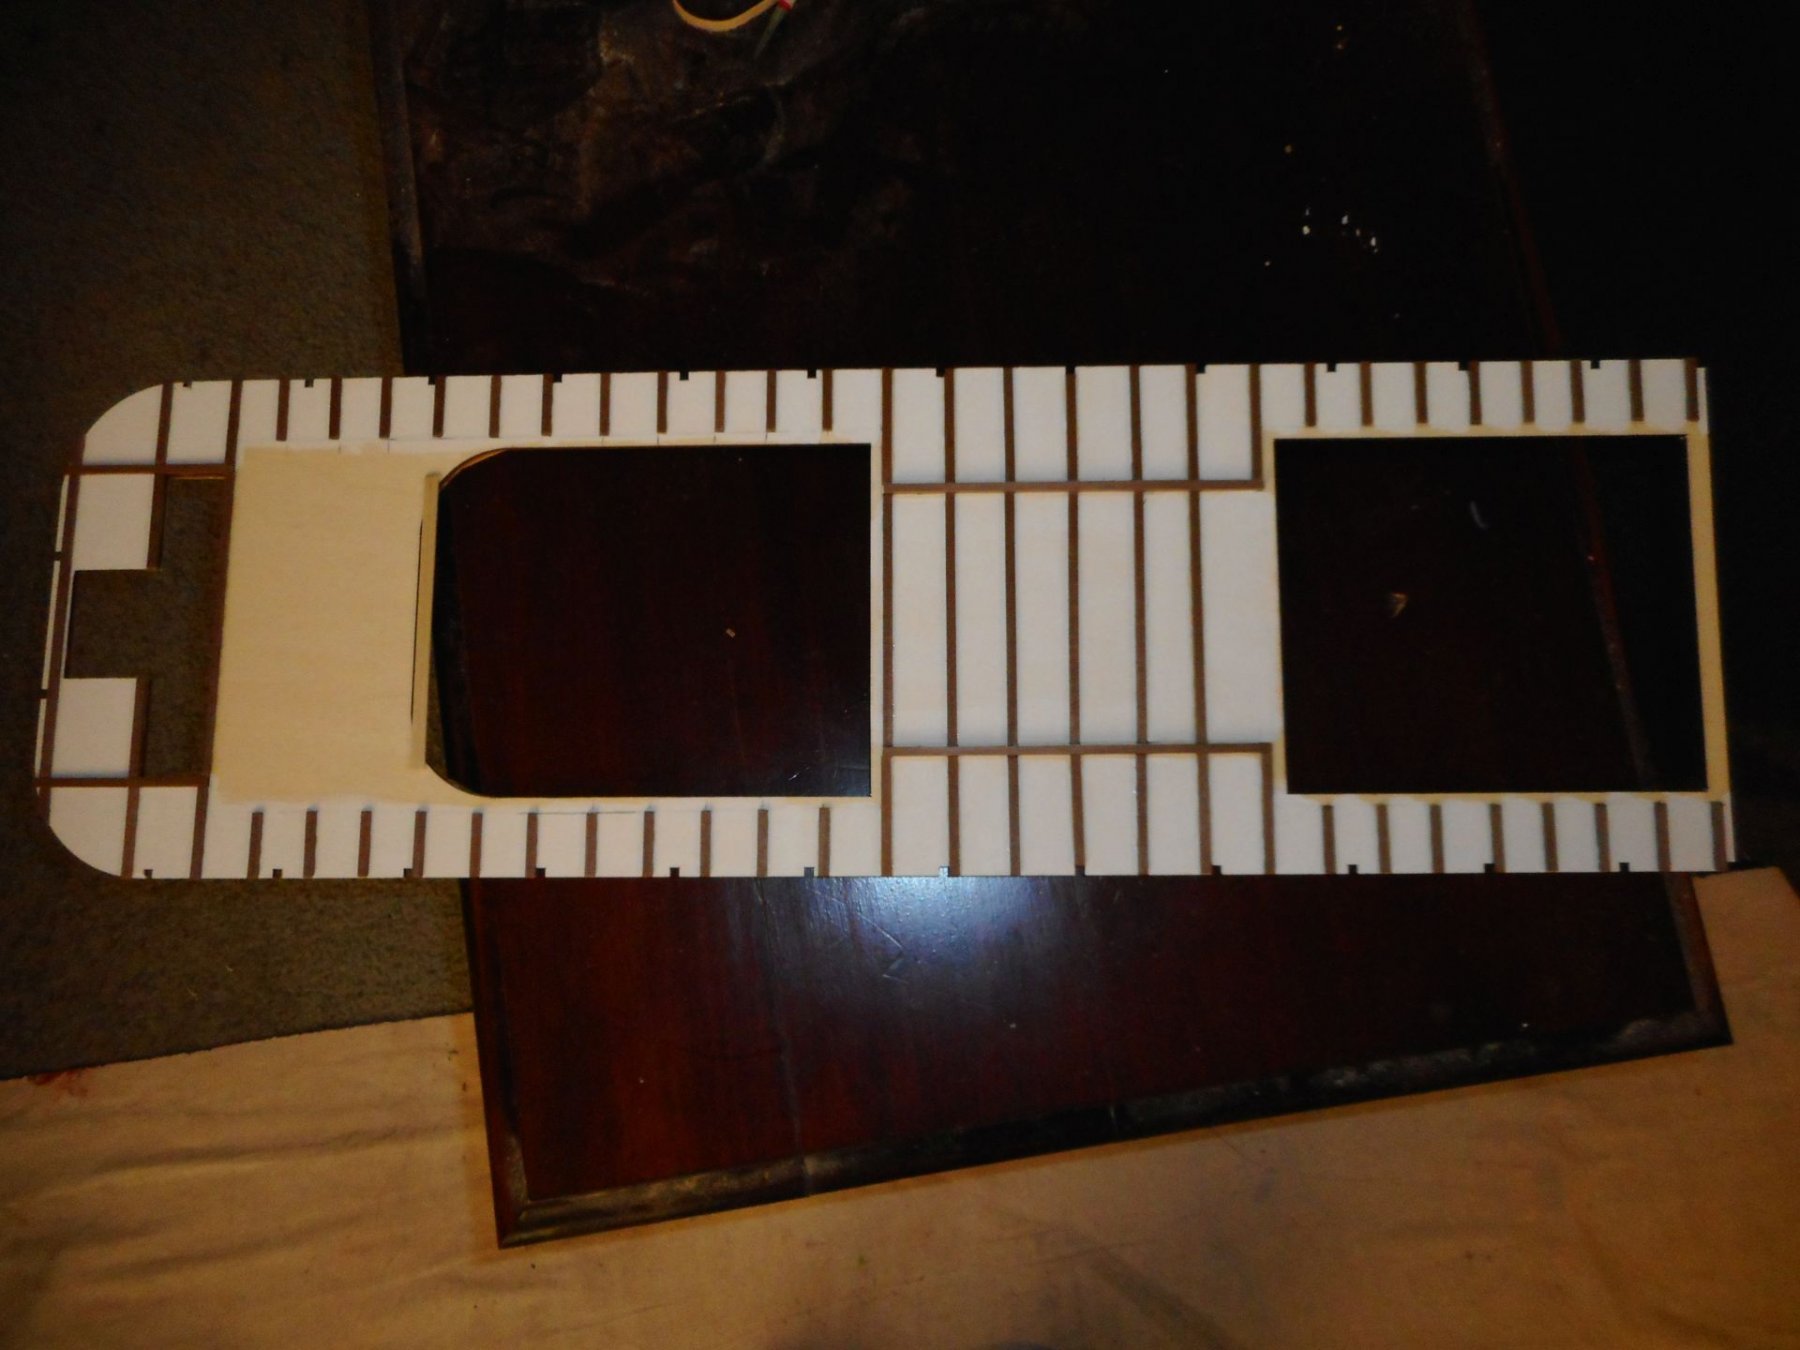
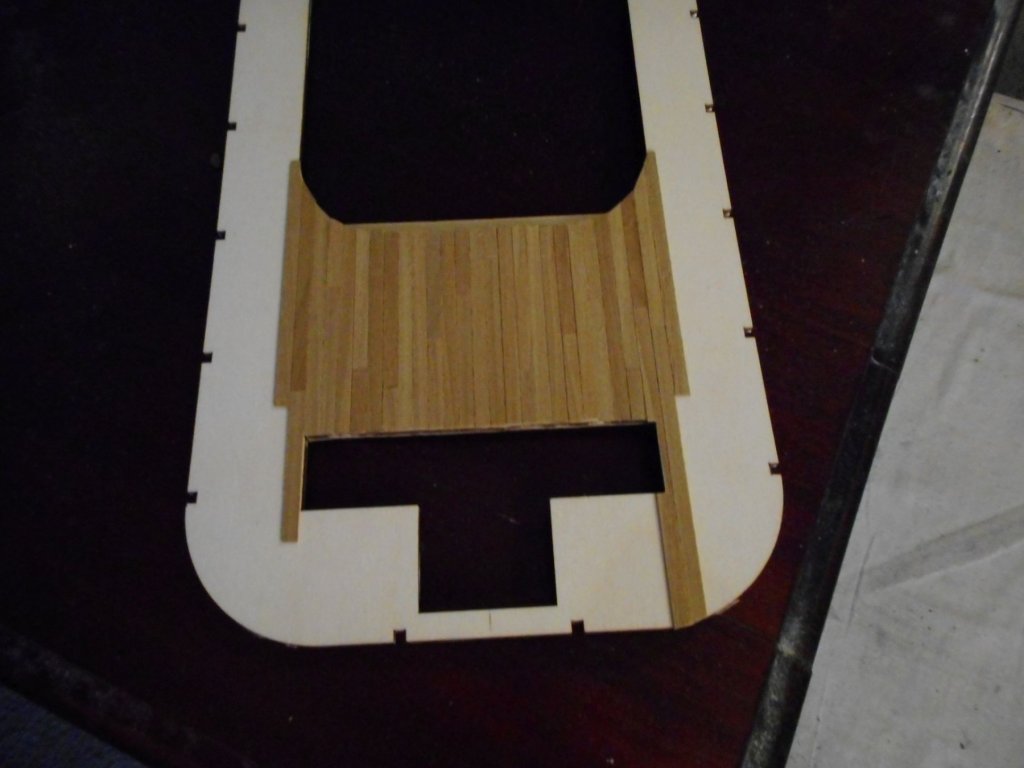
So here is where I am at currently. have done the underside of the second deck. This is a bit tricky as you have to mark it out from underneath when you place the deck on top of the boiler and engine room structures. As you can see over the horse bay, one went a bit wonky, but you cant see this when the deck is fitted. Made a novice mistake here of actually gluing the battens into place before painting the underside white! A lot of careful painting the result! After all had dried a test fitting revealed a really good fit of battens against all upper wall structures. Only real problem I encountered was that my deck in this particular kit was pretty warped. Really had to make sure the outline was correct before cutting and placing the battens. At this stage I could glue the second deck on I guess, but I have chosen to plank it first. Plus I want to add more to the horse bays, and it will be easier to access that area without the deck attached.

-
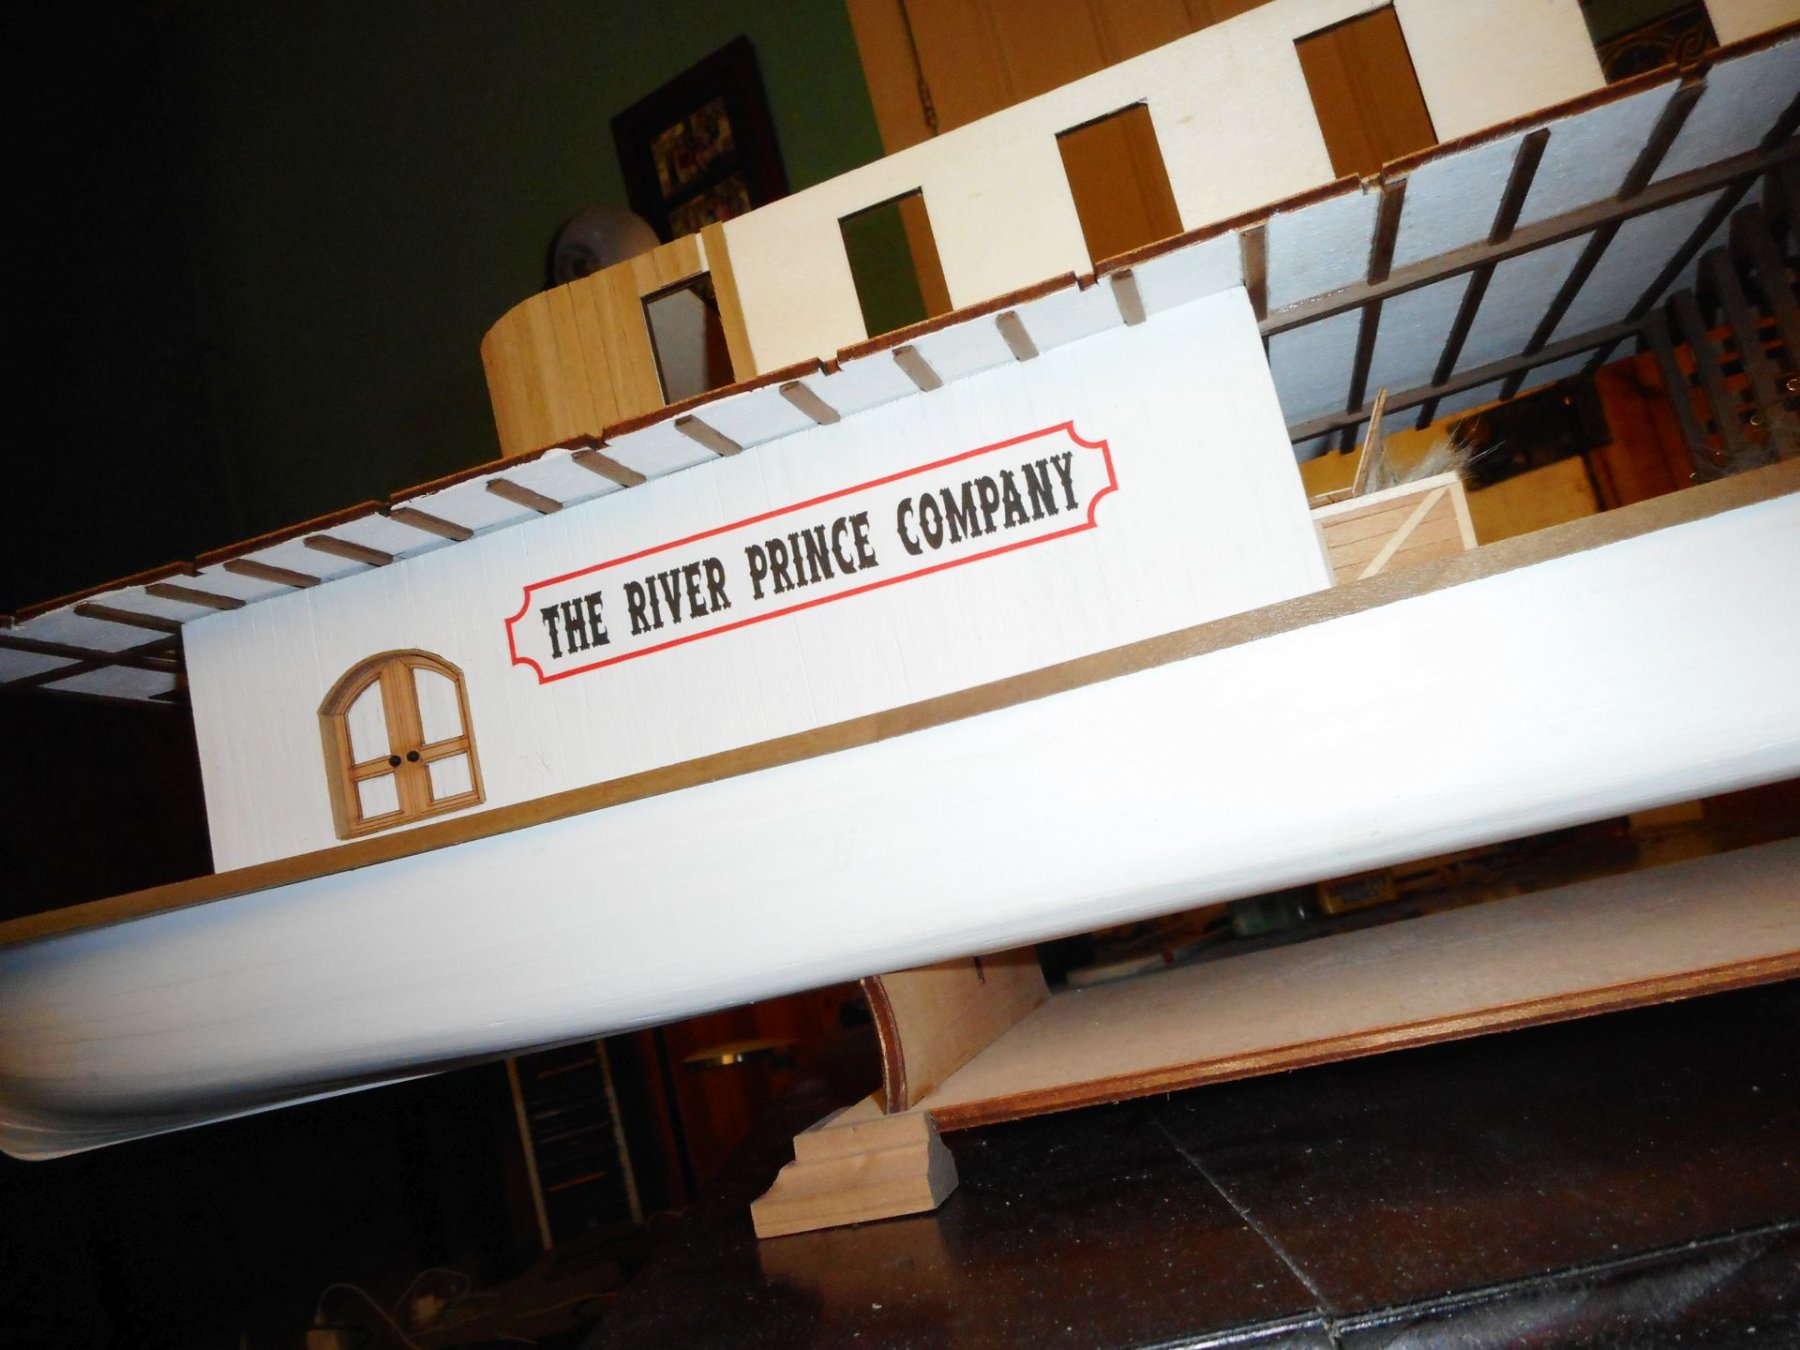
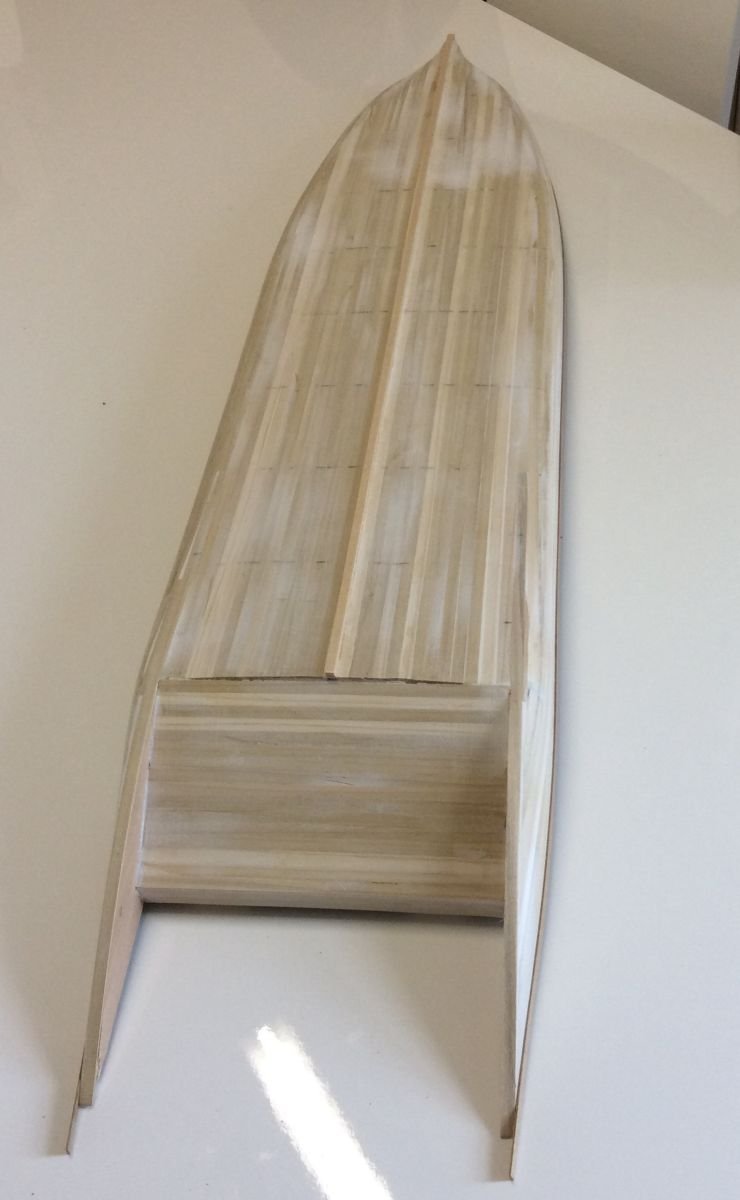
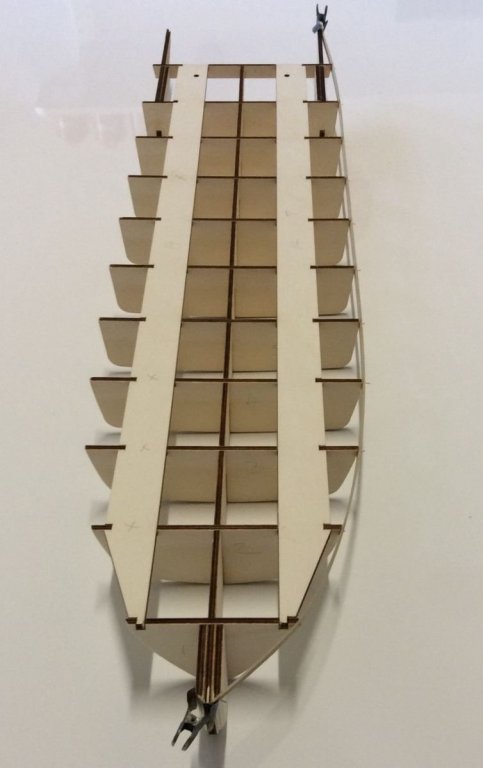
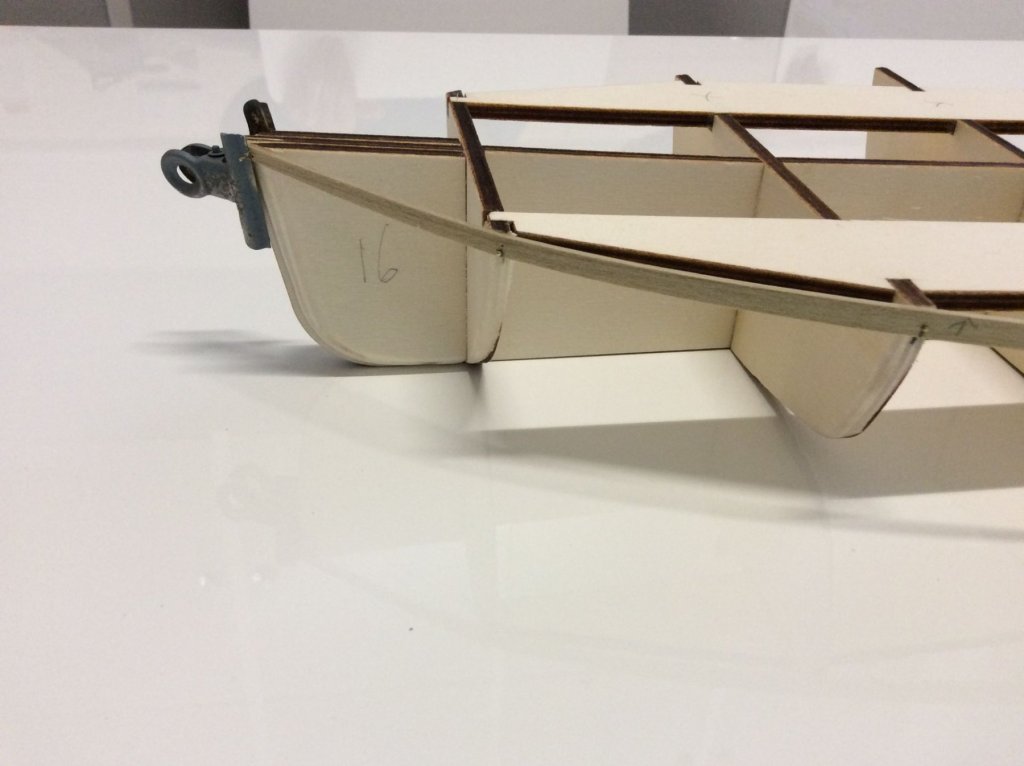
Possibly a bit late to start a log, but what the heck! Being an old steel boat sailor myself I never thought I could fall in love with any other type of craft. I was wrong! When I saw Charles's build log of this vessel I literally fell in love with this type of craft. Since then I have tried to learn as much about them as I possibly can. Kurt and Cathead have provided a wealth of information, and for that I am truly grateful. Previous to starting this model my main understanding of this type of vessel came from multiple viewings of the Jodie Foster ( best actress ever) film, Maverick. Obviously I had a lot to learn! The thing I learnt very quickly was that this particular model was not a very true, or accurate depiction of the type of craft of the day. Spewing, as Jodie would look fine on mine! Anyway, so given it is a bit of a fantasy boat, I intend to try to glam mine up a bit (as would befit Jodie). There are a few gaps between pic updates, but since Santa deemed I had been extra good this past year I was presented with a cool new digital camera! So once I get to master it a bit better I hope the updates will be more frequent. Anyway here is where I am at the moment.


-
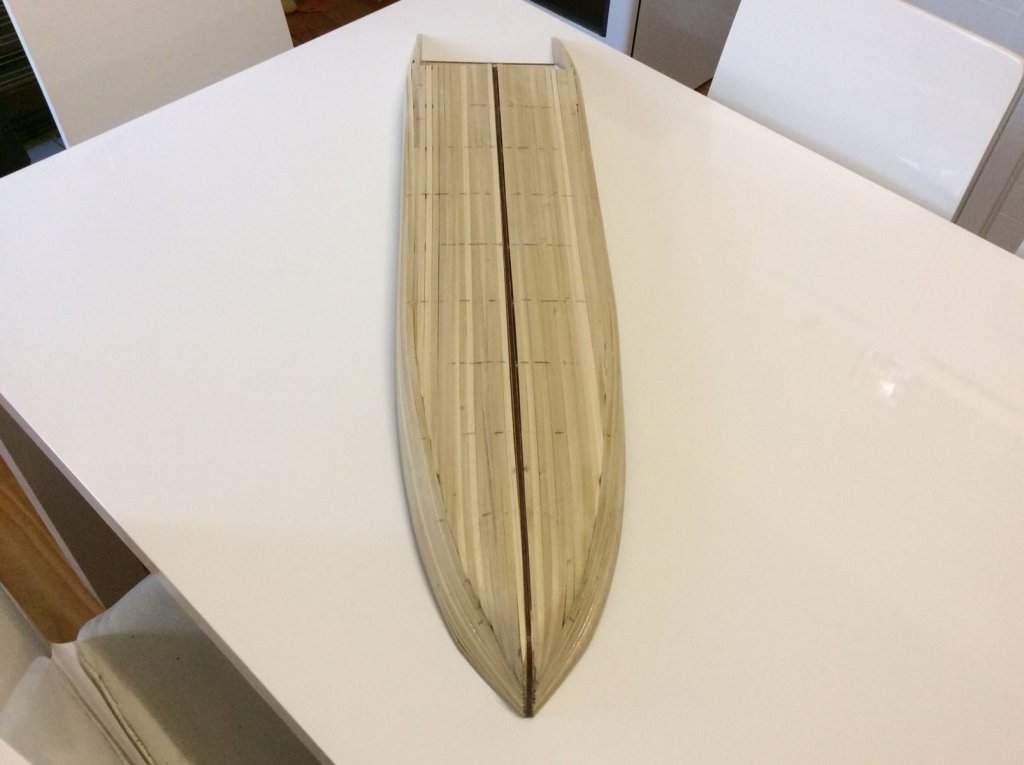
Hey Oliver, amid ships simply means the middle of the ship. If you look through numerous build logs here you will probably notice that more people than not tend to plank either side as they go. I certainly do, but you can do one side at a time if you wish. I also tend to start at the top and at the keel at the same time and just fill in the gap so to speak. This way also gives you a good guide as to how much you will need to taper each plank. Tapering simply means that you remove a small amount of wood from the plank at either end (sometimes this is not required), so that the plank is wider in the middle than it is on the ends. Never taper more than 50% of the plank width though. This is where steelers come in if needed. cheers Chris
-
Oliver, also look through heaps of build logs for planking progress pics, especially try to find vessels with the same hull shape as Santa Maria. The vessel doesn't have to be Santa Maria, but it will give you an idea of how to go about planking a hull of the type you have. This model was the first wooden ship I ever built, and I found the planking process to be a lot easier once I had a thorough understanding of the general principles of planking. Don't take short cuts. Ship modelling is a slow process. cheers Chris
-
Looking at your pics it seems you have maybe gone wrong from the beginning. The planking should have begun from the top of the bulkheads amid ships then continue downward one plank at a time on either side to get a uniform planking over both sides of the vessel. Remember that you absolutely must taper each plank fore and aft and only along the bottom edge. As you progress you may find it is necessary to add steeler planks to fill any large gaps that may arise. This is not uncommon. I don't know if you are gluing these planks or just nailing them on. If its the latter I would probably advise you to maybe rip them off and start again. Carefully read any planking tutorials you can get your hands on. Do not just simply nail the plank onto the bulkhead. It must be glued into place. The nails are simply driven in about halfway to hold it in place whilst the glue dries, then the nails are removed. It is a good idea to soak the planks in water for a period of time before attaching them to the model. I usually leave thicker first planks soaking overnight in my plank soaker then roughly shape them to the contour of the hull using a hot soldering iron. At this point I apply a small amount of glue to each bulkhead where the plank will meet it and gently drive in small nails to hold it secure until the glue has set. Once sufficient bond has been established remove the nails and repeat the process until the hull is covered. Any small gaps can then be filled with an appropriate filler. Larger gaps will require steeler planks. cheers Chris
-
Hey Oliver, looking at your planking so far it seems to me you need to taper your planks more. Also only taper them on one edge, not both edges. Another thing I notice is your nailing. Don't hammer/push them right in. They have to come out. They are only used to hold the planks against the false bulkheads as the glue dries. Once the glue is dry you will need to remove them. I typically use a small pair of hobby round nose pliers for this. Do not leave them in as you wont be able to fill and sand the first planking layer prior to final planking. cheers Chris
-
Hey Oliver, I would definitely follow OC's advice. Then you never bend the planks upwards or downwards. You taper them accordingly and they will take on the bent appearance on their own. Bending, or trying to bend, the planks upwards will result in snapping and skewing of the plank so they don't lie flat on the false bulkheads. I would recommend not relying too much on the pictures provided in the instructions. Use them as a rough guide only. Good to see you have read Mastini's excellent book. I regard it as the bible of ship modelling, but I would also advise to read the many tutorials on planking that are available on this forum. Just remember that first planking on this, and any other double planked model, doesn't have to/need to be perfect. You will find with some filler and a lot of sanding it is not too hard to get a really good canvas to apply the second (final) planking layer on this model. Also the second layer of planking is far thinner and more pliable wood to use than the first layer on this model. You are doing well mate. Chris
-
Have only half built one Mamoli kit (Golden Hind). Only half built her because that was all that came in the kit! Would never, ever buy another kit from them! Chris
-
Hello Oliver, I have built this kit and can say it is a really fantastic model (but I am a Columbus freak!). I found it had ample wood and pretty good instructions. The rigging I found to be pretty straight forward. Just take your time and ask questions when you come to any parts of the build you are unsure of. I can certainly answer many questions about this, or any of Columbus' ships and voyages, and I am certain I will not be alone here on that count. I will definitely follow your log with interest, and who knows, it may even inspire me to build this model again as I gave the last one to my mother. Chris
-
well done dave, super job, she looks really good! any plans to put her in a case? chris
- 104 replies
-
- 2
-

-
- king of the mississippi
- artesania latina
- (and 1 more)
-
Gluing Planks When Wet
vossy replied to mikiek's topic in Building, Framing, Planking and plating a ships hull and deck
hey mike, 99% of the time I just use nails for the first planking. of course they are not driven in all the way and are easy to remove once the plank has dried and taken on its shape. at this stage it is pretty rare you will need any clamps to glue it into place, but if I find I do I mainly just use rubber bands. I also only ever put one plank on each side whilst waiting for it to dry. ok, so it does take a long time this way, but as I am doing this I just begin other aspects of the build. here you can begin deck furniture, guns, masts etc. so you are not really losing any time on the overall build. chris -
Gluing Planks When Wet
vossy replied to mikiek's topic in Building, Framing, Planking and plating a ships hull and deck
place and clamp the plank in as near to exact position as possible whilst it is wet/damp. allow to dry (I usually leave overnight), then glue in place. some extremely minor movement maybe required prior to final dry gluing, but not too much as to break the plank. Never glue damp or wet planks. it results in the glue being diluted, and thus not creating as strong a bond as you would desire and expect. also, wood expands and contracts when it is damp. once it is dry, it will hold its shape better. chris -
Well Pat she is a fair way down. 300 meters I believe. It would take some serious equipment to get anywhere near her at that sort of depth given most conventional subs have a crush depth of about 400 meters. Of course increasing the penalty for looting such wrecks to maybe include being locked in a small room with a dozen or so very angry ex-pussers might also work! Chris
-
hey kurt, is there anyway I can get a copy of the 6 page article you wrote for the construction of the Chaperon?
pretty sure santa is bringing this kit and I would love to read your article.
thanks
chris
-
 Chris:It wasn't a 6 page article it was a series of six articles spread over a year's worth of issues.I will take the text from the articles and compile it into a PDF for you. However, this will not provide all of the photographs that were used in the article. But it will give you all of the issues I found and some work arounds and tips. As you get into the build and have a question check the build logs on MSW and if that doesn't clear it up maybe I can send a photo or explanation.I need you to send me your email so I can send it direct to you - as it's not going to fit into the message size here. I don't want to list my email here though it is quite public - go to the NRG's web site (link on top of the MSW home page) and click on "About the NRG" and at the bottom of the page is a link to each of our names - click on mine and send your email to me.I will send the pdf tomorrow - bedtime right now.Take care,Kurt
 -
-
-
http://www.abc.net.au/news/2017-12-21/hmas-ae1-submarine-found-after-century-long-search/9278782 RIP to all those brave souls who perished with her. Chris
- 7 replies
-
- 11
-
-
cool jig dave, but love the card! as a half dane/half aussie, this is gold to me! where on earth did she find that? chris
- 104 replies
-
- 2
-
-
- king of the mississippi
- artesania latina
- (and 1 more)
-
hey dave, I have been away for a few days but I can now see you have made great progress. really like the railings, they really clean up the model I reckon. it seems this particular kit comes with very scant instructions going by some of the problems you have encountered. it does look to finish into a really nice vessel though. pretty much up to putting on the second deck on mine now too. I can only get pics when I take it around to my sisters place though. its really the reason I haven't began a build log. maybe after xmas I might get a camera if finances permit. chris
- 104 replies
-
- 2
-
-
- king of the mississippi
- artesania latina
- (and 1 more)