HOLIDAY DONATION DRIVE - SUPPORT MSW - DO YOUR PART TO KEEP THIS GREAT FORUM GOING! (Only 36 donations so far out of 49,000 members - C'mon guys!)
×


thomaslambo
-
Posts
384 -
Joined
-
Last visited
Content Type
Profiles
Forums
Gallery
Events
Everything posted by thomaslambo
-
 Thanks much Tom, I really appreciate the compliment….you’re doing some fine work yourself on the Constitution
 -
All I can say is coming from one of best detailers I’ve seen your accolades are much appreciated Yes, planning or thinking through a design is part of the fun for me….and almost everything I start never ends up the way I originally planned it…it just grows and evolves into the final result.
-
Thanks Keith, I really appreciate the compliment….and I probably should take more pictures of the construction of the detail items. I get on a roll and the next thing I know it’s finished. As far as the pieces you see; the table, shelfs, maps, balusters/railing, etc….I spent quite a bit of time fabricating. All the wood items were hand made with X-acto blades and a myriad of files and sanding tools. The Captains Dining Cabin took 40-50 hours to complete….it was definitely a labor of love that slowly evolved from simple to more complex The chairs are plastic miniatures (1:48 scale) that I spent some time painting and finishing to simulate a wood look.
-
Thanks so much, I really appreciate the compliments….particularly coming from another detail fanatic One of the best aspects of this forum is learning and finding creative ideas that one can utilize on their project. You and many others have given me motivation to raise the bar wherever I can
-
Nils, Much of my work was inspired by your incredible build. I really appreciate your praise as it means a lot to me as a new builder. I spent hours thinking about the way I'd open the Dining Cabin....I had three templates I didn't like and was somewhat frustrated. Then I was looking at a picture of a finished AL Bounty model and thought....do it like the opening to the hull itself (a view within a view). Some times the obvious escapes you
-
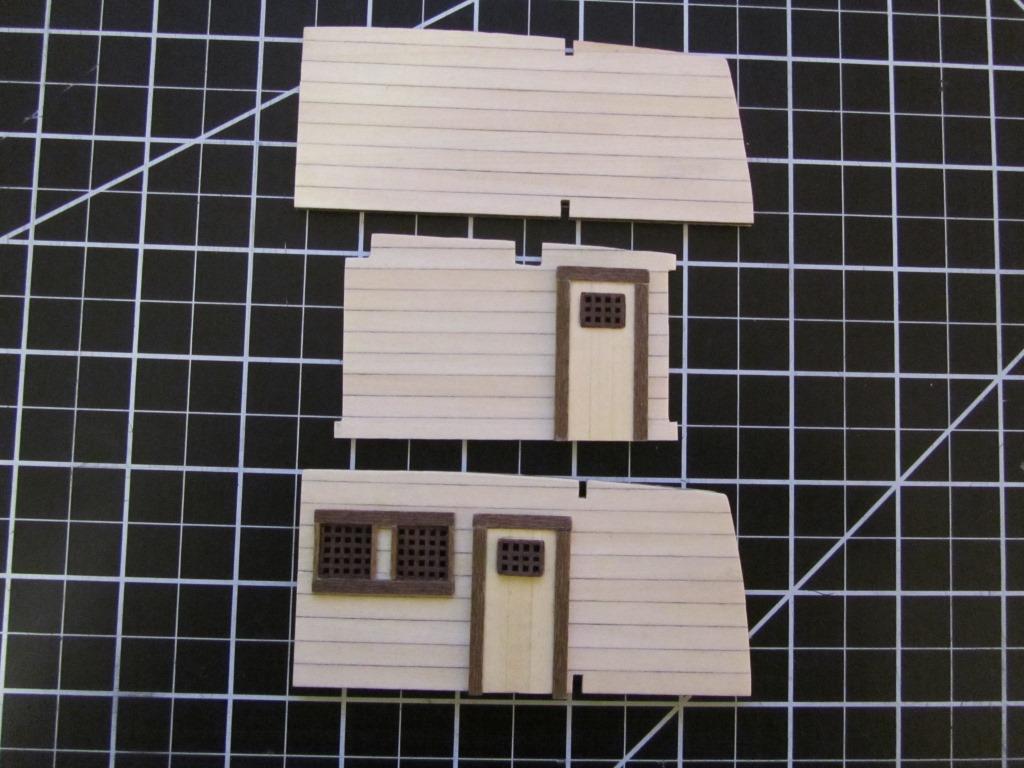
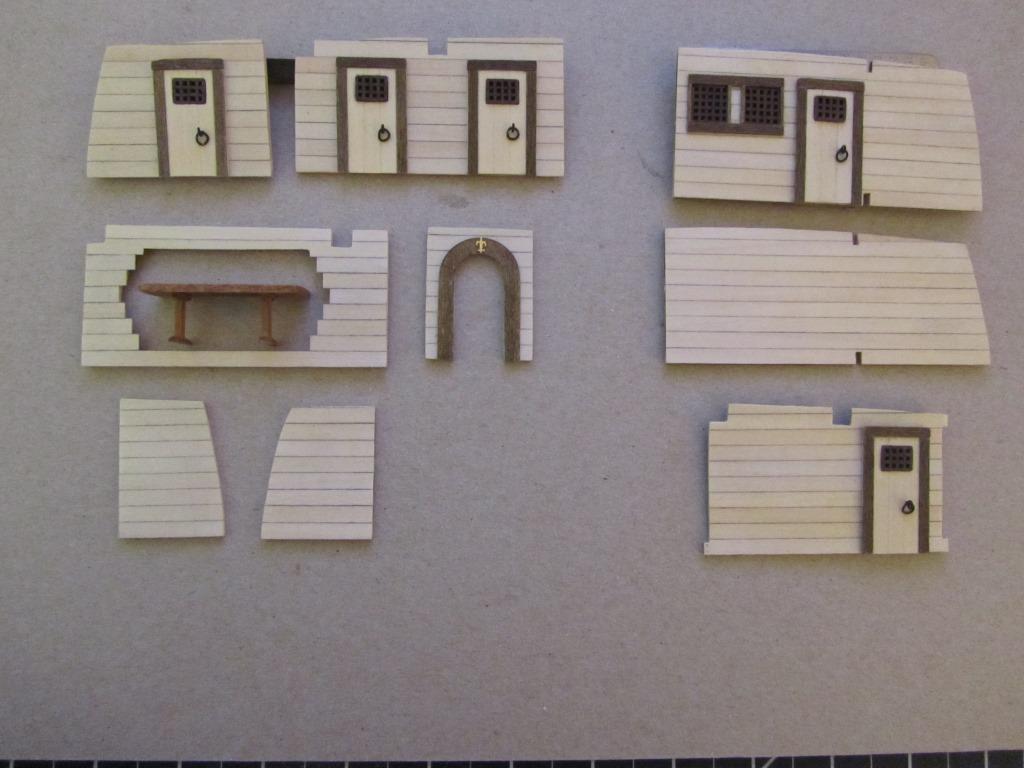
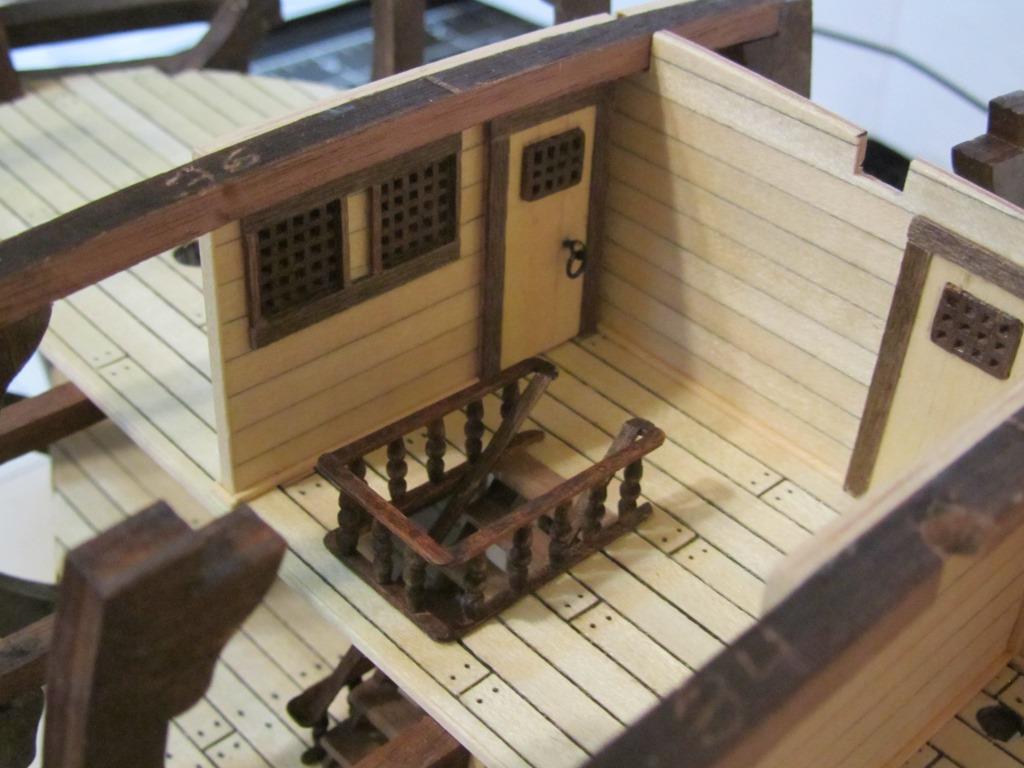
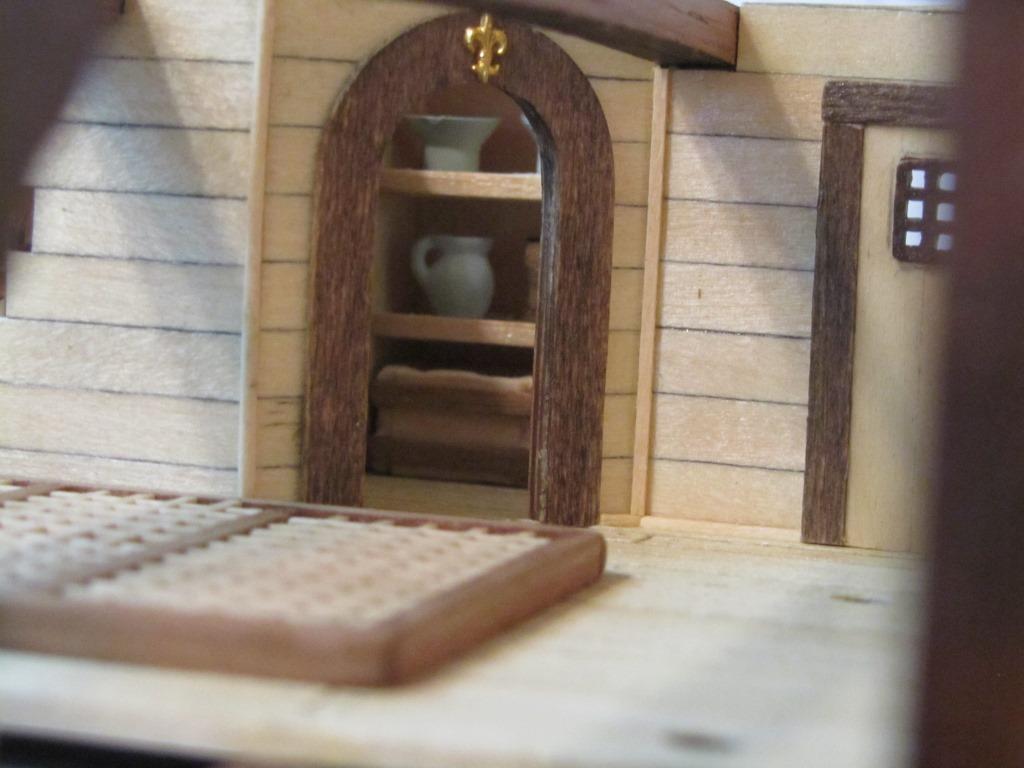
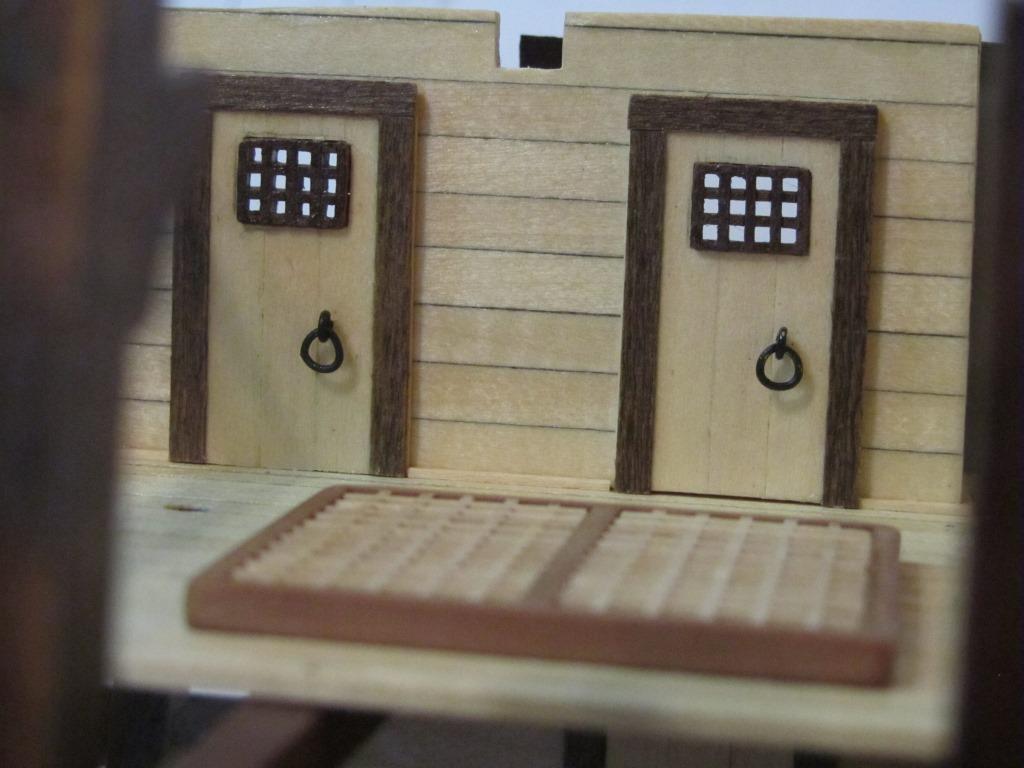
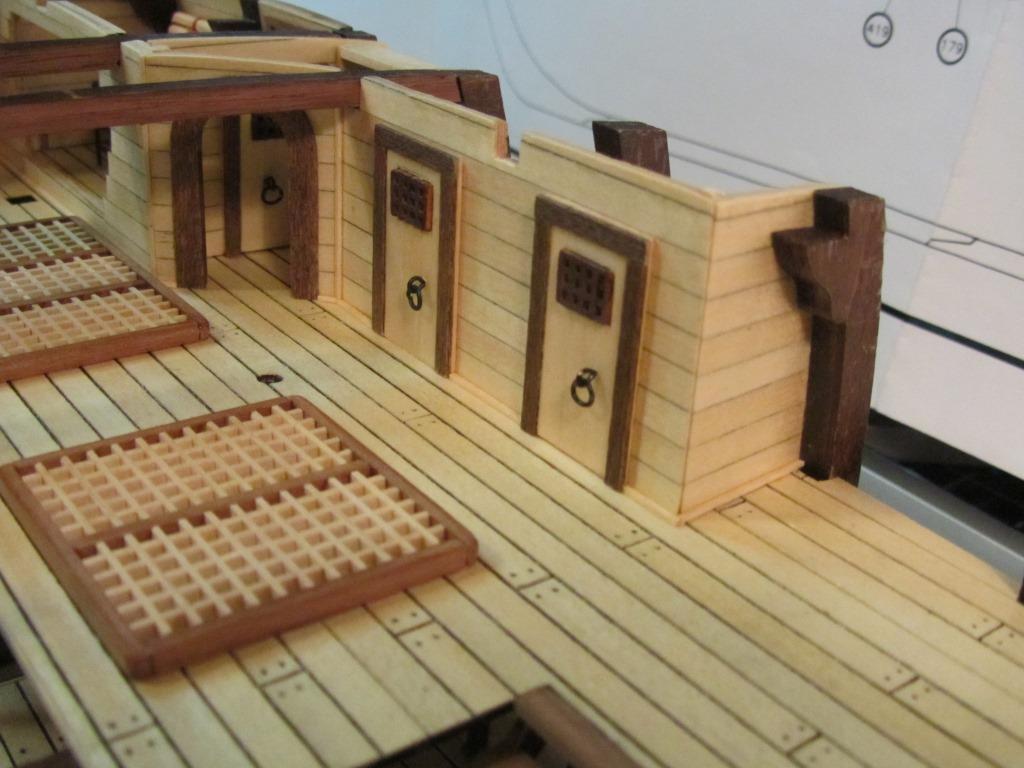
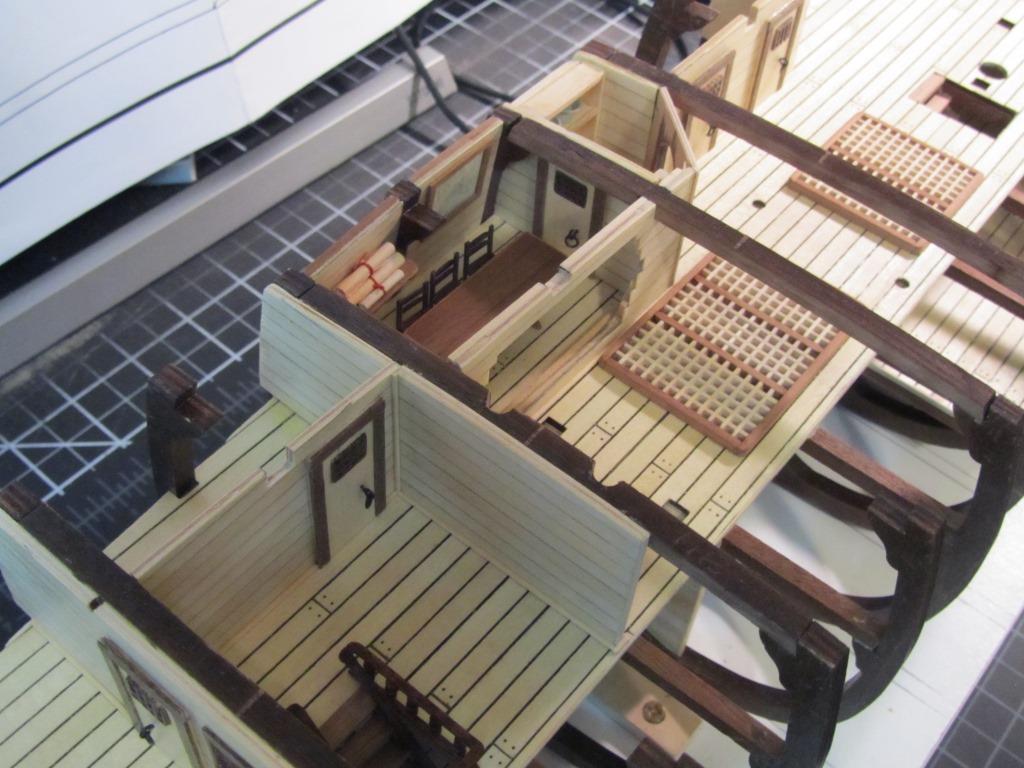
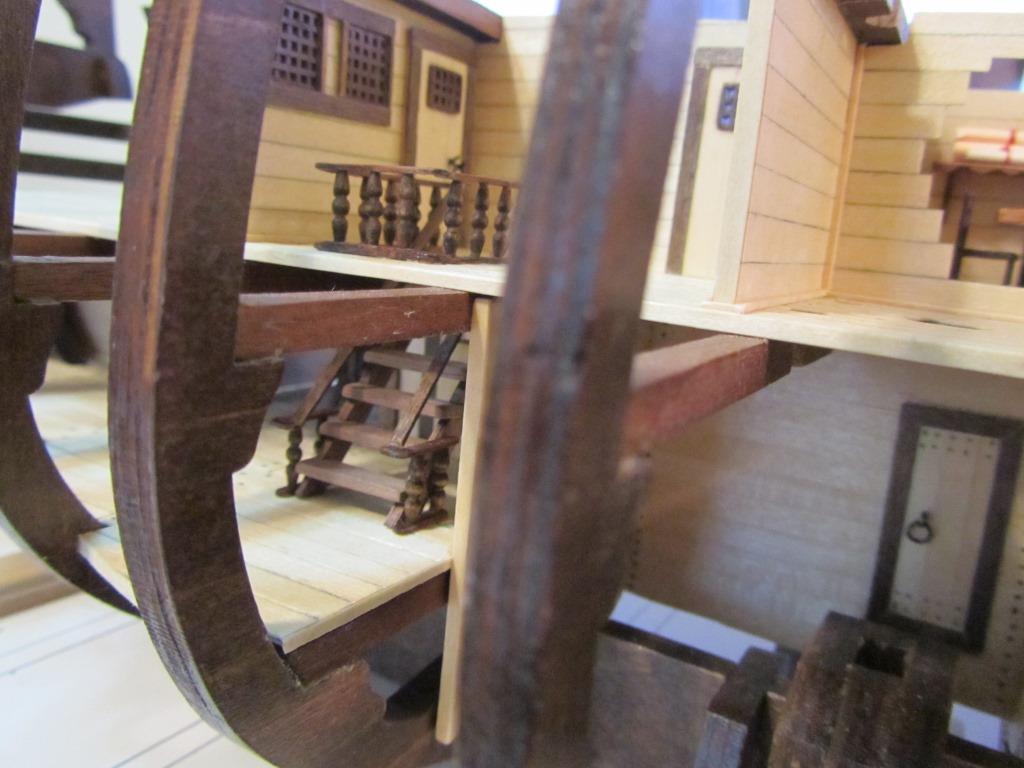
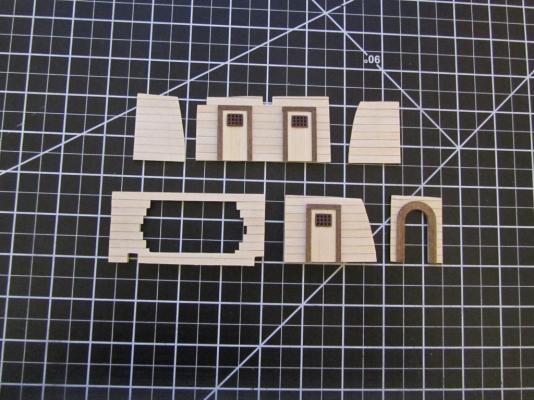
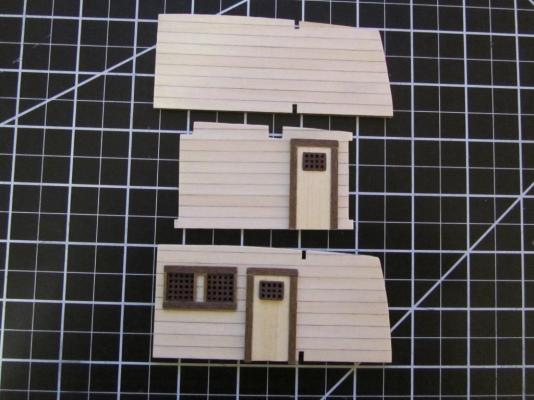
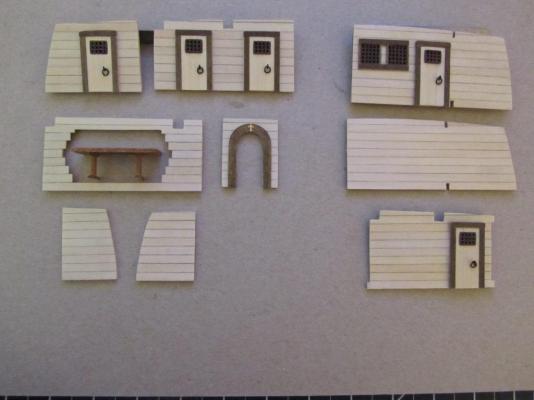
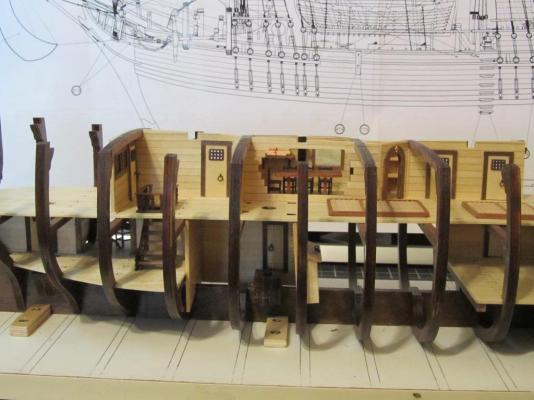
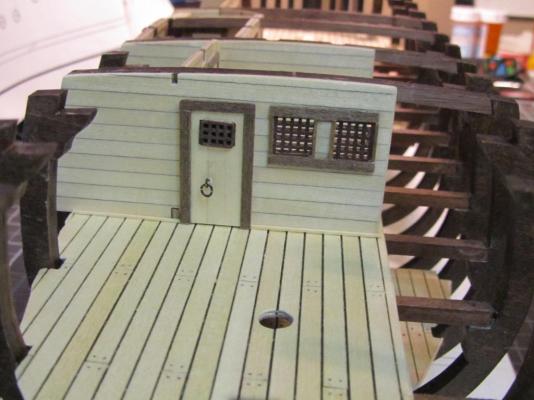
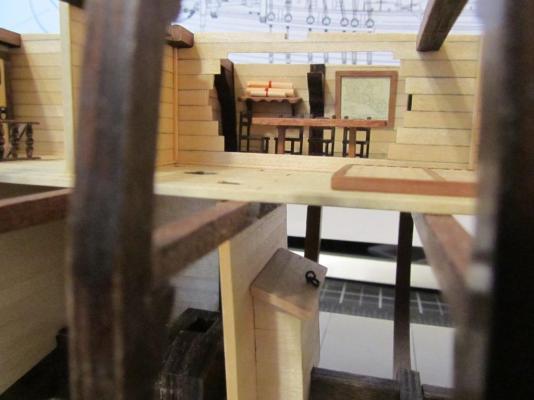
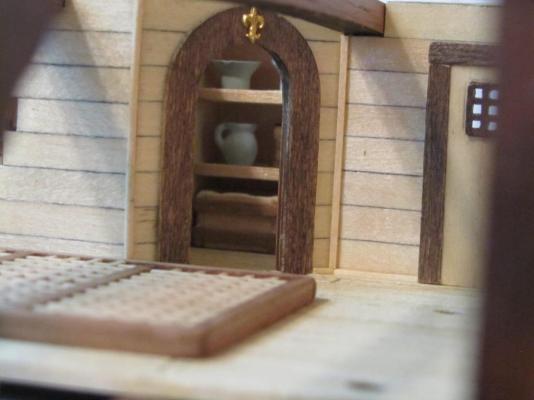
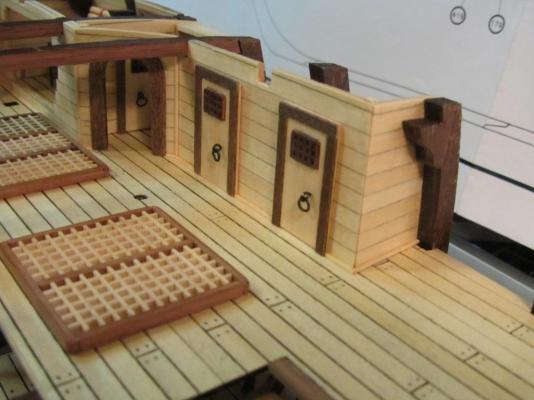
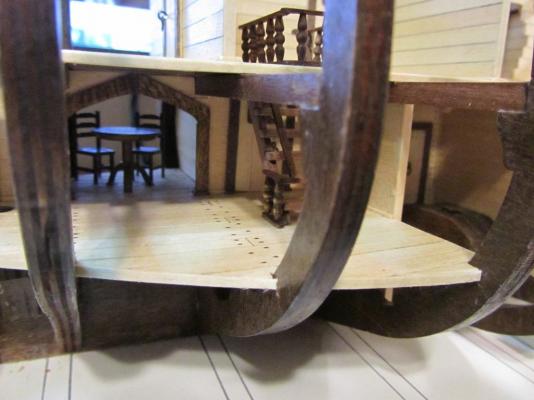
Middle Deck Assembly On the Middle Deck I planned to make extensive modifications and additions as this level has ample space/opportunity to do so. As such, I’ll complete this work in two stages. I’m estimating that I spent close to 150 hours on the model since my last post back in early May. Some of the time was spent on other areas like; testing breadfruit materials, designing the main deck planking pattern, and thinking about techniques for planking the hull (I’m a big fan of Chuck’s methods and think I’ll probably give it a go….should get to it in a few months). So, here are the items I’ve completed in Stage One (parts of kit steps 13 – 20, along with custom modifications and additions): Stern balusters and railings; I installed these prior to gluing up the kit bulkheads (easier to align and glue them in without the bulkheads in the way). I assembled the three Baluster sections on a flat surface to be sure they were completely level and square. Then I glued the assembly over the stair well. Once that dried I attached the railings from the middle to the lower level. Note; I’ll install the second (Bow) system in stage two after all the galley additions are completed (the assembly is already completed). Kit Bulkheads; I moved the bulkhead assembly (kit steps 16 – 18) slightly a stern to accommodate the baluster and railing system design (basically moved it closer to center to allow traffic to pass on all sides of the stair well/railings). This also required me to replace/lengthen the middle bulkhead panel (part 136). In addition, I changed the window and door treatments for the kit bulkheads. I used gratings for all the windows and paneled the bulkheads, cabin walls and doors with .06 x 5mm basswood strips. I used a Number 2B Pencil on the edges of the strips to simulate very light tar lines. I really like the look but it was very difficult to line up the tar lines on all the vertical walls and bulkheads where they come together in the corners (not all 5mm wide strips are created equal!!). Can anyone guess what I’m going to ask the Admiral to give me for Xmas Deck Gratings; this was a simple assembly for the two gratings (kit step 14). Nothing exciting here. Cabin additions; this was the most significant addition to the middle deck (I spent close to 100 hours here). Quite a bit of time was spent on brain storming design ideas and then cutting out and fitting cardboard templates. Some of my ideas for this stage were prompted from the Anatomy book...that mentions the Captains Dining Cabin (which doubled as a day room and clerks office) and the adjoining Pantry. The final additions included; a Captains Dining Cabin, a Pantry serving the Dining Cabin, and two additional forward cabins. For the Captains Dining Cabin; I added two back wall panels in between the frames. I built a dining table and wall shelf with maps and charts rolled up on the shelf. I also framed and hung a map of Tahiti on the back wall. Note; I spent several hours trying to figure out the best way to open up the view into the Captains Dining Cabin….three failed template versions later the “Obvious” came to mind. For the pantry; I put together a shelf (also served as a bulkhead between the frames) and built a storage crate that sits under the lower shelf. I also put some water/rum pitchers and serving bowls on the upper shelf's (they came in the furniture kit with the chairs I used around the dining table). Here are some pictures of the finished work….. Cabin additions (walls and bulkheads) Kit Bulkheads (with modified wall treatments) Finished bulkheads and walls (dining table assembled) View of all the finished assemblies Green house side view of kit bulkhead Stairway balusters and railings, note the increased space between the left railing and bulkhead wall (by moving the bulkhead to the stern side of the beam). Another view of the stairway Another view of the stairway Captains Dining Cabin Close up of Dining Cabin, I painted the frames dark brown. Note the map of Tahiti on the wall. Pantry to the Dining Cabin Two Cabin additions Another view of the additions, note the kit gratings Hihg level overview, note the notches in the cross beam for the bilge pipes


-
I bought the same bender myself and completed two layers on my Lexington build....works great after you get the hang of it. I might add your planking is coming along quite nicely
-
This is why I pay attention to as many builds as I can...I had no idea what length to cut breaching ropes. Very clean work as usual Brian
- 831 replies
-
- 2
-

-
- Armed Virginia Sloop
- Model Shipways
- (and 1 more)
-
Hi Keith, Hope all is well with you and your family....looking forward to seeing your next update
-
Hi Al, Beautiful job on the main deck...I think the brass cannons add a really nice finished look to the ship
- 265 replies
-
- 1
-
-
- finished
- artesania latina
- (and 1 more)
-
Hi Rowan, Thanks for coming aboard...and the kind words. I'm enjoying your excellent build as well
-
Ah yes, spending hours on details that most people won't even notice....this is what some of us call enjoyable trips to "The Dark Side" Nice job by the way
- 831 replies
-
- 2
-
-
- Armed Virginia Sloop
- Model Shipways
- (and 1 more)
-
Roland, Just beautiful work....you've definitely inspired me to raise the bar on my rudder as well
-
Hi Al, Thanks for stopping in and your welcome….I also appreciate you letting me know how you’re doing Actually, I’ve been very busy with the Bounty trying to complete the first phase of the middle deck. I’ve probably spent over 150 hours on this phase alone and I’m only just now getting ready to start gluing up the assemblies. . This phase includes the AL kit Cabin Bulkheads; as well as a new Captains Dining Cabin and galley side pantry used by the cooks as well as two additional forward cabins (lots of detail). I probably spent half of the above hours just contemplating the design as opposed to actually building…. I tend to over think my detail additions (many trips to the dark side). But for me, half the fun is researching and planning/designing the next step. I should have a post ready in the next week or so….if the Admiral doesn’t make a course change on me
-
I’ve been thinking about the single planking as well. Many AL builders have commented on their struggle when bending the very hard 2mm thick walnut planks (not to mention being limited to single planking on the Bounty). I’m actually considering double planking myself and see no issue with taking that approach. Also, a lighter color wood for the first layer will give better contrast on the inside and make it easier to see items placed on the lower and middle decks for viewing purposes (barrels, boxes, sail material, etc). Another possibility I’m considering (either with single or double planking) is to substitute the Walnut planks with a more forgiving wood/material that will make it a bit easier to accomplish spiling/shaping the planks into position. On a different subject…if you haven’t already considered it; be sure to notch/drill your cross beams on frame 34 (cross beams 49 and 160) to allow the bilge pipes to pass through to the hold area.
-
Tom, Really beautiful and extremely precise work...
- 1,350 replies
-
- 2
-
-
- constitution
- model shipways
- (and 1 more)
-
Brian, I think your logic is spot on target, nice detail touch on the rudder but no need to have it move
- 831 replies
-
- 1
-
-
- Armed Virginia Sloop
- Model Shipways
- (and 1 more)
-
CaptainSteve, Really nice work.....I wish I could use filler blocks on my build
-
Matt, Really beautiful finish...I've also been using Minwax products for years (I'm using their Special Walnut and Wipe on Poly on my current build). And thanks for the details on how you approach finishing....I'll be giving Murray's beeswax a try at some point.
-
Matt, The wax looks great on your decks. I'm wrestling with the finishes I'll use on my top deck and the hull planking (deck is light basswood and the hull is dark walnut). I never considered wax, can you give me your thoughts on this and what product you used? I hesitant to use varnish as this was not the look of 18th century ships....thinking of using polyurethane or lacquer (both clear matte finish). On a lighter note; we now have five very rambunctious baby squirrels and two baby rabbits in the back yard and there're the best of friends...and a couple of Mallards flew in yesterday and enjoyed a dip in the pool. Unfortunately, none of them have any desire to assist me in my ship building activities
-
Matt, I agree with George, the contrast of color is excellent, and combined with the weathered/rustic look (Bulwarks are amazing)....you're well on your way to another great build
-
Hi Tom, I just finished reviewing your log…all I can say is logs like yours are why people like me (first time builder) take the plunge into this amazing hobby. Can’t thank you enough for the wonderful level of detail and explanations….I’ll follow and learn as you continue the build
- 1,350 replies
-
- 1
-
-
- constitution
- model shipways
- (and 1 more)
-
CaptainSteve, Awesome detail work...and I know the feeling about rework...yesterday it took me 30 seconds to ruin 2 hours of work!! I think I need to build a couple more Ships before I take on something like the USS Constitution