


thomaslambo
-
Posts
384 -
Joined
-
Last visited
Content Type
Profiles
Forums
Gallery
Events
Posts posted by thomaslambo
-
-
-
Hi Nils,
Simply amazing build.....I'm soooo glad you dropped by my build while it's still in it's infancy. Can't believe the ideas you've spawned in my mind

Thanks again,
Boyd
-
congrats Boyd,
Looks like a fine kit you have Chosen, from what is to be seen so far. Also a nice idea to stain the Framework before Assembling, its a nice contrast to the light colored deck, and the interior Fitting out, great looking.....
Nils
Hi Nils,
Thanks for coming aboard....and I really appreciate the kind words on the build.
As you know, this is my first build so I can use all the moral support I can get.
I just checked out your scratch build, wow really nice and love the detail work on the inside (another open hull build).....I may borrow a few of your ideas

Boyd
- Mirabell61 and mattsayers148
-
 2
2
-
Outstanding work !!
Hi CaptainSteve,
Thanks for stopping in and I appreciate the vote of confidence.....as I noted on your build log I'll be needing some of your help when I get to the finer details on this build.
While I'm at it, have you ever soaked sails in Tea to give them a more used/aged look....this is what AL is suggesting in the build instructions?
Boyd
-
Hi Robert,
Welcome to MSW, I'm a fairly new member myself and just started my first ship and build log for the Artesania Latina HMS Bounty.
I try and follow most of the AL builds on this forum so I'll be stopping in to check out your progress.....and I might add she looks excellent so far, very clean and precise work
Boyd
- Robert29 and Dimitris71
-
2
-
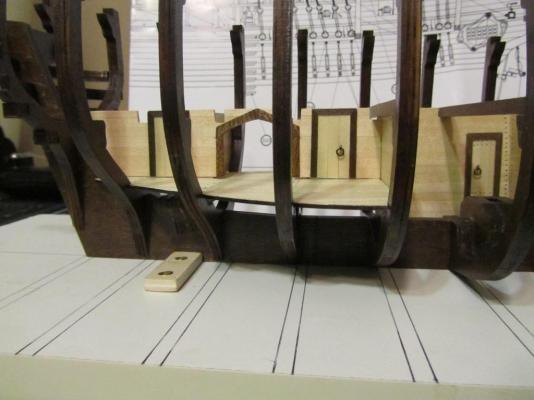
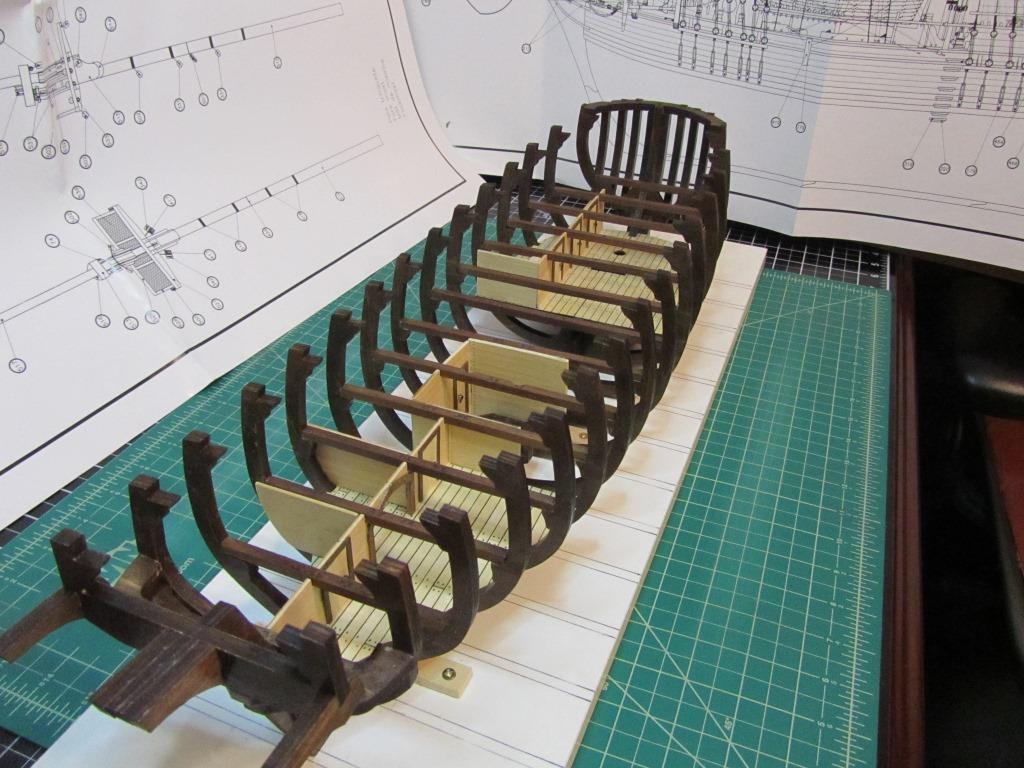
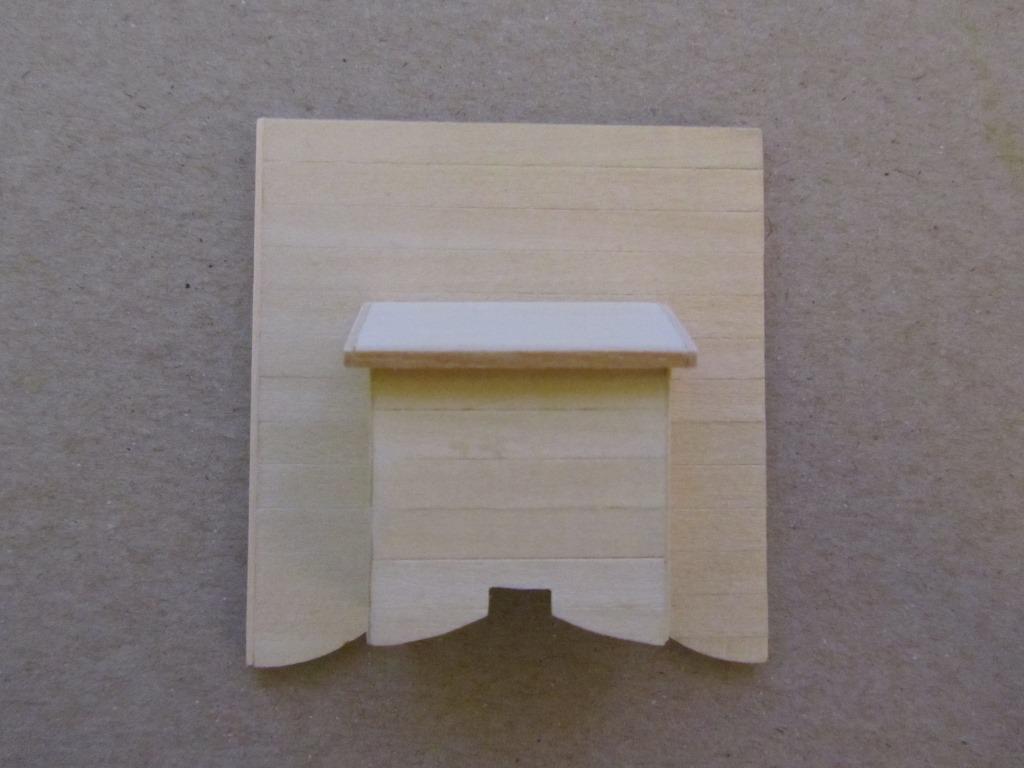
On to the lower deck cabin additions…. not included in the instructions.
As a reminder for people that may not be familiar with this particular version of the Bounty; the model leaves the starboard side of the ship open for viewing.
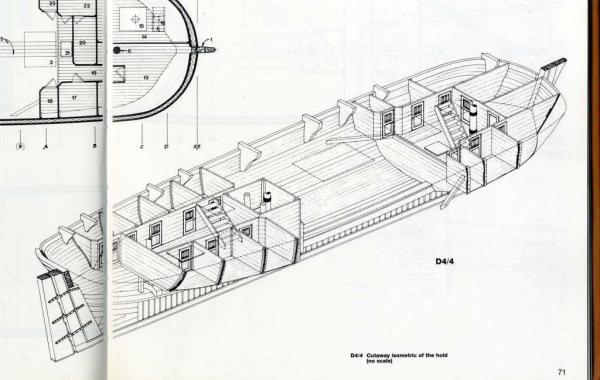
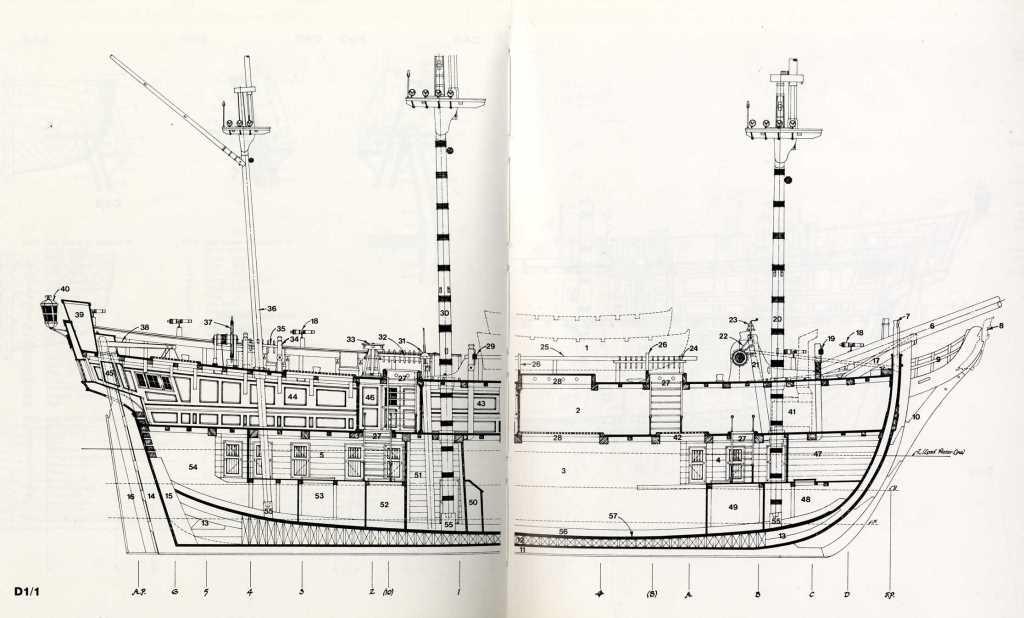
So, this is when I did some simple scratch work to design and install some additional cabins in the lower stern and bow areas. My ideas came from some of The Anatomy drawings (see the Bounty diagram images below) as well as pictures of other AL Bounty builds. It took some time but I think it was well worth the effort.
As I was designing the additions I wondered why AL didn’t expand on the interior details of the model as there is quite a bit of open space for making creative additions. Perhaps they left the opportunity open for the builder to take their own poetic license
Also, one other added benefit to adding cabins on both lower decks is you can fill the space behind them with filler blocks between the frames to aid in the very difficult hull planking process (particularly in the Bow and Stern areas). The filler blocks will be hidden by the cabin walls
Steps I took to design, build and install the cabins:
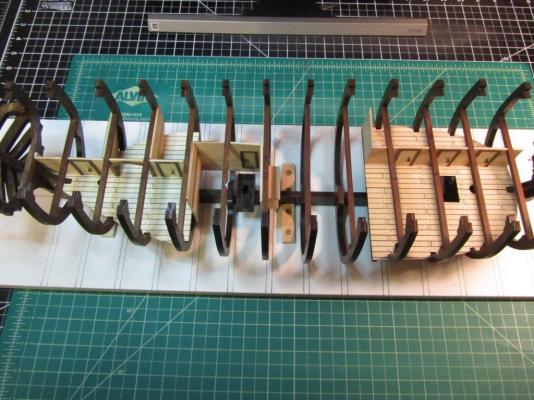
I first cut out templates for the wood façades and bulkheads/side walls (Bow and Stern) and carefully fit them to the space including cutouts for the overhead cross beams.
Then I spent some time laying out the design and look of the cabin facades.
Once I was happy with the templates and design style I cut out the wood parts using some birch panels I had left over from a previous RC airplane build.
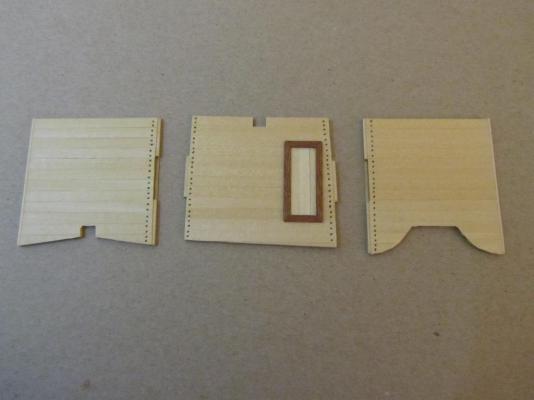
Then I paneled the front side of each façade with the same planking used for the decks. And then added the door frames, door handles and floor moulding.
On the stern cabins I left the middle cabin open for viewing some furniture I plan to put in the room. The inside of each side wall was also paneled with planking.
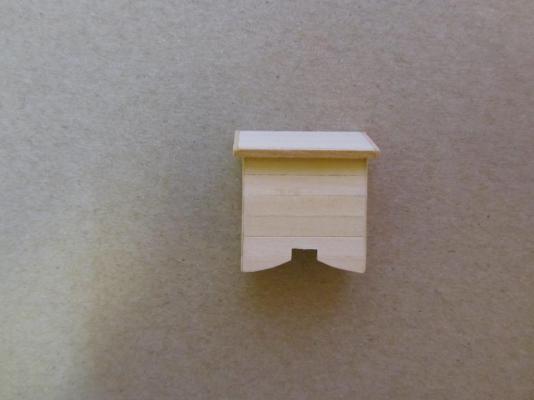
Then I did one last fit to be sure everything was tight, squared everything up with angle blocks and glued in all the parts (facades and side walls).
Note; I used 1/4 x 1/4 inch supports across the back side of the facades that should insure they stay in place securely.
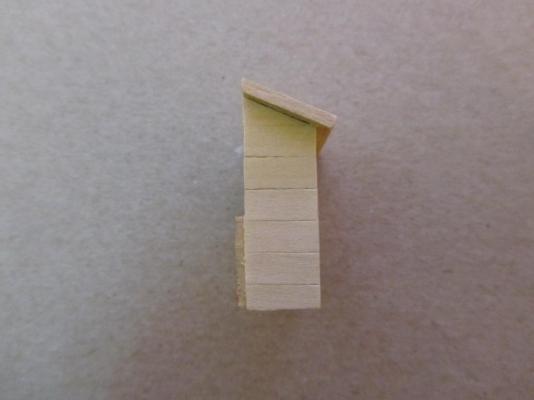
Bounty lower decks

Bounty side profile
Template laid over birch ply - decided to extend the wall a bit

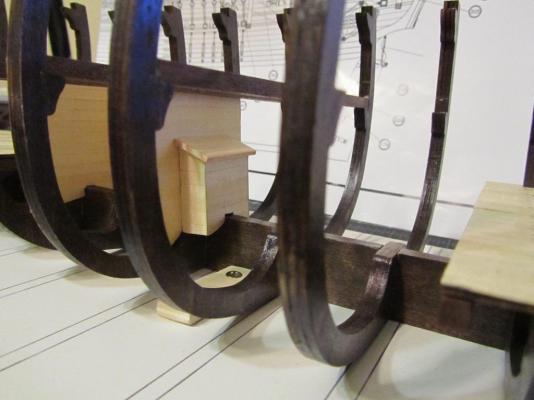
Bow wood facade being fitted
Stern wood facade being fitted
Another fitting in the stern prior to adding door handles and install

Another fitting in the bow prior to adding door handles and install

Gluing up the bow facade using angle blocks to keep it level

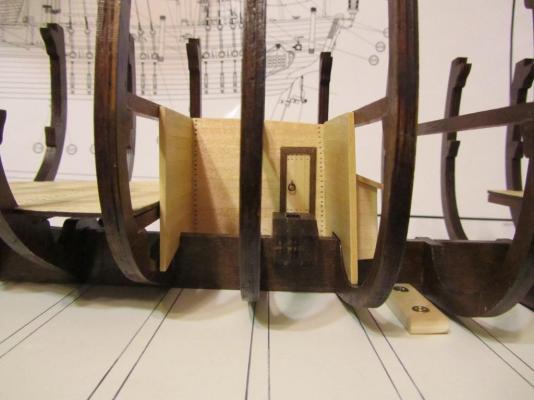
Installed cabins in stern (just need to add the furniture pieces)


Note the side walls in the stern middle cabin - inside walls have been planked like the cabin front

At this point I'm going to add the pins/dowels to each of the frame/beam joints for extra strength.
And then I'll check the alignment again of the main, middle and lower decks with the fore, main and mizzen masts, as well as bilge pipes and all the stanchions that drop below the main deck.....then on to installing the middle deck.
Stay tuned......
-
-
Your welcome, and I'll keep North Country Trophies in mind when I get to that stage.
I spent 3 years building a ground up Home Theater addition to our house (carpentry is one of my hobbies) and I had several plastic plaques made for my displays of movie memorabilia (swords, knives, etc) that I ended up getting rid of. I may give it another go with brass at some point.
I'm thinking about building a display cabinet myself only because I want to match all the woodwork in the theater (all Australian Jarrah wood). My HMS Bounty will be proudly displayed in the theater with a "Mutiny on the Bounty" movie poster right behind the display case.
I sure hope I get the model built faster than the Home Theater
Keep up the great work.
Boyd
-
-
-
Nice job on the sails, I'll be looking to you for some help on mine when I finely get there
Boyd
- mattsayers148, GLakie and CaptainSteve
-
3
-
Hi Grant,
Great choice for a build, I'll be following your log with great interest.
This subject is right up my alley, as I've been racing Fast Electric (FE) boats for years and still hold three NAMBA National Records.
I love the Dumas Chris Craft models and it's just a matter of time until I build one.
The electronic components are really straight forward and fairly easy to install, you just need to make a decision very soon on your setup as several of the components take up quite a bit of room and need to be considered in the build (e.g. batteries, controller, motor, steering system, drive shaft, receiver, ect.)
I know Dumas has setups for some of their boats but many FE people consider their power systems somewhat outdated and a bit over priced. But in many cases they have plans for the installation so that may be of help.
Have you made any decision on the electronics?
Ok, here is an edit; I see the kit has running gear included (this is a good thing), now you just need to choose your electronics (motor, controller, battery and radio and receiver). If you get the correct RC gear you won't need to run the antenna outside the hull as it's wood and won't interfere with the signal between the radio and receiver (no ugly antenna showing).
Good luck,
Boyd
- Nirvana and flying_dutchman2
-
2
-
Now I moved on to building and installing the “hold well”.
First; I think it’s interesting that much of the AL HMS Bounty model is quite accurate and one example is the hold well. You can see it in the design diagram from The Anatomy book I included in the first pic. Also, take note of the stern and bow cabins on the lower decks (in my next post I’ll detail the addition of six cabins in the diagram…a bit of scratch building).
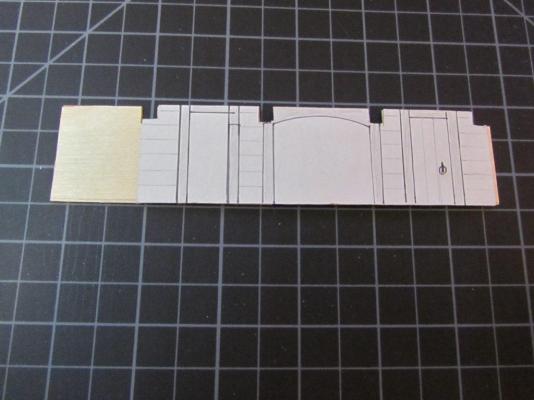
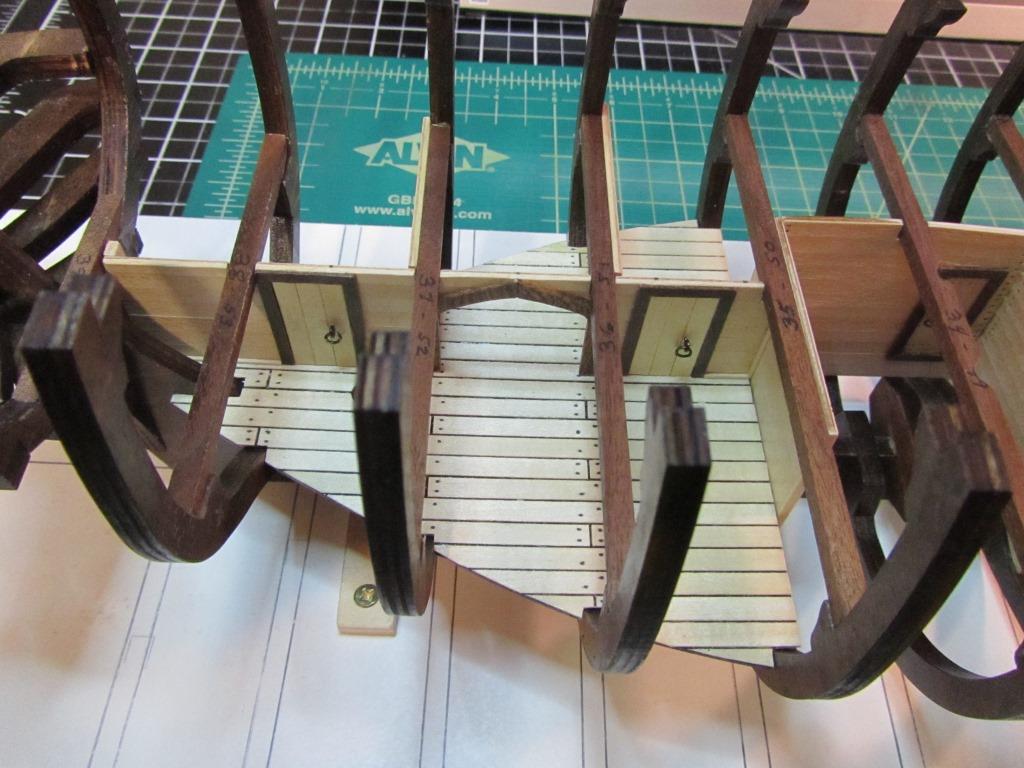
I paneled five of the six hold well panel sides per instructions (the backside of the middle panel is out of view), as well as the hold well box pieces that end up mounting on the right side panel.
Note the 1mm cut/gap on the inside of each panel of the hold well to allow the panels to fit snugly with the center panel (similar to a tongue and grove joint).
I also installed veneer end pieces to cover up the ply edges that are in view on both of the side panels and hold well box lid (edged the ends with some left over planking pieces).
One last change was to use simulated nail holes on the planked panels instead of the brass nails included in the kit (I just didn’t care for the look of the brass nail heads included in the kit).
I also blackened both of the brass pieces provided in the kit for the door knobs and well box handle. In addition, I shortened the diameter of the brass loops to try and make them closer to scale.
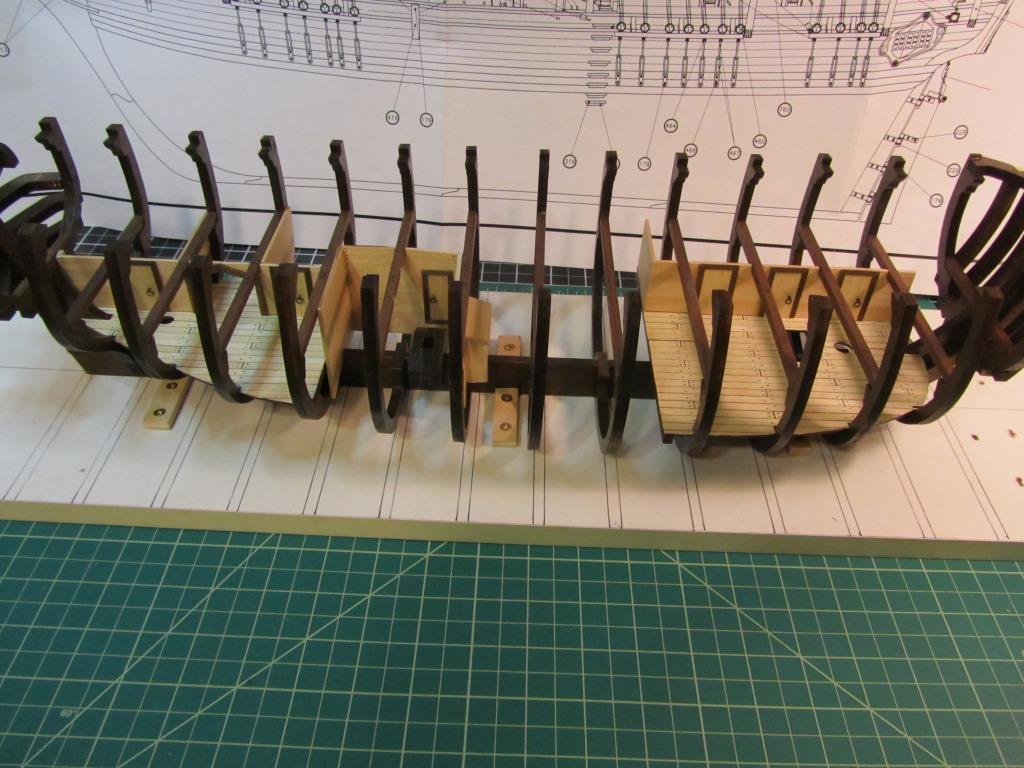
I then installed all three finished panels as well as the hold well box in the following order:
1 On the work bench; I glued the left side panel to the middle panel making sure it was perfectly squared up.
2 Did a careful dry fit of all three panels in the ship to be sure the fit was good (not much adjustment needed – so far the laser cuts have been very accurate).
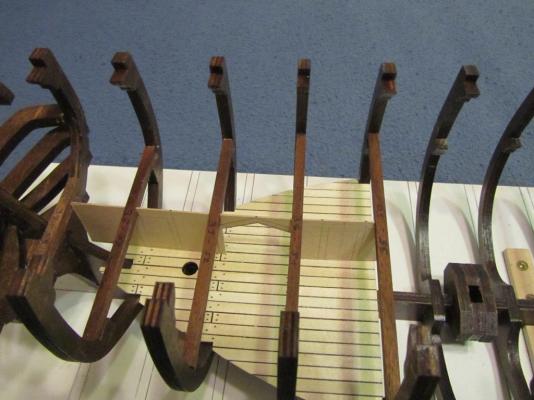
3 Then I installed the left and middle panels to the keel and frames with the left panel butted up against the stern deck and the middle cross beam on frame 35. Making sure I aligned the position as to allow the right side panel to fit cleanly.
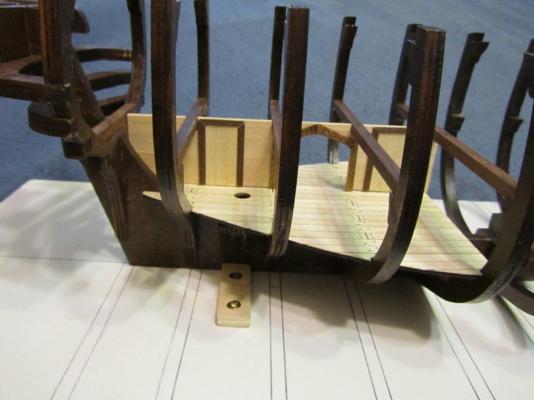
4 I glued the hold well box to the outside of the right panel and then glued it in the ship to complete the hold well install (note; the right panel is set at a slight angle from top to bottom by design – you can see it in The Anatomy diagram).
5 After taking all the pics and downsizing them, I noticed I had left off the hold box lid handle (same parts as the door knobs). This was a quick and easy fix due to easy access to the hold box.
Note; in the last two pics you’ll see part of the stern cabin addition in place for fitting purposes. You can see the lower deck stern cabins in the diagram below. I’ll detail the lower deck cabin additions in the next post.
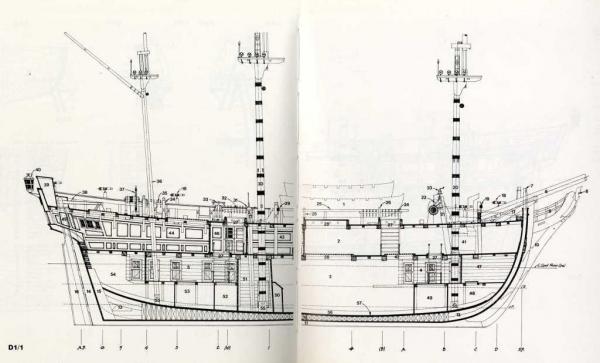
Diagram from The Anatomy - note the hold well at an angle (no 50 & 51 near the main mast) and stern and bow lower deck cabins
Hold well sides have been paneled and simulated nail holes added
Hold well box paneled

Note the trim to cover the ply edge

Glue up the left and middle panels on the bench
Hold well installed. Note both edges of the side panels have been veneered to cover the ply edge.
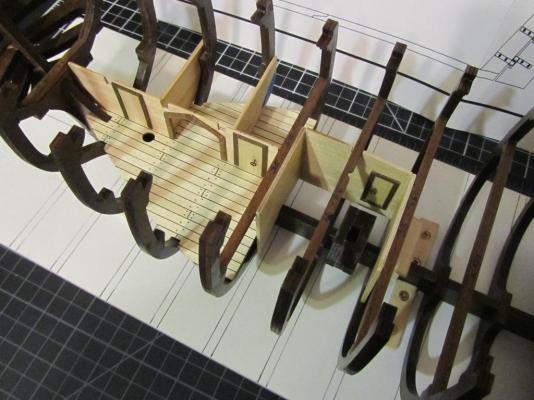
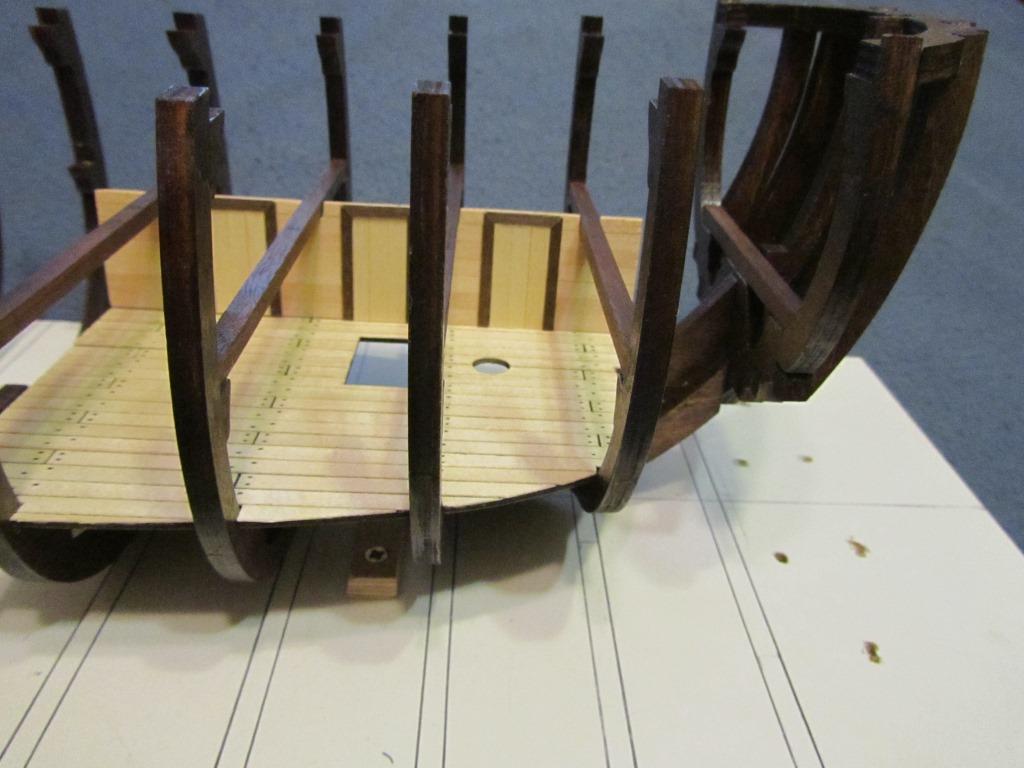
Note the dry fit of stern cabin facade. Also, see the notches cut for the bilge pipes in frame 34's cross beam.
Stay tuned for lower deck cabin additions (a bit of scratch building)…..
- yvesvidal, CaptainSteve, antanasp and 6 others
-
9
-
Hi Tom,
Nice to see another fellow AL builder…..you got a great build going so far, keep up the good work.
I’m in the middle of an AL HMS Bounty build myself and I hear you about the instruction sequence being a bit off in places….seems to be a pattern with these models.
However, with patience and attention to detail they can be amazing models when completed.
By the way, I kept a 150 gallon Mini Reef for over a decade…another great hobby that demands attention to detail
Regards,
Boyd
-
Hi Rowan,
Thanks for the kind words....and coming aboard to check out my build log.
Your comment about AL "errors and omissions" is consistent with my experience so far. One thing I would recommend with anyone building this model is read ahead thoroughly as some of the steps need to be considered ahead of time (true for any build I suppose).
However, overall I would definitely build another AL kit with no hesitation. In fact, my next build will be the Cutty Sark and more than likely I'll build the AL version.
Cheers back Mate,
Boyd
-
CaptainSteve,
I was just thinking about treatment of the sails on my build....this log just keeps on giving.
Wow, one lucky friend you have that will receive this beautiful Launch.
Boyd
- CaptainSteve and GLakie
-
2
-
Thanks for the response,
I found your pictures during my research and have several of them in my achieves as fine examples to follow.
Please join my build log as I would welcome any help/suggestions you could offer.
Boyd
-
You seem to be doing a fine job so far, Boyd.
As to blackening metals, I do prefer the look of chemically-coloured over painted. There are a number of products available ... as well as a number of threads on the topic here on MSW.
So far, my favourite is Casey's Brass Black.
CaptainSteve,
Thanks for your vote of confidence, and the suggestion.
I definitely plan to try my hand at using chemicals to blacken the door knobs and several other parts (cannons, among others).
I must have read a 100 build threads by now and I can't even put to words how valuable that exercise was (I considered it a home work assignment) to prepare myself for my first build.
As such, I came across a really nice thread called "THE BLAKEN-IT TRIALS" here is the link that I'm sure you've already seen: http://modelshipworld.com/index.php/topic/6977-the-blacken-it-trials/#entry205420
And yes sir, a bottle of Casey's is in the shipyard
Boyd
- mattsayers148, CaptainSteve and bryanc
-
3
-
Very nice start to your model. I will follow with great interest. I haven't viewed this kit before. I am guessing that it is made with exposed planking?
It looks very good.
Mike
Hi Mike,
Thanks for the kind words and coming aboard to check out my build log.
And yes, you're correct as the starboard side of the AL Bounty is open for display purposes and adds a level of complexity to the build. There are a couple of other build logs on this ship, as well as some fine pictures of this model in the gallery.
Boyd
-
John and Captain Steve,
Thanks much for your input...I'm definitely leaning toward the blackened approach and I'll spend some time improving the process I use (the pic was a quick and dirty use of a marker pen just for comparison).
I'm following both of your current builds and would humbly appreciate any help and advise
Boyd
-
Hi Rowan,
I just saw you log.
Like yourself, I recently started my first major build...the AL Bounty.
I really appreciate your comments on how to deal with bending the very hard and dense walnut planking (your jig is very nice). As you may or may not know the Al Bounty has mostly walnut planks with only one single layer on the hull.... so I appreciate the information on how you approached this challenge.
Good luck and I'll be keeping an eye on your build.
Thanks much,
Boyd
-
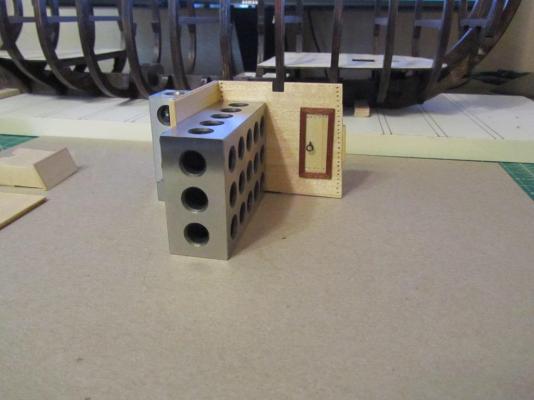
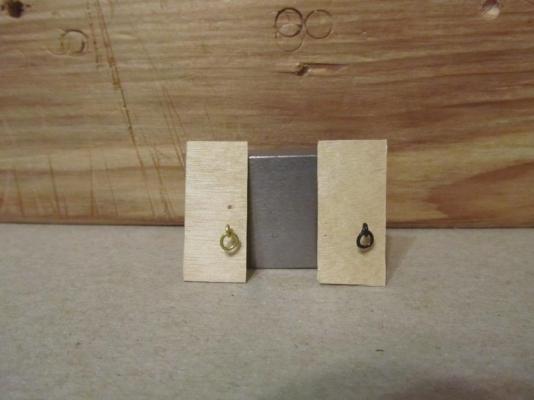
One other item I've been playing around with are the door knobs (if that's what you call them).
I don't much like anything brass on the ship, and the AL kit comes with two brass pieces that make up the suggested door knobs.
Take a look at the picture below and let me know what you think (note; in both pics the end ring has been slightly reduced in diameter to try and make it closer to scale).
The door on the left is the stock brass color that most people used on their AL Bounty model.
The door on the right has the same brass pieces that I blackened.
I'm not sure about what kind of hardware was used on the Bounty (or any 18th century ship) and what color it was.
Any opinions on the two I show in the picture would be appreciated (which color do you think looks best)?
Thanks
Boyd
-
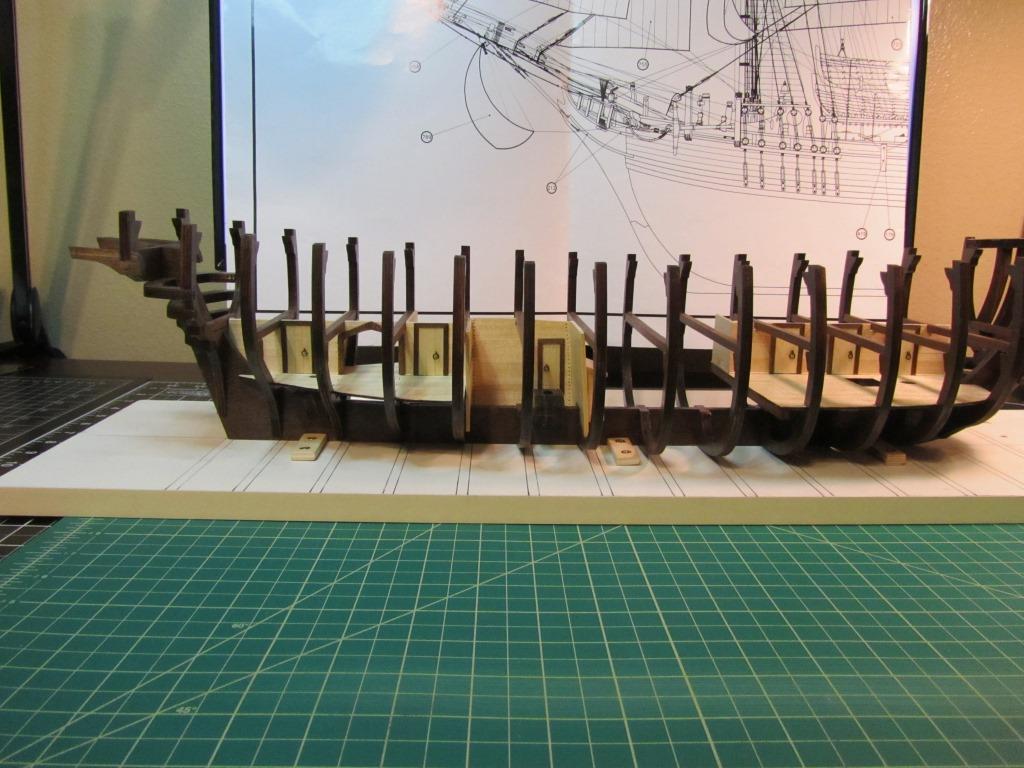
Install the middle deck cross beam supports.
Normally I wouldn’t have spent much time discussing this step because it’s quite straight forward (cut the beam to length and glue it into the frame).
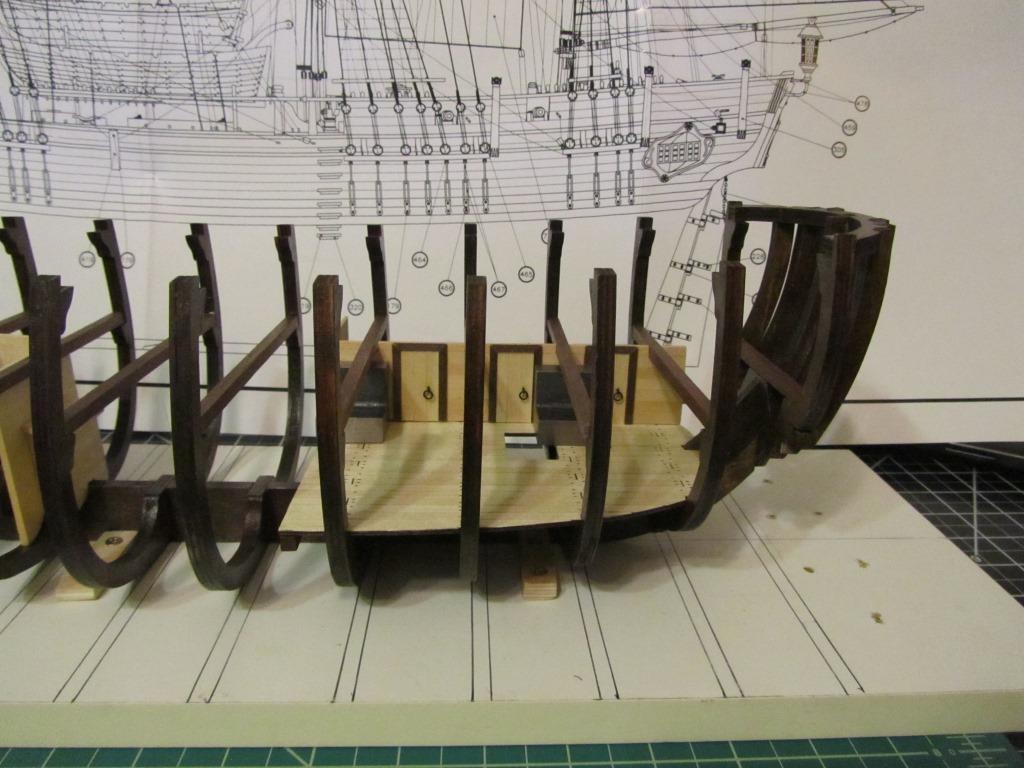
However, as I cut and glued in the cross beam supports it really brought my attention to how flexible (probably flimsy is a better word) the frames are on this model.
When you think about it; most of the model ships use a POB design which is quite strong in comparison to this POF model (which is due to the open hull design). The AL Bounty only has 15 frames and three decks (2 of which are partial decks that don’t meet all the frame sides). As a comparison, the real Bounty had close to 90 frames according to The Anatomy diagrams.
Now I realize this model will never see the ocean and heavy seas, but none the less I think a little extra effort can help shore things up a bit.
As such, I’m going to add pins to the joints by drilling pilot holes at a slight angle from the top of the beam into each frame and insert wood dowels coated with glue for good measures.
This should tighten things up a bit and help keep everything in tact during the fairing/planking/sanding process. It shouldn't take more than a couple hours to complete this step.
I’ll install the dowels just before I lay the middle decks as I need to work without several of the cross beams in place while I install my lower deck modifications (i.e. 6 cabin additions in the lower Bow and Stern decks – I’ll describe this activity in a future post).
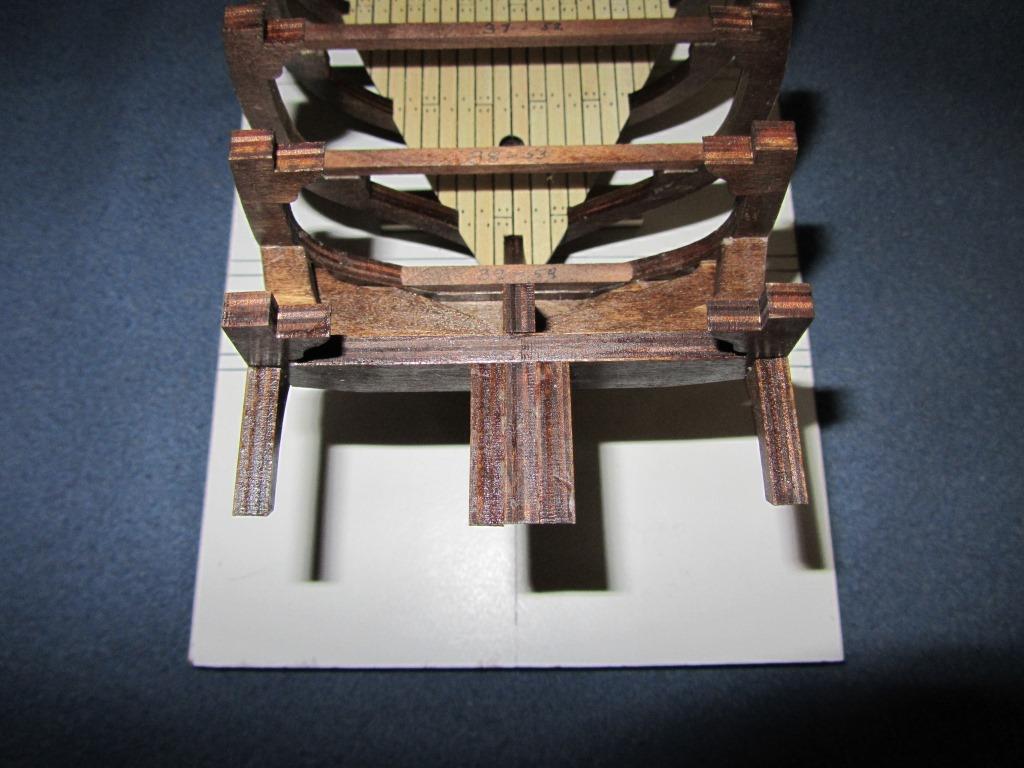
And the last item was to install the remaining stern supports.

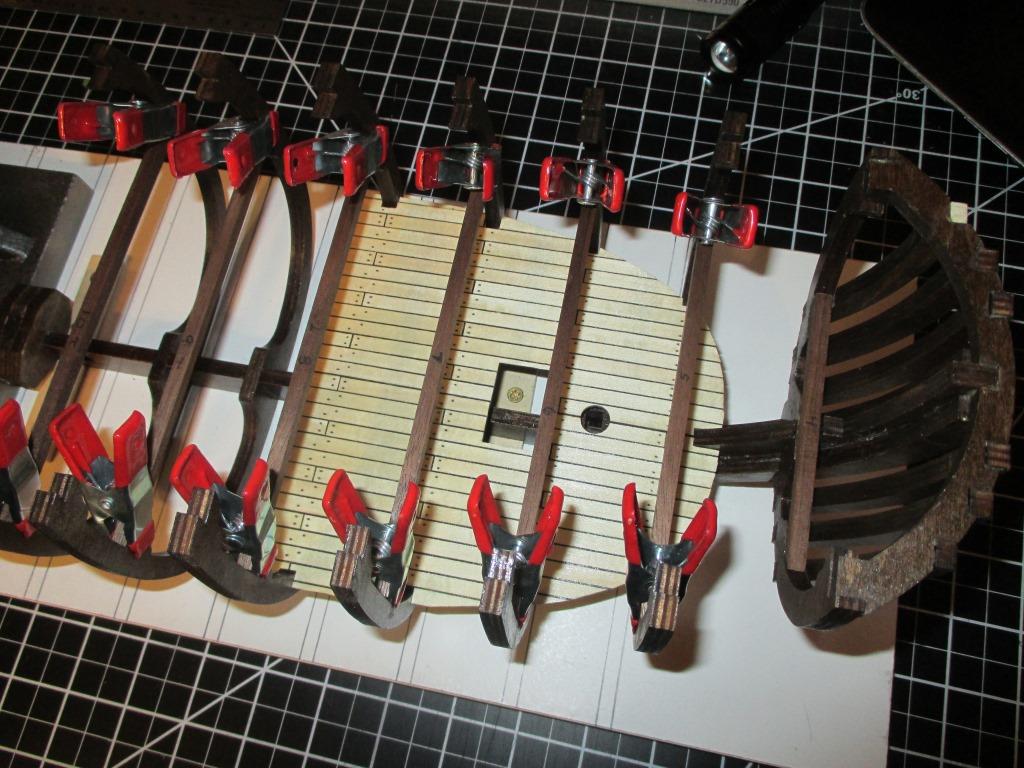
Bow cross beam supports glued in

Also note the four clamps on the bow (gluing in the under deck cross beam)

Finished cross beams on the stern

Stern supports glued in
And in case you're wondering; I didn't realize I'd need to remove some of the cross beams to complete the cabin additions until I started fitting the templates and cabin facades onto the lower decks (the reason why I had to hold off on installing the pins in the beam/frame joints).
Stay tuned for the “hold well” installation…..
-
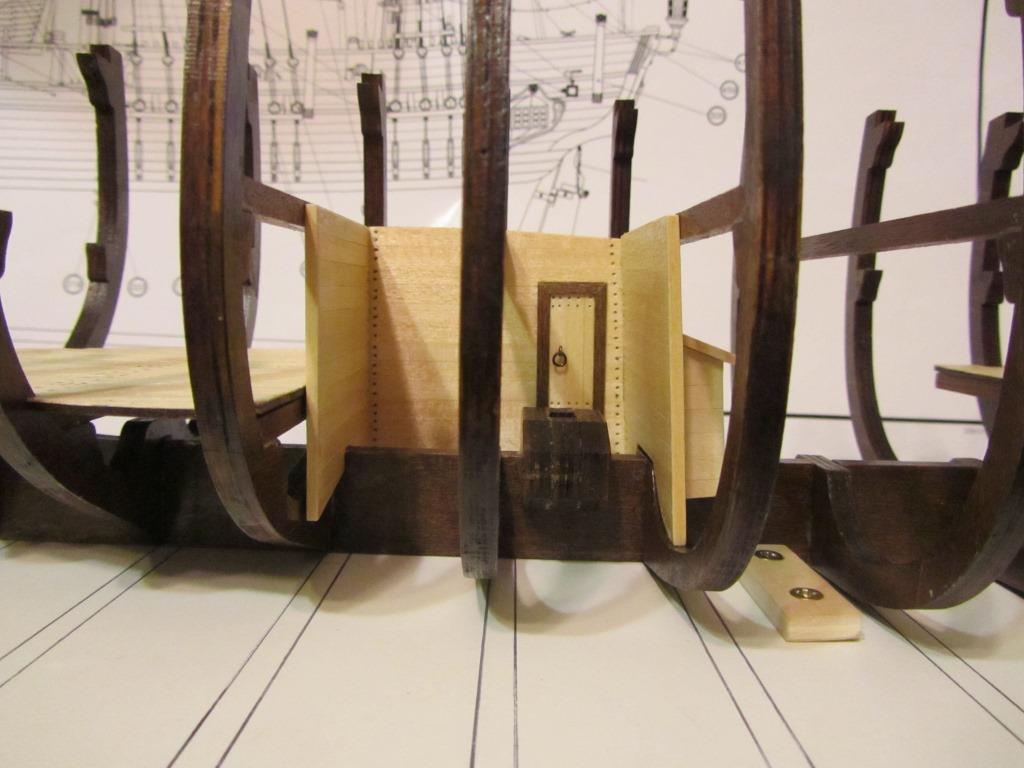
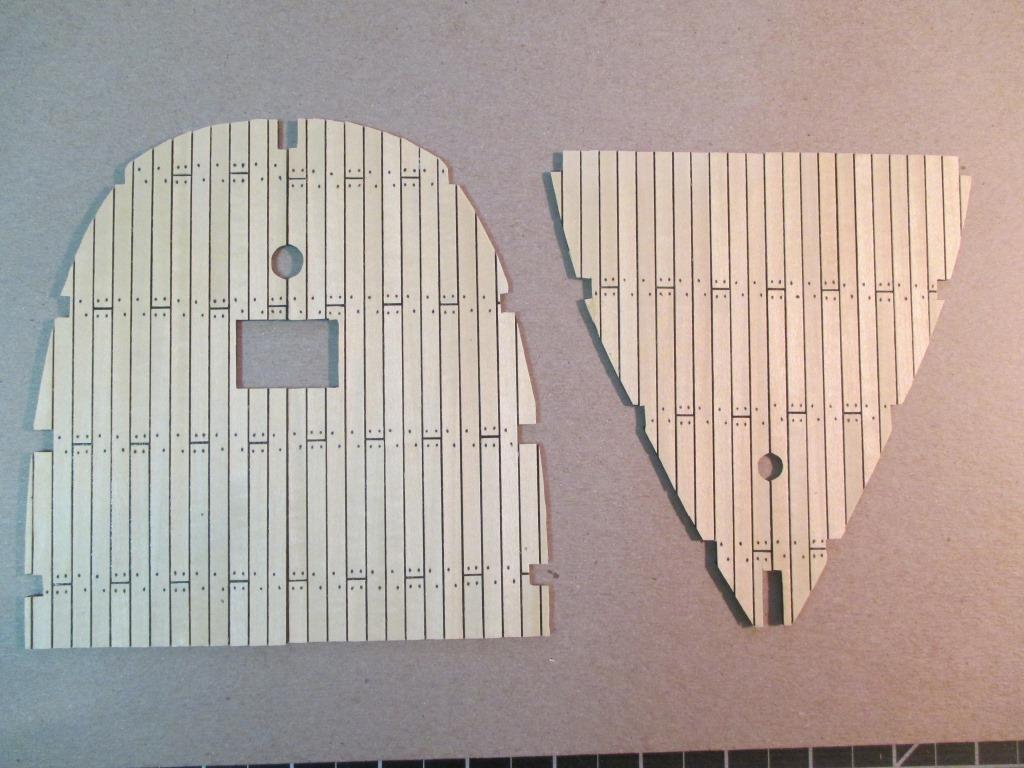
Next up, the lower deck planking and installation.
I planked all four of the bottom deck halves at the same time as I was on a roll and wanted to get that stage finished.
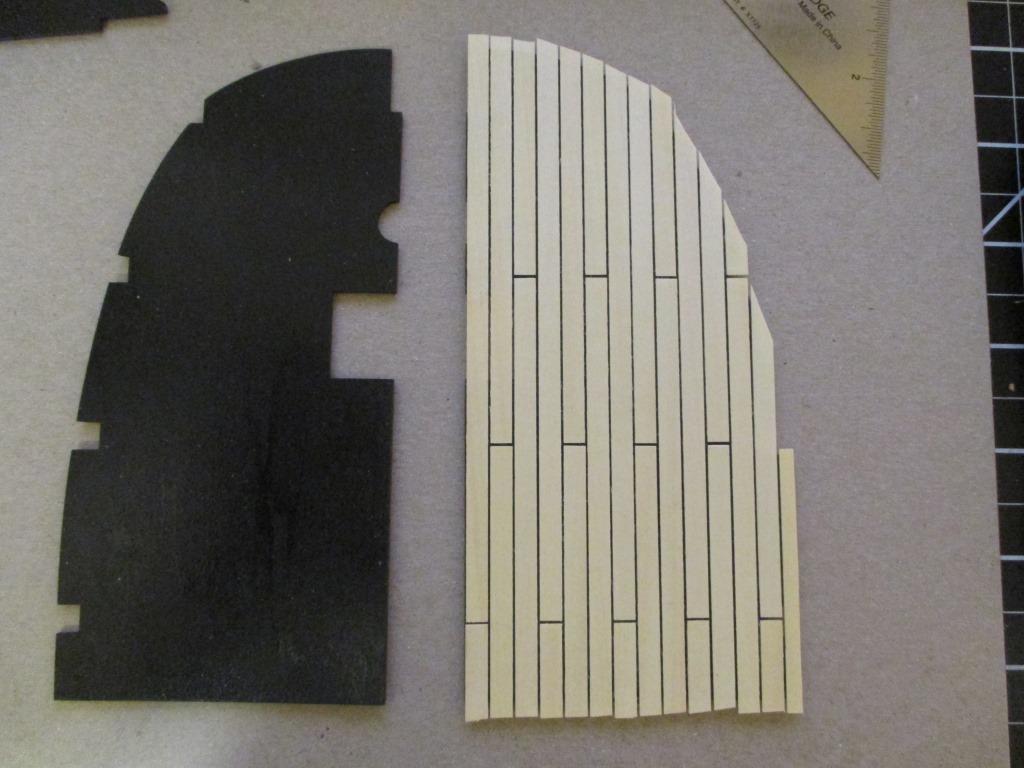
First I stained both sides of the false decks and then I painted the top side black to simulate tar (I looked at several methods of simulating tar and choose this one because I think it looks fairly good and it’s clean and easy to do).
I used a two-step shift of butts pattern for the lower decks.
I marked lines between the frames on the deck and proceeded to lay each plank row individually over the black painted surface. After I glued each row of planks in place I carefully spaced the planks with the edge of the X-acto triangle square (.5mm gap), also using it to remove any excess glue that crept into the gap after I pressed the planks down. Note; I used a small paint brush to apply the glue so I had complete control over the amount of glue on the plank.
After I completed each half and it had dried for a period of time I laid the deck (plank side down) on a piece of wax paper and placed a weight on top and let it sit overnight.
Then I laid each deck (plank side down) on a cutting mat and used X-acto knifes (with brand new blades) to carefully cut away the excess planking.
At that point I went on to simulating nail holes. I debated about dowels but felt that would be overkill for the lower decks and went with the pencil/sharpie technique.
However, I’ll definitely plan to use bamboo/wood dowels on the main deck and hull planking (really not a big fan of using the brass nails supplied with the kit for the hull planking).
The last bit of work on the decks was to put a couple coats of clear matte polyurethane finish on the decks.
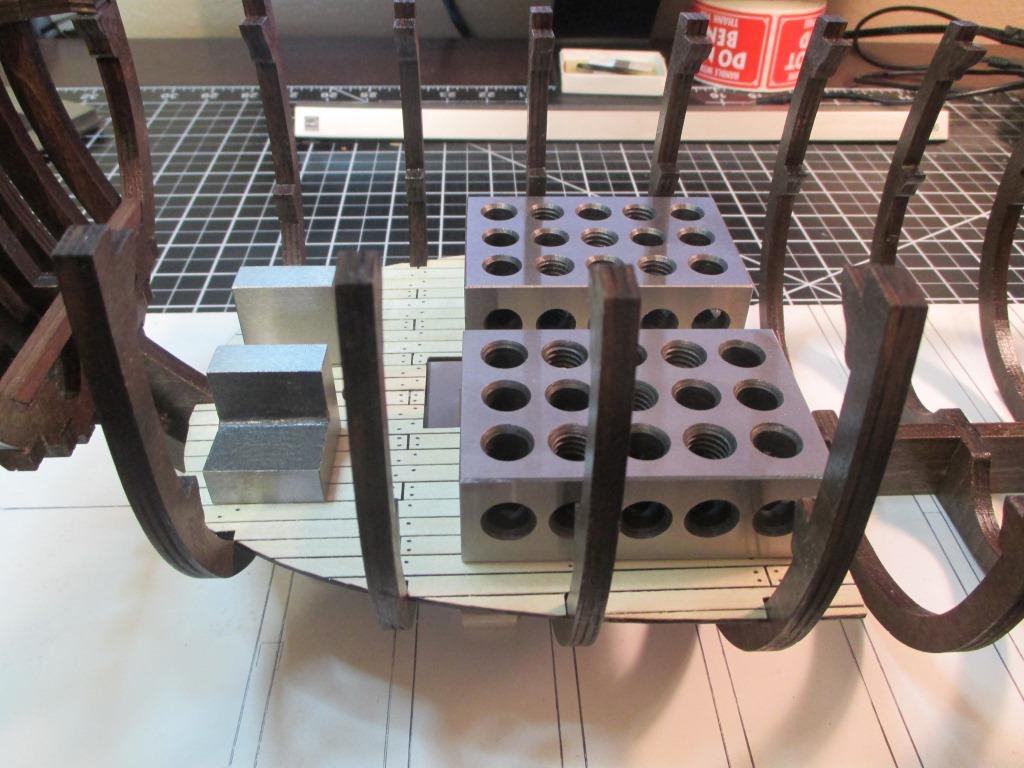
Then I installed/glued the four half deck pieces onto the cross beams (Bow and Stern).
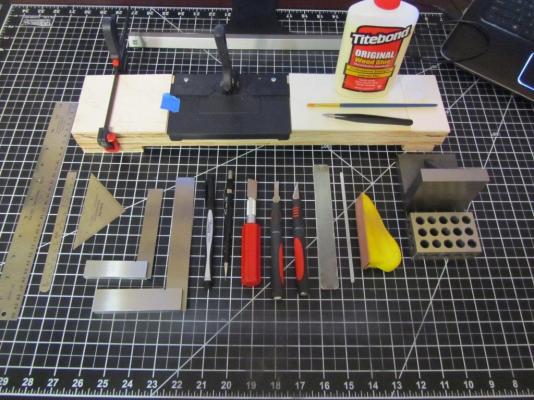
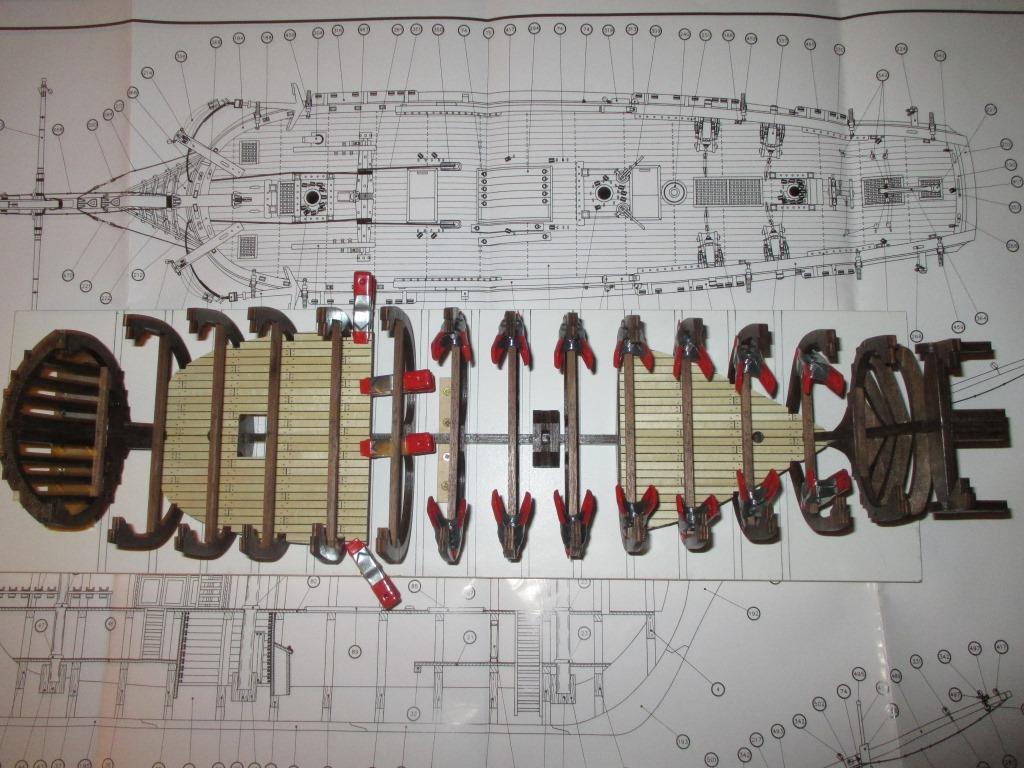
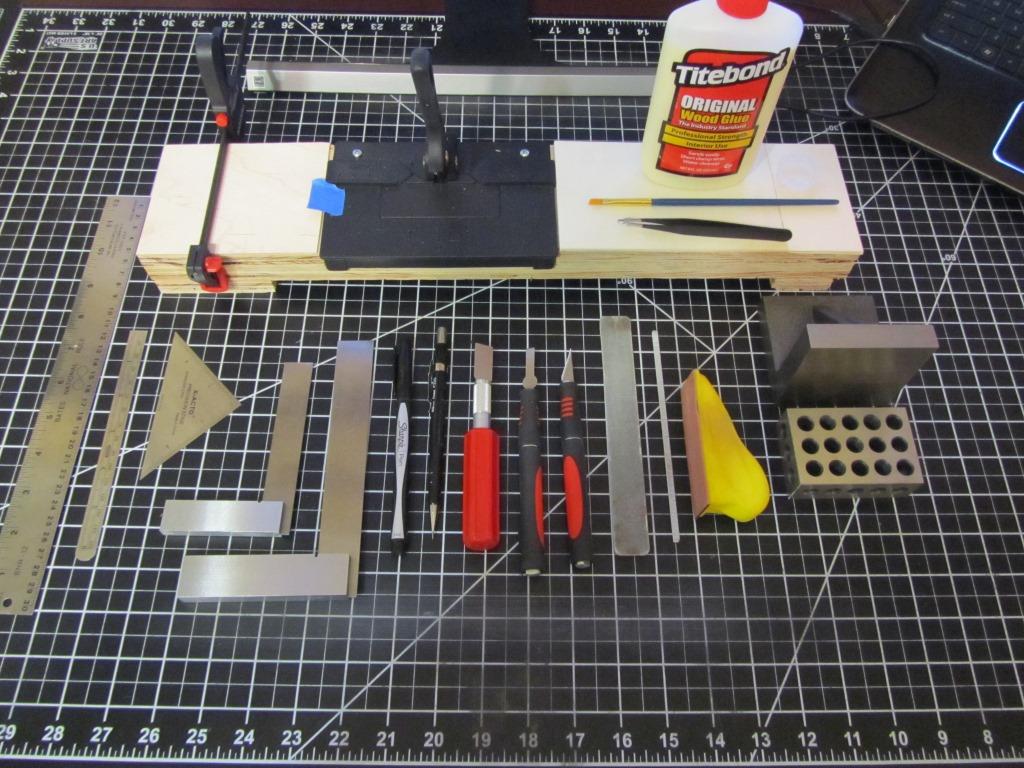
Thought it would be nice to show a pic of the tools used for the planking
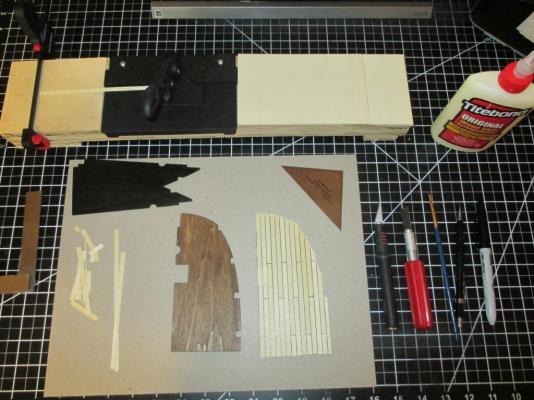
My plank cutting device and also the right side of the deck planked and the color of the stain on the bottom side of the decks

Initial planking complete on the right side of the Bow deck (note the X-acto square used for spacing)
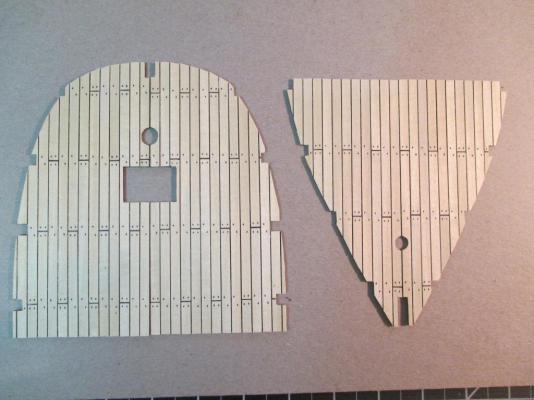
Both Bow and Stern lower decks are now complete along with simulated nail holes

Bow lower deck installed
Stay tuned for the installation of the middle deck cross beam supports…...
- mattsayers148, UpstateNY, yvesvidal and 4 others
-
7


HMS Bounty by thomaslambo - Artesania Latina – Scale 1:48
in - Kit build logs for subjects built from 1751 - 1800
Posted · Edited by thomaslambo
CaptainSteve,
Thanks much for the information and suggestions.
I plan to get some more sail material to place in the hold of the Bounty. I'll get enough so I can do some testing....and at some point I'll post the results.
Boyd