kurtvd19
-
Posts
3,048 -
Joined
-
Last visited
Content Type
Profiles
Forums
Gallery
Events
Everything posted by kurtvd19
-
Welcome to MSW Mike. this is the place to find the help. Kurt
-
 Eric's correct - hog chains were not chain but steel rods with hook ends (or hook to round end). I have quite an extensive collection of period photographs and have never seen actual chain used though I guess it could have been used. I suggest that solid rods should be used. Kurt
- 76 replies
-
- 2
-

-
- model shipways
- chaperon
- (and 1 more)
-
Model Shipways paint on plastic
kurtvd19 replied to jct's topic in Painting, finishing and weathering products and techniques
Roger: I use Badger Modelflex Acrylic's exclusively. They do not require an undercoat and for many years I didn't use one. Then Badger developed their STYNYLREZ primers and I now use them prior to the top coat and in many instances no top coat is needed as they have developed many colors for the STYNYLREZ primers bowing to the needs of the wargamer/figure painters. Currently they are available in white, gray, black, red brown, neutral, light flesh, ebony flesh, dull pink, oceanic blue, metal and black gloss. All but the black gloss are flat. The one color I don't have is neutral - no idea what color it actually is. Badger's Modelflex Marine Acrylic paints and their other Modelflex acrylic paints are airbrush ready in the bottle - shake and spray. As such they don't cover in one coat. Because they dry so fast several coats can be applied as fast as the one coat is done the next coat can be applied. All of the Modelflex paints have the same chemistry and I found that their RR colors had most of the colors I used before the Marine paint line was introduced. Hull Black - Engine Black = same paint different label. As I airbrush almost exclusively - masking and fine detail airbrushes (currently have over a dozen in my painting arsenal) means I don't use paint brushes much. I have brushed the Badger paints in small areas and they do require two or more coats for coverage. Some day I will need to brush some of the STYNYLREZ stuff and I expect it will cover better when brushed. I have hand brushed the occasional piece using Vallejo's Model Color Acrylics. Got them at Hobby Lobby. They do have excellent coverage with a brush. they come in a 0.57 fl oz bottle for $4.99 at Hobby Lobby making them very expensive in my opinion. Badger's Modelflex is $2.55 (usaairbrushsupply.com) for 1 fl oz making it a lot more economical for me to stock many colors. I hope this helped a bit - but using an airbrush almost exclusively I just don't do a lot of brush painting. Take care, Kurt -
Model Shipways paint on plastic
kurtvd19 replied to jct's topic in Painting, finishing and weathering products and techniques
There are good acrylic model paints so you don't have to break out the enamels. One of these days the enamels just will not be around - the EPA will get them eliminated eventually. If you mean to break out the Testors or Model Master paints then disregard the following except for general info. It's important to use a model paint not something from the hardware store meant for the homeowner to "cover in one coat". The avg house type pain has the pigments size of about 37 microns whereas the good hobby paints are about 1 micron in size. The smaller pigment size will not hide detail like a 37 micron size will. Go to a lot of work replicating rivets, seams, etc and then try to keep the detail when applying such thick paint is sure counterproductive. Kurt -
Model Shipways paint on plastic
kurtvd19 replied to jct's topic in Painting, finishing and weathering products and techniques
Don't even bother. It's not a fine pigmented model paint - more like big box store house paint - way too coarse for models in any case. Just as an experiment I tried to shoot some with an airbrush - just to see if it could be done - results were pure garbage. I had heard such bad reviews about it that when somebody offered a couple of bottles that they were unable to get to work I gave it a try. I dumped it all in the garbage as I wasn't about to pass it on and give somebody big problems thinking it was a model paint. -
Can i live without a BYRNES TABLE SAW
kurtvd19 replied to shihawk's topic in Modeling tools and Workshop Equipment
Doc: Thanks for the link to the Hobbymill tips on using the saw. I added it to my files. We will get it posted onto the Resources pages so it's not lost to the members. Kurt -
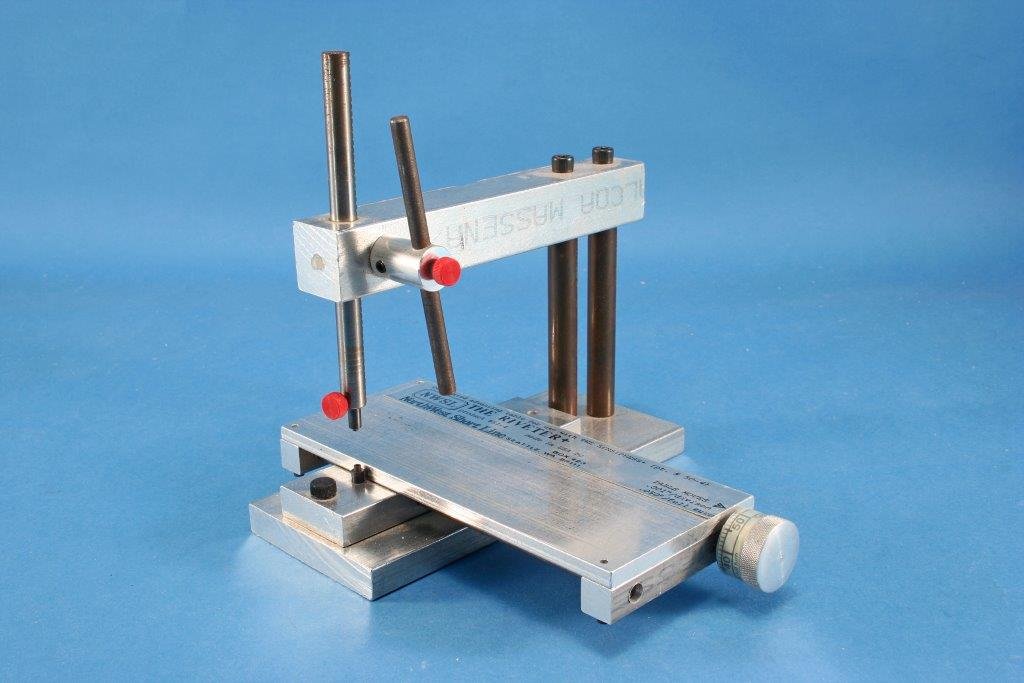
I have a great tool made by Northwest Shortlines - more costly than Michael's nice shop made tool. The table allows precise spacing of the "rivets". Kurt
-
Bob: Here is an extract from the article where I described the silkspan "tar paper" method. Hope this helps. Kurt Extract on roofing technique.pdf
- 76 replies
-
- 5
-
-
- model shipways
- chaperon
- (and 1 more)
-
Oliver: I wouldn't mess with this one due to the Li-ion battery. Li-ions are the batteries that are burning up all sorts of things including the house or garage where they were charging while unattended. There are several similar models that use ni-cd's that I would consider instead. I have one of the 2 speed minis with ni-cd's (model 750) and don't have qualms about leaving it in the charger. I personally don't think the Li-ion batteries problems with unattended charging are worth the risk when the ni-cd batteries are well proven. The original mini Dremels were really nice but you can't get batteries for them any more and I have found the 750 works for me. Kurt
-
This is individual and his courses has been a controversial subject here. In the search box at the top of the page type in Hunt + Practicum and you will see almost 150 mentions. Check through them. Some will say great others will say not so good with a few less than OK. The information is there - you decide. Kurt
-
Good to see you back in the shop. I will be following this project. Looking back at your build log I was very happy to see you have a fire extinguisher in your shop - right on the bench - something very few modelers consider as appropriate shop equipment. Take care, Kurt
-
Miniature Tilting Arbor Table Saw
kurtvd19 replied to DocBlake's topic in Modeling tools and Workshop Equipment
Dave: Give this a try before crossing off the tilting table for the Byrnes saw. Cut some wedges from 2x4 stock to the angle you want to cut with the saw and the tilting table and put the wedges under the saw so that the tilting table sets level with the bench top. This in effect tilts the blade to the table making it much easier to use. The thing becomes much easier to use and safer without having to try to hold the work up on the table with a tendency to fall into the blade. For the little bit of angled cutting I do this has worked for me - and I sure don't need another saw in the shop. Take care, Kurt -
Ilhan: The one note on the drawing says it is at the scupper - the lower surface of the scupper will be at deck level so the metal tread plate has to be at the deck level or the scupper is blocked. Kurt
-
The covers I have observed over the steering chains/rods was a simple cover flush with the deck - as the steering chains were below the decks surface. A simple wood slat assembly that can be lifted out for a wood boat and steel on a metal boats. My experience is strictly with tug and tow boats. On the drawing side view they probably would not be detailed so you would only have the plan (top) view. Kurt
-
Chris: Midwest is still in business - but they stopped the model boat kits entirely. Kurt
-
Mike: Welcome to MSW. Check out the plans that Wooden Boat Magazine sells for full size boats of the type you are thinking of for your full size build. Scale down the measurements to a scale you might be comfortable with (my personal recommendation would be 1/12 scale) and where you can actually build the model just like the real boat. A big savings in materials and time. Again, Welcome to MSW. Kurt
-
Dan: Welcome to MSW. Your business sounds interesting (and I just checked your website) and what you posted about it is OK within our guidelines. However, please read the rules about business postings outside of the dealers section. Again Welcome to MSW Kurt https://modelshipworld.com/index.php?/guidelines/
-
LETTERING
kurtvd19 replied to timjina's topic in Painting, finishing and weathering products and techniques
Use the white background paper for white letters. You have to match the color of the surface you are putting the decal down onto for the area surrounding the letters so the decal doesn't show. Remember to make sure the surface where the decal is going has to be glossy so the decal doesn't "silver" with trapped air between the decal and flat paint - apply the appropriate dull or matte coat over the decals once dry. Kurt -
Badger Airbrush has their Modelflex Acrylic Marine paint- Shipyard Rust #16-429. You can get it from usaairbrushsupply.com and some other on-line sources. Kurt
-
Using acrylics you should use a synthetic bristle. The brush shown looks like a natural (red sable?) bristle that tend to split and fray when used with acrylics. Natural bristles are best used with oil based paints. Kurt
- 25 replies
-
- 11
-
-
Wain: I just shipped your copy to you. thanks, Merry Christmas Kurt
-
The Nautical Research Guild (NRG) now has all of the Lexington book and CD files formerly sold by Ships in Scale magazine. The CD with the pdf book is available for $39.95 on a CD disc or $49.95 on a Flash Drive plus $5.00 shipping from the NRG. We do not have it available in the NRG store yet for on-line ordering, but if you call the NRG office (585) 968-8111, Mary can take your card information or give you the PayPal payment information and we can ship you one. You can print out the book or use it on your computer. Take care, Kurt
-
Need help with saw blade output
kurtvd19 replied to bigcreekdad's topic in Modeling tools and Workshop Equipment
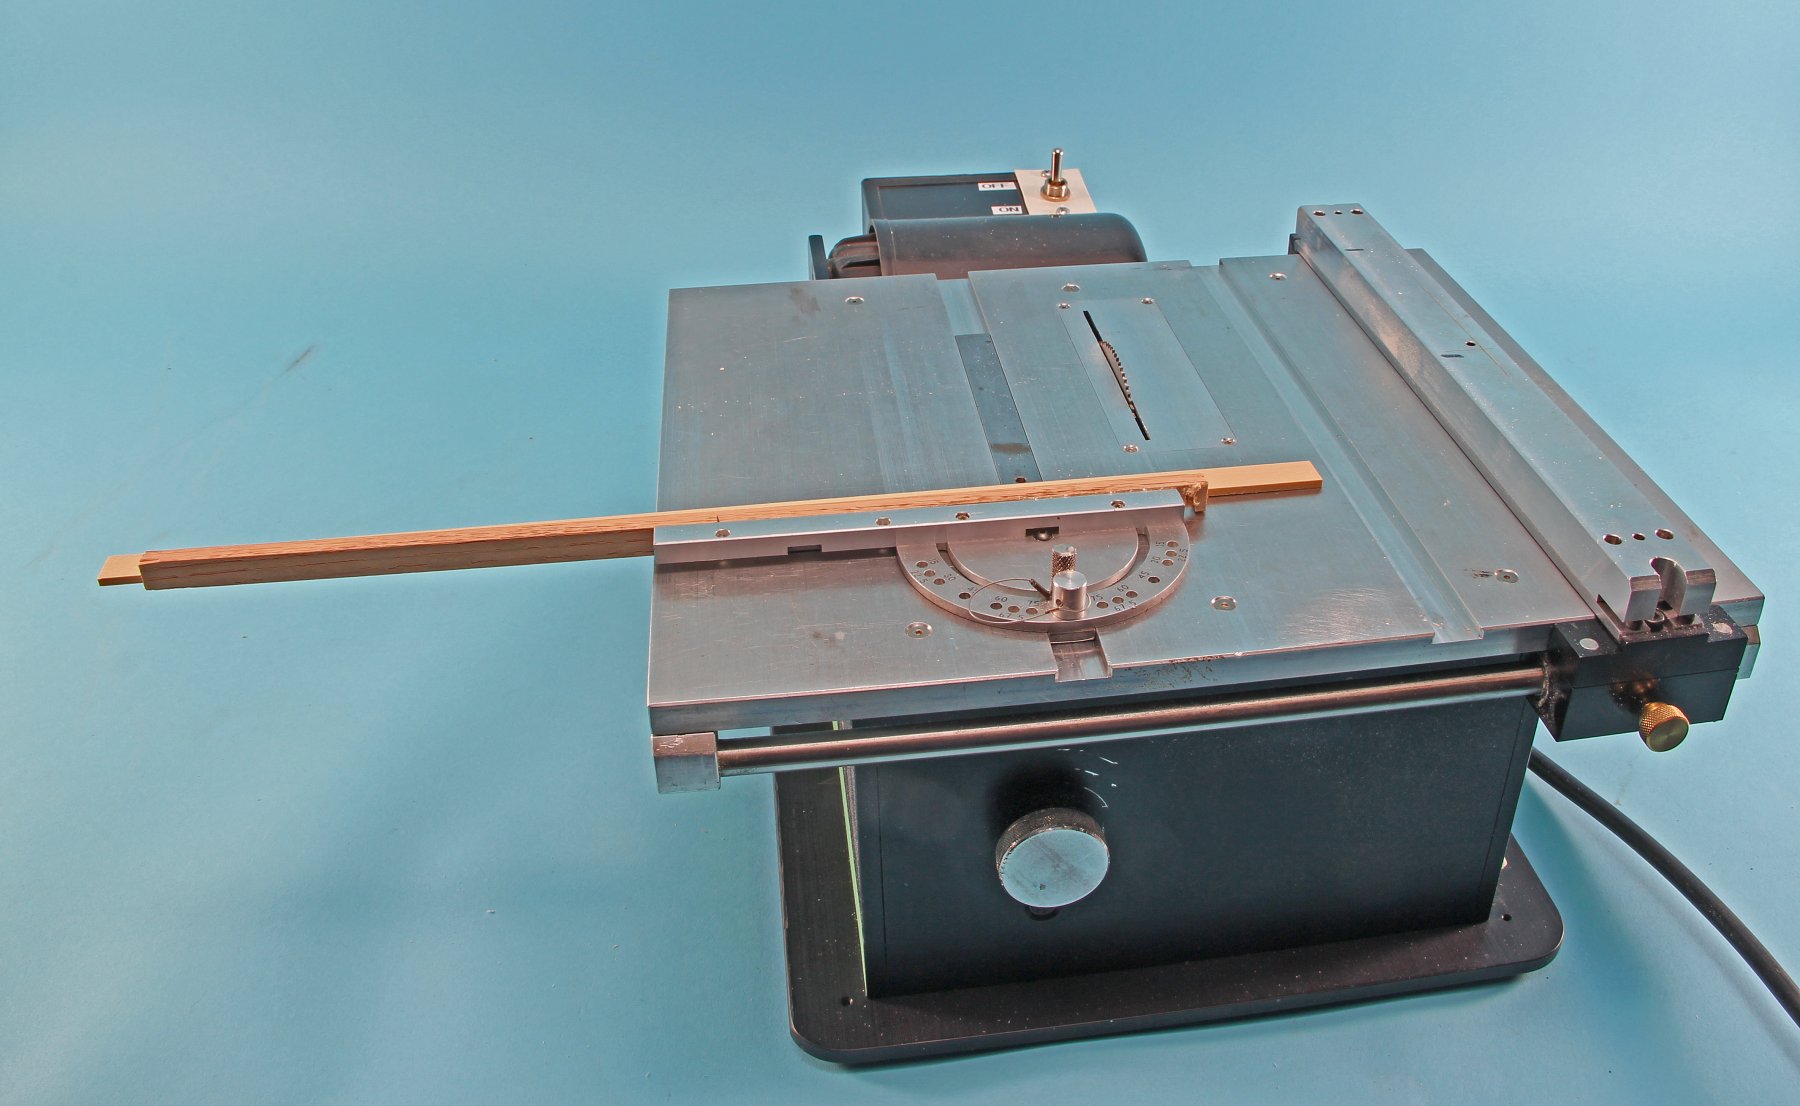
Byrnes sells new insert plates for about $8. Lower your blade all the way. Take out the old insert and put the new one in. Move the fience over to cover part of the insert plate but make sure it is short of the blade's location. Clamp it in place and turn the saw on and raise the blade up through the aluminum plate. The slot will be cut by the blade and there will be a very close fit between the blade and the insert. The close clearance keeps the wood backed up on the bottom side and reduces tear out and combined with the wood piece on the miter gauge no tear out on the back side of the piece being cut. Always have the blade high enough so that the teeth are full exposed when cutting through the wood so the sawdust can escape (slitting blades have no off set and shallow tooth throats so saw dust can clog up causing overheating. The blade should be high enough that it is cutting in a downward manner not just towards the operator. Reduces the tendency for kickback. Kurt -
Need help with saw blade output
kurtvd19 replied to bigcreekdad's topic in Modeling tools and Workshop Equipment
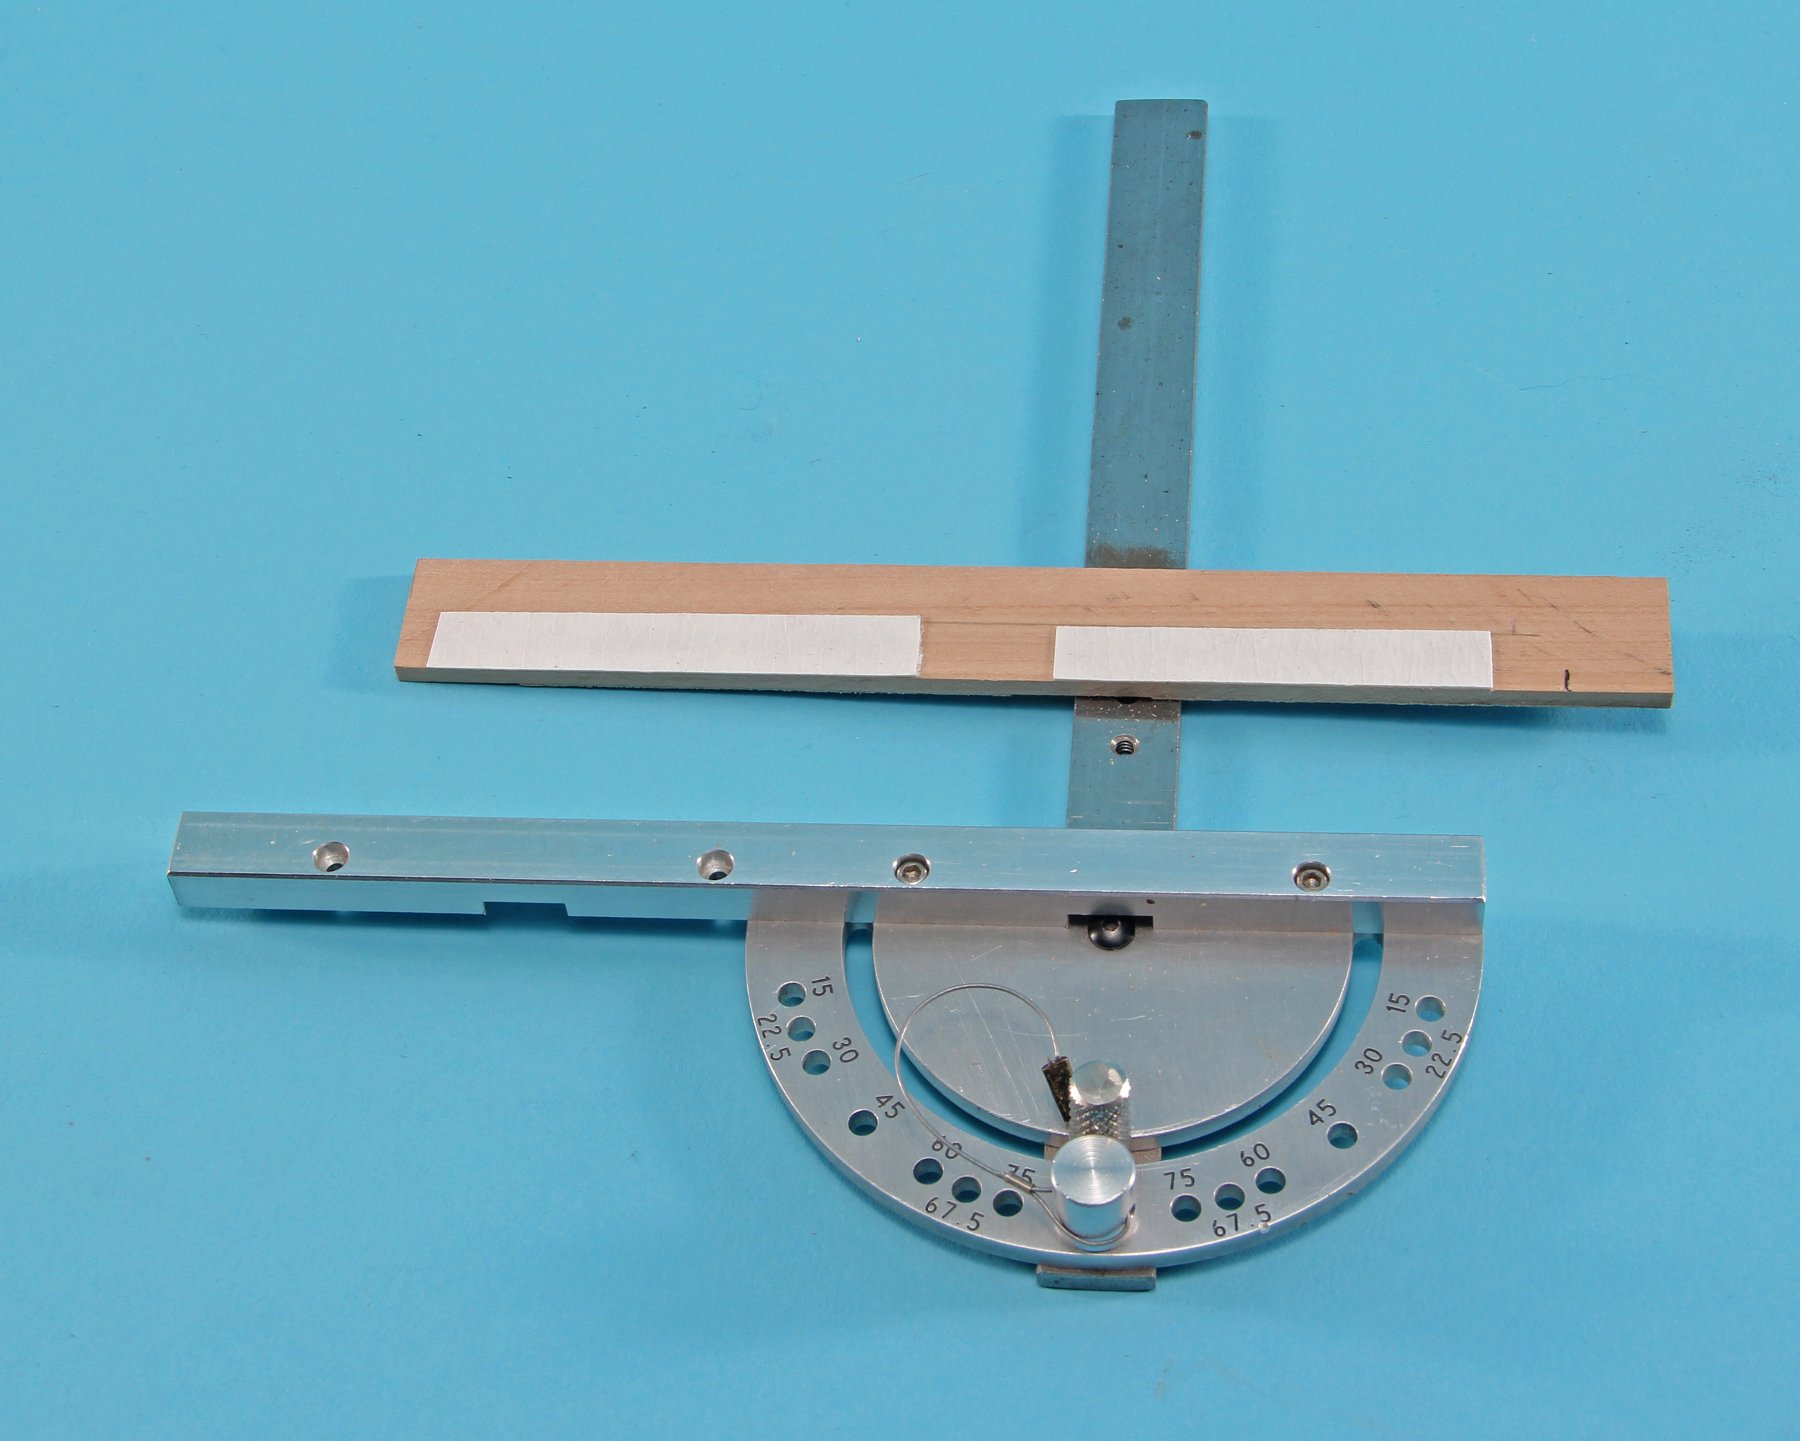
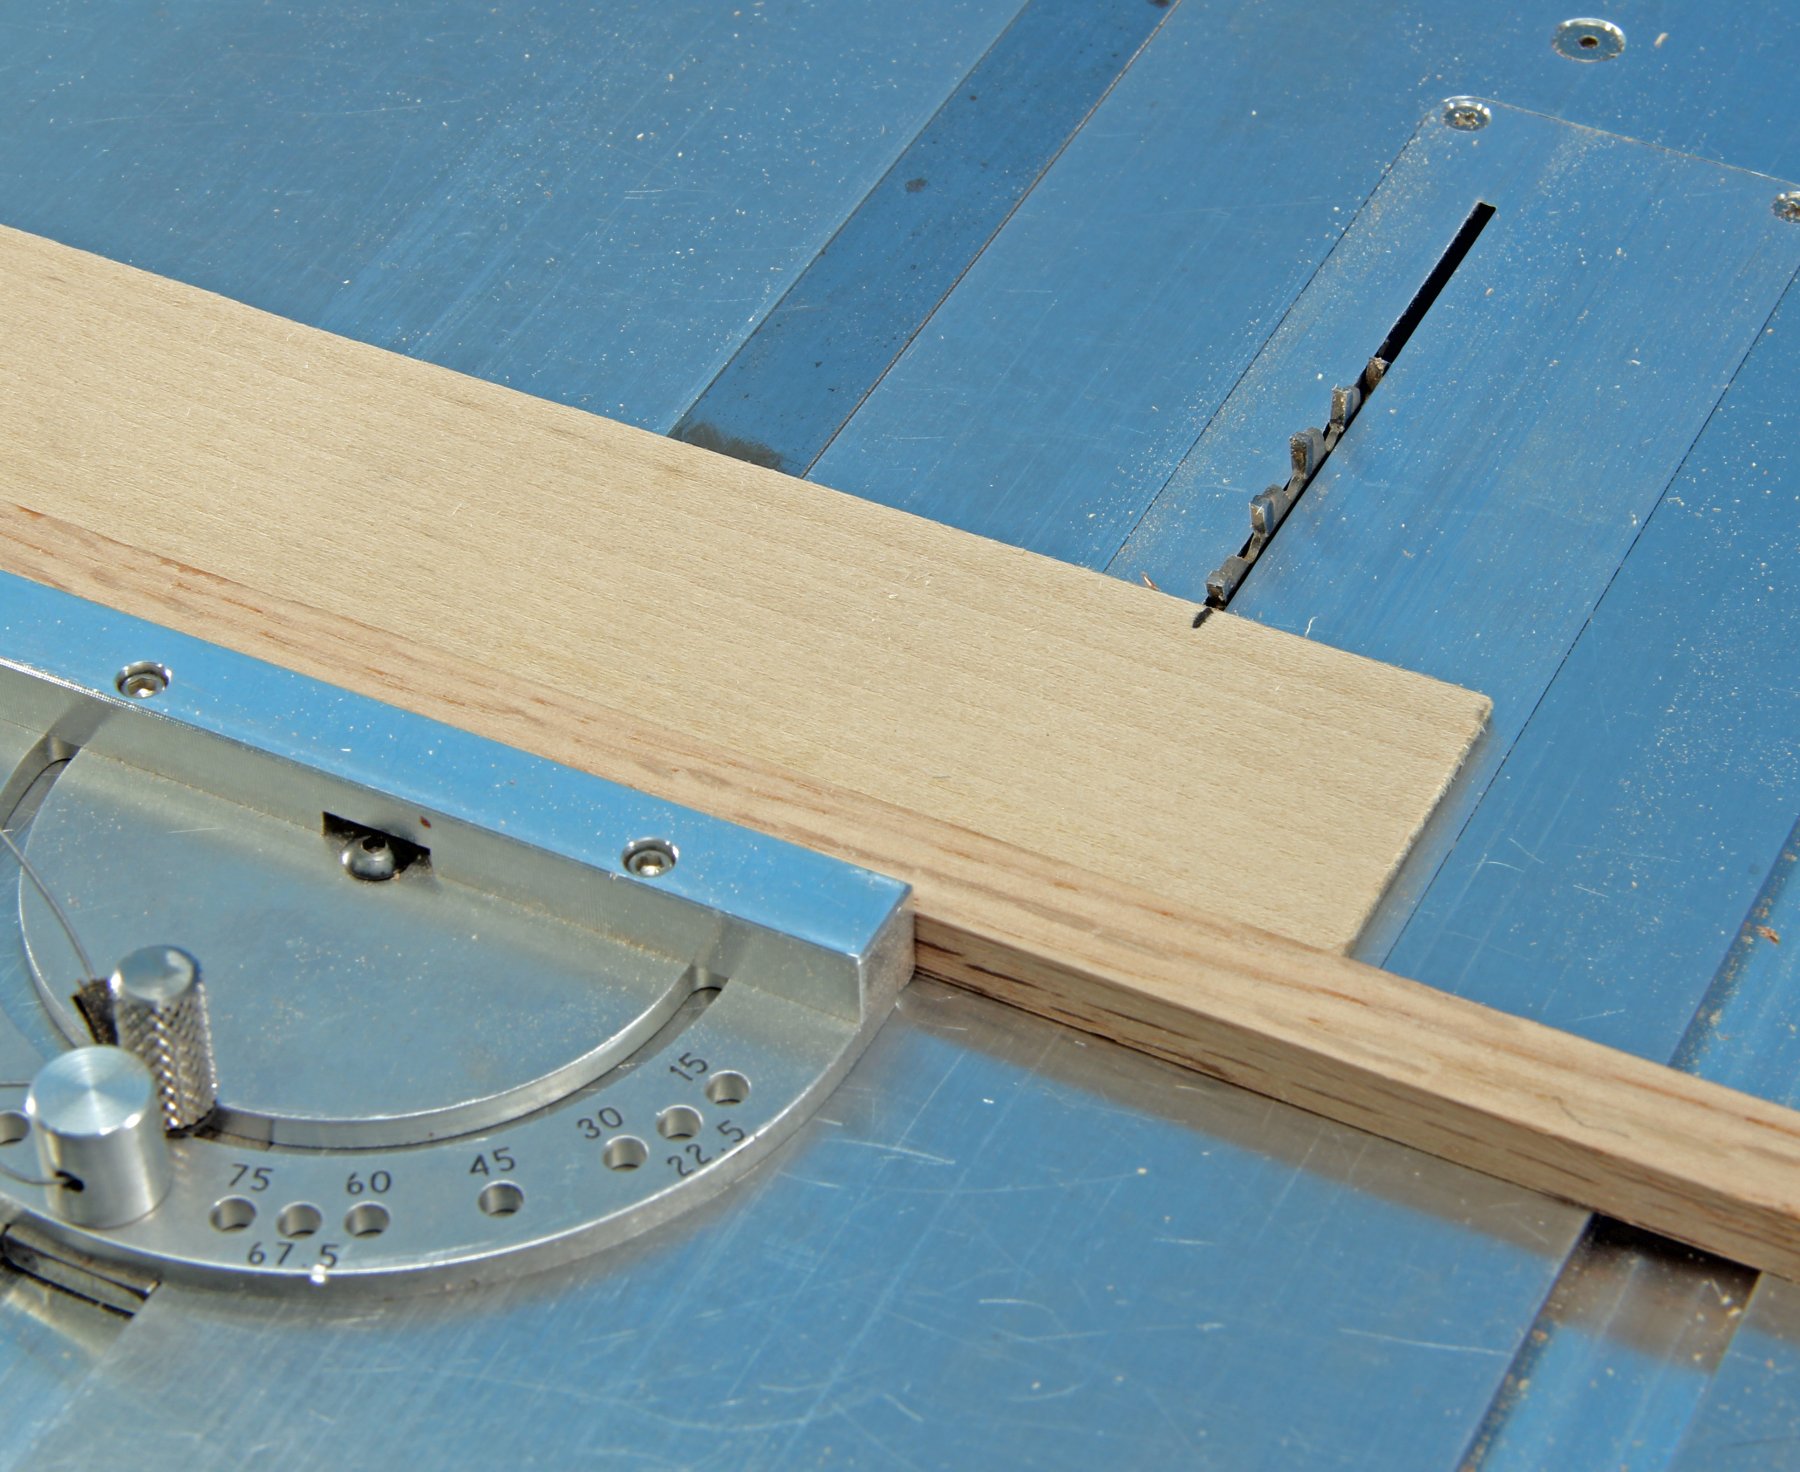
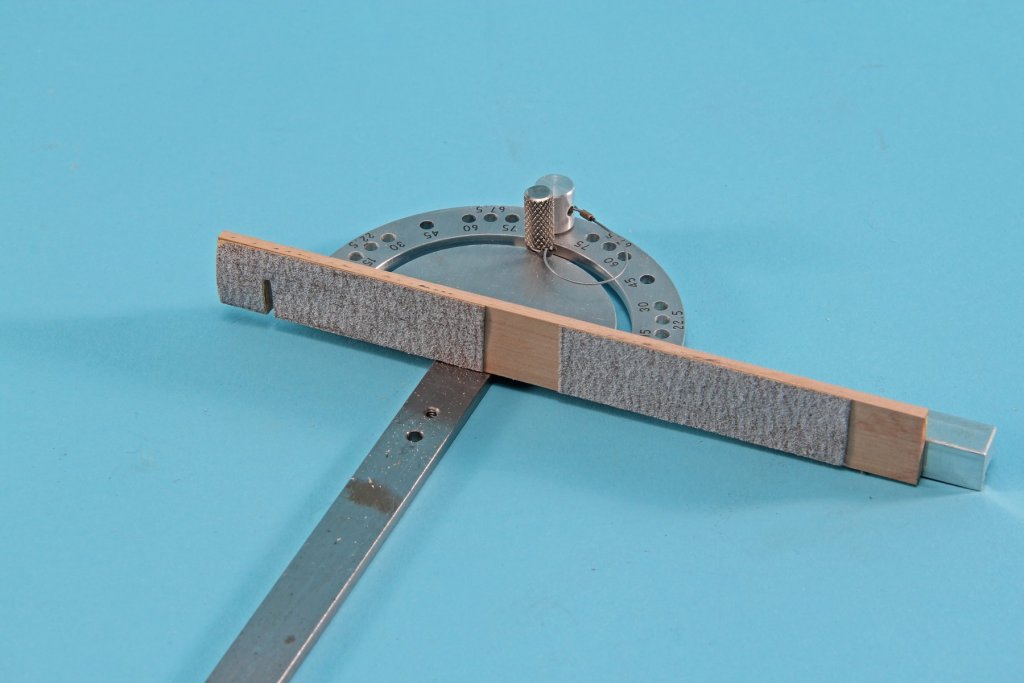
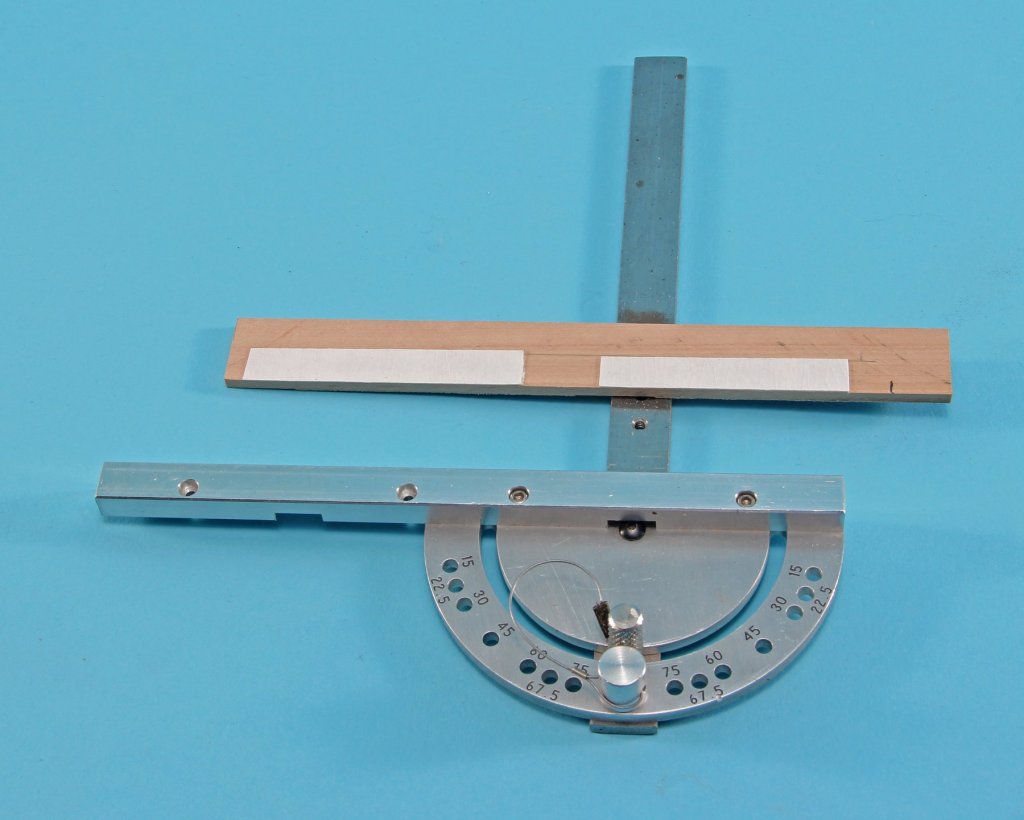
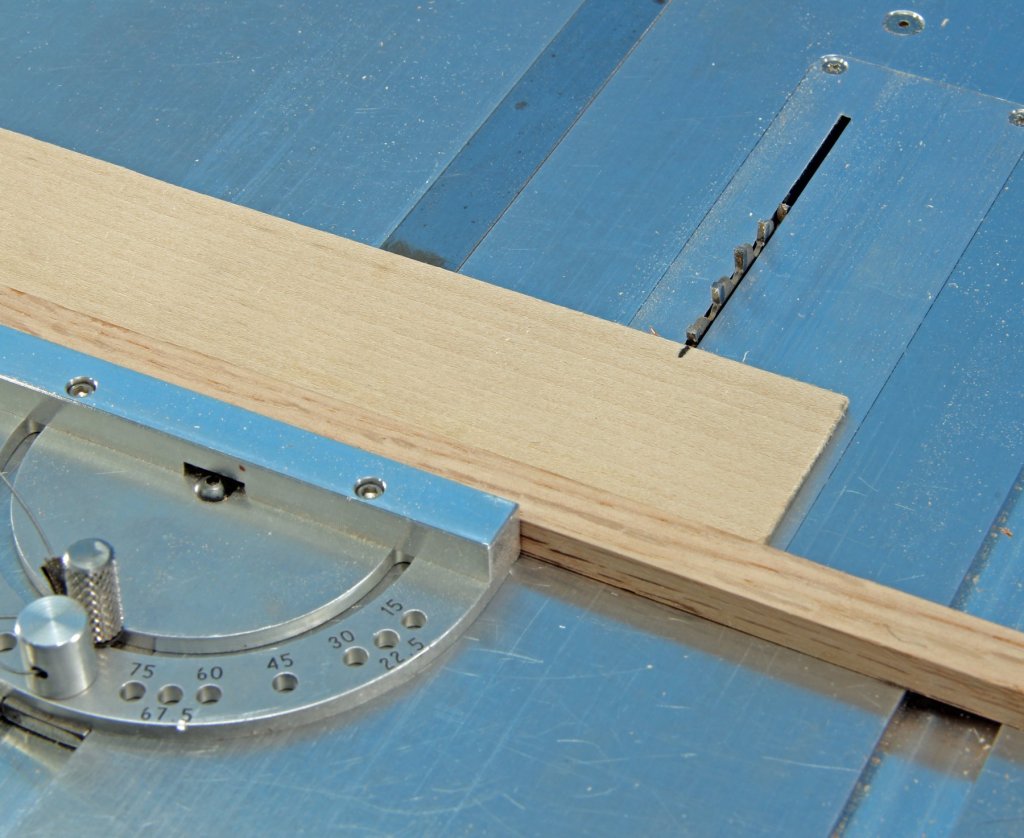
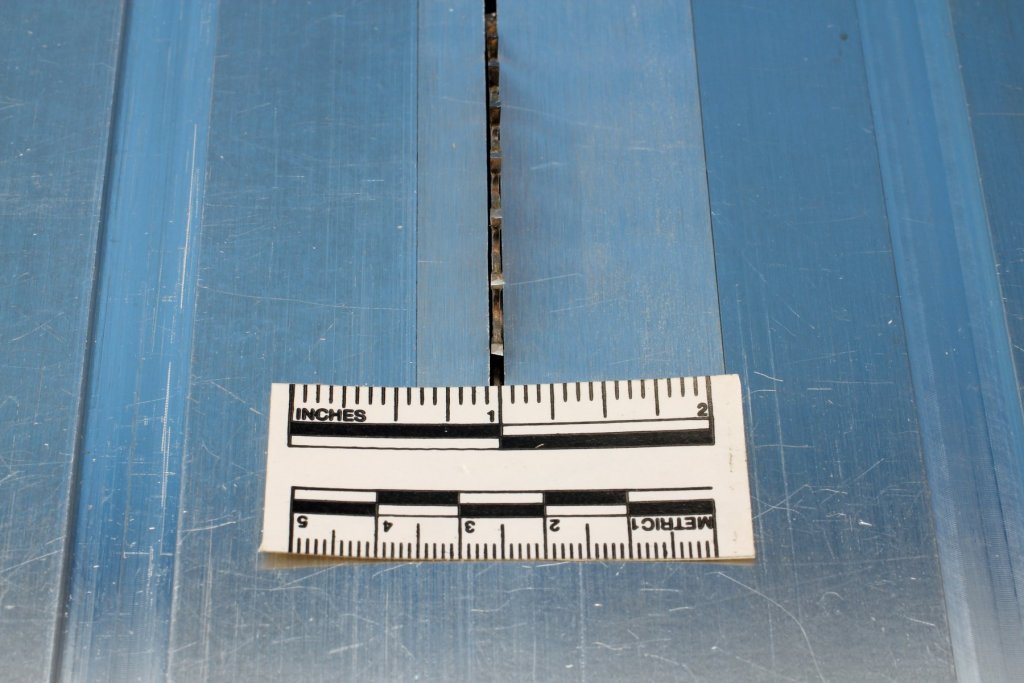
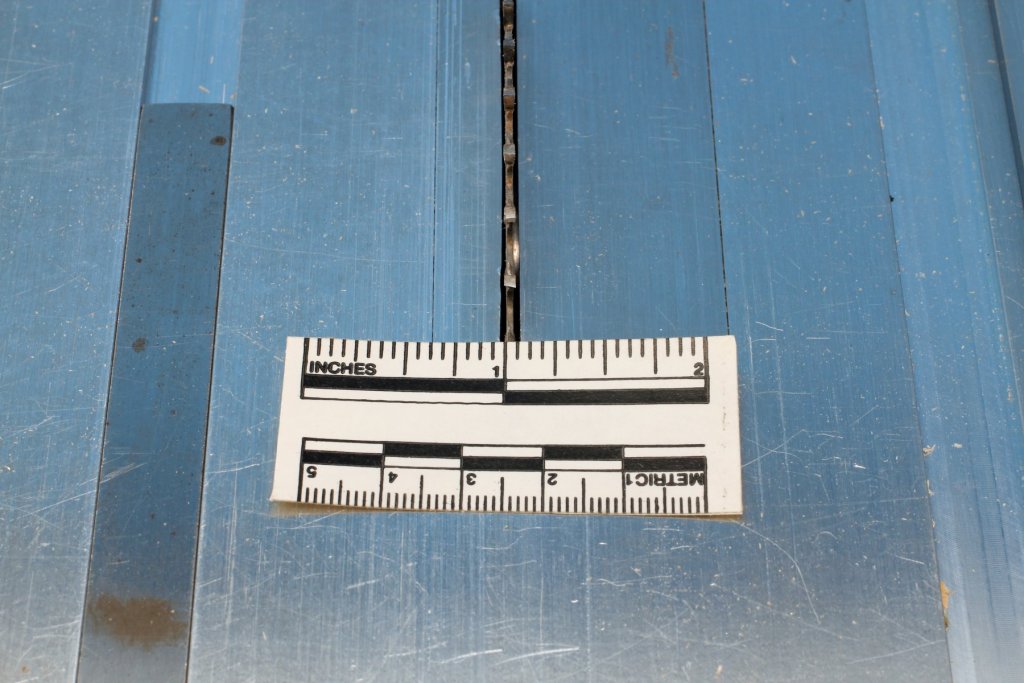
Bigcreekdad: Show us a photo of the blade and the aluminum insert plate. If you have set up a zero clearance it should leave a much better edge than what you show. Also back up the miter gauge with a piece of straight hardwood that will back up the piece being cut for a cleaner cut w/o the tear out you are showing. The piece of wood can attach to the miter gauge with 2 faced tape. The photo of the shorter but higher backing piece is what you need for back side tear out prevention. The backing piece can be as long as you want to the left side - just make sure it's straight. For zero clearance make sure the blade and the plate are matched - each width of blade requires a matching zero clearance plate. Examples follow - first is too much clearance and next is correct clearance. This shows too much clearance This shows proper clearance - blade matched to the slot Kurt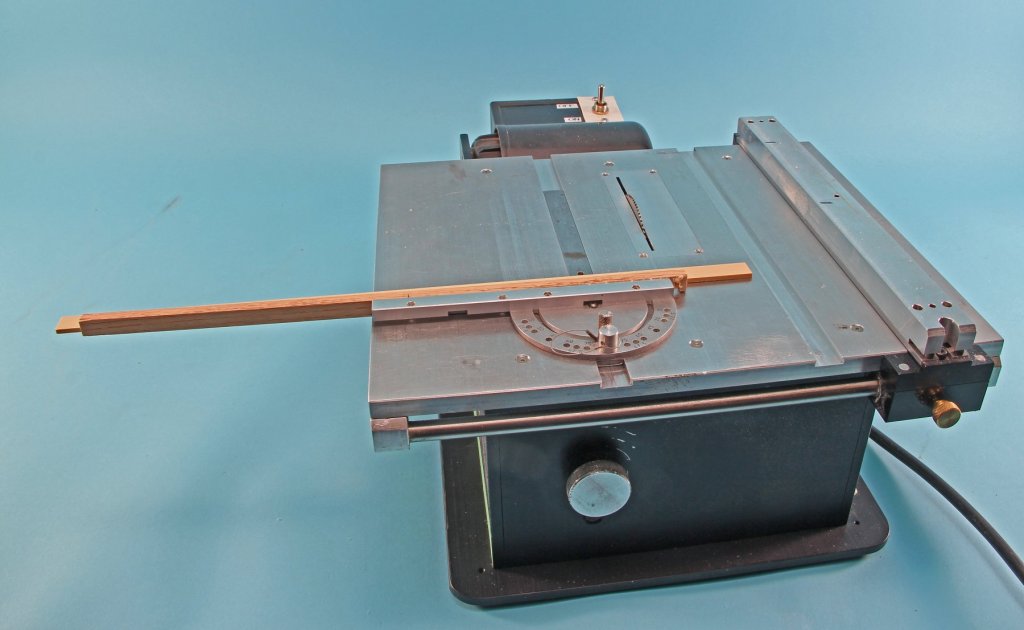
- 20 replies
-
- 14
-
-
CA adhesive, which one do you use?
kurtvd19 replied to Modeler12's topic in Masting, rigging and sails
I guess in the time frame of models made in the 1700's CA doesn't have much of a track record - but I have stuff glued with CA going back to 1968 - and it's as good as the day it was applied. Acetone is the solvent for CA - apply a bit let it soak in and give it a try - add more if needed. Have never experienced a joint that I wasn't able to get apart using Acetone. All this is personal experience and I don't hesitate to use it where needed. At this point as far as I am concerned the CA glue I use today has a longer life expectancy that I do (same with installing LED bulbs in the house). Kurt