kurtvd19
-
Posts
3,048 -
Joined
-
Last visited
Content Type
Profiles
Forums
Gallery
Events
Everything posted by kurtvd19
-
 Yes. Scroll down the home page here and click on their banner sponsor ads - they go right to their web sites. Both are East coast. Kurt
 -
MS Gunboat Philadelphia Eyebolt/Ringbolt Washers
kurtvd19 replied to George in MN's topic in Wood ship model kits
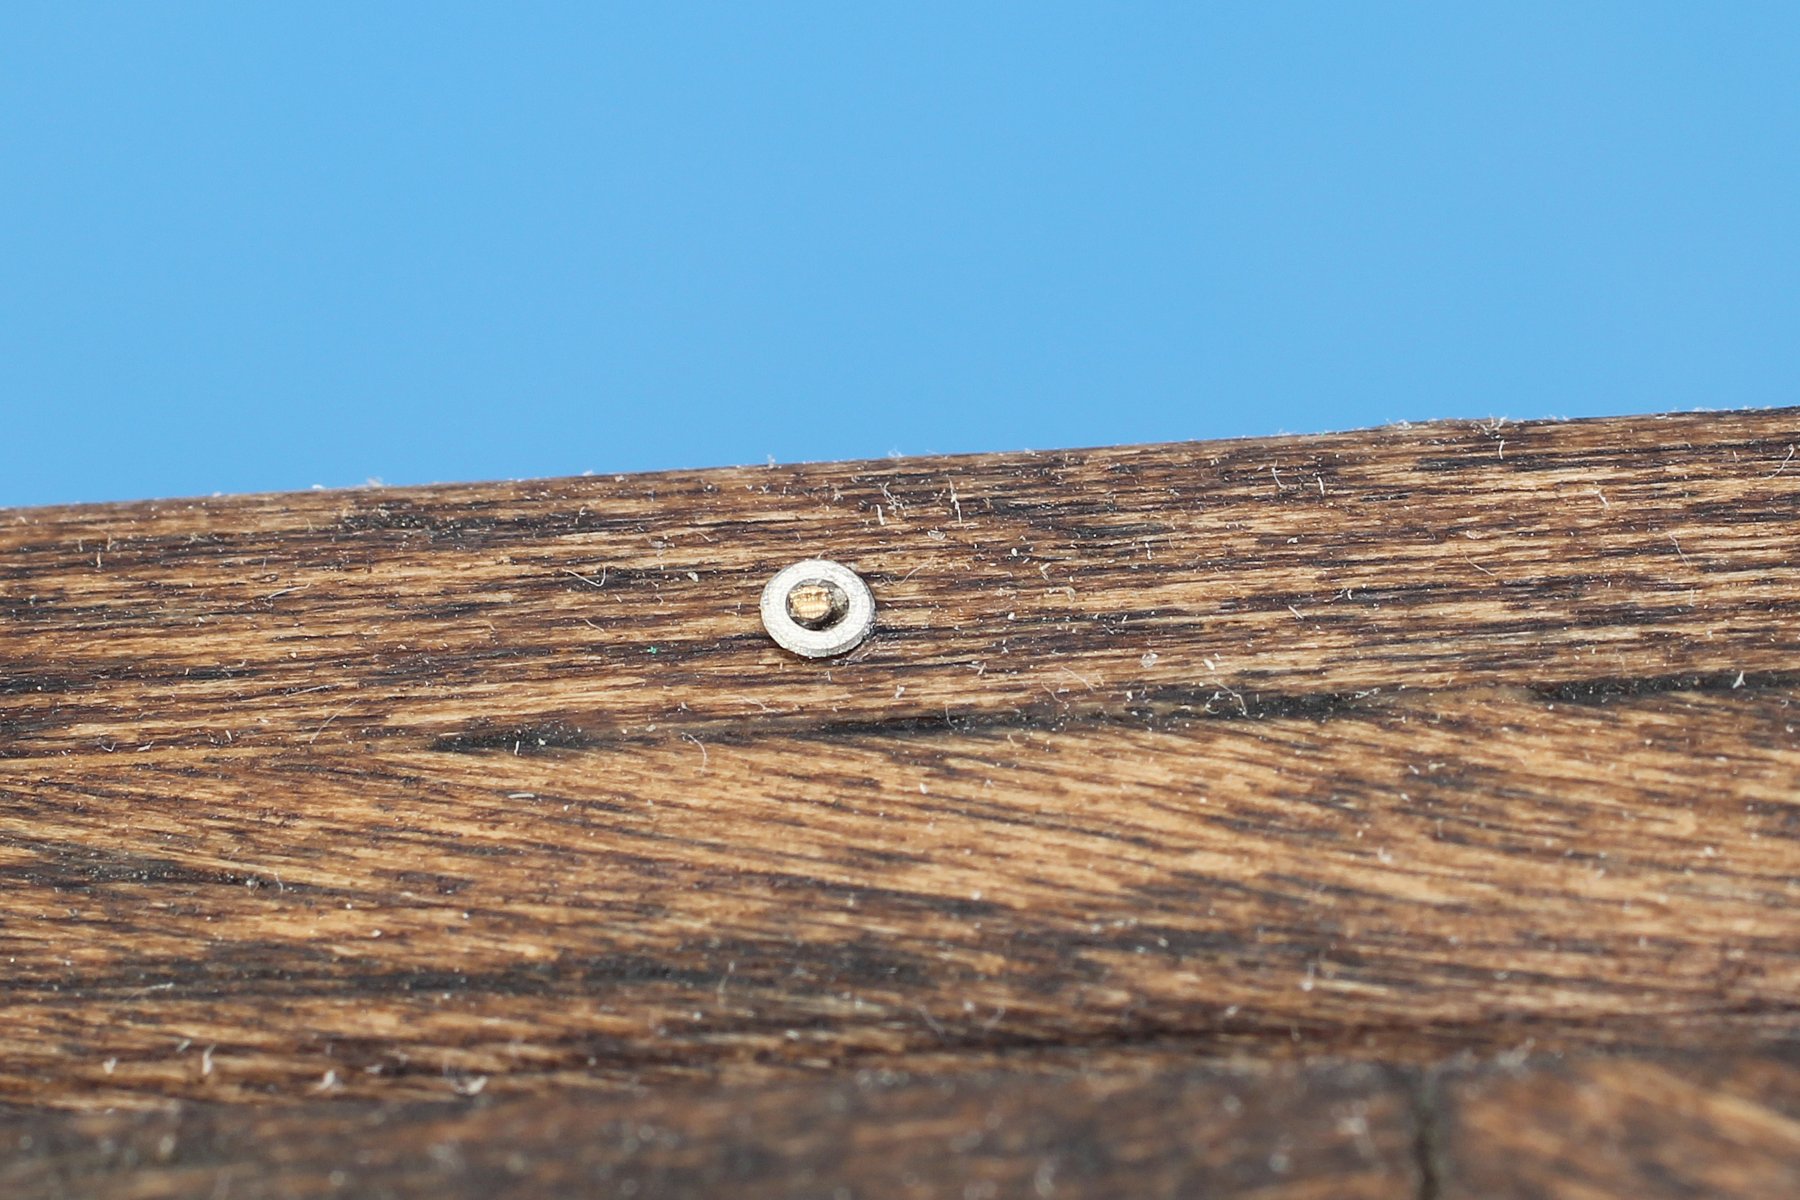
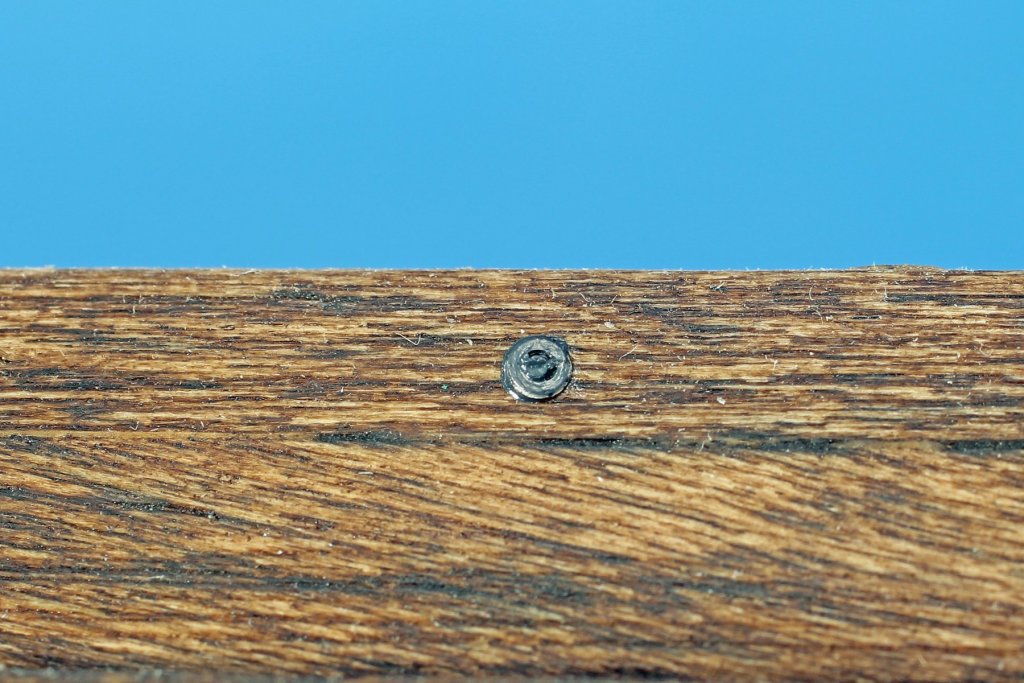
George: Your idea of making some small washers is good. I have copied below text from part 4 of my series of articles om building the Philadelphia. I used some small washers I had in my parts supply and C/A was completely adequate to hold them together so I think soldering might be overkill. The photos show before the washer and end of the eyebolt were touched up with black paint and the other photo as completed. The washers are small and the photos show some unevenness of the bolt end - which might look like peeing - but at the scale of this detail it is not able to be seen w/o magnification of the close up photo. Hope this might help a bit. Kurt I wound up using a small 0.8mm (0.0315”) I. D. washer from Scale Hardware over the end of each bolt and secured with a very small drop of C/A glue. The C/A glue filled the very small gap between the washer and bolt and secured the washer to the hull and bolt as shown in Photo #63. When the bolt was cut off with a flush cutter, the end of the bolt and washer was touched with a bit of flat black paint. The result is a very convincing simulation of the washer and peened bolt arrangement on the boat as shown in Photo #64, a close up view of the final assembly.
-
There are two wood suppliers who sponsor this forum. Crown Timber Yard and Syren. Both have very good quality woods. Syren is not primarily a wood supplier but the wood Chuck has is excellent. Kurt
-
The Byrnes saw comes fully set up and you shouldn't have to adjust anything as it's pretty much pinned in alignment. Look at the way the fence indexes into the guides and you will see what I mean. Check out the topics posted above and you will be all set. Kurt
-
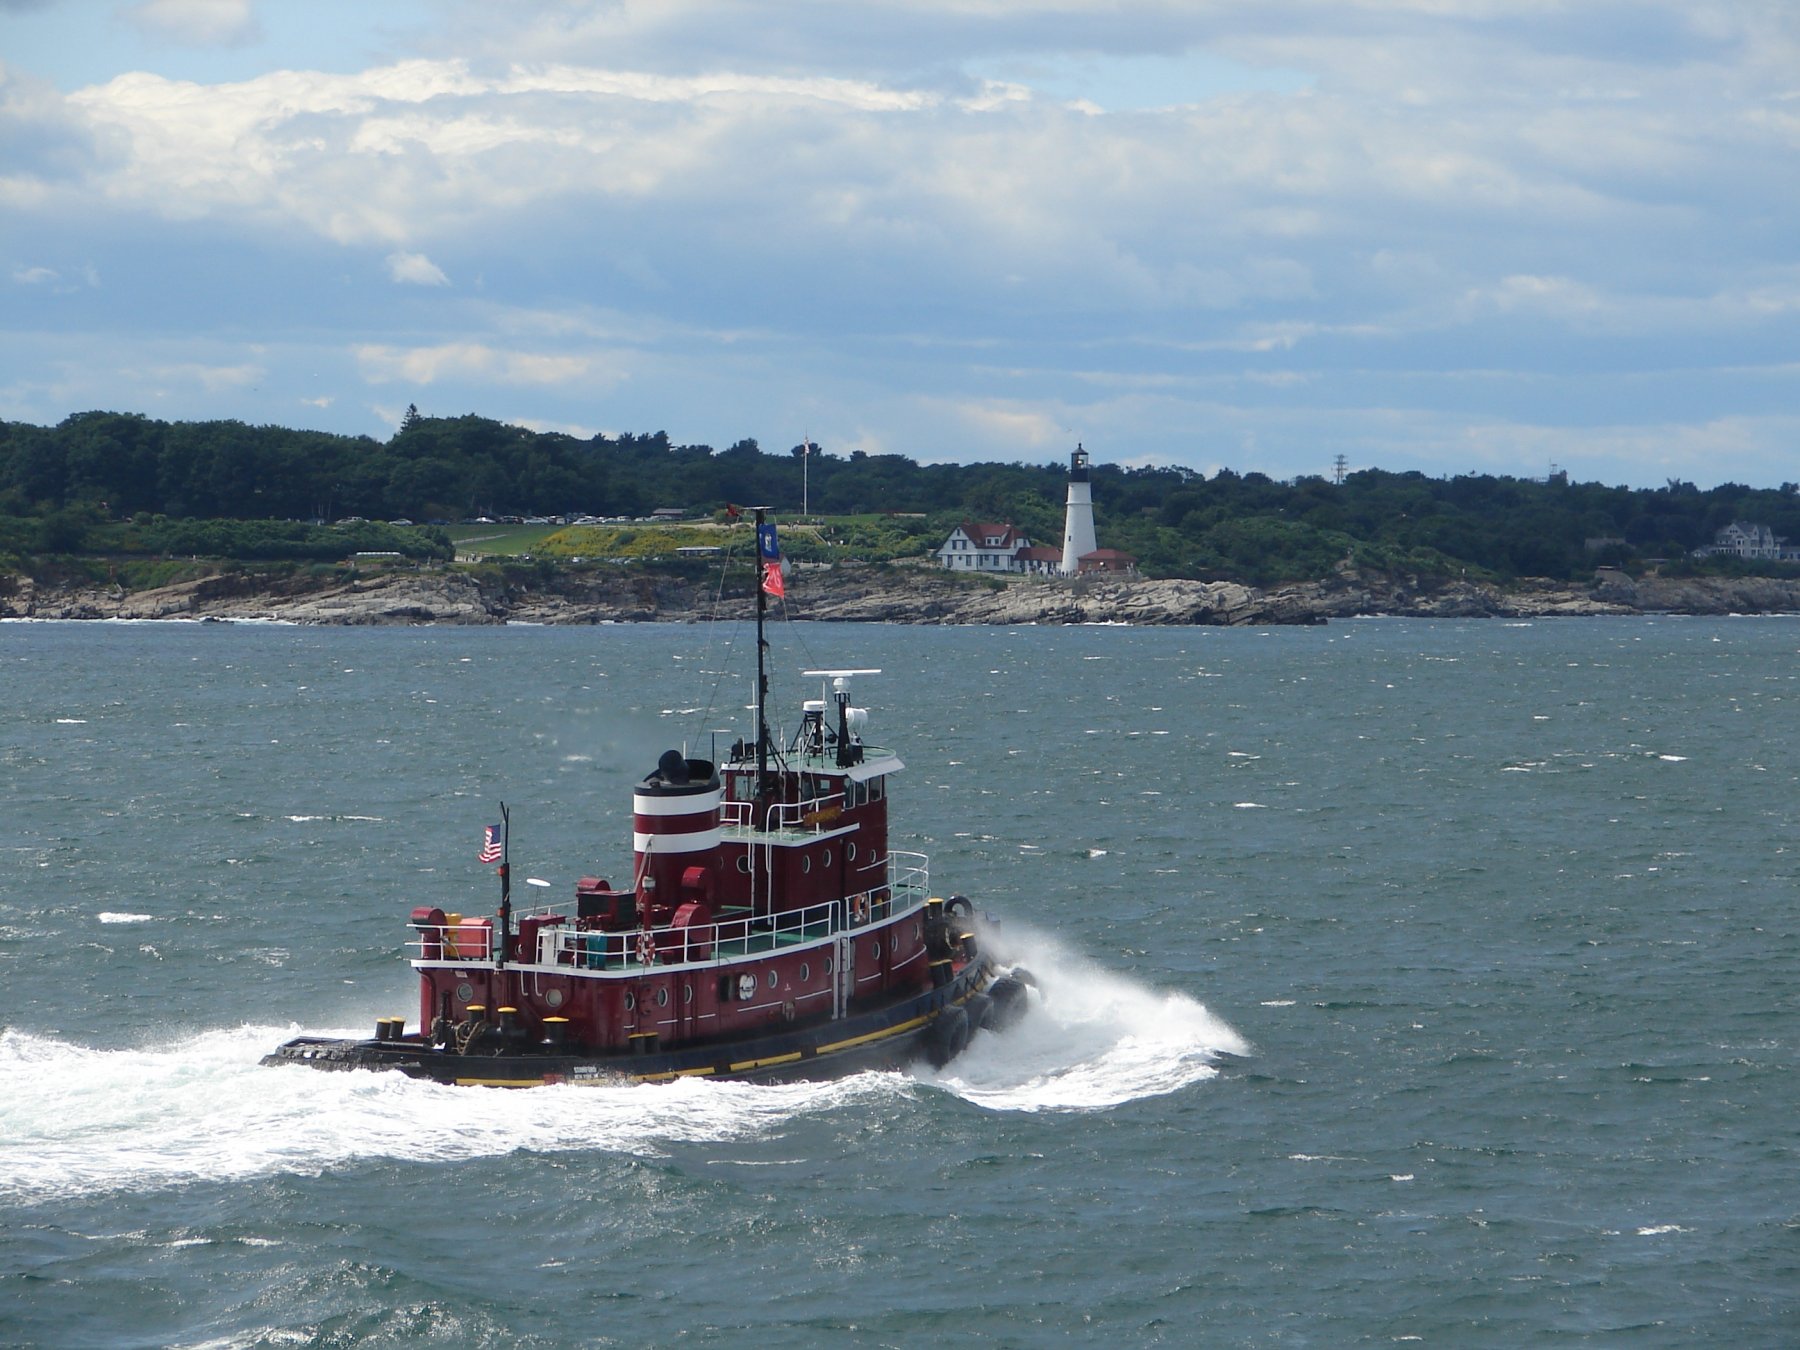
Love the Moran tug photo. Here is one to share with the tug lovers here. It's the tug Stamford off the Portland Head Lighthouse taken from another McAllister tug on the way to the Portland Tug Race. The Portland Head Lighthouse is the most photographed place in Maine but not too often from the water. Combines two of my interests in one photo. The NRG had been at the Portland Head light just days before during a conference. I wound up running late to catch the plane back from the conference when I spent too long watching these tugs come into the harbor in Portland for the race. The USCG Eagle was also there that day. I was lamenting missing the race so the photo was sent to me by the Capt. of the Stamford. This photo is my desktop screen saver.

- 63 replies
-
- 8
-

-
- revell
- harbor tug
- (and 2 more)
-
Bruce: Thanks for the kind words about the articles. They are now out of print and there are no physical back issues available from SiS or the NRG. And yes, they did edit Part 2 and 3 to fit. There wasn't anything left out but it they moved some shorter stuff into Part 2 to fit and put it into Part 3. The Part 3 stuff was out of sequence. I had forgotten about the edits completely until earlier this month when I was working on a PDF Book that will contain the entire series on the Chaperon with all the model building photos in color and it will have extra material that wasn't printed in the magazine series. I intend to make it available for a very affordable amount (TBD) on a CD or flash drive hopefully sometime in March. It will be some time before the series will be on a new and final disc of the Ships in Scale CD's we will sell through the NRG Store and the disc will contain only what was published, as it was published, including the goofed up editing. Take care, Kurt
- 76 replies
-
- 4
-
-
- model shipways
- chaperon
- (and 1 more)
-
Great overall appearance and finishing with so many added details is a nice touch. Bob Smith c/a is by far the best stuff available. If the hobby shop or mail order place show their name on a c/a bottle it is most likely Bob Smit's stuff as they offer this branding to customers. There is still a company id on the back side with the Bob Smith name as somebody else will probably offer the store branding some day but the BS stuff has done this since the mid 90's.
- 76 replies
-
- 3
-
-
- model shipways
- chaperon
- (and 1 more)
-
Dying cloth with tea look good for a short time - tea is very high in tannic acid and the cloth will be affected by the acid and it will deteriorate. It's happened to sails that have been dyed with tea. Check out Sculpy clay. You can shape it to the shape of a sack and then bake it in the oven to set it. Hobby Lobby and such stores carry it. Many colors so you might not even have to paint it.
-
I have been using these since their initial introduction. V2 is a big improvement - and they are worth the $$. Kurt
-
One can make a small fortune in model ship building. The trick is starting with a large fortune. I went to their site and looked at a bunch of the models and agree that the quality is all over the place. However, this is a business and time is money and it looks like they are able to deliver high quality - BUT the customer has to be willing to pay for the level of quality they desire. It all depends on what the model is for. Up on a shelf to be a decoration item (less detail) or in the waiting room or board room of a shipping company - a lot more detail. As to the contractual limits on building the same models after leaving the company that's not unusual. If a company's product or IP isn't protected they can soon find themselves competing with former employees unfairly. Kurt
-
Can i live without a BYRNES TABLE SAW
kurtvd19 replied to shihawk's topic in Modeling tools and Workshop Equipment
I clamp a piece of ply over the plate and raise the blade through the plate and the ply. Gives backing to the plate and makes the slot cleaner.- 367 replies
-
- 10
-
-
Yes, it's a vent for one of the fuel tanks. There is another directly opposite.
- 63 replies
-
- 7
-
-
- revell
- harbor tug
- (and 2 more)
-
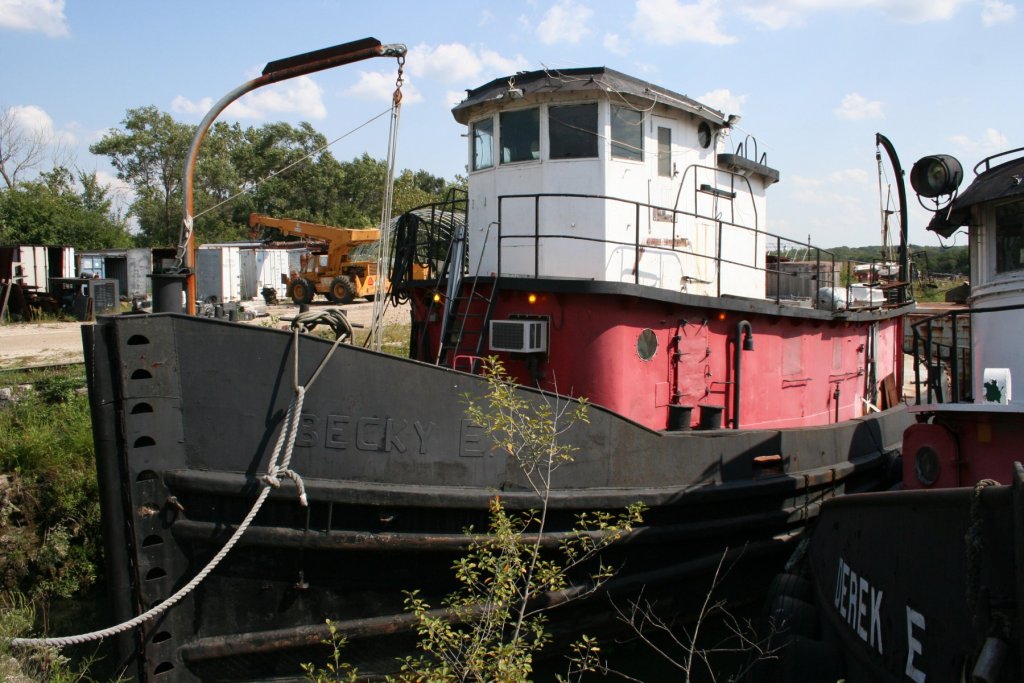
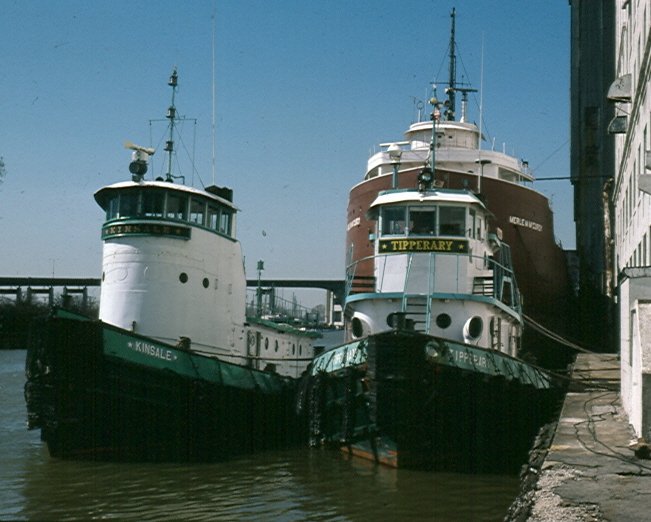
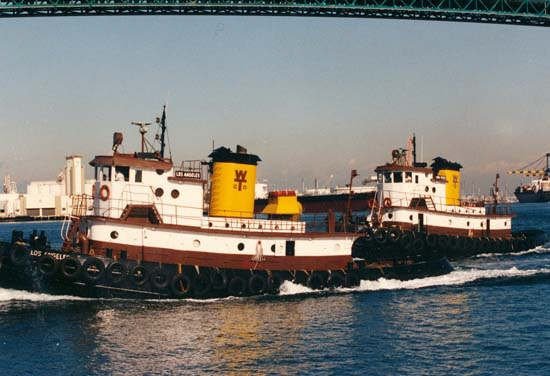
The kit is a model of a DPC Tug built during WWII. They were built on a rush basis due to the number of tankers being sunk off the east coast of the US early in WWII. The tankers being sunk created severe shortages of fuel oil for heating in the NE so these tugs were designed so that barges could be pulled closer to shore or in the intercoastal waterways where the U Boats couldn’t get to them The Office of Defense Transportation planned 100 Diesel tugs of 85’ x 24’ x 8’ and 500 barges and turned over the designing and superintending the construction of this fleet to the Philadelphia district office of the Engineer Corps, US Army. The plans called for 100 identical tugs in order to facilitate the construction as ordering 100 of each component would simplify the manufacturing and later the servicing of the boats. This also shortened procurement time as it was critical to get the tugs into service as soon as possible. In October of 1943 the Defense Plant Corporation placed an order for the Engineer Corps, US Army for the Defense Plant Corporation (DPC) for 100 diesel tug boats. The order for the 100 tugs was divided into contracts to six shipyards with individual contracts from a low of 4 tugs to a high of 42. The Long Beach shown on the kit box was based in LA and was a DPC tug as indicated by the pilothouse being squared up rather than round for the ease of production. There was also the Los Angeles another DPC Tug that was essentially identical to the Long Beach - only the name boards were different. The photos are of DPC tugs - The Becky E is shown under conversion to a live aboard in Lemont, IL. The head on of the pilot house at dawn is Miss Laura in Duluth and the Tipperary is also in Duluth. The Long Beach is shown following the Los Angeles. Kurt

- 63 replies
-
- 9
-
-
- revell
- harbor tug
- (and 2 more)
-
Eric: Something I read or maybe when I was at the museum and talked with the one brother that I seem to recall something about the mule being at the stern. I think that at that point (the museum was just opened and a lot more has been put on display since) there might have even been some sort of placard or indication of the spot evidence of the mule was found. I might be totally wrong but this is my recollection. Kurt
- 599 replies
-
- 6
-
-
- sidewheeler
- arabia
- (and 4 more)
-
If you started with Syren blacks for your current build I would wait for them to be back in stock. Any others on the same model will stand out like a sore thumb in comparison. Place an order with Syren ASAP and work on another area in the meantime.
-
Eric: If I remember correctly wasn't there a mule on the aft end that died when it sank? The B option (like the Mary MacDonald) has a space for the mule while A doesn't. Kurt
- 599 replies
-
- 5
-
-
- sidewheeler
- arabia
- (and 4 more)
-
RG Welcome to the NRG and MSW. You have a great local club there in San Diego - an invaluable tool for a modeler. Kurt
-
Admiralty model query
kurtvd19 replied to iMack's topic in Building, Framing, Planking and plating a ships hull and deck
Bob: The NRG article Roger mentioned is from the June 1984 30.2 issue on pages 55-67 and the cover photo. The article shows the Smithsonian plans and is about making the plans and the model at the Smithsonian. The plans were printed at a reduced size so each of the 3 plan sheets duplicated in the article are each on a single magazine page. But they will help with using the Model Shipways plan set. I just extracted it from the digital files and it is available, like most of our articles, for $2.50 as a PDF that is emailed. Contact the office to pay the $2.50 by card or pay pal and we will email a copy. Office phone is 585-968-8111 or nrghomeoffice@gmail.com 9 AM to 4 PM CST for calls. Kurt -
I think it would hit the roof trim if swung out - inward it is....
-
Welcome to MSW Jeff. I am the author of the Practicum in SiS so if yo have questions this is the place. Kurt
-
Use epoxy with the fiberglass cloth. West System is the best but very pricey. I have used it for model hulls and their dispensing plungers work great in getting an exact mix. Works just like the polyester resin without the odor. Kurt
-
Cutting Brass Strips-Best tool to use?
kurtvd19 replied to Kelp's topic in Modeling tools and Workshop Equipment
This is a topic that has been discussed in length - do a search for cutting brass strips.- 1 reply
-
- 2
-
-
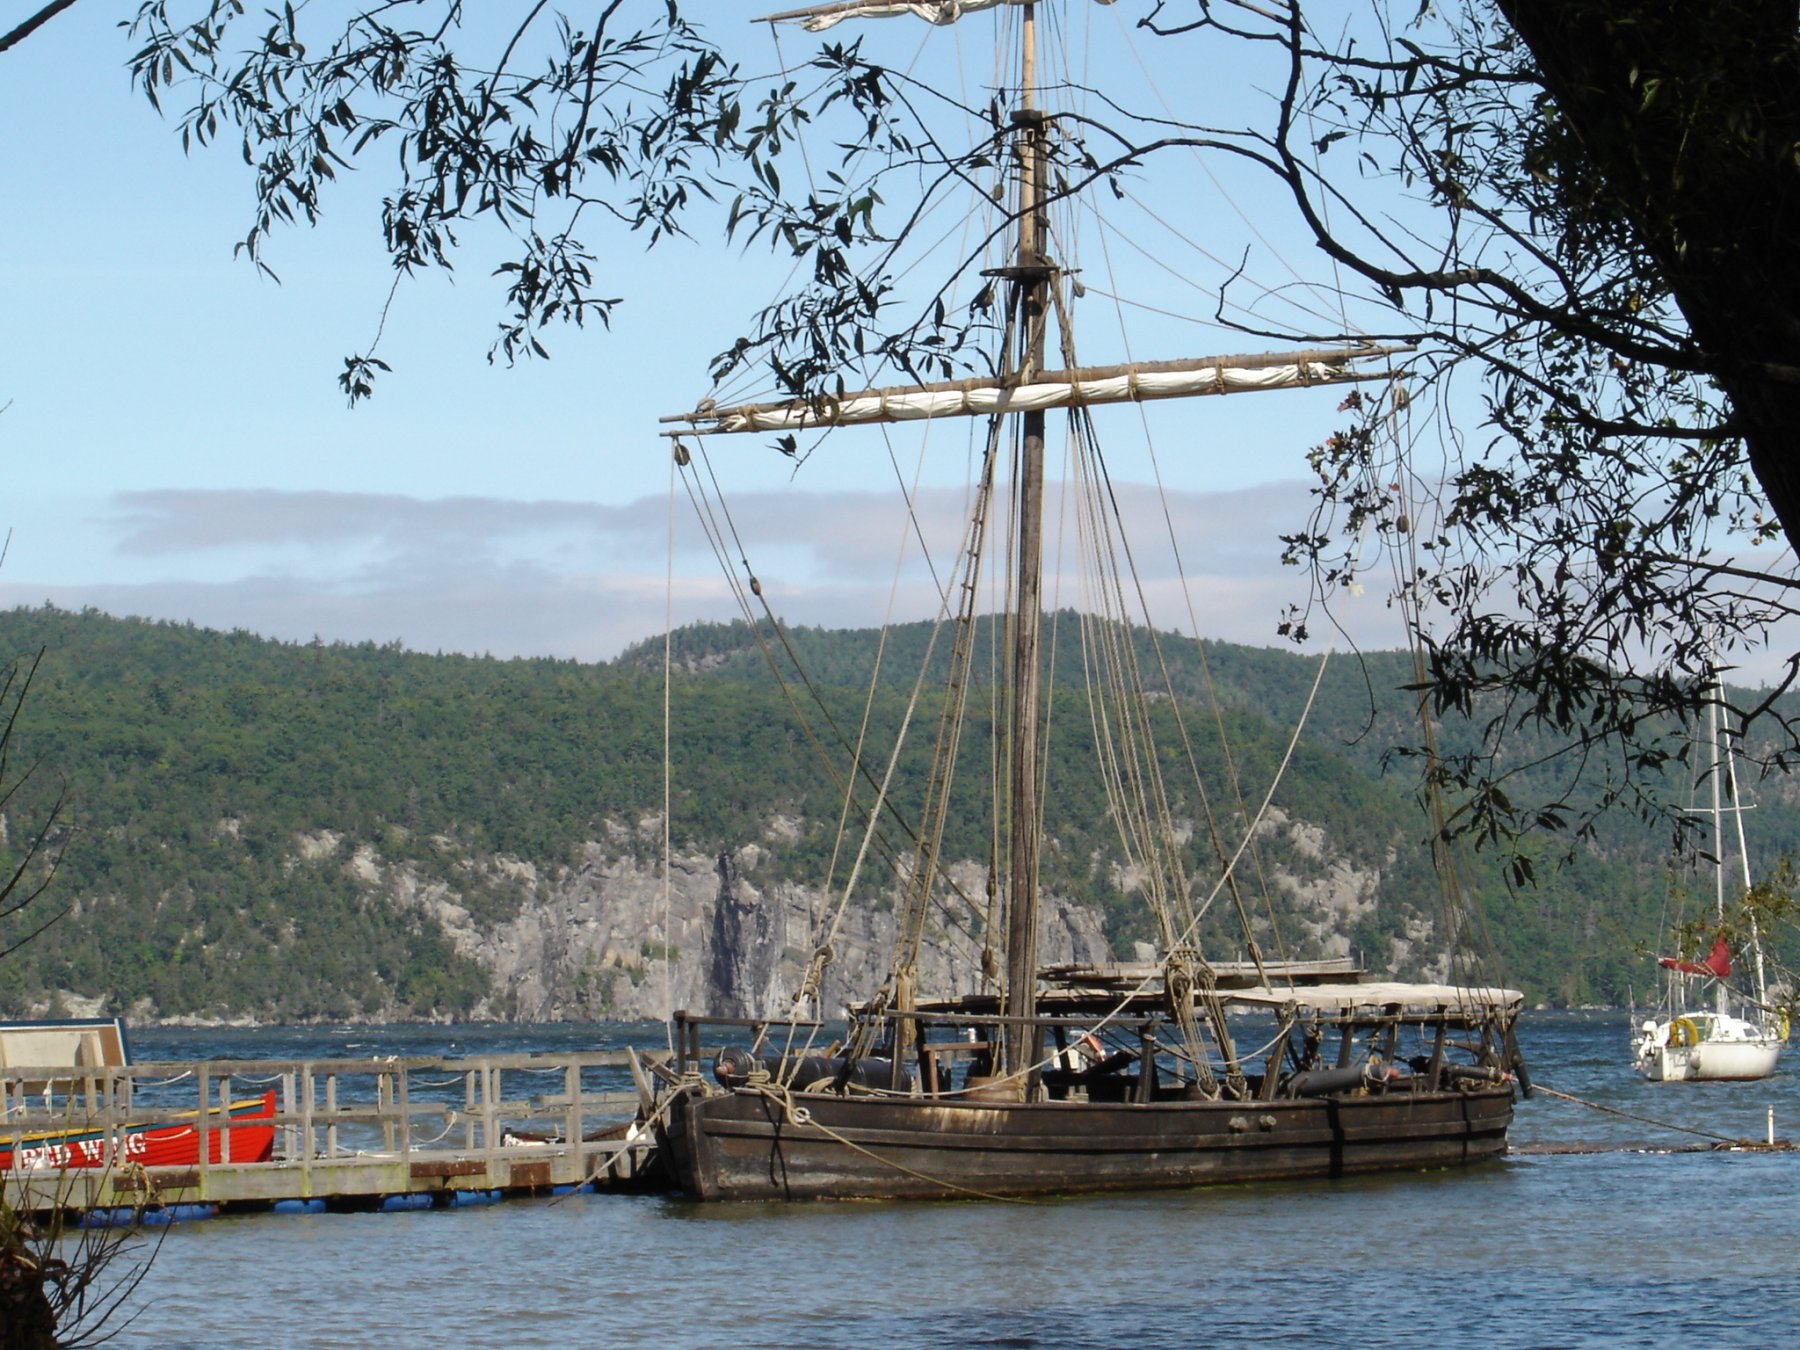
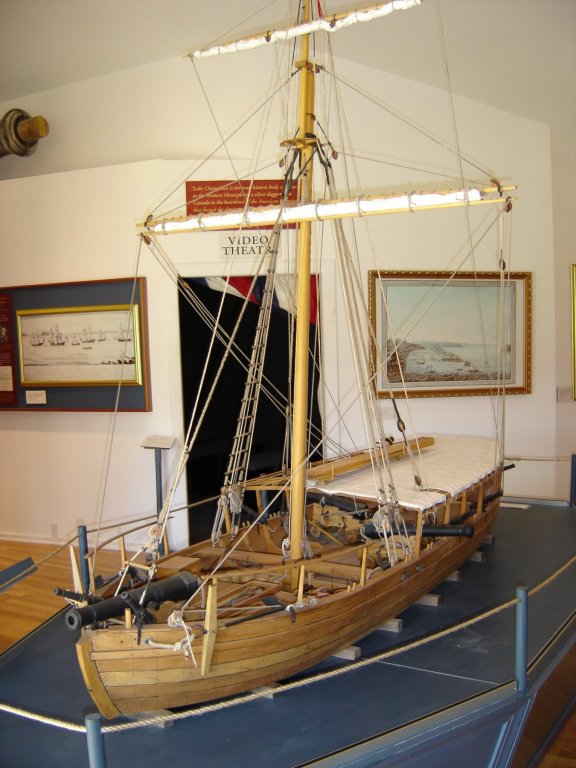
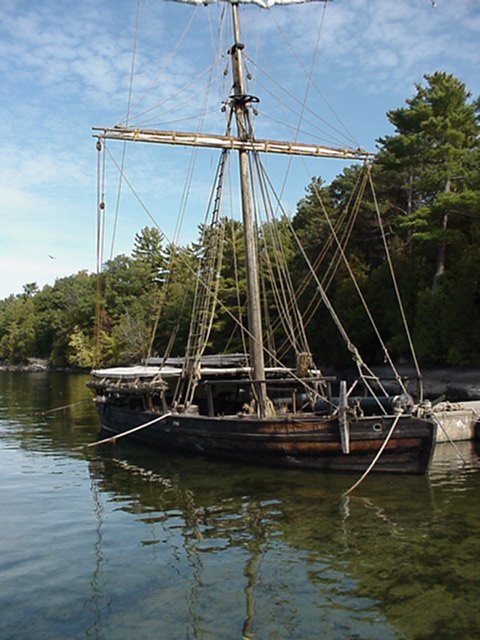
Elijah: Here are three photos that show the relative sizes of the spars. First the model in the Museum and then the replica. Got these from Bob Filipowski when I was building my model. Kurt

- 228 replies
-
- 7
-
-
- gunboat
- model shipways
- (and 1 more)
-
In my experience I have never seen any thing other than the planks overlapping the side planks. Many times there are reinforcing boards at the edges - sometimes on both surfaces. Hope this helped. Kurt
-
John: Welcome to MSW - I assume you are somewhat new making your first post - but this is the place for sharing and learning. Bluejacket has exceptional customer service and they really listen to their customers. And if there are other kits on the shelves they will be checking to make sure that part is correct in the boxes and they will make sure future parts are the right length. Kurt