kurtvd19
-
Posts
3,048 -
Joined
-
Last visited
Content Type
Profiles
Forums
Gallery
Events
Everything posted by kurtvd19
-

NRG's JOURNAL is now Digital
kurtvd19 replied to kurtvd19's topic in NAUTICAL RESEARCH GUILD - News & Information
The Fall issue (63.4) is now available to all digital subscribers. Check your email for the NRG's email with the instructions for setting up your password that was sent just a bit ago by our Constant Contact email service. All subscribers have to set a password to access this and future editions. It's just a few easy steps and fully explained. Also, FYI, there is a pdf button on the tool bar that gives subscribers access to a pdf version that can be printed if a copy of an article is desired. Kurt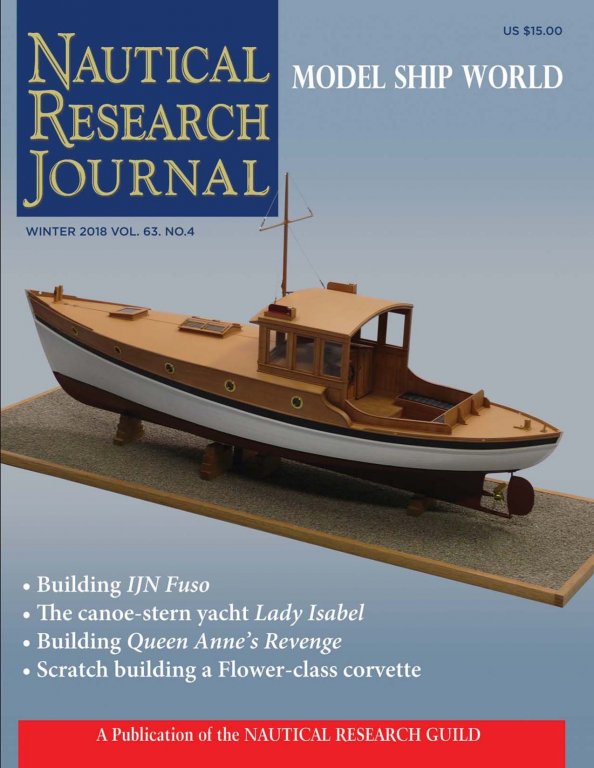
-
How would you improve your Byrnes tools?
kurtvd19 replied to Keith_W's topic in Modeling tools and Workshop Equipment
A good way to make your sander variable speed is to use different areas of the disc. It's spinning at lot faster at the outer edge and slower the closer you go to the shaft. Same RPM but much different feet per second. Kurt -
NRG's JOURNAL is now Digital
kurtvd19 replied to kurtvd19's topic in NAUTICAL RESEARCH GUILD - News & Information
Somehow I left out a couple of words in that sentence - now edited to read as intended The digital is $40. The print is $50 and for an additional $15 you get both the print and digital - total $65. We have had a very good response with many people going for both and nobody mentioned the difference until now. Thanks for mentioning it. Take care, Kurt -
NRG's JOURNAL is now Digital
kurtvd19 replied to kurtvd19's topic in NAUTICAL RESEARCH GUILD - News & Information
If you haven't taken the time to check the free digital edition of the Journal do it today as the Winter issue will soon be available for viewing and it and future editions will require you to sign up for a membership/subscription. The digital issue is released prior to the print issue being mailed The Winter print issue is at the printer and if you have been putting off subscribing now is the time as waiting might mean you miss getting a copy of the Winter issue. Kurt -
Rusty: In my original post - prior to editing I said "Use a calculator to divide by 2" - because that's what I do - but I deleted the bit about using a calculator even though I would always use one. Look at it as another tool we get use in building our models...🤩 Kurt
- 152 replies
-
- 2
-

-
- medway longboat
- Syren Ship Model Company
- (and 1 more)
-
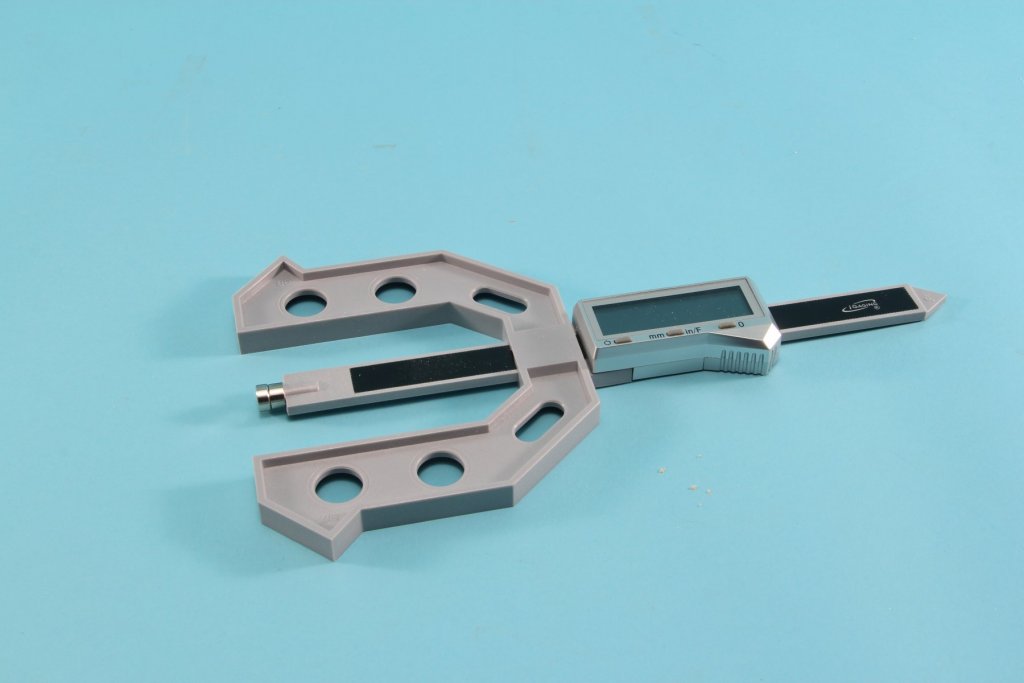
Rusty: I found a very easy way to set the saw to make the half-lap joints. I have a combination height, depth & thickness gauge from a company called iGaging (igaging.com) that takes all the guess work out of setting the saw up. Use the gauge to measure the wood thickness - have the wood on a flat surface. Divide the thickness by 2. Using the iGage tool raise/lower the blade to match the divided thickness. You can make a test cut if you want, but unless you screwed up the math it's going to be right on. The tool is #35-0906 and it's priced anywhere from $16.95 to $22.00 - check carefully as some have free shipping. Rockler also lists the tool. It's got a 6" range of measurement. I have several of this company's products and they are all a good value for our use. I showed the use of this tool for making half lap joints during a round table on saw use and safety at the NRG Conference last month. Take care, Kurt
- 152 replies
-
- 12
-
-
- medway longboat
- Syren Ship Model Company
- (and 1 more)
-
How was the 2018 Conference?
kurtvd19 replied to VinceMcCullough's topic in NAUTICAL RESEARCH GUILD - News & Information
Thanks for posting the photos Clare. I have been promised photos for here and the web site - I didn't have time to take any myself. Will post when they are received. Kurt -
Byrnes Table Saw Tips (requested)
kurtvd19 replied to Matrim's topic in Modeling tools and Workshop Equipment
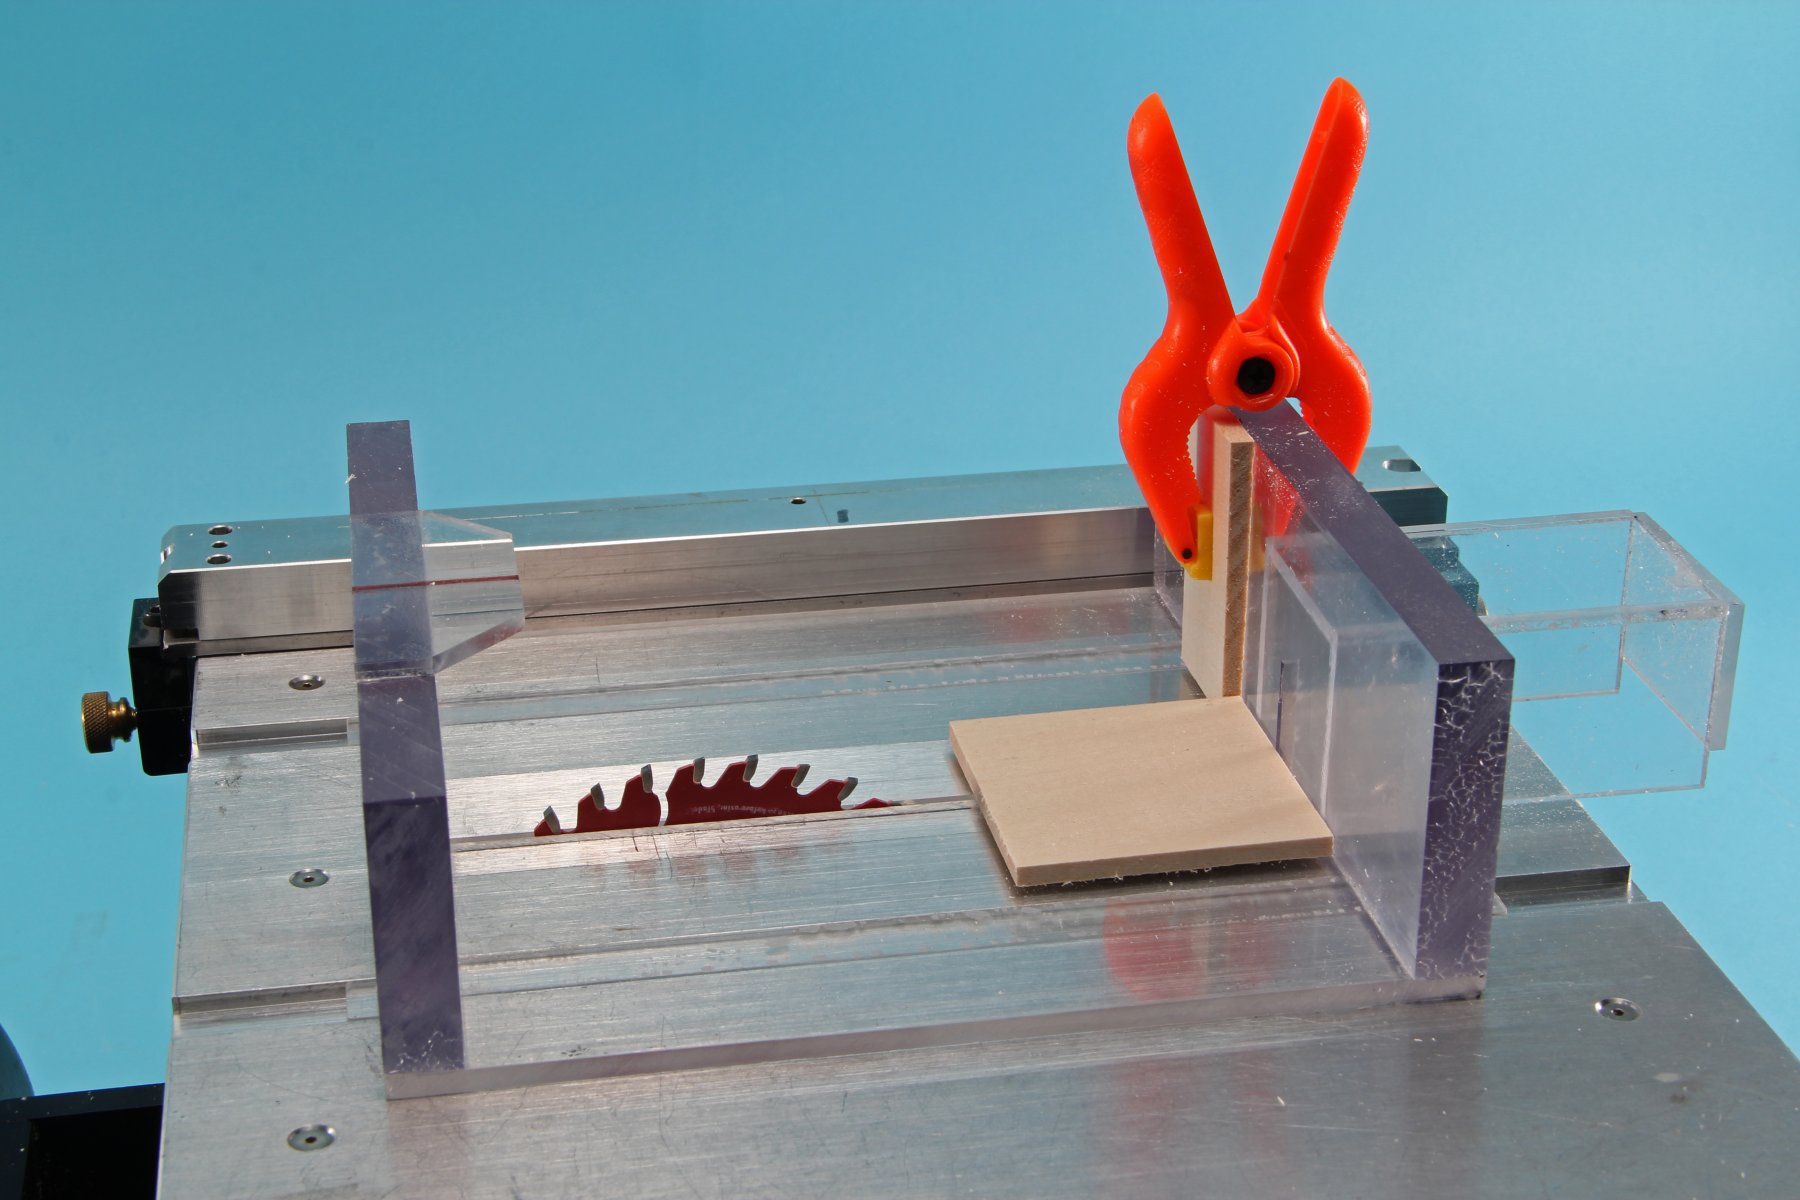
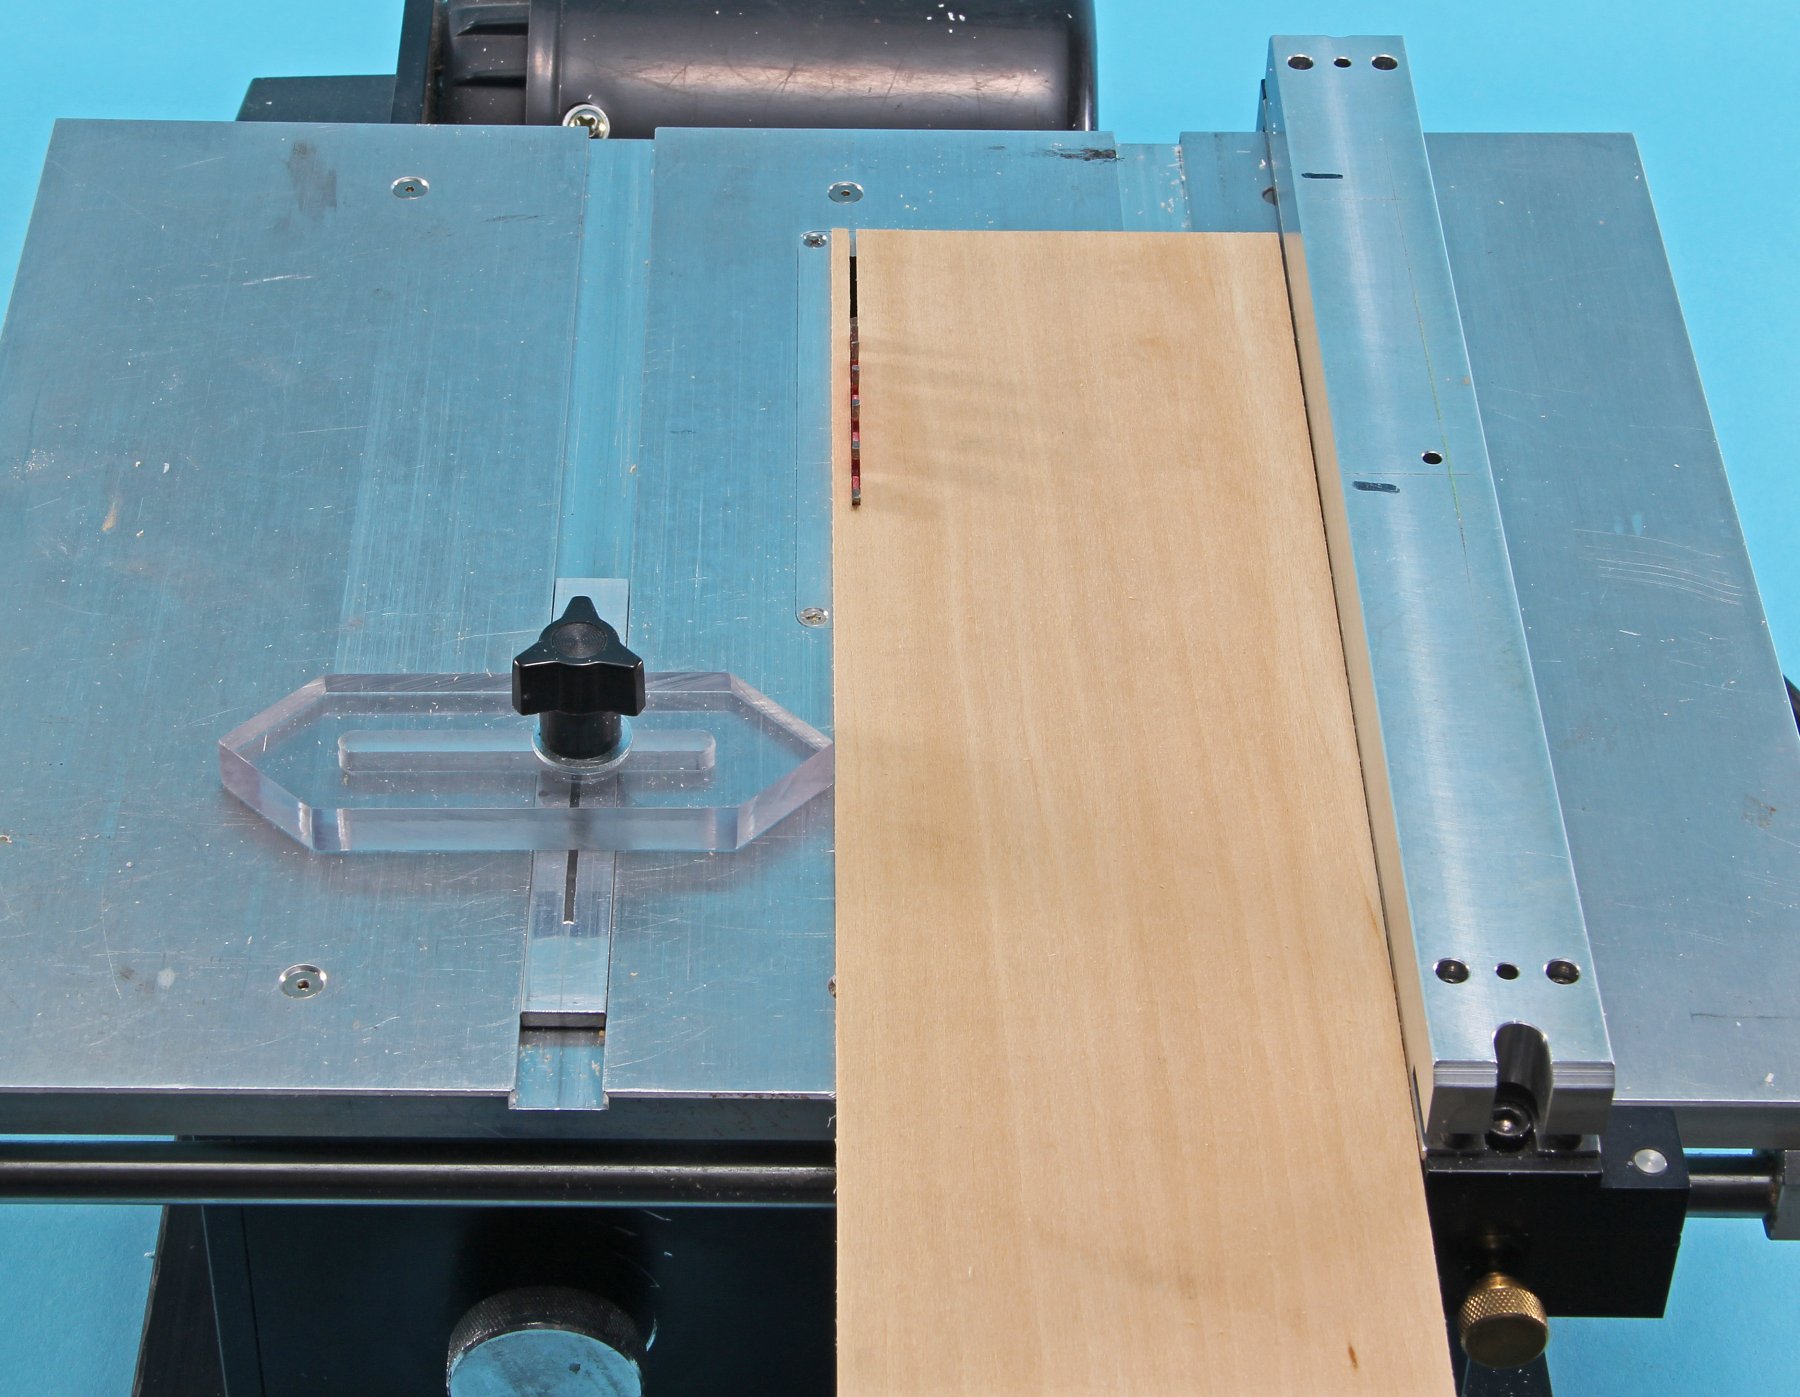
My home made sliding table showing a positive stop to the right of the blade to make repeated same size cuts. Mine is also made from left over materials from the shop. Not as fancy as the Byrnes model but it gets the job done. For repeated same width cuts use an adjustable fixture to the left of the blade. Set it to the width wanted and after each cut move the fence so the sheet is against the fixture and make repeated cuts. This avoids the cut off piece being trapped between the blade and the fence and no push stick is required for the strip itself like it would be if cut to the right of the blade between the blade and fence. Fixture shown is also shop made from materials on hand. Kurt

- 53 replies
-
- 12
-
-
Byrnes Table Saw Tips (requested)
kurtvd19 replied to Matrim's topic in Modeling tools and Workshop Equipment
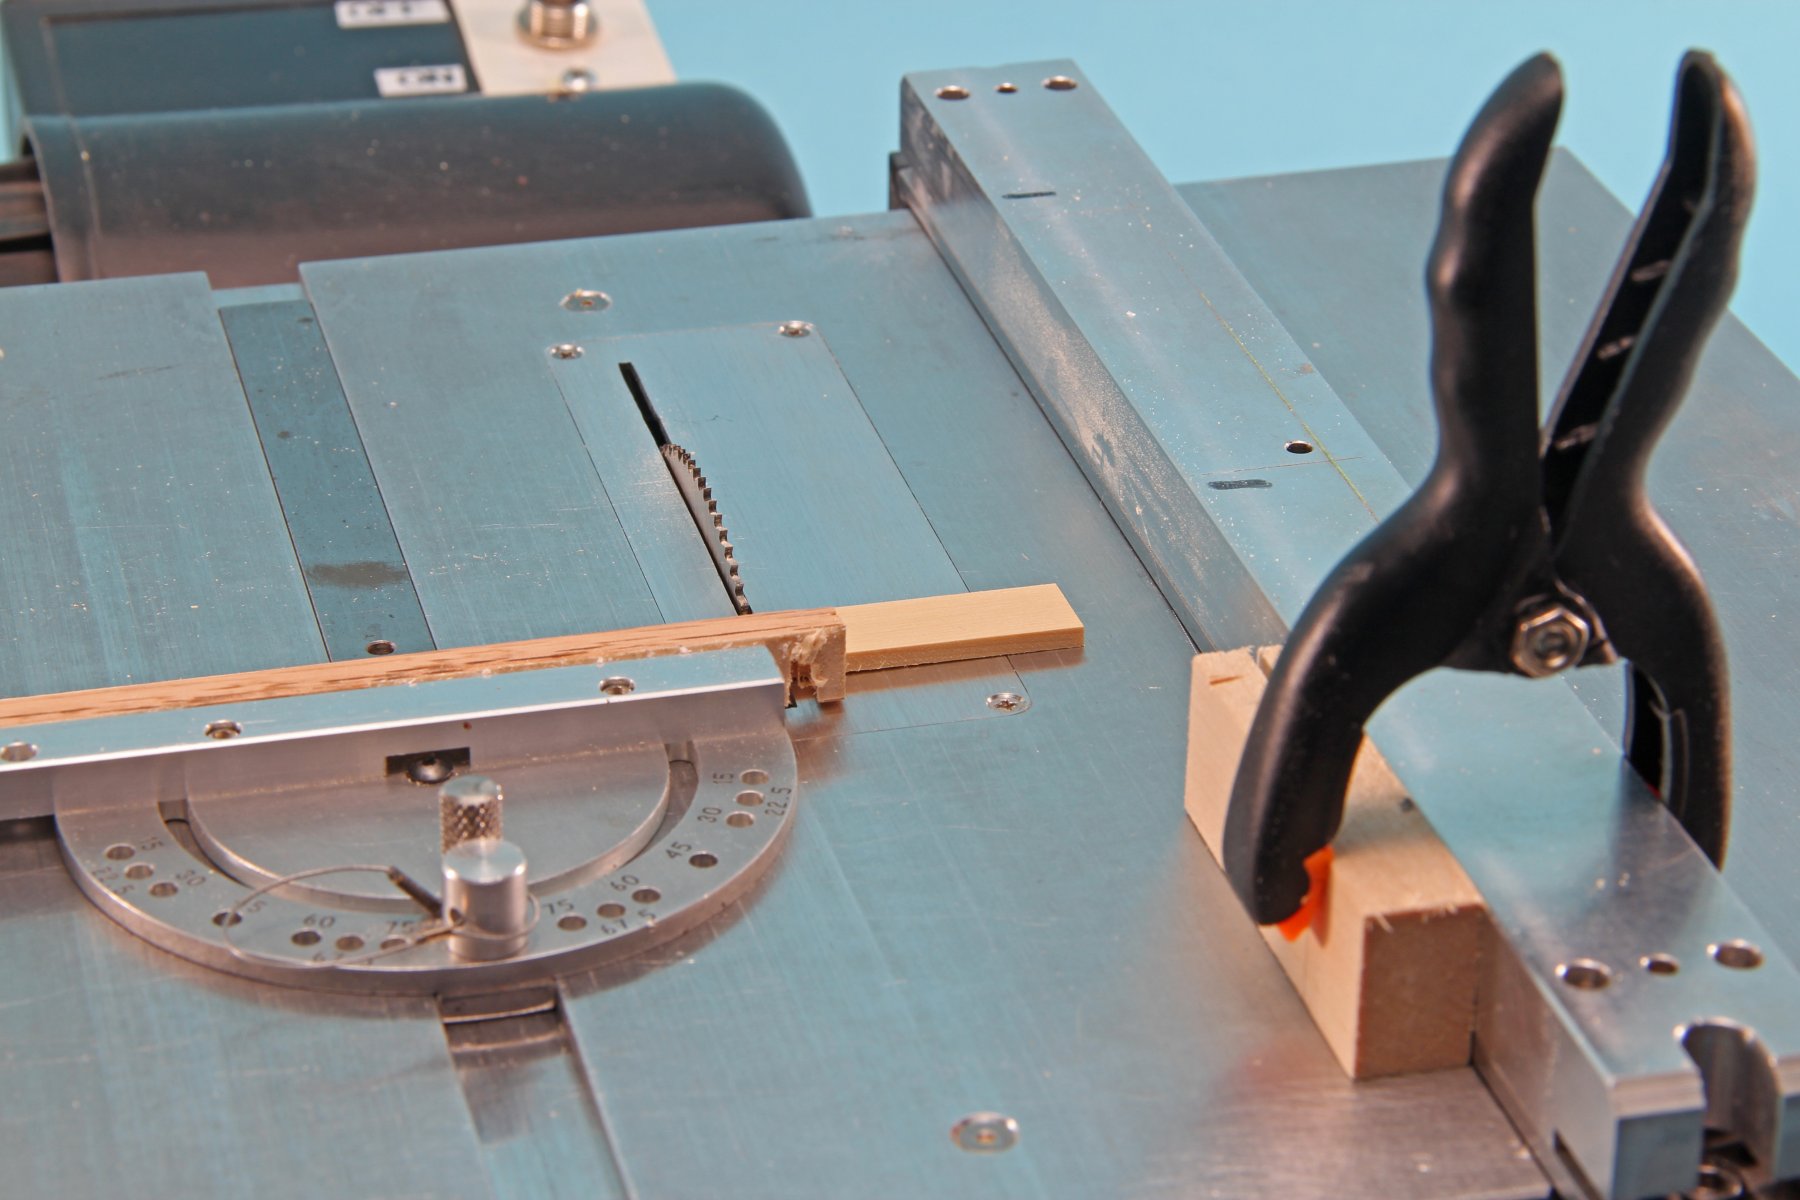
Moving the gauge black or angle back from the blade provides more room for pieces. Have to move the miter gauge a bit more each time but the offset is a bit safer operation with more space. Kurt
- 53 replies
-
- 10
-
-
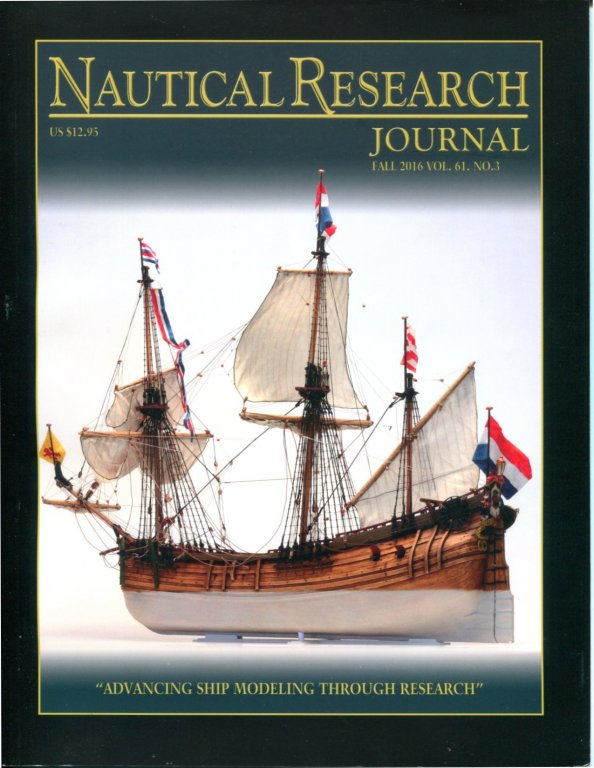
Welcome to MSW Ab. Ab is very modest - one of his paper models was on the cover of the NRG's Nautical Research Journal - Fall 2016 (61.3) and featured inside Kurt
- 77 replies
-
- 11
-
-
I got some AYC from Chuck and I am using it on a new model and I love the stuff. In my case the model is of a 1890 era canal boat primarily made of White Oak for which I am using Birch - dead ringer at 1/2" = 1' To White Oak. There is also a lot of Yellow Pine used on the boat and the AYC looks perfect in place of Yellow Pine on this model. I was very impressed with the ease of using the AYC as it cuts great on either my Preac or Bynes saws and finishes nicely. I bought a couple of sheets from Chuck and after actually using a bit of it ordered a bunch more - it will be stocked in my shop going forward. And as usual Chuck delivered it quickly and well packeaged. Kurt
-
Sanding photo etch is tricky and probably not needed - I have never had to do it at least. Any sanding should be followed with a cleaning using a grease/oil cutting agent - acetone should work for most crud and lacquer thinner works too - and to get the sanding debris cleaned. I follow the solvent soak with a water rinse and then let the parts air dry. Don't skip the water rinse. If you are on well water or have real hard water you might be advised use distilled water. Next, do not touch the parts with your bare hands. Use tweezers or clean cotton gloves or exam gloves W/O powder! Primer should stick just great. I use an acrylic primer - Badger's Stynylrez - and it and the final color coats stick. This is what has worked for me. Kurt
-
Welcome to MSW Dave. Be sure to start a build log of your Fair American. Kurt
-
Tools, supplies and workstation......
kurtvd19 replied to CPDDET's topic in Modeling tools and Workshop Equipment
Dave: Welcome to MSW and I hope the start of a long time hobby. Both of these topics have been discussed at length on the forum. I suggest you do a search and after reviewing the various Q&A's post your follow up questions to those areas. A search is easy to do - upper right area of the page - type in "basic tools" for one search and "workbench height" for another. This should give you a start. Members will be glad to offer advice. Kurt -
That's the ask a question button. They will not and can not charge you until you give them a card number. Kurt
-
Cutting Planks
kurtvd19 replied to sfotinos's topic in Building, Framing, Planking and plating a ships hull and deck
The sand it is an aluminum extrusion with ridges at each corner. The sandpaper is attached to the recessed area between the raised edges with the raised edges contacting the guide surface. The sandpaper never contacts the tool surfaces. Kurt -
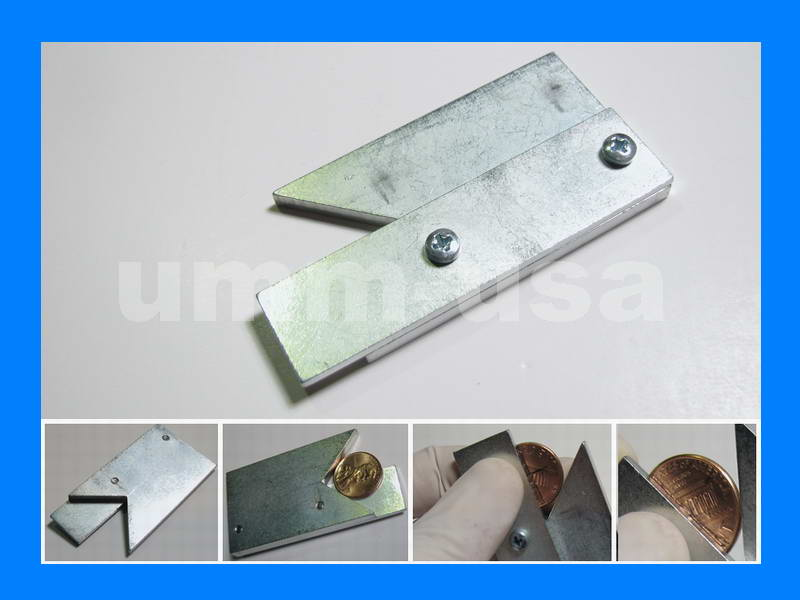
UMM-USA has this nice little center finder - I have one and love it - for only $8.50. http://umm-usa.com/onlinestore/product_info.php?cPath=21_162&products_id=6607 UMM is a good source for good tweezers and photo etch tools Kurt
-
NRG's JOURNAL is now Digital
kurtvd19 replied to kurtvd19's topic in NAUTICAL RESEARCH GUILD - News & Information
Derek: Welcome aboard. Your support of the NRG helps us do things like making MSW available to the hobby. Glad you like the Journal. Take care, Kurt -
NRG's JOURNAL is now Digital
kurtvd19 posted a topic in NAUTICAL RESEARCH GUILD - News & Information
NEW DIGITAL EDITION OF THE NAUTICAL RESEARCH JOURNAL The digital option that many have been asking for is now a reality. This first issue is being made available free to everybody, members and non-members alike, because we are convinced many will want to sign up for the digital option. WE HAVE UPDATED THE COVER - We have added the name of the NRG’s Ship Modeler’s Forum, – Model Ship World, - to the right of the new title box as the forum has become so widely used and now such an integral part of the NRG. We have added 16 pages to the Journal and increased the modeling related content. The additional 16 pages are full color – doubled to total 32 pages of color - to feature more modeling content. Features of the digital edition: The same content as the printed Journal Viewable on any computer, tablet or mobile phone Full color photos and illustrations Add bookmarks and notes Archive of all digital editions released during your membership Available immediately when each issue is released...no more waiting for the mail New lower-cost digital only membership option Cost-effective for international members Go to https://www.thenrg.org/digital-edition.php to see the first digital issue. The digital edition is available for only $40. The print Journal is $50 or an additional $15 if both print and digital are wanted. Existing members - If you prefer to receive only the digital edition (starting with the next issue Winter 2018) or want to add the digital edition to your print copy contact the NRG office to make the change. Non-US members may want to take advantage of the assured delivery and save with the digital edition for $40 versus the $62 fee for print copies to non-US areas. New members can pick print, digital or both at the NRG Store – don’t put it off – sign up now. NRG Office – nrghomeoffice@gmail.com or 585-968-8111 Sign up on-line - https://www.thenrg.org/join-the-nrg.php Show your support of the NRG – sign up for the digital Journal. Membership in the NRG helps us support MSW and the hobby of model ship building.
-
The digital issue will be available before the print issue even hits the post office - that's a 3 month advance for some Canadians who tell us they don't look for their Journal until we announce the next one is mailed - 90 days is routine for some. Beat the wait - go digital. Kurt
-
Went to the hardwood store and took various woods over to hold next to some White Oak planks. After a bunch of back and forth I decided on Birch. Looks perfect. Steve Wheeler had suggested using Birch and he was right. A piece of 1 x 4 and a piece of 1 x 2 each about 5' long will be a lot more than I need for this project but these were the shortest lengths w/o any streaks of darker wood. Less than $20 and I am all set. Have already ripped a bunch and cut all the frame pieces I need. Thanks for the input guys. Kurt
-
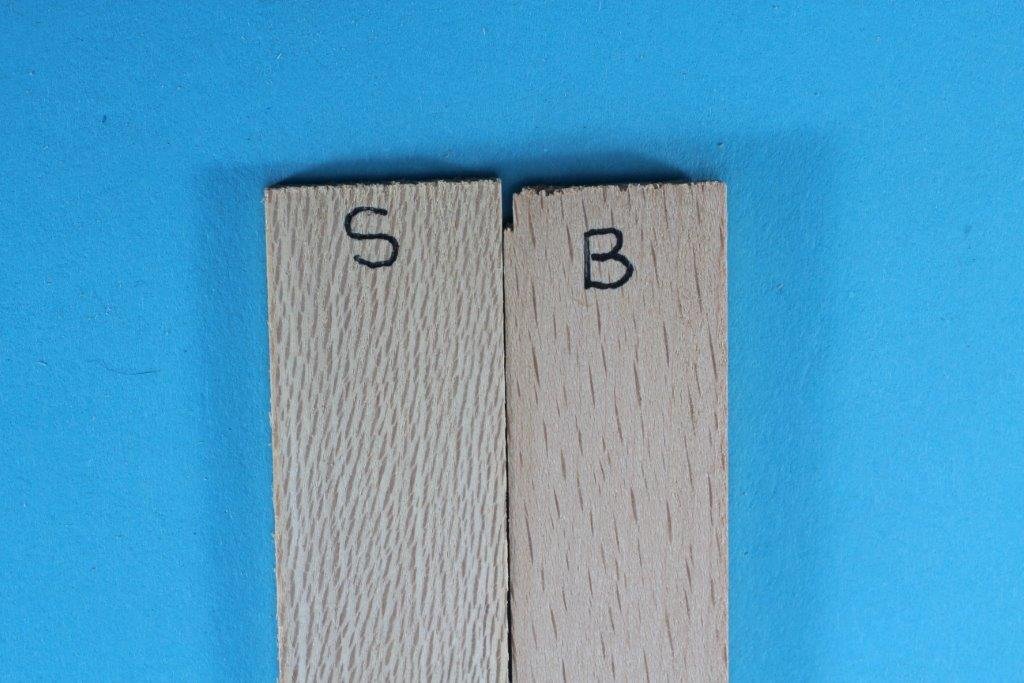
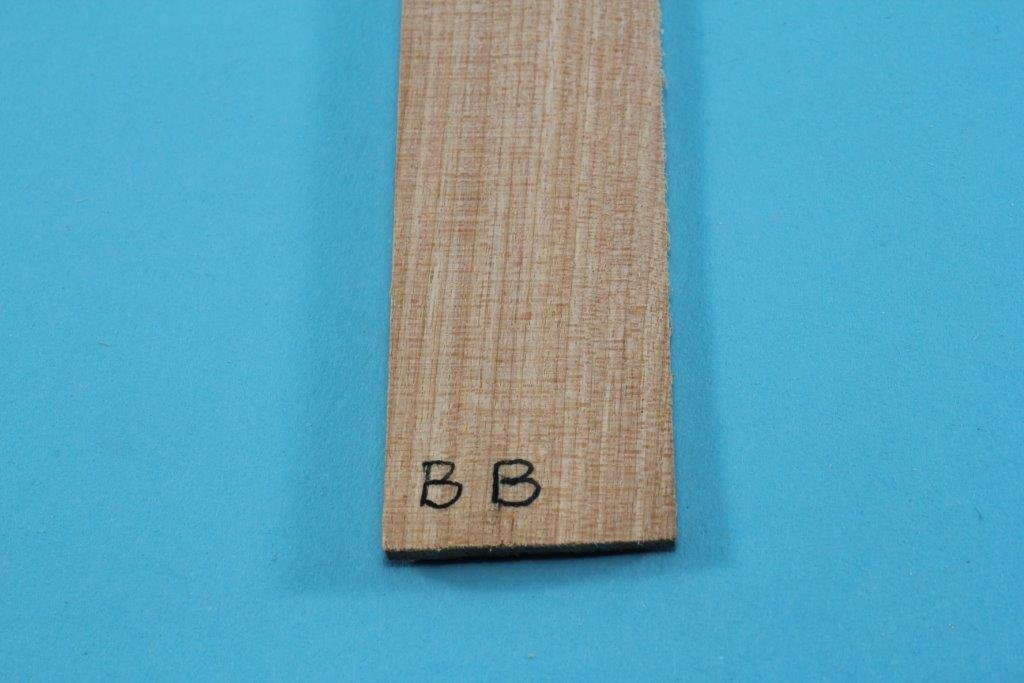
Thanks Roger. I looked through my stash and found a piece of Sycamore. I think the figuring may be too much. The photo is of a 13/16 inch piece marked as "S". The other piece "B" in the photo is Beech. Between the two I am leaning to the Beech. I cut a piece off a billet of Black Birch that I like. I am going to the hardwood store tomorrow or Wednesday and check out some White Birch as I am told it has less figure than the Black Birch. I have Red Oak galore in my full size shop but not a stick of White Oak, so I am going to compare the pieces I cut against the White Oak as well as comparing the White Birch to the White Oak. I plan to use Chuck's Alaskan Yellow Cedar in place of the Yellow Pine that was used for ceiling planks, cabin framing and planking and a few other places. White Pine was the primary wood used as it's the hardest and best wood for boats that is native to IL. Kurt
-
I am planning a 1/2" = 1' cross section model of a boat that had White Oak planking and frames. What would like more like White Oak at 1/2" scale Beech or Maple? I have misplaced my reference for which woods look like others at scale. Thanks, Kurt
-
Eric: Great work and it looks very good. Had you not mentioned the wider planks nobody would have noticed.😀 As to weathering the hull - once you start with the weathering you need to keep the rest of the boat weathered to the same degree. A pure white hull will look odd with weathered decks. Good to see you got some time to post. Kurt
- 599 replies
-
- 4
-
-
- sidewheeler
- arabia
- (and 4 more)
-
Larry: My current project has some dead ends and I had to just say - it would be nice to know but it's not worth any more of my time. One dead end is what happened to the steam engine from the City of Pekin - an I&M Canal boat? The records tell me the manufacturer, model, sizes, HP, etc of the engine. It also names the boat where it was originally used. However, all sorts of records show that the aft 40' of the City of Peking were cut off - presumably so the engine, boiler and machinery could be used for another boat but neither the exact year the stern was removed or where the engine went has been documented. I finally said that I just can't spend any more time on this question because I don't need the info for my project. If it happens to drop into my lap someday, I will be sure to get it published so future researchers will have the answer. An interesting thing I found out and a good lesson why one has to question "facts" that are published relates again to the I&M Canal. Dr. John Lamb wrote that the locks on the I&M Canal (paraphrased) "were all identical in size so that a canal boat 18' wide by 99' long could fit into the locks". He never provided the actual measurements of the locks. Common sense said they had to be longer than 99' and wider than 18' - but how much? This quote was picked up word for word by every subsequent author that wrote anything about the I&M Canal locks. Not a problem until the I&M Canal Heritage Foundation group hired me to build a diorama of Lock 14 and the two canal boats they were proposing to build for tourists to take rides on the stretch of the Canal between Lock 14 and Lock 13. They provided the plans for the boats direct from the designer but when I asked about the actual size of the locks their historian wassn't able to give me anything except Lamb's description and many subsequent copies of his description printed in other sources. Plagiarism? Not when one is researching I guess! Well, luckily I live within 15 miles of Lock 1 and as it is completely dry I could measure the lock and made drawings for the model and provided them to the canal group so they now have actual dimensions rather than Lamb's description that everybody just copied. Is there anything in the newspaper photo that you can use as a comparison to the size of the boiler? A doorway, person or a coal shovel? Kurt