kurtvd19
-
Posts
3,048 -
Joined
-
Last visited
Content Type
Profiles
Forums
Gallery
Events
Everything posted by kurtvd19
-
 CAMM = Council of American Maritime Museums. The NRG is a CAMM member. NRG members who join at levels of $100 and up get a CAMM card which gives them free admittance to all CAMM member museums for the year. This can save members a lot of money if they frequent maritime museums. Kurt
 -
Use a gloss clear coat over the paint used. Just use a compatible clear coat. Using same brand clear as the colors is best way to assure compatibility.
-
They are sometimes called back boards - I am sure there is a technical term For authenticity the light back boards should conform to the standards with the vertical surfaces on the light's side of the assembly normally painted red and green as applicable to offer better visibility. The other surfaces can be whatever the other colors nearby are (in your case black is fine) except the red and green can not show except on the surfaces lit by the lights. Kurt
-
The nice thing about the tent spray booth is that it can be lit up very easily for good lighting on the subject being painted. Kurt
-
I use acrylics 90+% of the time - I have a spray booth for the smaller stuff but have not felt the need for a big booth as the over spray is completely dry before it lands on anything beyond the model. A bit of cleanup with a vacuum cleaner and no problem. If spraying over a finished floor use a cheap plastic drop cloth (picnic type table covers are good) and when you are done take it outside and shake it clean. It's good enough for when we demo in a hotel ballroom at trade shows. But ONLY for acrylics - solvent based must use safe extraction. Kurt
-
USA Airbrush supply has an ongoing 4th of July sale. Get 15% off using the code - 4thflash Click their sponsor banner ad on the right side of the home page. Kurt
-
- 6
-

-
Mike: As a NRG donor member, don't forget to use your NRG membership card along with your CAMM pass to get free admission to the museum. Can't answer the question about seeing it all in one day but there are loads of members here who can tell you. Kurt
-
Roger: You know I would love to have one in Duluth and so would Steve Wheeler. The three of us would probably be pretty lonely though. Kurt
- 599 replies
-
- 3
-
-
- sidewheeler
- arabia
- (and 4 more)
-
Thanks for the additional information Eric. Very interesting. Knew they will have to move the Arabia Museum but had no idea of the ideas for Jeff City.
- 599 replies
-
- 4
-
-
- sidewheeler
- arabia
- (and 4 more)
-
Dave Hawley found another MO River wreck buried in a farmers field.. https://www.kcur.org/post/second-sunken-steamboat-raises-questions-kansas-citys-arabia-museum?fbclid=IwAR0yYp5zui1_dmw1_hbdTD4rK9O9hU1K-tyBrDScfn_n3asXpF_KBbnNglU#stream/0
- 599 replies
-
- 7
-
-
- sidewheeler
- arabia
- (and 4 more)
-
Flagship Models is a mfg of (mainly) top notch resin civil war era ships and they are a former sponsor of this forum. I forget who did up the master for the fighting top kit and the other two in that series but they got very favorable review when they were first released. I have built a couple of the Civil War gunboat kits and they are great kits. He's got a line of Civil War figures that can be used on any ships of that era. Rusty White is the owner of Flagship and it looks like he's recently provided space for some other CDs to be sold. The review above of the rigging CDs is what it is. His own CDs are good as I have seen them and own two. Kurt
-
Mike: I have done several presentations and round tables at conferences. Maybe time for another - 2020 though - all is set for New Bedford. Kurt
-
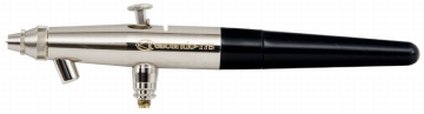
No I haven't David. I looked at them when they first came out and thought they looked promising but guys trying to shoot acrylics were turned off with being told they needed one nozzle for acrylics that was an extra and then being told they needed the next size when they were unable to shoot acrylics with the specified nozzle. This was right when everybody else was redesigning their needles to almost be universal for normal fluids. I thought one or two needles were easier to keep track of than so many plastic nozzles with the Aztek. I know a lot of people swear by them but I've used a Badger since getting one for Christmas when I was in 8th grade. I don't find the regular airbrushes difficult to clean and I normally use gravity feeds or the 360 when using a bottle - and it cleans just like a gravity feed brush. When I give workshops I show how to clean a brush in about 3 minutes tops - at the end of the session - in between colors it's much quicker. I use acrylics 90+% of the time and they are easier to clean up after than solvent based paints. To each his own. When I wanted to upgrade from my little Badger 350 I got a Paasche double action - couldn't work with it. The Badger Sales Manager gave a demo at a local club meeting and I got to try several Badgers - including one that was almost a twin the the fat barreled Paasche I had - couldn't use it either. But when I picked up a 155 or the 360 it felt natural in my hand and I was laying down paint right away. Sold the Paasche to a fellow club member and my next brush was a 360. Now have 14 Badgers in my workshop. The one I don't have and never show when doing workshops here or on the road is that fat barrelled Crescendo 175 - I tell people about it but as I still can't get one to work well for me it would be crazy for me to demo one with poor results. And I like a fat barrel on a pen - just not on an airbrush. Take care, Kurt Take care, Kurt
-
Don's site has good reviews of a lot of brushes. Covers the important things. I forgot to mention that in keeping with the NRG's and MSW's advocacy for not buying pirated goods be careful to buy only brand name airbrushes. Many that are sold with non-airbrush brand names (store names, etc) are inferior copies of brand name airbrushes. Name brand airbrushes are all good and I defy anybody to tell the difference in a paint job done with an Iwata or a Badger or a Passche. The skill of the artist/modeler plays the biggest role in a quality paint job when using name brand brushes. Name Brands: Badger, Paasche, Iwata, Thayer & Chandler, Harder & Steenbeck, Grex. If the name isn't listed here I wouldn't recommend it. Stay away from cheap garbage. Also, don't buy the most expensive model or the newest model thinking it's going to make you an artist when you use an airbrush once a year. Practice is so very important. You worked a long time on the model, don't screw it up trying to airbrush it w/o some practice - your model is not a practice piece. Kurt
-
I am partial to Badger Airbrushes myself and have several. If the kids are going to paint I suggest you get them a Badger 350 it's inexpensive and very simple to use. It is single action - push down on the button and air and paint come out. It is adjusted for spray onto scrap by turning the fluid cap for more or less paint. Hand it to the kid and they can concentrate on holding the brush at the proper distance and where they want the paint to go. Check it out at USA Airbrush Supply - a MSW sponsor - and you will not beat their prices. The link is to a 350 set with extra head assemblies for any type of paint. Note when you go to the sponsor ad on the right side of the MSW home page that you get a discount if using the NRG Discount noted when you hoover over the banner ad. https://usaairbrushsupply.com/products/350-4-deluxe-airbrush-set-fml This is the same airbrush I used for many years and a modeler at the WI Maritime Museum competition painted a model with this airbrush and took home best of show. It can do a great job and is the perfect learning tool for a kid or an adult w/o experience. Once the trick of keeping the brush the correct distance from the model and how much paint to use is mastered then a more advanced brush can be looked at. For a modeler with experience who wants a good double action brush good for details as well as general use the 360 is my go to brush. It is called the 360 because the front end rotates. With the color cup facing up paint is put into the color cup and the paint flows into the brush by gravity making it usable a very low pressures for details but if doing a broader area rotate the front end and a paint bottle can plug into the color cup from below providing enough paint for any job. https://usaairbrushsupply.com/products/360-1-universal-basic-set If you get a Badger be aware that they use a proprietary thread on the air hose connection - but if you get the 350 set it comes with a hose that fits all Badgers - the other end is a universal thread that fits compressors. There are adapters available if you wind up with another brand compressor hose. BTW, the 360 shown has a quick disconnect on the air inlet and a High Roller Trigger for better control. I recommend the High Roller Trigger for any of the double action Badgers because the control is so much better - it will help the novice as well as the artist. The quick disconnect is only needed if one changes from one brush to another often. Kurt


-
Sorry but the articles from the Nautical Research Journal are copyrighted and posting them and downloading them is against long standing MSW policy. They have been deleted from the thread. Posting in their entirety is way beyond the fair use provisions. Articles from the Journals are available for personal or research use direct from the NRG for a nominal charge. We provide CDs with the entire run of Journals up to 2015 from the NRG Store. Individual articles can be obtained as PDFs. Kurt
-
I have seen a couple of paint charts comparing the various brands of paints to one another. None of them cover all the model paints available and none of them cover the MS paints. I am unable to find the copies I have of these charts - and I might have deleted them as they were essentially useless. Check out Chuck Passaro's build log of the original MS longboat kit to see the colors Chuck used. He designed the original smaller scale MS longboat kit. Best source you will find for the longboat. Kurt
-
Bob is correct about the article in Shop Notes 2. It was very costly to print this with accurate color chips and the original author of the article, Eric A. R. Ronnberg, Jr., was consulted and gave final approval of the reprint. In Shop Notes 2 it is 4 pages of text, 5 pages of color chips and two large photographs of models by Mr. Ronnberg with one model having three additional color chips specific to that model. The text in SN2 has been shortened from the 7 pages in the original article. The original article in it's entirety is available on our CD set - The First 40 Years from the NRG store. NRG members get 20% off the $74.95 price of the two disc set. The article in PDF format can also be obtained by contacting the office - it is not available direct from the store at this time but if you tell Mary you want the article by Ronnberg on colors she will ask you to pay $2.50 and we can email you a PDF copy. Be advised that your computer screen may not show the colors matching the printed colors in SN2. So unfortunately if you want the full text you will need the PDF article from the Office and a copy of Shop Notes 2 for the actual color plates - also from the office or store. The price of Shop Notes 2 is $35 - NRG members get a 20% discount saving $7. If one is interested in the research and text the PDF copy might be all you need. One quote from the article is "The specific colors must be treated as approximations -- randomly-chosen points, each within a range of shades to which a specific name was given" so while the PDF colors might not match the color chips in Shop Notes 2 exactly, even they are approximations. But if you are at all familiar with Mr. Ronnberg's work you know that his "approximation" is pretty darn close to right on. It's a matter of how accurate you think your screen reproduces colors. Kurt
-
The masking technique I mentioned will work with any combination of paints. Kurt
-
Chris Watton's new Vanguard Models is the newest sponsor of MSW. Welcome to MSW as a sponsor Chris! Kurt
- 2 replies
-
- 13
-
-
Have you seen the supercharged nitro Harley Davidson bikes run? They are absolutely scary!
-
They have also shortened the length for the Nitro cars to 1,000 feet from the old 1,320 due to the high speeds and running out of shut down space. The funny cars are running almost identical times and speeds to the top fuel dragsters today. Kurt
-
A tip to avoid the bleed under the tape with the second color - after you have the masking tape in place for the second color - in this case over the white, lightly spray the edge of the tape with some of the white paint. If there is any bleed under the tape it will be white and it will never bee seen. The addition of the light mist of white seals the edge of the tape to prevent any of the red bleeding under. Do not spray towards the white at the edge of the tape or you will get a build up. Just a mist and at close to 90 degrees. This should solve any bleed issues assuming the tape is tight to the surface. Hope this helps next time. Kurt
-
The hangers for the steam pipes are a neat detail that you have added. Kurt
- 133 replies
-
- 4
-
-
- chaperon
- model shipways
- (and 2 more)
-
adapt this idea for a small spray both?
kurtvd19 replied to Bob Blarney's topic in Modeling tools and Workshop Equipment
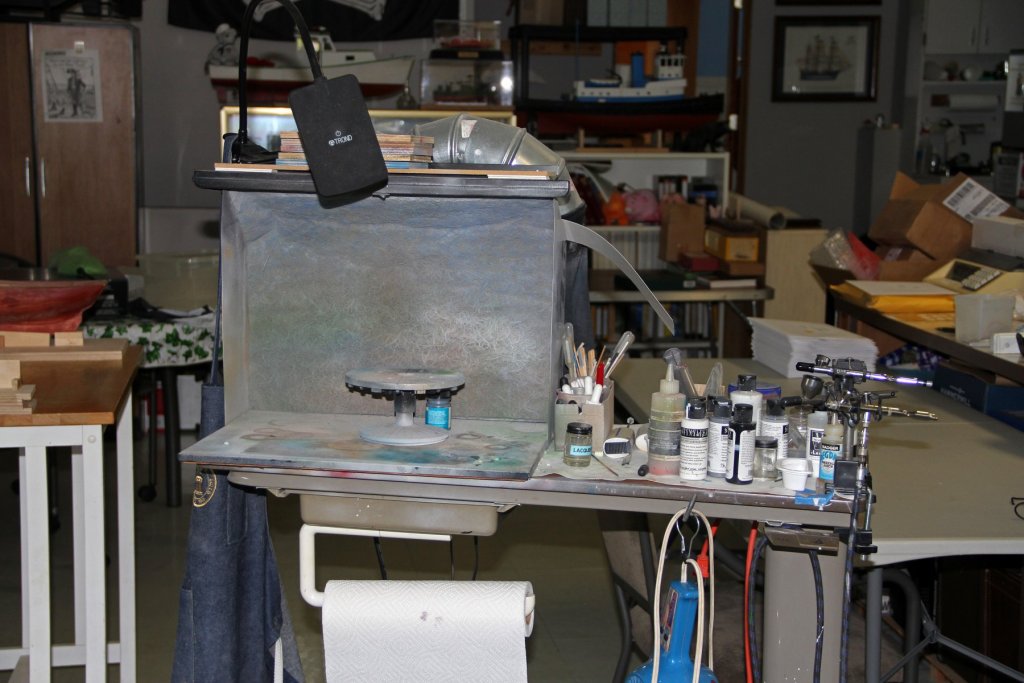
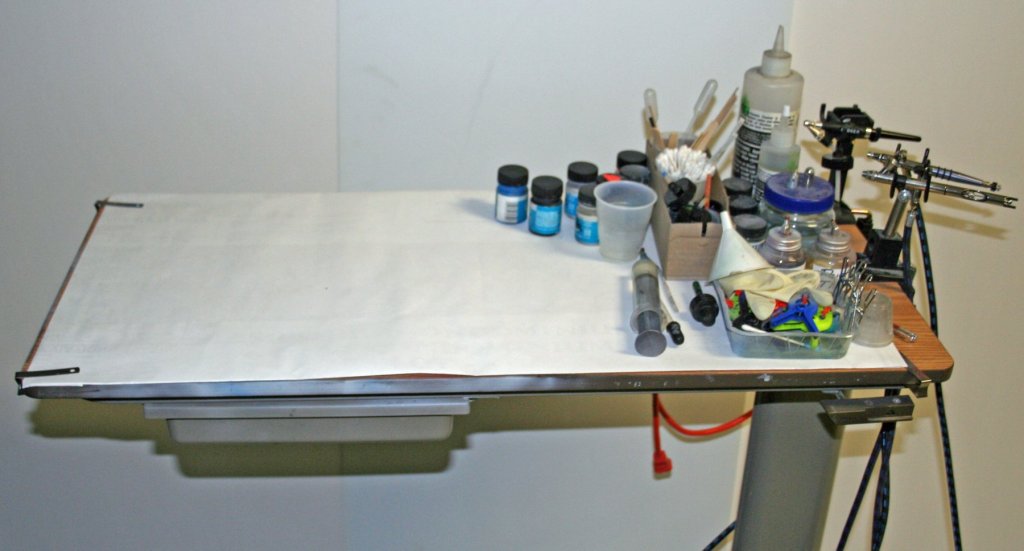
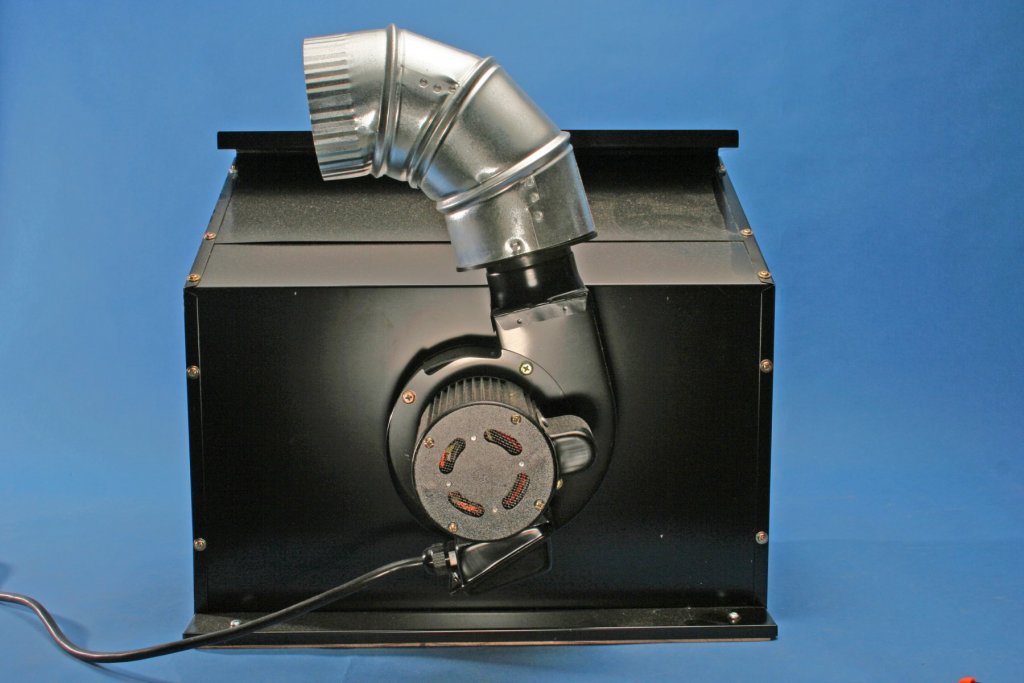
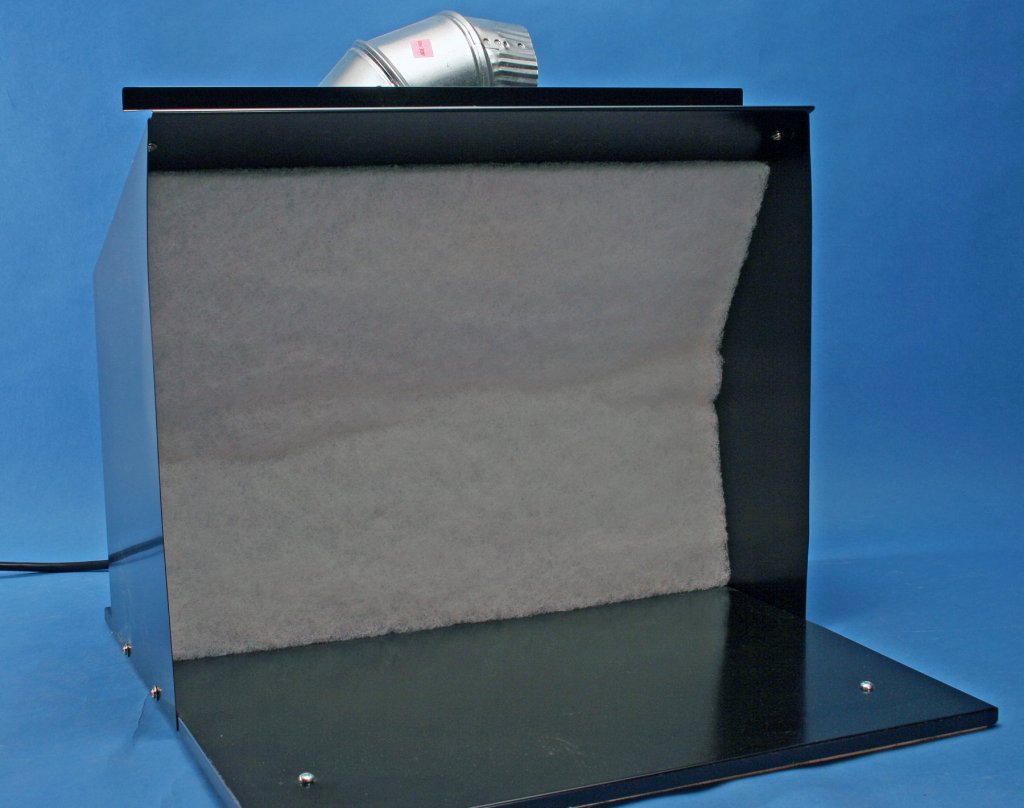
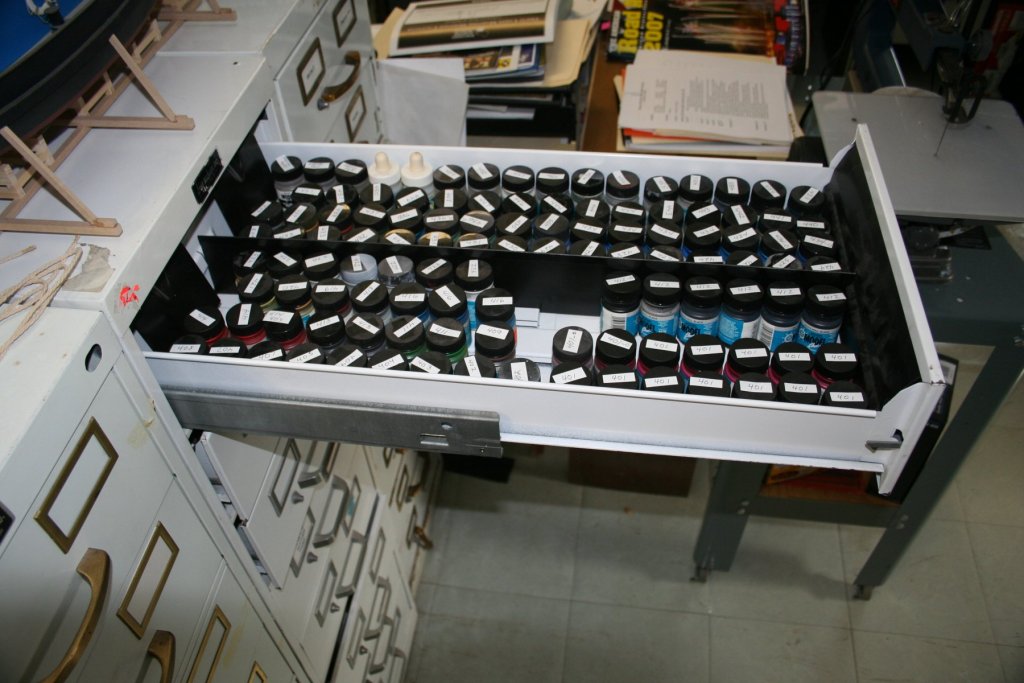
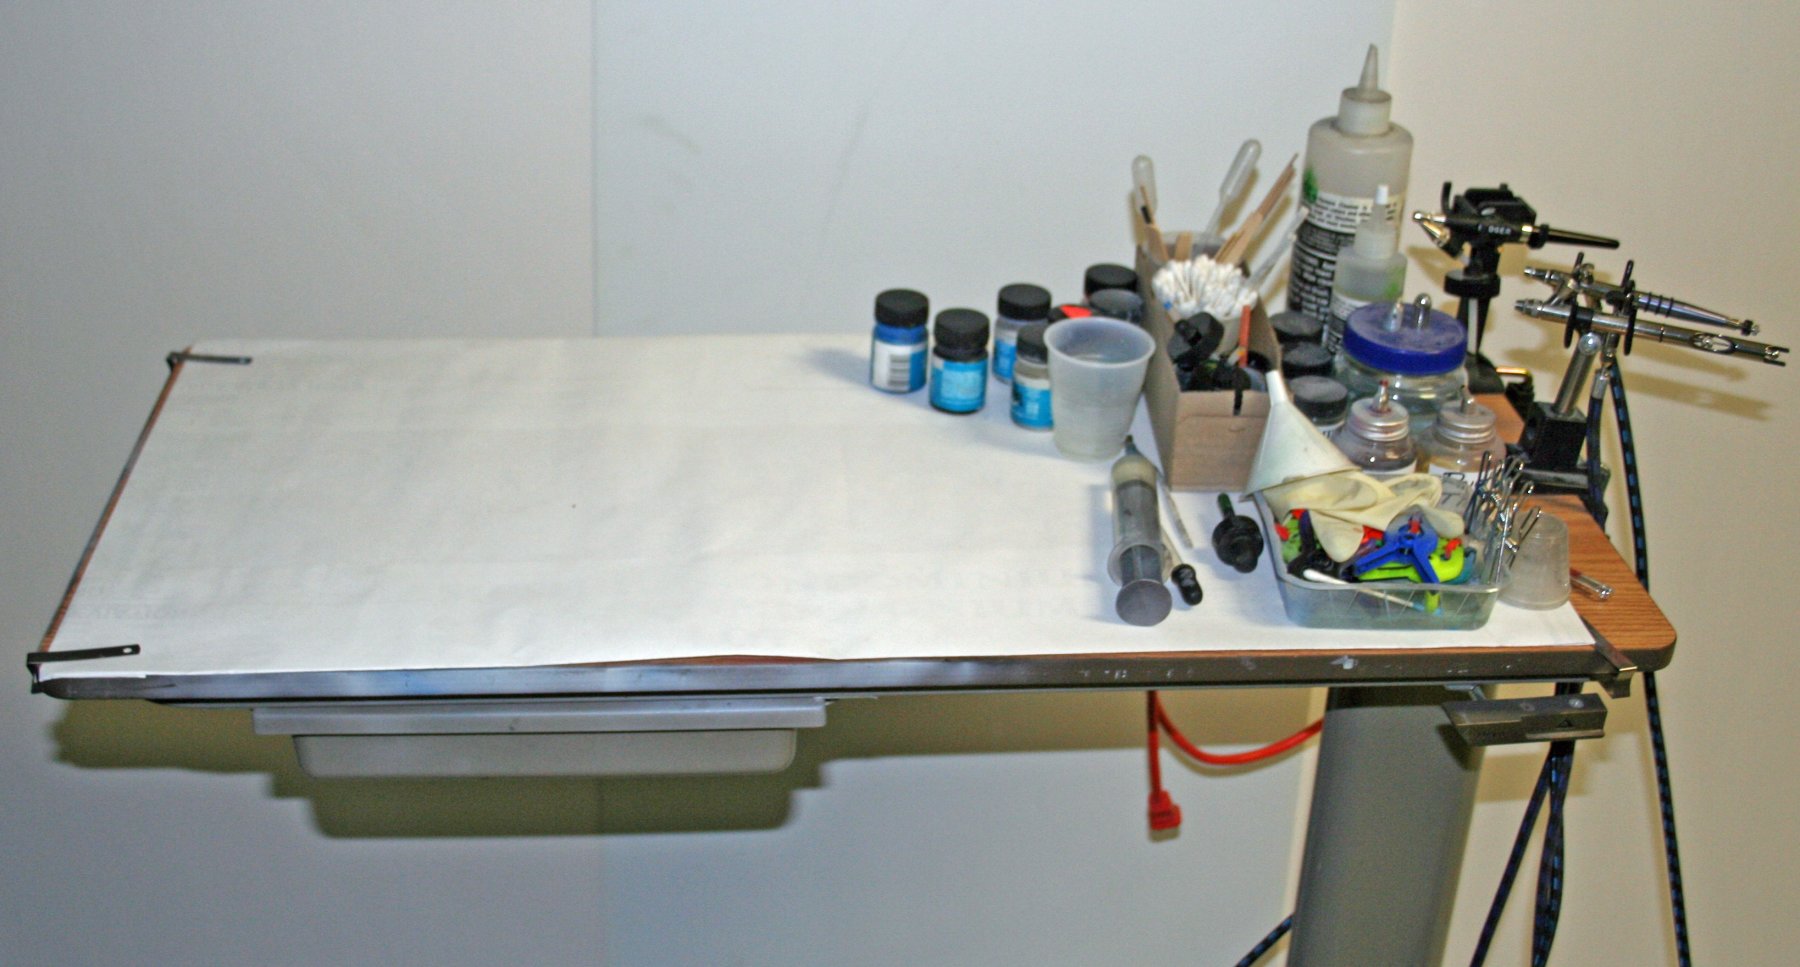
Some photos of my airbrush station and associated stuff. The spray booth - just out of the box. Badger sent this to me several years ago to test. I liked it and use it for all but larger hulls. Has the proper explosion proof motor and wiring. I added a nylon stocking to the exhaust duct that I added coming off the back that catches some fine particles that get past the filters. If I use it for solvent based paints I add a piece of duct and move it over to exhaust out the window. But it's not an issue 90+% of the time as I use acrylics almost exclusively. I don't think Badger ever sold these units but there are similar units on the market. If you only use acrylics a spray booth is a DIY project - but, in my opinion, if you use solvent based paints unless you have the knowledge and access to the specialized class of electrical components to use with flammable liquids it's best to purchase a properly built booth. The photo below shows the booth after a lot of use. My set up is contained on a hospital patient table that adjusts for height (I used to use it for rigging until I vowed to never rig any model with more than a single mast). The spray booth sits on top and the compressor sits on top of the base in a small tray I made. The black rectangle on the flex arm is a 3 level LED light that has greatly increased the lighting for my set up. As it's outside the booth there isn't any concern about paint over-spray getting on the lens. The filter needs to be replaced soon. I have two filters with the front one being discarded when dirty and the back one then becomes the front one with a new filter piece behind it. The arrangement of Airbrush holders and accessory items w/o the spray booth in place. My airbrushes now all have quick disconnect fittings so I have eliminated multiple hoses and having to bend down and change the hoses (with quick disconnects) at the regulator. I keep my paints in a file cabinet I got when a pharmacy shut down. The drawers are sized for prescription forms so the paint bottles are not lost in a deep drawer. The drawer pulled out and the two below it hold all of my paints. The nice thing about having the set up on wheels is I can put it into an alcove when not being used freeing up floor space. Kurt