MORE HANDBOOKS ARE ON THEIR WAY! We will let you know when they get here.
×


Jeff-E
-
Posts
699 -
Joined
-
Last visited
Content Type
Profiles
Forums
Gallery
Events
Everything posted by Jeff-E
-
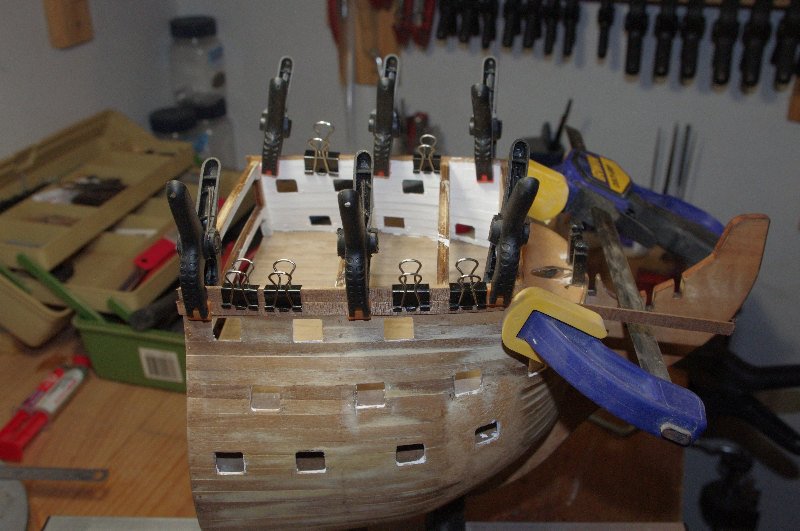
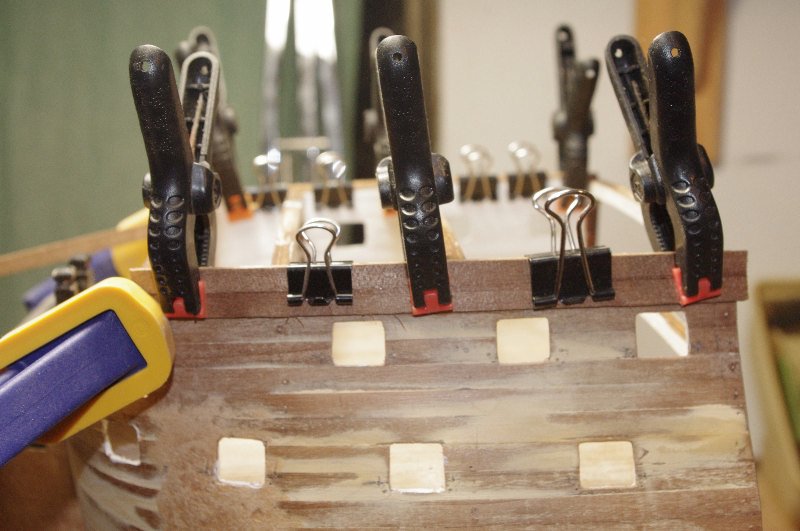
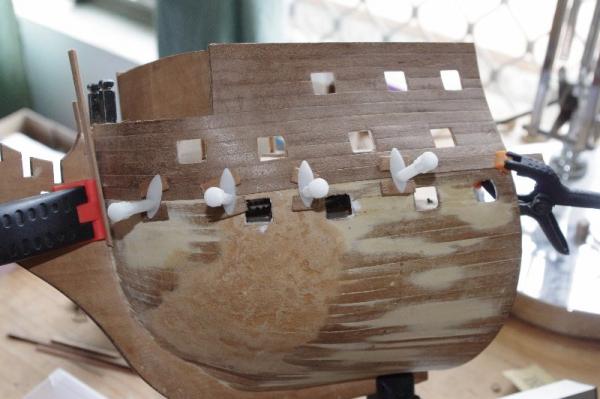
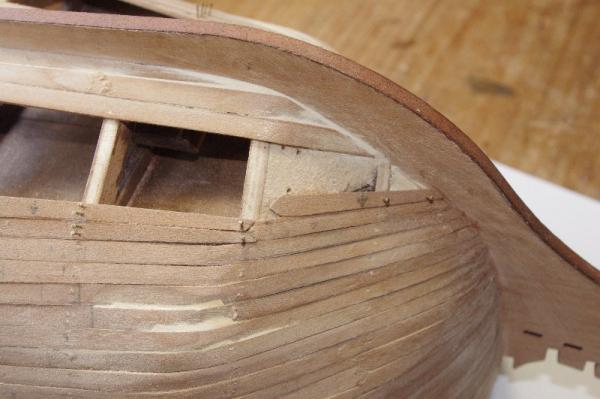
Because the gunports had already been cut out the next plank could be cut into sections and fitted in between each port, eliminating the need to soak it. From this plank down I started to taper each plank so it would not ride up over the one above it As the planking progesses down the hull past the Middle gun deck I no longer could use spring clamps to hold the the planks flat agaist the hull. So I had to resort to planking screws, which I had got from Modellers Shipyard a few years ago. As I did not want big holes on the inside of the hull I made up some spacers by gluing two pieces of 1.5mm offcut planks together this allowed the scew to bite into the first planking without going through it I must admit that I was a bit aprehensive at using 1mm strips for the second layer of planking but I think that the use of thicker planks for the second layer is better as they tend to hold their shape and can be adjusted to fit more easily than the thinner 0.5mm strips, this is just my humble opinion however So this is where I am up to as of today, the log is up to date. The updates may be a bit slower from here on in so please be patient with me. At my present rate I hope to have the sescond plaking complete in the next few weeks


-
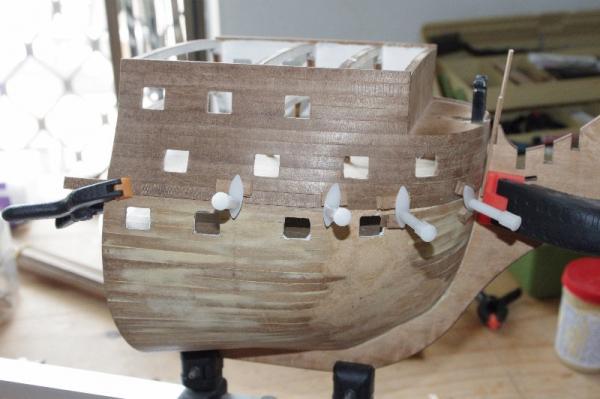
Hi All, Now it is time to begin the second layer of planking. The supplied timber for this is 1mm x 6mm walnut this will be the first time I have used 1mm thick planks for the second layer, my two other models used 0.5mm planks for the second layer, so we will see how it goes. The first five planks were fairly straight forward to lay and I filed out the gunports to size as I went. The next two planks were then fitted. I found that the planks bent to shape fairly easily with my plank nipper. They were both soaked, as with the first layer planks, and then clamped into postion to dry, any small adjustments were then made with fine sand paper and they were then glued into place. Both of these planks were untapered


-
Hi Richard, Thankyou very much. She is progressing slowly and I'm fairly happy with the progress so far
-
Hi Mobbsie, Well done, your ships boats look fantastic and the oars look very realistic. I look forward to seeing them lashed to the Aggie's deck
- 1,279 replies
-
- 1
-

-
- agamemnon
- caldercraft
- (and 1 more)
-
Hi Slog, Very nice work on the fish davit. It seems surprising to me that Caldercraft went to the trouble of suppling a very nice CNC cut part for the davit but did not supply a sheave to go into it
-
Hi John, Think I'll pull up a seat too. Looks like it is going to be an interesting project and a bit of history from my part of the country that I didn't know about. Looking forward to the start of your build
-
Hi Anthony, I like the new hinges for your shot lockers . The ryders came out really well, you must be pleased with them, can't wait ot see them fixed in position
-
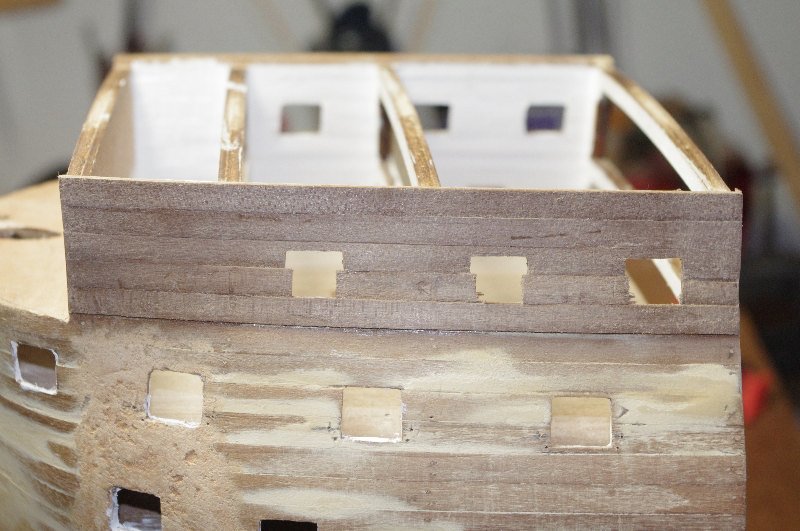
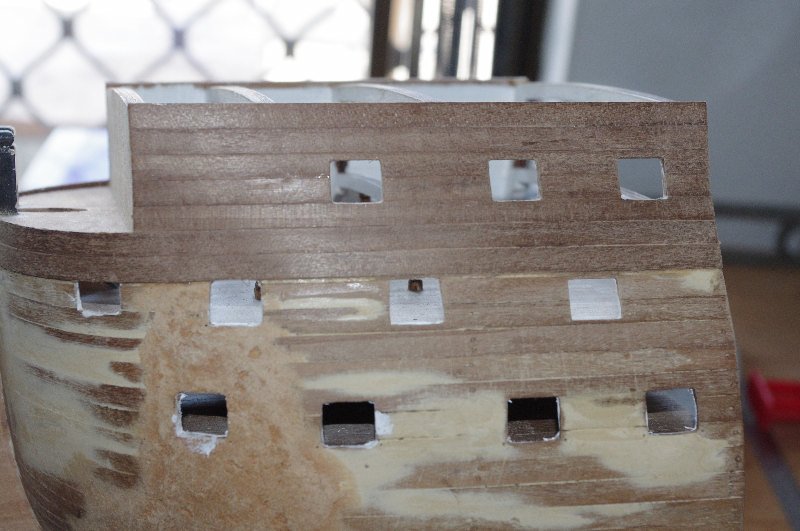
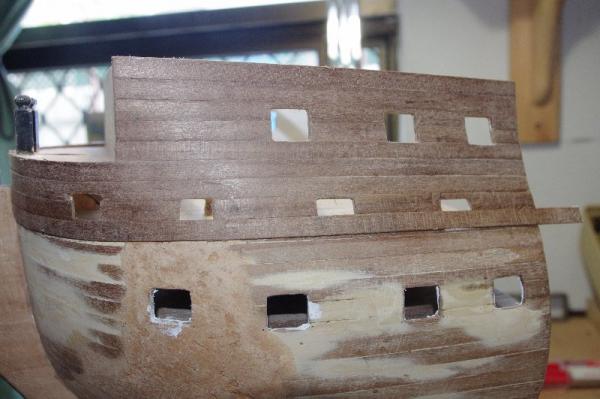
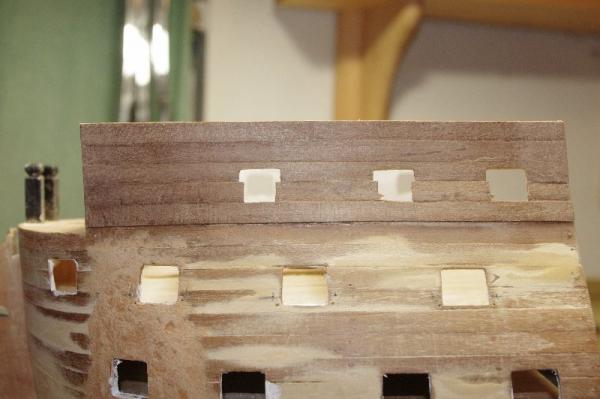
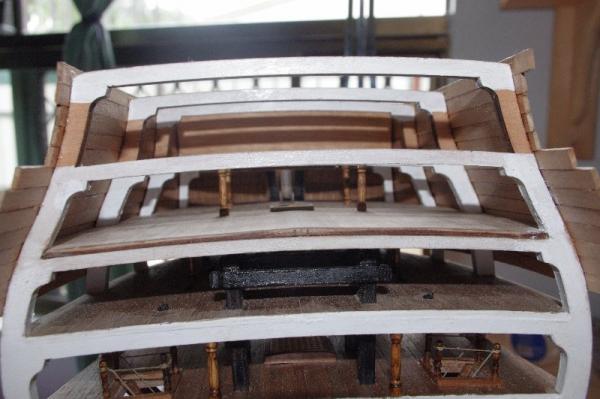
I then painted the inner walls white. Please note that the Upper gun deck walls will be painted yellow ochre after the false deck has been fitted
-
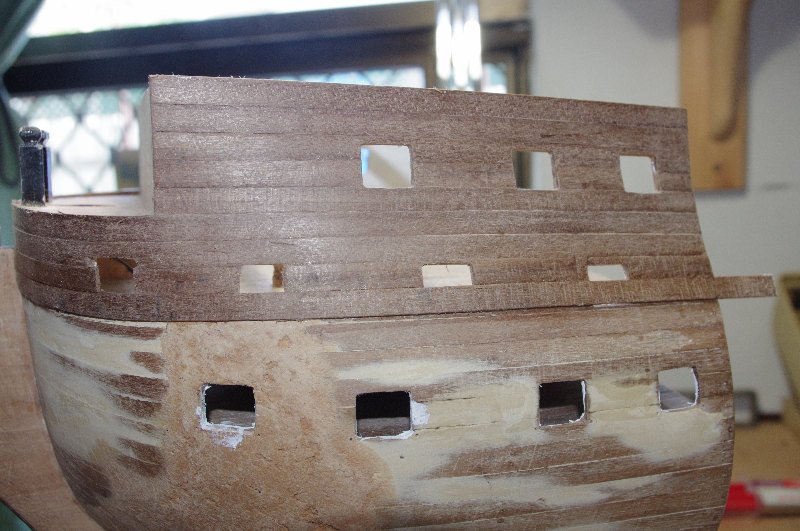
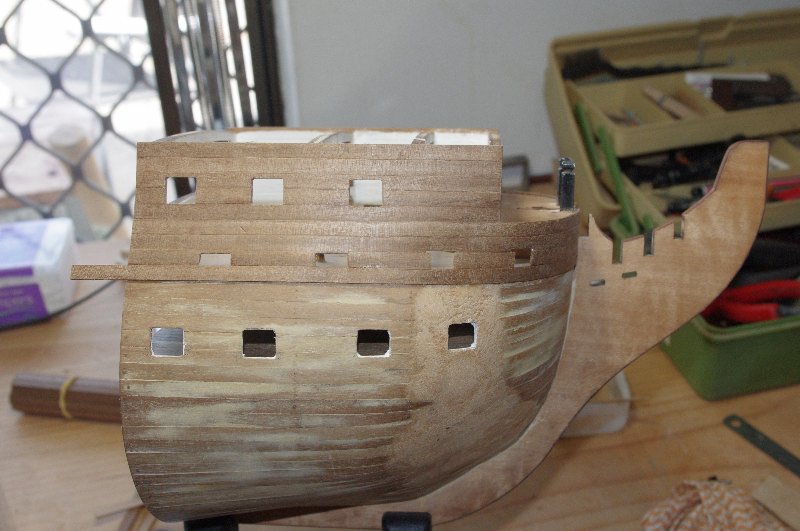
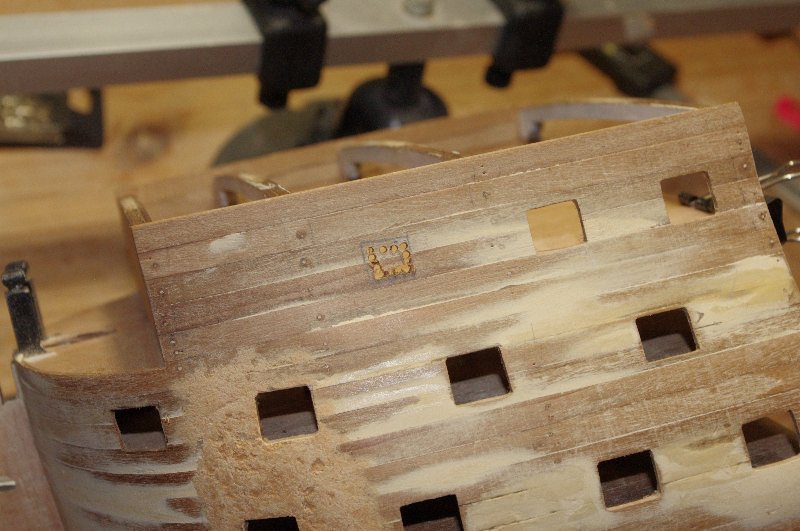
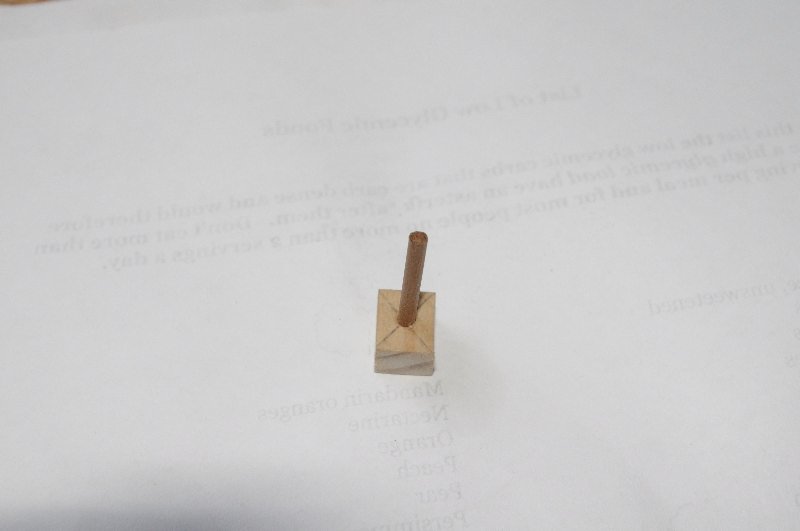
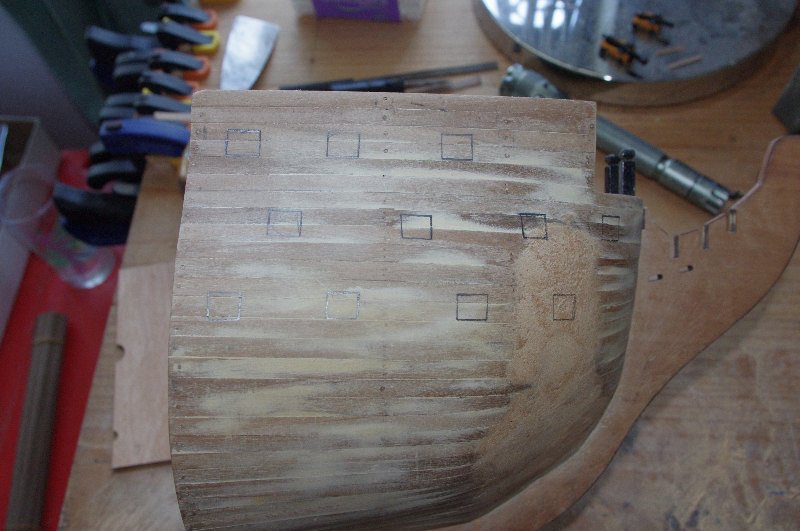
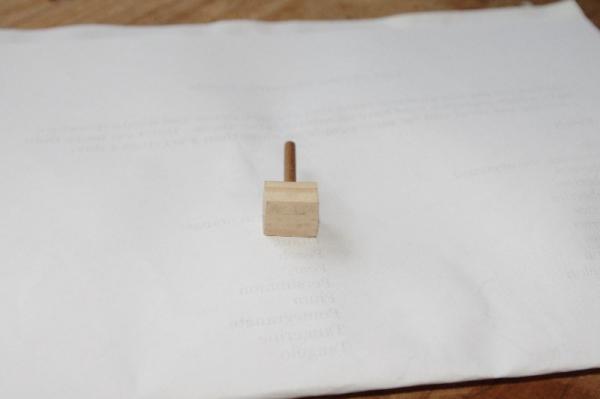
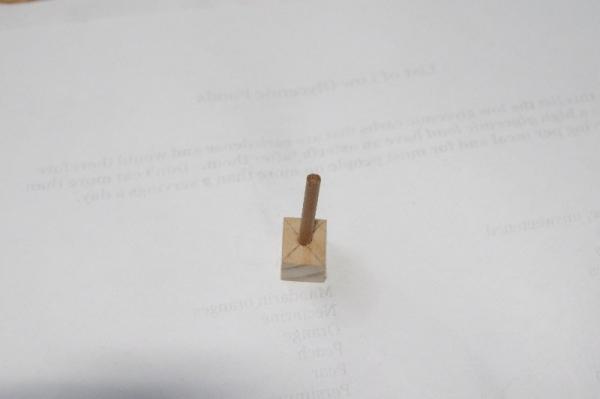
Some photos of all the gunports cut out To get all the holes for the ring bolts for the breeching rope and side tackle in the same spot on each gun I made up the supplied tool, that will be used as a template for drilling the port lid opening ropes, and drilled four extra holes near the bottom of it. So when it is inserted into each port all the hole will be drilled in the same spot.
-
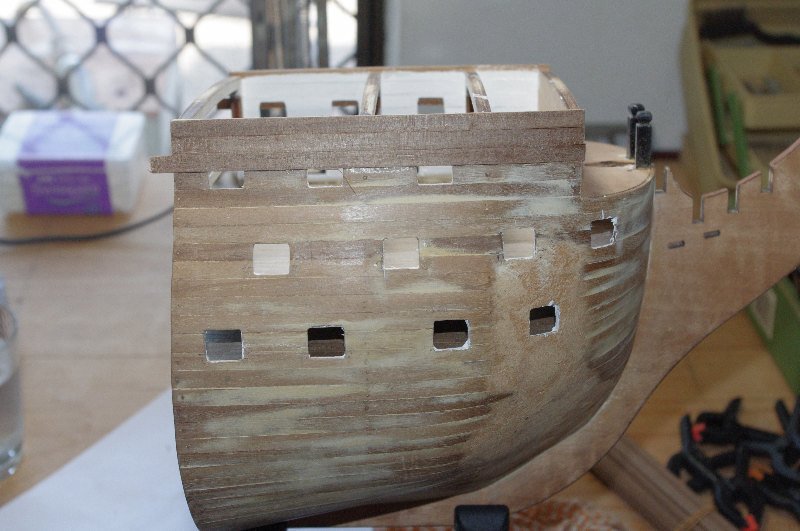
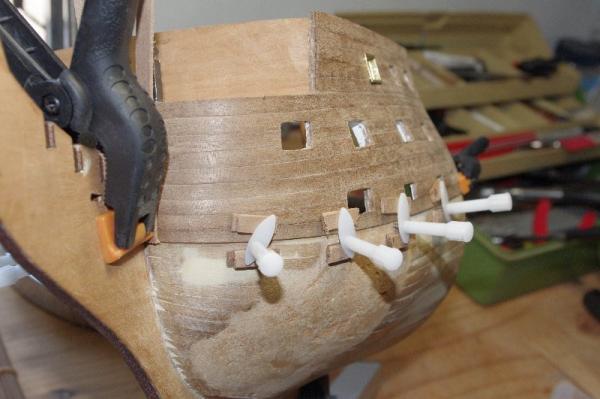
Hi All, After they were maked out and I was happy with the positon of them the gunports were cut out. This was done as per the instructions by drilling a series of small holes inside the marked lines and then carefully cutting out that section and finally finishing it to size with a file

-
Hi Matthew, Looks like your of to a good start, the deck and inner bulwark planking is very neatly done . That first plank looks fairly thick in your last photo. What size is it? Is this kit double planked?
-
Hi Fredrica, She is coming along fine Excellent job on your first planking, looks very neatly done
-
Hi Matthew and thank you for your kind comments. Yes you did see sinkers but unfortunately they haven't been used for their designed purpose for a while. The weather is starting to warm up now the build up is here so I hope to go fishing in the coming weeks
-
Thank you very much, Anthony
-
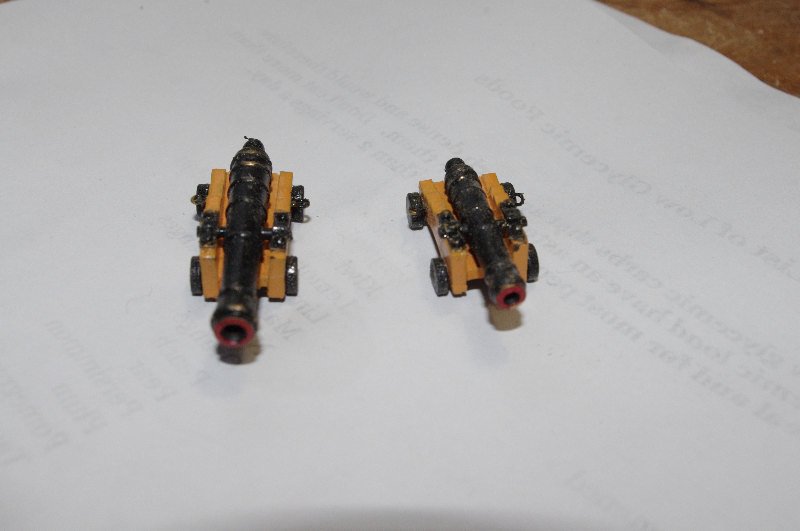
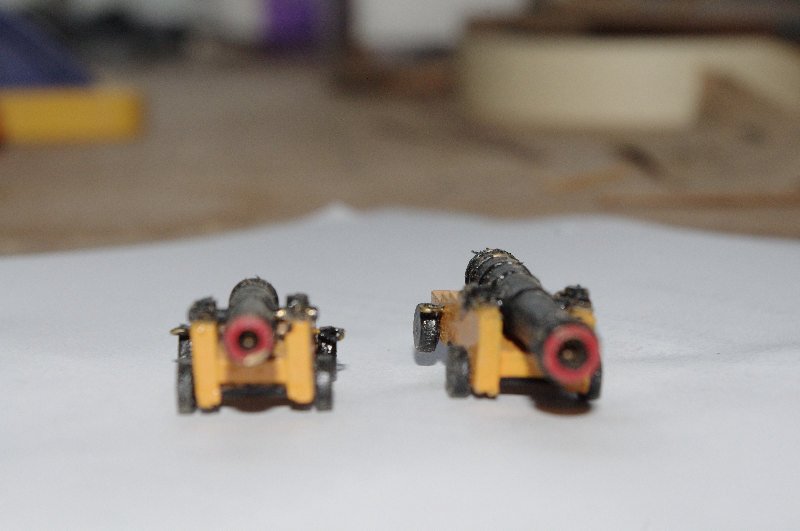
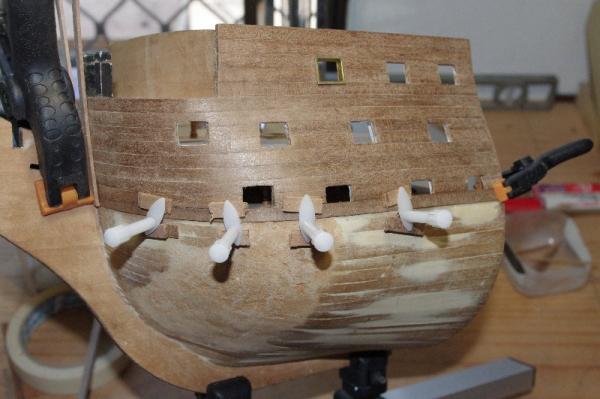
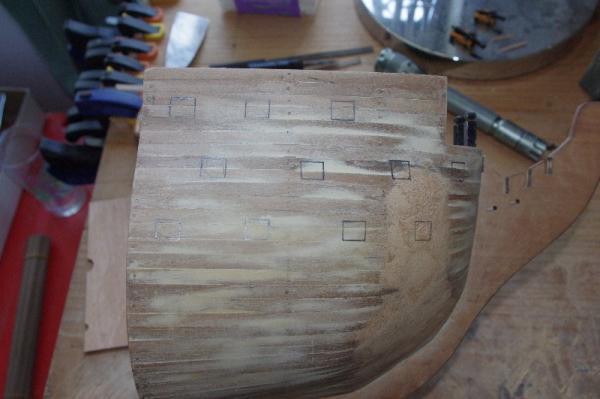
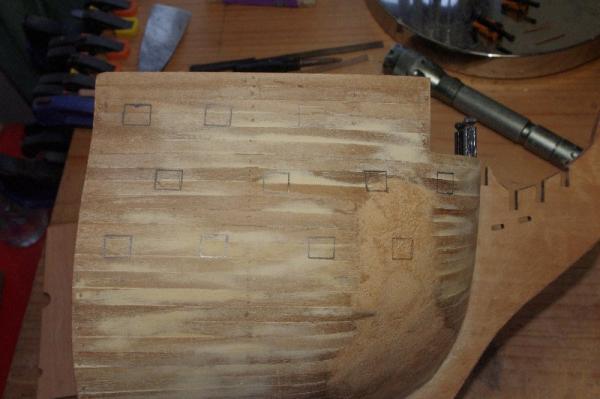
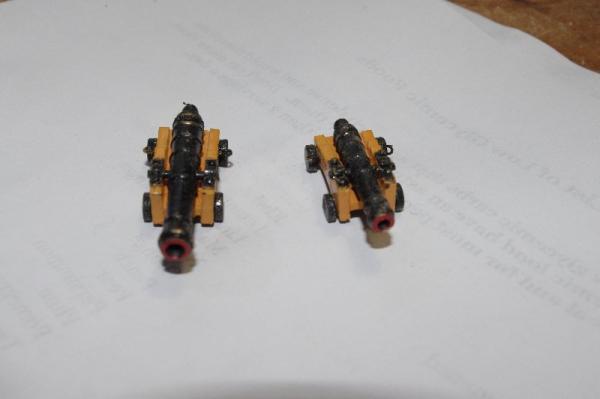
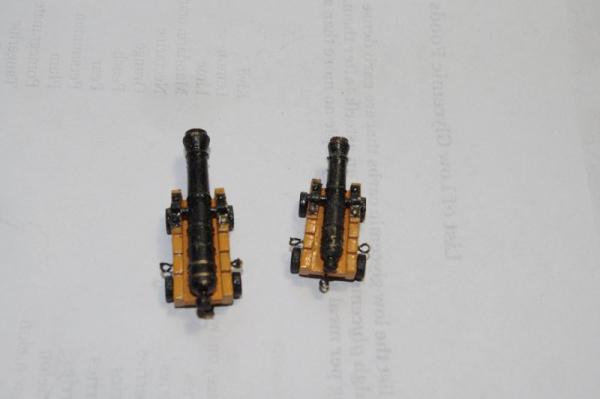
Hi All, After filling and sanding the hull to get a nice smooth surface for the second layer of planks my next job was to mark out and cut the gunports. The instructions tell you to do this after the second layer of planks has been completed but I think that if I cut them now any small errors or minor damage to the planks while cutting them out can be covered by the second layer. I made up a small tool to ensure the ports are all the same size. I got the sizes from the brass inserts that are to be glued into the ports I also made up one of each of the cannons so I could get the height to the lower sill from the deck correct. Unfortunately the kit only supplies two sizes of cannon so the larger 32 pounder gun will go on the lower and middle gun decks and the smaller 12 pounder gun will go on the upper gun deck The next pics are of the gunports marked out . I thought I had a picture with the gunport pattern attached to the hull but I can't find it, probably deleted it


-
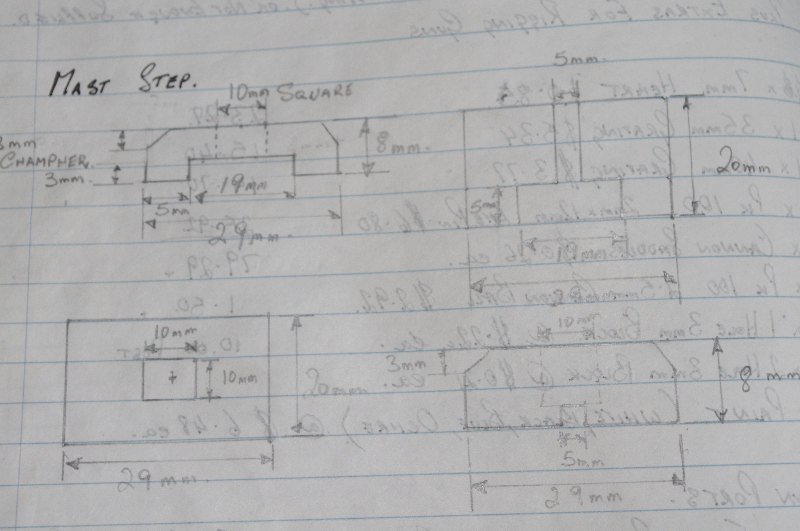
Hi Kester and Mobbsie, Thankyou both for your kind words Kester, you are right the only part of mast step that will be visible is the back end of it with a torch
-
Hi Richard, She's coming along well, are the filler blocks part of the kit or did you add them? Can't wait to see some more planks on her. Are you going to plank her from the keel up?
-
Hi Matthew, Very nice looking kit I'm looking forward to your build.
-
Congatulations Mathew on an excllent build , I blinked and I nearly missed it you were so quick, you should be very proud of her. I look forward to your next build of The San Marcos, I am interested in building a Spanish Galleon myself one day I will have to keep a close watch so I don't miss it !!
-
Hi Ollie, This looks like it will be a very interesting build, I like what you are going to do with the interior. On A small Cutter such as Mermaid, I think that most companionway openings were rectagular as they were easy to cut and could be supported more easily by the adjacent frames. The access ladder would probably be set at an acute angle of say 70 -75 degees. Hope this helps and I will follow your build with interest
- 803 replies
-
- 3
-
-
- colonial cutter
- modellers shipyard
- (and 1 more)
-
Hi Slog, Thank you. Yes I will be painting the hull in the Trafalgur colours and coppering it
-
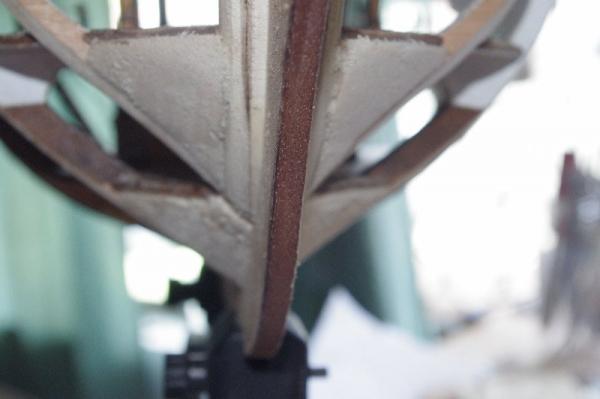
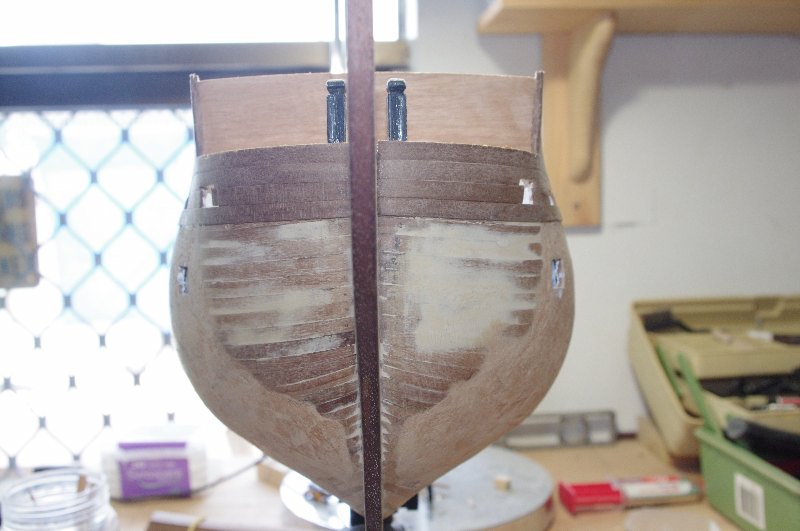
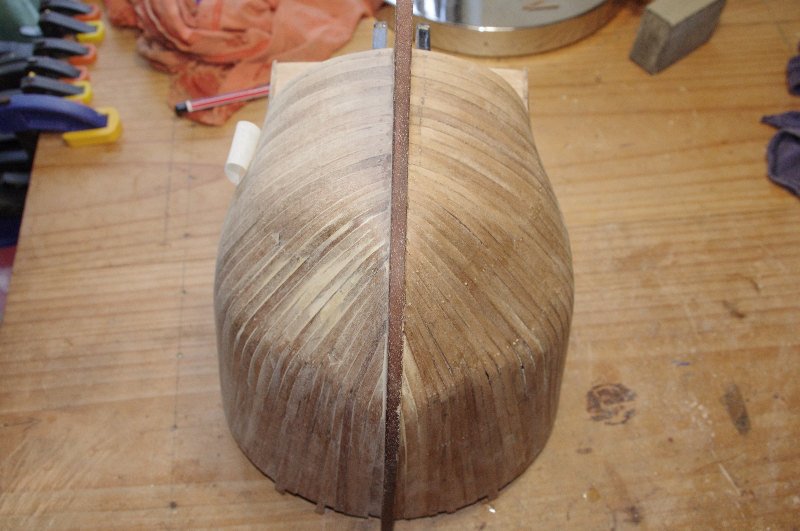
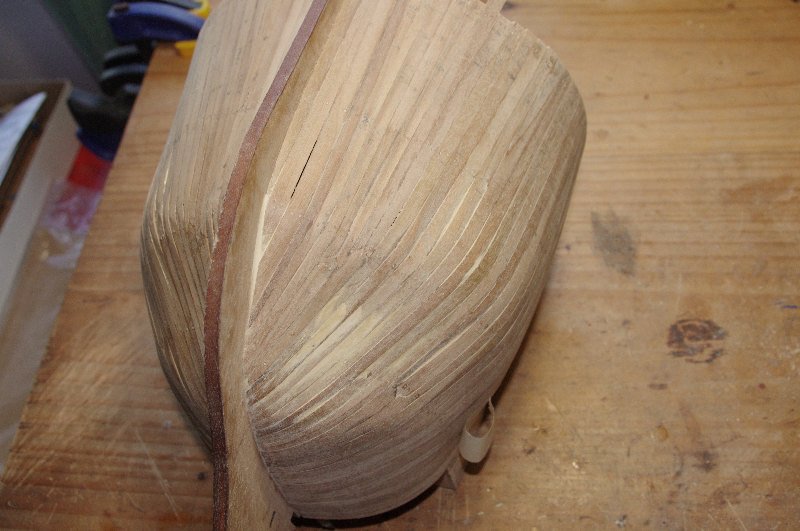
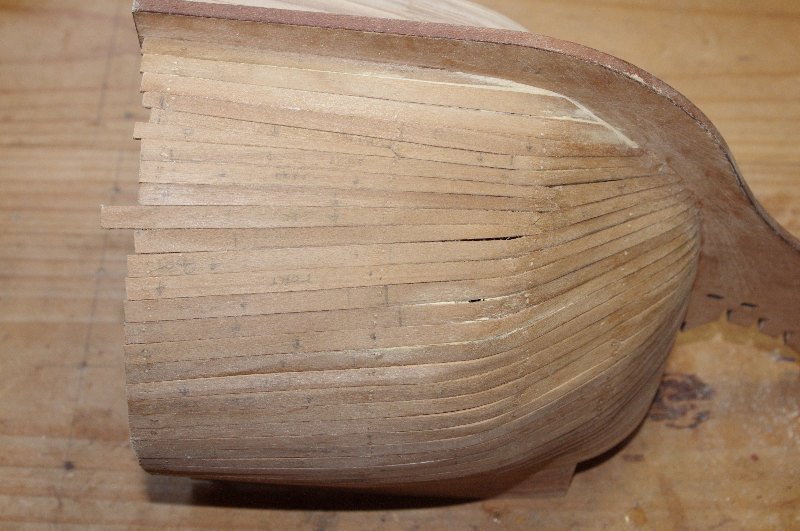
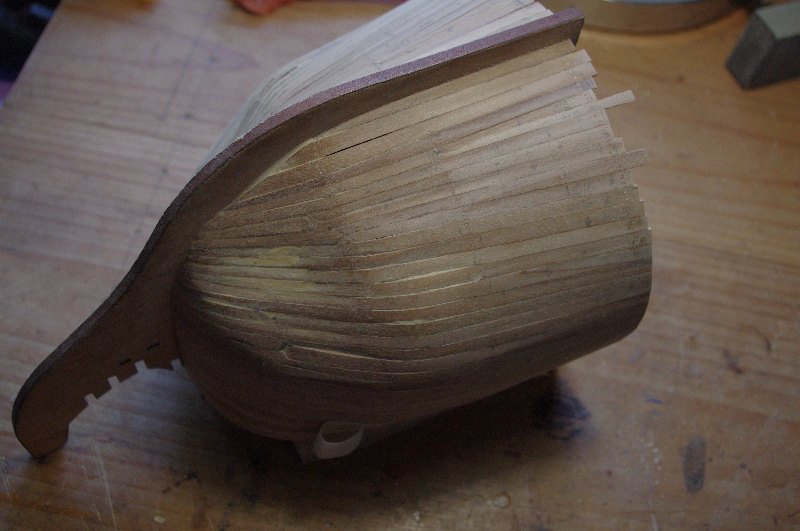
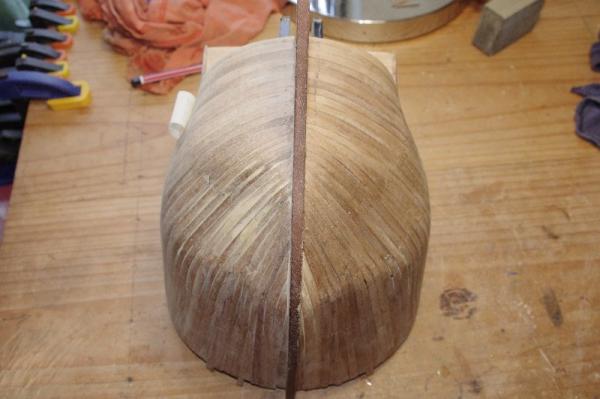
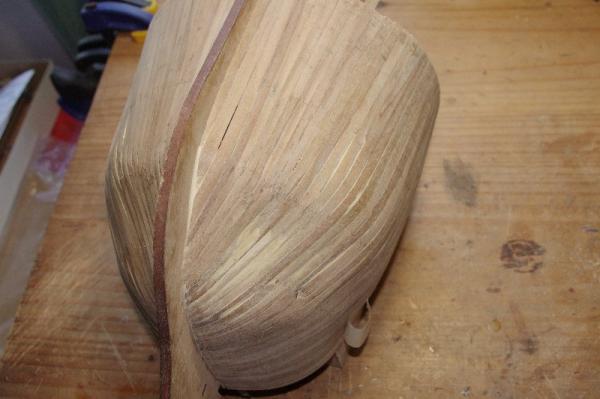
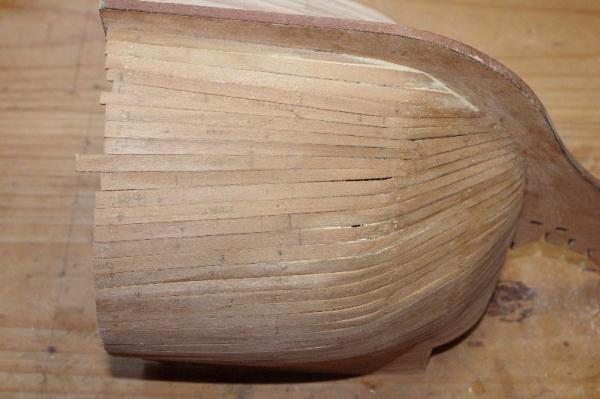
The first planking is finished I am fairly happy with how it turned out however some filler will be needed to fill some small gaps between the planks and to fill the dimples near the lower part of the bow to give it a nice round shape

-
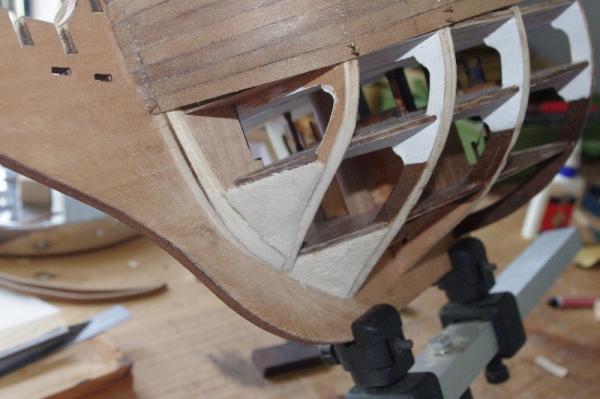
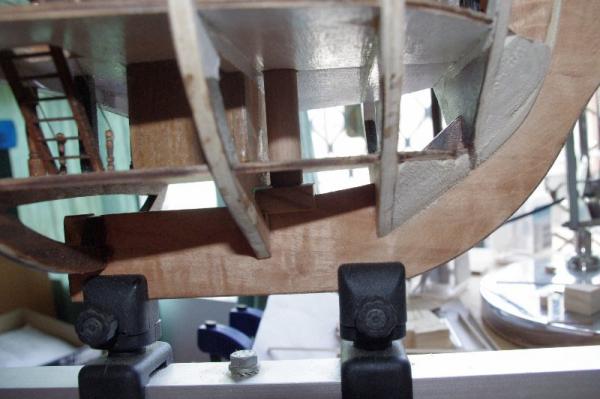
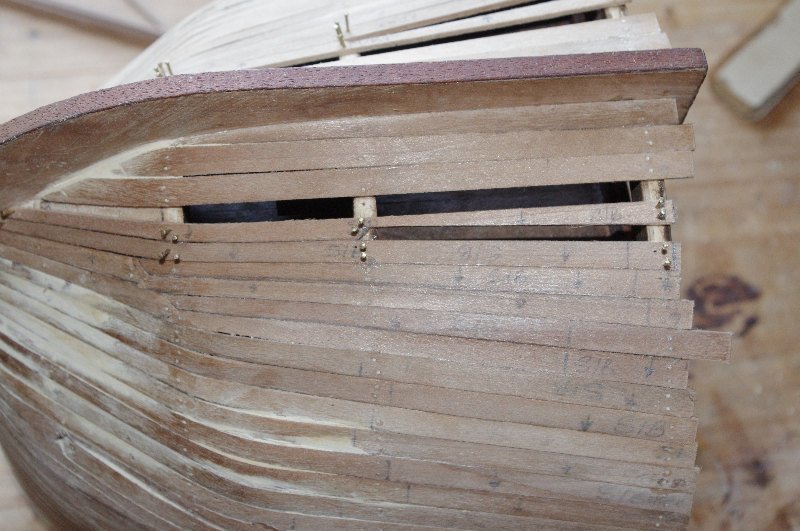
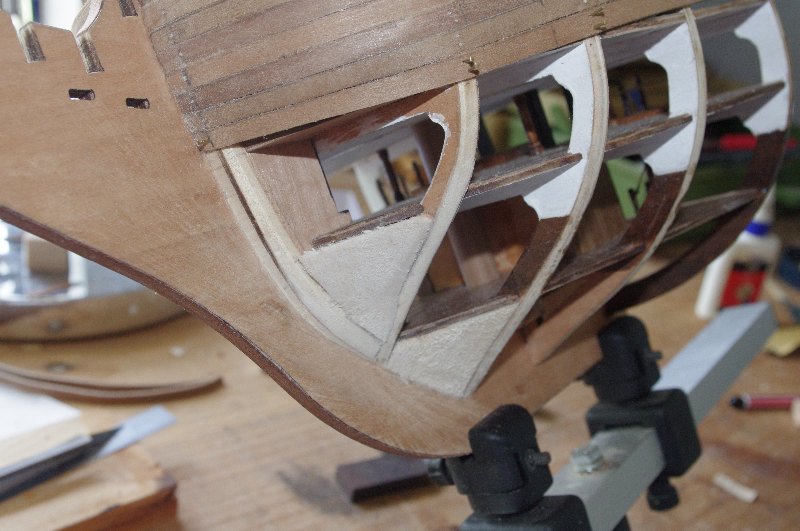
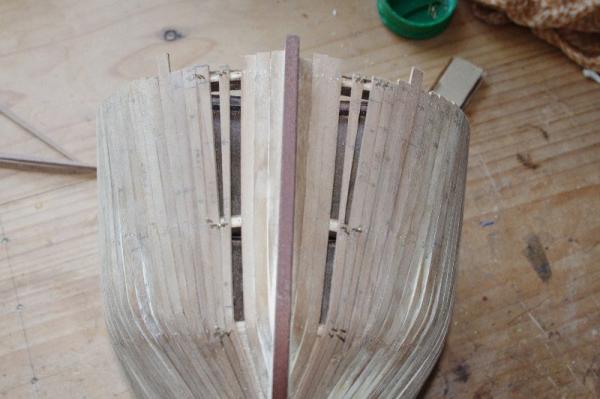
The hull planking was then continued down to the keel. The first pic shows of an inside view of the hull.

-
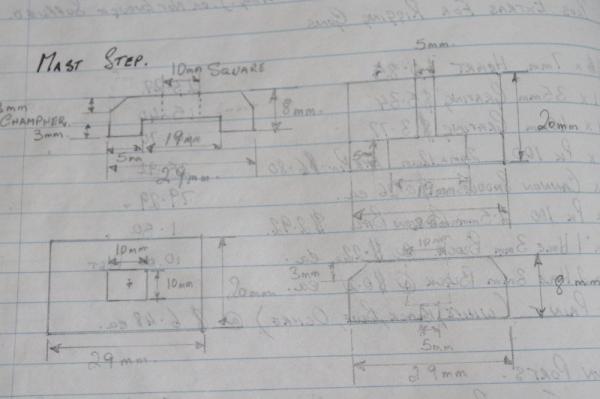
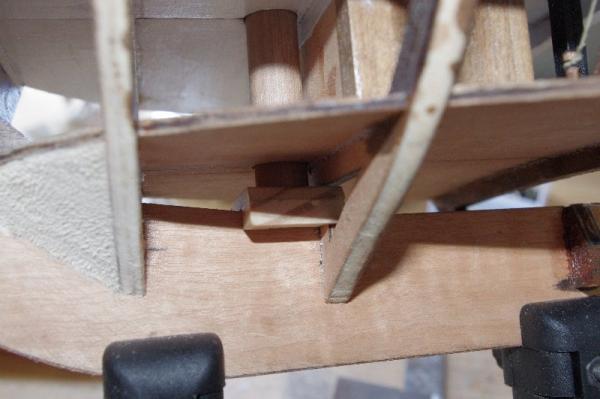
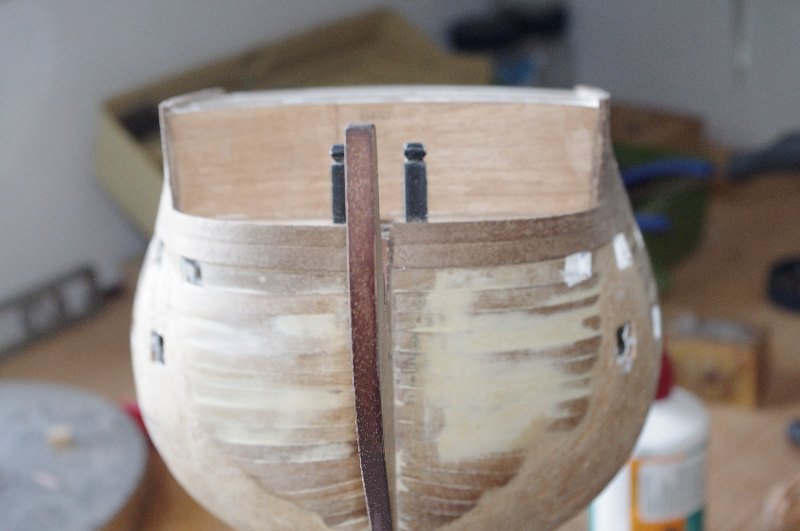
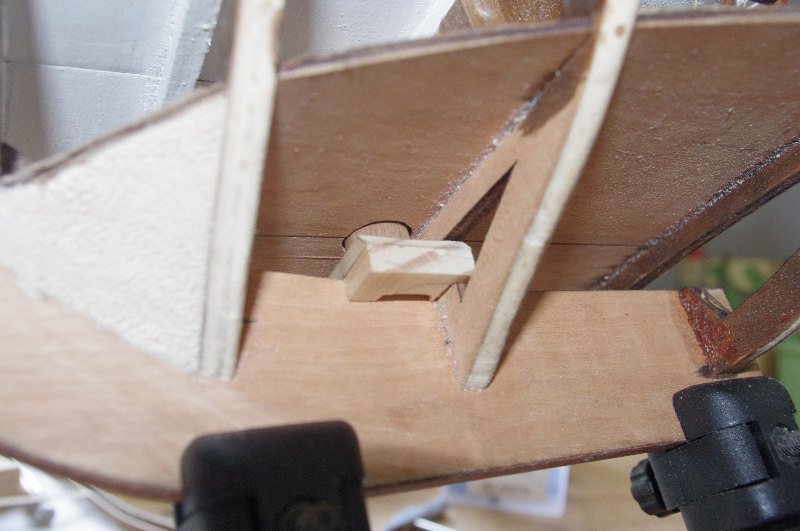
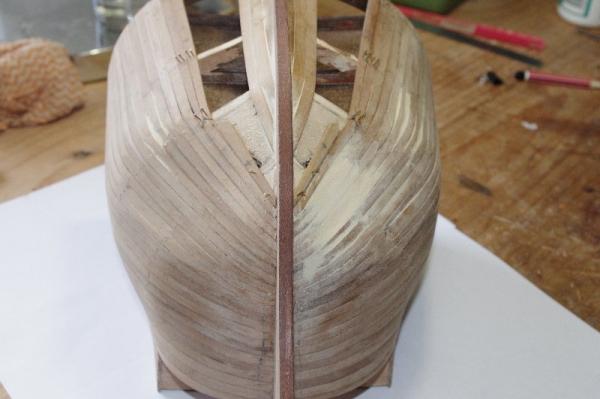
Hi All, A quick footnote on the planking that I failed to mention in my last update, I did record how much and over what length each plank was tapered to make the second planking easier and to correct any mistakes that might and probably will be made Before I planked any further dow the hull I decided I could add a couple of filler blocks at the bottom of the hull to try and keep a round shape to it. These will not be seen as they are in front of the first bulkhead. I also had been toying with the idea of adding a mast step for the fore mast and decided to make one. It will be fitted over the keel and the third frame. Unfortunately I can not find a photo of it before it was fitted but I do have a pic of the drawing I made it from. Sorry if it's a bit on the light side and the mast step fitted to the keel.