Check out our new MSW Sponsor Innocraftsman
×

Lt. Biggles
-
Posts
342 -
Joined
-
Last visited
Content Type
Profiles
Forums
Gallery
Events
Everything posted by Lt. Biggles
-
 That is extremely helpful thanks! No idea where you all get this info from!! But appreciate it a lot! This mixed with the plans RGL sent I’ll be able to give it a good go. Will use the spray primer option and give it a few coats. Do we know what refit they thickened the black water line? im going for a 1943 time build so just before getting damaged by the guided bomb. Which means the 6” broadside guns were still on her and the stern lower port holes are covered. Just putting together all the things to change and do. I’ll not go too accurate but I’ll definitely change what I can and know about.
 -
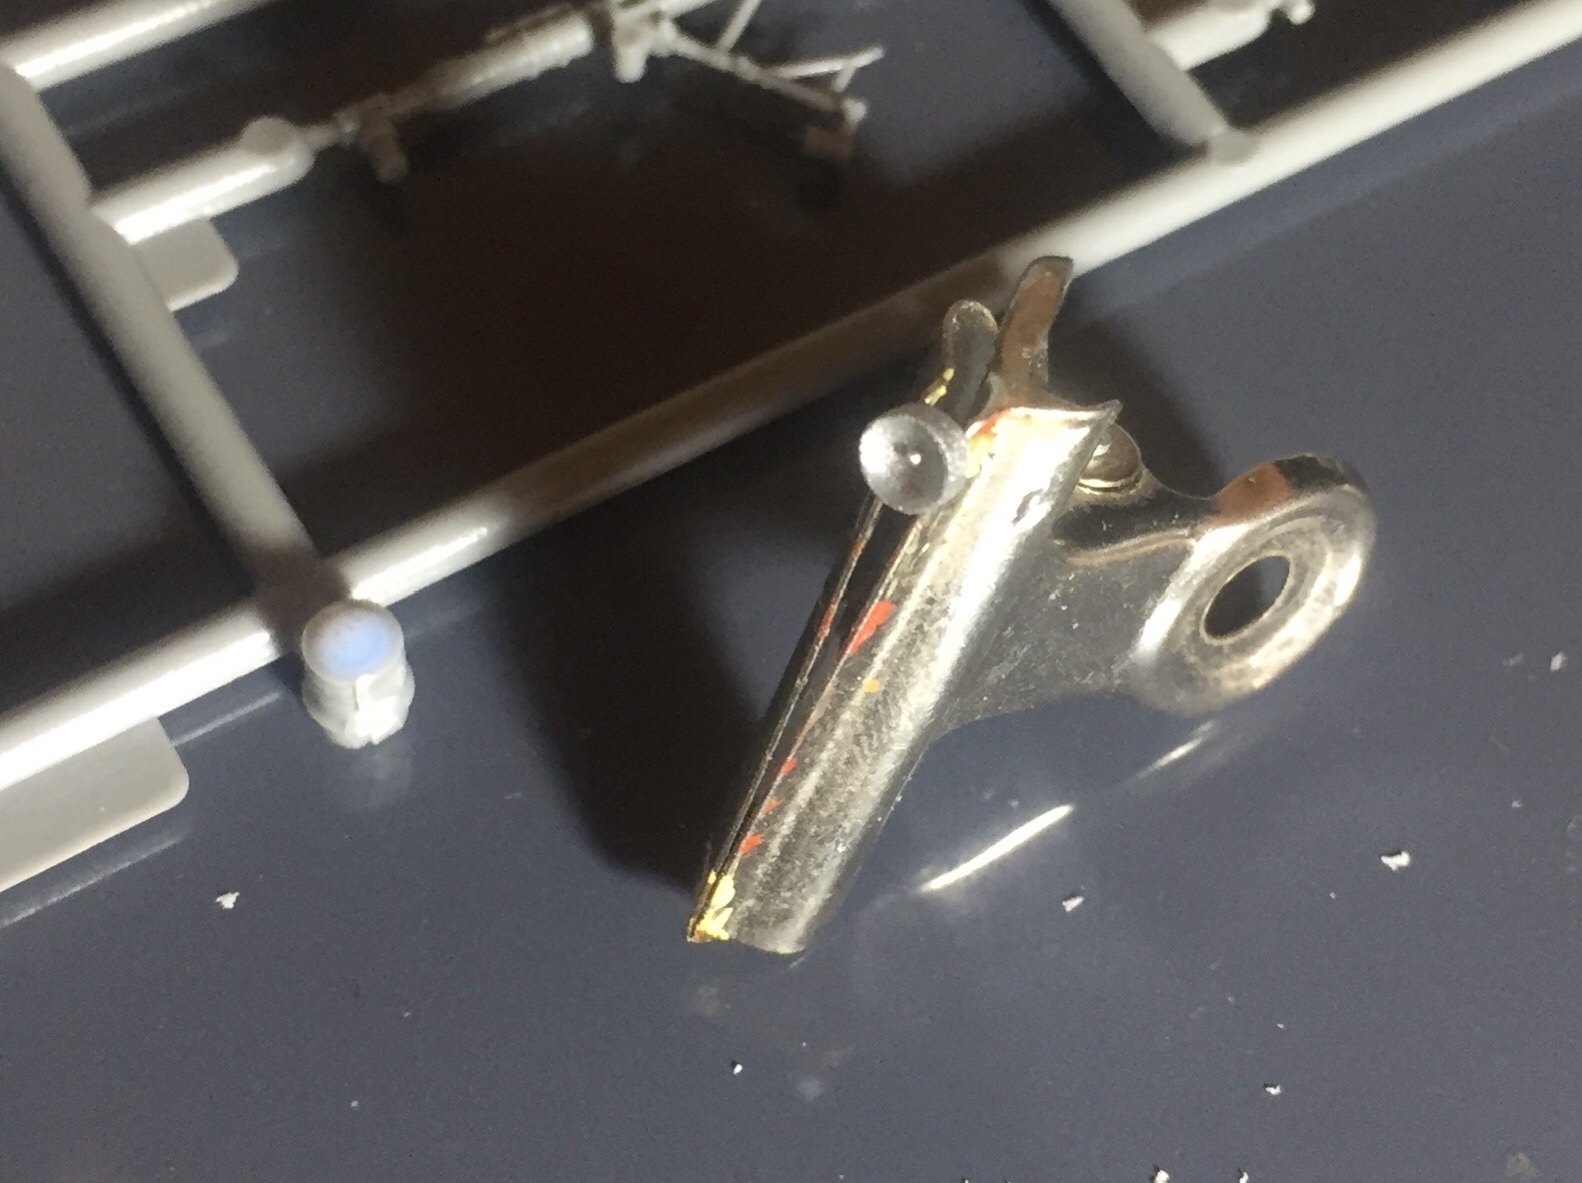
Haha I’ll try avoid madness as best as I can! ive got some 5mm tamiya tape so that should do the trick well. one last thing... I’m happy scribing panel lines or shading them in but the strips of armour plate. They are different all together aren’t they? The strips of paper or coats of primer? If so are they just a 6ft strip of armour then a 6ft gap followed by 6ft of armour all the way? Or am I just super confused 🤣
-
Thanks heaps for those! That’s a whole lot of detail!! So my nice idea of not having to do panel lines has be totally shattered haha! I might get a set of PDF plans from morskie and do the hull to the best level I can, might take a week or two to be emailed through if I remember right from the POW plans but they were quite helpful. Again thanks for the details!
-
I can try with primer but my searches for plate armour details or plans has turned up nothing except other build logs. Do I just copy roughly what others do or is there a place that has all the plans to copy? I can’t even see the plating on photographs.
-
I’ve got your build log bookmarked so one button and I’m there! It’s got some good info! if printer paper is too thick would you think normal lined paper might work? Is the plating effect noticeable enough to add to the model? Also looks like I’ll need to fill in the rear lower portholes too.
-
Sounds like a lot of work! What did you use to work out the shape and size and thickness of the armour plates? Any ideas on a better way to reproduce them other than paper? At this scale they must be pretty thin! ive been looking at the kit and will try a different approach than my last one. Am thinking I’ll join the hull and glue on the decks with them slightly sunk in. Then paint the whole hull and deck furniture, once complete lay on the wooden deck. Any thoughts on that not being a good idea? If I line up the camo well then later when superstructure is complete can carry on with the camo pattern.
-
Ah good info! Thanks! Very useful! Especially knowing that the lower guns were taken off and the position of the boot line. Was hoping it didn’t reach high enough to be on the sloping part of the hull as that would be fun to fade but alas my hopes are dashed haha! Info like this is often more helpful than the kits instructions. The hull has no panel lines so not sure if I’ll add them. Did you scribe them on? I’ve a feeling I’ll add them now
-
Nice to have your company! Welcome mate, once you have done a ship with Photo etch it’s impossible to do one without... in my humble opinion! hey, any info and drawings you have will be great thanks! I’ve not got anything. Sounds like you have a lot of info there!! 😁
-
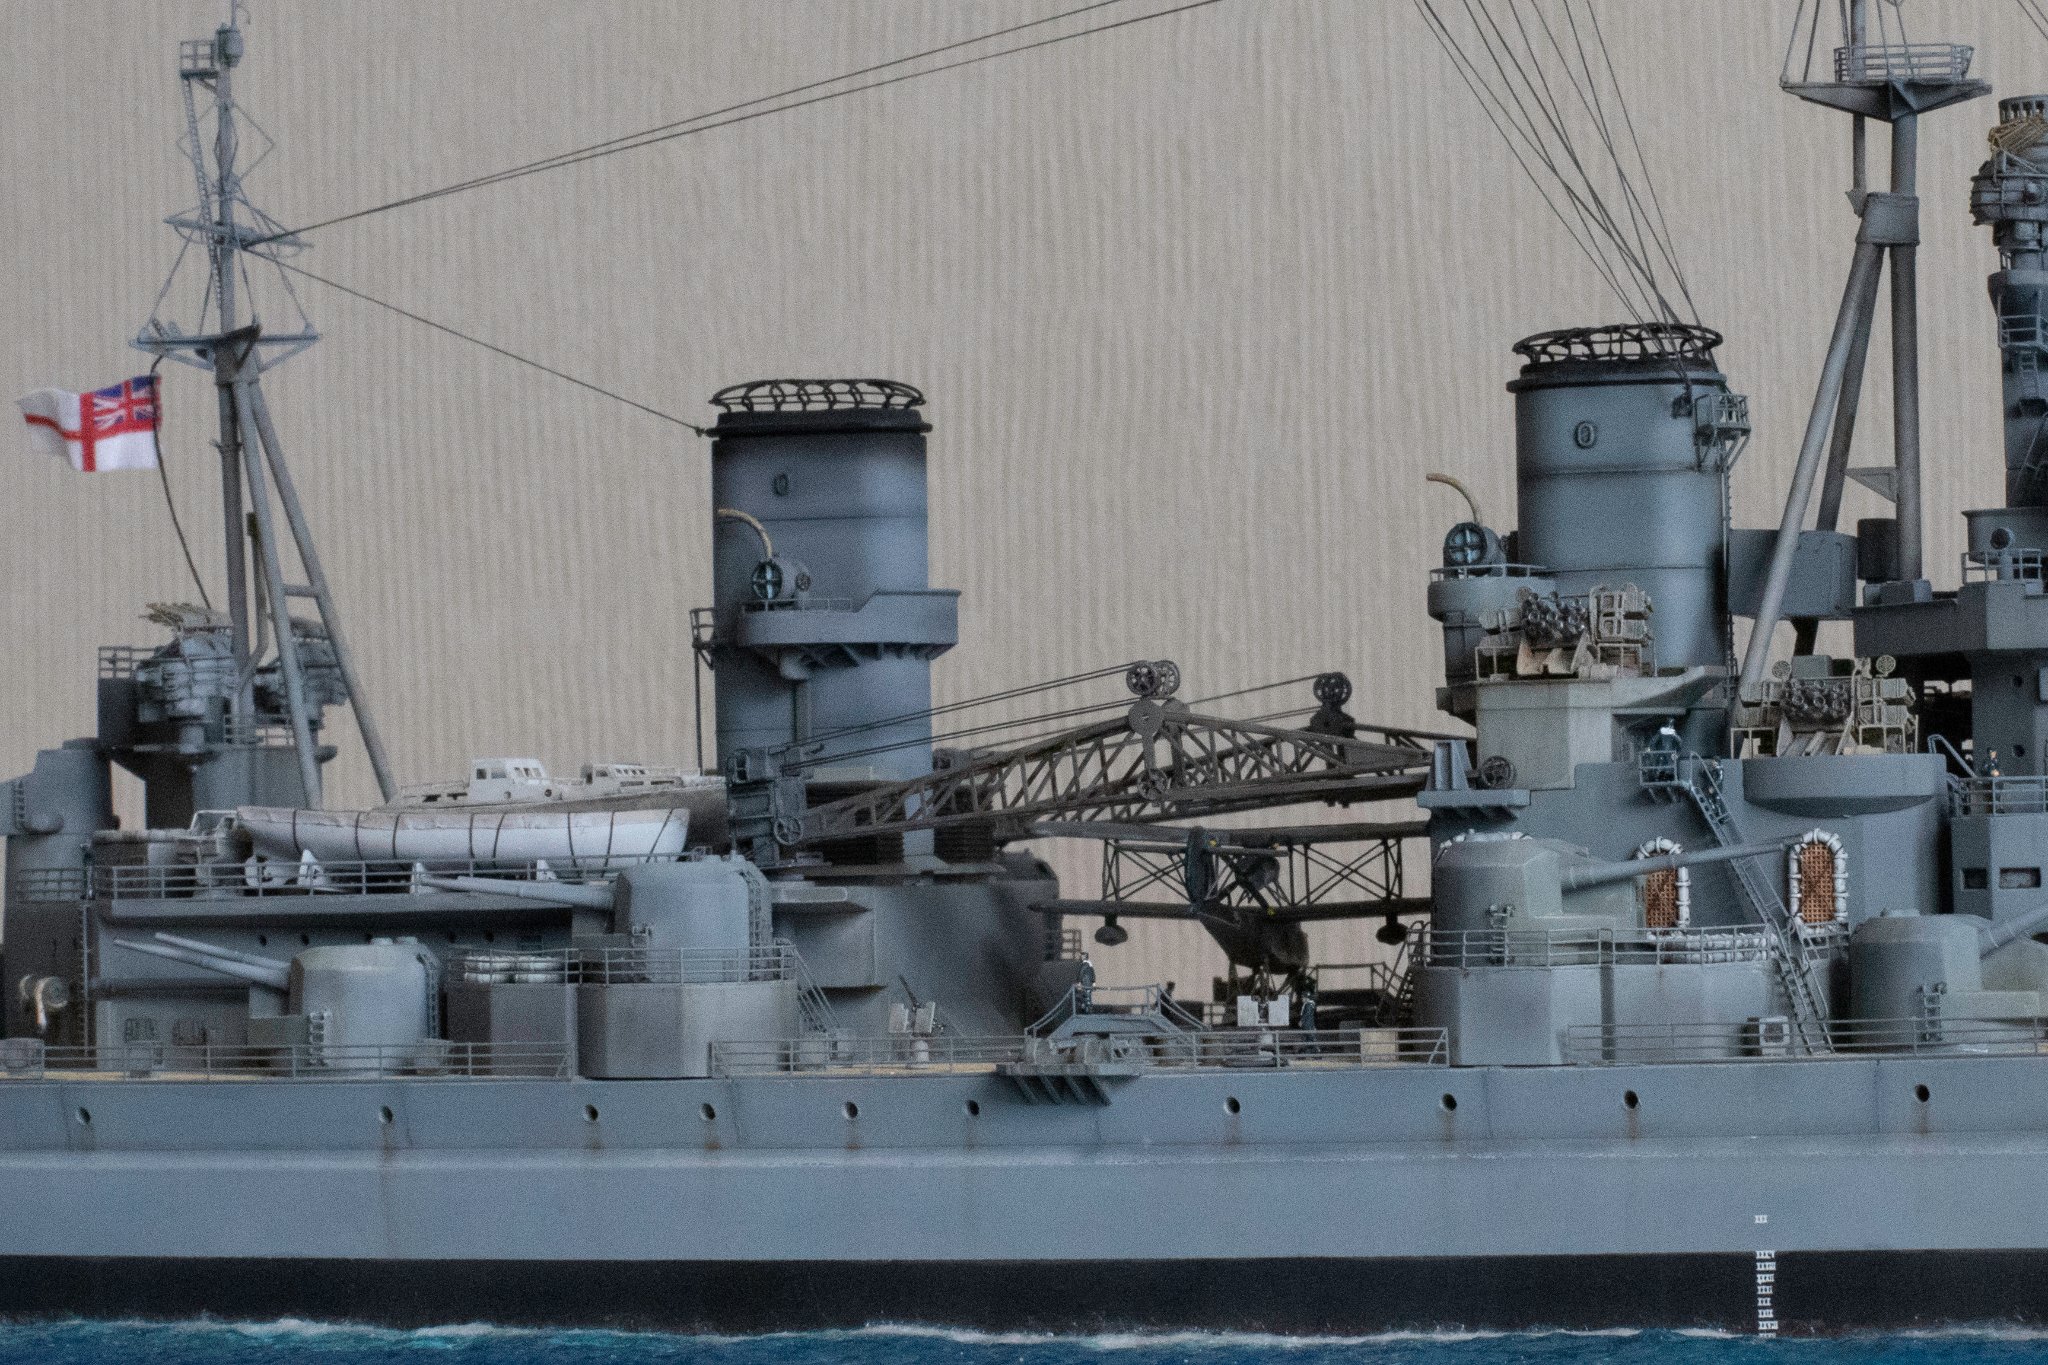
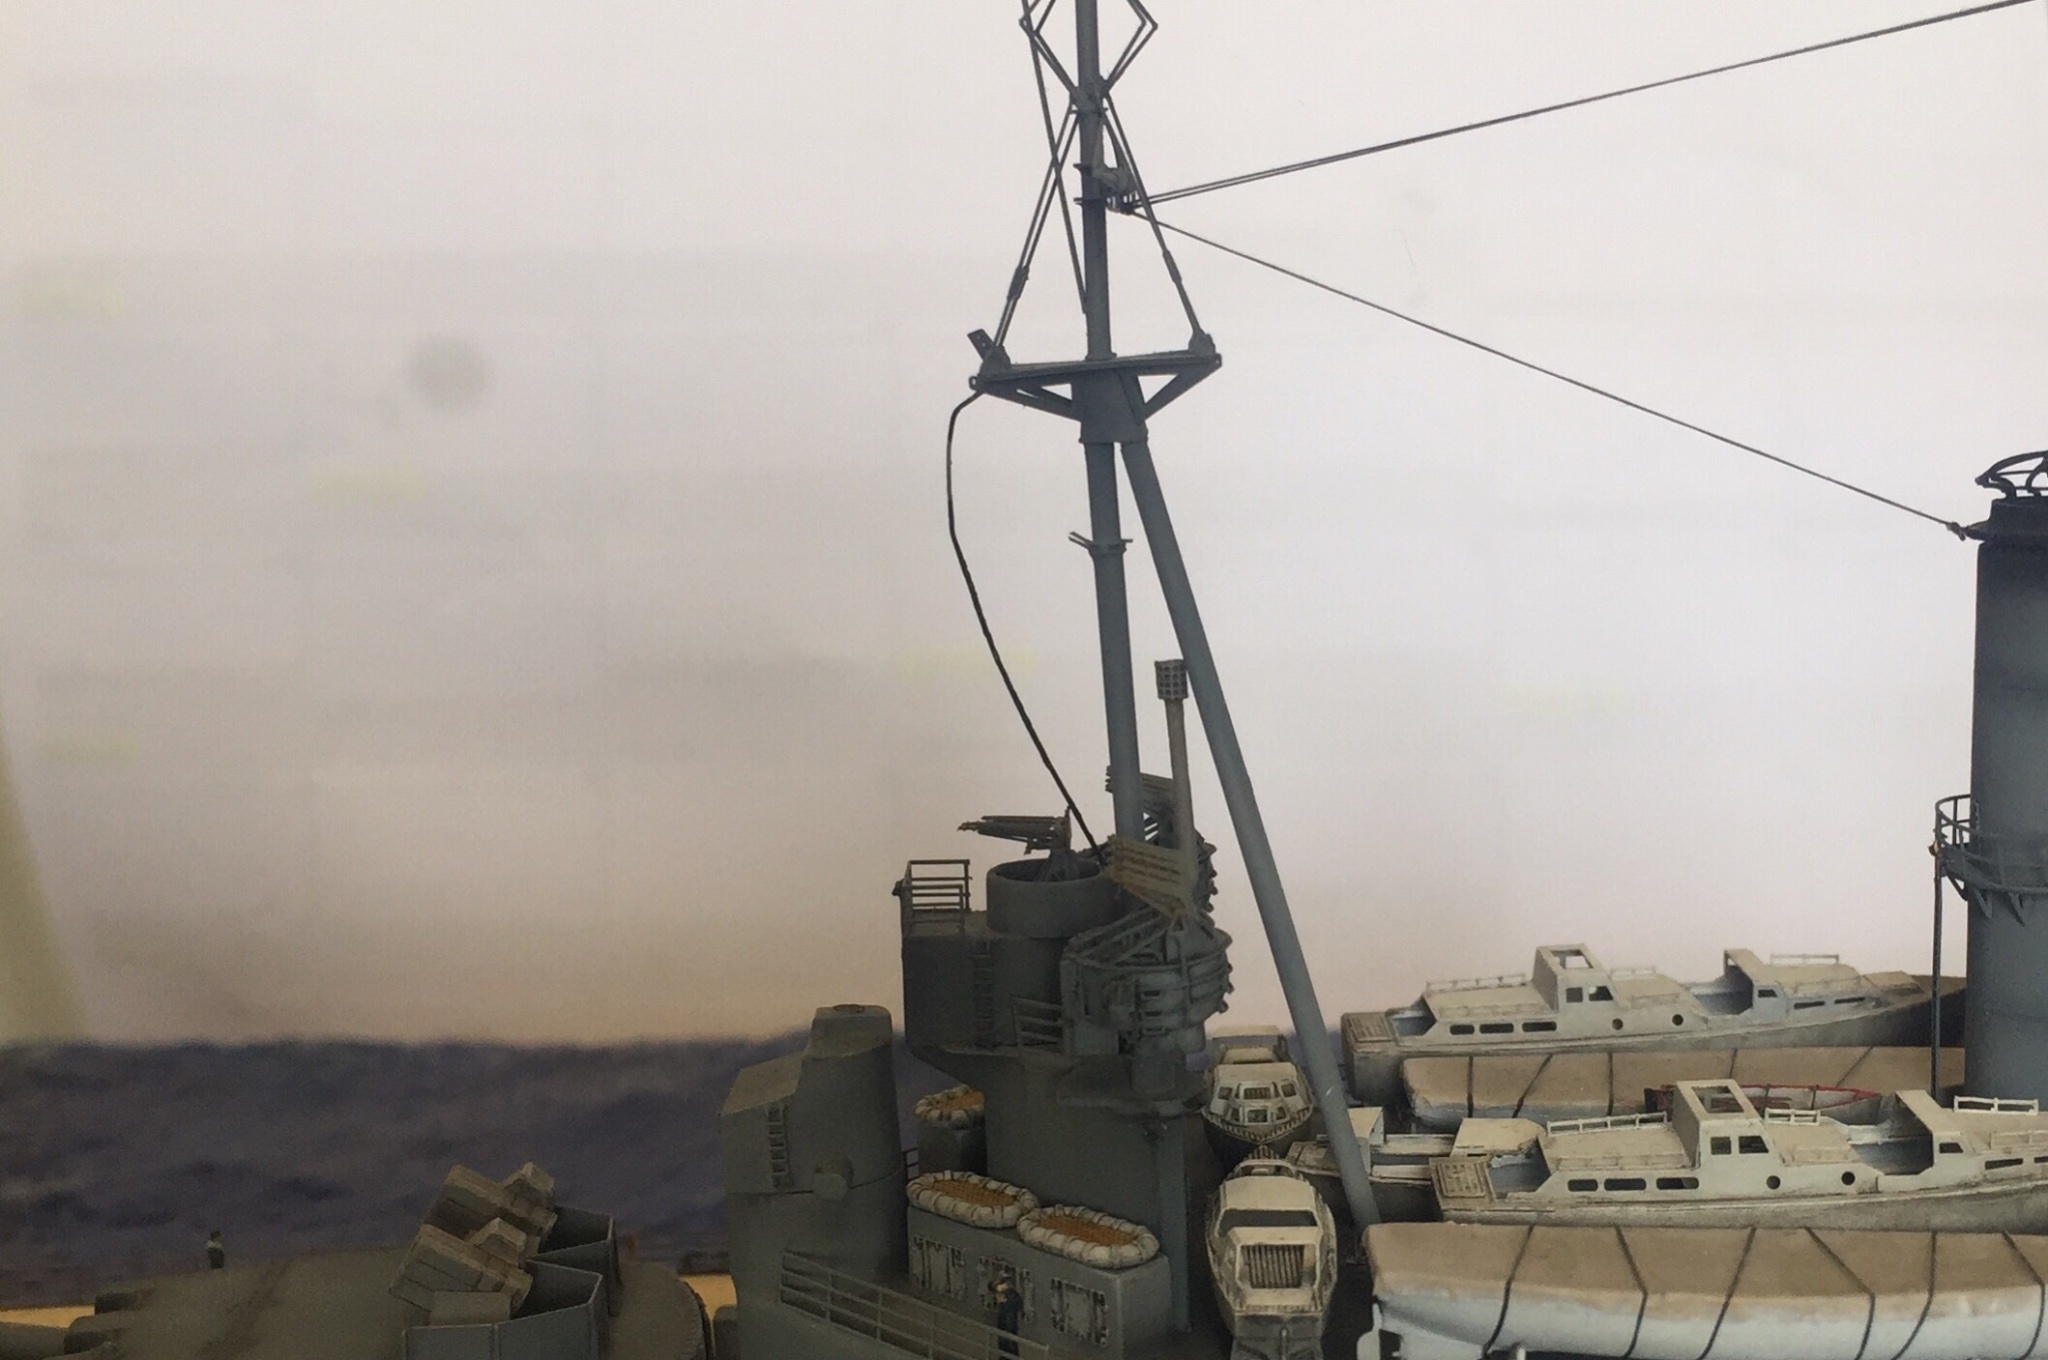
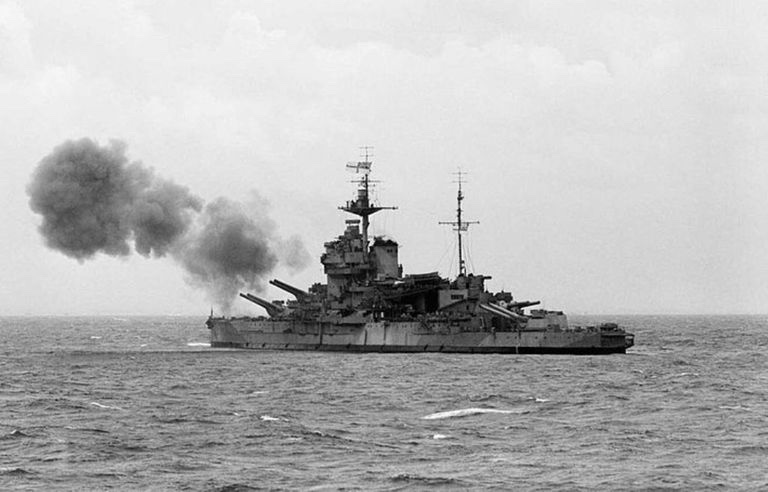
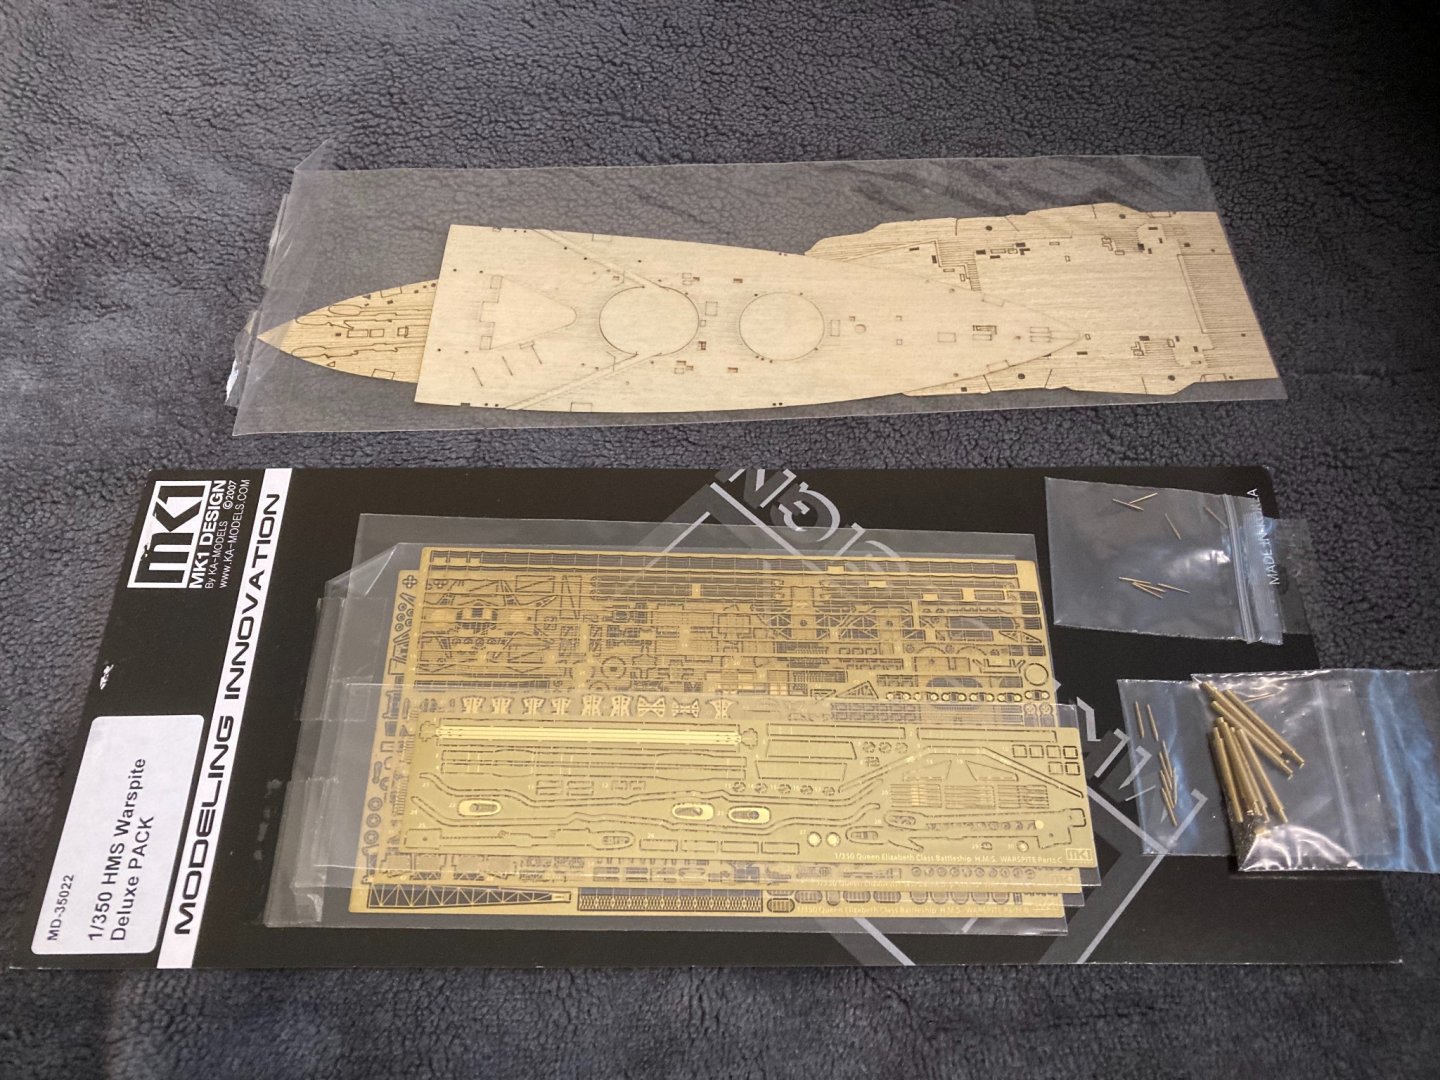
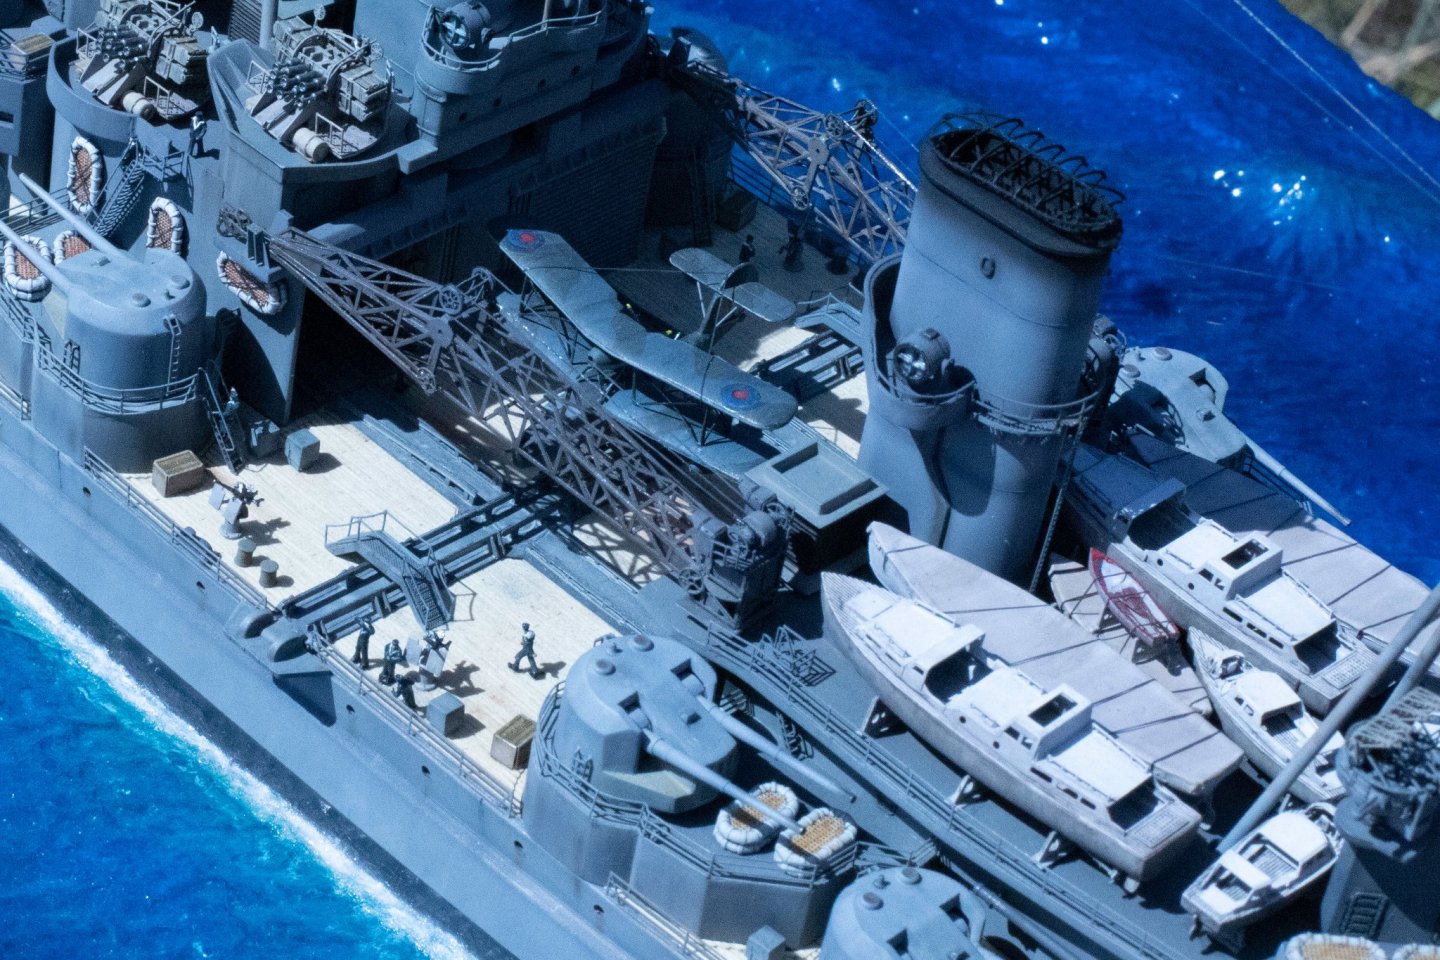
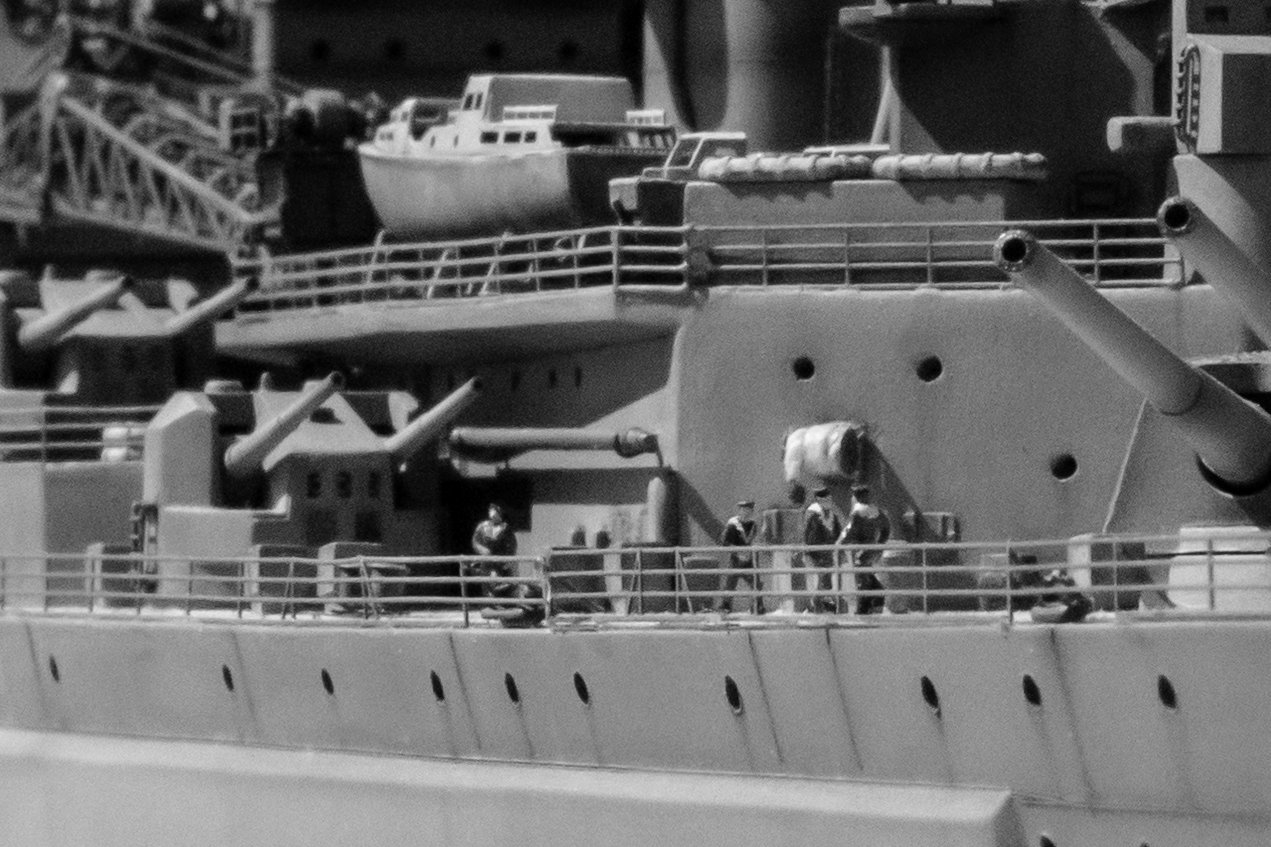
Hello, Slowly getting ready for my second ship build, really enjoyed my last HMS Prince of Wales build and all the feed back and help was much appreciated. Ill begin the build shortly and was given this kit to build for someone else with no time limit and just for fun. Included in the box is a MK1 upgrade set which has some PE, anchor chain, wooden deck and brass barrels for all guns plus I’ve pe from my POW build so can use that too. Thought I’d start this log a bit before I begin so if anyone has built this ship and has any advice or “wish I’d known before I built” tips would be great to hear from you before I learn them the hard way! I suspect this build won’t take as long as I learnt a lot from my last build. Will be my first attempt at camouflage and a few pics have her looking quite faded and weathered so will be fun to play around with making her look well used. Here is a pic of her during D-Day and you can see the state I’ll be trying to go for which should be fun.
-
your build log will be the first place I go when I’m unsure how something goes together! Often build logs are a lot more useful than the instructions and plans!
- 211 replies
-
- 3
-

-
- prince of wales
- tamiya
- (and 2 more)
-
The weathering would be fun on an AV3! I had a look through your build log of Warspite OC, she looks great and seems like a good looking ship too. Seeing I’ve got that kit here I’ll have to read up on her exploits to get to know her. The kit is set in 1943 so camo! I’ll practice that on my hurricane build as it does add an extra layer of complexity to a ship. Just hope she was busy and not freshly painted. I don’t think this one will take so long! I learnt a lot during this build... mainly what’s not worth getting perfect only to be covered over and never seen haha!!
- 211 replies
-
- 4
-
-
- prince of wales
- tamiya
- (and 2 more)
-
Good question, it’s too hot and humid at the moment for any painting and my thin superglue is thicker than golden syrup so I’m not doing anything till after summer. But I’ve 2 options. Someone here gave me HMS warspite (academy 1:350, with some pe, brass barrels and wood deck) I will make it for them. The other option is trying to find a model of HMNZS Achilles, a Leander class light cruiser. My Grandad served on her during the war. So would be good, but can’t find anything except a full resin kit so at this stage it’s just a nice idea. Can’t do anything that doesn’t have a good PE kit though! Just adds so much. Any good ideas for me to try? I’m new to the ship model world.
- 211 replies
-
- 7
-
-
- prince of wales
- tamiya
- (and 2 more)
-
Thanks for the kind words, I really enjoyed the company during the build a lot different enjoying a hobby with others than just building alone. Im waiting for it to cool down abit before I carry on with any builds!
- 211 replies
-
- 5
-
-
- prince of wales
- tamiya
- (and 2 more)
-
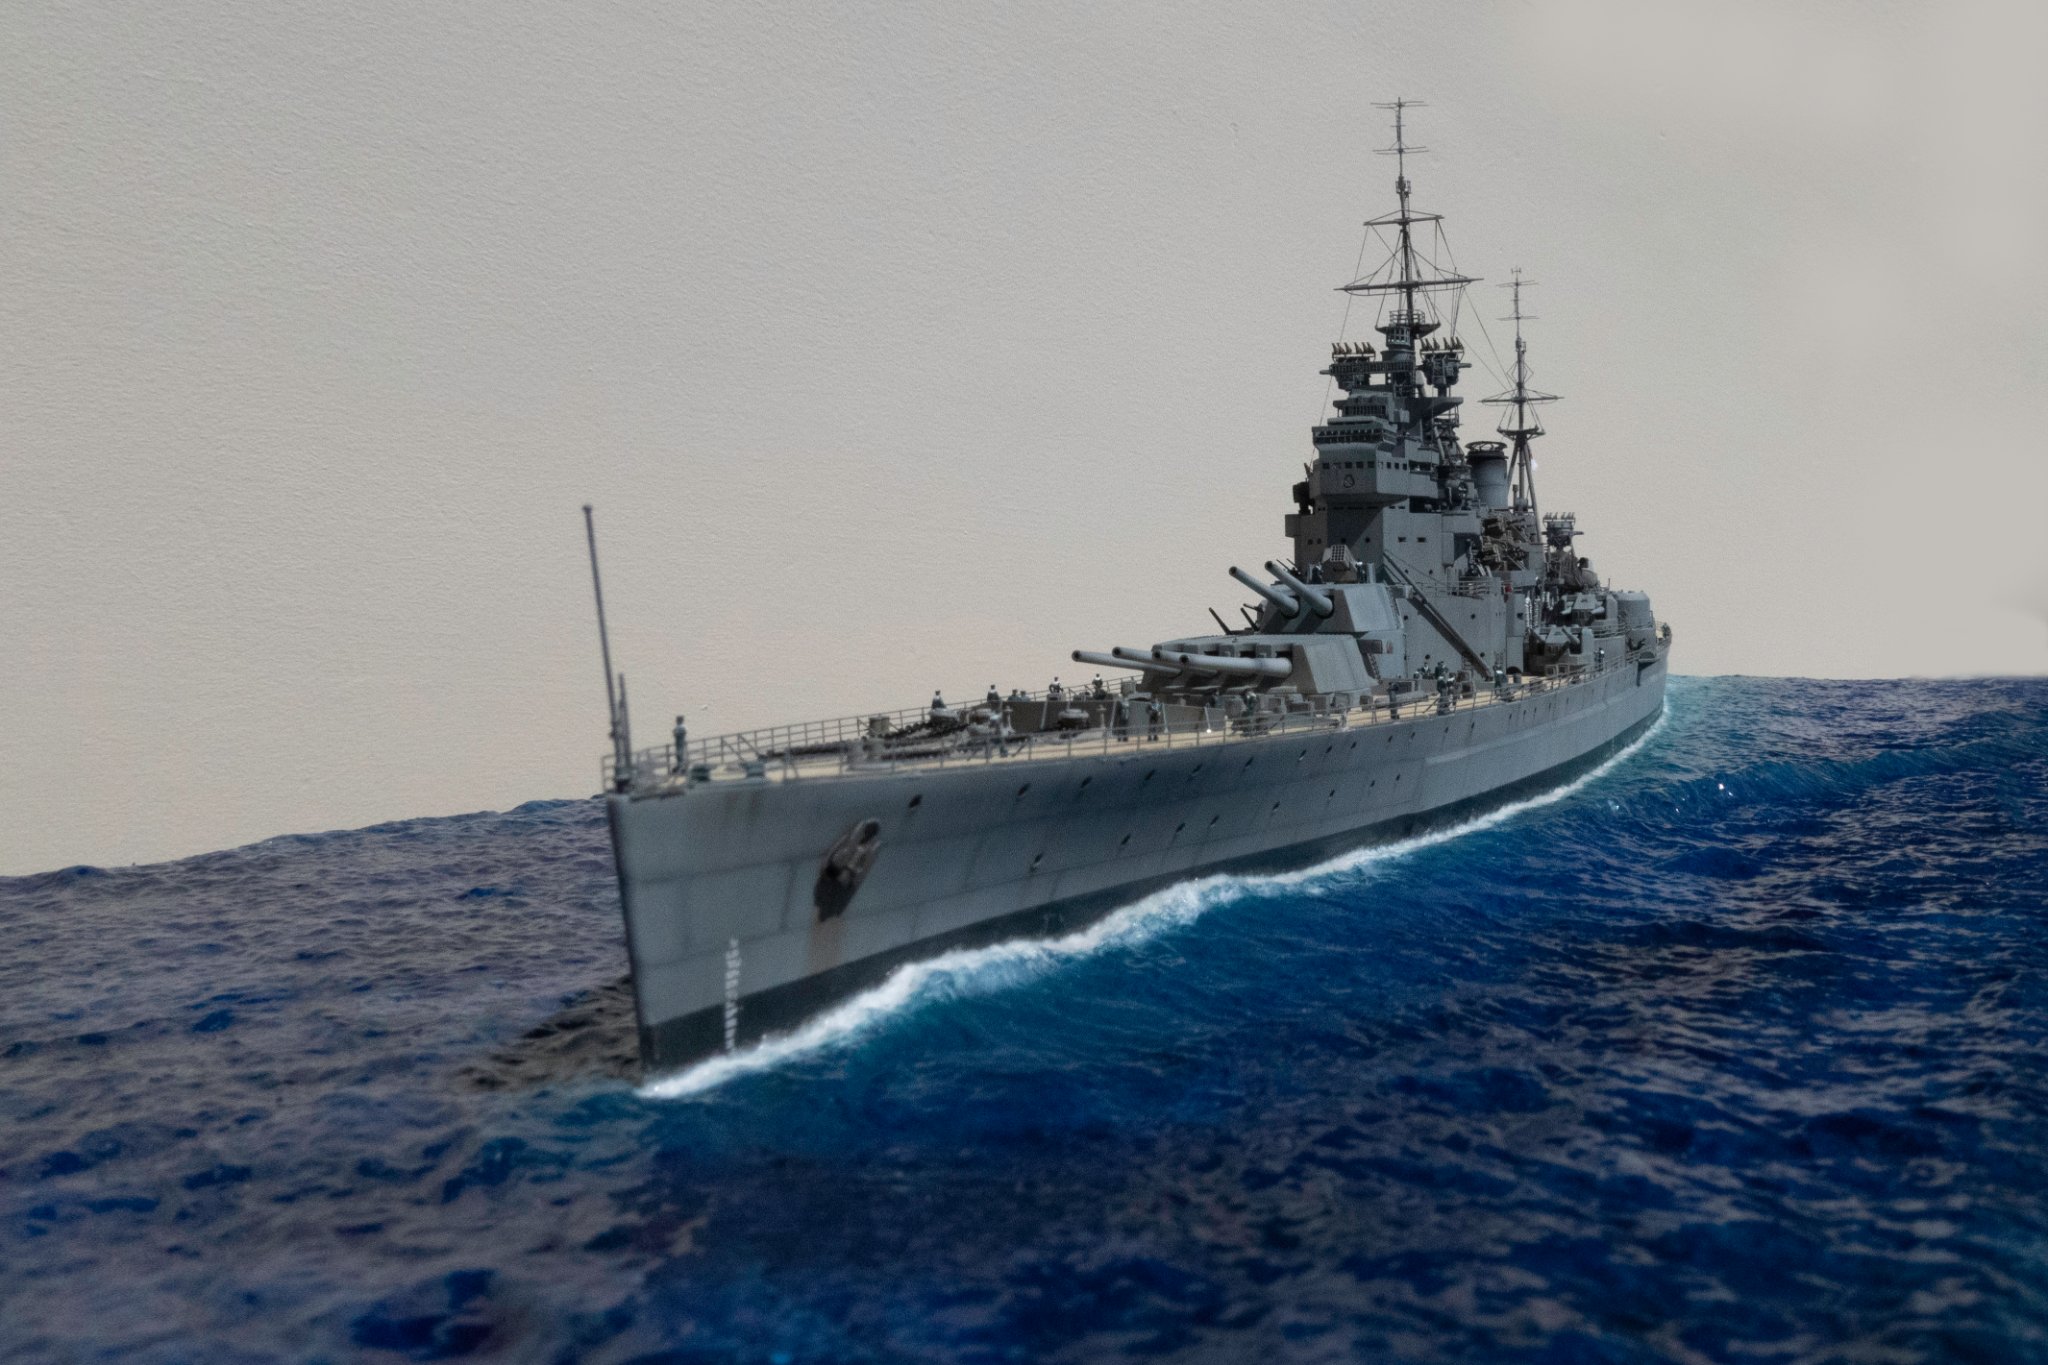
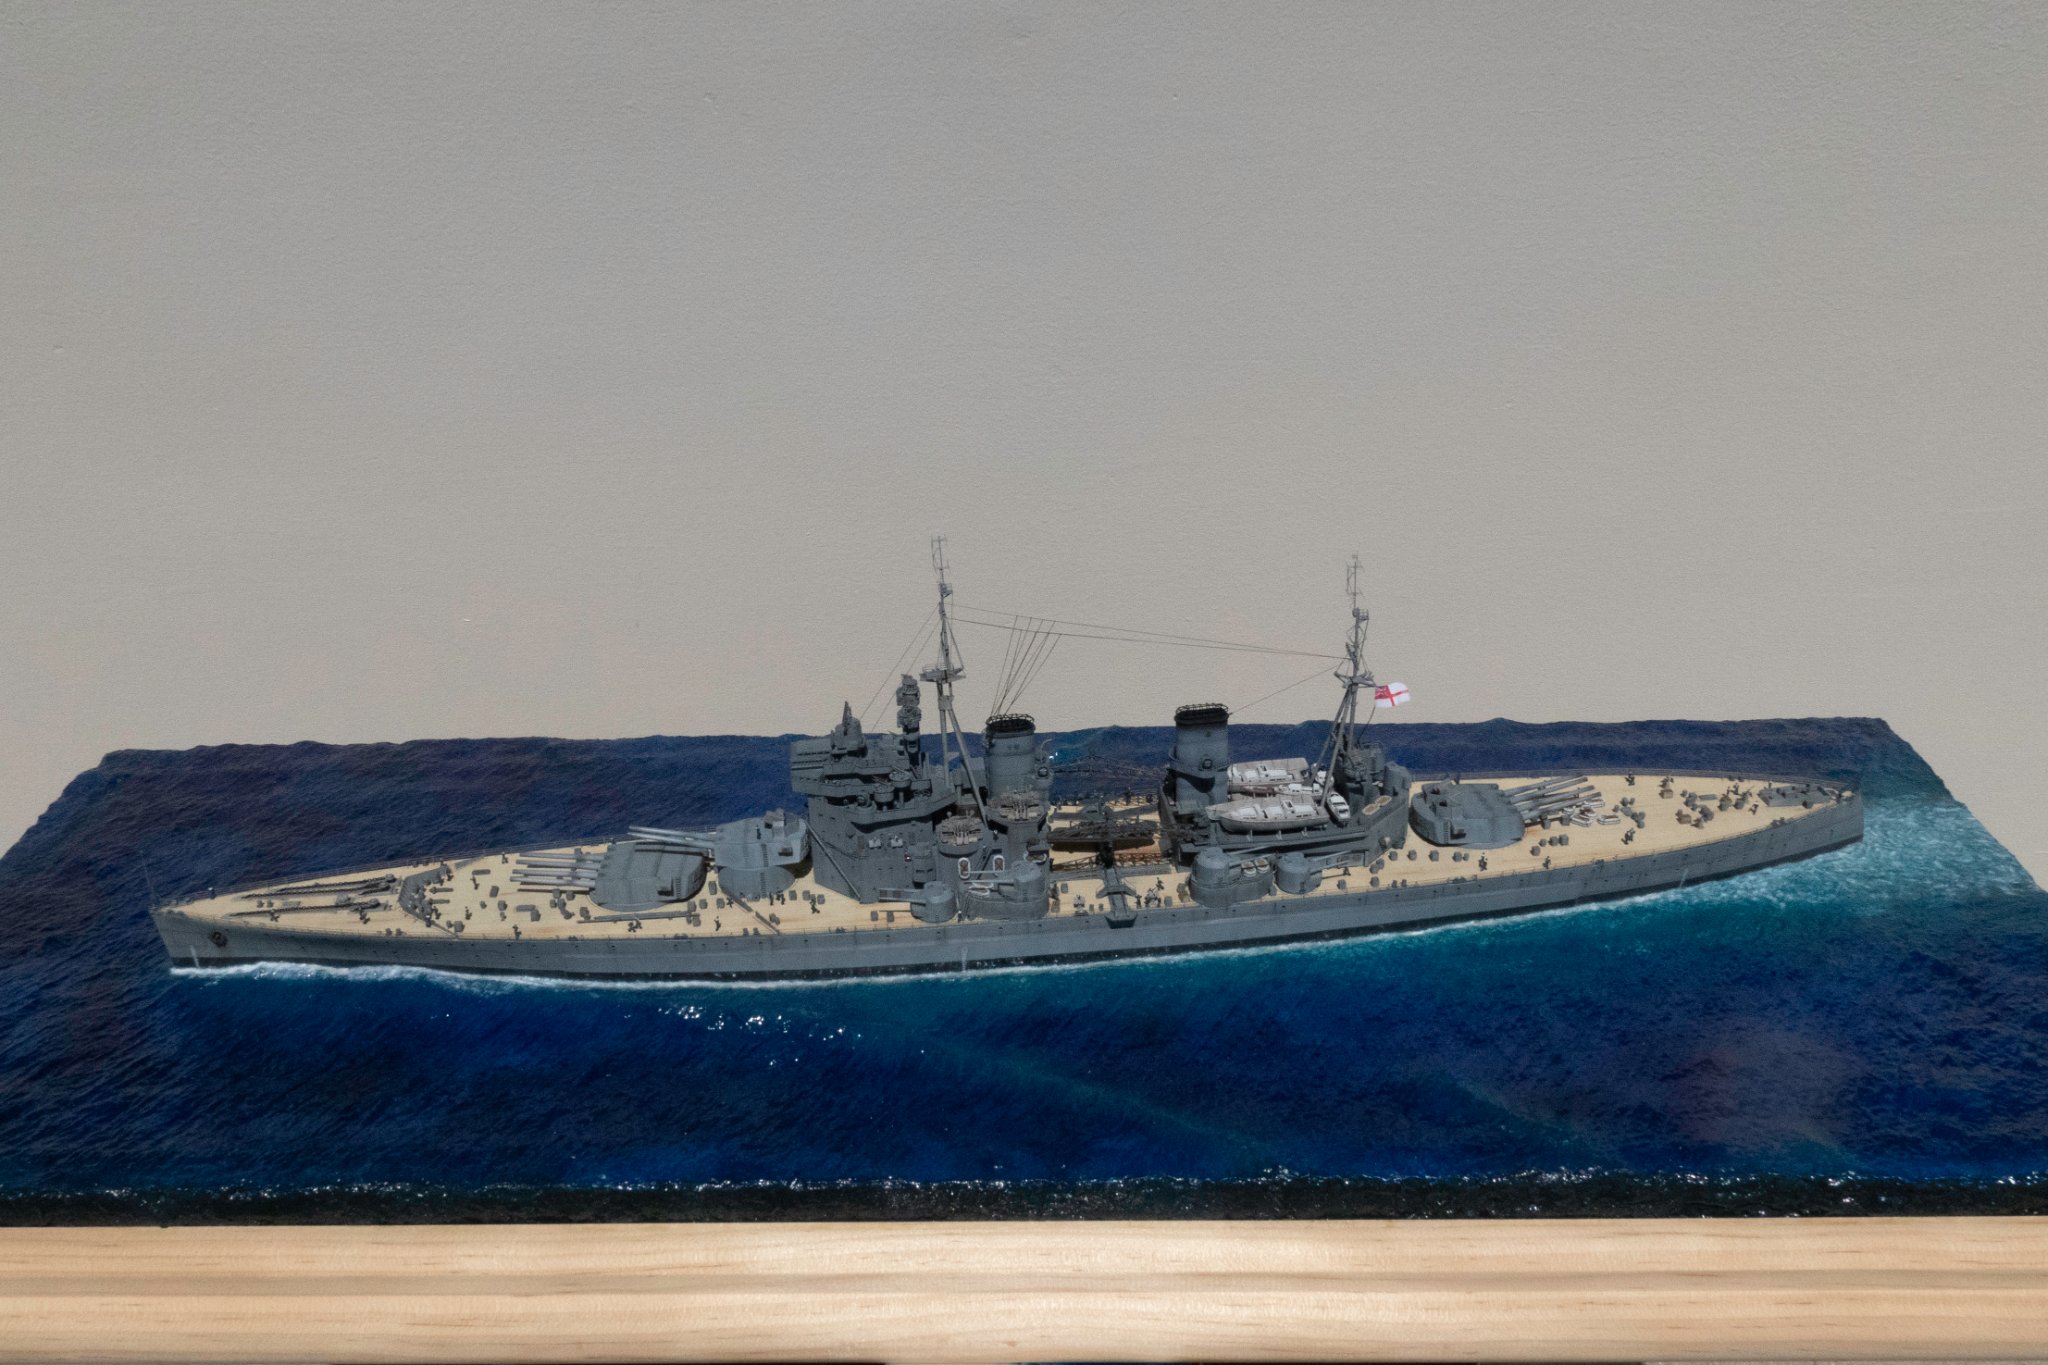
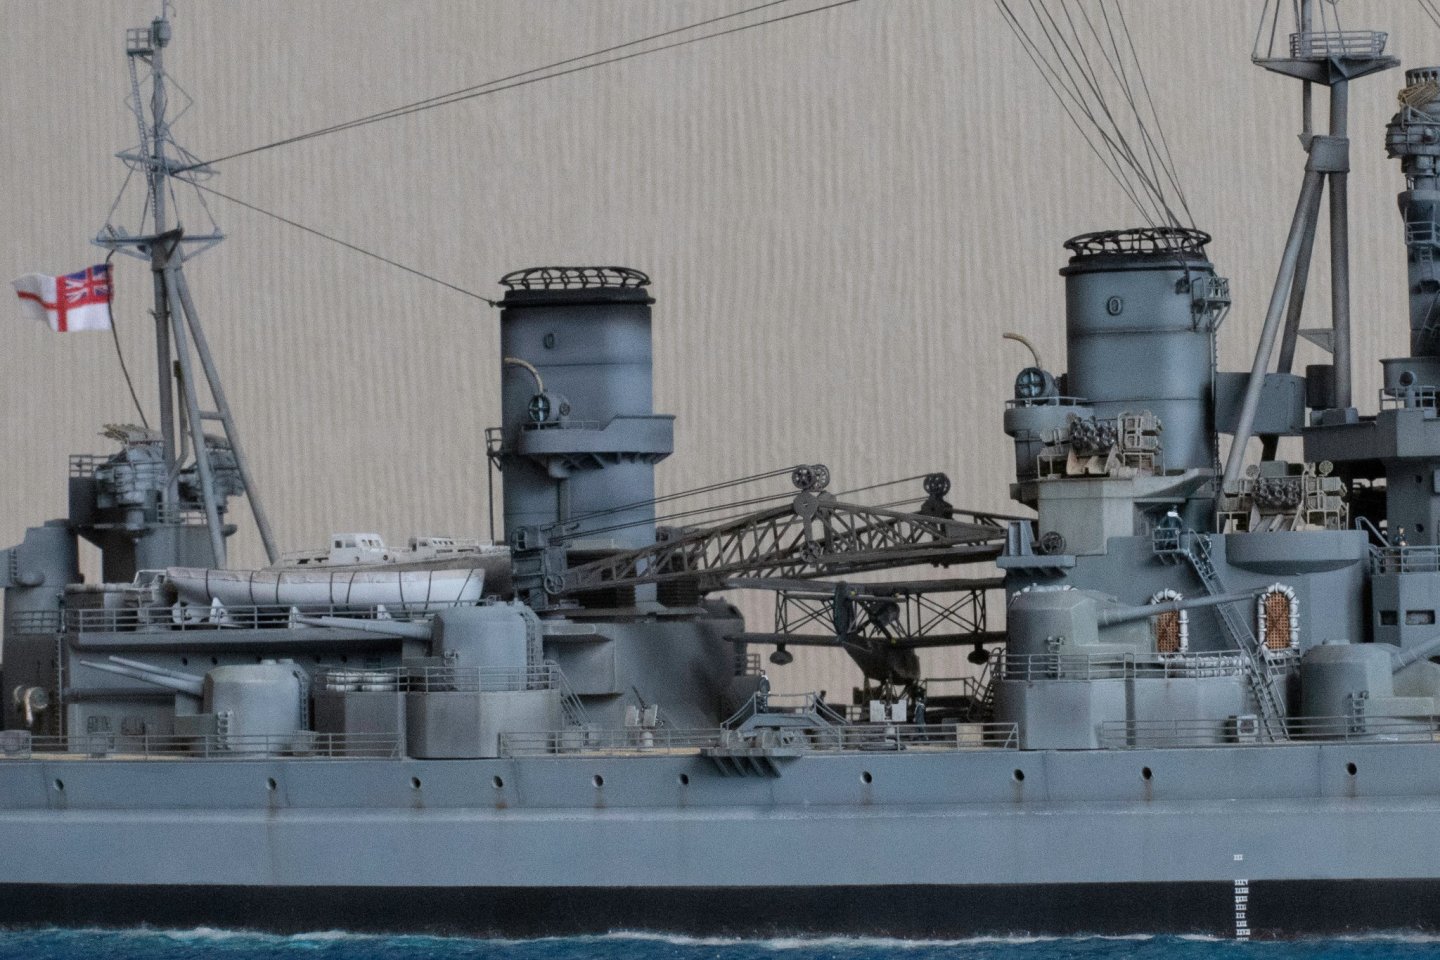
So this is it! She is complete! I'm not really sure what to say, but thanks for all the help and kind words. I learnt a heap and enjoyed the build! I've a feeling it won't be my last ship...


- 211 replies
-
- 15
-
-
- prince of wales
- tamiya
- (and 2 more)
-
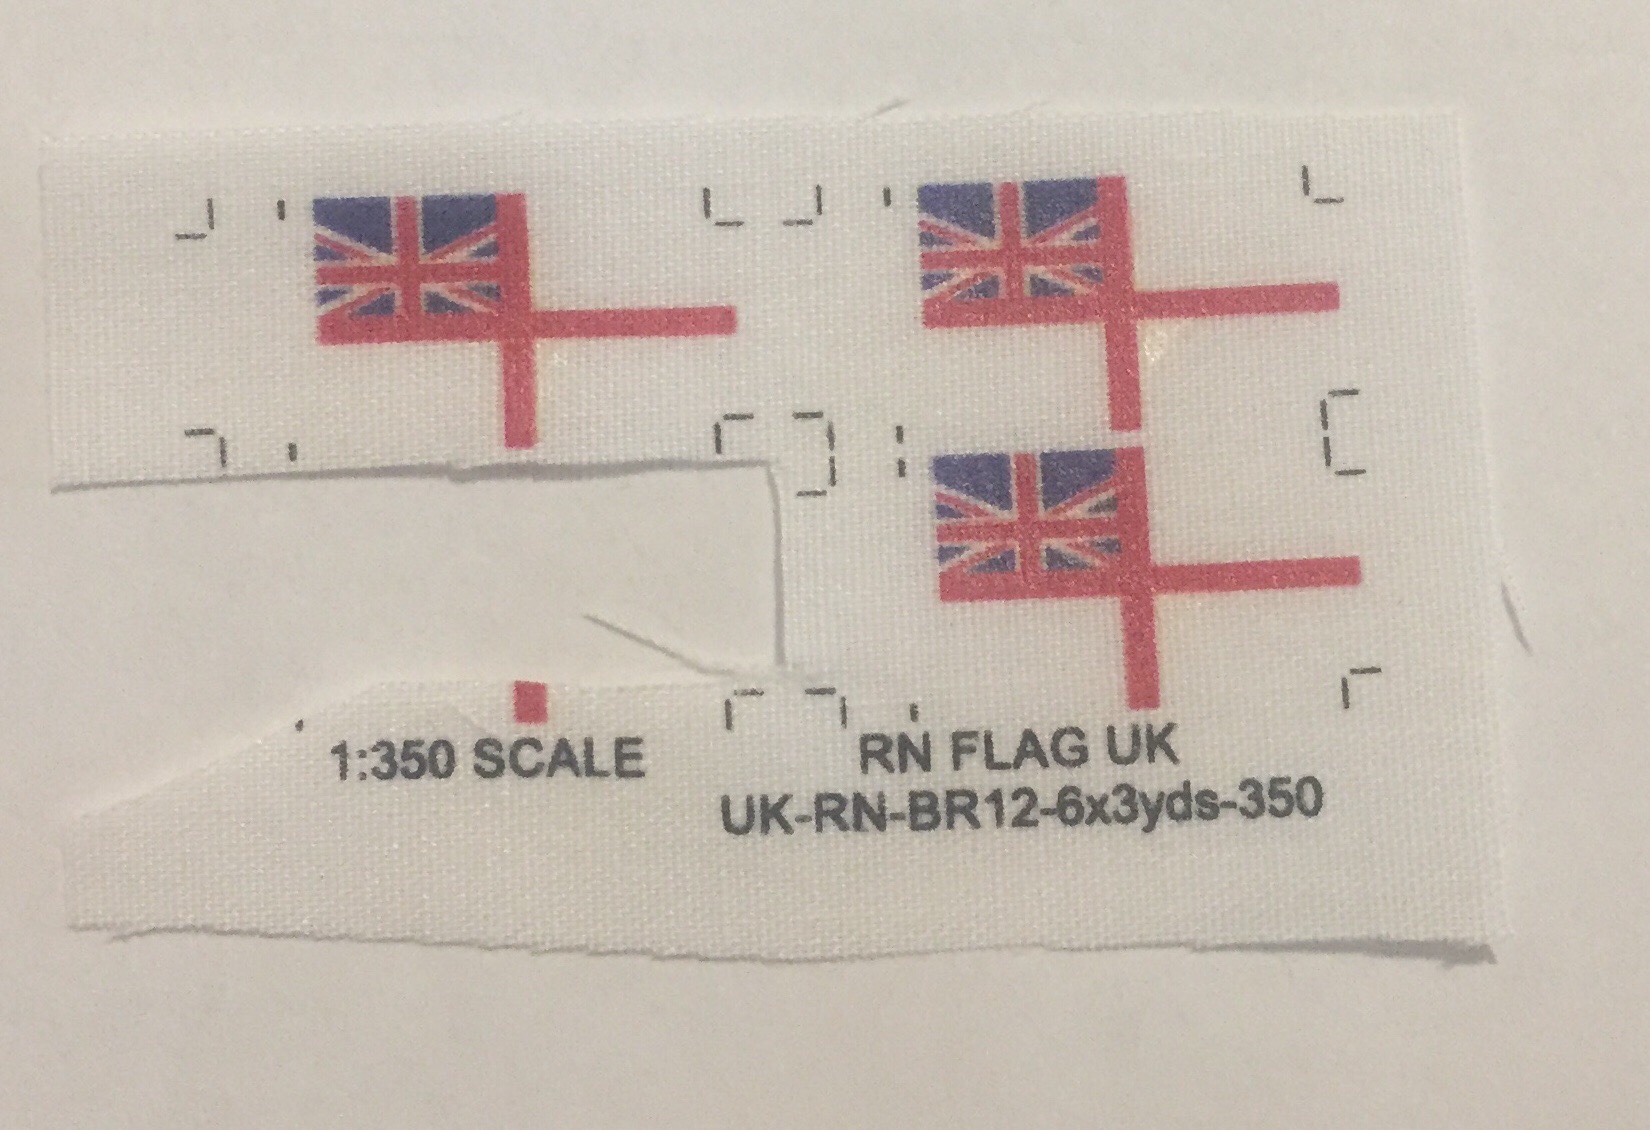
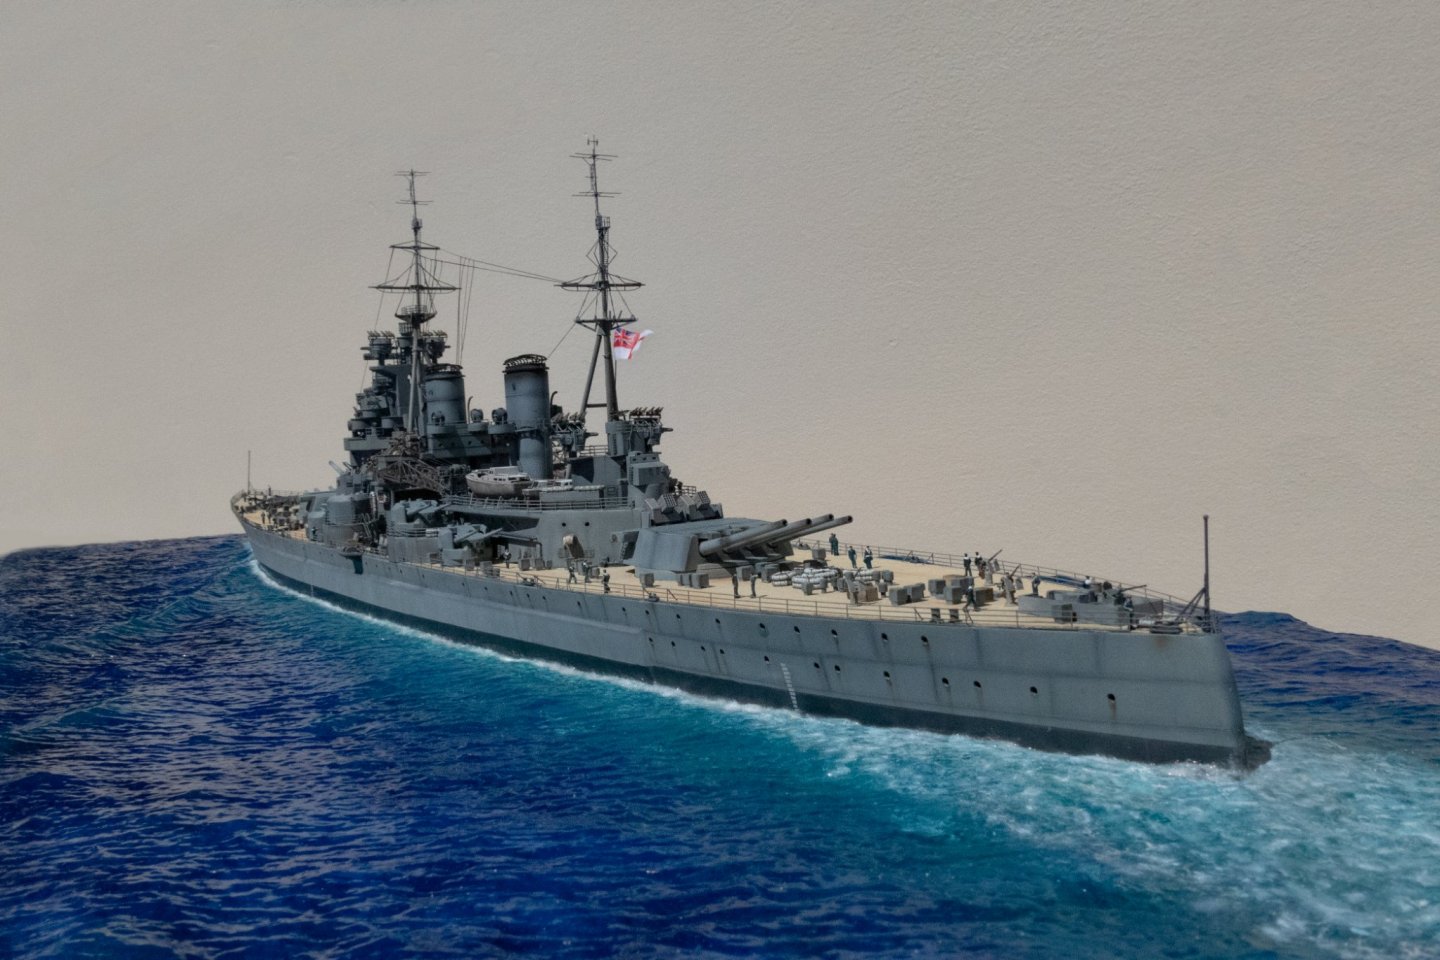
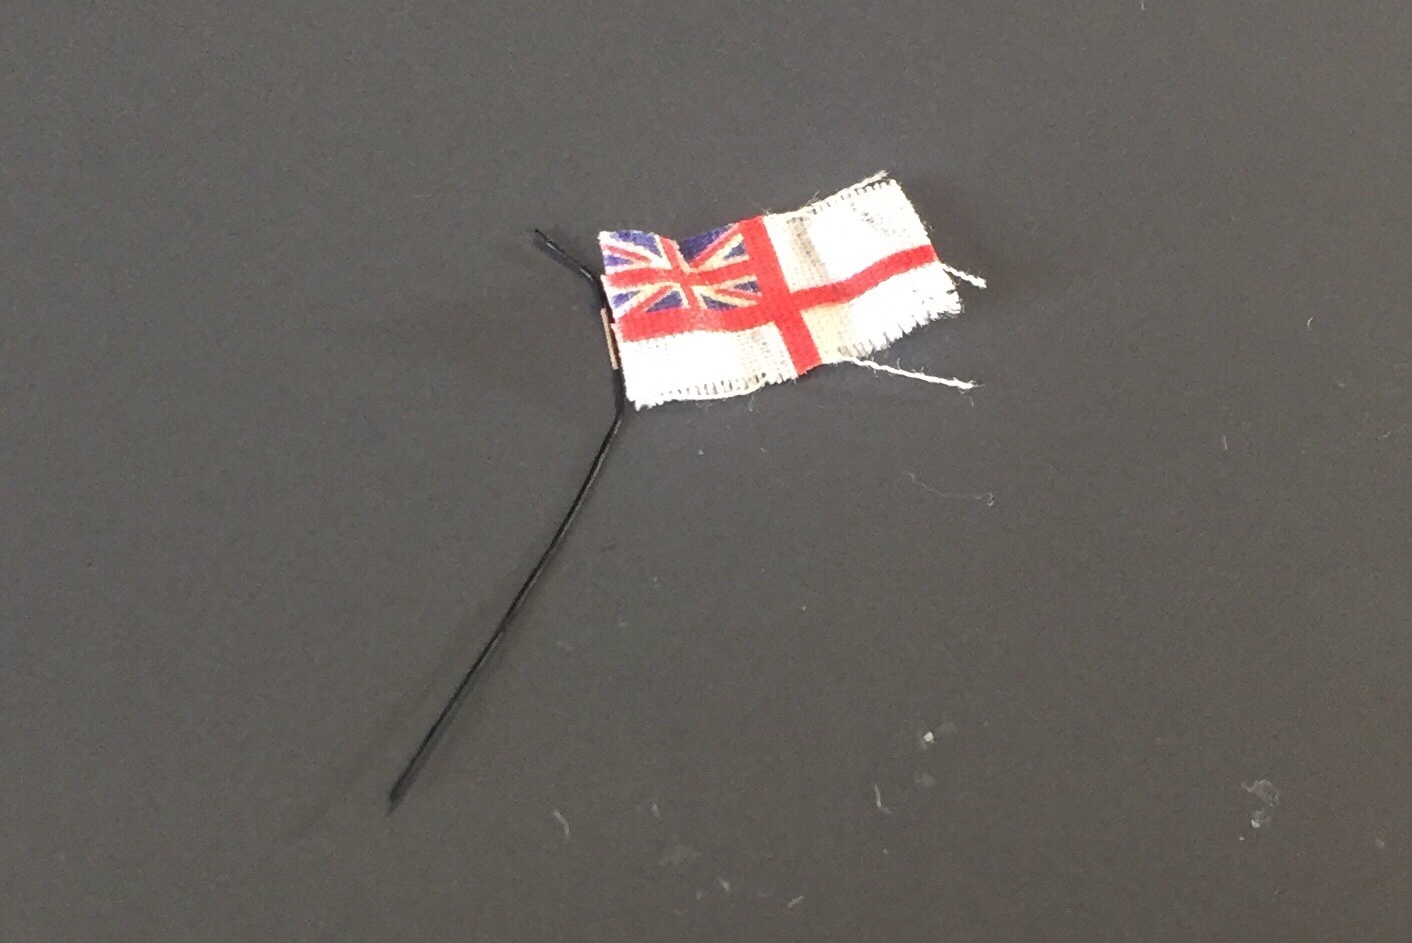
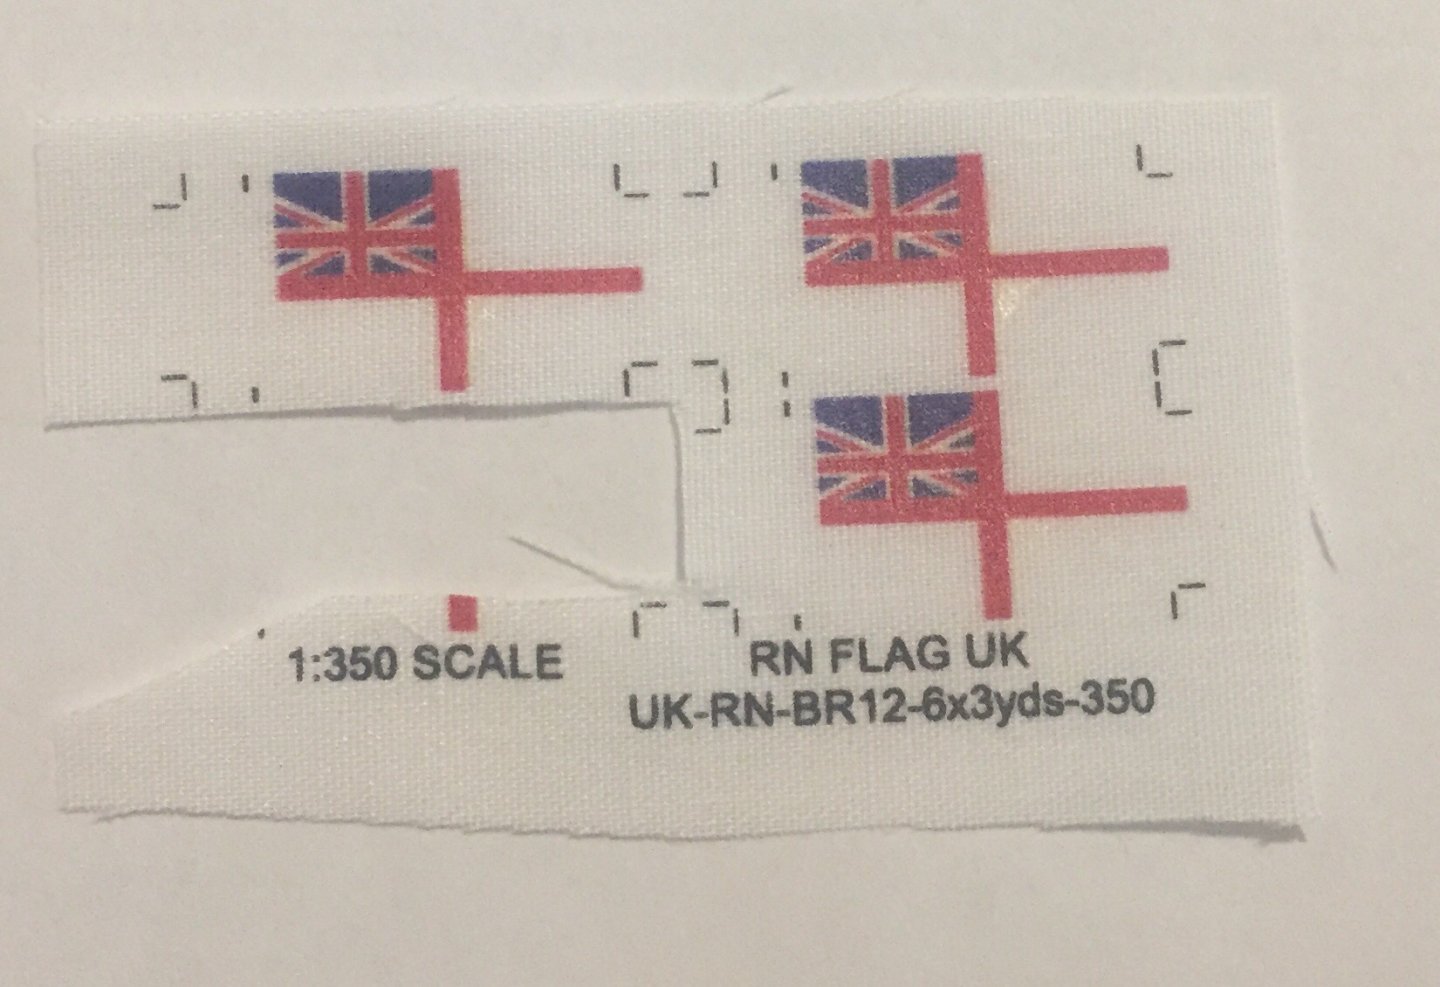
Hello all! Been waiting for the flag to arrive and it finally did! In the mean time I have gone and got another camera for astrophotography and a telescope and a bunch of other equipment! So that has kept me busy as I want to get so nice planet and deep space pictures... But the flags arrived and I can finish my project! tried a few things with string but impossible for it to maintain any shape so I’ve had to use my thinest wire! and spent the morning watching videos videos on how to make a flag look realistic and it’s not easy at all! but ive got 4 flags to practice with and then I guess I’ll use the best looking one! Which means the next lot of pictures will be with a flag on... hopefully not looking odd and it will be on a complete model! Wow weird to think it’s finished!! But it’s finally arrived!!

- 211 replies
-
- 4
-
-
- prince of wales
- tamiya
- (and 2 more)
-
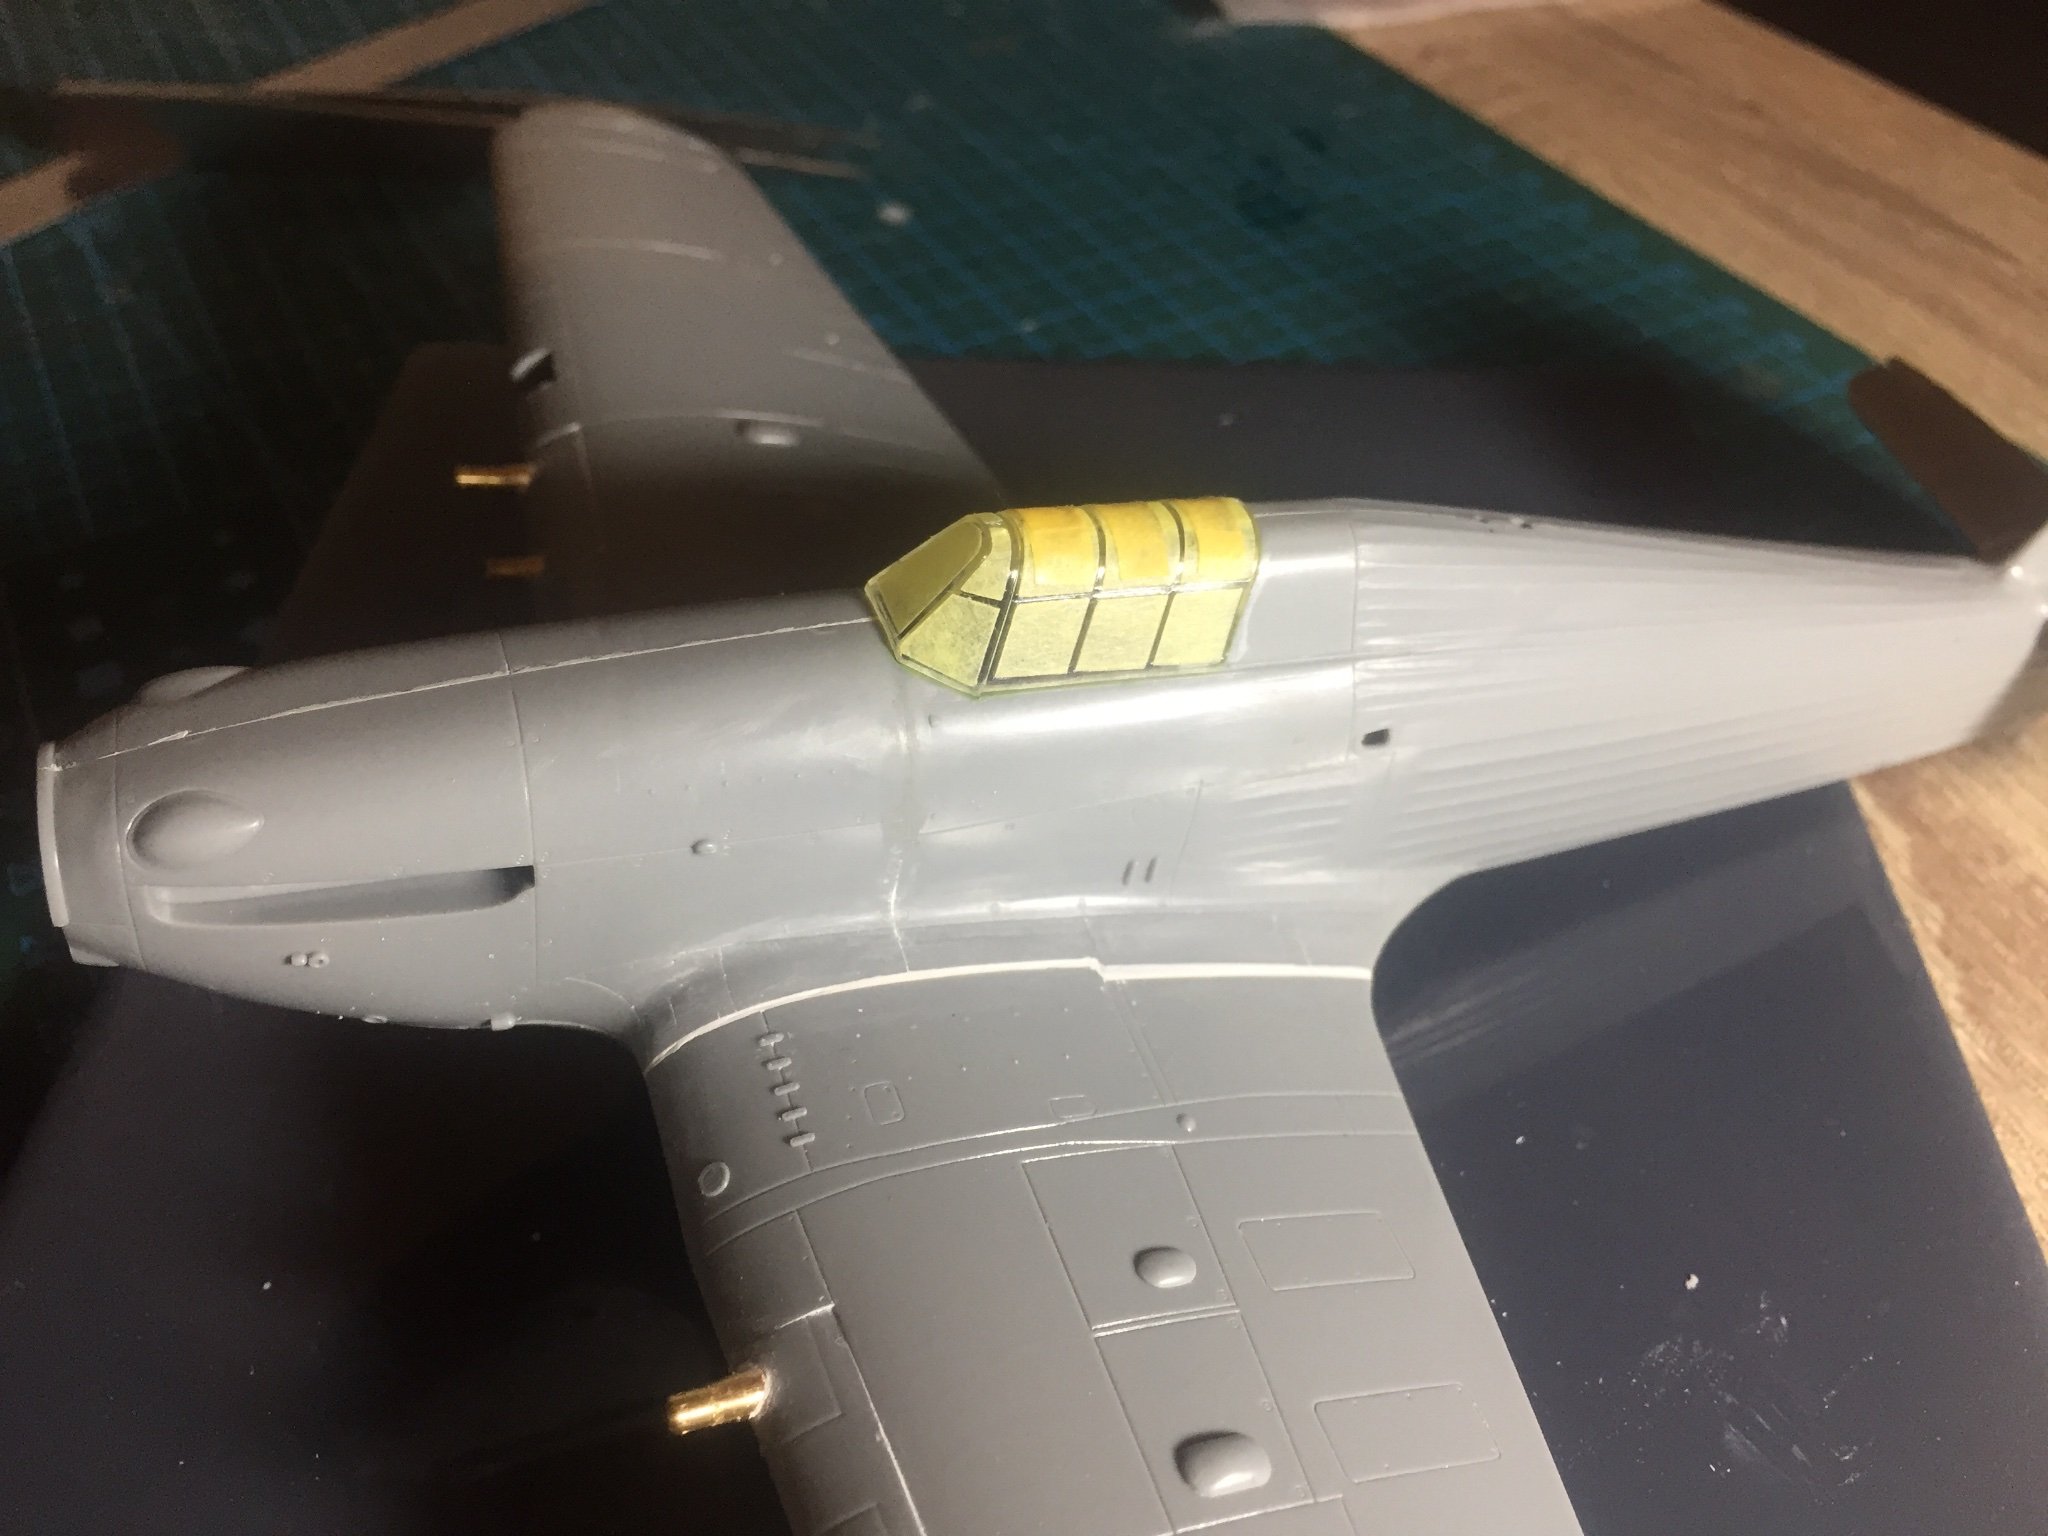
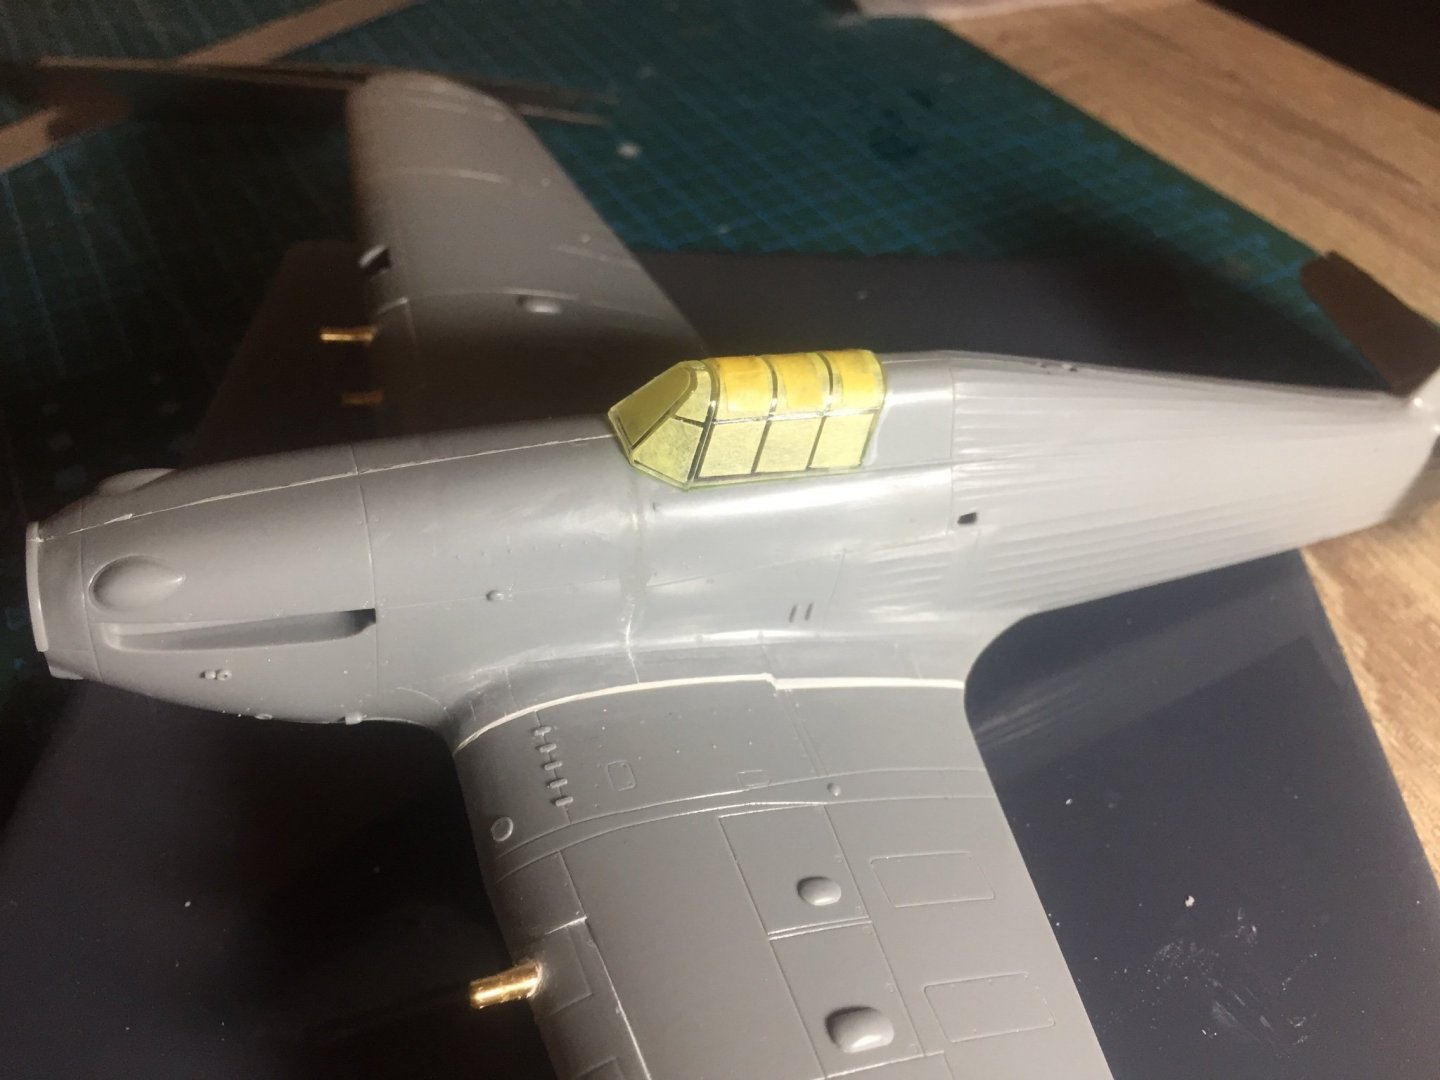
Doing some experiments with the landing lights. ive drilled out a similar size hole and have filled it with gloss varnish to see if it dries clear even when in a big blob. if it works will will probably use it as the bulb. Once the lights on the wings are sorted ready to prime as I tried out using a canopy mask for the first time ever! But!!! I forgot to make sure the inside of the glass was clean from dust or finger prints before I glued it on so maybe it will have to come off if there is anything awful on the inside 😂
-
My first priority is small size as I don’t like carrying around a massive camera around the world, and then just the best internals that can squeeze in. So it’s got a great sensor and brain. It will do nicely for what I need
- 211 replies
-
- 5
-
-
- prince of wales
- tamiya
- (and 2 more)
-
Looking good mate! I think it adds a lot to a ship when it’s shown on water, abit more life.
-
Looking forward to seeing the process you use for building up the colours! If not too much trouble can you post pics of each stage? As I’ve not painted a plane with an airbrush before so am on the learning path! I think for mine I’ll black base and layer from there. Such fine lines of over doing, under doing, over weathering, under weathered!
-
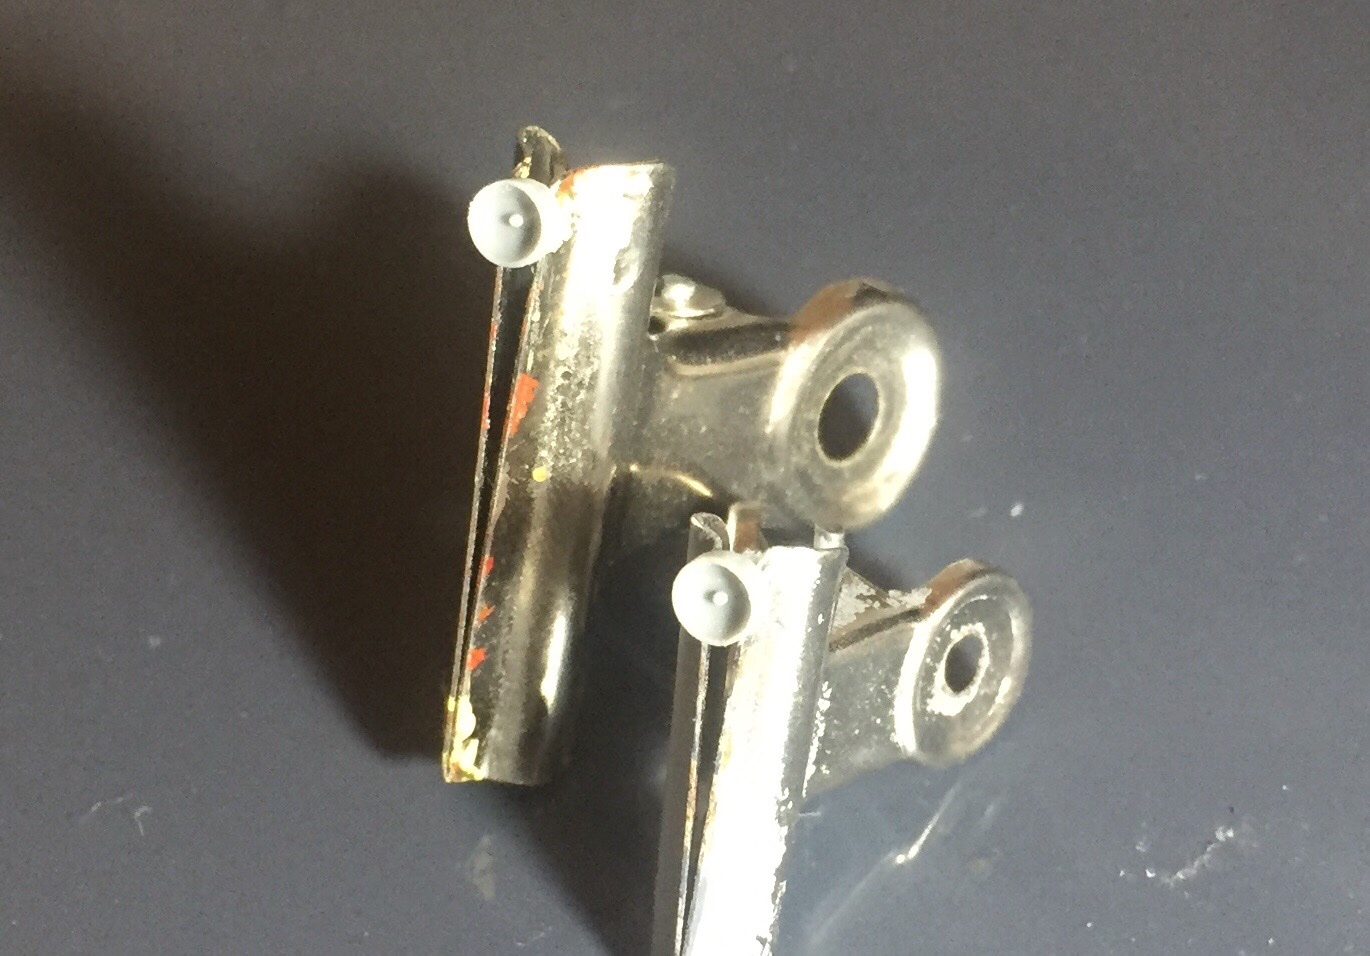
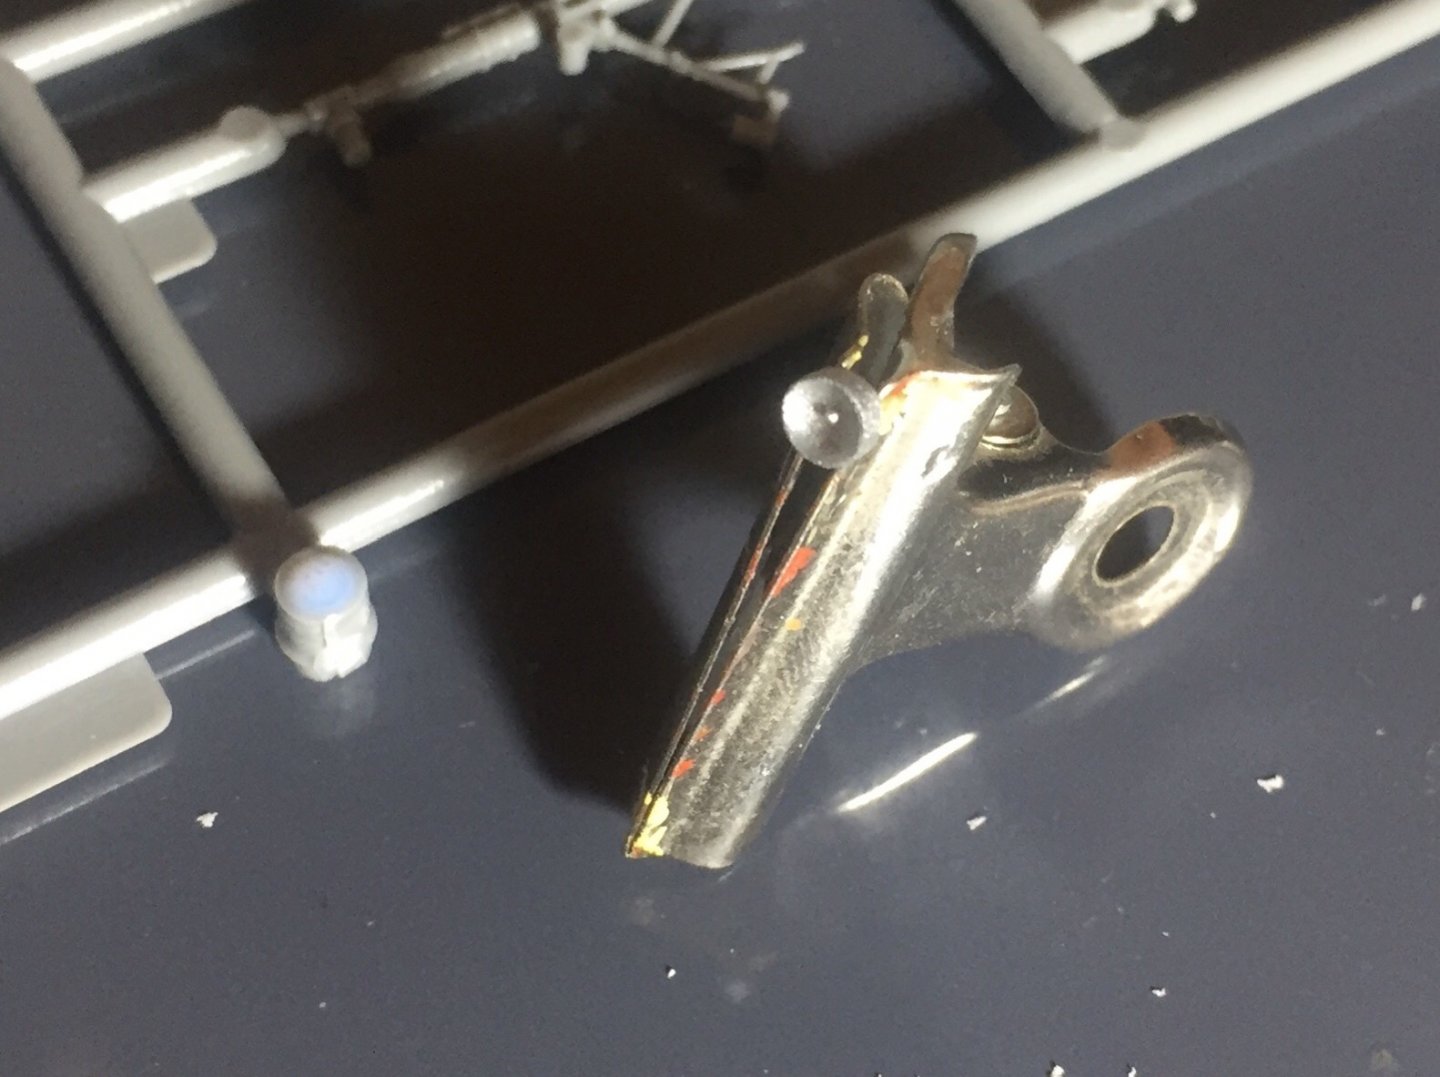
Wow good work! This scale PE must suck! I’ve a feeling if you have enjoyed this scale then you will love it when you get to 350!! My rule was when I started talking to the PE... then it was enough for the day!
- 179 replies
-
- 8
-
-
- hatsuzakura
- pit road
- (and 2 more)