HOLIDAY DONATION DRIVE - SUPPORT MSW - DO YOUR PART TO KEEP THIS GREAT FORUM GOING! (Only 20 donations so far - C'mon guys!)
×

Cabbie
-
Posts
599 -
Joined
-
Last visited
Content Type
Profiles
Forums
Gallery
Events
Everything posted by Cabbie
-
 Good afternoon Hof Can't see any reason, there isn't any plans as such, just photos and colored drawings. They don't show it too clear. The bulwarks are meant to run to the transom and glue to it. I am inclined to make the transom wider, and have less fairing to do. Thanks Chris
 -
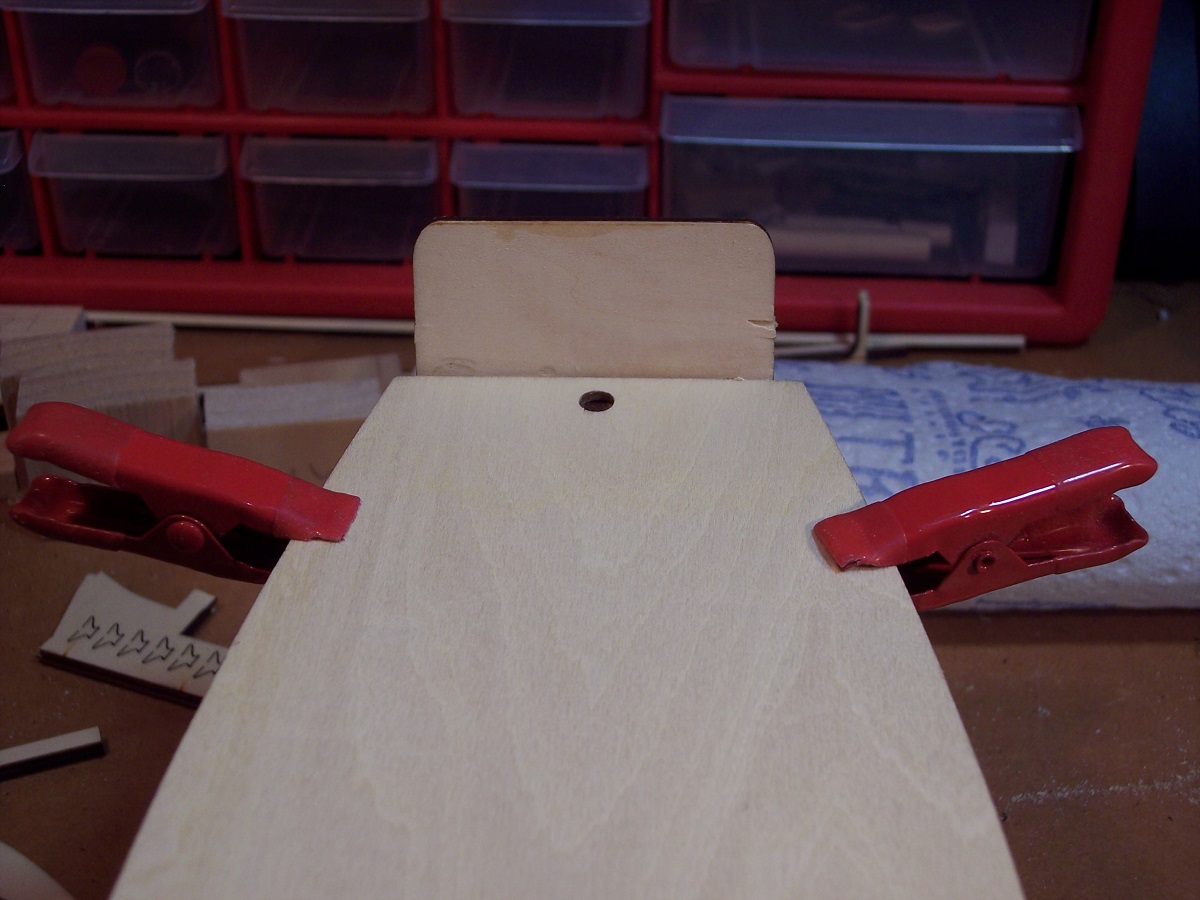
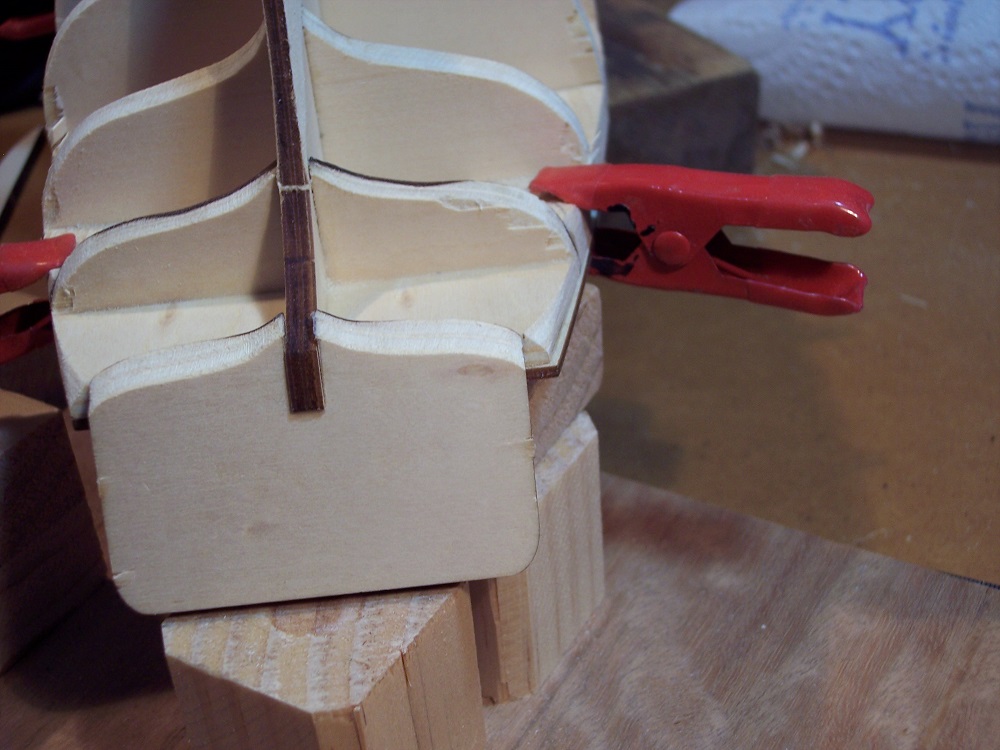
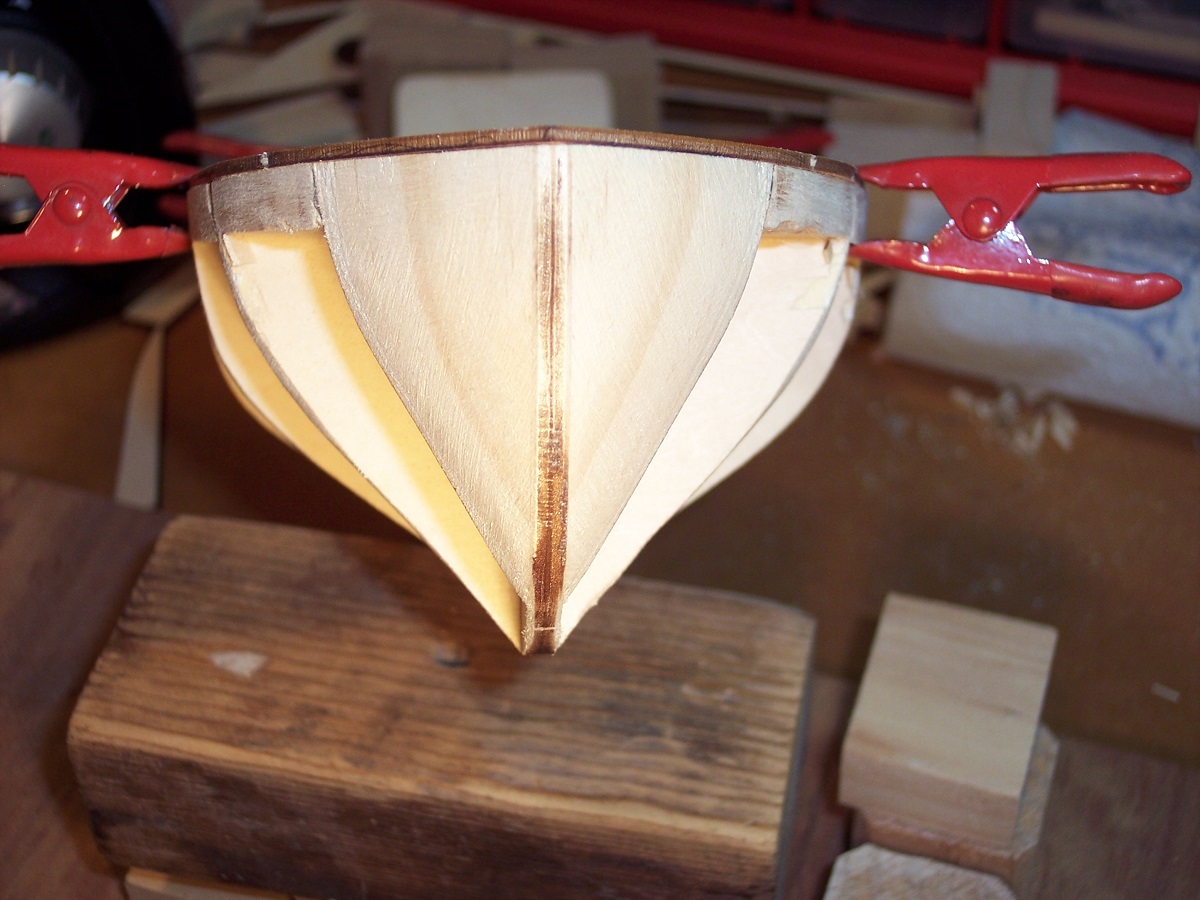
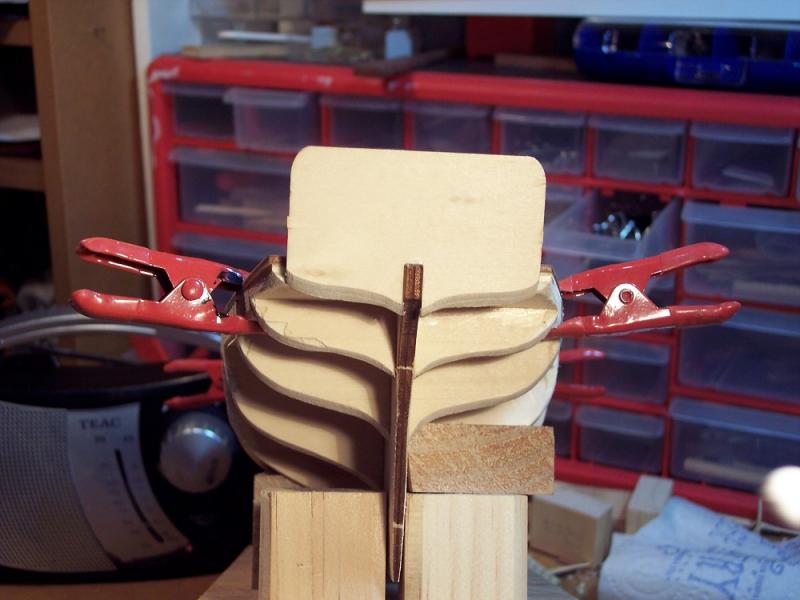
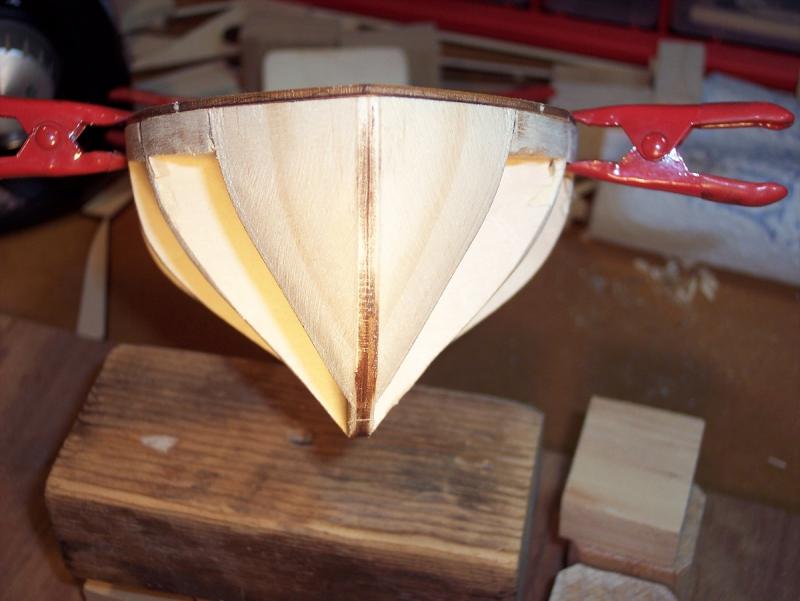
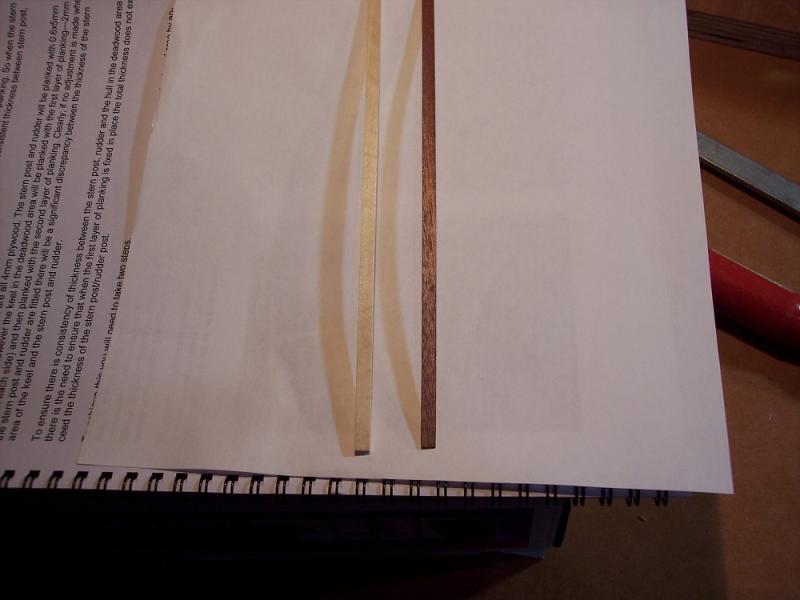
Thanks Hof But if you are watching, you have to help. A couple of questions for the brains trust, I have been fairing which was easy enough to do, except for the bit, up to each side of the transom. It seems to be a lot to take off, or should I glue some strips on to make the transom wider. And how should the bottom of the transom be finished? with the curl as now, or straight across, or as the plans have it, with a rounded bottom. A few pics to show


-
For someone who works at turtle pace, you seem to get a lot done. And it is all quality work. It will take me a month of Sundays to work out what you are doing with the cad program, and then actually do the building. You must have retired in recent times. Cheers Chris
-
Top work and technique there, Don. It still looks like you are having a load of fun Hooroo Chris
- 653 replies
-
- 6
-

-
- trabakul
- marisstella
- (and 1 more)
-
Thanks Rick, haven't thought that far ahead, but will look into it when I get there. Chris
-
Hi Don yes I know fiddling again, guilty as charged. Yes they are my filler blocks, I thought, after posting that i should have trimmed them a bit, but with the aid of various tools they will be bought into line. thanks Chris
-
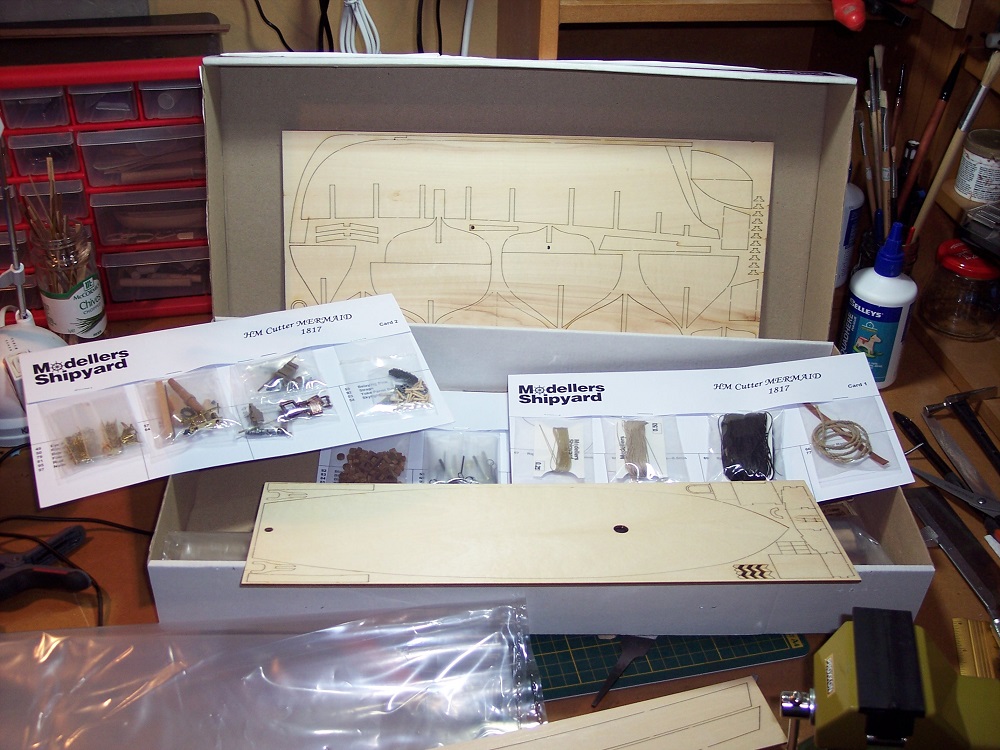
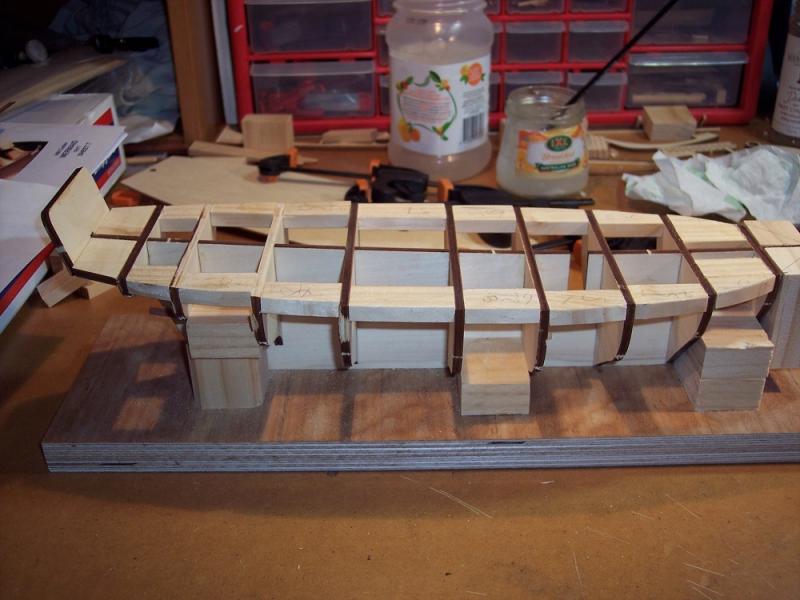
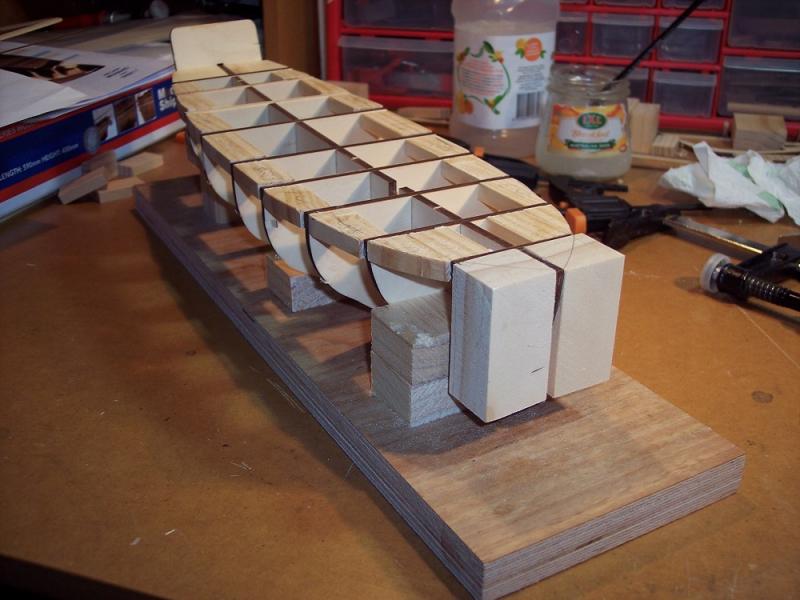
Yee hah A little modelling to update. After separating all the pieces and doing a dry fit, only one bulkhead needed a shim to bring it up to the right height, then I made a build board to hold and glued it all together. But one thing that is going to be hard to handle is the planking timber. The 1st planking is limewood, which I have never seen before, and is very hard and 2.2mm thick. it is meant to 2mm. The second planking is mahogany .35 to .4mms thick and meant to be .5. Modellers shipyard told me that the 2nd planking was mahogany, before I Bought it, but their picture advertised shows a browner timber. Which I like the look of better. (PS no complaints from me about it) Yes, I know that I am meant to be keeping this build simple, but I am going to thin down the lime wood to 1.5mm thick, which will still be hard work to use. Then I am going to cut my own 2nd planking from some Kauri that I have, of which I like the color much better. it will be .8mm thick. That will allow me to cut wider planks for spiling if need be. The mahogany that is left I am going to put on the deck, and the rudder. Anyway that is the plan, we will see what happens Cheers Chris
-
Top job dave It looks like you are a master of the little boats as well. Cheers Chris
-
Hi Martin You have got it right, I know very little about old sailing ships. it is just nice to sit down, and do something, and not stress about it. And thanks for looking in. Hooroo Chris
-
Thanks for that Rick, one of those things, that if you know, all is ok, otherwise you end up messing up, no fault of yourself. I will check very thoroughly when I get to it. Thanks Chris
-
Hi HOF Good to hear from you, Not about the quake though. I am glad we don't get those shakey things around here, cause too much mess. I hope you didn't suffer any damage or injury. Yes i think the new one will take just as long Cheers Chris
-
Hello J-H This is something I need to learn as well. i will keep an eye on what you are doing. Thanks Chris
-
Thanks Rick For the links, though I was thinking that I wouldn't be doing much research for this build, and I did groan, when I saw what you put up. If it is easy enough to decipher, and make changes they will be done, otherwise the ship will be as the kit is. Thanks Chris
-
Good Morning Don Thanks for looking in, yes all is well, just too busy at work and other things. Maybe at Christmas I can put a few days together and plan some items, and get organized. Its not so much the doing, but the, what and how. Hello Scott Thanks for the compliment. I keep telling myself that one day I will master the art of miniature carving and do them myself (LOL) The hull seems to be surviving ok, no movement or cracks. The Endeavour will be finished, just don't want to mess it up. Hooroo Chris
-
Scare Bleu, yes i know starting another one. As stated I my Endeavour log I am very time poor at the moment, but I need to do something. Something, I can just sit down and model with, and not spend time sorting out what and how to do. A couple of pics it will be done as the kit is, except after looking around it appears, a binnacle needs to be added. Cheers Chris

-
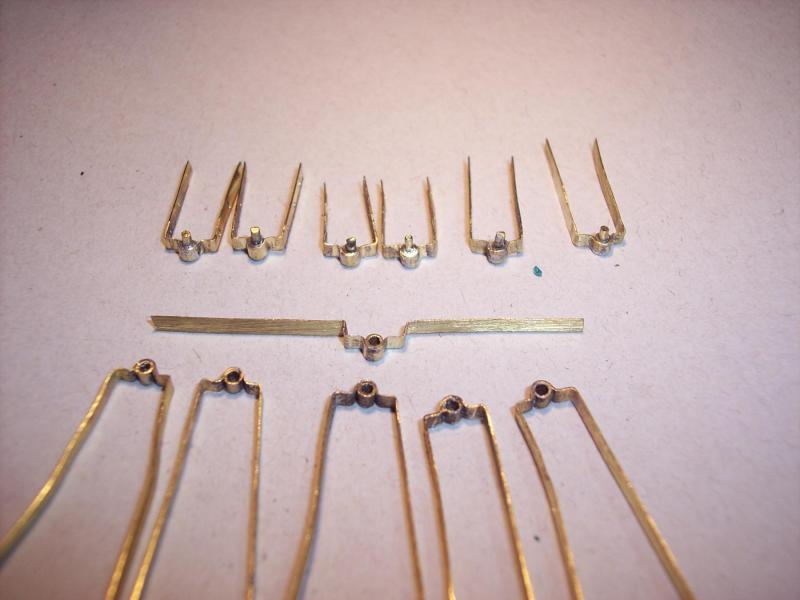
YO, Howdy folks, yes I am still alive. The poor Endeavour has been sitting on the desk feeling sad and lonely, and that is not about to change. The trouble that has developed, is that this build as I am doing it, is too involved, and takes too much thinking time, and because i am fiddling with it, changing timbers, and trying to do as accurate as possible, it is taking time I don't have at the moment. Therefore, it is on hold until I can put in more than an hour or so, here and there.. The time thing is not going to get better, because i am thinking about a change in how I work, that will make even less time available next year. That and all the other life things, that seem to be need to be done these days. I have done a little bit of construction, and made some hinges for the rudder, But because I need to do something, I am going to partake of that time honored tradition, of model ship builders, and start another one. Build log coming soon. Hooroo Chris
-
Good Morning Tim For a 2nd time builder you are very neat and precise. Finely detailed work on the hooks. Sorry can't help with the history side, I am new to old ships and model building myself. Cheers Chris And PS welcome to MSW
- 115 replies
-
- 2
-
-
- Scottish Maid
- artesania latina
- (and 1 more)
-
I really do feel sorry for you, Don, it must be terrible to have all this free time, and have to do modelling with it. i hope you are not suffering too much. Great looking model, it looks like a very enjoyable model to do. Back to the fun past time of mowing now. Cheers Chris
-
Good Morning Don Looking brilliant, the color of the timber gives it a real good natural finish. looking forward to seeing more. Cheers Chris
- 653 replies
-
- 4
-
-
- trabakul
- marisstella
- (and 1 more)
-
Hi Rowan thanks for dropping in and the and the likes. Getting my act together to do some more. Hooroo Chris
-
Hi Again SC, slow, is OK by me around here as well, at the speed you are going, you will zoom past me. I don't envy you using the 2x 6 sapeli, from what I have seen of it, it looks very brittle. I am looking forward to see how you do the lighting, that is something I want learn, but know nothing about. Hooroo Chris
-
Hi SC That looks a very neat and precise hull and it should look very good when you get the planking done. It looks like you have a very methodical way of constructing a ship, that will help a lot. Keep bringing us the updates. Thanks Chris
-
Howdy Hof, looking good, that is a big effort, stripping the first deck back and putting another on on. It looks like it will be worth the effort. What sort of glue are you using? When i did mine i used a fast setting Sellys white pva, i would put it on, then clean off the excess glue, and keep an eye on it while it was setting to make sure it stayed down. If it needed pushing down, the glue would grab if it wasn't dry. While I was doing that i would get the next one ready. The glue usually set in about 5 mins. Hooroo Chris
-
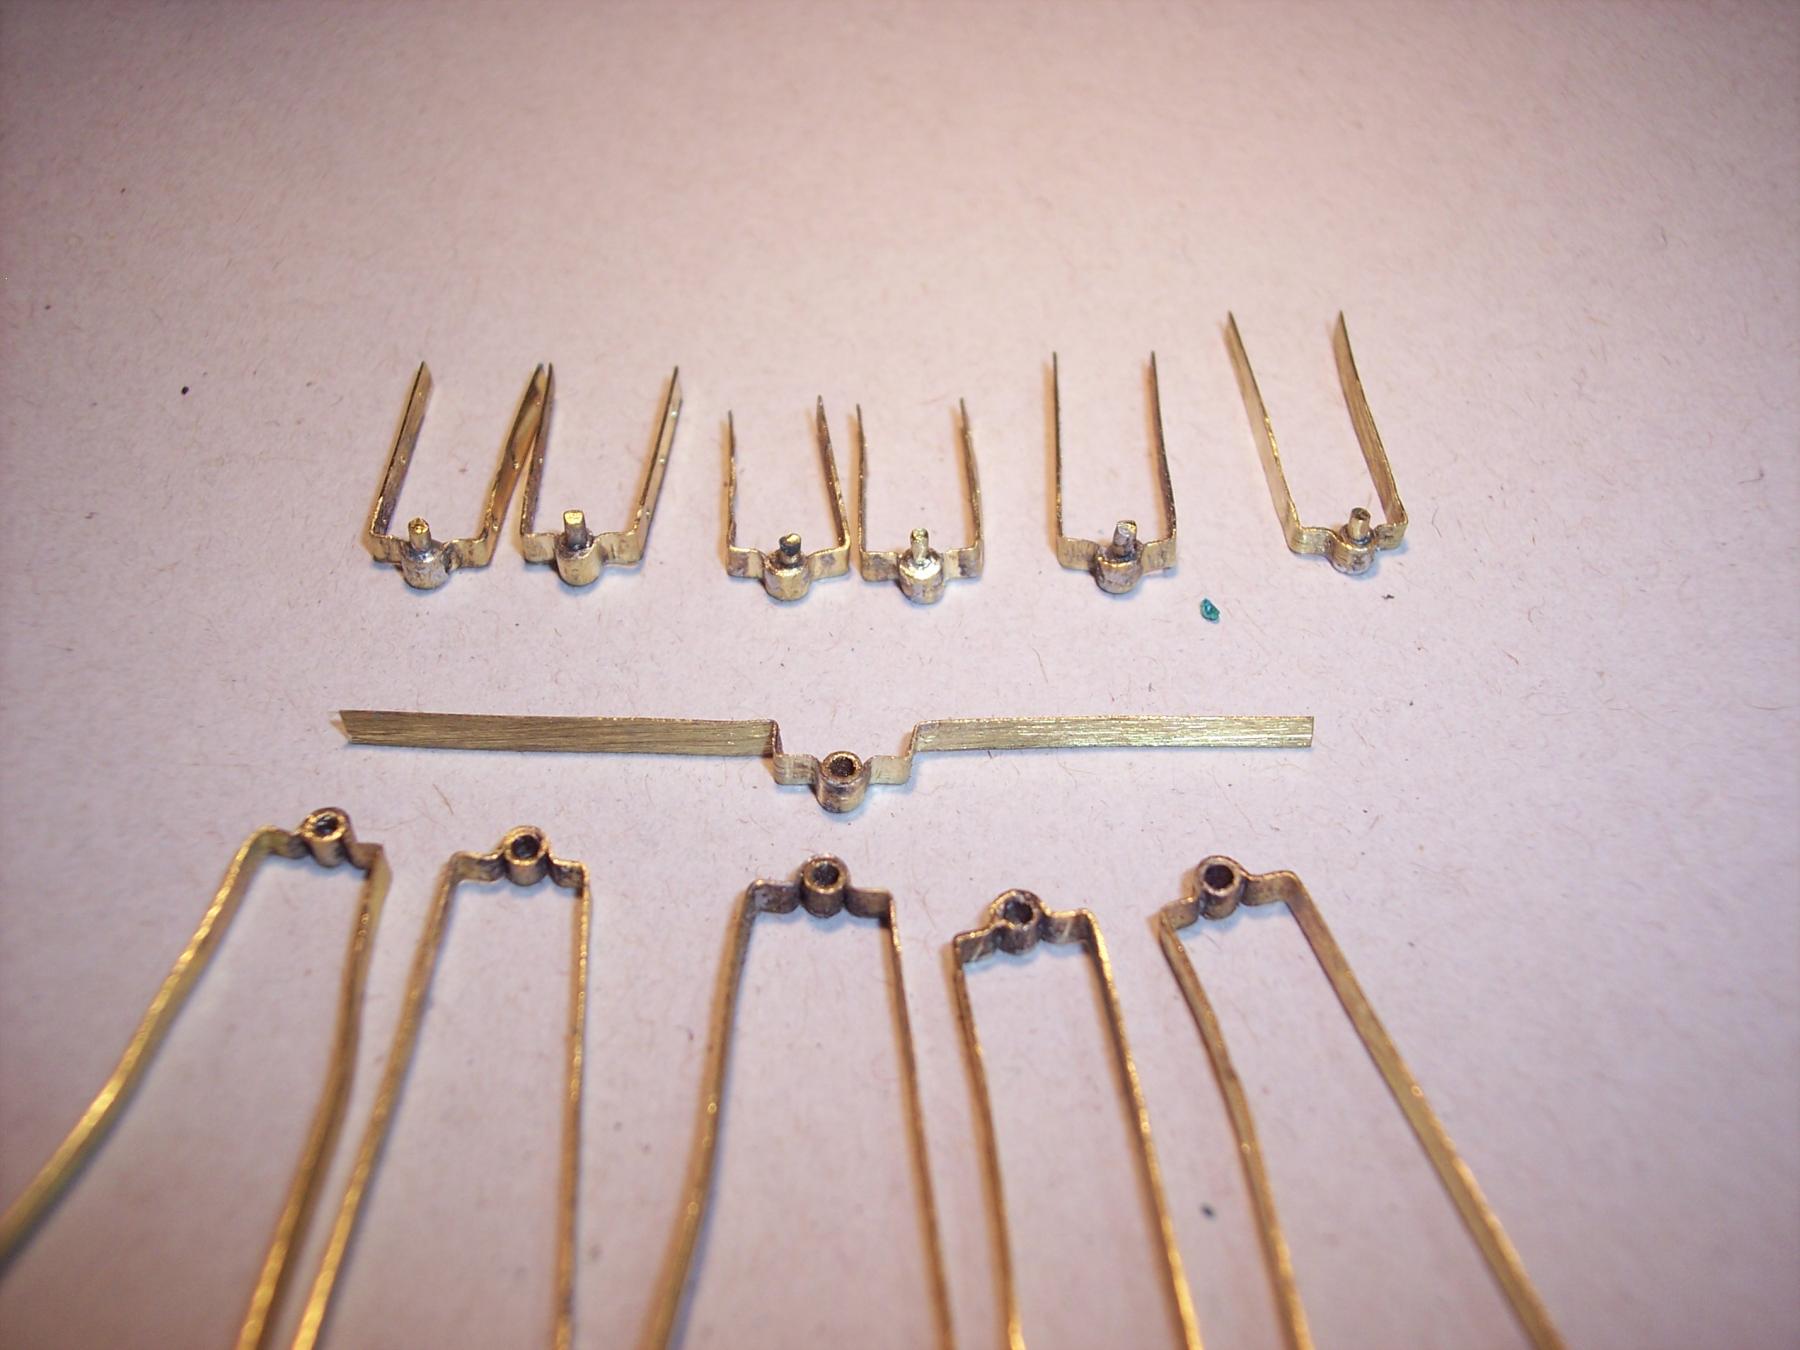
Good Evening Hof Time does get by before you know, its months later. I was just thinking, its time to get on with it. I have done a little bit lately, been making the rudder hinges and soldering them. I think they are going to look pretty good. I need to get the deck furniture sorted out and start making it. One thing that has been taking time lately, apart from all sorts of things around home, is that i have a new kitchen designing software, and I have been learning to use it. That and all the usual one person, small business, book work. Looking forward to seeing some pics of the new deck . Cheers Chris