HOLIDAY DONATION DRIVE - SUPPORT MSW - DO YOUR PART TO KEEP THIS GREAT FORUM GOING! (Only 20 donations so far - C'mon guys!)
×

Cabbie
-
Posts
599 -
Joined
-
Last visited
Content Type
Profiles
Forums
Gallery
Events
Everything posted by Cabbie
-
 Hi Dave I found this pdf today, I don't know if you have seen it before, but it could be handy for cross checking your rigging plans against. And for myself it will make it a lot easier to be able to see where the ropes are belayed. http://juwarki.org.au/wp-content/uploads/2012/03/VC-Man-final.pdf Cheers Chris
 -
Howdy Hof checking in to see how things are going I noticed that you are chasing a deck pdf, I have hunted around and haven't found any thing in the past. I did mine by looking at the pics of the replica and marking it out the best I could. I think it came up fairly close but its too hard to do properly without actually standing on the deck. Anyway I'm the ship master and builder and I like it as it is. I noticed that you have that decking topic, in the card model section, it might be a bit hard to attract attention there, but you have had a few replies. One thing I did find today is find this pdf I don't know if it has been put up at MSW before. It will be very handy when it comes to rigging, and there is a few other bits of info. http://juwarki.org.au/wp-content/uploads/2012/03/VC-Man-final.pdf Are you thinking of re-doing your deck? A lot of work to do that, but if it is really bugging you then I found the best idea is to just get on with and enjoy doing it. It's all good practice, and we just have to put it down to experience ( we never seem to be too old to leave that one behind) I have had to heed those words myself a few times. Now off to to do a bit on mine. Cheers Chris
-
Hi Steve, yes i do have the AOTS. I was thinking that it would be good to be able to look at these sorts drawings as well. Chris
-
I think it would be safe to that the Endeavour's rigging would be similar to what is shown in the book. Thanks Chris
-
Thanks folks I will look it up.
-
Can someone please tell me what book this image is taken from. it has very clear, precise drawing in it, and I want to buy the book. Image removed by me now that i know where it comes from Thanks Chris
-
Looking good Biz Clean the blocking up and you will have a very nice ship too work on. Cheers Chris
-
Morning Dash Looking at the tiller pic, I think that there is a metal cap on top of the rudder post to which the brace is attached to. I wonder if they added any more hinging under the canopy to make it stronger. I was just thinking too, I wonder if they hid a steel bar inside the laminated timber? Also that pic also shows a very clear view of the inside of the stern which will help for our models.
-
Hi Dash This page has a closer in shot and other pics, also a little model if the rudder and wheel assembly https://traveltoeat.com/hm-bark-endeavour-australian-national-maritime-museum-sydney/
-
HI Dash I kept this one, of the rudder. https://www.flickr.com/photos/49614558@N02/5672239356/in/album-72157626613240438/ And this album Of The Endeavour in dry dock has a couple looking up. https://www.flickr.com/photos/endeavourvoyages/sets/72157634081735926 I think you are right about the brace it looks like it on the drawing. I opened the image in photo viewer and enlarged it and the brace line is there. It doesn't seem to show the tiller support you are asking about though. Something else about that drawing it has 2 steps in the gunwales, so i don't know if any ones knows what's correct. Chris
-
Here is a couple of photos showing the setup on the replica https://www.flickr.com/photos/endeavourvoyages/10322467525/in/photostream/ https://www.flickr.com/photos/endeavourvoyages/10322645013/in/photostream/
-
Thanks Pat, Yes very nice to work with, soaks and bends easy. It is a bit dull at the moment, but with some poly later it will come up very nice. Cheers Chris
-
Good Morning Ian i have been a bit remiss in not looking at your log for a while, that is some mighty fine work you have been doing. The anchor stock jig worked a treat, and your work is so neat and tidy. In fact, I reckon you must be hiding something from us, a background your keeping secret, you have the ideas and the workmanship of someone much more experienced. She is going to be a real beauty when finished. I was thinking along the same lines with my wales, and putting a black stain on them for a bit of variety. it will be good to see what the ebony miniwax is like. The only problem with mine is that they are a soft wood and won't take the stain even. Keep the good work coming Cheers Chris
- 191 replies
-
- 2
-

-
- victory
- caldercraft
- (and 1 more)
-
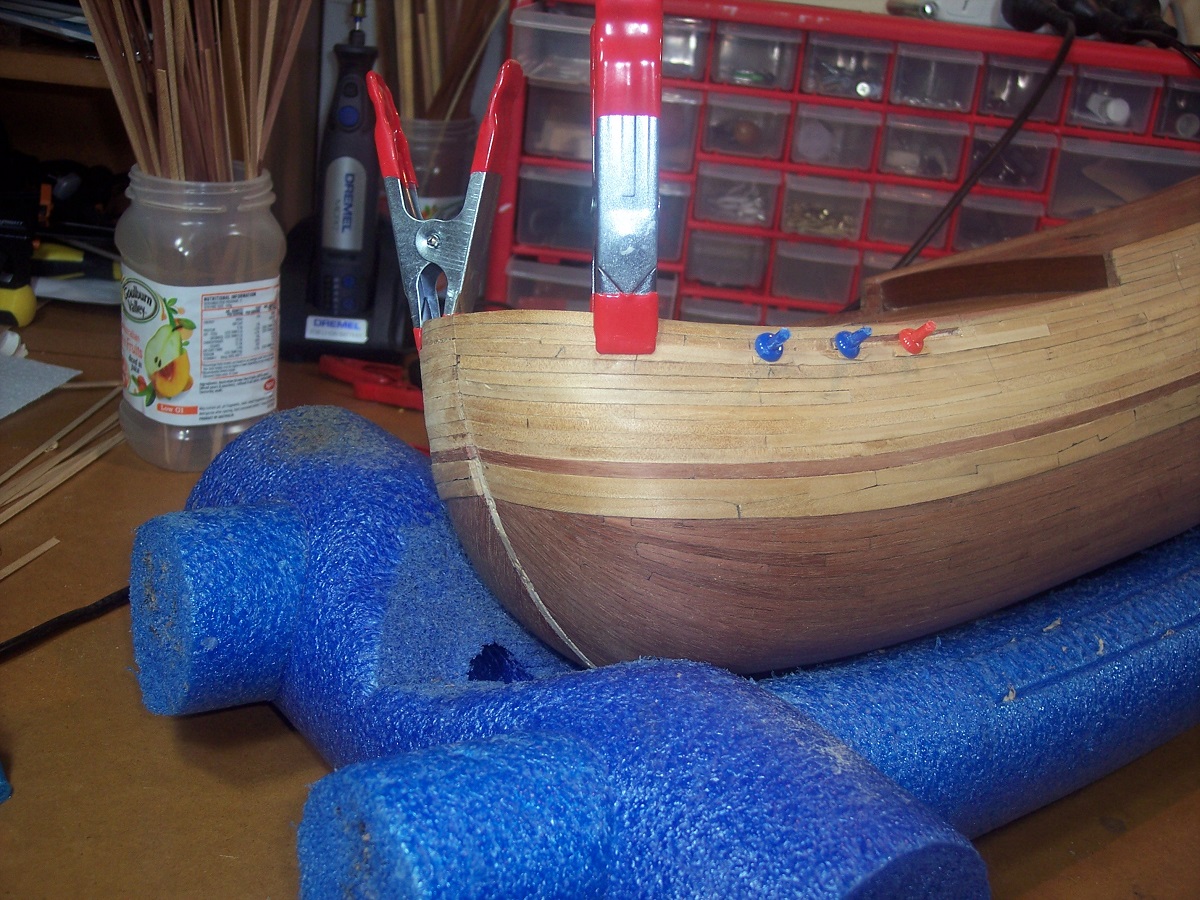
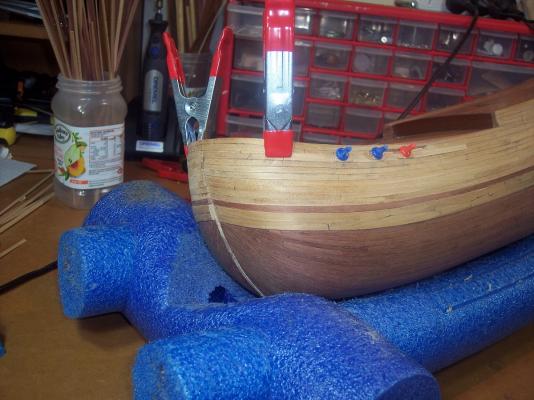
Howdy Hof I have been plodding along a bit, time has been a bit of a battle, as well as the planking. But others seem to think that once you get past it the fun things start to happen I think that sometimes we put too much pressure on ourselves, to get things done and to do it at a certain standard, and that takes the fun out of it. So I decided a while back just to let it happen as it does, and that it will finish as it does. Though I will keep looking to learn, and improve the skills. I had to replace some bow planks that I sanded through, It was probably worse thinking about, than actually doing it. But on the deck a bit of well placed cargo might do the job for you. Someone around here has a saying that if you treat each little part as model itself, you will do thousands of models, that is what I am doing now taking it bit by bit and not looking at the bigger picture too much. Enough talk, a couple of pics of where I'm up to. Its a bit hard to see the 2nd layer Kauri planks, but trust me they are there. Cheers Chris

-
Hi Dash have a look in here https://www.flickr.com/photos/endeavourvoyages/albums/with/72157634081735926 Only 3729 photos, but the Albany to Port Lincoln album has a few not quite complete pics Chris And a few photos here http://www.modelships.de/Museums_and_replicas/Endeavour/Photos%20HMB%20Endeavor.htm PS, if someone could remove the people it would be much better for us
-
Yes Don I agree as well, Dave, it looks as though you have a great assembly line set up, producing very consistent looking chains. And yes the pics look real good showing up your work. Chris
-
Very nice dash The lines, the colours, and the brown stuff on the hull, are all combining to make her very enjoyable to look at. Cheers Chris
-
Great looking work Pat They are going to look very neat and even on the ship. Chris
- 517 replies
-
- 2
-
-
- Endeavour
- Artesania Latina
- (and 1 more)
-
I was thinking that you had gone past gluing the deck down. It is looking very good . Cheers Chris
- 114 replies
-
- 1
-
-
- swift
- artesania latina
- (and 2 more)
-
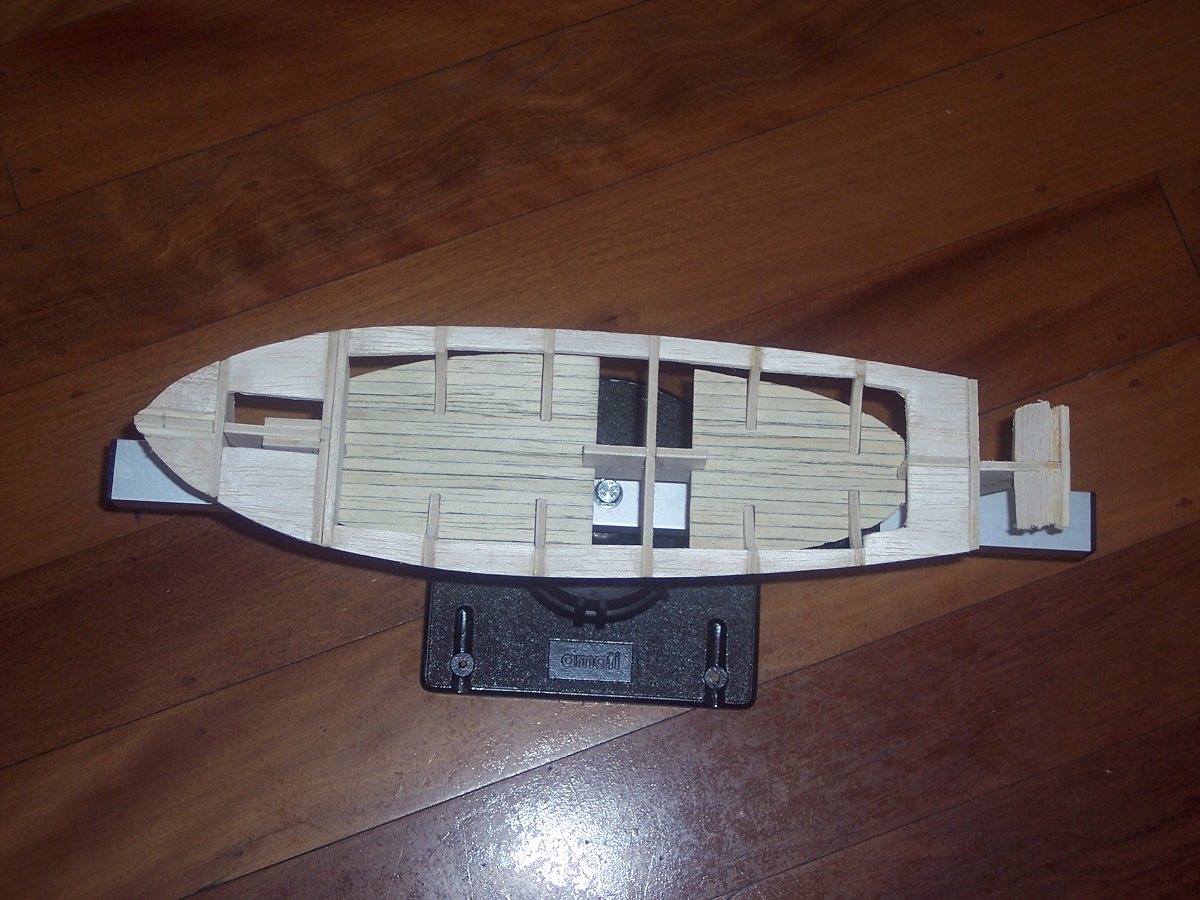
I also added strips of timber along each side at the top of the bulkhead, to help hold it straight,and the bulkheads square. They were also good to help hold the deck down when gluing it.

- 114 replies
-
- 3
-
-
- swift
- artesania latina
- (and 2 more)
-
Good Morning Stripehunter and welcome to MSW. My first ship was the Swift 1805, and i think that it was very challenging for a first ship, but a great ship to learn with. BUT, do not be anxious to finish, you probably won't be happy with it. There are a lot of things you need to learn, to do ship modelling, so you might as well start learning how to do them now. Look around this site it has all the resources you need. So take a deep breath and relax so you can enjoy ship modelling. It will be finished when it is finished. Cheers Chris
- 114 replies
-
- 5
-
-
- swift
- artesania latina
- (and 2 more)
-
Hi Dave If i get down on my knees and beg, will you pass this information on to me later? Oh and did I say your model is looking absolutely brilliant. Thanks Chris
-
Very nice work Dave You have been a very busy chap. The chains look very straight and neat and with the deck furniture she is coming along real well. Hooroo Chris
-
Good evening mark Not too sure what 2nd planking you are thinking of. I am going to put a second layer above the wales, there are some ugly gaps in the 1st layer and because i have caulked I can't fill them, wouldn't look right. We were talking treenailing above and I don't know if it is a worth while exercise and whether I would do a good enough job of it. Cheers Chris
-
Hi Pat I haven't done the deck planks, I'm thinking that I will leave them as well. The Jarrah on the hull will go fairly dark when varnished, and I don't know if the treenailing will show up that much, for something that will be a lot of work. Besides I like how it looks now (that's my story and I'm sticking to it.) Thanks Chris