HOLIDAY DONATION DRIVE - SUPPORT MSW - DO YOUR PART TO KEEP THIS GREAT FORUM GOING! (Only 24 donations so far out of 49,000 members - C'mon guys!)
×

Gaetan Bordeleau
-
Posts
1,307 -
Joined
-
Last visited
Content Type
Profiles
Forums
Gallery
Events
Everything posted by Gaetan Bordeleau
-
 They are interested up to they see a $
 -
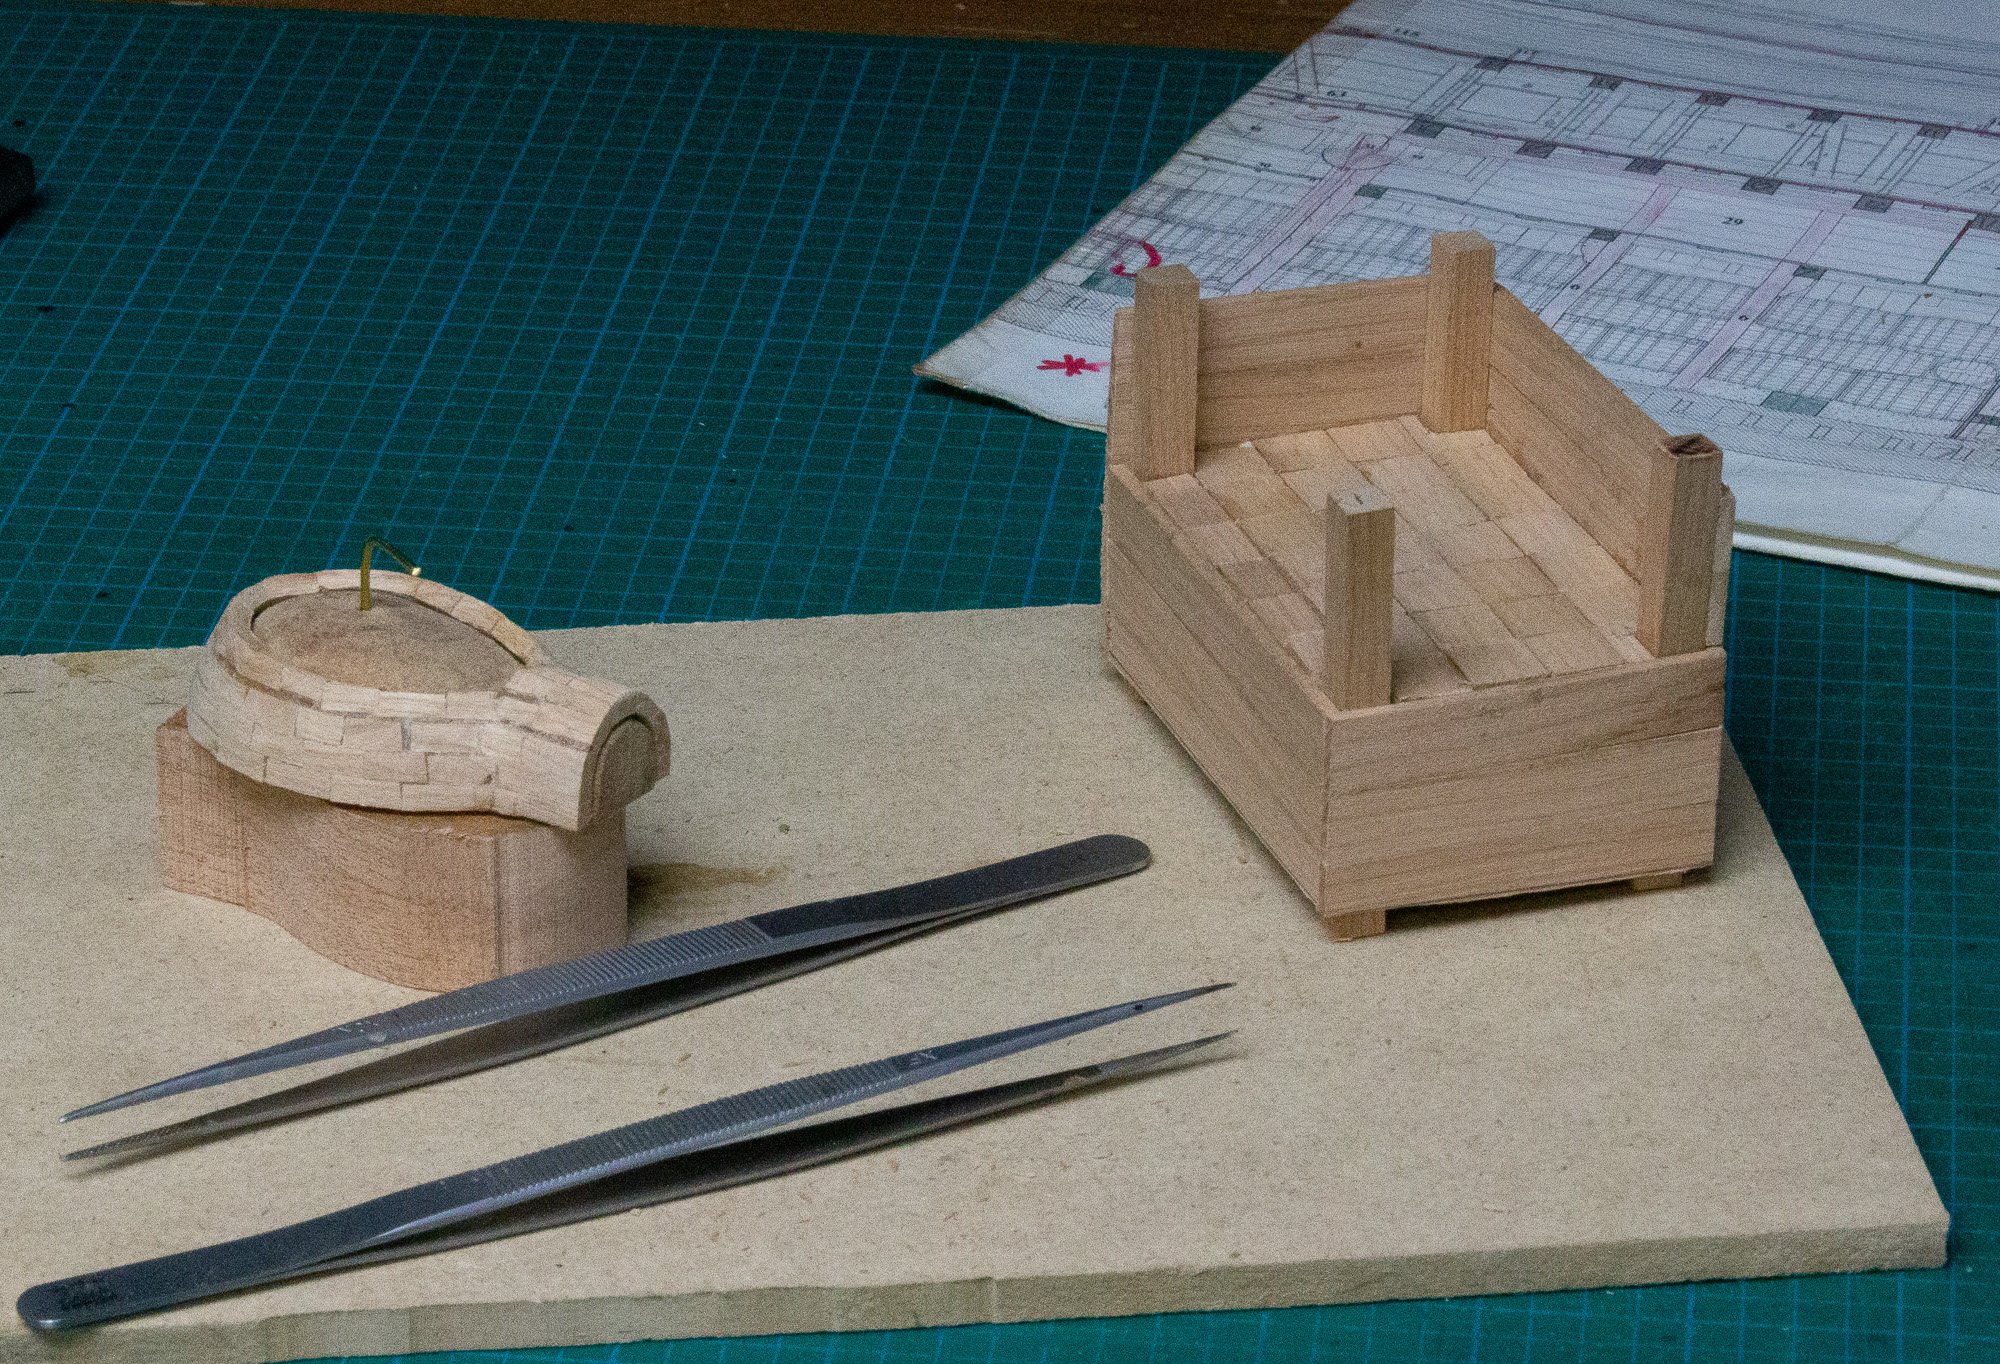
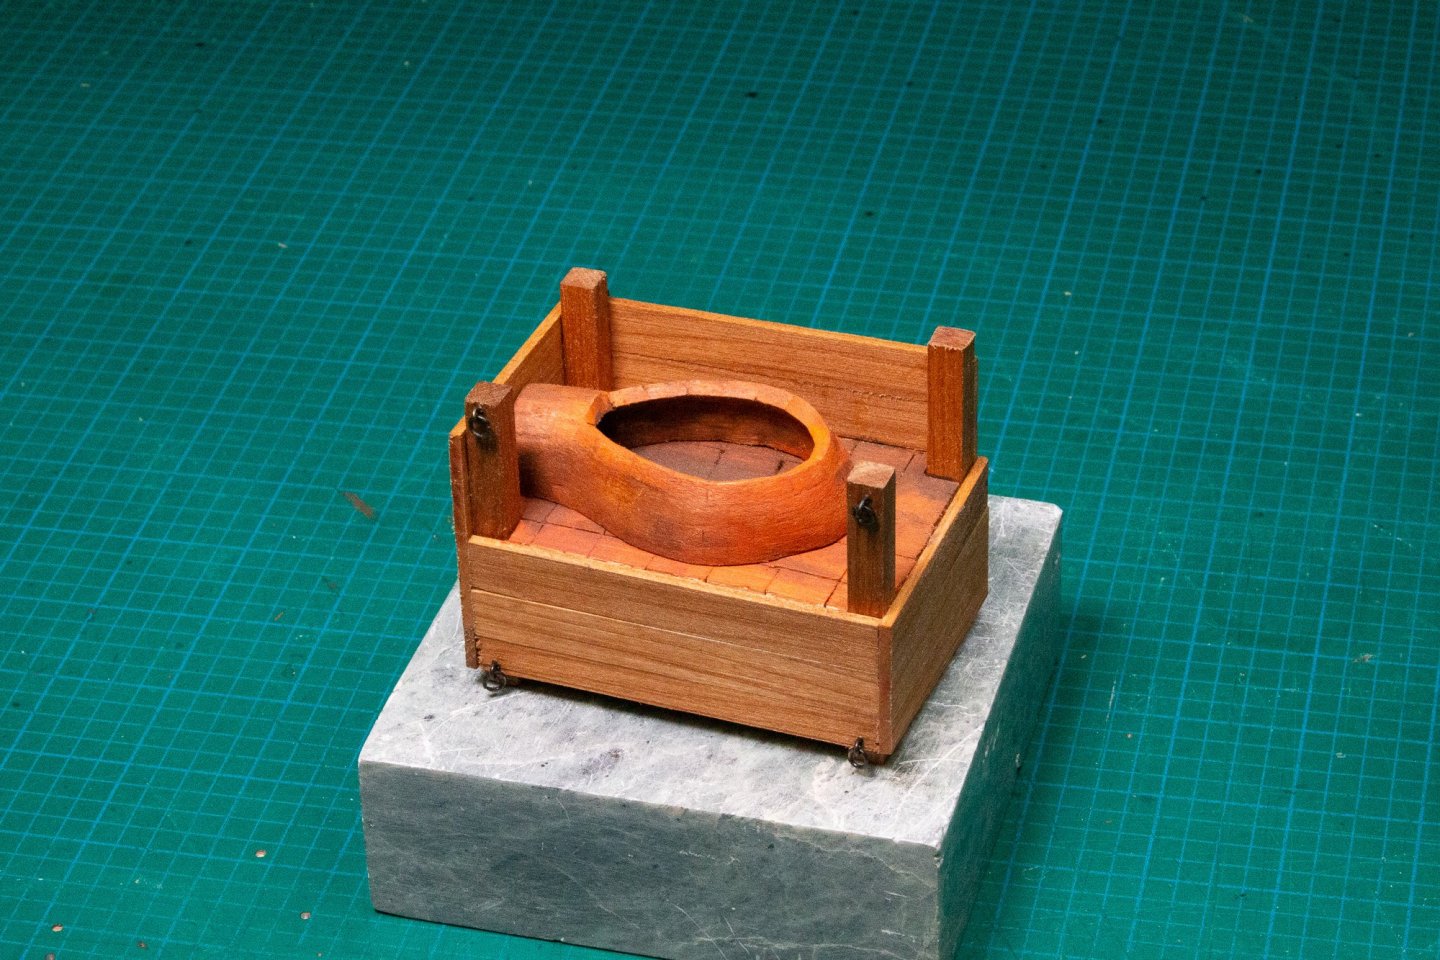
There is a second oven on the ship. The pastry oven is intended for high ranks officer tables only. Before cooking the pastries, embers are placed on the floor tiles of the oven until the pastry oven is hot enough. The opening of the oven is on the port side. All that concerns the service of the meals for the officers takes place on port side under the forecastle. For this reason, a wall of planks separates the kitchen in 2. The small oven weighs around 3500kg. The weight of the bread oven is 8000 kg. Around 150 kg of bread can be cook at the same time. The floor can be made of tiles or "oven earth"; clay soil mixture, limestone earth and sand.


-
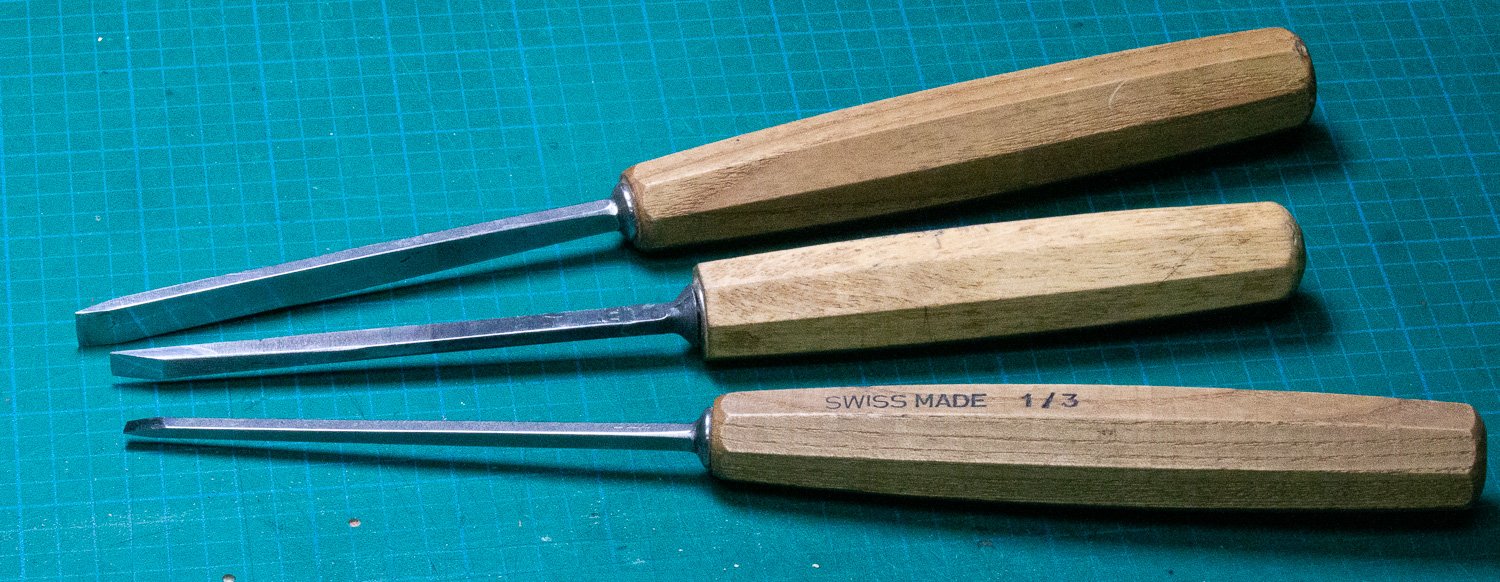
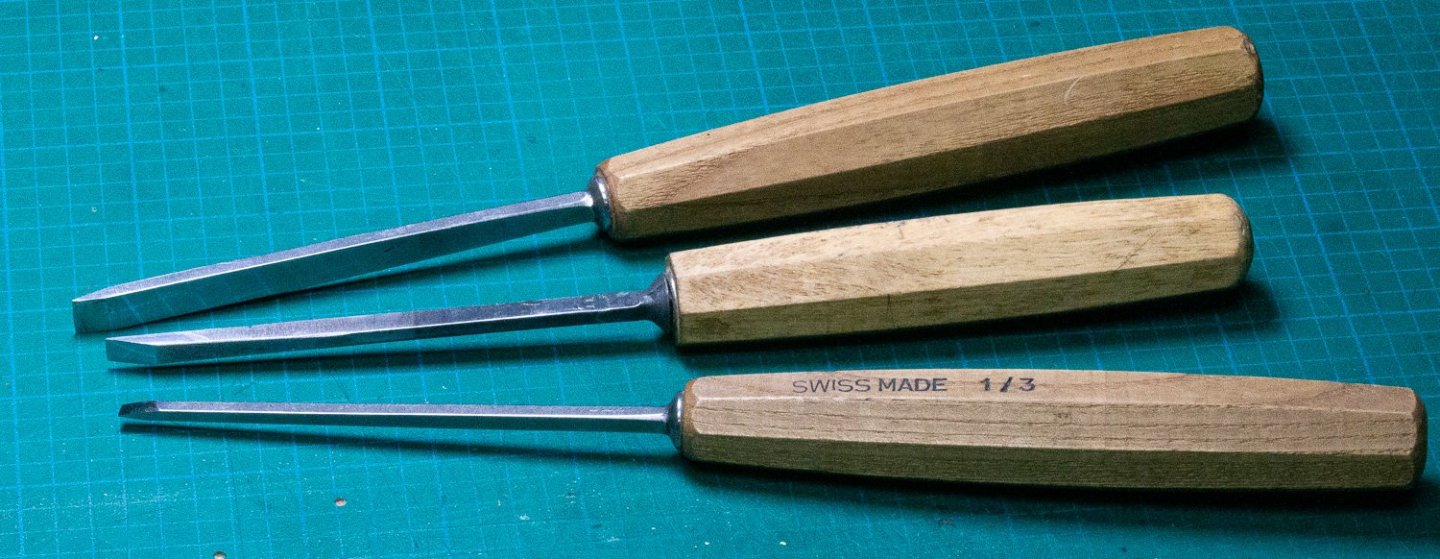
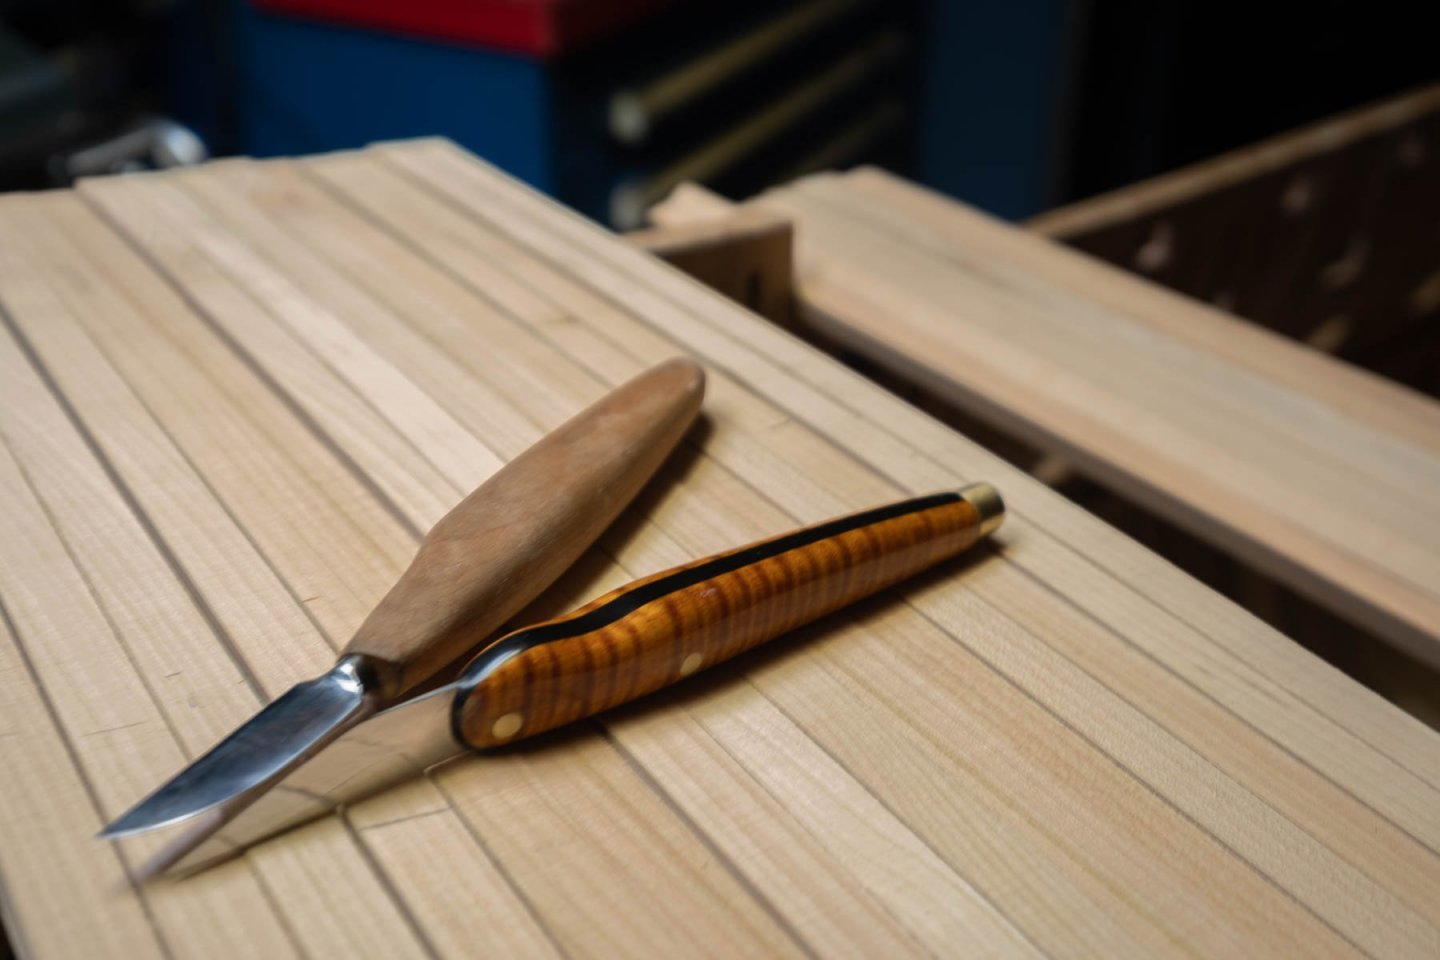
Between pages 15 and 20, with the help of Vossiewolf, we have explained intensively: what is a good knife, how to grind it, sharpen it with water stones and why to use a leather strope with polish compound.
-
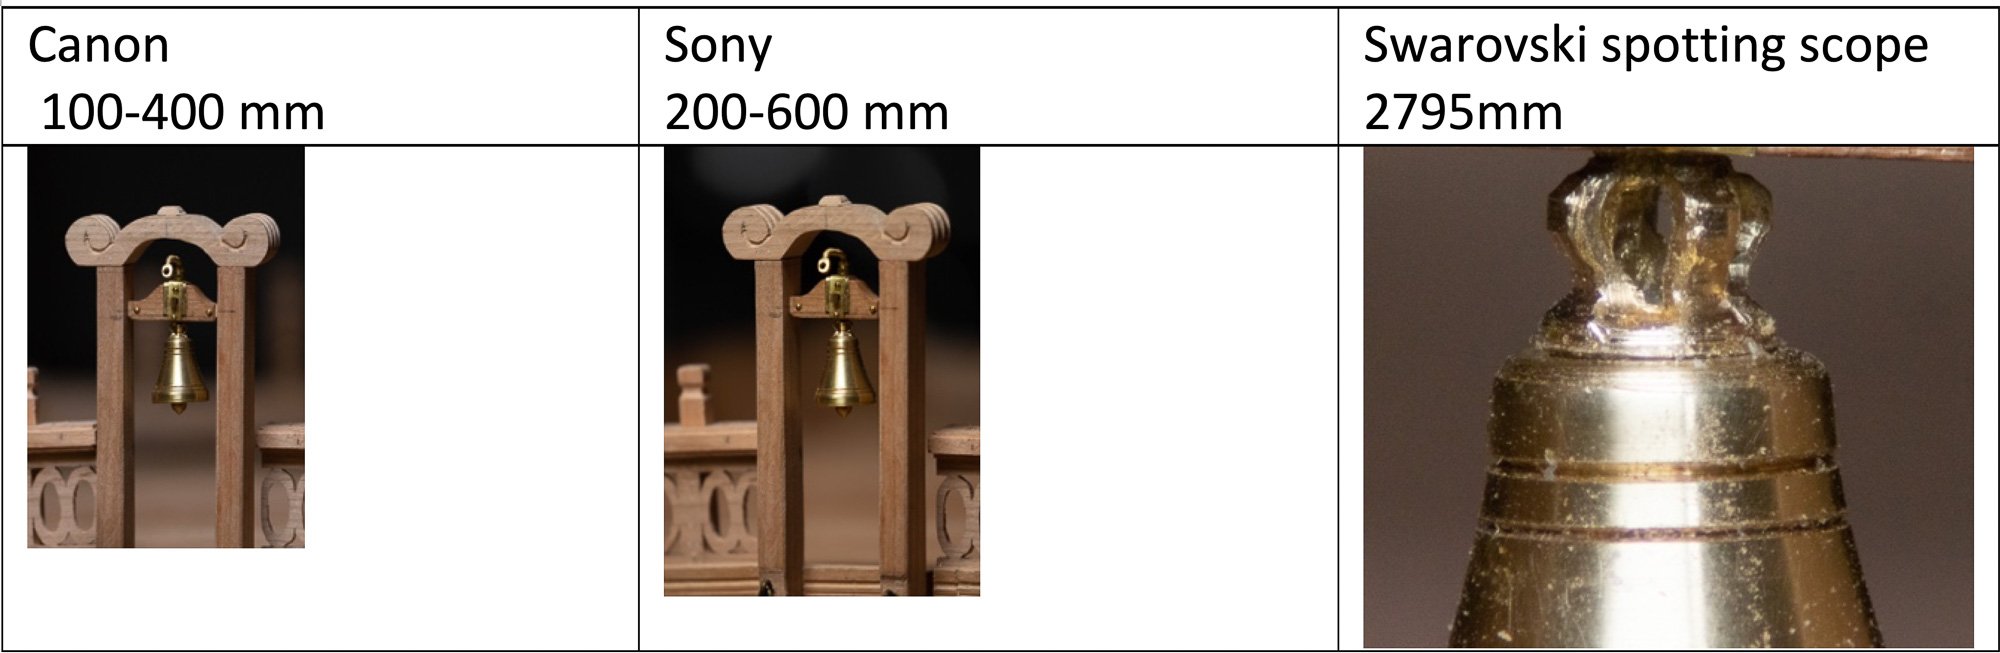
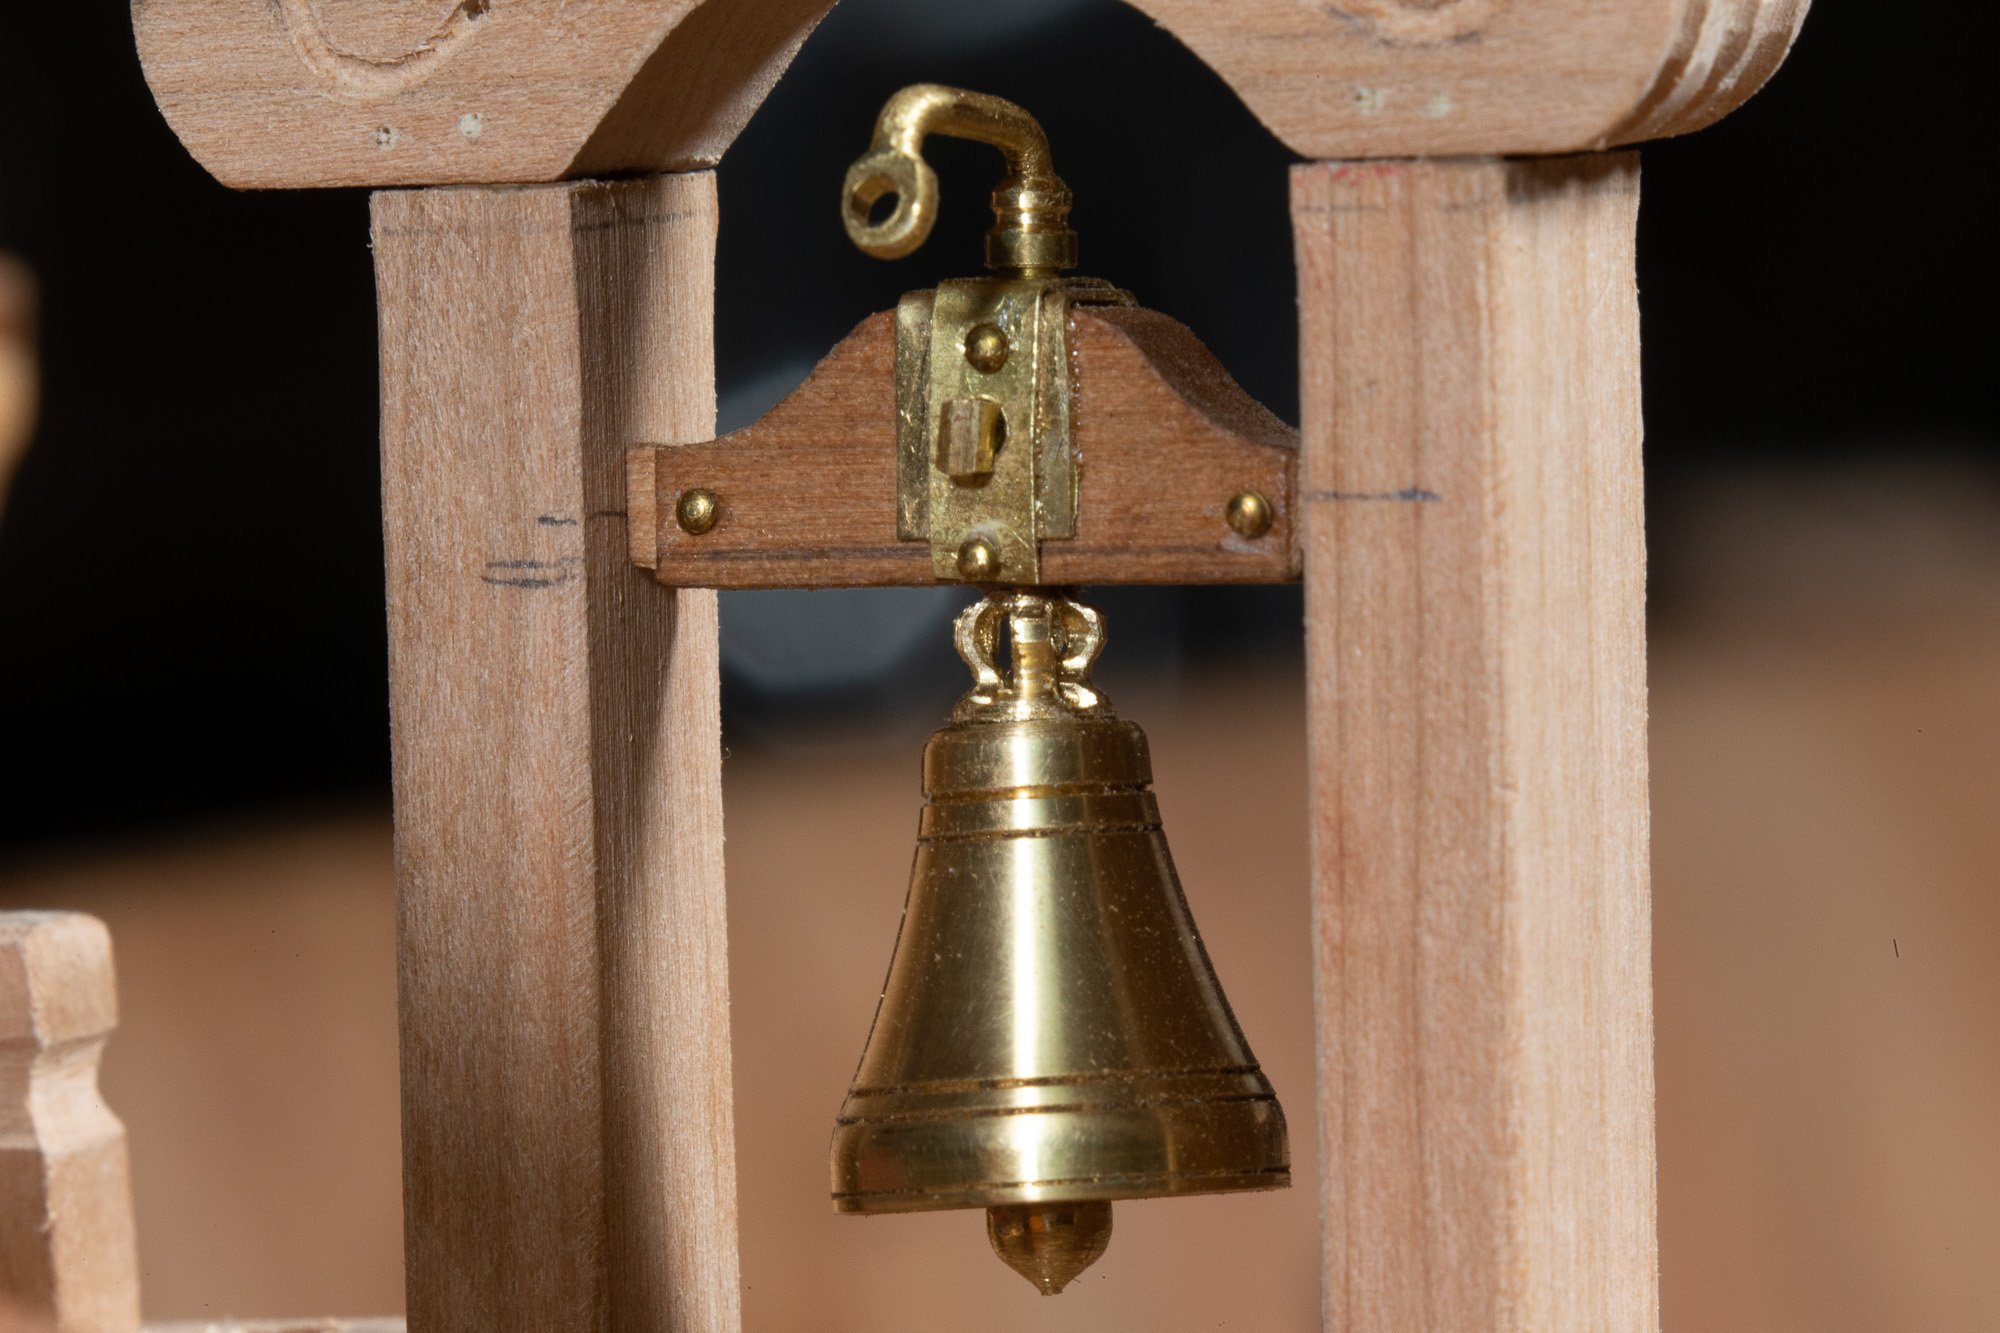
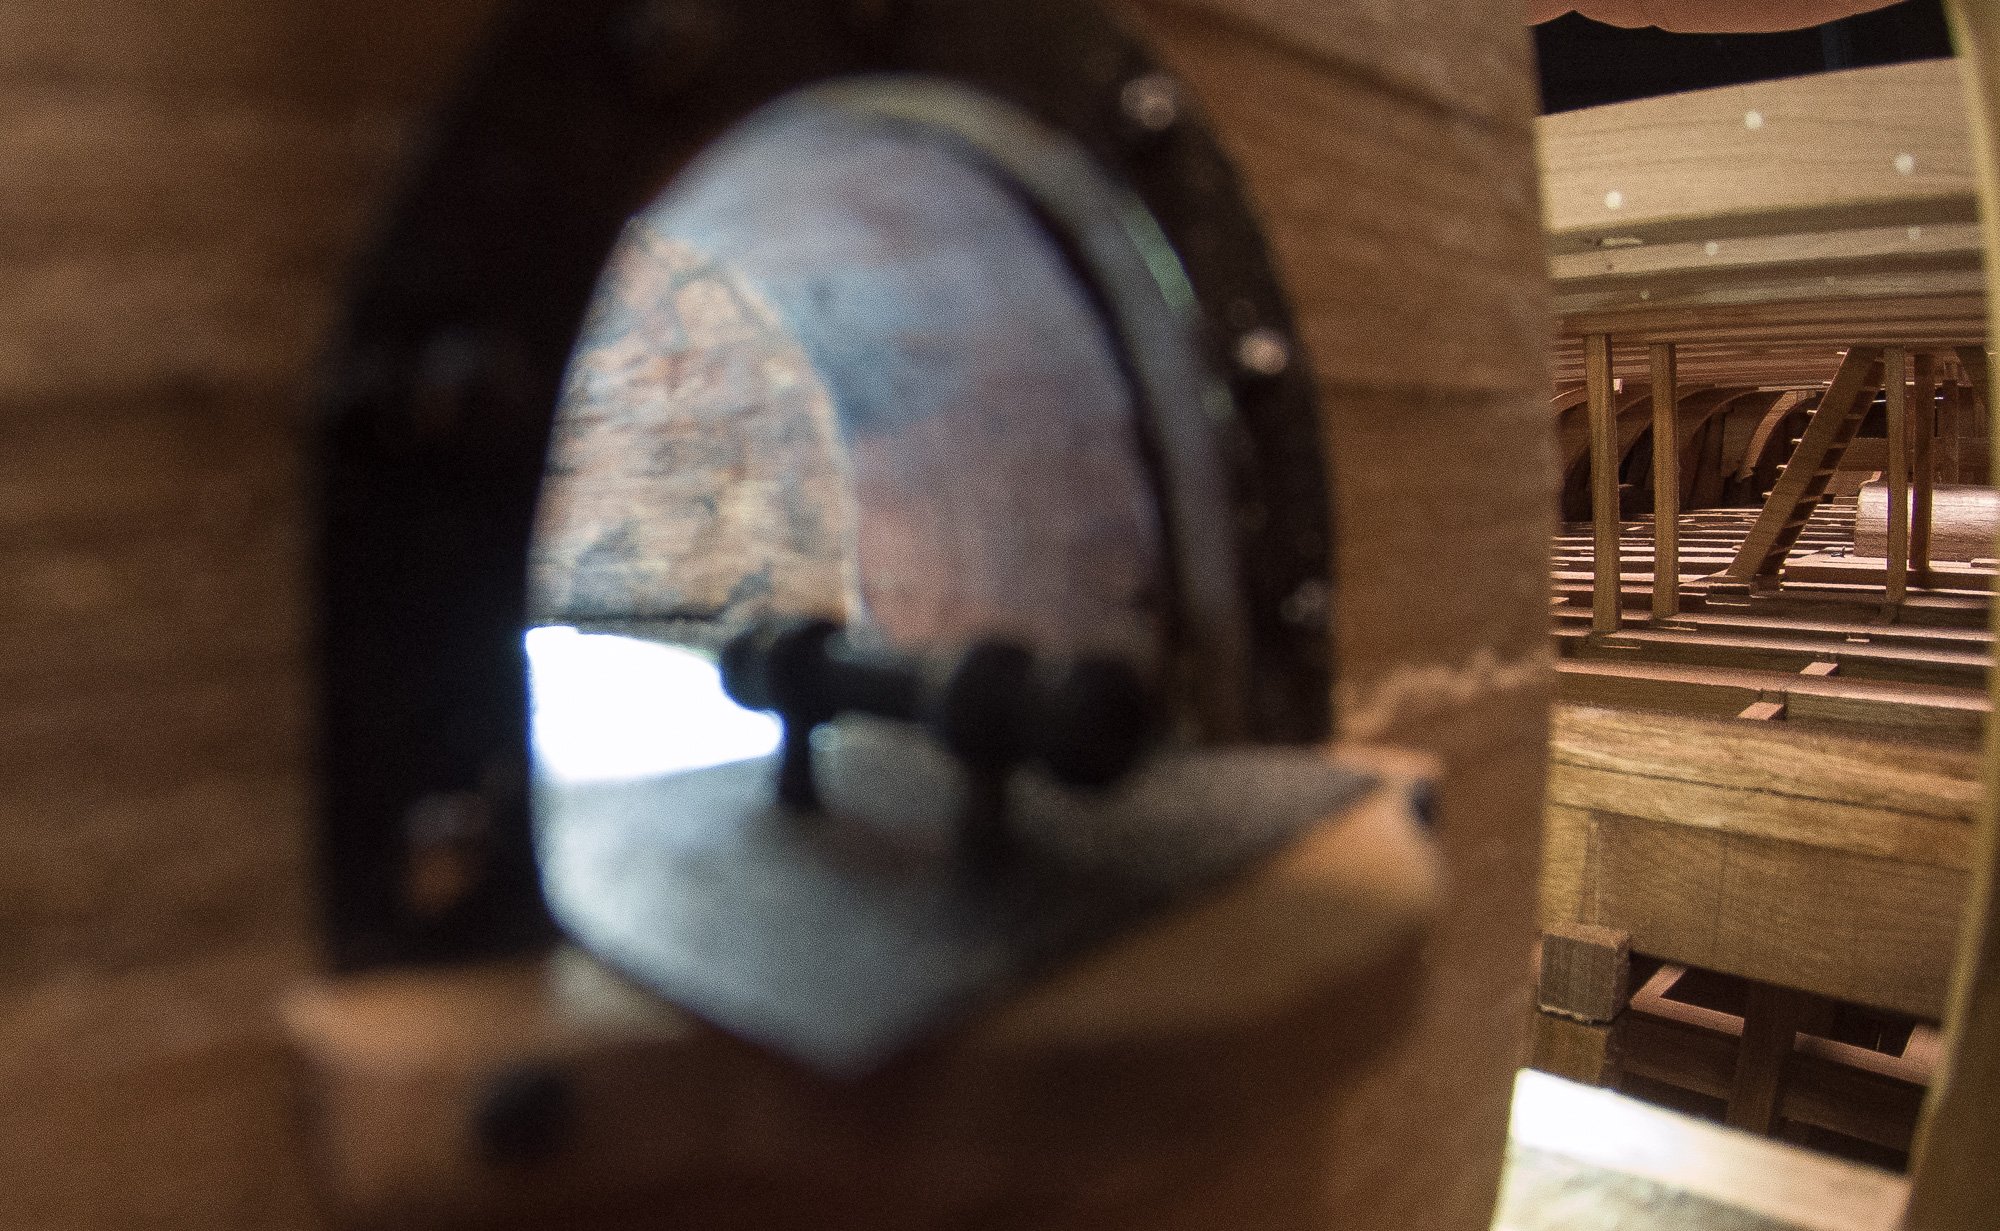
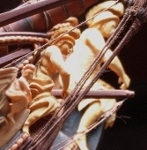
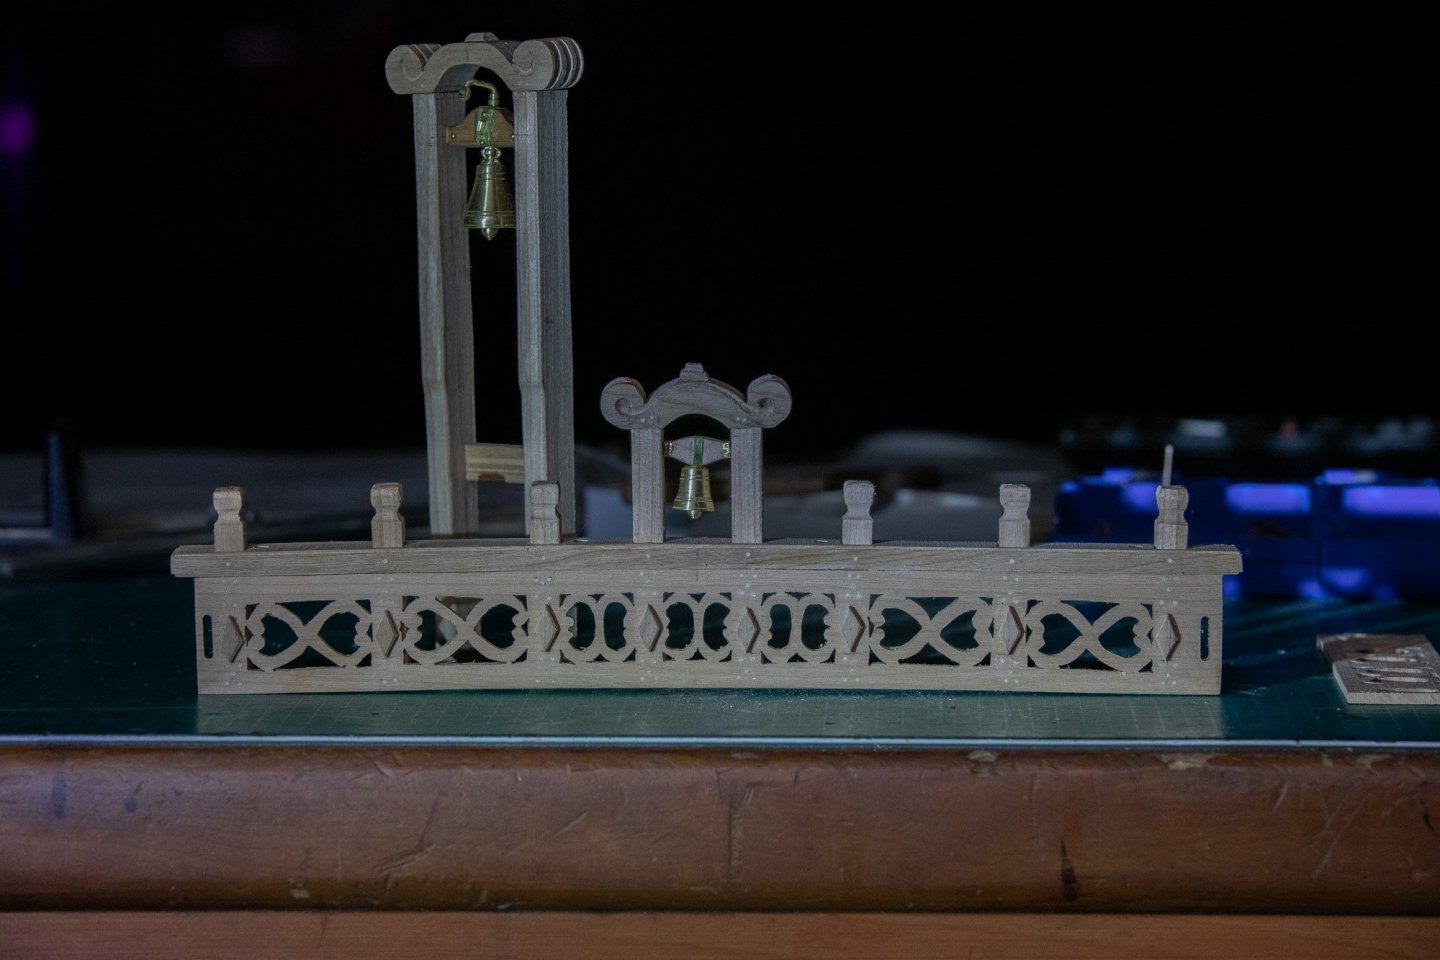
Mark, The second photo, is not from the Sony 200-600, but from the Canon 100-400. Probably, for a telephoto lens, an object relatively far, would be sharper with the Sony 200-600. Telephoto lens often have a minimum focusing distance of 2 or 3 meters. In this particular case, the Canon 100-400 has a minimum focusing distance of less than 1 meter. I guess that, for this reason, the photo has been taken, more than 50% closer in distance, at a distance of 1 meter instead of 2,4 meters. It is probably why the photo with the Canon lens is sharper. My goal, when I did this test, was to have a photo as sharp as possible. Did I cheat, by not taking the photos at the same distance? What you have to remember, is that a telephoto lens is often useful to take photos in a "macro photography mode". I will give an example: I like to take photos of flowers. -If I want to do a photo in a macro mode, I will need to be very close to the flower, often less than 1 foot. -If I use a telephoto lens, it is possible to do a similar photo by being at 1 meter by example and not worrying about other flowers near by. -It is also possible to do macro photography with a spotting scope, a lens able to see at kilometers away. I can be at 3 meters, and photograph the flower pistils. I also can take a detail of the bell while being at 3 meters as in the previous photo. The idea is that it is sometimes easier to position yourself far from the object with less binding objects.
-
I tried a lot of different knives and 2 categories are very interesting: For the lathe and the mill, there is no need at the beginning. A metal lathe can do everything a wood lathe can do, so it is a waste to buy a wood lathe

-
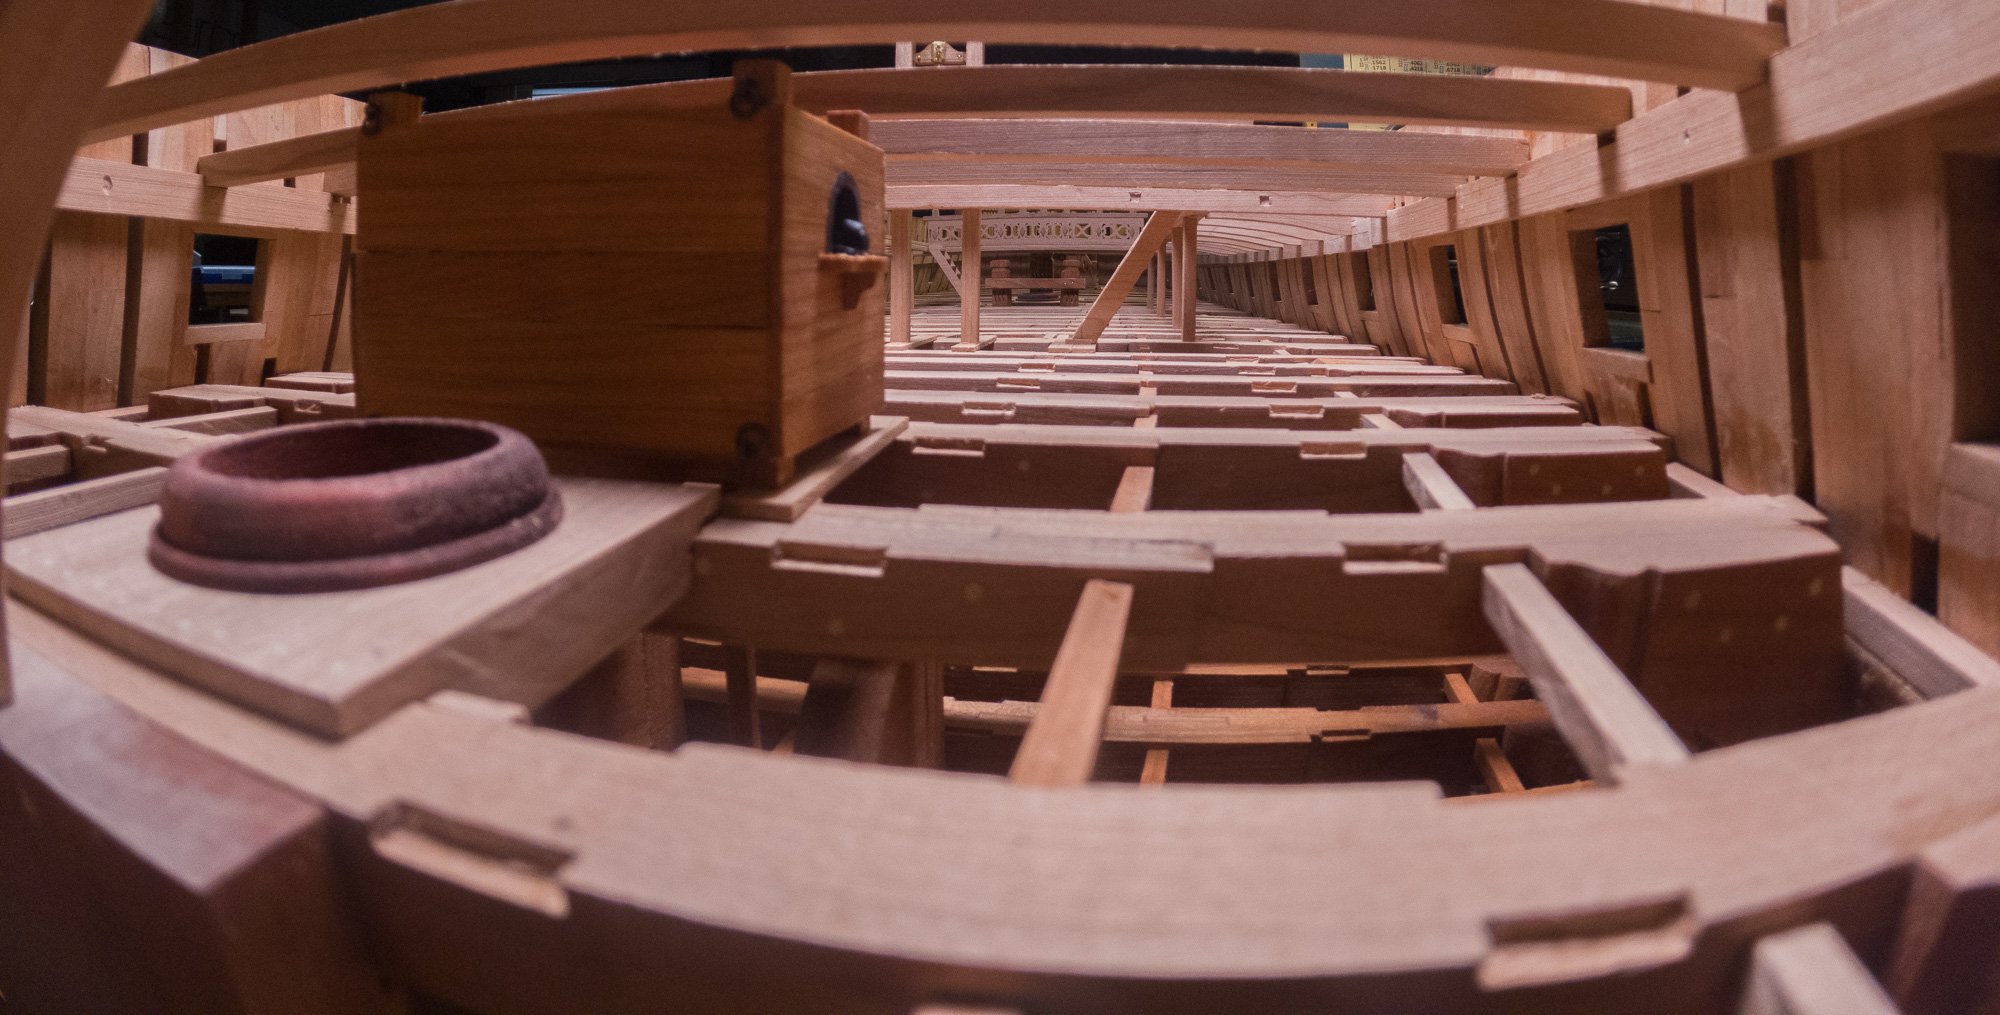
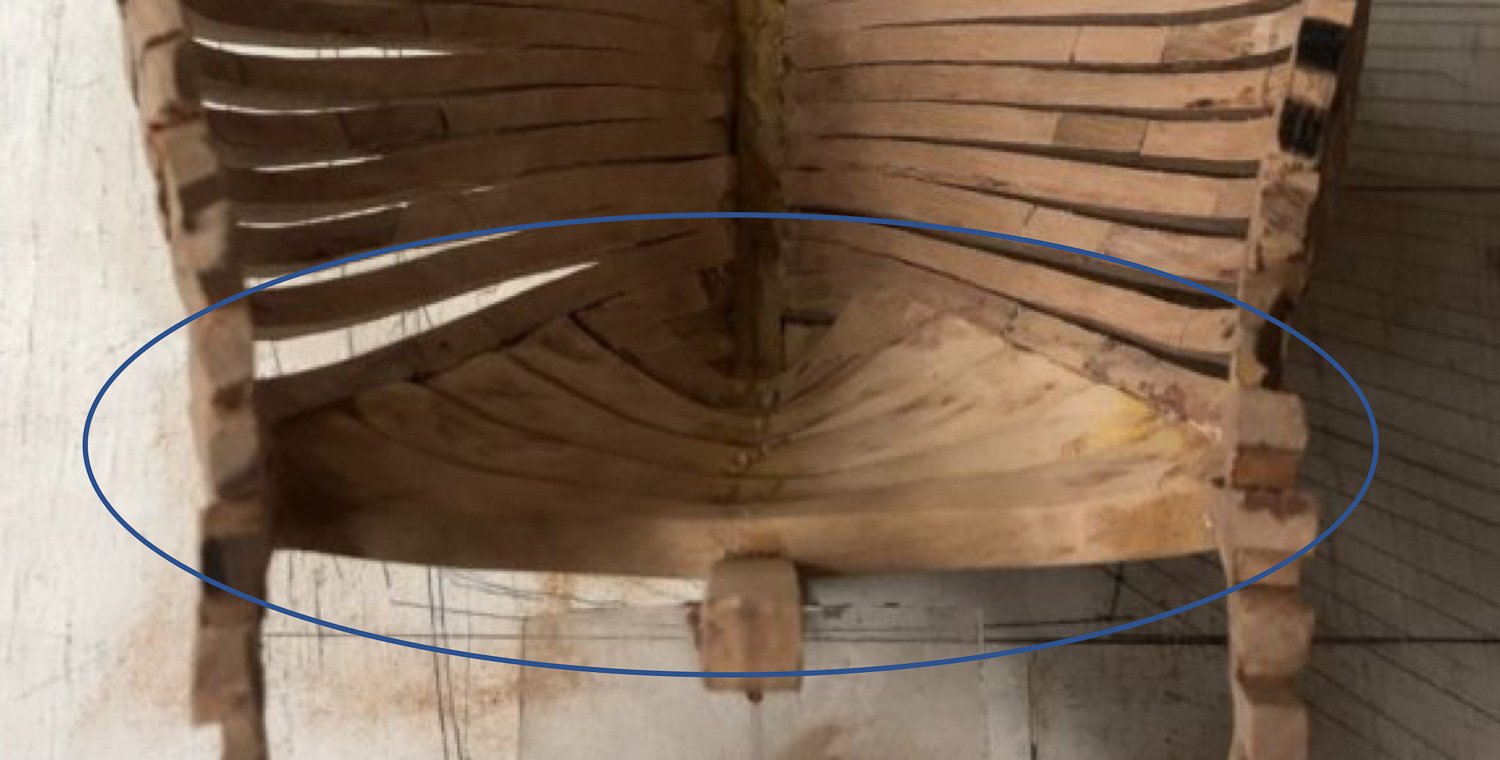
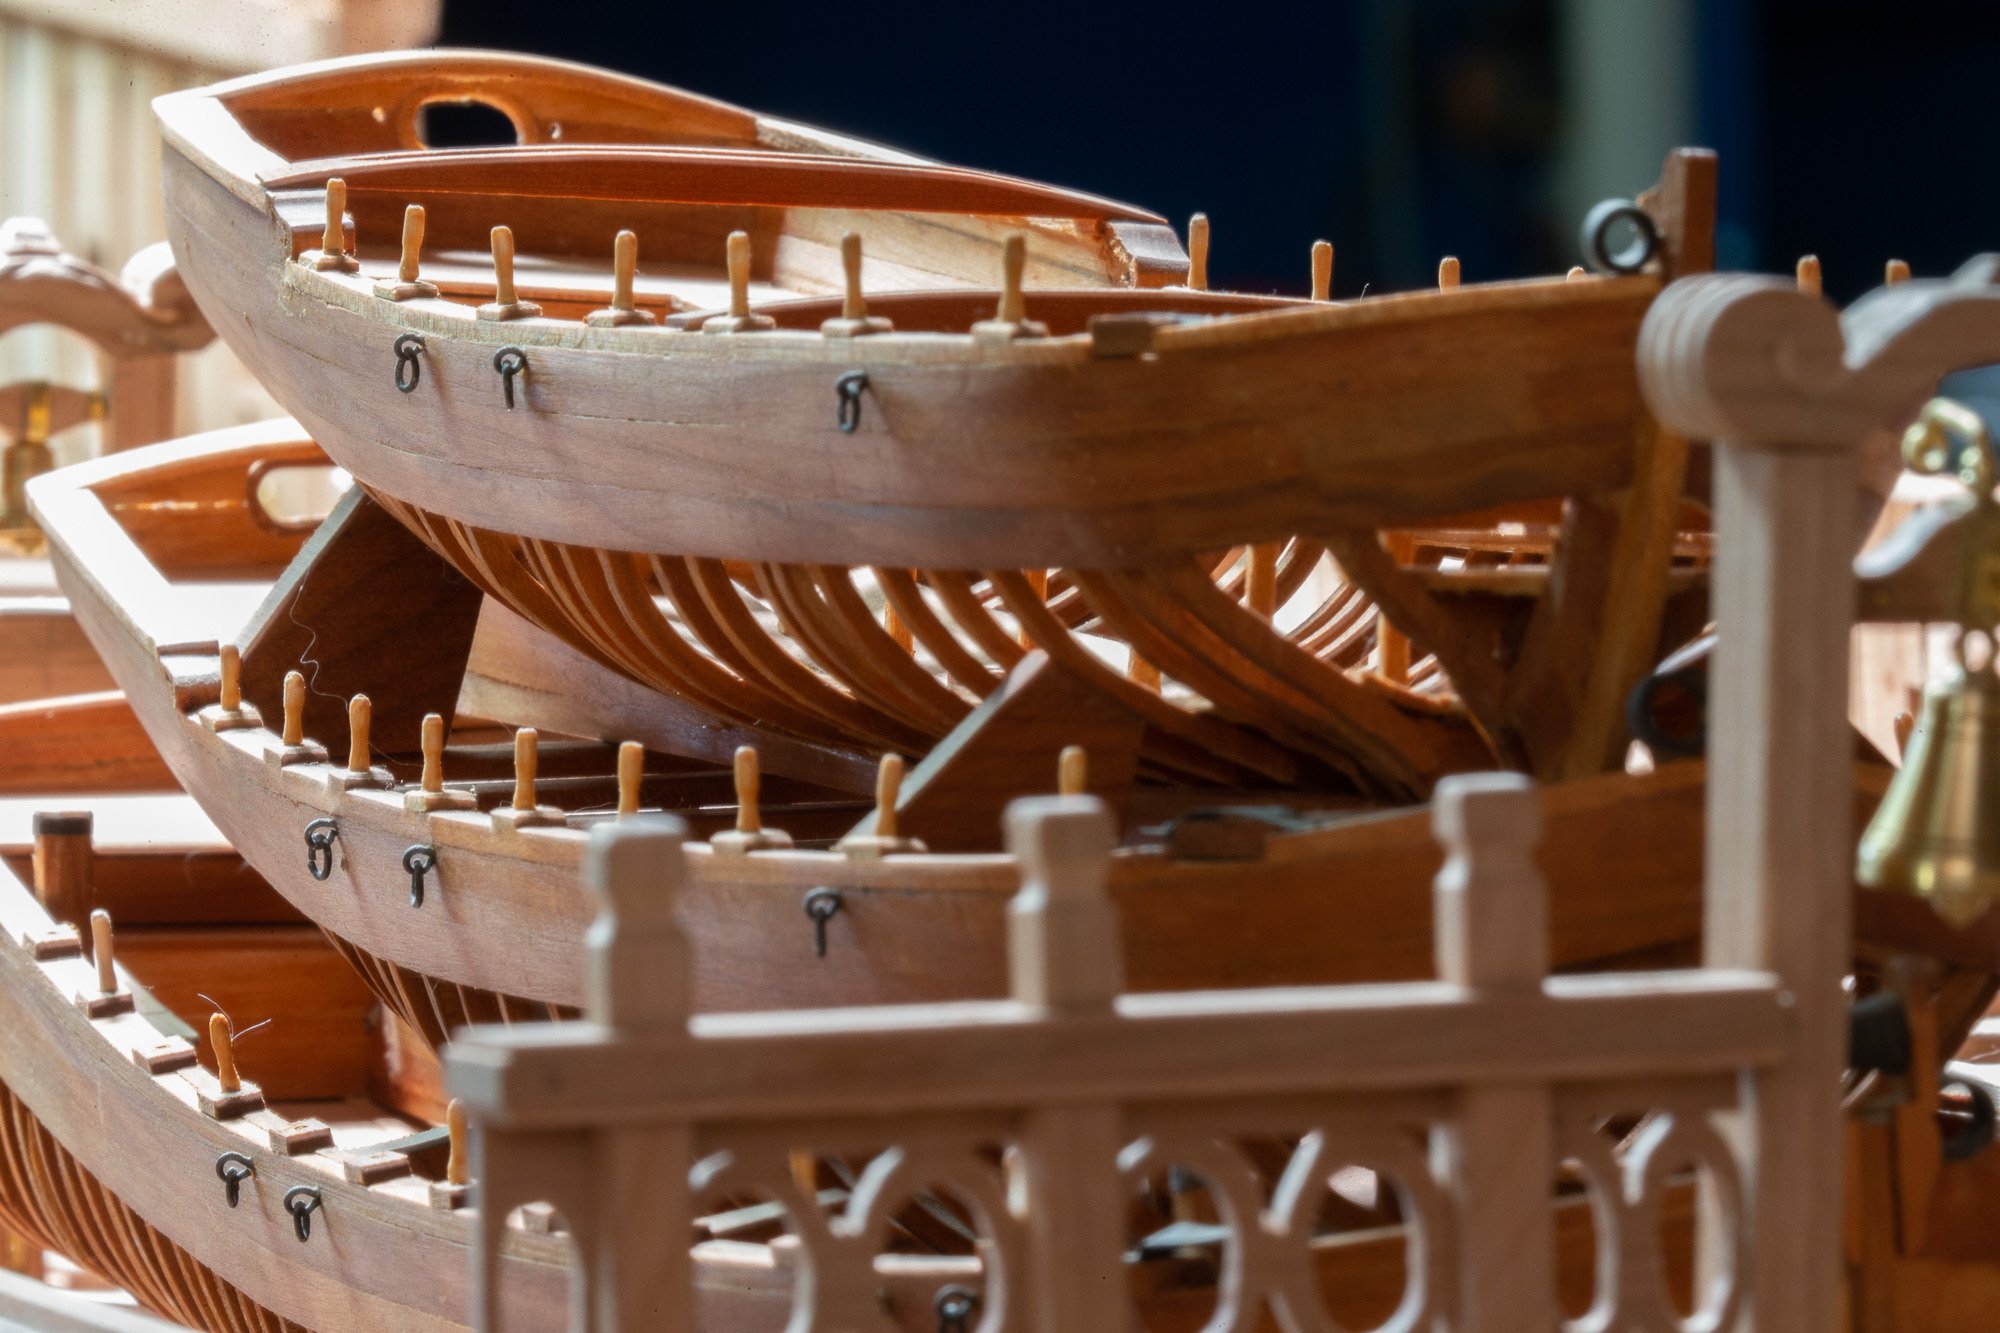
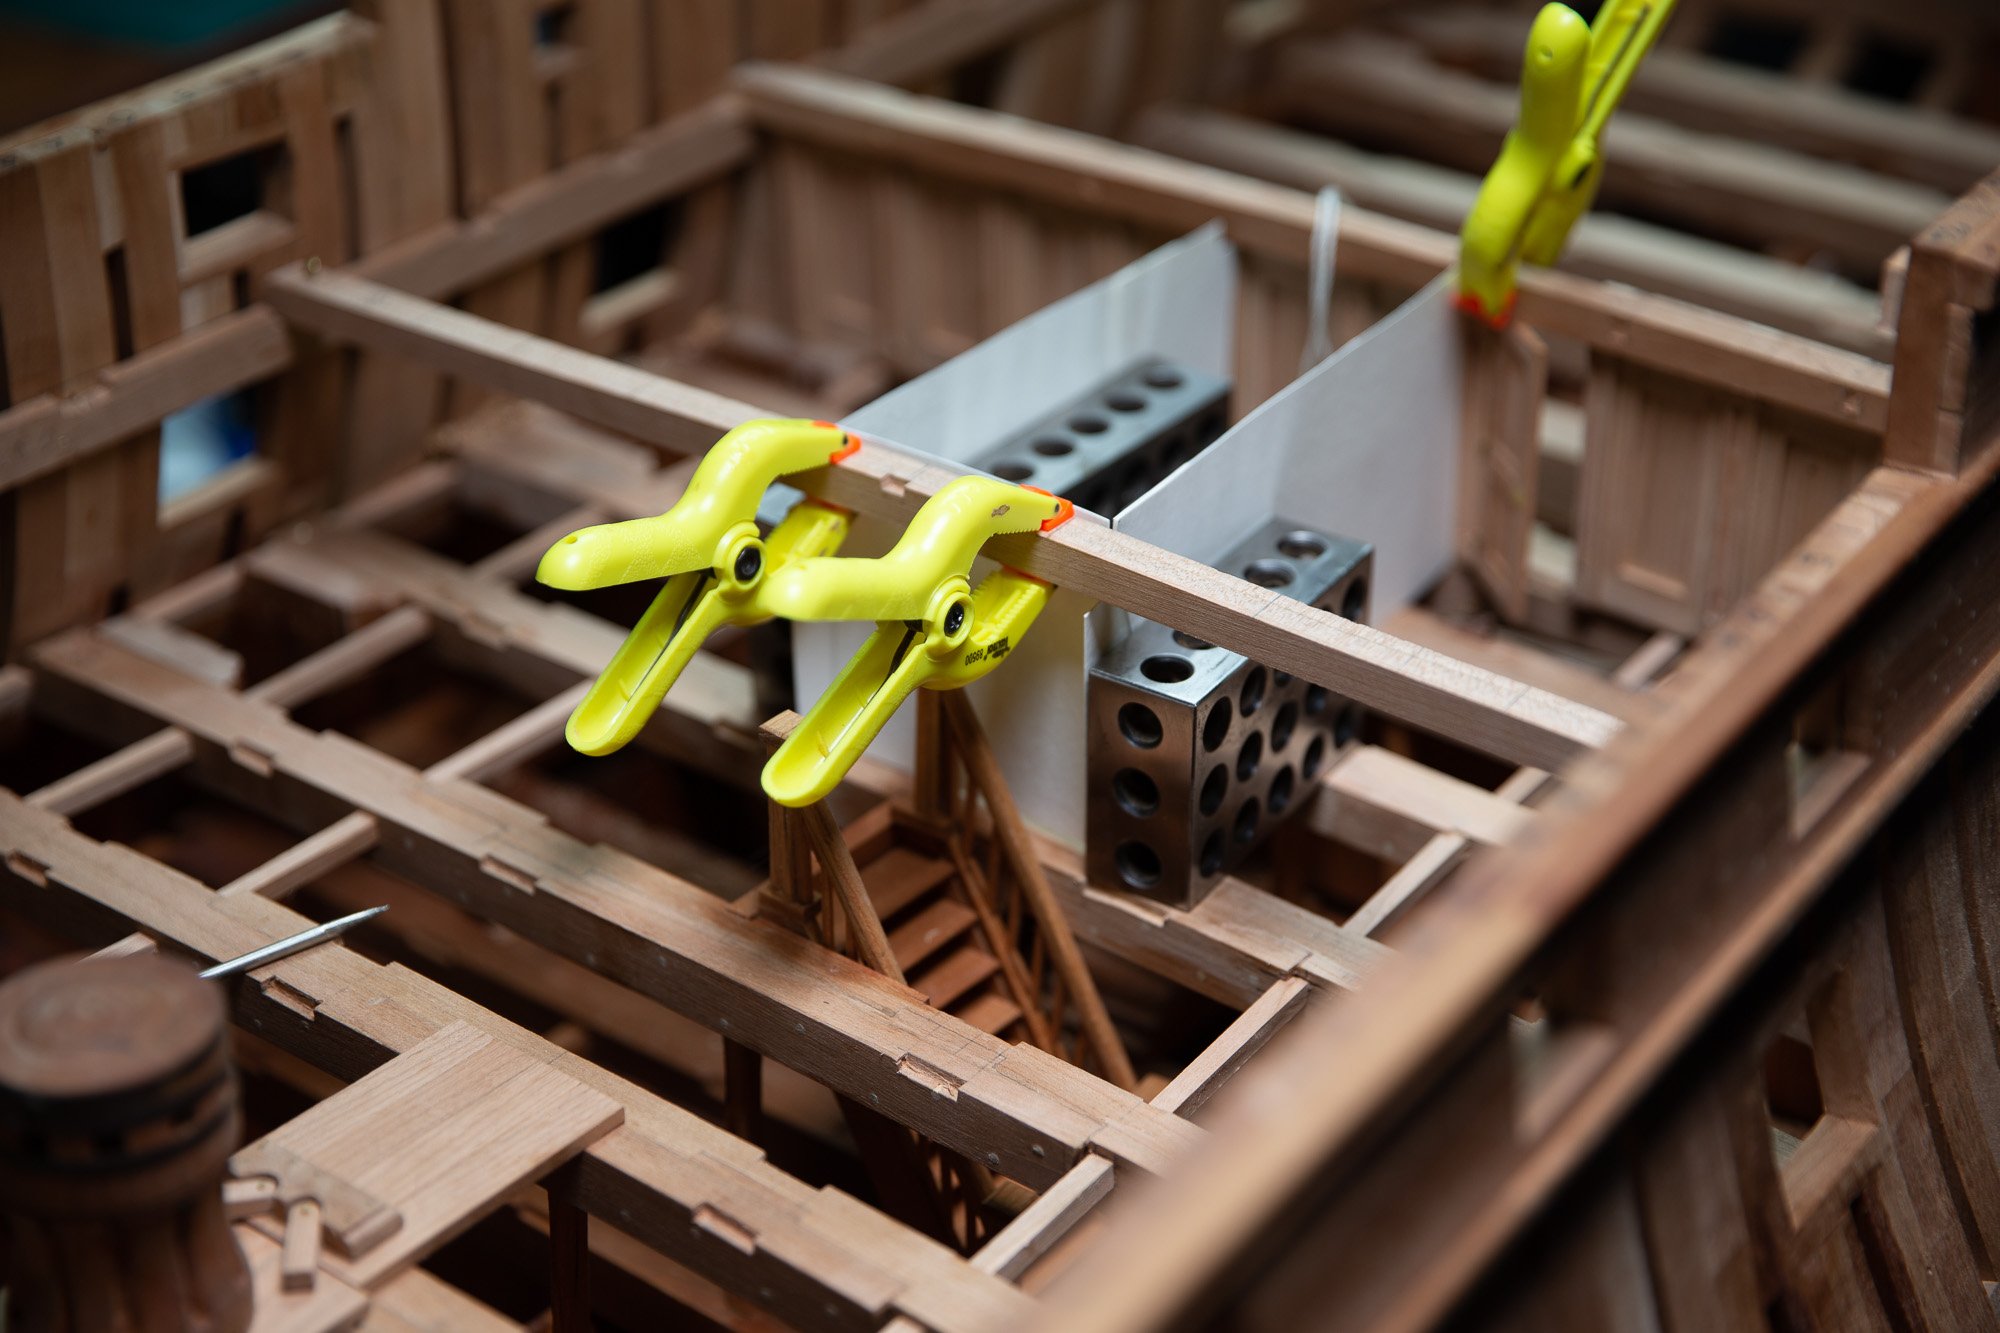
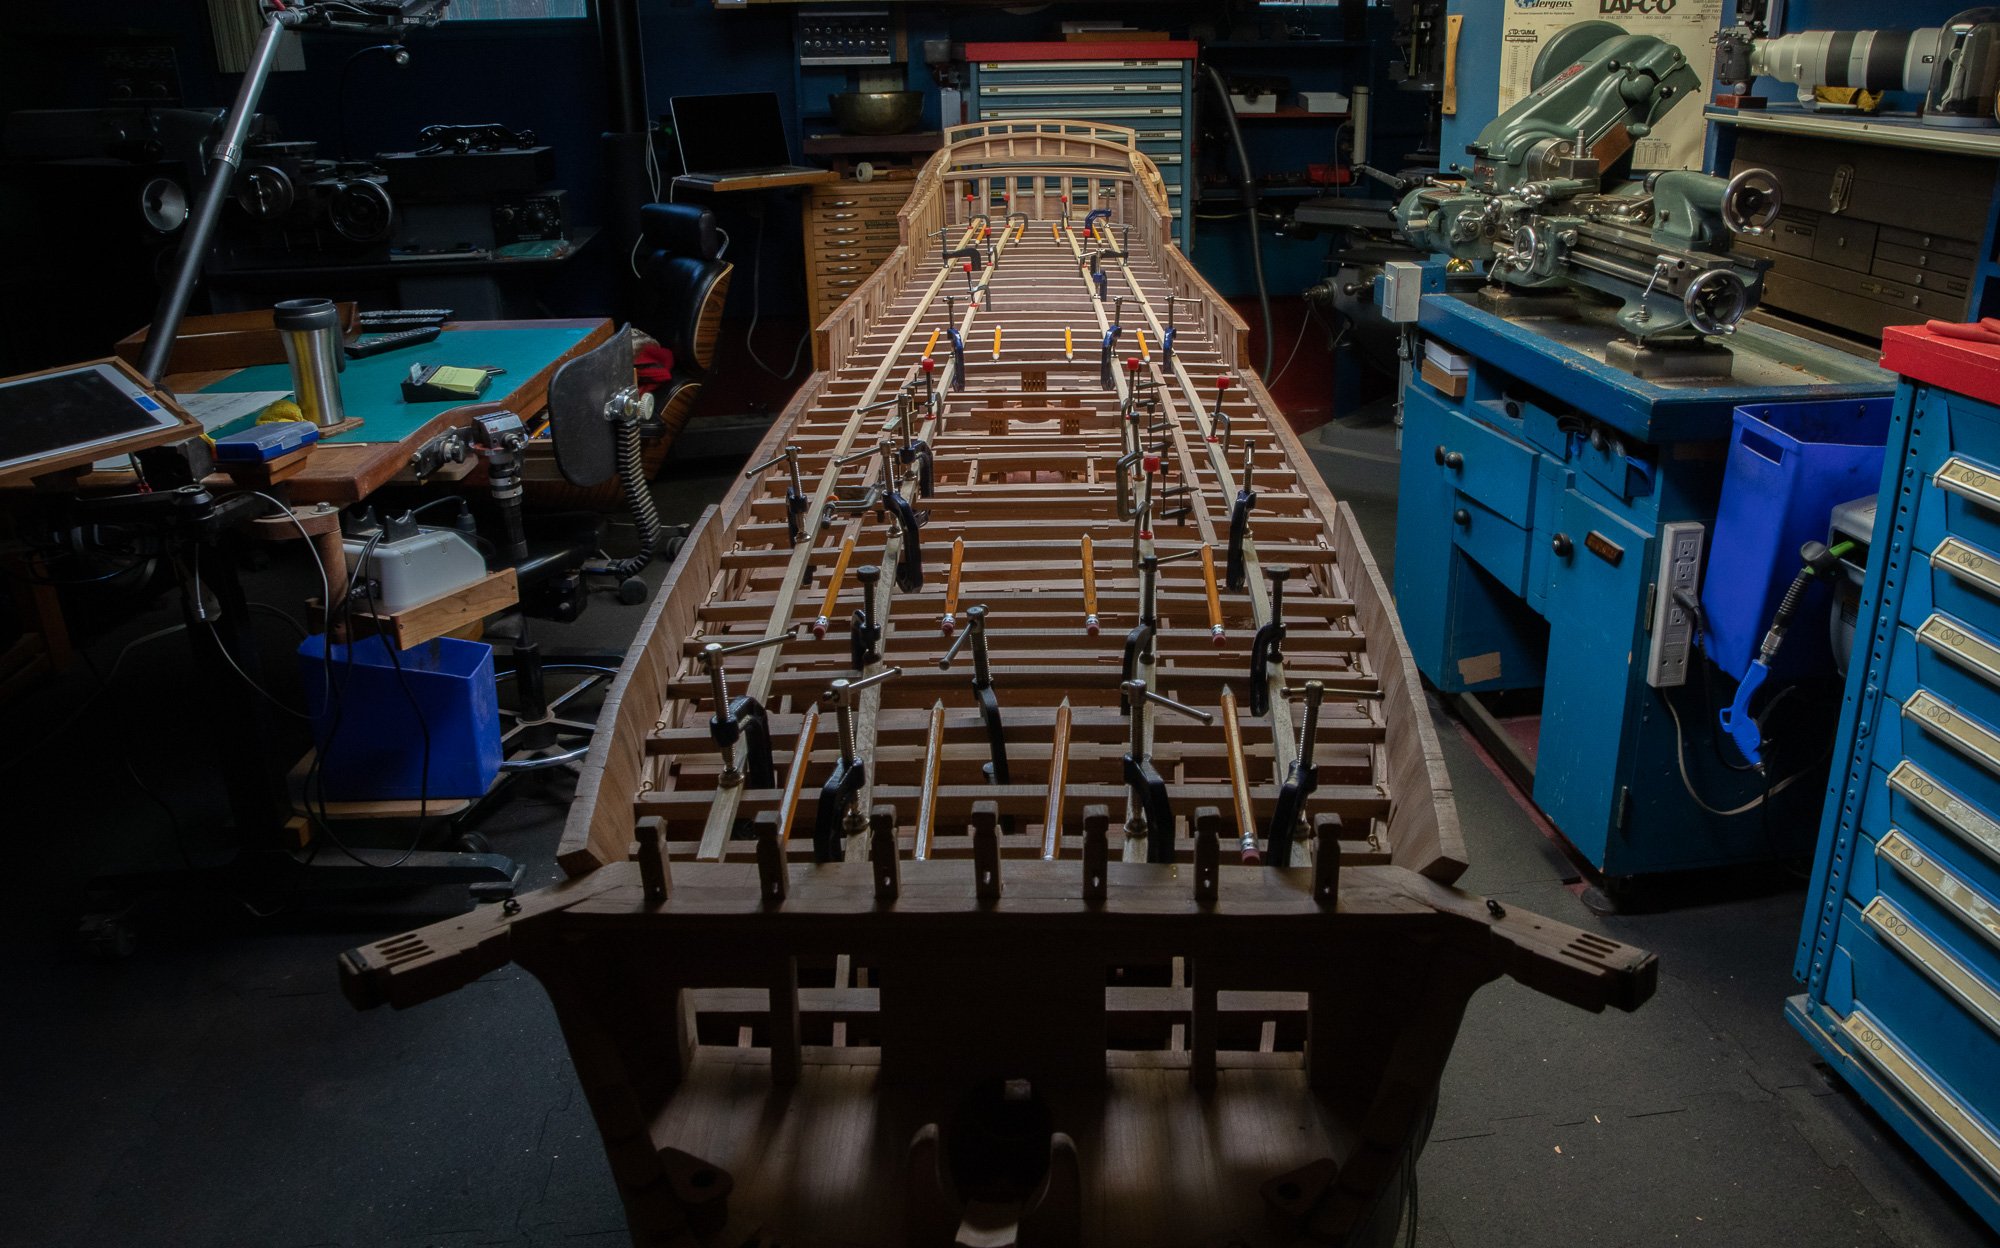
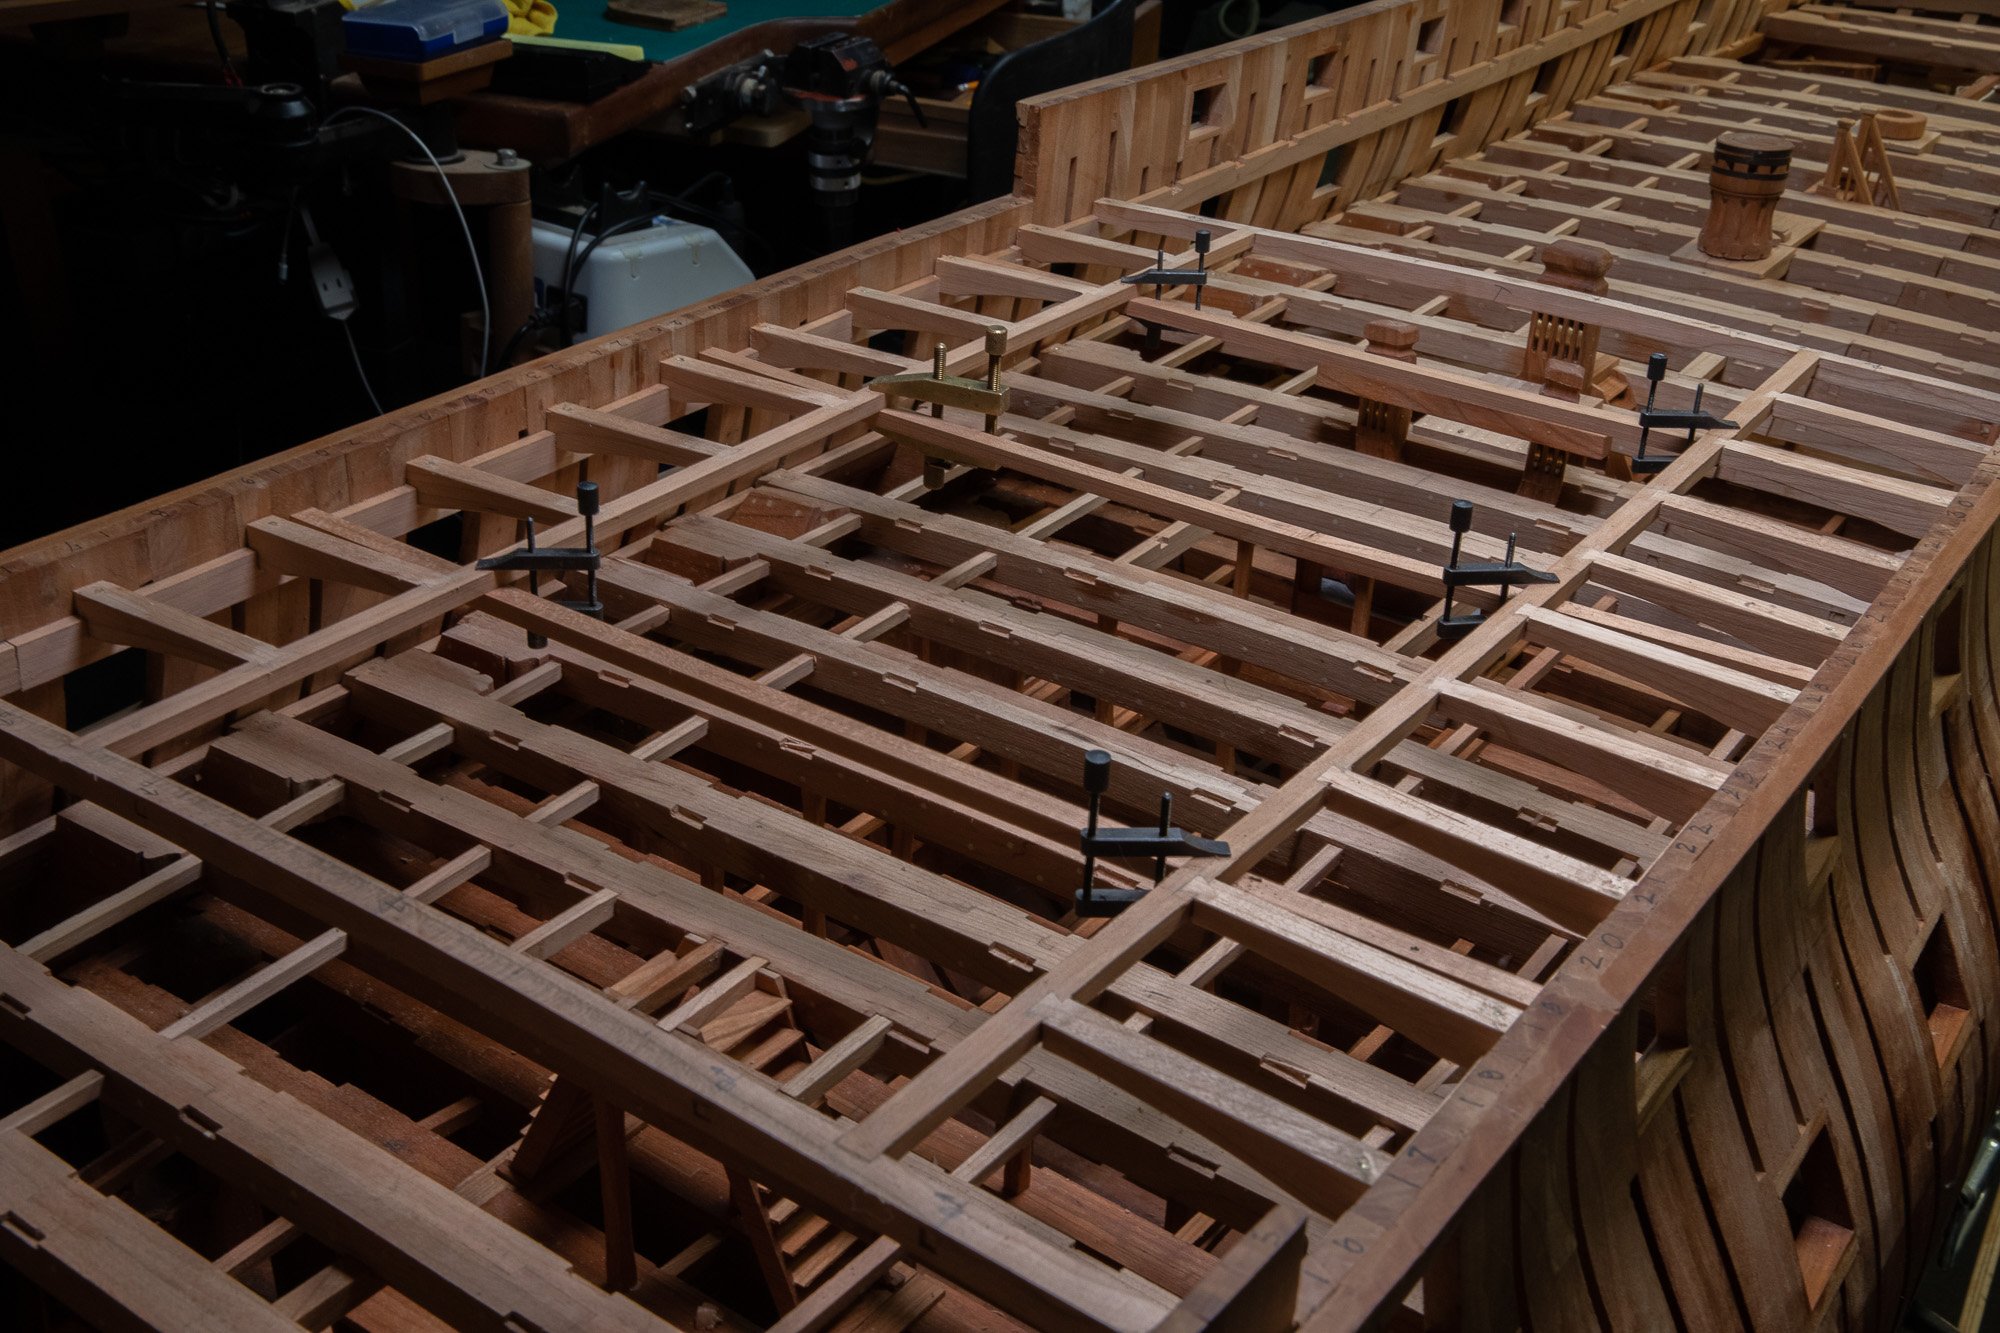
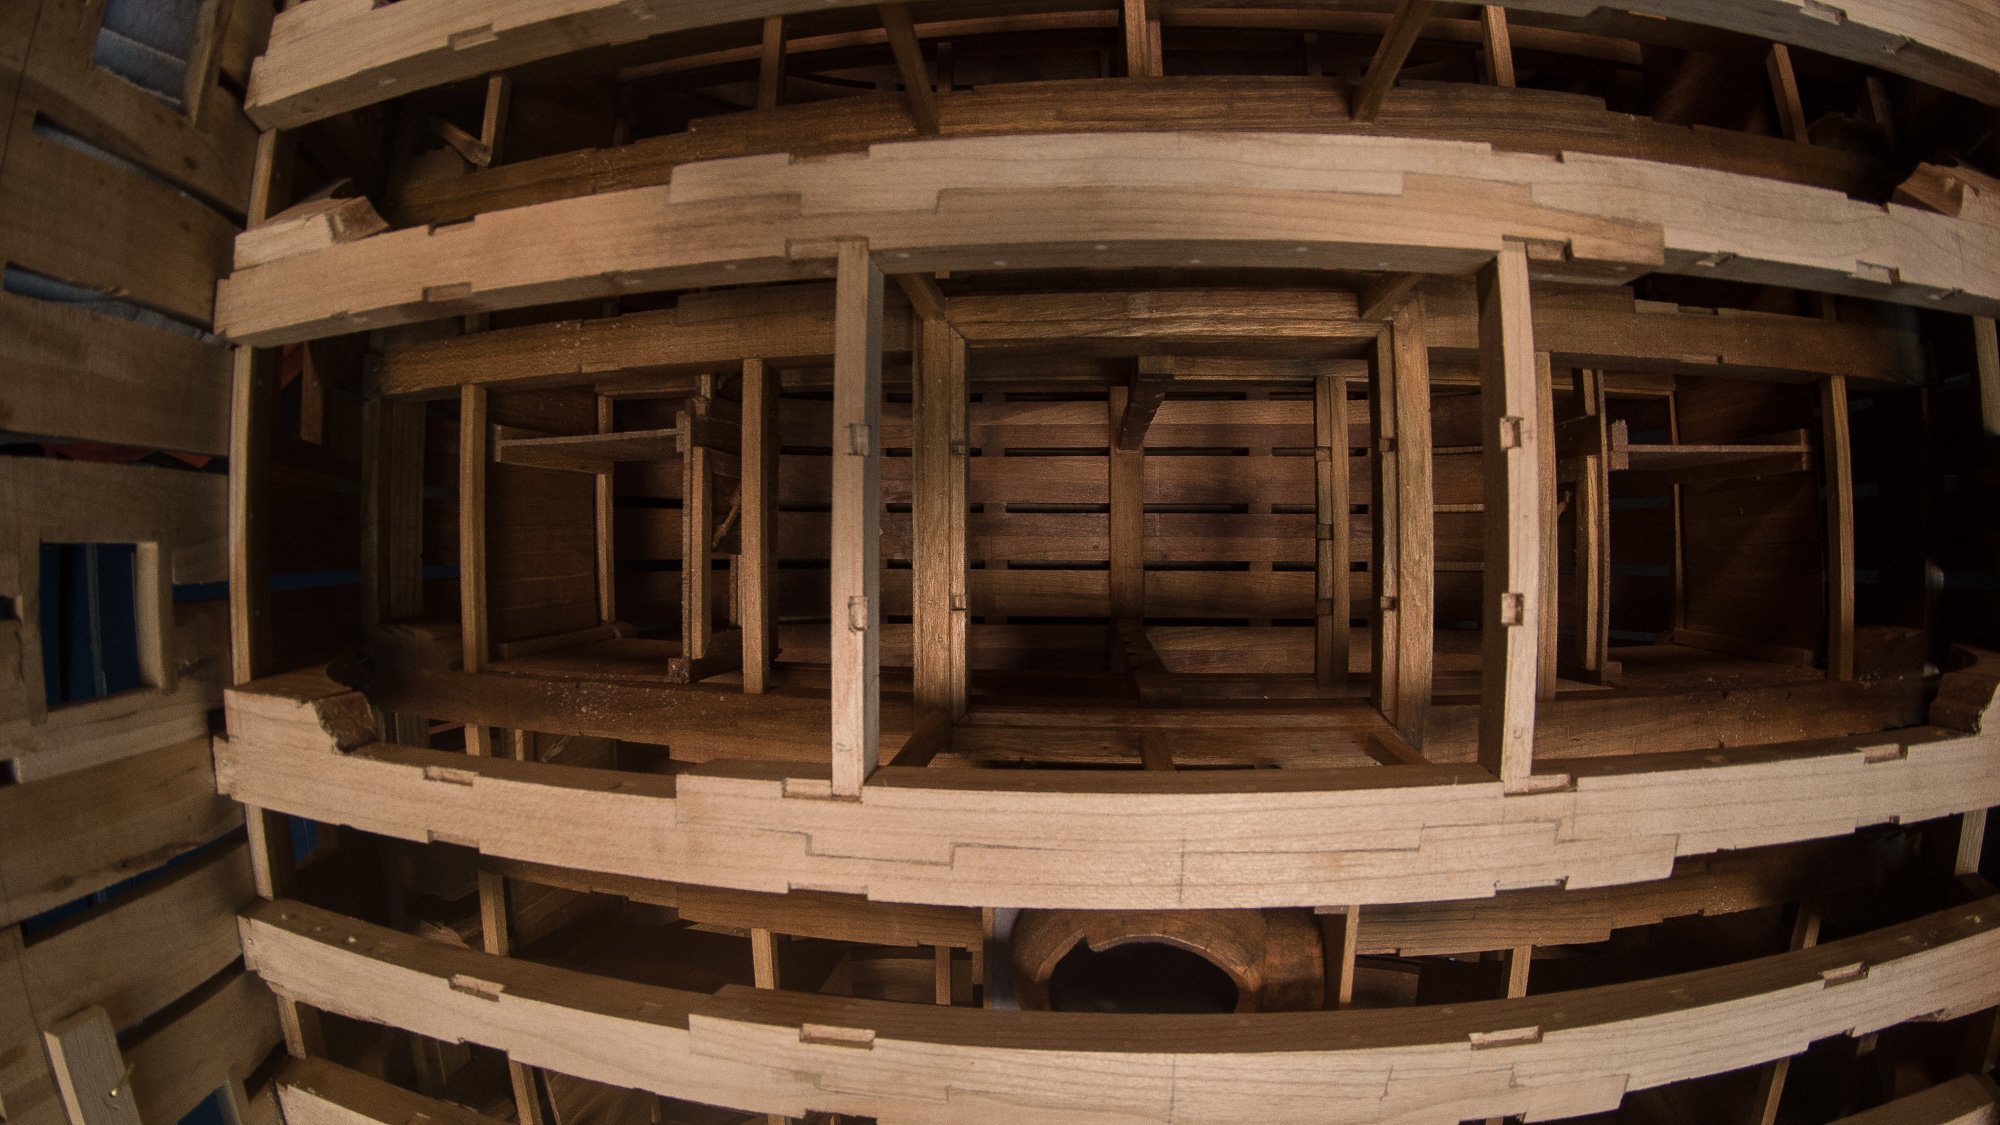
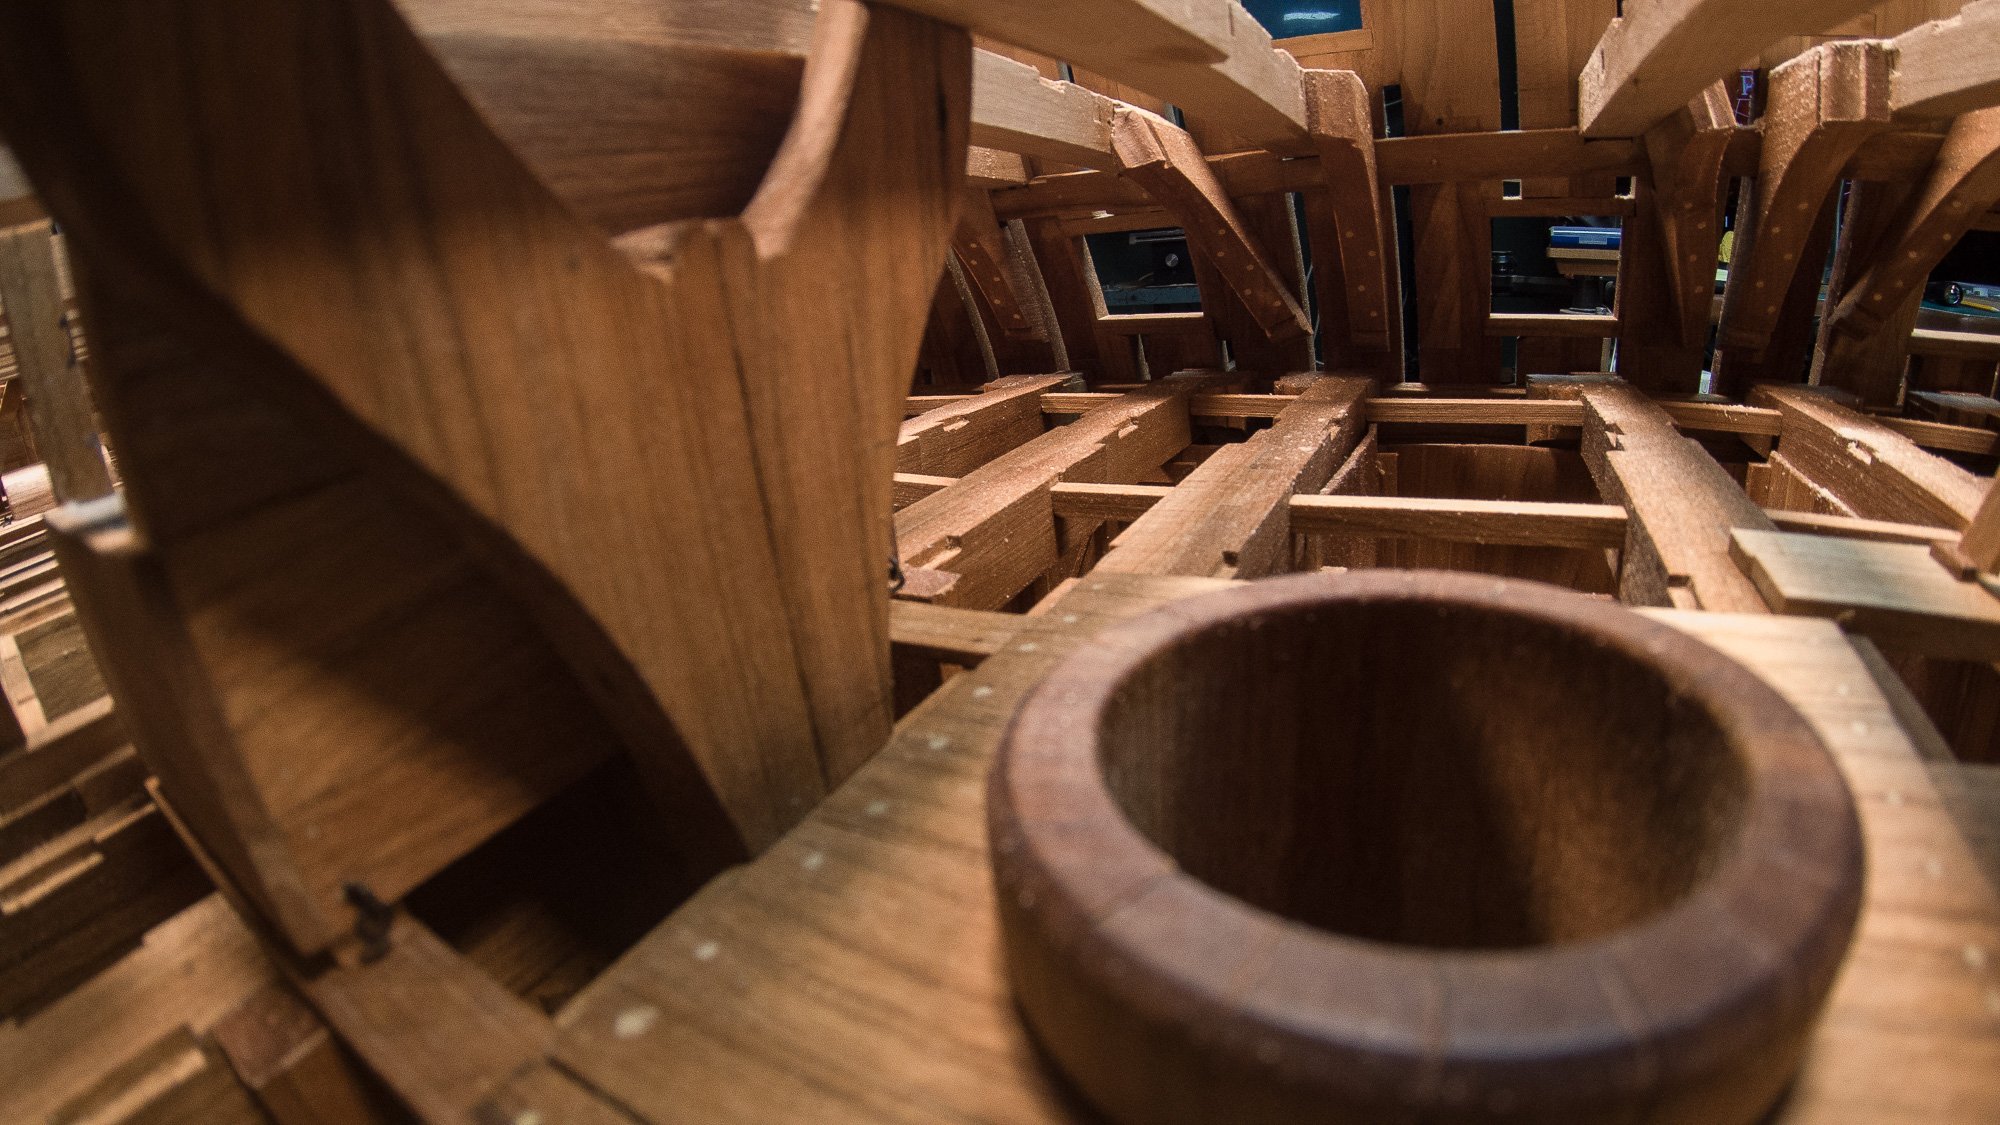
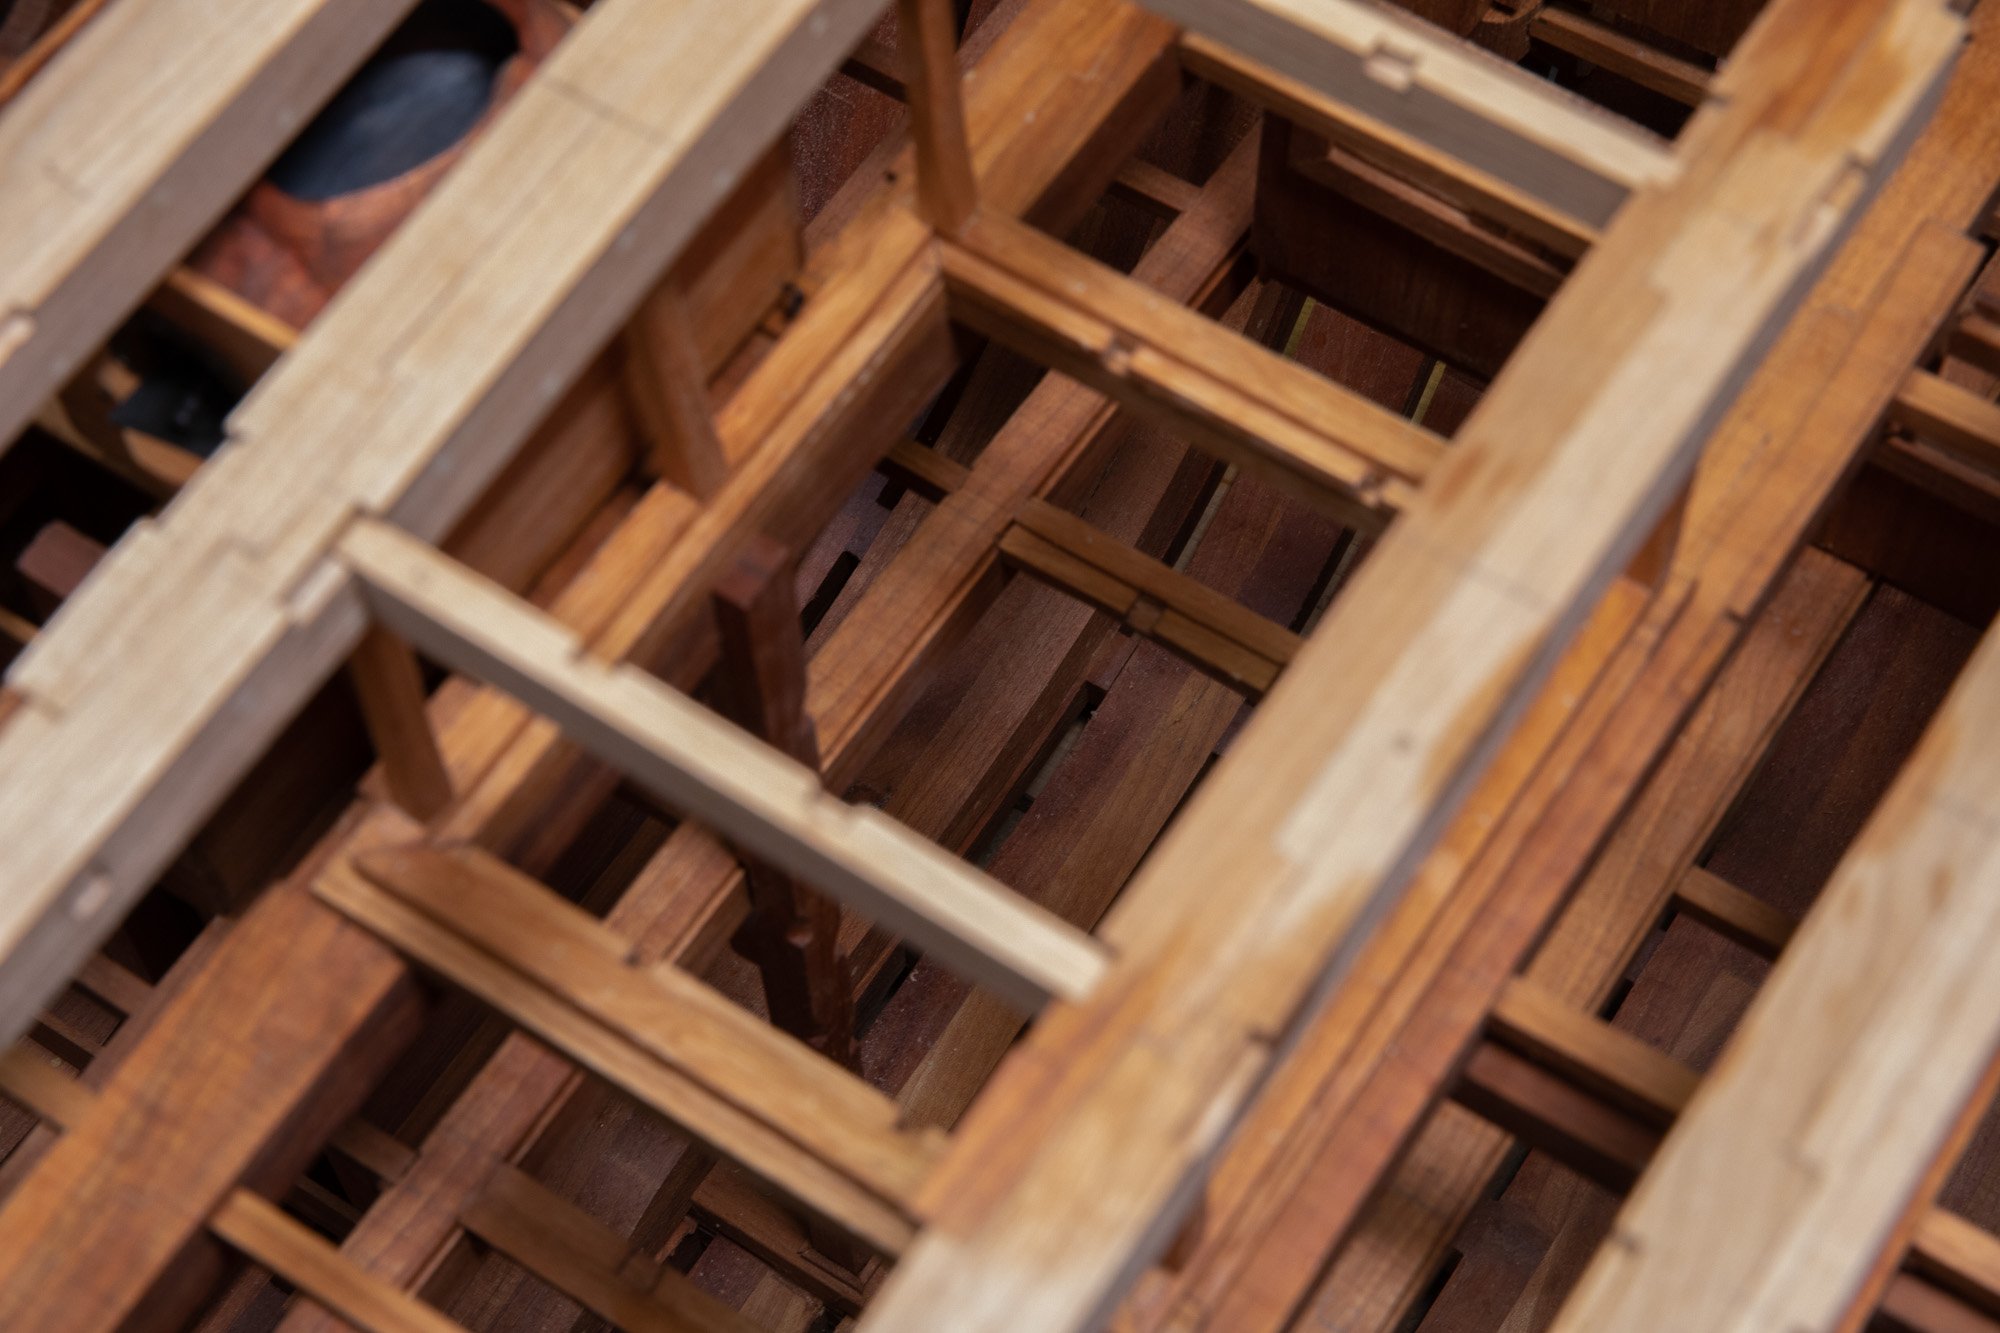
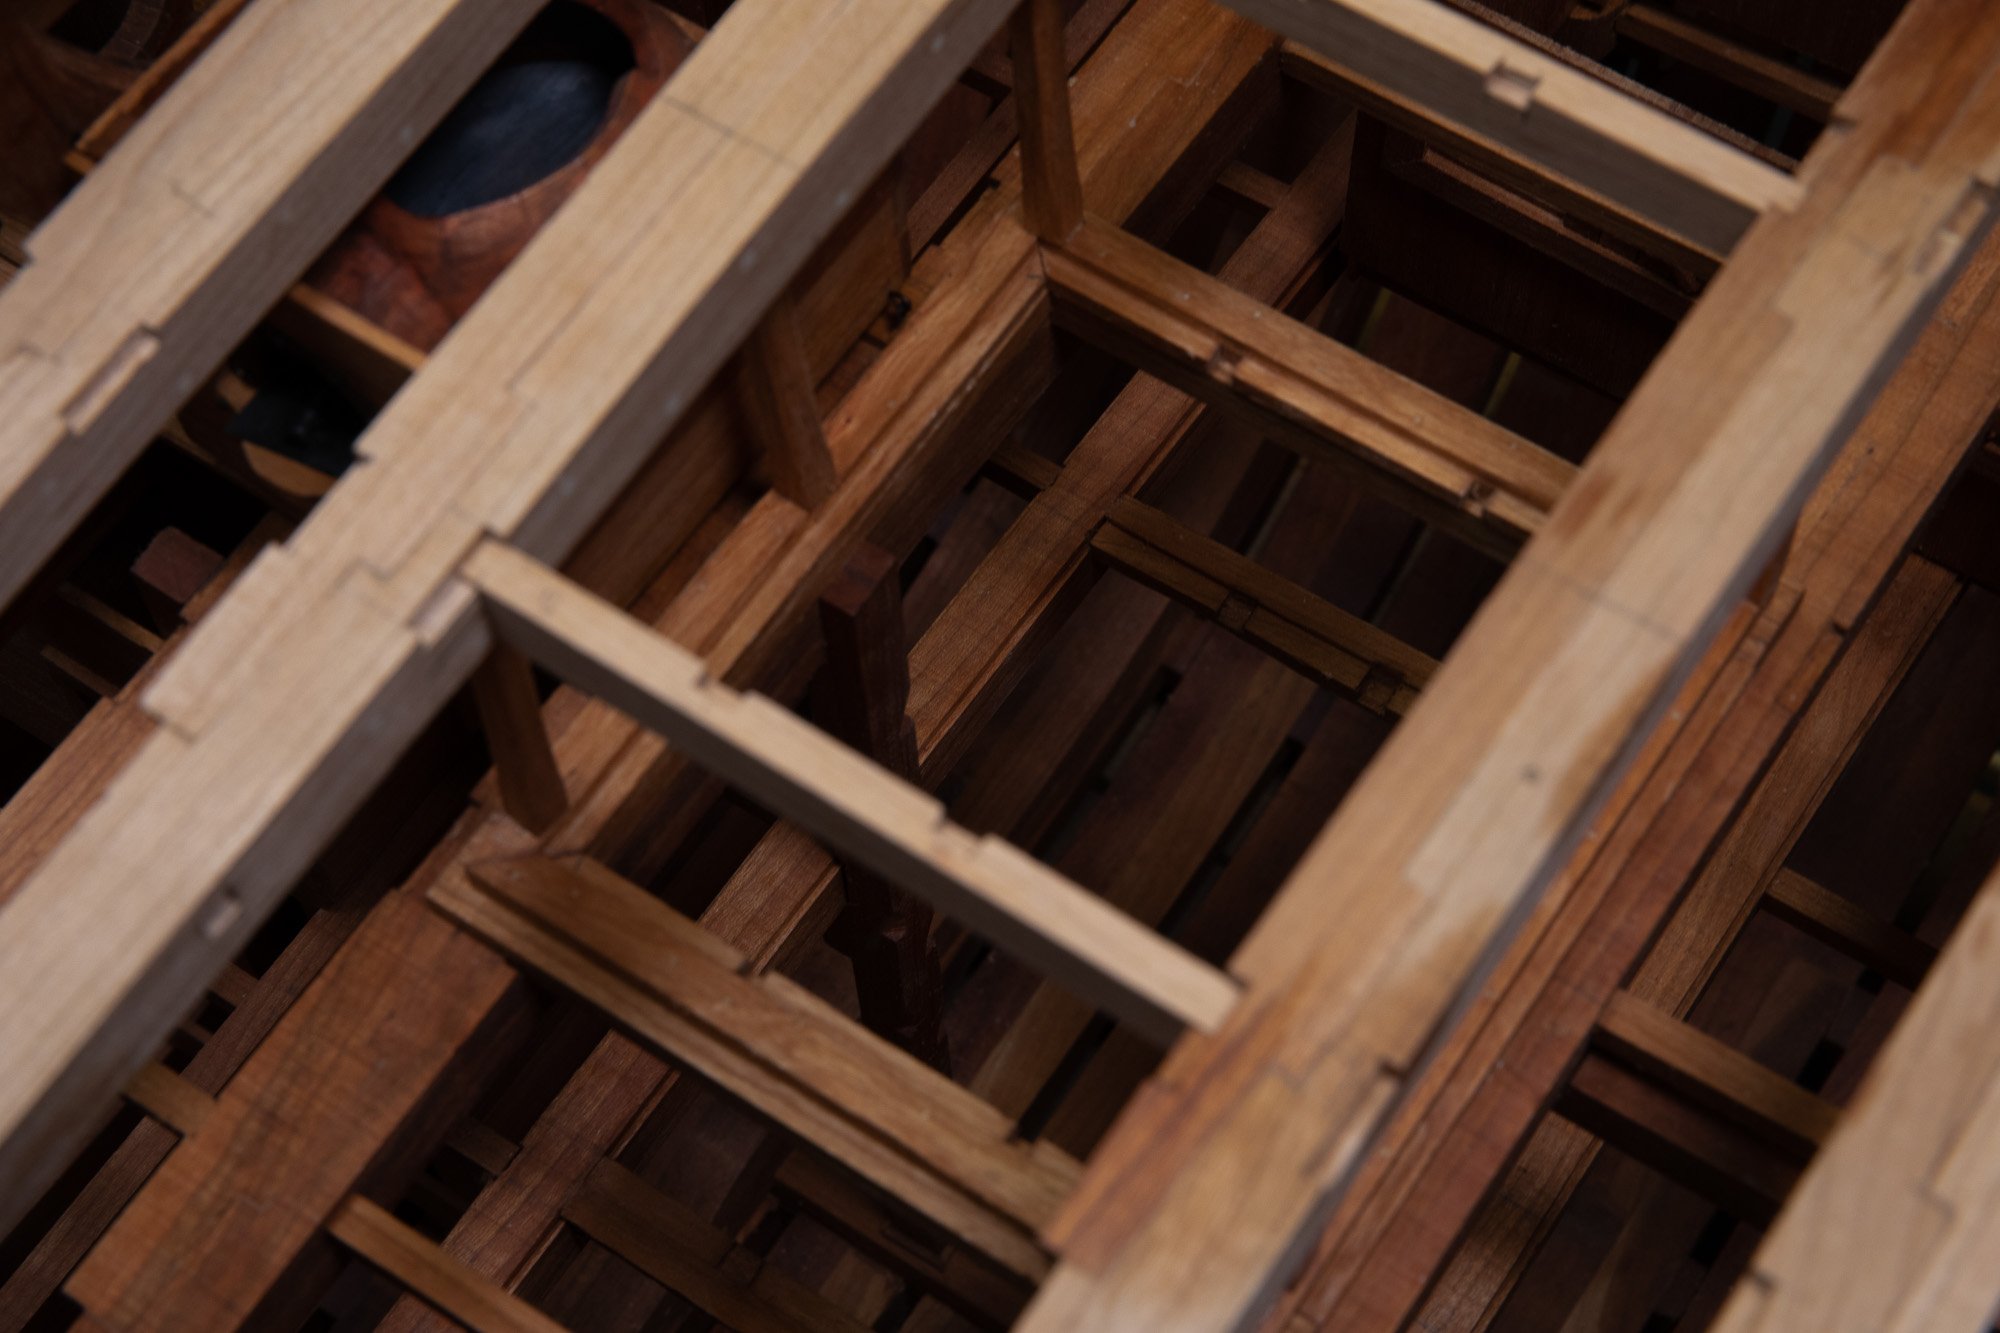
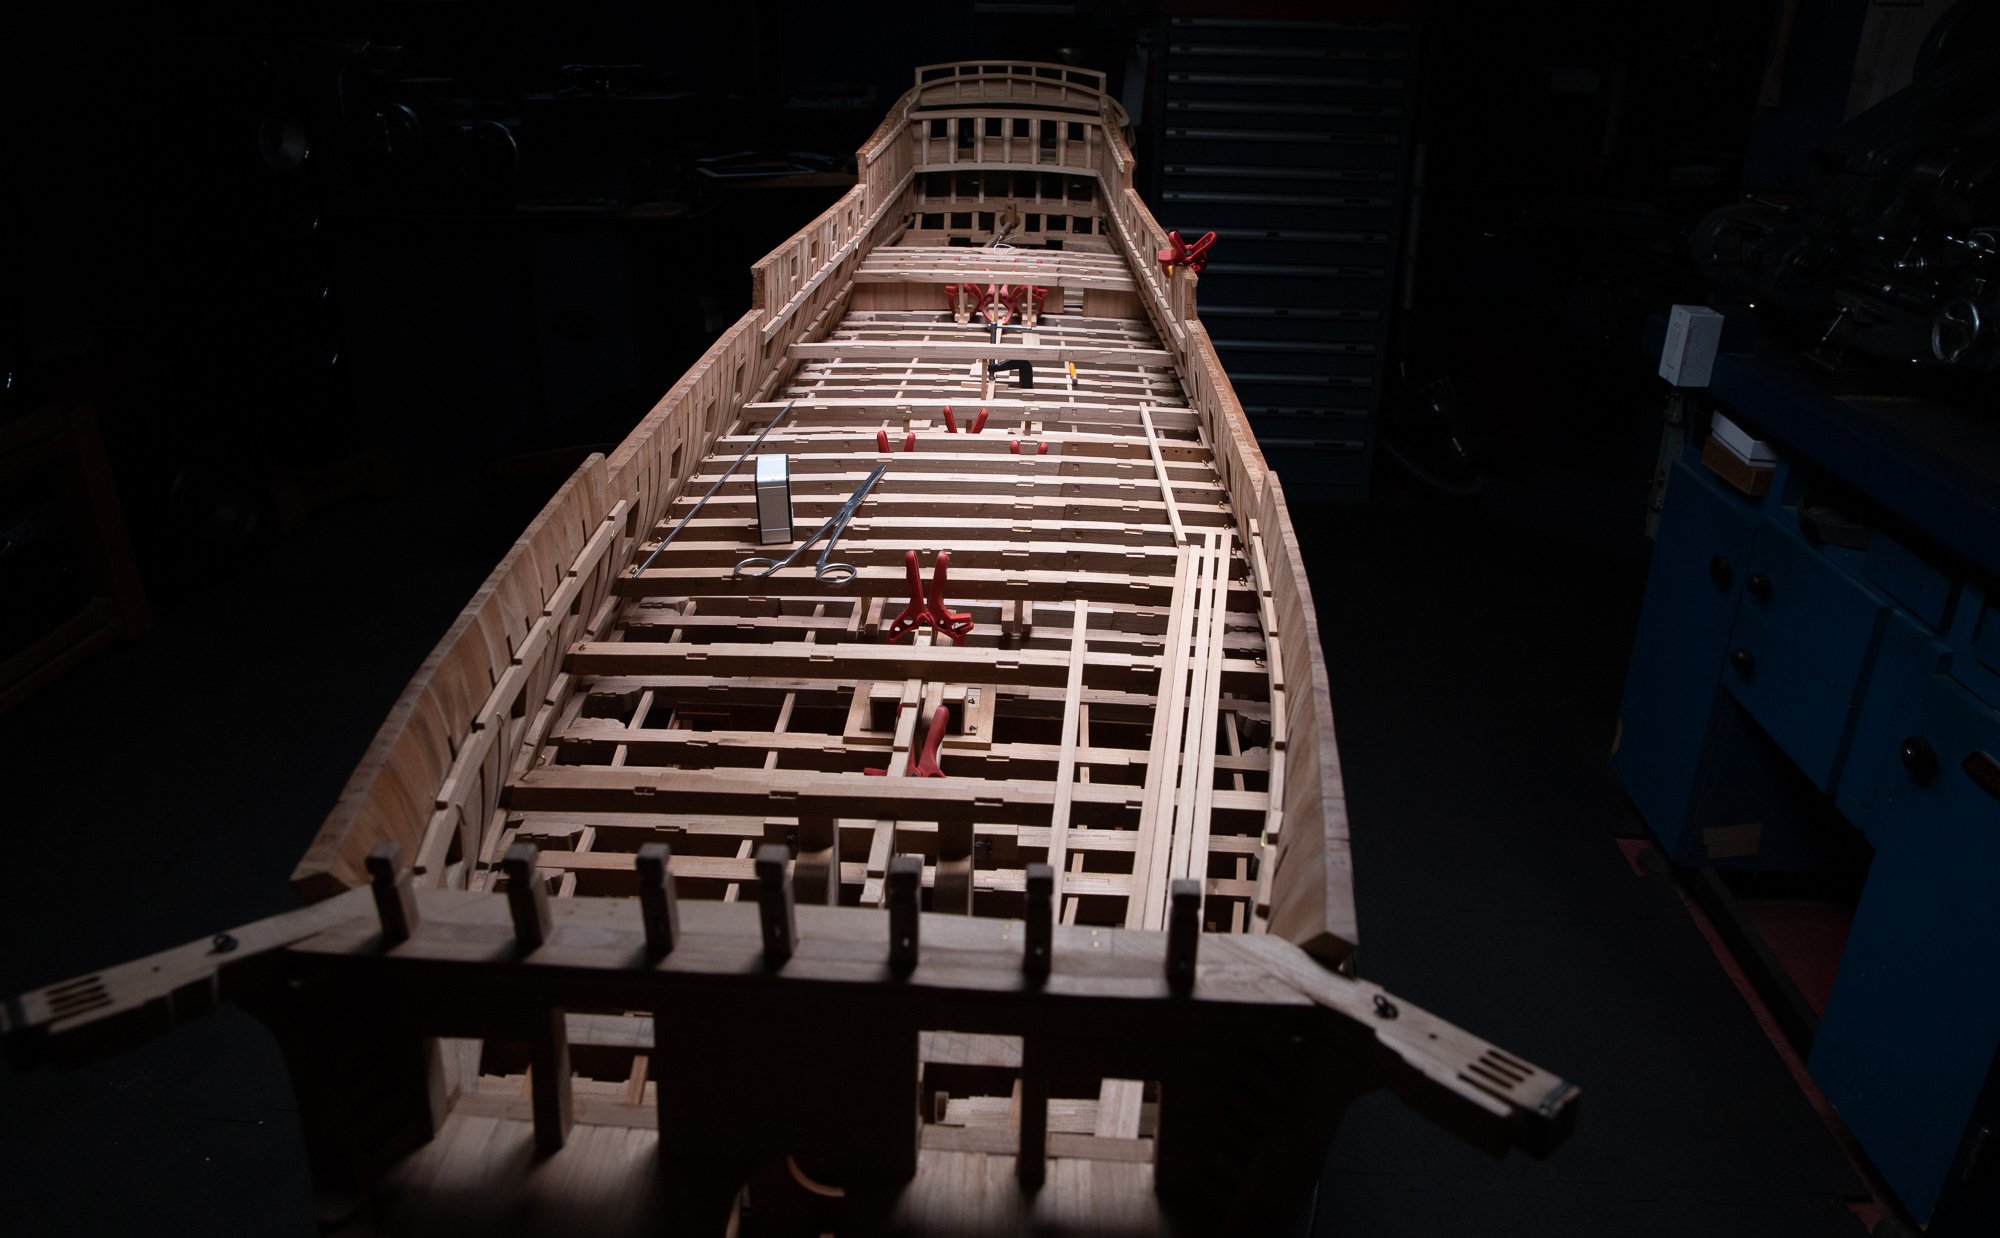
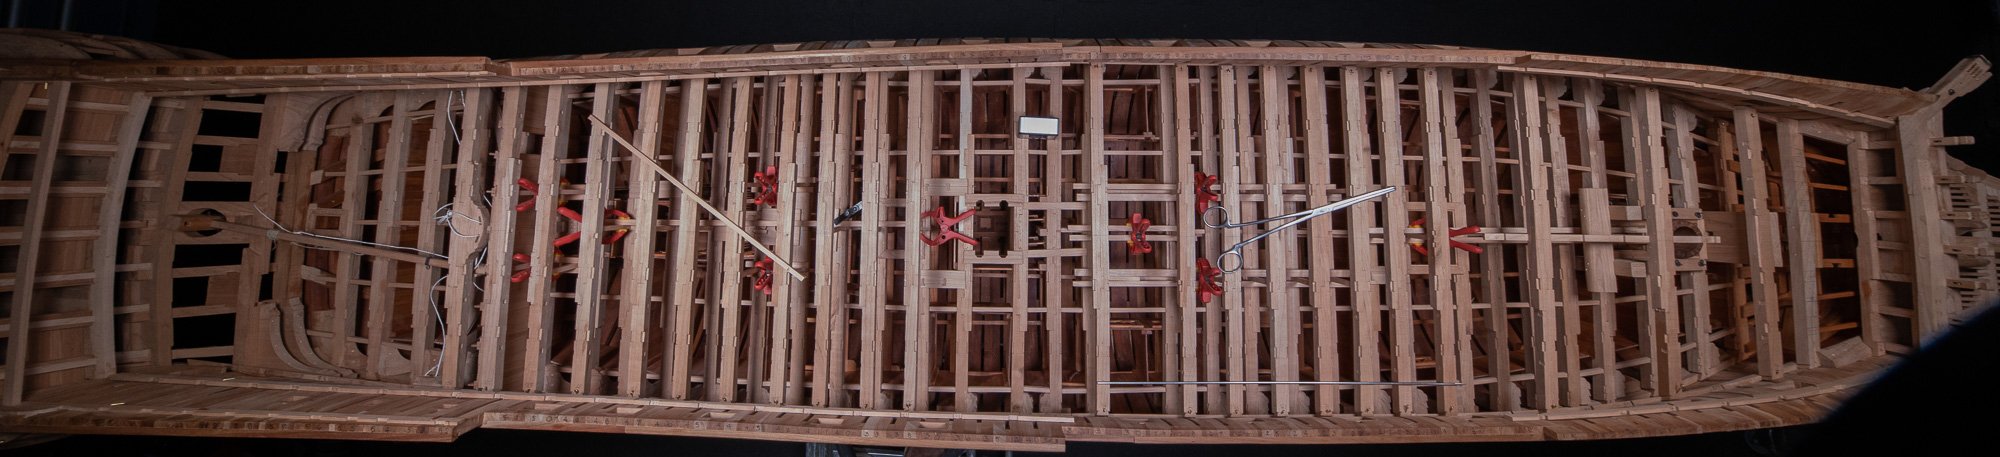
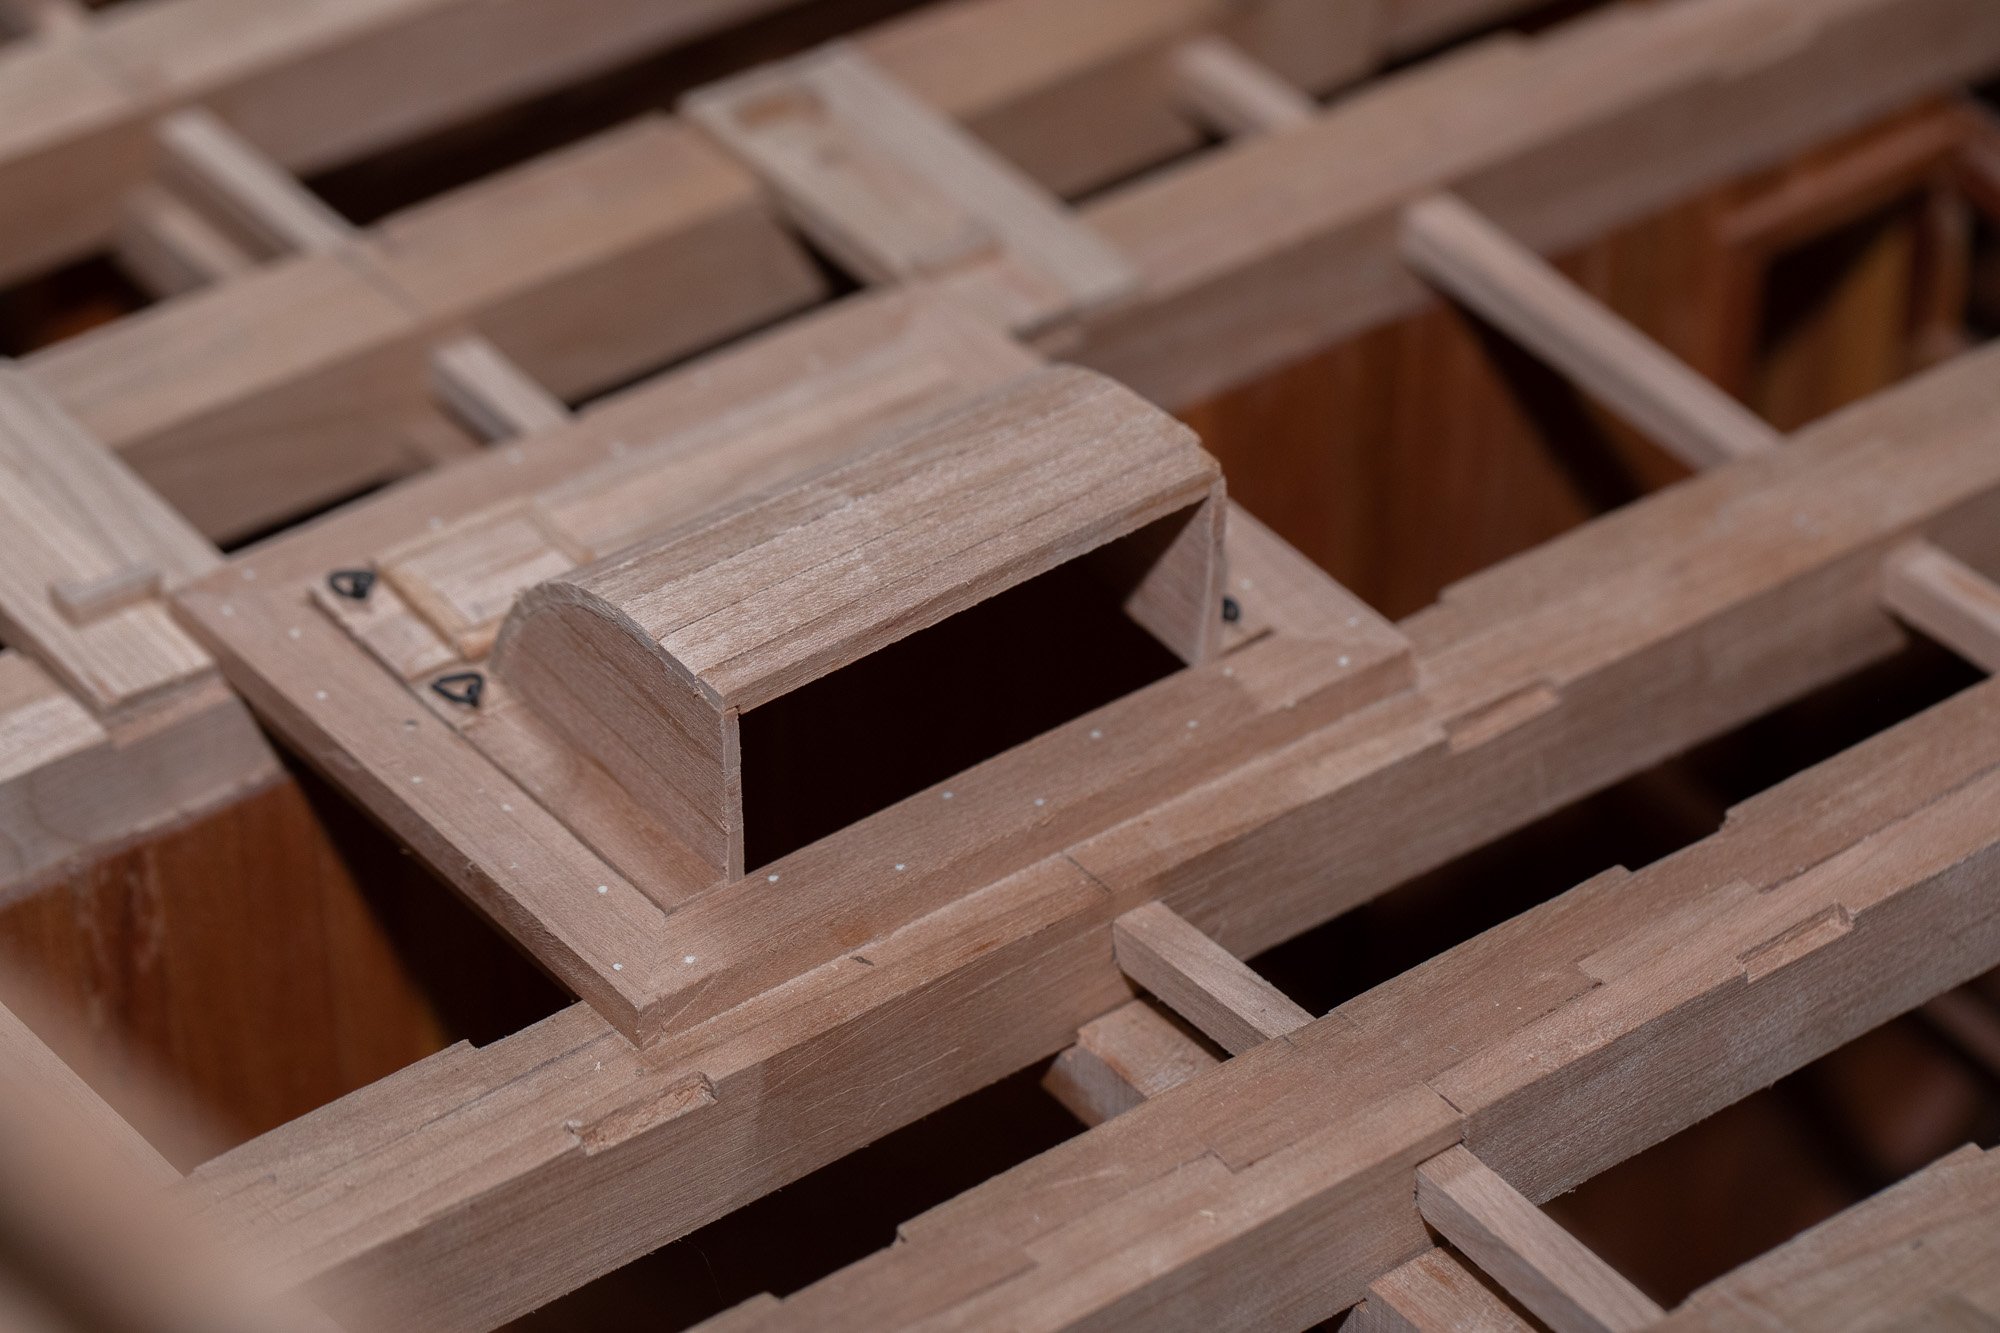
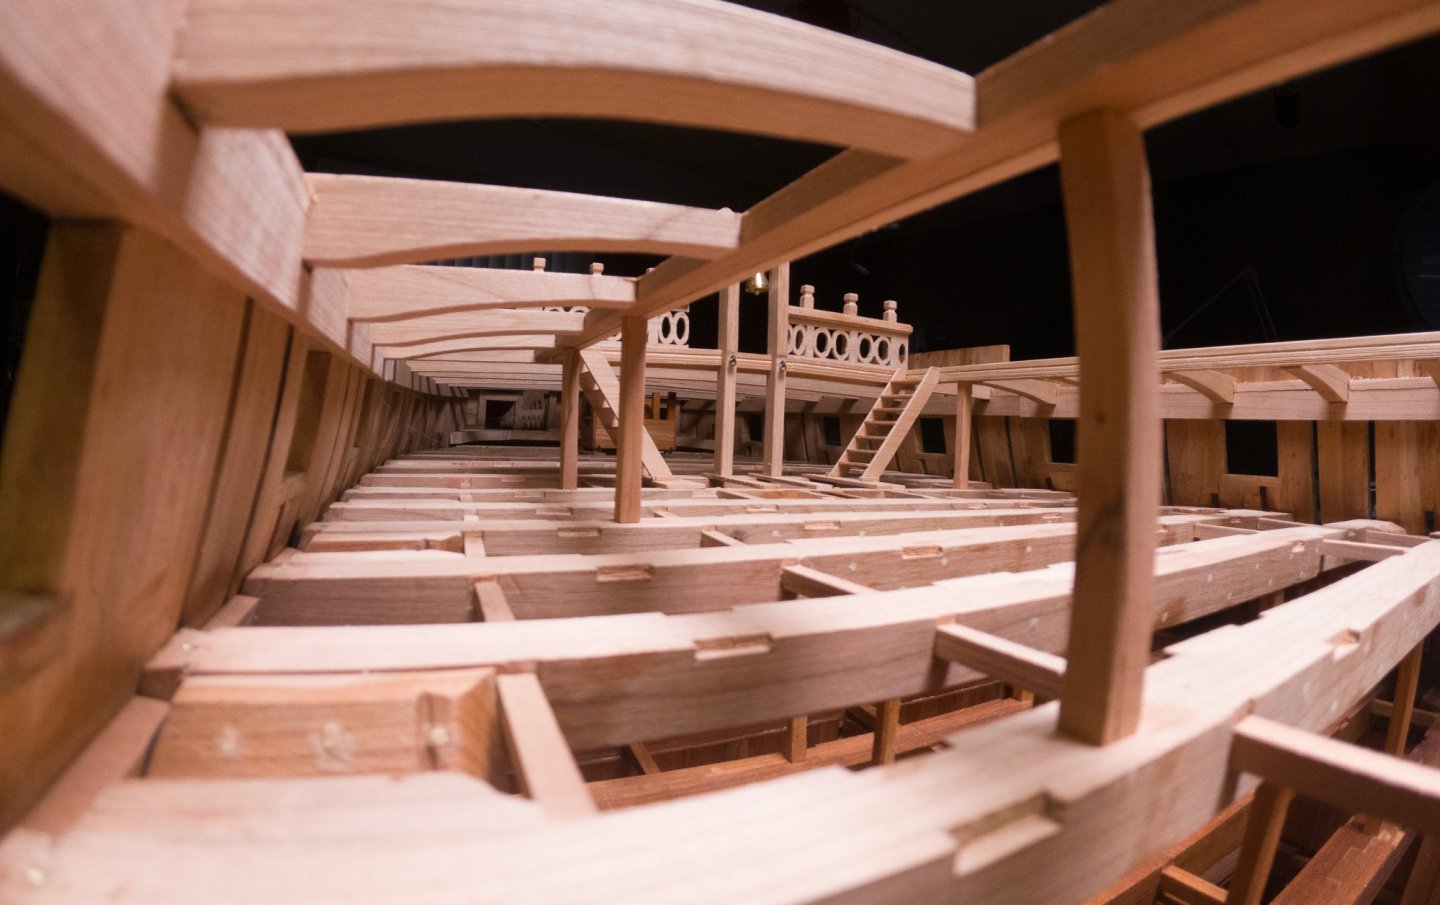
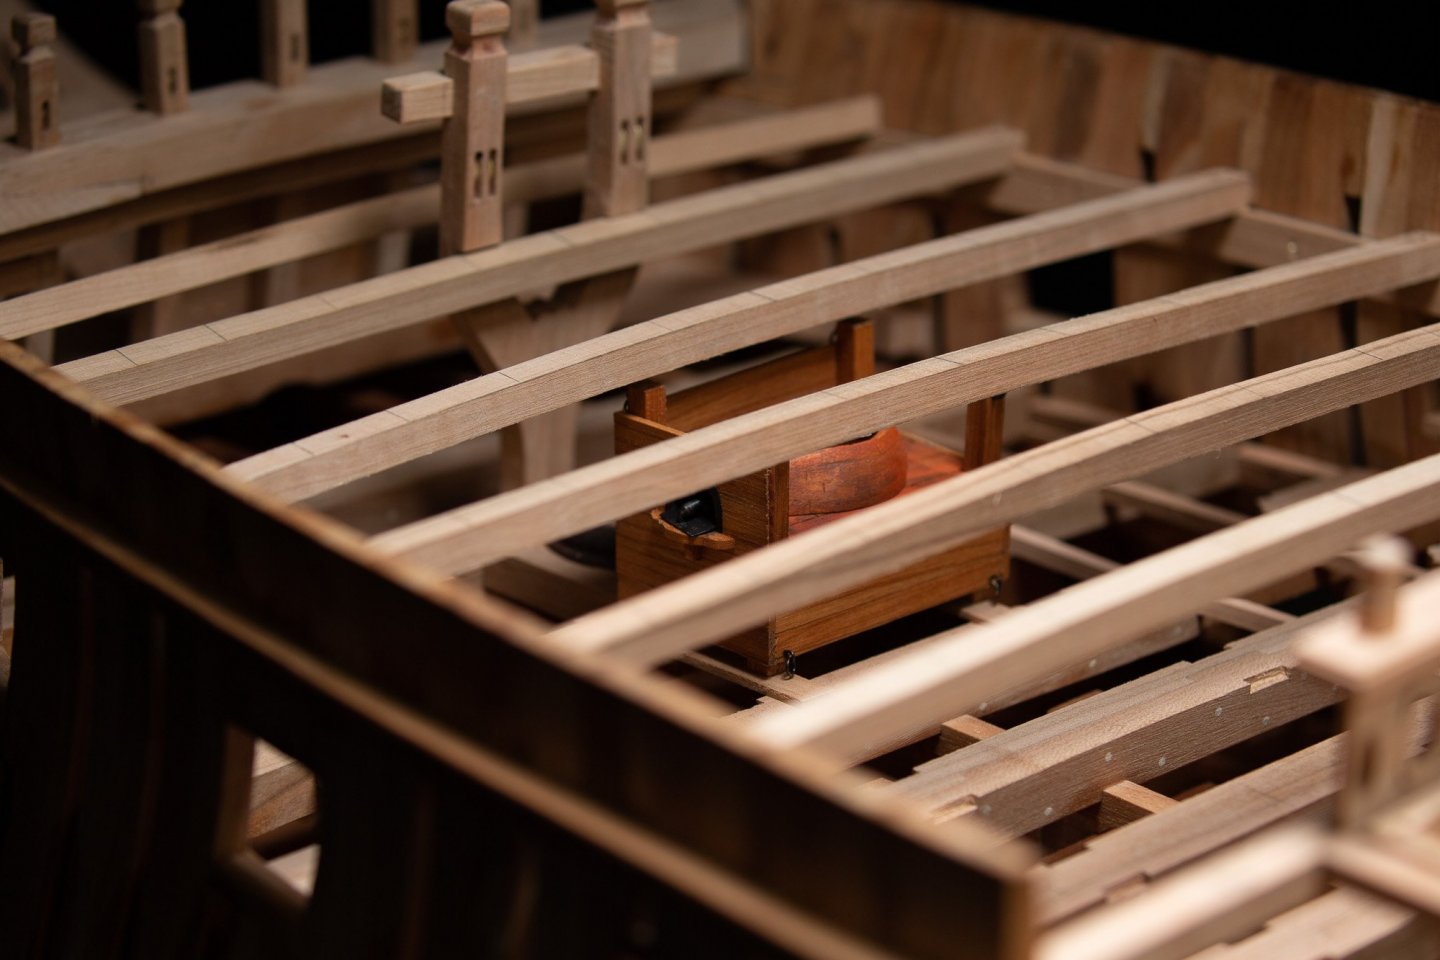
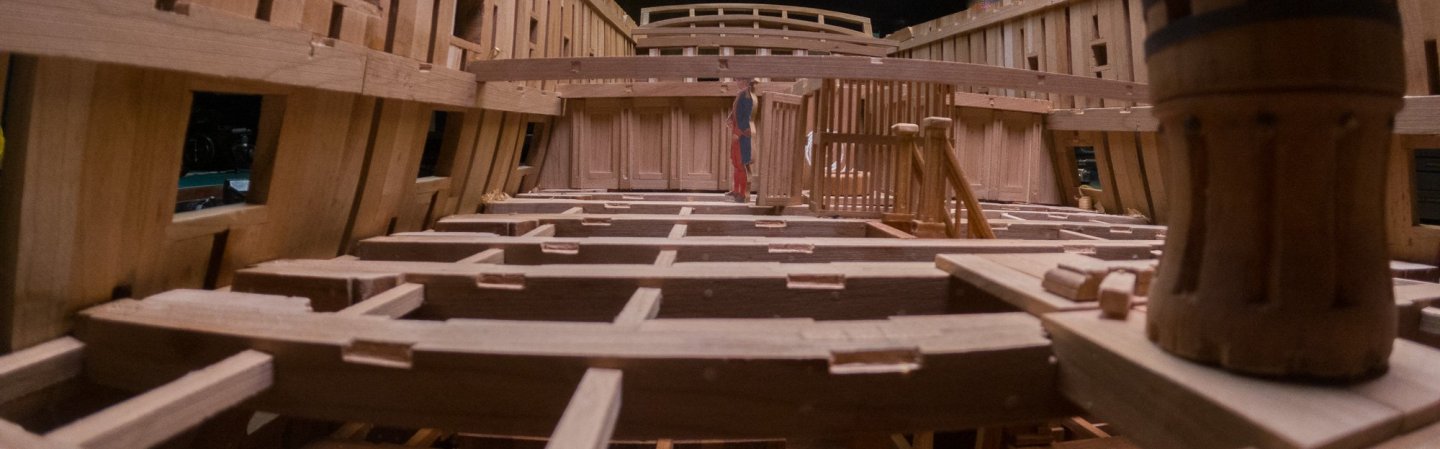
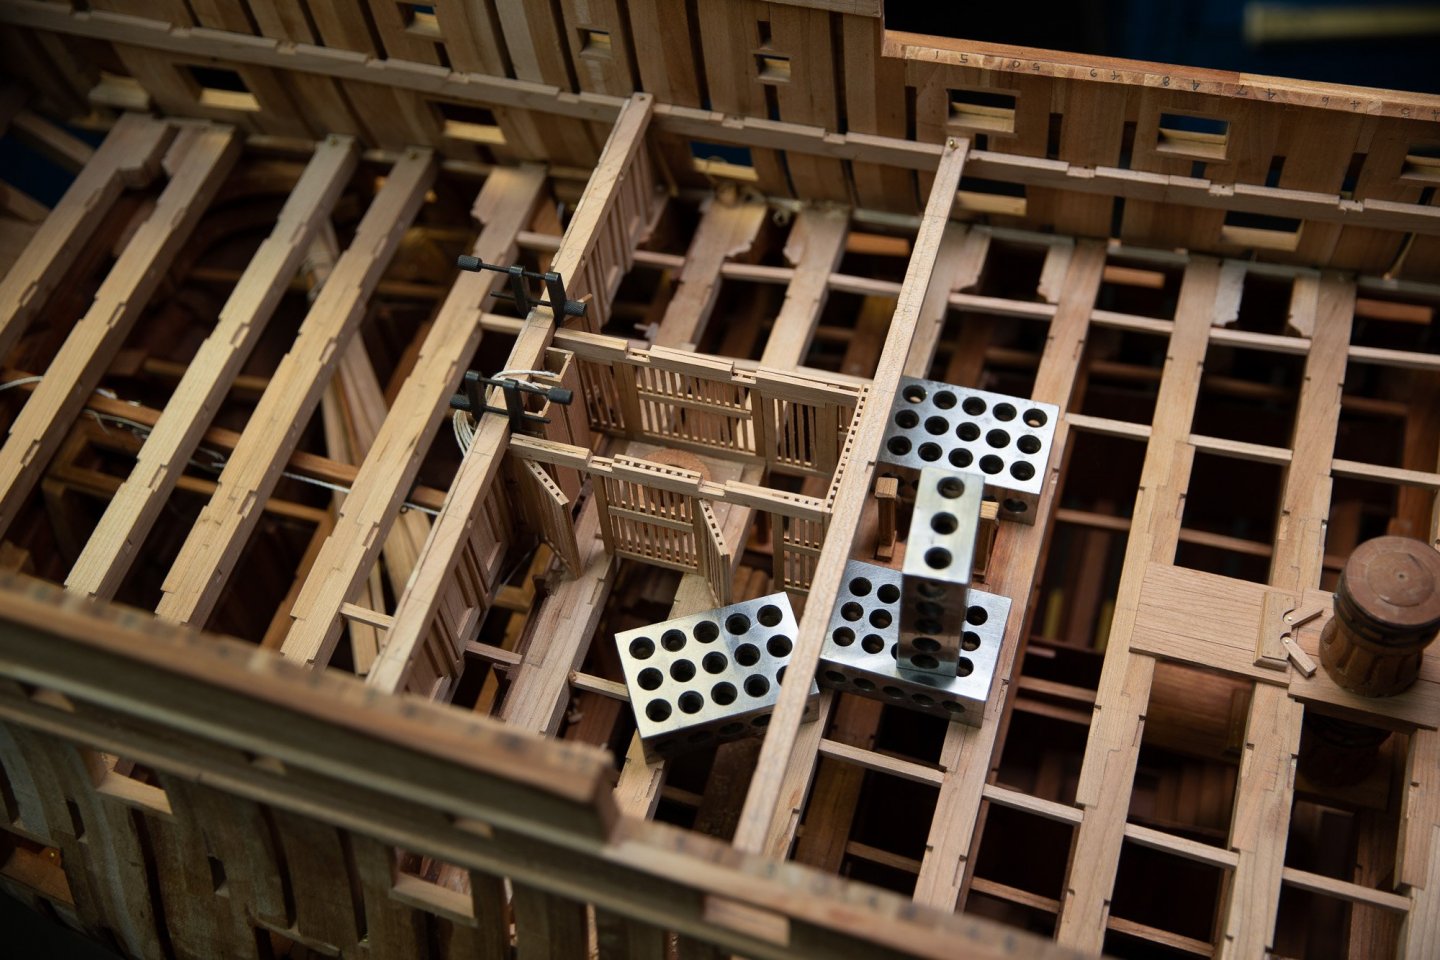
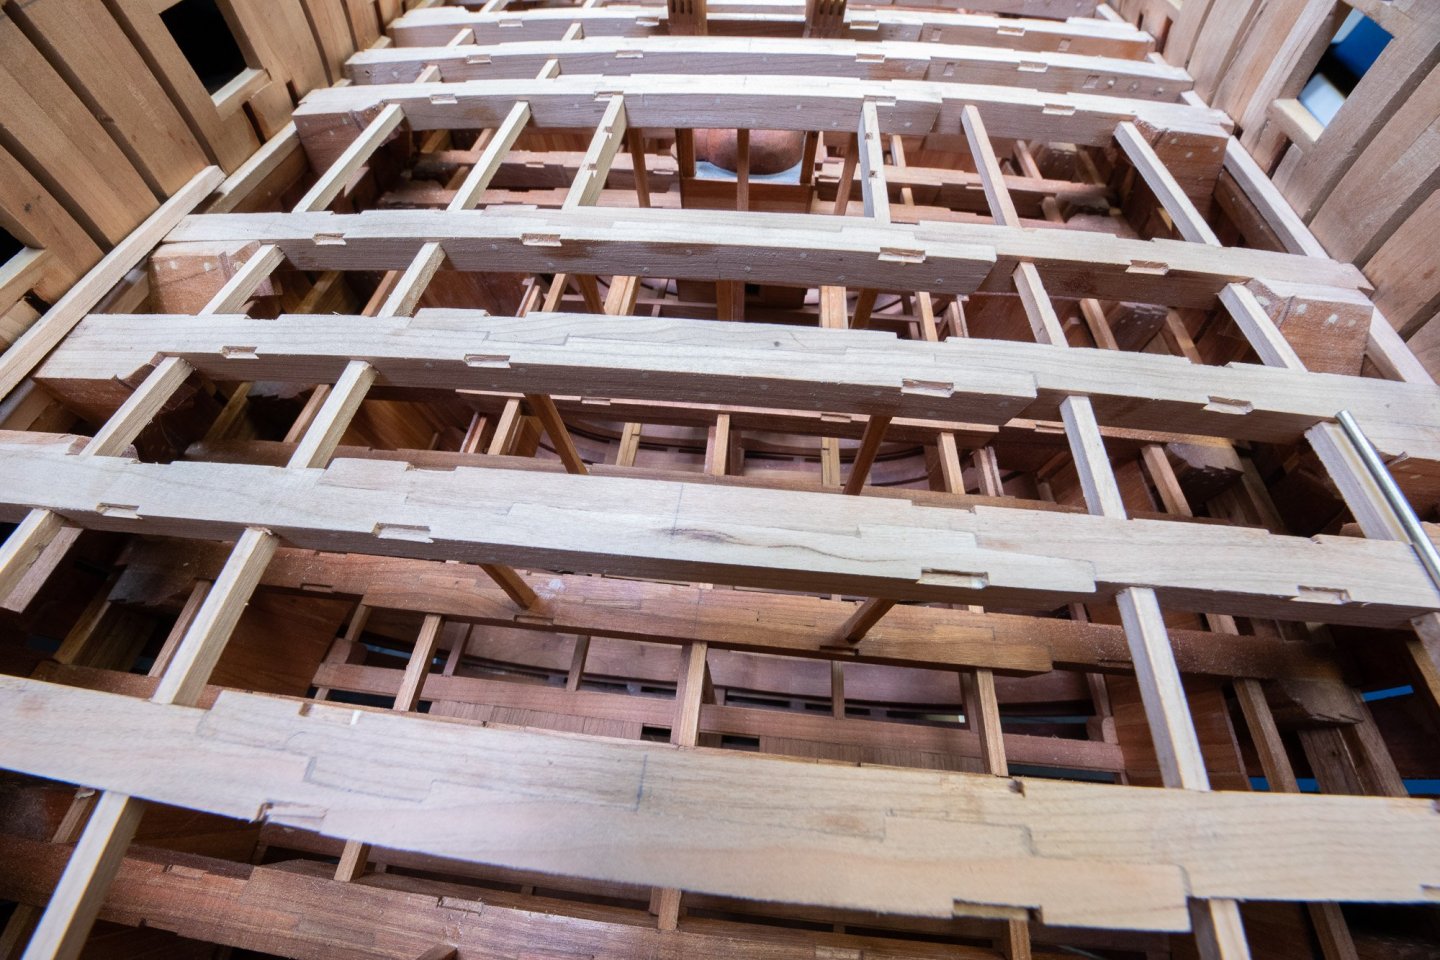
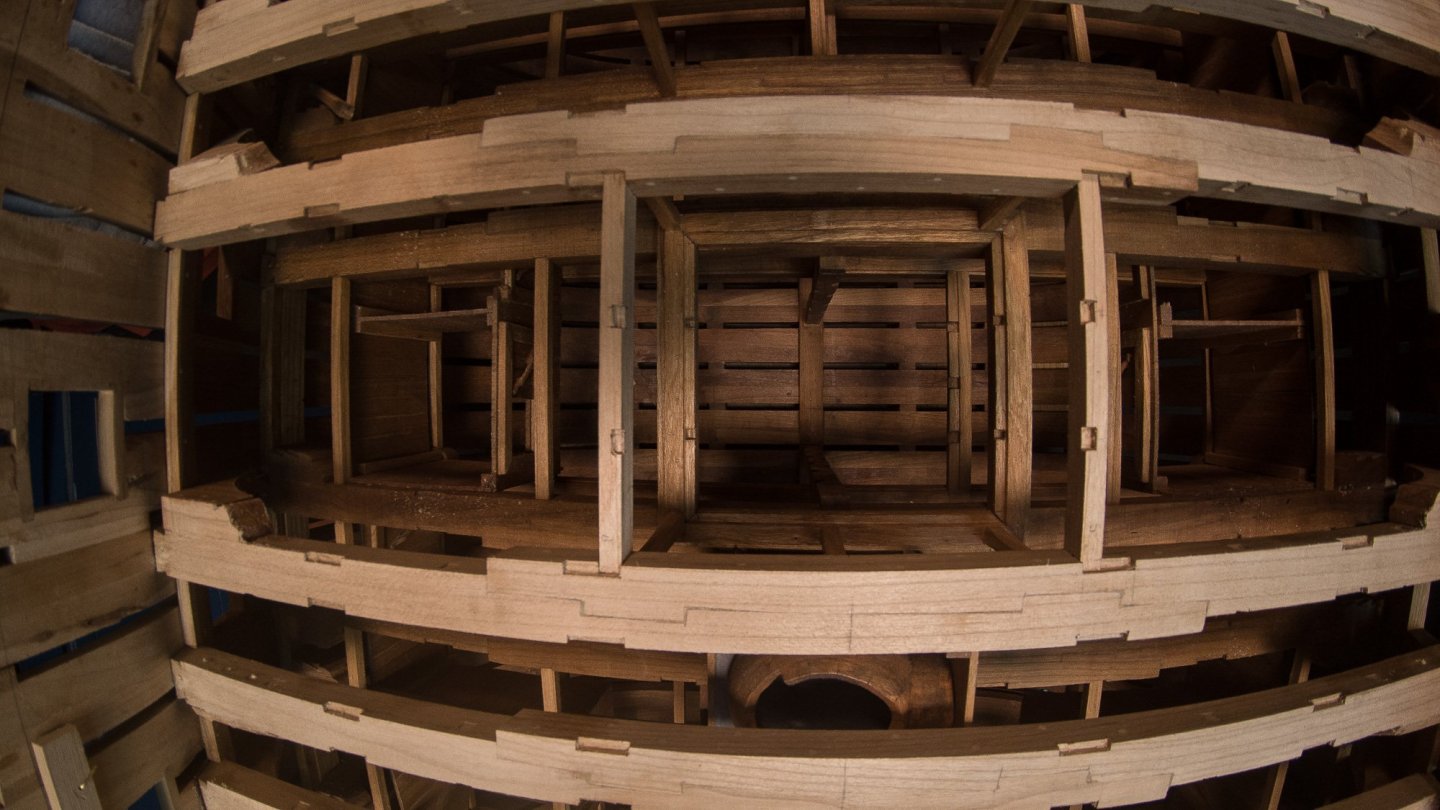
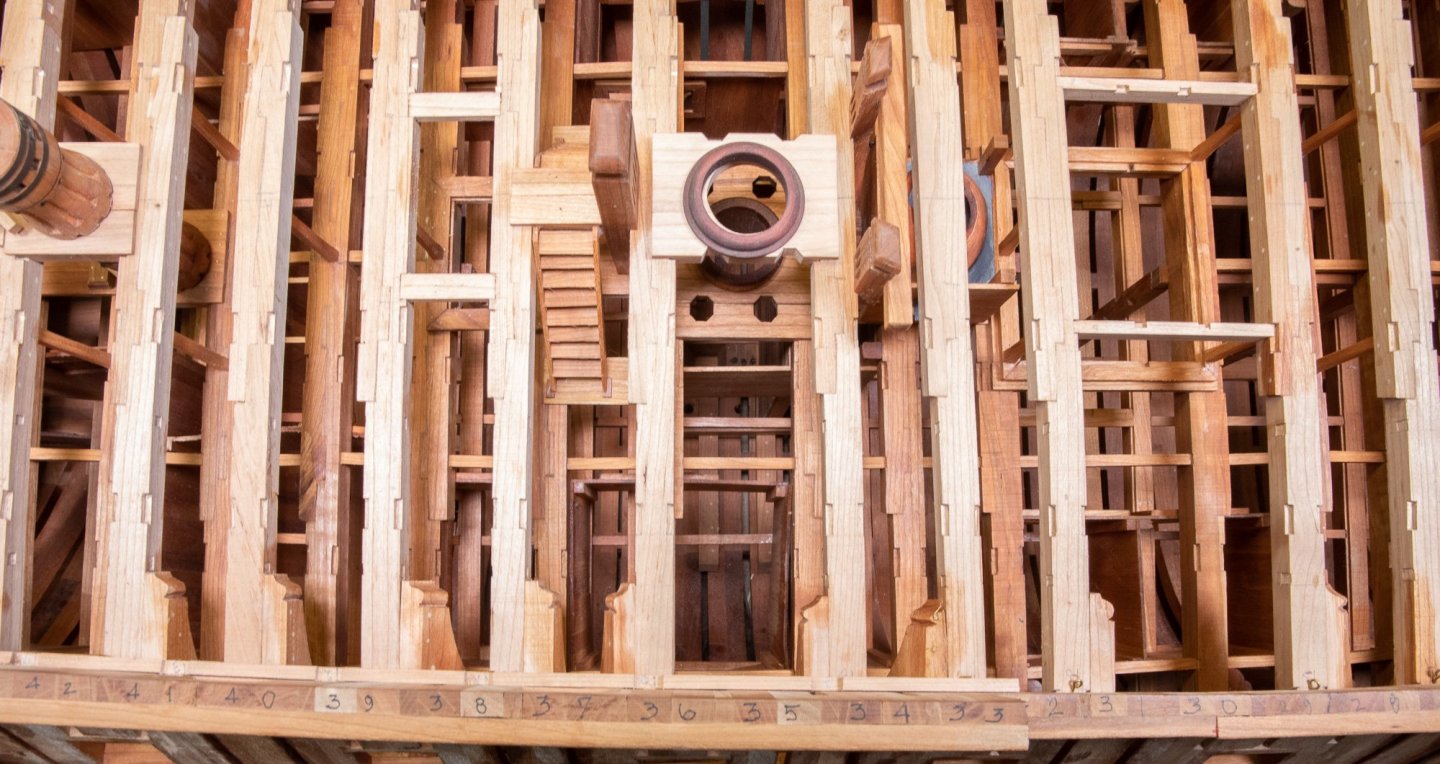
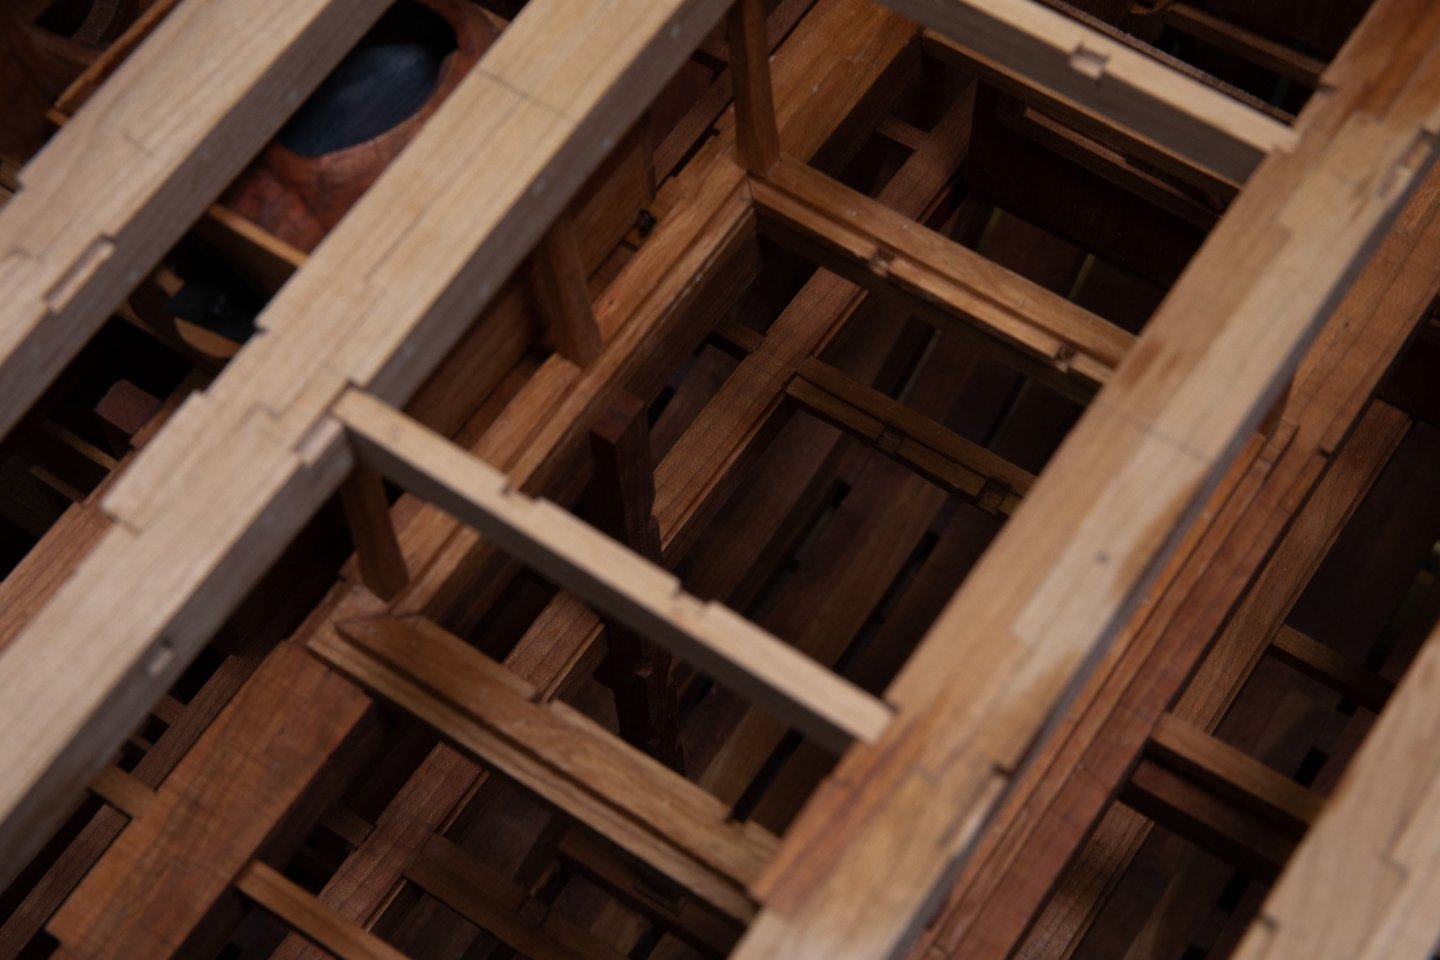
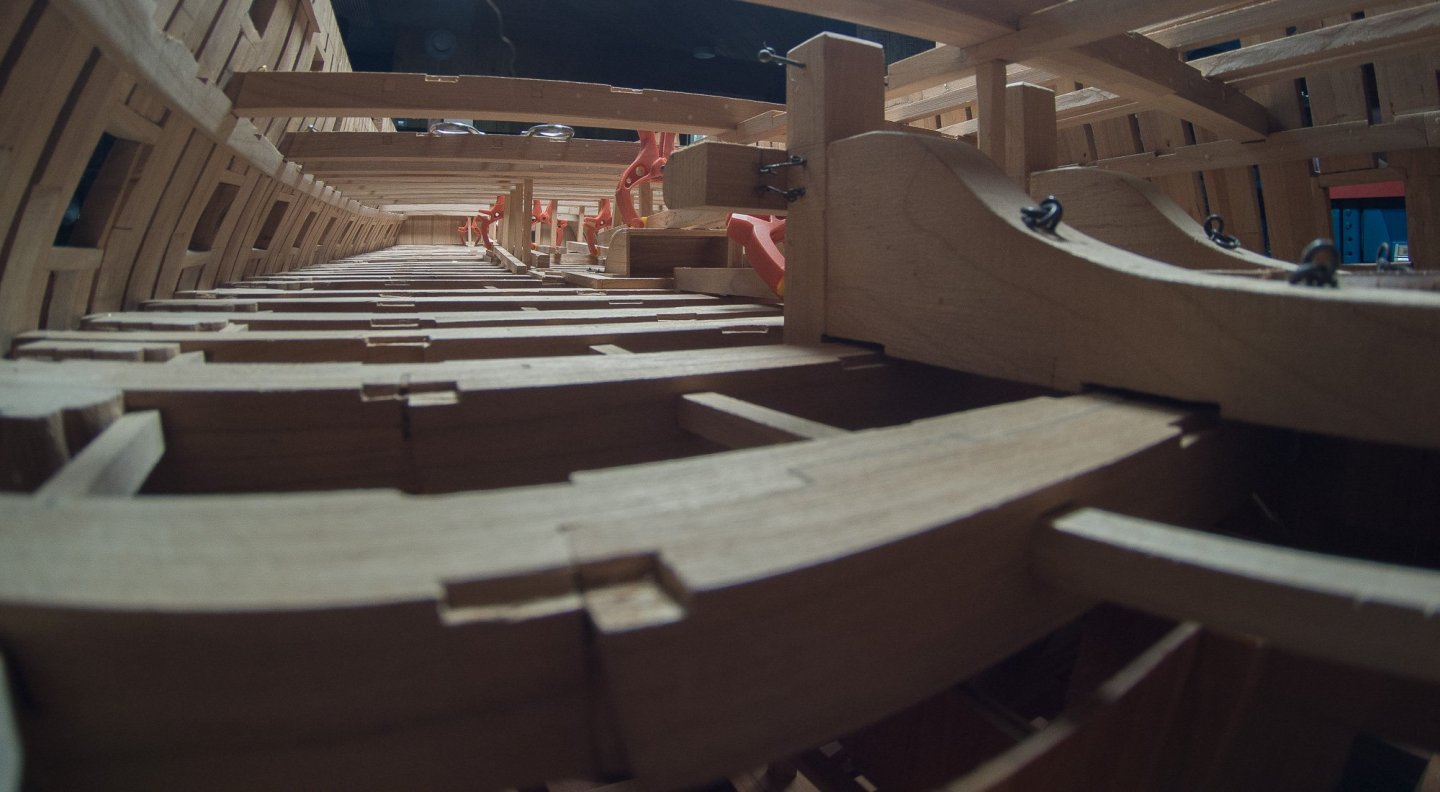
Did you know that the most difficult part of the framing is this area:

- 257 replies
-
- 4
-

-

-
- pegasus
- Swan-class
- (and 1 more)
-
Other pictures from Denis in a 3D forum: https://blenderartists.org/t/hms-pegasus-full-ship-building-in-progress/696956
- 141 replies
-
- 2
-
-
- pof swan series
- swan
- (and 1 more)
-
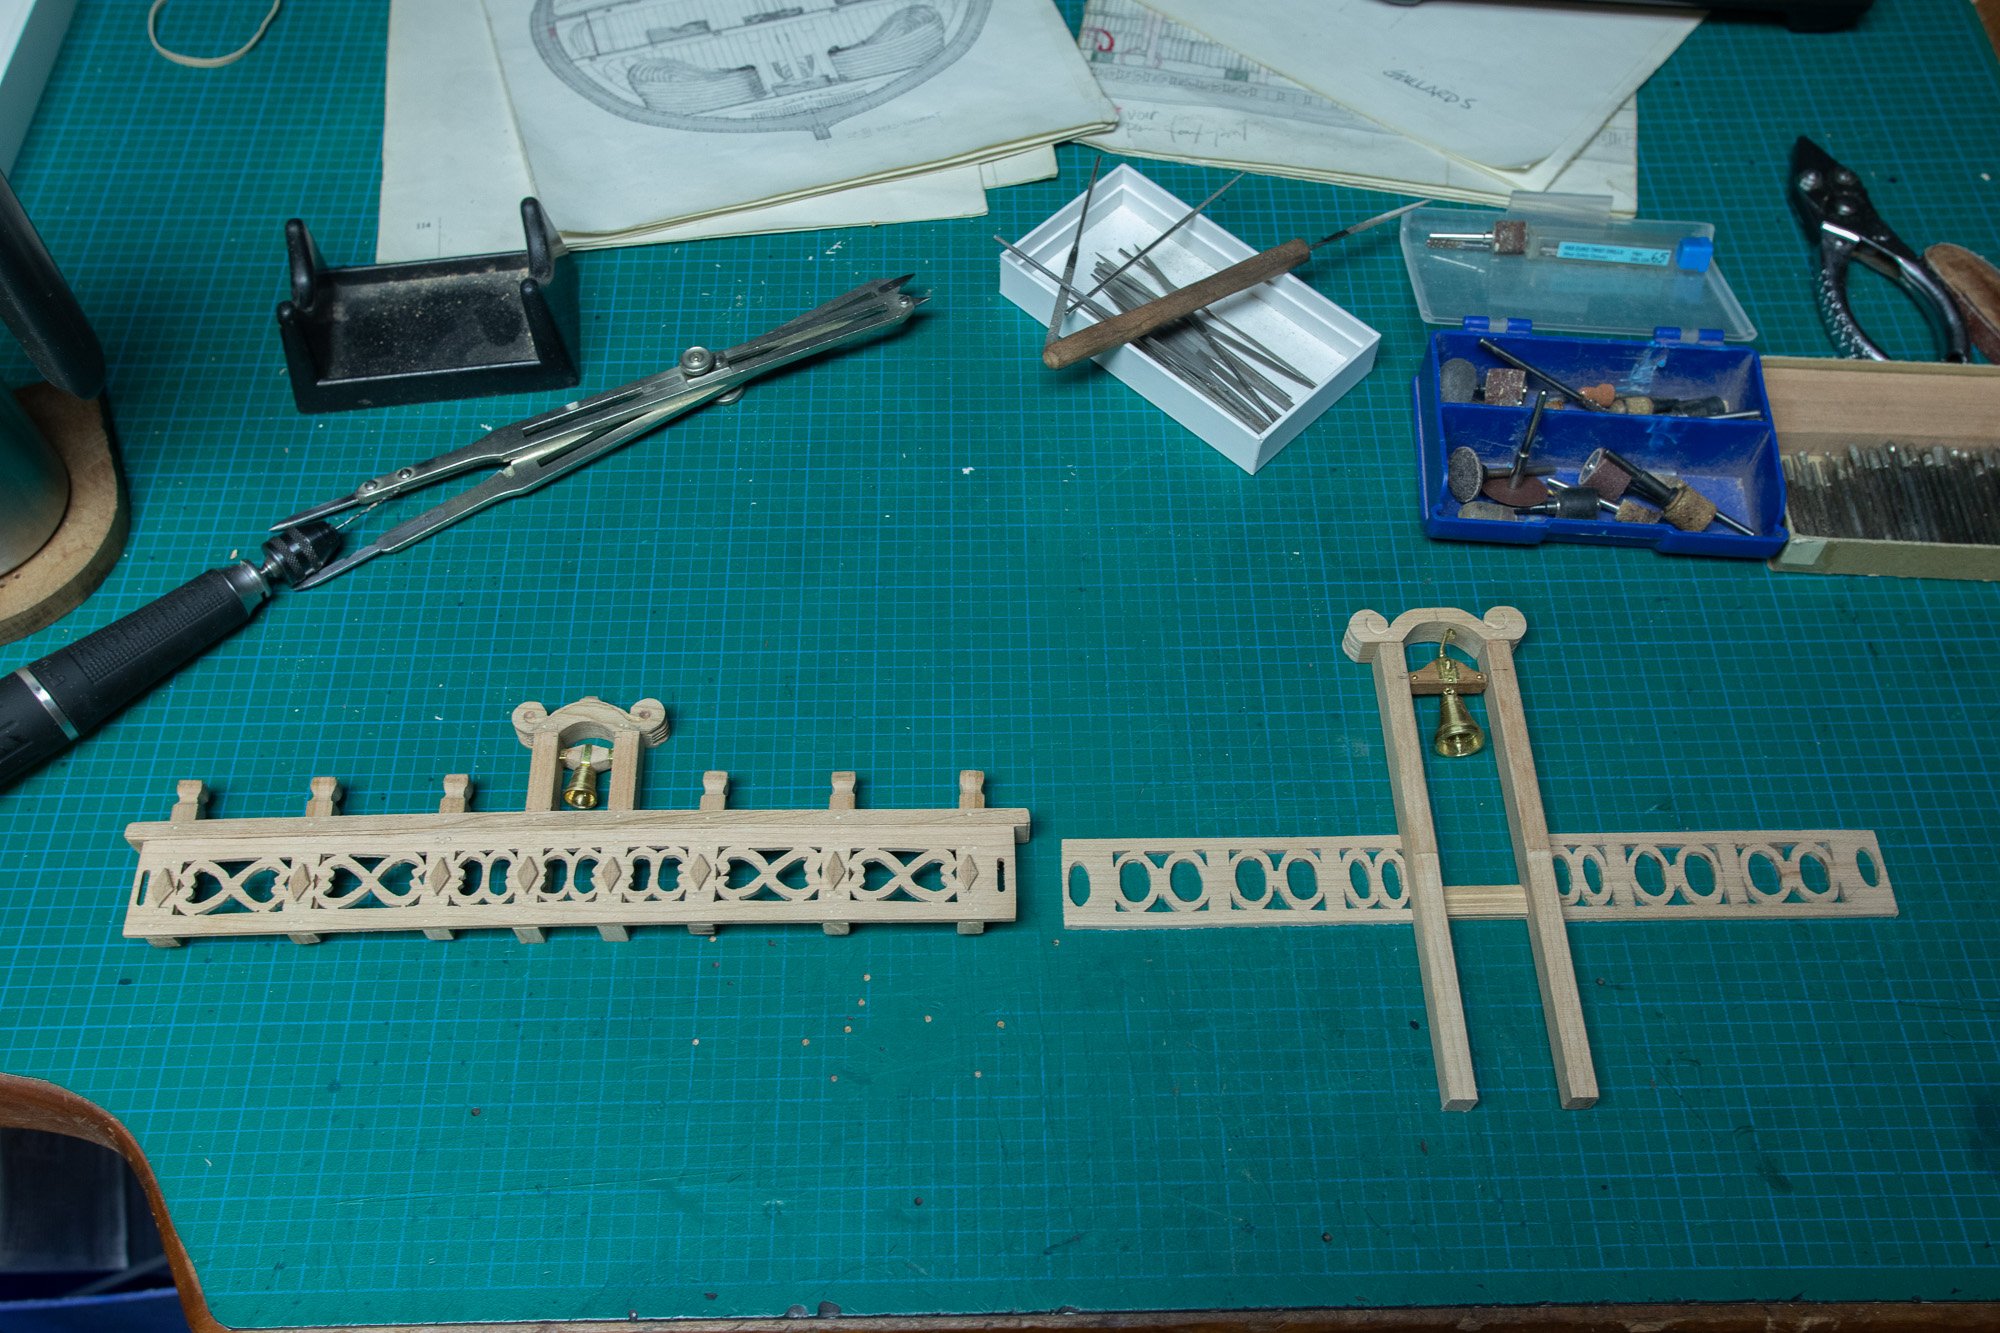
THE USE OF TELEPHOTOS LENS FOR MACRO PHOTOGRAPHY To make things simple, let' s divide the photo lens in 2 groups: prime lens with a fixed focal length and telephoto zoom lens with variable focal length. Here is the challenge: 3 telephotos lens and 1 photo by each lens: Associate the good photo with the good lens. As a comparison, a photo taken by a spotting scope is included, but he is in another team and I wanted to include it to see how close it can comes to the bell. Usually, telephoto lens are use to photographs far objects. In this challenge, the question is: Does the 600mm lens will take a photo closer than the 400mm? The first answer which comes to mind is yes. Before answering, we need to add another specification of the lens: the minimum distance the lens can take a photo. For the 100-400mm the distance is 98cm and for the 200-600 the minimum distance is 2,4 meters. The 100-400mm lens can take a photo 2,5 times closer than the 200-600. Usually this specification is not important when you take a photo at long distance. But using these lens for "macro", it is another story. For this reason, the first photo is not the one of the 100-400 lens, the second photo is the one for the 100-400mm. Did you guess it right?
-
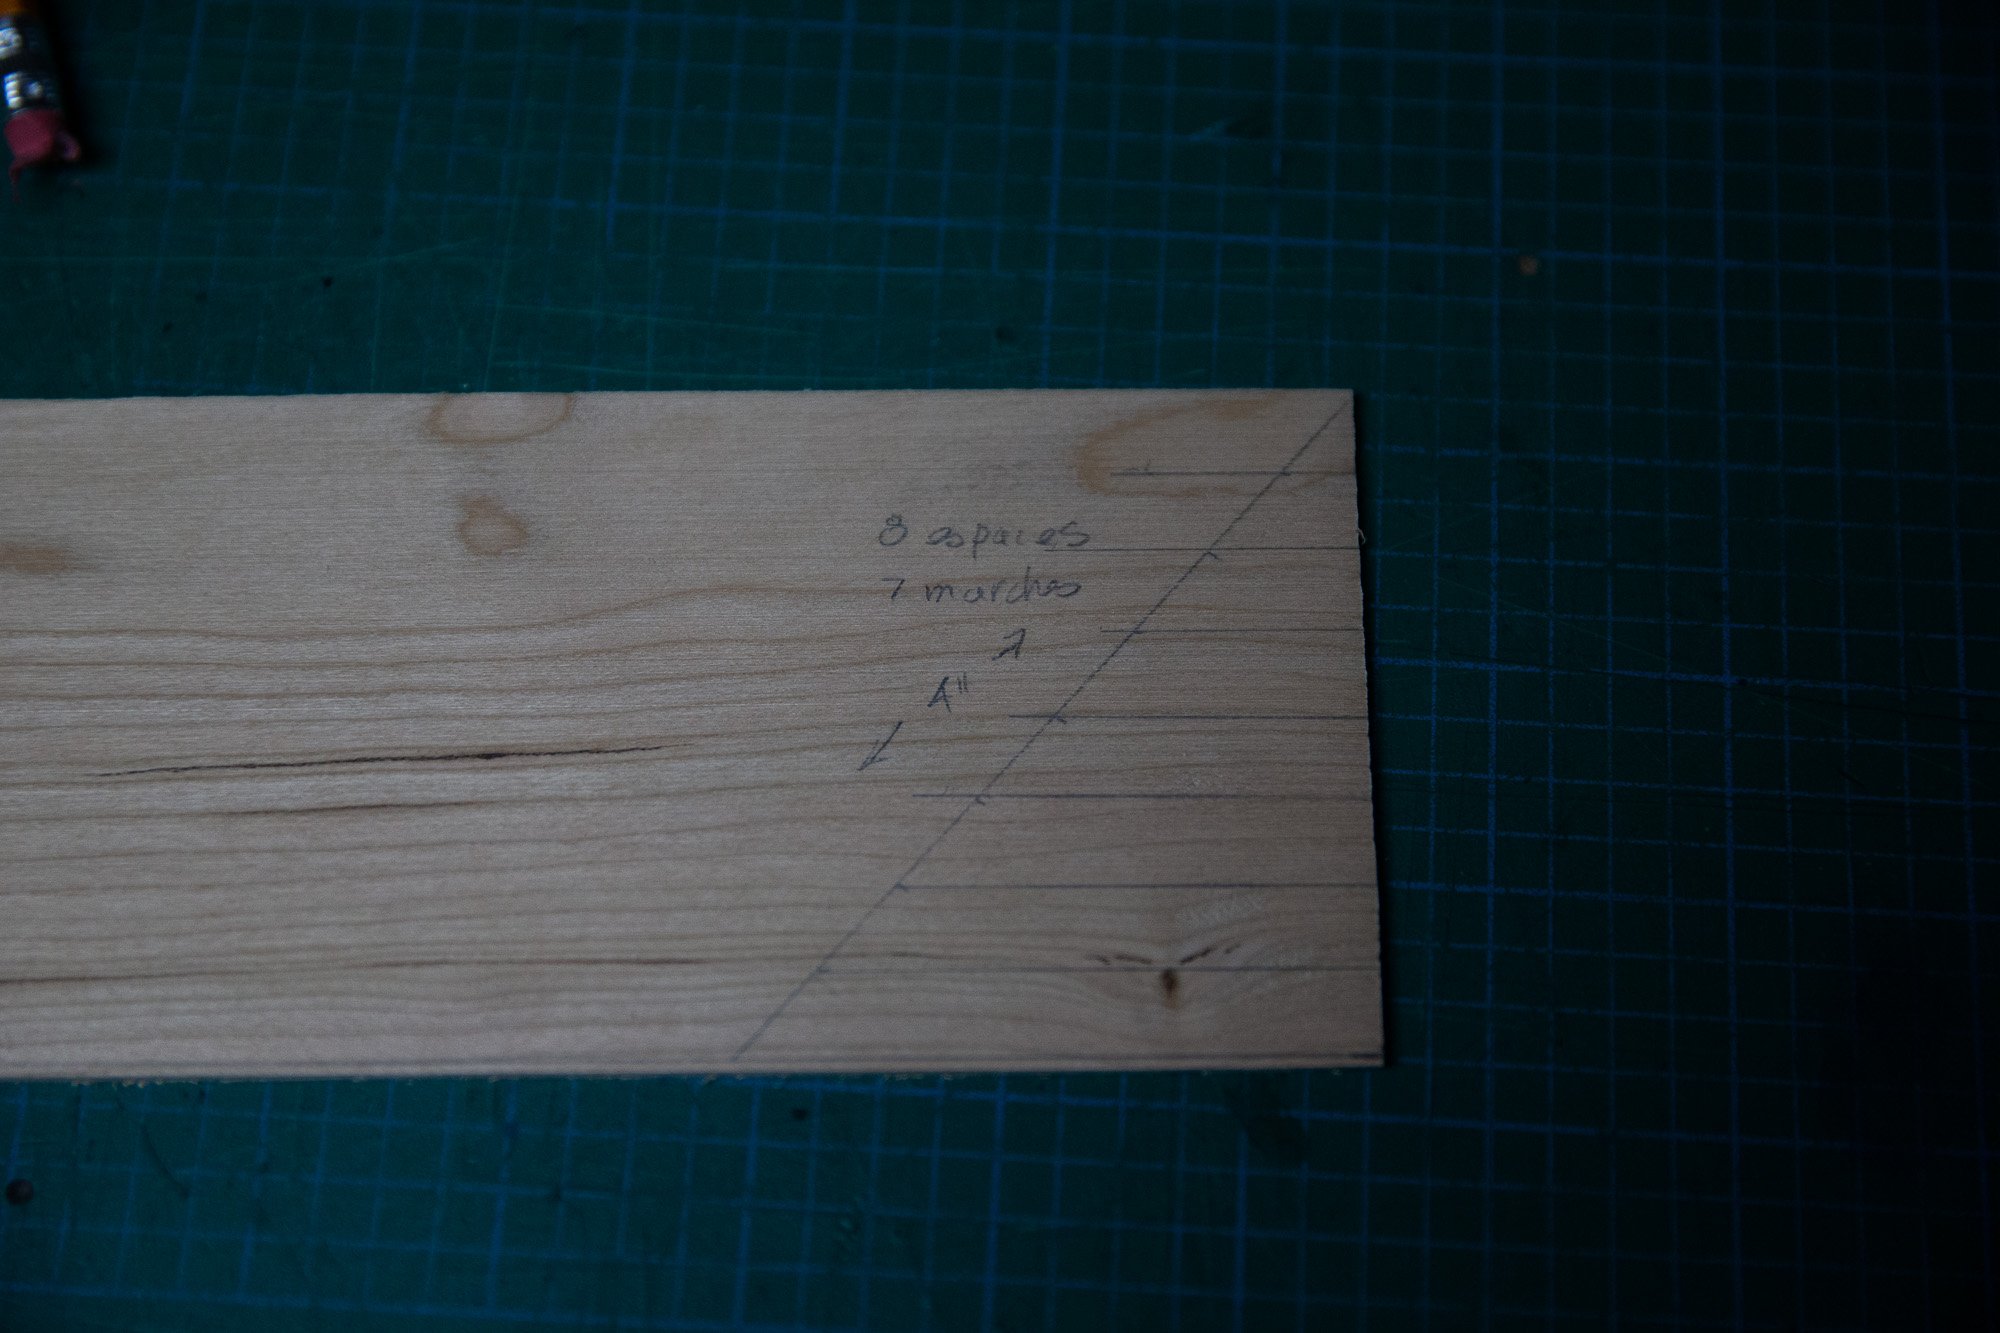
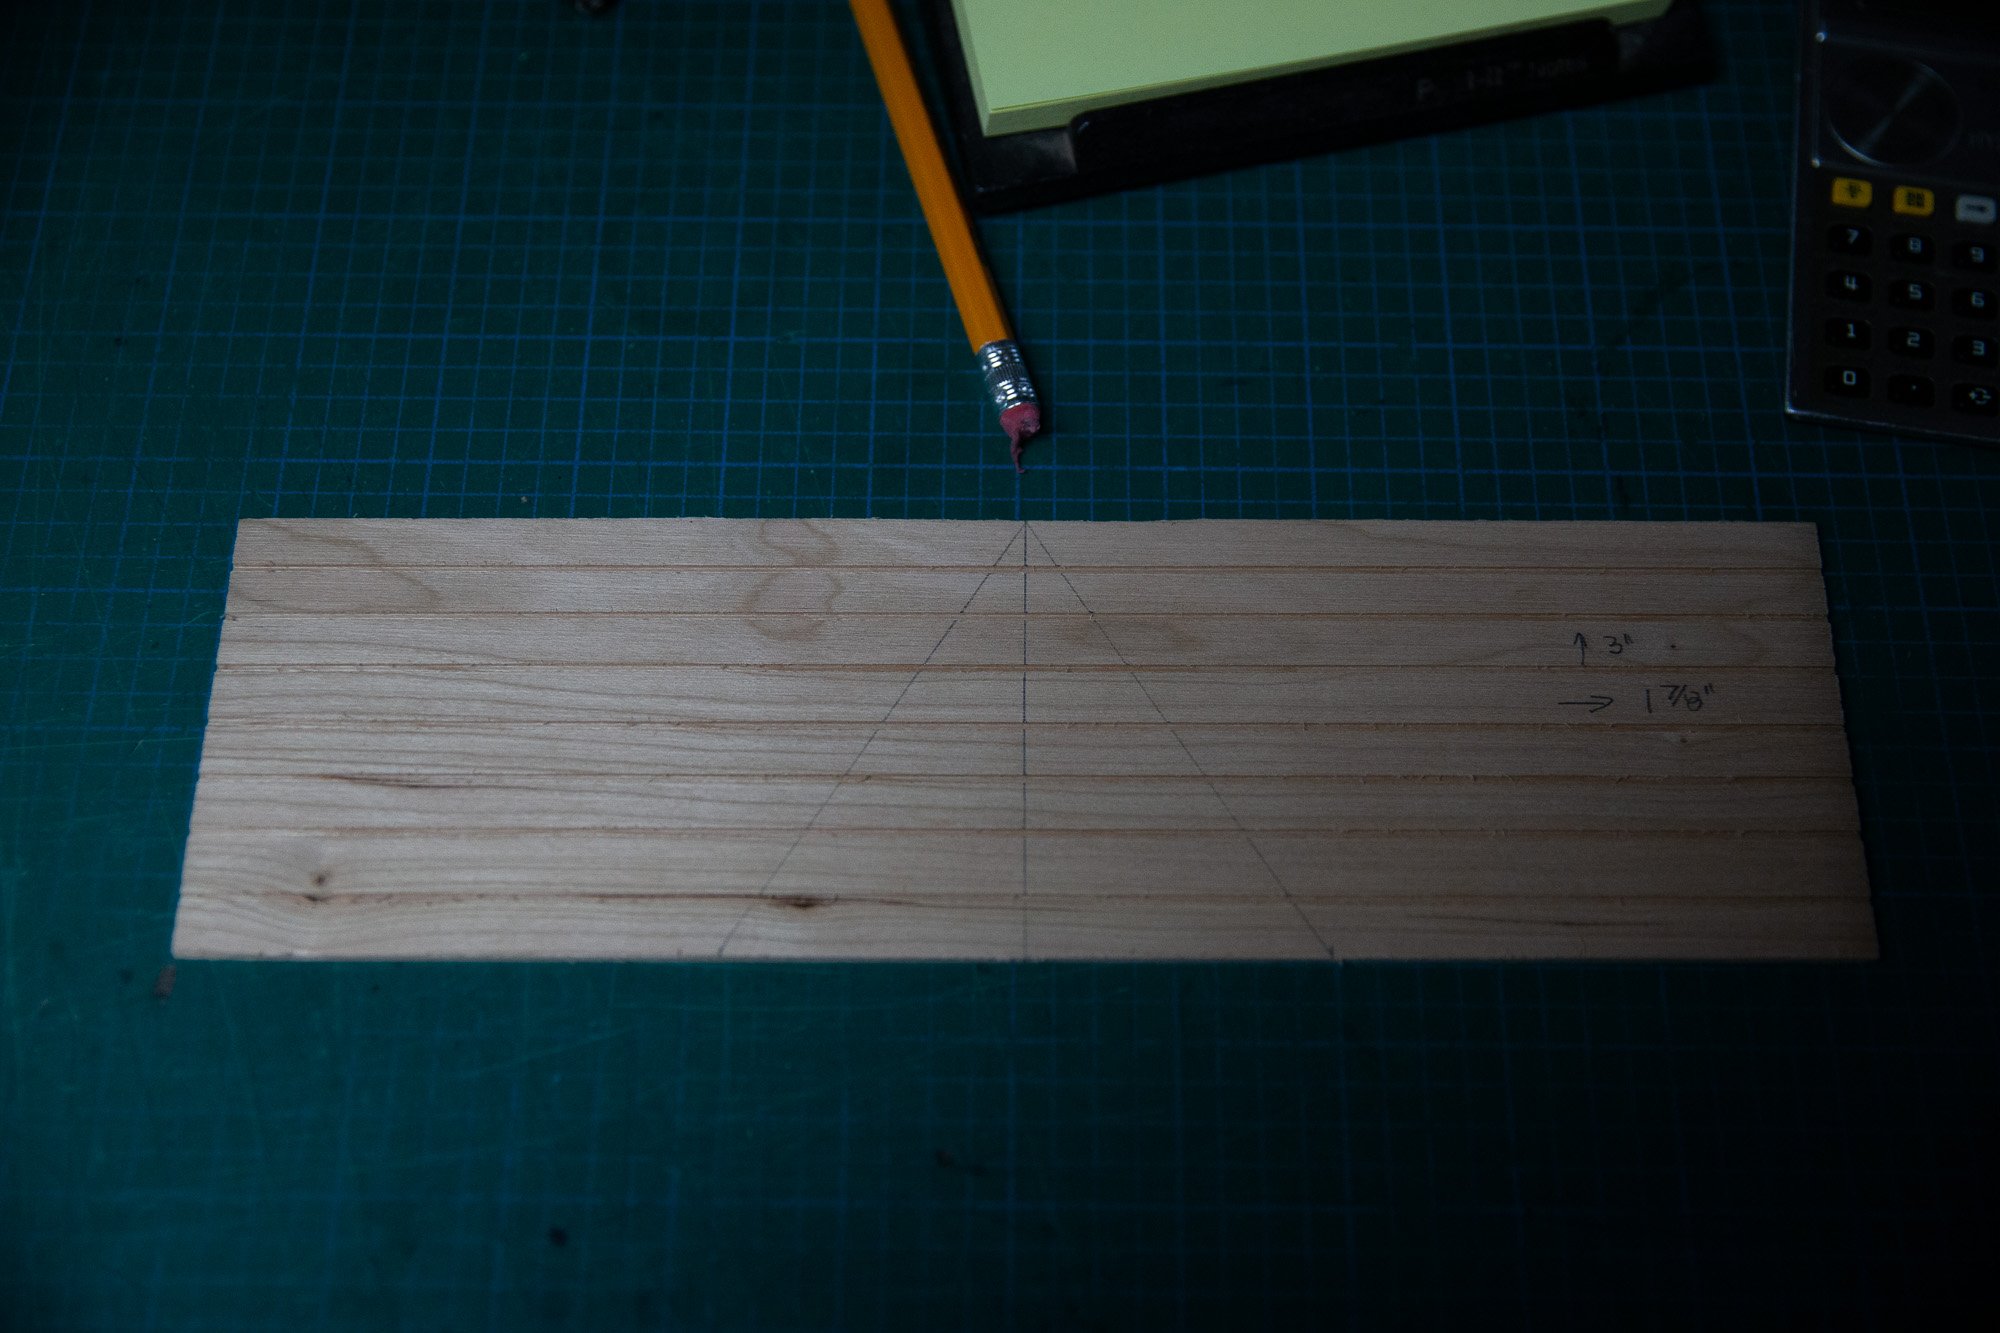
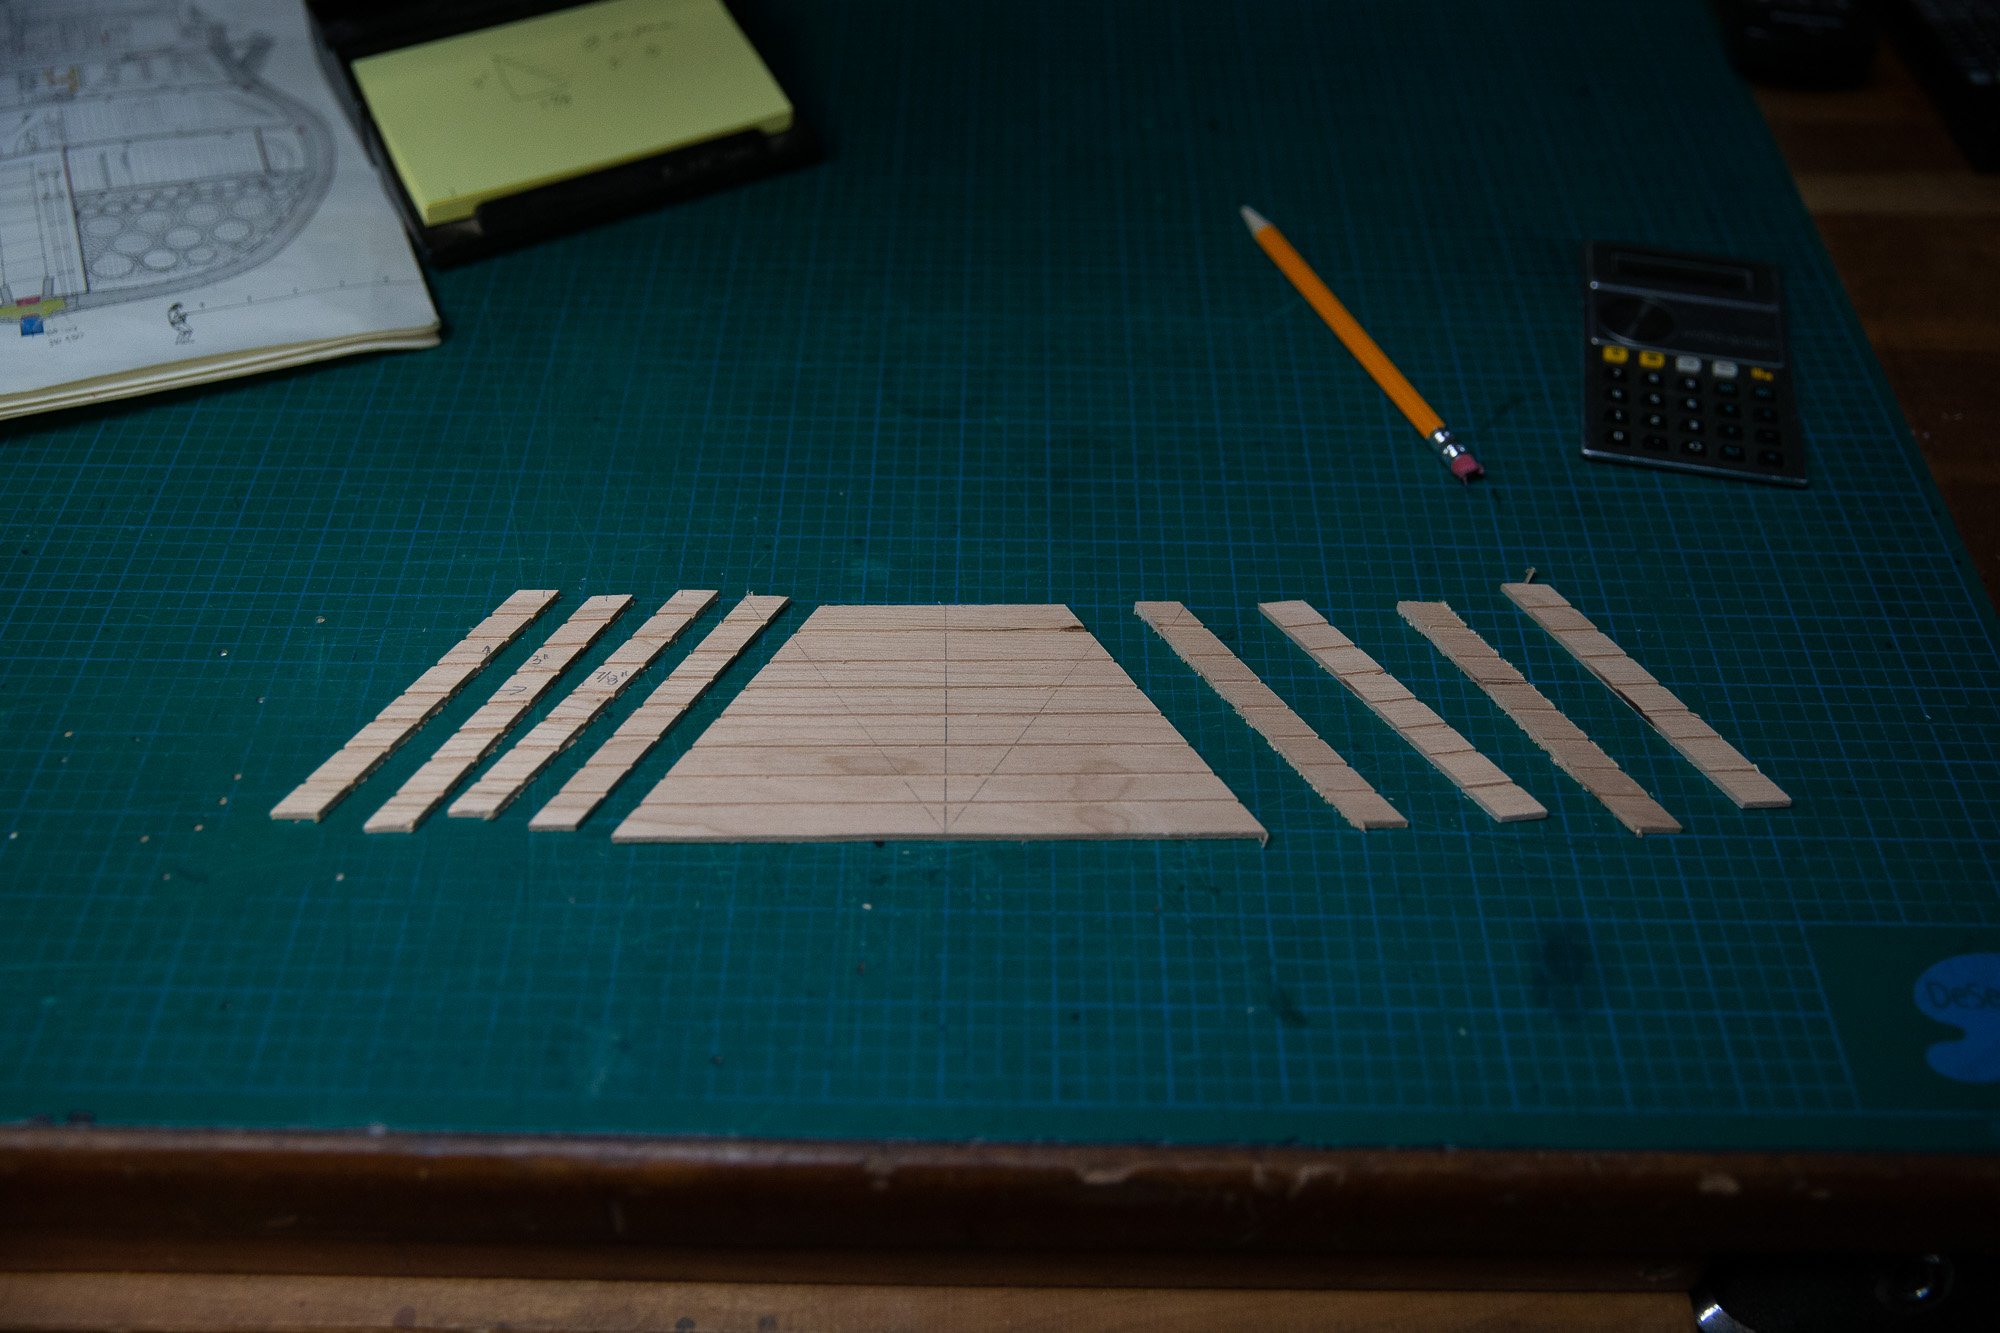
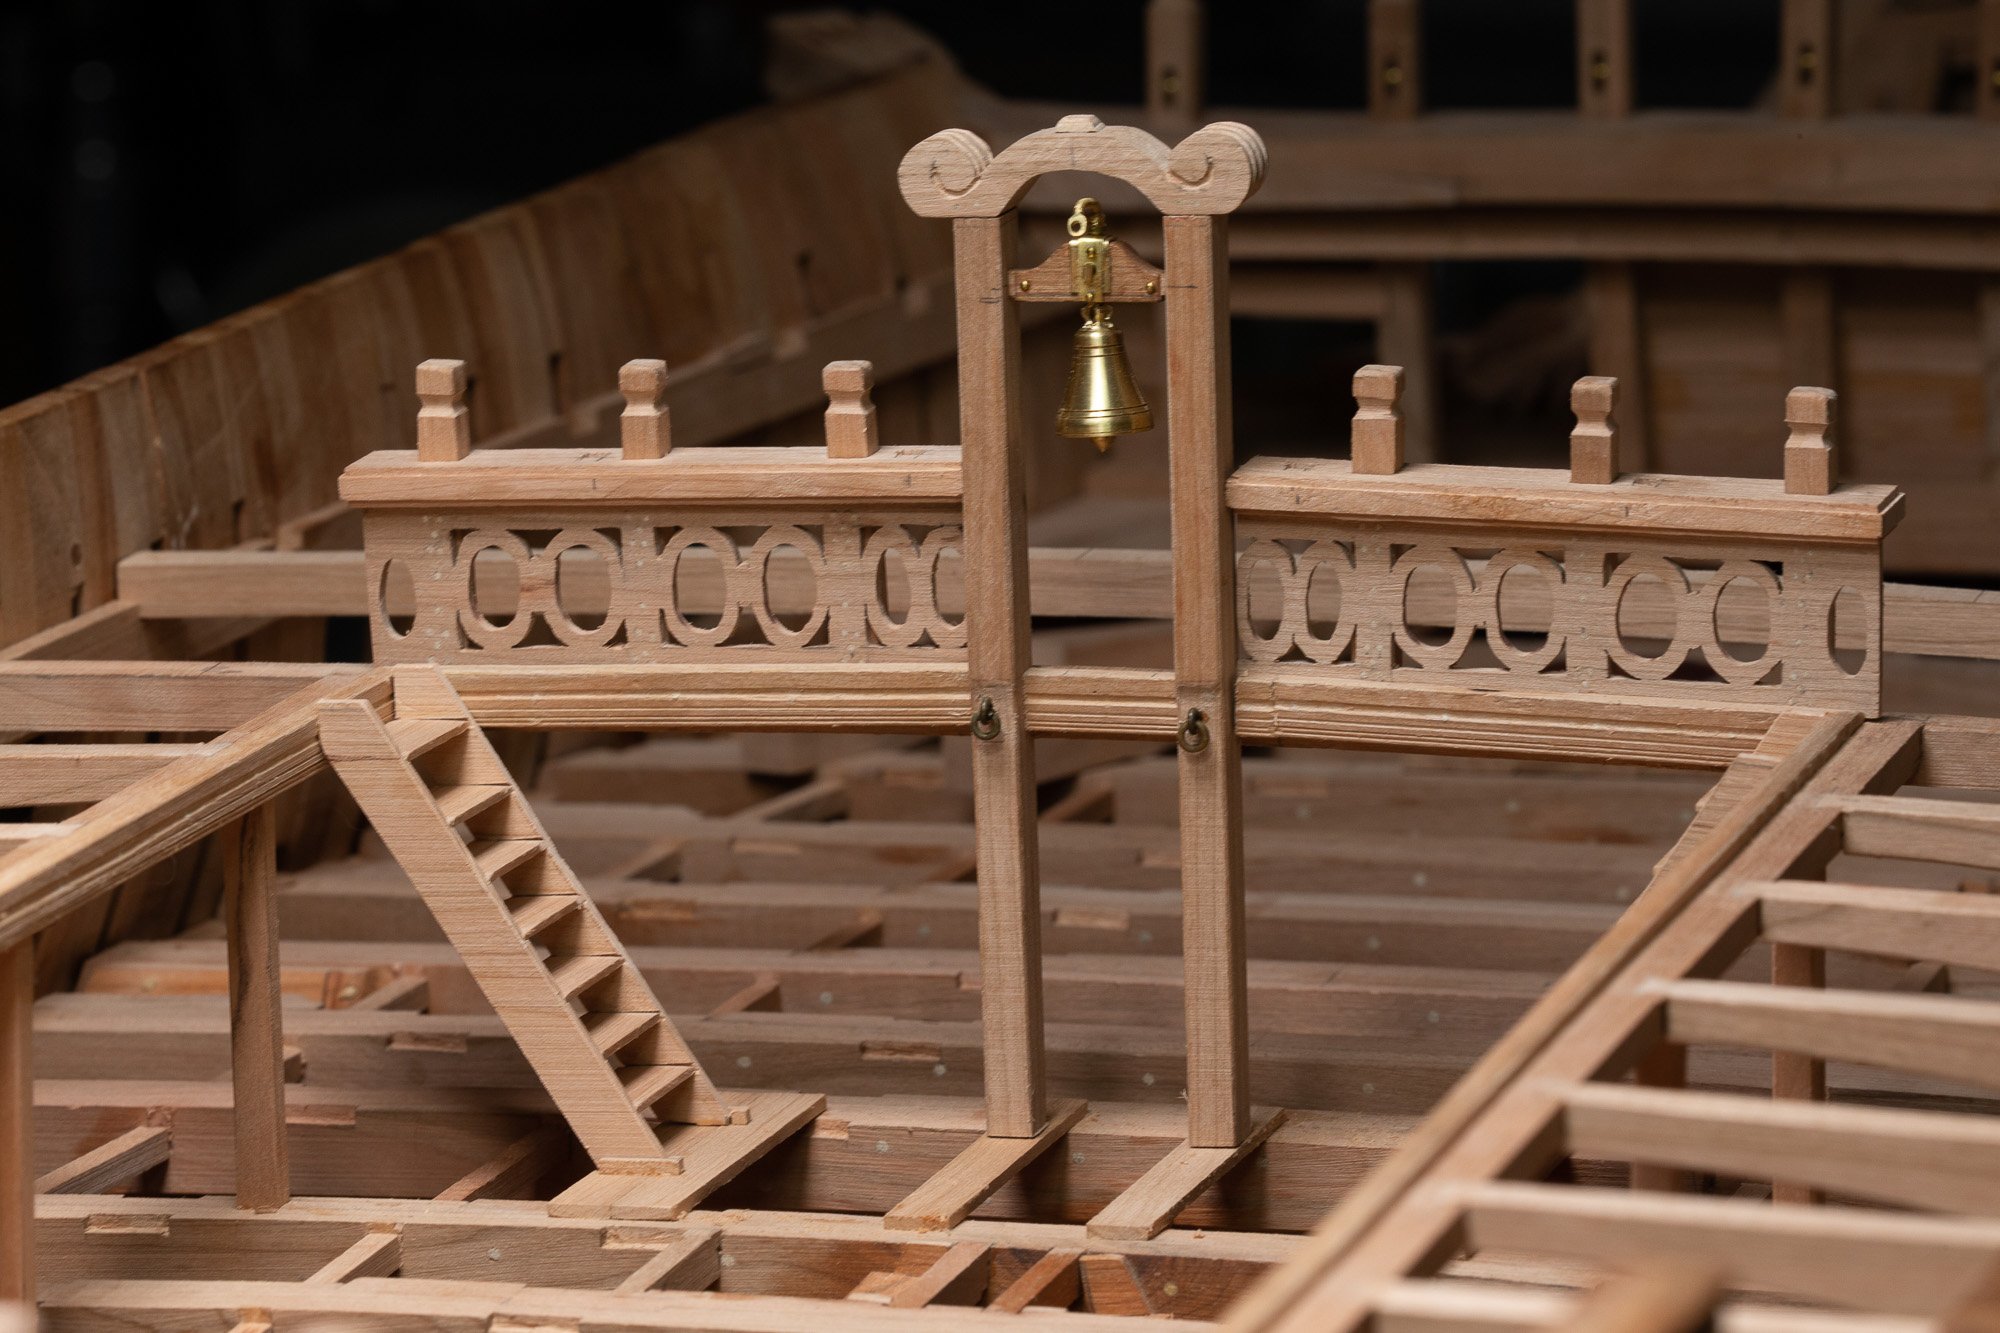
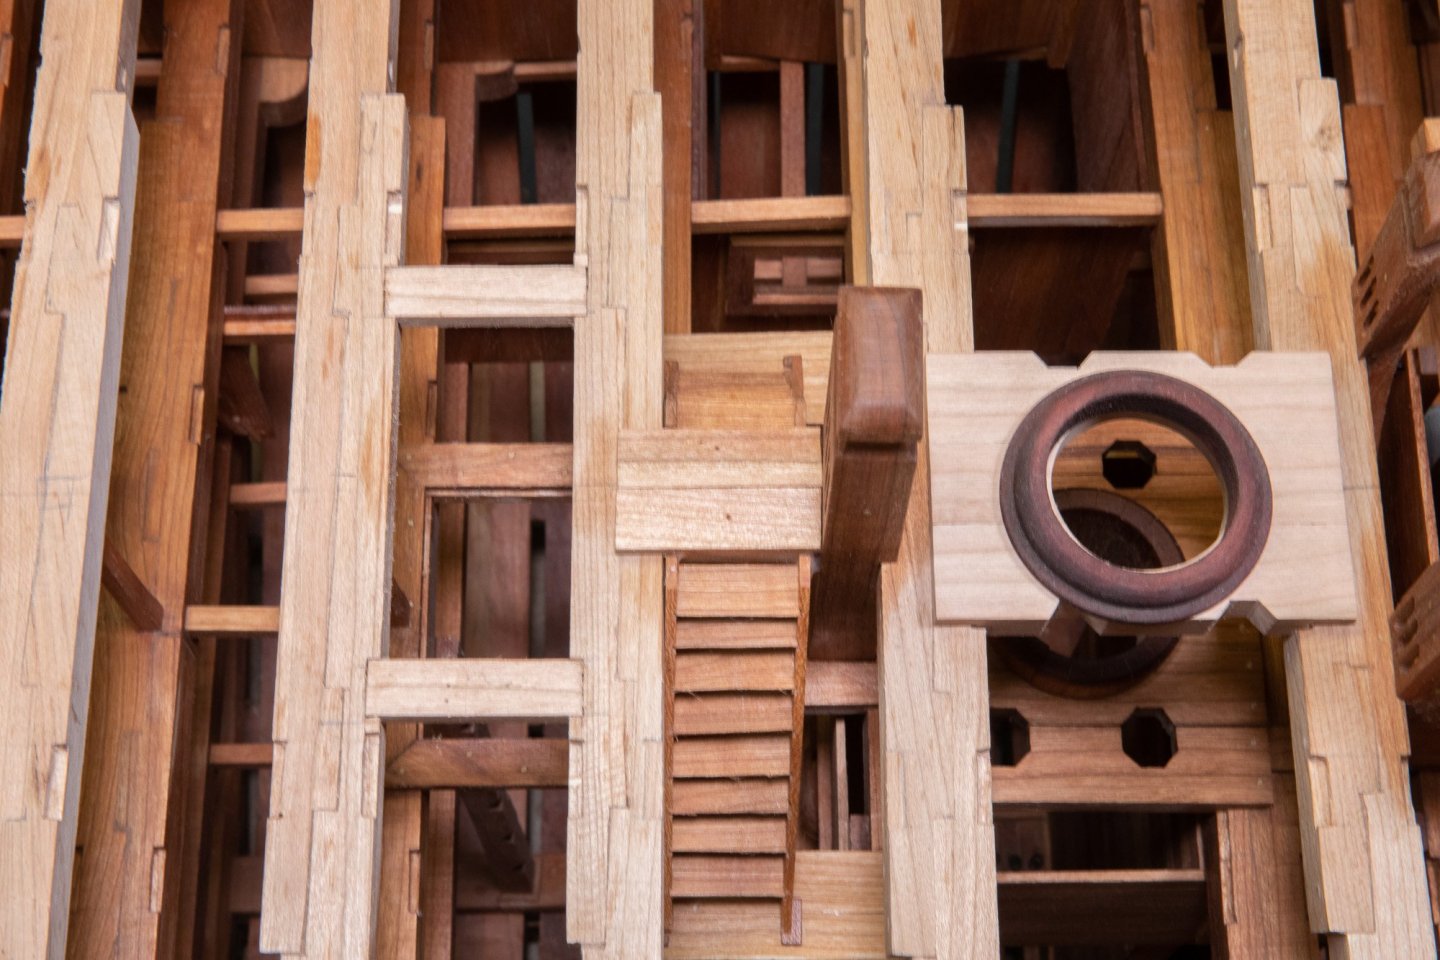
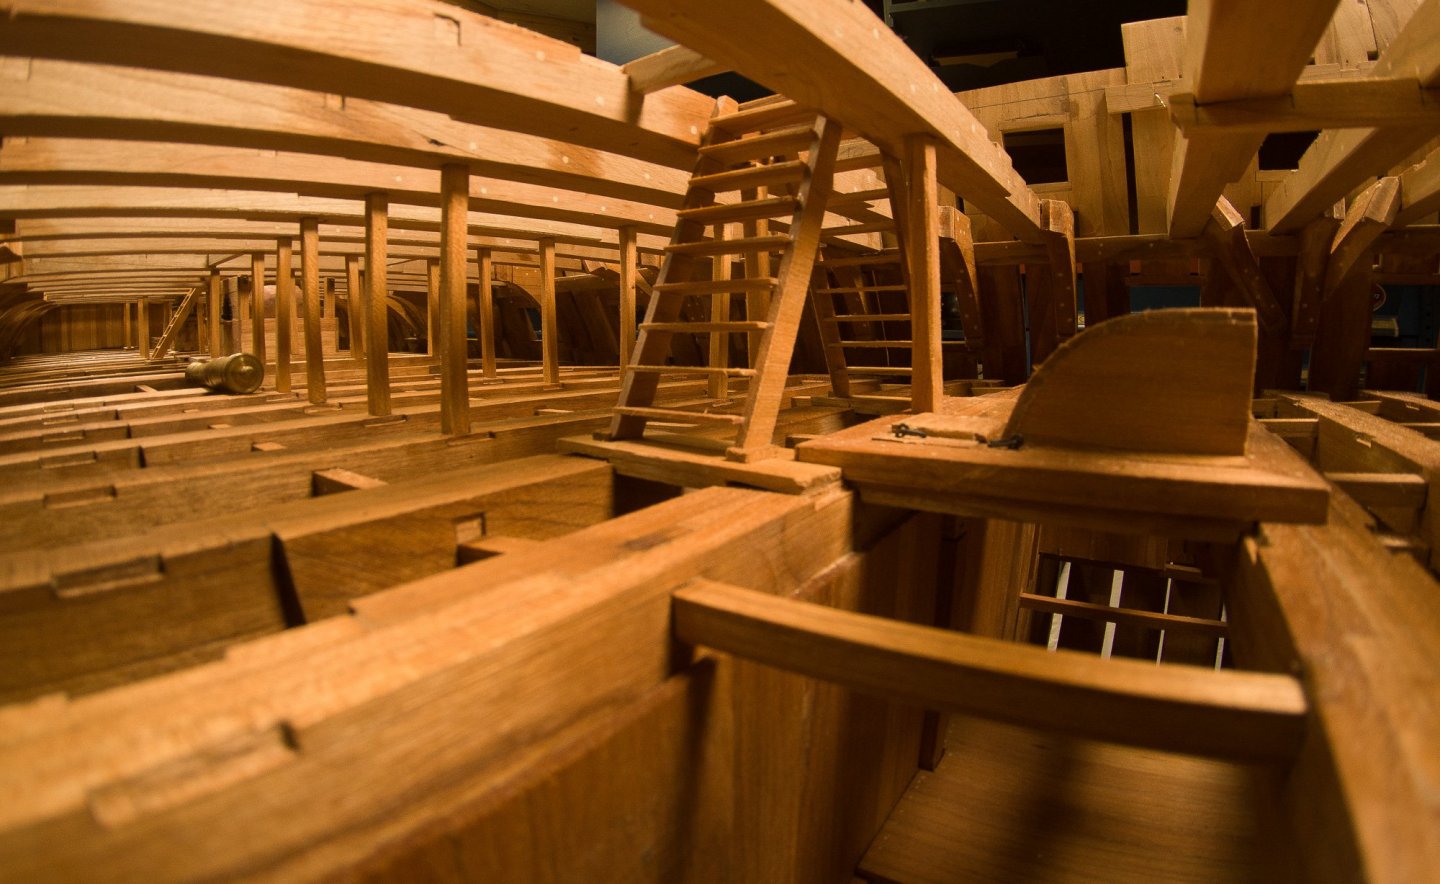
The easy way to make stairs: 1- ex for 7 steps we need to divide in 8 spaces 2- cut 1 kerf for each steps 3- measure the angle of the stair by measuring the height and the width that the stair will occupy 4- cut the sides, 1 for each side 5- the thickness of the steps must be few thousands less the width of the saw blade, for easy assembly


-
Thickness Sander questions
Gaetan Bordeleau replied to Ron Burns's topic in Modeling tools and Workshop Equipment
I did a thickness sander few decades ago and I sold it few years later. Then I bought one with a second motor for the automatic feed. Feeding at a regular speed will produce a more even thickness all along the plank. It is exactly the same principle in turning. If you turn by hand, the finish is rough but if you use the automatic feed, it will be completely different and much more smoother and regular in thickness. I have a 16 inches long drum and the paper used is specifically design for this application only. I change the paper around 1 time a year. The easiest way to scrap the paper is to sand a wood like bloodwood, the particules clog on the belt and burn. I use #80 paper and always sand in the wood direction. If I would use #80 paper for a sanding disk, the results would not be good. In fact, I do not understand why peoples use a sanding disk, with a sanding belt, results will always be better. If I use a too much fine grain, the paper will have a tendency to clog. For what I do, #60 would be too coarse and #100 too easy to clog, For Byrnes sander, I do not know which paper grade is best, because I did not tried it. -
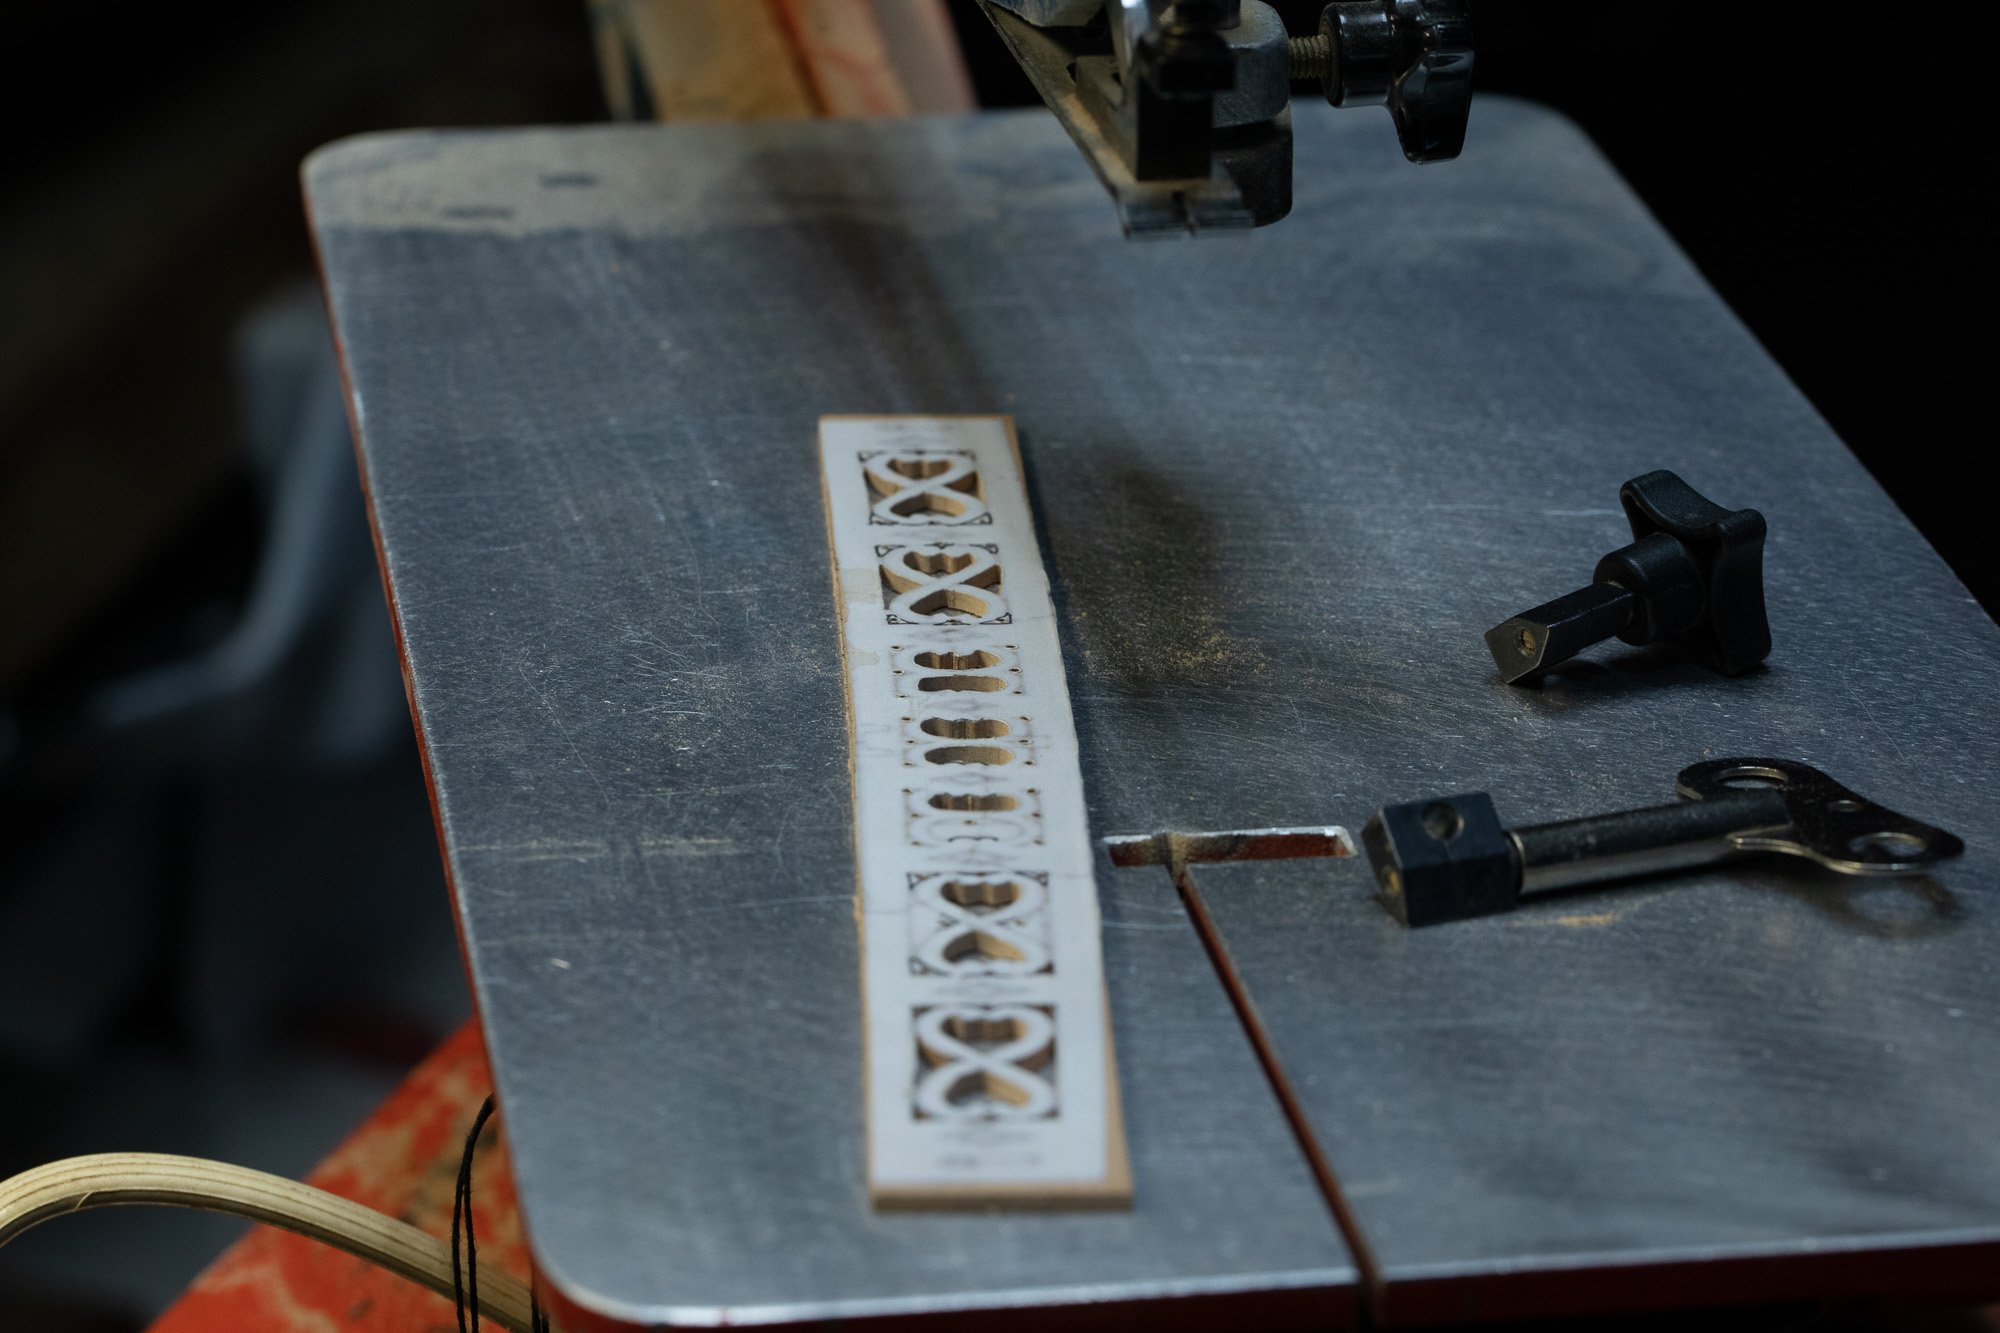
The plastic bellows of the scroll saw needed to be replace. It would have cost about $100 to replace it. I did not like that price, so I replaced it with an aquarium air pump.


-
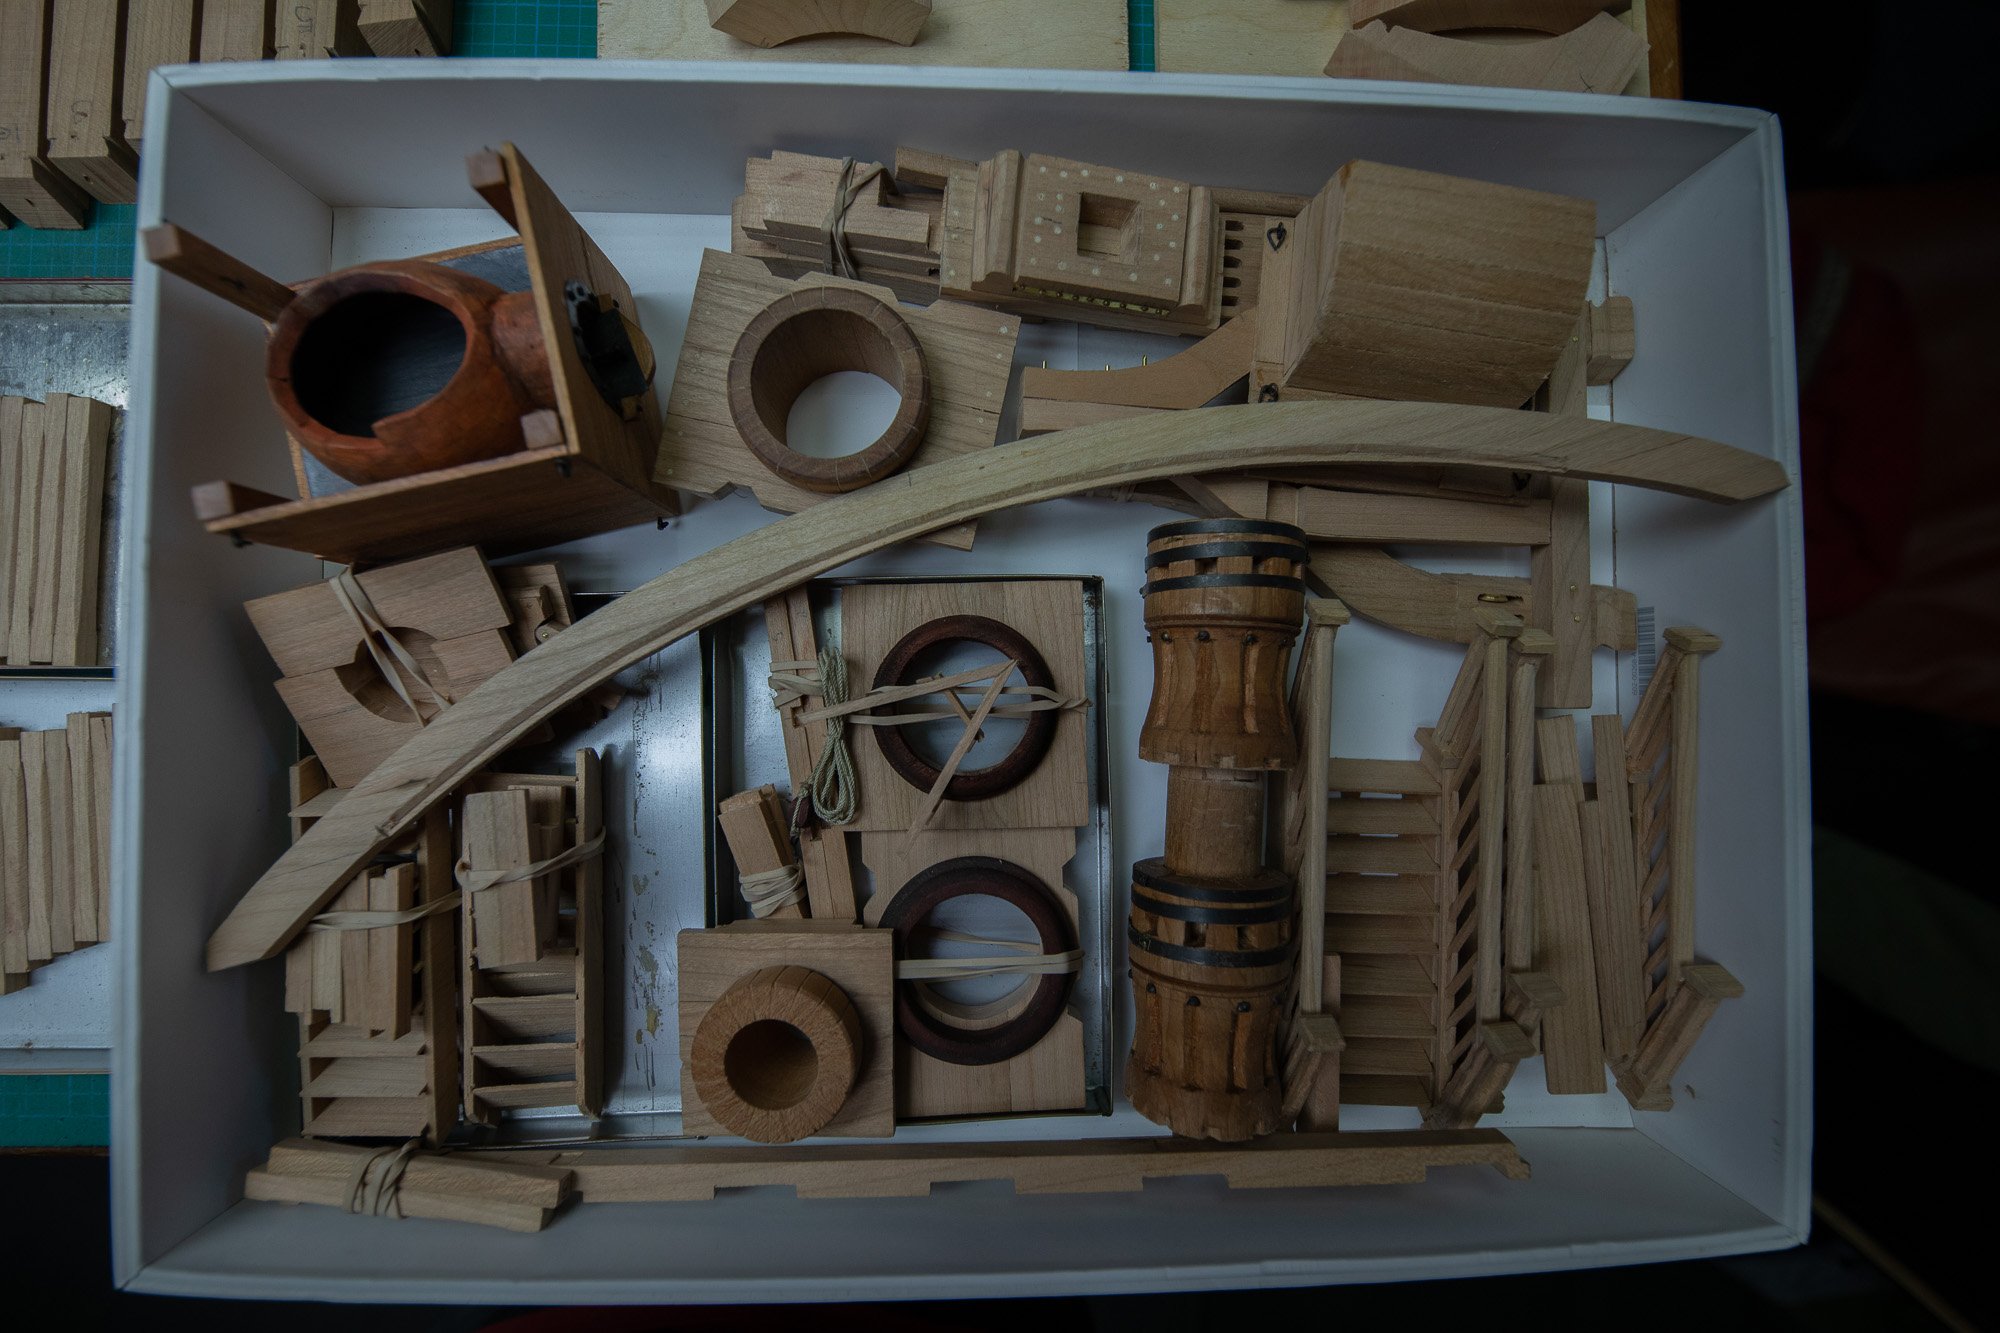
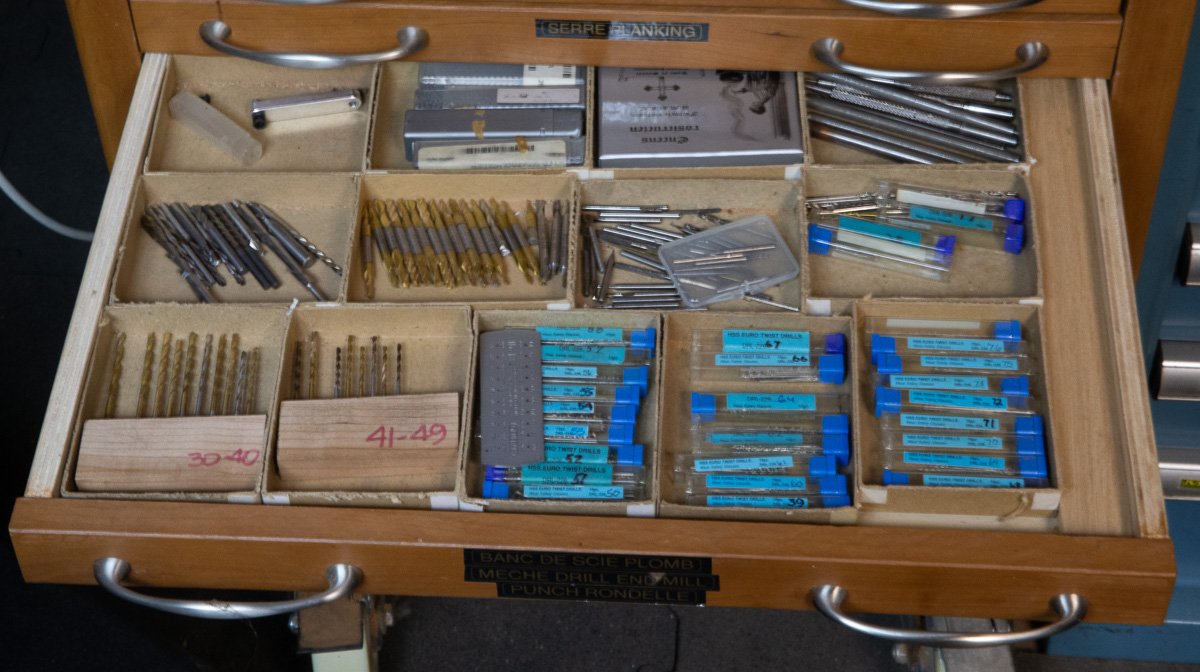
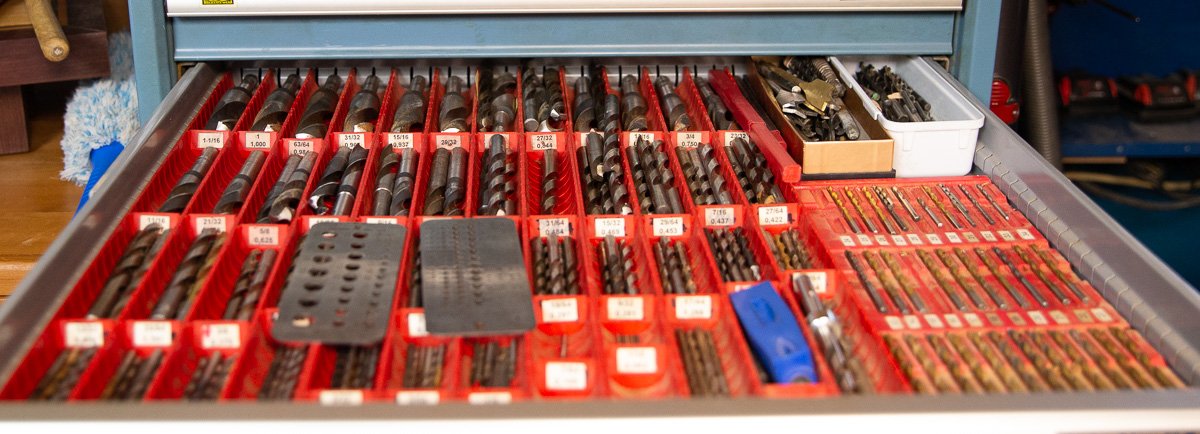
Another way to store and measure drill bits.

- 39 replies
-
- 10
-
-
I would think that the period was larger. There were variations from one port to the other and from a builder to the other. Also, from time to time there were also variations from the drawings, because sometime, there are details, which almost only can be seen, on the construction site, exactly as today.
-
In french, there is a saying: It is by forging that one becomes a blacksmith. It is also true for the aspiring model ship builder. A model ship builder must expand his web of competence in many areas related to wood, metal, etc. There is also another branch which his worth exploring and can make things appear more beautiful than they really are. This subject is neglected by many. I remember in the beginning of this forum, photography was a subject, not really welcome, and this is a big mistake.
-
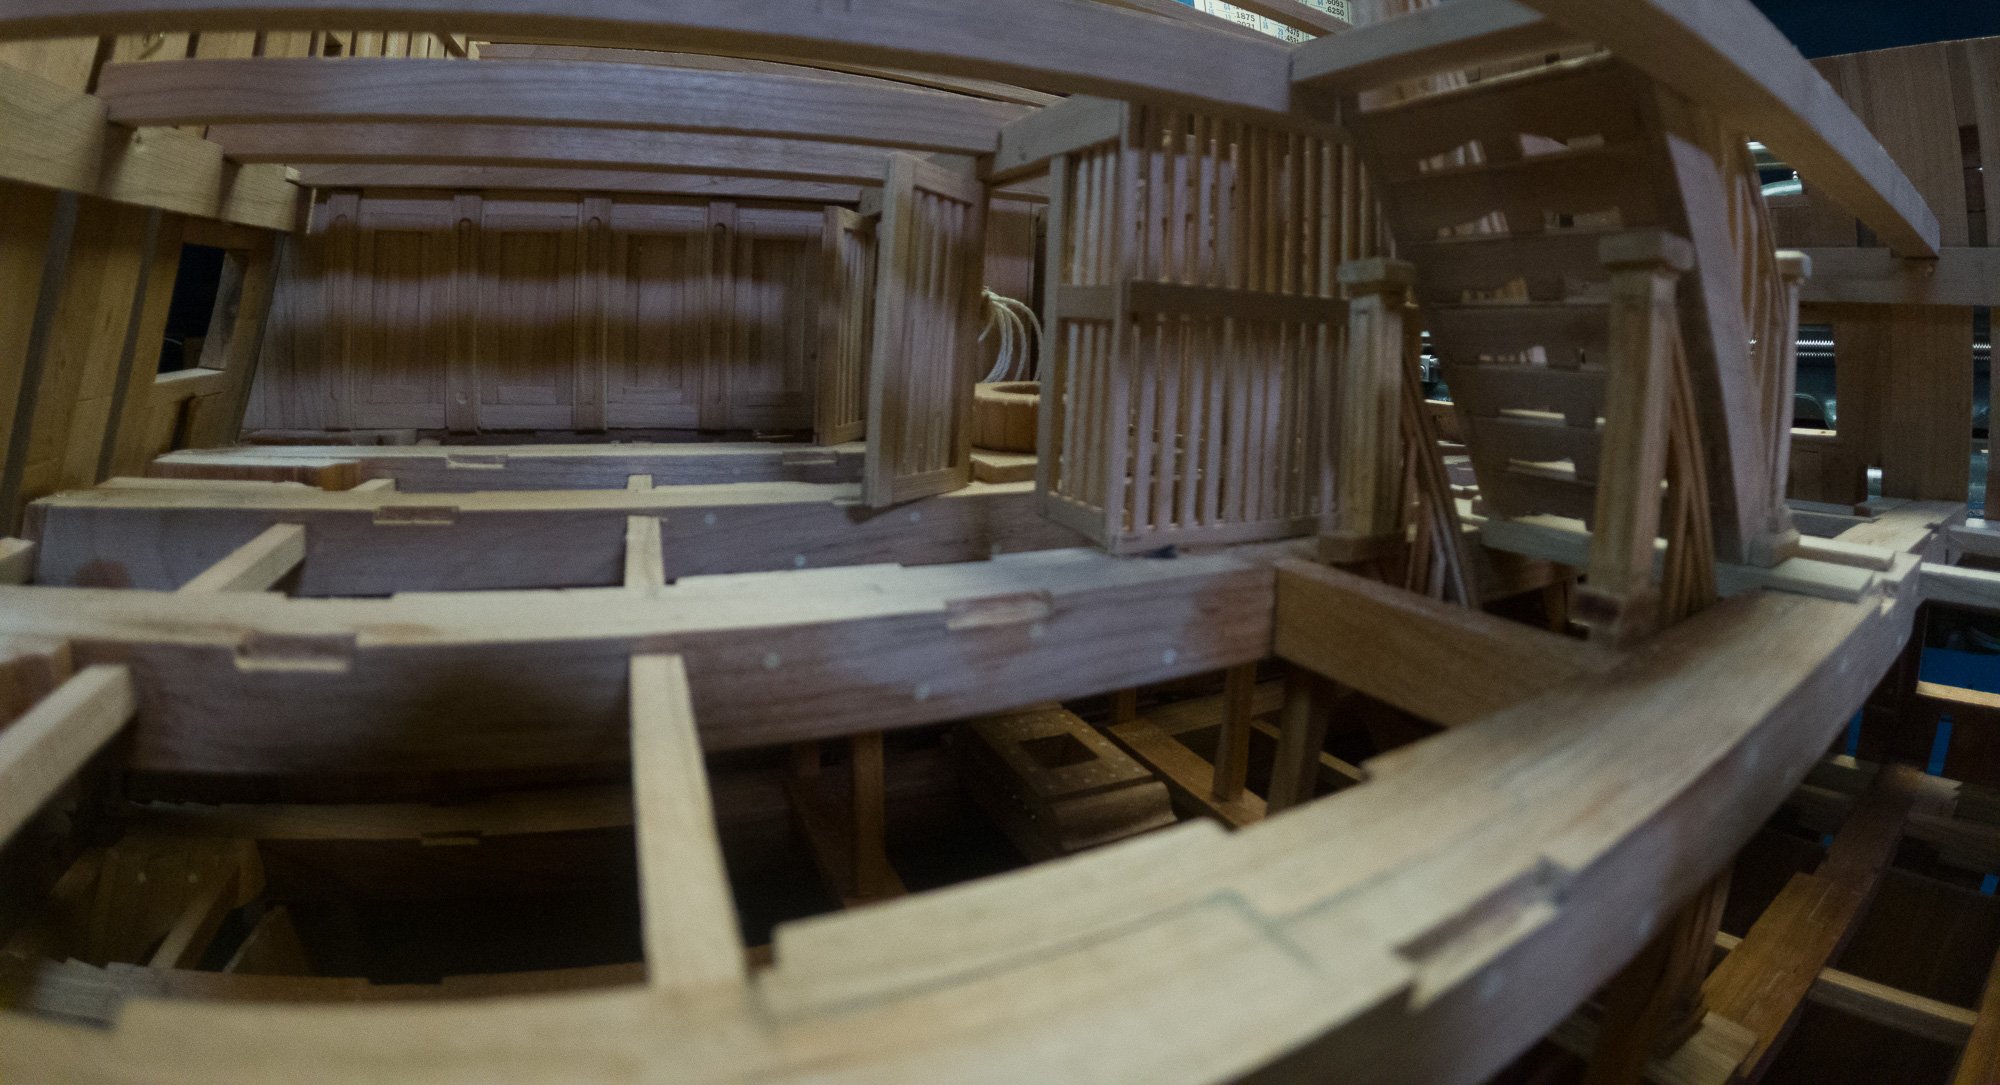
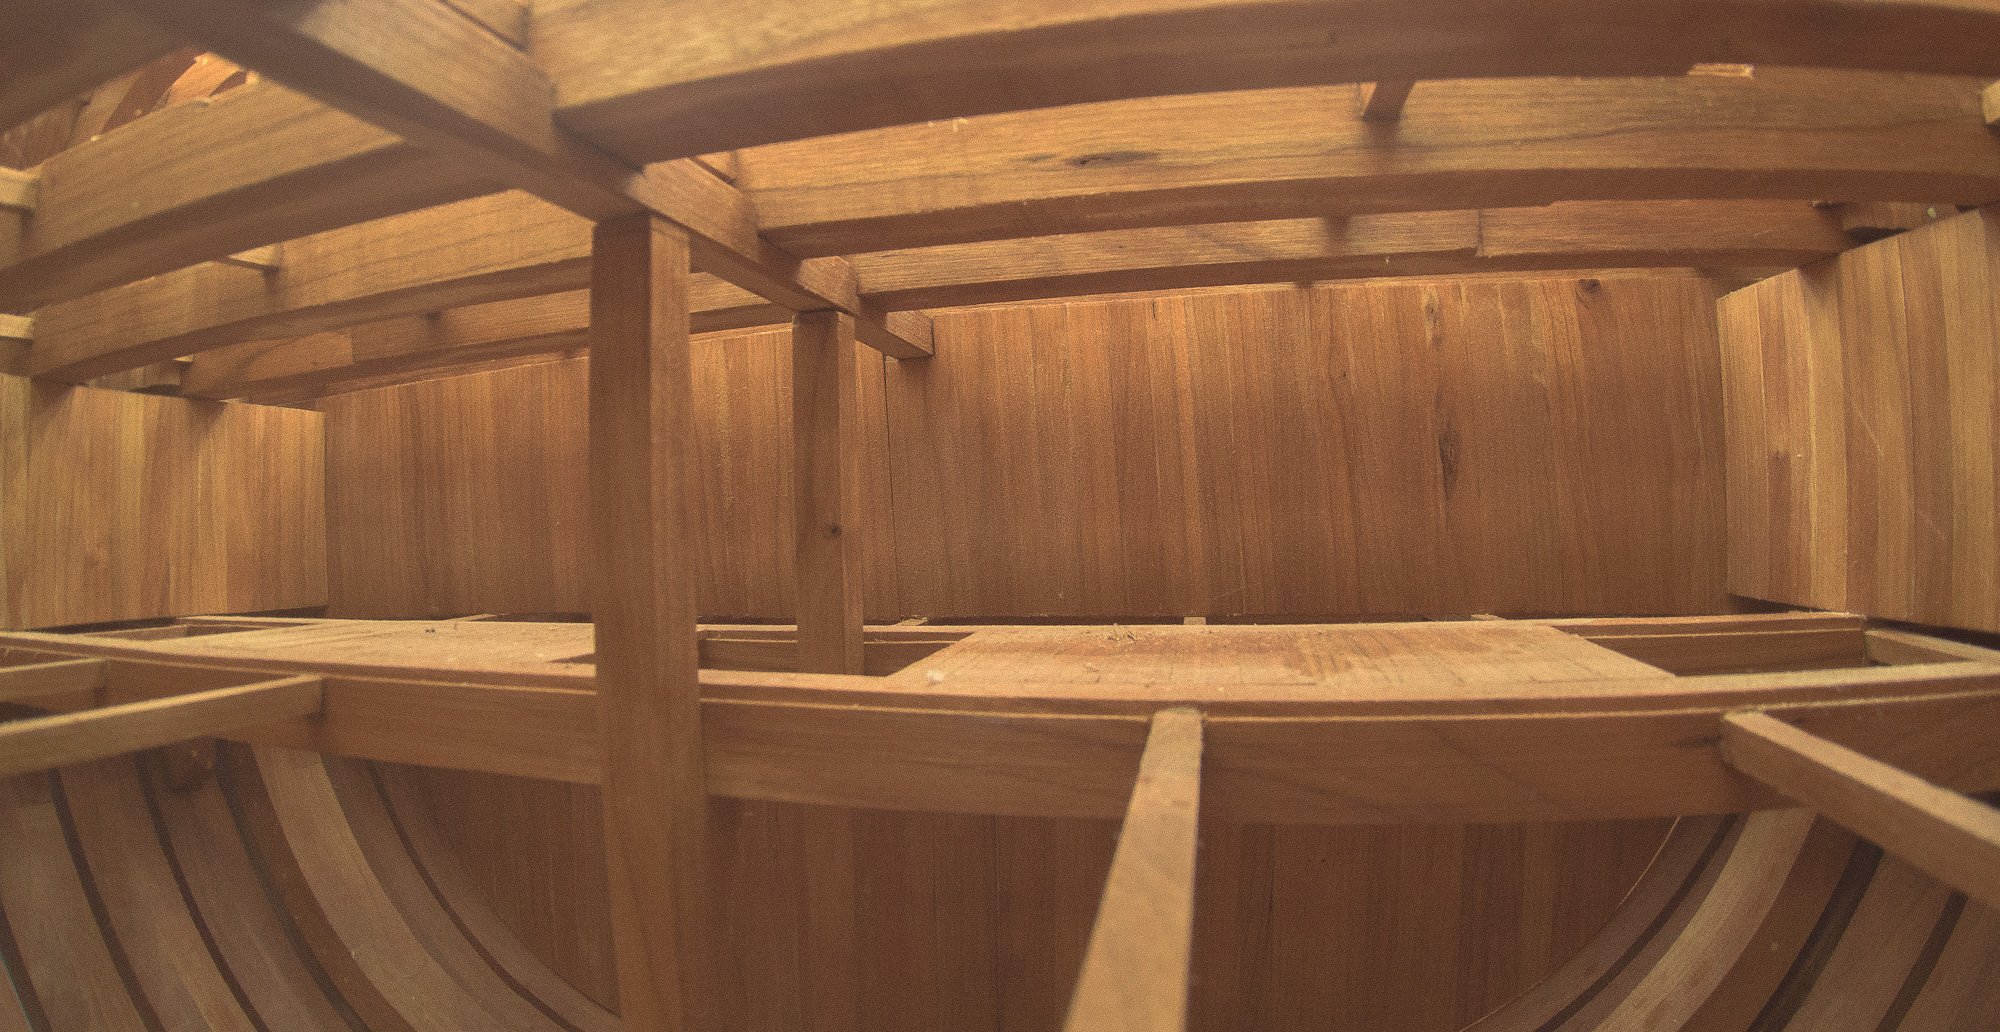
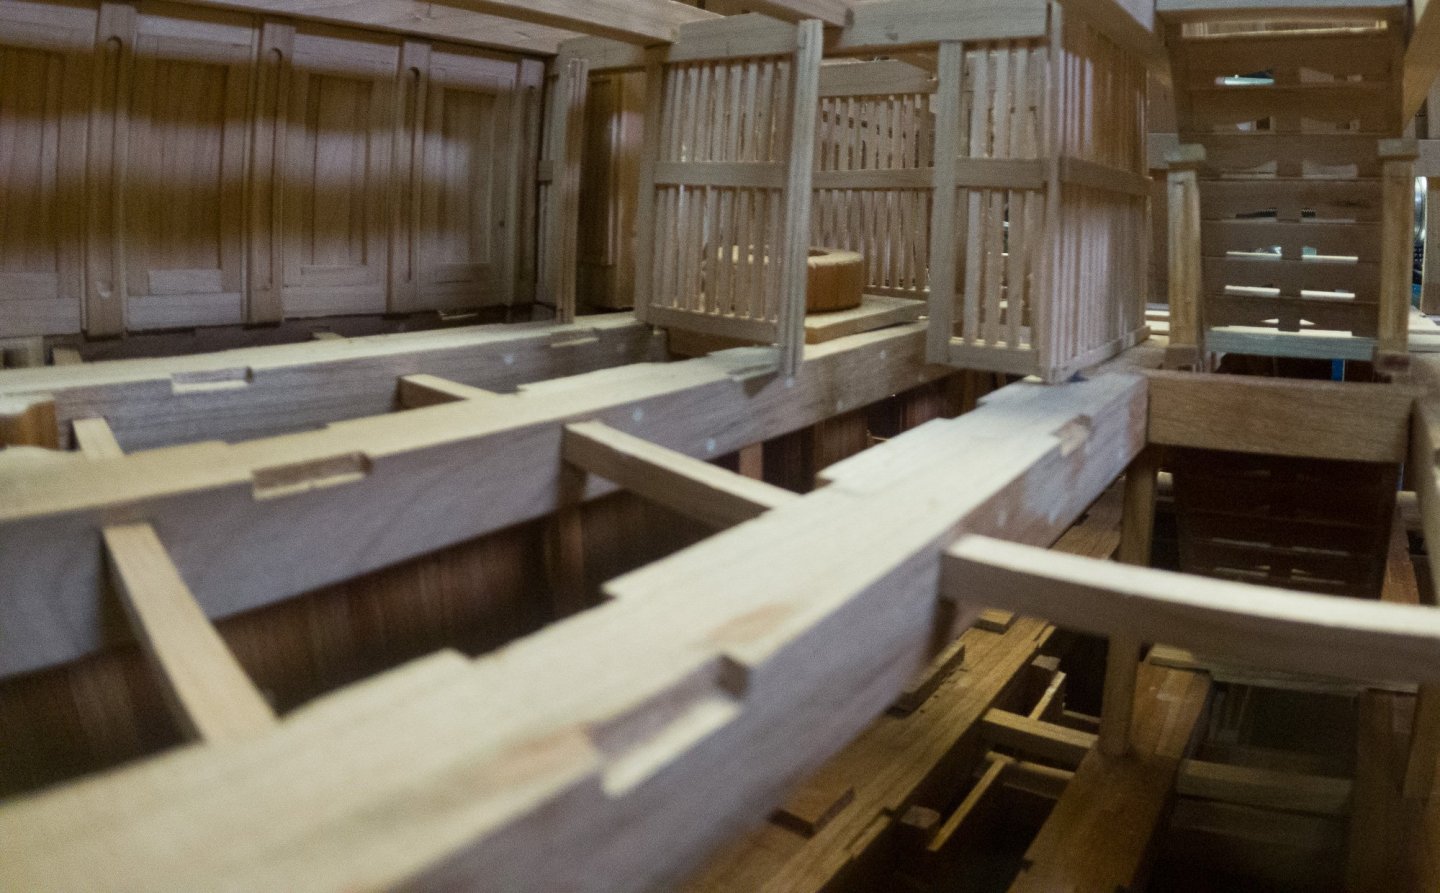
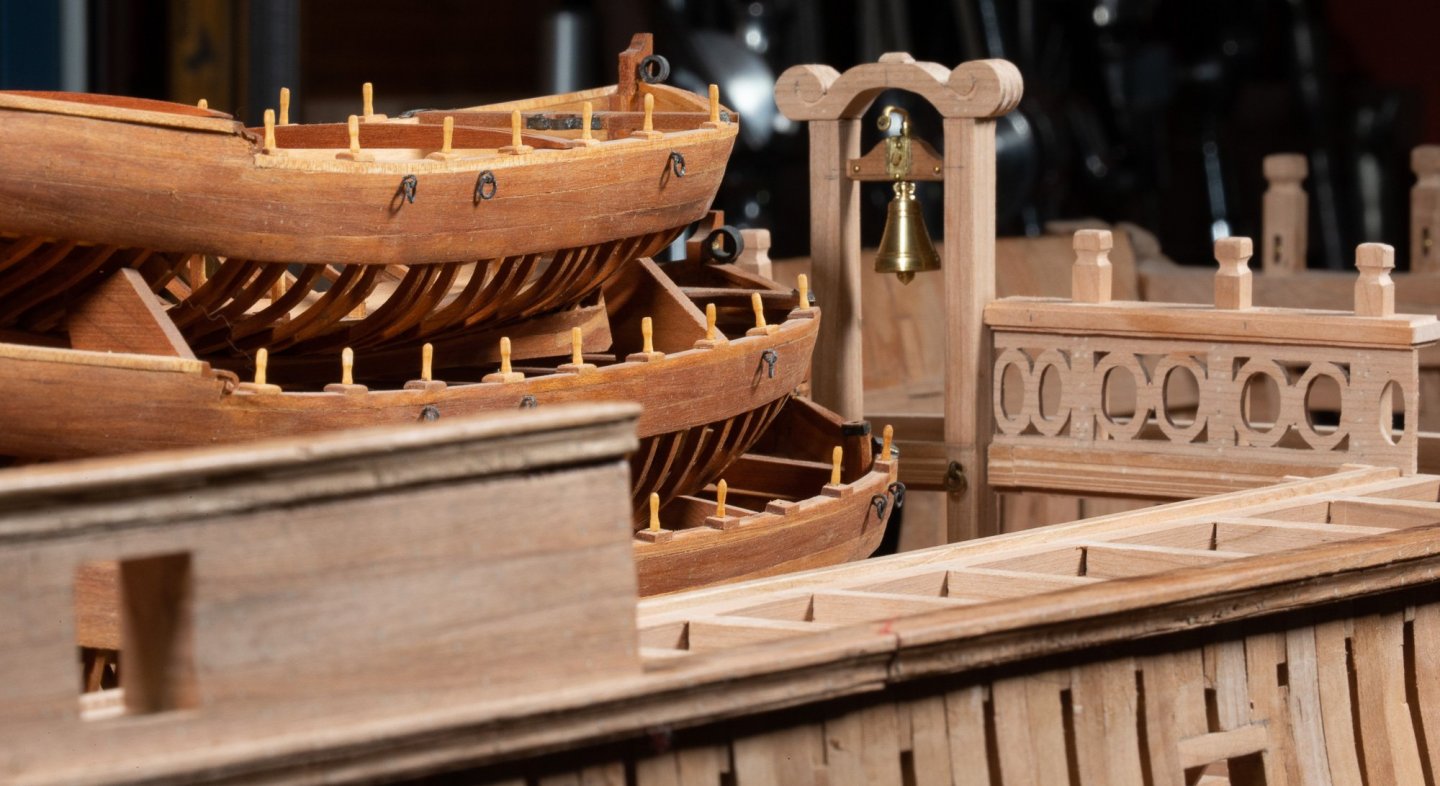
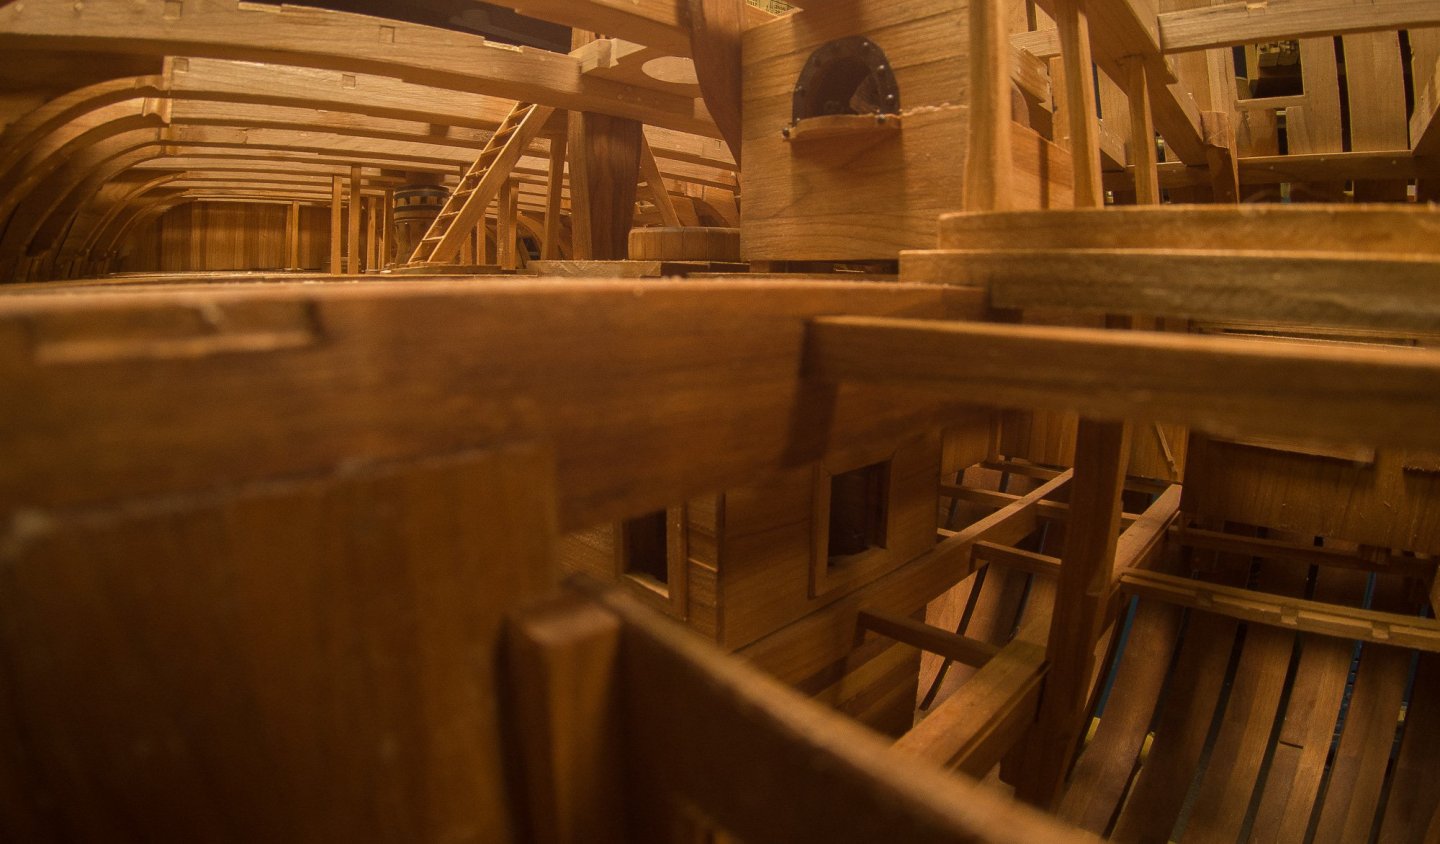
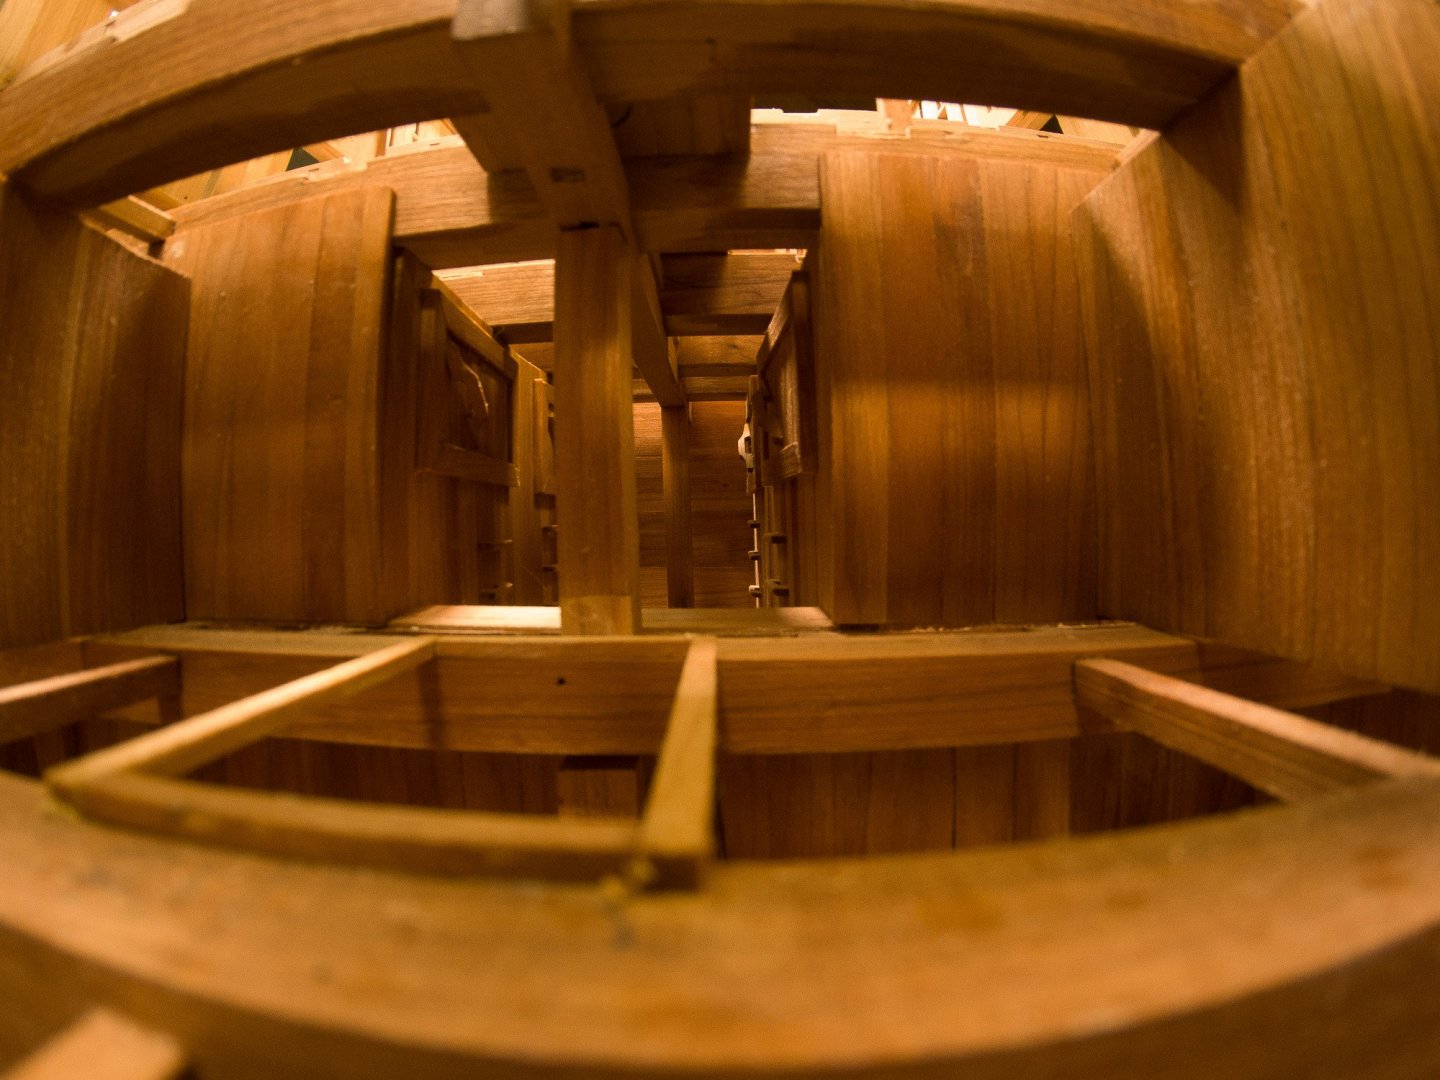
The second deck has few wall. Here they are:


-
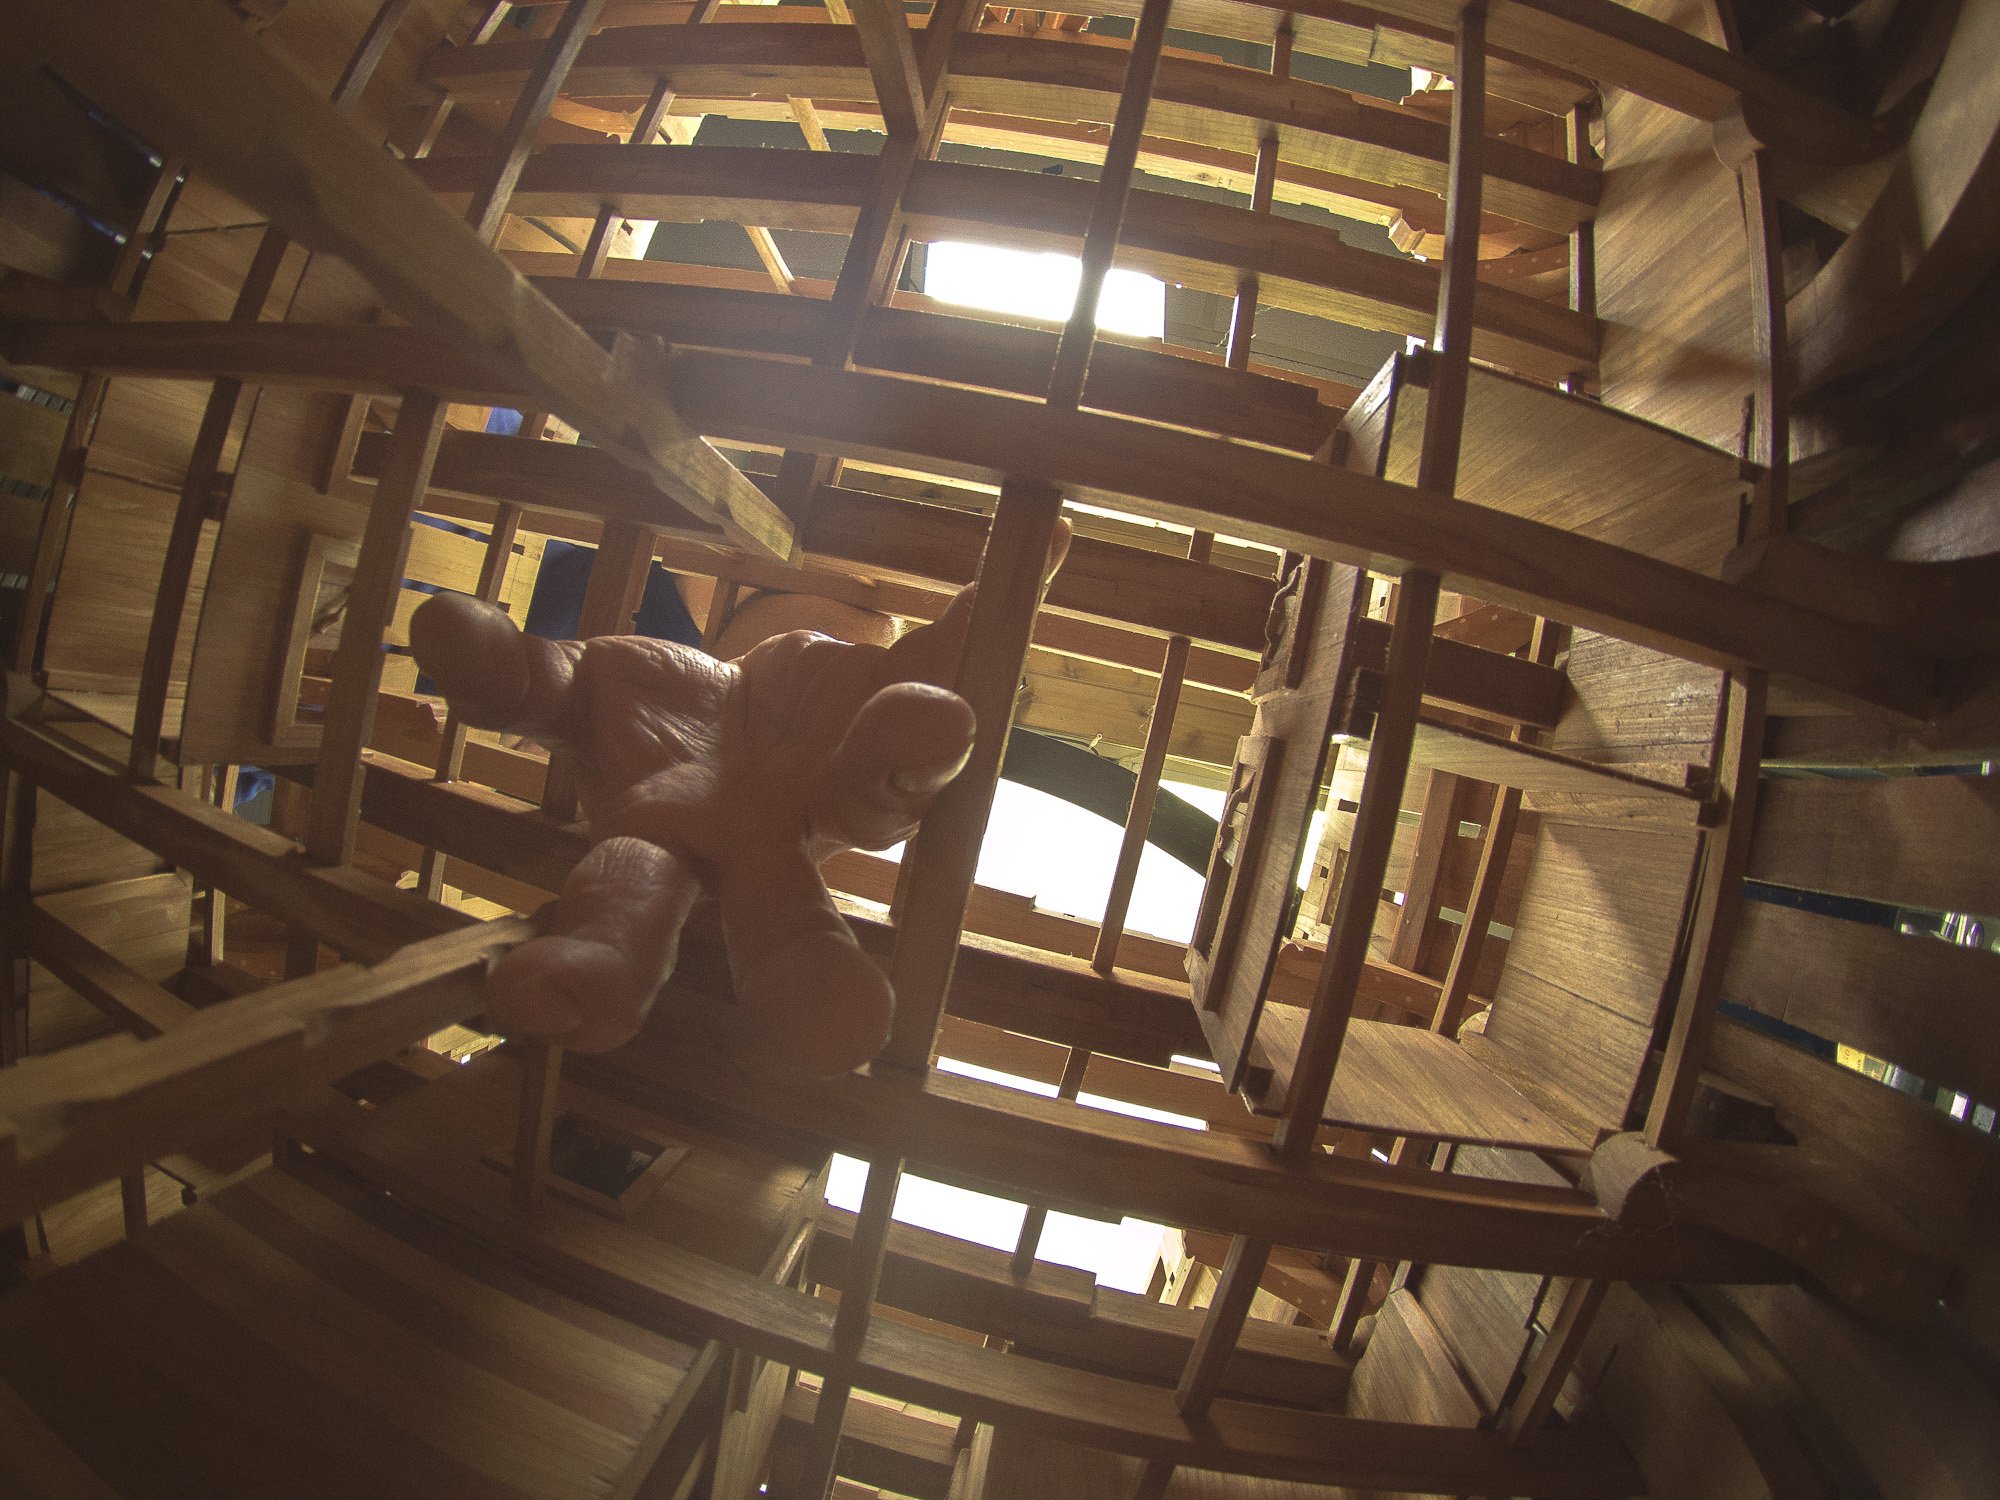
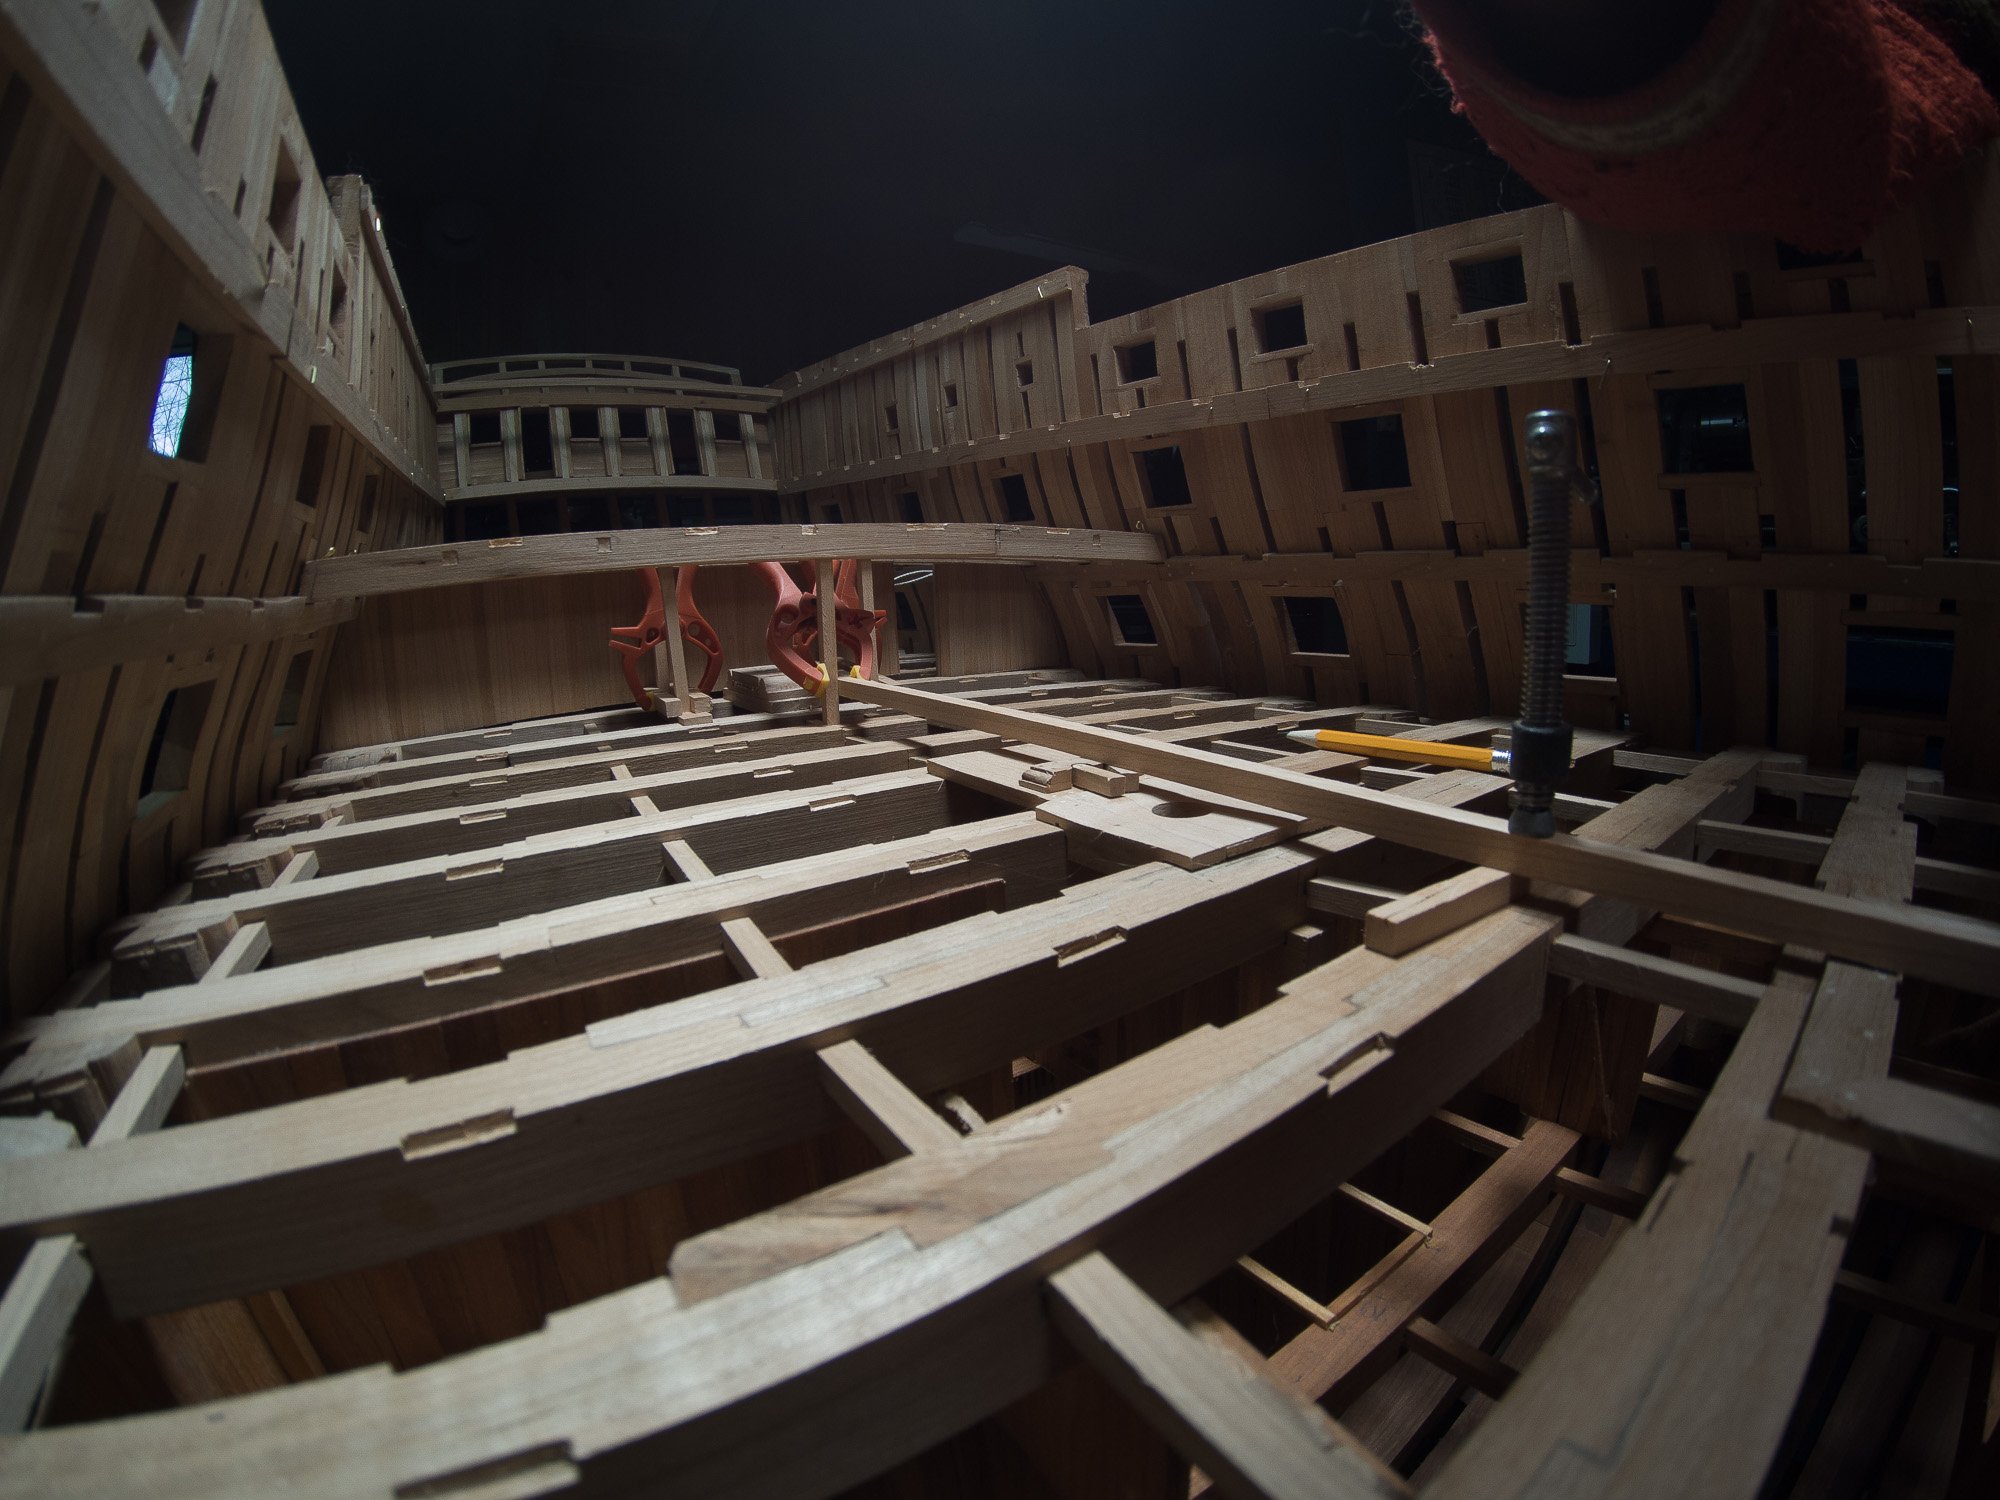
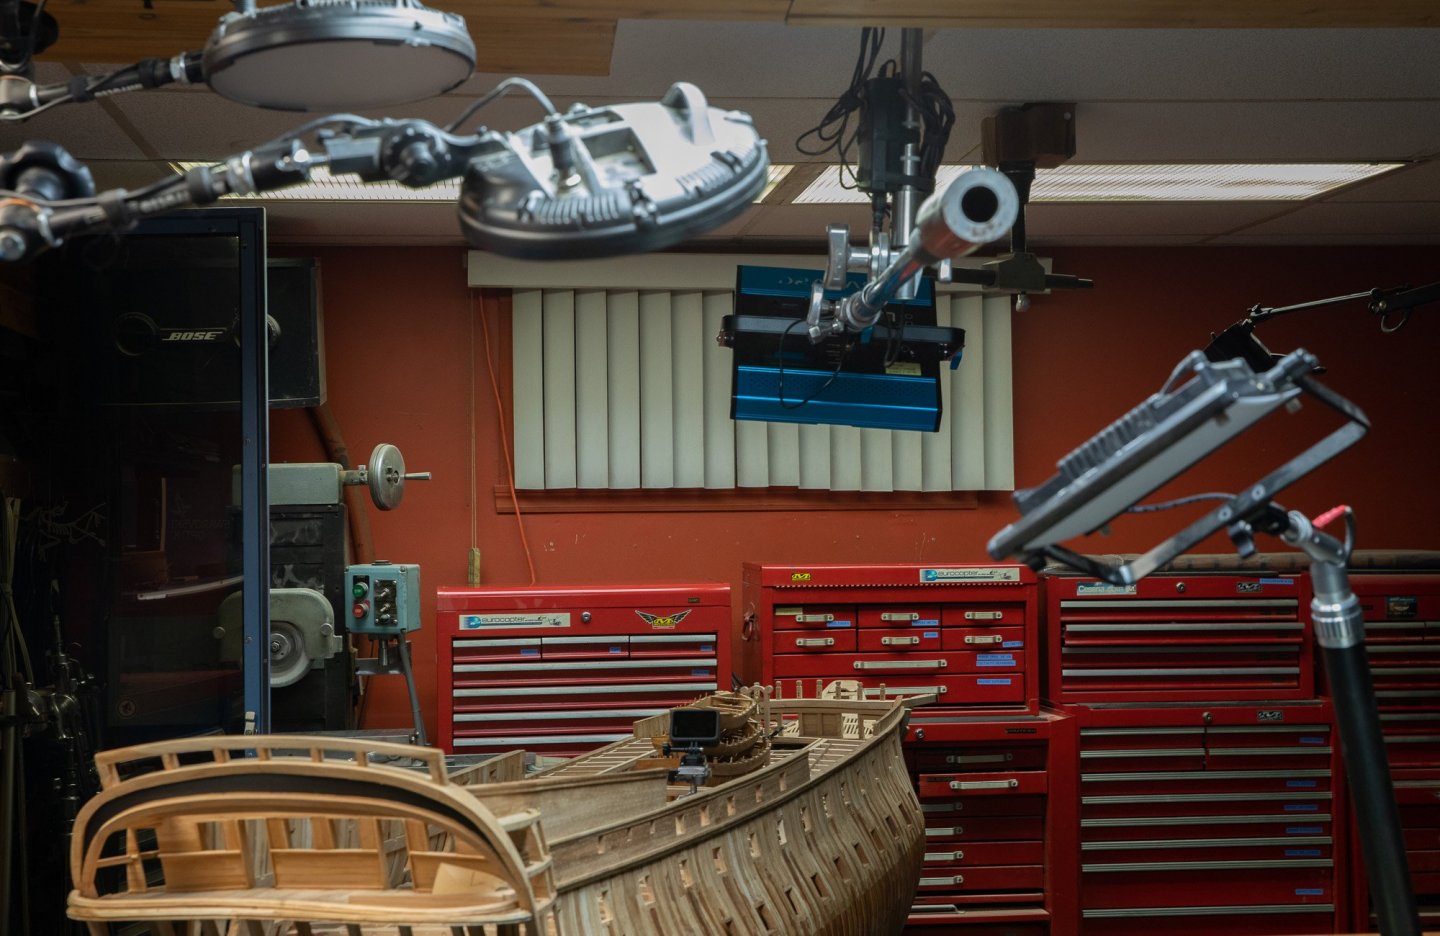
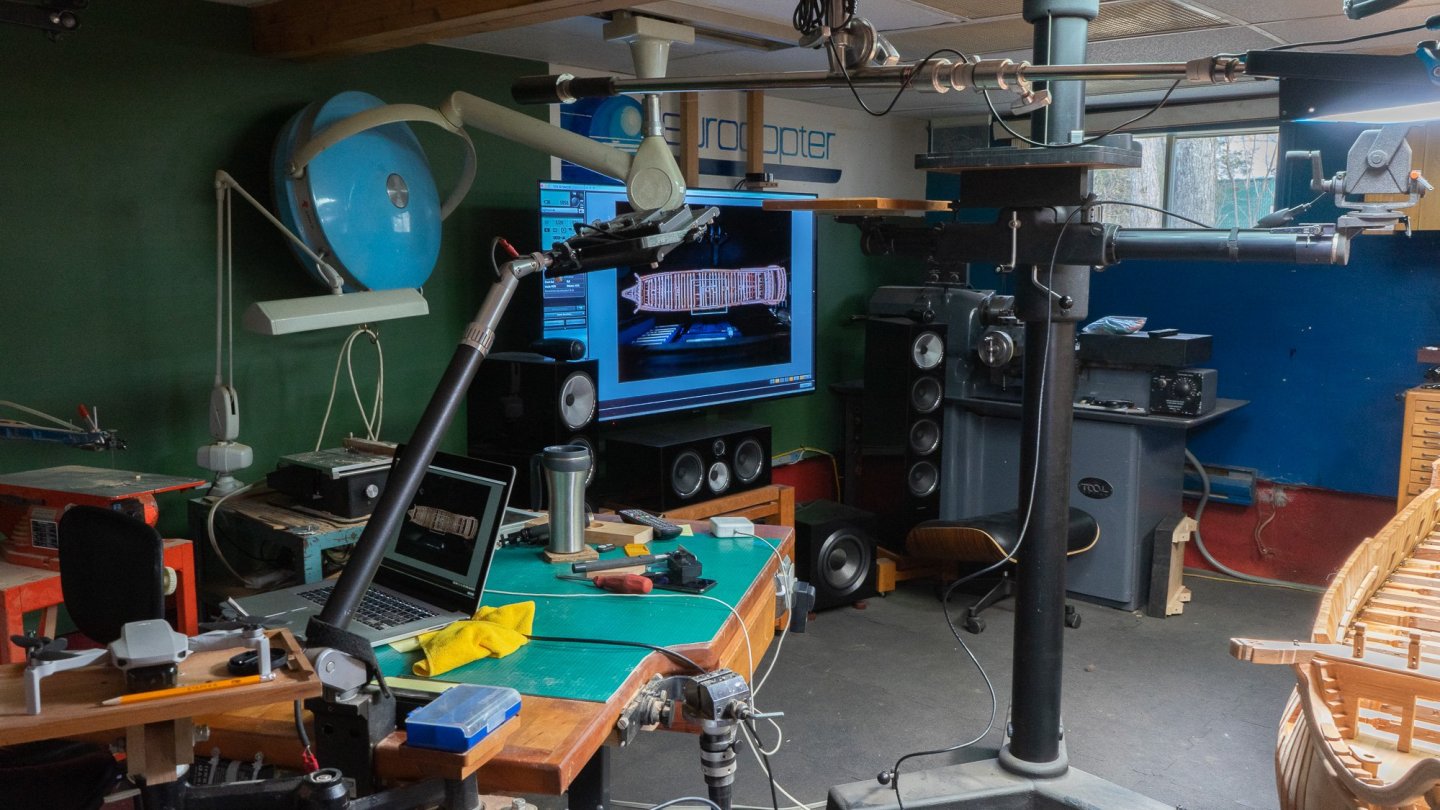
Mark, the last one are from a small action camera Go pro hero 9 with a standard lens, they also have another one that I did not try. Camera is 1 thing, but not enough for the inside; lighting is also very important. https://www.amazon.com/s?k=photography+led+lighting&ref=nb_sb_noss_2 As an example, for around $100, you can have a decent LED lamp which compares to nothing as a standard working lamp. I learned to use these for photography and now I also use these to work. It is like trying to work on an height adjustable table. Ounce you tired it, you never go back on a standard 30 inch height table. Also you can see more details, details you would not see with an ordinary task lamp. Finally, you can also take photo like the bell, lighting on the object only, and everything black around.

-
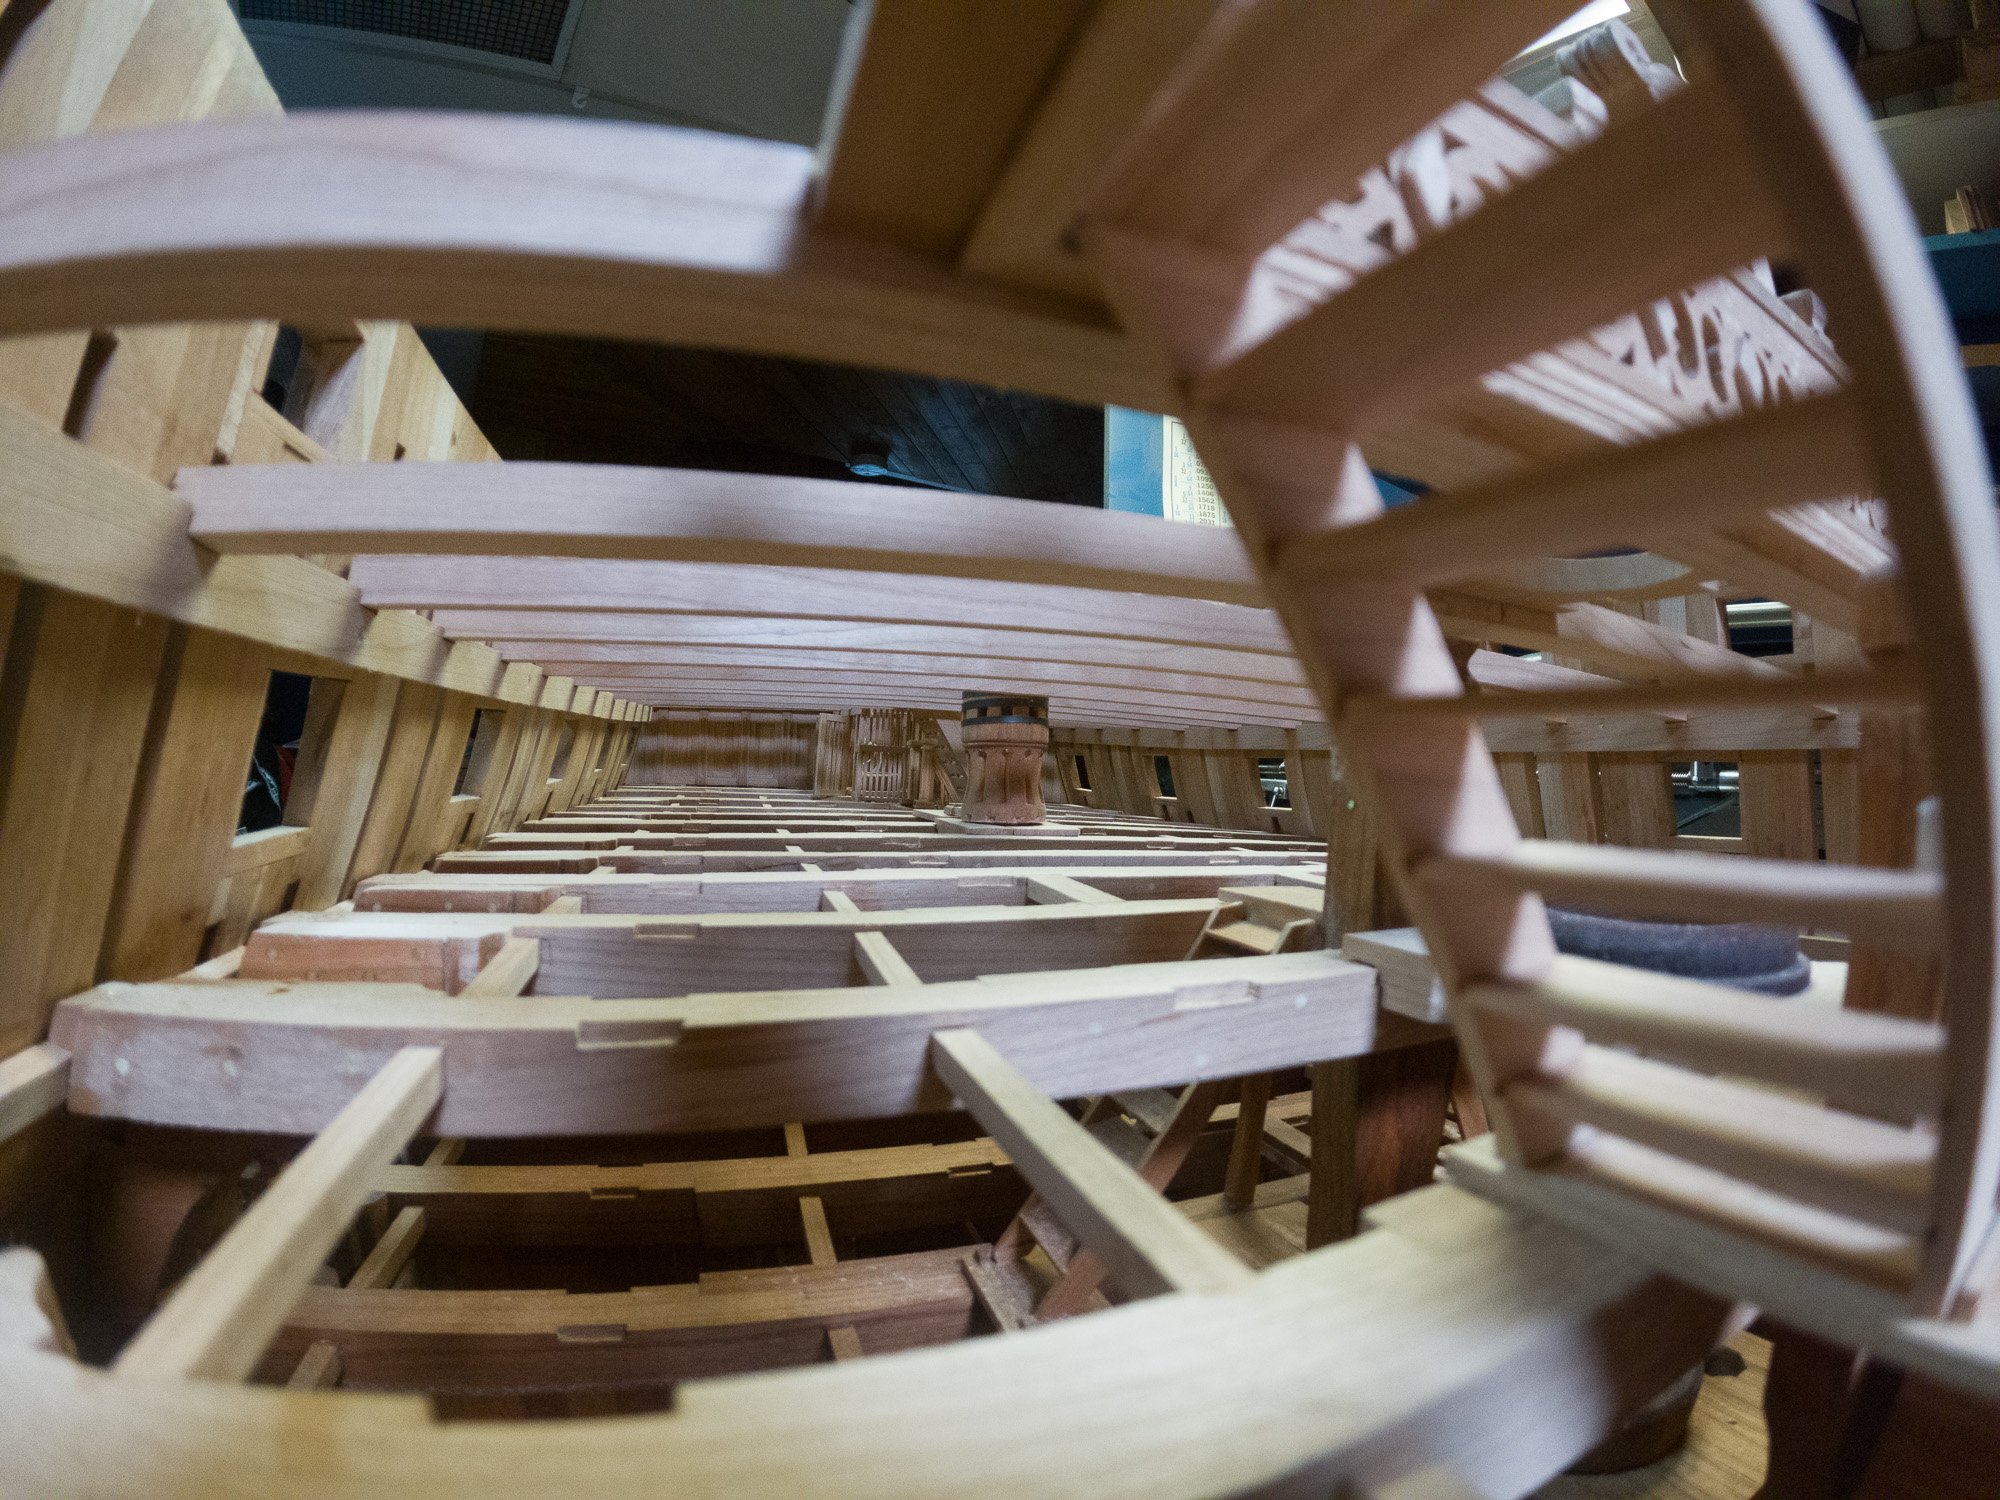
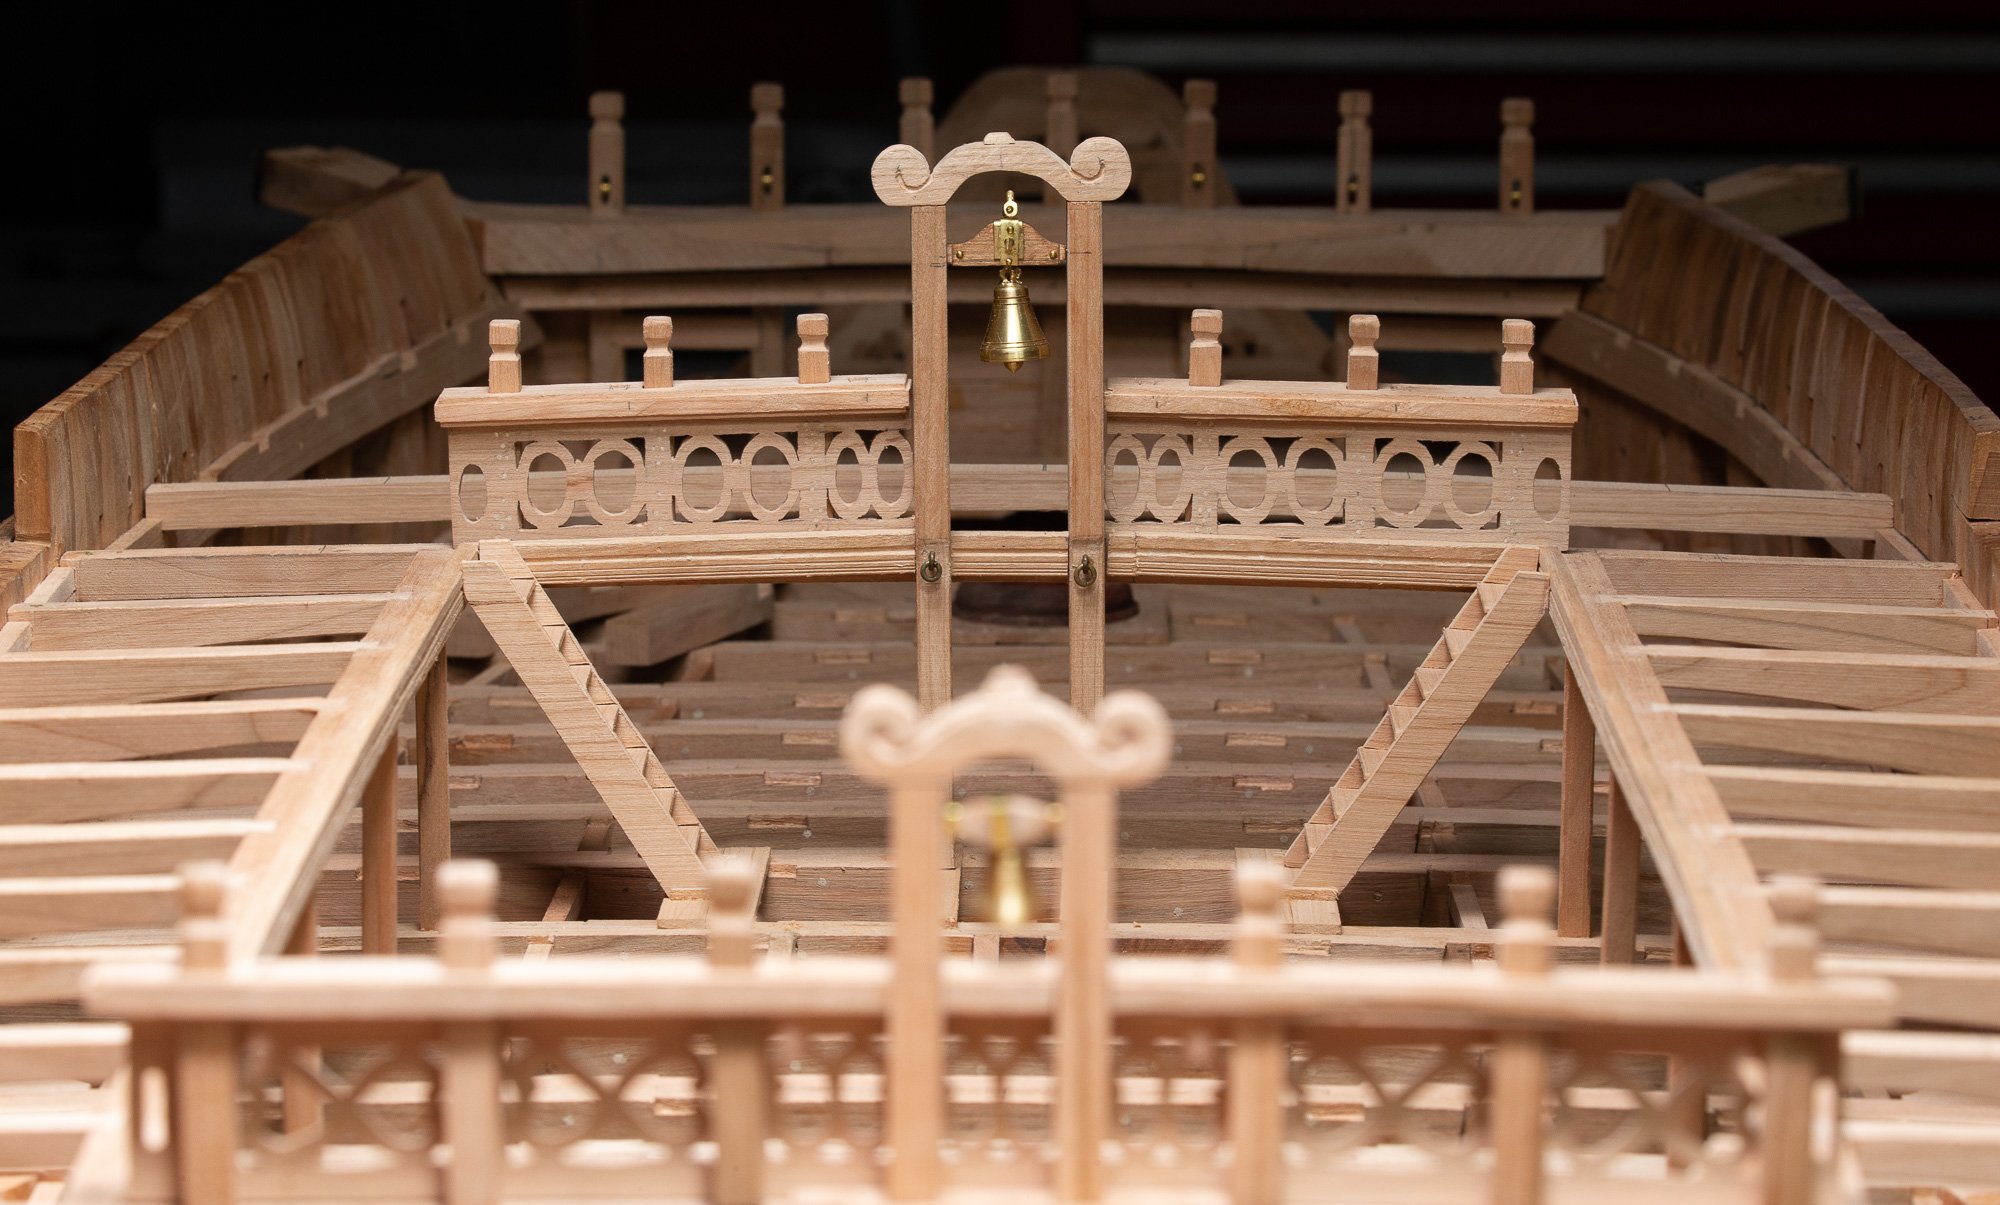
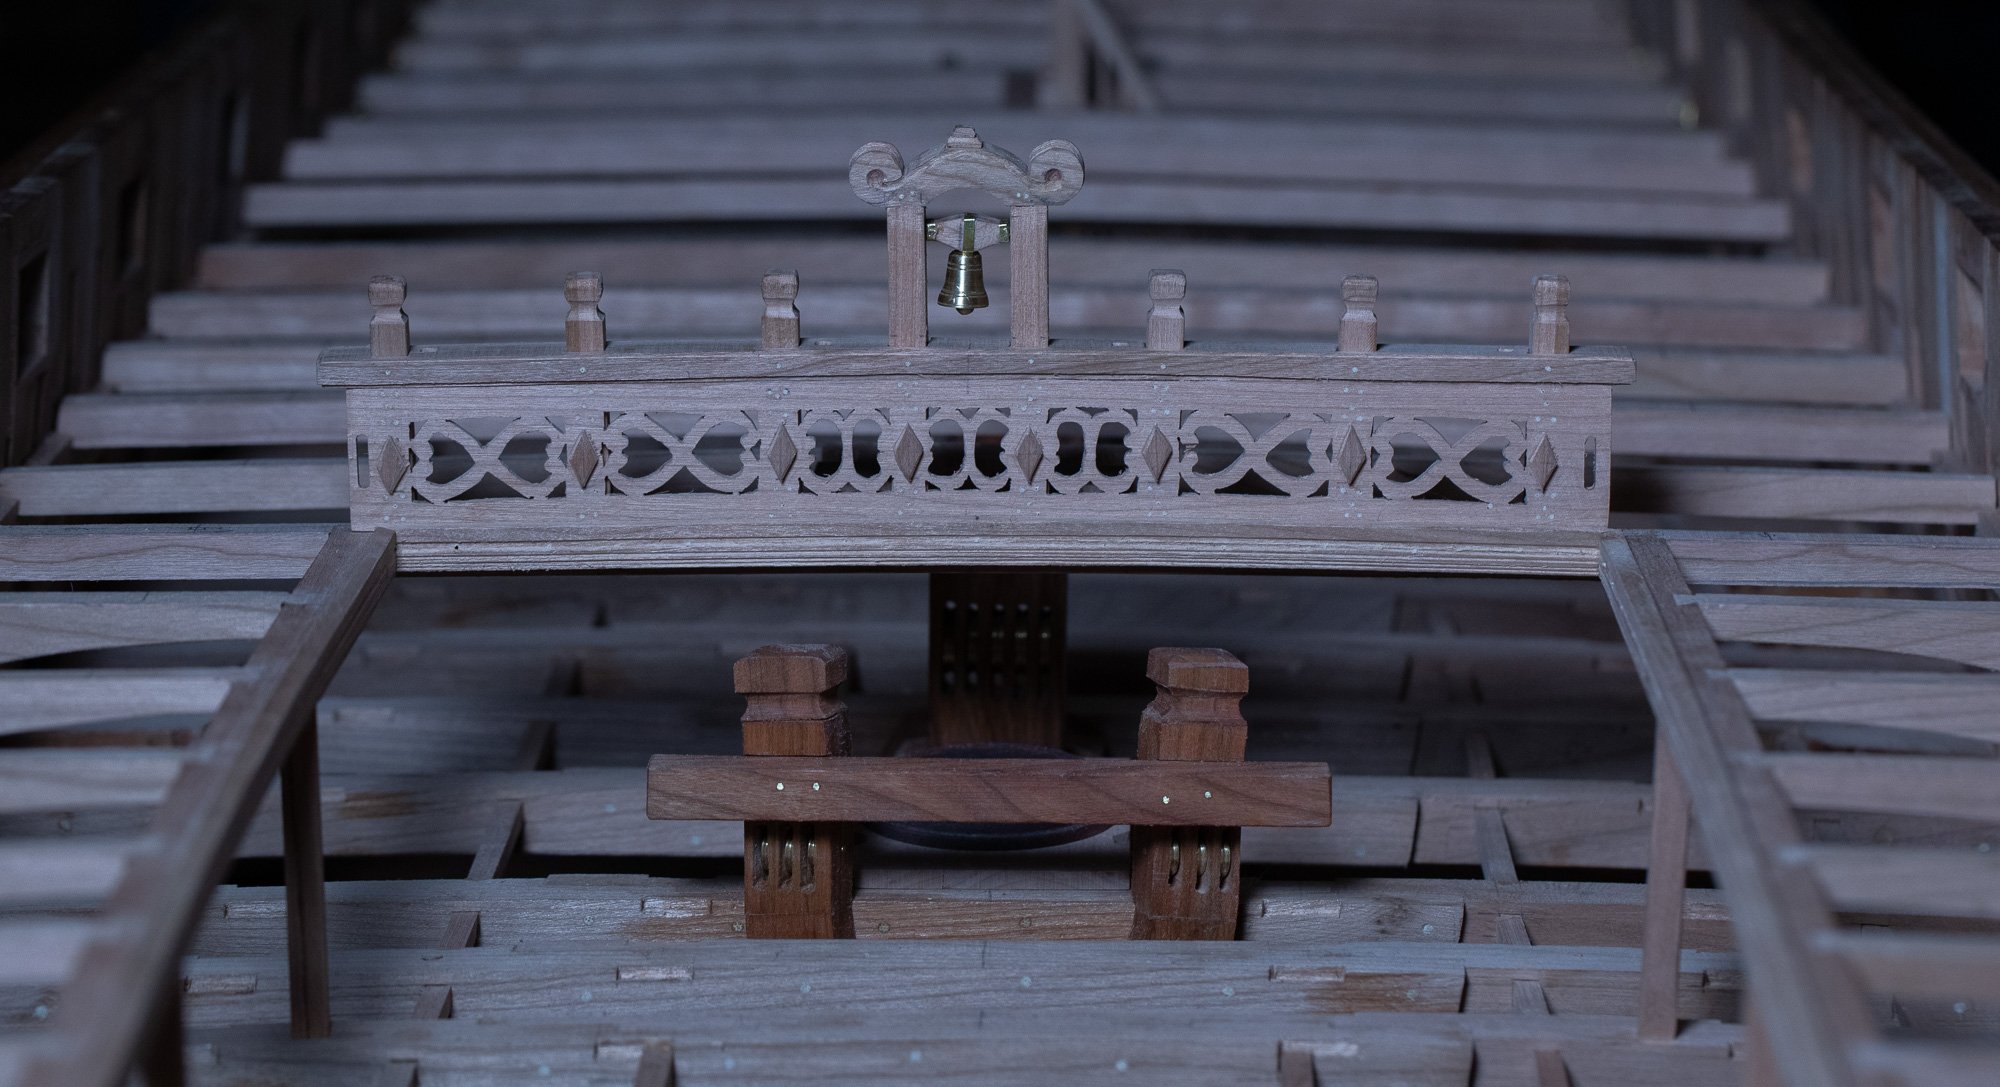
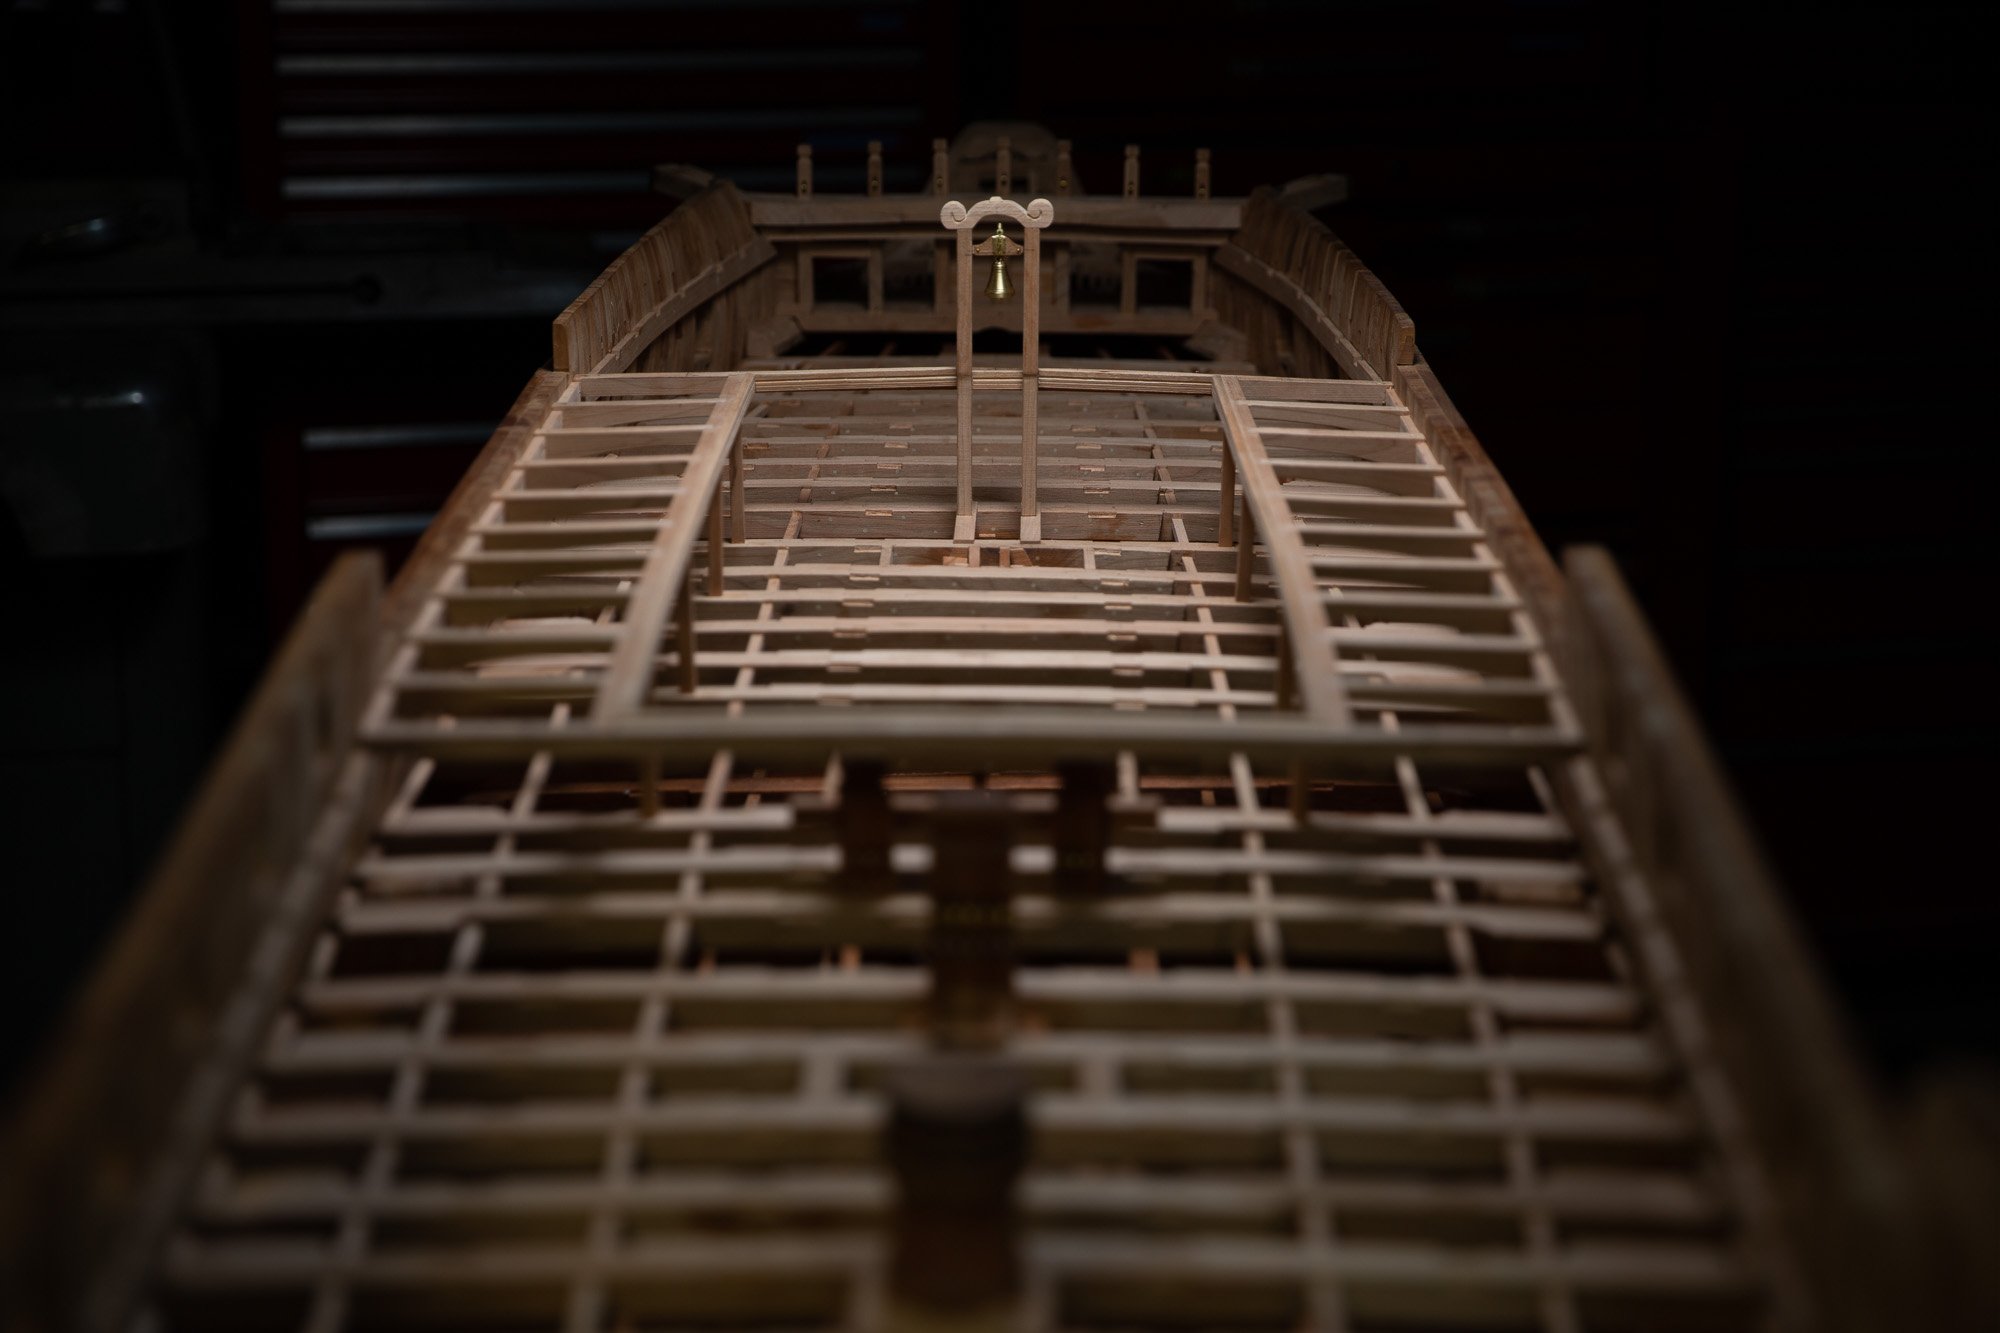
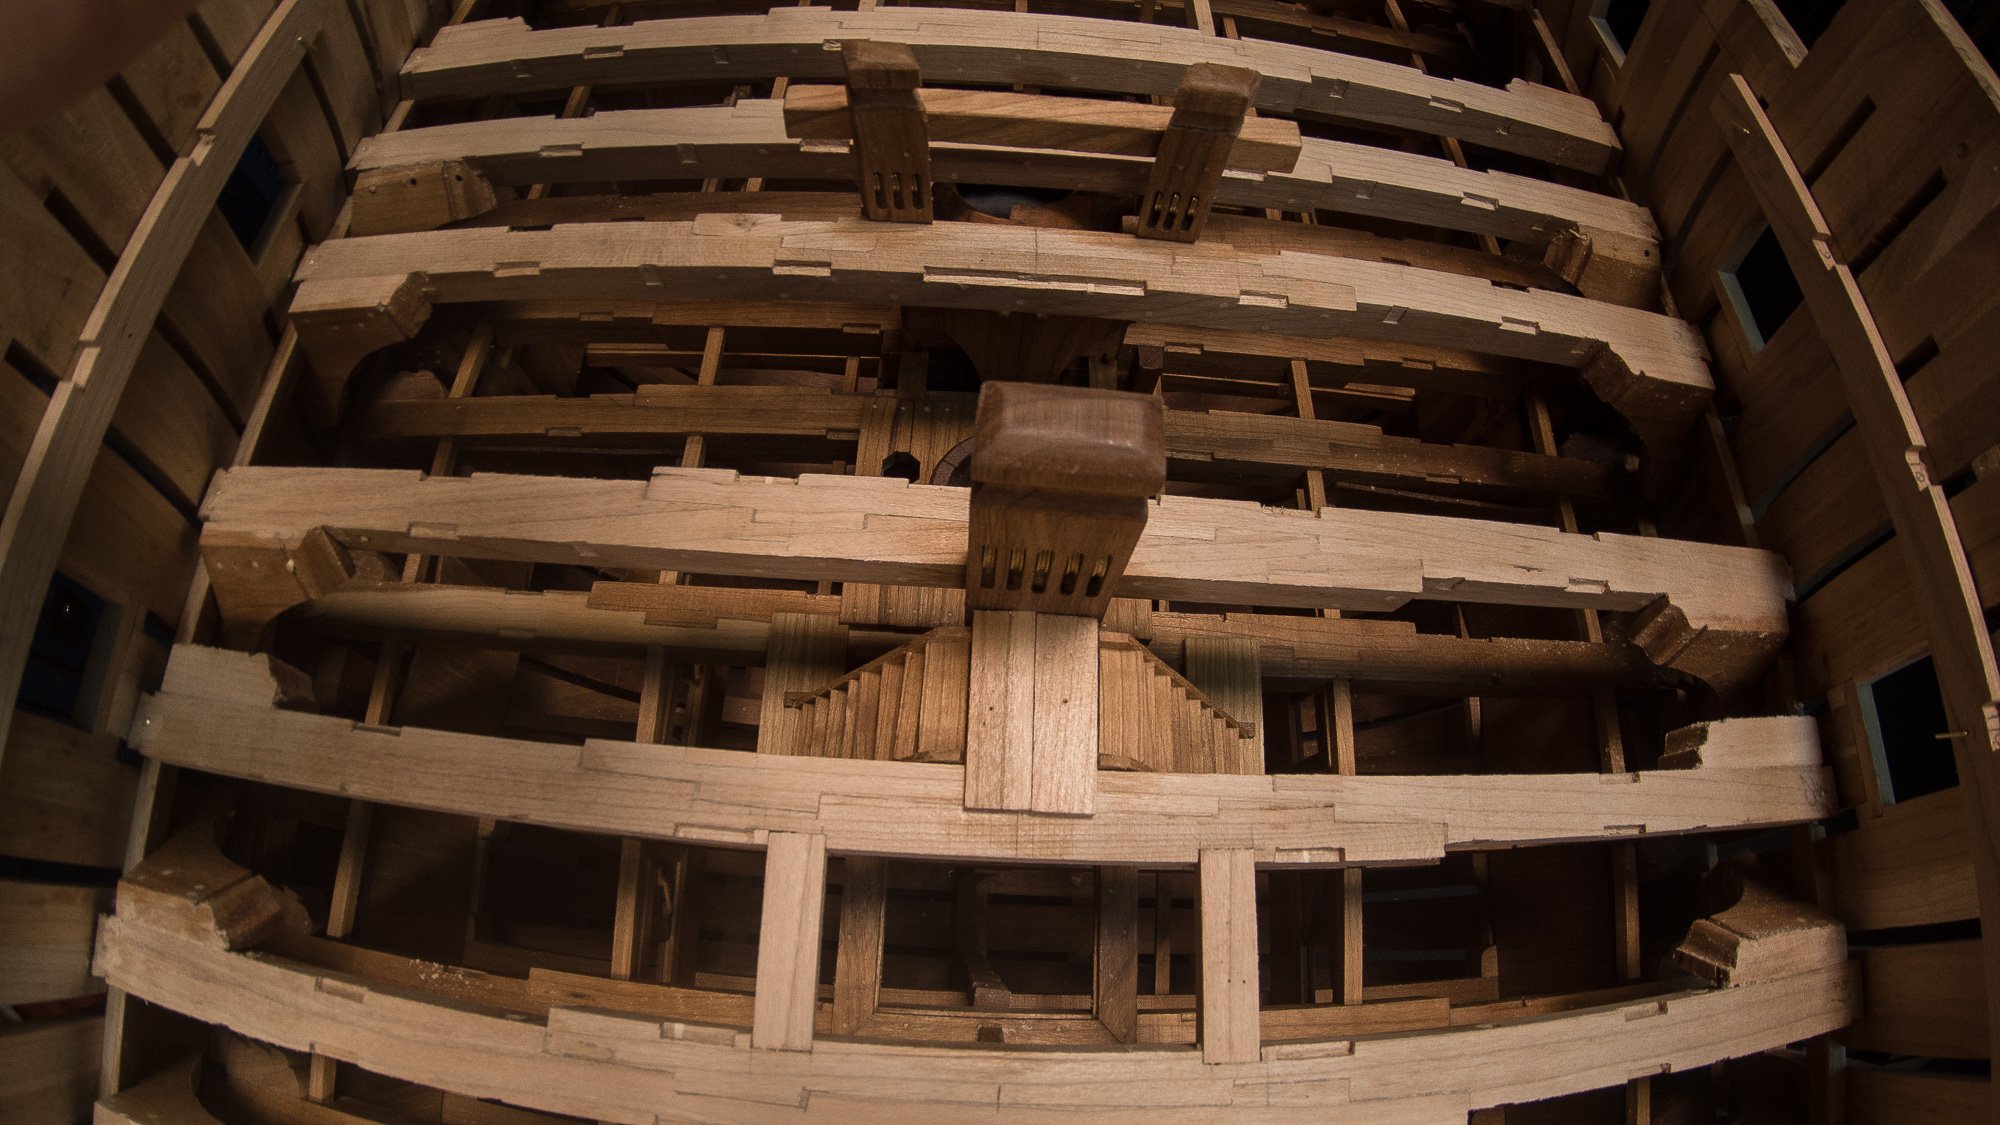
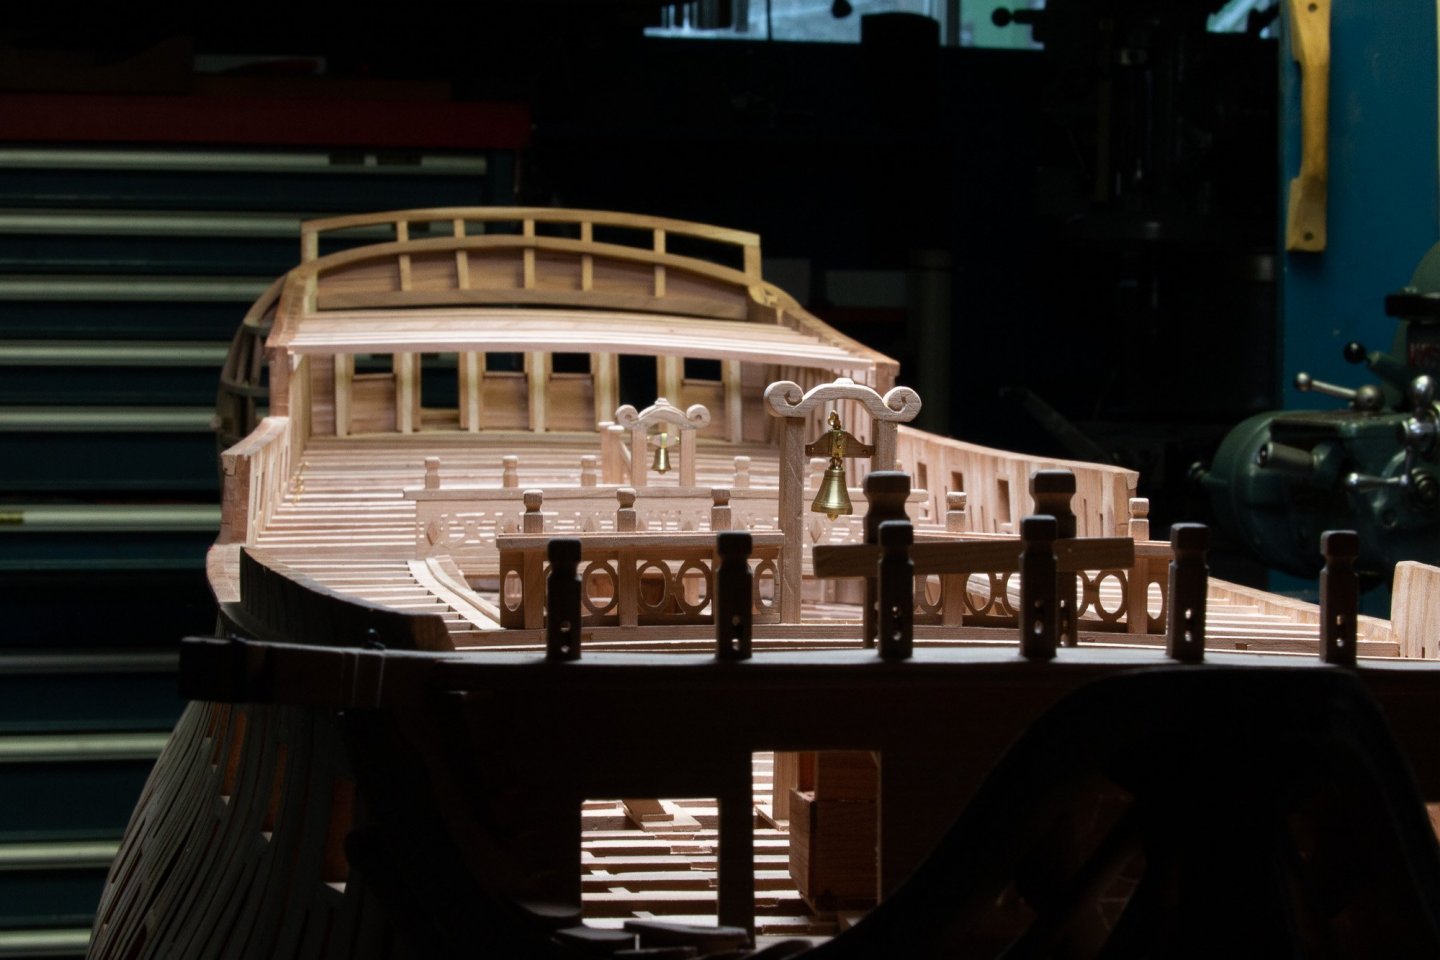
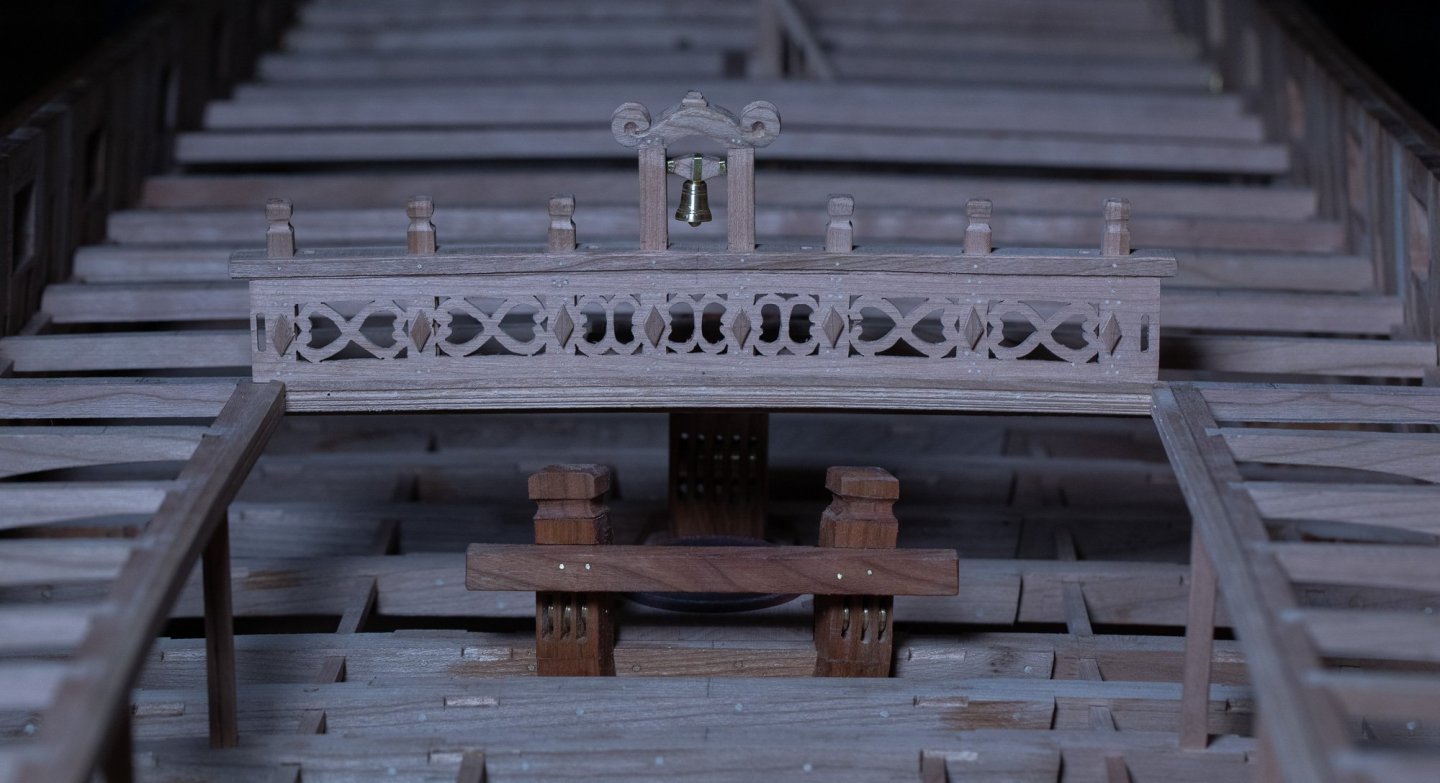
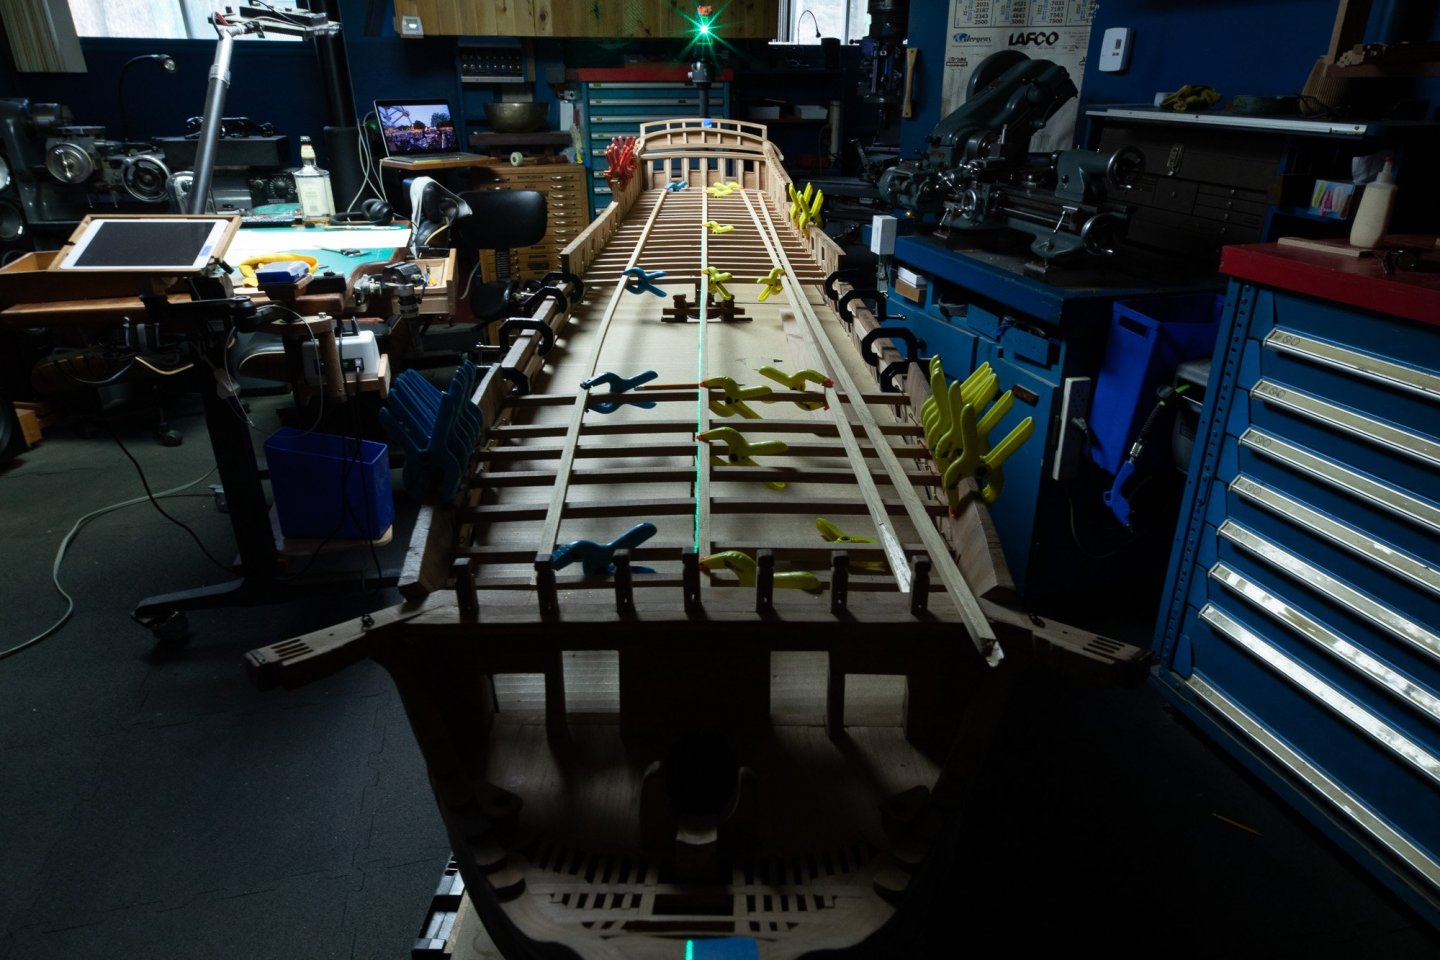
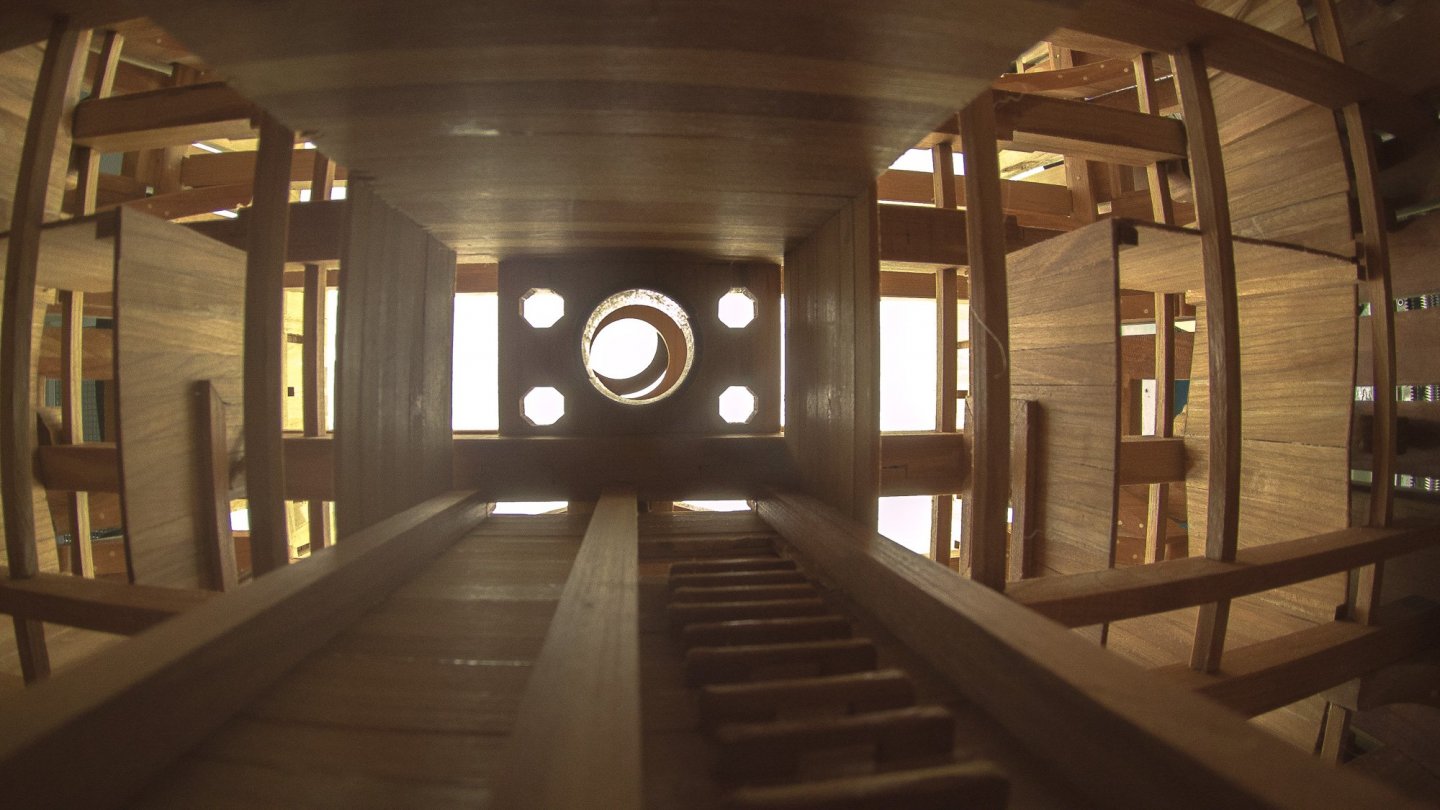
the bridge between the front and aft of the deck


-
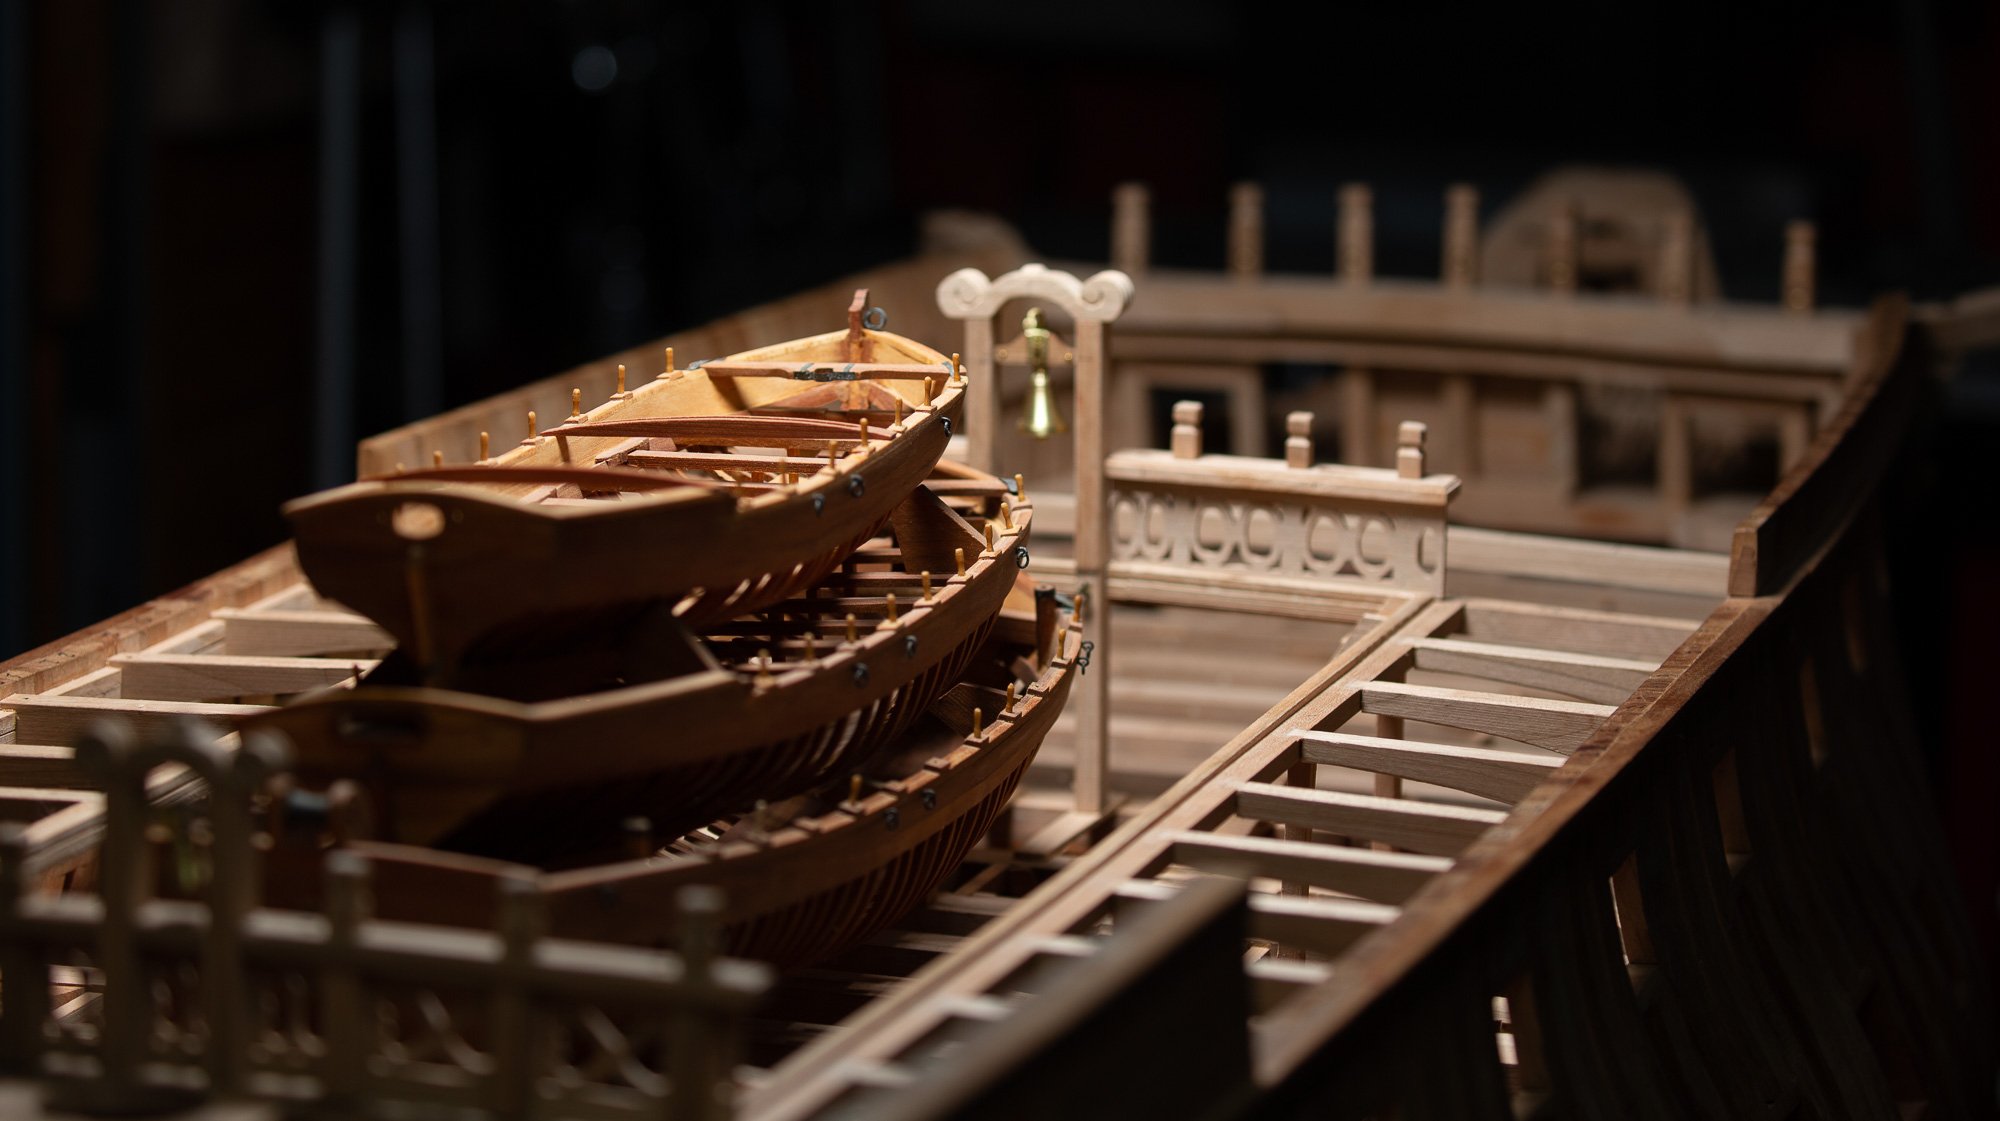
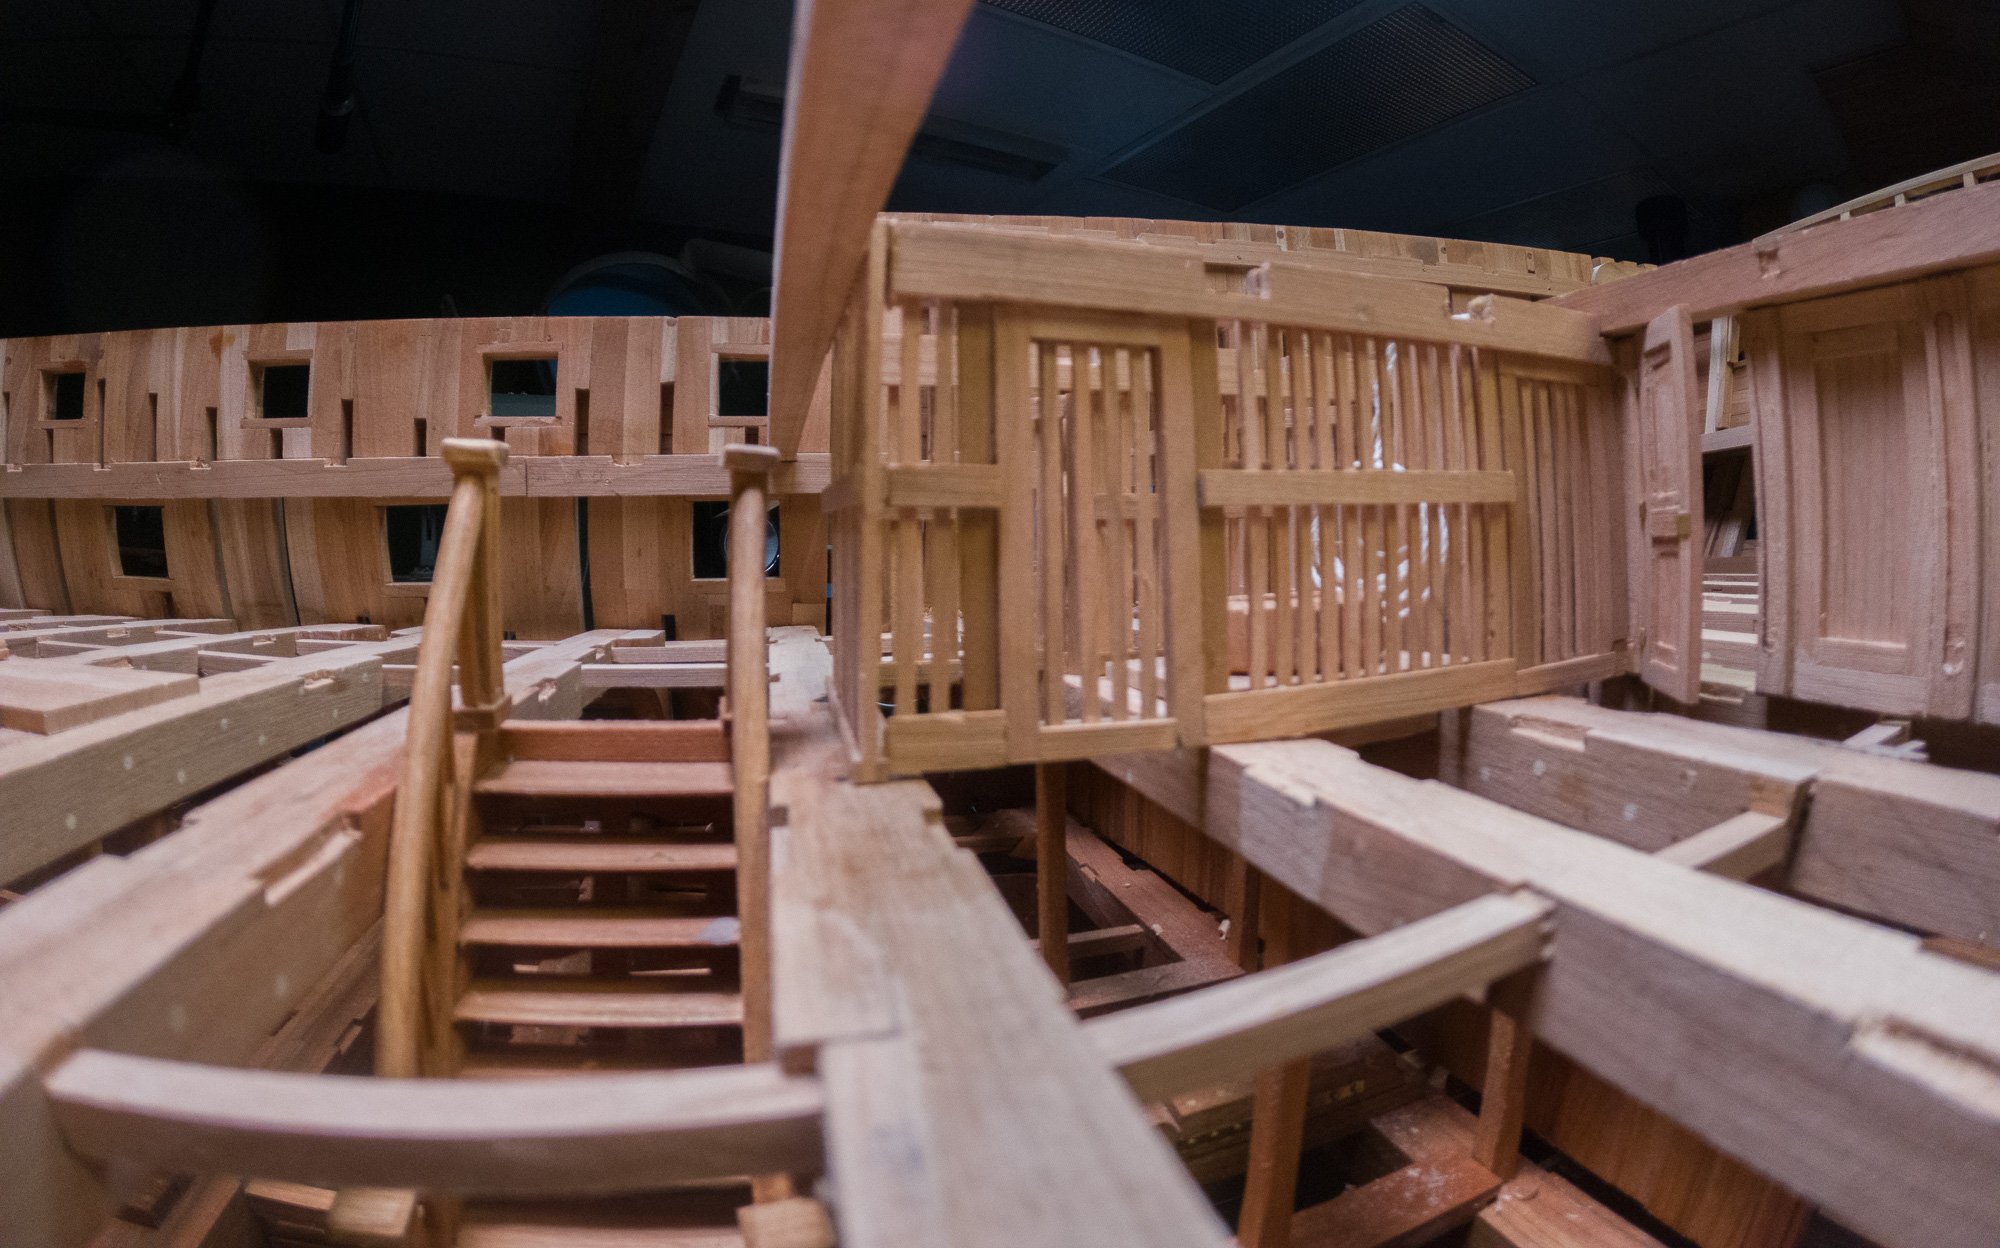
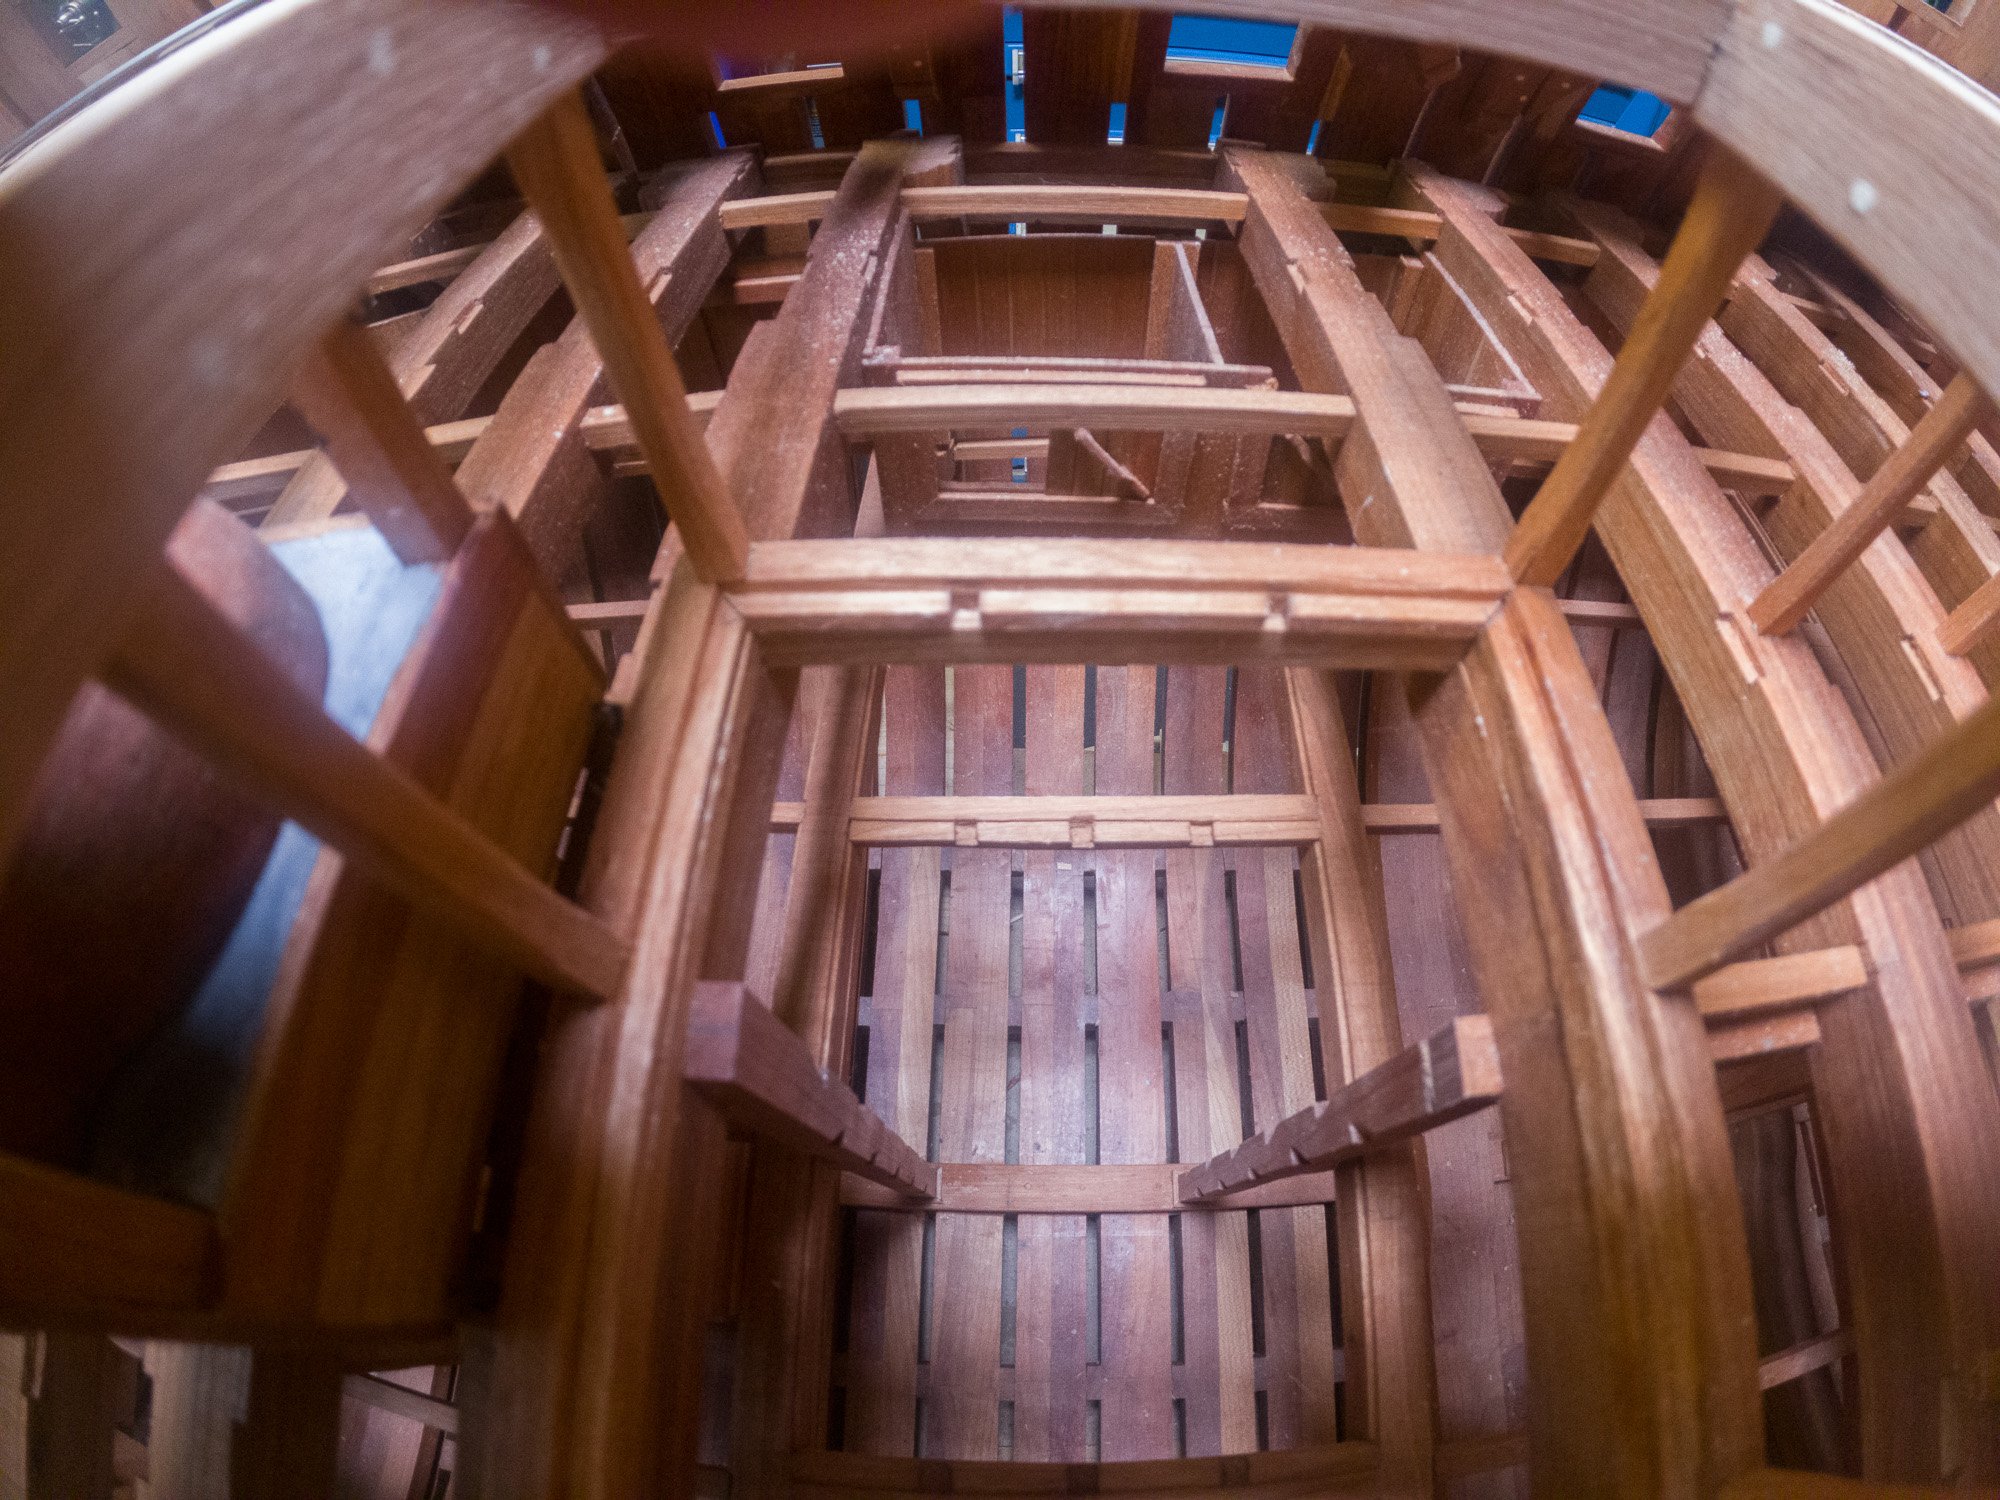
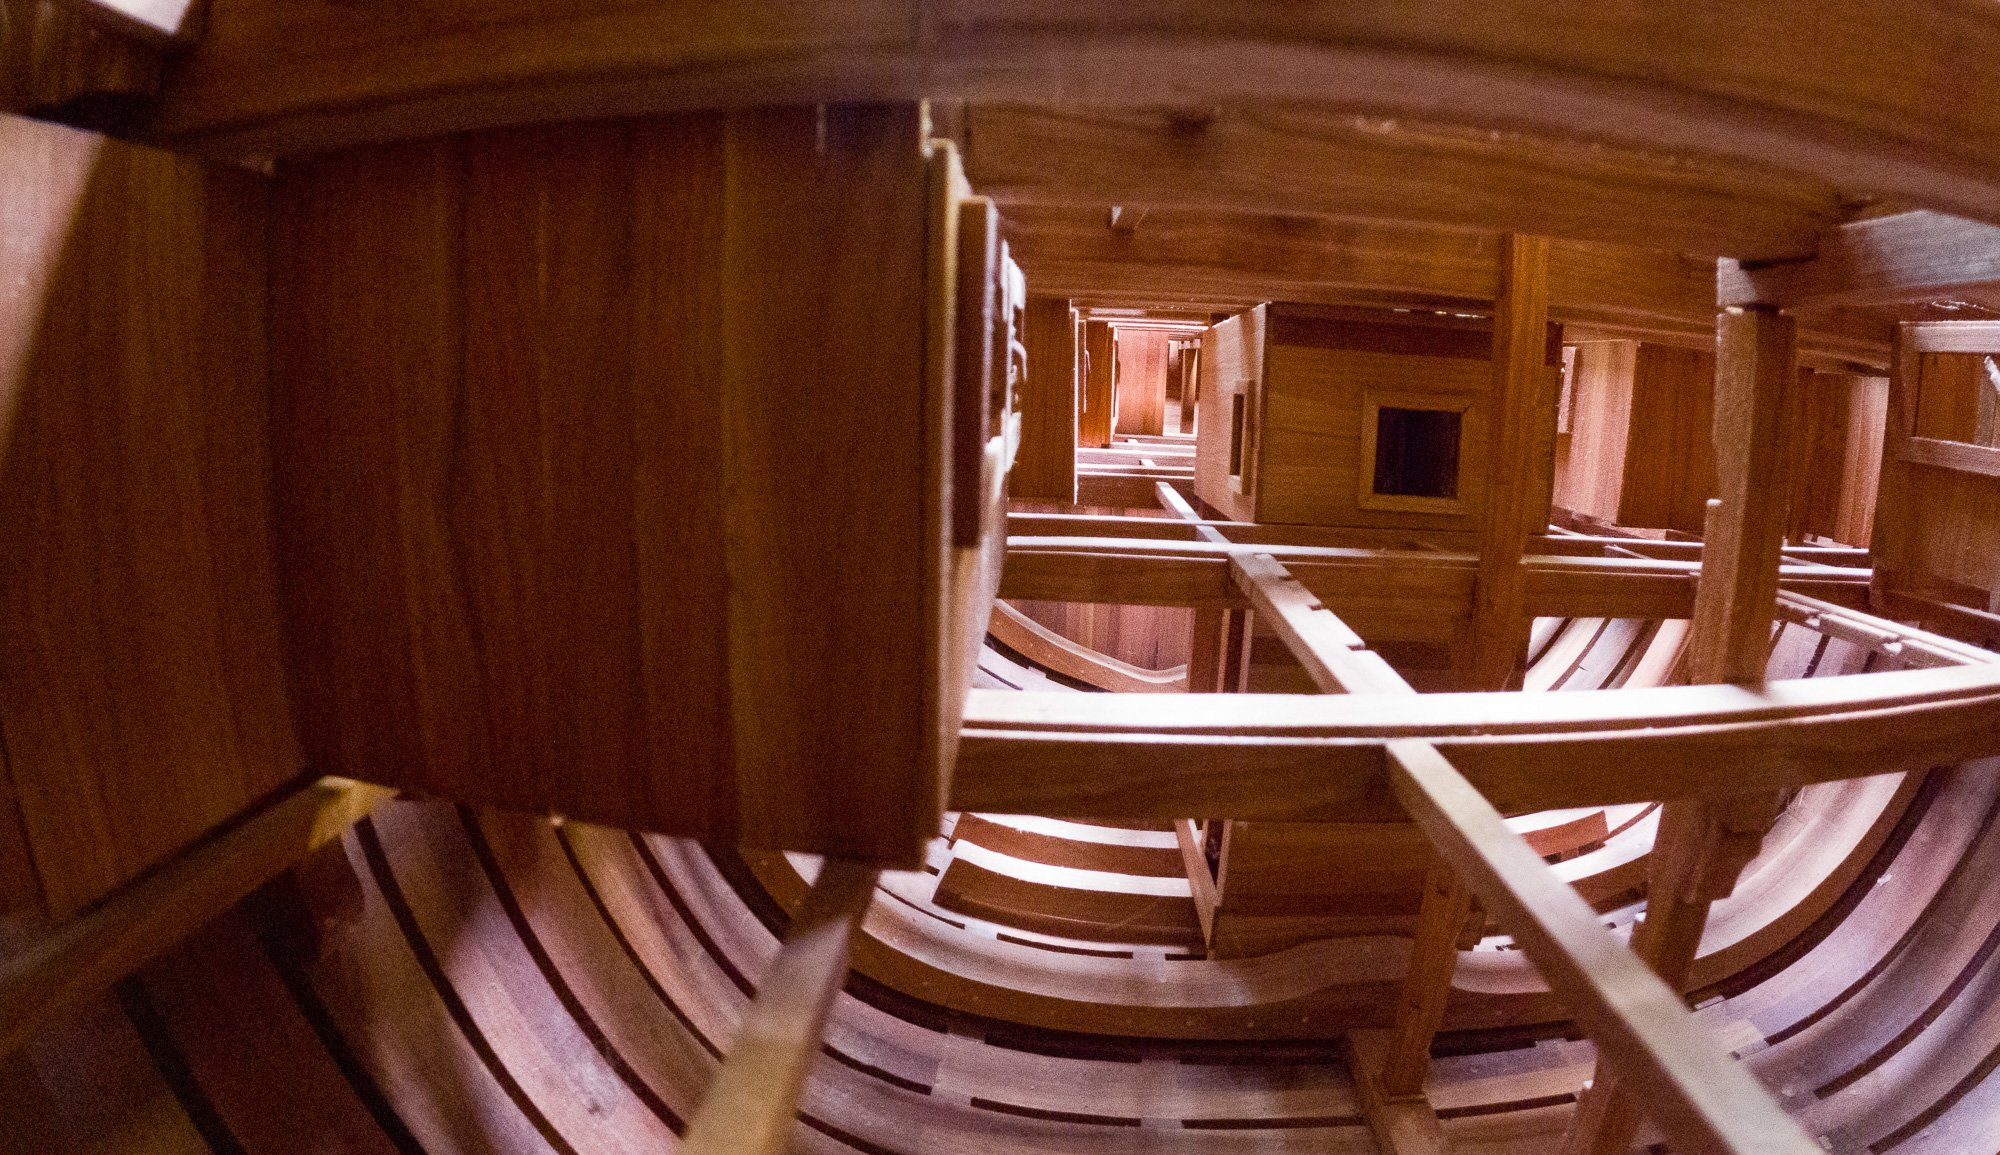
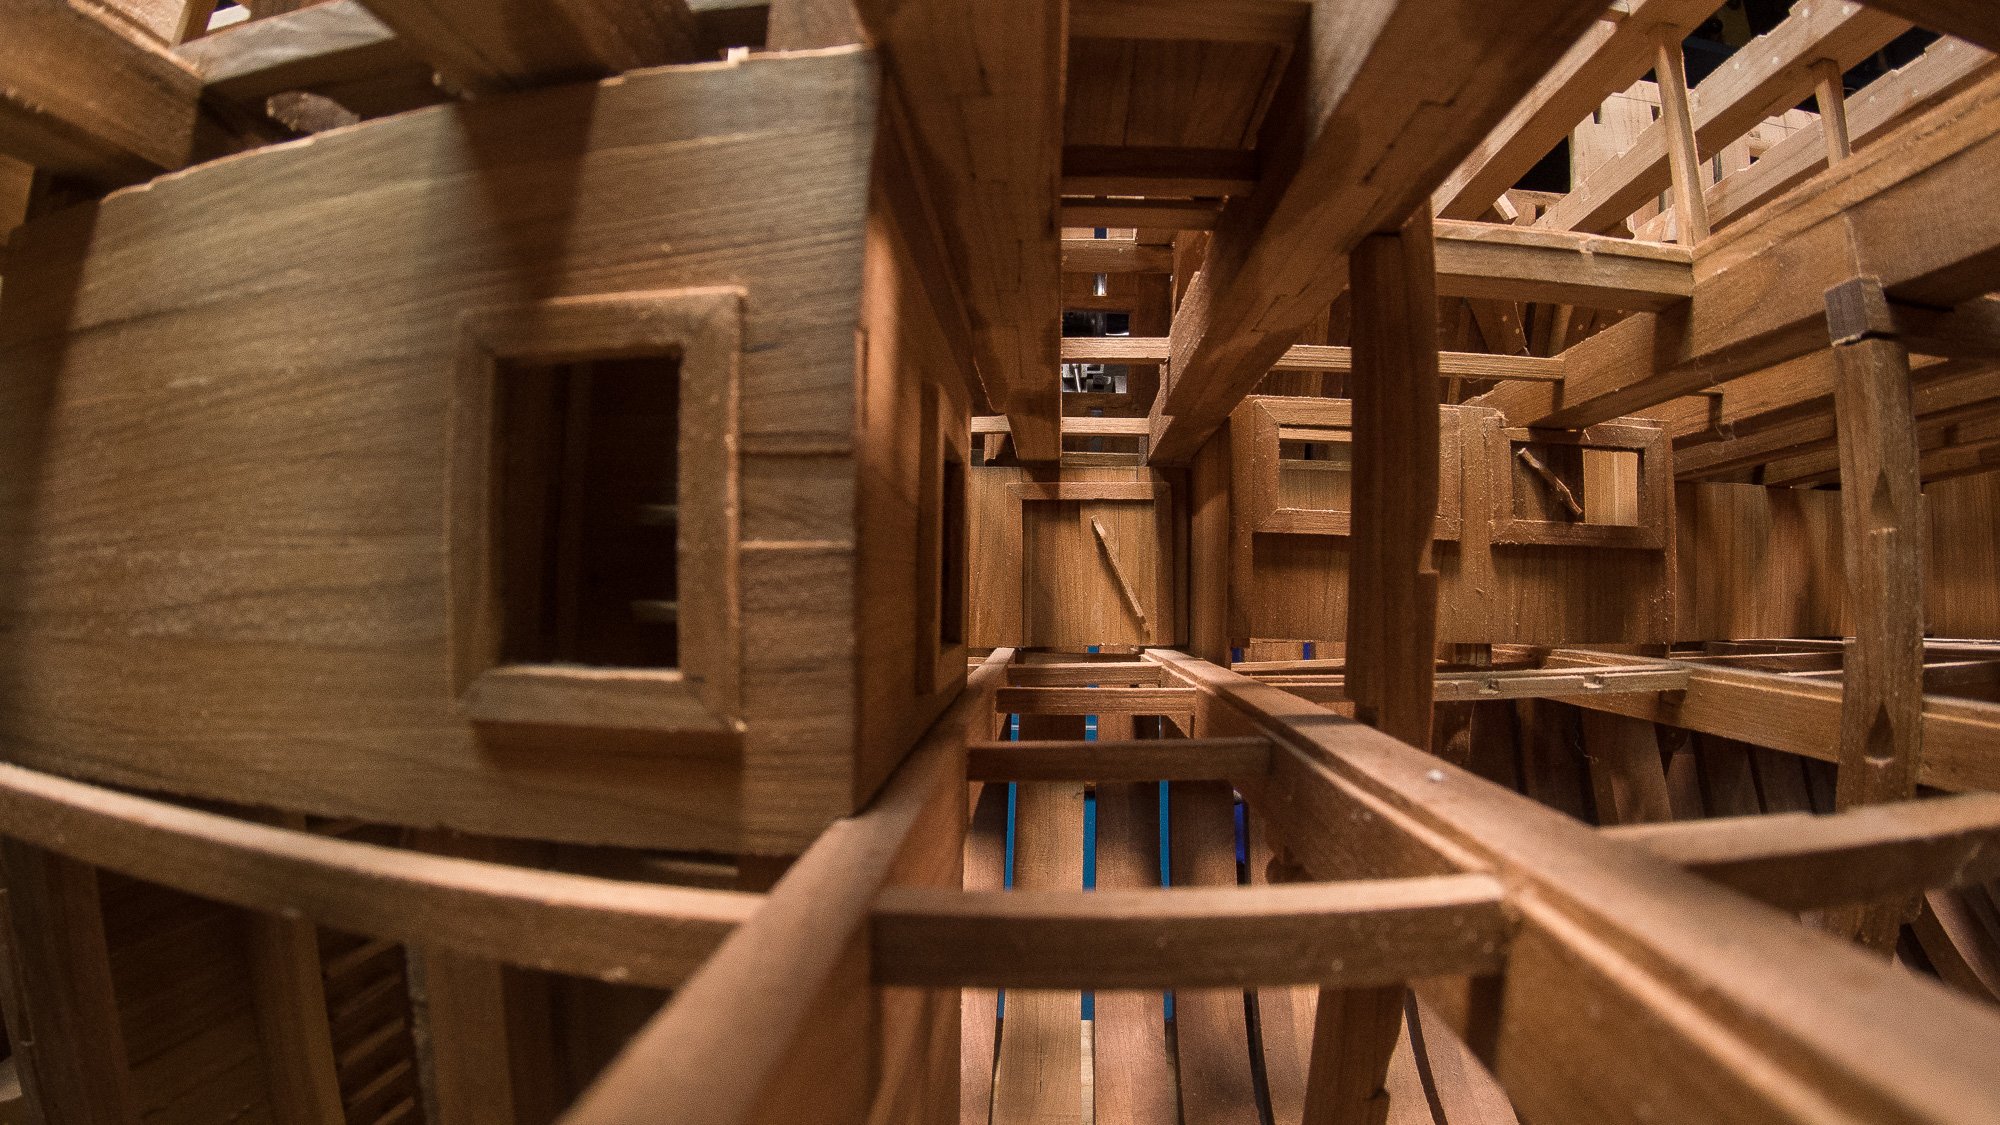
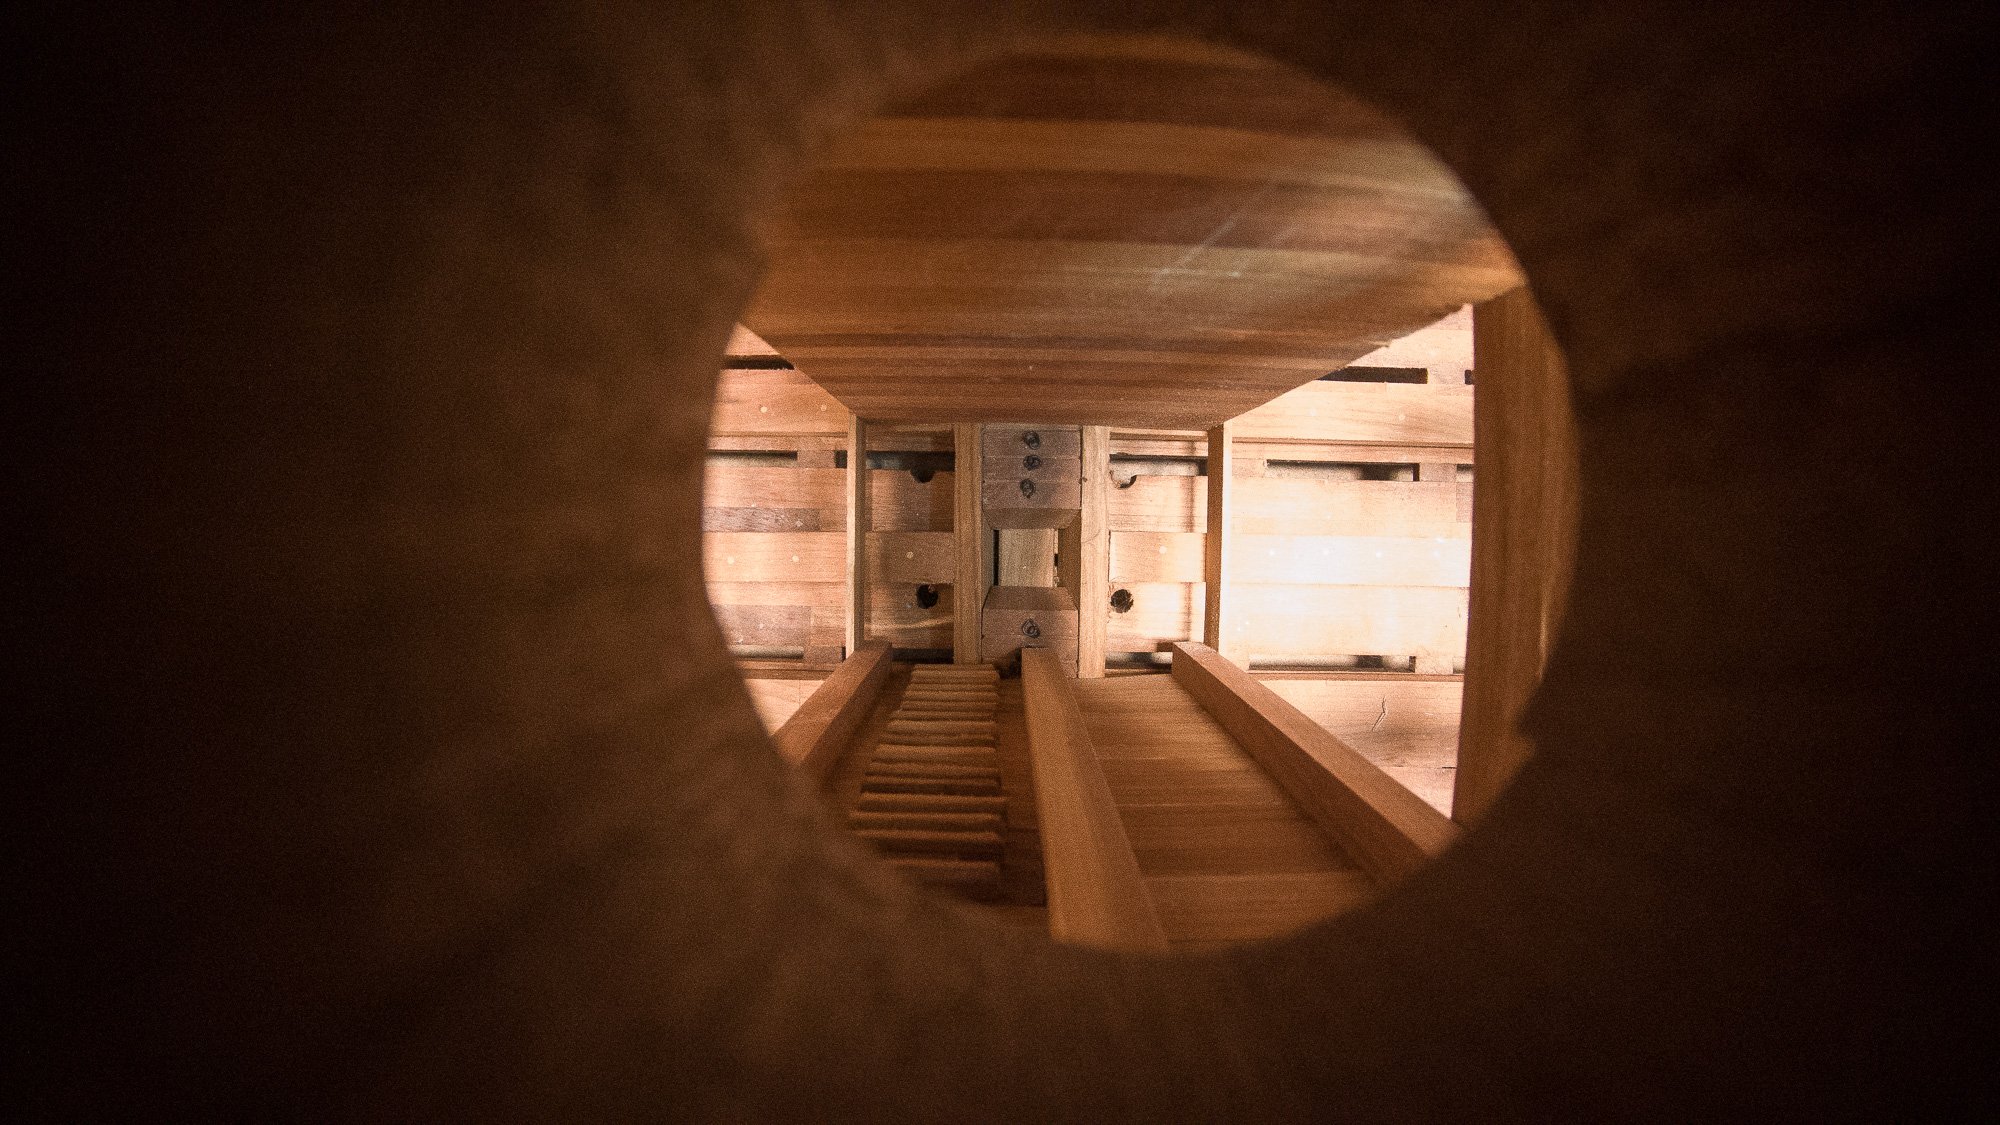
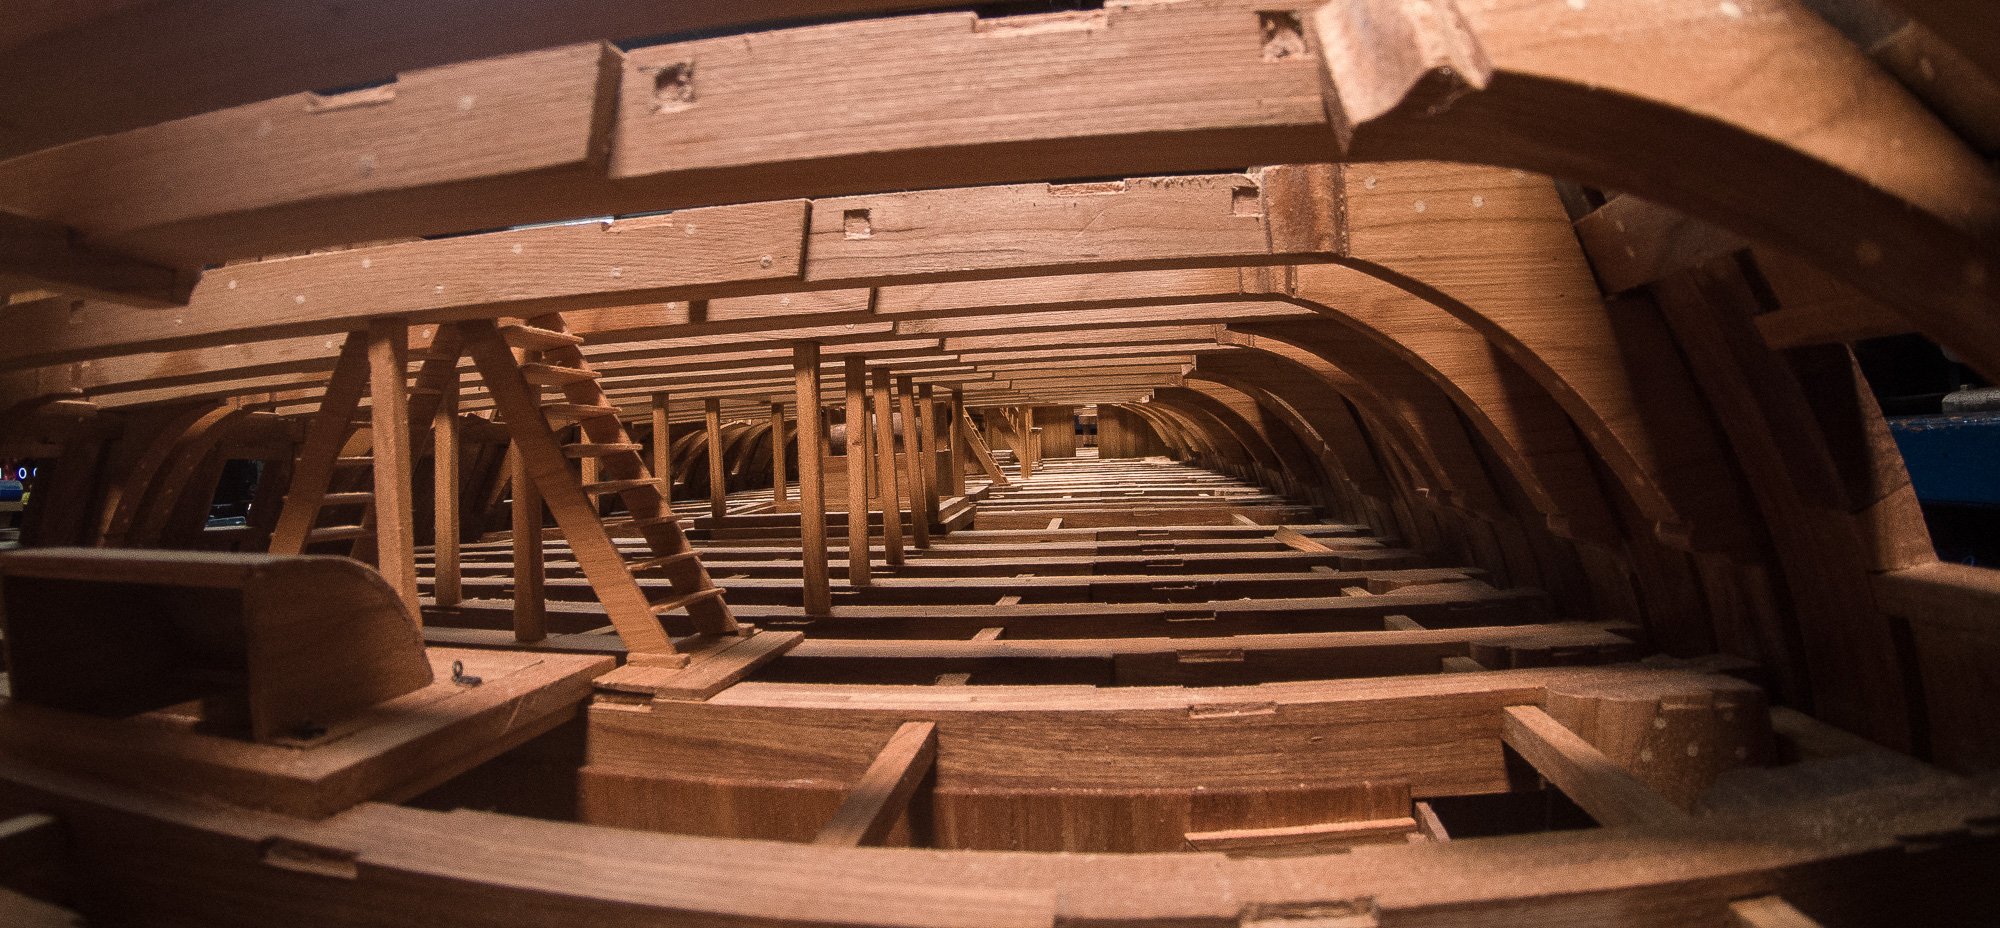
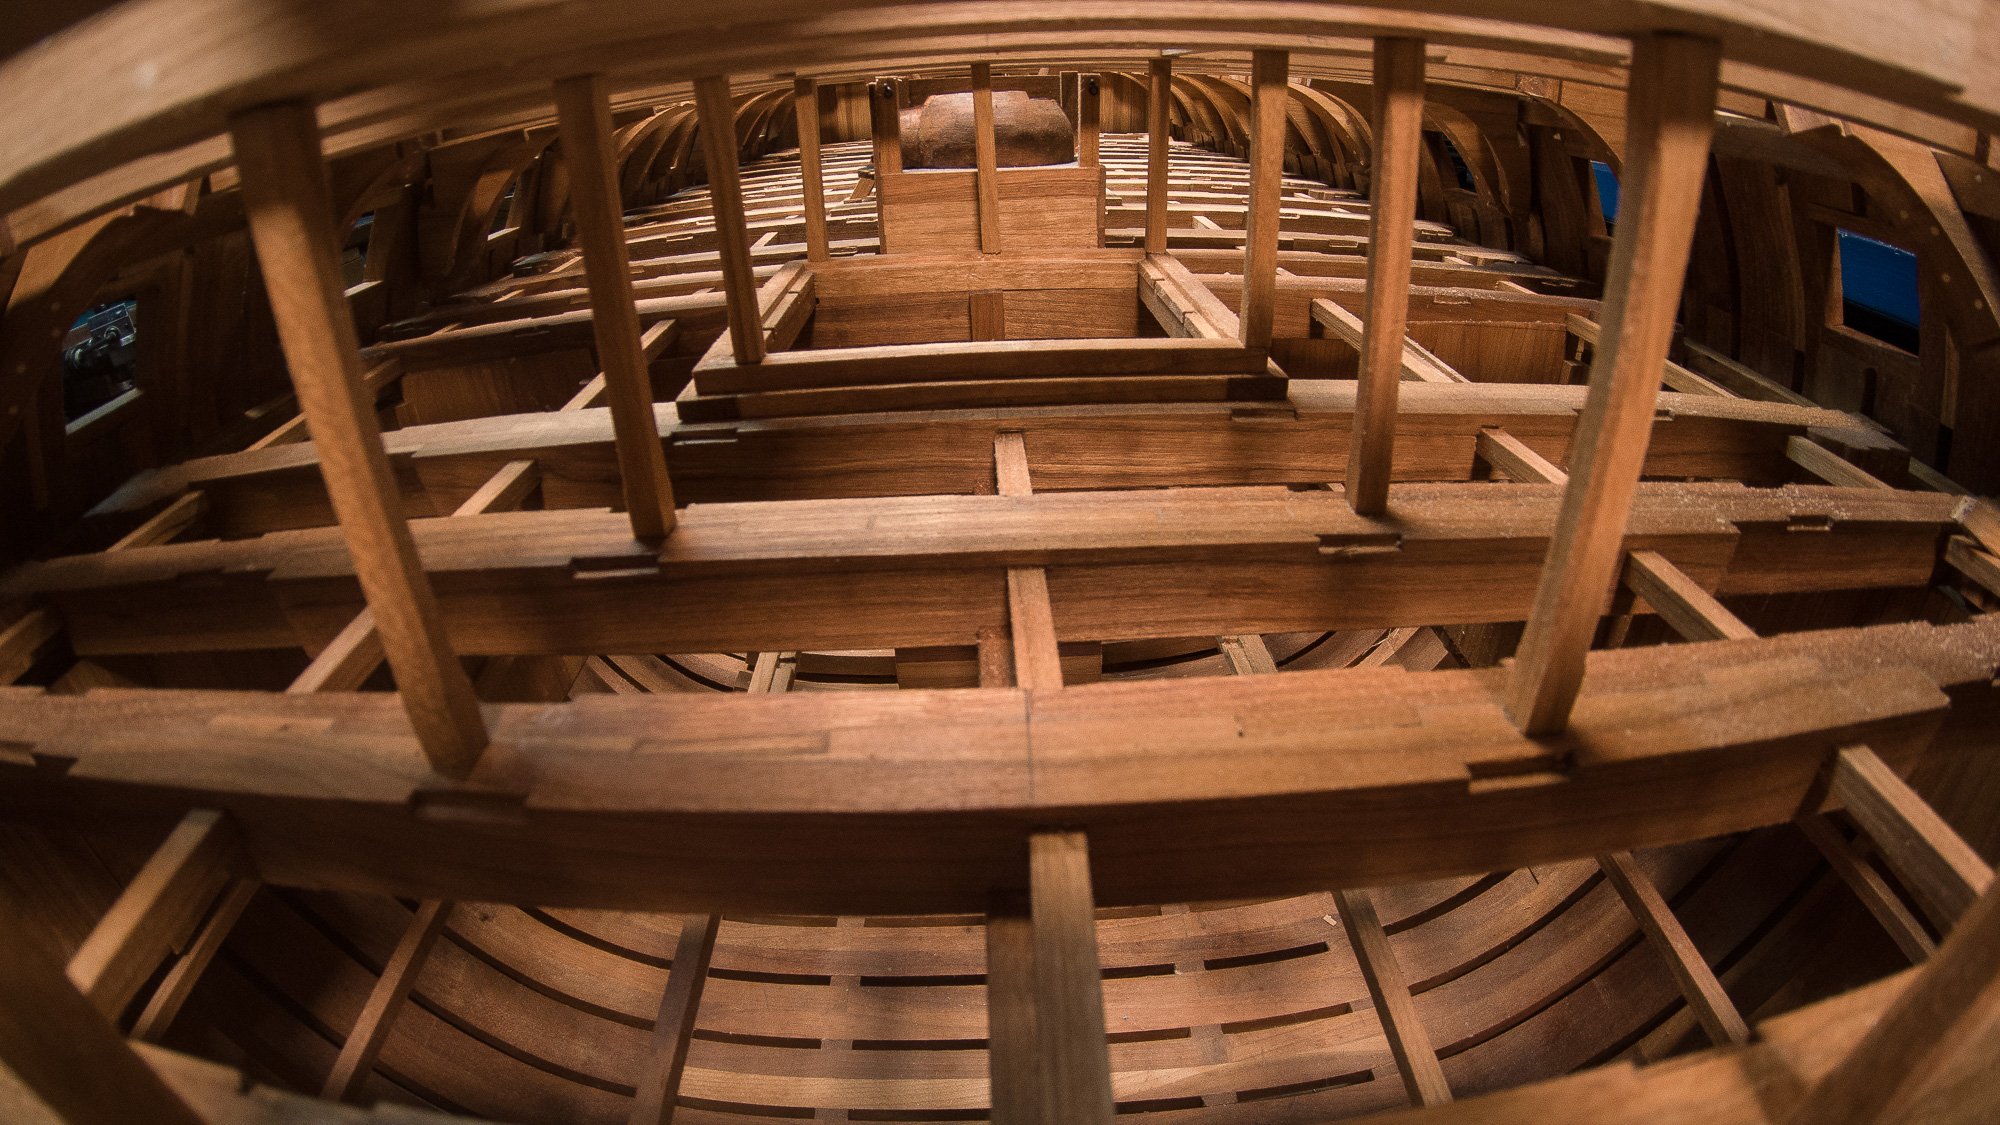
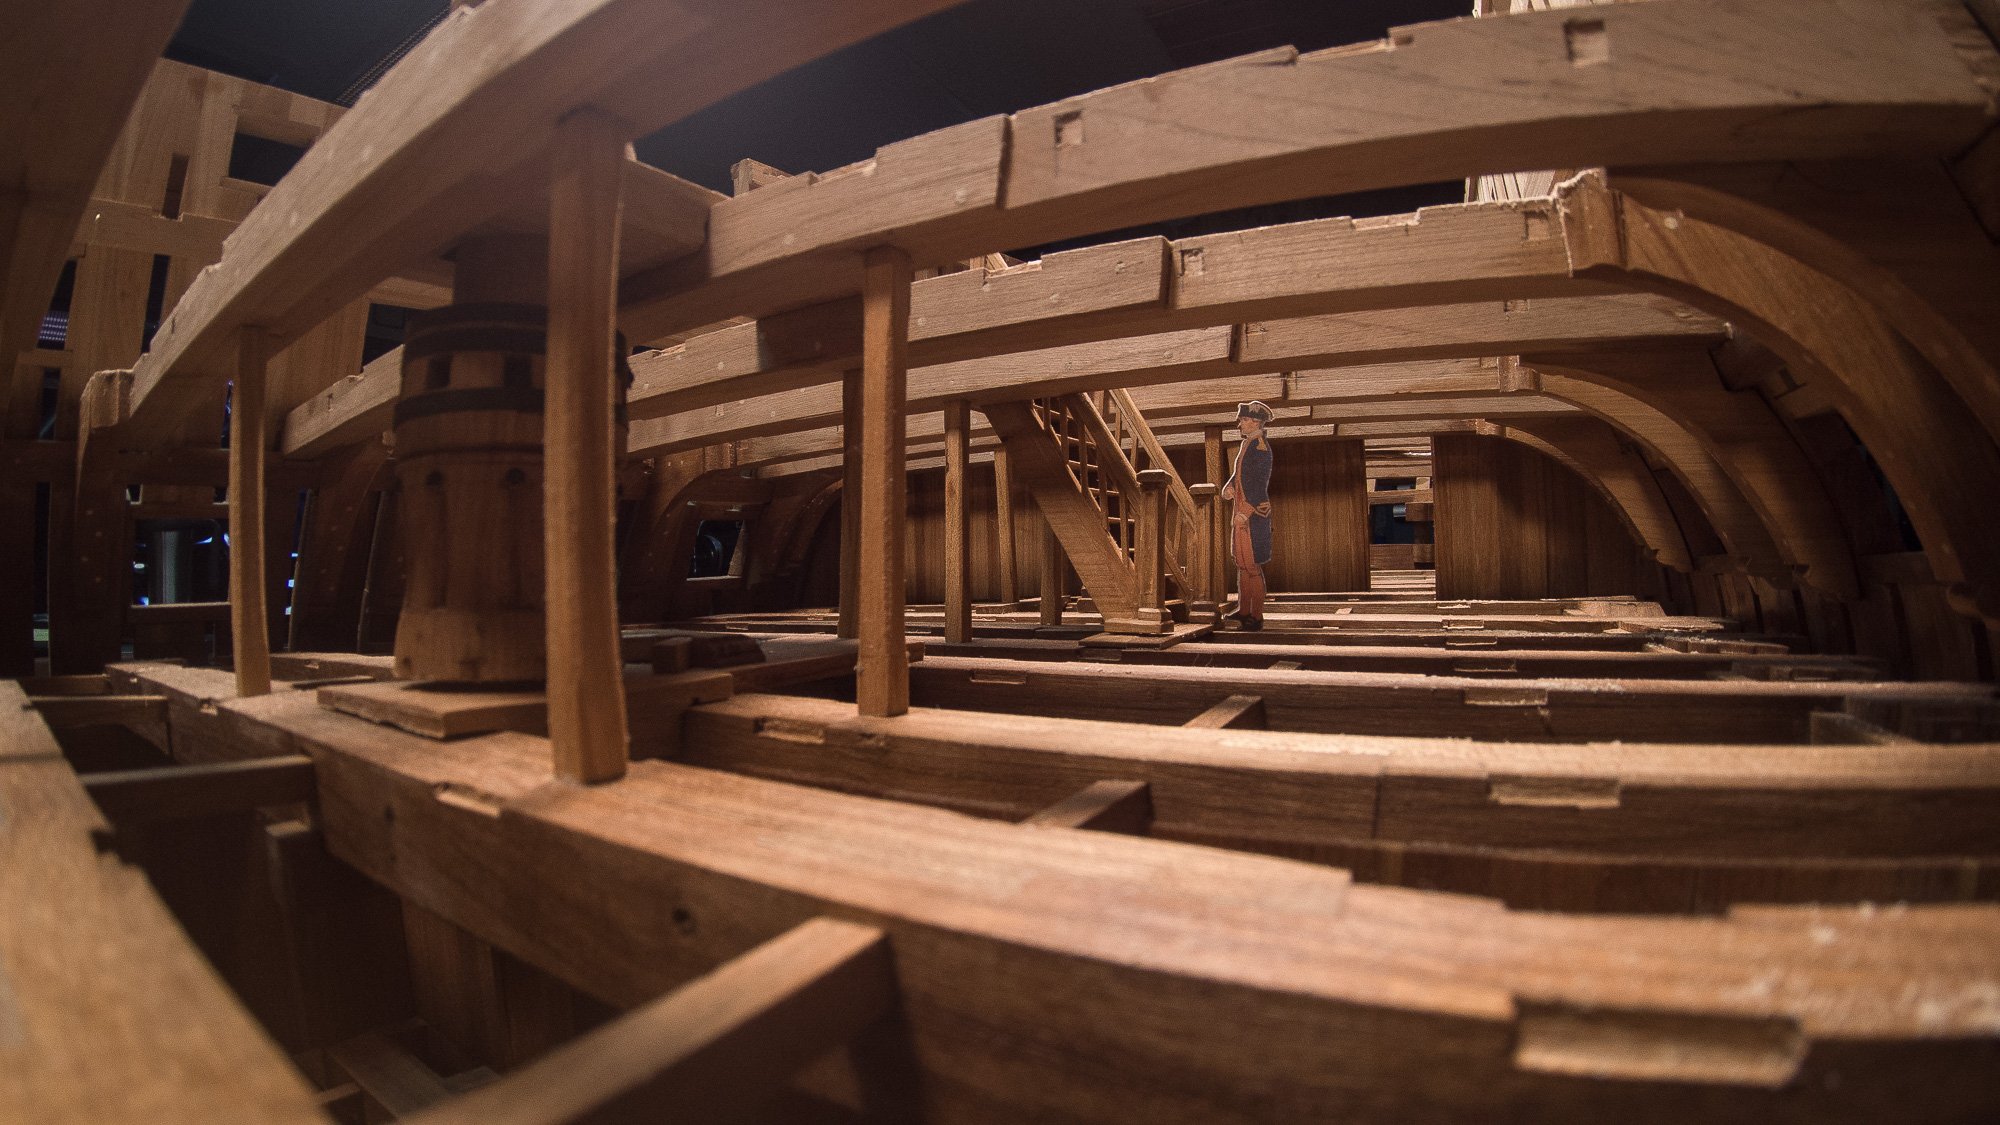
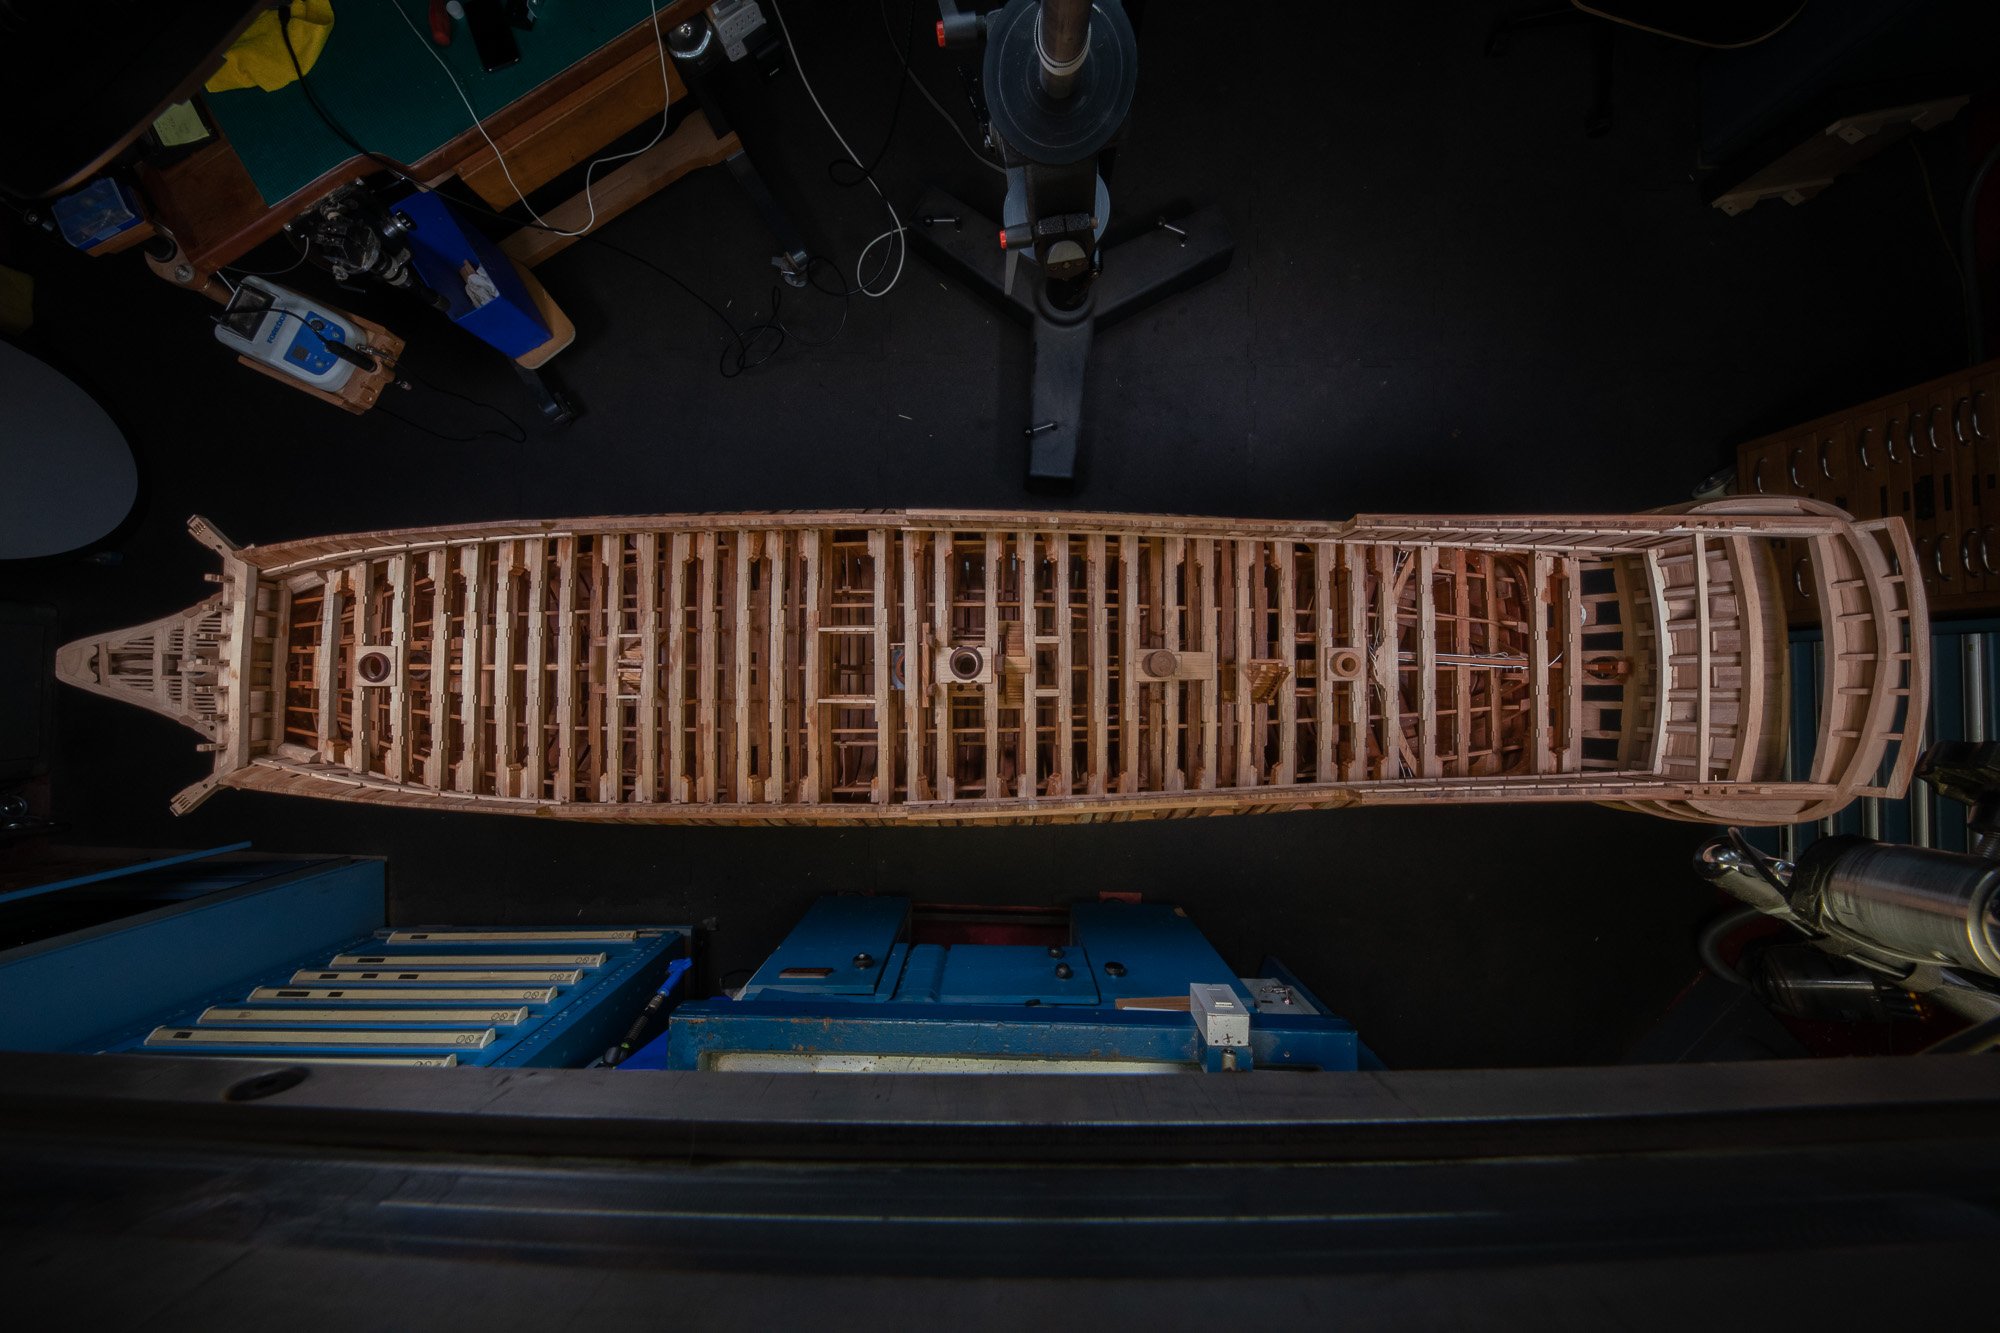
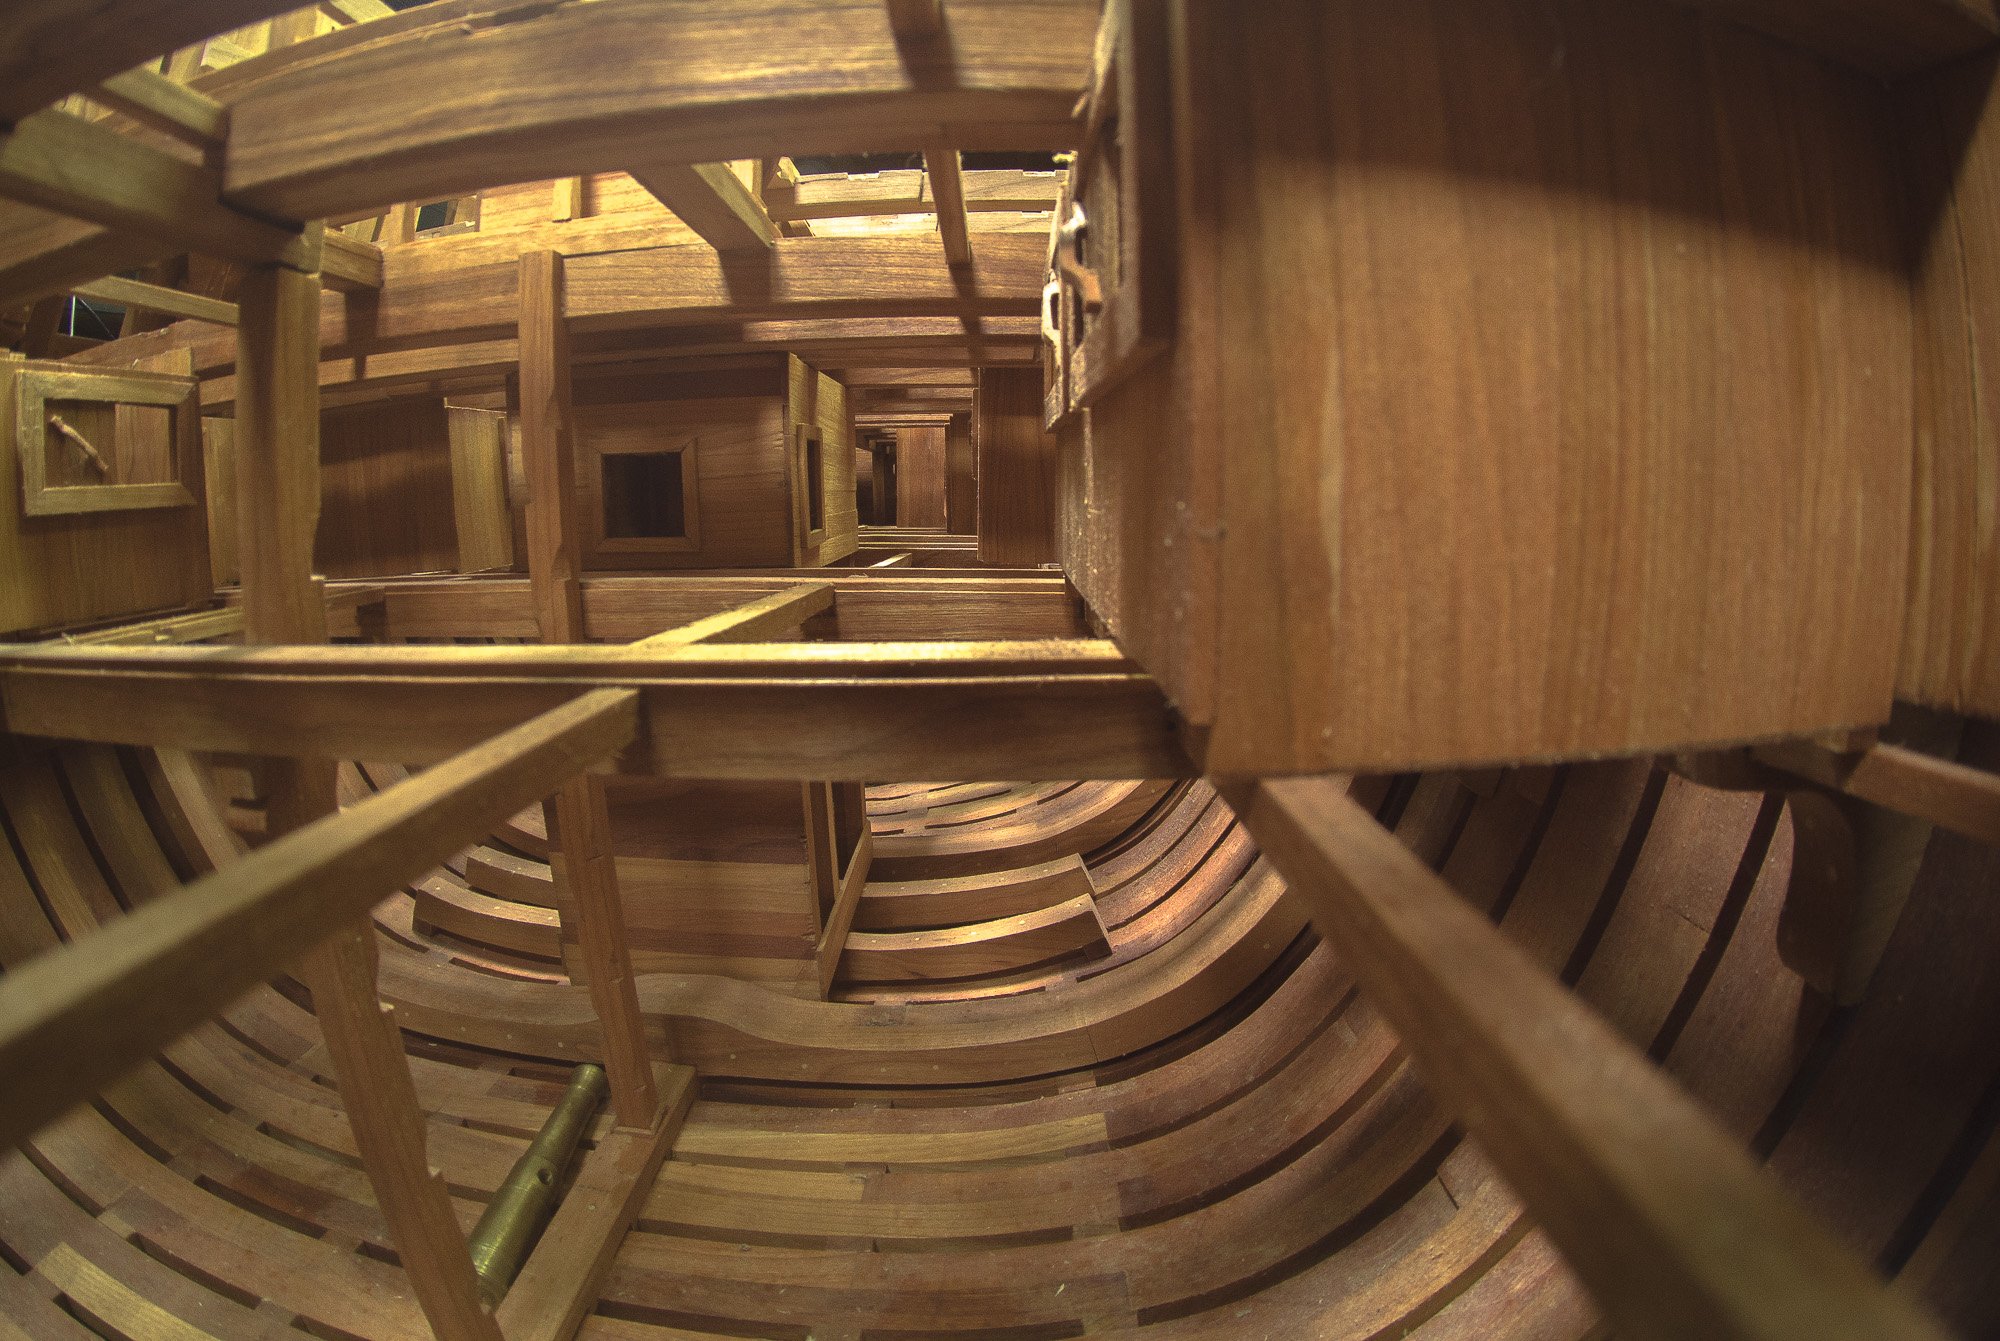
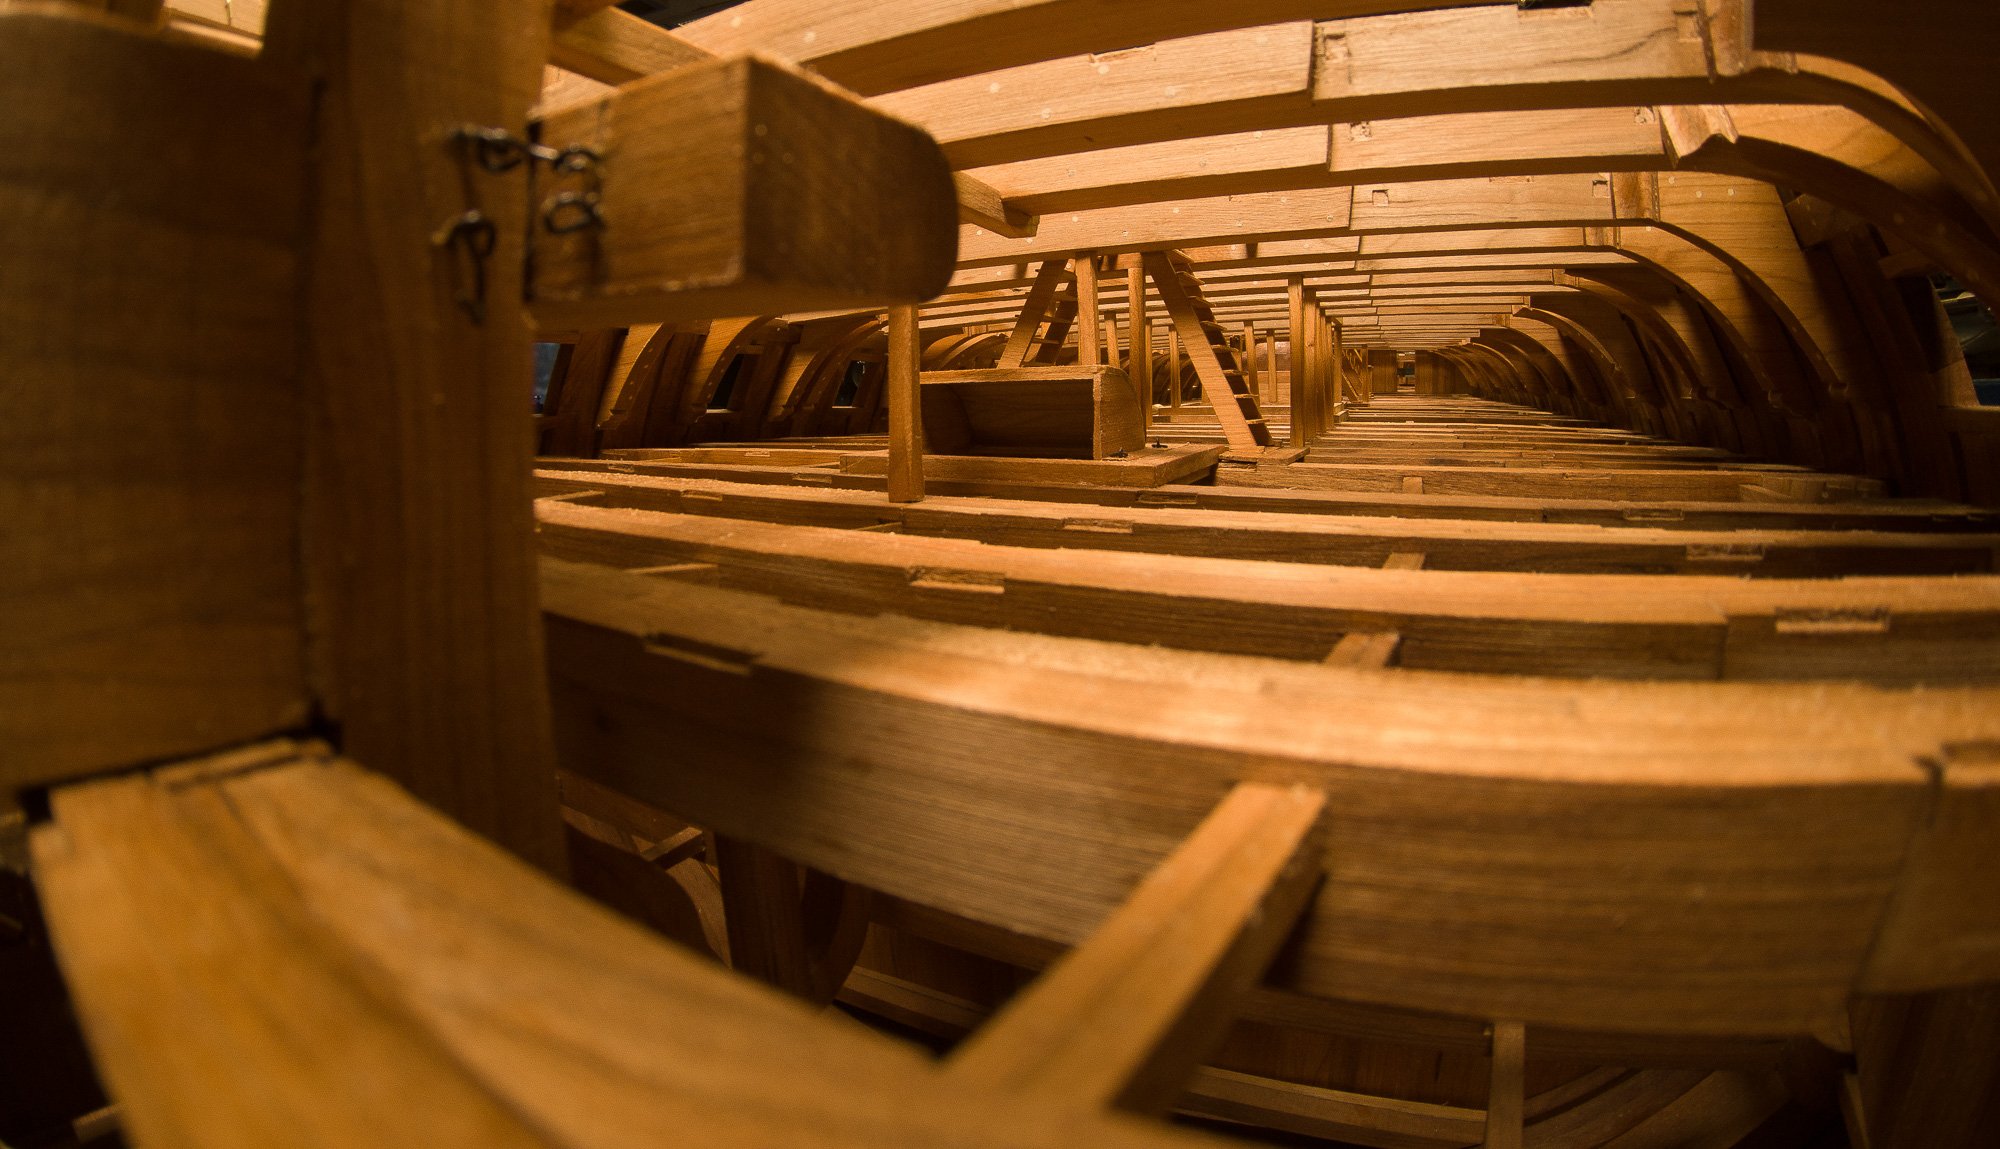
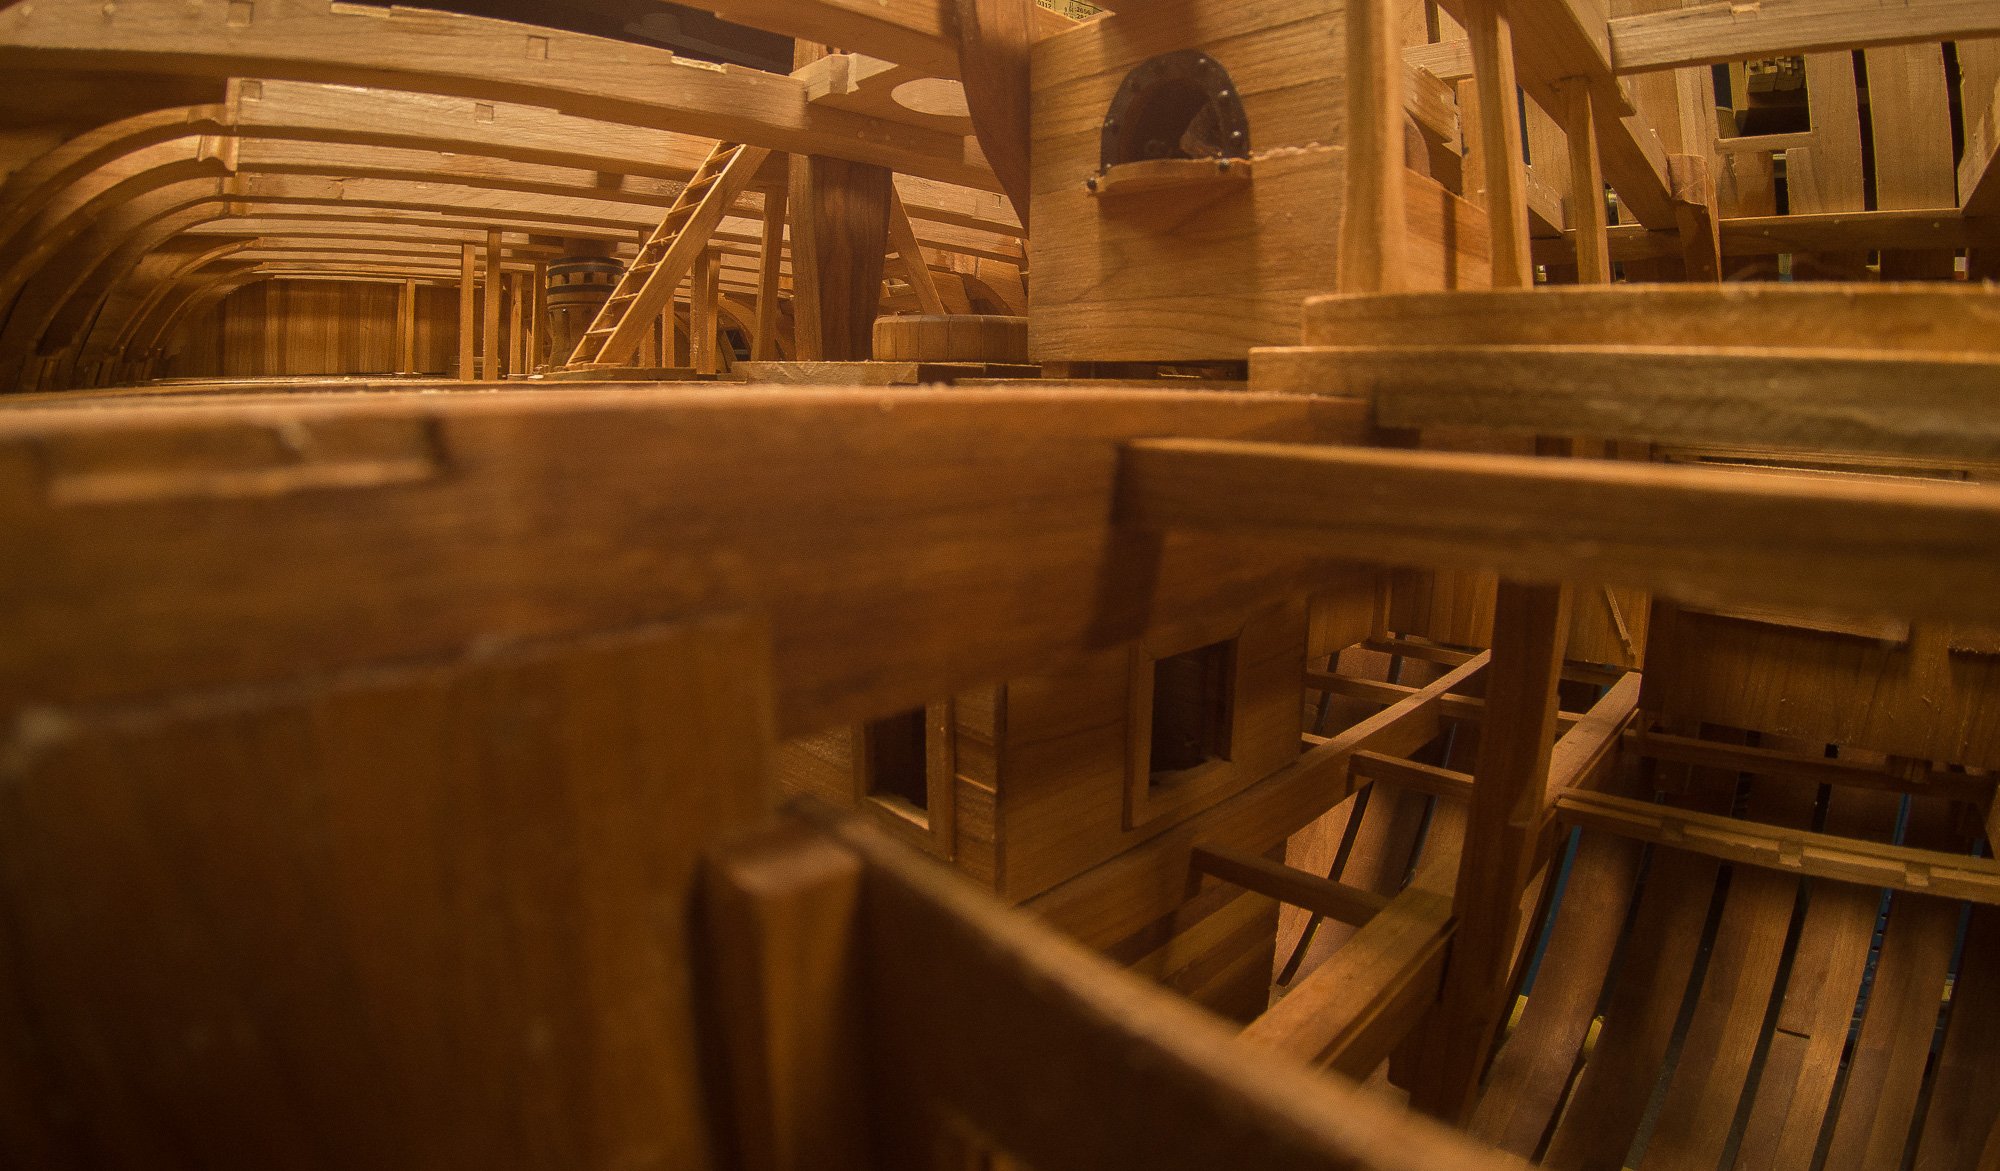
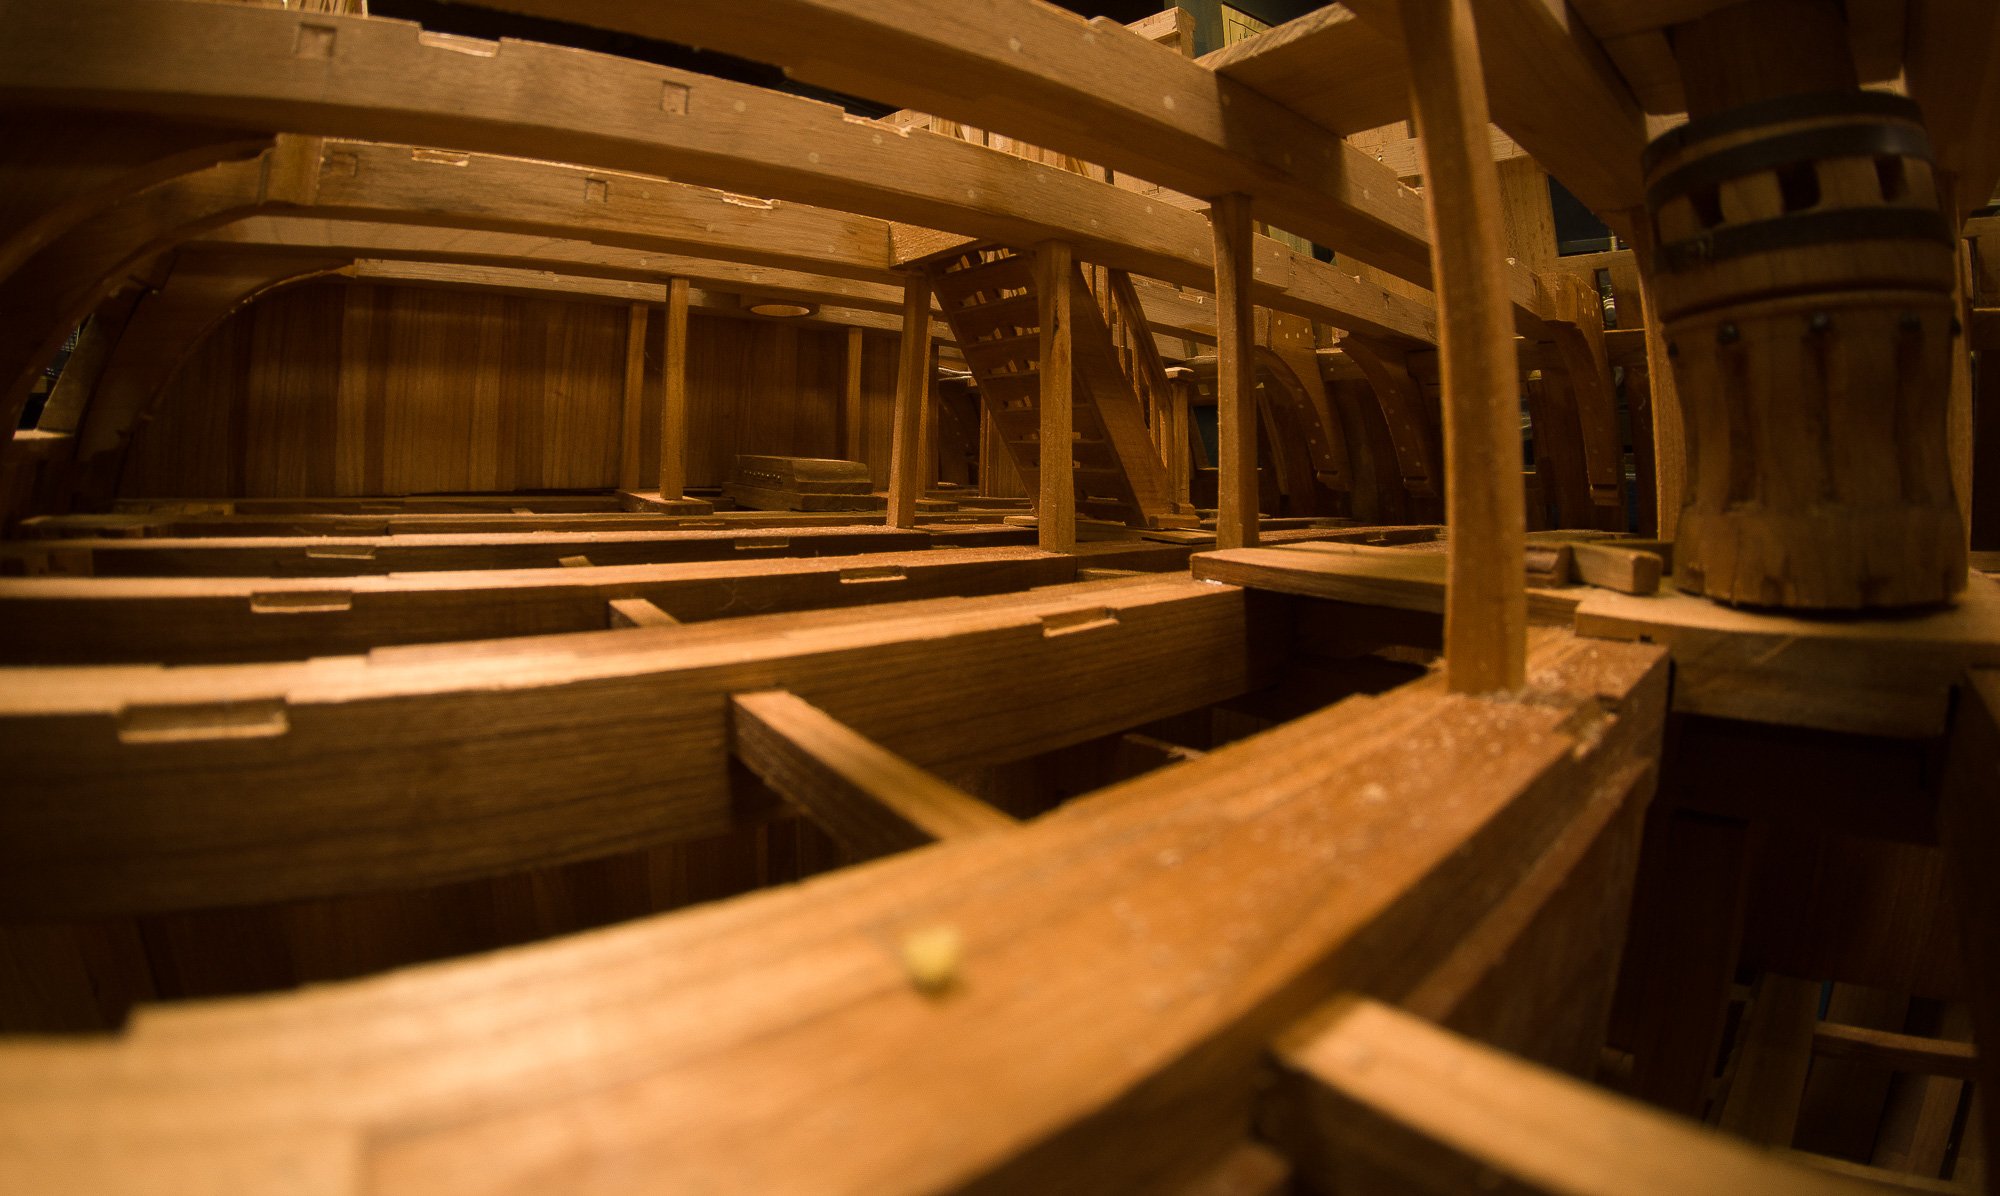
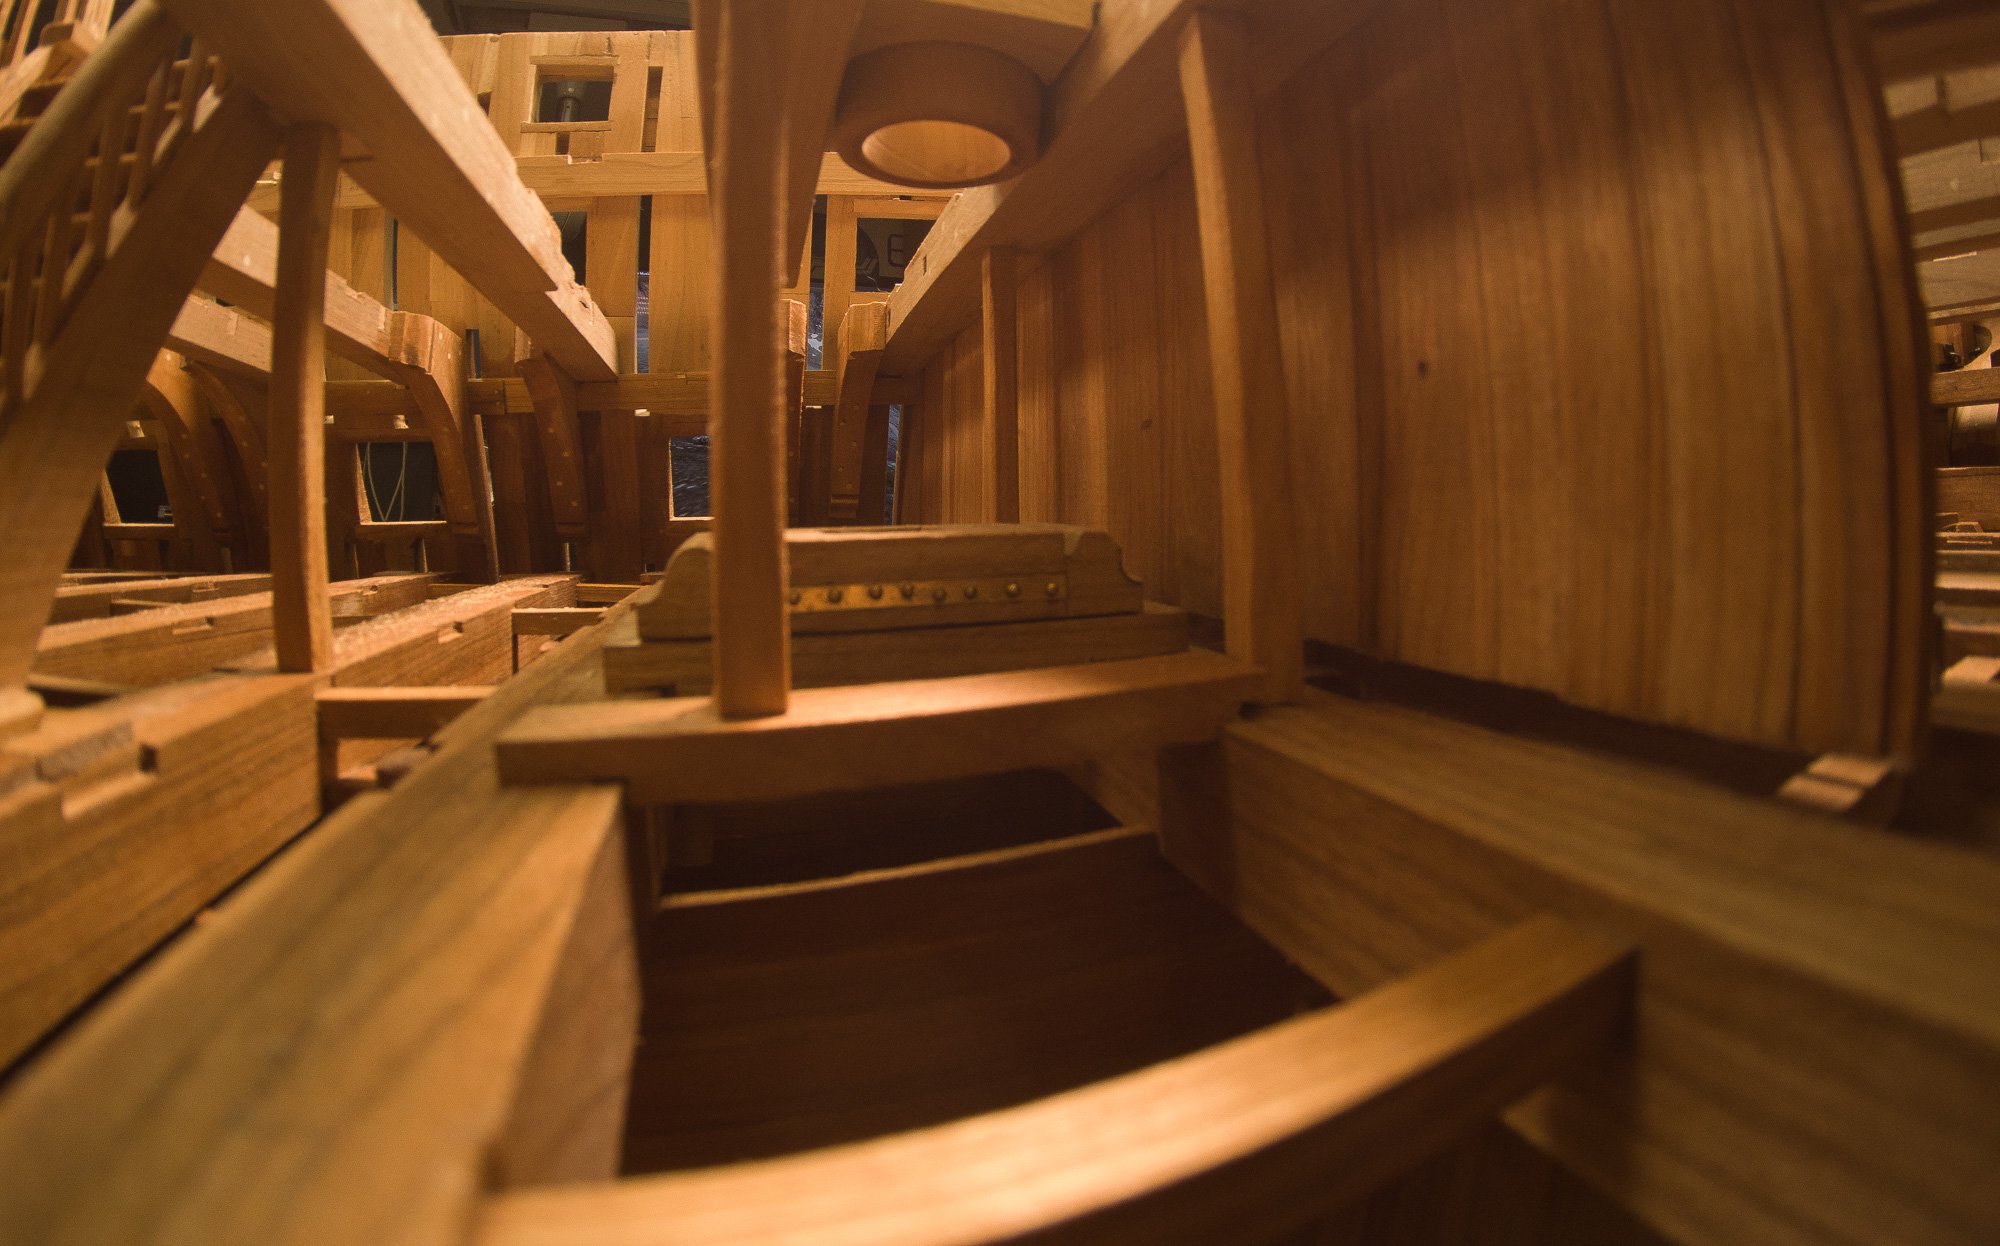
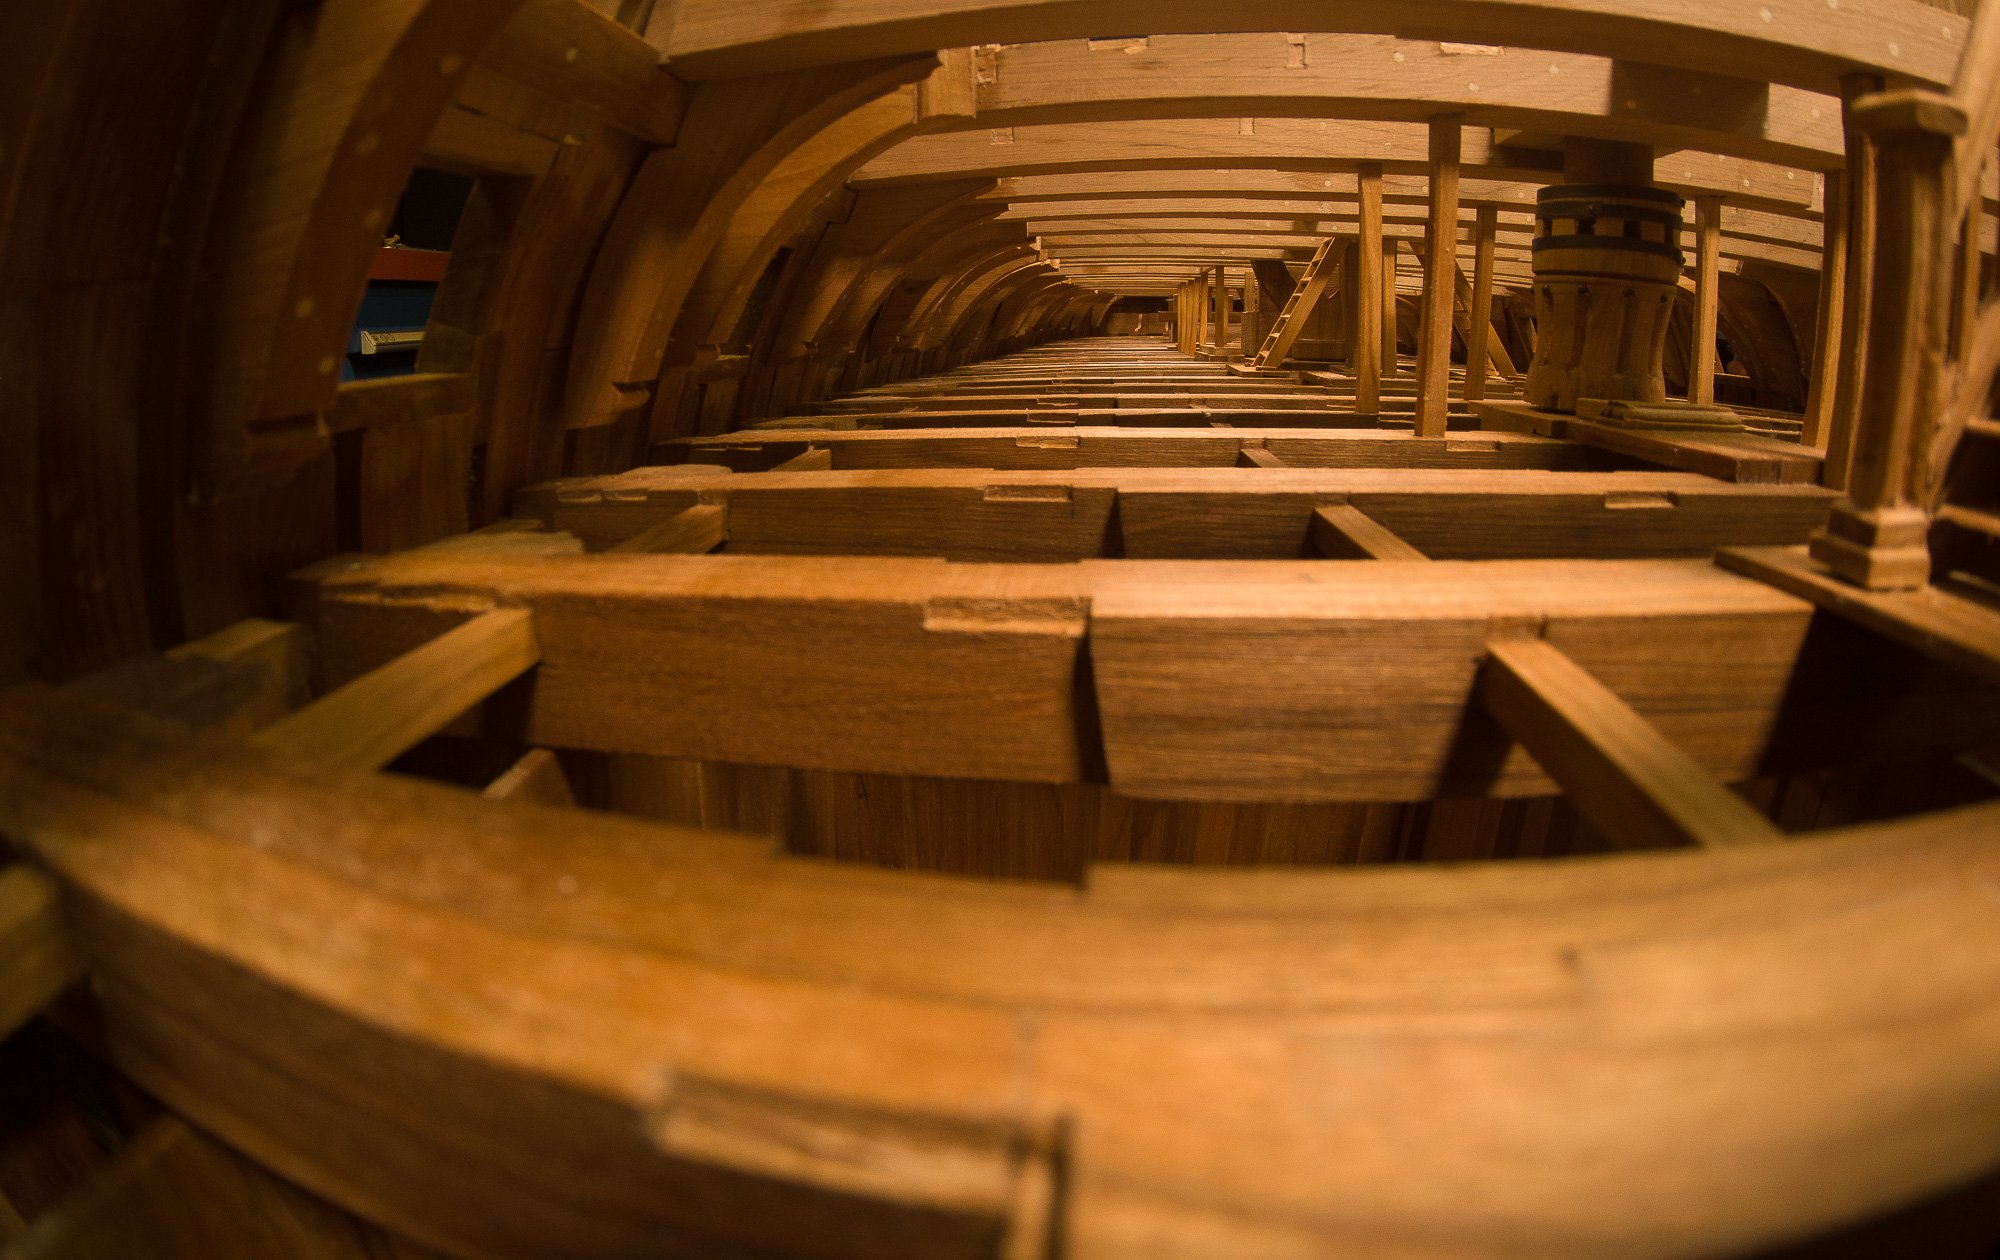
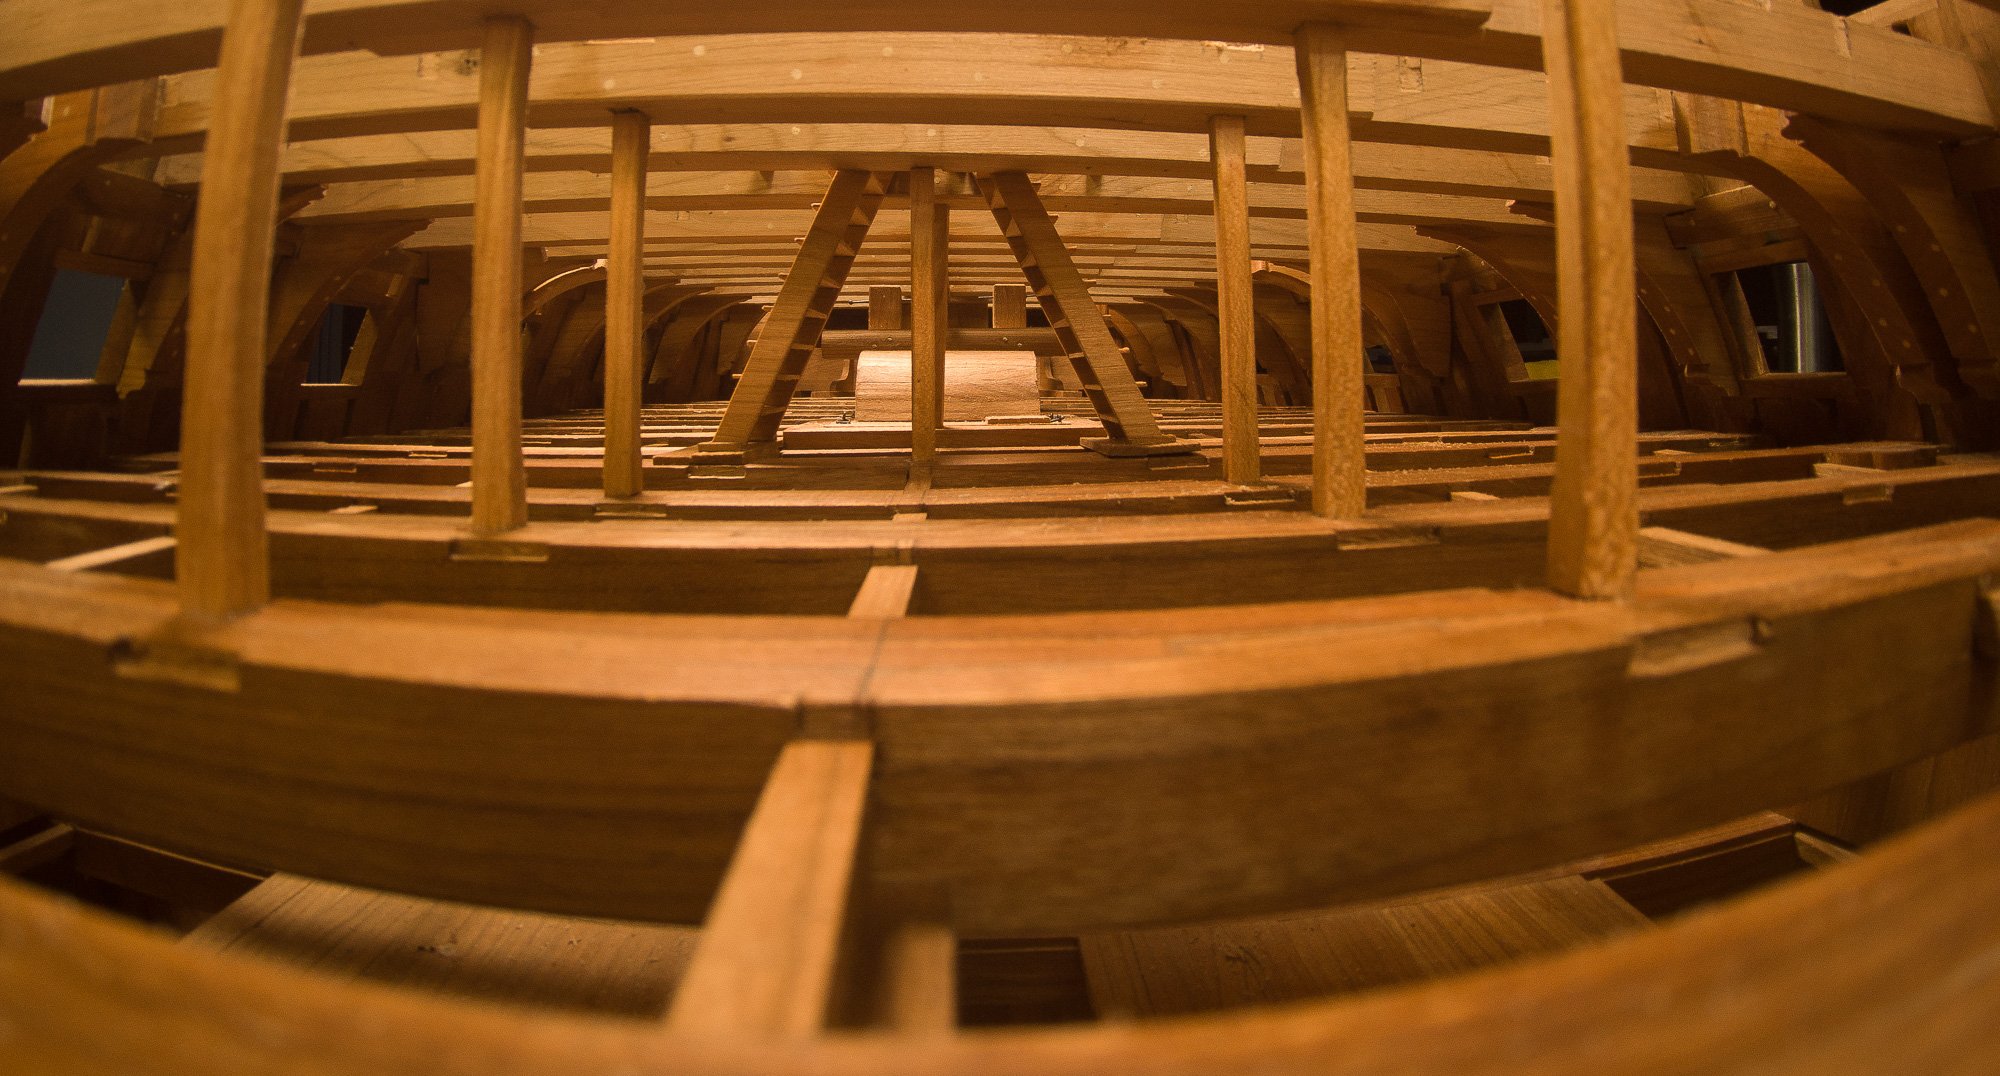
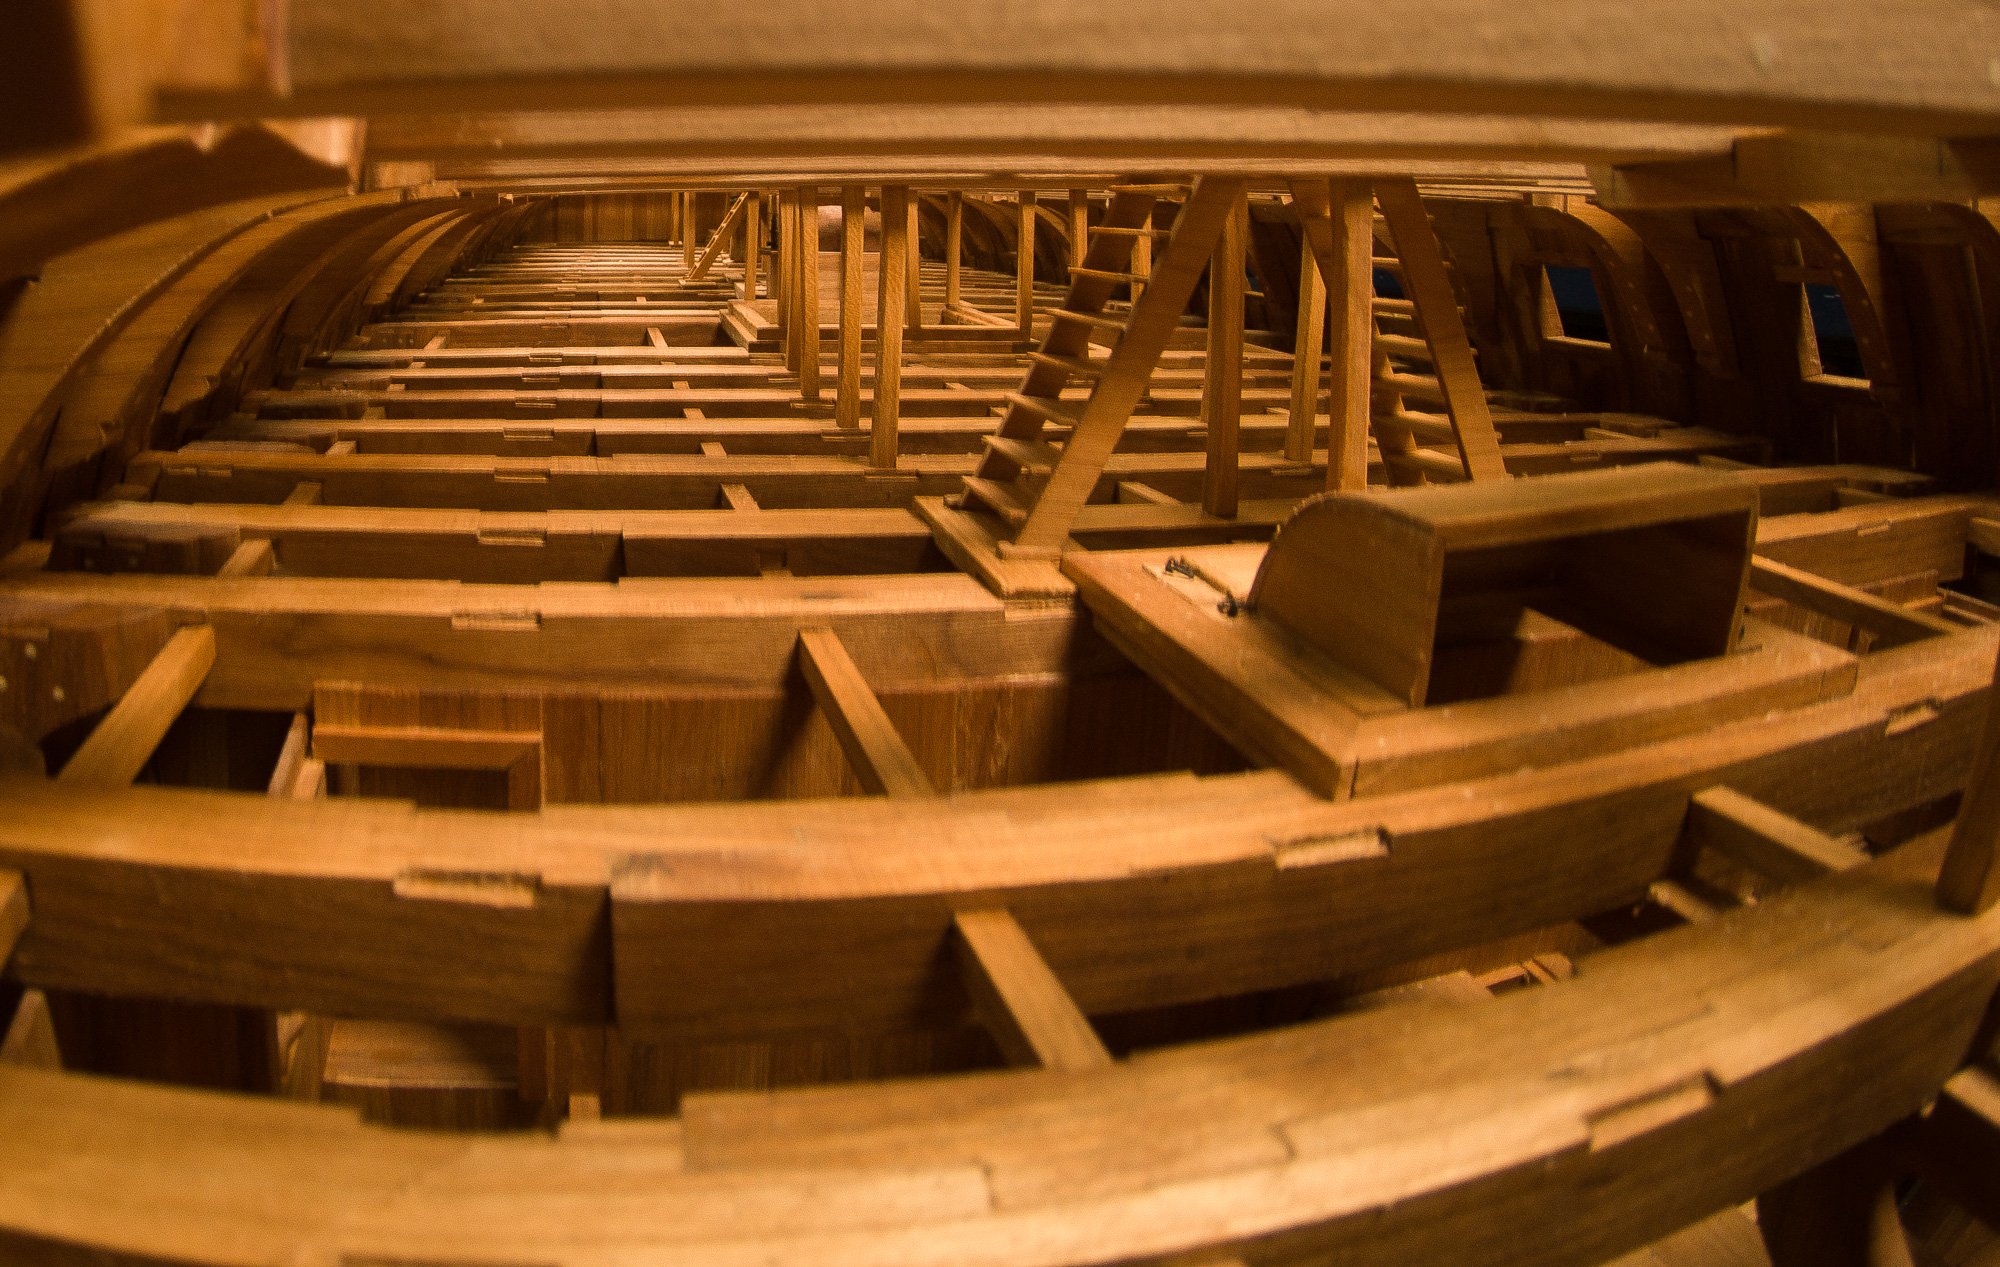
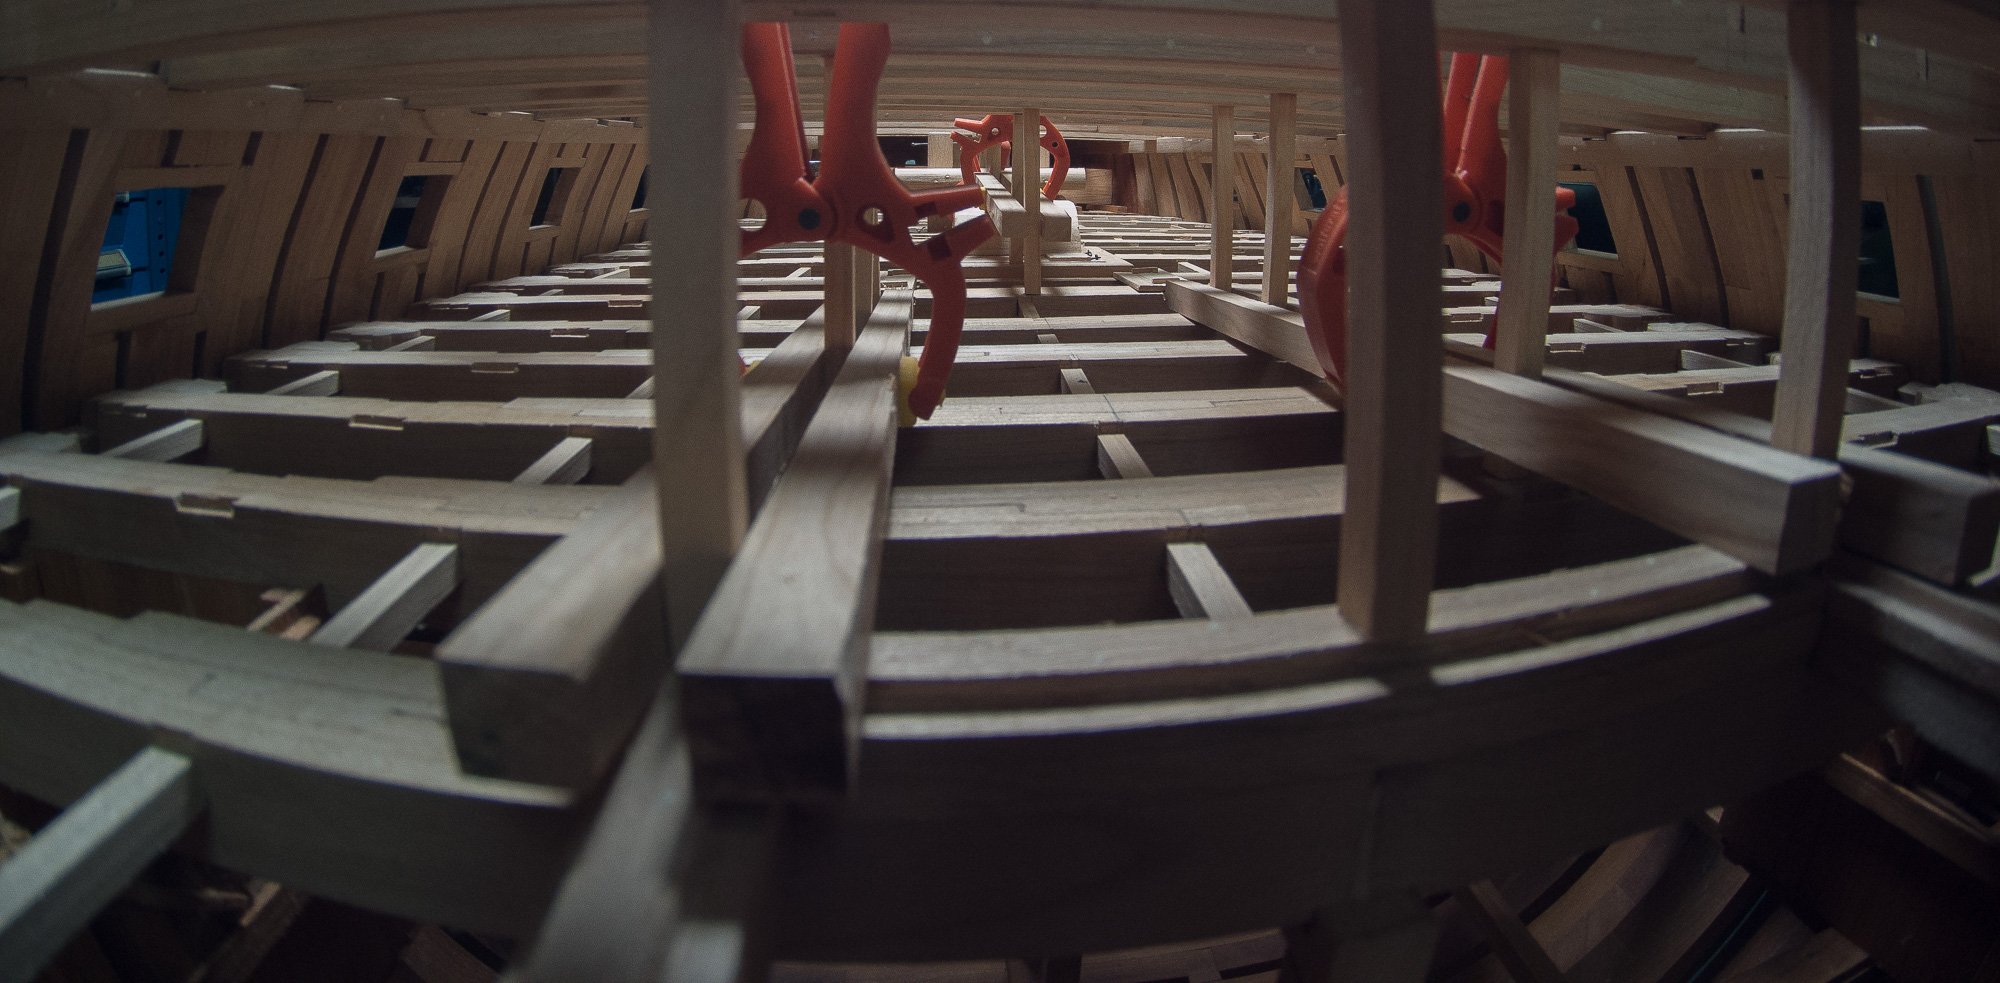
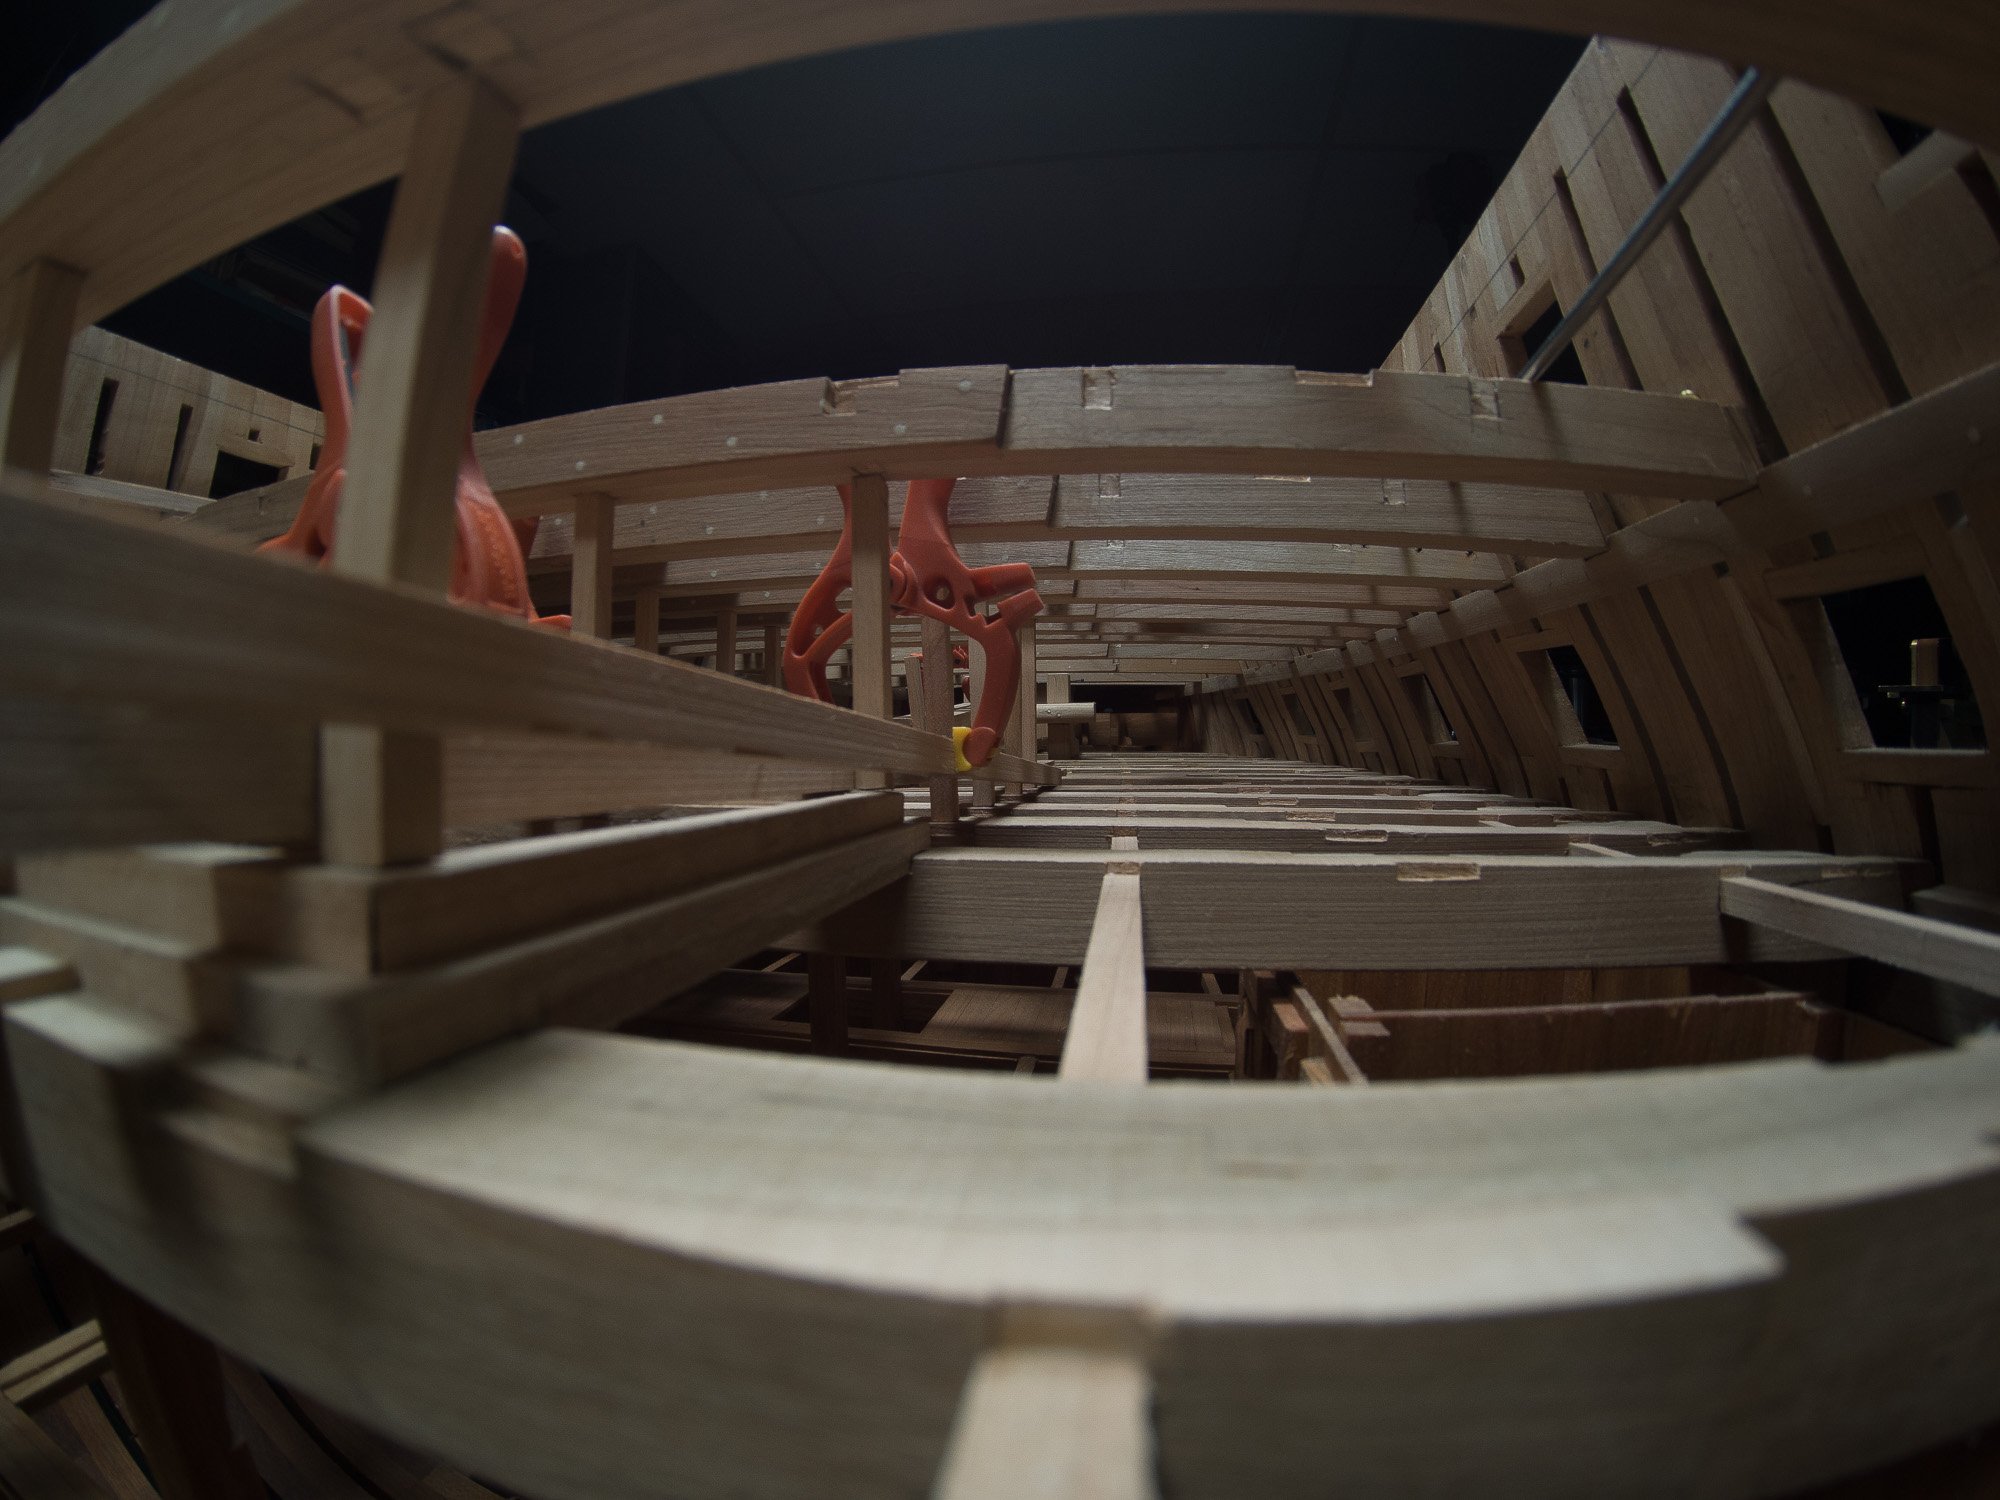
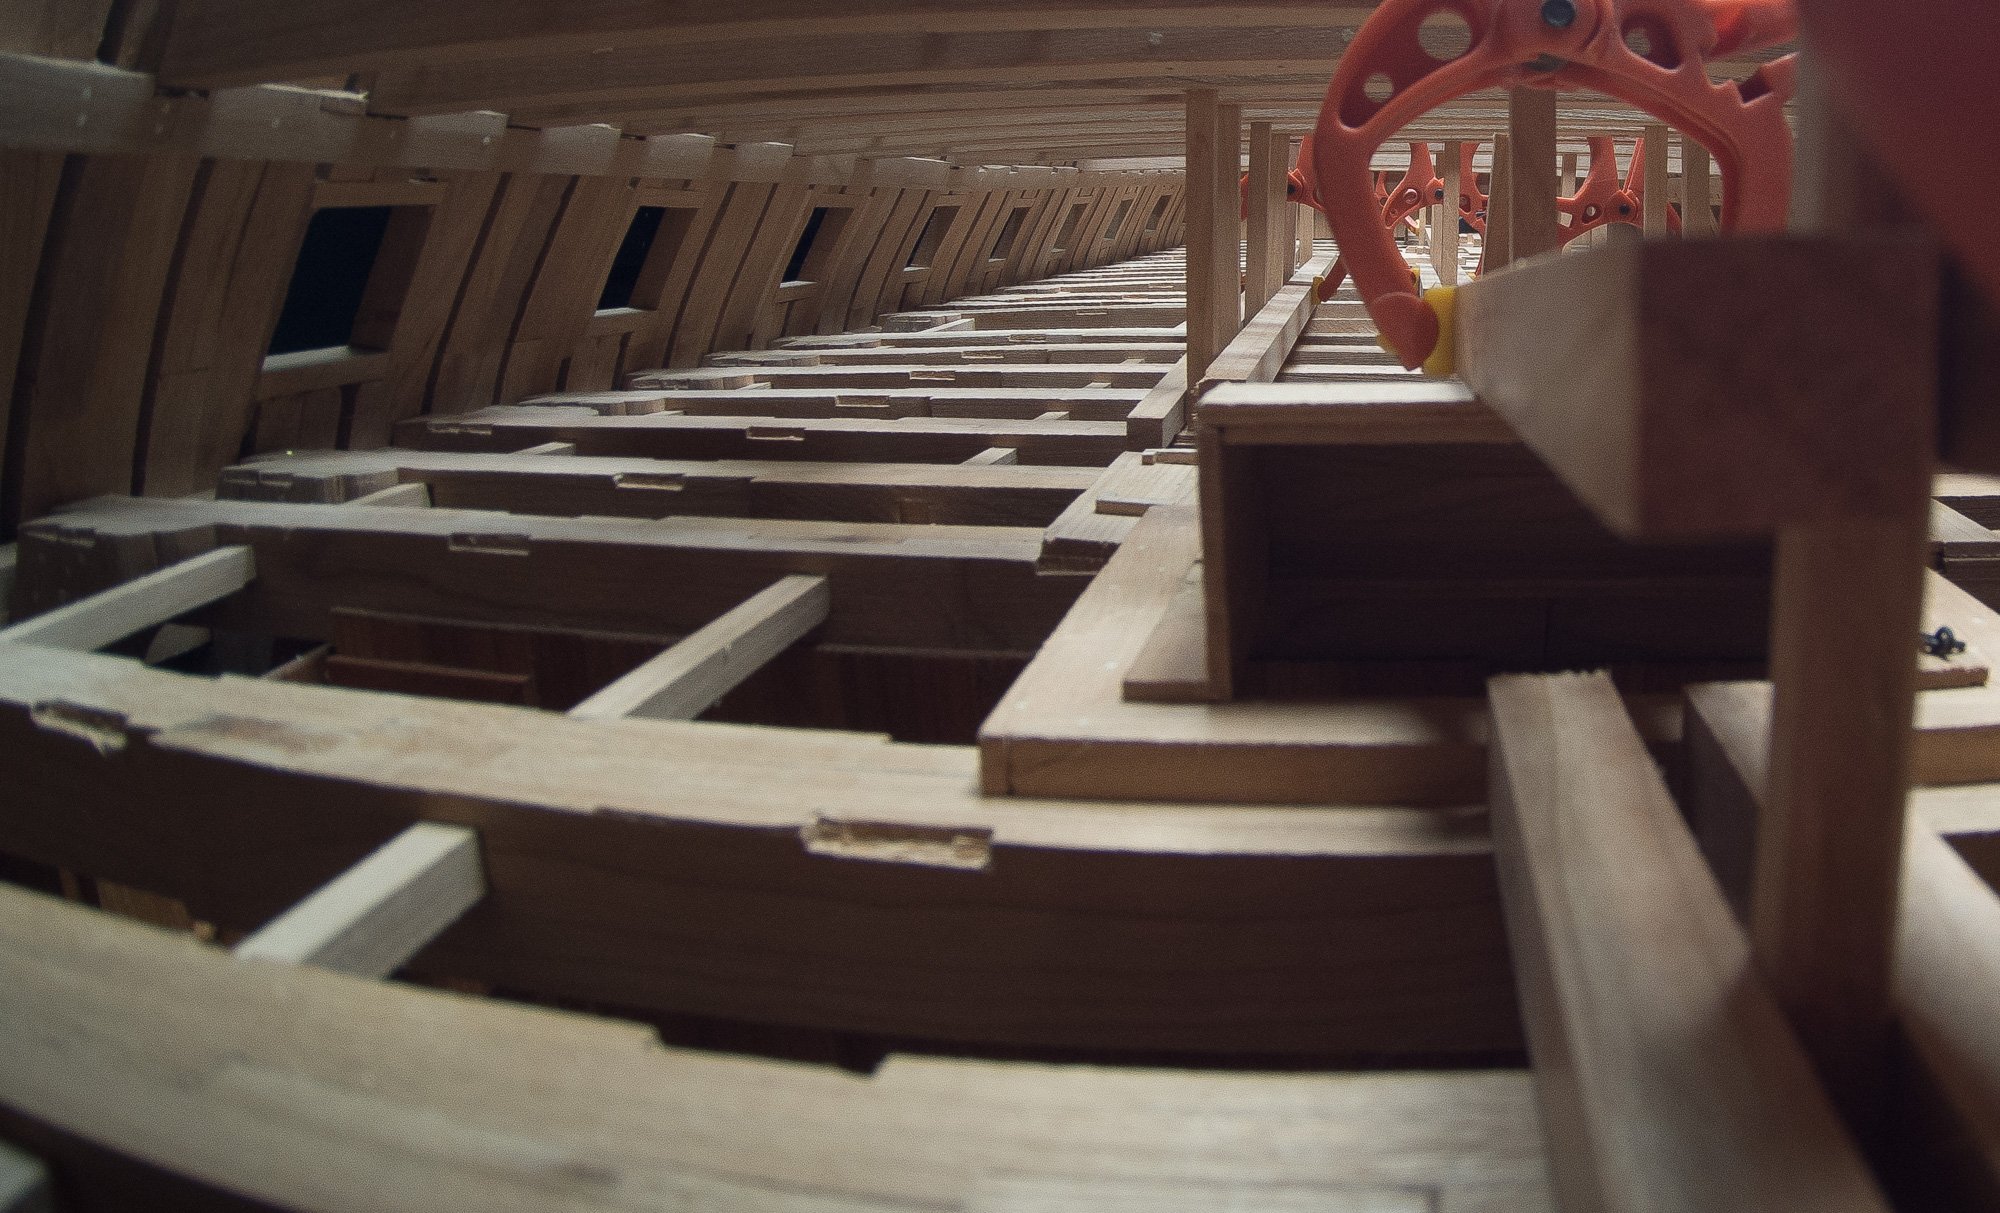
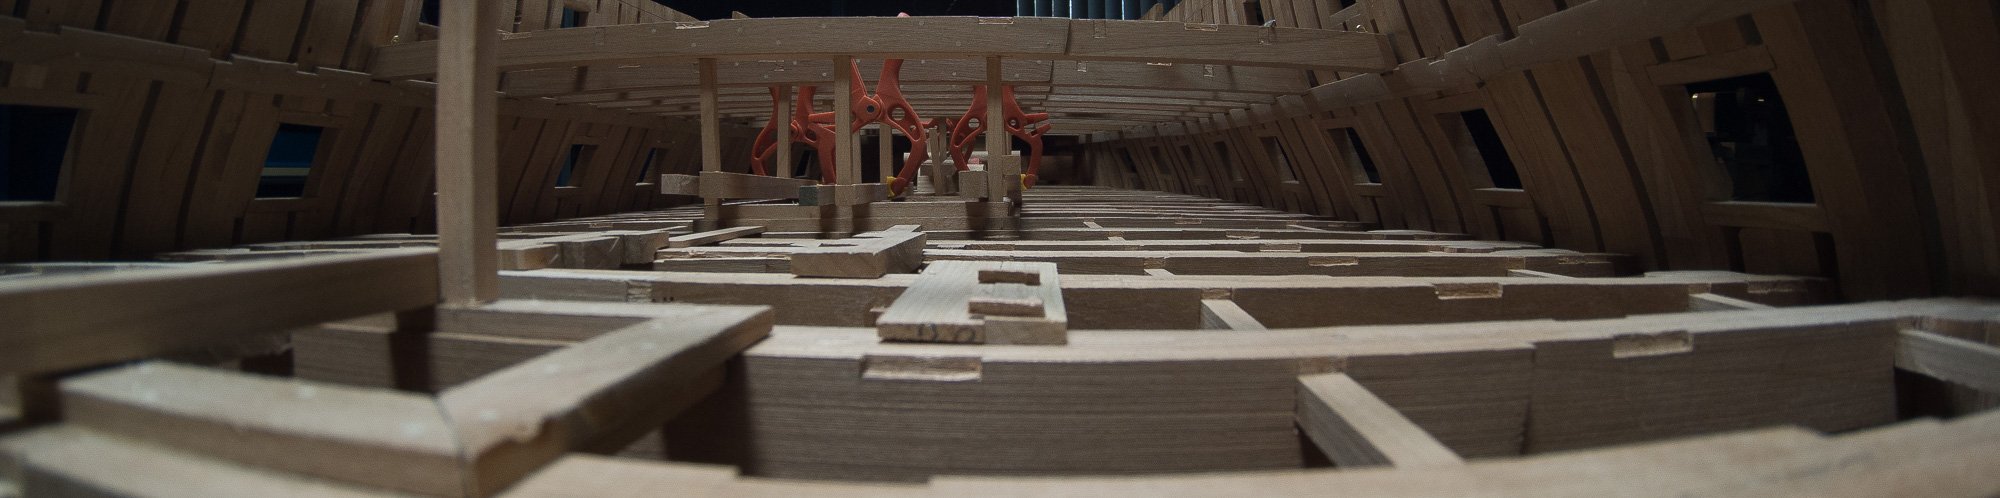
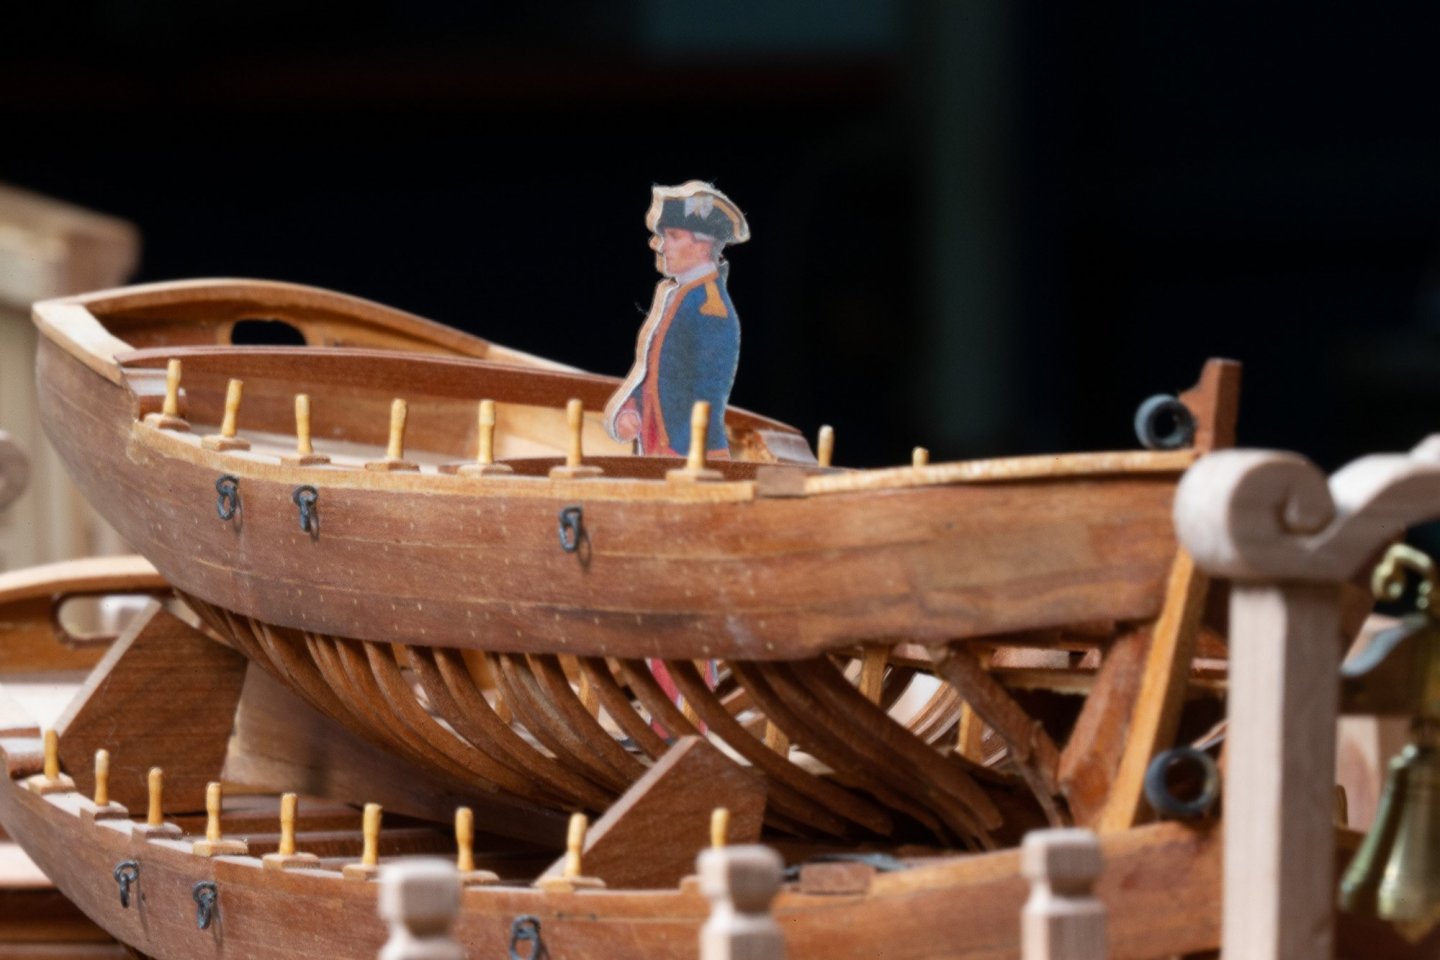
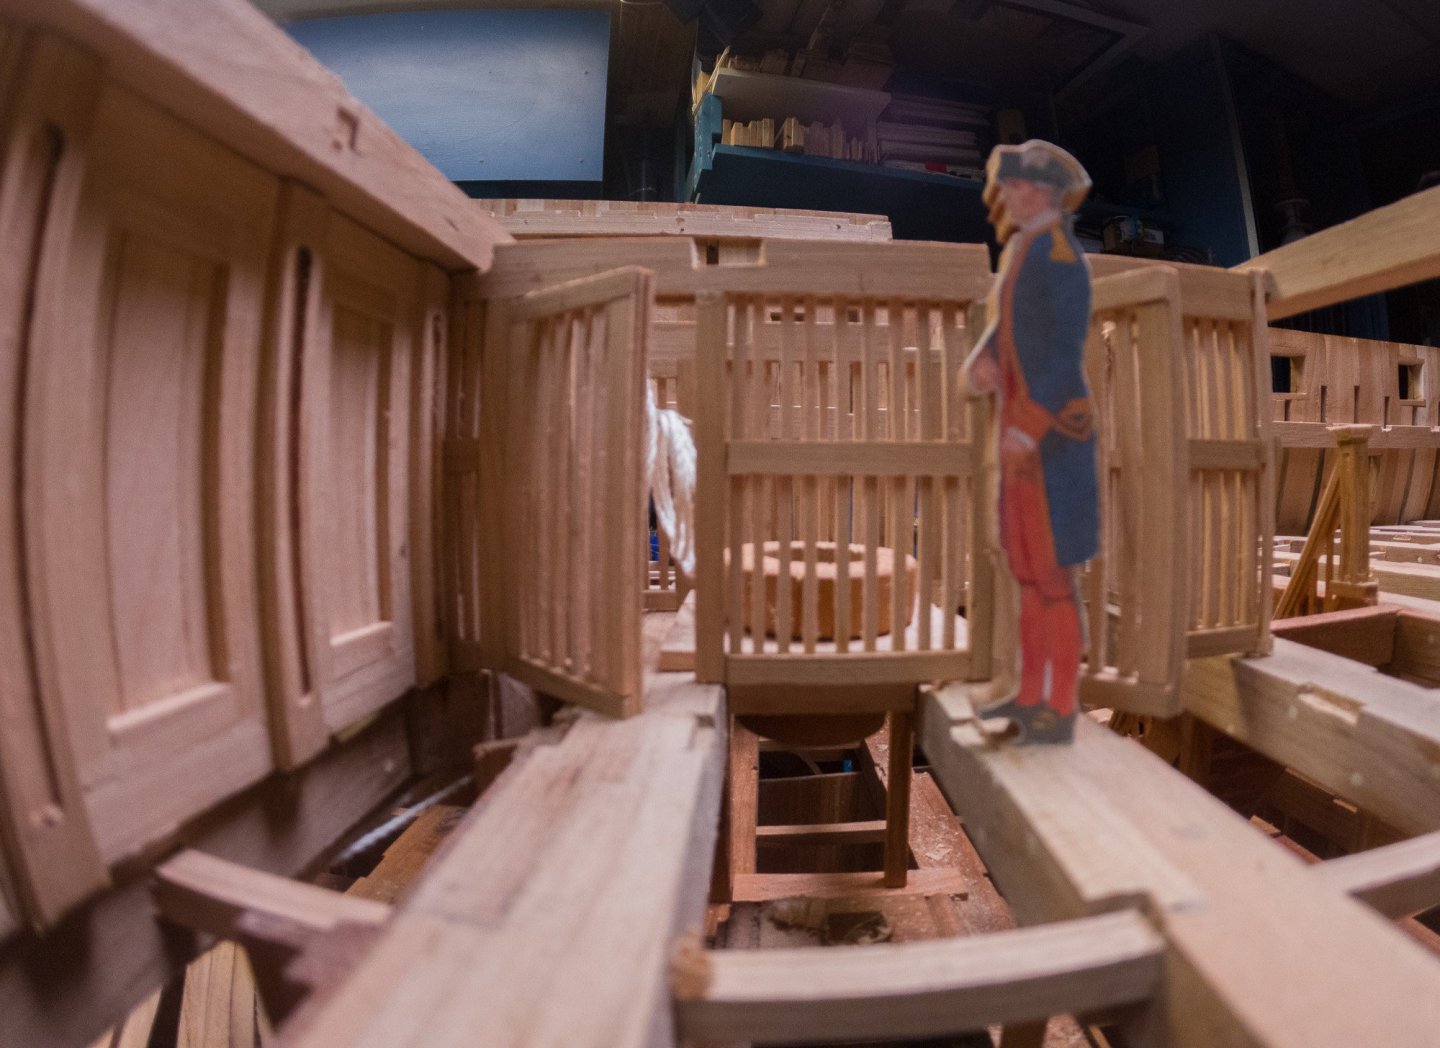
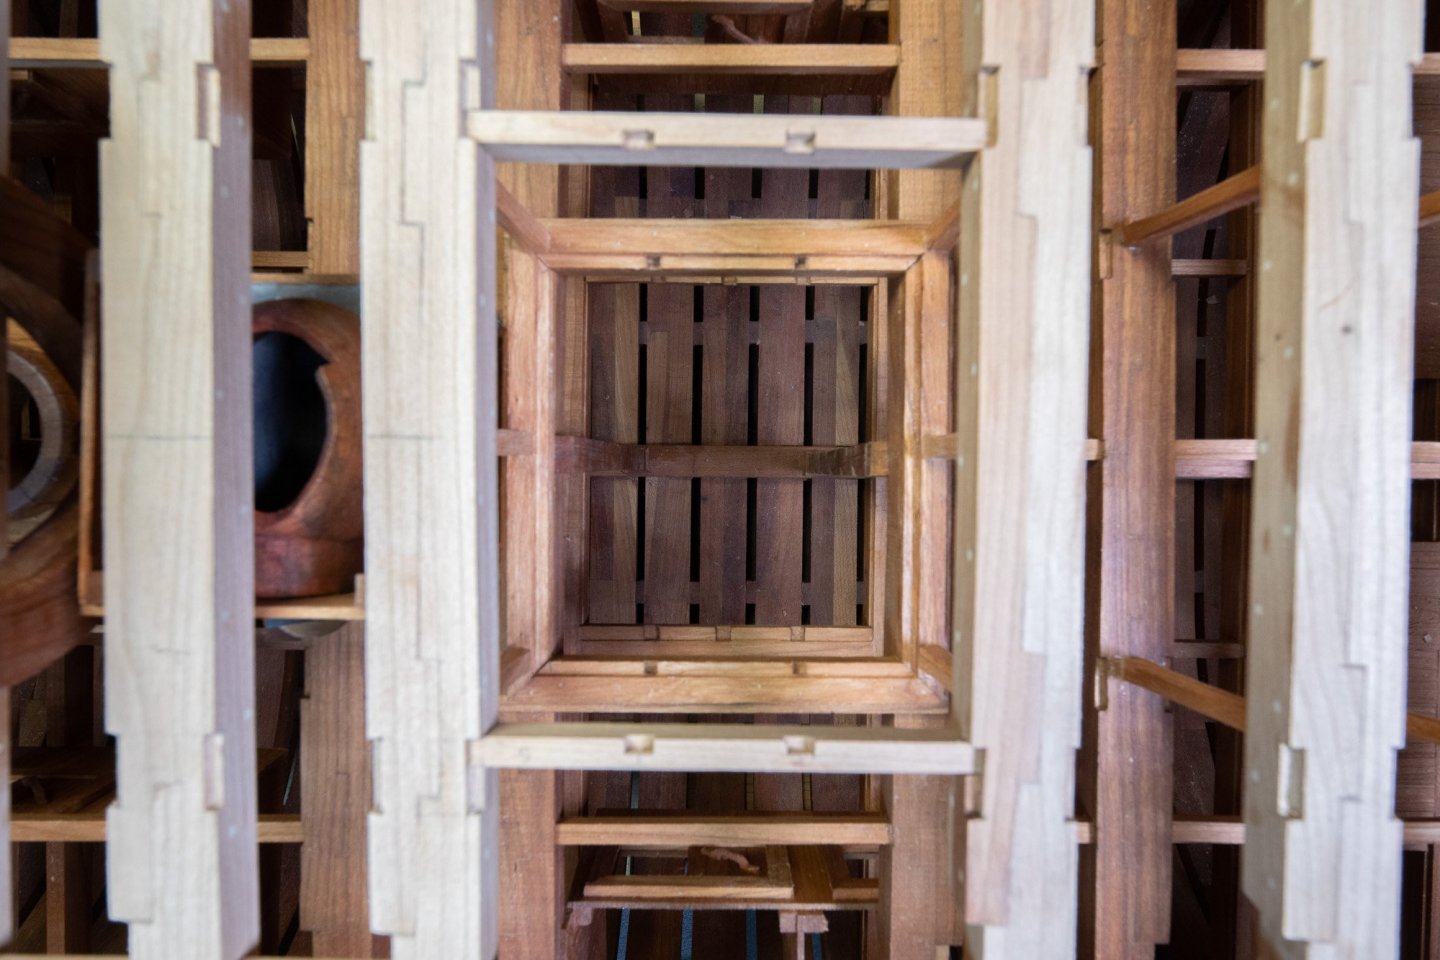
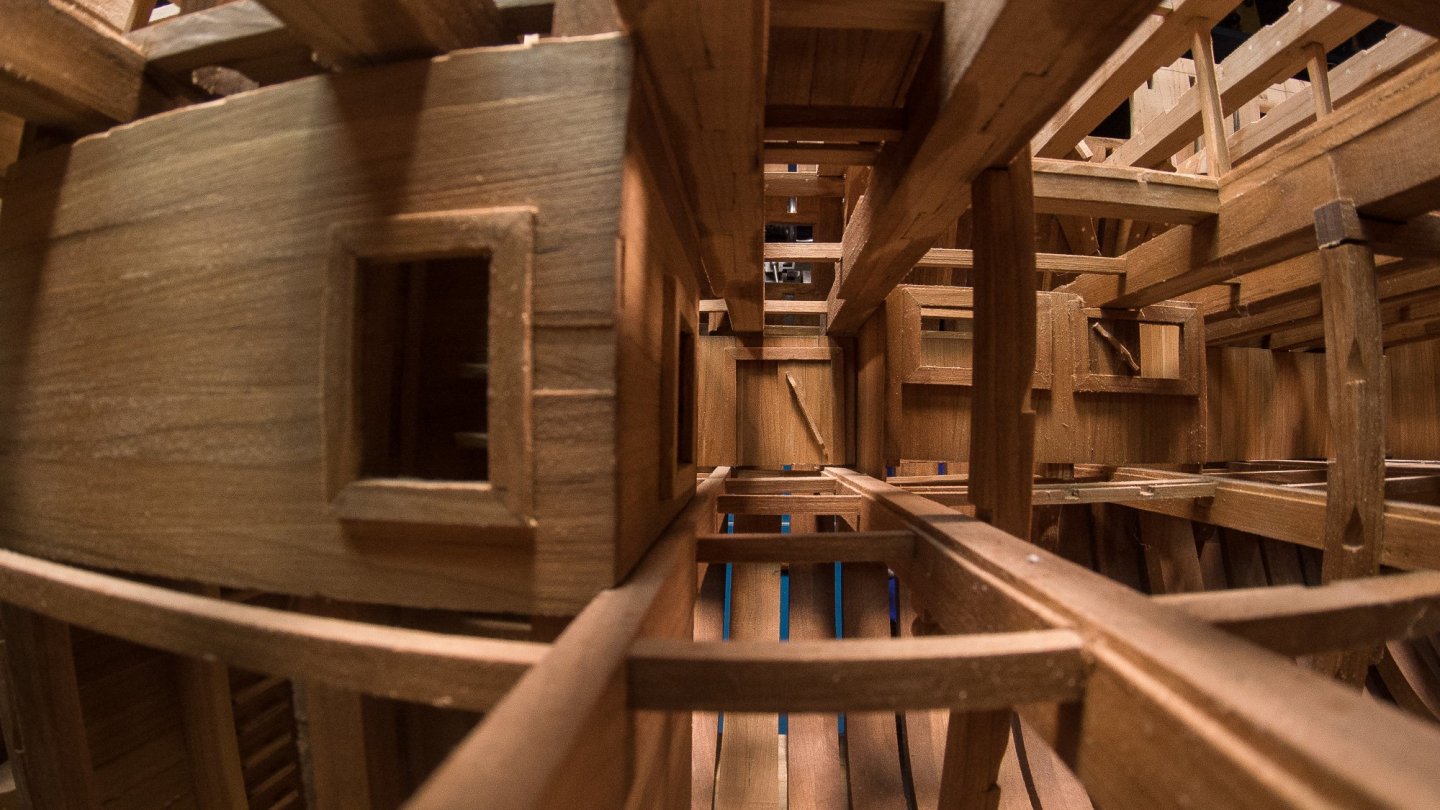
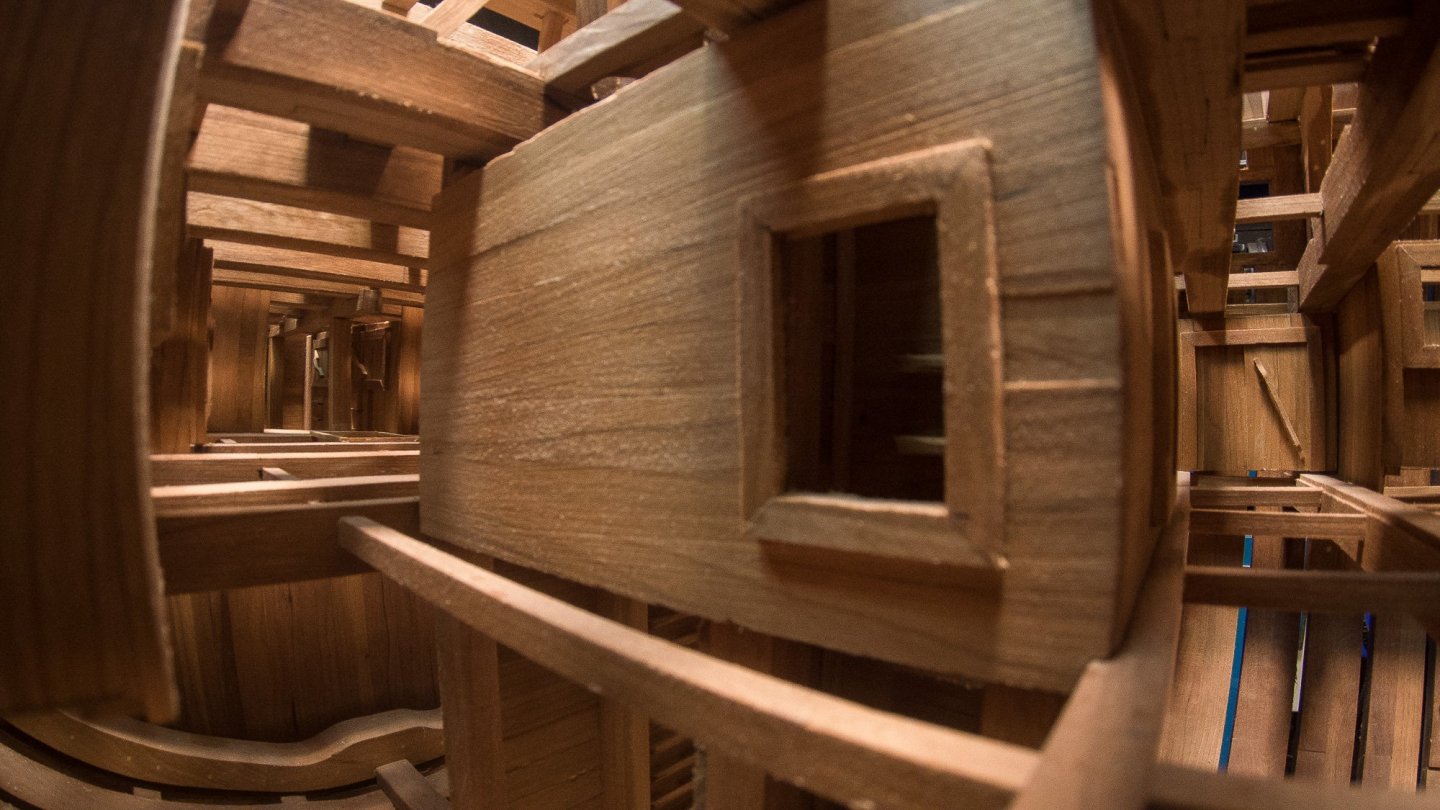
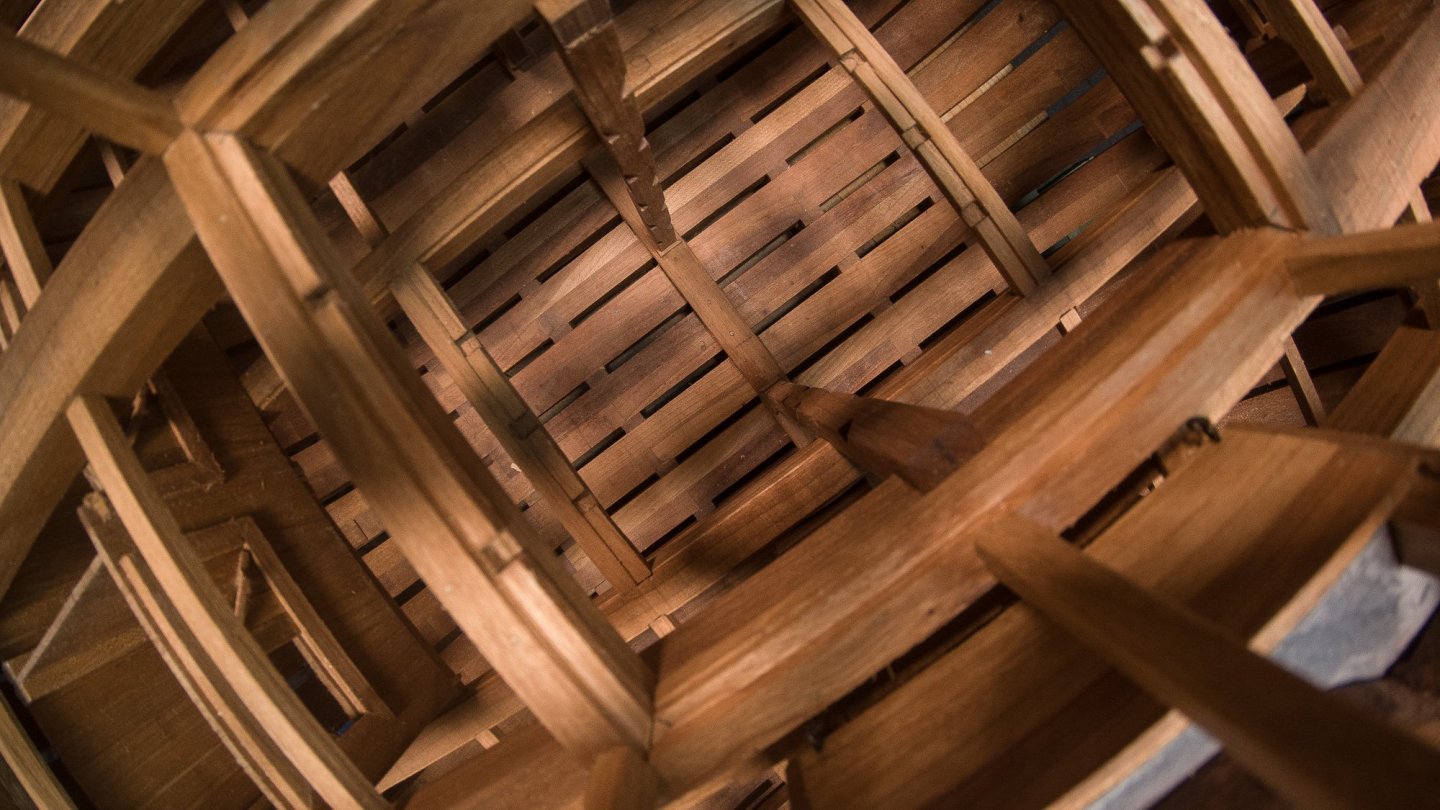
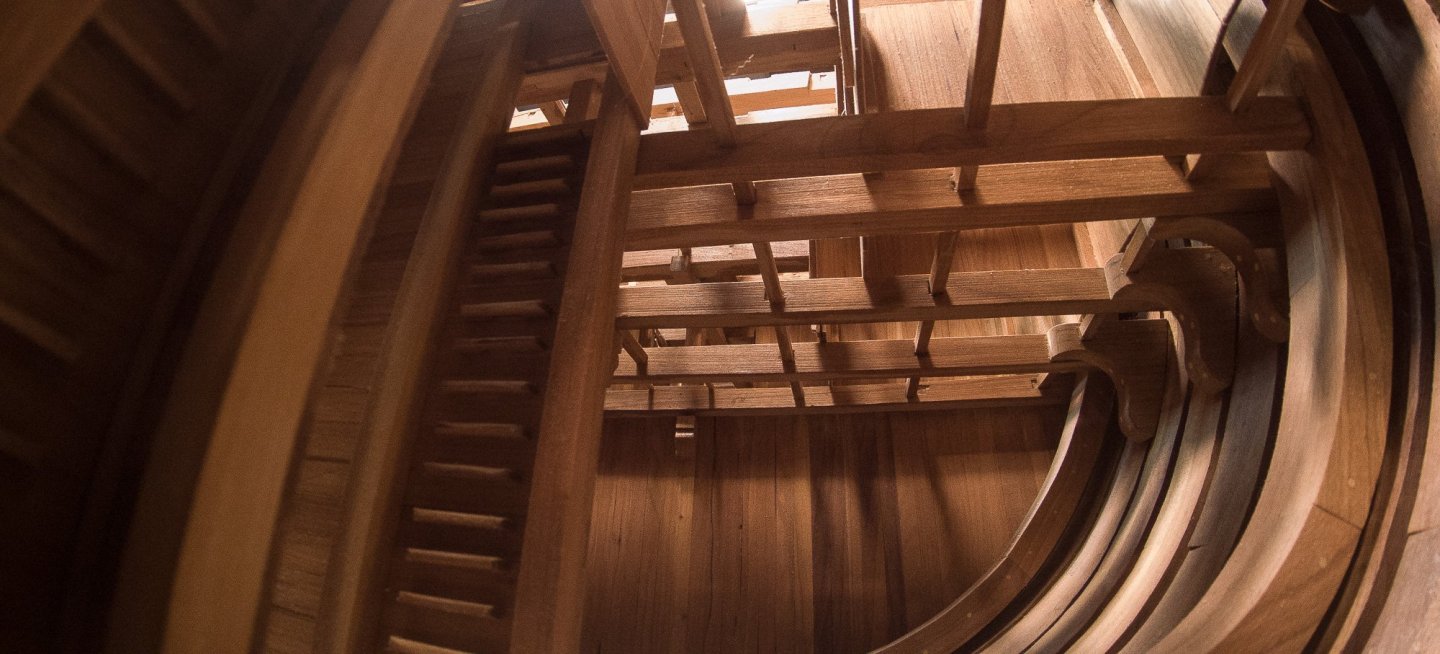
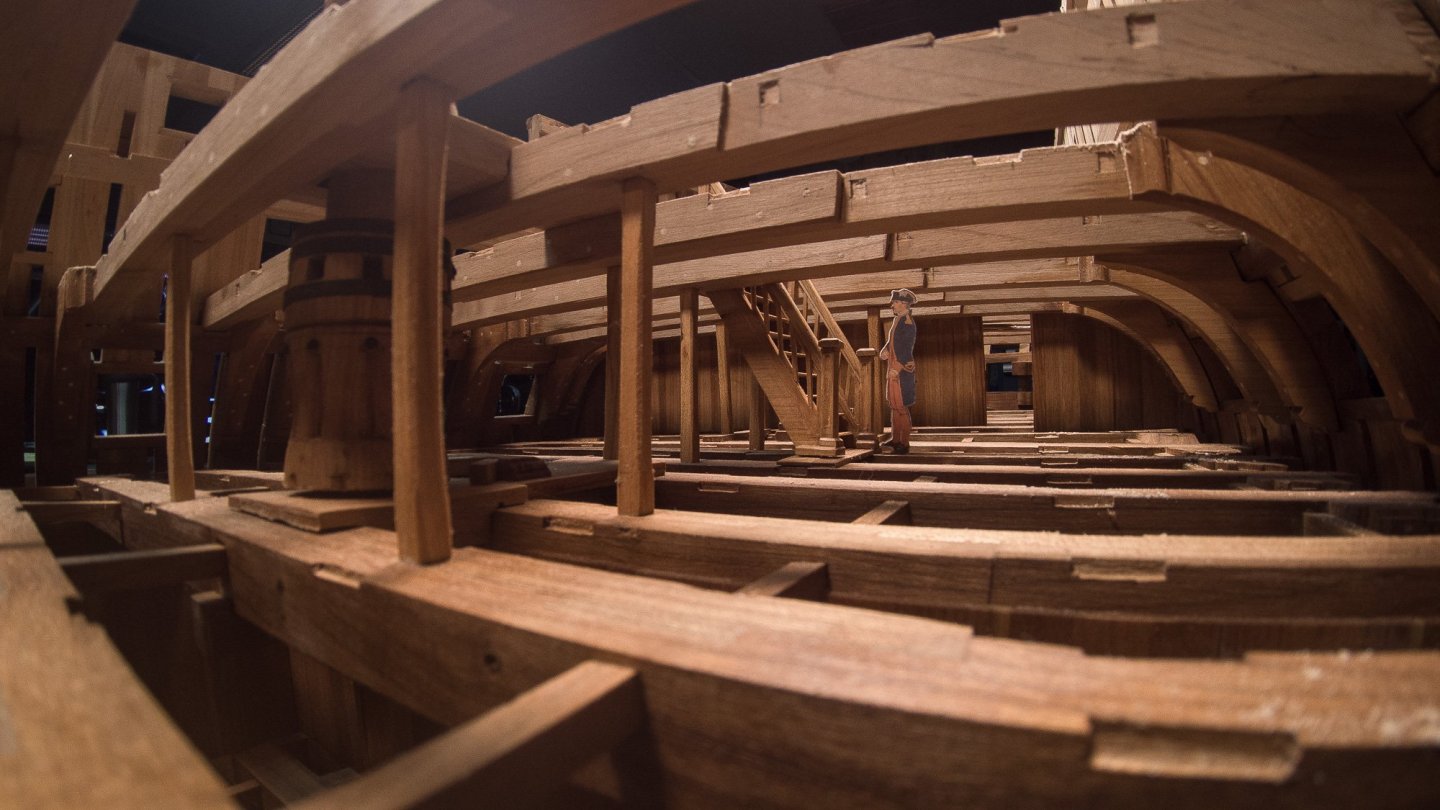
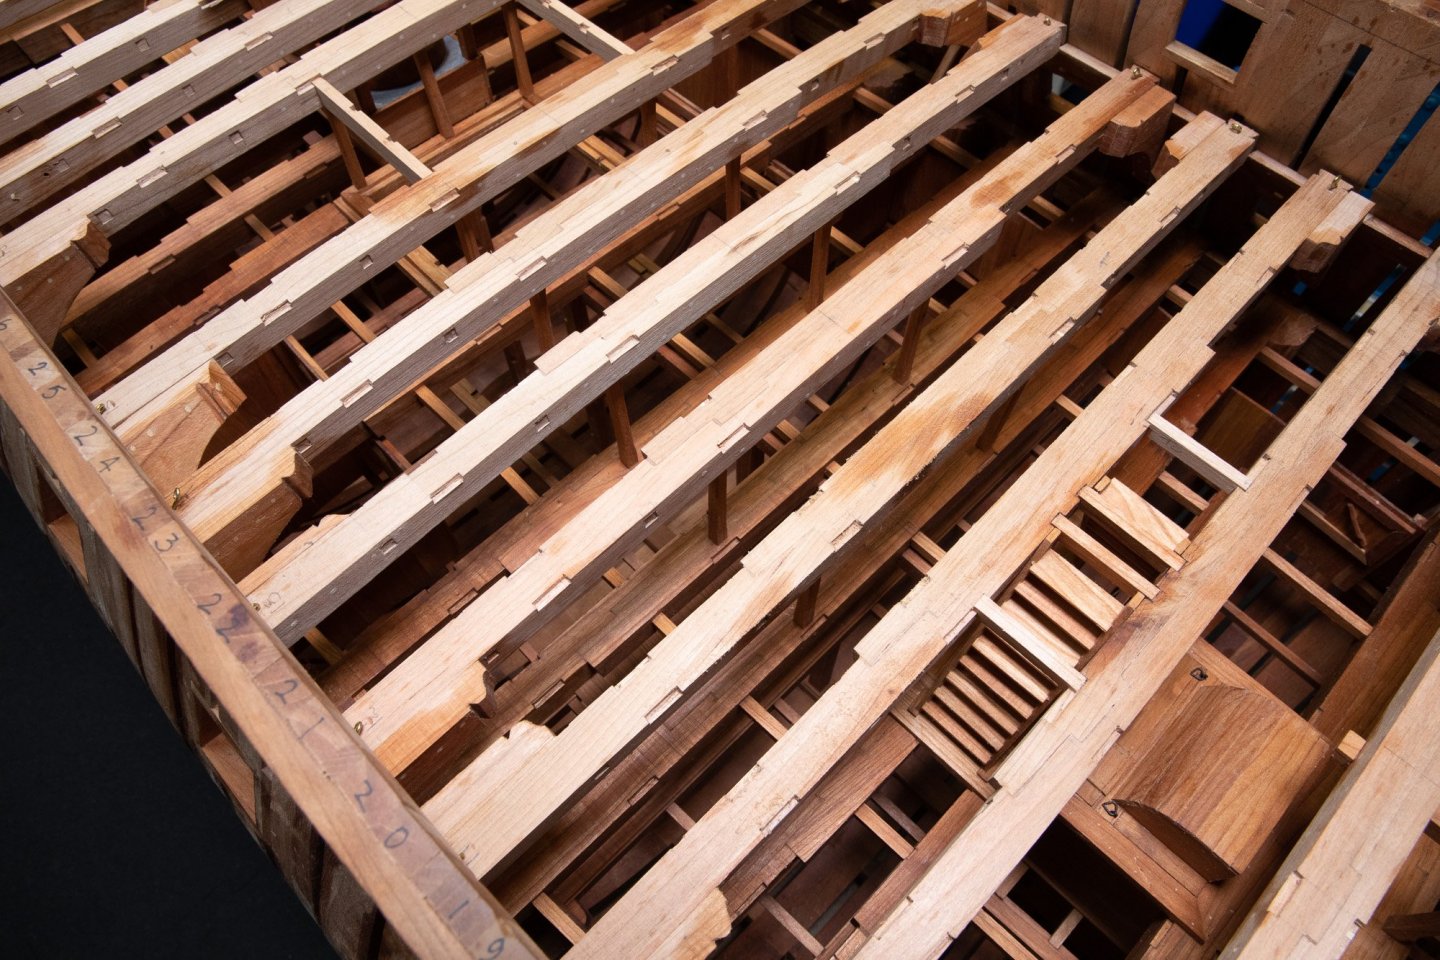
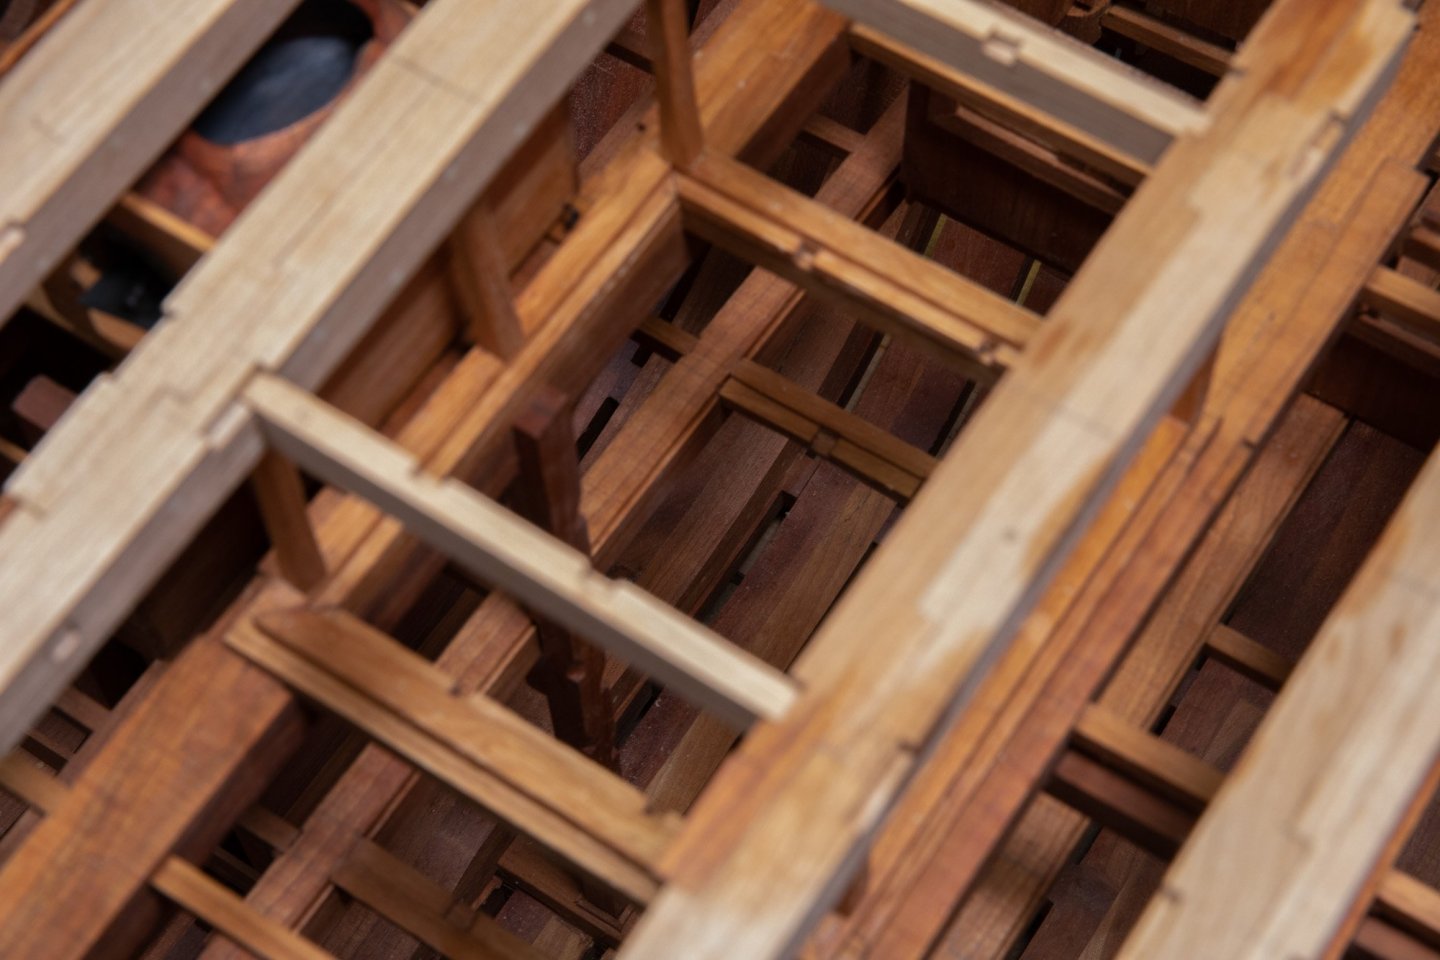
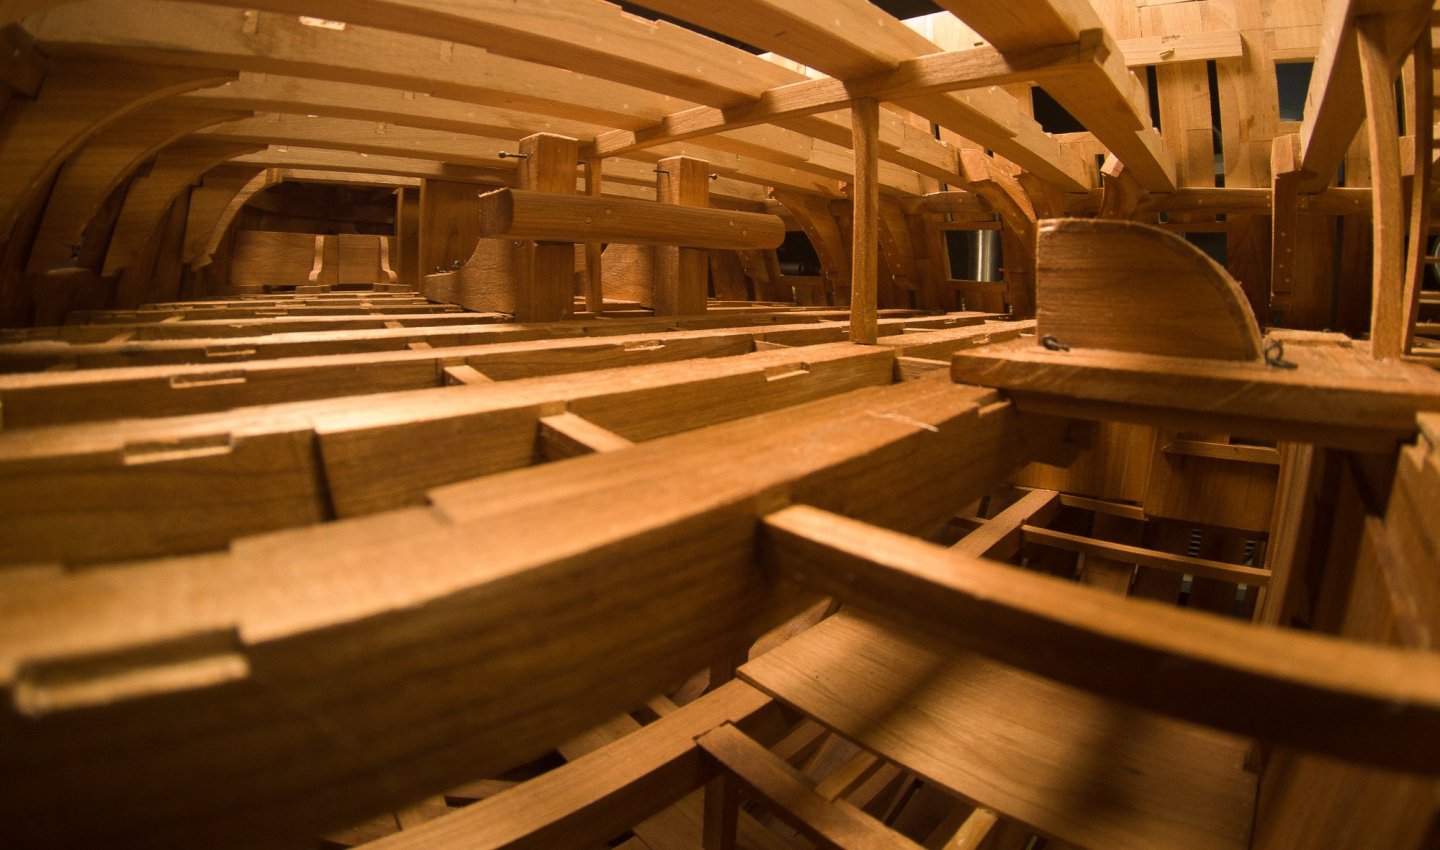
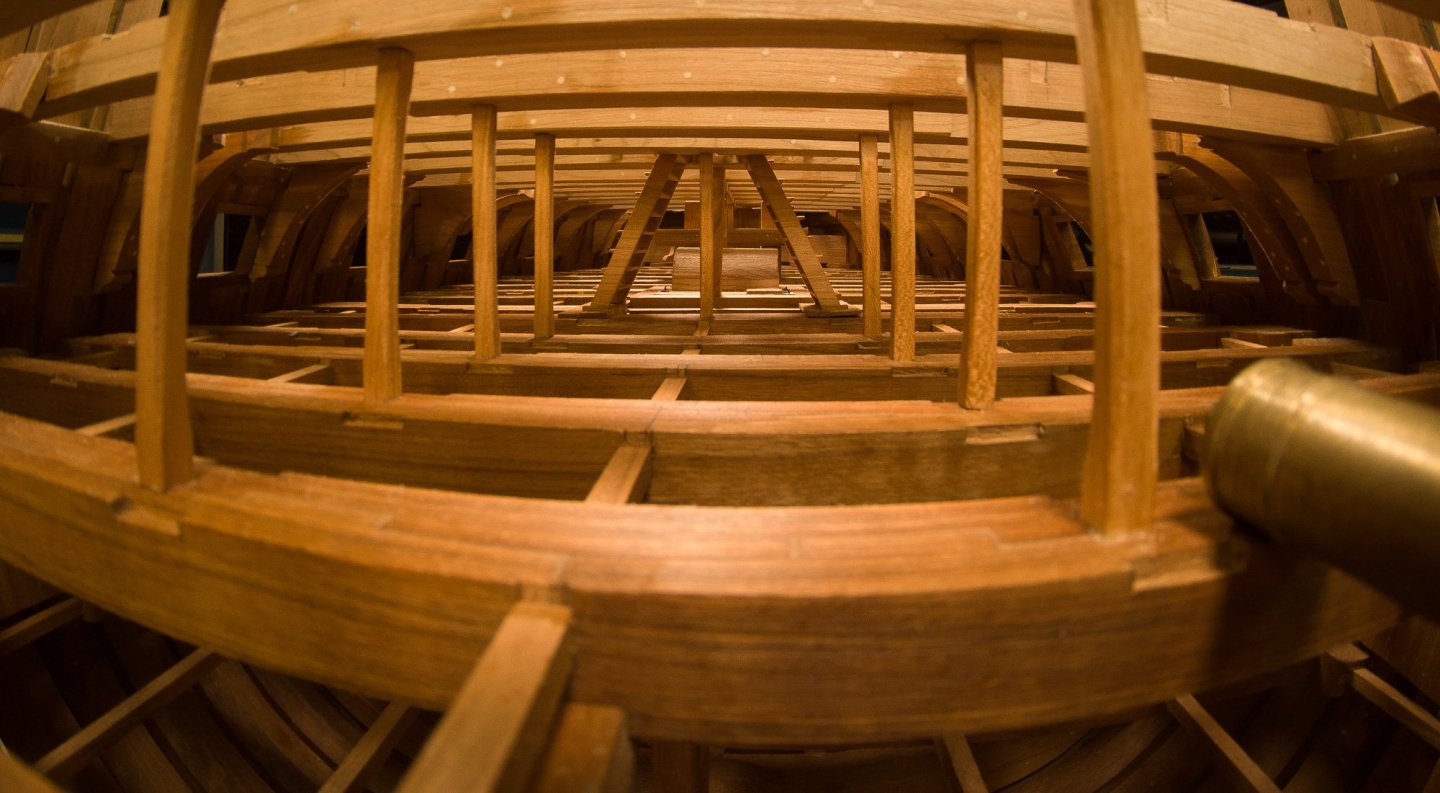
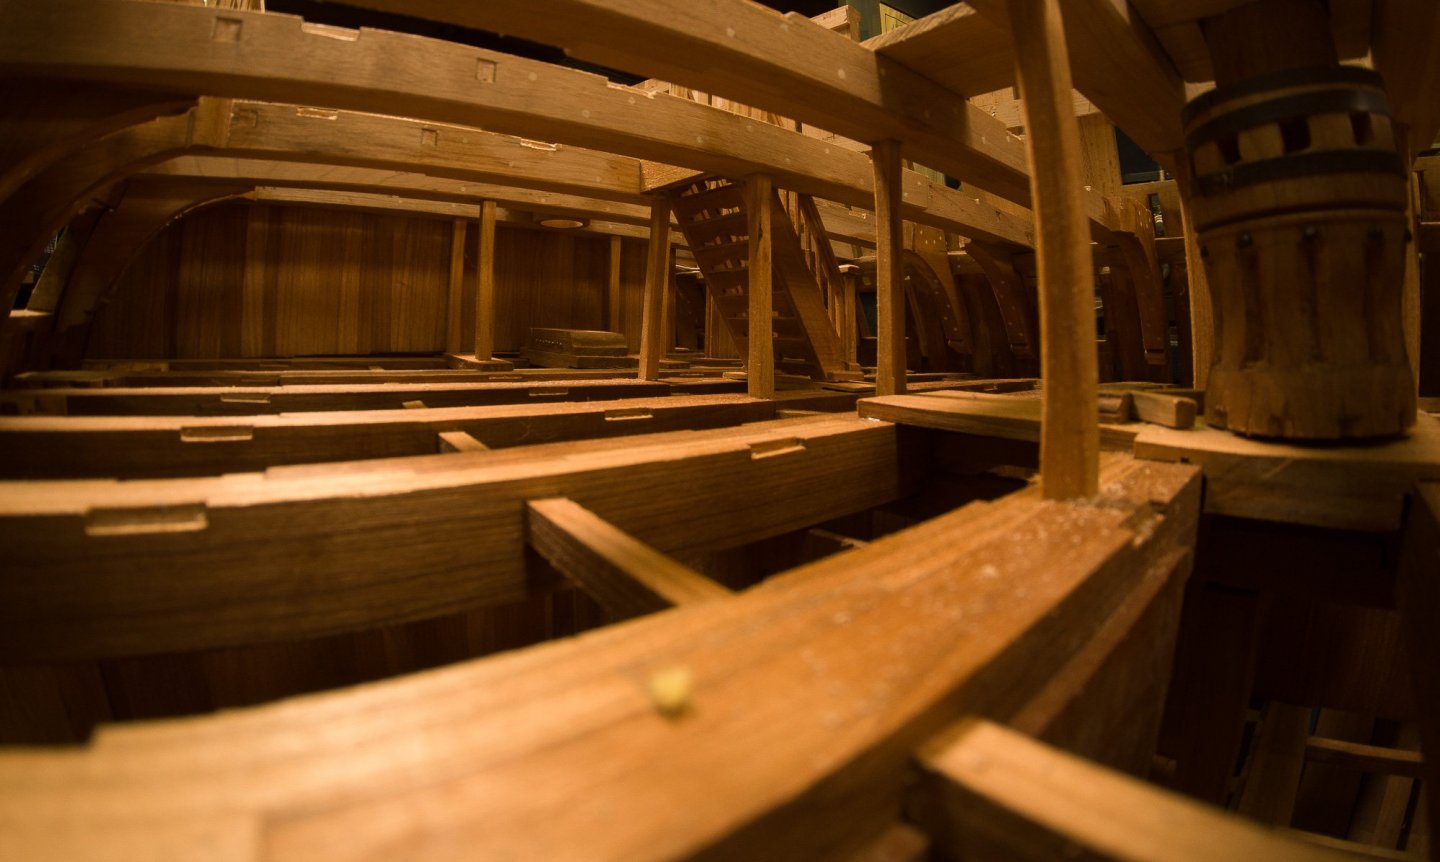
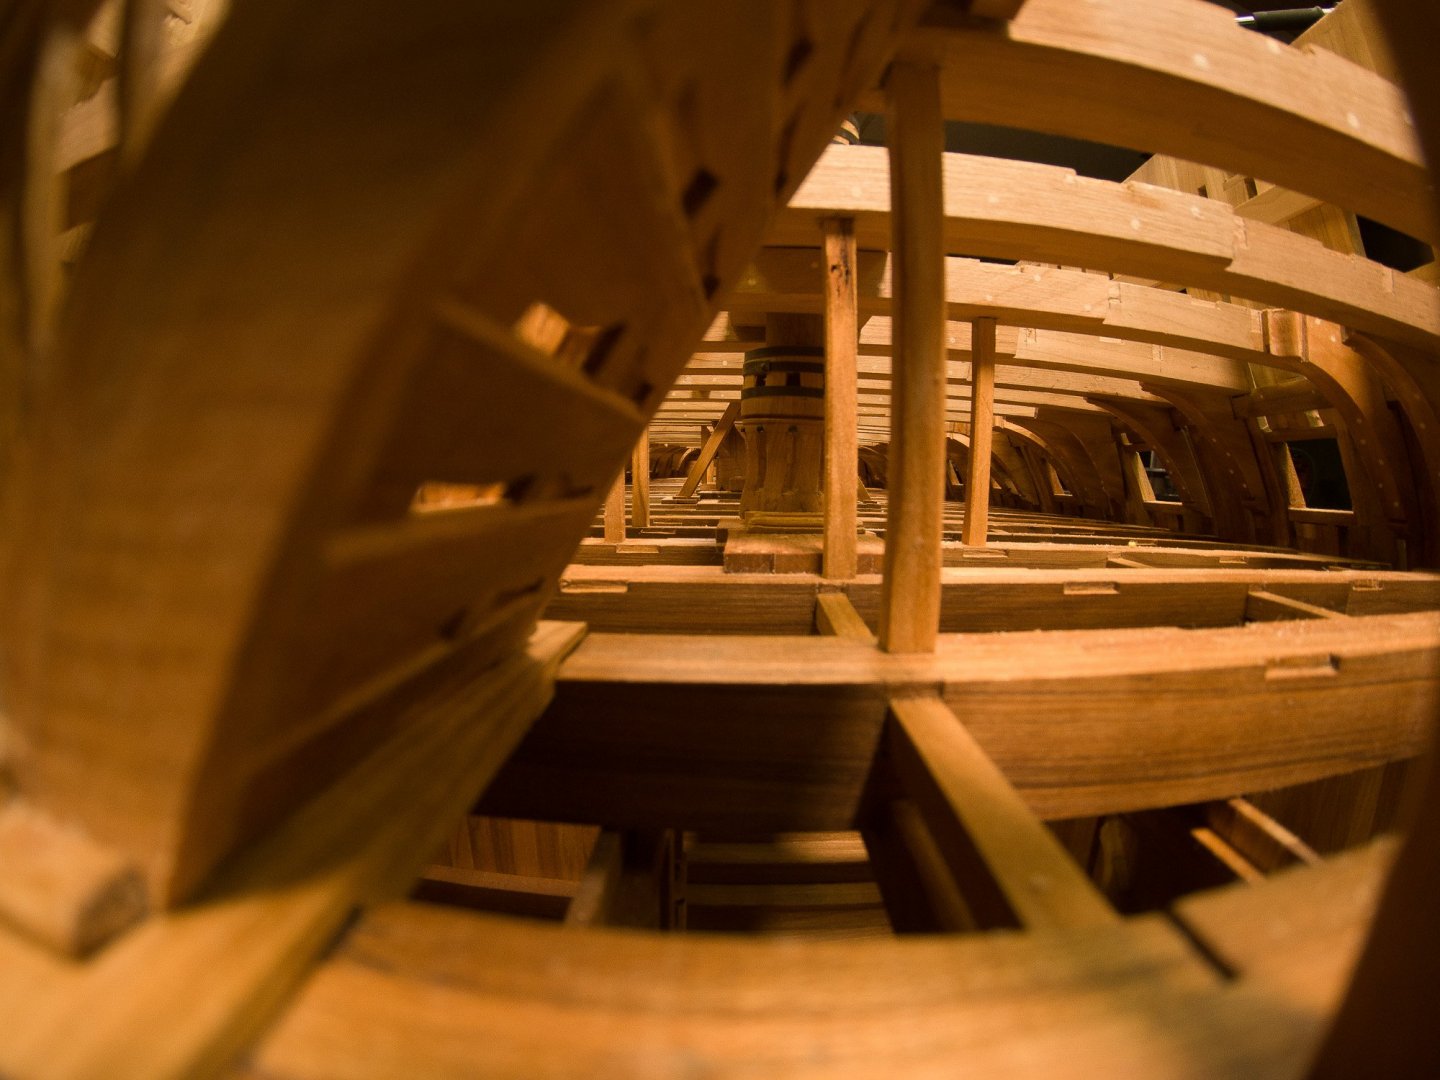
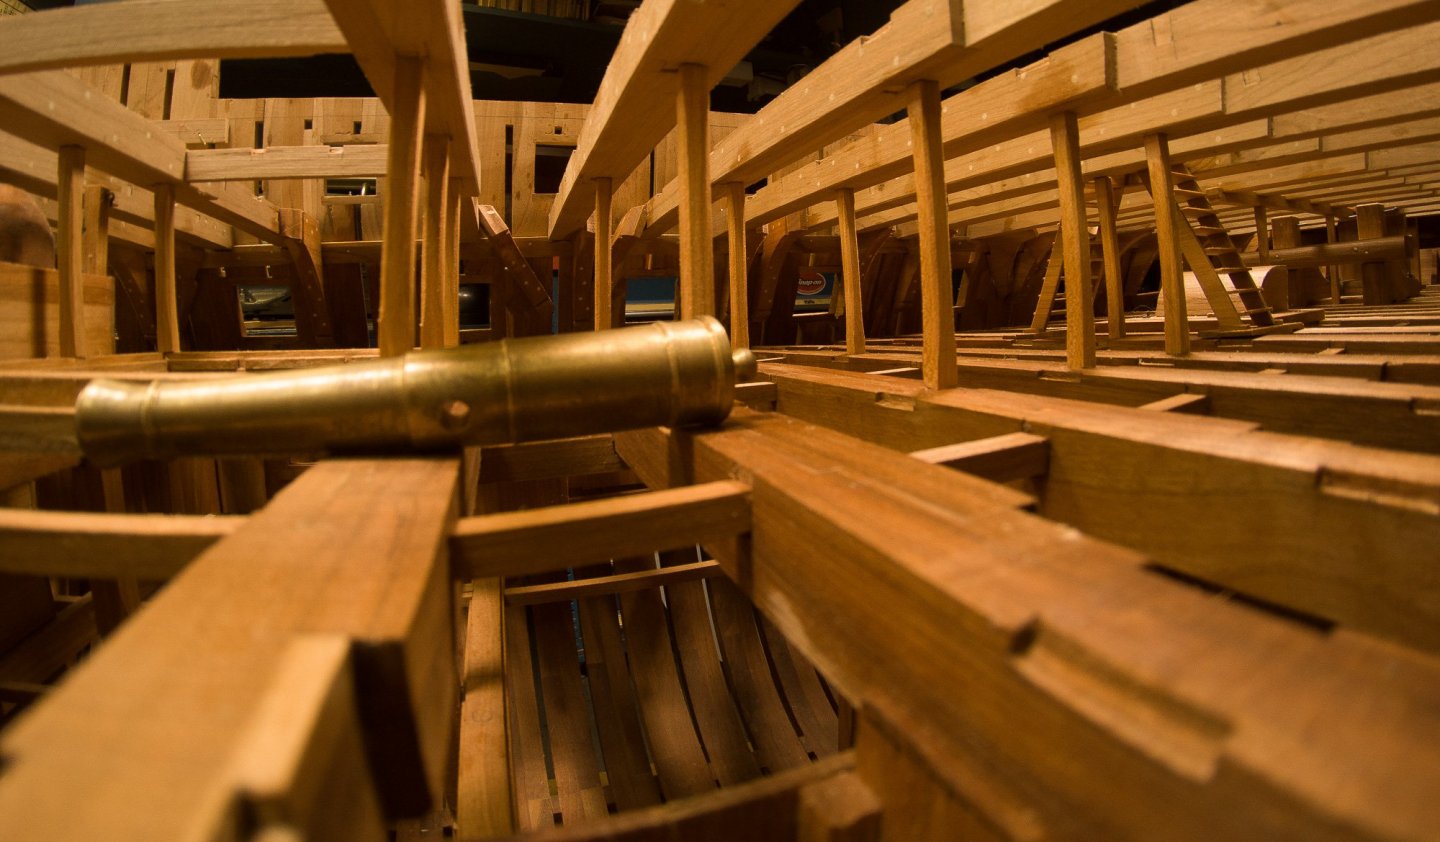
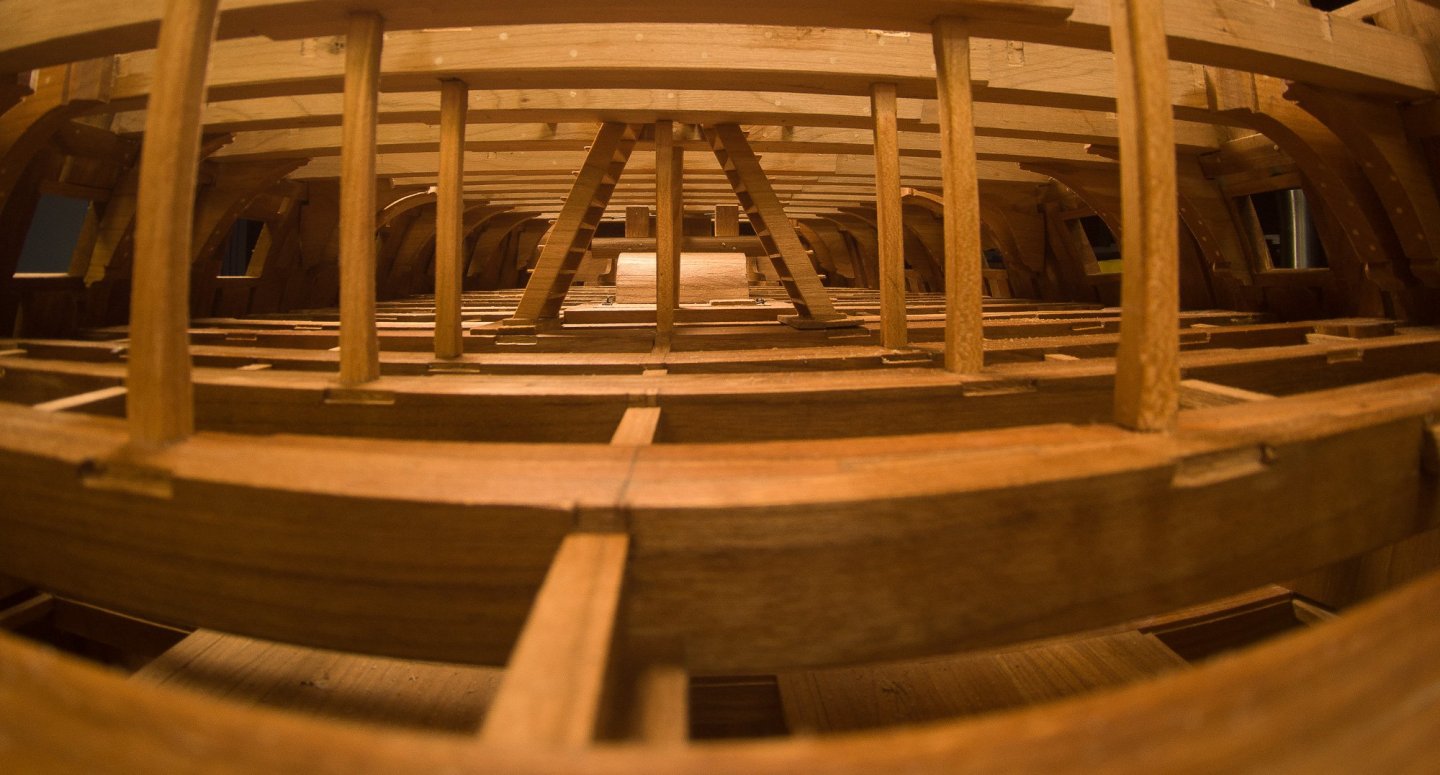
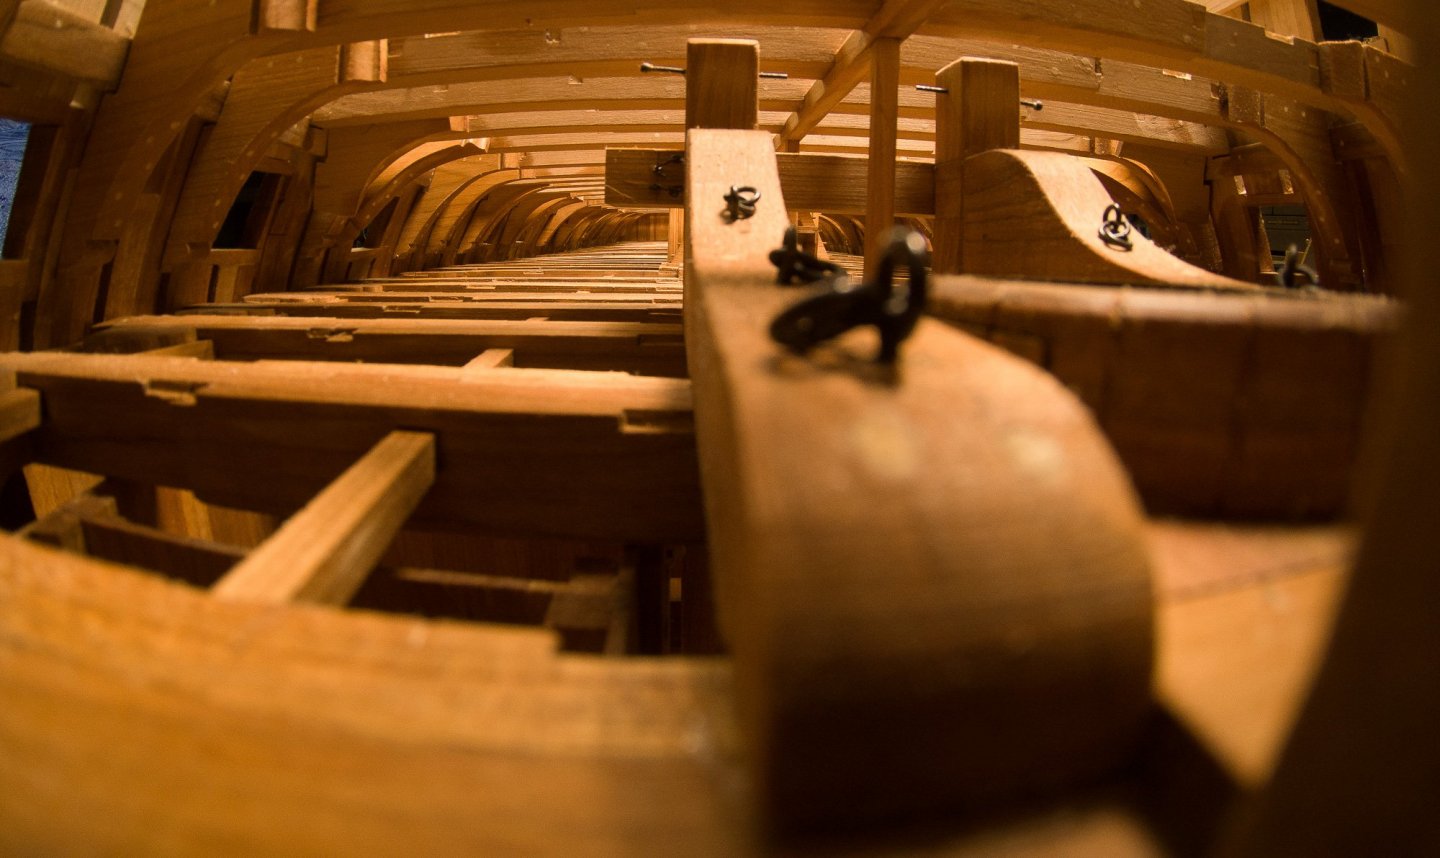
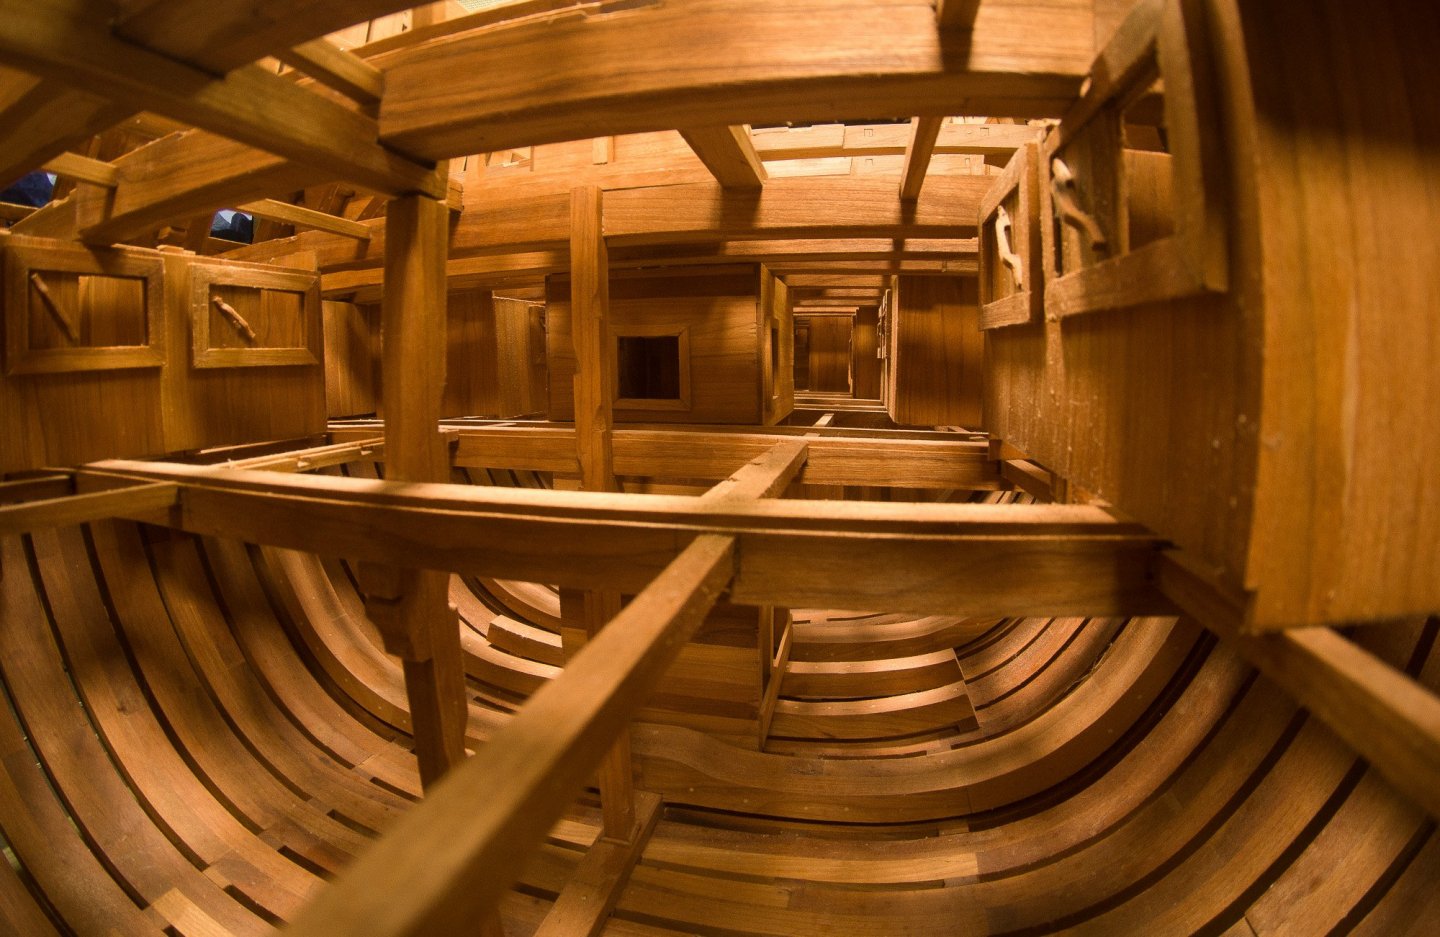
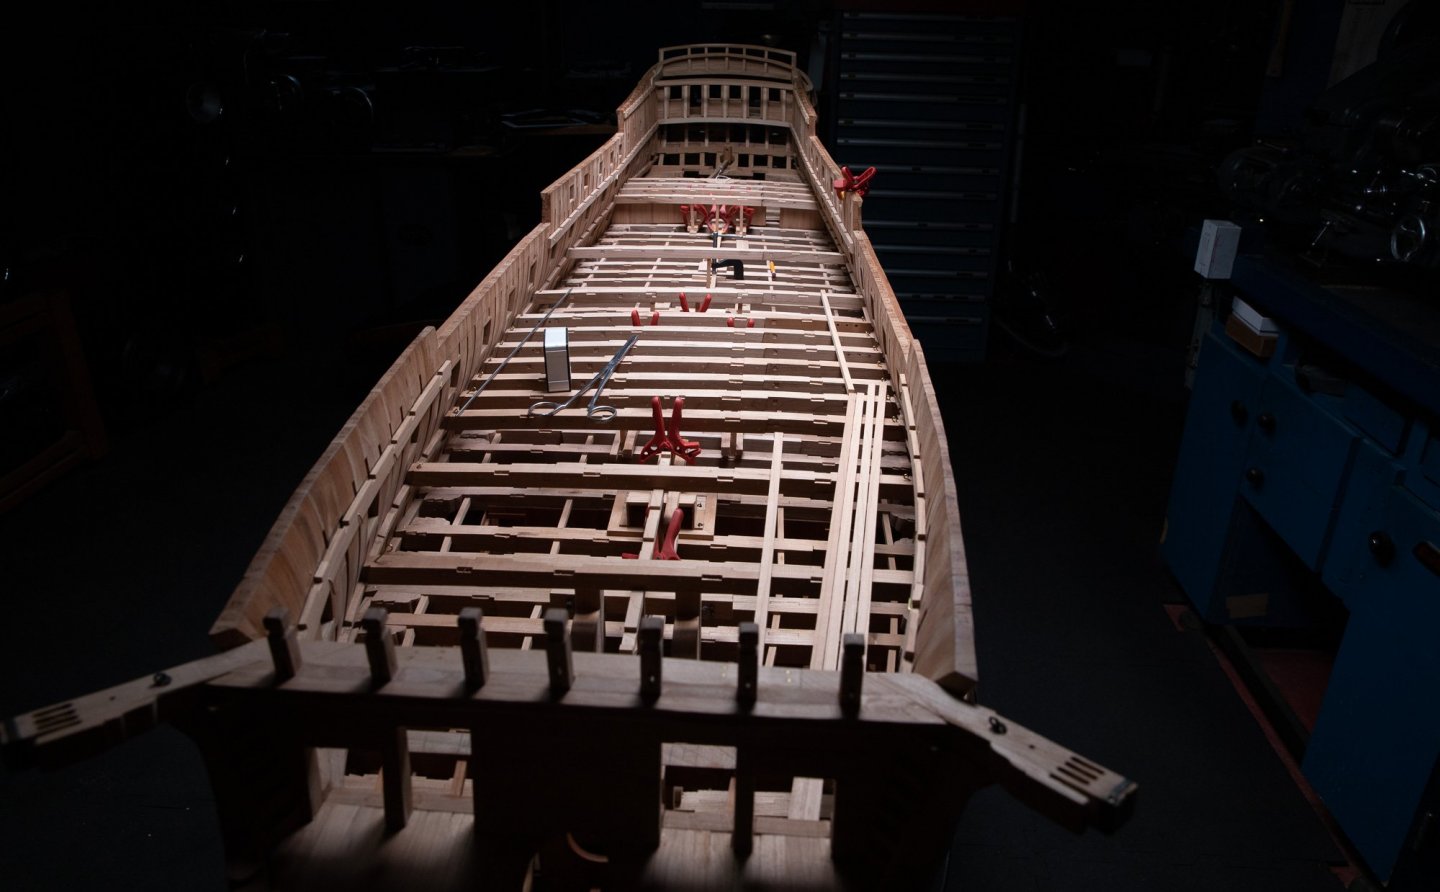
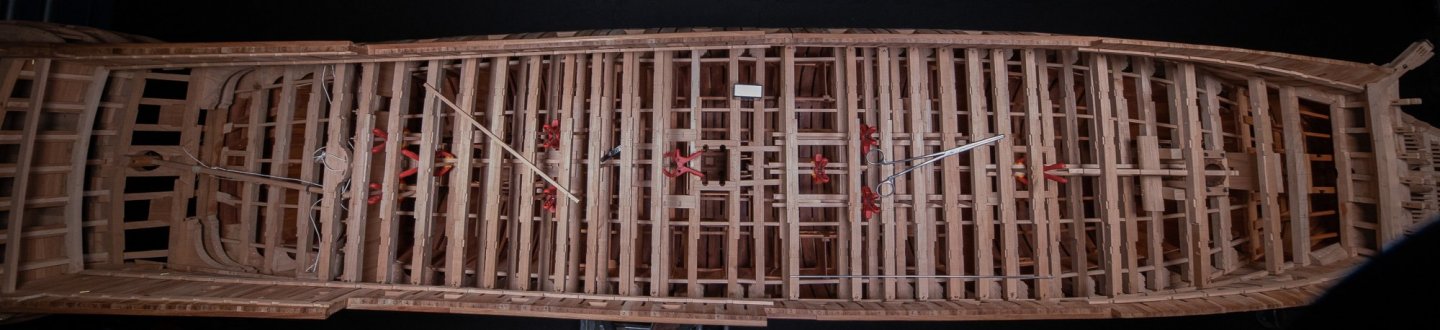
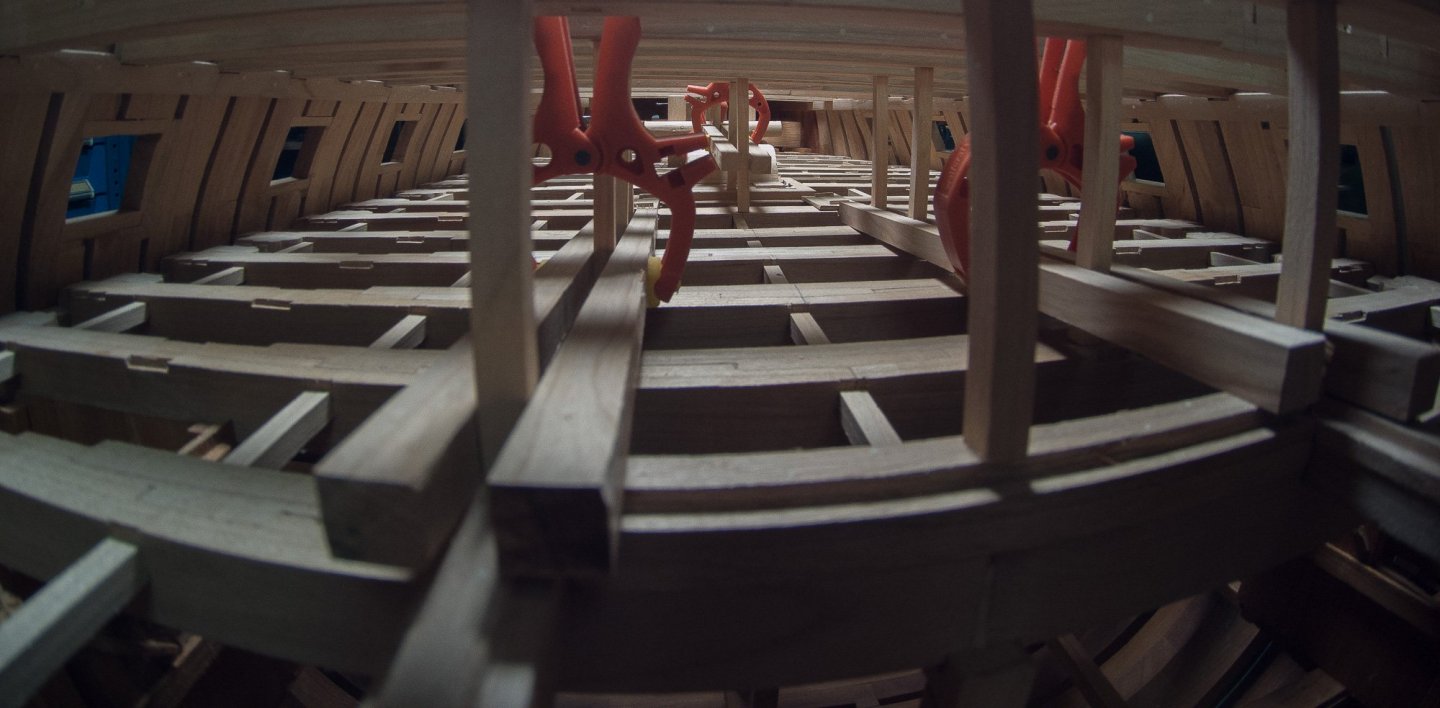
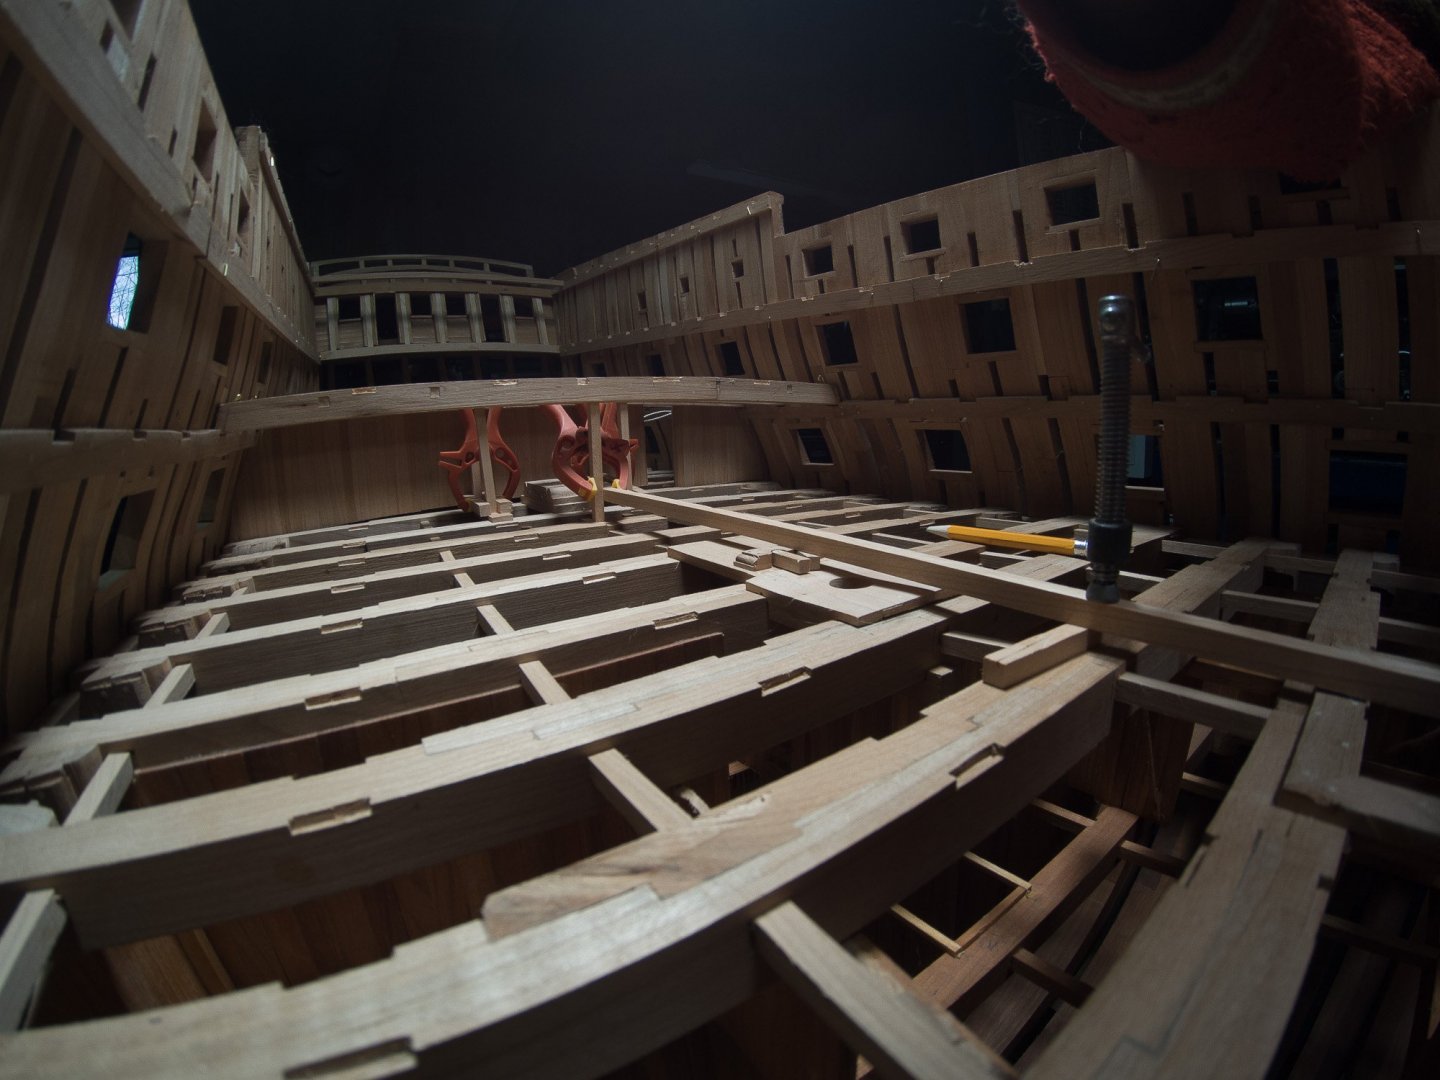
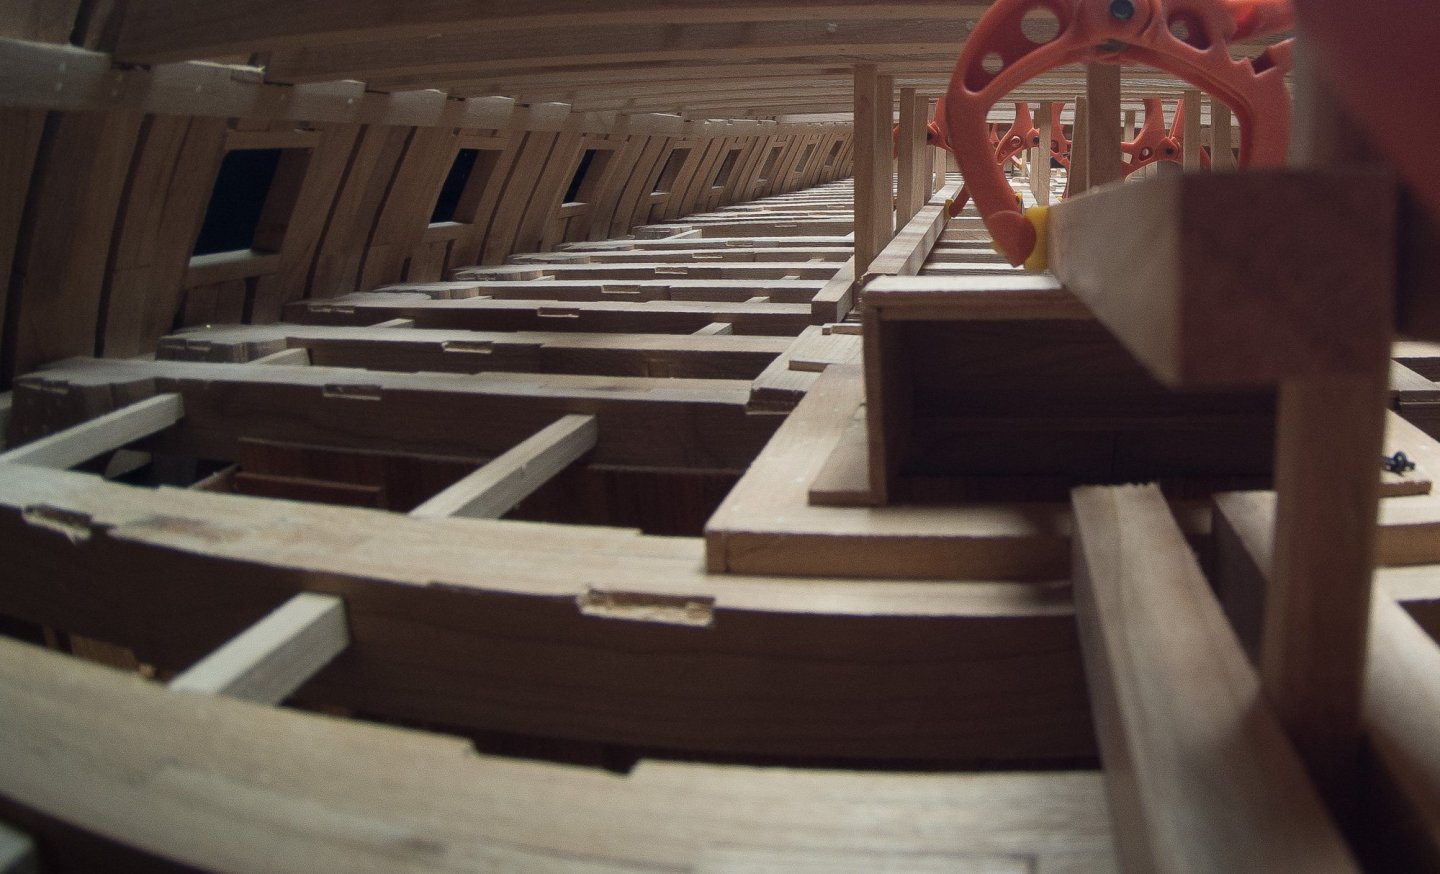
Thank you Michael But my photos are real stairs... In fact, one of the the predefined goals for this build, is to be able to see inside the model ship. The first thing to get there; no deck planking; that is the easy part. trying to capture some photographs showing this, is a different approach. I am exploring 3 ways to look inside: from the top at an angle between 30 and 45 degrees to try to see multi level decks. Finding the perfect angle is not easy. Lastly photos inside the model with a small camera. In fact, the inspiration probably came a long time ago, when I saw the 3D drawings of Boudriot in the 74 guns books which have many of these kinds of drawings which are "spectacular " to see.


-
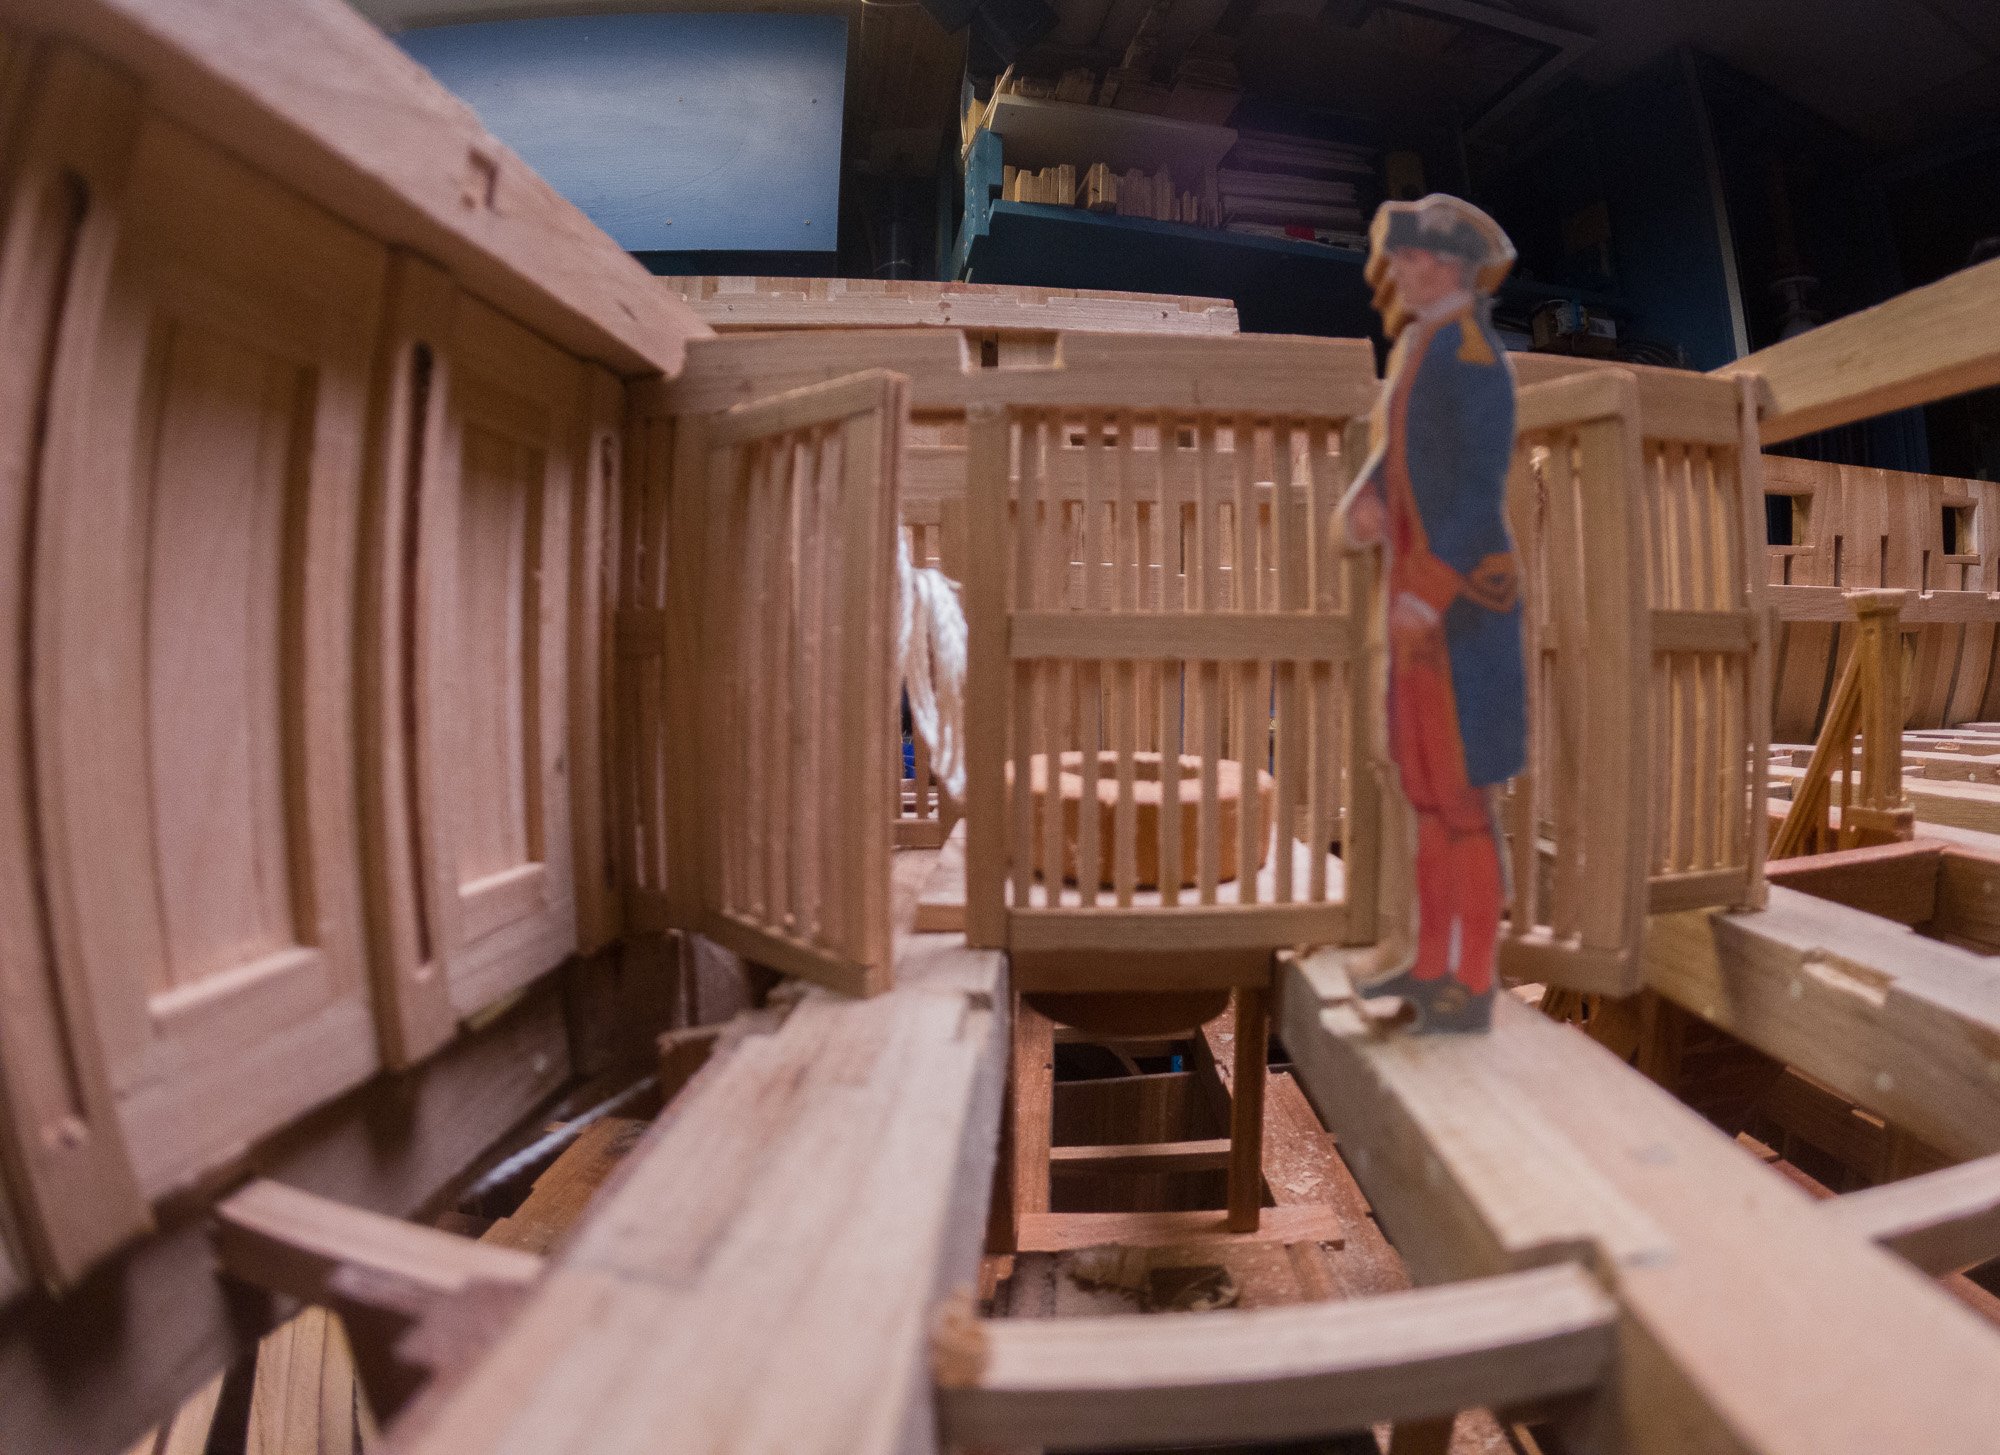
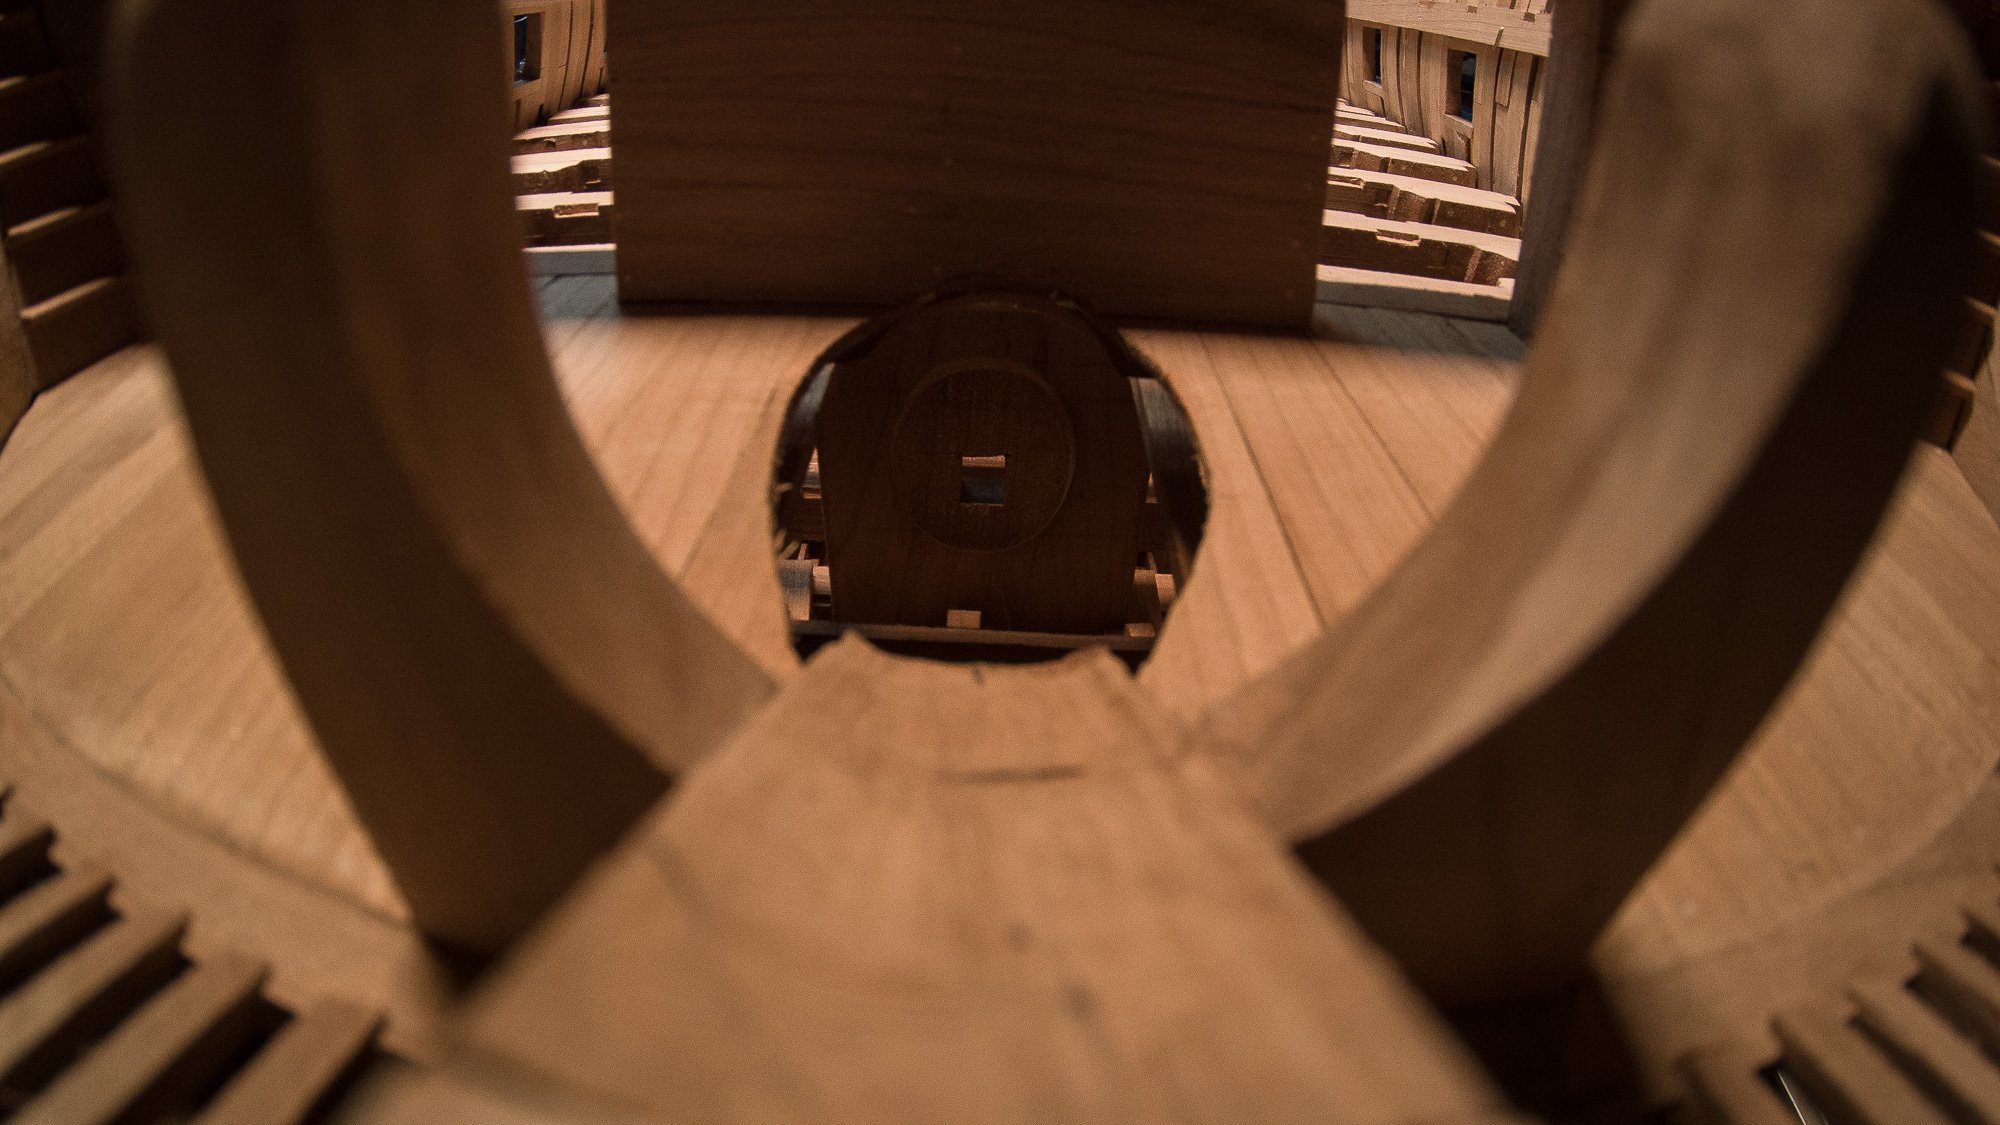
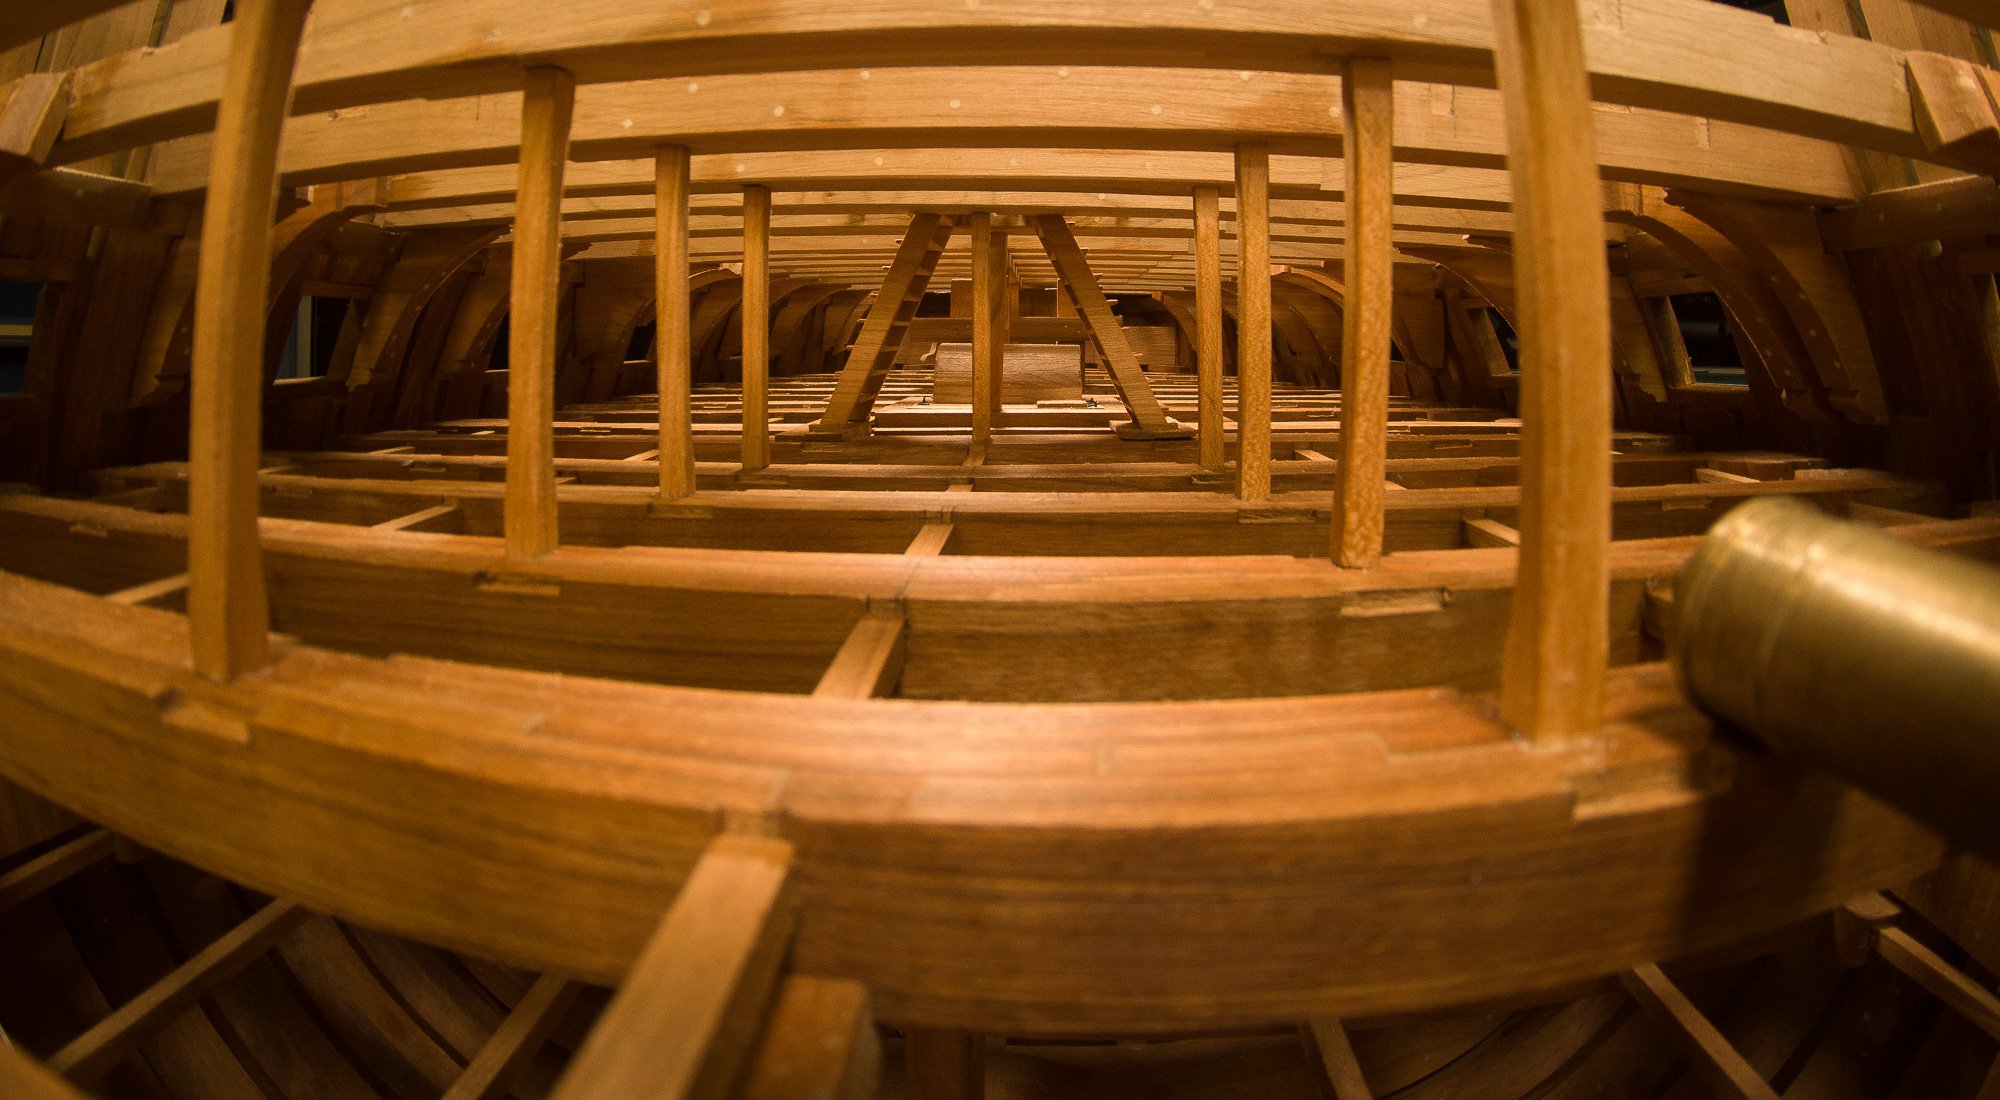
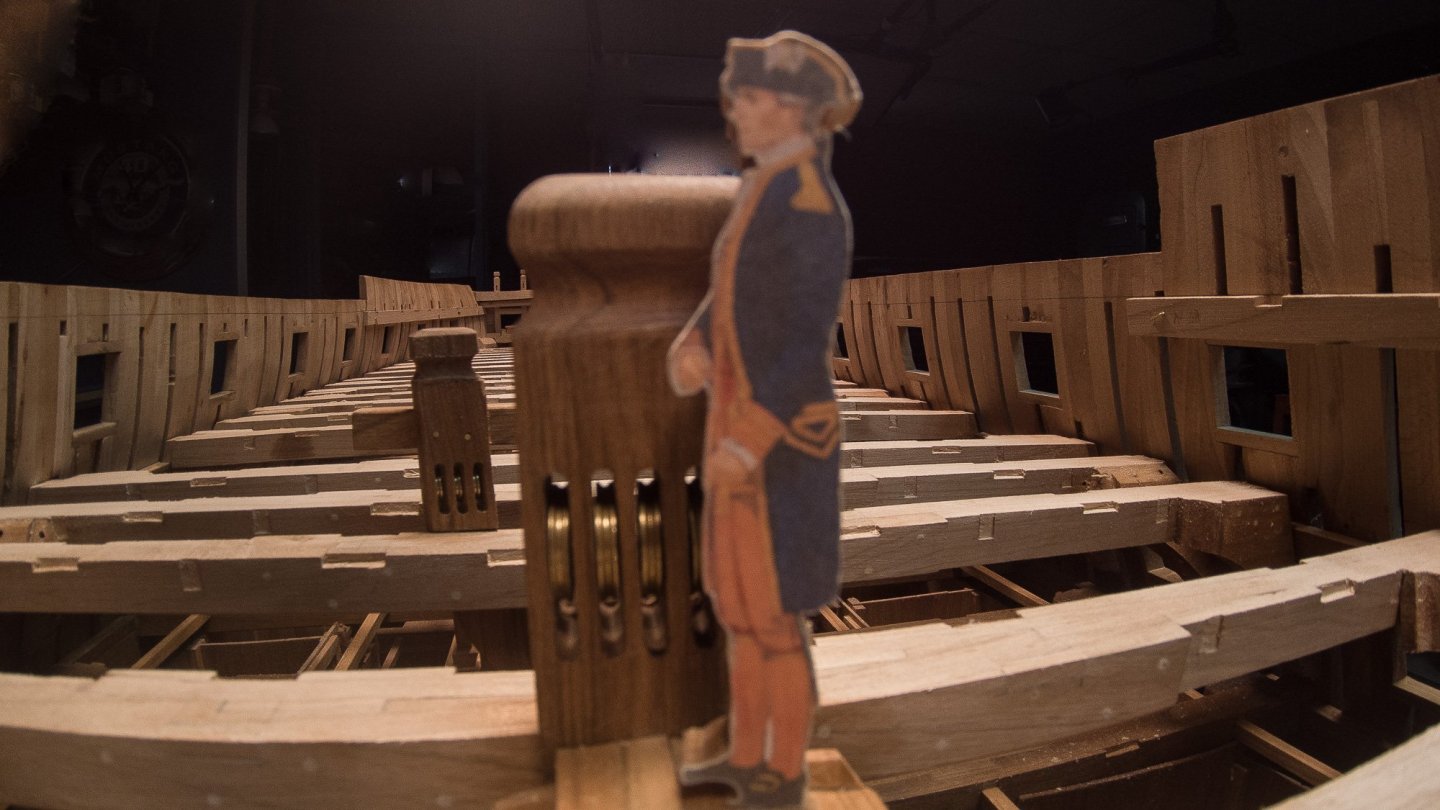
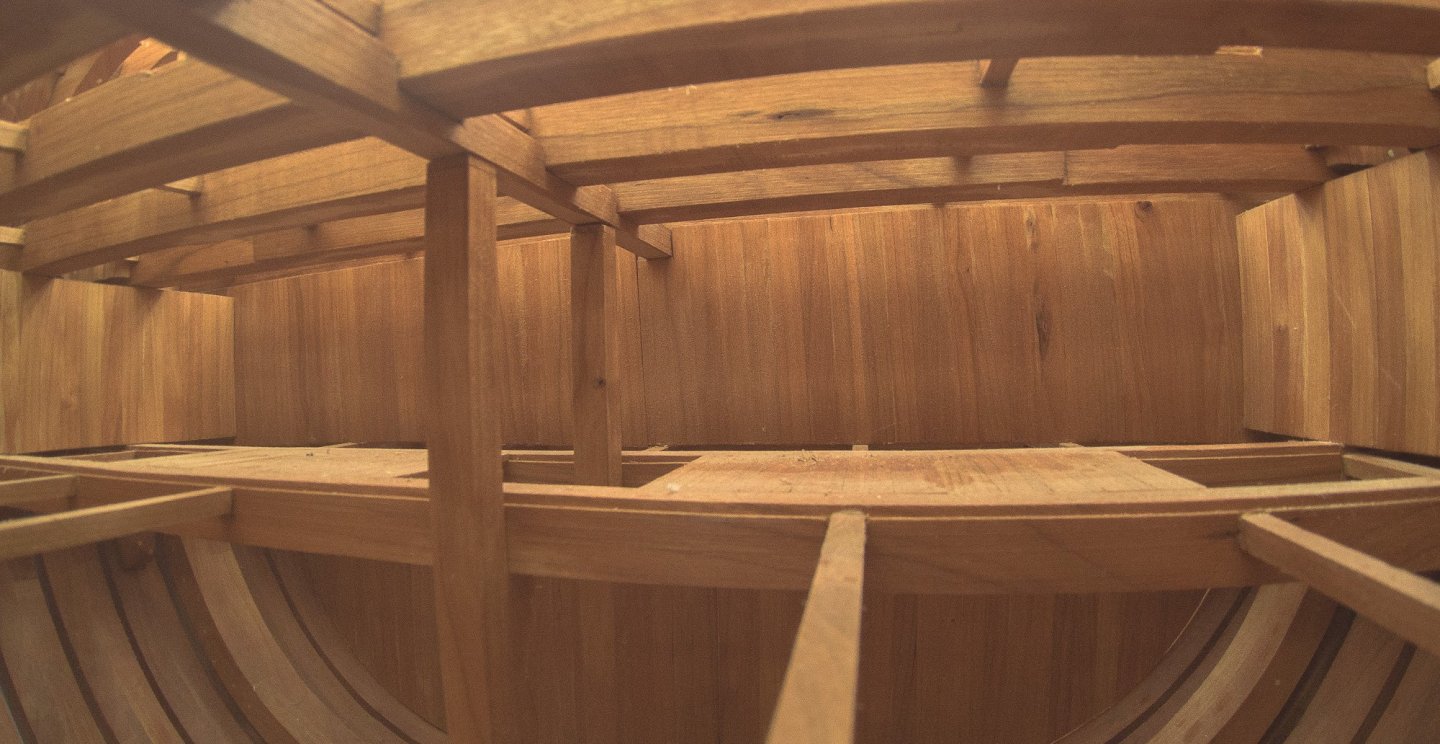
Thank you or your comments but taking photos inside the model is very difficult to get the perfect LIGHTING. This morning, I tried another set of photos, still with different settings and still the results are not there... I am sorry I cannot get the correct lighting. The photos are done with a small camera action, half the cost of the Go pro. Does this camera would be better? I do not know. In this set, I tried to have less "orange color" in the photos and this is the results.


-
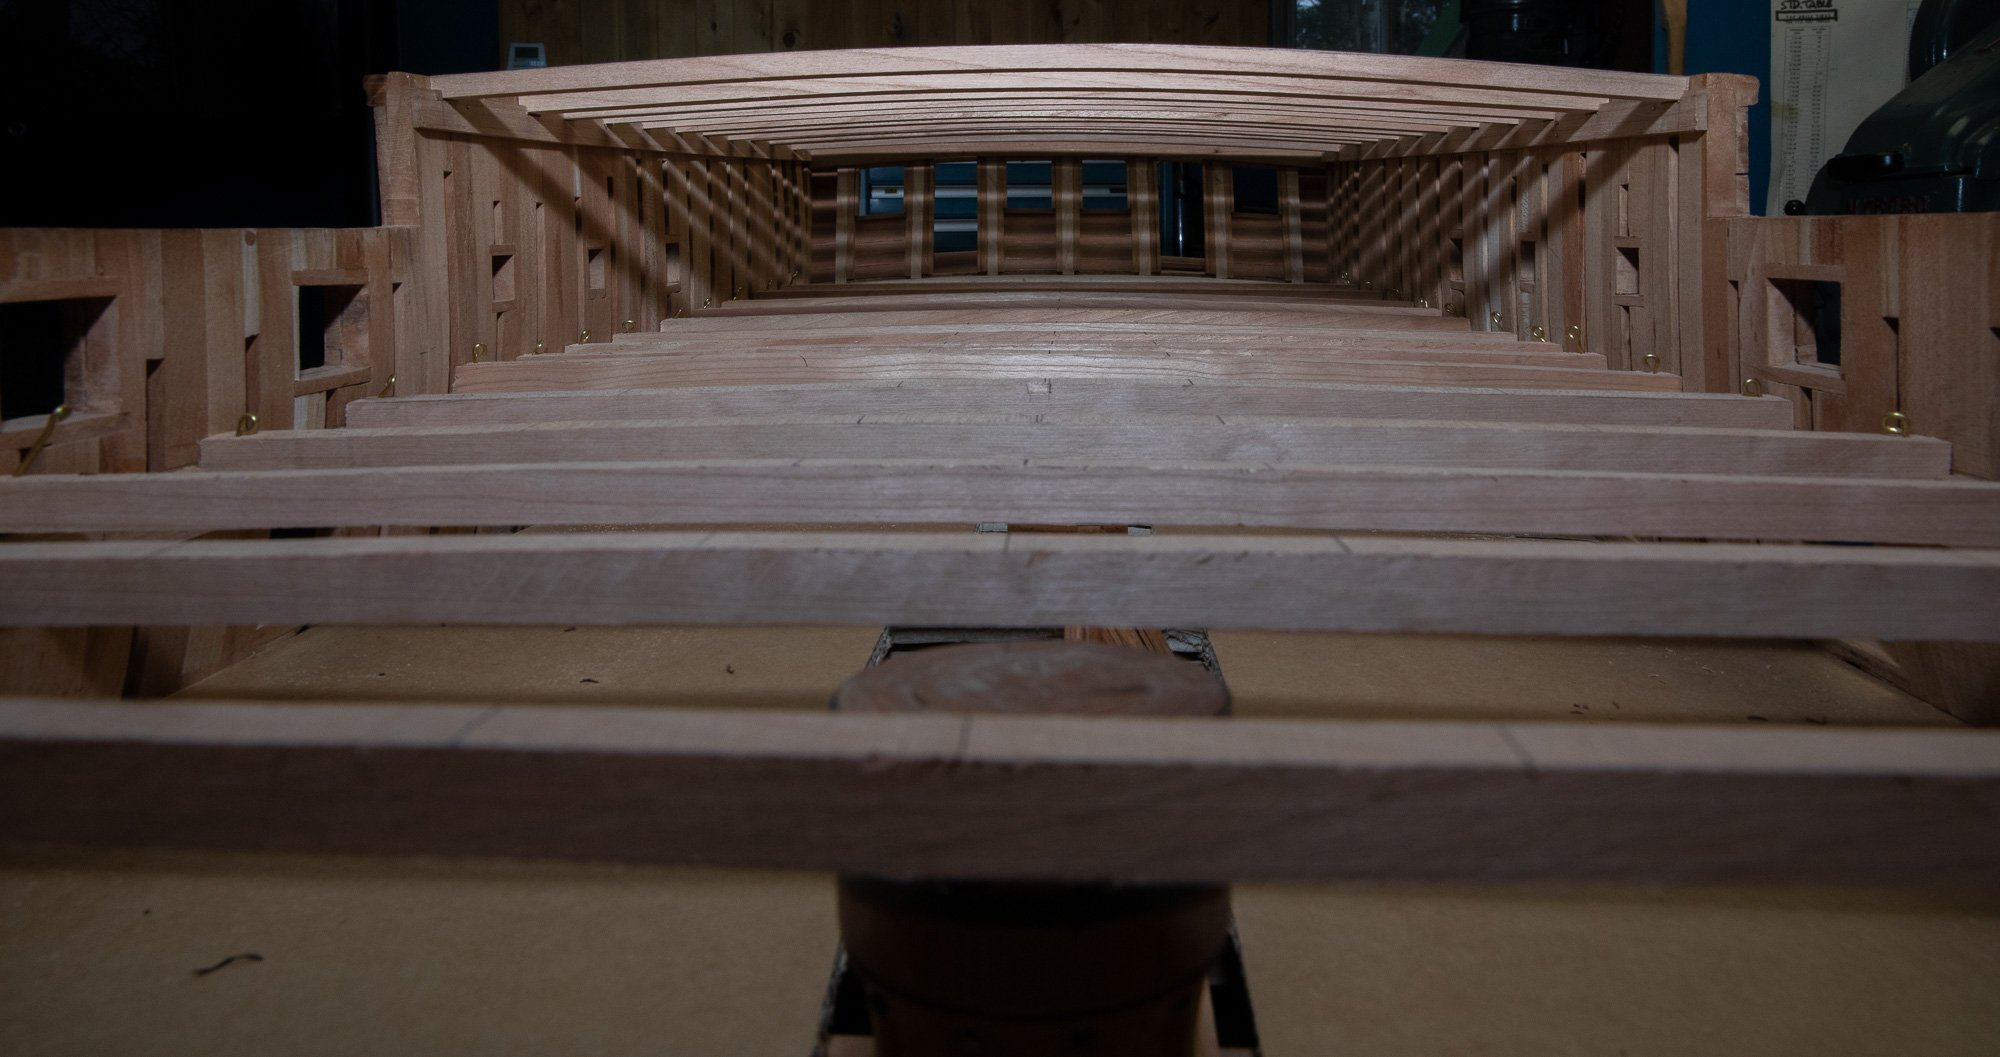
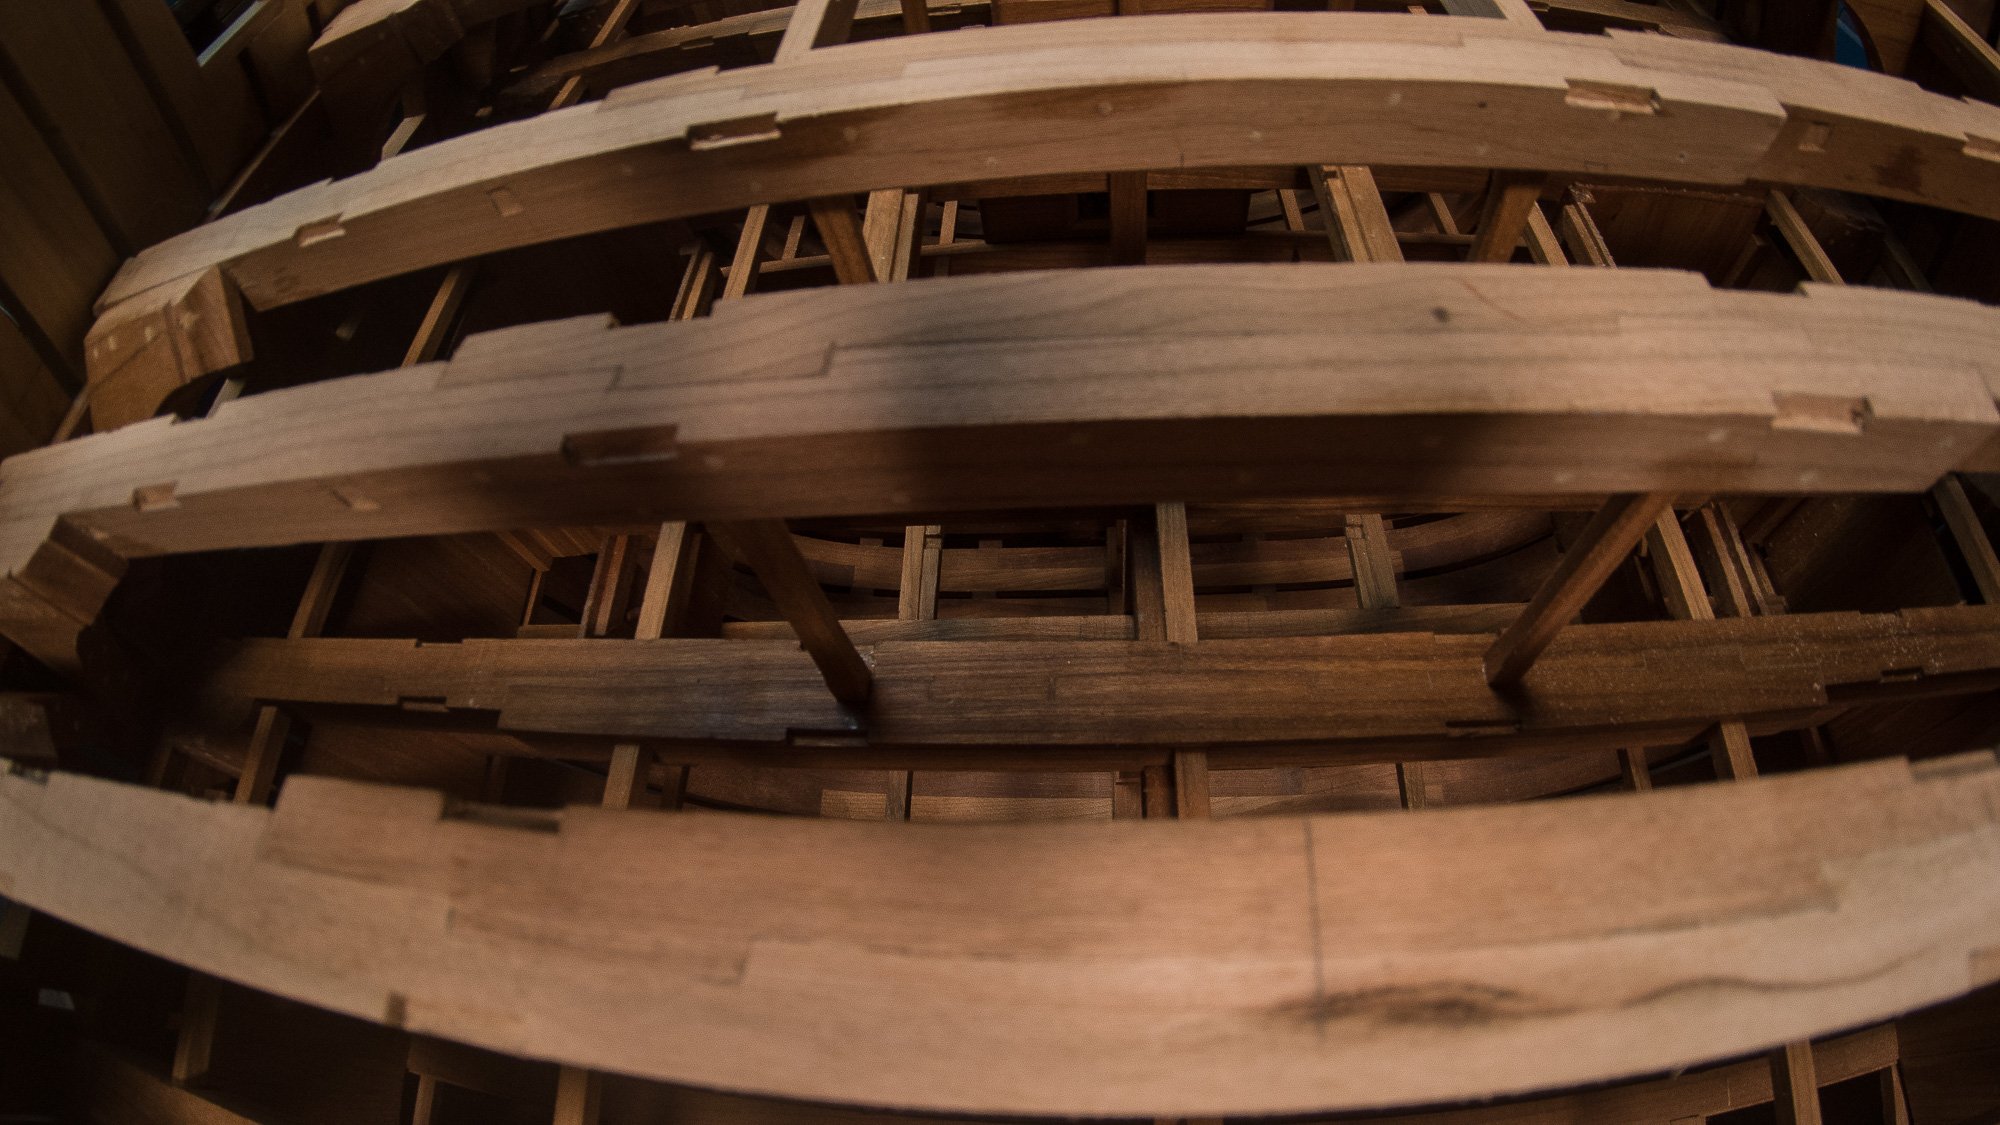
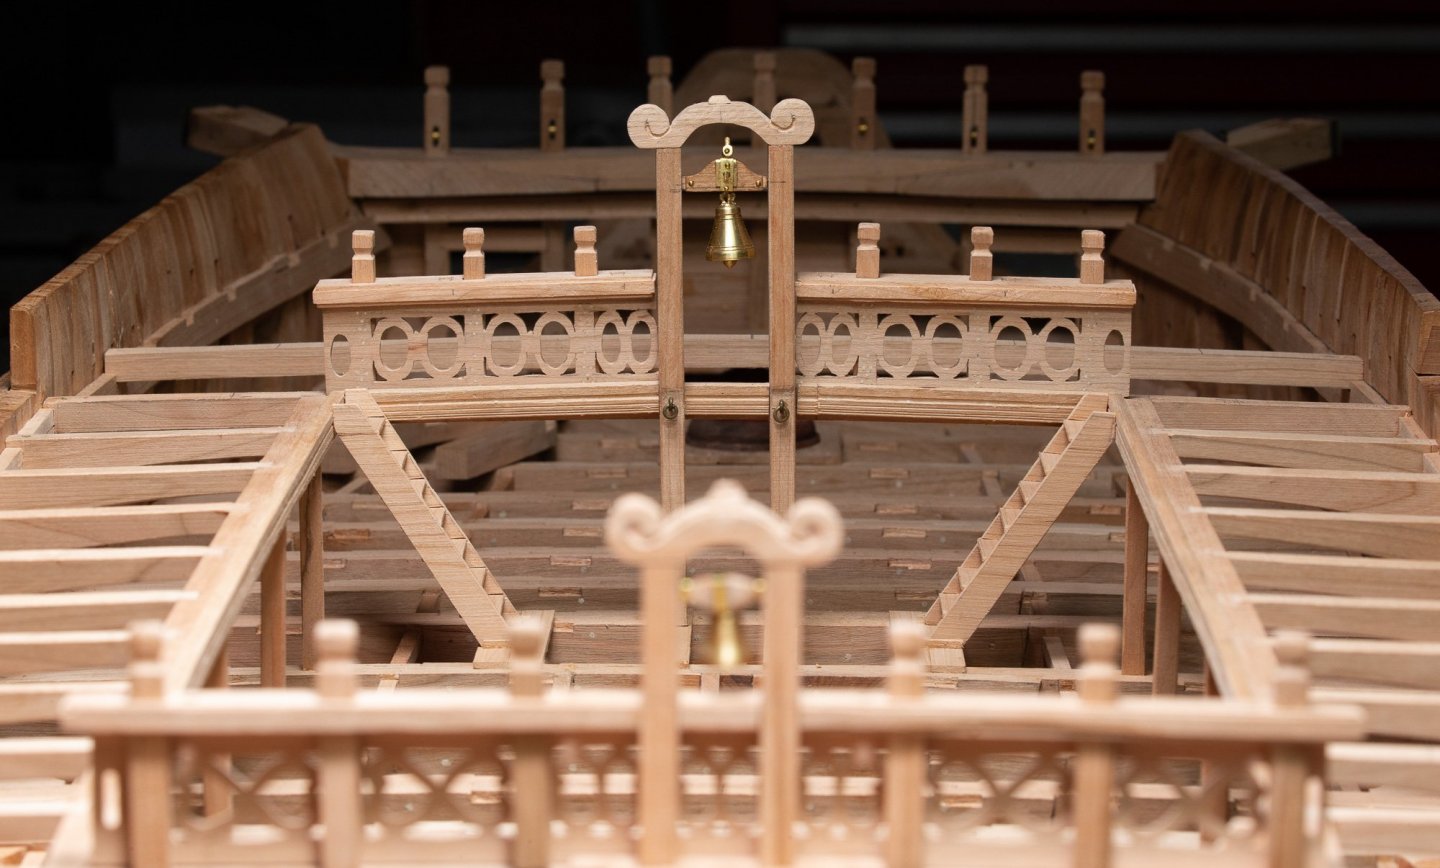
Presentation of the build, I would say, is as much important as the construction of the build. One of the things to do is to take sometimes to take photos. There are some basics rules to follow by examples when taking photos inside the model the photo must be well horizontally. When taking photos, I try to take photos at the height of the human eye at the scale, this provide a more natural photos look. By contrast, photos taken too high do not look as well. This morning, I tried another series of photos.


-
https://modelshipworld.com/topic/196-hms-bellona-1760-by-sjsoane-scale-164-english-74-gun-as-designed/page/65/ We talked about this subject in Mark logs and I also tried to think about this subject in a previous post. The French practice was probably similar. The simplest solutions are often the best solutions. Also, near the capstan, the tenon had a hinge, something like a door hinge of that time at the top of it. Again, here is the photo of Giorgio who did a nice representation to show how these tenons were lifted. On the previous photos, I did only the mortice in the top deck beam and nothing on the deck. The problem with this representation, it is more difficult to align vertically the tenon. Having a slot in the deck facilitates the positioning of the tenon. Also, the ramped tenon eliminate the need to use a jack.

-
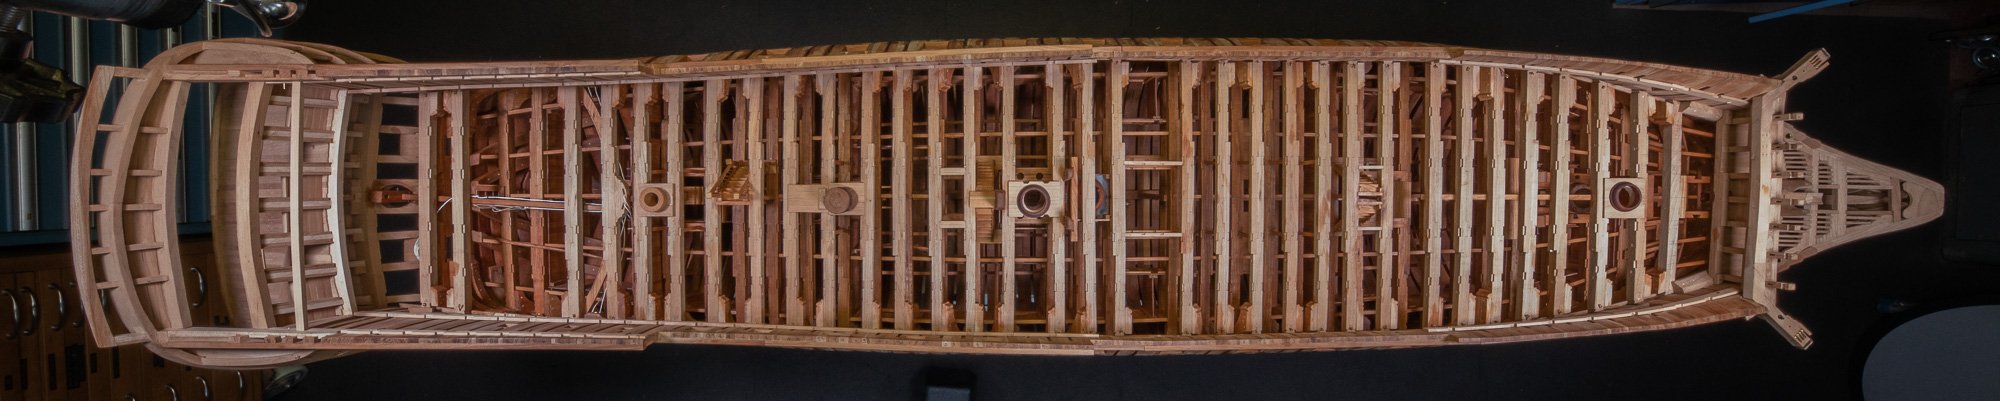
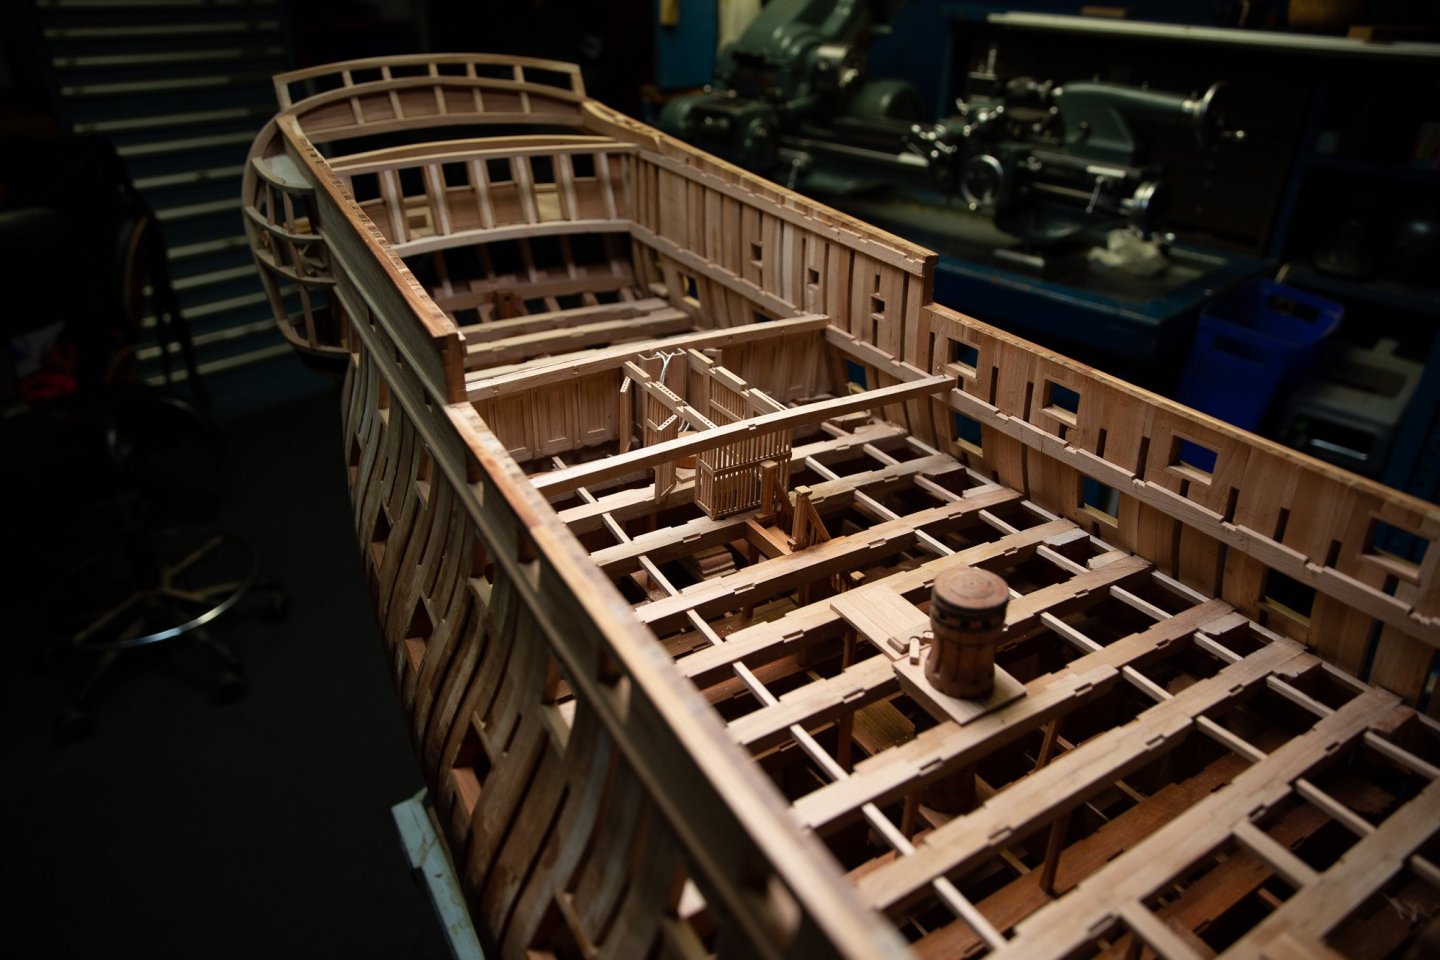
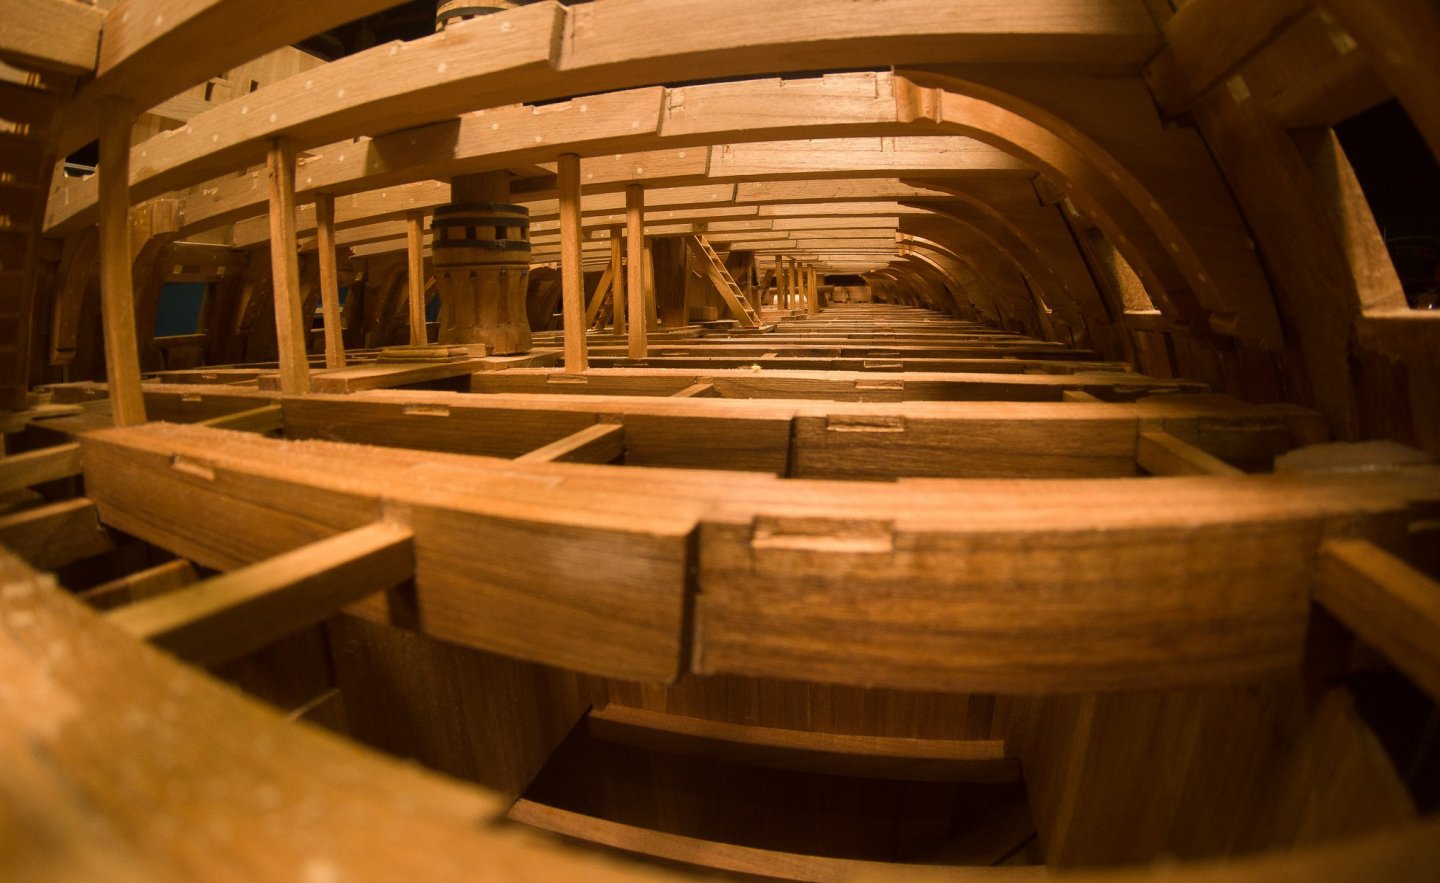
Ok Mark, I erased them! 2020 objectives, first deck completed, and still 1 1/2 month to go. This model is more oriented on carpentry, so no cannons will be install. Parts for the first deck are glued. As usual, 1 coat of tung oil us applied. On the previous models, I tried 2 and 3 coats, and I prefer the 1 coat application, just enough to accentuation the wood grain. At the opposite, too much tung oil will create a transparent thickness, a varnish look, and I do not want this effect. Most of the photos are done with small camera Yi 4K.


-
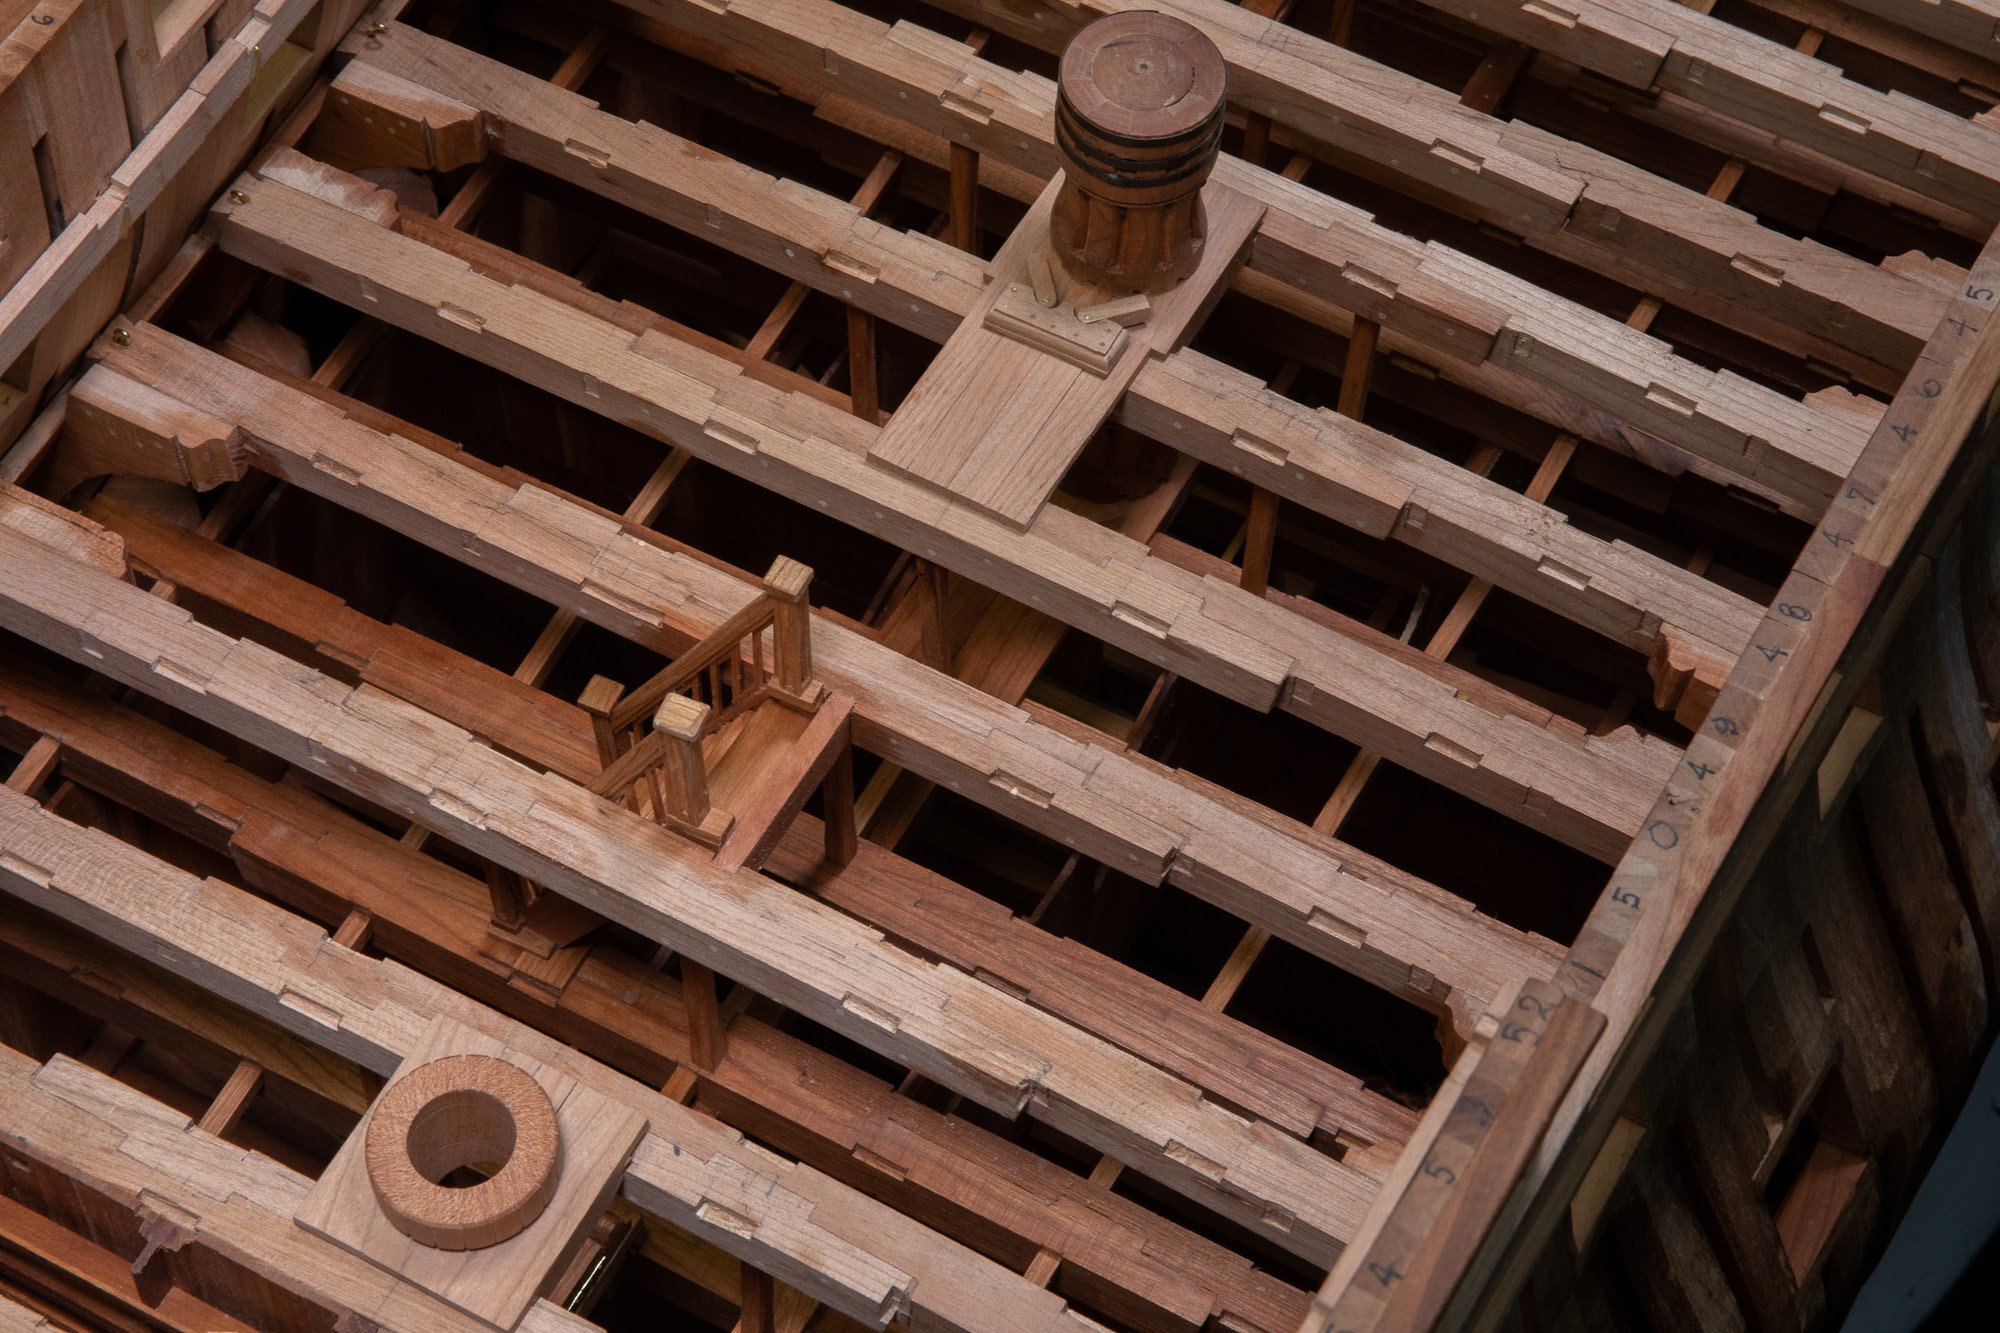
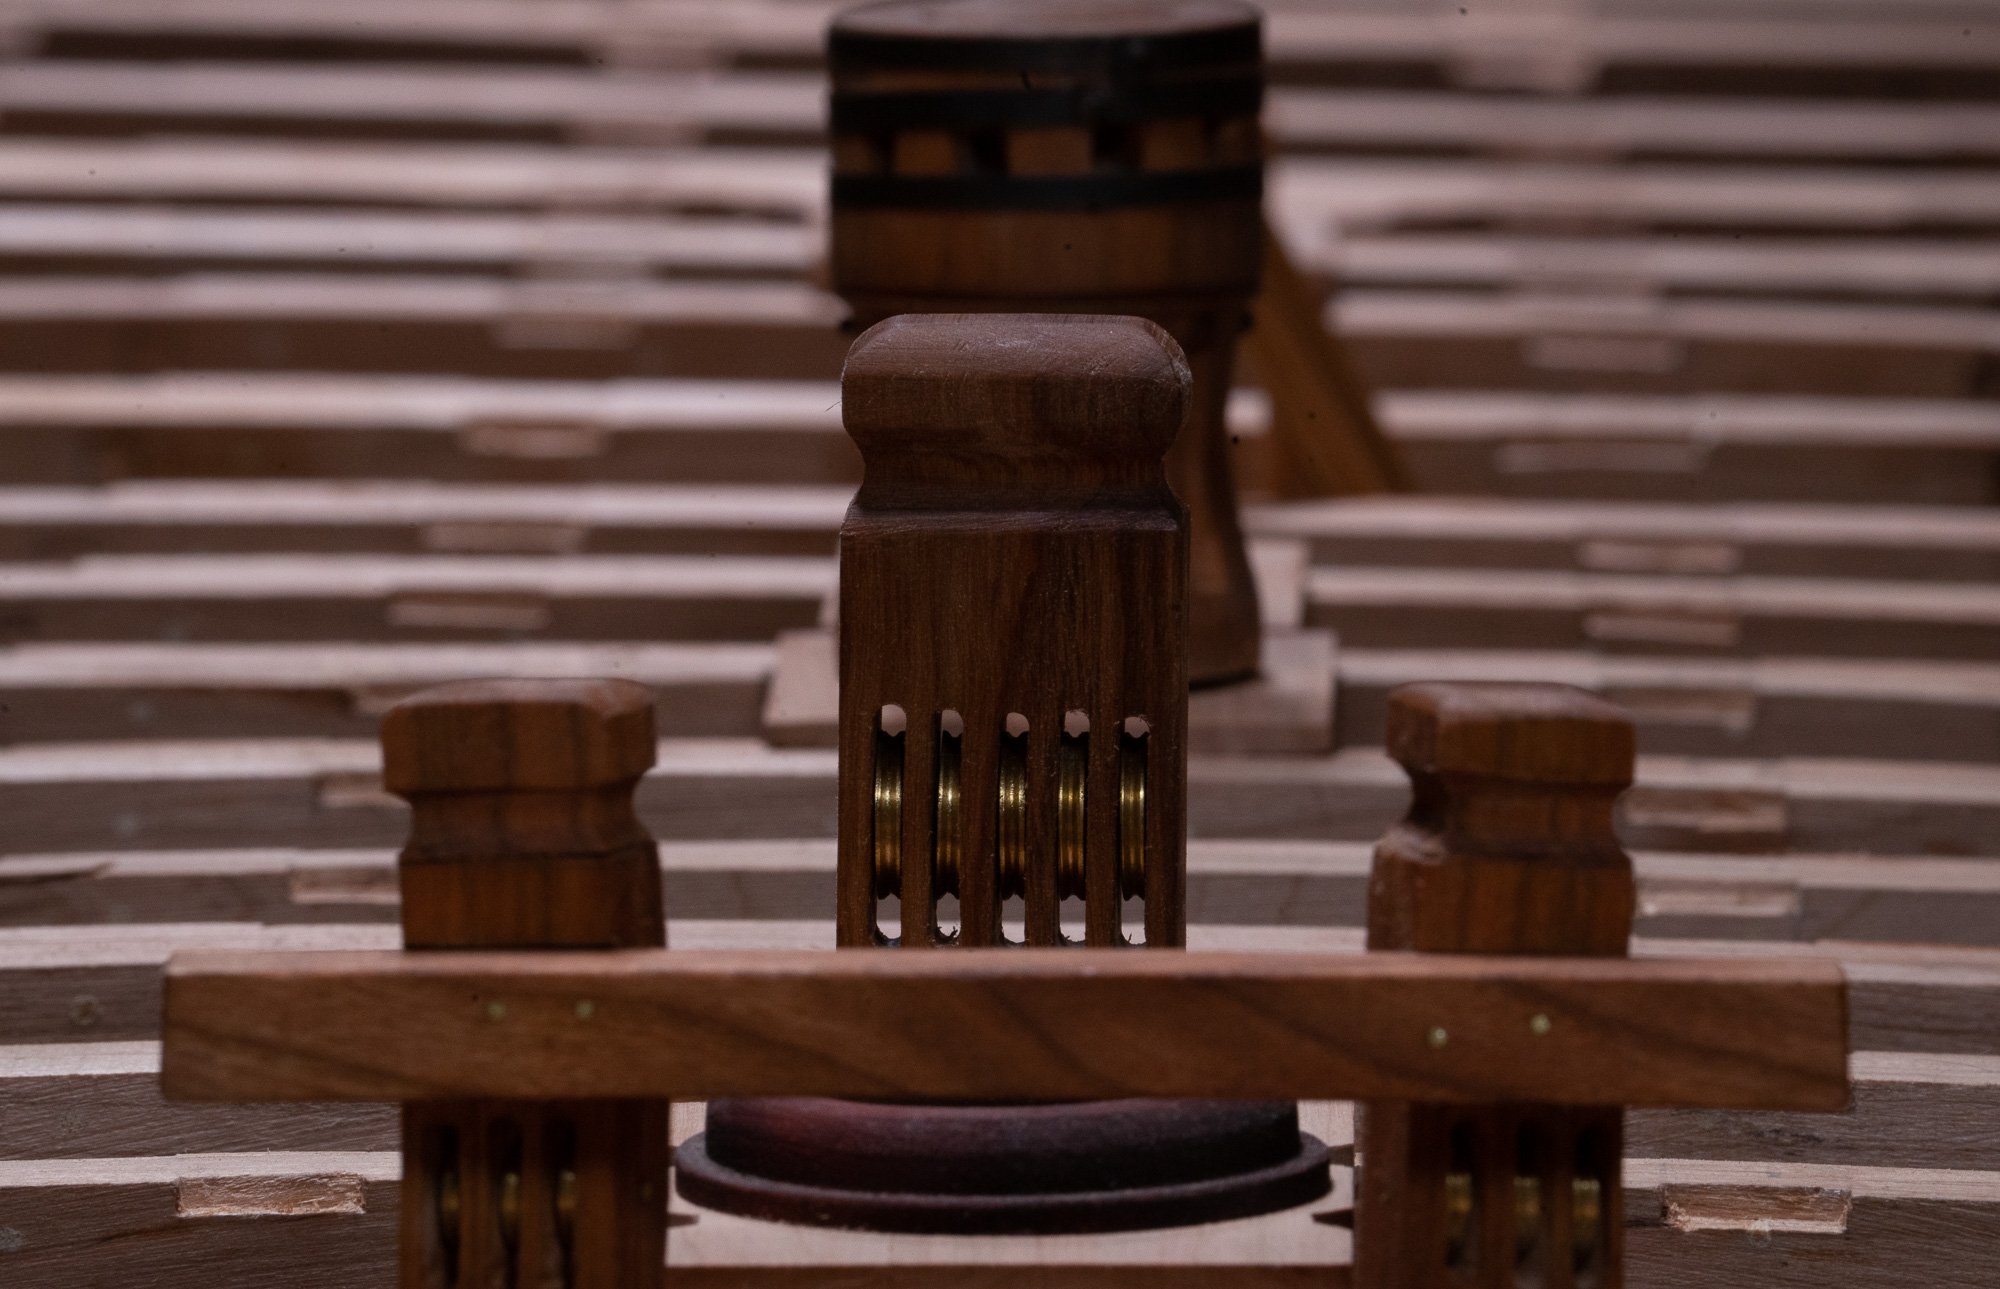
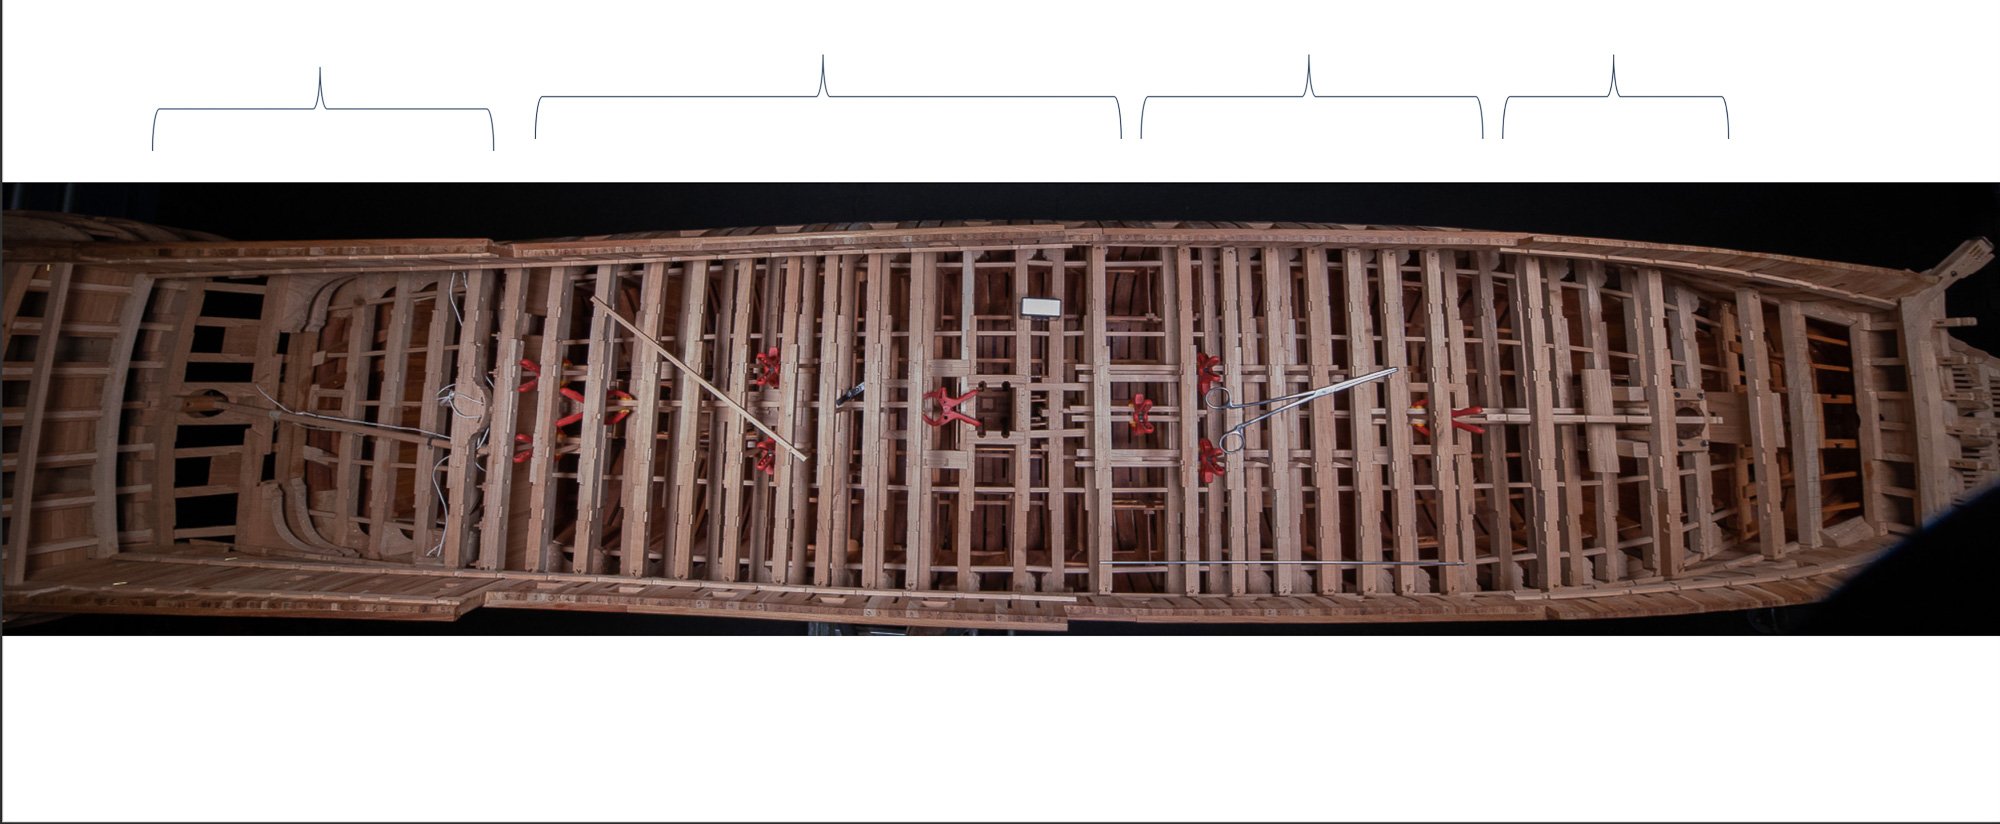
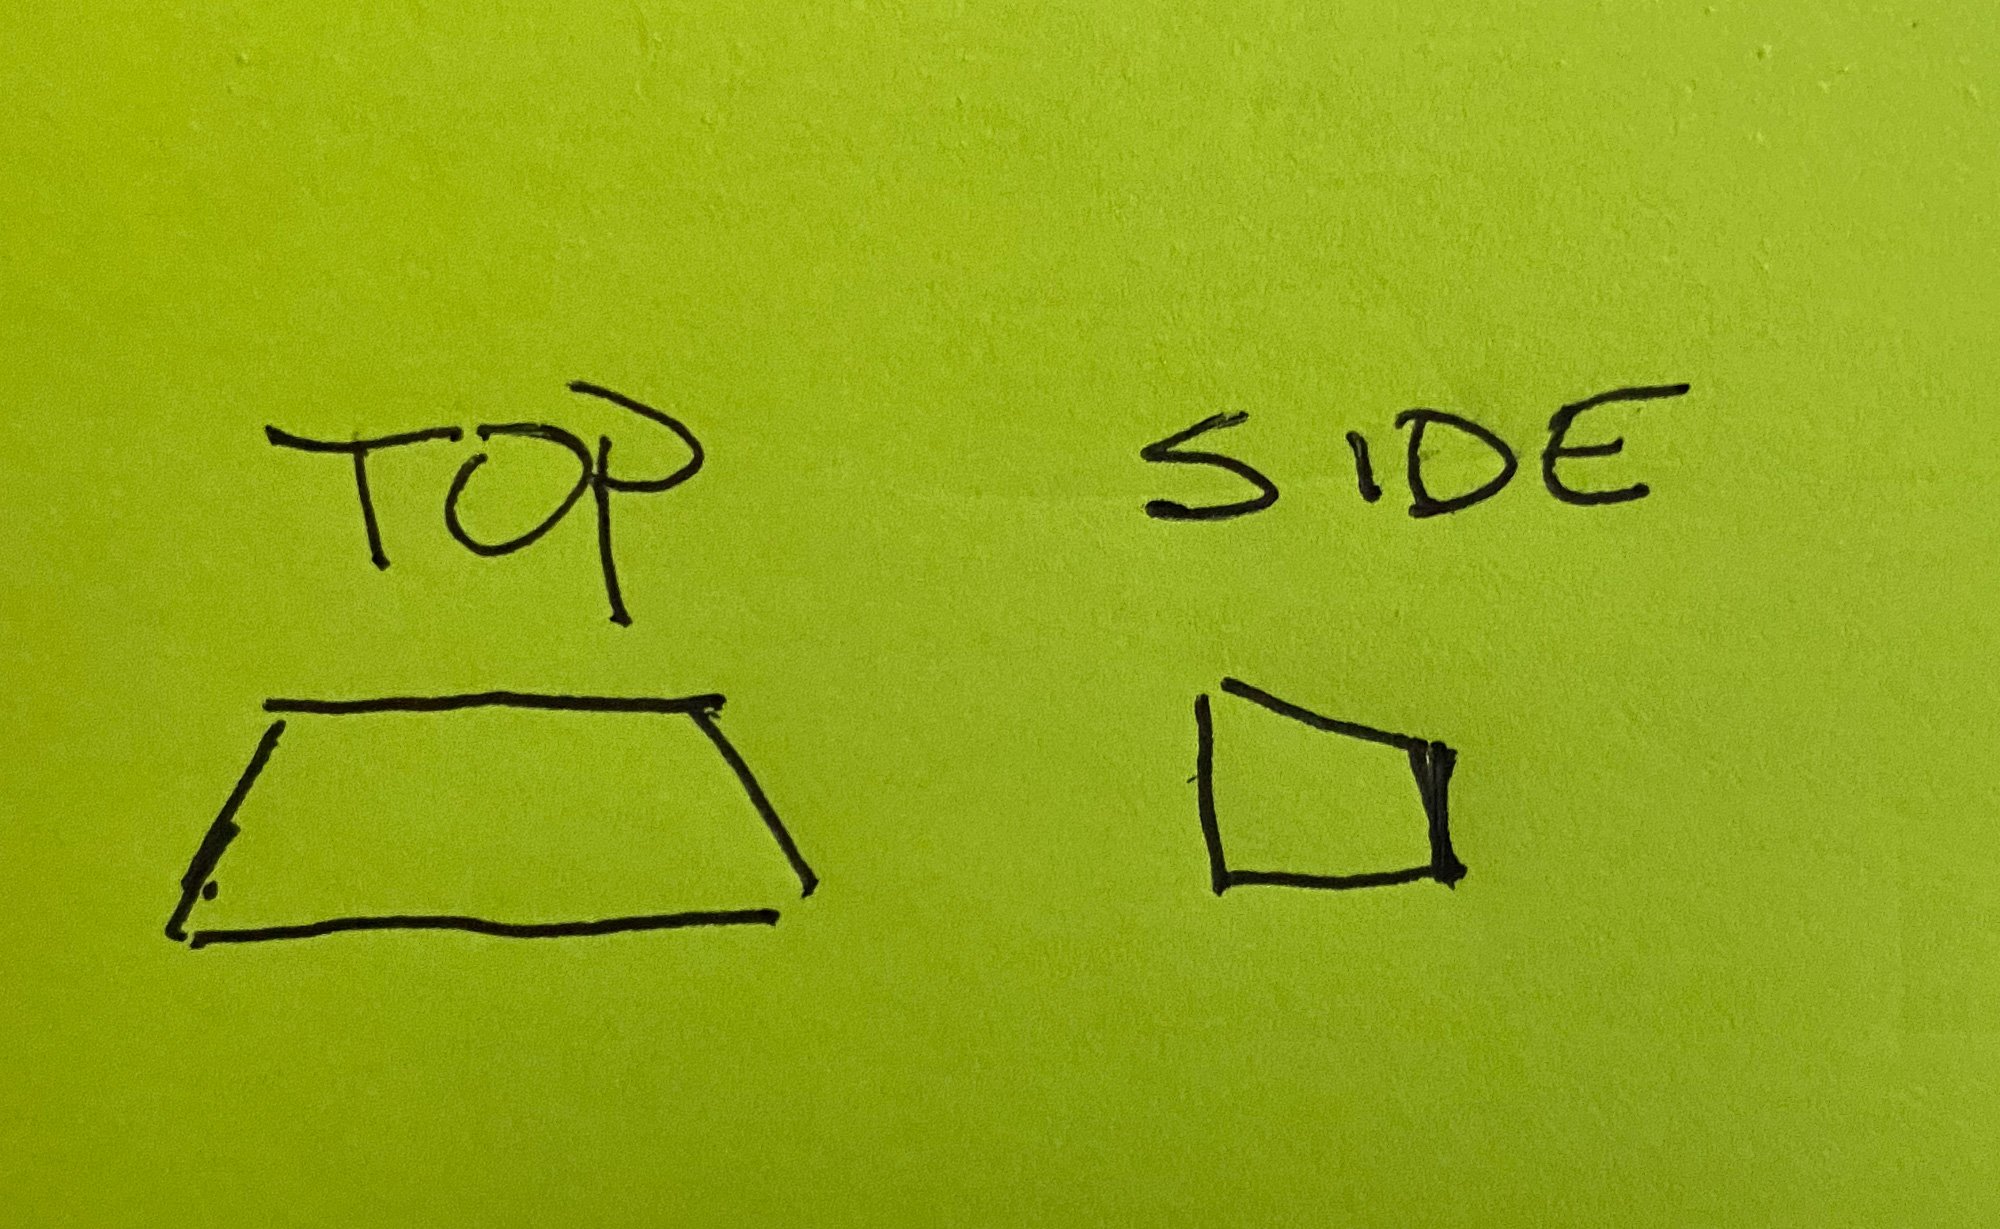
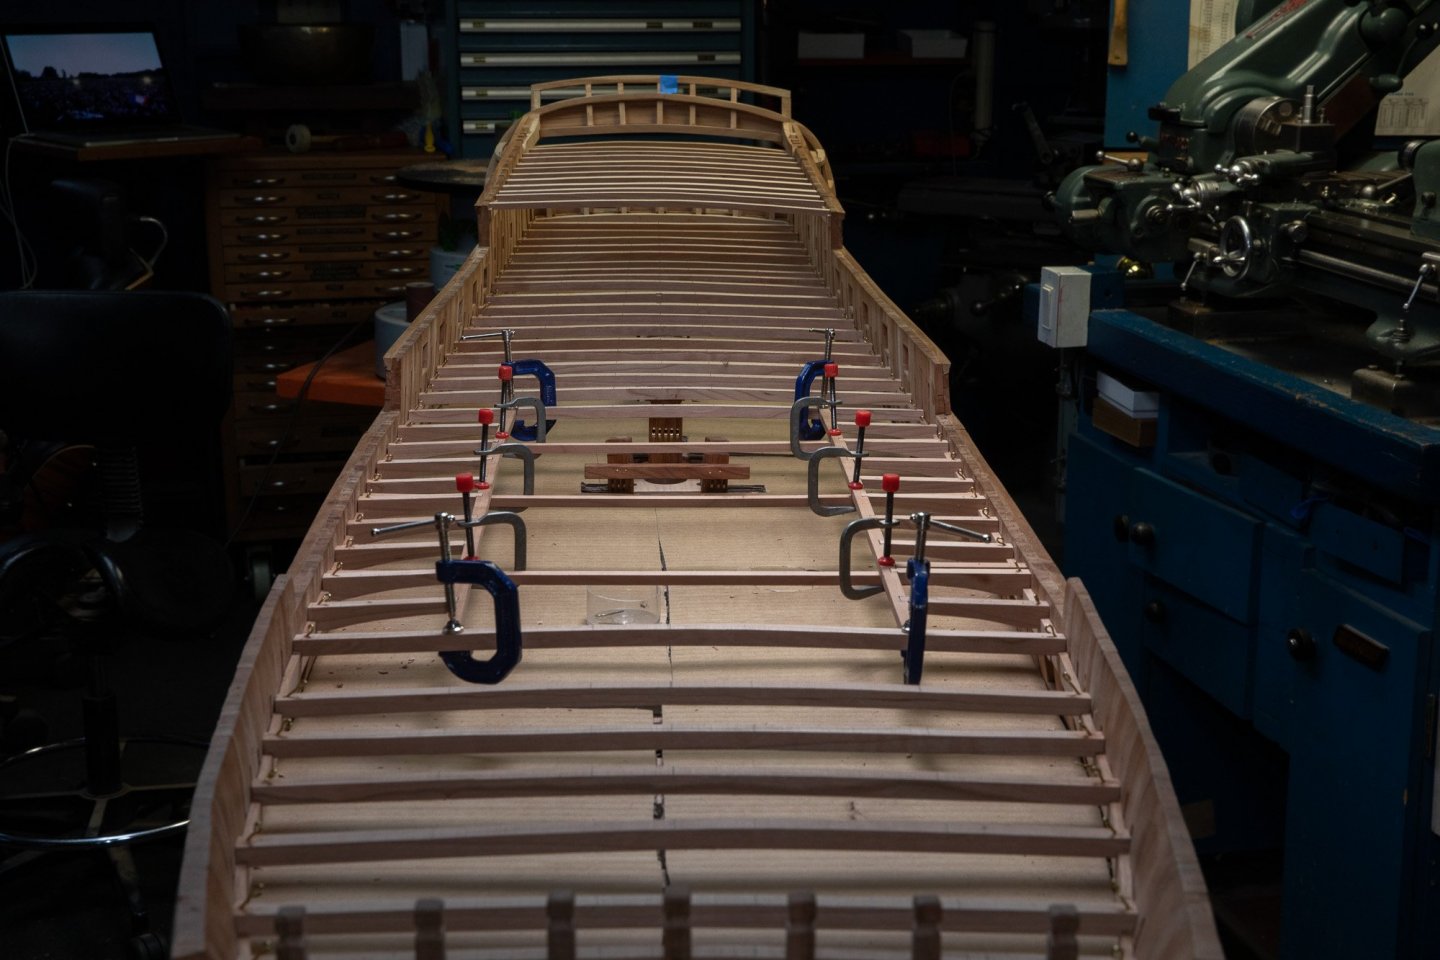
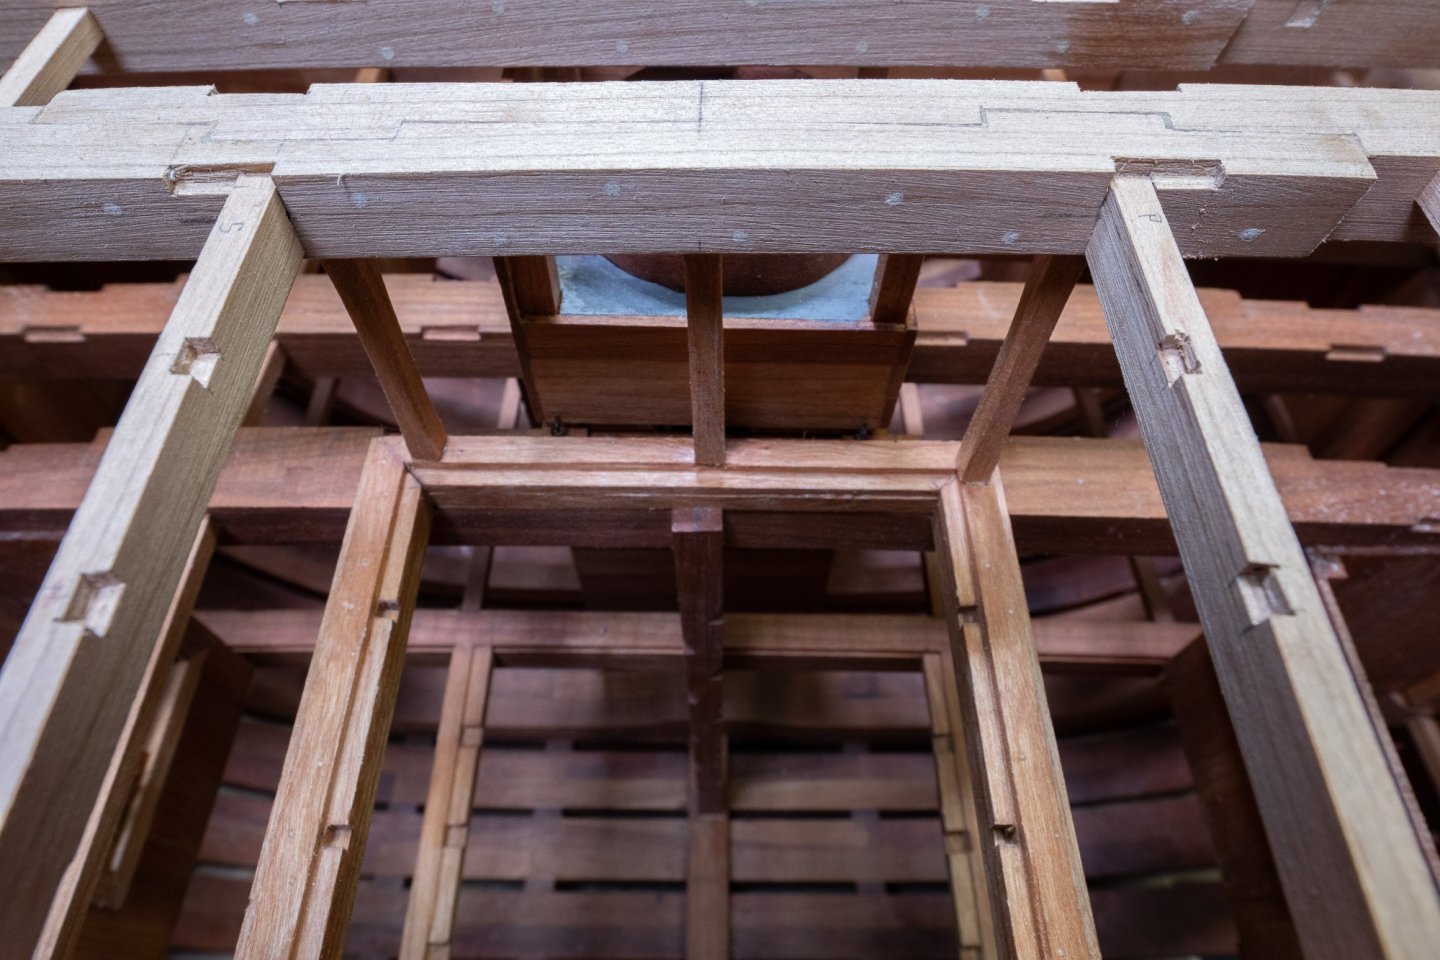
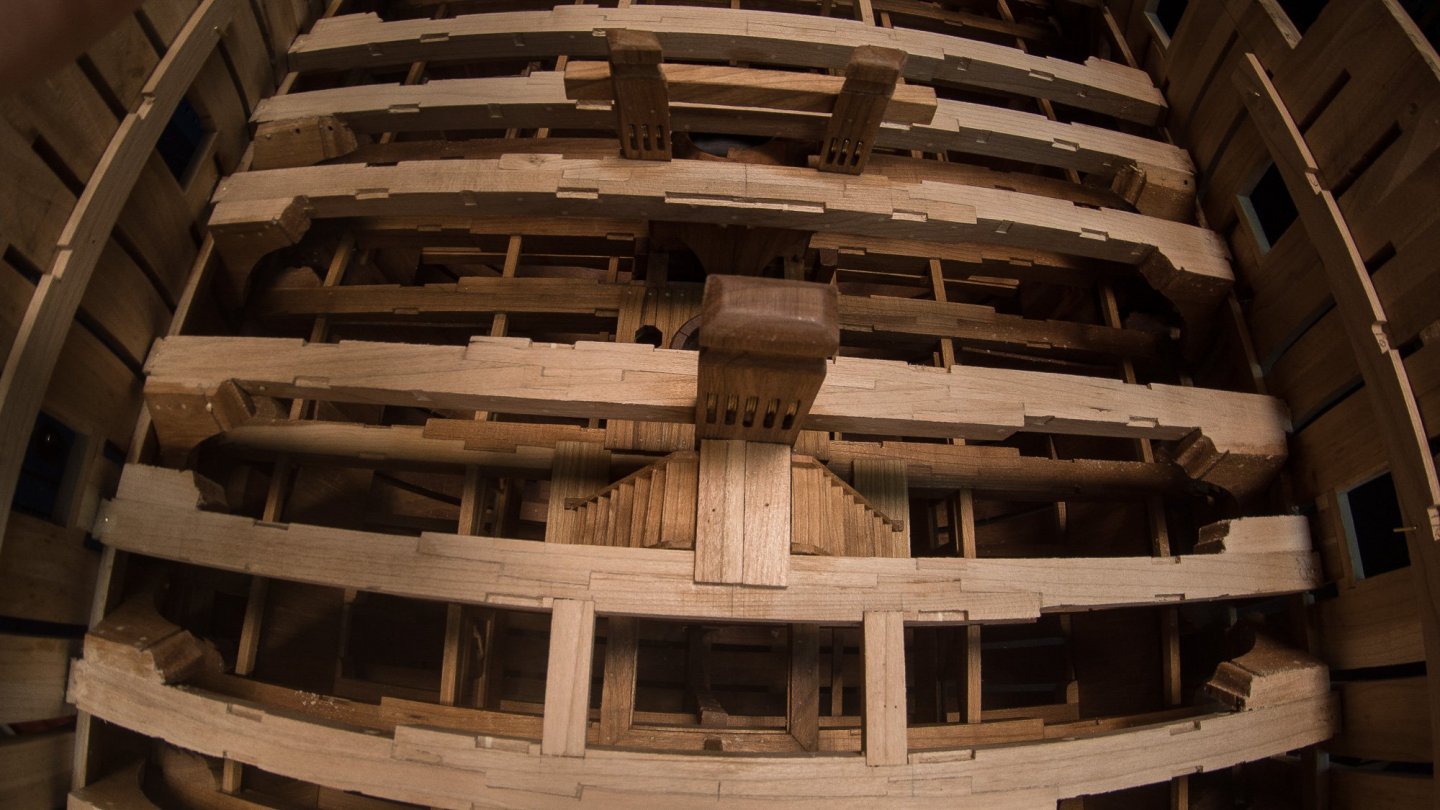
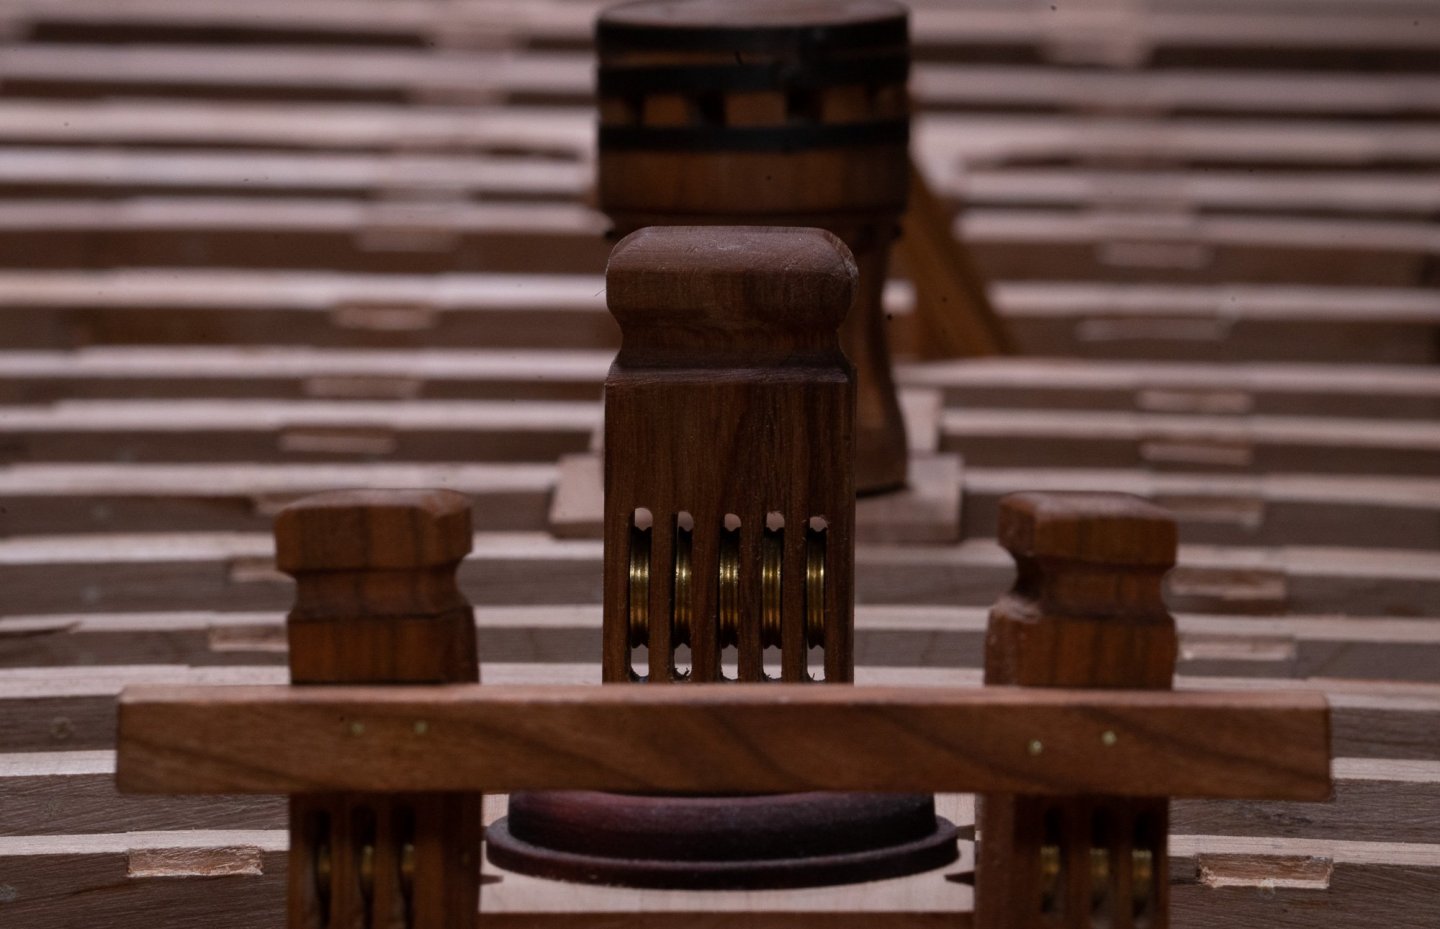
photo 1 : post experiences; if the height of the post: - is finely adjusted, it is easy to install - is too high, it needs great forces to install Now, if we translate to the ship, I believe the same principles applies, for the height of the post. We often see metal rods at the each end of the post because this is an easy way to install on a model. I do not believe that this can apply in a full scale model. So, for today, my solution is to carefully adjust each post. No notches on the deck, but 1 under the beam. At full scale, a sledge hammer would be enough. All this is pure speculation, As usual, I do not know the answer, I just try to find the good angle of the problem. photo 2: location of the posts; not at at the back because of the rudder assembly, not at the front because of the anchor cables, instead there is a beam to support some deck beams. In the middle, 2 sections with posts1 or 2 posts in some area, and few others: 3. As usual, nothing is fix yet and the posts are still to be shaped. For now, only the height is fixed.


-
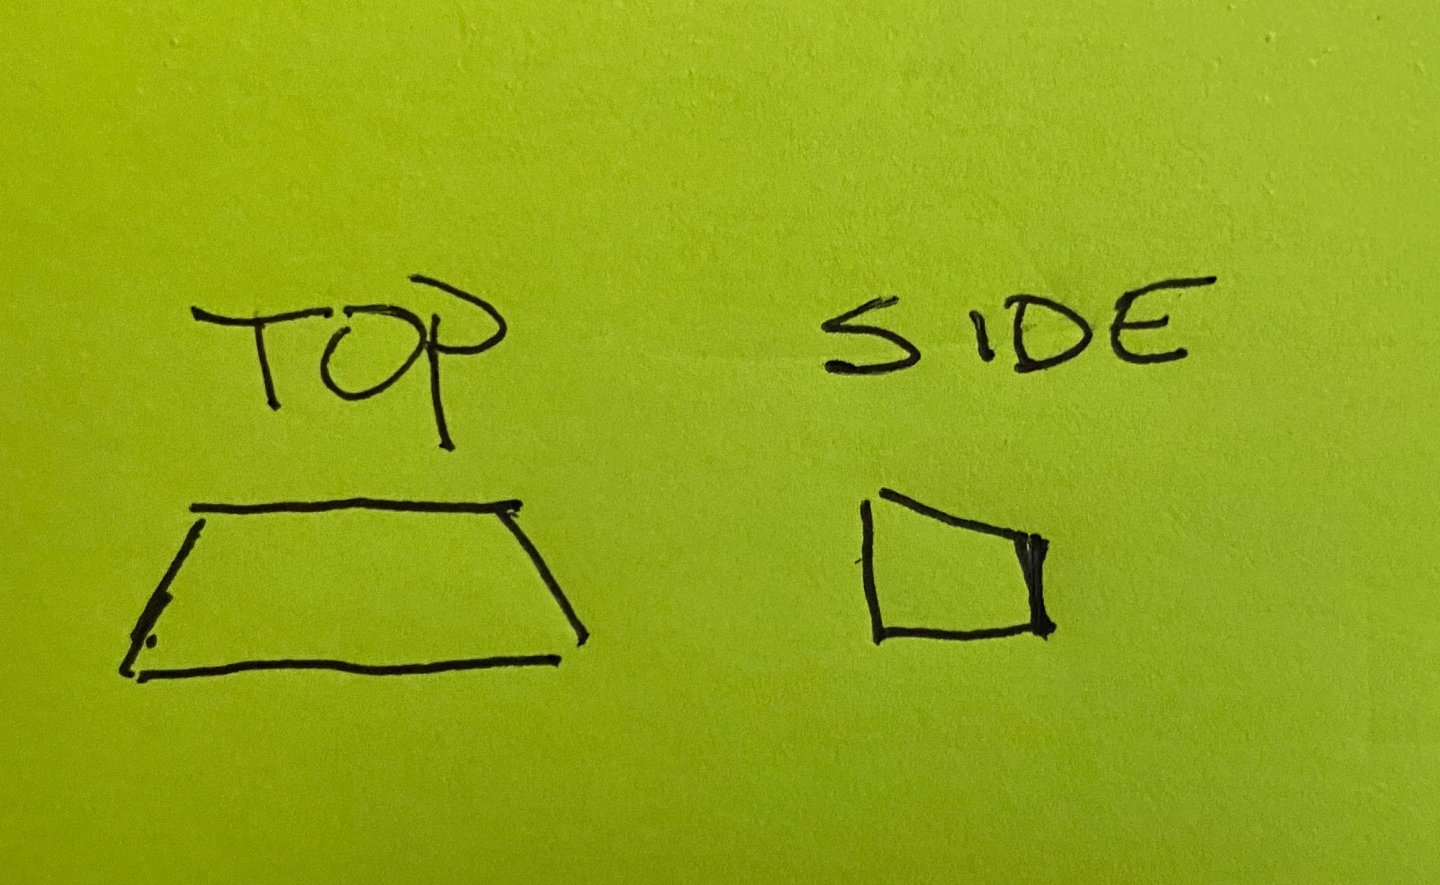
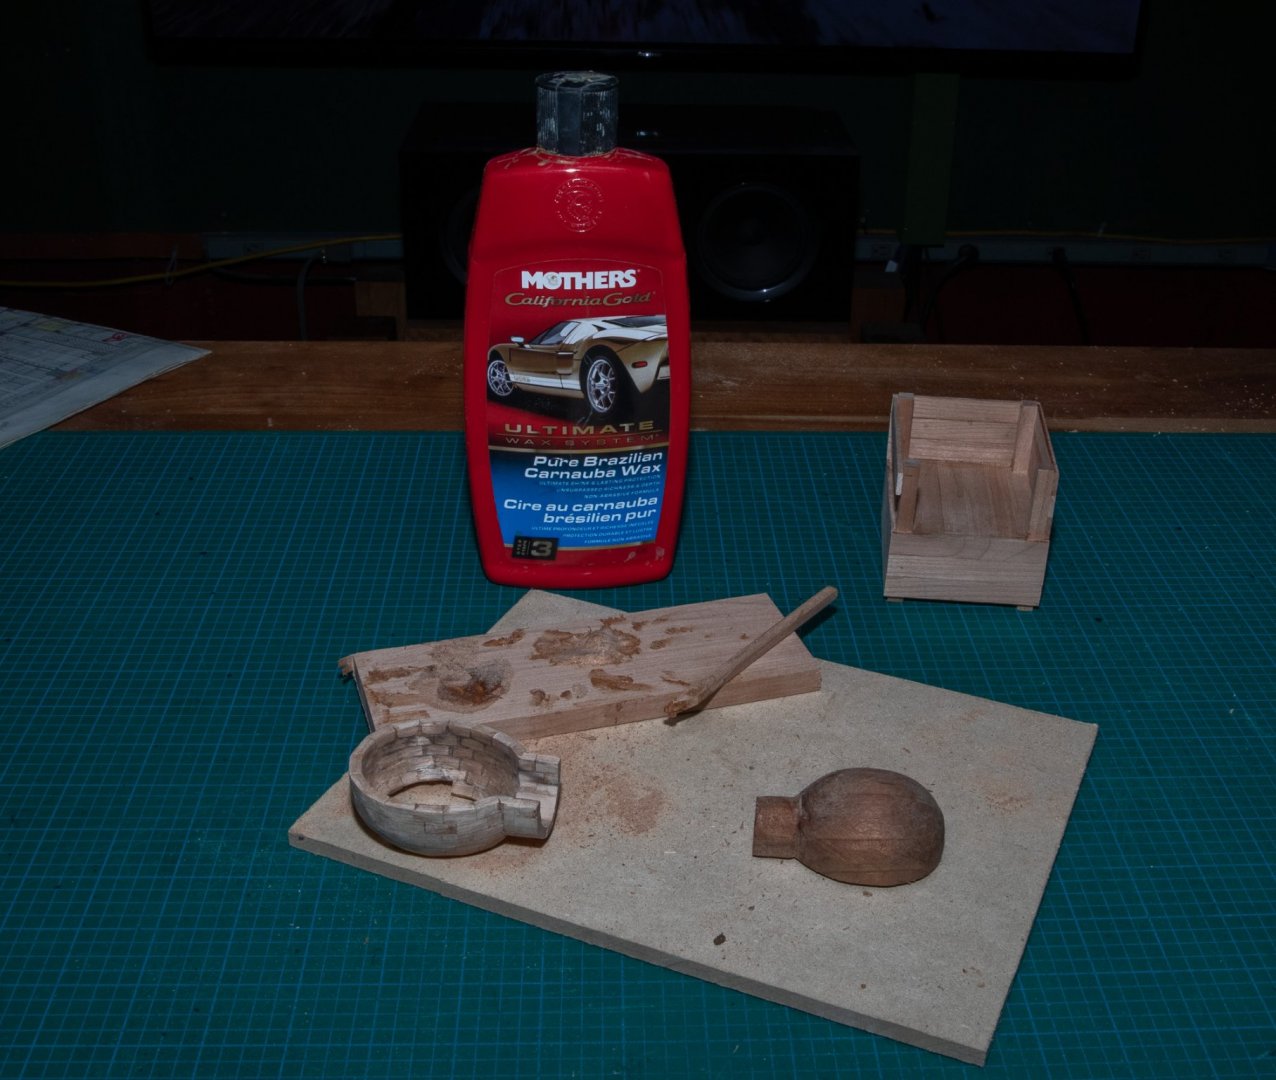
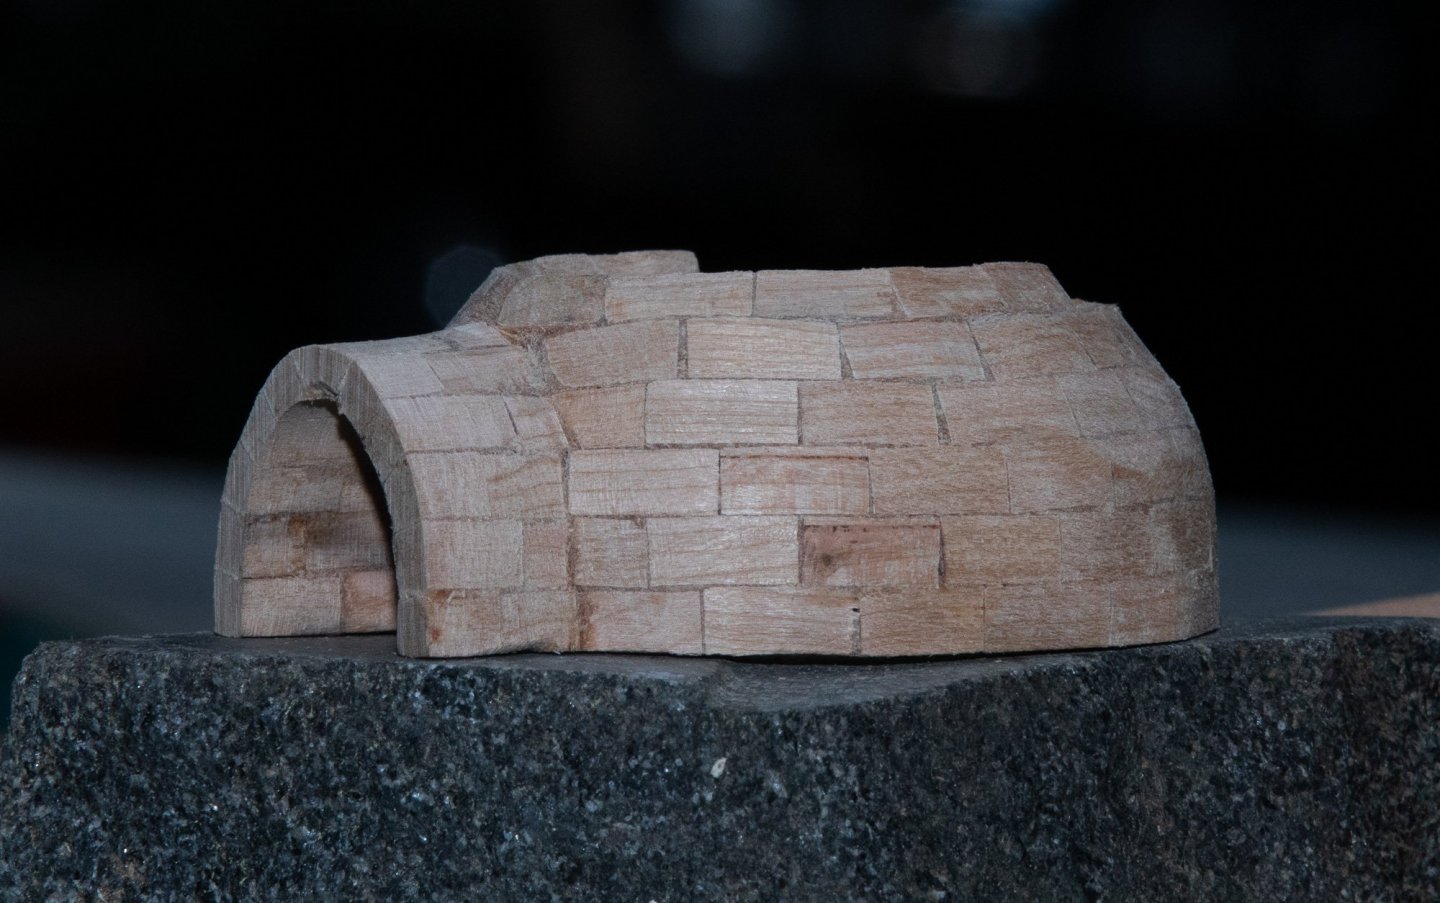
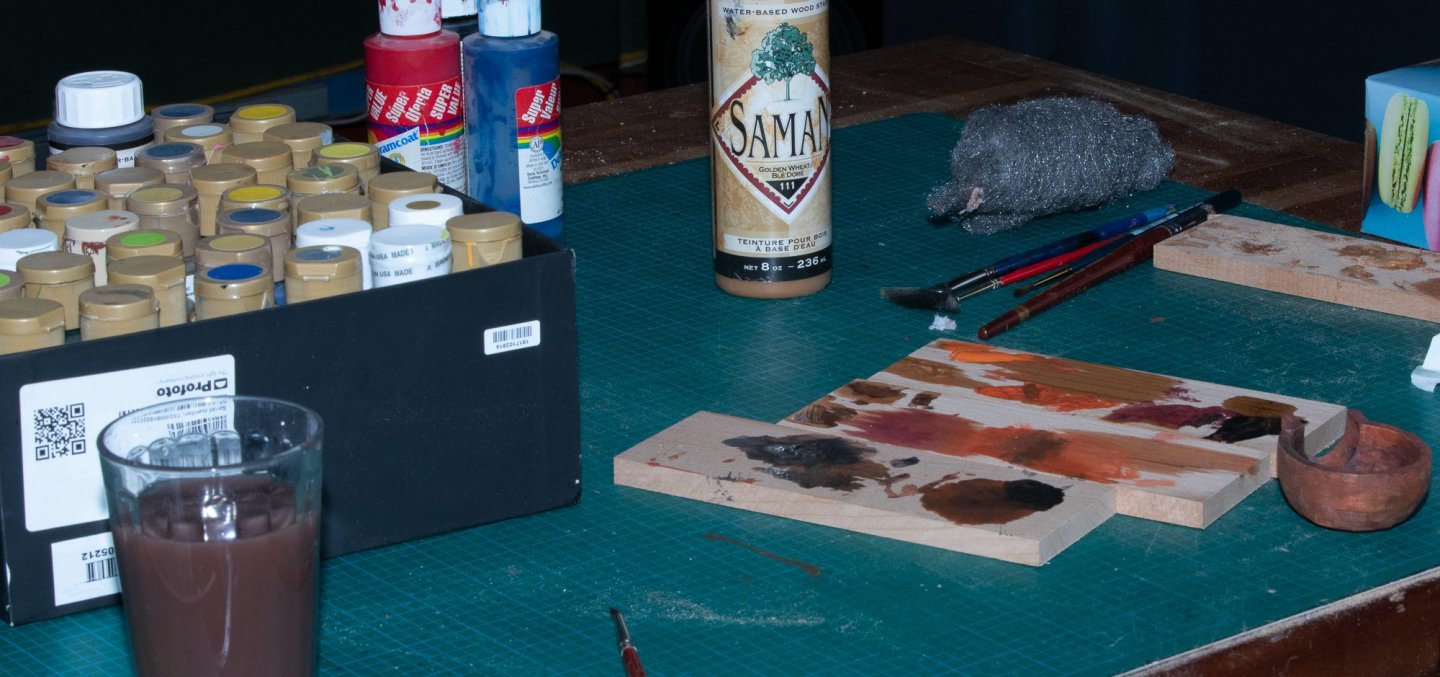
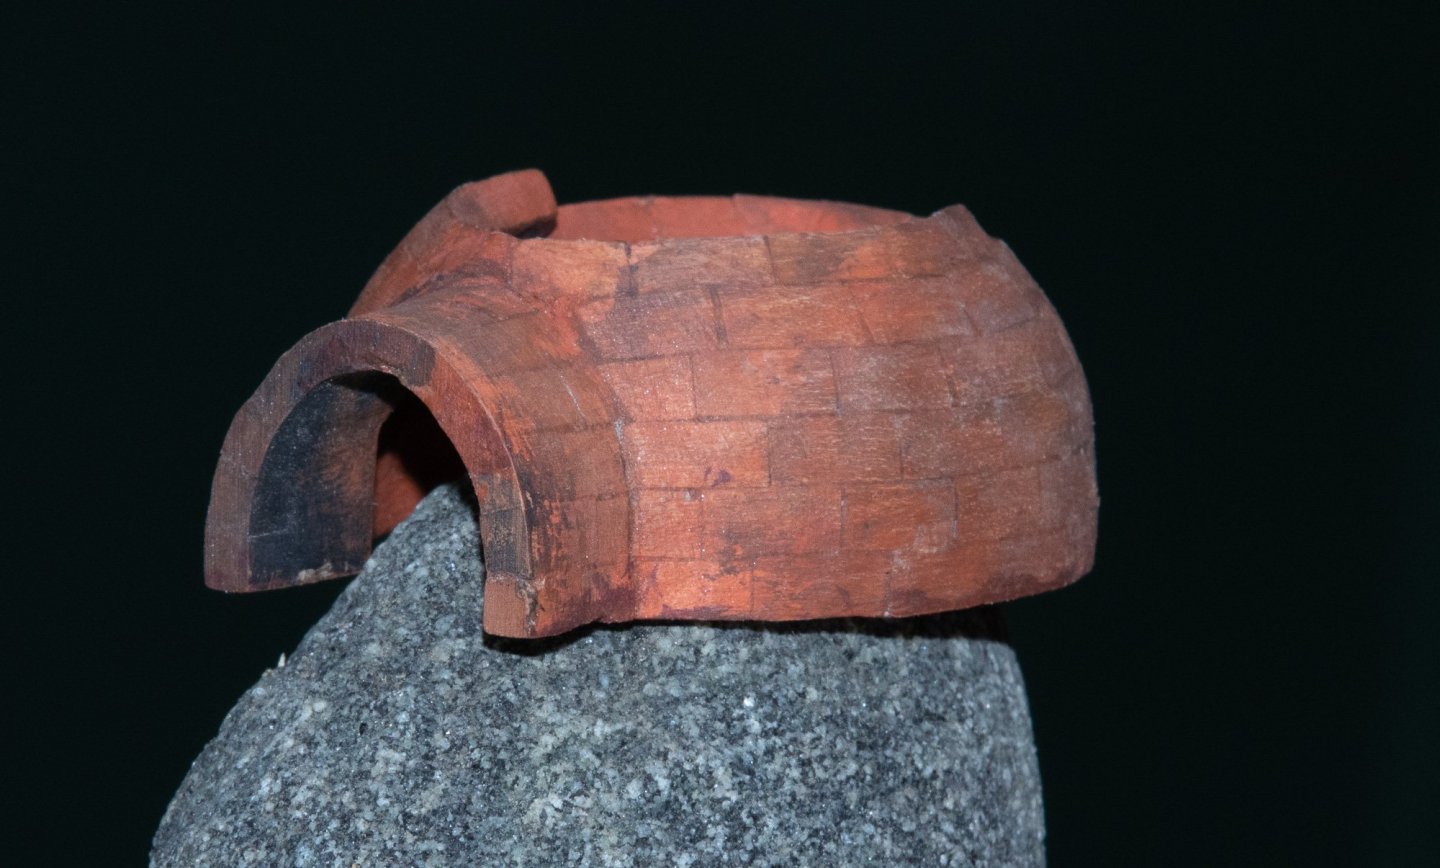
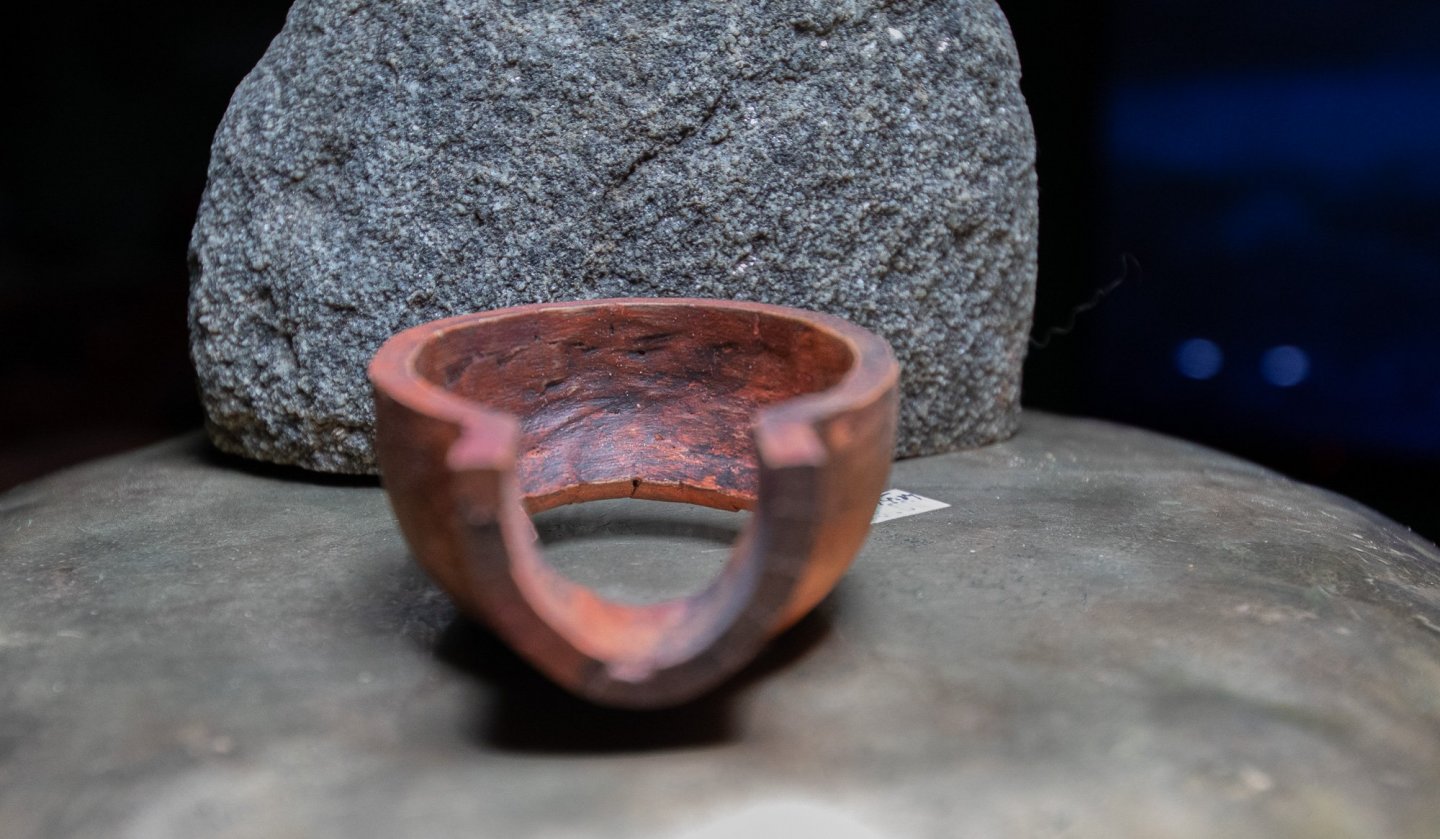
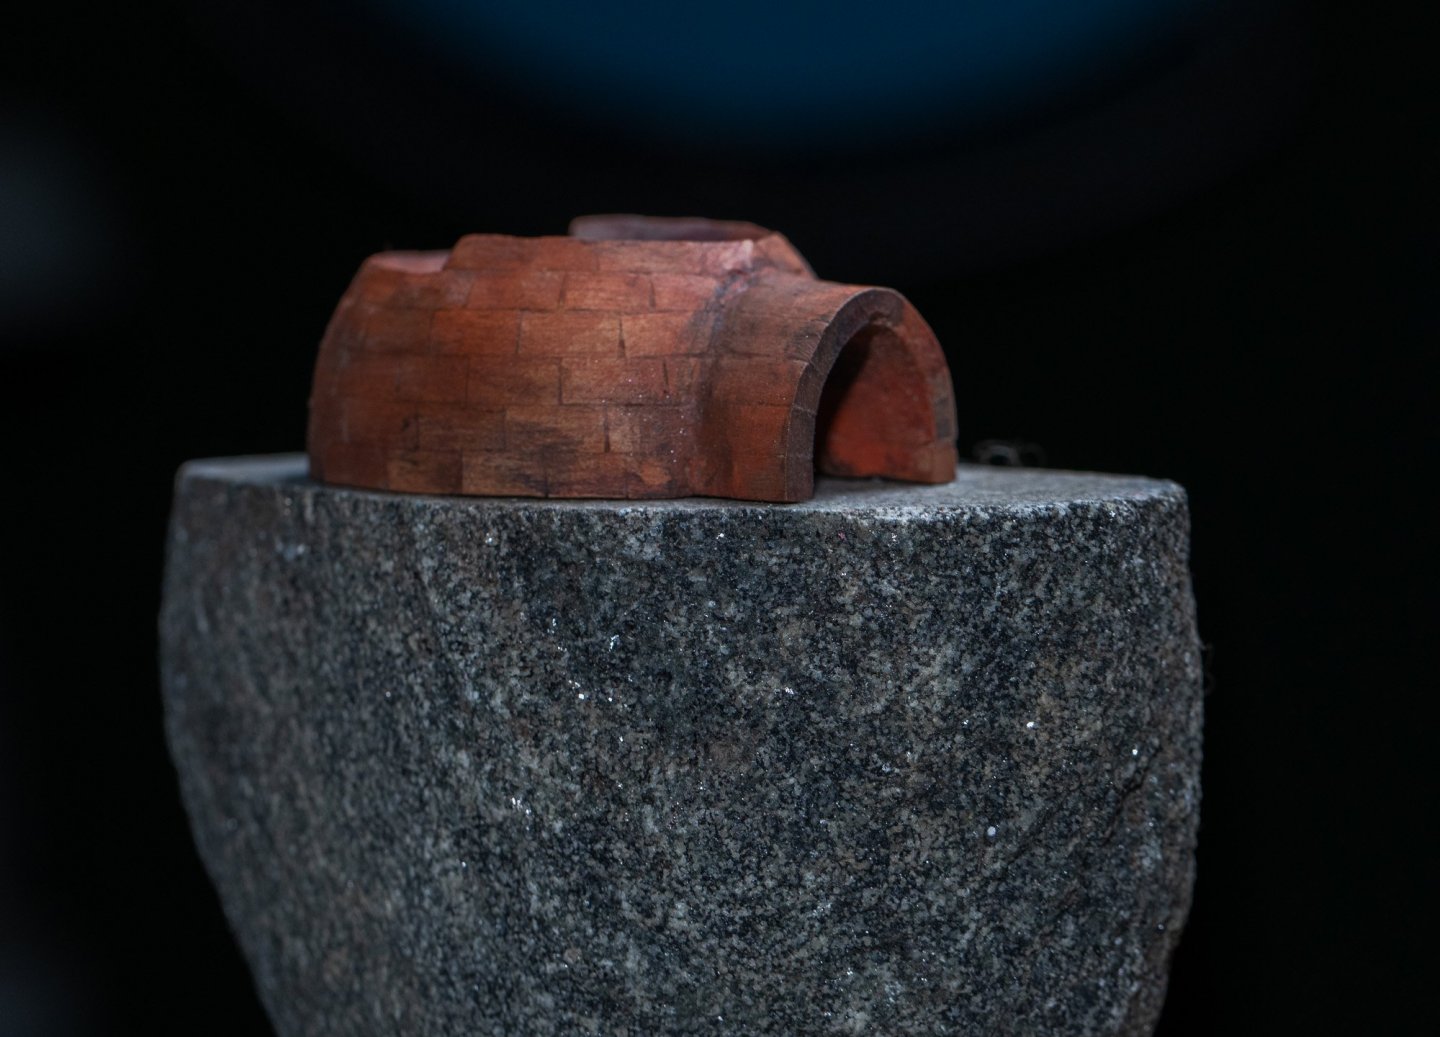
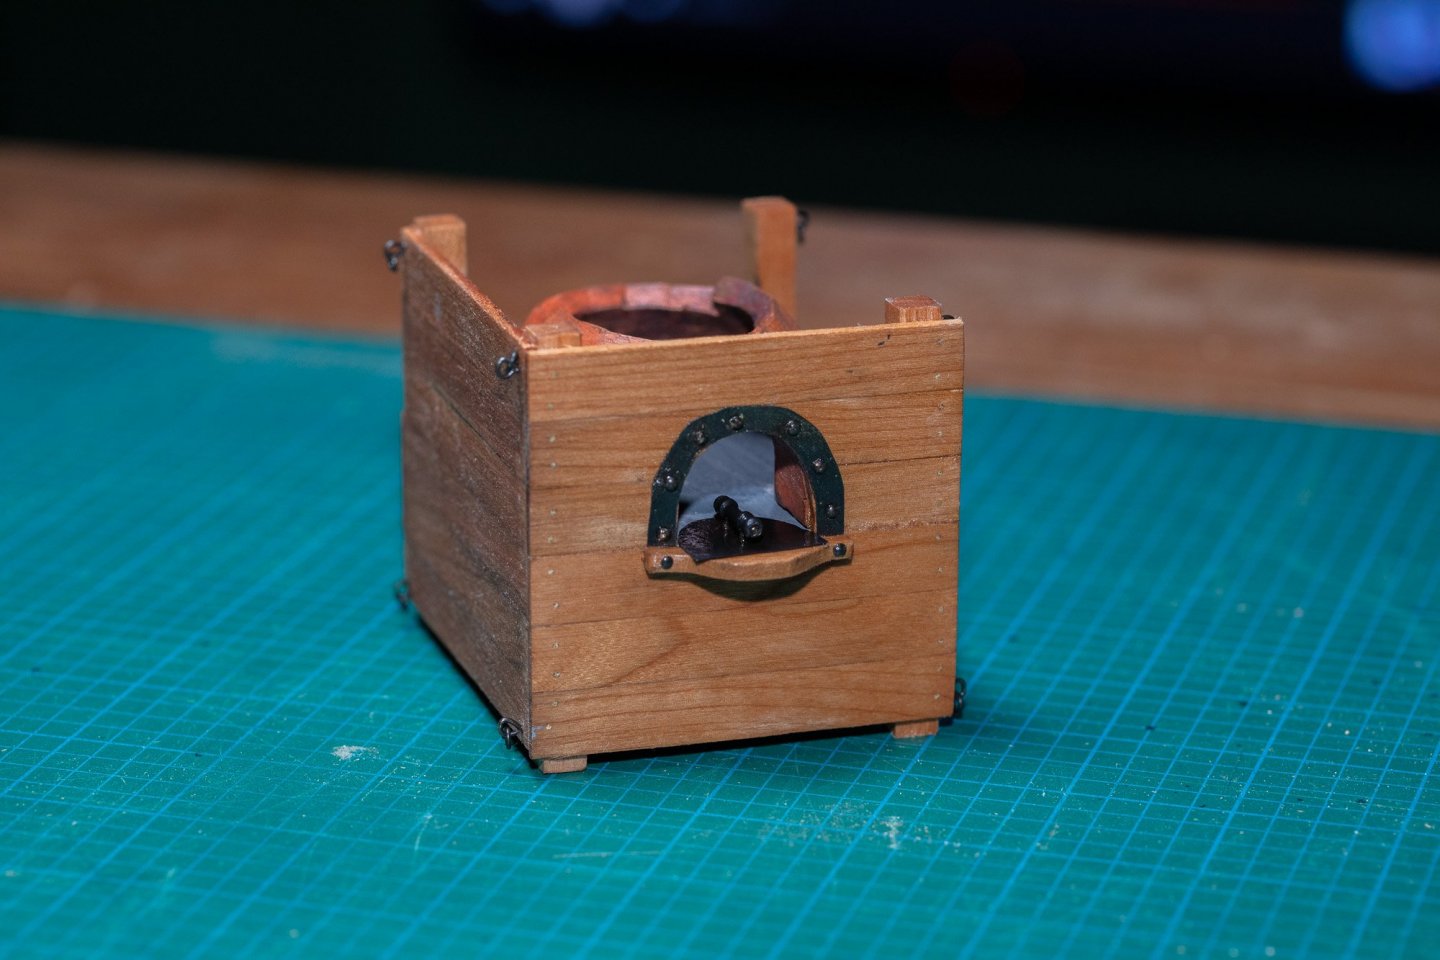
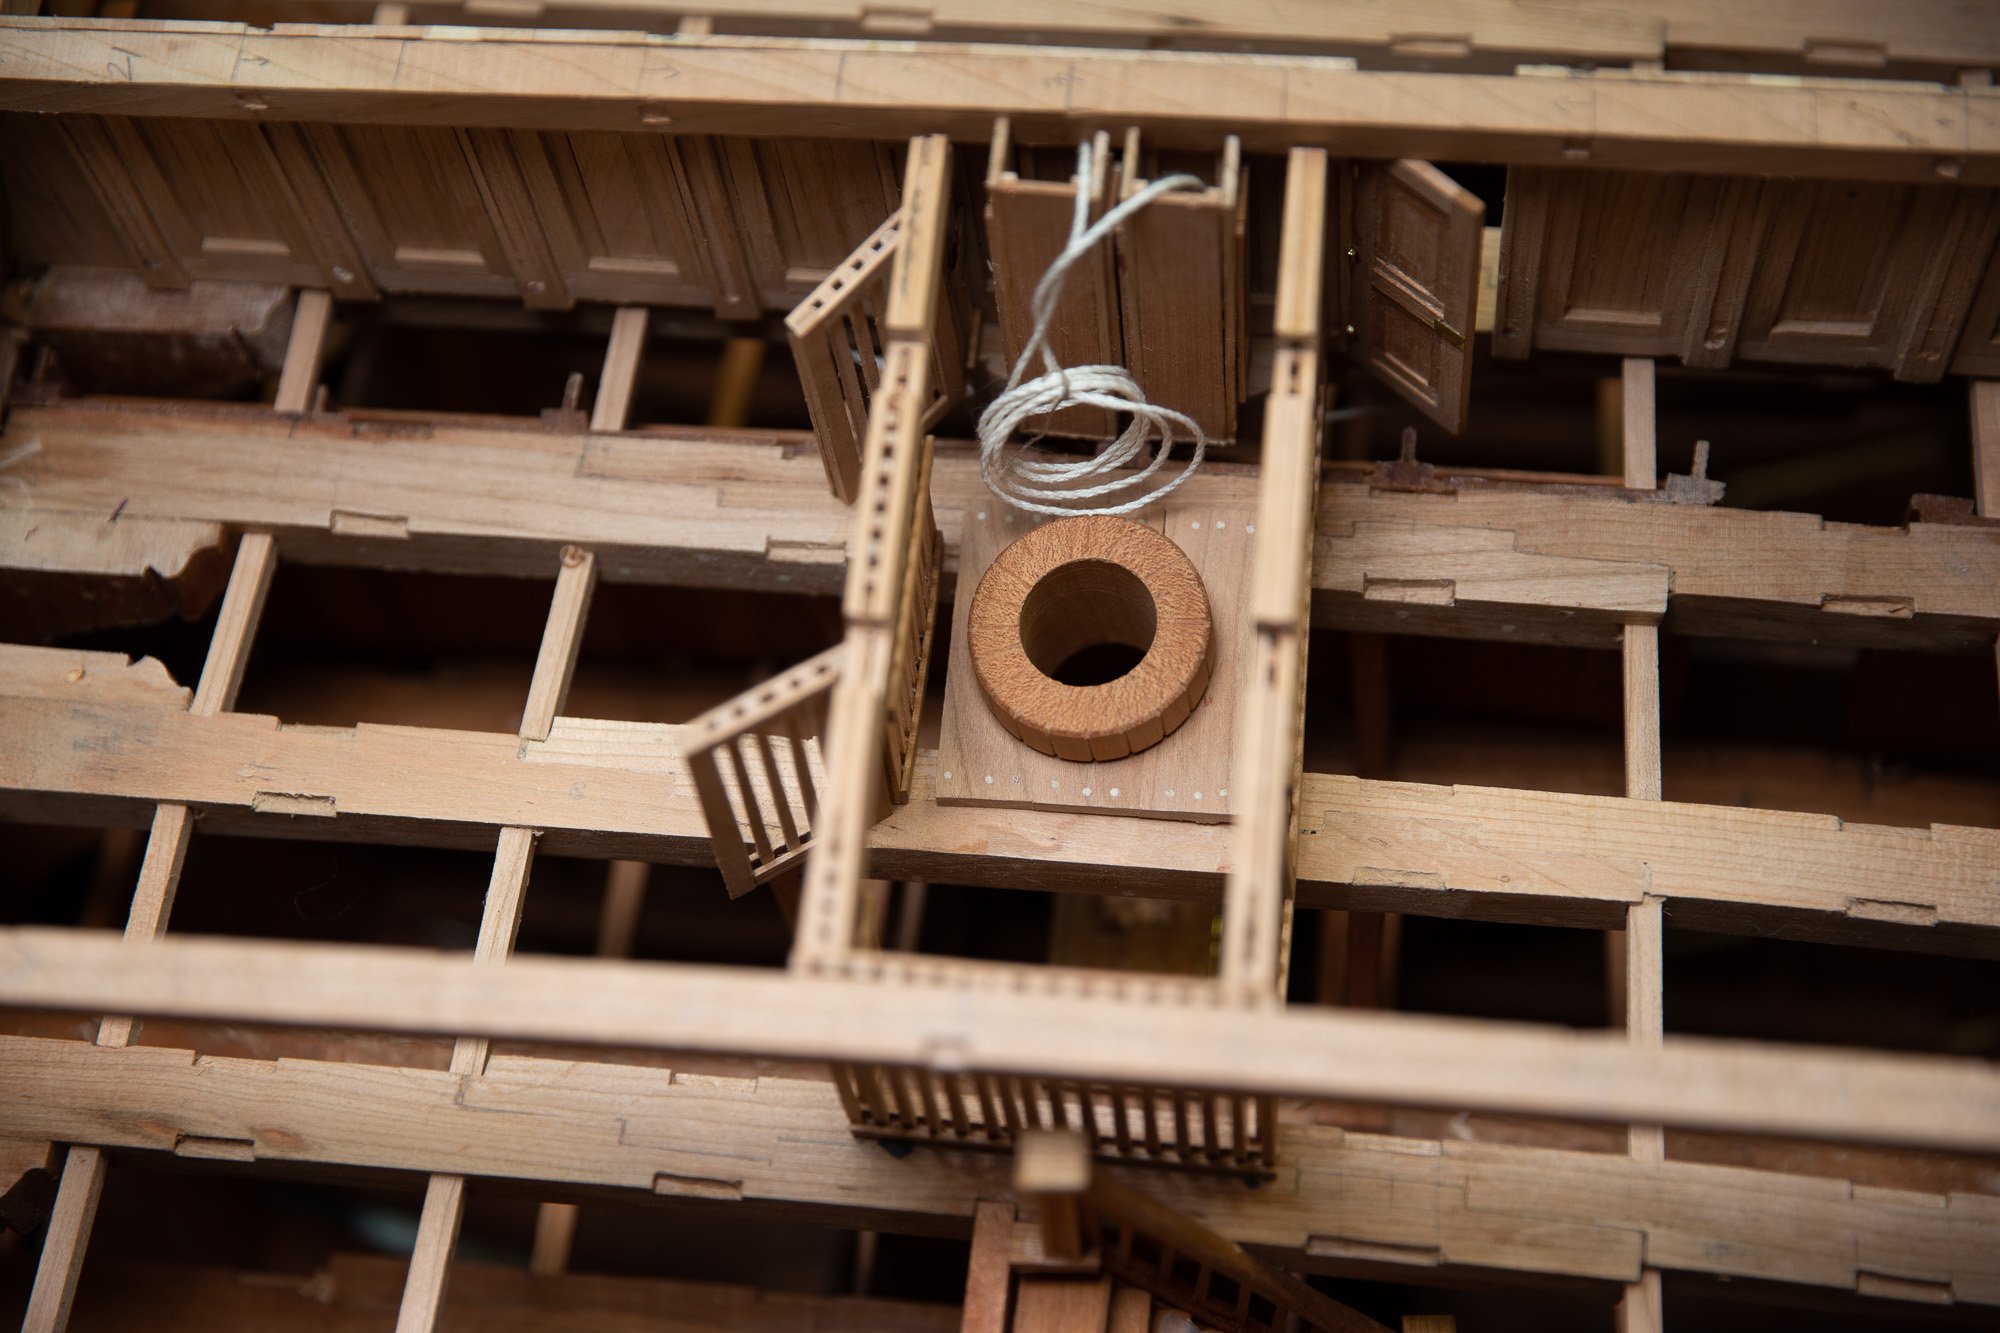
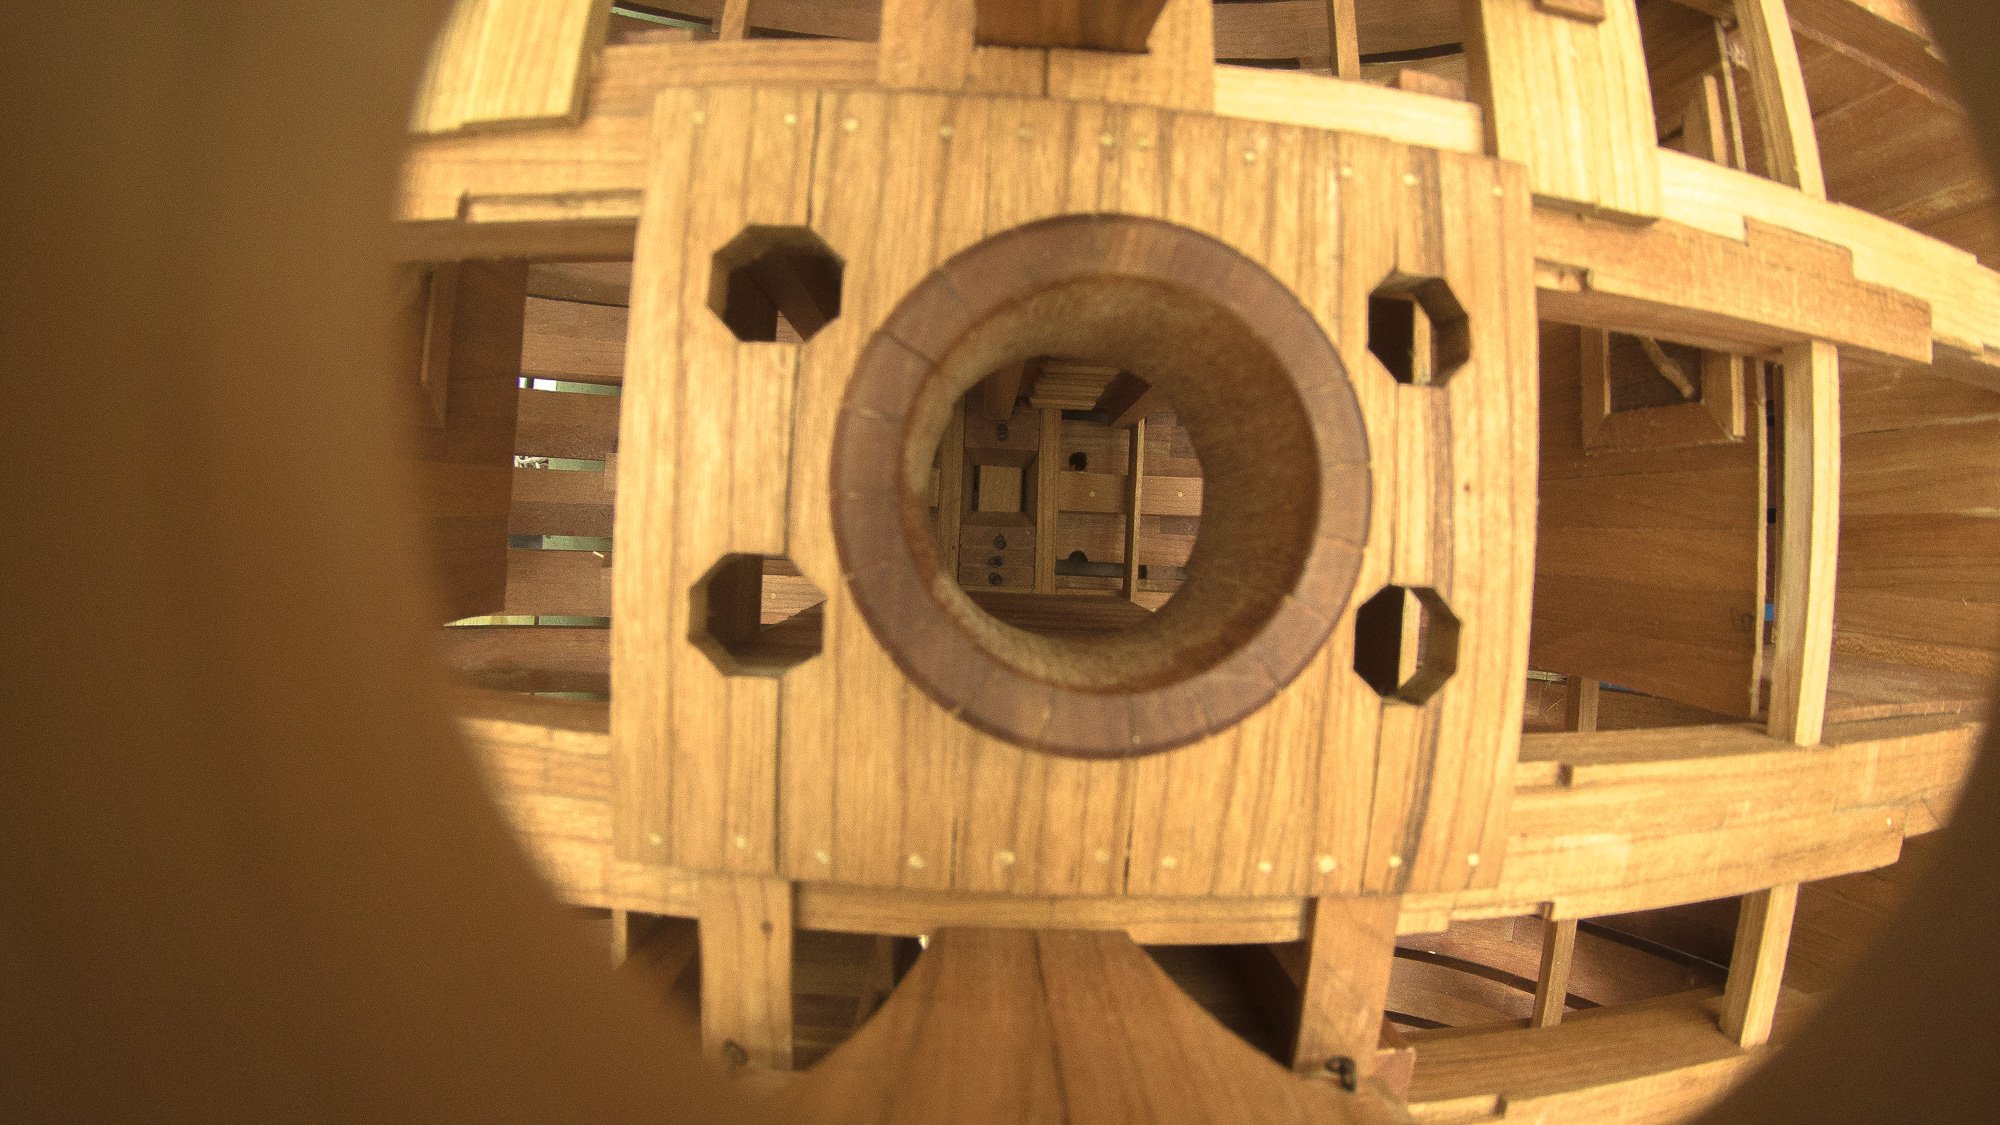
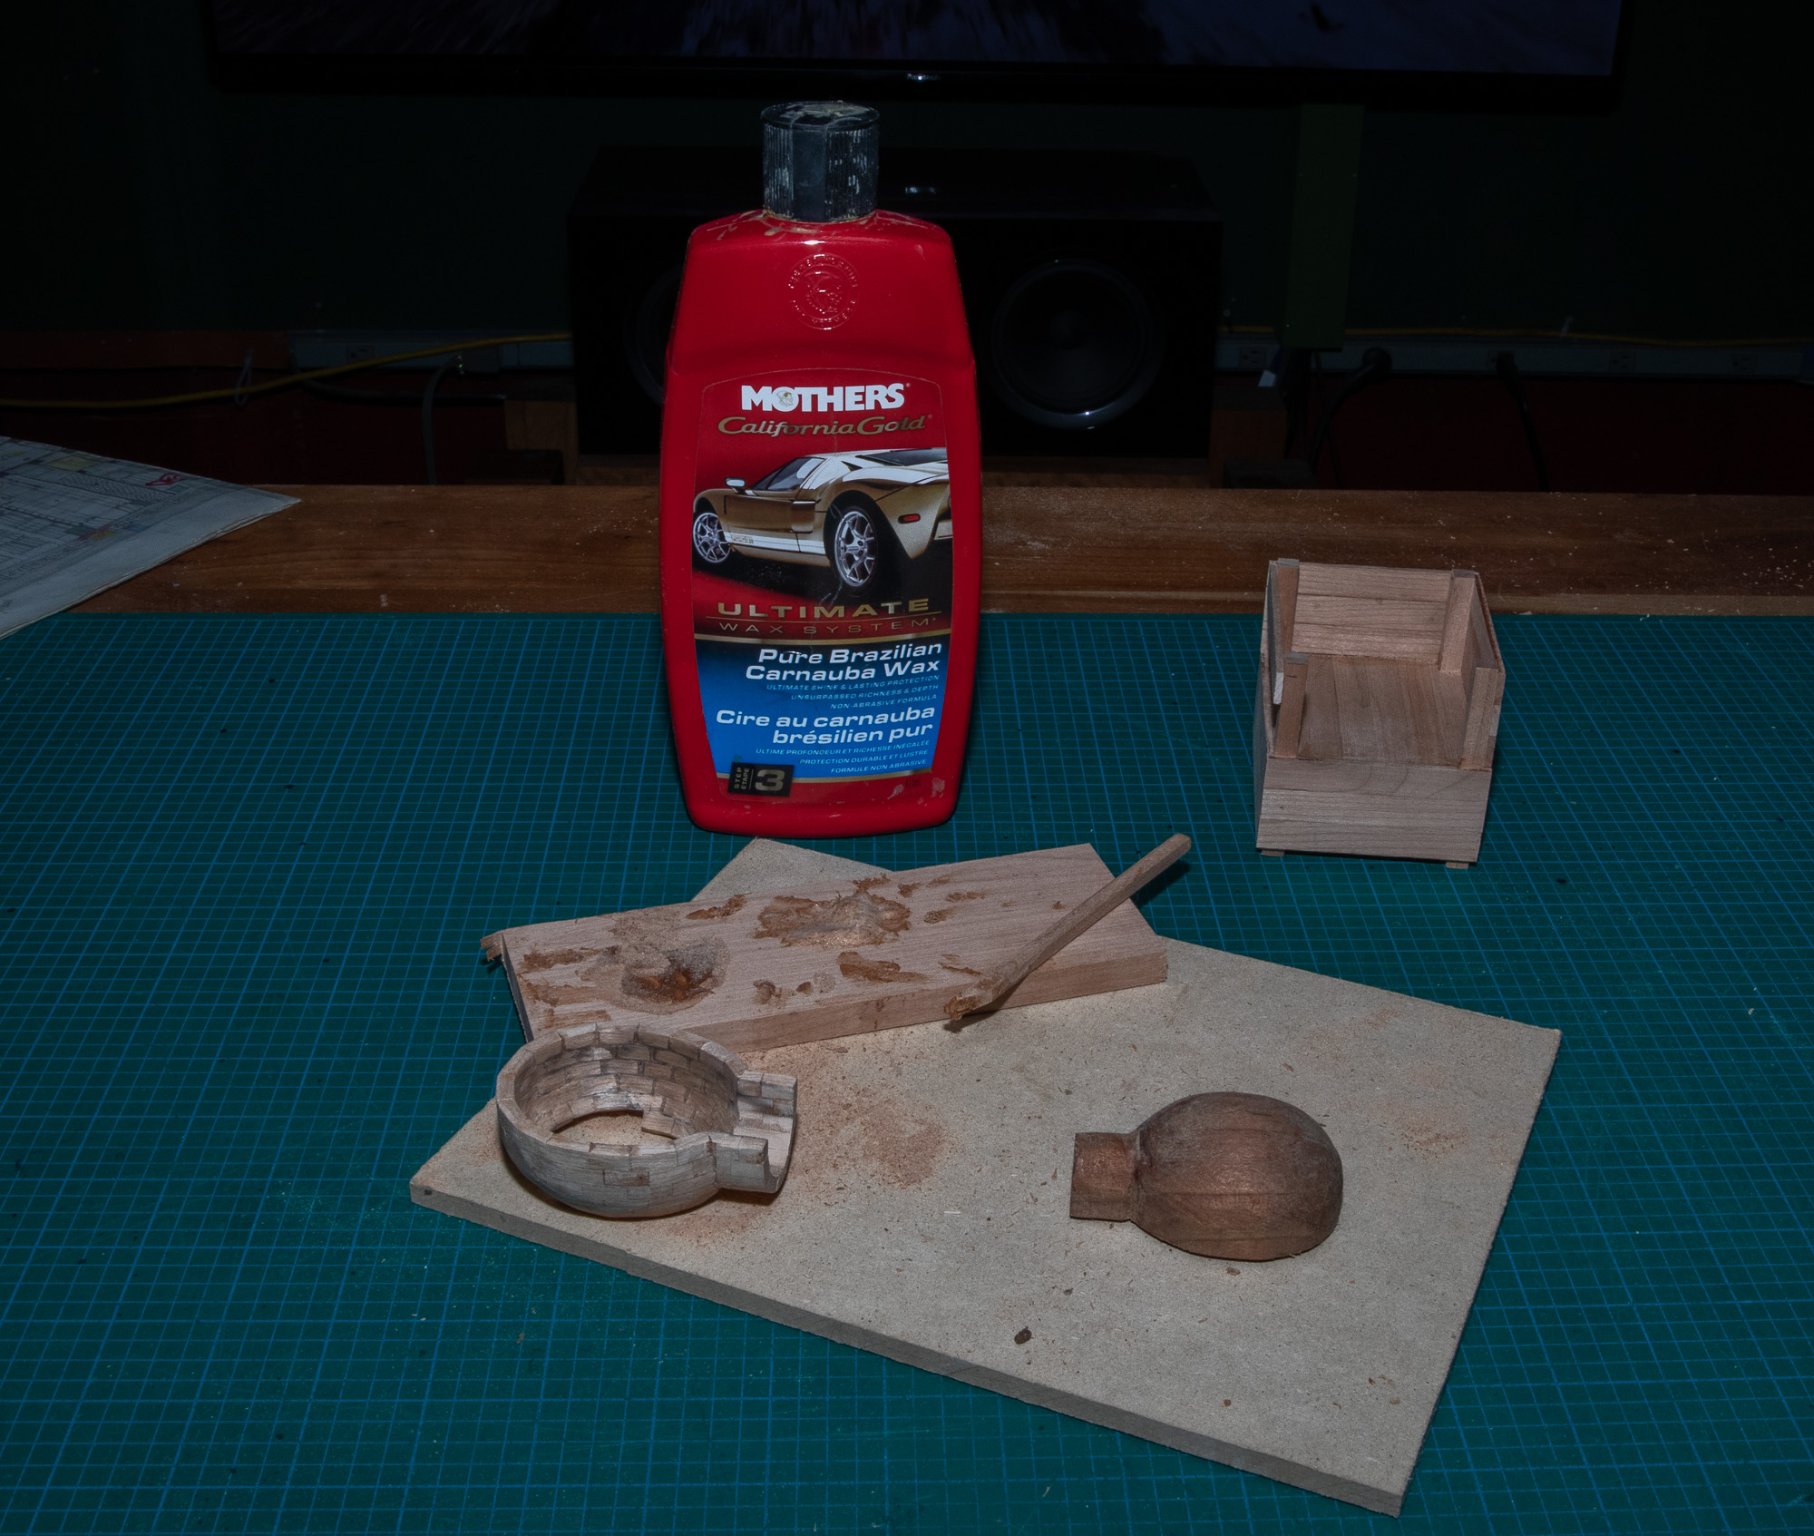
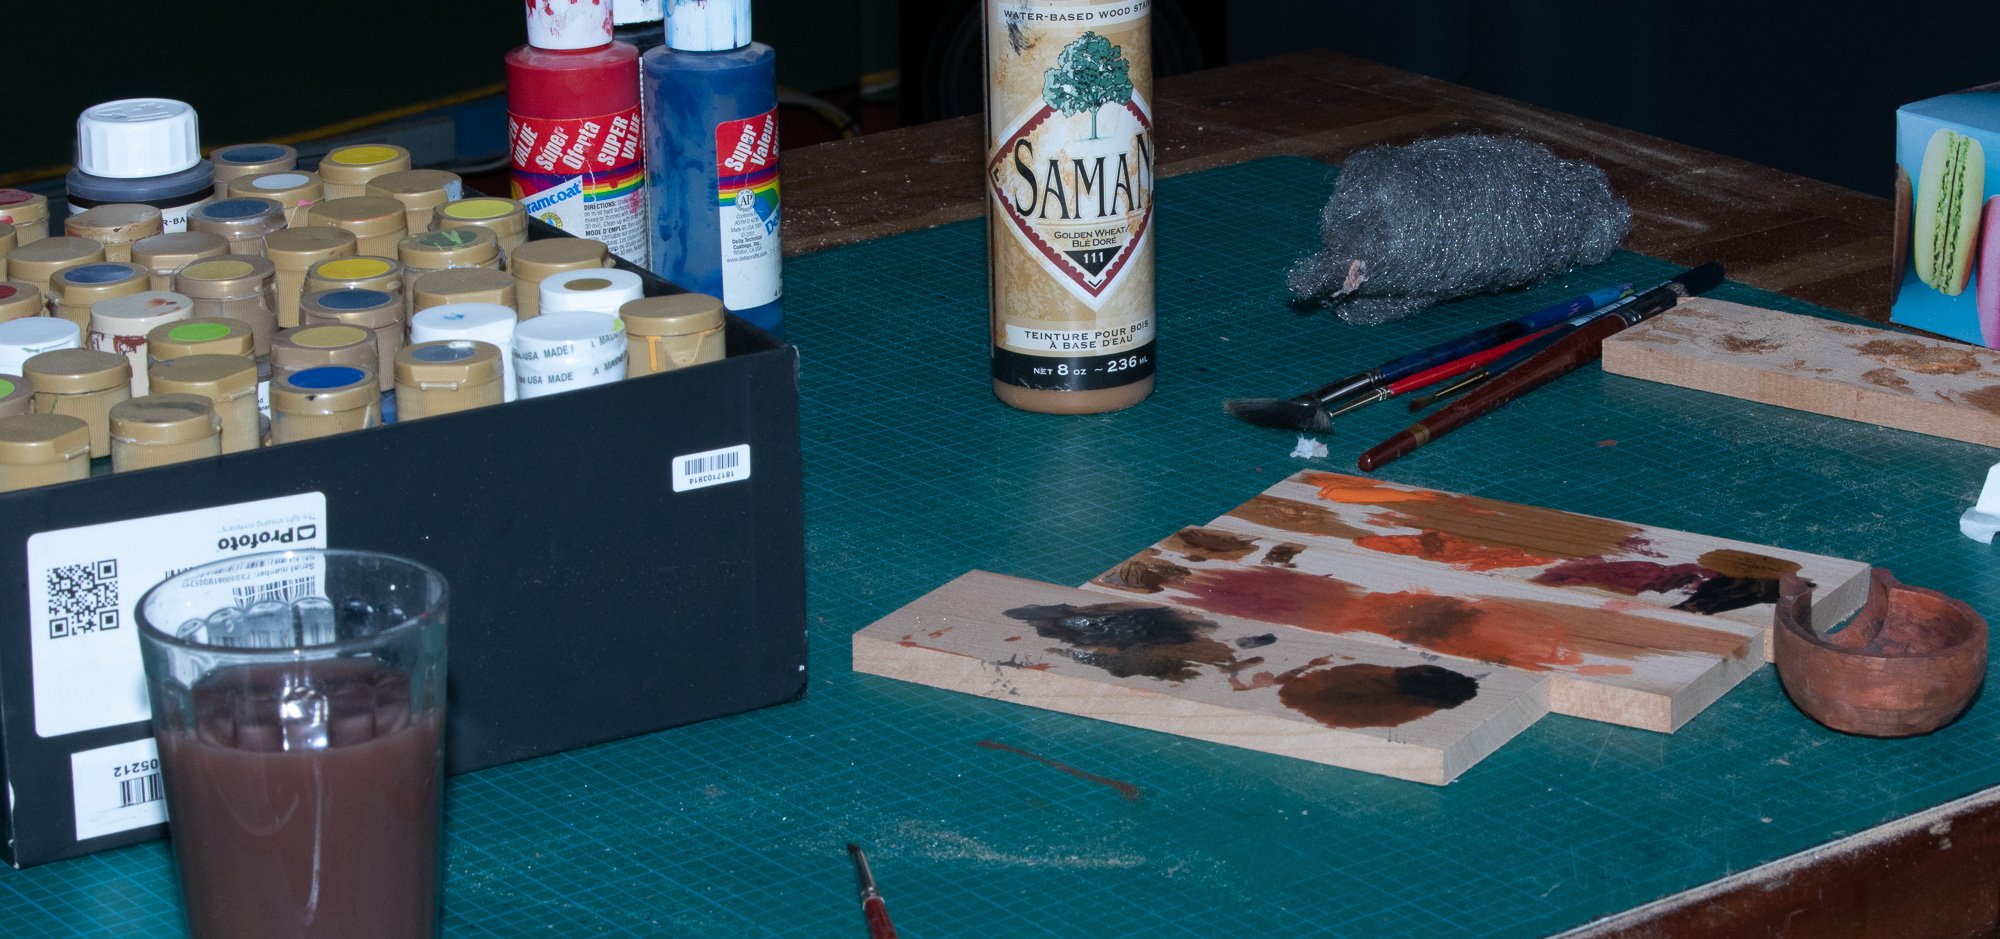
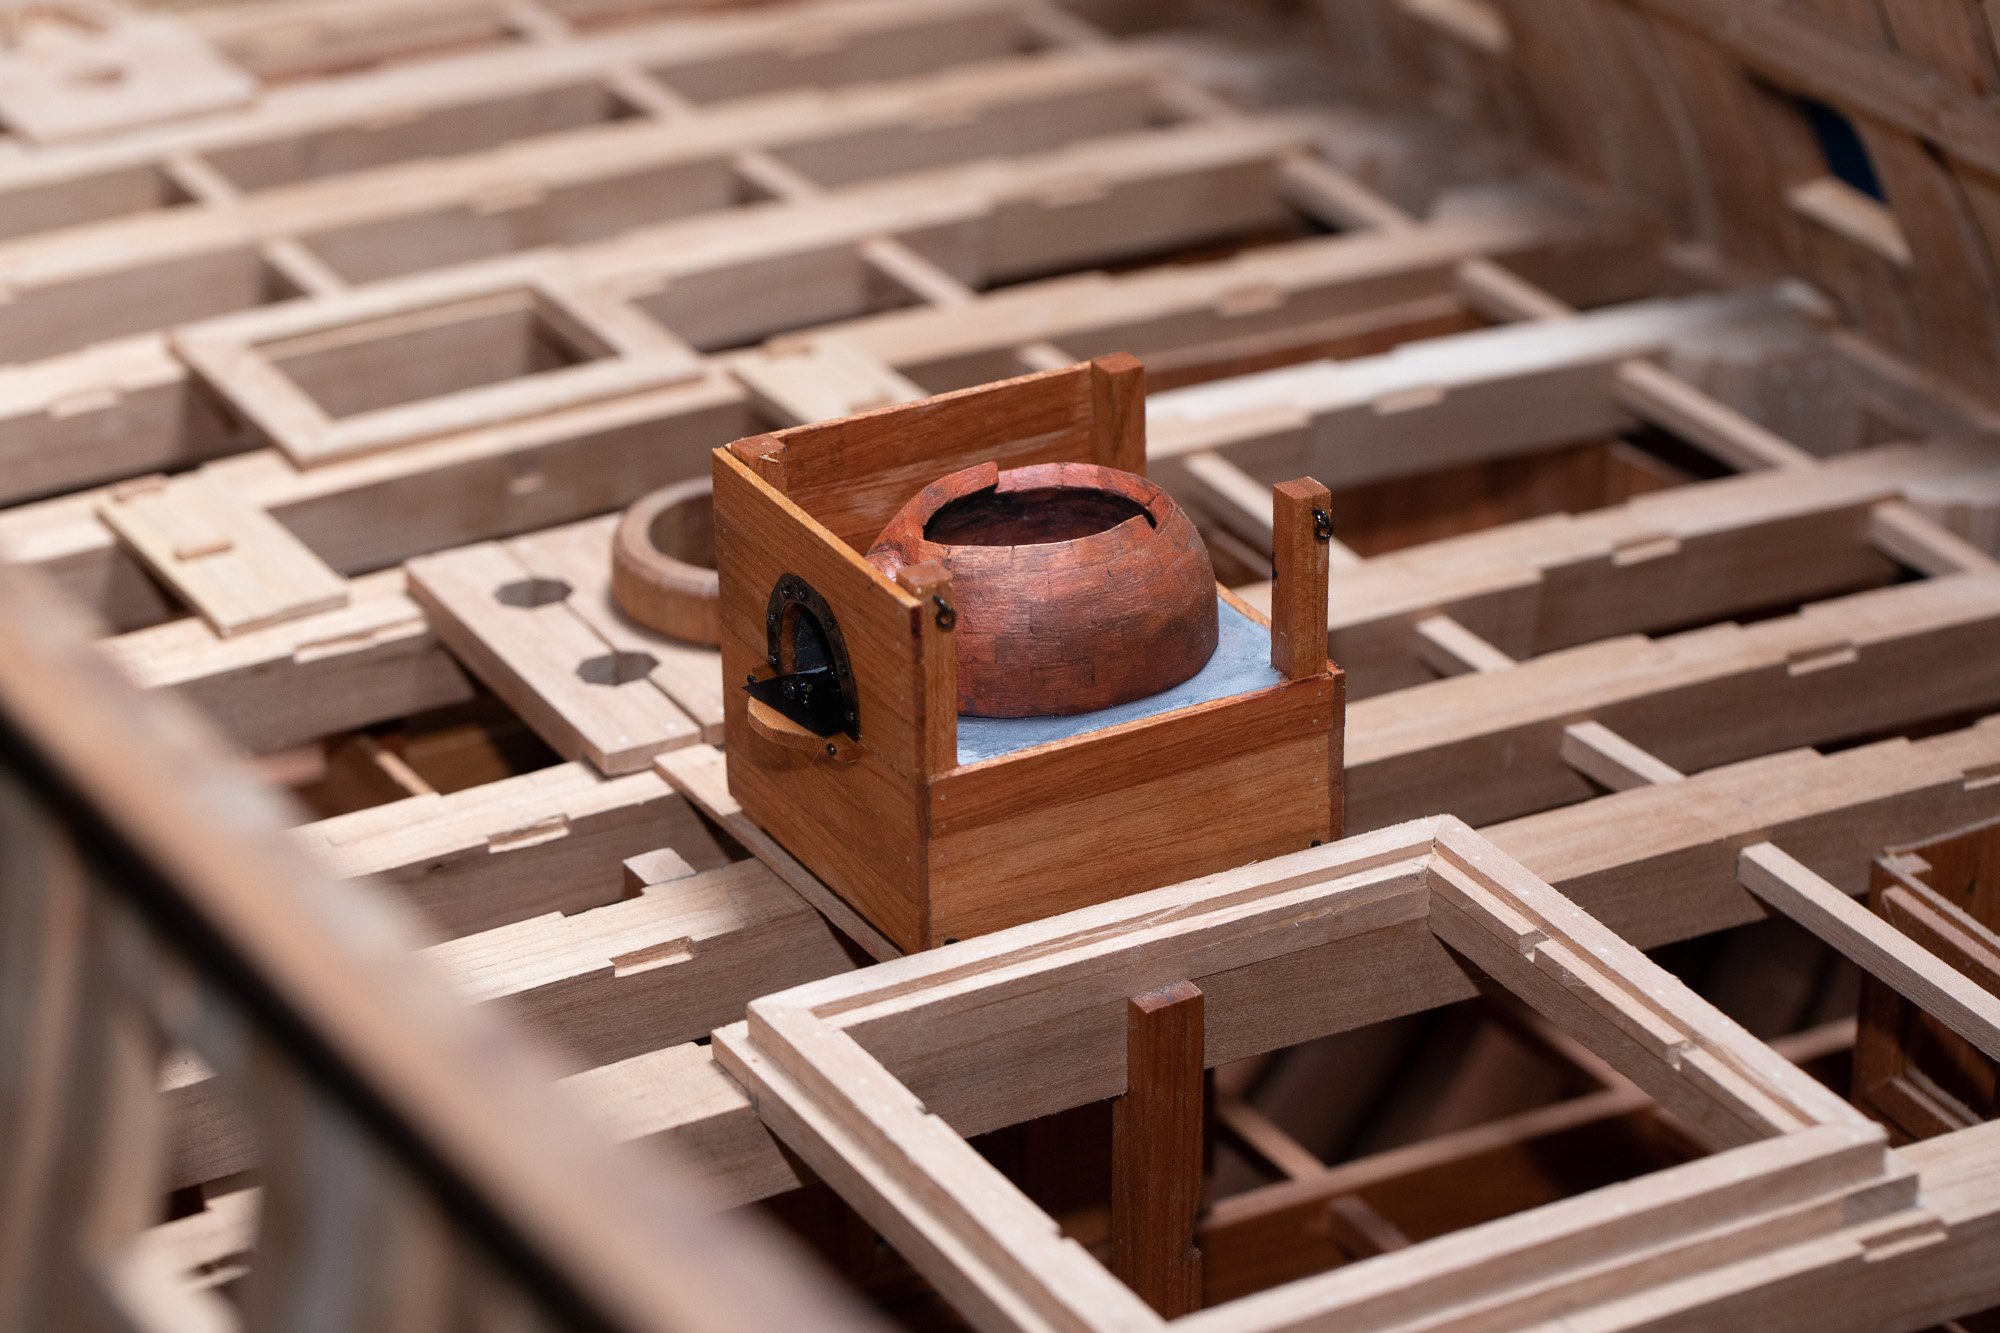
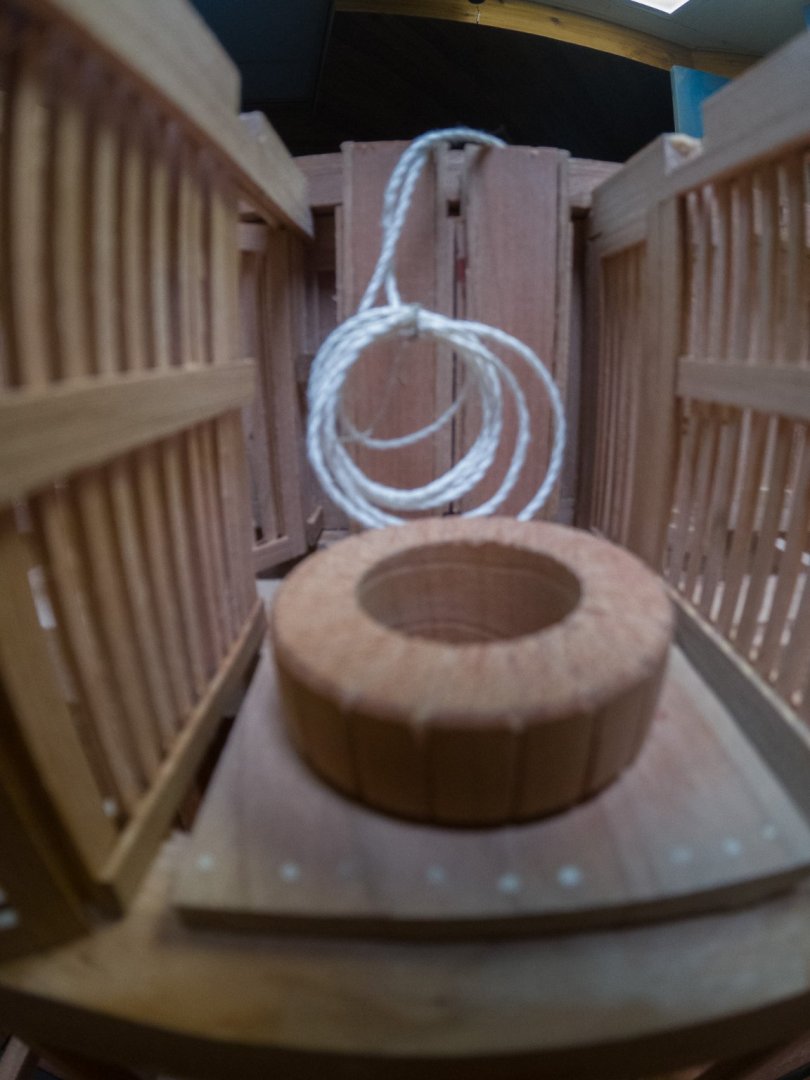
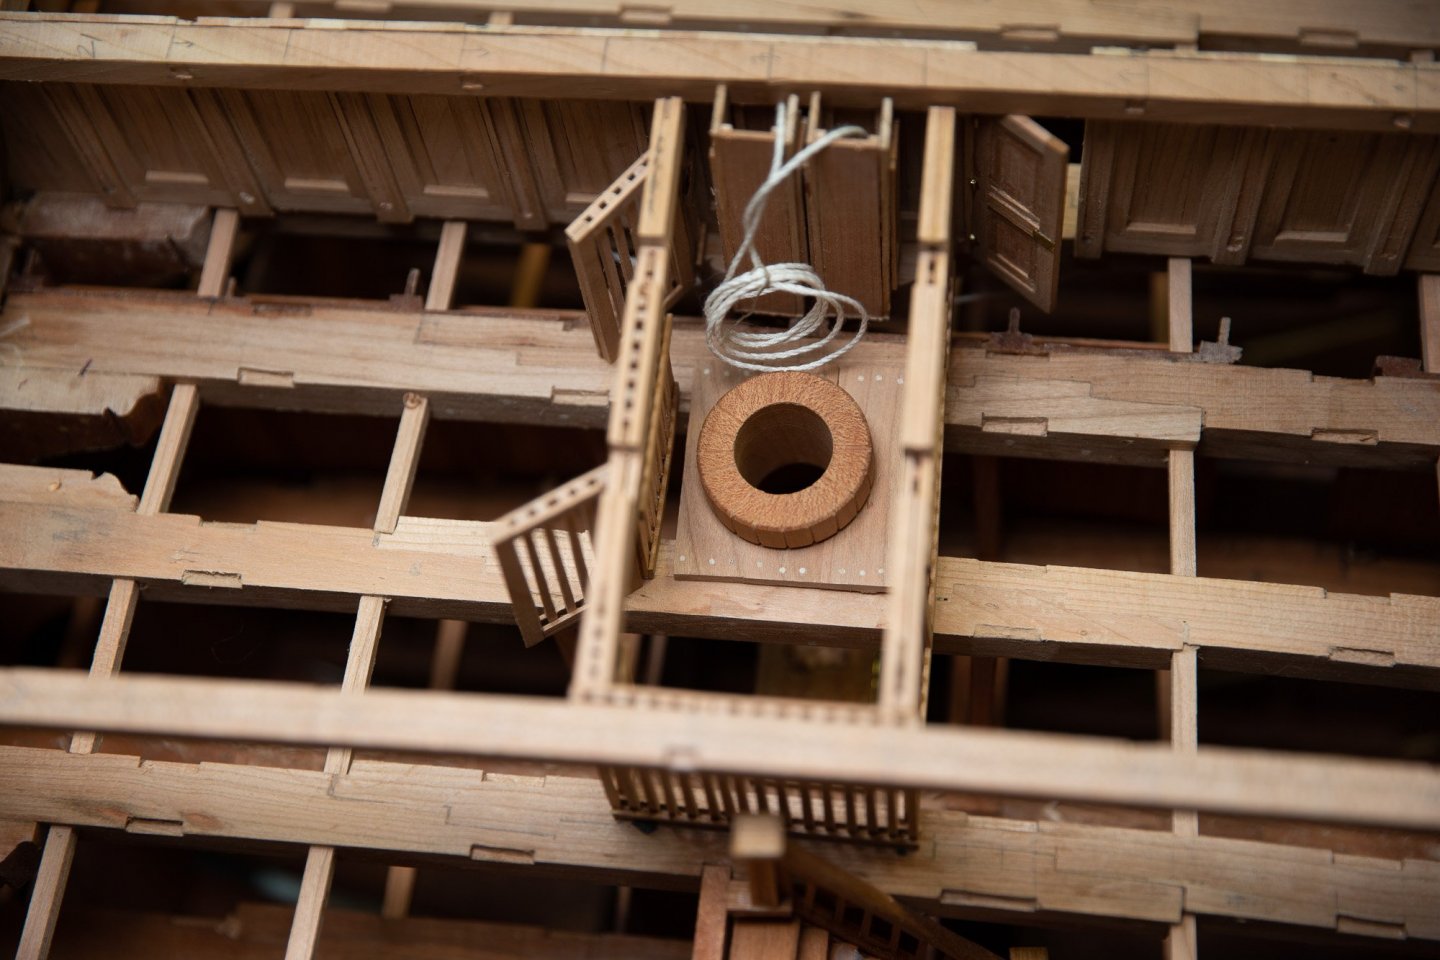
Construction of the bread oven and the entrance of the anchor cables in the hold. On the drawing , we see the shape of the bricks. The assembly is made on a wood form. All the holes are filled with wood putty made of saw dust and glue. 2 actions are done so that the glue does nit stick to the form: adding oil and car wax. Finally, the painting. Here is how I think "the cage" could be done. Below the oven, we need 2 things so that the support of the oven does not burn. Just under the oven, there could be thin plates and or a brick thickness. In the bottom half of that support, it would be filled with sand to dissipate the heat.