rafine
-
Posts
2,932 -
Joined
-
Last visited
Content Type
Profiles
Forums
Gallery
Events
Everything posted by rafine
-
 Thanks so much David and the "likes". David, I hope you're right about the stern blocks. For the rudder, I'm going to make my own and try to do it to fit. I haven't decided yet about the gunports, but it will have to be soon. Bob
- 359 replies
-
- 4
-

-
- prince de neufchatel
- model shipways
- (and 1 more)
-
Thanks so much OC, Dave and the "likes". OC, I sanded the area below the the bearding line thinner than the keel former. I created a "fake" rabbet by making the stem, keel and stern post slightly wider than the keel former. Bob
- 359 replies
-
- 6
-
-
- prince de neufchatel
- model shipways
- (and 1 more)
-
I'm looking forward to your usual great work. Bob
- 120 replies
-
- 4
-
-
- queen anne barge
- Syren Ship Model Company
- (and 1 more)
-
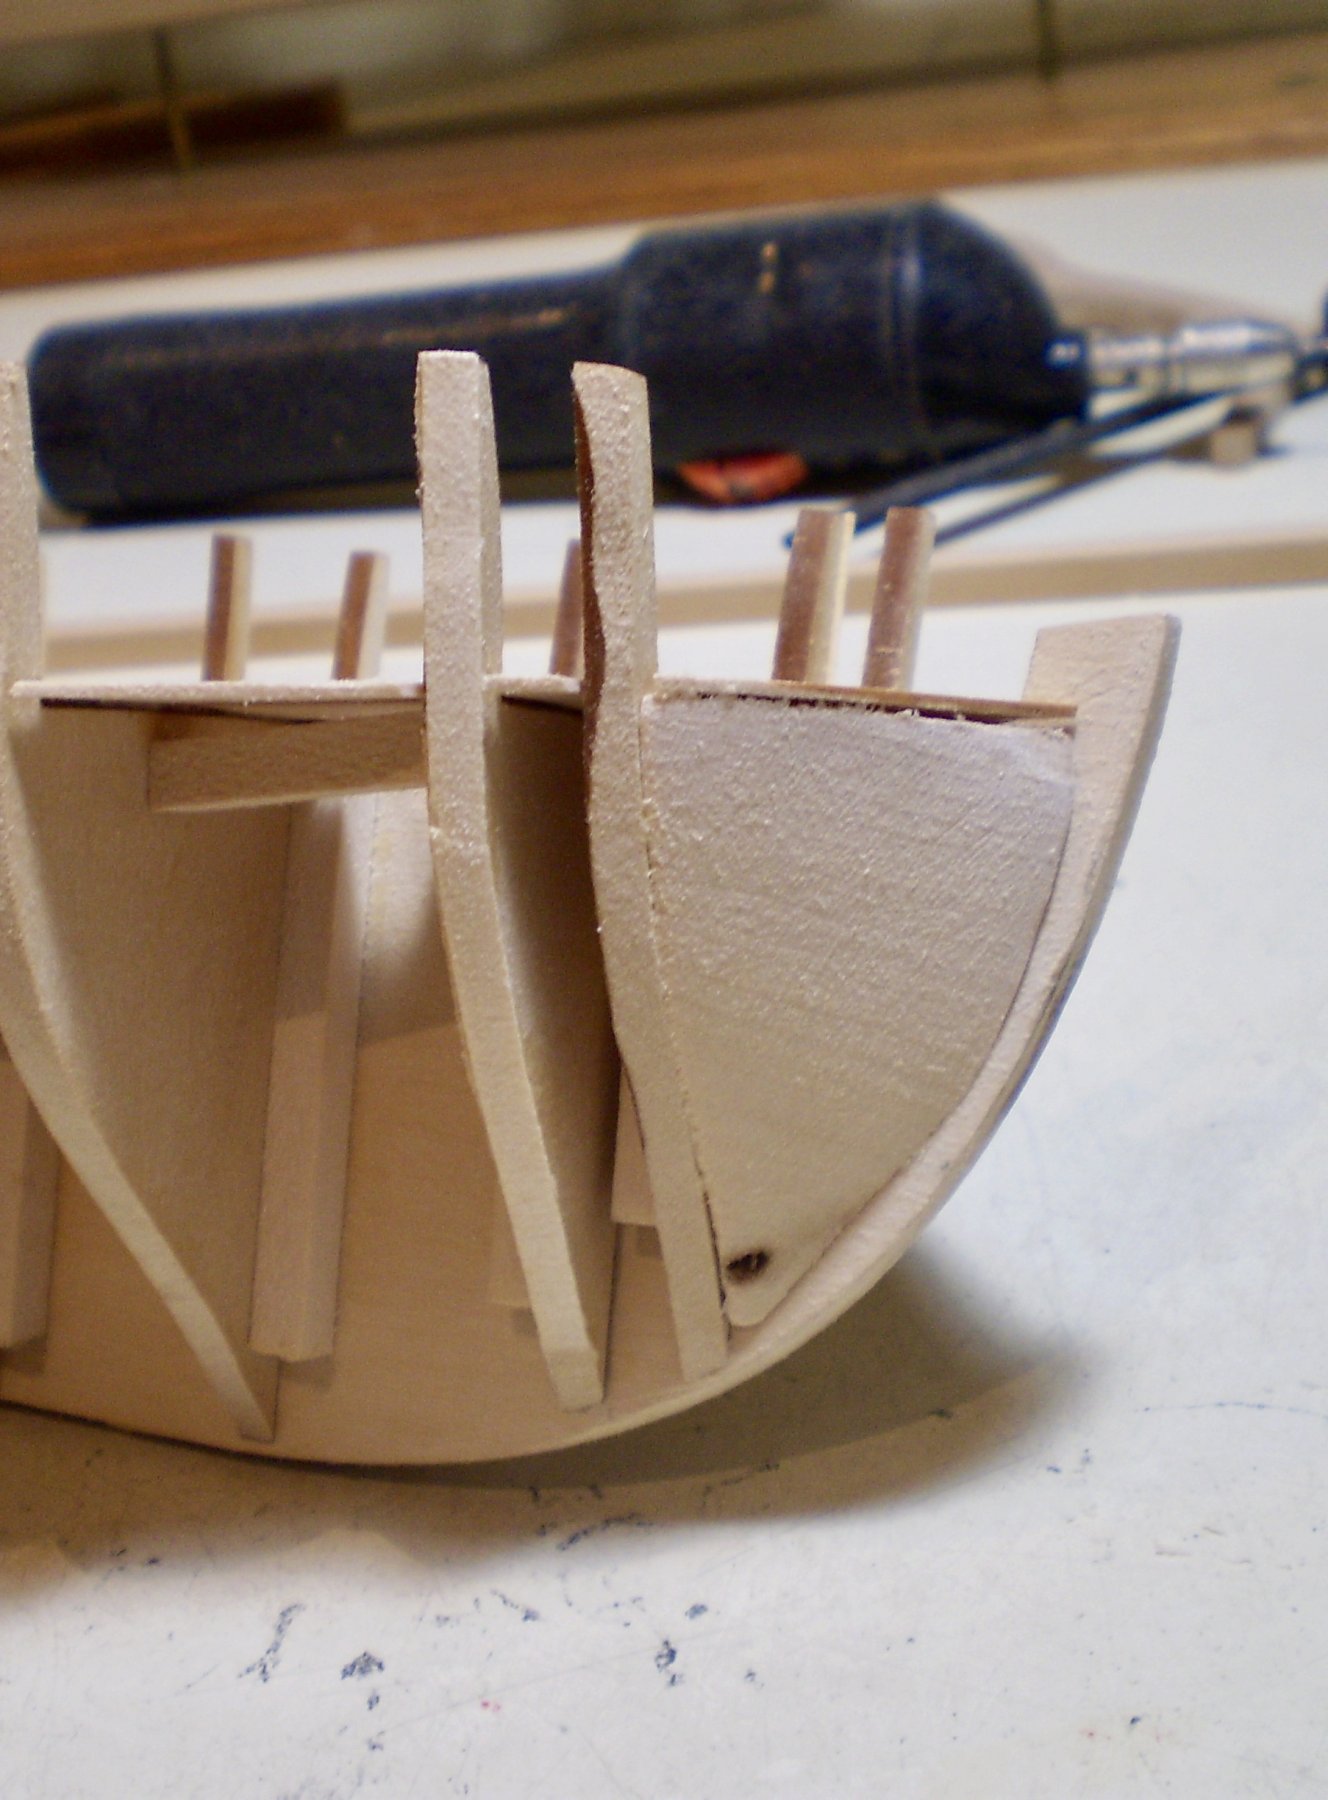
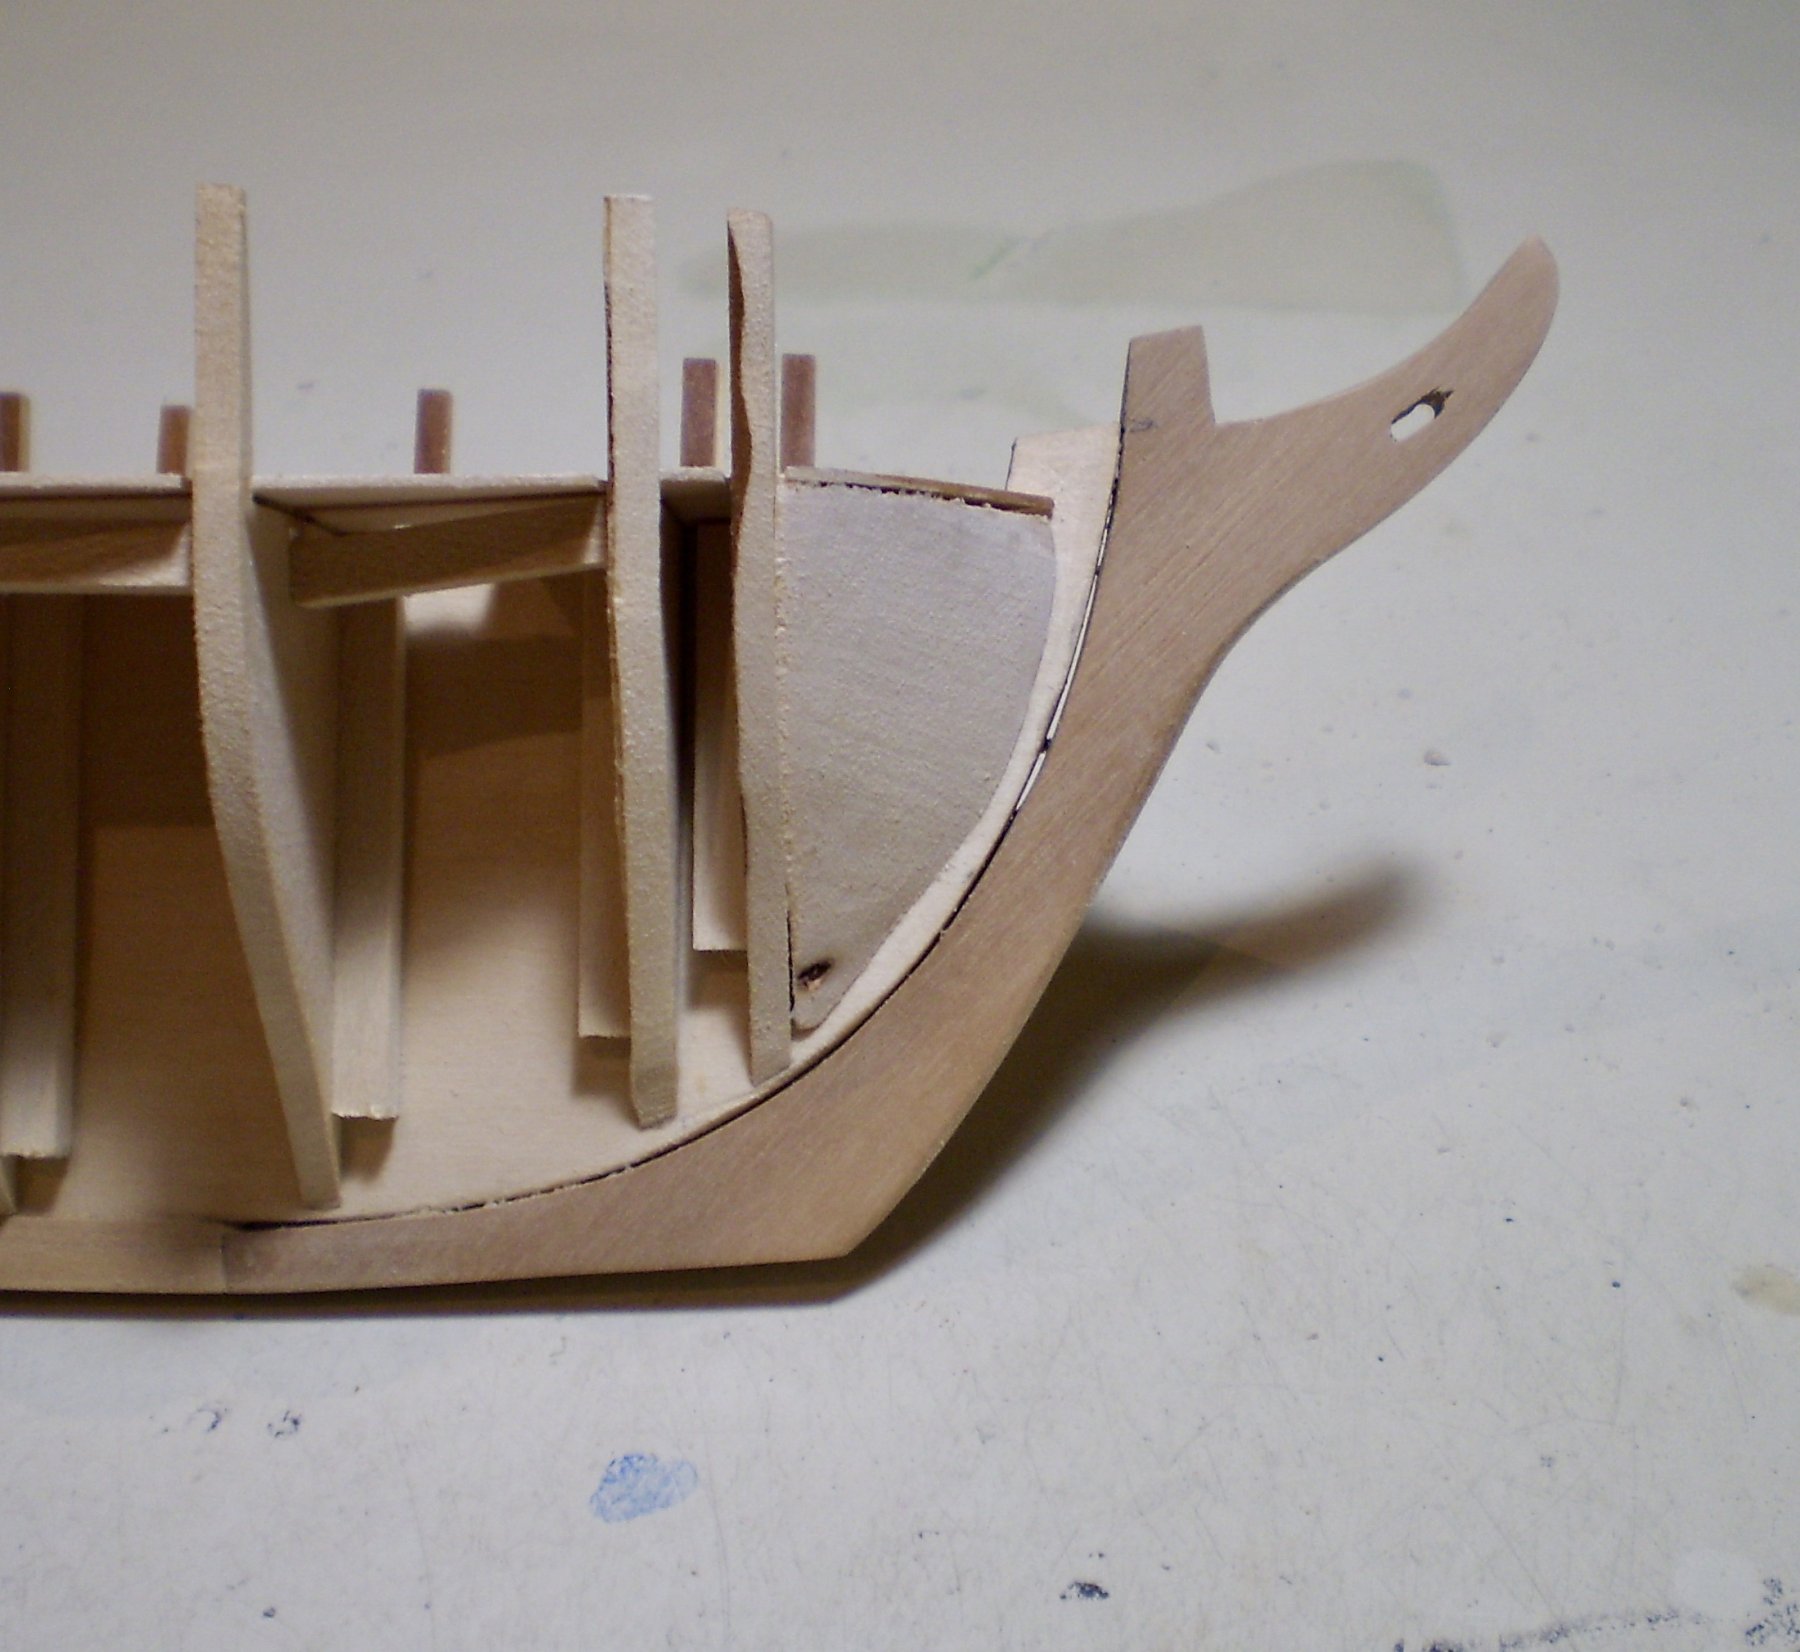
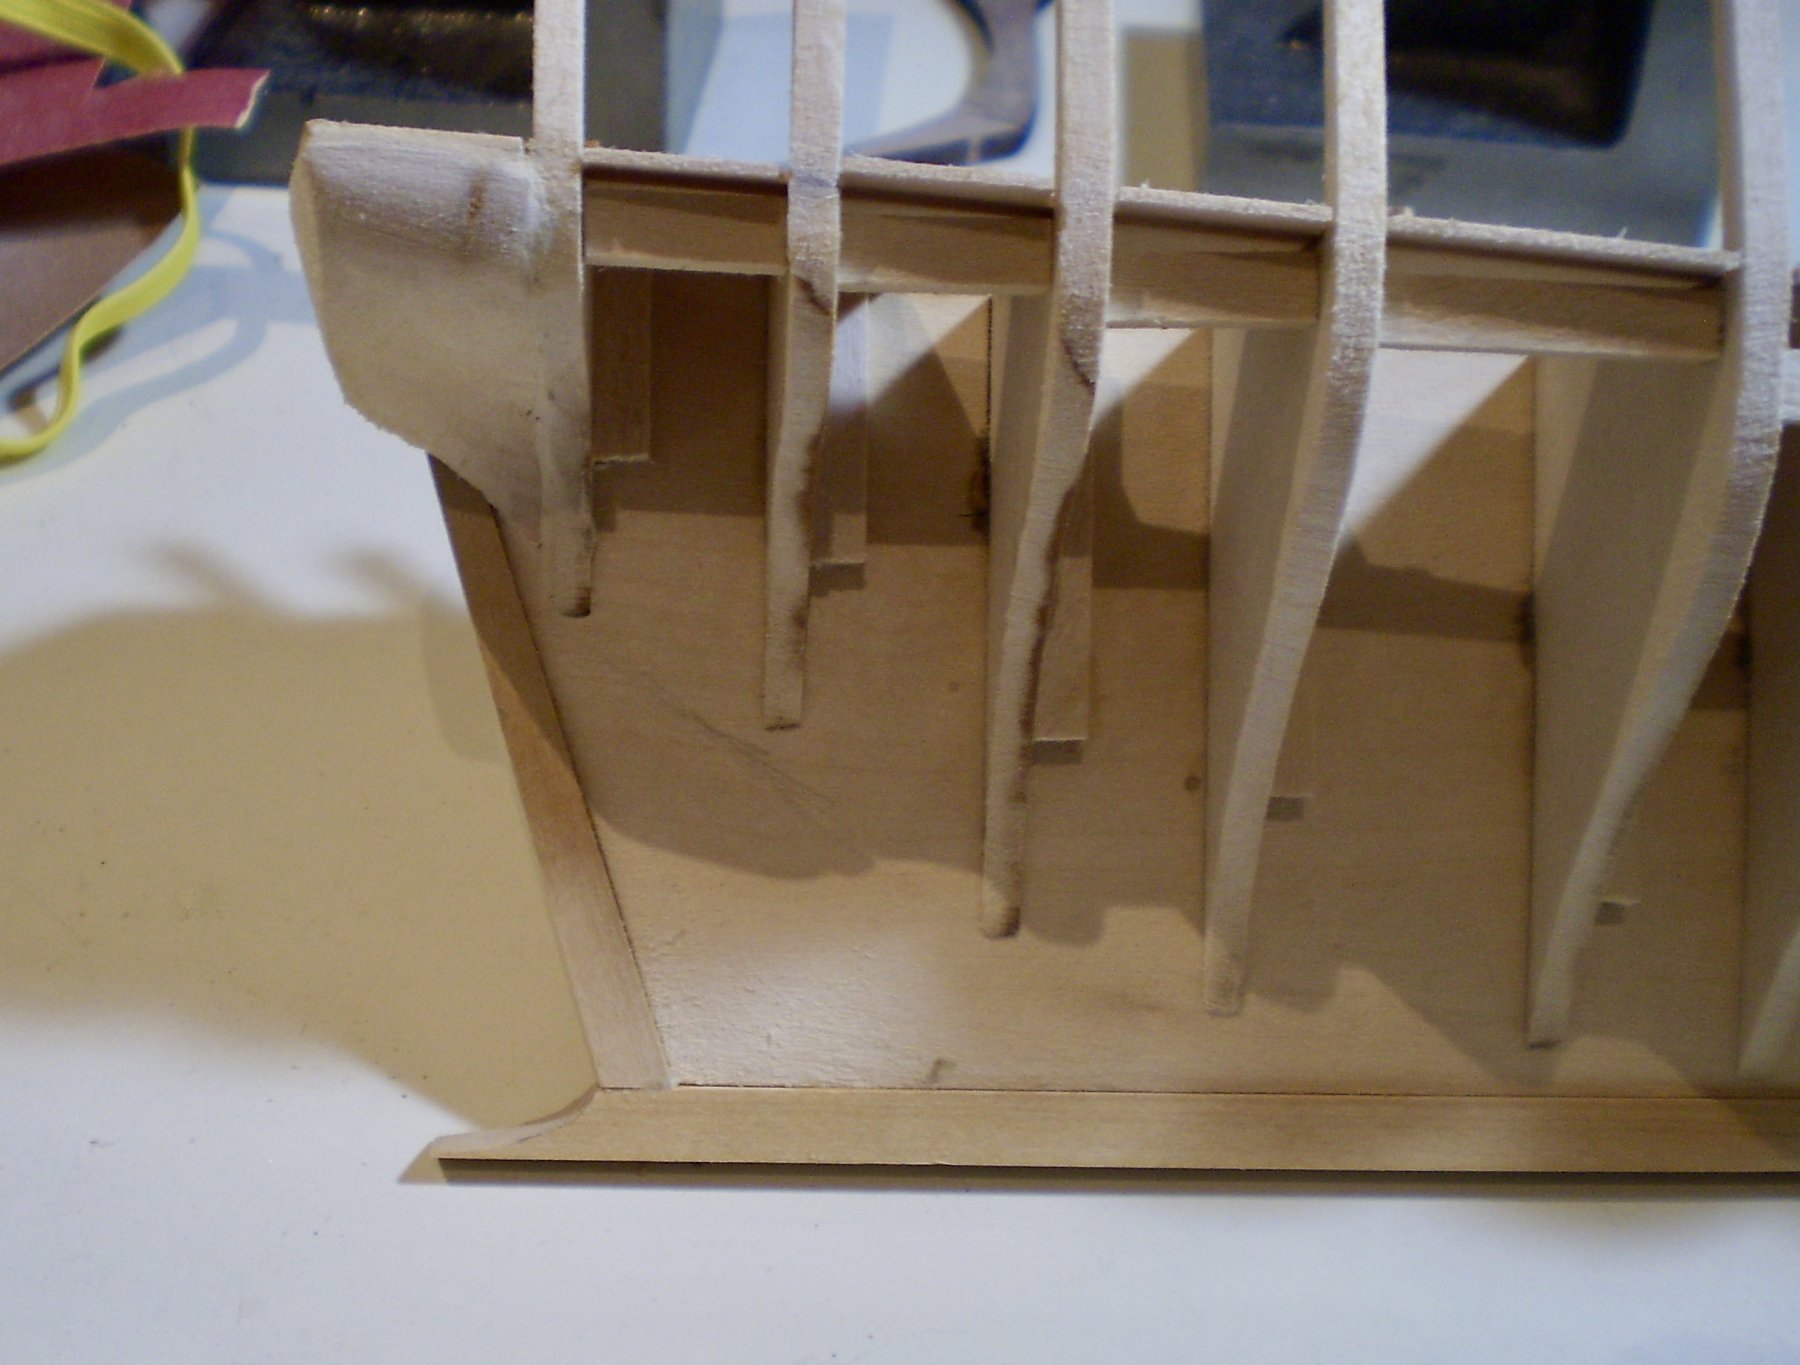
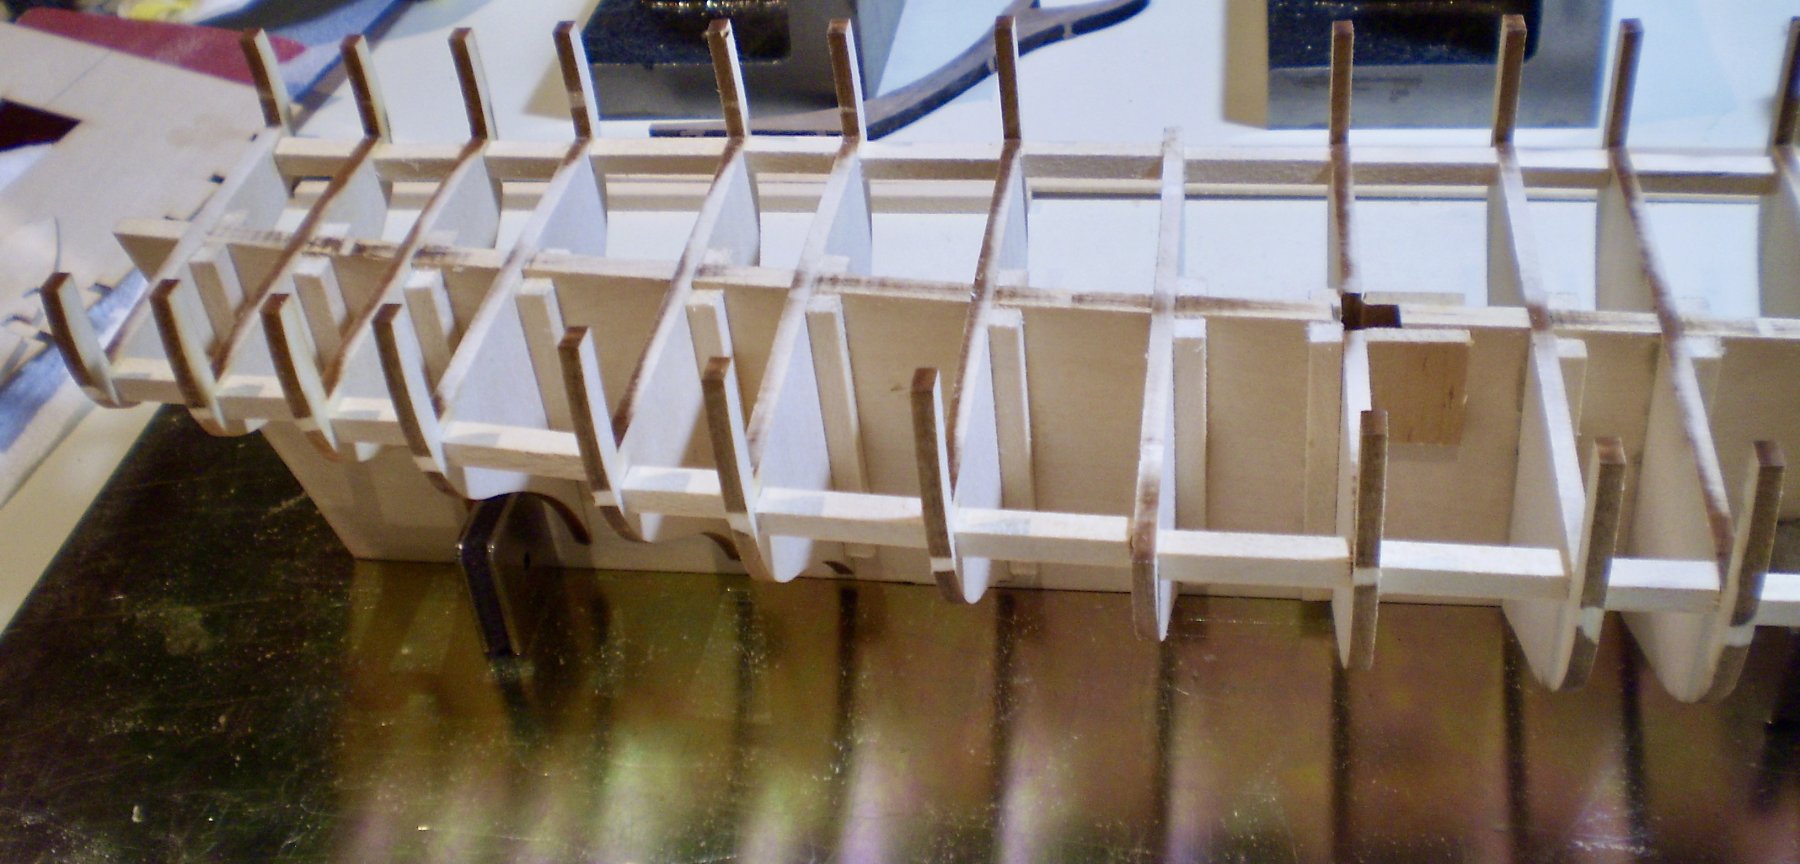
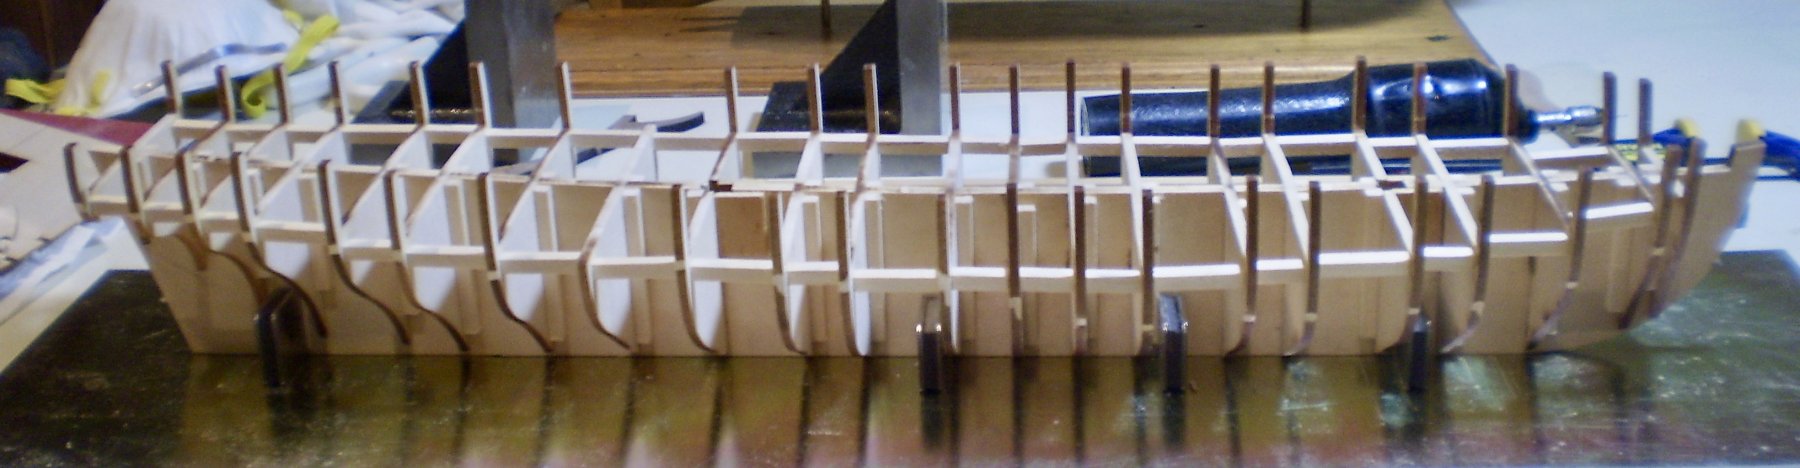
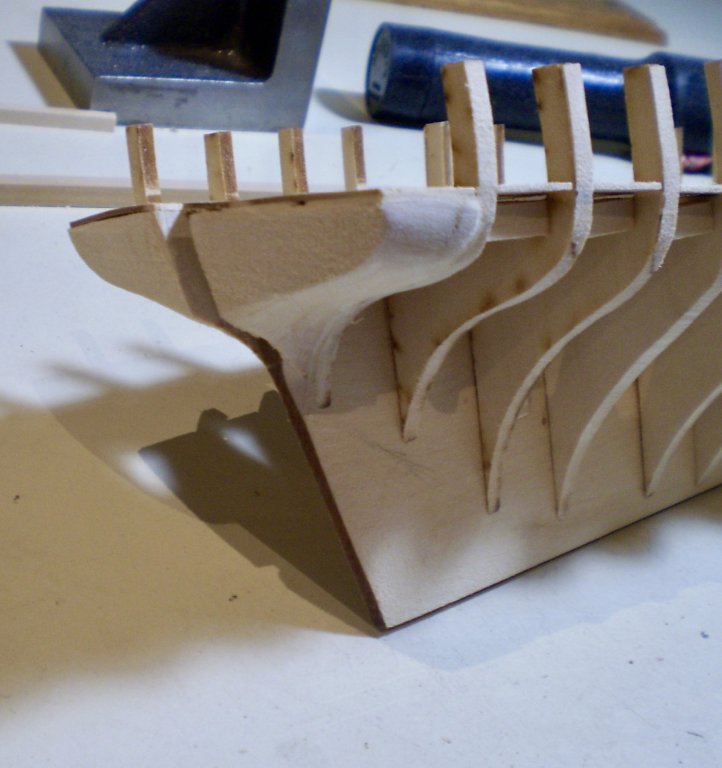
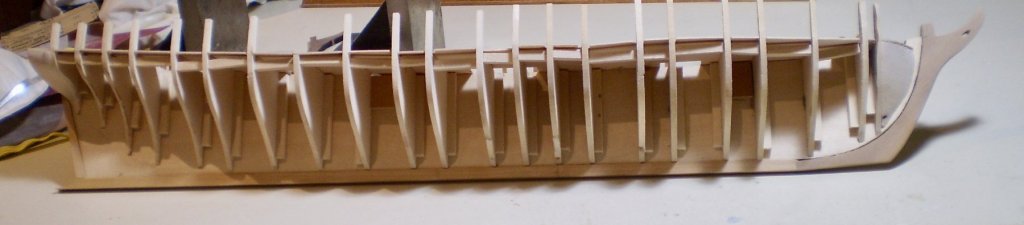
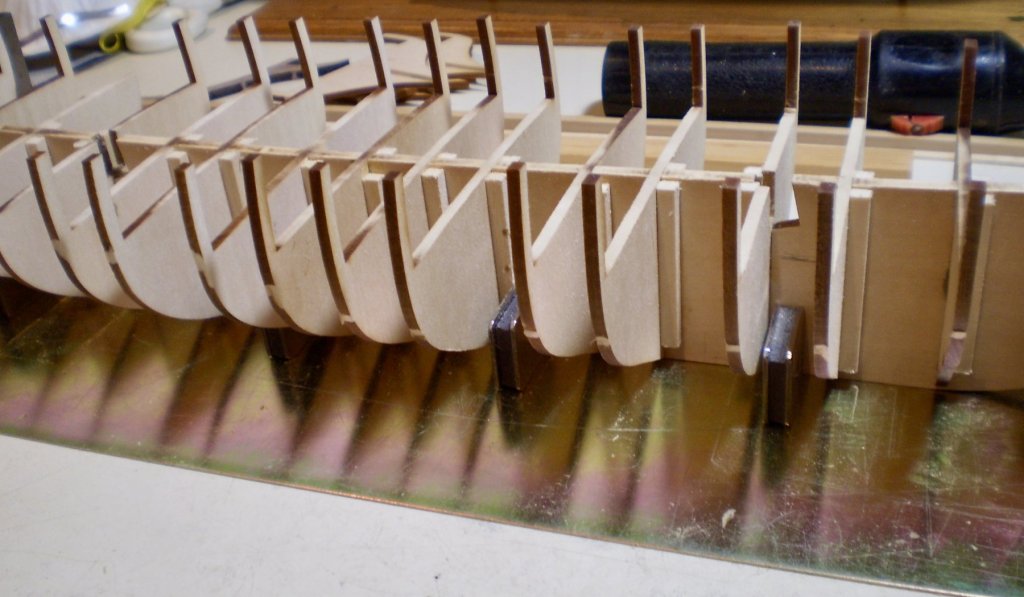
Further steps in the basic construction have been completed. These involved making and mounting the bow and stern blocks, fairing of the hull, and making and mounting of the stem, keel and stern post. The blocks were an interesting exercise. The drawings and instructions provide little, if any, help. There are no views showing them. The bow blocks were relatively simple, because the shape was pretty self evident. The stern blocks, on the other hand, are mostly a creation of imagination, since there is no guidance as to what the shape and size should be. There are a couple of photos from which a general impression can be gained, but that's it. The fairing went pretty well,, after shims were added to various bulkheads. I expect the there will still be some additional tweaking required when planking begins, particularly in the stern area. I didn't like the kit stem pieces, so I decided to make new pieces for the stem, keel and stern post. I cut them from boxwood sheet and strip, and made them slightly wider than the keel former to create a small rabbet, since none is provided for by the kit pieces or instructions. The pieces were pinned and glued in place. The joints for the stem are hardly perfect, but will be covered by planking. I now need to decide how to tackle the gunports. Bob


- 359 replies
-
- 25
-
-
- prince de neufchatel
- model shipways
- (and 1 more)
-
Dave, either way you will have a winner. Of course, you know my opinion -- go for the rigging. 😄 Seriously, it's a relatively simple rig in a large scale, and you should enjoy doing it. Bob
-
Never too late Tim. Welcome aboard, Bob
- 359 replies
-
- 3
-
-
- prince de neufchatel
- model shipways
- (and 1 more)
-
Looking good Denis. A nice neat job on the deck. Bob
-
Thanks so much Thomas and the "likes". Still plenty of time left on this one Thomas. Bob
- 359 replies
-
- 3
-
-
- prince de neufchatel
- model shipways
- (and 1 more)
-
Thanks so much Denis. Yes, the spacing of the bulkheads seems to be related to the gunports. Bob
- 359 replies
-
- 3
-
-
- prince de neufchatel
- model shipways
- (and 1 more)
-
Thanks so much OC and the "likes". Bob
- 359 replies
-
- 4
-
-
- prince de neufchatel
- model shipways
- (and 1 more)
-
Good idea on how to work those strips David. I'm almost to the point of having to decide what to do, and that gives me one more option to consider. Bob
- 59 replies
-
- 1
-
-
- prince de neufchatel
- model shipways
- (and 1 more)
-
Beautifully done Dave. I'm with you that making changes is the fun part. Bob
- 75 replies
-
- 3
-
-
- constitution
- mamoli
- (and 2 more)
-
Thanks so much Rusty, Jean-Paul, Joshua, Don, Dave and Russ for the very generous comments, and thanks also to the "likes". Guys, I have to admit that I decided to cut up the deck because I simply couldn't figure out how to make it fit in one piece. I am pleased with the way it turned out. Bob
- 359 replies
-
- 12
-
-
- prince de neufchatel
- model shipways
- (and 1 more)
-
Nicely done on the first planking. Those gunport strips can be a pain. Bob
-
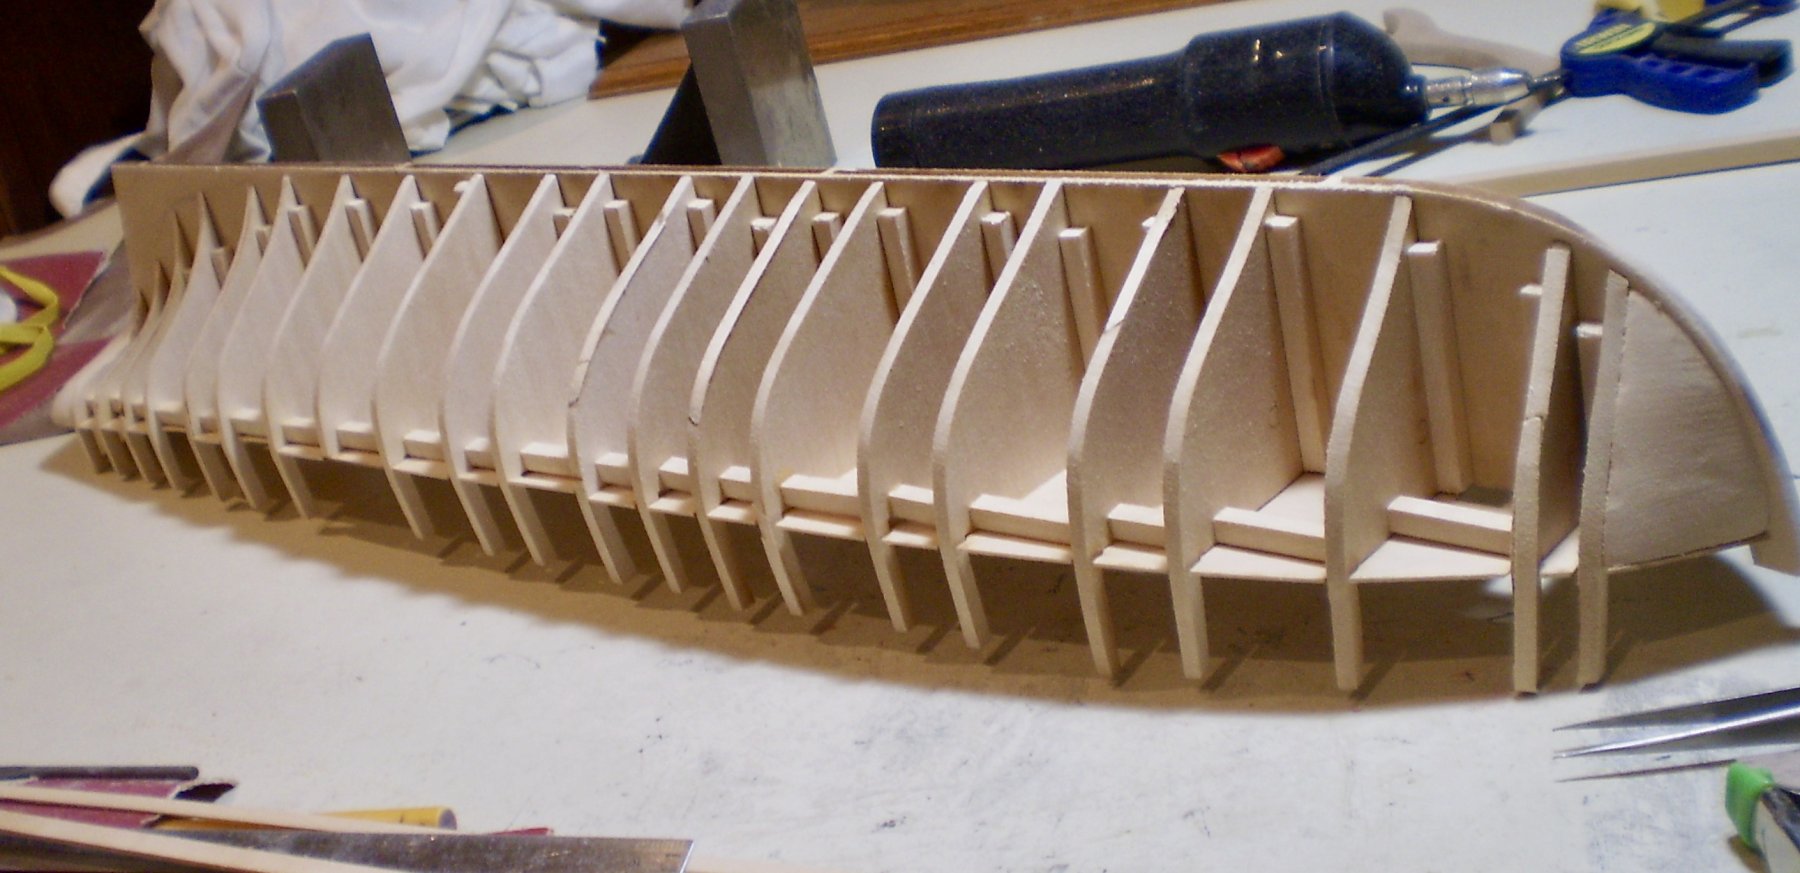
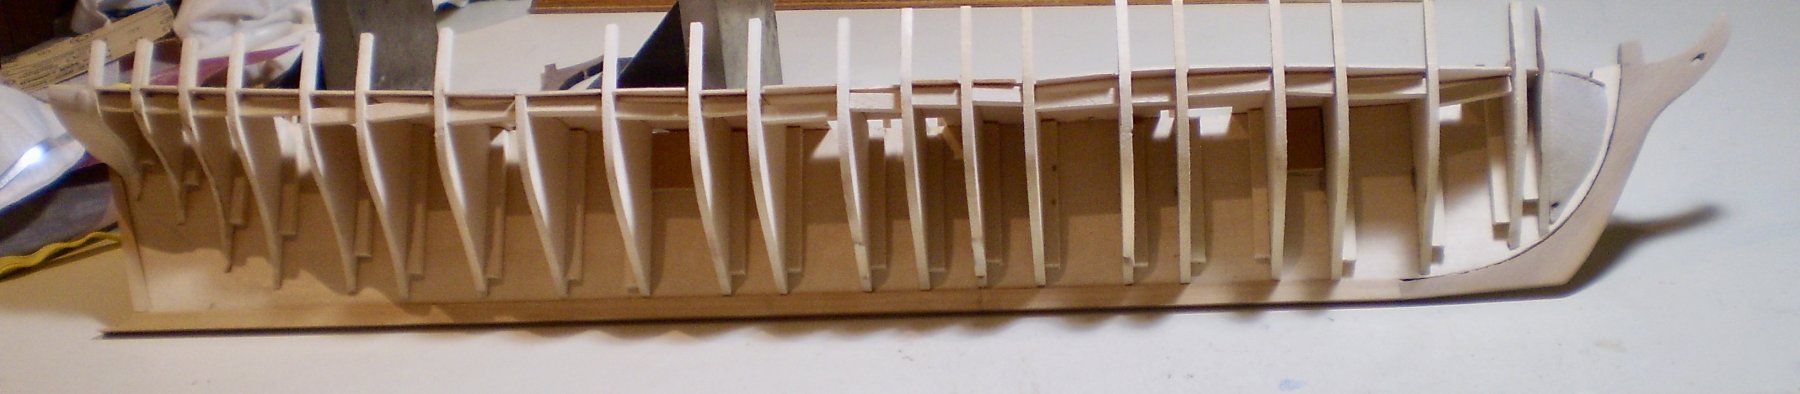
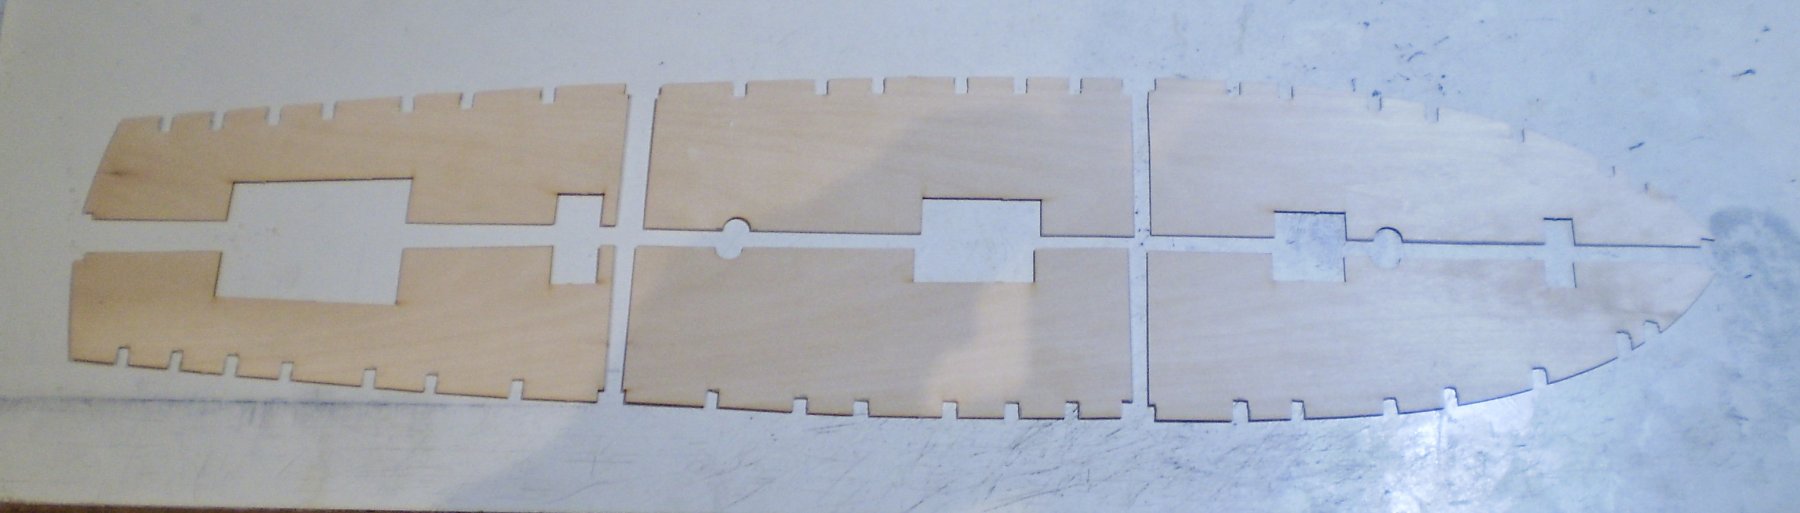
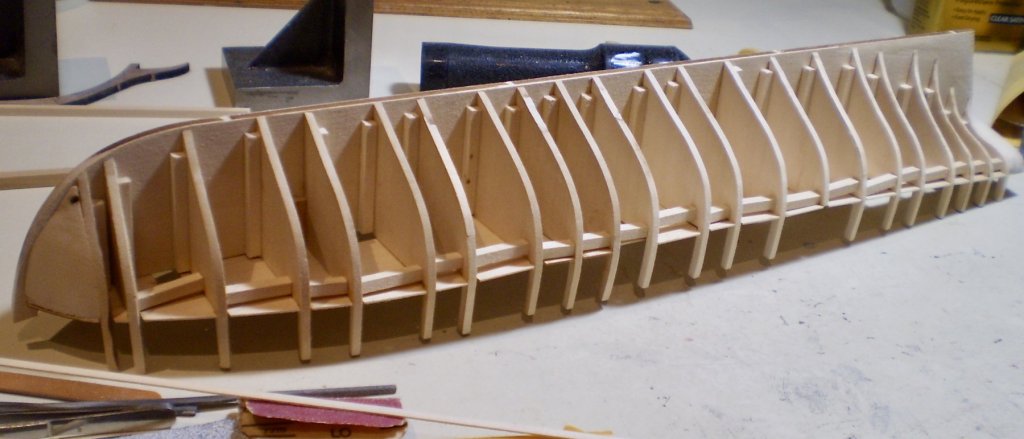
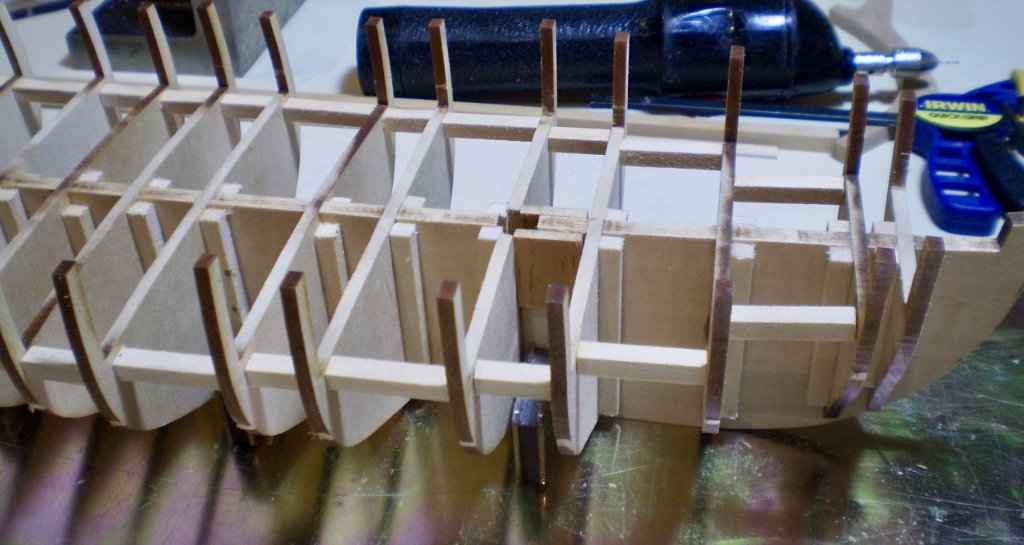
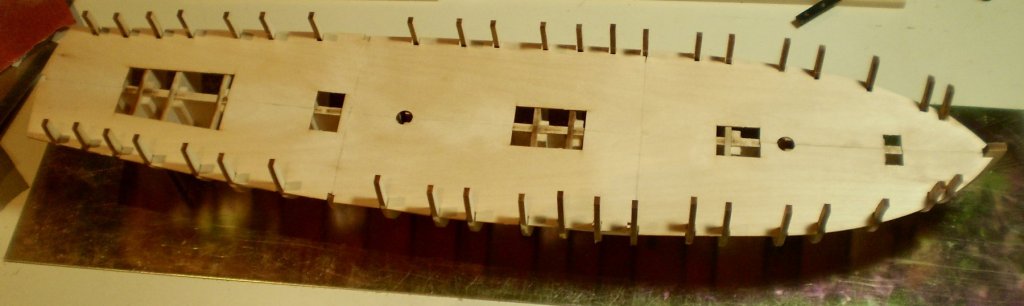
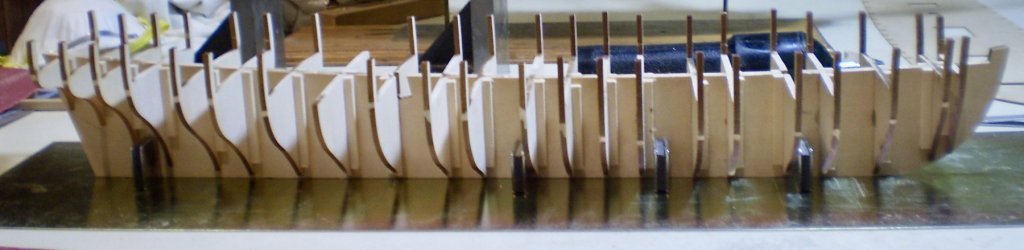
I've now done two further steps in the framing process. First, I added bracing between the bulkheads toward their outer edges. These were done with 1/4" square basswood strip .Tedious, but not very difficult. I also boxed in the mast mounting slots. Next, I added the false deck. The kit has a thin plywood piece with slots to fit around the bulkhead extensions. I found this unwieldy to work with, so I cut the deck into six sections, and fitted and mounted each separately. The slots required some adjustment to get a good fit, but that went smoothly. With the bracing and deck in place, the structure is surprisingly rigid, and ready for fairing, which I have begun.During the fairing process, I will also have to shape and add the bow and stern blocks. Bob


- 359 replies
-
- 30
-
-
- prince de neufchatel
- model shipways
- (and 1 more)
-
Denis, it's tough to keep up with you -- but I'm happy to give it a try. You're off to another great start. Bob
-
Thanks so much OC and the "likes". I agree with you OC, the number of bulkheads should be a big help. Russ, my angle plates (now that I know what they're called) are 3 x 3 x 3 rather than 2 x 2 x 2 and the Micromark ones are $21 dollars each, which seems rather high, and far more than I can imagine that I spent. But then again, it was a long time ago, so who knows? Bob
- 359 replies
-
- 6
-
-
- prince de neufchatel
- model shipways
- (and 1 more)
-
Thanks so much Dave, Joshua, Denis, Zappto and the "likes". Joshua, I wish I could tell you where I got them, but it's been about 20 years and I can barely remember what I had for lunch today. Bob
- 359 replies
-
- 7
-
-
- prince de neufchatel
- model shipways
- (and 1 more)
-
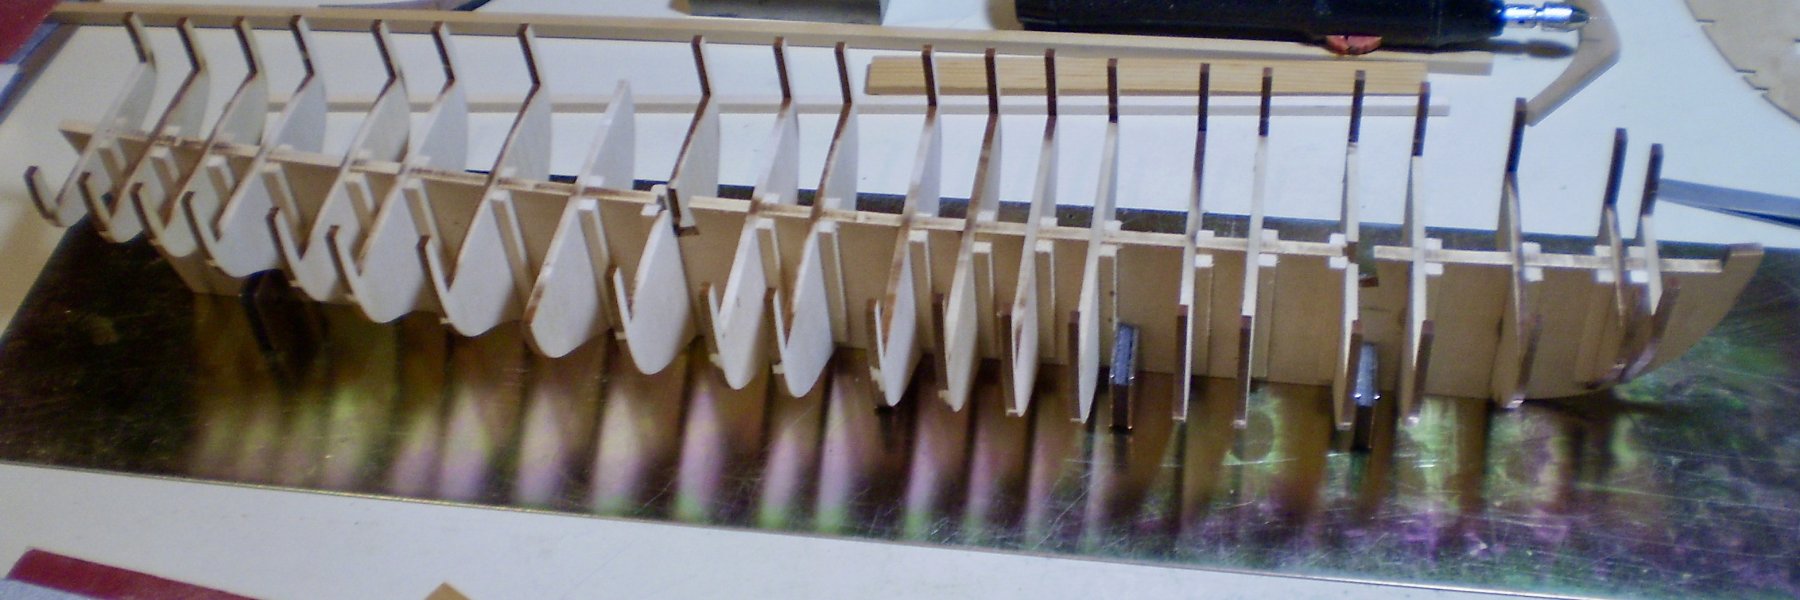
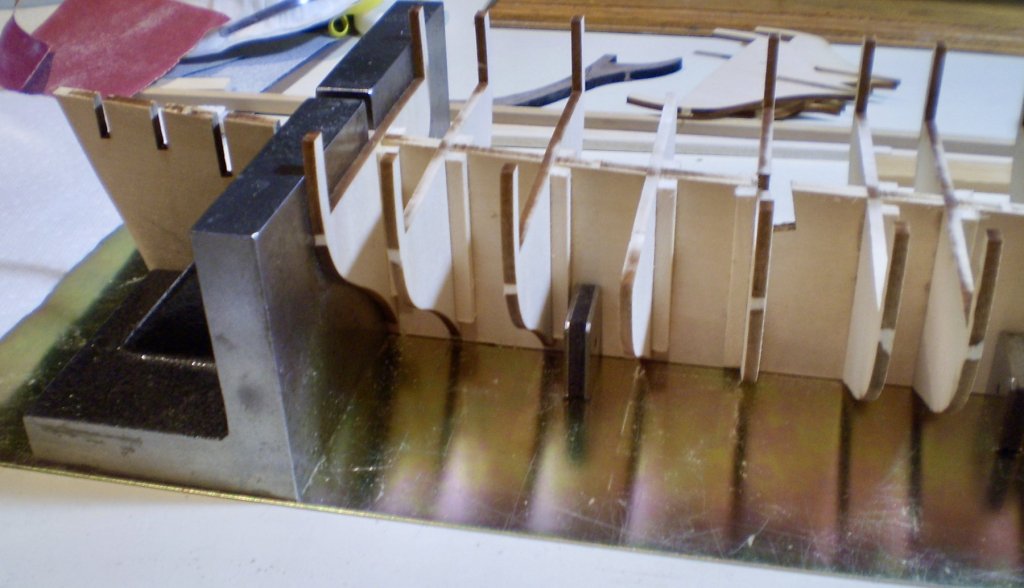
My first actual progress was the usual mundane work of preparing and assembling the keel former and the bulkheads. I found that it only required relatively minor adjustments by sanding to get a good fit. My principal concerns at this point were to get the deckline right by fitting and sanding as I added each bulkhead and, of course, to mount them square. I use two heavy steel squares to square the bulkheads and then add square strip wood bracing. I have no doubt that, whether as a result of poor parts or my own errors, there will be need for considerable fairing and some shimming to get an even outer surface for planking. Frankly, over the years, I've come to expect that. With the exception of Chuck's almost perfect keel former and bulkheads for Cheerful, that is the rule. My next tasks will be to add additional bracing between the bulkheads, to box in the mast holes and to add the false deck. Bob

- 359 replies
-
- 25
-
-
- prince de neufchatel
- model shipways
- (and 1 more)
-
Thanks so much Albert, mpeltier and Richard. Richard, I'm sure you're right and I appreciate the advice, but I'm afraid that I consider photography as more of a chore than something that I want to spend time on. Mpeltier, for that reason, I doubt that my next efforts would be a whole lot better than these. As to photos of the interior, I have previously recorded all of the interior work, in much better detail than anything that can now be seen (much of it is hidden entirely, or almost so). Bob
- 682 replies
-
- 2
-
-
- halifax
- lumberyard
- (and 1 more)
-
Thanks so much bigcreekdad and Mike. Greatly appreciated. Bob
- 682 replies
-
- 2
-
-
- halifax
- lumberyard
- (and 1 more)
-
Thanks so much Jeff and John. You're much too kind. Bob
- 682 replies
-
- 2
-
-
- halifax
- lumberyard
- (and 1 more)
-
Plenty of room on board. Welcome. Hopefully, some results will start to show soon. Bob
- 359 replies
-
- 7
-
-
- prince de neufchatel
- model shipways
- (and 1 more)