rafine
-
Posts
2,932 -
Joined
-
Last visited
Content Type
Profiles
Forums
Gallery
Events
Everything posted by rafine
-
 Denis, you're racing along to another beauty. Great work. Bob
 -
Very well done David. Bob
-
Thanks so much Bigcreekdad and the"likes". Bob
- 359 replies
-
- 4
-

-
- prince de neufchatel
- model shipways
- (and 1 more)
-
Looking good B.E. All being done with your usual care and precision. Bob
- 574 replies
-
- 4
-
-
- cheerful
- Syren Ship Model Company
- (and 1 more)
-
Thanks so much OC, Enemeink ,Thomas, David,Denis and the "likes". David, I' m also leaning toward using the copper tape, which I've used before, but I might try the Caldercraft plates. j just have no idea how many I would need. Bob
- 359 replies
-
- 5
-
-
- prince de neufchatel
- model shipways
- (and 1 more)
-
hanks so much Joshua, David,Martin,Daveandc the "likes". Much appreciated. Joshua,I have no idea if mine is right.It was really just a guess. David, what are going to use for the copper? Martin, hopefully next week. Dave, I bought the e-book for $14. Bob
- 359 replies
-
- 5
-
-
- prince de neufchatel
- model shipways
- (and 1 more)
-
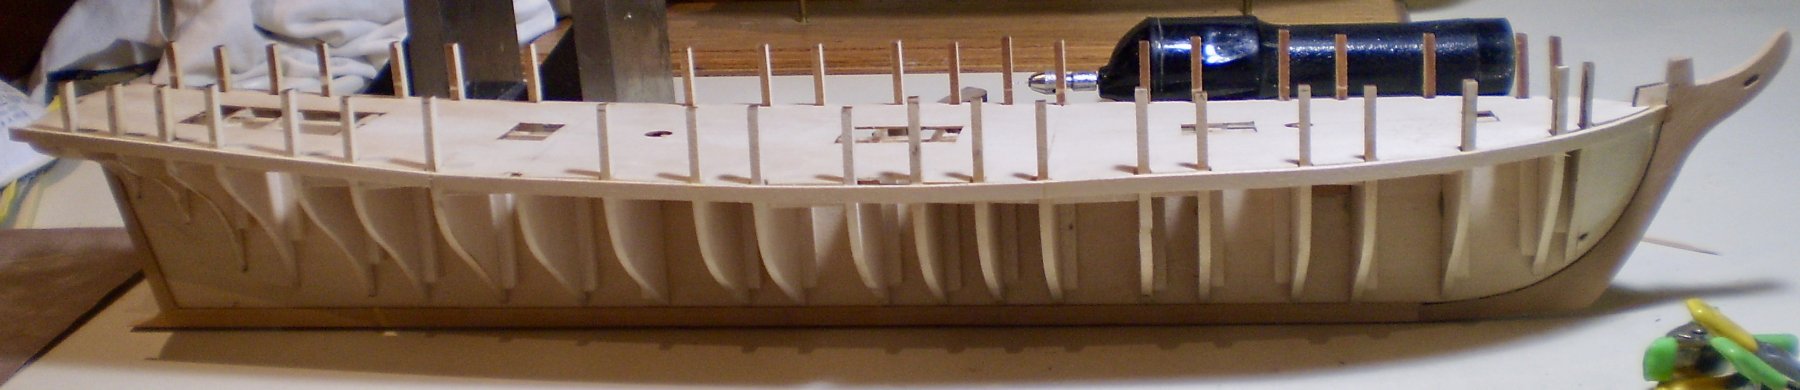
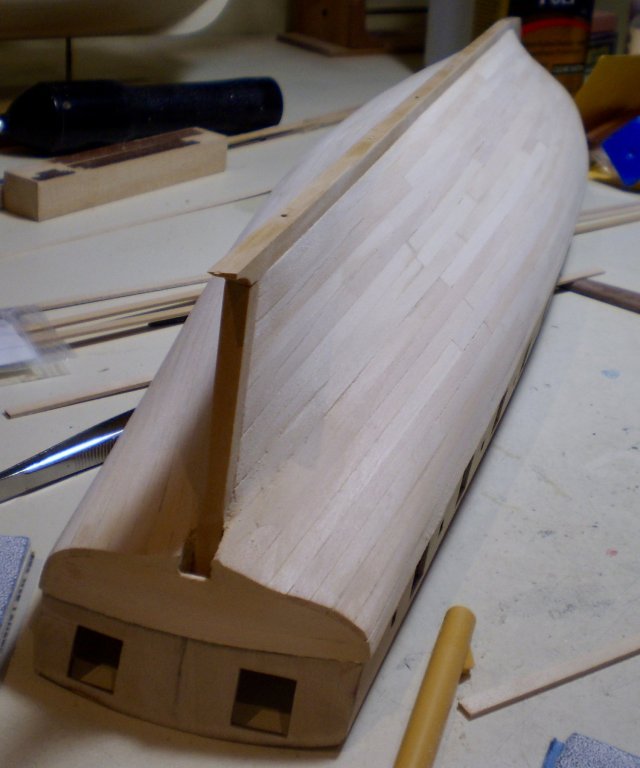
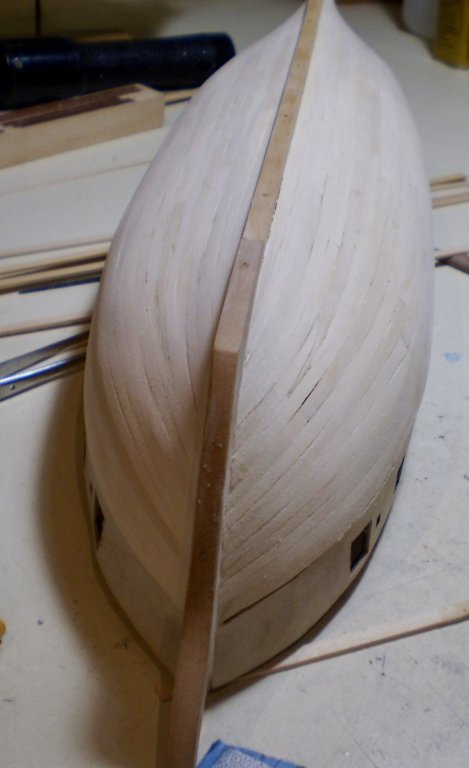
It's taken a bit, but I've done the planking of the lower hull. A couple of general comments: Since the lower hull will be painted in part and the remainder covered in copper sheathing, the principal concern was to get a smooth, even surface; despite this, I still decided to do the planking in a prototypical pattern, using scale length planks.This meant tapering the planks at the bow, prebending each plank and beveling the mating edge of each plank to obtain tight joints. I was able to use only two stealers at the stern and no drop planks at the bow. I've also made a decision that although the kit calls for double planking, I'm not going to do a second layer. I see no reason to do so because of the copper and paint.The only exception will be to build up the wales. I'm not sure what I'm going to next, because I'm waiting for the imminent reopening of Crown Timberyard to get the boxwood that I need for the upper hull and inner bulwark planking. Bob

- 359 replies
-
- 33
-
-
- prince de neufchatel
- model shipways
- (and 1 more)
-
HMS Naiad 1797 by albert - FINISHED - 1/48
rafine replied to albert's topic in - Build logs for subjects built 1751 - 1800
It doesn't get any better than this. Wonderful., Albert. Bobt -
She's looking beautiful Rusty. Bob
- 120 replies
-
- 3
-
-
- queen anne barge
- Syren Ship Model Company
- (and 1 more)
-
Thanks so much Joe and the "likes". Bob
- 359 replies
-
- 3
-
-
- prince de neufchatel
- model shipways
- (and 1 more)
-
Thanks so much Art, Thomas and the "likes". See you on Saturday Art. Thomas, it was different than any that I've done, but it went surprisingly well. Bob
- 359 replies
-
- 3
-
-
- prince de neufchatel
- model shipways
- (and 1 more)
-
Christian, I would strongly urge that you go with the case. I don't believe that my models would have survived over the years without their cases. My cases are plexiglass, and the large ones have a thickness of 8mm. They are strong, but still capable of being moved about, if necessary. Bob
-
Thanks so much Joshua, Dave, David and the "likes". Bob
- 359 replies
-
- 6
-
-
- prince de neufchatel
- model shipways
- (and 1 more)
-
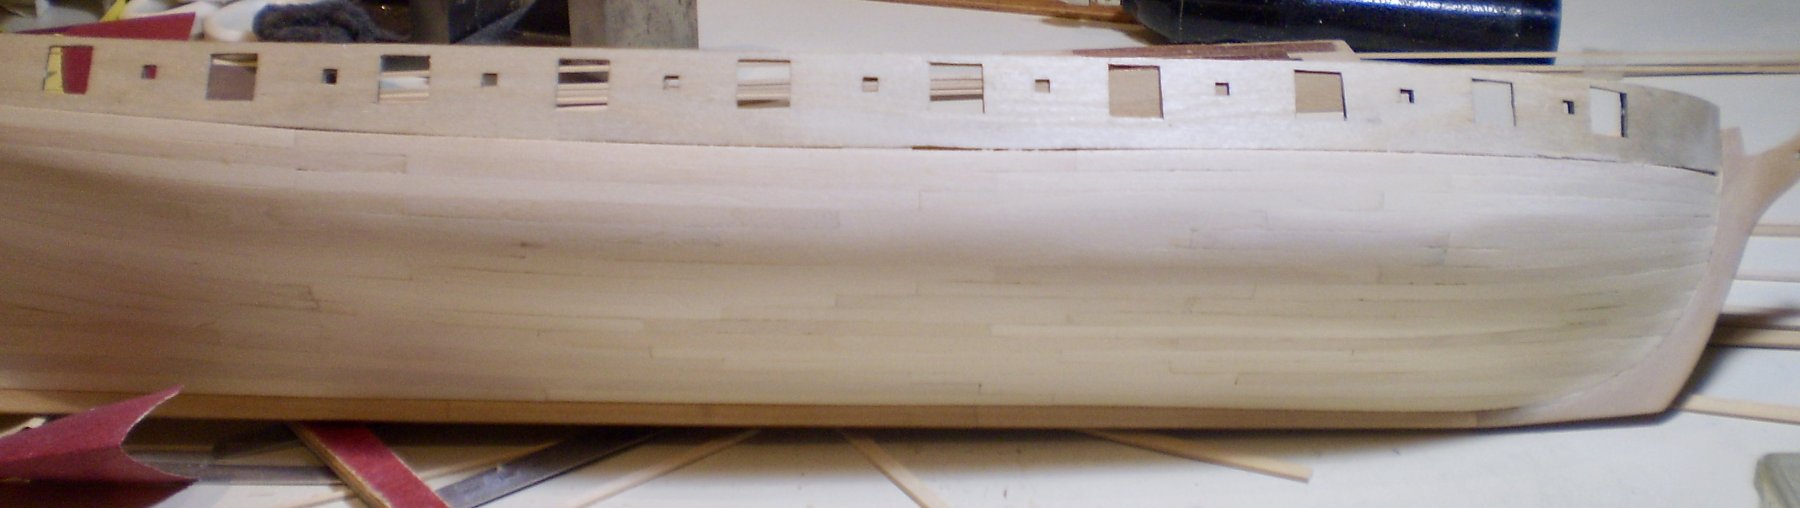
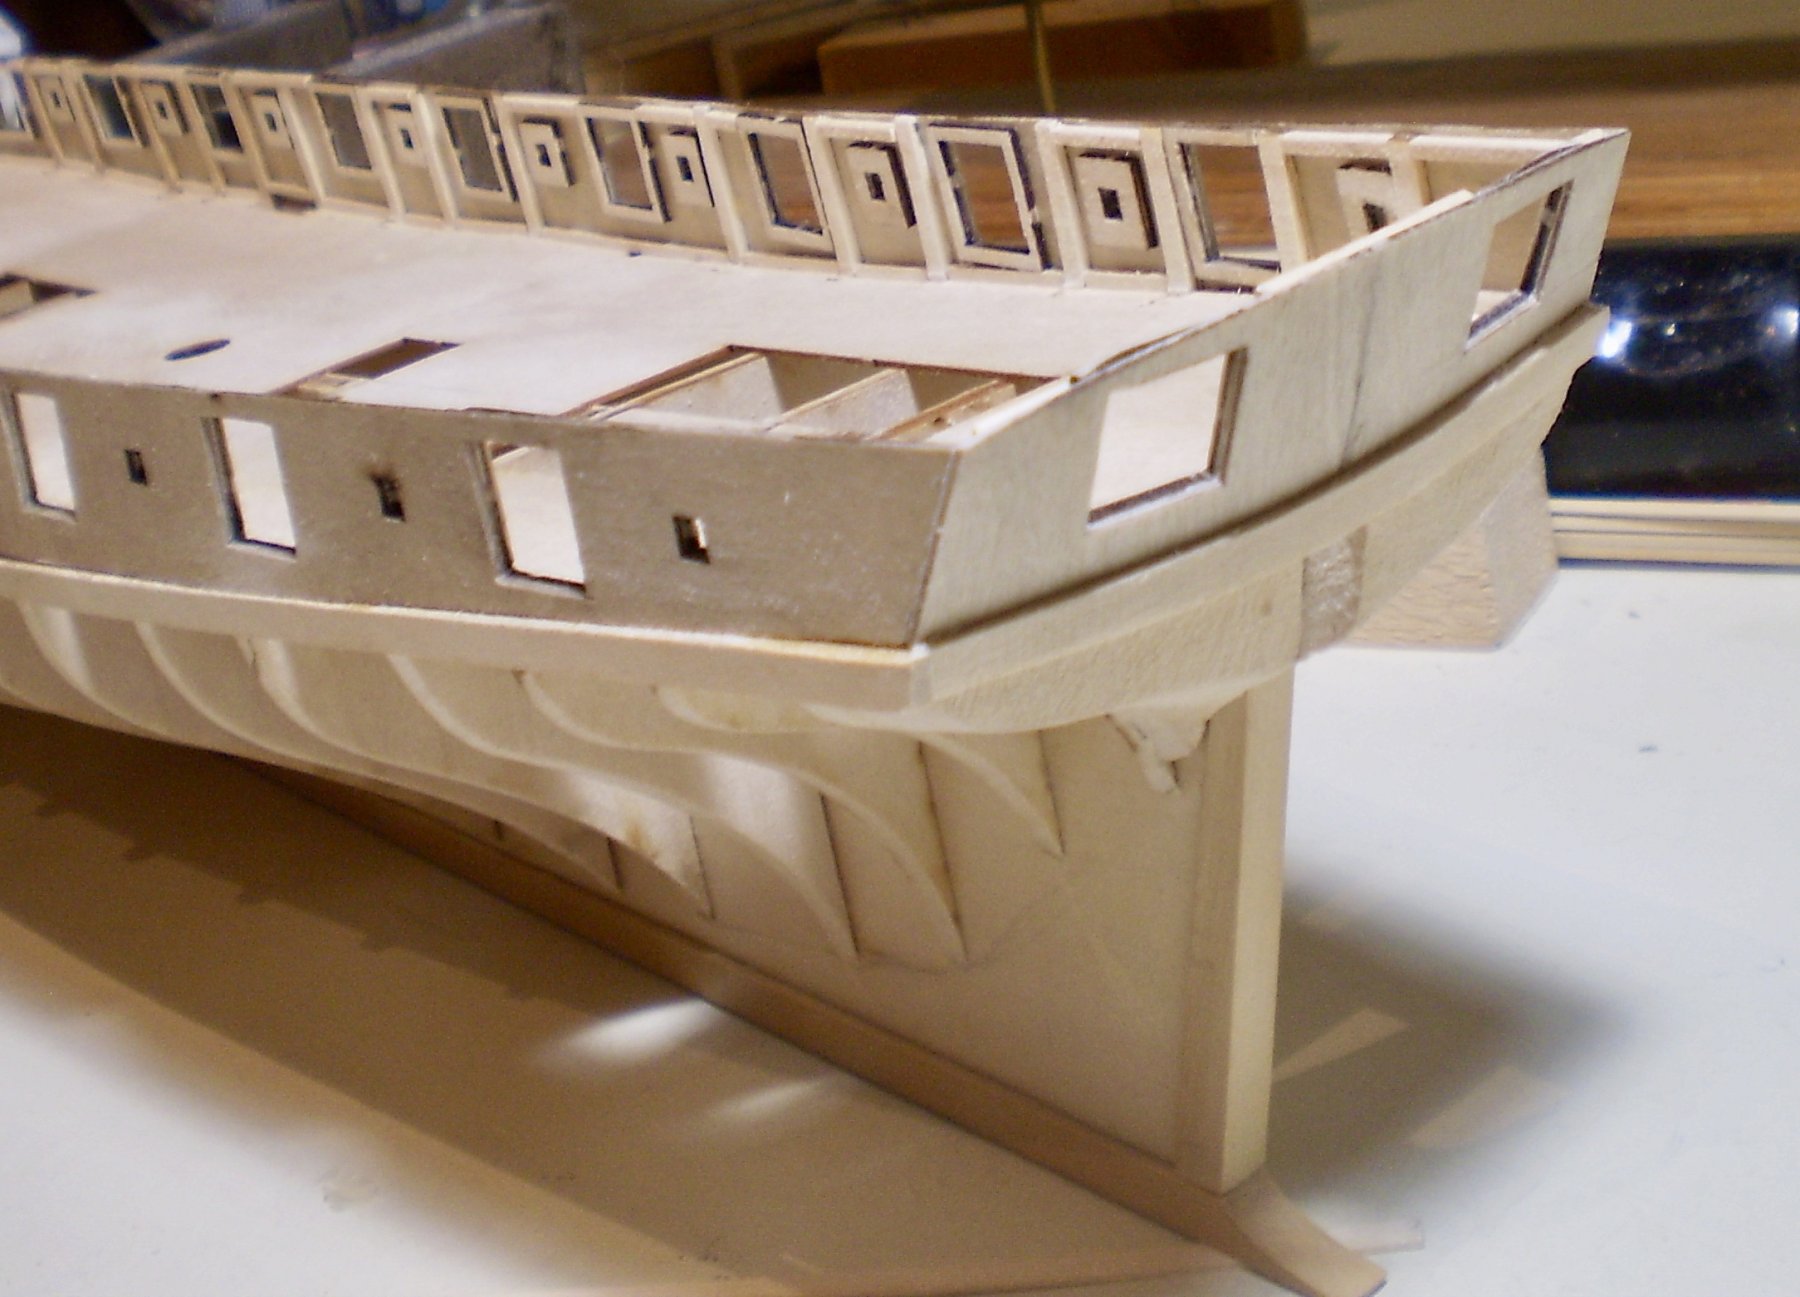
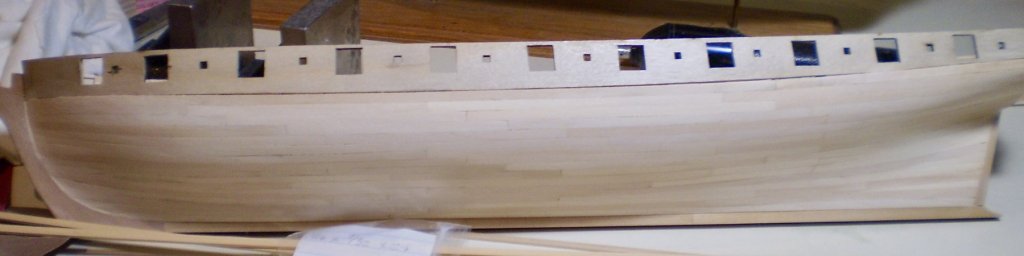
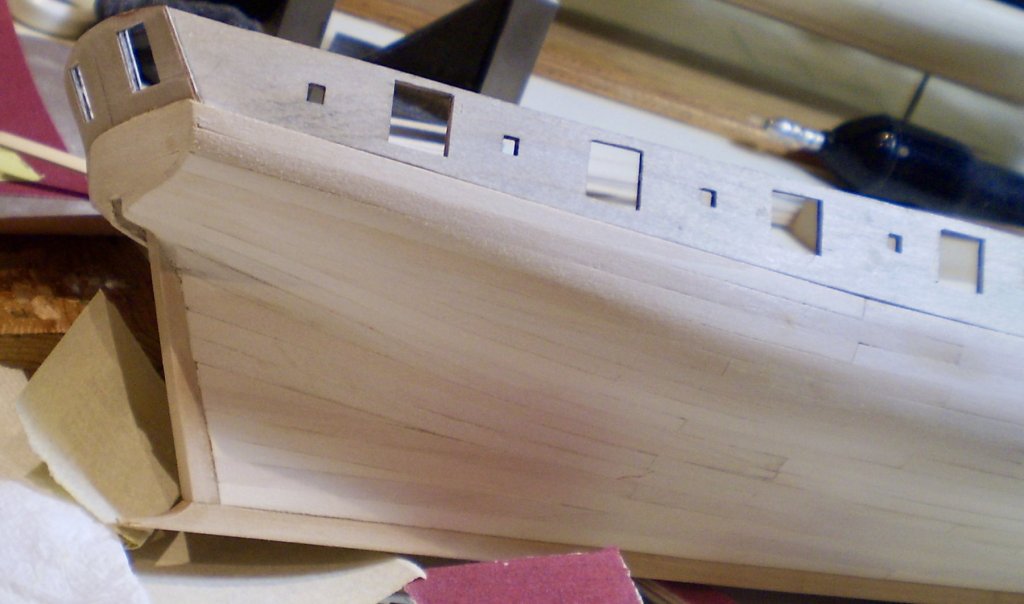
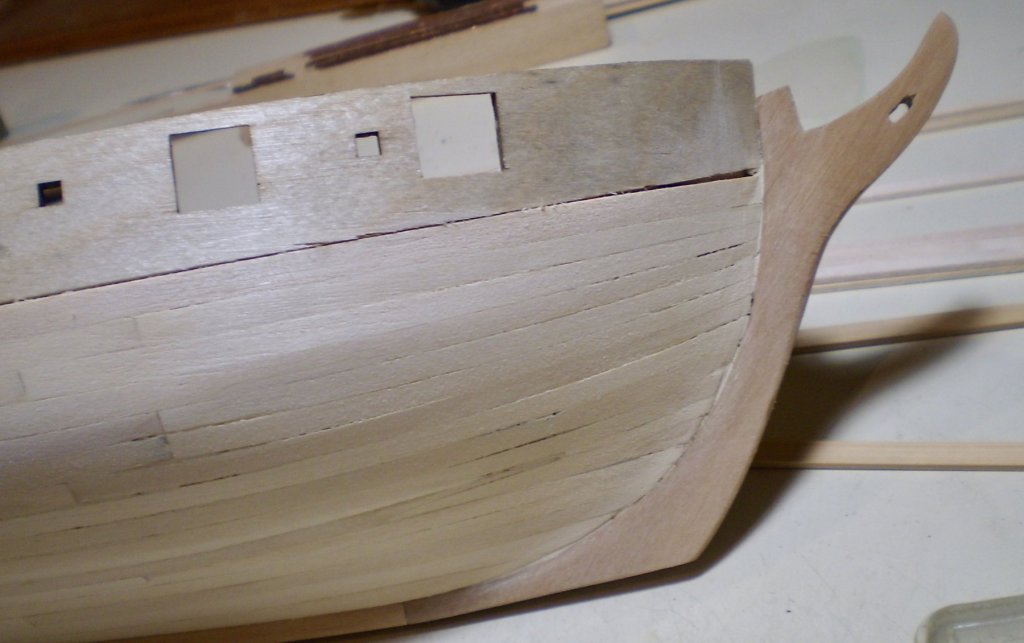
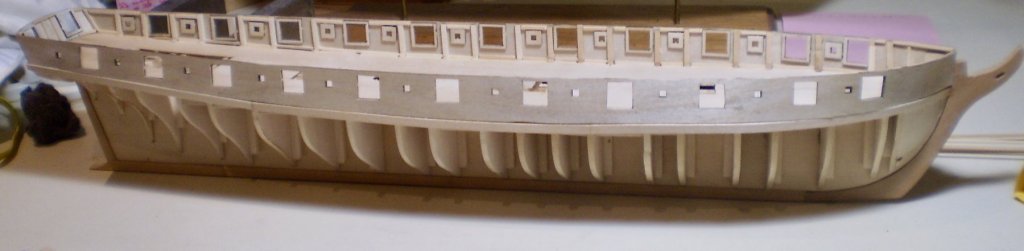
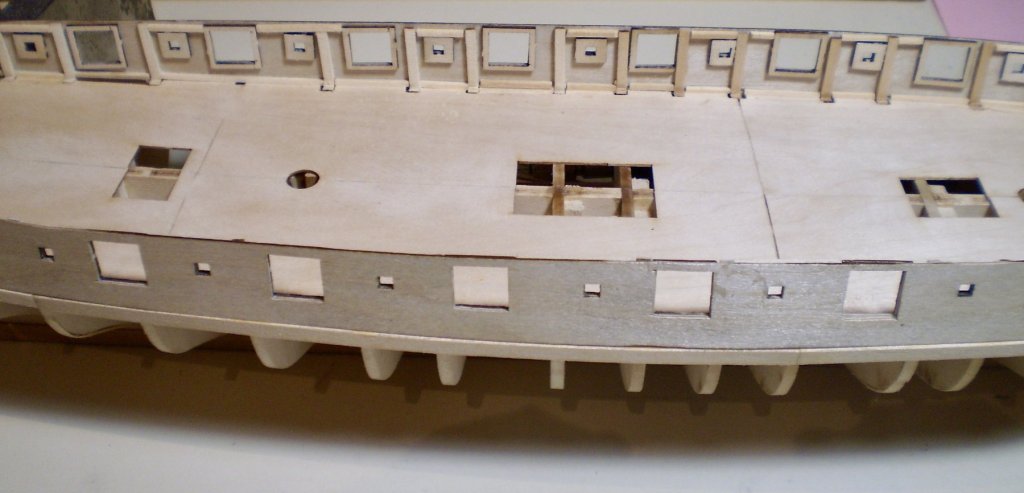
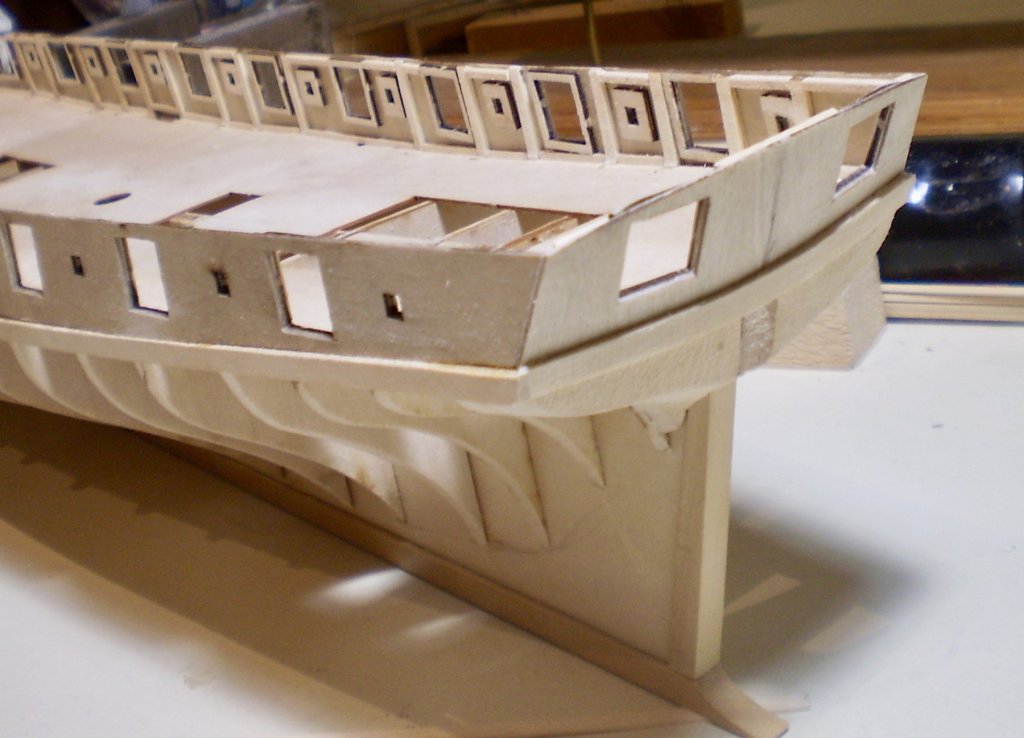
I've been moving along in the "less fun" portion of the build. This most recent work involved the initial strake of planking, representing the position of the wale. This sets the position of the bulwark/ gunport pieces. I decided, after considerable internal debate, to go with the ply pieces rather than building up the gunport framing. Although they were a pain to deal with, I'm pleased with the result, and I'm doubtful that it would have been better or easier to do it the other way. The first step was to set the upper line of the bulwarks on the bulkhead extensions. Next the lower line was drawn in on the gunport pieces while they were clamped in place.Lastly, the lower portion was trimmed and the pieces finally fitted. I had to wet heat bend the forward end to get a smooth fit. Before mounting the ply pieces, I glued the laser cut port frames in place and cut and sanded the ports to fit the frames (thanks David Lester for the sequence). After mounting the bulwark pieces, it was necessary to trim down the bulkhead extensions to 1/16". This was tedious work, made a little easier by the fact the bulkheads are basswood, rather than ply. The bulwark pieces were then glued in place, using clamps. The last step was to add 1/16" square framing pieces for further support of the planking. Finally, I added the ply transom piece, following the same steps as used for the bulwark pieces. Bob


- 359 replies
-
- 26
-
-
- prince de neufchatel
- model shipways
- (and 1 more)
-
Thanks so much arimagnus for the info on google. I've just bought the e-book. Bob
- 359 replies
-
- 2
-
-
- prince de neufchatel
- model shipways
- (and 1 more)
-
Tim, I've looked on Amazon, Abe and E-bay. That's where the $300 + prices were. Thanks for the offer on the pages. Let's see how it goes. Bob
- 359 replies
-
- 3
-
-
- prince de neufchatel
- model shipways
- (and 1 more)
-
Thanks Tim. I've tried to get the Reed book, but I've yet to find a copy for less than $350. No matter how helpful, that's a bit much. I have Chapelle's "American Sailing Ships", which also has info on PdN, but I'll take a look for the other one. Bob
- 359 replies
-
- 4
-
-
- prince de neufchatel
- model shipways
- (and 1 more)
-
As always Denis, your eye for detail is just wonderful. Bob
- 378 replies
-
- 5
-
-
- t78 norden
- billing boats
- (and 1 more)
-
Thanks so much Zappto and the "likes". Bob
- 359 replies
-
- 4
-
-
- prince de neufchatel
- model shipways
- (and 1 more)