-
Posts
2,932 -
Joined
-
Last visited
Content Type
Profiles
Forums
Gallery
Events
Everything posted by rafine
-
Thanks so much John, Michael, Denis, Carl, Thomas and the "likes". Michael, I believe that wales are generally black. There should be no problem painting over the Wipe-on poly if you lightly sand it first. Carl, as I indicated above, the wale ends will be painted black at some future point. Bob
- 682 replies
-
- halifax
- lumberyard
-
(and 1 more)
Tagged with:
-
Thanks so much Don and the "likes". I am using DAP walnut wood filler from Home Depot on the boxwood planking and golden oak on the holly. Any hard drying sandable filler will work. Bob
- 682 replies
-
- halifax
- lumberyard
-
(and 1 more)
Tagged with:
-
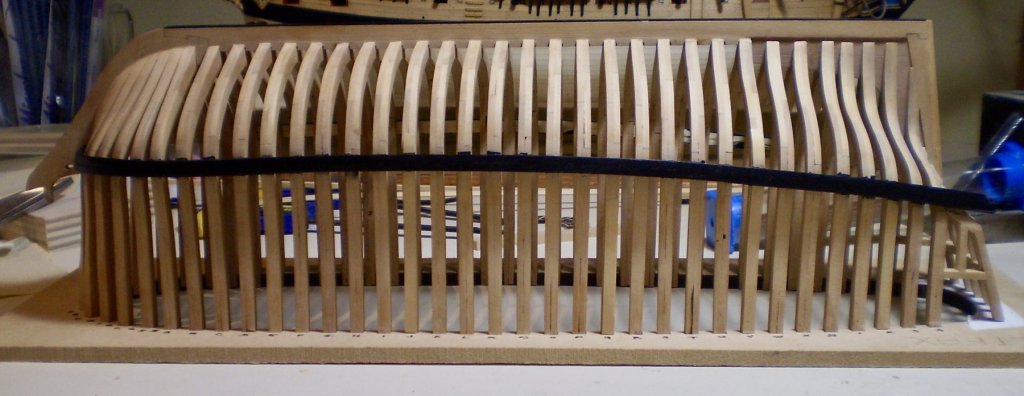
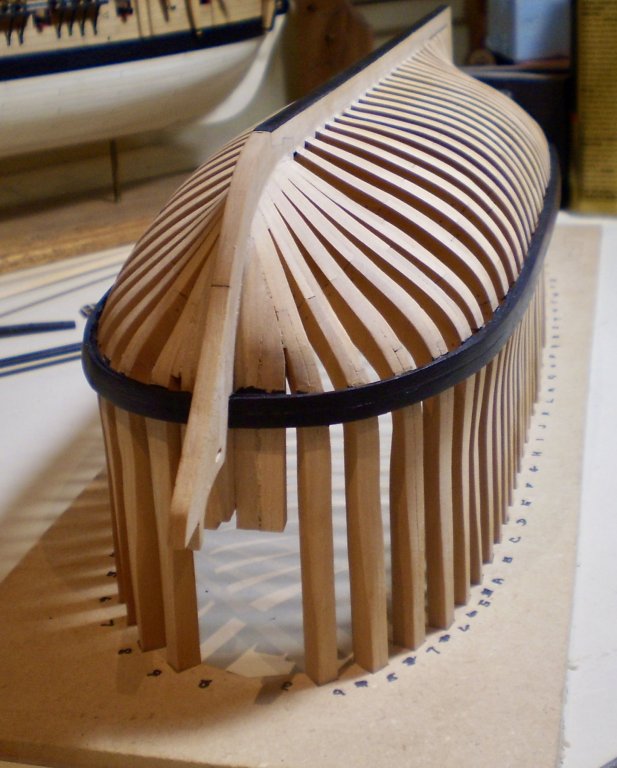
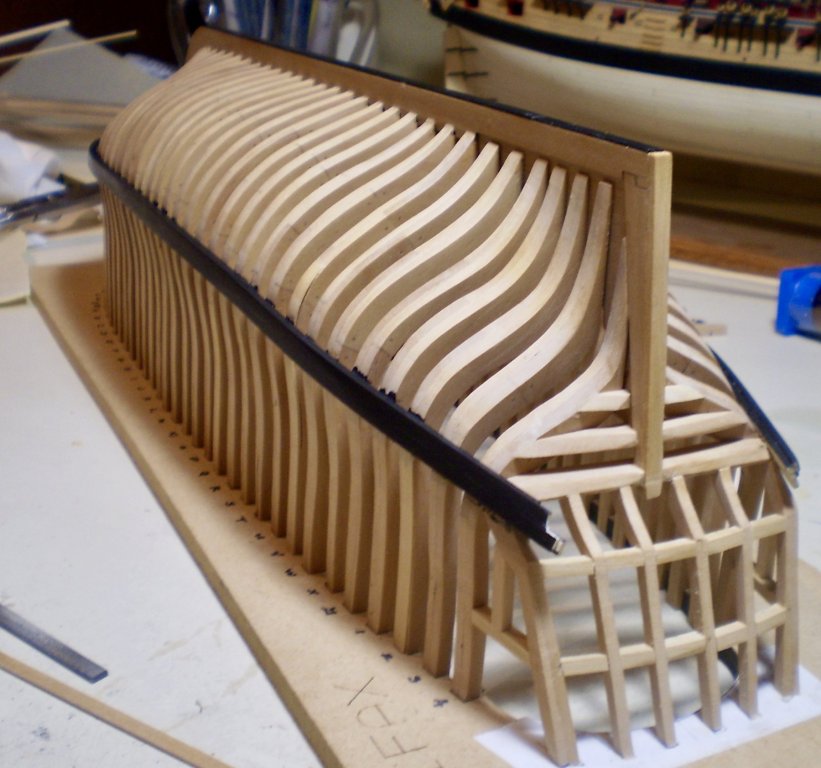
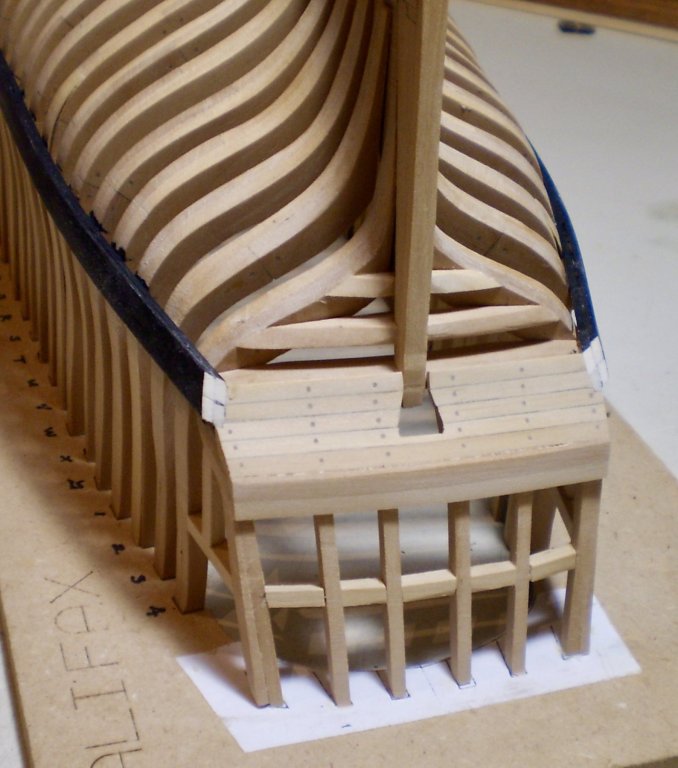
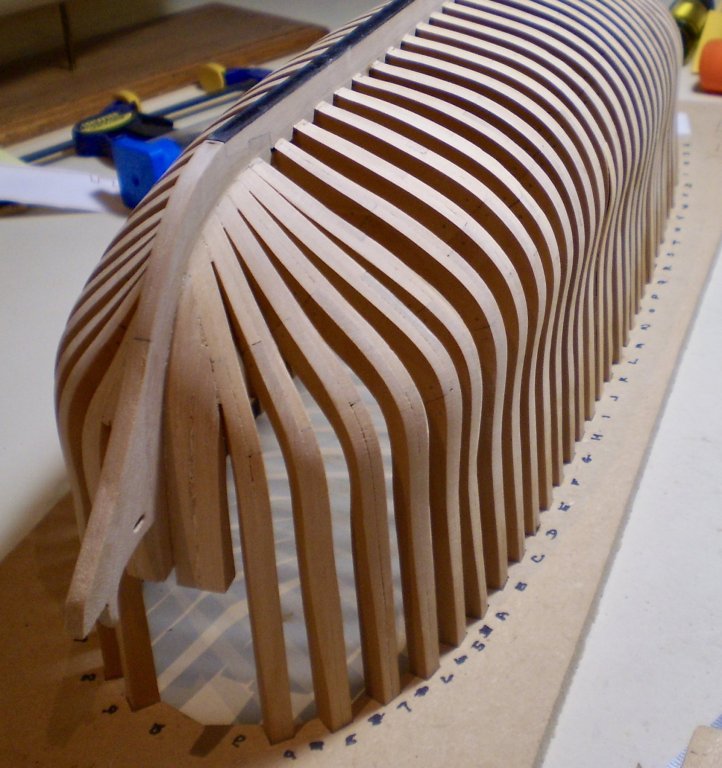
With completion of the framing, it was time to make some decisions. First, I decided that I would leave the hull below the wales unplanked, except for a single strake of holly directly below the wale. Second, the hull above the wales would be fully planked on both sides. Third, I would leave fairing of the interior hull until I have completed the hull planking and have cut the hull from the framing jig. Having made these decisions, it was time to begin the planking process. The first item was the wales. Since they were to be painted black, I chose to use holly which is easier to bend than boxwood, and made them in two layers, again for ease of bending and fitting. When they were in place, I painted them using multiple coats of ModelMaster engine black (the former Pollyscale). Next, I planked the stern counter and the lower portion of the transom. This was done with boxwood and was treenailed using the drill and fill method (which I intend to use for all of the treenailing). I trimmed back the wales to meet the counter planking. I still need to add moldings, finish the counter planking with Wipe-on poly and paint the wale ends black. This will be done later, as will the remaining stern transom work. Bob
- 682 replies
-
- halifax
- lumberyard
-
(and 1 more)
Tagged with:
-
Thanks so much Iosto, Dave, Ben, John and Vivian for the nice comments and thanks also to the "likes". Always appreciated. Bob
- 682 replies
-
- halifax
- lumberyard
-
(and 1 more)
Tagged with:
-
Thanks so much Rusty for the vote of confidence. I'm not always so sure that's true, but I try. Bob
- 682 replies
-
- halifax
- lumberyard
-
(and 1 more)
Tagged with:
-
Those railings look great Denis. BTW, you mentioned using wire for the foot ropes on the yards. I do it all the time and it works really well. Bob
- 453 replies
-
- thermopylae
- sergal
-
(and 1 more)
Tagged with:
-
Thanks so much Denis, Michael and the "likes". Bob
- 682 replies
-
- halifax
- lumberyard
-
(and 1 more)
Tagged with:
-
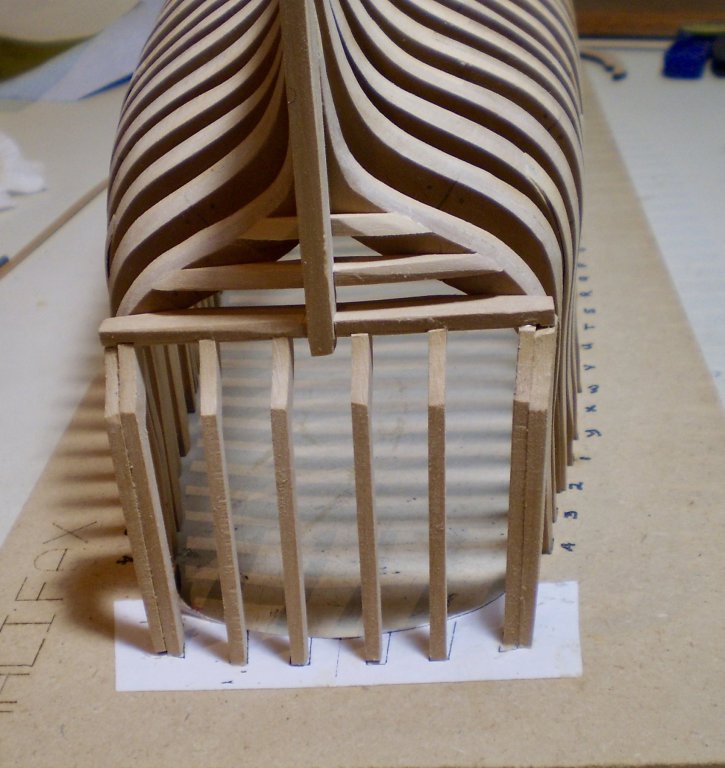
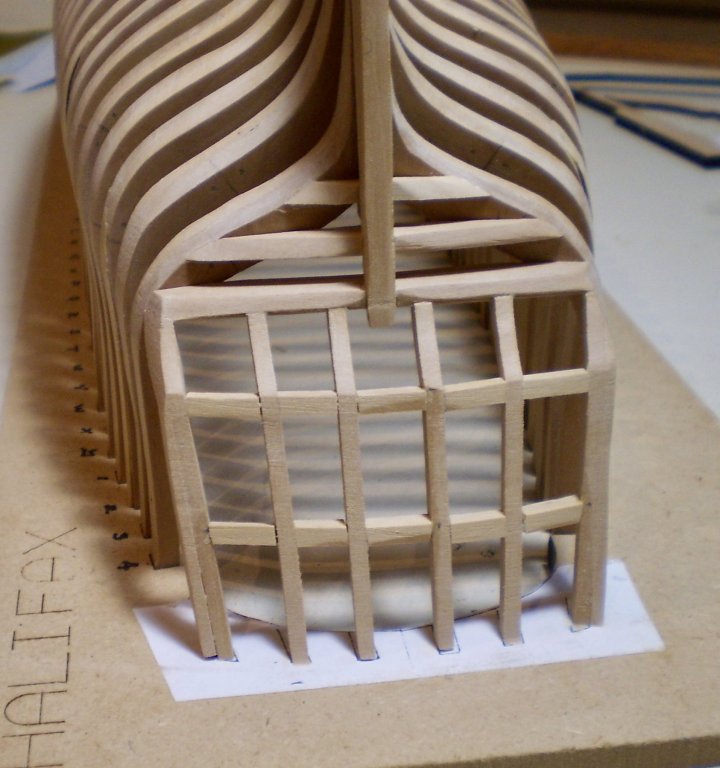
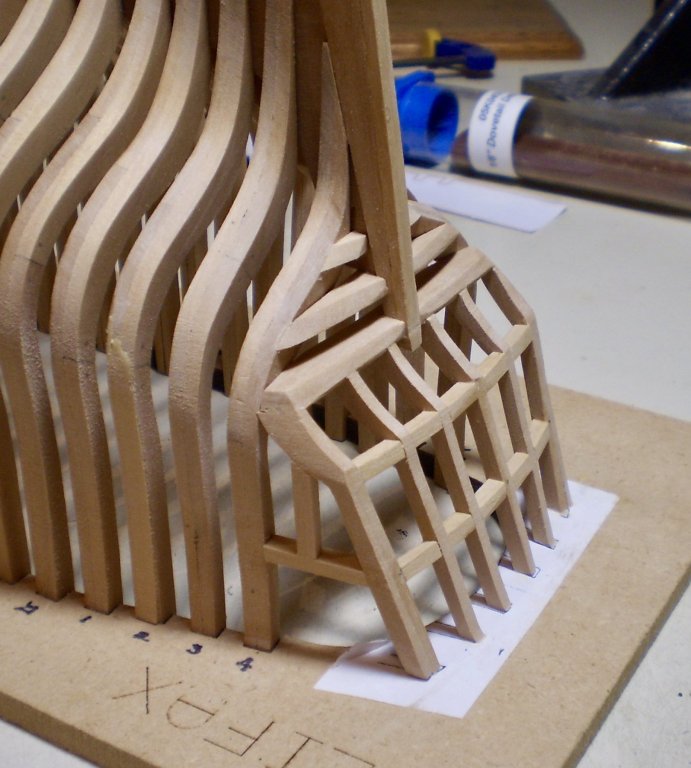
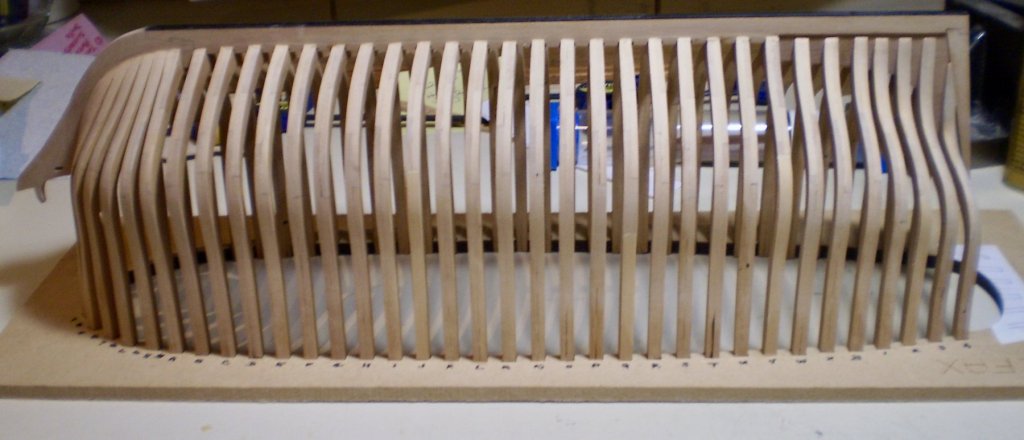
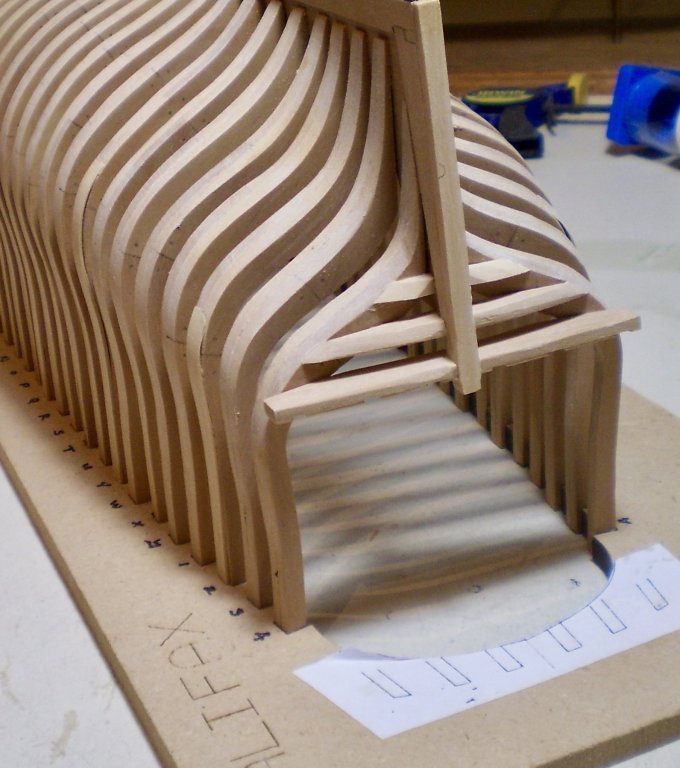
I have now completed framing of the hull with the stern framing and fairing. First, the stern frames were glued into place between the slots cut into the wing transom and the template cut from the plans and glued to the framing jig. Then, I cut pieces of boxwood strip to fit between the stern frames in curves set out in the plans. Next, I added the framing pieces between last hull frame and the outer stern frames. Lastly, I faired the entire stern assembly. I am now moving on to start the wales and then the planking. Bob
- 682 replies
-
- halifax
- lumberyard
-
(and 1 more)
Tagged with:
-
Thanks so much John. I've not contacted the Lumberyard, nor do I expect to. Perhaps I'm just fatalistic, but things are what they are and are unlikely to be changed. As I have said before, I expected to be doing substantial scratch building on this project. A few more scratch items and some corrections fall into the category of "oh well". I would only buy this if you're willing to take that attitude. Bob
- 682 replies
-
- halifax
- lumberyard
-
(and 1 more)
Tagged with:
-
Thanks so much Denis. With regard to the bow, the framing seems to match up to the drawings pretty closely. During fairing, I ran battens around the curves at the bow and there didn't seem to be a problem. We'll see when I get to doing the wales very soon. Bob
- 682 replies
-
- halifax
- lumberyard
-
(and 1 more)
Tagged with:
-
Thanks so much Thomas for the generous comments and also the "likes". Bob
- 682 replies
-
- halifax
- lumberyard
-
(and 1 more)
Tagged with:
-
Thanks so much Michael and the "likes". Bob
- 682 replies
-
- halifax
- lumberyard
-
(and 1 more)
Tagged with:
-
Thanks so much Nils, Grant, Dave, Don, Sjors and the "likes". Since I expected to do a substantial amount of scratch building on this, a few more pieces to be scratched wasn't really a big deal. Bob
- 682 replies
-
- halifax
- lumberyard
-
(and 1 more)
Tagged with:
-
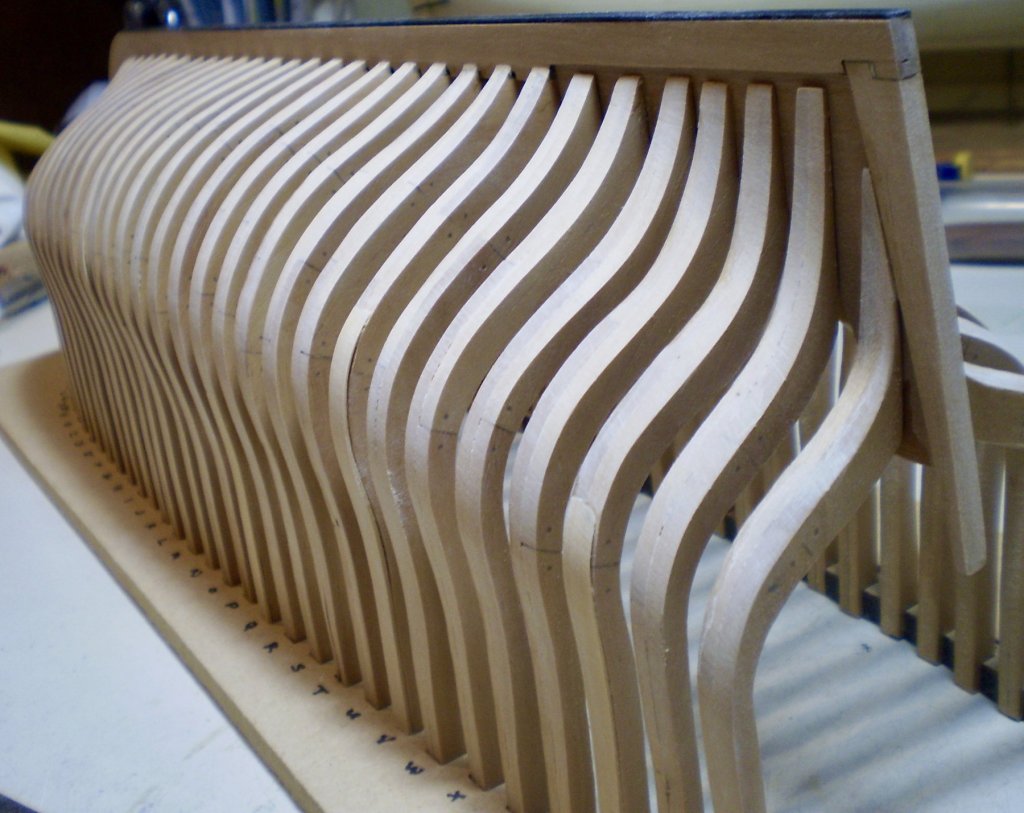
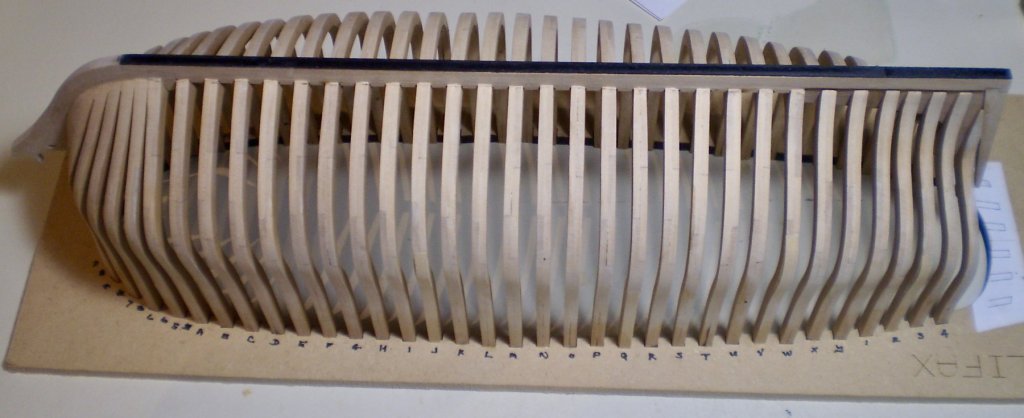
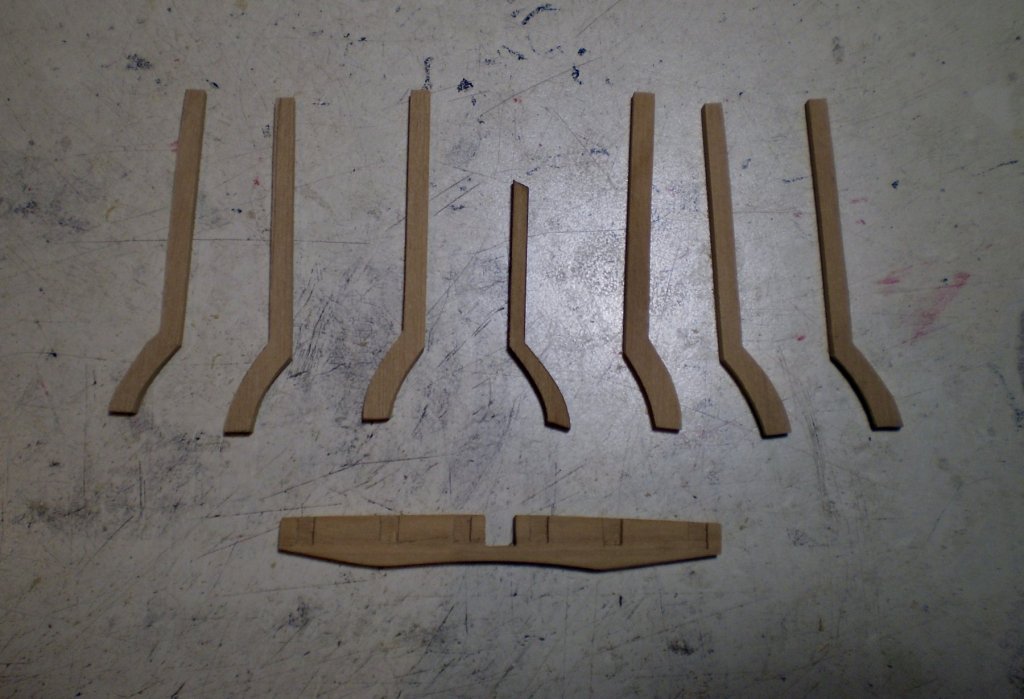
I spent the first part of my time since my last update completing the fairing of the hull. This involved first adding boxwood strip shim pieces to the frames that were low as a result of the the jig slot misalignments. This was tedious work, but straightforward and uneventful. I've attached photos of the faired hull which don't look all that different from the prior photos, but there really is a big improvement. After completing the fairing, I turned to the stern framing. This presented some challenges. I quickly realized that the laser cut wing transom and stern frames were simply not right. After wasting some time trying to figure to ways to "improve" them, I decided that the easiest solution was simply to cut entirely new parts from scratch. I started with the wing transom, which required multiple efforts to get any thing that was any good at all. The plans don't really show it in any way, other than it's position, and the book photos are are also somewhat vague. I cut the part from boxwood sheet, rough shaped it to fit and cut notches in the top side with small chisels for the stern frames. I then cut and shaped the other two transoms from boxwood sheet and mounted all three. I did some rough fairing of the lower two transoms, but left the wing transom until the stern frames are in place. The laser cut frames were simply too small and didn't match either the plans or my construction. I cut them from boxwood sheet, but have not mounted them yet. I have attached a photo of the rough wing transom and the stern frames before mounting. The photo also shows a laser cut frame, for comparison. The final photo shows the three transoms mounted. Next up will be the mounting of the stern frames and the remainder of the stern framing. Bob
- 682 replies
-
- halifax
- lumberyard
-
(and 1 more)
Tagged with:
-
That is a beautiful piece of work Don. Bob
- 653 replies
-
- trabakul
- marisstella
-
(and 1 more)
Tagged with:
-

HMS Naiad 1797 by albert - FINISHED - 1/48
rafine replied to albert's topic in - Build logs for subjects built 1751 - 1800
Albert, your joinery is just perfection. Bob -
Thanks so much Martin and Thomas. As I said at the outset of this log, one of the primary reasons for my choice of this project was to be able to do a POF build without having to cut all of the framing by hand, since I have no power tools. Interestingly, most of the problems that I've encountered would have been present even if I had used the standard Lumberyard framing package without the laser cut frames. Bob
- 682 replies
-
- halifax
- lumberyard
-
(and 1 more)
Tagged with:
-
Thanks so much Thomas. Your question is a little difficult to answer. In general, the laser cutting is good, although there have been a few burn spots. The major issues have been that the drawings and the parts don't all match up and that some of the jig slots were misaligned. I've had to make adjustments to overcome these problems and in some cases to scratch build replacements for some laser cut parts. Having said that, it' s been fun so far. Bob
- 682 replies
-
- halifax
- lumberyard
-
(and 1 more)
Tagged with:
-
Thanks so much Nils, Ken and the "likes". You're so right Nils about the jig. Even very small discrepancies in the jig can cause a lot of trouble, as I'm now starting to see. Hopefully they are all correctable. Bob
- 682 replies
-
- halifax
- lumberyard
-
(and 1 more)
Tagged with:
-
Thanks so Denis. I'm always glad for a vote of confidence. Bob
- 682 replies
-
- halifax
- lumberyard
-
(and 1 more)
Tagged with:
About us
Modelshipworld - Advancing Ship Modeling through Research
SSL Secured
Your security is important for us so this Website is SSL-Secured
NRG Mailing Address
Nautical Research Guild
237 South Lincoln Street
Westmont IL, 60559-1917
Model Ship World ® and the MSW logo are Registered Trademarks, and belong to the Nautical Research Guild (United States Patent and Trademark Office: No. 6,929,264 & No. 6,929,274, registered Dec. 20, 2022)
Helpful Links
About the NRG
If you enjoy building ship models that are historically accurate as well as beautiful, then The Nautical Research Guild (NRG) is just right for you.
The Guild is a non-profit educational organization whose mission is to “Advance Ship Modeling Through Research”. We provide support to our members in their efforts to raise the quality of their model ships.
The Nautical Research Guild has published our world-renowned quarterly magazine, The Nautical Research Journal, since 1955. The pages of the Journal are full of articles by accomplished ship modelers who show you how they create those exquisite details on their models, and by maritime historians who show you the correct details to build. The Journal is available in both print and digital editions. Go to the NRG web site (www.thenrg.org) to download a complimentary digital copy of the Journal. The NRG also publishes plan sets, books and compilations of back issues of the Journal and the former Ships in Scale and Model Ship Builder magazines.


