rafine
-
Posts
2,932 -
Joined
-
Last visited
Content Type
Profiles
Forums
Gallery
Events
Everything posted by rafine
-
 Thanks very much Augie, Sjors and Rusty for the kind words and thanks also to the "likes" for your interest and encouragement. Bob
 -
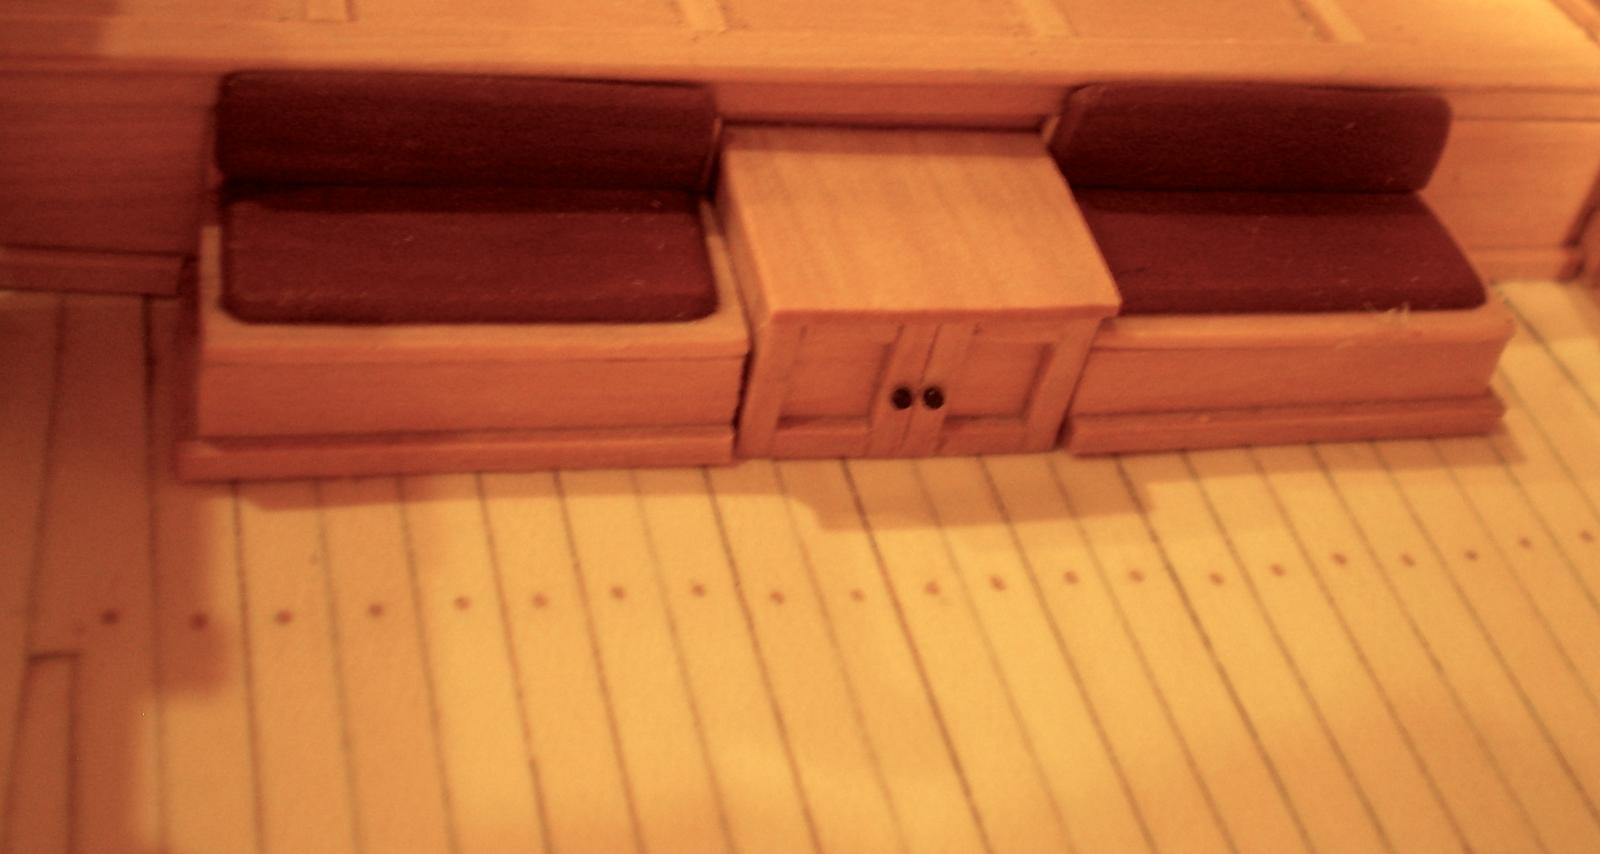
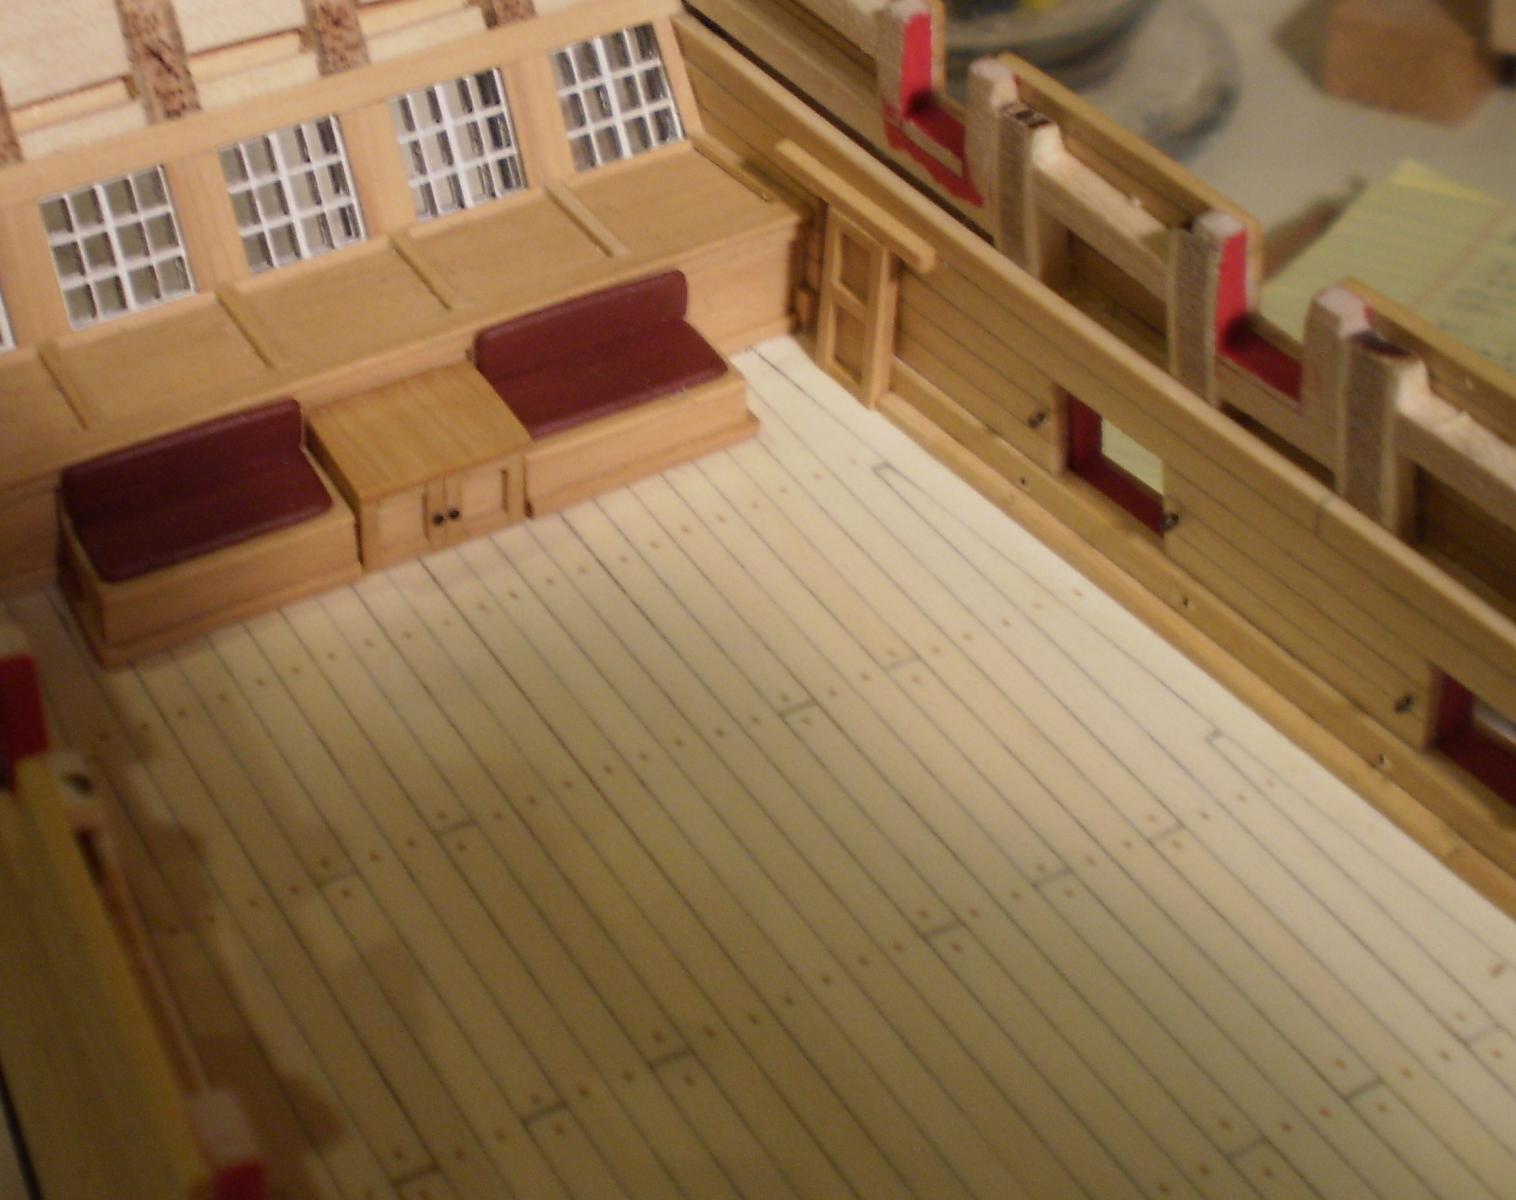
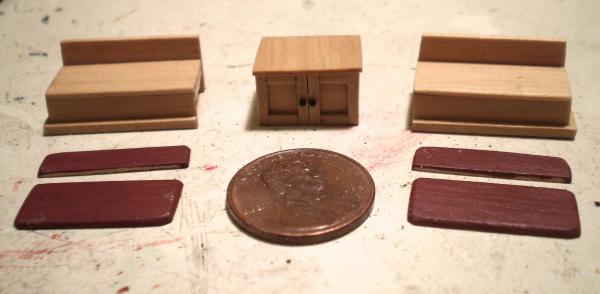
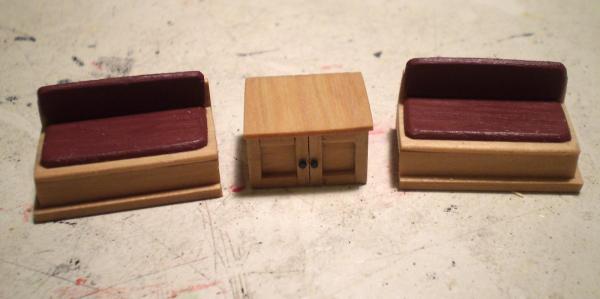
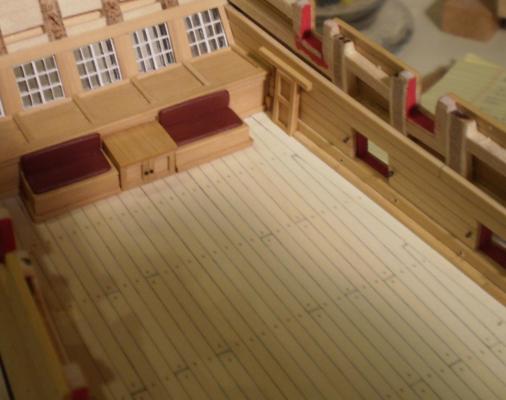
A small but fun item accomplished. I made and installed the remaining cabinetry at the stern in the Great Cabin. This consisted of the rudder head housing and two benches. They were made from boxwood sheet and strip and finished with Wipe-on Poly. The "cushions" on the benches are boxwood, shaped and then painted a maroon color. The cabinet knobs are the smallest nails that I had on hand. The penny in the first photo gives an idea of the size of these pieces. Bob

- 1,477 replies
-
- 28
-

-
- essex
- model shipways
- (and 1 more)
-
Thanks Wes, Bug and Nigel for the nice comments and continuing interest. Bob
- 1,477 replies
-
- 1
-
-
- essex
- model shipways
- (and 1 more)
-
Thanks Augie, Sam and the "likes". Sam, the kit cannon balls are about 3/32" (3mm). I'm not sure yet how far I will go with the interior detailing, but there's no way that it will look anything like Doris' work which is unbelievable. As to the Essex papers, I actually have not seen those manifests. Bob
-
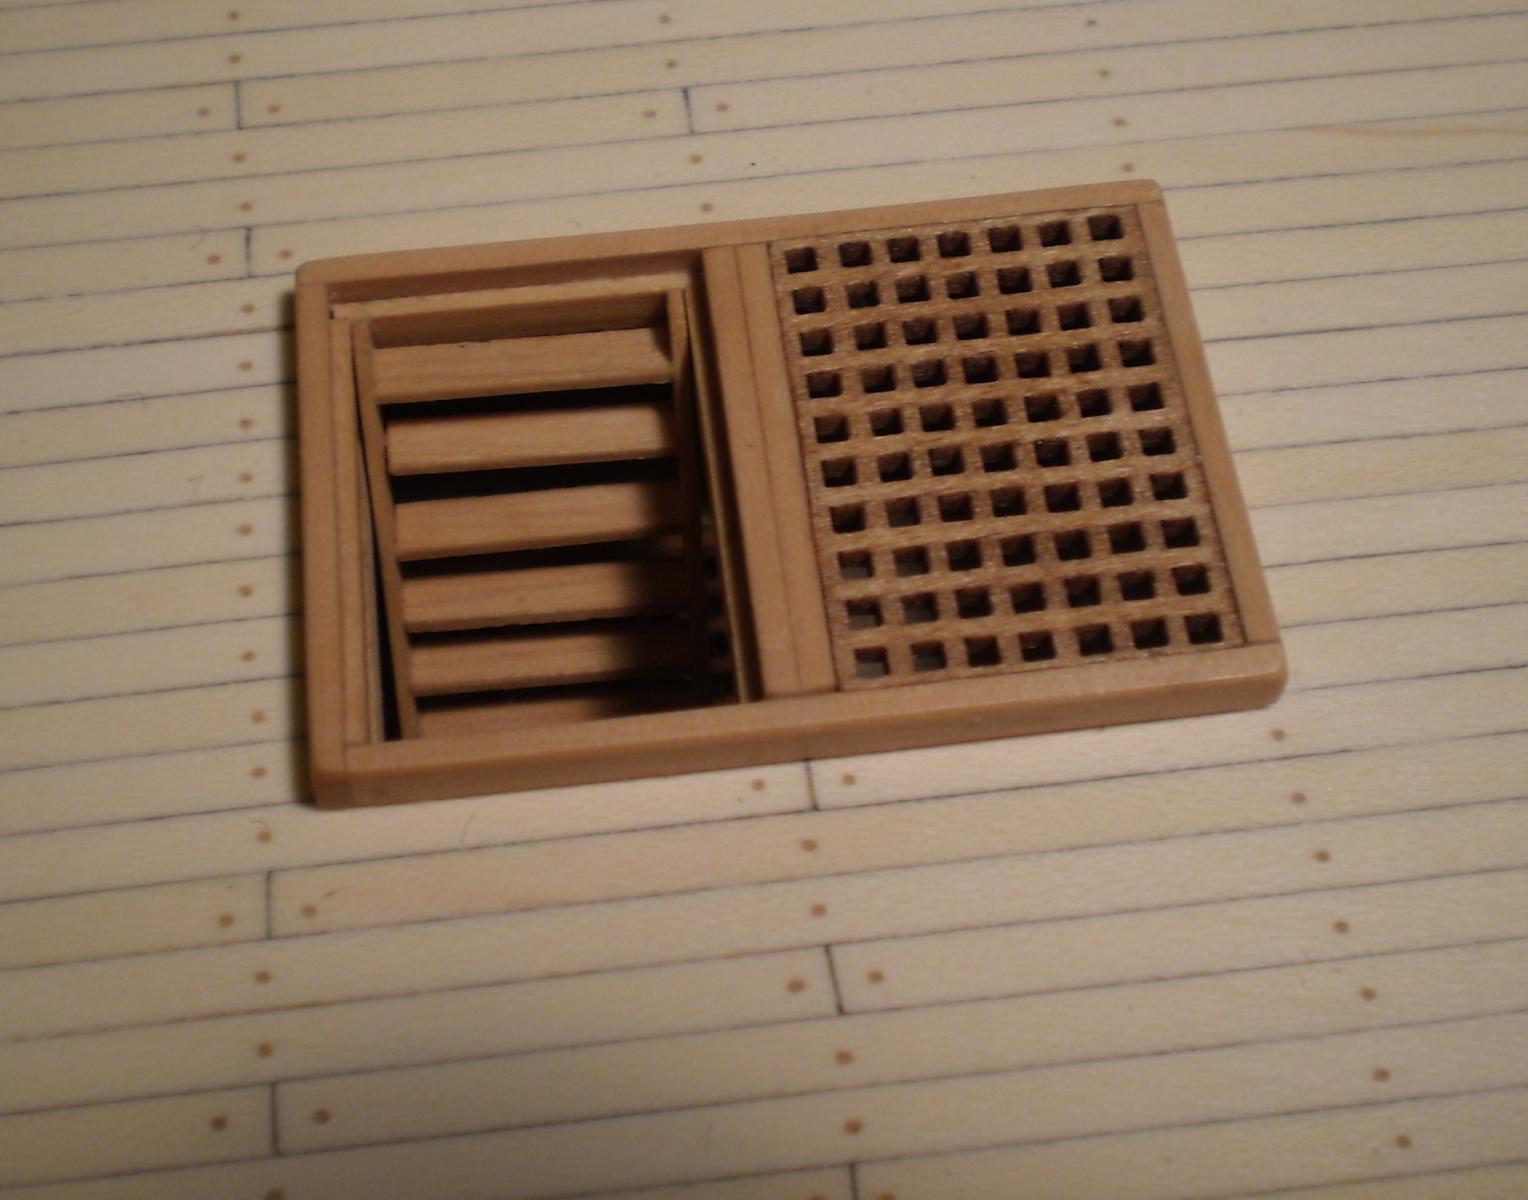
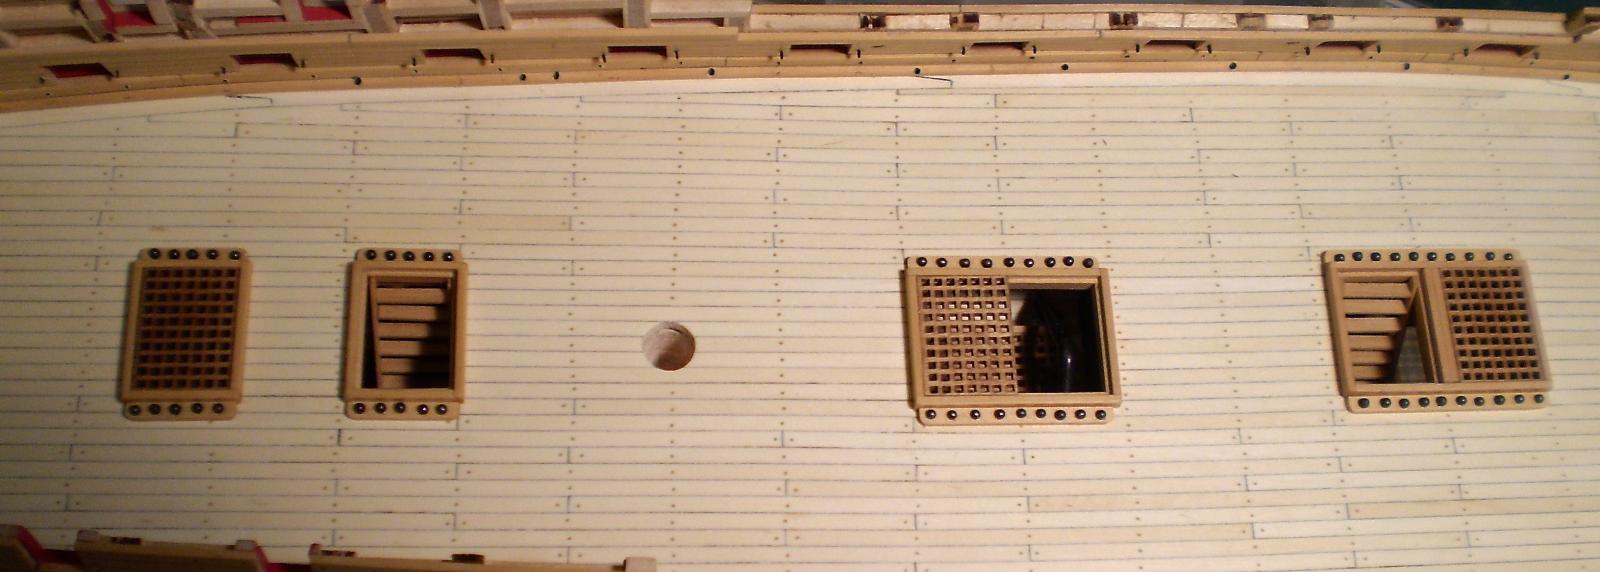
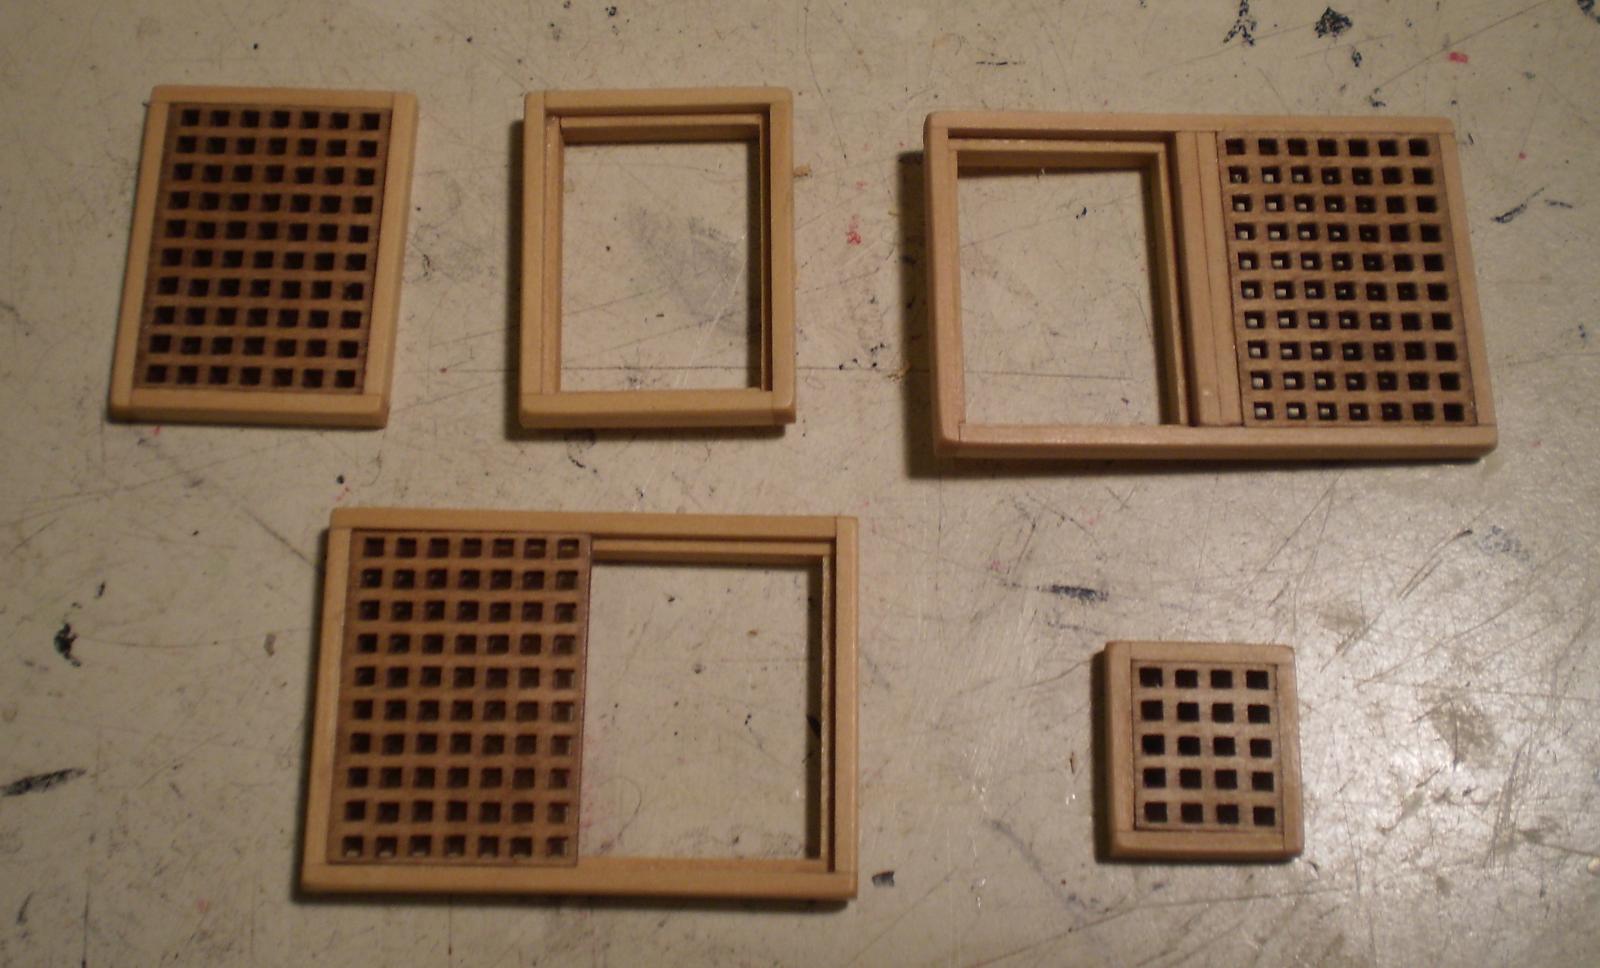
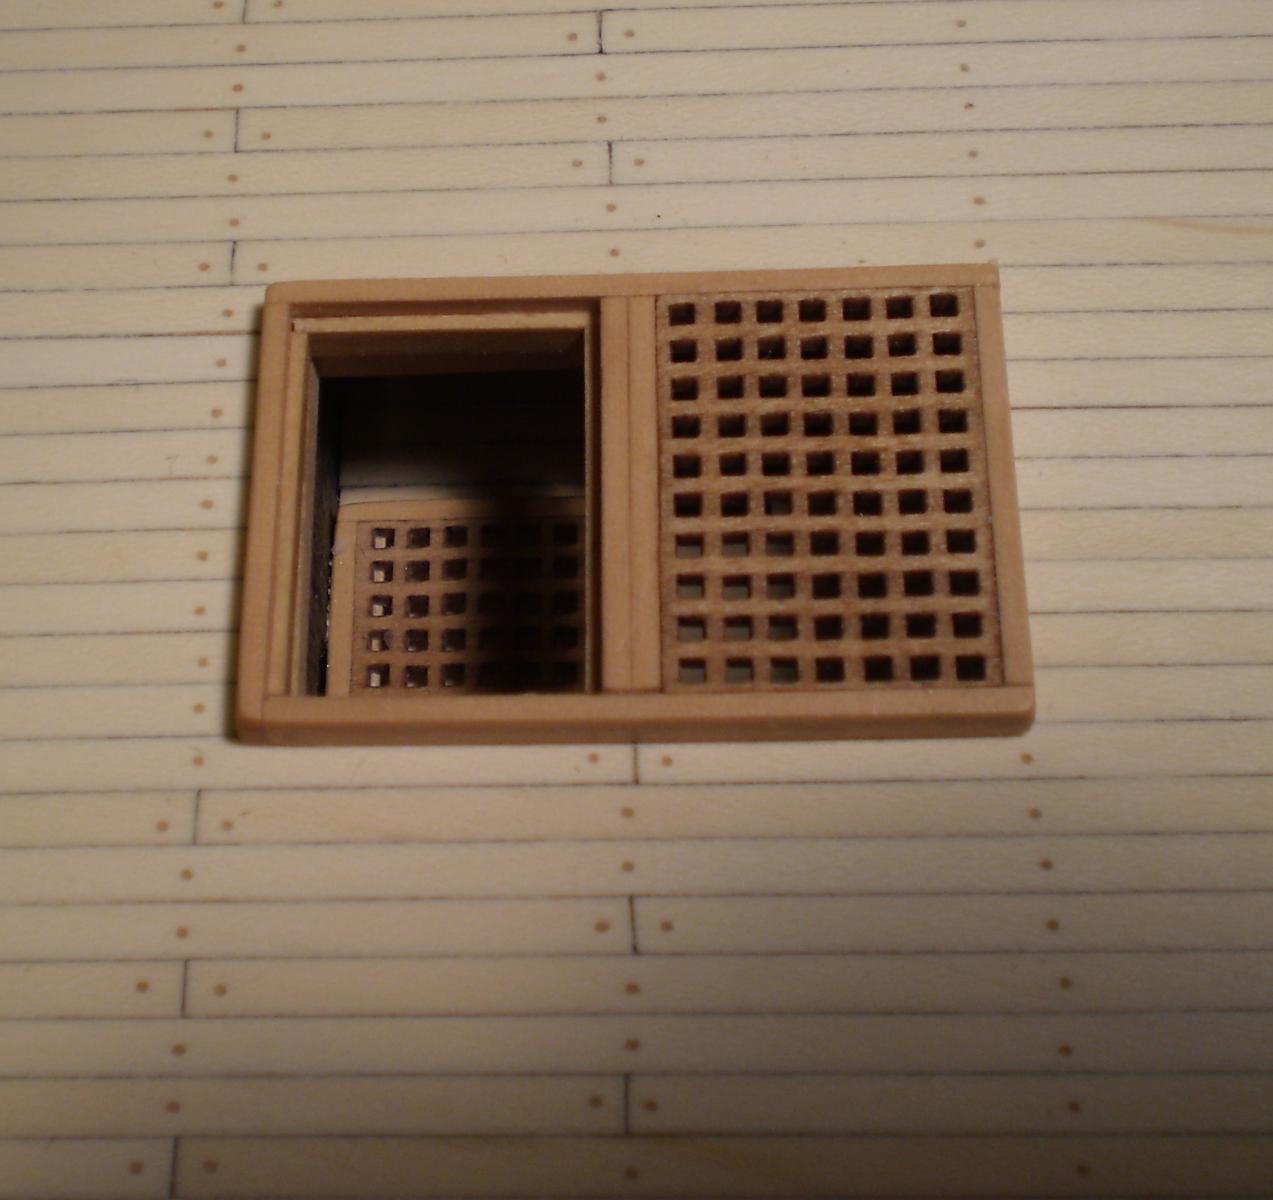
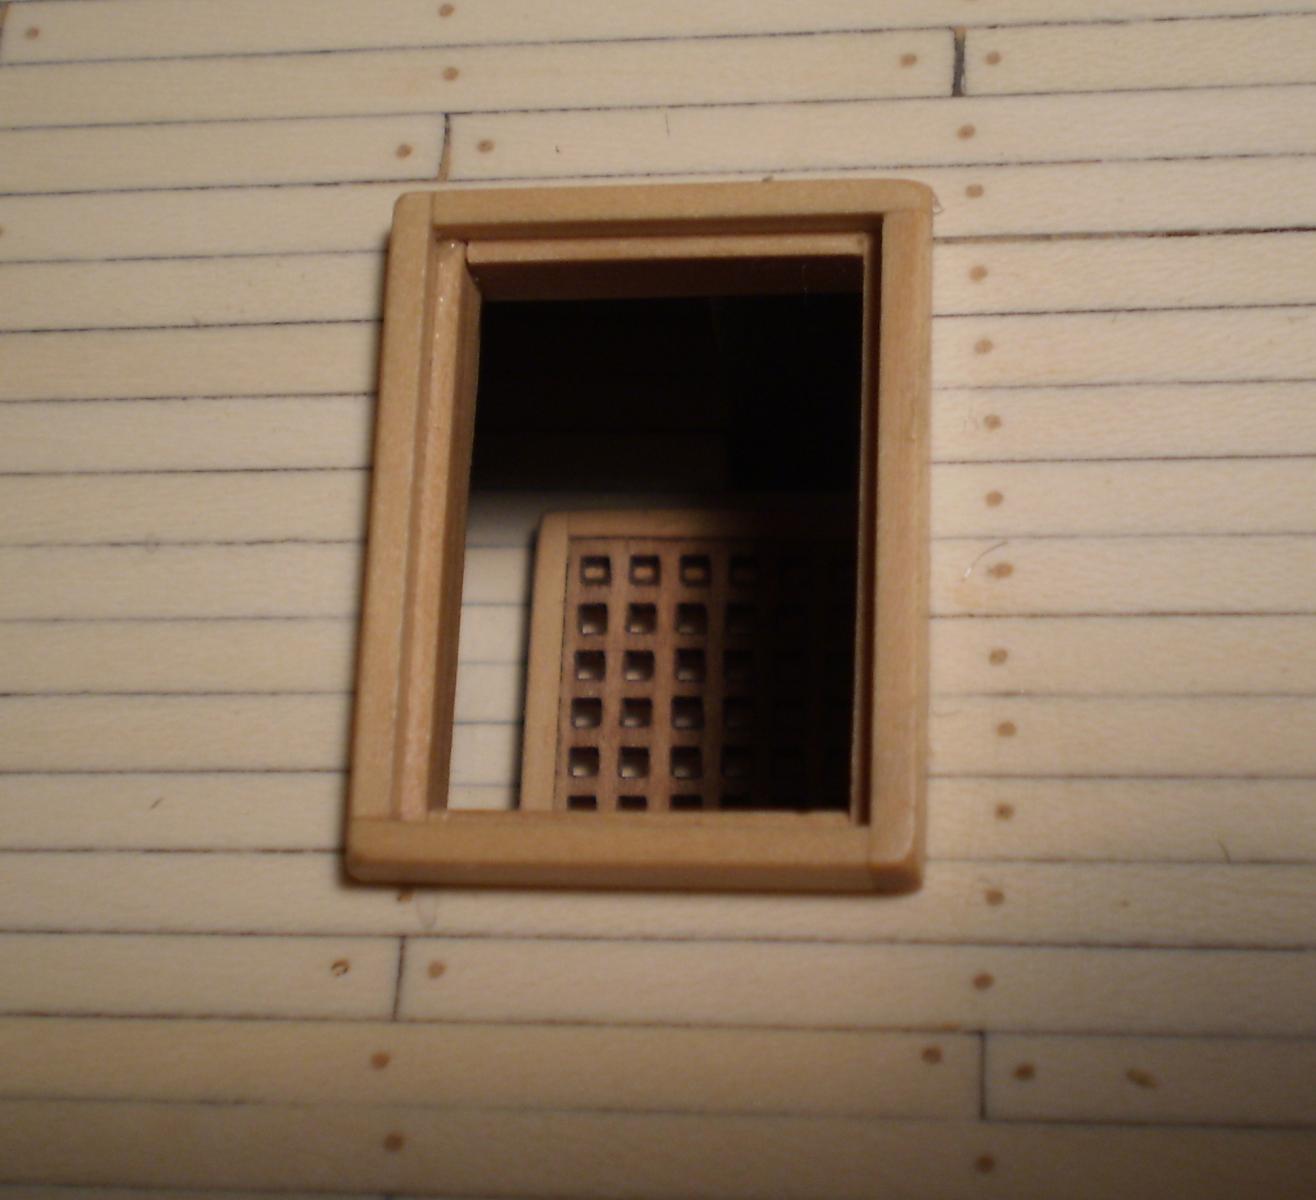
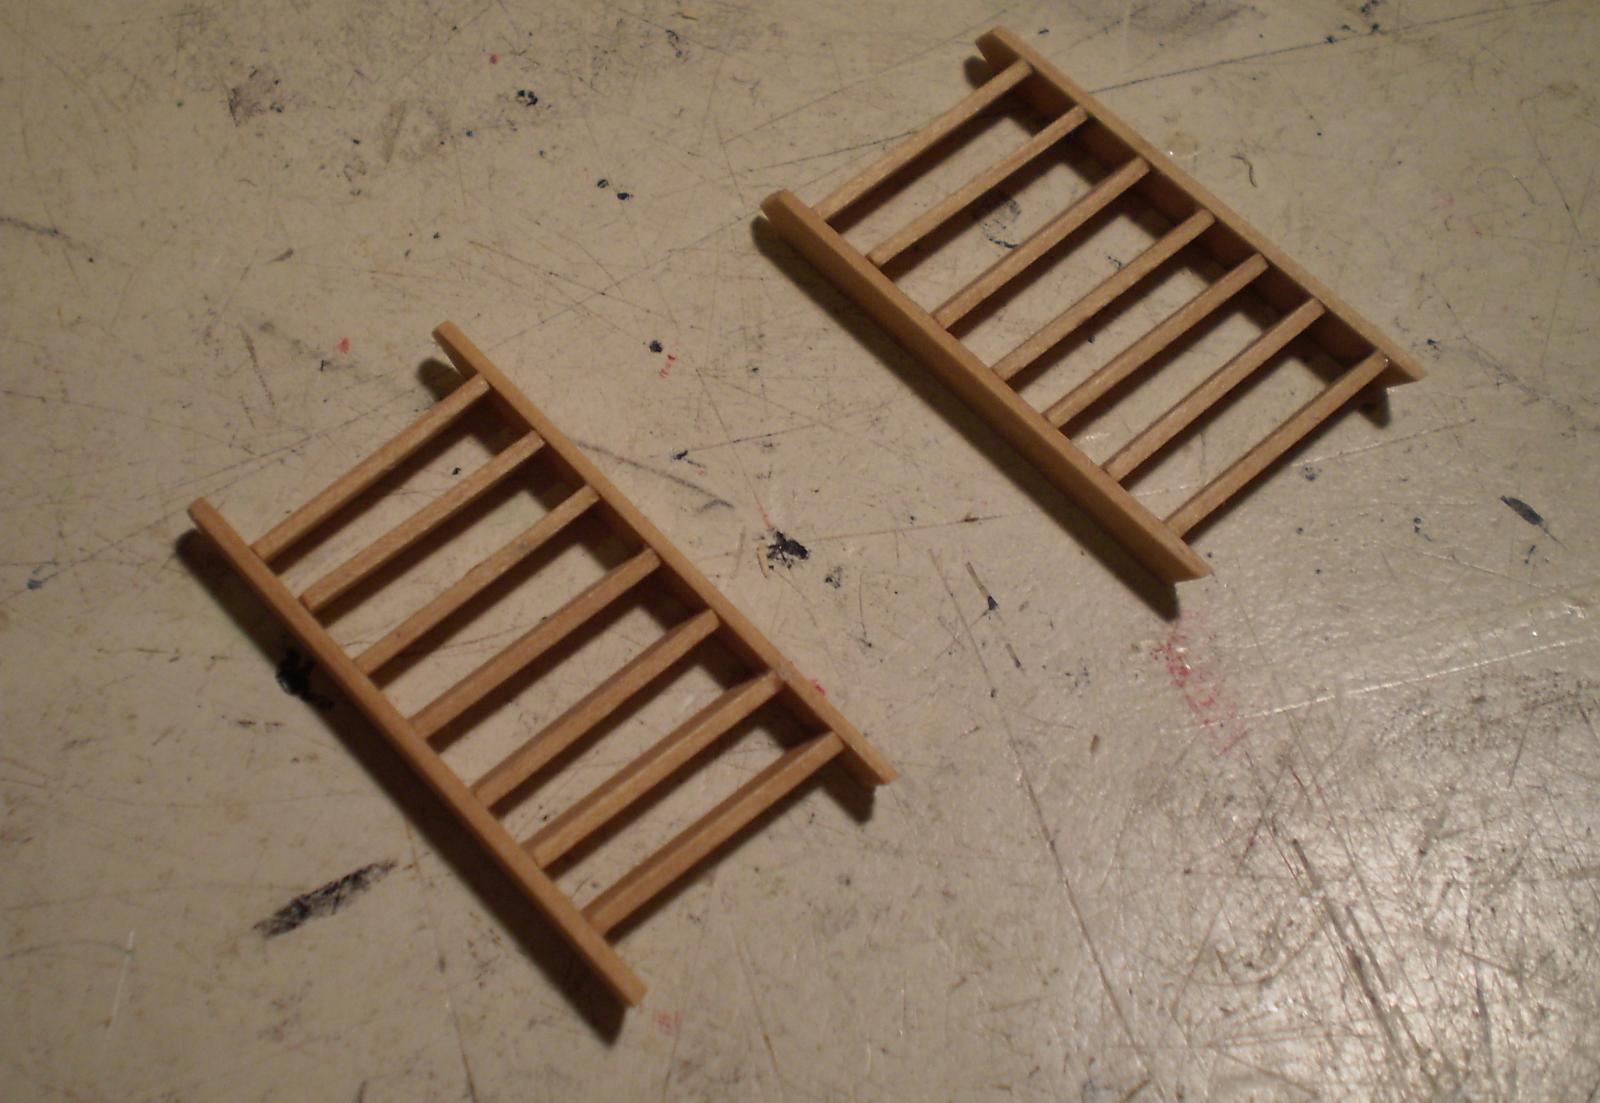
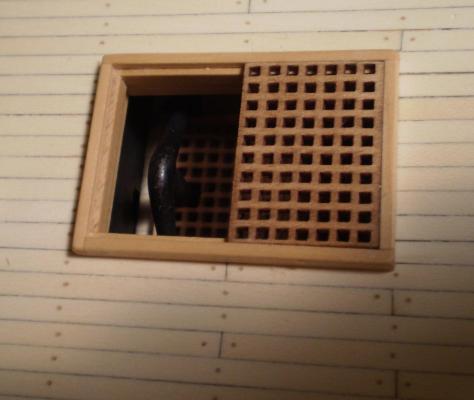
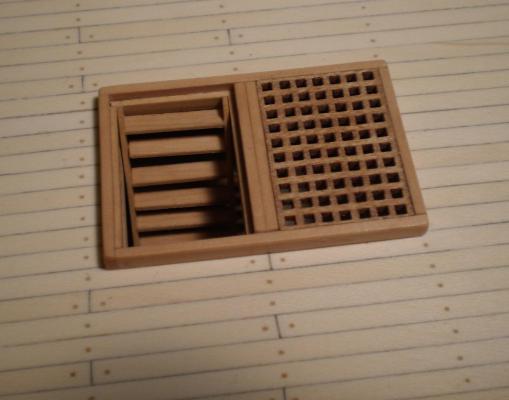
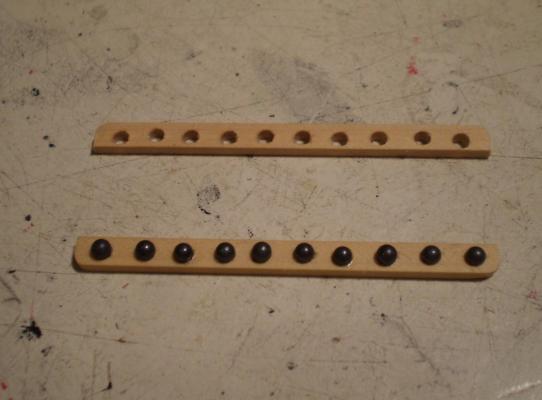
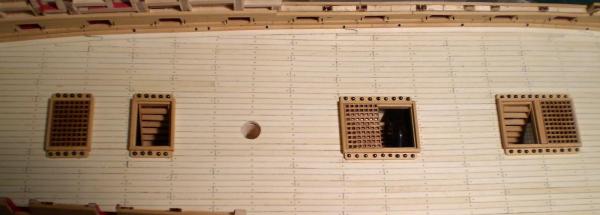
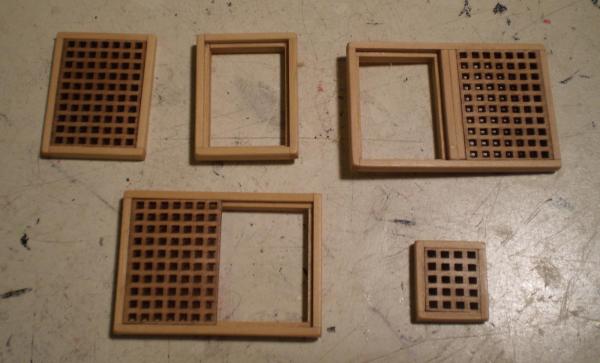
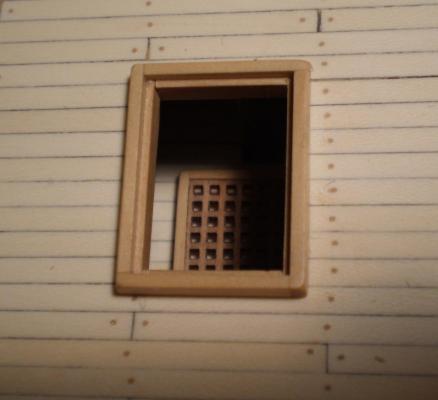
First an update and then some questions. The update: I 've now added the hatches, ladders and shot racks on the gun deck. The coamings were made from boxwood strip, the gratings are the laser cut pieces from the kit, the shot racks are boxwood strip and the ladders down to the lower deck are made from boxwood strip. The gratings were stained with golden oak stain and all of the pieces were finished with Wipe-on Poly. The "cannon balls" provided in the kit seemed much too large, so I used smaller ones that I had on hand. Predictably, after installing these pieces the work previously done on the lower deck sections pretty much disappeared. Now for the questions: (1) I'm going to add two cushioned benches in the great cabin as shown in AOTS. Does anyone have an idea as to what color the cushions would be? (2) The kit shows only one partition on the gun deck. AOTS shows three, with the great cabin partition and a partition for the captains bed space aft of the one in the kit. I'm assuming that these are correct, but there is nothing to show their appearance. Would they be simple board construction, or paneled construction on one or both sides? (3) There are cannon in both the great cabin and the captains bed space.Should these be shown any differently than the other cannon on that deck? I would be appreciative of any help you can provide. Bob


- 1,477 replies
-
- 17
-
-
- essex
- model shipways
- (and 1 more)
-
Mark, I don't think that I could do what you're doing -- in fact, I know that I couldn't. I'm sure that I would try to tweak it to be "good enough". I have nothing but respect and admiration for your decision not to do that. Like everyone else, I look forward to version 2. Bob
-
Thanks Sam. I've used the brass rods on my last few builds and have been very happy with them, both during construction and as permanent mounts. No balance issues. Bob
-
Thanks Gary, Bug and Sjors and the "likes". Gary, the pin mount is just one of the many good ideas that I have picked up on MSW. Sjors, I'm afraid that photography is not my strong suit and the copper really did me in for the pictures. Bob
-
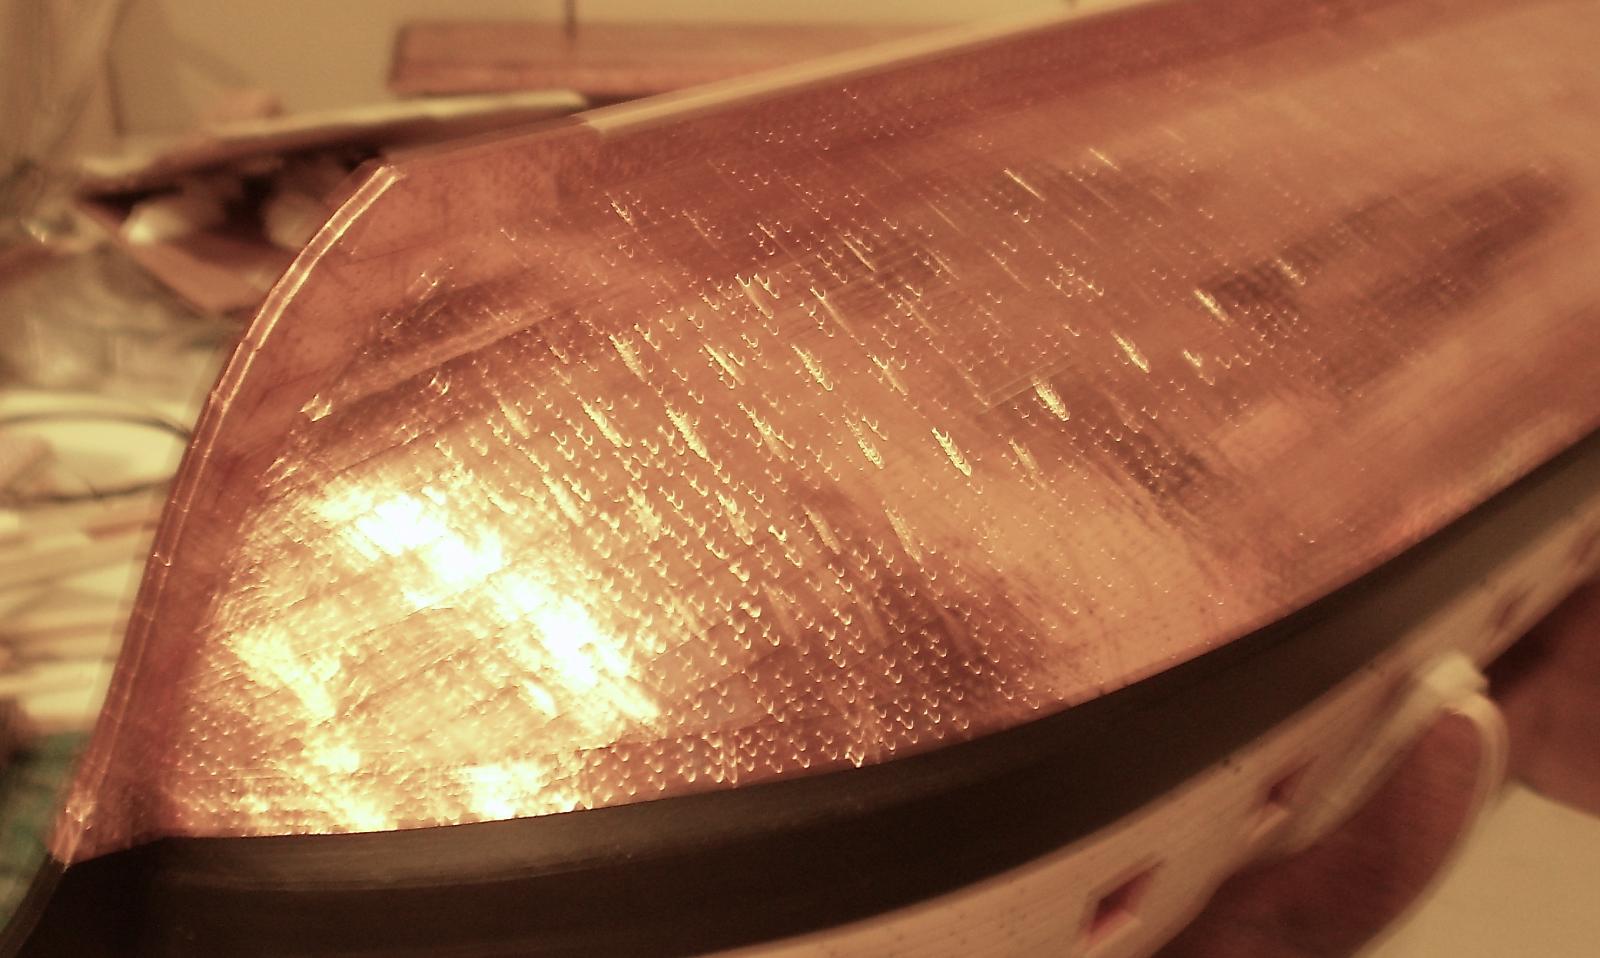
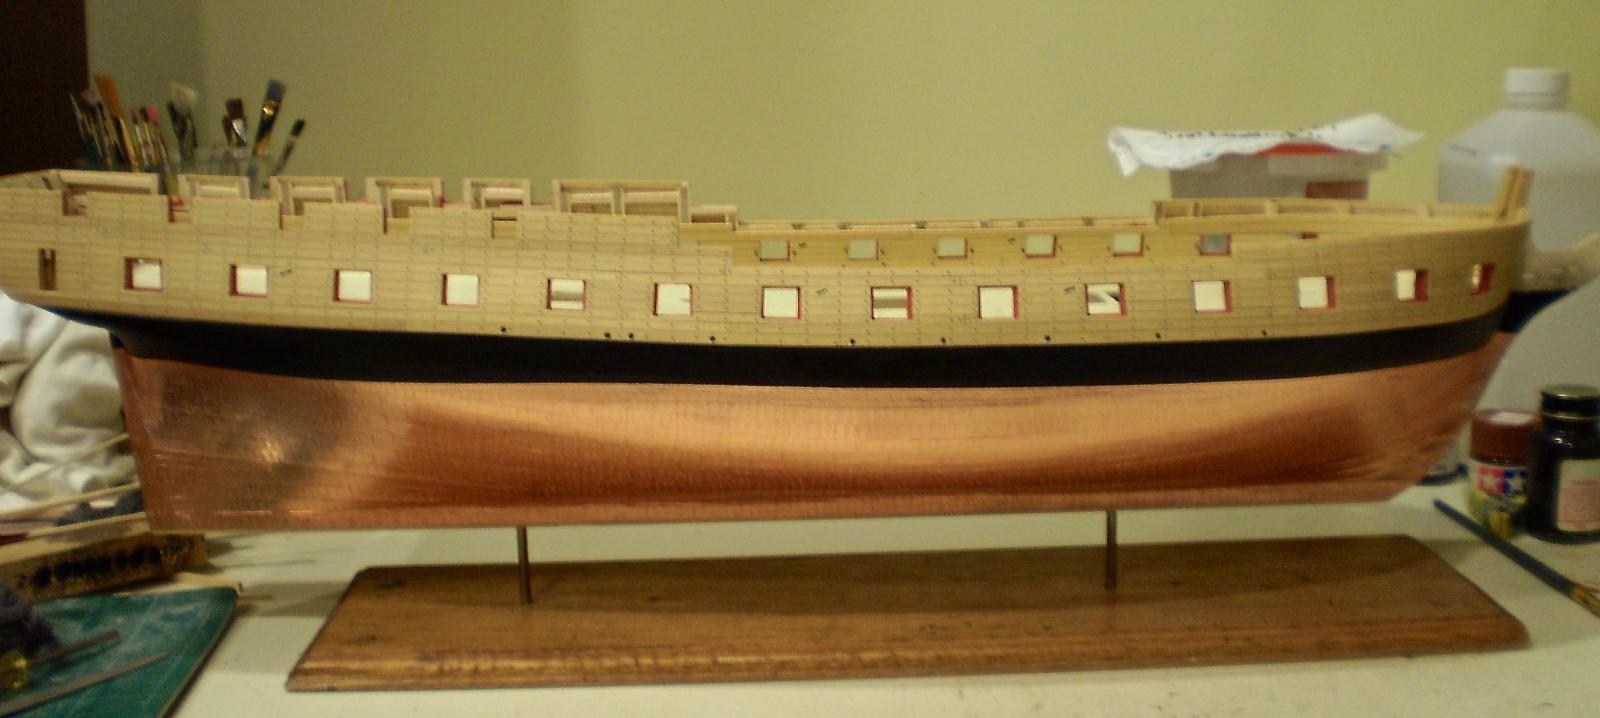
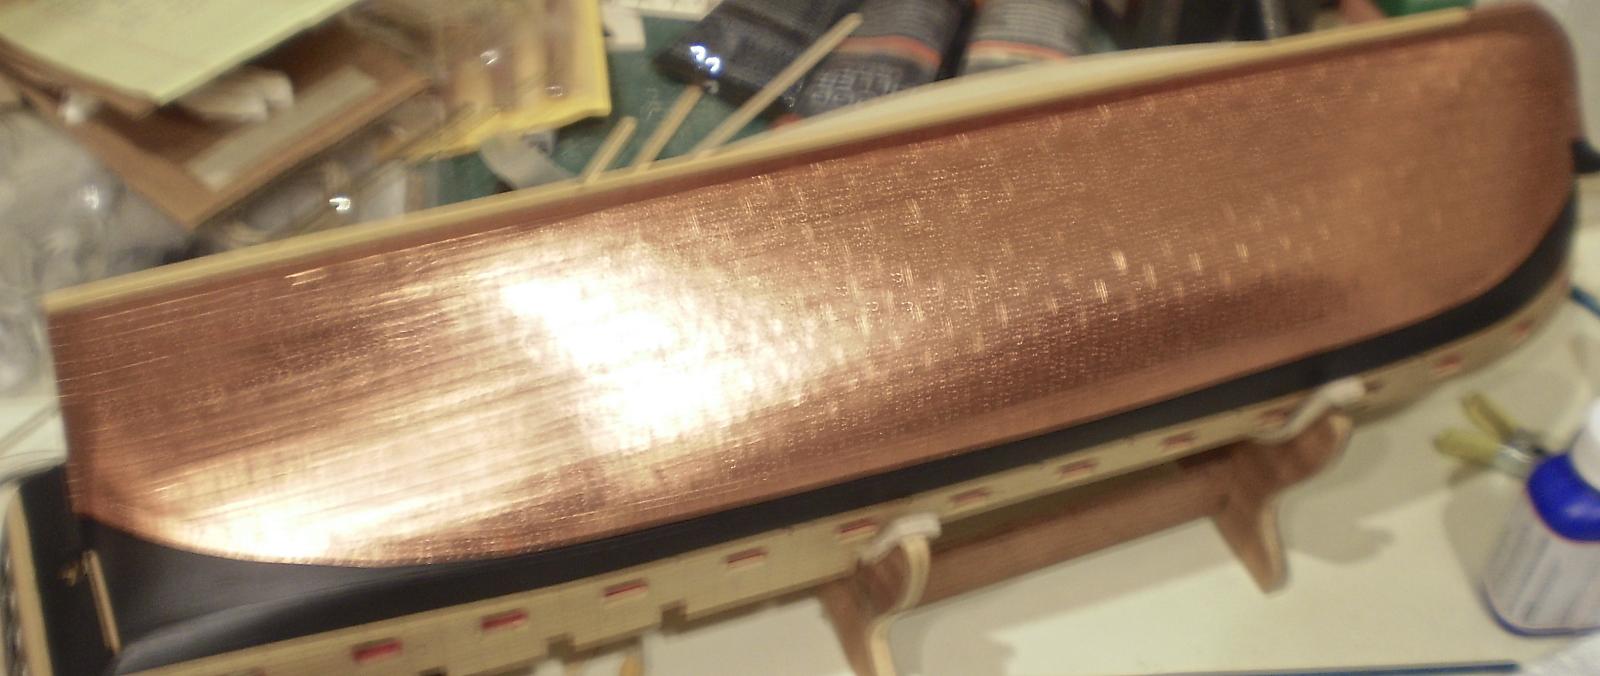
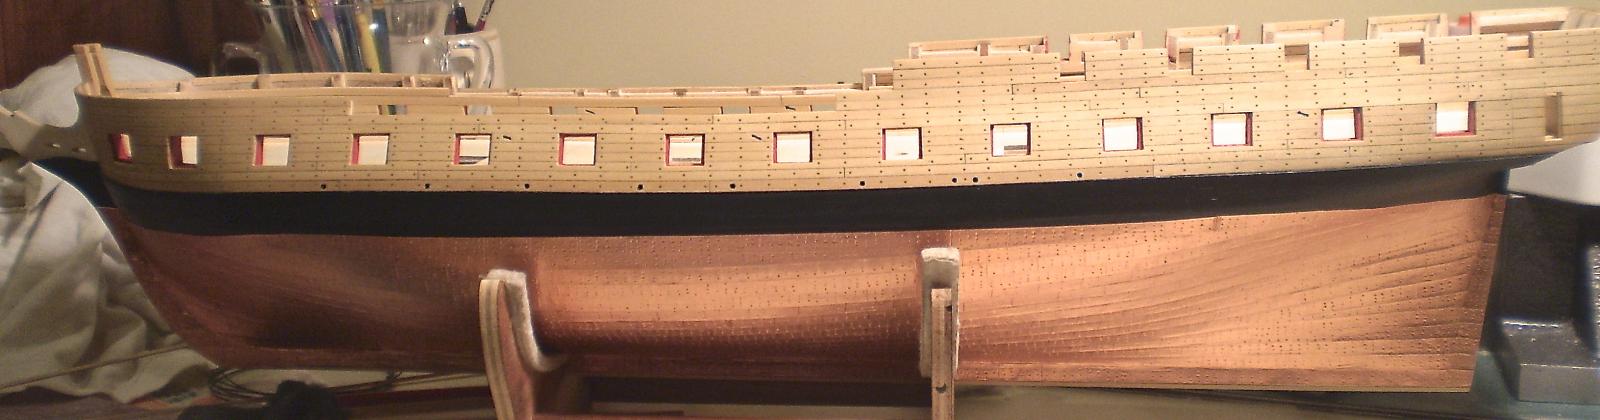
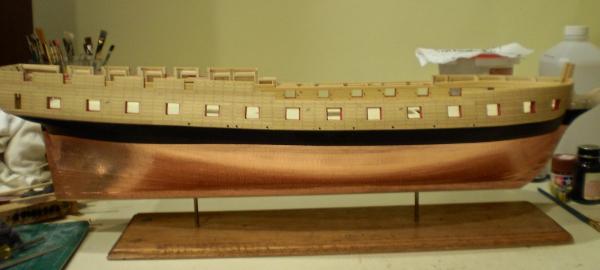
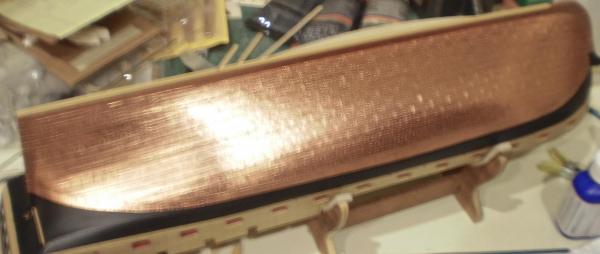
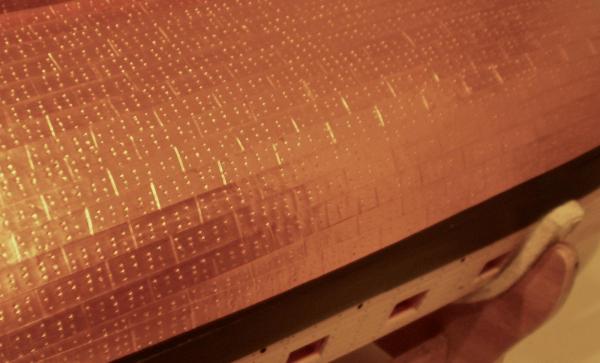
Practice may not make perfect, but it does make quicker, easier and, hopefully, better. The second side of the copper is done and I like it better. Now if I had a third side to do......... The last photo shows the copper with a coat of Floquil Flat Finish brushed on. Although it still looks quite shiny and bright, it is less so than before the flat finish was applied. Looking at my Syren of a few years back, which was finished comparably, I expect a nice mellowing of the copper on Essex as well. After finishing the copper I decided to move the model from a cradle to a brass pin mount, which is how it will be permanently mounted after completion. This involved using epoxy to install pieces of brass rod into holes drilled through the keel and slide these into brass tubing installed in a base. This will avoid contact with copper as much as possible during future construction, but still permit removal of the model, if necessary. Next up will be some items that I've already done some work on, the rudder and the gun deck hatches. Other deck items will also be done after that. Bob


- 1,477 replies
-
- 17
-
-
- essex
- model shipways
- (and 1 more)
-
Thanks Nigel. Your comments are appreciated. Try the Birchwood Casey. I like it so far, although I haven't tried it on any large surfaces yet. Bob
- 1,477 replies
-
- 1
-
-
- essex
- model shipways
- (and 1 more)
-
Bug, I have 8 completed models in my house -- and obviously a very understanding wife-- but even she draws the line. I'm on a "one in, one out" system. A new one can't be started unless an old one is on it's way somewhere else. Our storage system is similar to yours with bookshelf cabinets adapted to fit the models. Bob
-
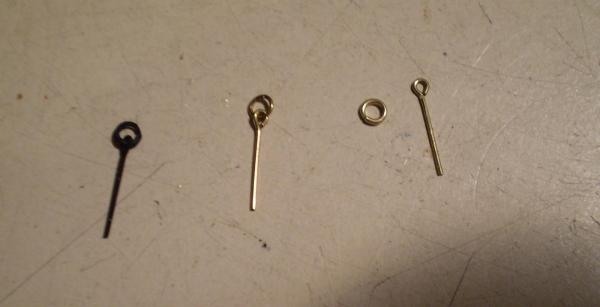
Thanks so much Wes. I thought it was worth a try. The eyebolts and rings are both from Model Expo, bought on-line. They are the smallest available sizes. I'm surprised you don't have at least the eyebolts in the Conny kit. Bob
-
Thanks Steve for your kind words and suggestions. With regard to the Essex in your stash, if you haven't been following the problems with the kit, I would wait until the kit modifications are done and replacement parts issued by ME (see the thread by Sam Cassano in the "Wood ship model questions and reviews" section of this site). Bob
- 1,477 replies
-
- 1
-
-
- essex
- model shipways
- (and 1 more)
-
Like Grant, I used the solution uncut. I haven't used a sealer afterward and so far there has been no problem. My guess is that if you were doing larger surfaces, such as cannon barrels, some rubbing down after the rinsing might be needed and maybe a sealer. Bob
- 1,477 replies
-
- 2
-
-
- essex
- model shipways
- (and 1 more)
-
Gary, I don't really recall which size carriages I used, but I'm sure that what I did was to compare the size of the kit barrels that I was using to the Lumberyard barrel sizes and then to get the carriages that went with the comparable Lumberyard barrels. I'm not sure what you are referring to as "tapering". The carriages are narrower at the front than the rear, if that's what you mean. As to the gunport enlargement, it did cause me to raise the bulwark height slightly to accommodate the larger opening. Bob
-
You've become a Master of Planking, Augie. Beautiful work. Bob
- 2,191 replies
-
- 1
-
-
- confederacy
- Model Shipways
- (and 1 more)
-
Thanks to all for the comments and the "likes". Sam, I never had much luck with it either, but this stuff just seems to work easily. I did nothing complicated --no cleaning, etching etc. I poured a very small amount in a lid, dropped a bunch of parts into it for about a minute or so, took them out and put them in a lid of tap water for another minute or two and then took them out and let them dry on a paper towel for a day. I changed the Brass Black whenever it got too dark to see the parts. Thats it. I guess we'll see what happens over time. Bob
- 1,477 replies
-
- 1
-
-
- essex
- model shipways
- (and 1 more)
-
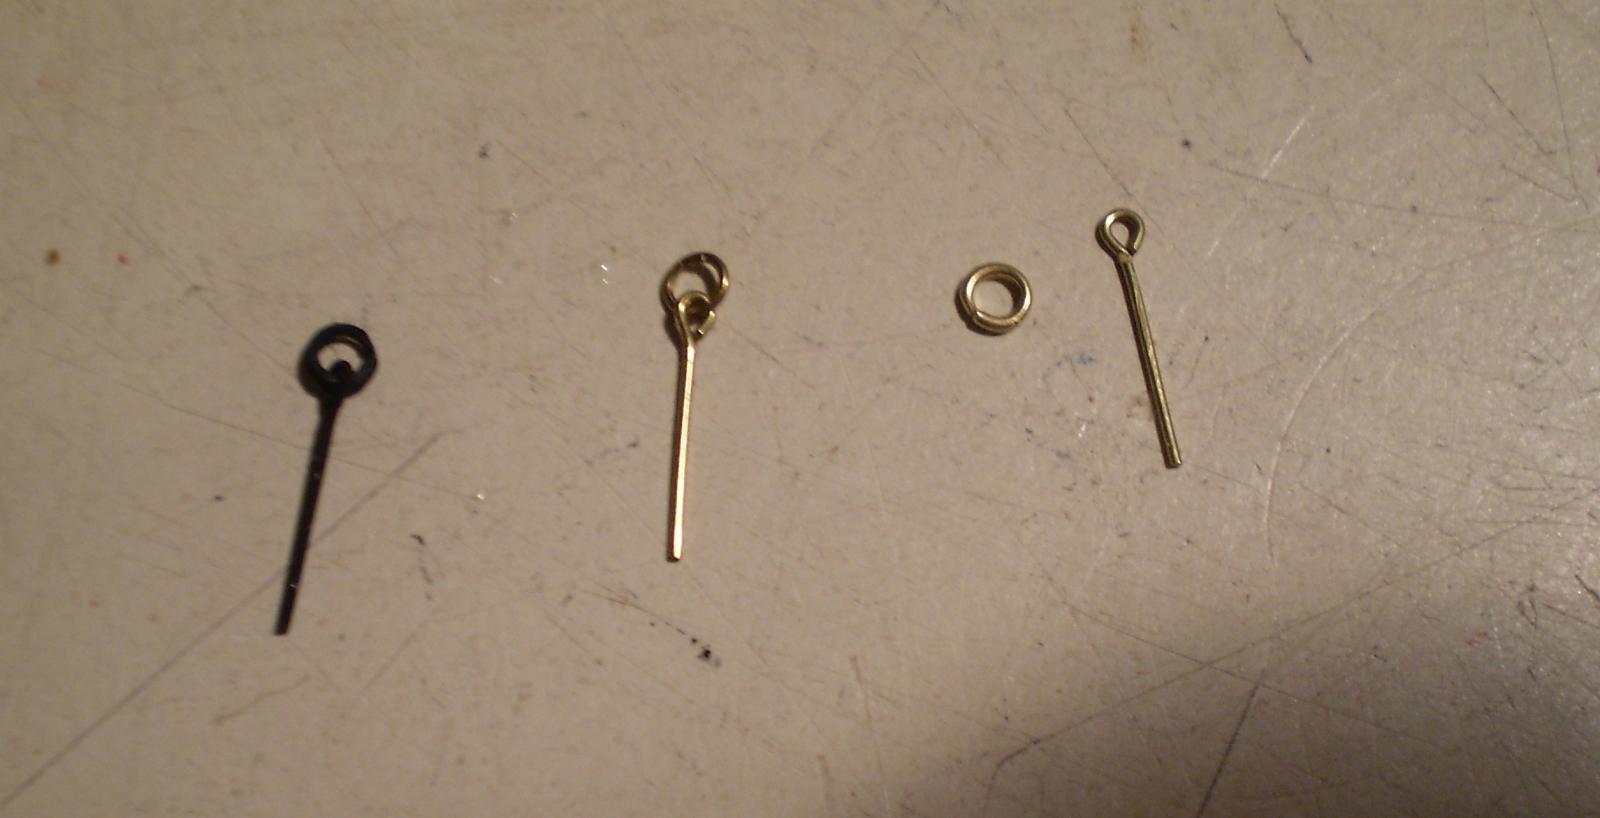
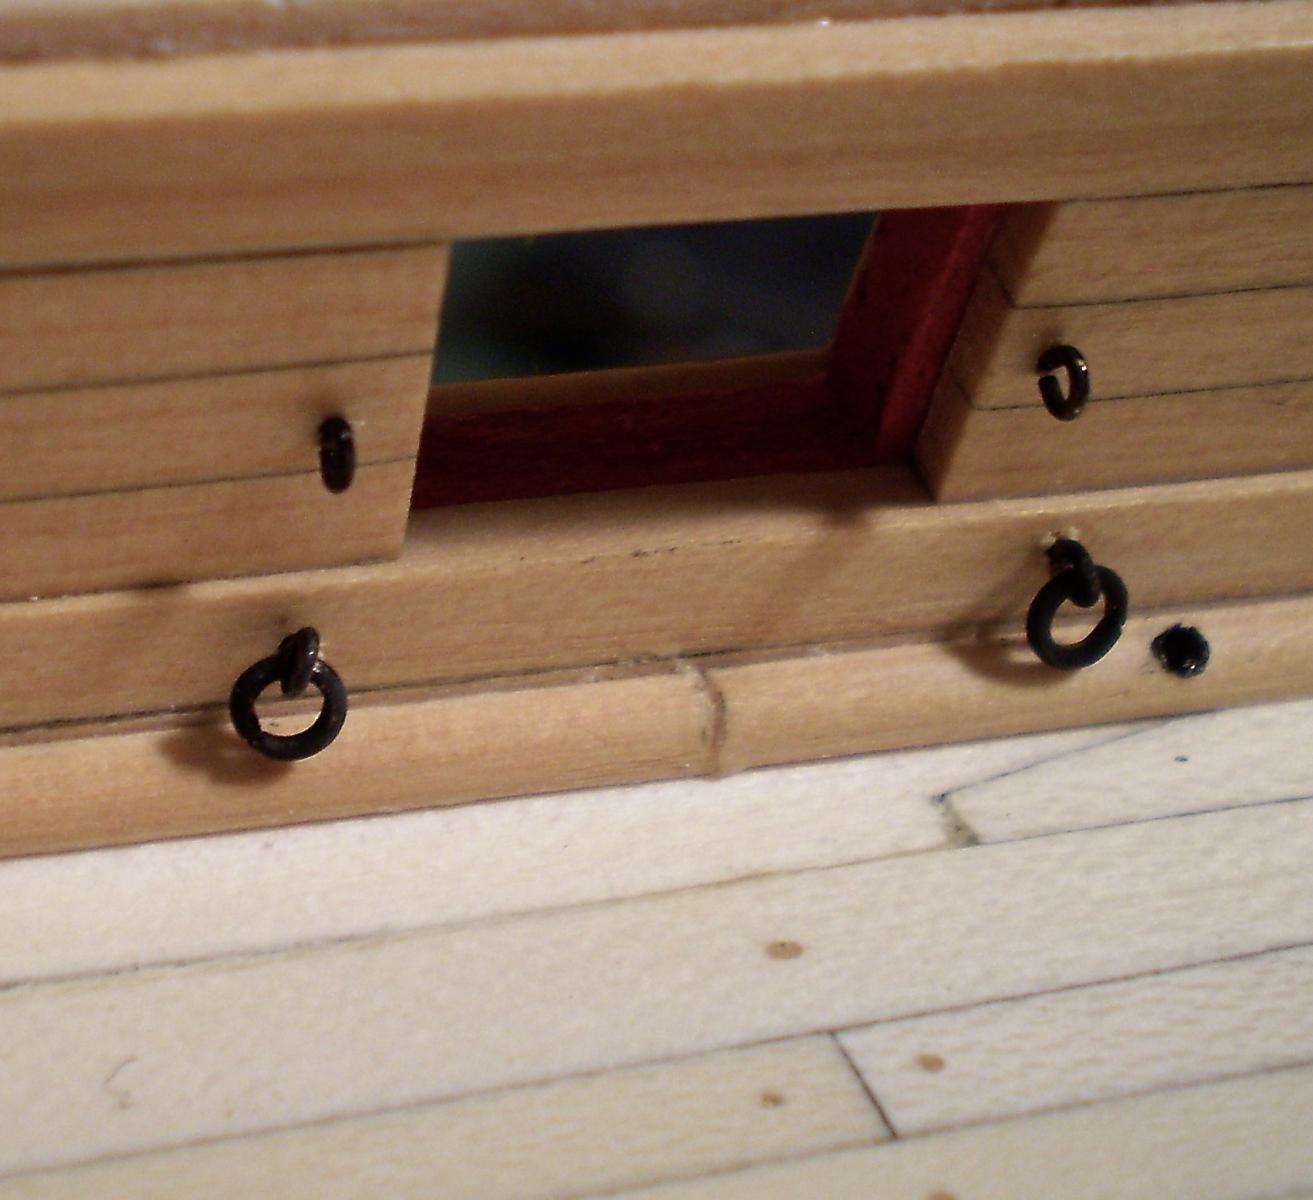
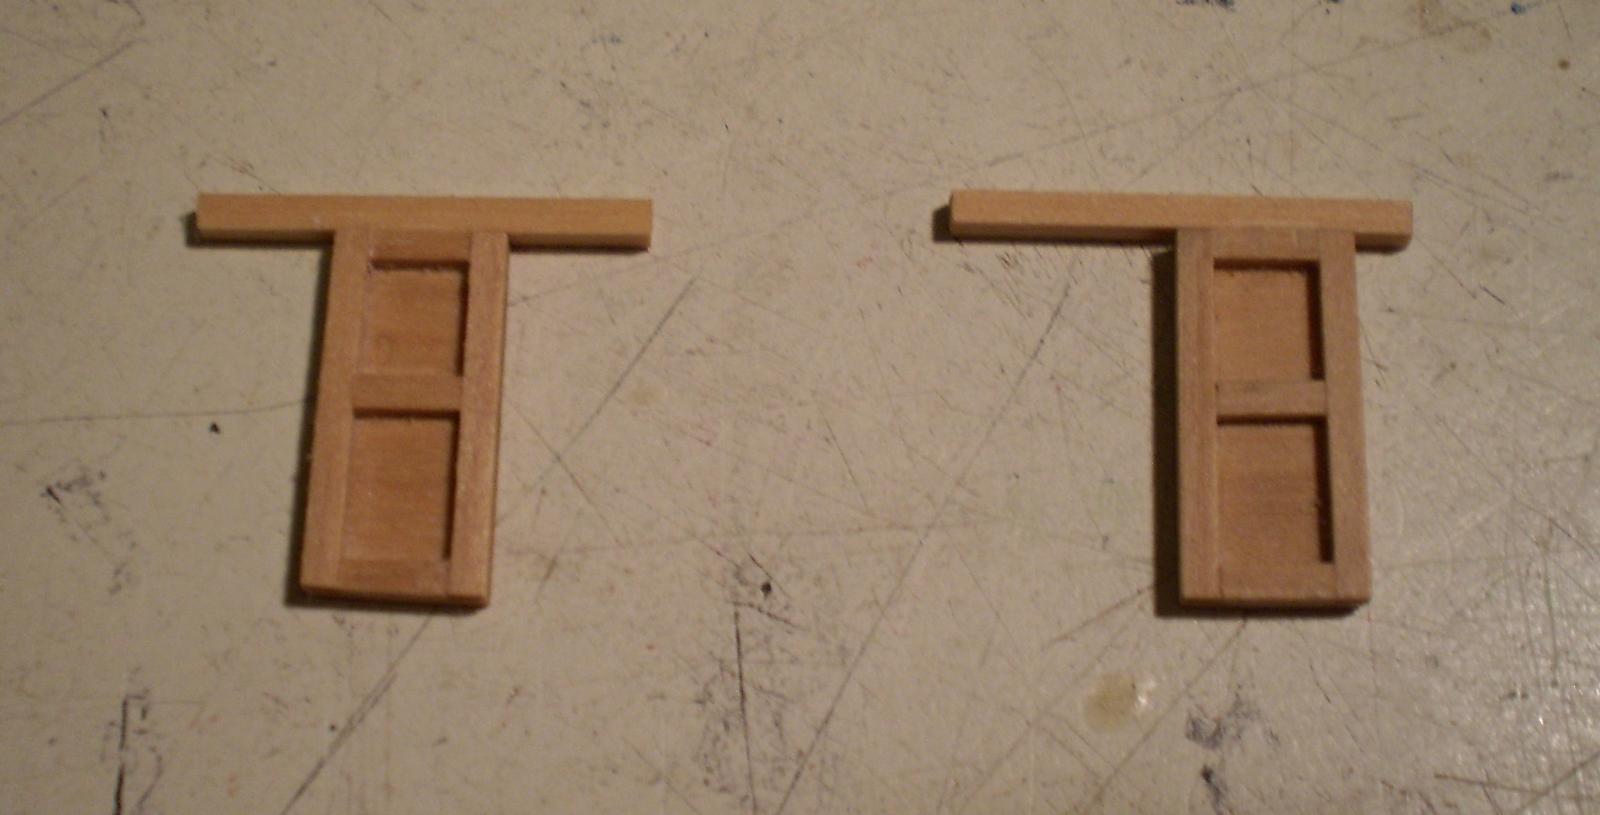
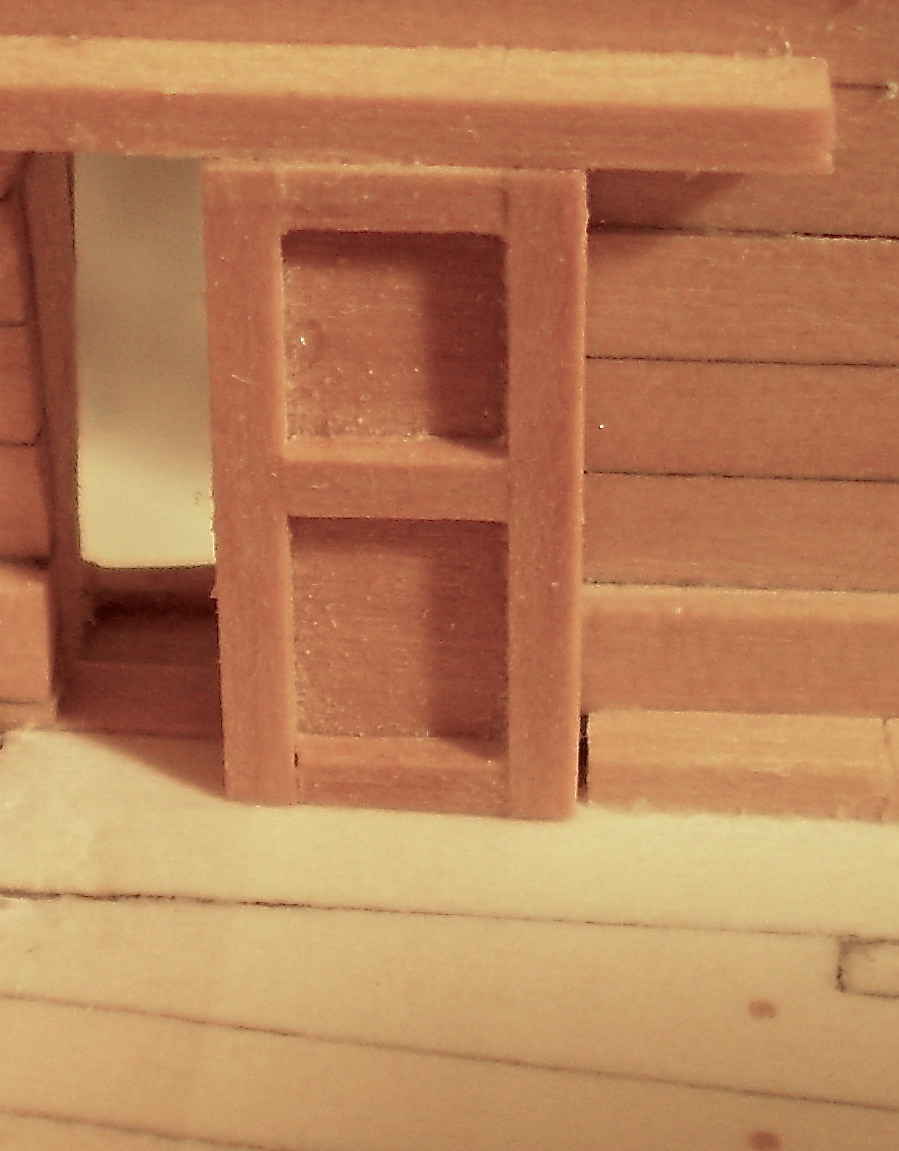
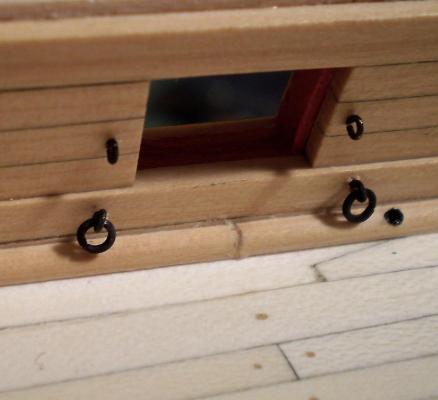
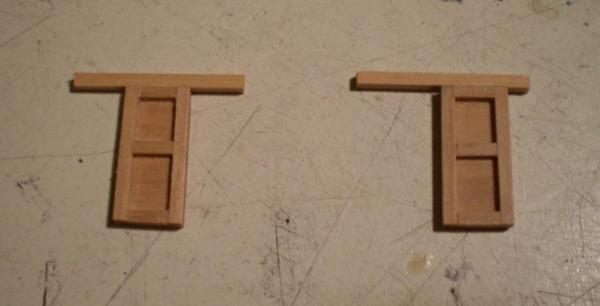
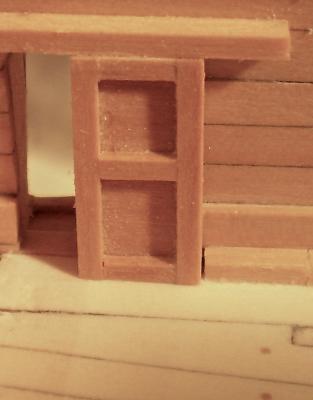
I took my few days off from coppering by doing the bulwark eyebolts and ringbolts. These are very small and I chose to use commercial eyebolts and rings. The parts are all brass and were finished with Birchwood Casey Brass Black. This is the first time that I have used that product (which has been recommended by quite a few on MSW) and I must say that it works better than any such product that I have tried before. Chalk up another satisfied customer. The eyebolts are permanently glued in place. The ringbolts are just sitting in their holes and will be removed when I do the breeching ropes later. I did one other small project. I made and installed the sliding doors from the great cabin to the quarter galleries. No reason to do them now except that I just felt like making something. Back to the copper. Bob


- 1,477 replies
-
- 17
-
-
- essex
- model shipways
- (and 1 more)
-
You're coming along very nicely Gary. It is always a good idea to have a cannon made up to use to verify the gunport height. With regard to the interior fairing, I find it easier to do the framing first and then fair the whole structure at one time. Bob
-
Very nicely done, Rusty. Pretty soon, you're going to have to do those guns and the mortar. Bob
- 421 replies
-
- 1
-
-
- granado
- bomb ketch
- (and 2 more)
-
Thanks Grant. Just trying to keep up with your beautiful Victory. Bob
-
I guess that I'm a pack rat, but this was the second ship that I built around 45 years ago and I still have the plans. However, there are no instructions of the kind found in kits today. I would be happy to send you the plans if you would PM me with the necessary information. A few words of caution, though. The kit then contained a lot of lead castings. If your kit dates from that era, I don't know how they are packed or what their condition may be after all these years. Not only are they a hazard to use, they will deteriorate to the point of disappearance at some point after construction. You needn't ask how I know. Bob
-
Thanks Sam, Augie and Bug for your comments and input and a continuing thanks to the "likes". I had previously done some experimenting with alcohol on test pieces and can attest that care needs to be taken if you choose to wipe the copper down with it. I haven't decided yet. Bob
-
Thanks for all the nice comments and the "likes". Sam, I did think about all those individual plates. That's why I decided to try something different. Ken, I've seen others who have used a sealer of one kind or another, but I've used copper tape without it successfully in the past and didn't use any here. So far, so good. As to the gloves, I've thought about them, but never tried. They might be a good idea. I'd be curious what others think. Bob
-
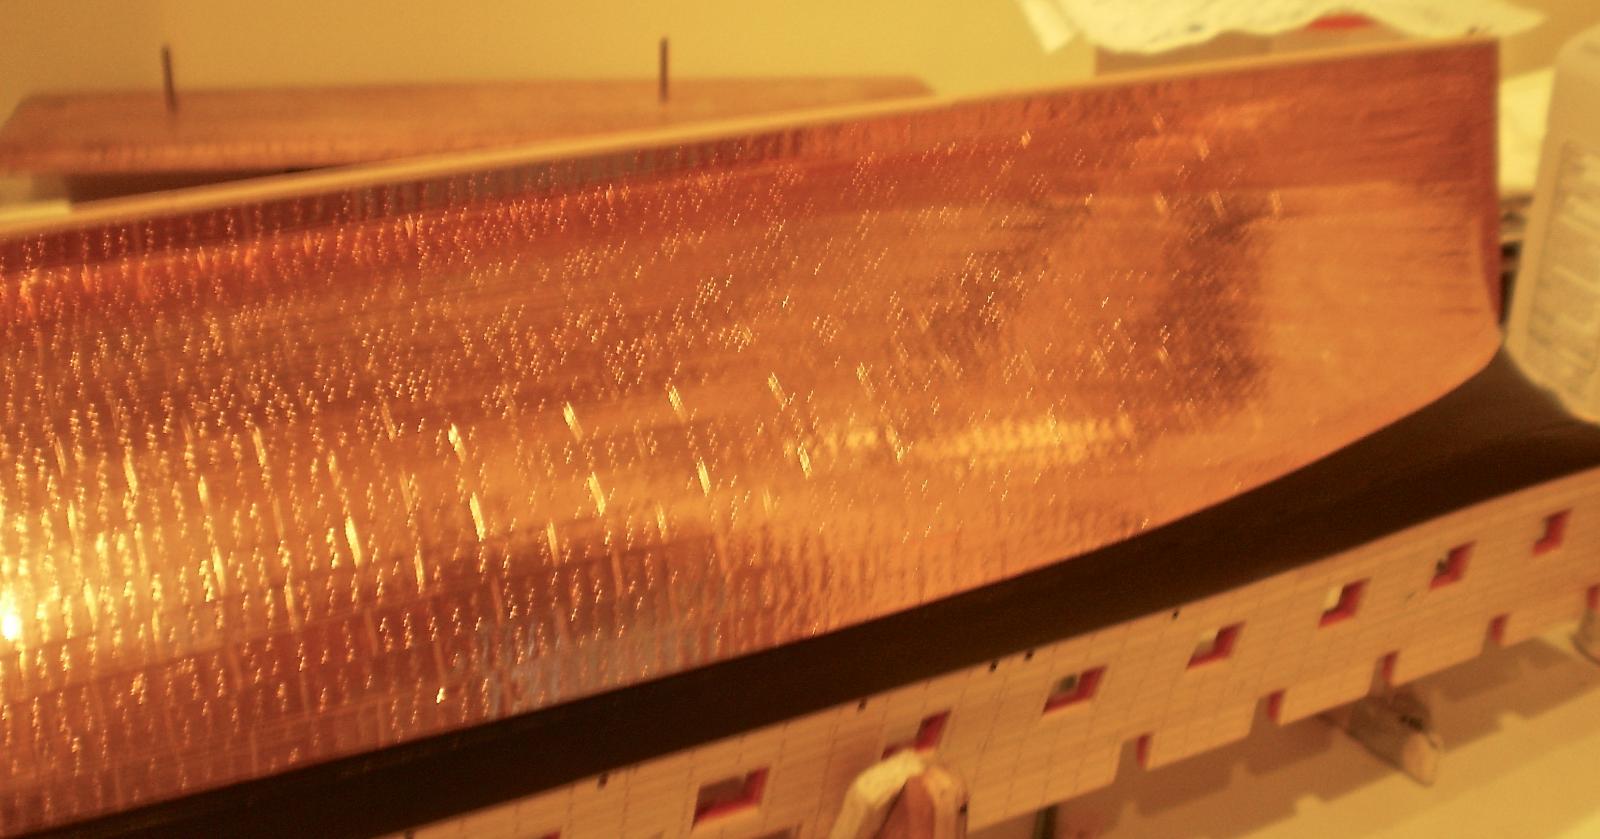
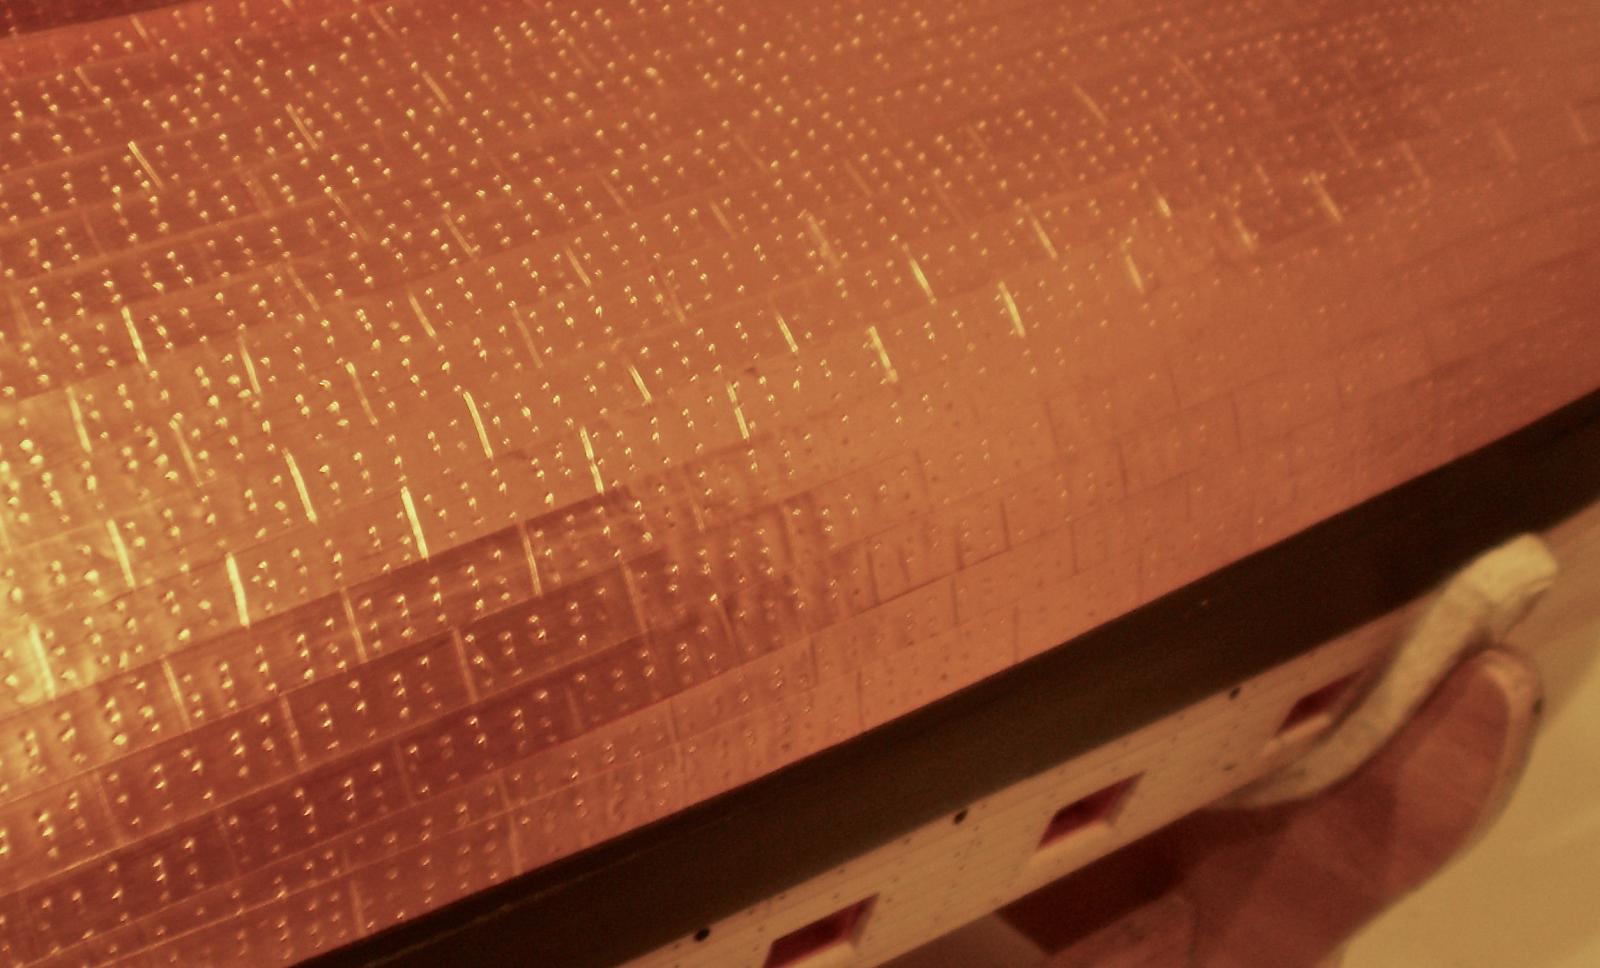
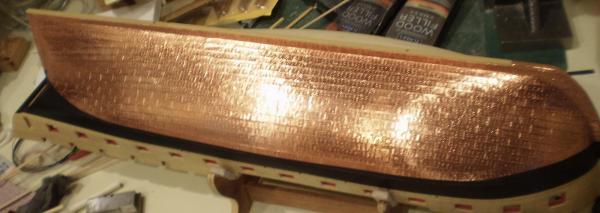
After some minor cursing and a small change of method, I've completed the first side of the copper. The change was to go, as much as possible, to one continuous strip of copper tape for each row, rather than piecing two or three pieces together. This took a little more care to avoid twisting the strips, but ended up taking less time and looking neater. While I'm generally pleased with the look of this side, I have no doubt that the refinement of method, and the practice that I've had, will make the second side easier and better. I will take a day or two off from the copper, however, because I am a little bleary-eyed from looking at it for a week. Now that my Brass Black has arrived, I think that I'll do some eyebolts and ringbolts for a bit. Bob

- 1,477 replies
-
- 23
-
-
- essex
- model shipways
- (and 1 more)