rafine
-
Posts
2,932 -
Joined
-
Last visited
Content Type
Profiles
Forums
Gallery
Events
Everything posted by rafine
-
 Thanks so much Thomas and Patrick and also the "likes". Thomas, I only hope that the kit problems get resolved and that there are other Essex builders. Patrick, the clean edges are the product of using boxwood. It really makes a difference. Bob
 -
Seeing your beautiful work again makes me envious of your opportunity to do this terrific model. I look forward to each of your posts. Bob
-
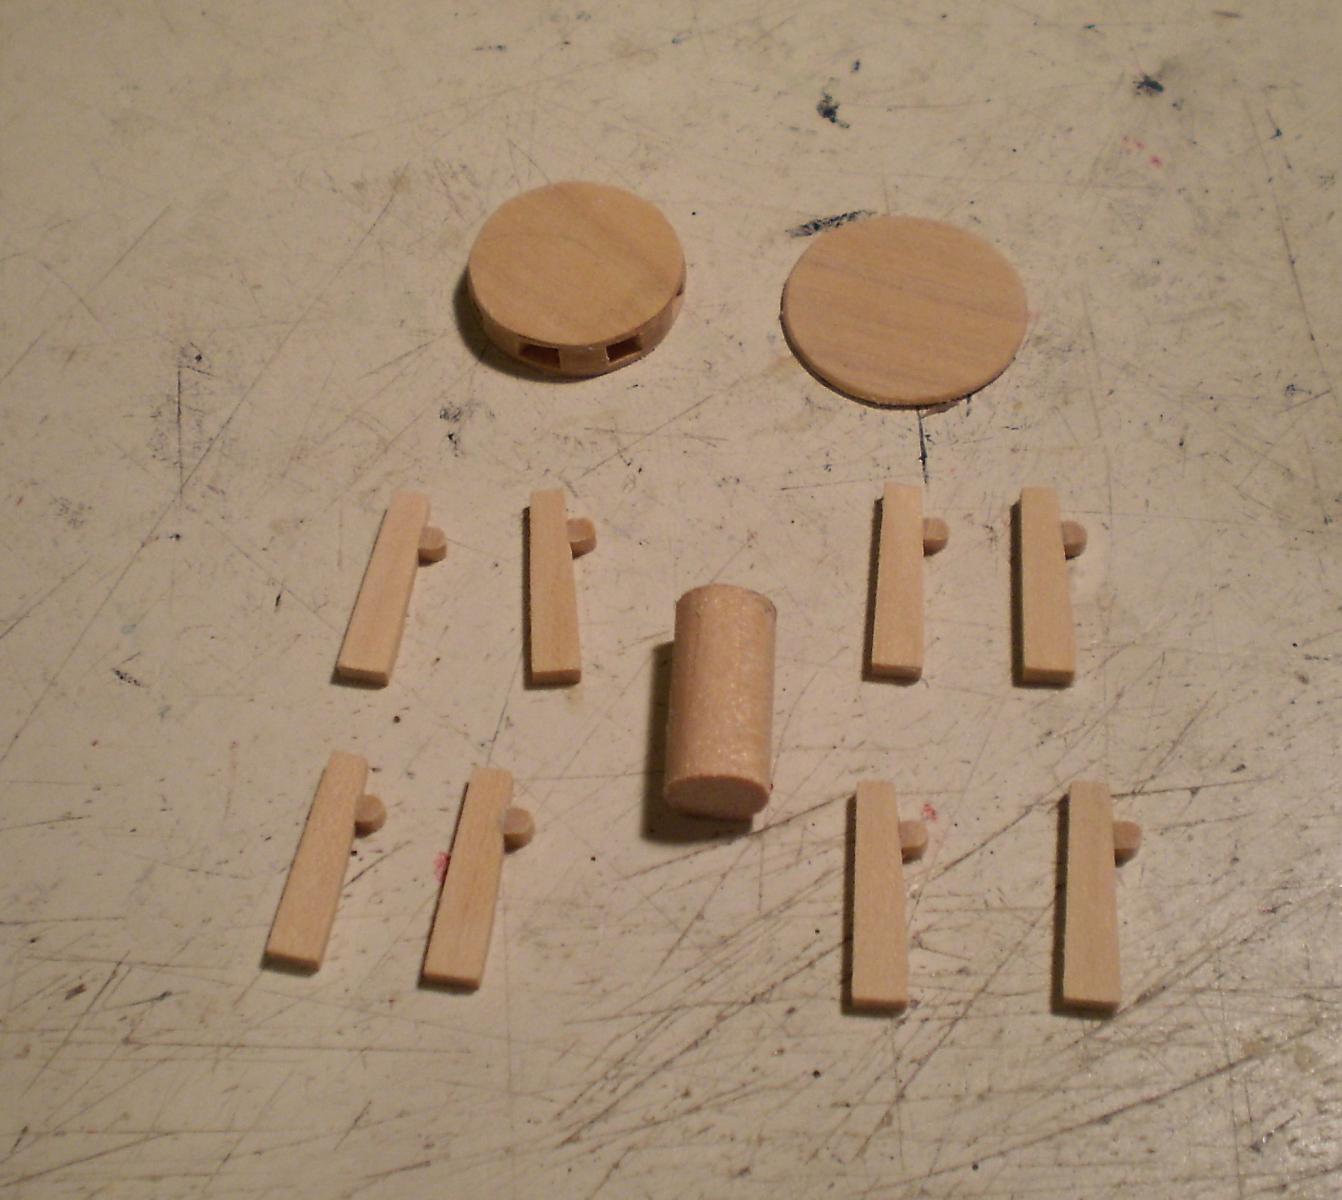
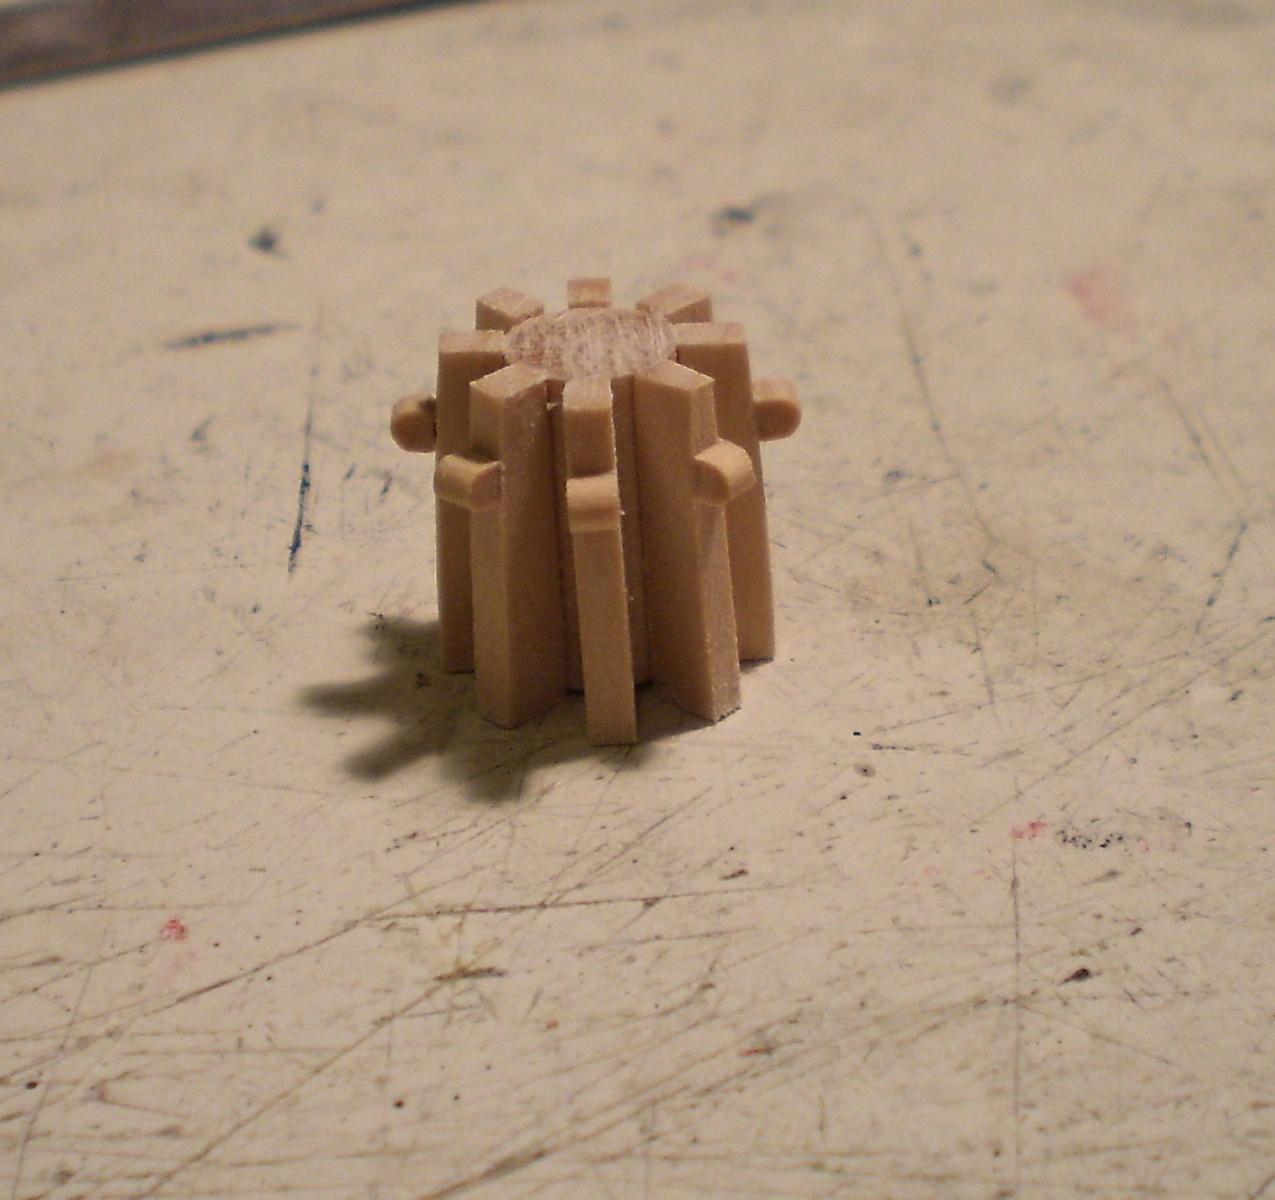
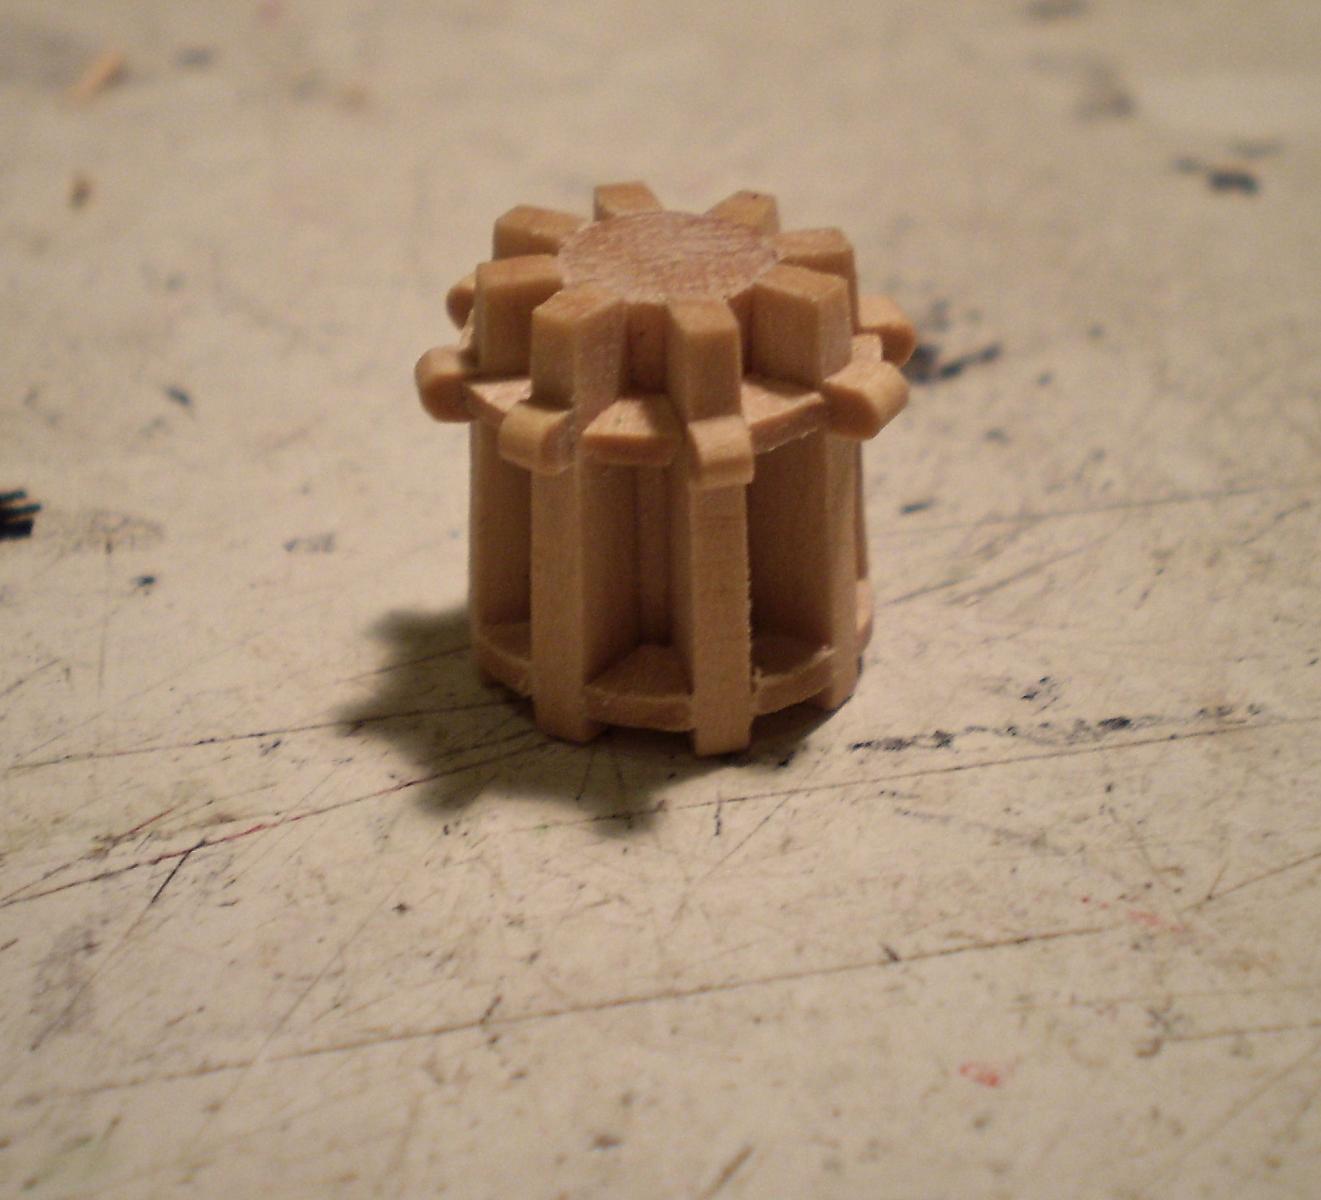
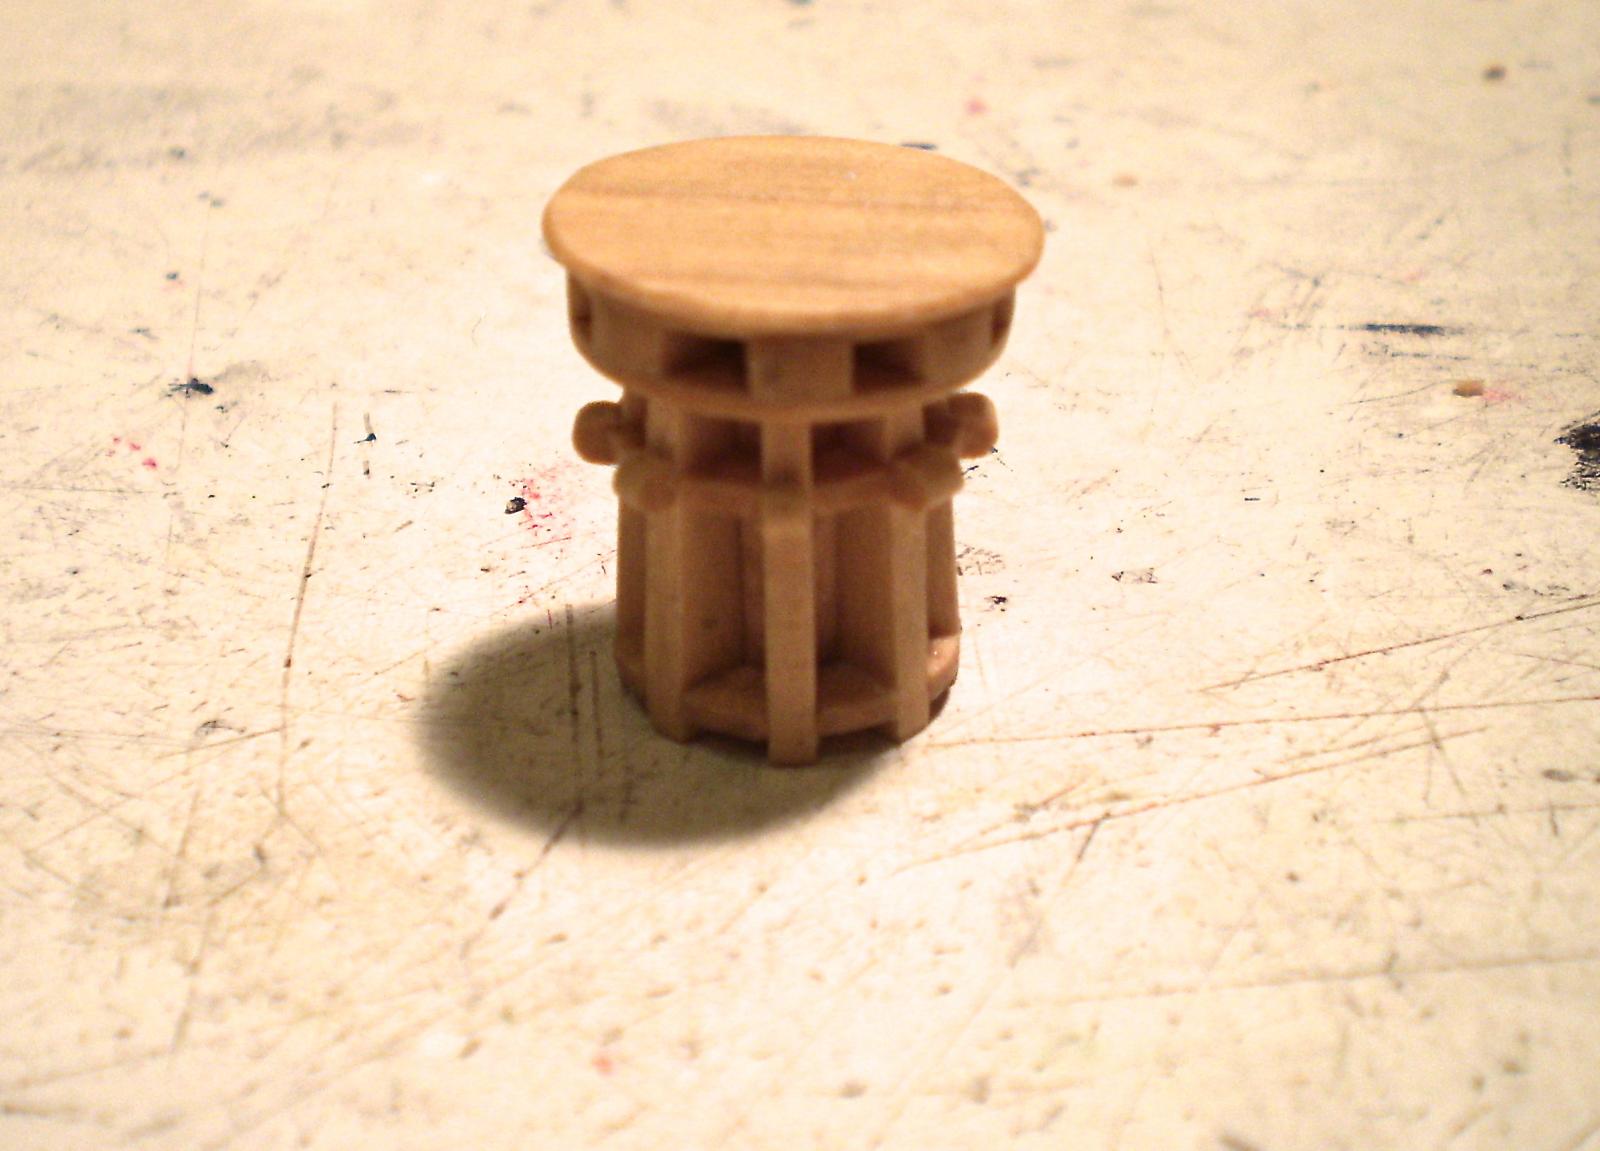
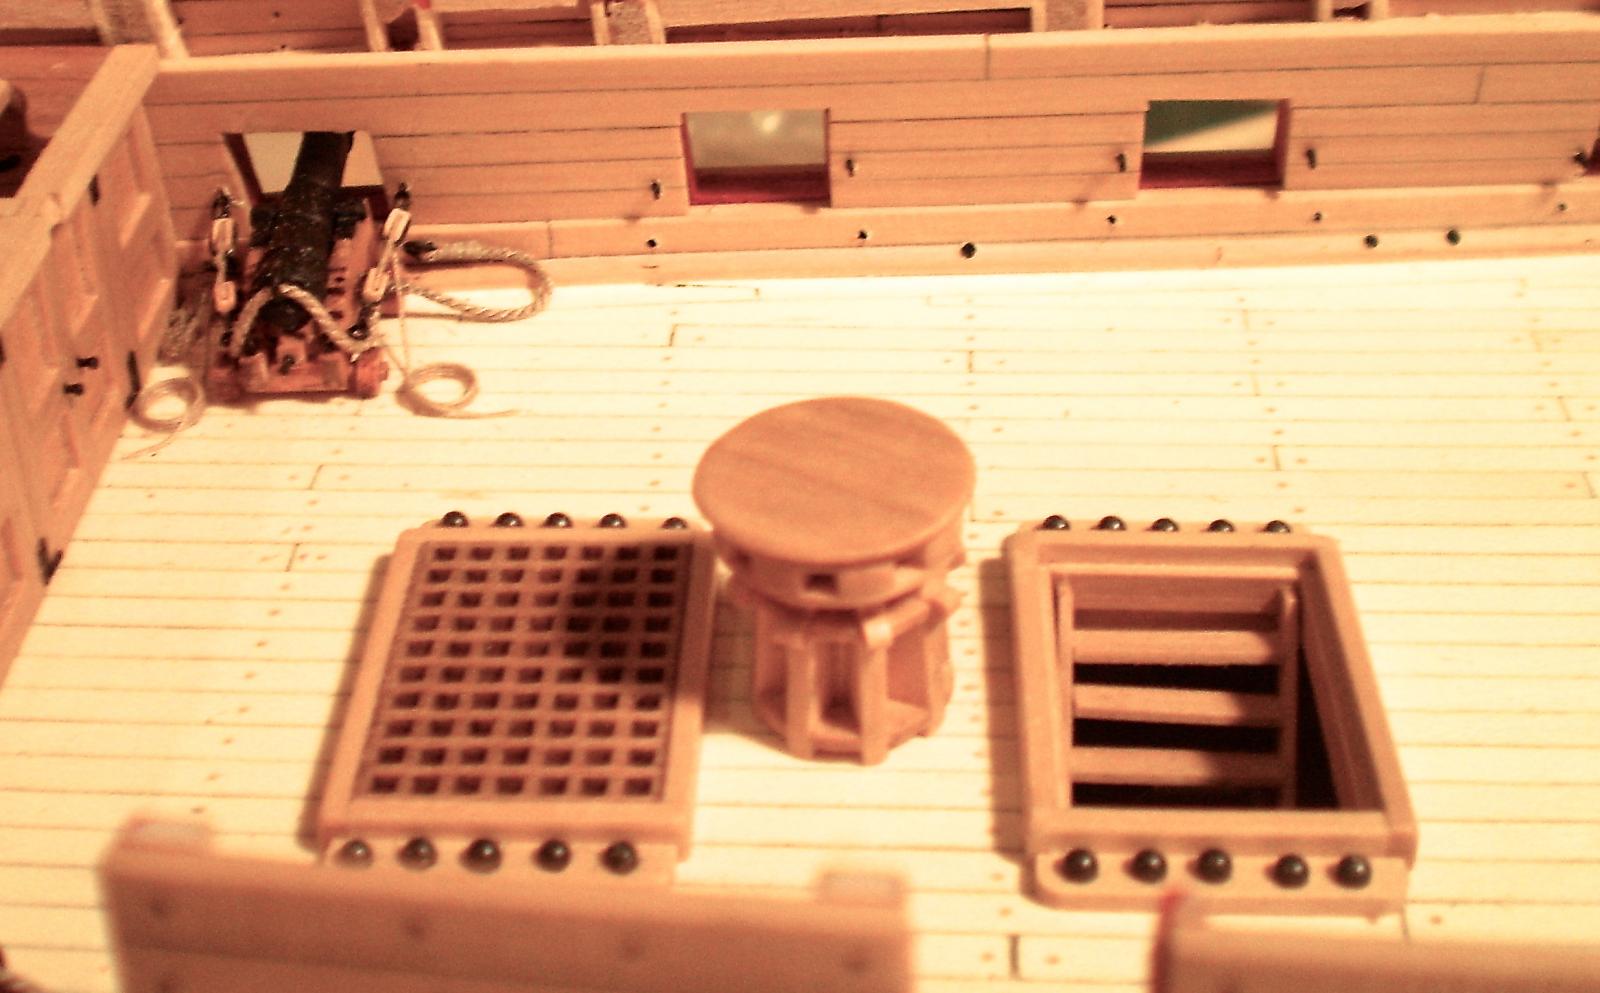
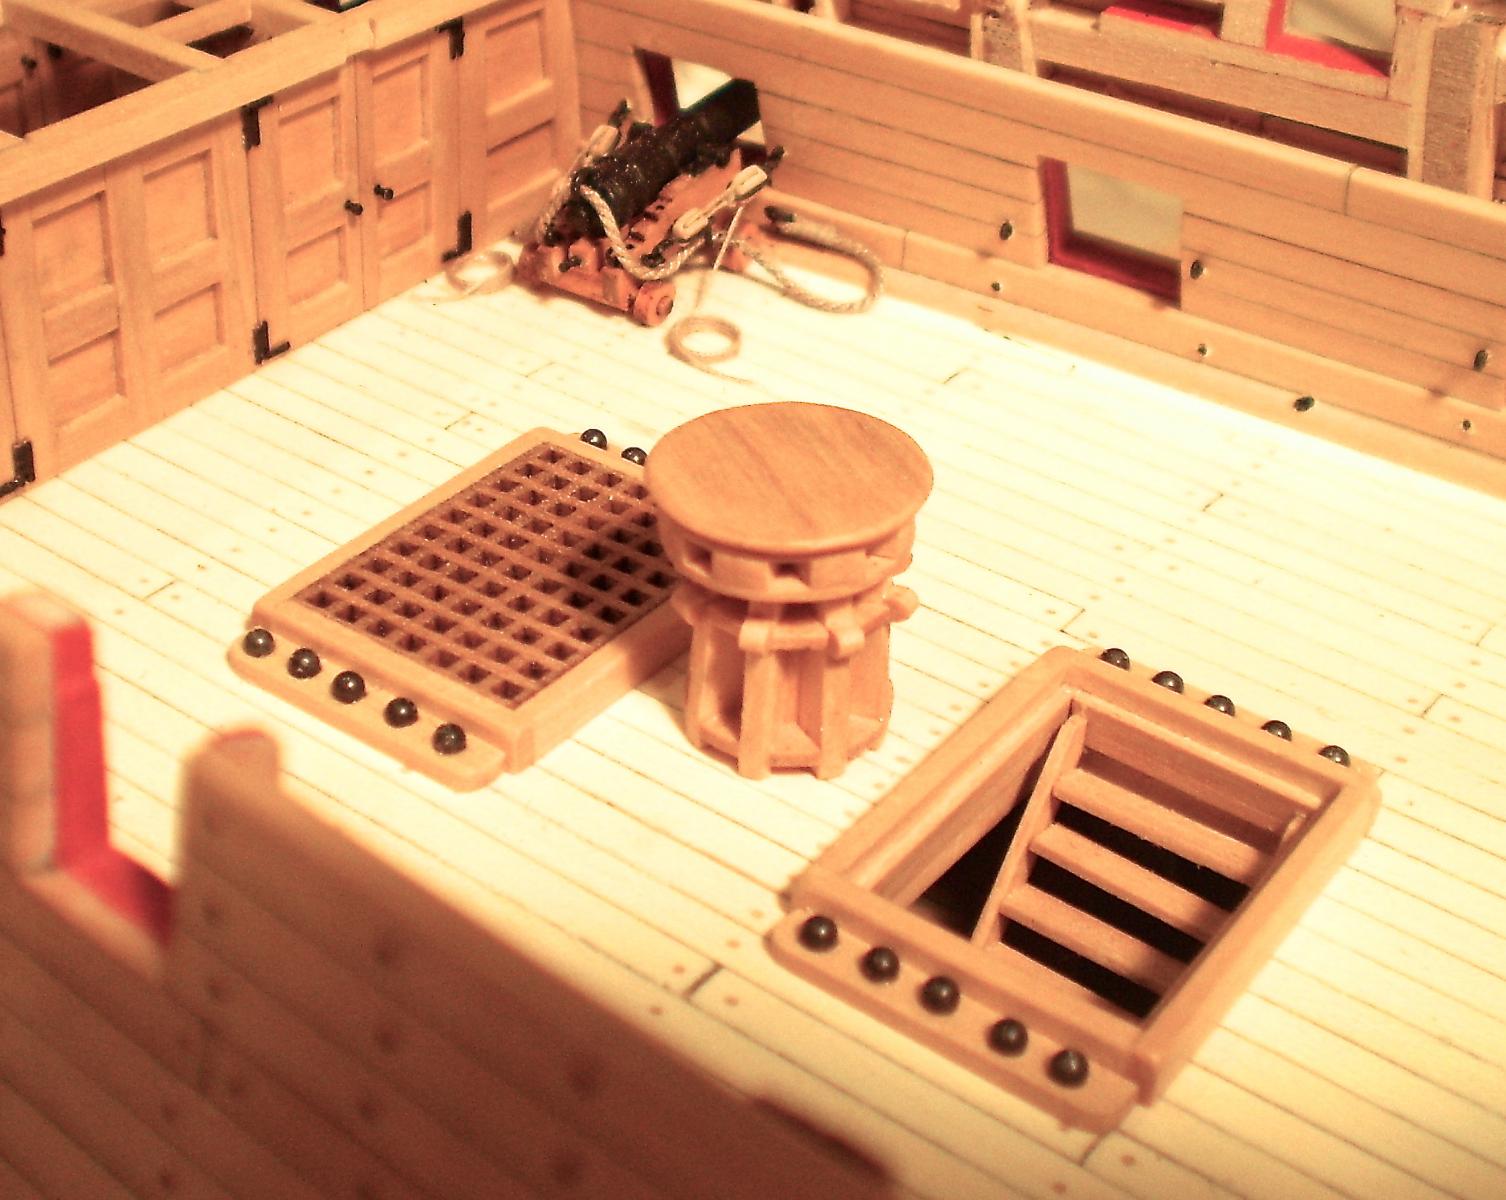
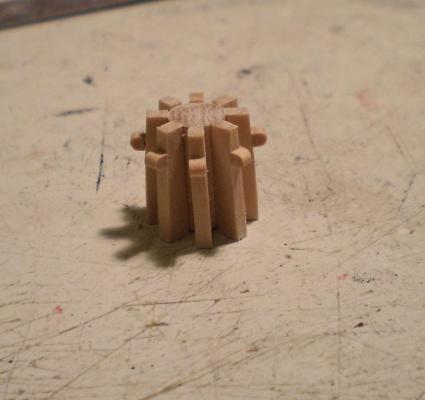
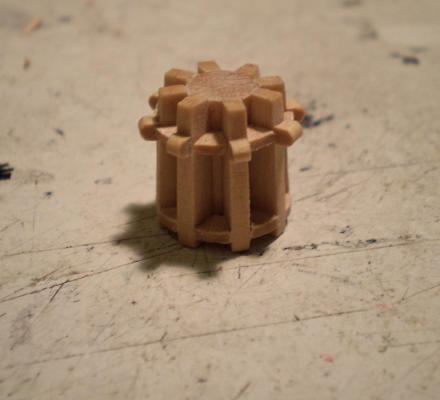
While working on the next batch of guns, I decided to make the lower main capstan, the first of three capstans that will be done. As with the other deck items, I chose to make the capstan from boxwood strip and sheet. It was a very enjoyable piece to make, with the exception of the 16 tiny chocks that had to be individually fitted between the whelps. Very fiddly work, but satisfying to get it done. The guns are well along and should be mounted and rigged in the next few days. Bob


- 1,477 replies
-
- 27
-

-
- essex
- model shipways
- (and 1 more)
-
Great work on the rudder Augie. It just adds to the beautiful overall appearance of the entire stern. Bob
- 2,191 replies
-
- 1
-
-
- confederacy
- Model Shipways
- (and 1 more)
-
It looks just great Grant. Given how much you've accomplished, you really "only" have a little left to do. Bob
-
Thanks Rusty, Nigel, Gary and Ben. Thanks also to the "likes". I really appreciate the interest and the generous comments. Nigel, I only jump around on one build at a time. You are amazing in going around on multiple builds at once. Bob
- 1,477 replies
-
- 1
-
-
- essex
- model shipways
- (and 1 more)
-
Thanks so much Sjors. Bob
-
Augie, that's the way they are shown on both Sam's kit plans and the AOTS drawings. Thanks Dirk. Rich, I try to use pins wherever there is stress or (as here) there is danger of damage. Bob
- 1,477 replies
-
- 2
-
-
- essex
- model shipways
- (and 1 more)
-
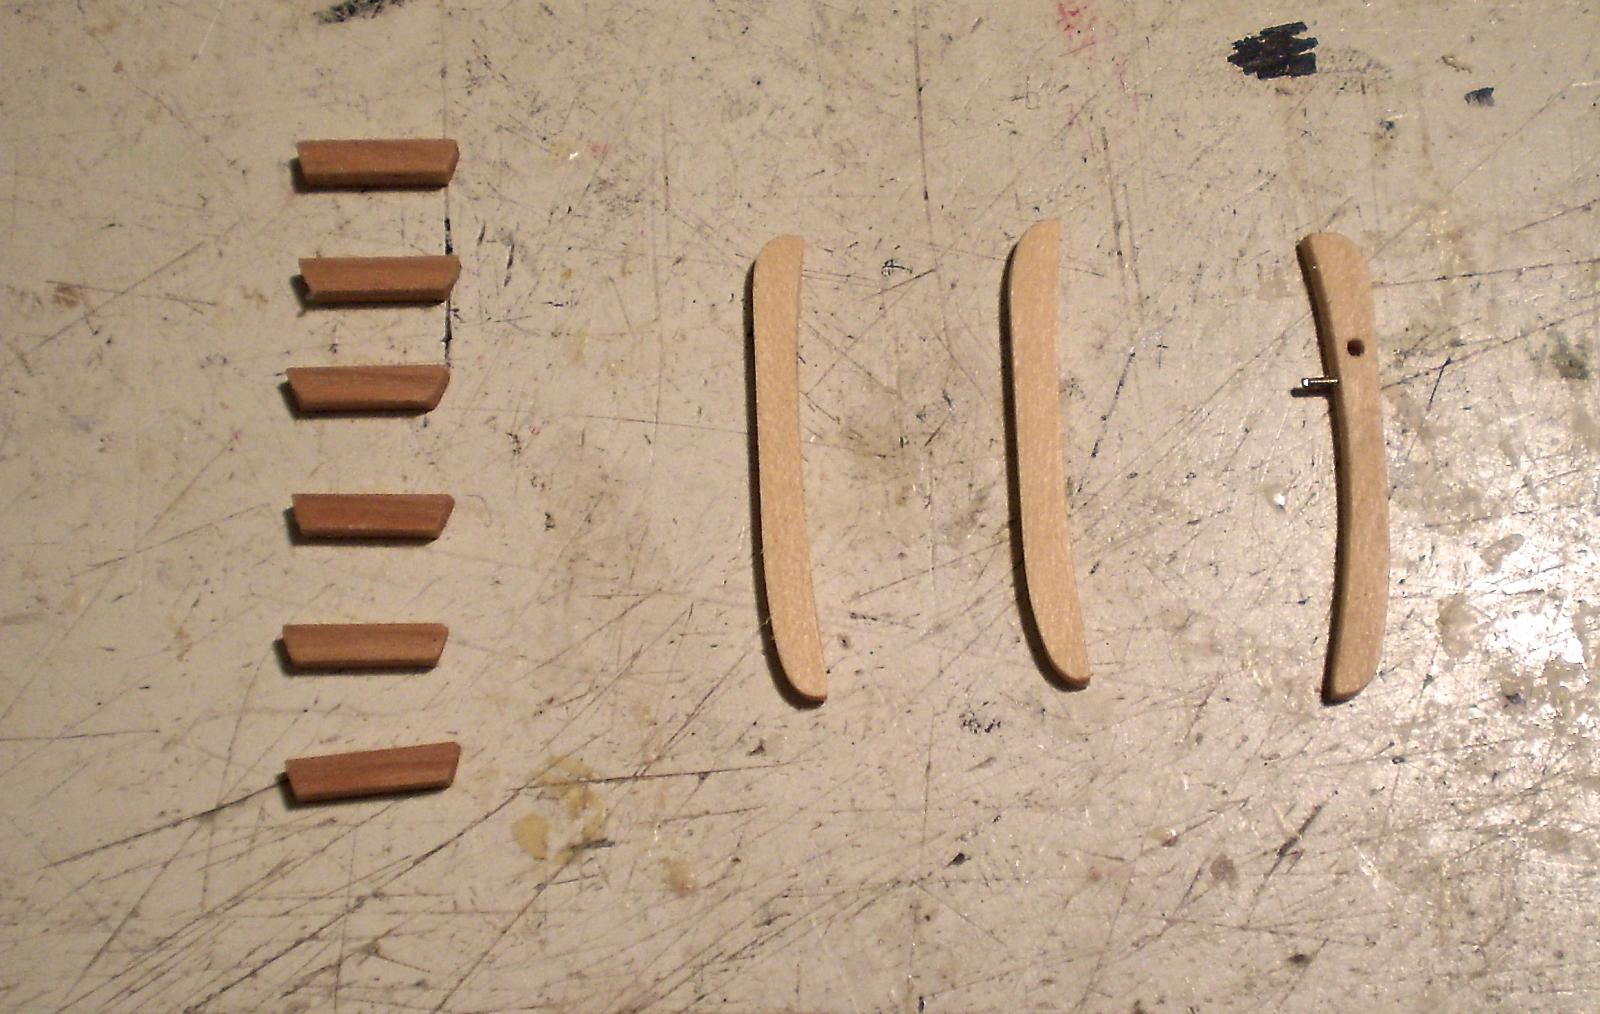
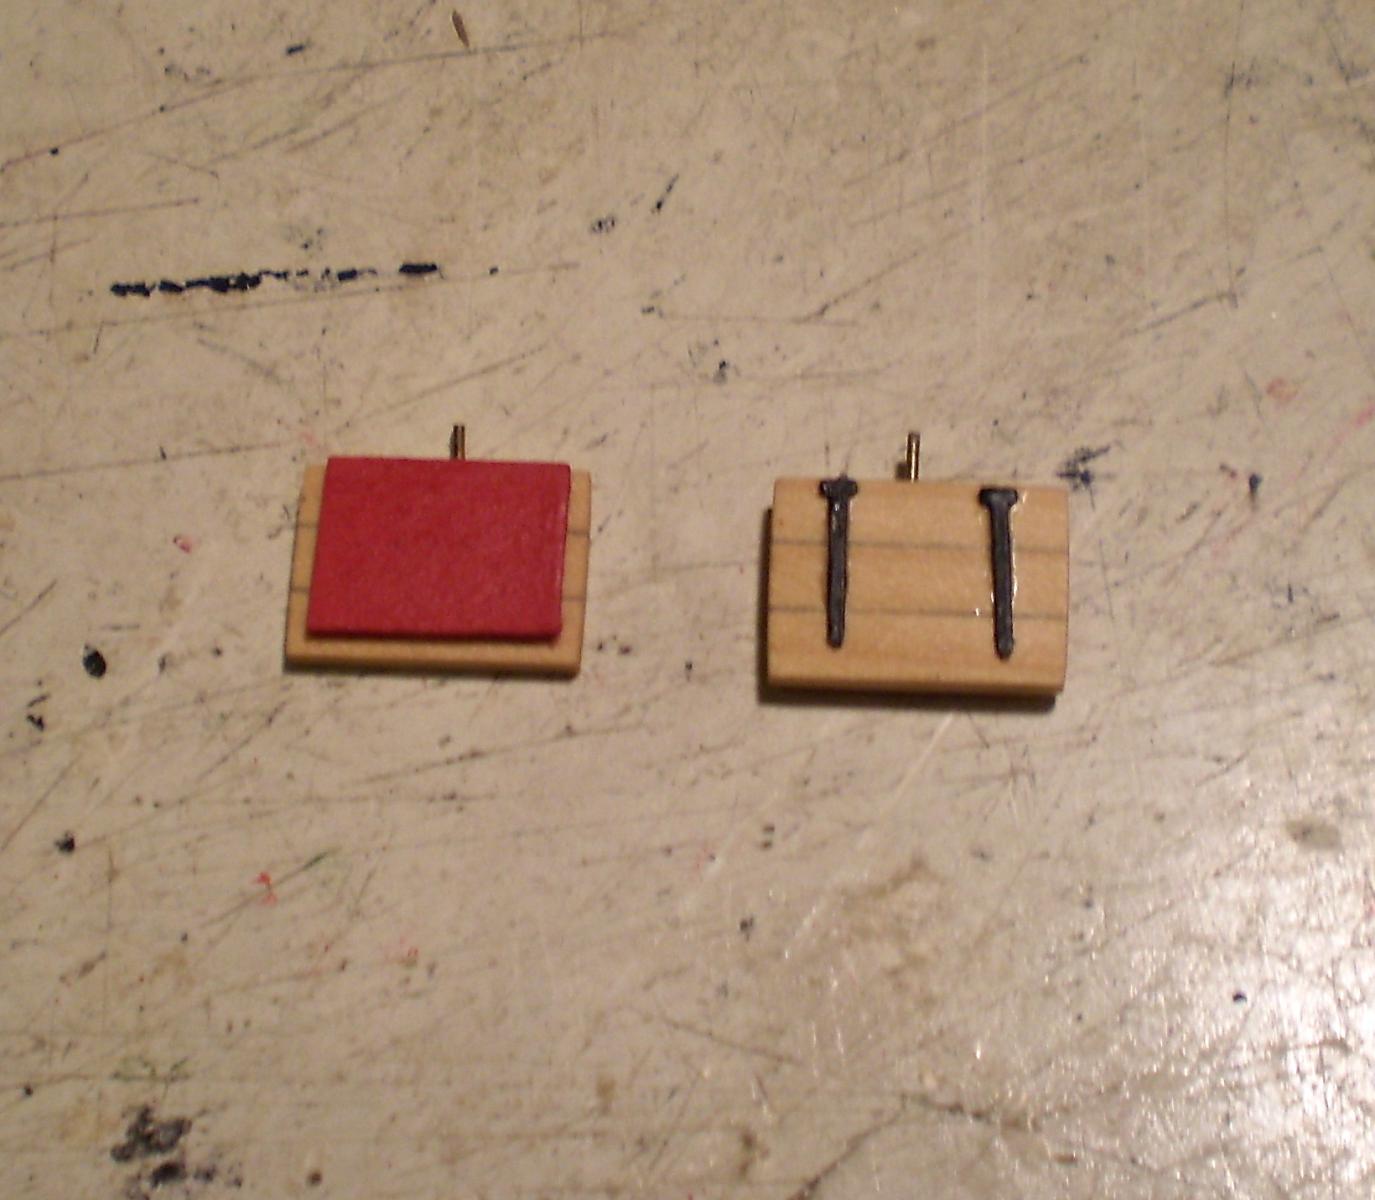
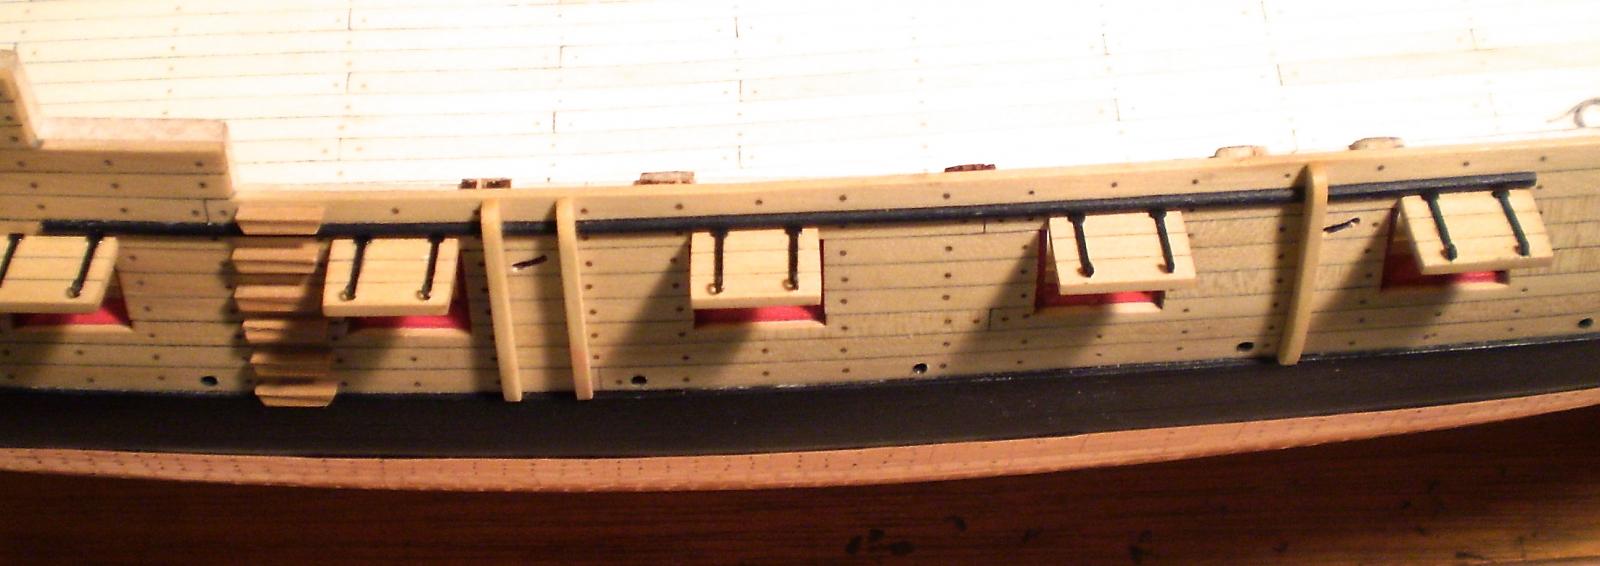
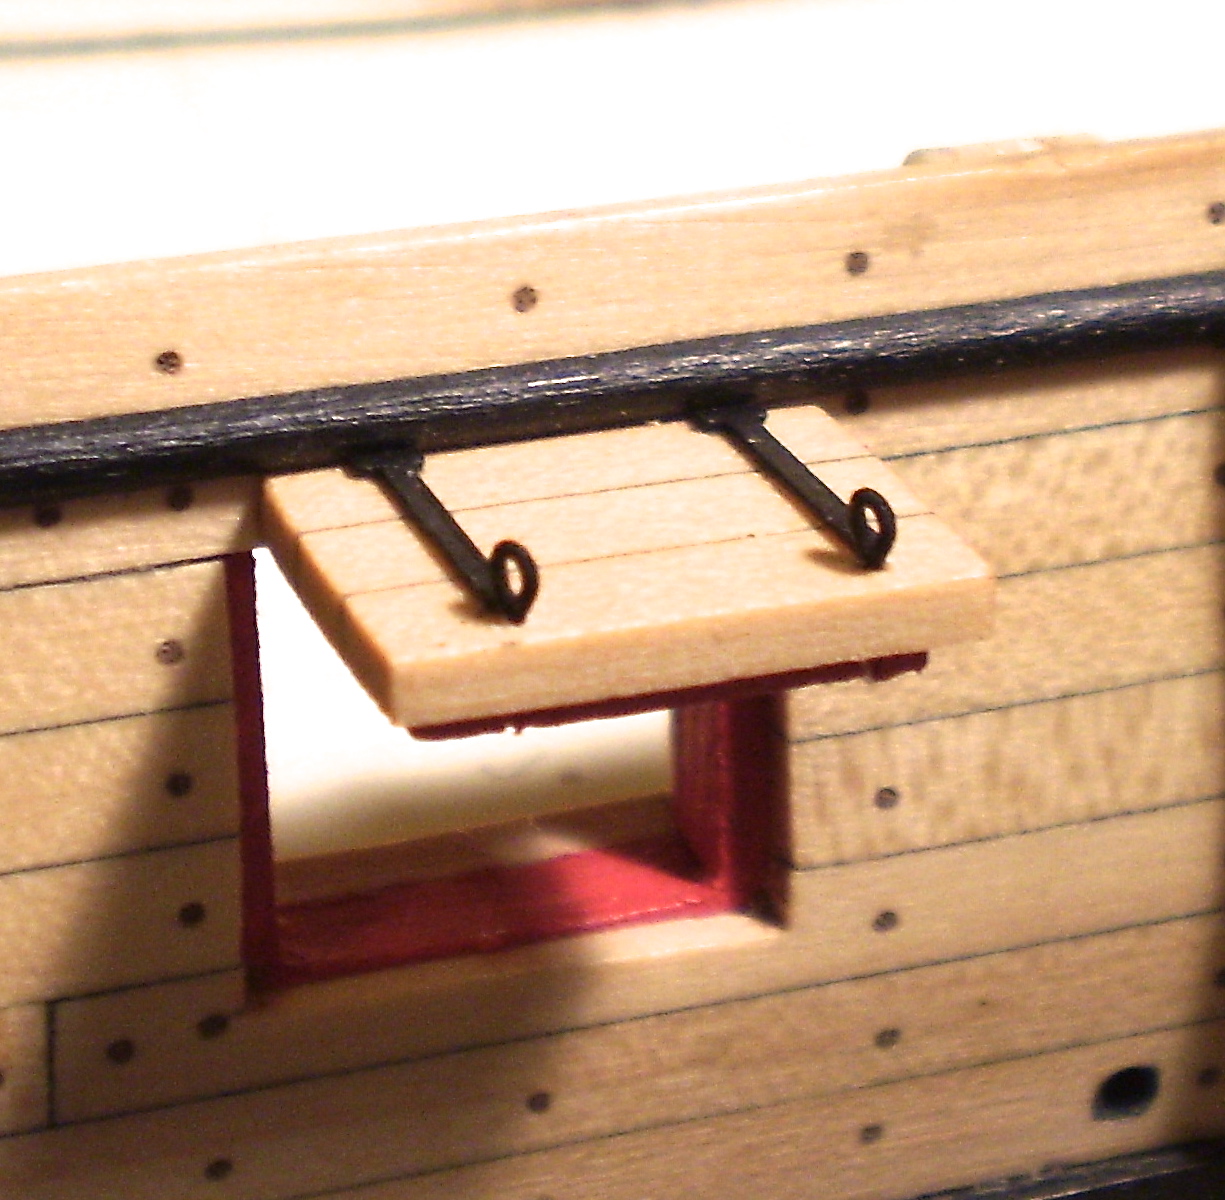
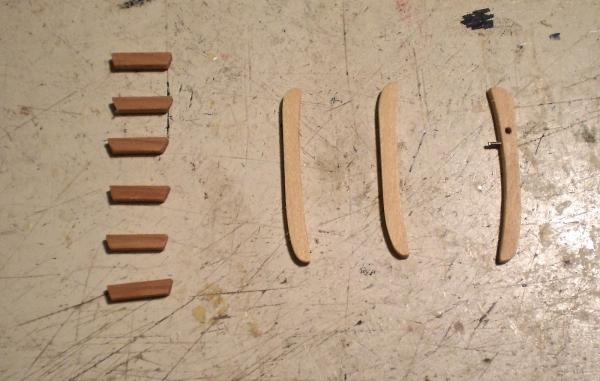
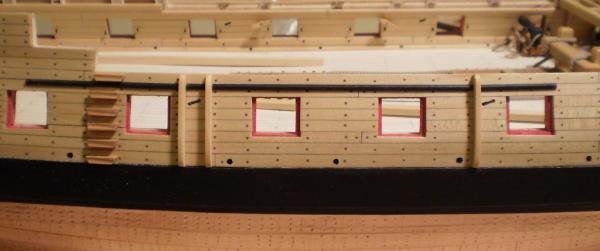
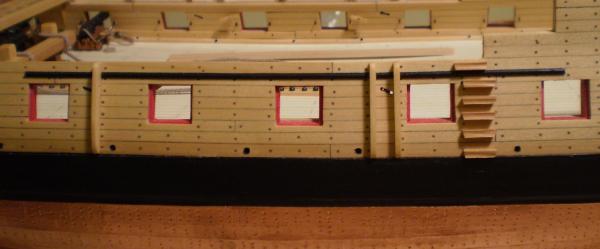
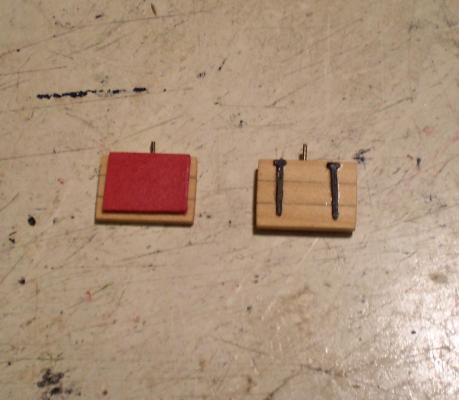
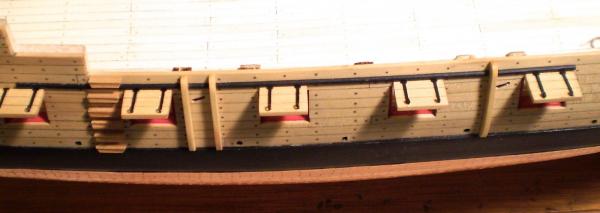
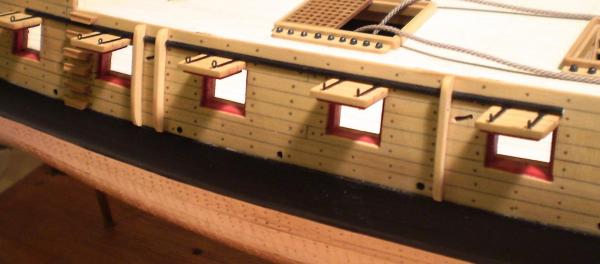
Time for some work on the exterior hull. The first items that I made and installed were the fenders and chesstrees. These were made from boxwood strip and sanded to shape and to fit the hull contour. Next, I added some black painted molding on a line above the gunports. I prefer to install the molding in pieces between the fenders and chesstrees, rather than notching those pieces to fit over the molding. Then, I made and installed the entry steps. These were done with pear strip cut to size and filed to shape. All of this work was done on both sides of the hull. I was enjoying this, so I decided to do some gunport lids as well. I made up and installed five lids on the starboard side. The exterior of the lids was made up of pieces of boxwood to match the hull planking. The recessed interior was done with thinner wood and painted red to match the gunport linings. The hinges are from the kit photoetch sheet. Lastly, I added eyebolts. The lids were pinned and glued to the hull for strength. I'm tempted to continue on with the channels and more lids, but may also return to more guns and quarter deck framing. I'll decide today. Bob

- 1,477 replies
-
- 23
-
-
- essex
- model shipways
- (and 1 more)
-
US Brig Syren by Gahm - Model Shipways
rafine replied to Gahm's topic in - Kit build logs for subjects built from 1801 - 1850
This is a WOW moment in your build Thomas. Simply beautiful work. Bob -
Always a pleasure to watch your work as it progresses. Bob
-
That is some really nice looking work Ken.The paint job is absolutely first rate. Bob
-
Thanks so much Mark. Bob
-
Thanks Grant. I appreciate it. Bob
-
Thanks Nigel for your continuing interest and kind comments. My current intention is to do enough planking on the center line to mount the capstan, the wheel, the binnacle and any rigging attachments at the masts and enough other planking to mount guns on one side. We'll see how it turns out. Bob
- 1,477 replies
-
- 2
-
-
- essex
- model shipways
- (and 1 more)
-
Thanks so much Dirk, Ken and the"likes". Dirk, with just a little modification, you could have the first Syren with a quarterdeck . Ken, I actually did think about it -- but only briefly, because I'm an electrical buffoon. Bob
- 1,477 replies
-
- 2
-
-
- essex
- model shipways
- (and 1 more)
-
Very nicely done Rusty. You're off to a beautiful start on what should be a great build. Bob
-
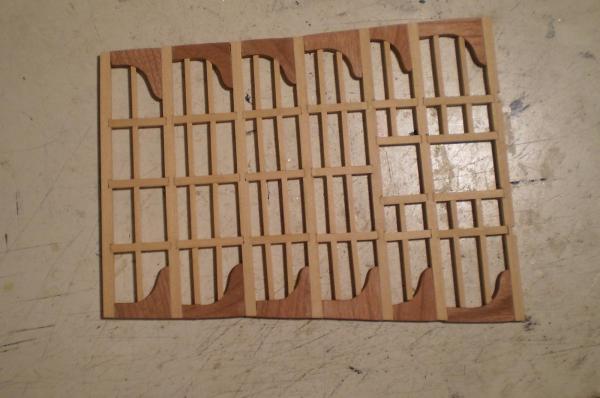
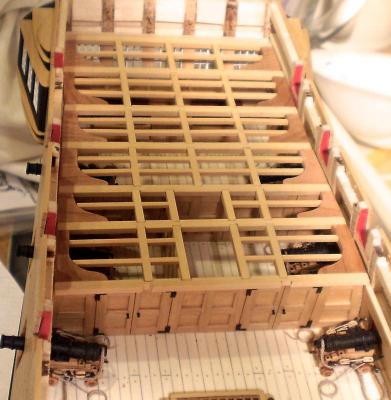
I've now completed the quarter deck framing at the aft end and finished it with Wipe-on Poly. This was done as a unit off the model as I had done with the forecastle deck. As with the forecastle, the beams, carlings and ledges are boxwood strip and the knees were cut from cherry sheet. Of course the beams had been fitted on the model and the spacing measured before the off model construction proceeded.. The photos show the deck framing in place, but it is not permanently installed yet. That won't happen until I attach lines for the main lower yard sheets to the bulwark cleats that will be impossible to reach once the decking is in place. I can't do that until I figure out the sizing for the rigging. That's a tedious job that I've started, but is a long way from done. In the meanwhile, in my haphazard fashion, I'm going to move on to some work on the exterior hull for a bit. Bob

- 1,477 replies
-
- 22
-
-
- essex
- model shipways
- (and 1 more)
-
The post was a long time in coming Ed, but the work is very nice and you've added some interesting features like the cabin interior. Keep up the good work and don't wait so long to post again. Bob
-
Tim, the barrels are the kit castings, but the carriages are modified from laser cut pear kits from the Lumberyard. Bob
-
Thanks Nils for the vote of confidence, but I have to say that I'm getting too old to work at scales this small. Not again. Bob
- 1,477 replies
-
- 1
-
-
- essex
- model shipways
- (and 1 more)
-
Many thanks BareHook, Martin and Sjors. BareHook, take a look on p.36 for the answer to your question. Bob
-
Glad to hear from you again Ed. On Fair American, I twisted a loop of wire around the deadeye, nipped off one end at the twist, passed the other end through the channel slot and then looped the wire through the bend that I had made in the chain plate and then bent the wire back on itself under the channel using tweezers. I hope that makes sense. I look forward to seeing your photos. Bob
-
Thanks so much Patrick, Nils and Nigel for the kind words and continuing interest. Thanks also to the "likes". Although I know that there are many who like to use production line methods (and use them well) to do things like the guns, i"m glad to see that there are at least some others who share my aversion to repetitive tasks. Nils, the Essex is at 1:76.8 scale.
- 1,477 replies
-
- 3
-
-
- essex
- model shipways
- (and 1 more)