HOLIDAY DONATION DRIVE - SUPPORT MSW - DO YOUR PART TO KEEP THIS GREAT FORUM GOING! (Only 24 donations so far out of 49,000 members - C'mon guys!)
×


rafine
-
Posts
2,932 -
Joined
-
Last visited
Content Type
Profiles
Forums
Gallery
Events
Everything posted by rafine
-
 Good tip Sam. You're absolutely right. Thanks Thomas. Bob
 -
Remco, this stuff is so good, it's beyond mere praise. I'm blown away. Bob
- 1,215 replies
-
- 1
-

-
- sloop
- kingfisher
- (and 1 more)
-
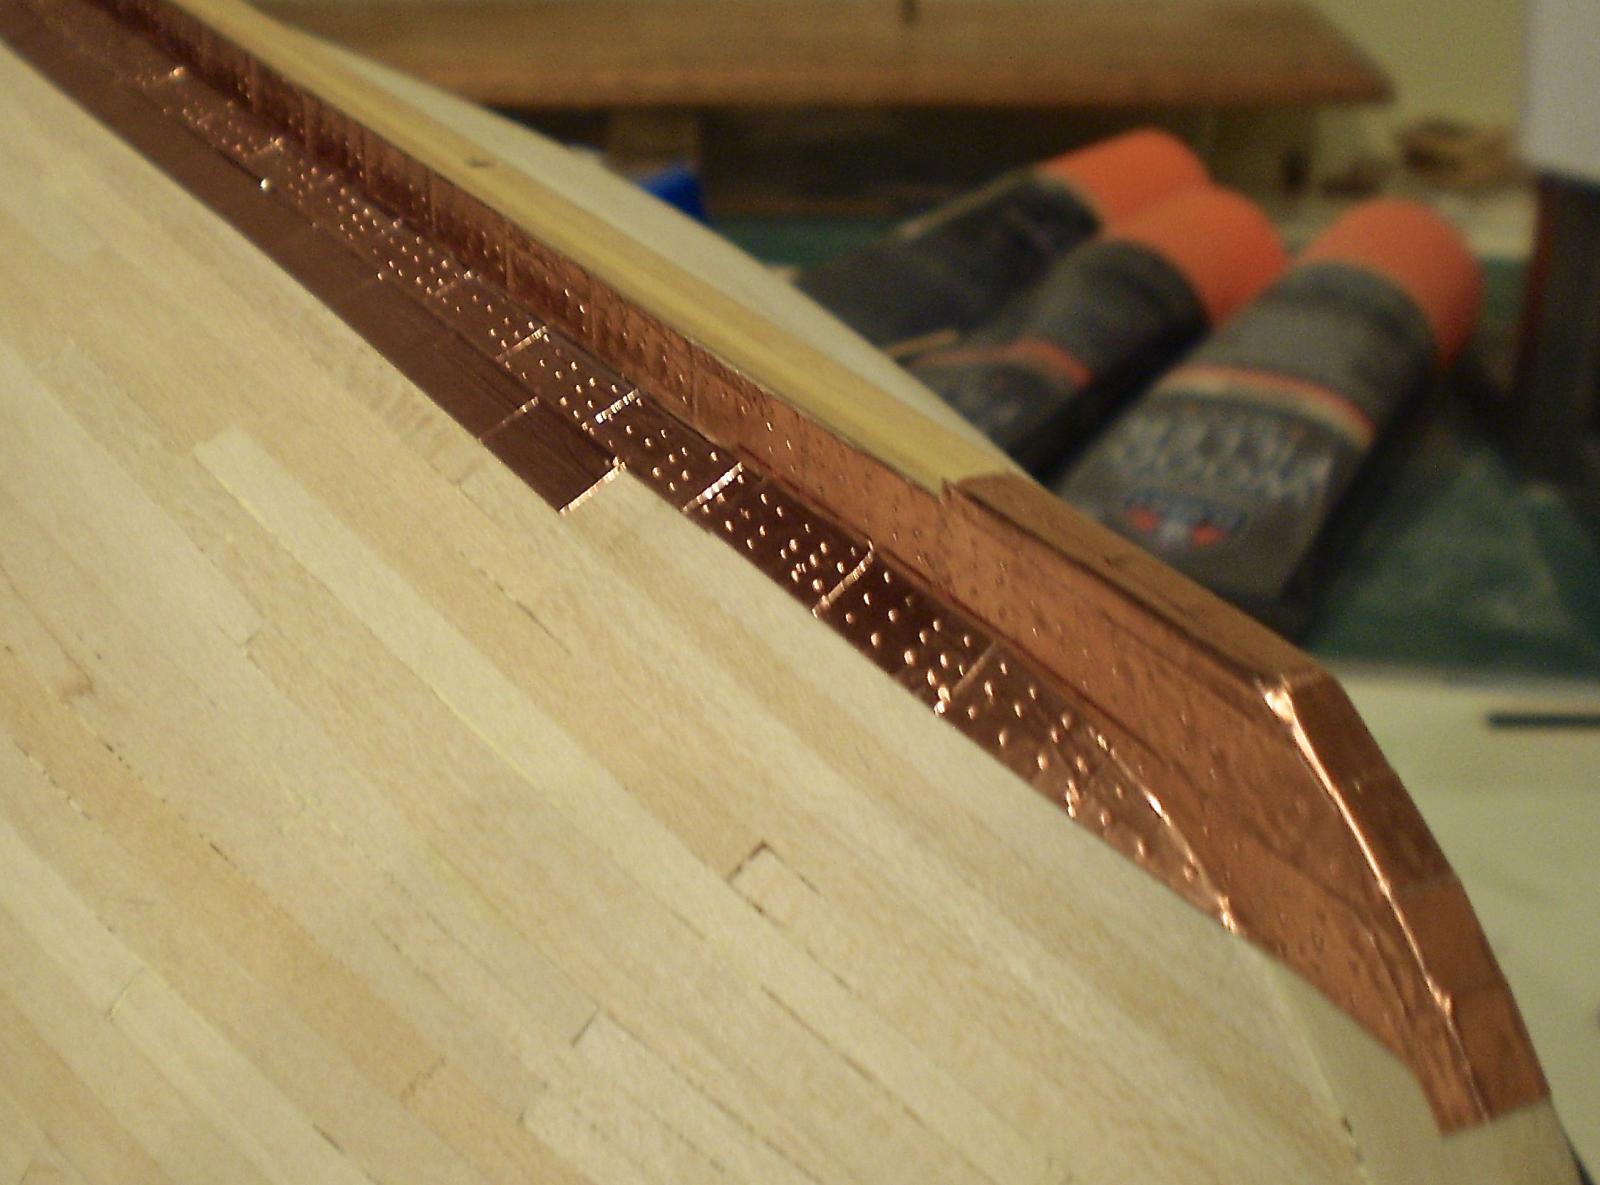
Thanks Scott sand Terry. Sam, I'm very pleased with the method. It is much quicker and easier than the individual plates and I don't see any real difference in result. I 've had no problem with tearing, but you do have to be careful about twisting when the strips are long. I try not to remove too much backing at one time to avoid that. The scribing is being done with an awl-like tool (center punch?) that has a dull point, but I'm sure that the back of a knife would work as well. The plate size is controlled by use of a spacer block, but you could really just eye the center of the plate above for reference if you wished. Try it out on some scrap and see what you think. Bob
- 1,477 replies
-
- 1
-
-
- essex
- model shipways
- (and 1 more)
-
I'll be following your build with interest, Wayne. Glad to have another Essex on board. Bob
-
Thanks very much guys. It is my intention to use a coat of flat finish on the copper when I'm done. I've used Pollyscale flat finish for this in the past, including on Syren, and been pleased with the result. Even with the finish coat, the copper seems to age nicely with time. Rusty, we were lucky to have no damage, just inconvenience. The golf course wasn't as fortunate, leaving me with continuing added modeling time. Bob
- 1,477 replies
-
- 1
-
-
- essex
- model shipways
- (and 1 more)
-
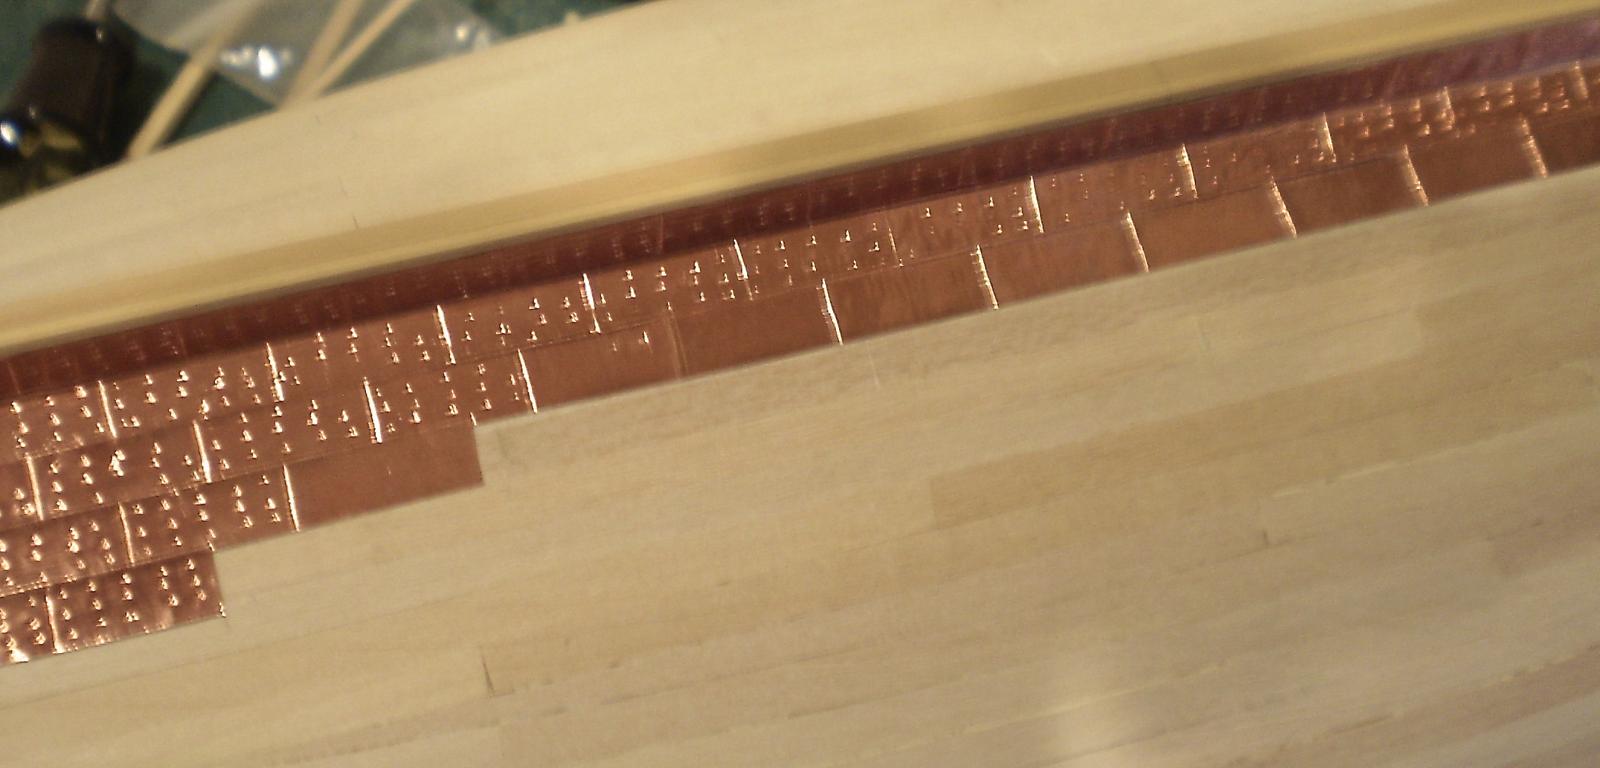
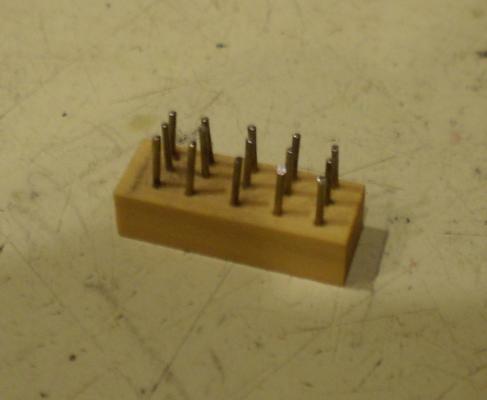
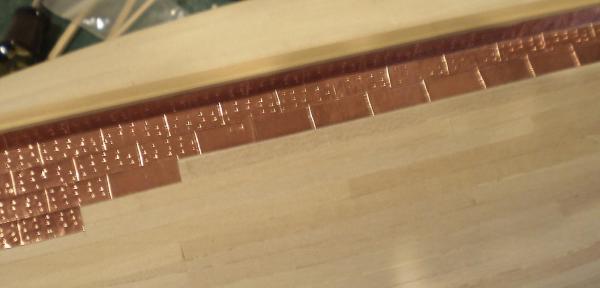
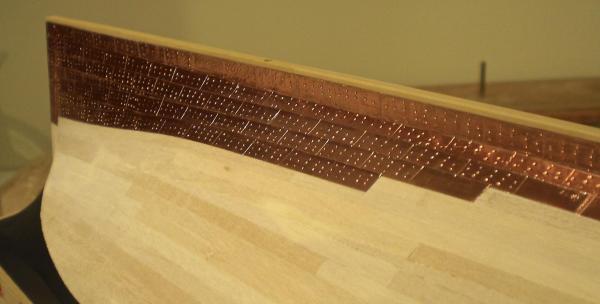
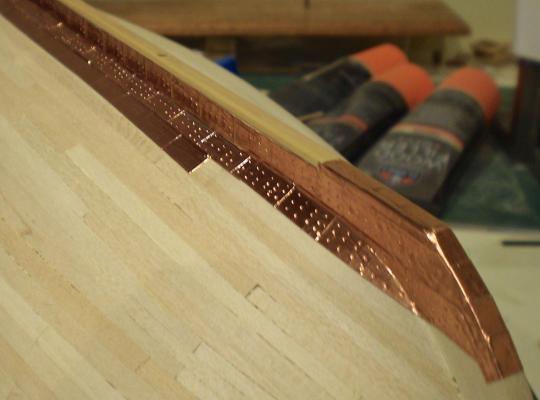
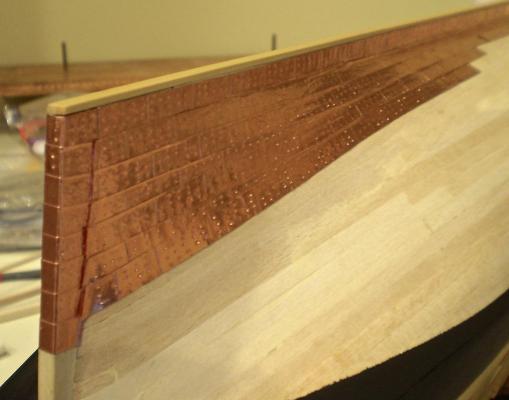
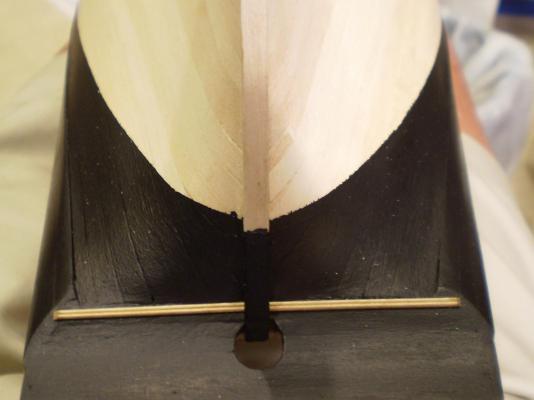
Moving ahead at a faster pace caused by unusual weather (13" of rain that caused local flooding that pretty much trapped us in our house for a couple of days), the first copper has been applied to the hull. After some experimenting , I decided to try something a little different. Rather than cutting the copper tape into individual plates, I chose to apply the tape in long strips (two or three for the length of the hull). I then burnished the strips with a piece of stripwood and then scribed in the plate division lines. The last step is to use a stamp made of a piece of wood with headless nails to simulate the plate nailing pattern. Because of the scale, I didn't attempt to to do the actual pattern, but like so many other things on the build, used a pattern that seemed to look "right". There is a slight overlap of the tape strips. I found it very hard to take decent photos of the copper because of the glare and reflection and apologize for the quality of those attached. Now it's back to applying what seems to be an endless expanse of copper. Bob
- 1,477 replies
-
- 18
-
-
- essex
- model shipways
- (and 1 more)
-
Now you tell me Bug. I wish that I had remembered sooner ( or you had told me sooner ). Bob
- 1,477 replies
-
- 1
-
-
- essex
- model shipways
- (and 1 more)
-
Thanks Nigel. Such a simple and sensible idea. Thanks Augie. I can't wait to see it either, since I'm trying something different. Bob
- 1,477 replies
-
- 3
-
-
- essex
- model shipways
- (and 1 more)
-
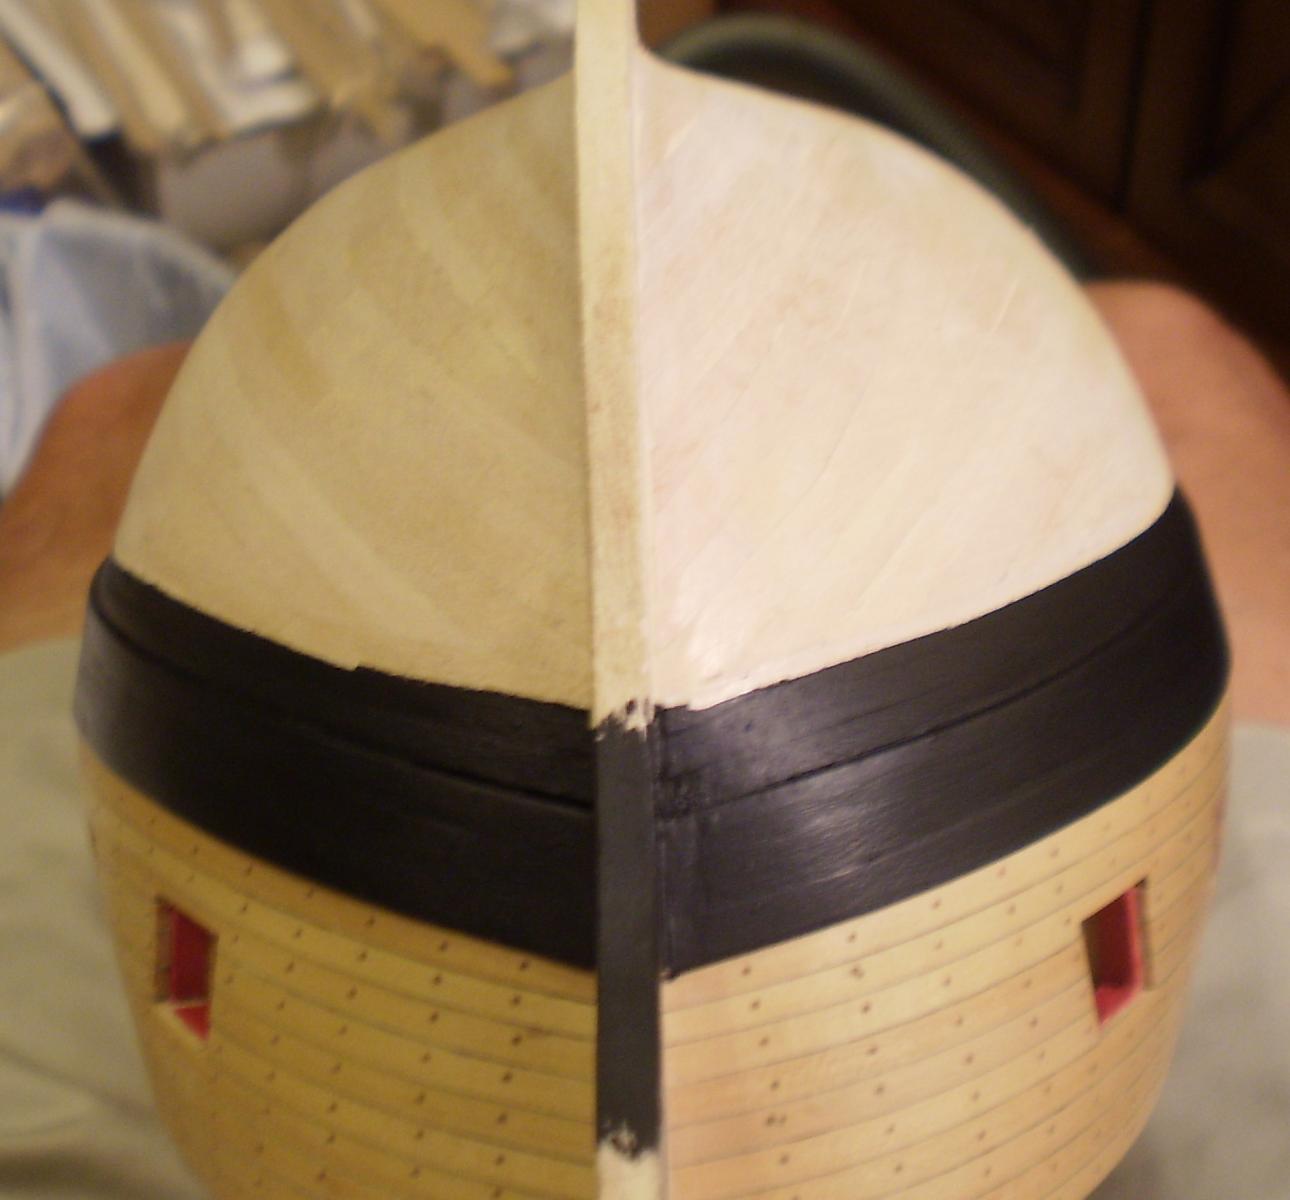
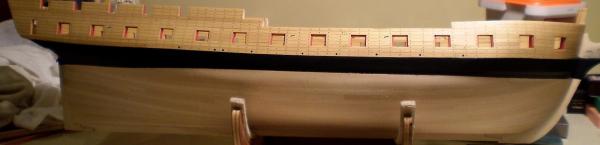
This is an update covering a little bit of this and a little bit of that. I started by attempting to drill all those inner bulwark holes for eyebolts and ringbolts. That came to a screeching halt when I broke my remaining drill bits and had to order more. While waiting for their arrival, I started making up ringbolts, a tedious task at best. I couldn't finish them or the eyebolts, however, because I am still waiting for arrival of some Birchwood Casey Brass Black. I then decided to do the painting of the hull from the wales to the top of the copper. This was done with Pollyscale black. The edge is a little ragged in places, but this will be covered by the top of the copper. I also added pieces of molding at the joint of the hull and counter planking. The drills then arrived and I immediately started breaking them again. Fortunately, I remembered an old trick. If even a small part of the cutting portion of the drill remains, they can still be used. In fact the broken drills worked as well and lasted longer than the unbroken ones. The holes are now done, but nothing installed in them yet. Finally, I experimented with the copper, and began on doing it today. I'll post some pictures when I get enough done to be seen. Bob
- 1,477 replies
-
- 10
-
-
- essex
- model shipways
- (and 1 more)
-
Thanks so much Thomas. Always appreciated. Bob
-
Very nicely done, Bugra. I know well the joys and miseries of working only with hand tools on this project. It can be done. Bob
-
Thanks Rusty, Bug and B.E. for the nice comments and the vote of confidence for "faking it". B.E., you're right that one of the scuppers is for the pump dales, but nether the kit plans nor the AOTS drawings show any size difference. Bob
-
Gary, you look like you're off to a good start. ME seems to have gone to plywood that is problematic, both from a dimensional and a quality standpoint. I encountered the same problems on Essex. I found Fair American to be a really interesting and fun build and I look forward to following your progress. Bob
-
Who among us can say that it's never happened to them. There can't be a worse feeling in modeling. Like everyone else here, I know that you'll see this through. Bob
-
Thanks Nigel for the very kind words. They are very much appreciated coming from someone of your skills. Bob
- 1,477 replies
-
- 1
-
-
- essex
- model shipways
- (and 1 more)
-
Thanks so much Sjors and Bug. In larger scales I've done real sheaves, but these are really small. Bob
- 1,477 replies
-
- 1
-
-
- essex
- model shipways
- (and 1 more)
-
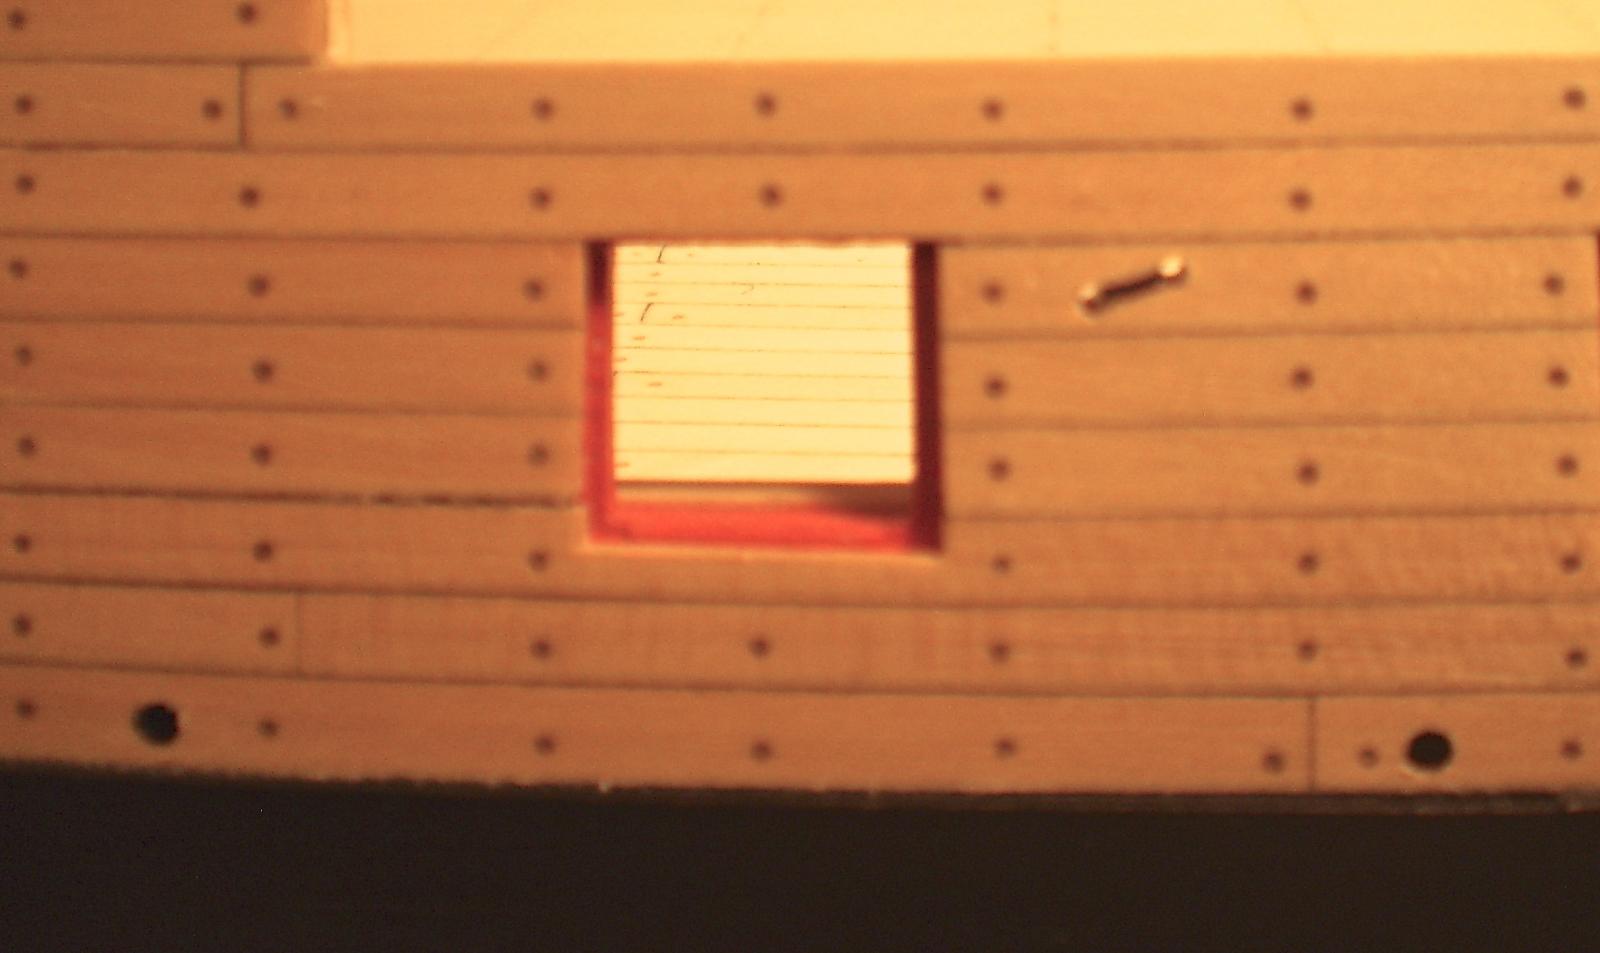
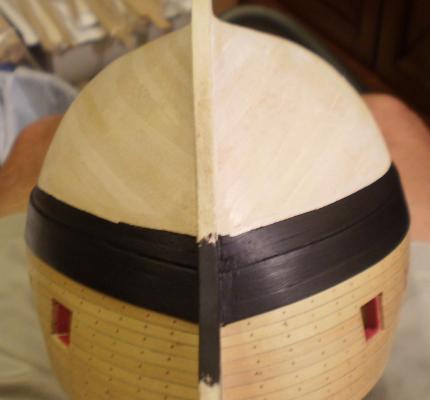
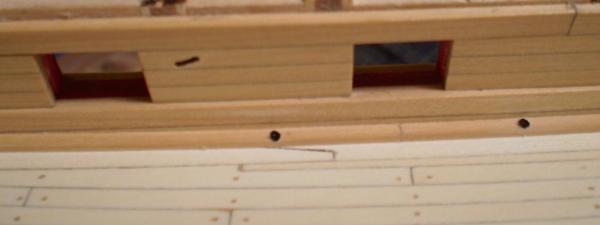
A very small change of plan. I decided to do the scuppers and bulwark sheaves, before moving to the inner bulwark drilling. Like on many other things on this build, scale has caused me to simulate these items. The scuppers were drilled from both sides and do not connect, although I tried to position them as closely as possible to direct lines. I also did not use tubing, but merely painted them with Floquil graphite to represent the lead liners. The painting was done with a toothpick. The sheaves are also "fakes", consisting of two drilled holes with the space between them deeply scribed to represent the sheave.The scribed line was blackened using an ultra fine marker. Bob


- 1,477 replies
-
- 20
-
-
- essex
- model shipways
- (and 1 more)
-
Wes, I am fascinated by this build. I will be following along with interest and anticipation. Good luck. Bob
-
Thanks Bug. Thanks Rusty. I'll also be sure to eat my veggies before I get dessert. Bob
-
She's coming along beautifully Augie. I'm glad that my painting tip was helpful. Bob
- 2,191 replies
-
- 1
-
-
- confederacy
- Model Shipways
- (and 1 more)
-
Thanks B.E. I'm in awe of the job you're doing on the rigging of Pegasus. Bob
-
Thanks Hamilton and Alistair and thanks also to the "likes" for your continuing interest. Hamilton, I'm not sure why the filler would be a problem. I'll bet that I'm as messy with it as you are -- I also use my fingers. I did three lines of treenails at a time so that it never seemed overwhelming and the sanding went pretty quickly. I've done both real treenails and filler in the past. The filler is certainly quicker and easier and at this scale (1:77) just seemed to be a more feasible approach. Alistair, your way is probably more "right" than mine, but I just liked the way it looked when I did some trials. Bob
- 1,477 replies
-
- 1
-
-
- essex
- model shipways
- (and 1 more)