rafine
-
Posts
2,932 -
Joined
-
Last visited
Content Type
Profiles
Forums
Gallery
Events
Everything posted by rafine
-
 It couldn't look better Augie. You've really nailed it. Bob
- 2,191 replies
-
- 1
-

-
- confederacy
- Model Shipways
- (and 1 more)
-
Great job finishing that first planking Sjors. Sorry that we won't get to see more of her for a while. Bob
-
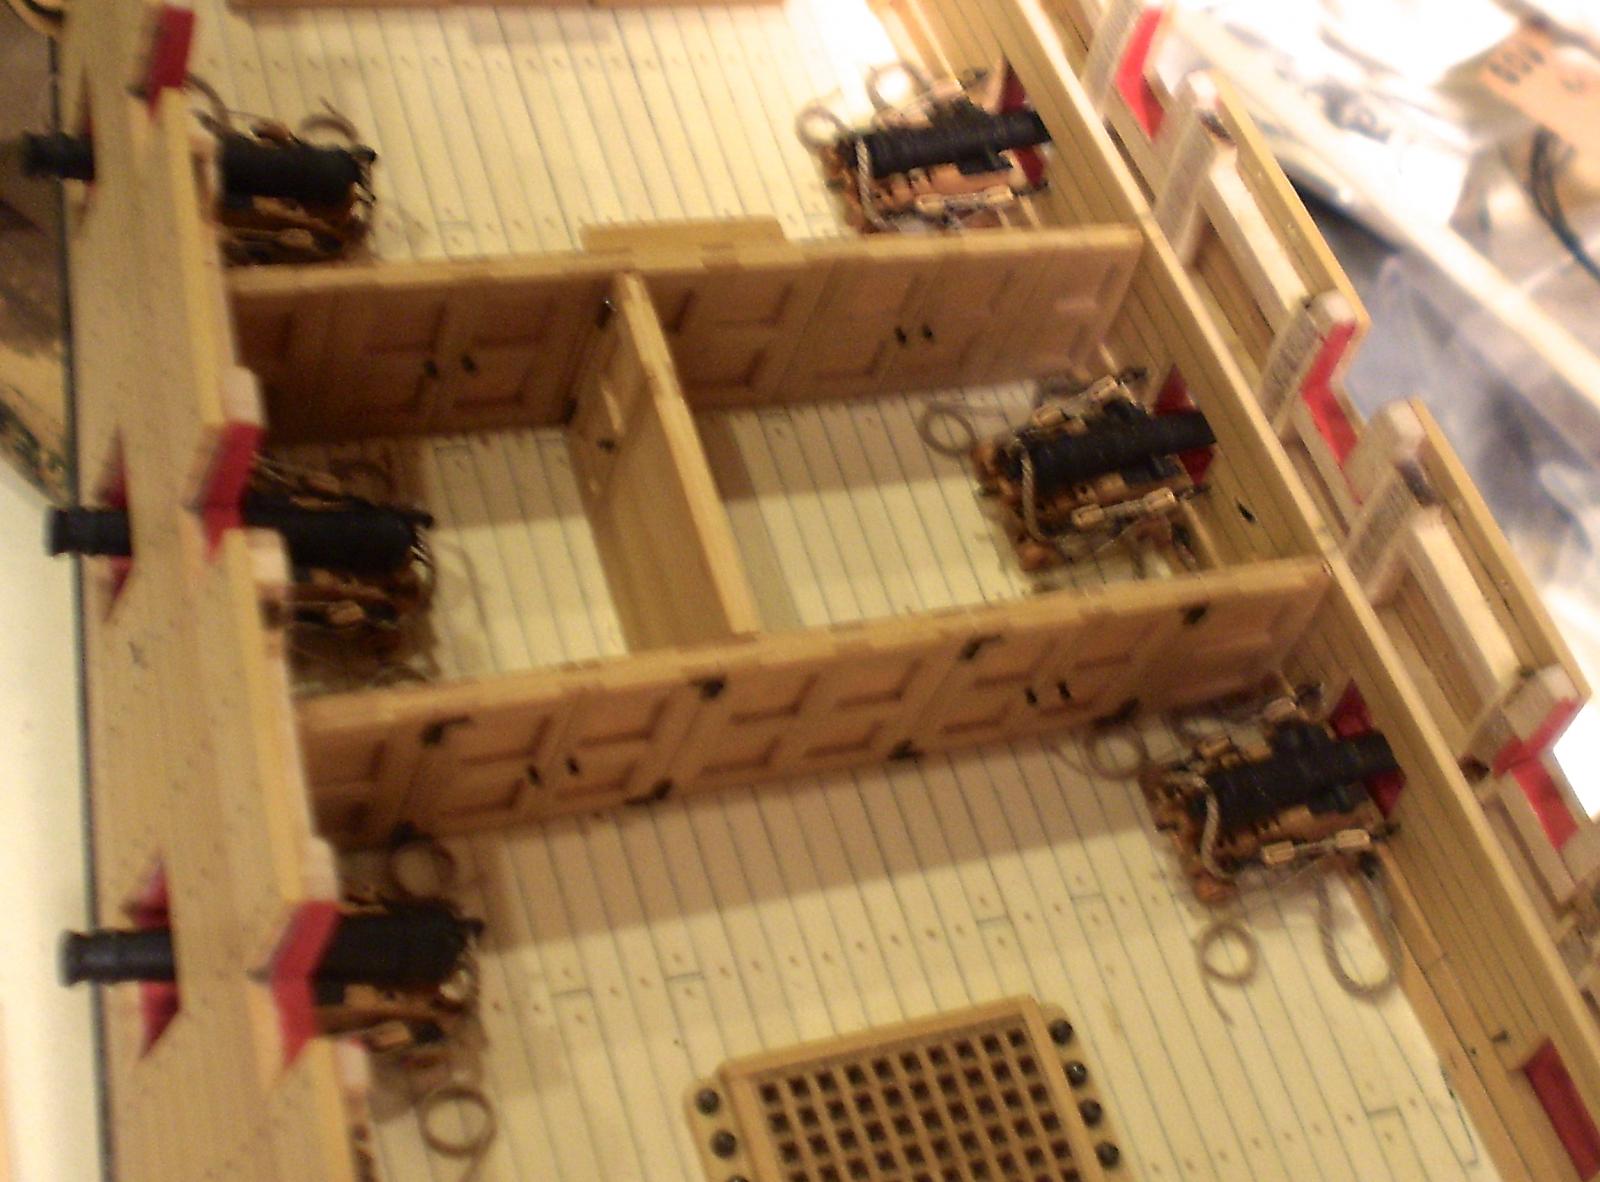
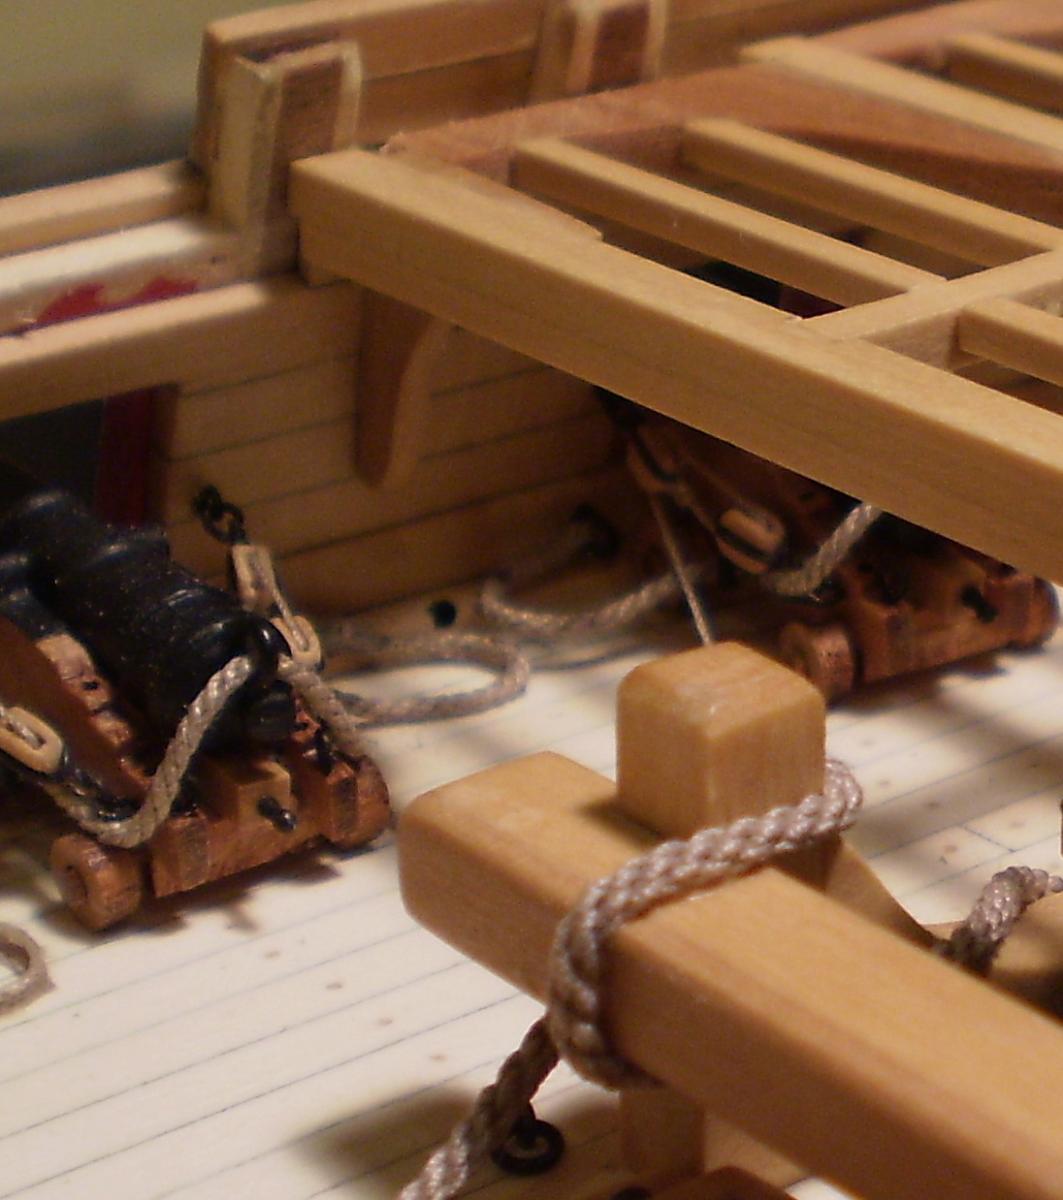
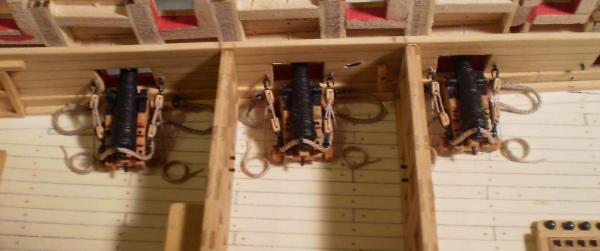
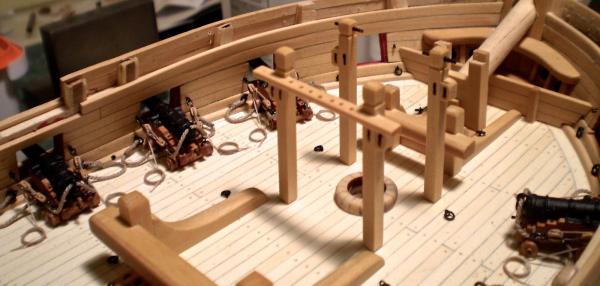
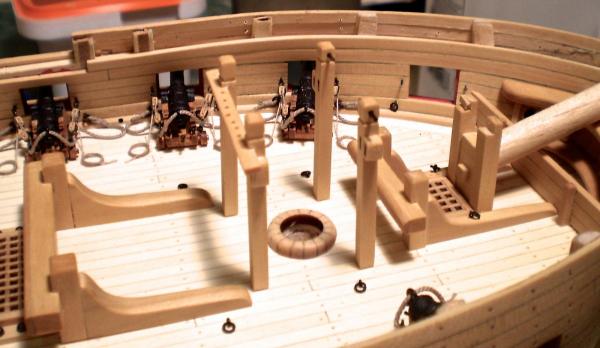
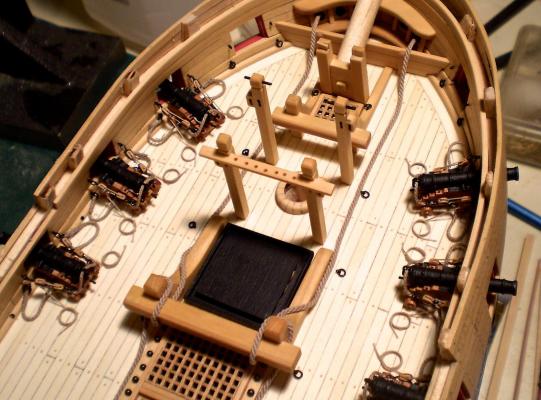
A small update. I've added another batch of guns at the aft end of the gun deck. They were made and rigged exactly like the first batch at the fore end. Since I really hate repetitive tasks, there will be no more guns for a while. Next, I will do the aft end of the quarter deck framing, and then likely will do some work on the hull exterior before returning to more guns. Bob
- 1,477 replies
-
- 19
-
-
- essex
- model shipways
- (and 1 more)
-
Very nice work on the rudder and chains Ken. Bob
-
Thanks so much Thomas. Since I replaced all of the visible wood with boxwood and holly, there are very few parts from the kit that have been used. I have used the cannon barrels, the window frames, parts of the stove and the gratings. The gun carriages are from the Lumberyard and most every thing else is from scratch. "Improvements" from the kit so far include the full deck framing, the wood quarter galleries and the cabin interior. Bob
- 1,477 replies
-
- 4
-
-
- essex
- model shipways
- (and 1 more)
-
The planking and treenailing look wonderful Ken. You should be proud of this work. Bob
-
It's looking great Augie. Can't wait to see more. Bob
- 2,191 replies
-
- 1
-
-
- confederacy
- Model Shipways
- (and 1 more)
-
Thanks Luca. I just caught a look at your Cutty Sark. You seem to be doing just fine. Bob
-
Thanks so much, B.E. Bob
-
I'm so sorry to hear of your problem Nils. My best wishes for a speedy recovery. Bob
-
Many thanks Mark, Daniel and Sjors. Your interest is always appreciated. Bob
-
Thanks so much Nigel and Rusty. The work you guys do is an inspiration to me. Bob
- 1,477 replies
-
- 1
-
-
- essex
- model shipways
- (and 1 more)
-
Many thanks Dirk, Grant, Patrick and Martin for the generous comments and also to the "likes". Patrick, the additional work isn't that hard, and it's a lot more fun. Go for it. Martin, I'm leaning toward a minimum of planking. Some will be necessary, such as around the fore mast to support rigging eyebolts, and at the break of the deck to support the barricade and belfry. After that, we'll have to see. Bob
- 1,477 replies
-
- 1
-
-
- essex
- model shipways
- (and 1 more)
-
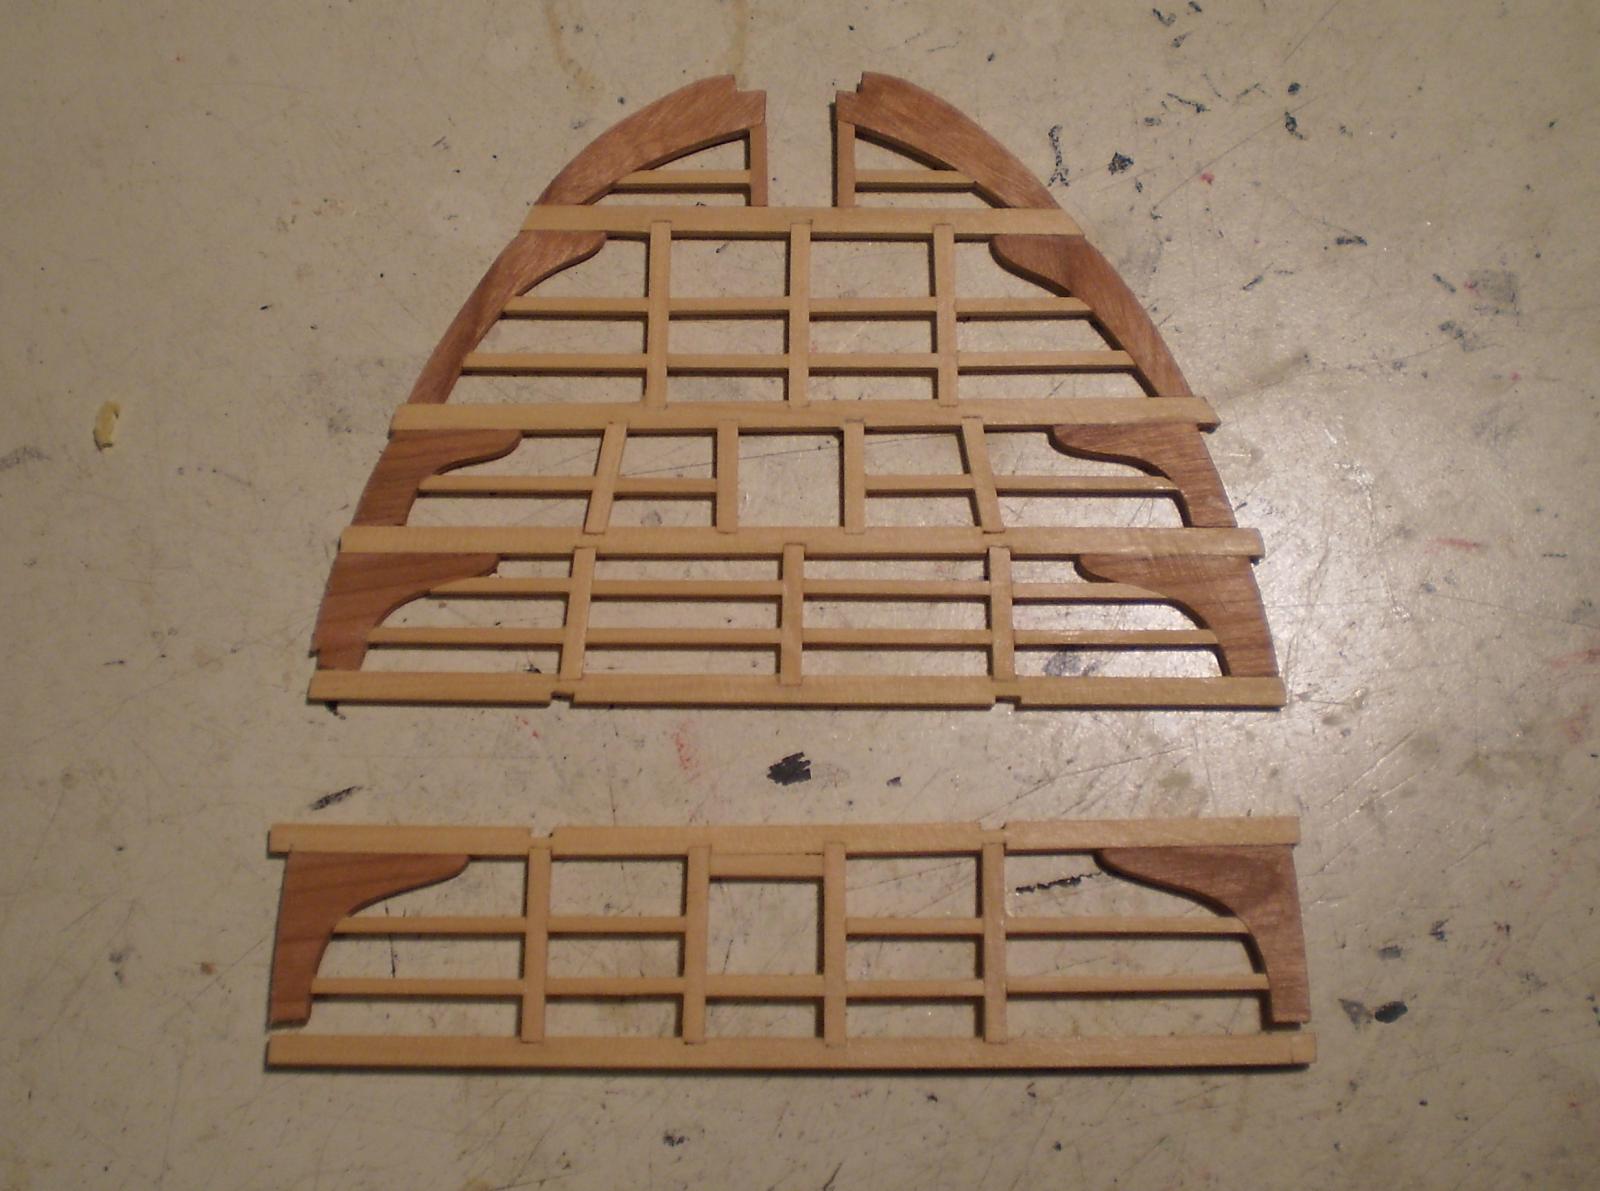
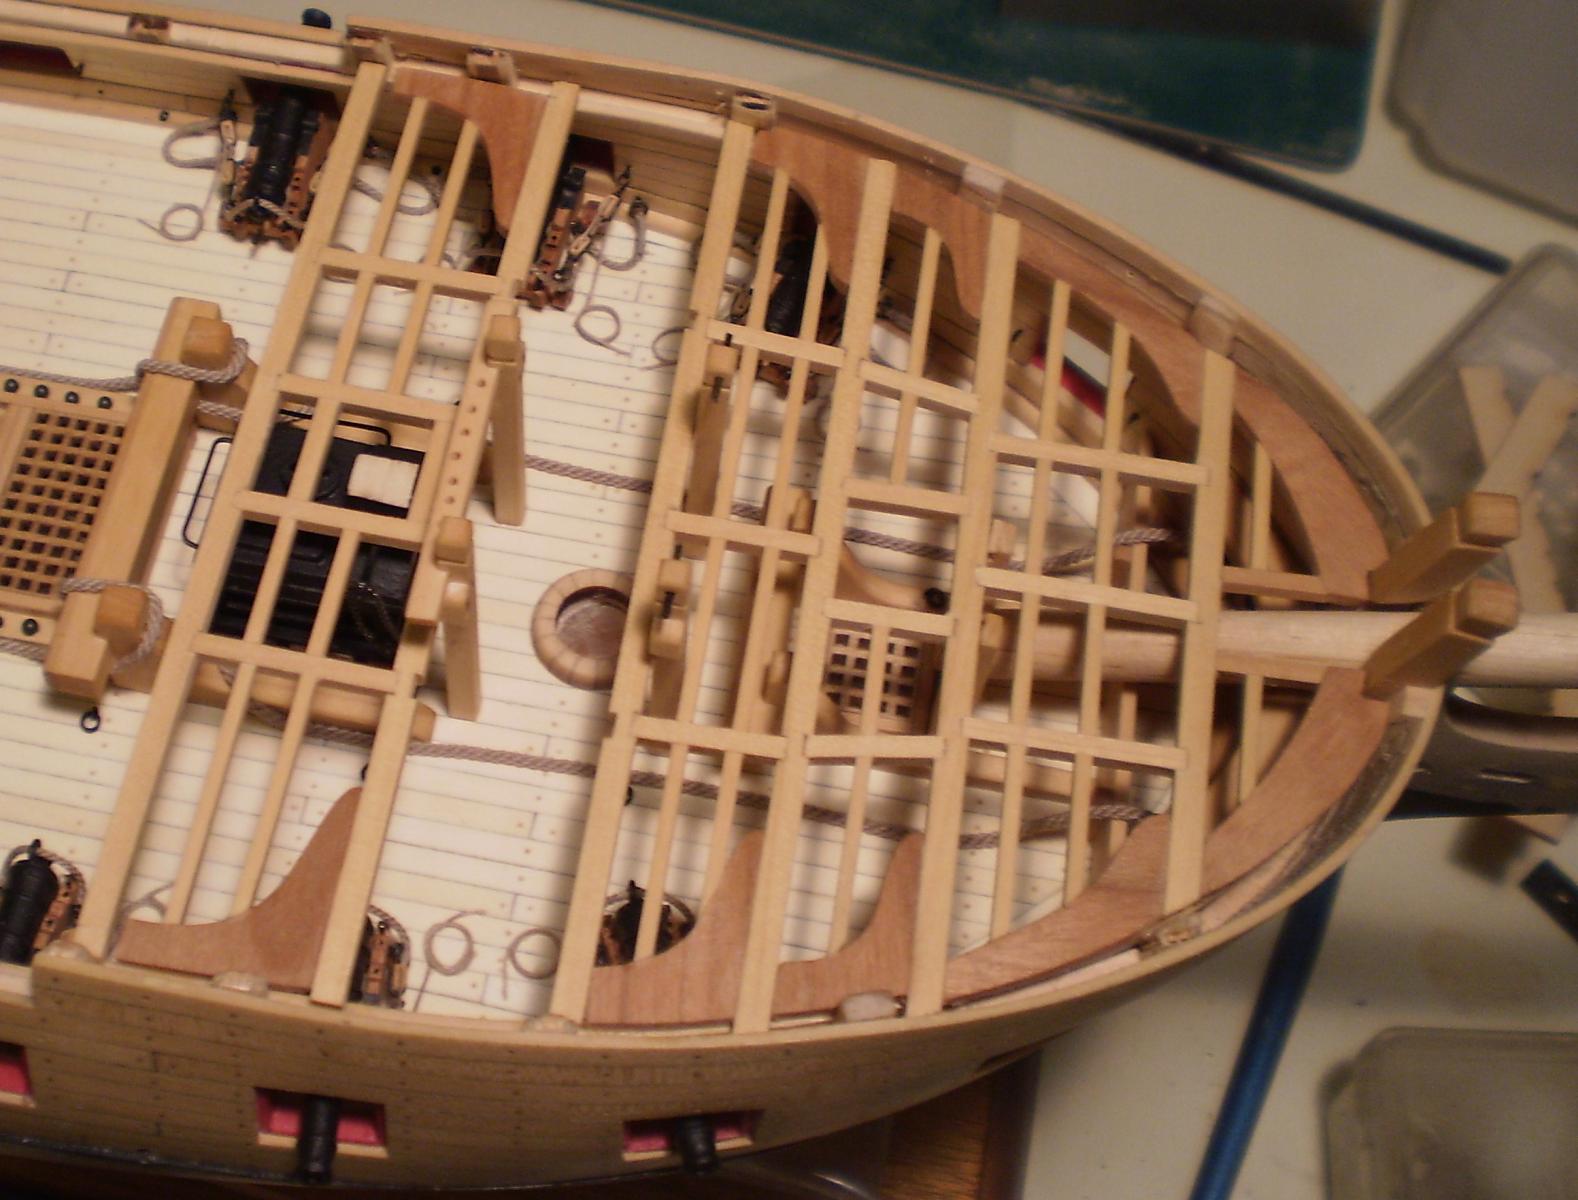
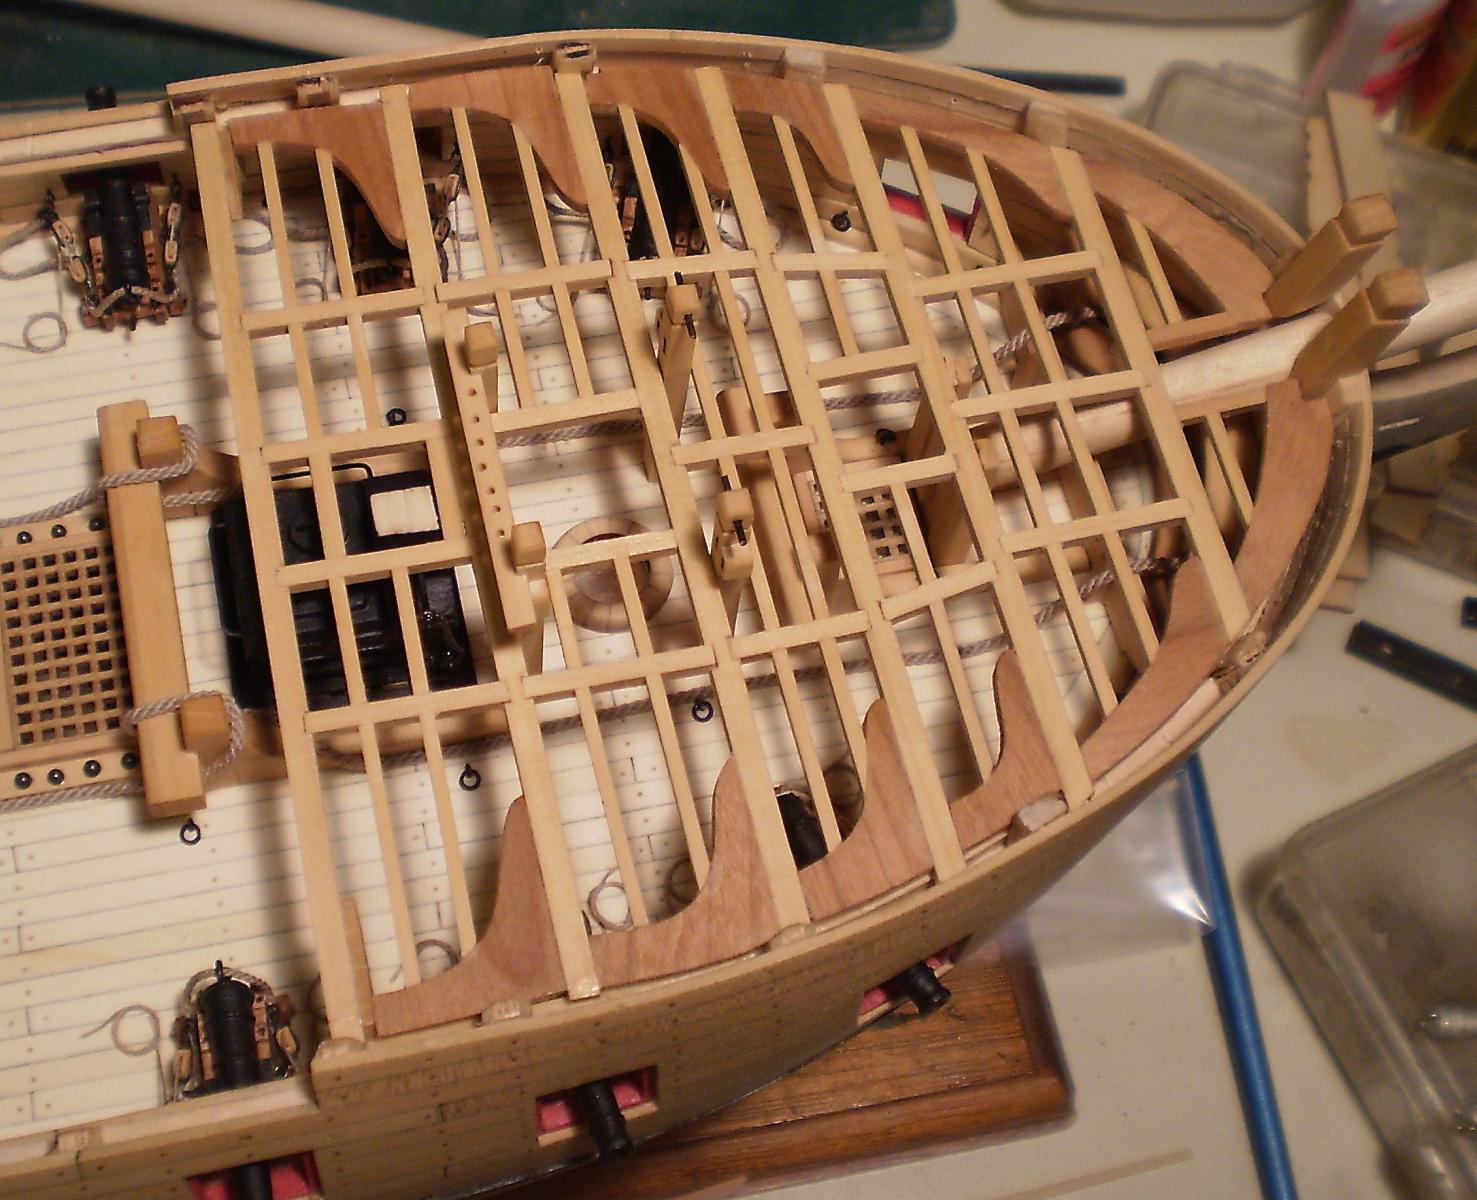
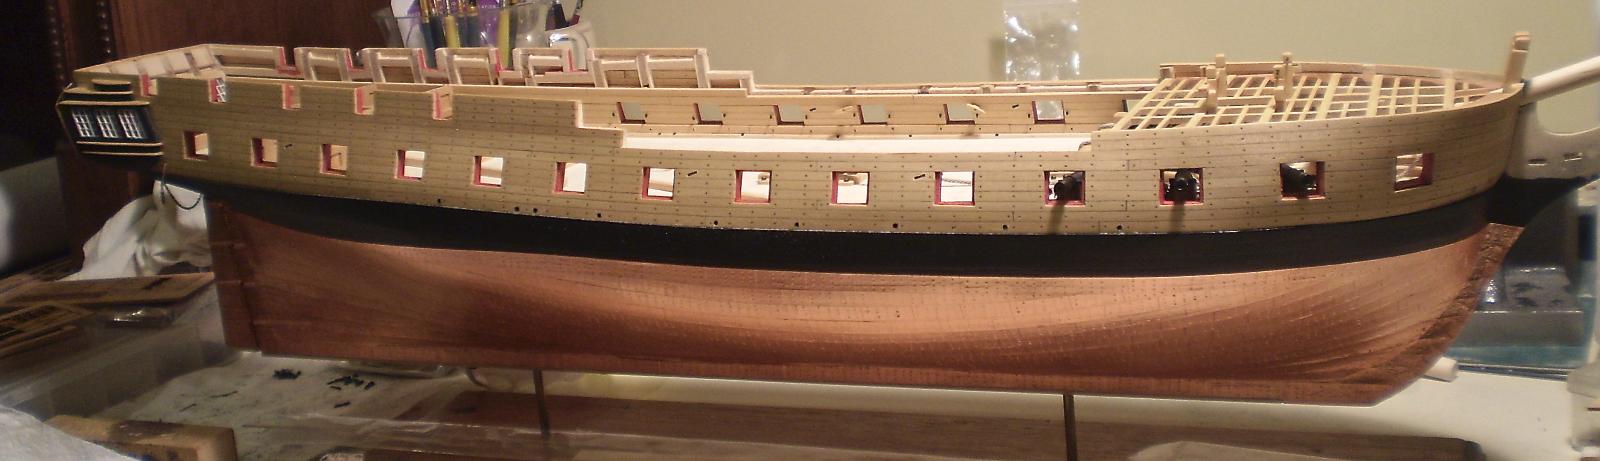
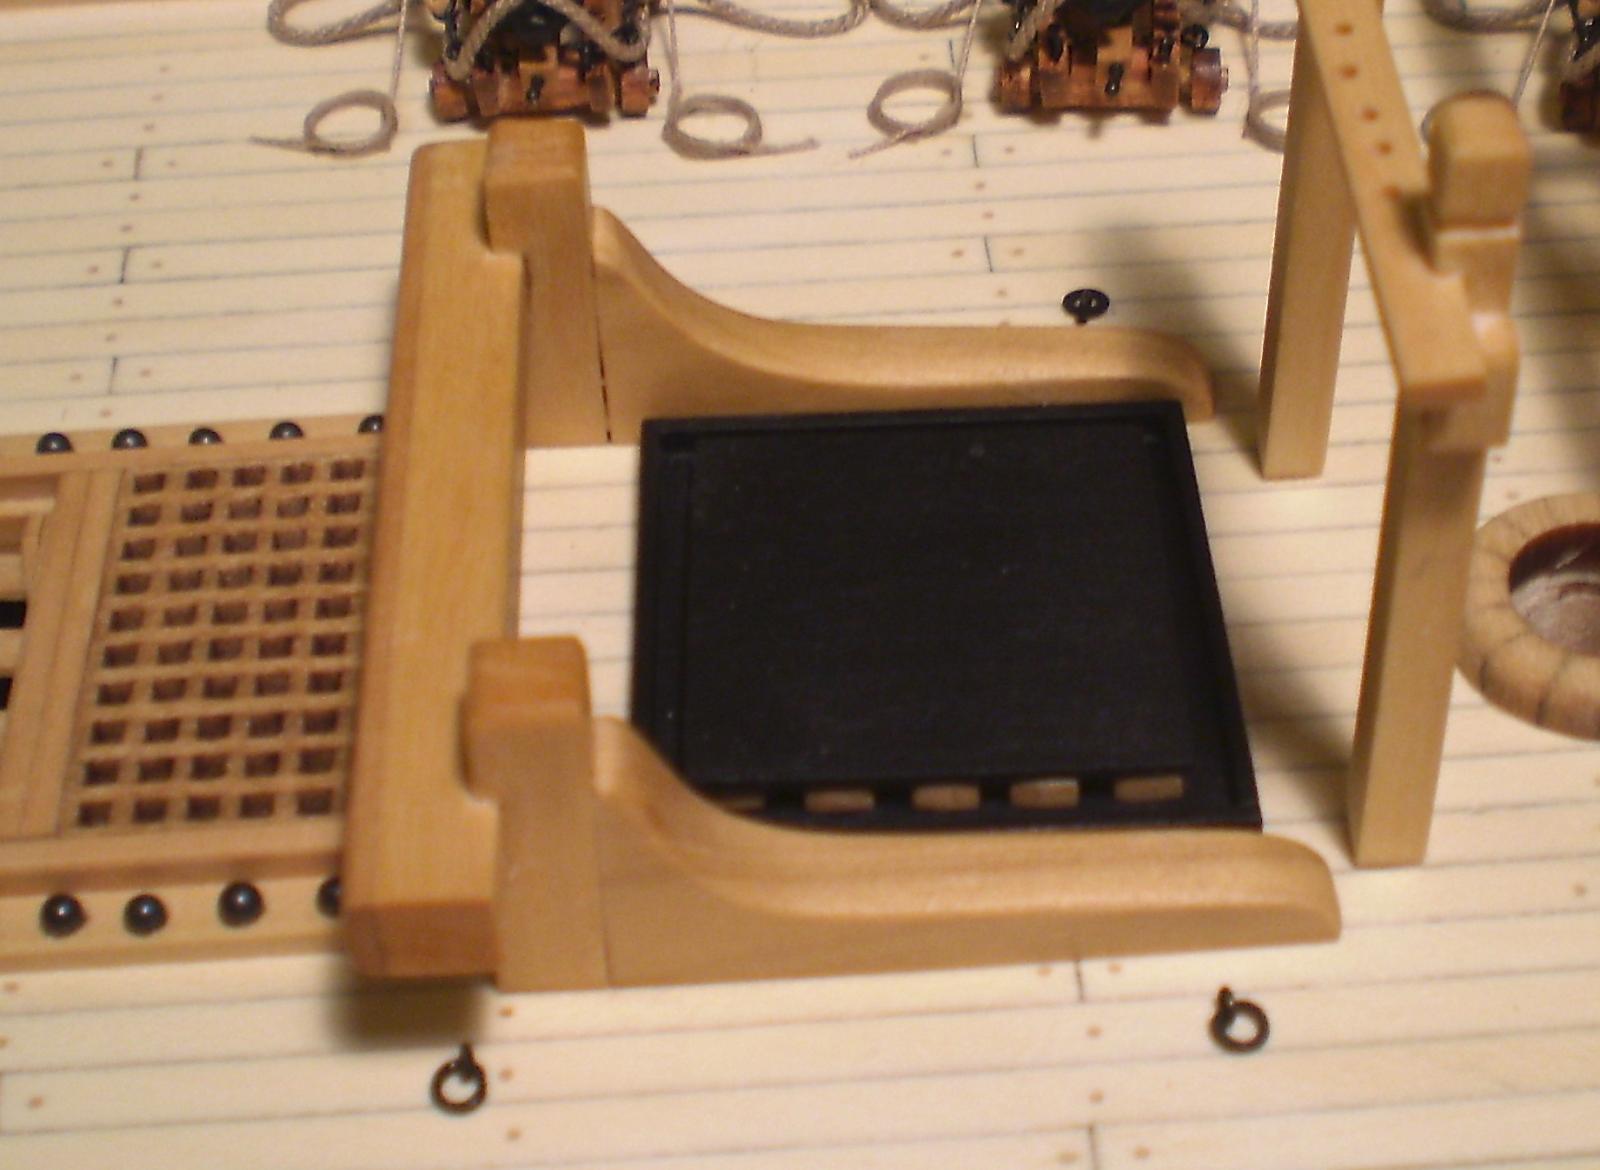
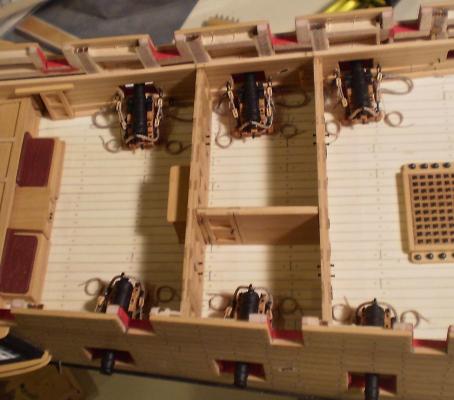
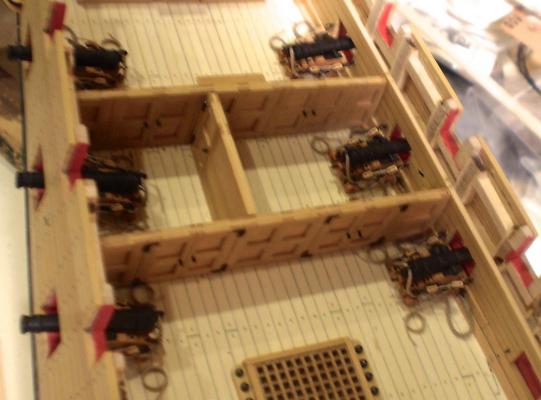
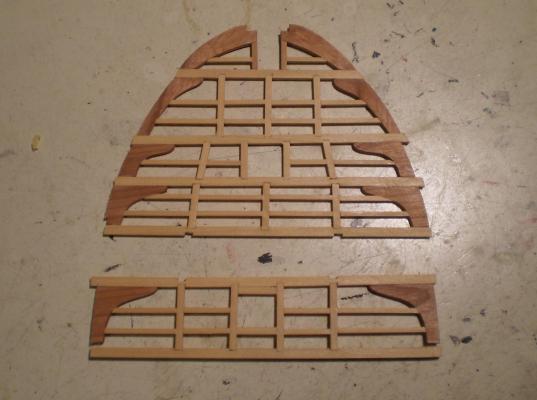
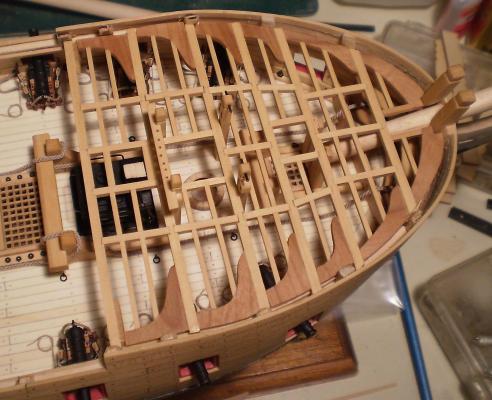
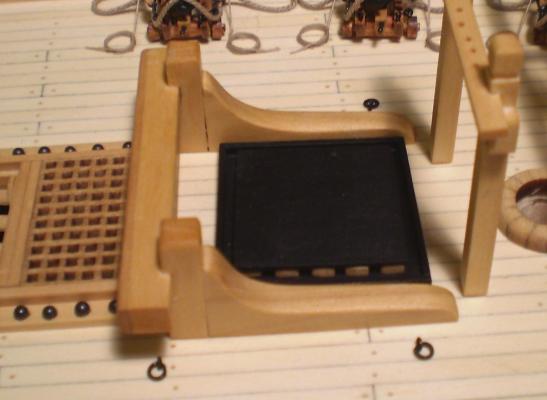
Thanks so much Hamilton. I've now completed the framing of the forecastle deck. This is a total departure from the kit construction which calls for only the beams to be installed. I went with beams, carlings, ledges and knees. All of the parts were made from boxwood, except the lodging knees which were cut from a sheet of cherry of the appropriate thickness, which I happened to have on hand (I had no boxwood sheet of that size). Owing to the small size of the parts and the cuts needed to be made, I decided to build up the deck framing in sections off the model and then install the completed sections and connect them in place on the model. This was a method that I had tried successfully on my Triton cross-section and I am pleased with the results here, as well. I'm hoping that similar results can be obtained on the larger sections of deck framing for the quarter deck and midship areas. Wipe-on Poly was used to finish the framing. Prior to installing the deck framing, I mounted the stove on its previously mounted base. I still haven't decided how much deck planking will be used, although i'm sure that it will not totally cover the framing. Right now , I'm thinking of using very little planking, at least in this area. I can defer that choice until the rest of the gun deck fittings are done and the remaining upper deck framing is in place. The remainder of the gun carriages have arrived from the Lumberyard and I'm now working on the next batch of guns to be installed. The last photo is a current full profile shot , since Nigel has pointed out that I haven't posted one in quite a while. Bob


- 1,477 replies
-
- 30
-
-
- essex
- model shipways
- (and 1 more)
-
Absolutely fabulous work Remco. My envy knows no bounds. Bob
-
Very nicely done Sjors. With that nice smooth surface, the second planking should be easy. Bob
-
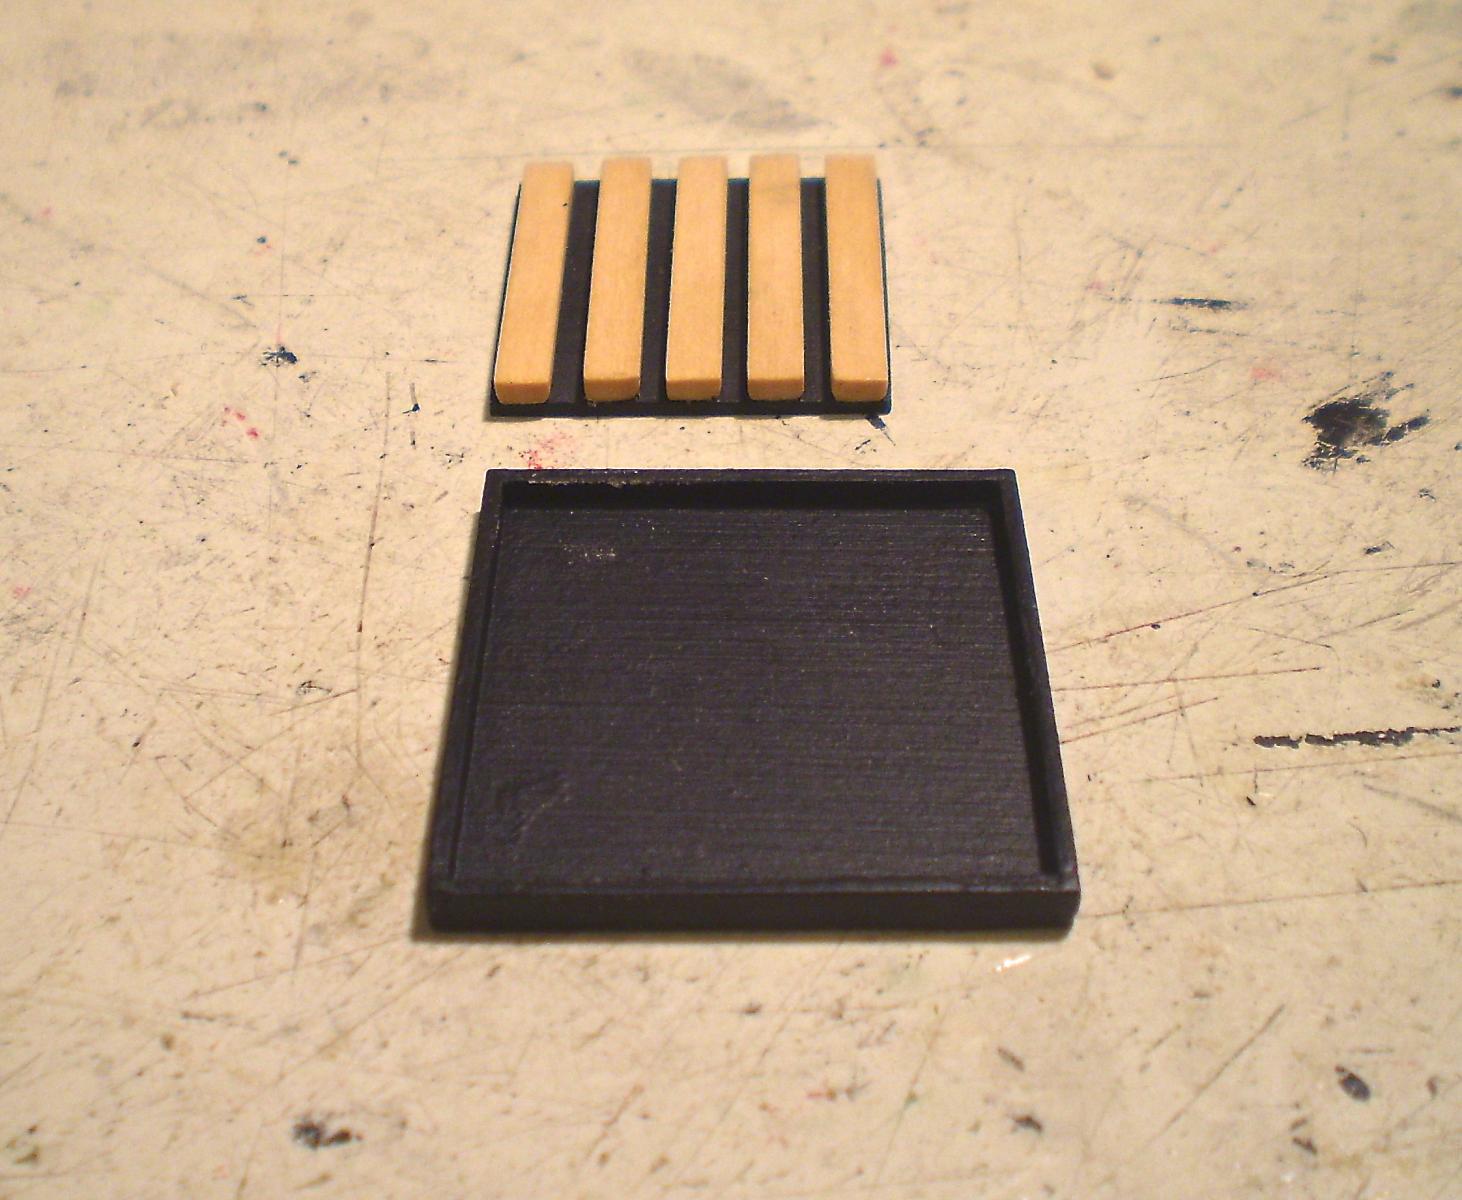
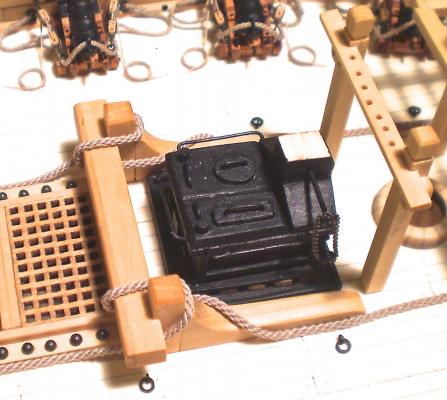
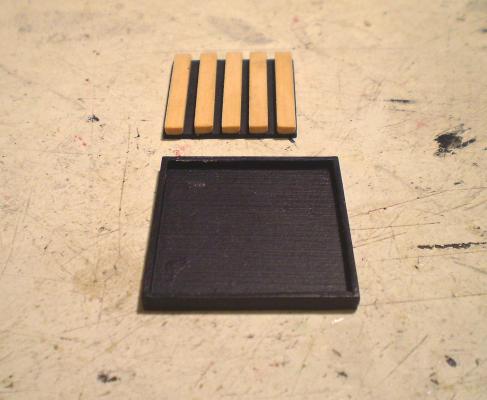
Thanks Patrick. Apparently, the stove on it's metal base and beams sat in the metal pan which was filled with water to take care of the heat. Bob
-
Thanks so much Alistair, Grant and the "likes". My understanding Alistair, is that the cable does not run through the ringbolts. "Stoppers" were attached to the ringbolts and then tied to the cable at times. I'm afraid that if there's no easier way to retrieve the photos, they just may have to wait a while. Bob
-
A year hardly seems a long time for the beautiful results that you've achieved. It's looking great. Bob
-
I've been continuing with work on the bow end of the gun deck. Completed and installed are the fore jeer bitts and the fore topsail sheet bitts. These were made from boxwood strip with the sheaves "faked" in the same way that I did the bulwark sheaves ( two drilled holes with a scored line between them, blackened with a marker). I also made and installed the fore mast wedges. This was done with a single piece with the wedge lines marked in. I then made up the base for the stove. This was done as discussed in the various recent posts. A metal base plate resting on wooden beams, set in a metal tray with a shallow lip. The parts were made of boxwood, with the beams left natural and the metal parts painted black. This was installed but the stove was stlll left off, although it's position, like that of the bitts , was determined by temporary fitting of the forecastle deck beams. Lastly, I ran the anchor cable from the hawse holes back along the deck and around the riding bitts.With the exception of mounting the stove, this concluded the work under the forecastle deck. I am now working on the forecastle deck framing and will finish that before moving back along the gun deck. By the way, I've noticed that some of the earlier posted photos in the log have now disappeared. Does anyone know how to retrieve them? Bob

- 1,477 replies
-
- 19
-
-
- essex
- model shipways
- (and 1 more)
-
Another fantastic build Nils. Your work is special. Bob
- 222 replies
-
- 1
-
-
- gorch fock
- barque
- (and 2 more)
-
Thanks Nigel, Sam and Thomas. I'm inclined to go with Nigel's view of the construction. That's how I've been interpreting it as well. Barring anything more definitive, that's how I'm going to build it. Bob
- 1,477 replies
-
- 3
-
-
- essex
- model shipways
- (and 1 more)
-
Beautifully done Augie. I love it more with each update. Bob
- 2,191 replies
-
- 1
-
-
- confederacy
- Model Shipways
- (and 1 more)
-
Patrick, I ended up using the kit cannon barrels because I couldn't find anything the correct size. I did a lot of filing to smooth them out and drilled out the bore, but no drastic revisions. Bob
-
Thanks Dirk. The Victory stove appears to be set on stones, which seems to be the more common arrangement, but not what was done on Essex. Bob