Seventynet
-
Posts
797 -
Joined
-
Last visited
Content Type
Profiles
Forums
Gallery
Events
Everything posted by Seventynet
-
 Thanks Bob, I'm going to be watching you carefully on the bow planking. I have the same sort of bluff bow. I just took a cruise through your endeavour build as you'll see from my likes. Best, Ian
- 107 replies
-
- 1
-

-
- brazzera
- marisstella
- (and 1 more)
-
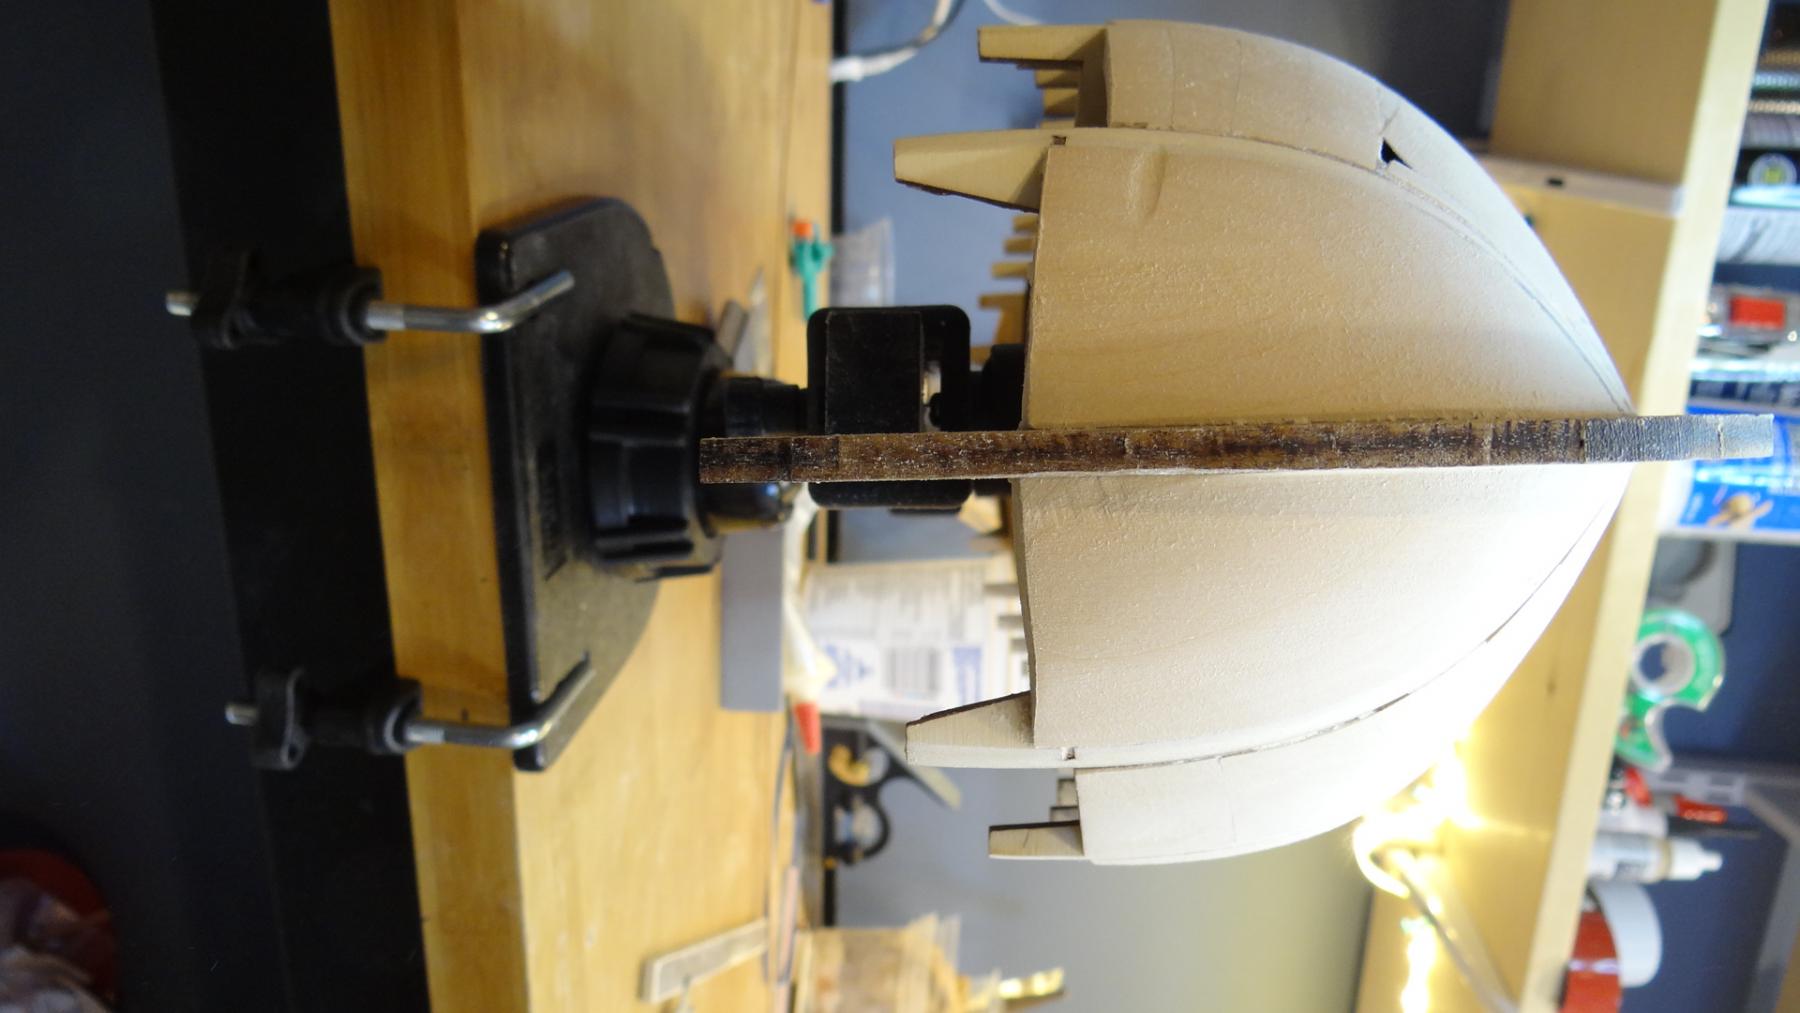
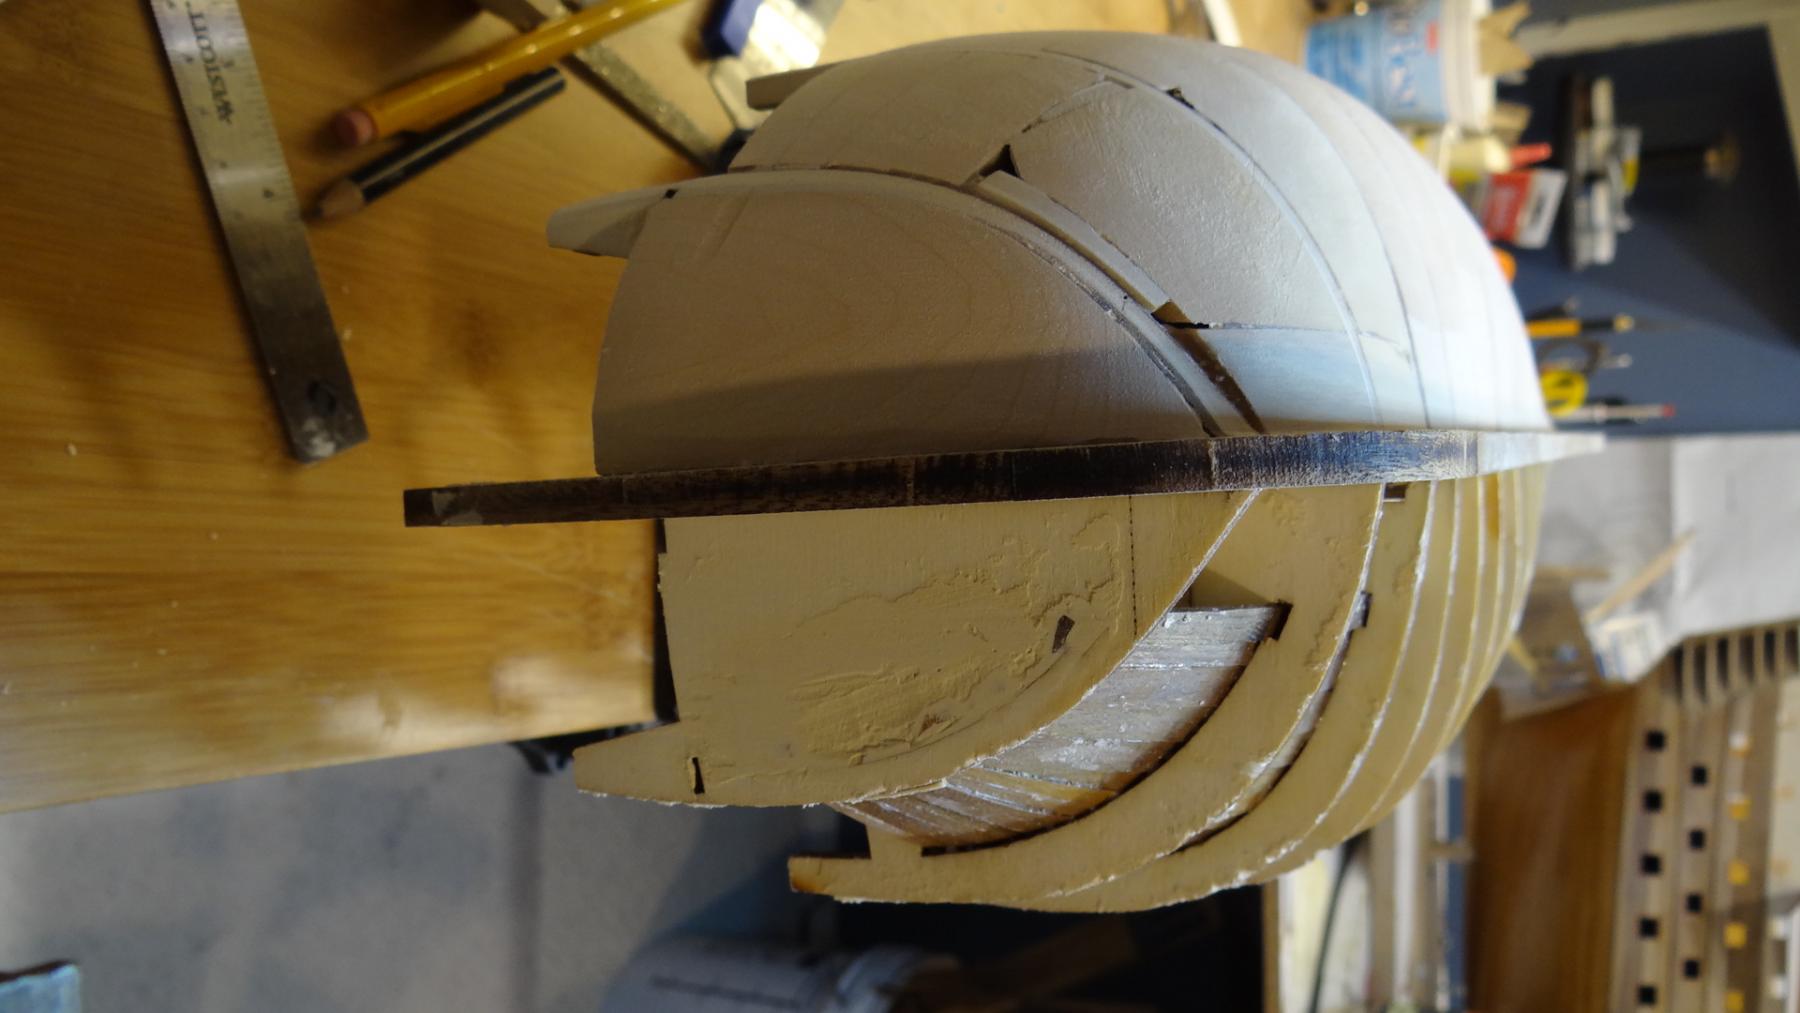
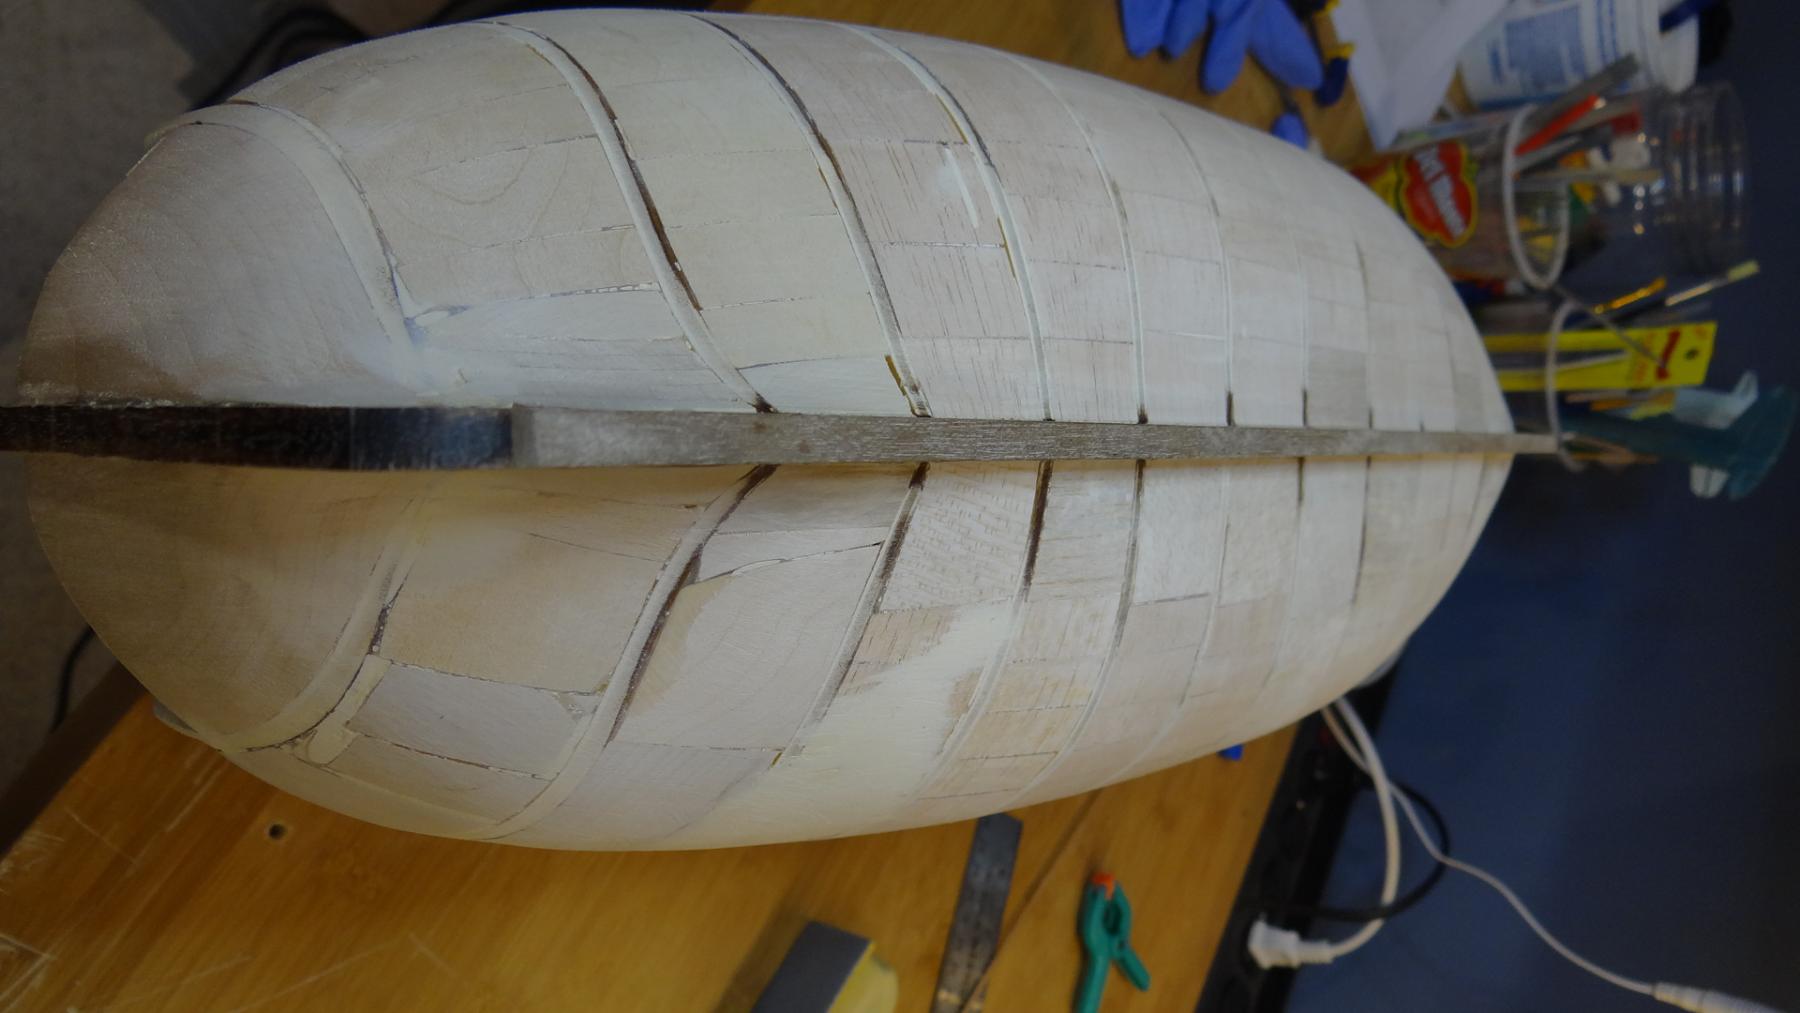
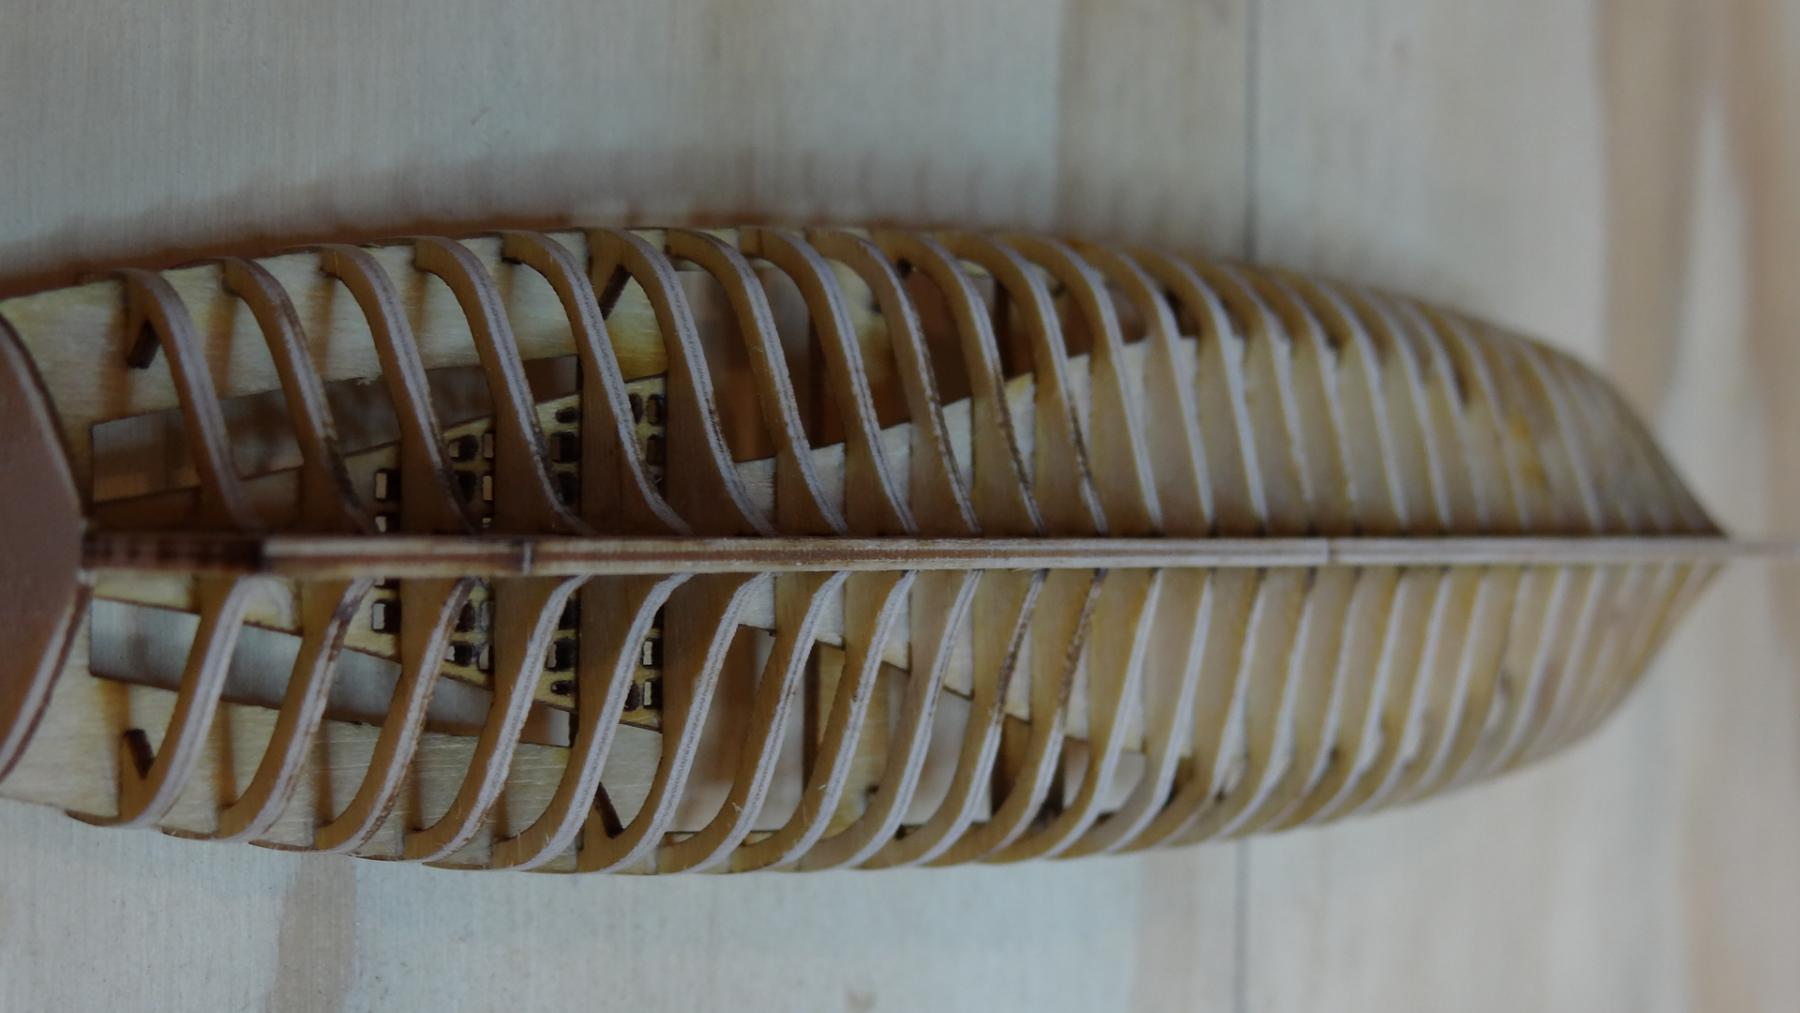
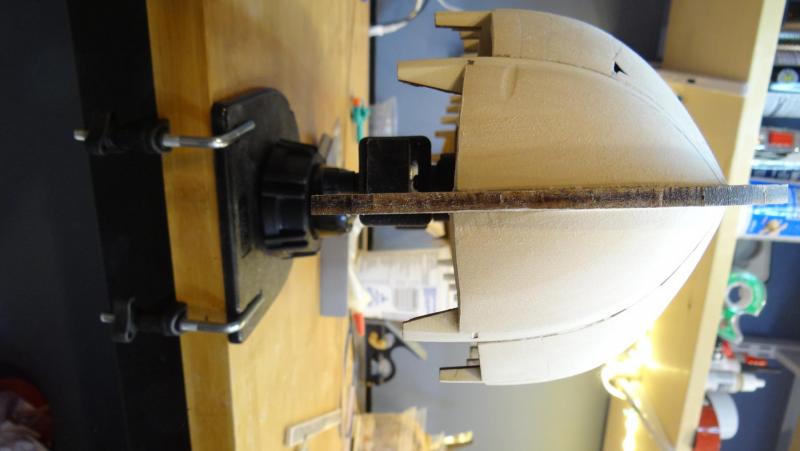
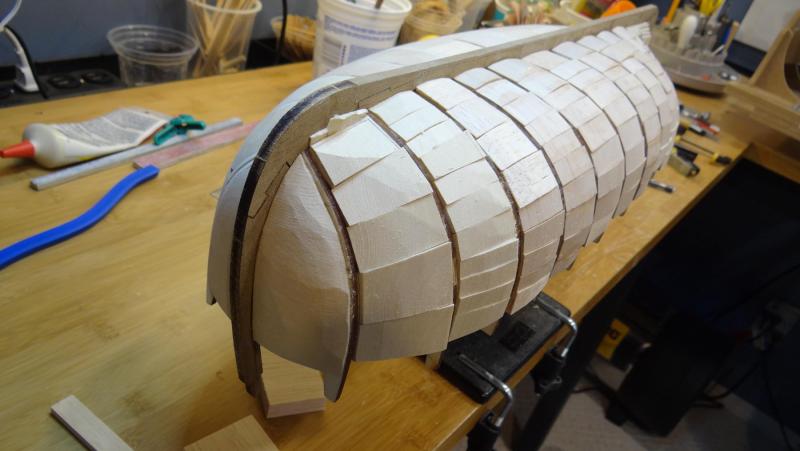
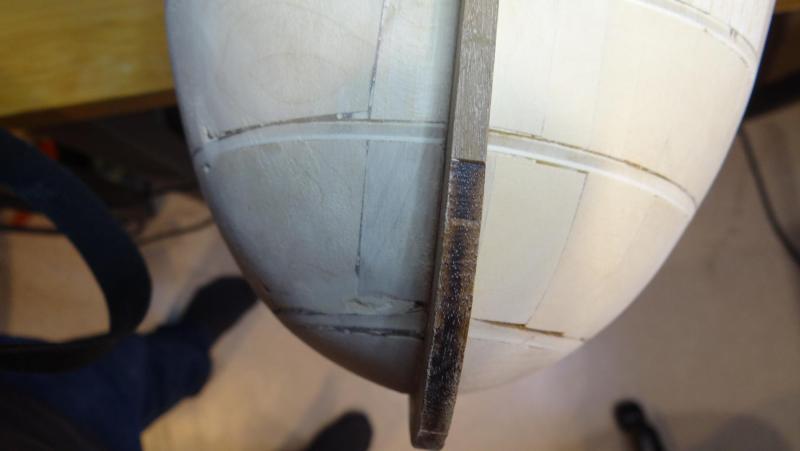
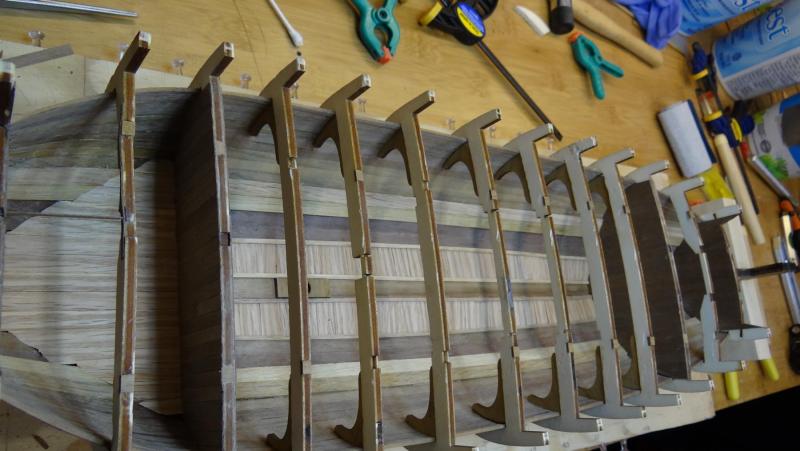
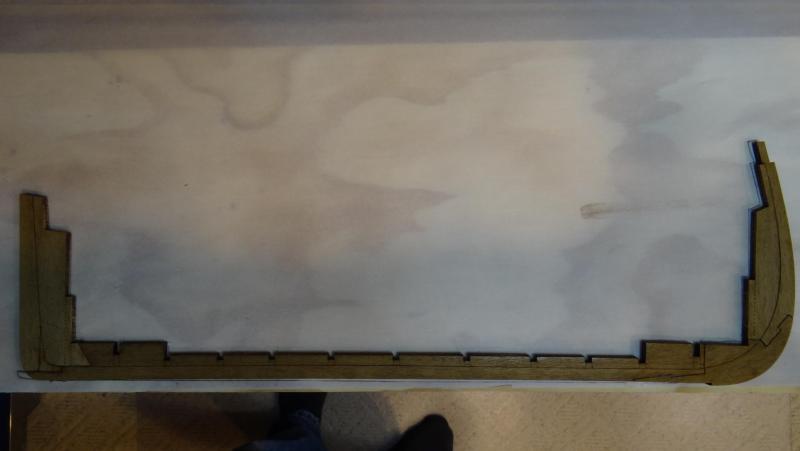
Thanks for the likes and well wishes everyone. Its been a few weeks but not hard at it weeks. I've added and shaped filler blocks for the entire hull. I won't defend using blocks between the first three and last three bulkheads at the bow and stern, except to say they were pretty easy to do. Balsa and less complicated curves make life simple. But really, the bulkheads are fairly close together so one could easily get away without them I used basswood for the stern and bow bulkheads and that took more time. Anyway I am now ready to mark off the planks with the likely deluded notion that I can avoid drops and stealers. Stay tuned. Best, Ian


- 107 replies
-
- 8
-
-
- brazzera
- marisstella
- (and 1 more)
-
Nice work on the hatches, doors and steps. The cherry looks great. Best, Ian
- 653 replies
-
- 4
-
-
- trabakul
- marisstella
- (and 1 more)
-
Thank you kindly for the well wishes Don and Zoltan. Much appreciated.
- 107 replies
-
- 3
-
-
- brazzera
- marisstella
- (and 1 more)
-
Thanks Don, I will definitely be calling on you for the hull planking if you don't mind. I almost forgot I better throw some poly on the innards before I turn it over.
- 107 replies
-
- 4
-
-
- brazzera
- marisstella
- (and 1 more)
-
Thanks Michael. You are keeping me highly entertained with your many ongoing builds and your new restoration project. What a beauty that is! Ian
- 107 replies
-
- 4
-
-
- brazzera
- marisstella
- (and 1 more)
-
Thanks for looking in Zoltan. I'm just giving the Victory a break for a while. I'm loving your Sanata Maria. Please keep it coming. Best, Ian
- 107 replies
-
- 4
-
-
- brazzera
- marisstella
- (and 1 more)
-
I haven't looked in for a while Elijah, fantastic job! Ian
- 701 replies
-
- 7
-
-
- phantom
- model shipways
- (and 1 more)
-
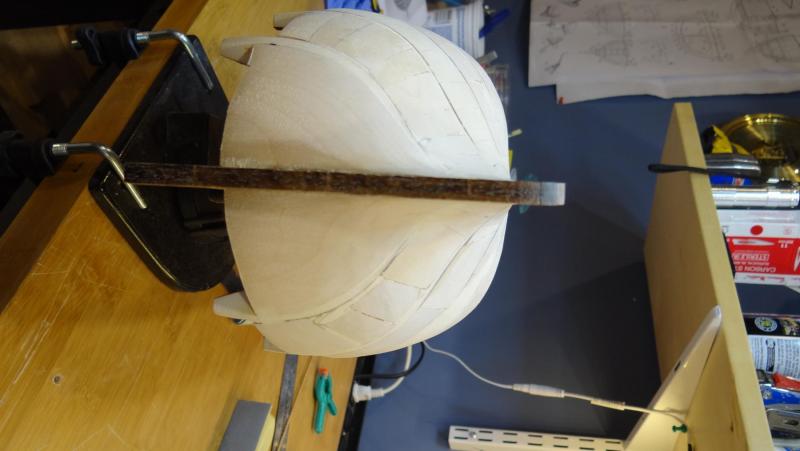
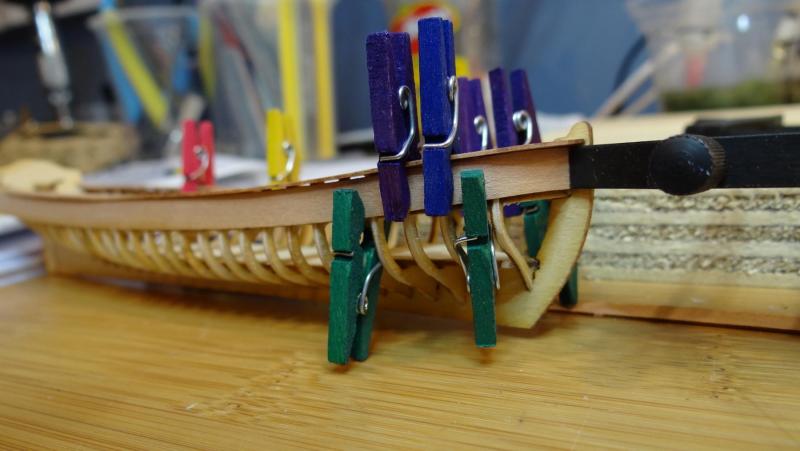
And here we are right now. Fore and aft bulkheads planked, knees installed and ready to turn it over and start the preparation for the outer planking. Best, Ian

- 107 replies
-
- 11
-
-
- brazzera
- marisstella
- (and 1 more)
-
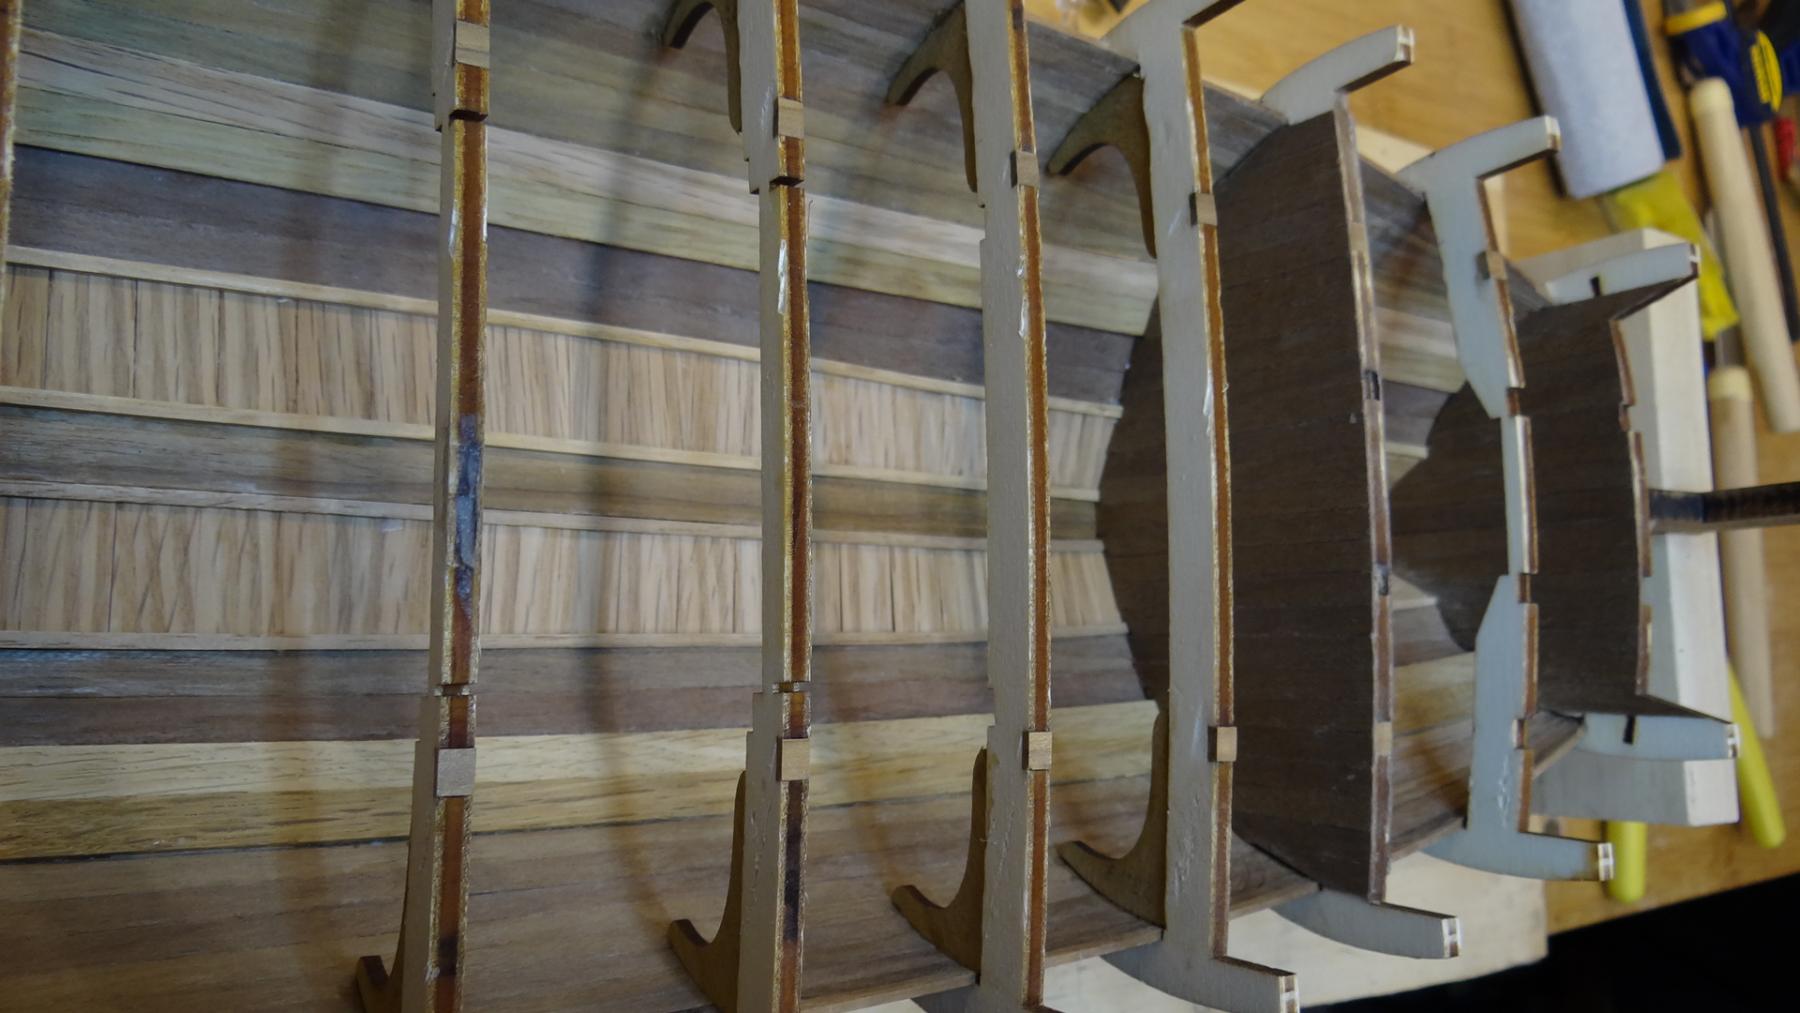
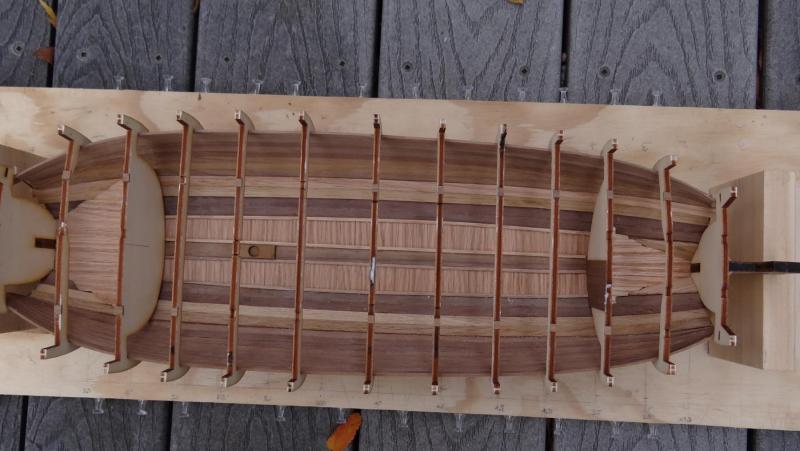
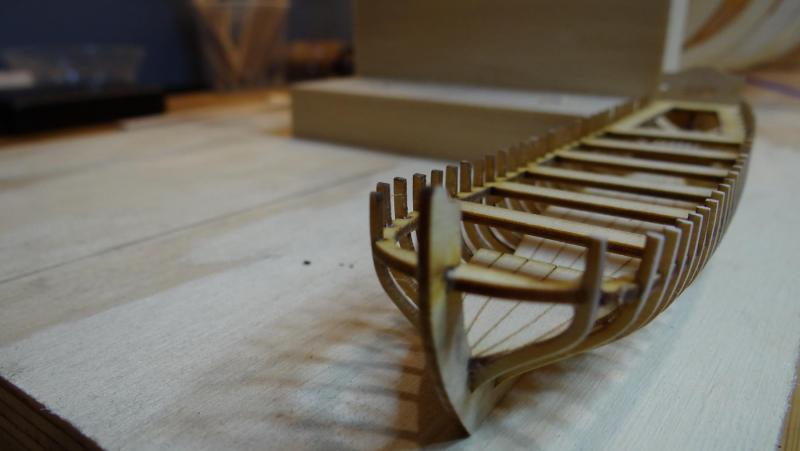
This is where I was a few days ago. Floor boards laid, inside planking completed, bow and stern floors constructed and just starting the panelling of the fore and aft bulkheads. Fiddly work. Sanding is very challenging - and nuts to the advice that you should sand before you lay the boards, I just don't see the point. Sanding is only required after you lay the strakes and flooring to flush them up. Oh yes, I forgot to mention that I milled oak for all the floors. The bilge stringers that came with the kit were oak, not mahogany as advertised in the manual - unless I somehow misplaced them . Lots of old oak house flooring lying around so it was no problem to extend the theme to the build flooring. Besides I really didn't like the limewood that came with the kit, it had a green tinge to it (no reflection on the quality of the materials overall - really good). I like the colour of oak and found it generally easy to work with. Seemed to hold an edge pretty well. Ian
- 107 replies
-
- 11
-
-
- brazzera
- marisstella
- (and 1 more)
-
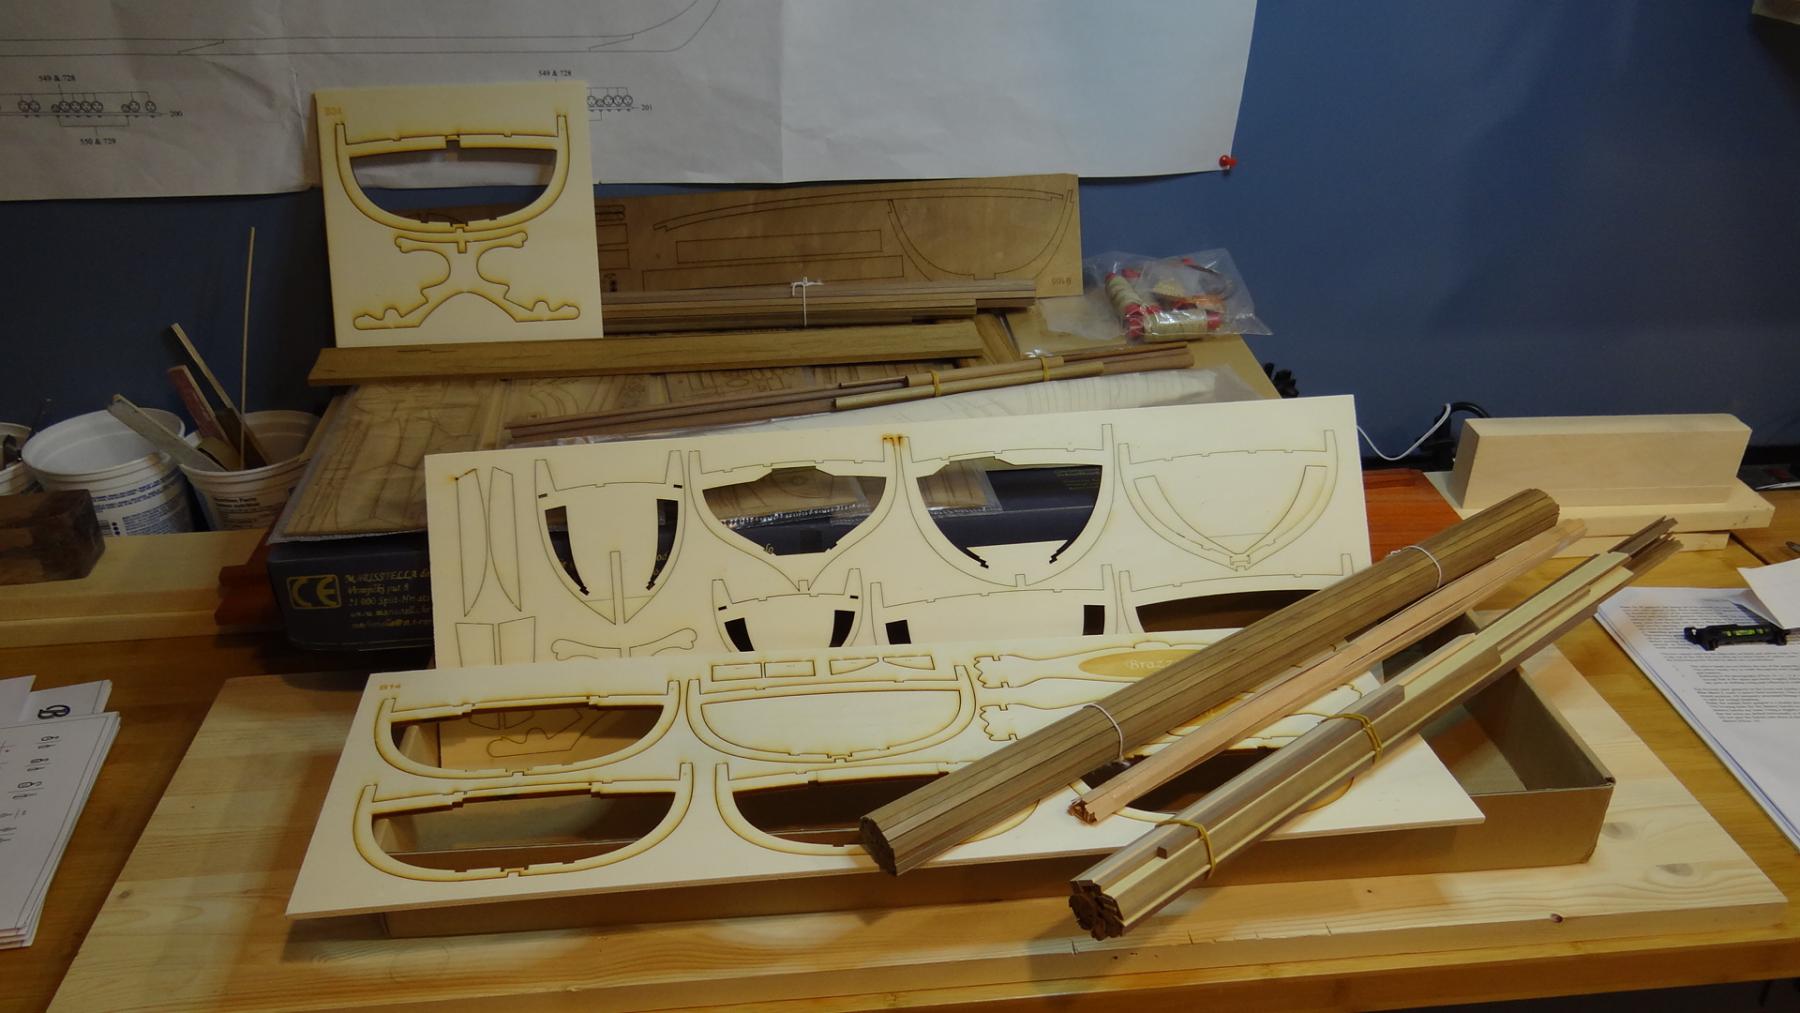
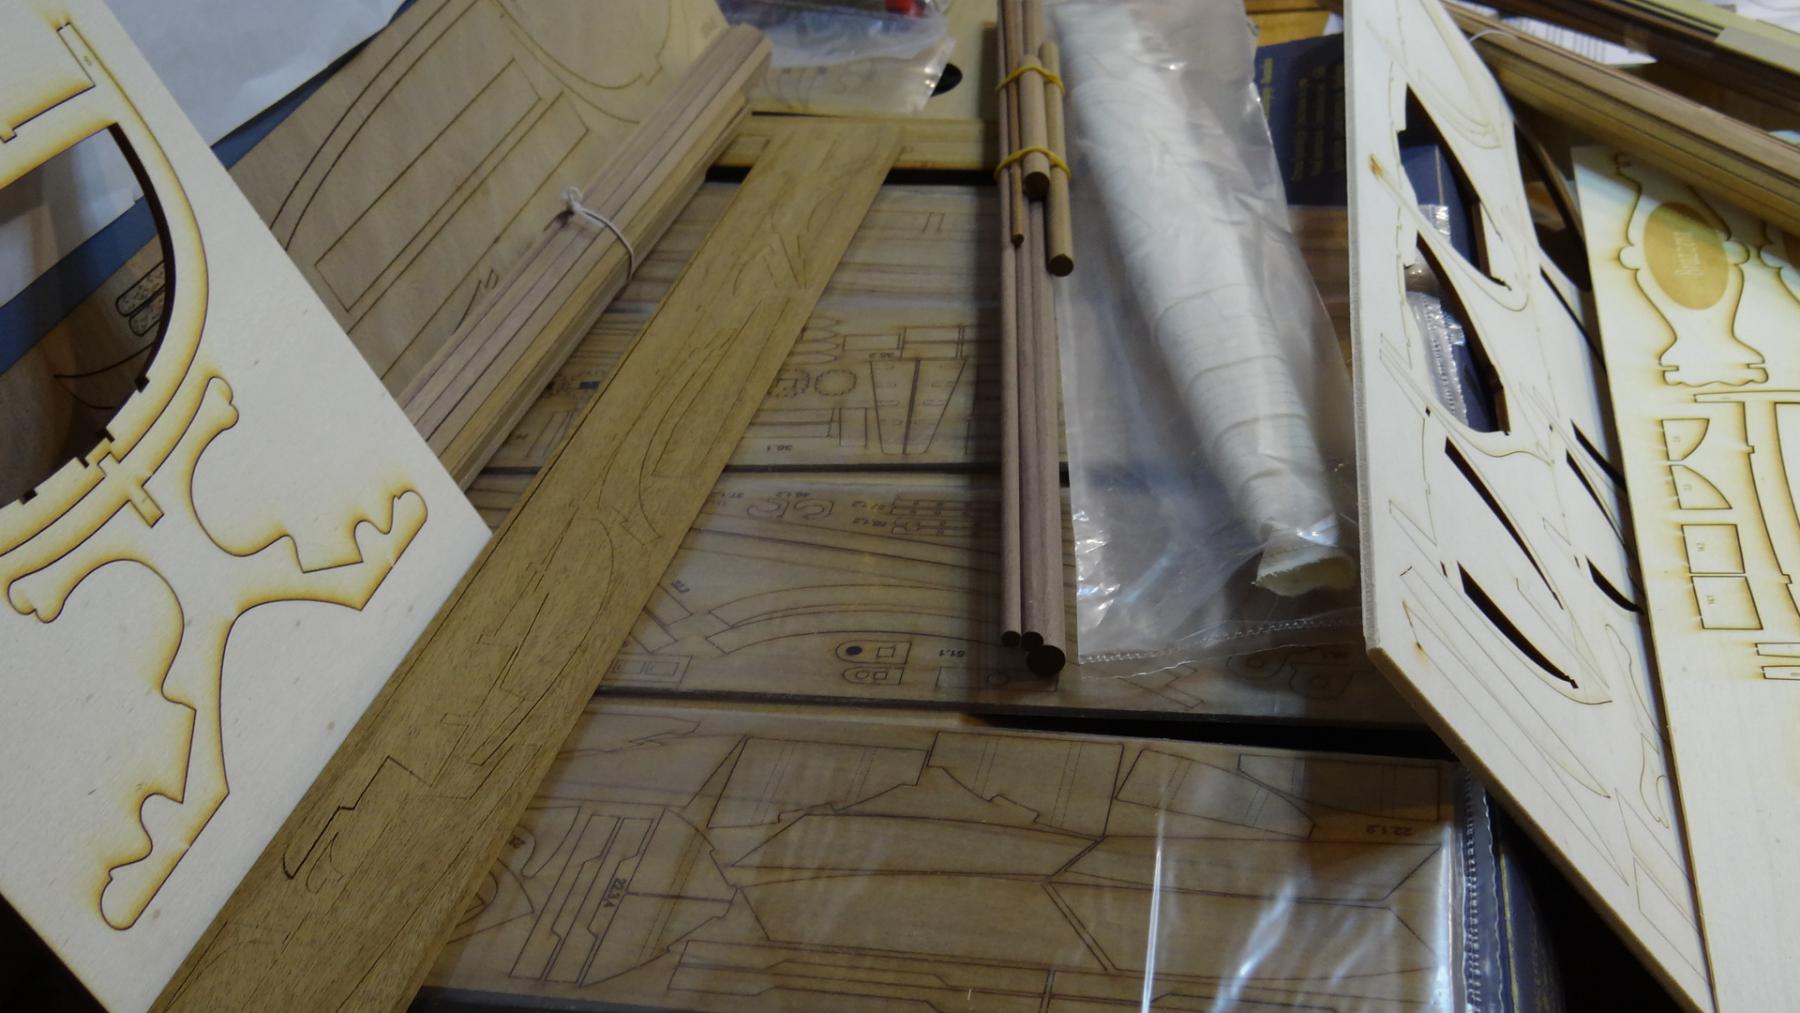
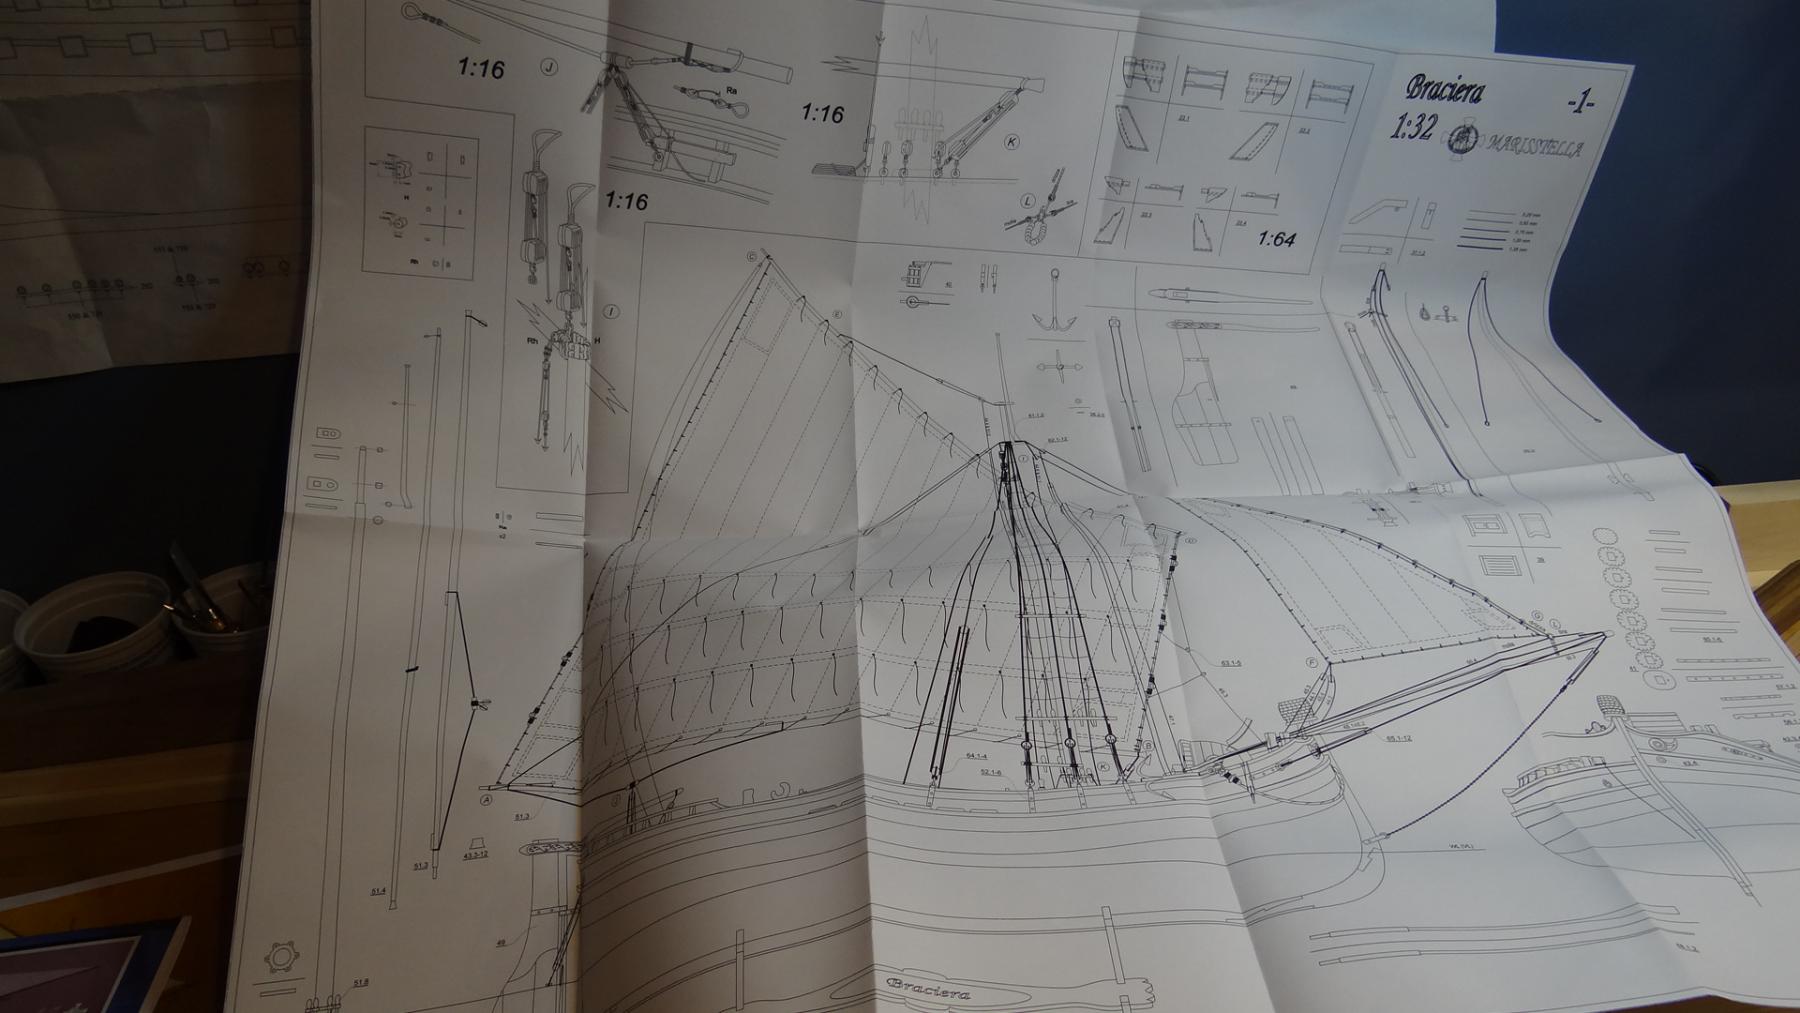
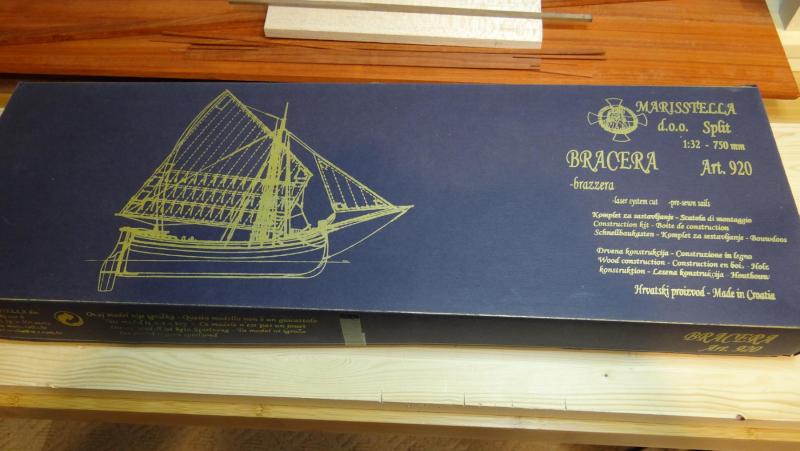
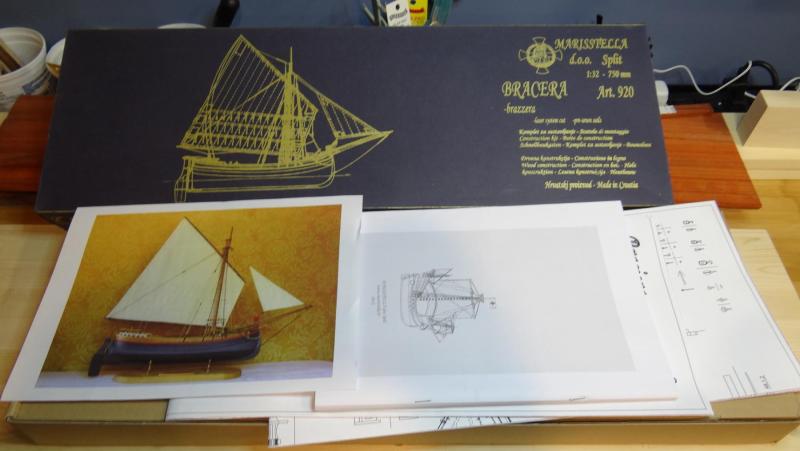
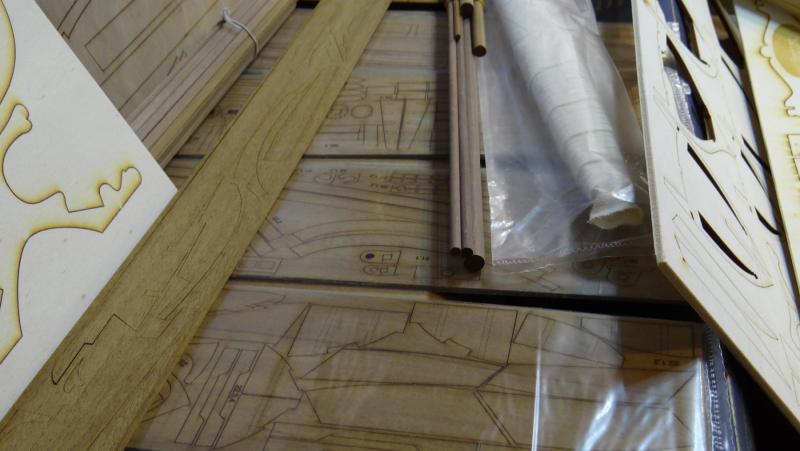
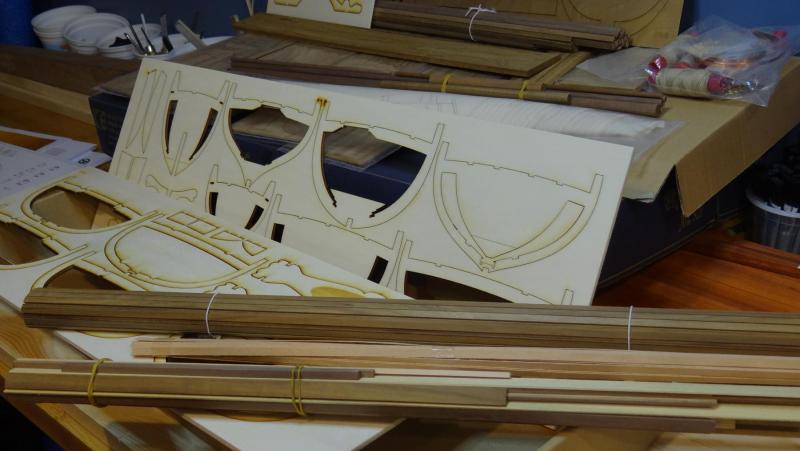
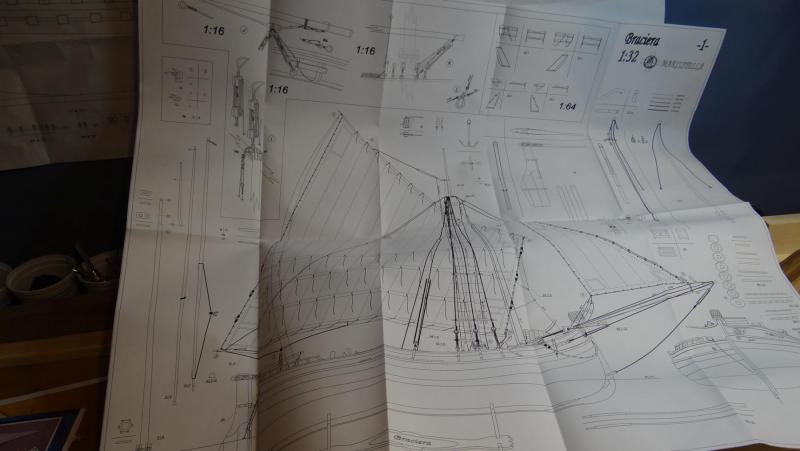
Greetings shipbuilders, Following is my build log for the Brazzera from MarisStella. I think it will be rather short, at least for the beginning because I didn't take many pictures and because it seems to be well covered by Zoran in his news from MarisStells log and Don in his Trabaccolo log. The Trabaccola is very similar - the Brazzera is a bit shorter and has only one mast. This kit has beautifully prepared materials. It is not an easy kit to build but I am enjoying it. If anyone has comments or suggestions I very much welcome them. Regards, Ian


- 107 replies
-
- 10
-
-
- brazzera
- marisstella
- (and 1 more)
-
It is starting to look like you are getting closer to the home stretch. Looking really good Don. I'm panelling the bulkheads on Brazzera, dreaming of when I can start the outside hull planking. Best, Ian
- 653 replies
-
- 7
-
-
- trabakul
- marisstella
- (and 1 more)
-
Really nice work Don. Thanks for showing the step-by-step procedure, it will come in handy for me. I woke up to snow in Calgary as well and it seems like a pretty good reason to spend more time in the shipyard. Ian
- 653 replies
-
- 5
-
-
- trabakul
- marisstella
- (and 1 more)
-
Photos from Viking Ship Museum in Oslo Norway
Seventynet replied to Erik W's topic in Nautical/Naval History
Thanks for these Eric. After having completed a Dusek kit of the Gokstad I have a whole new appreciation for the art and craftsmanship of these Northmen. If you ever decide to build one of these ships check out some of the videos that are linked to recent posts of the Viking ship Drakken, particularly its building. I hope to see you back at your shipyard soon. Best, Ian -
Pringles and beer Bob.
-
My favorite too - great for big builds. Anyway keep the lovely job going. I've pulled up a chair. Ian
-
Bob, Oh no, I am hardly the one to argue this , except to say that my Victory manual calls it the 4 butt shift system - I can only surmise, if they are correct, that there are 4 shifting planks before the 5th one is again in alignment. Anyway, this is the pattern that I used as well. I guess maybe we can get the popcorn out and watch this debate play out. Best, Ian
-
Nice work Bob! That 4 butt shift pattern looks sweet. Ian
-
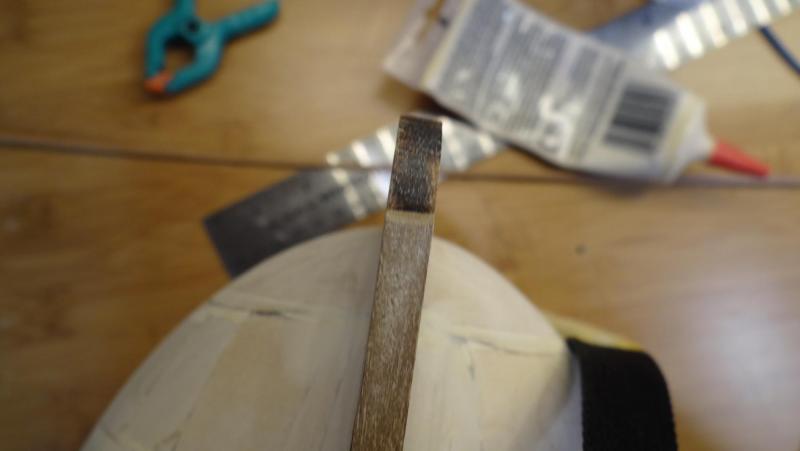
The getaway was great Don. We are stocked up on wine for the next several months! Funny that you should mention bending. I am currently pondering how to bend, edge bend and twist the first interior plank (number 18) to follow the supporting bilge stringer (17.1) at the bow...otherwise known as wood torture. . Ian
- 653 replies
-
- 5
-
-
- trabakul
- marisstella
- (and 1 more)
-
Don, it looks really, really good. I am sure I am going to have to borrow several of your approaches for my Brazzera build. Thanks for showing me the way. Ian
- 653 replies
-
- 6
-
-
- trabakul
- marisstella
- (and 1 more)
-
Thanks for checking out my build and the kind words Robin. I am enjoying your Greek Bireme project and thinking about putting that one on the list. Best, Ian
-
Thanks Don, I guess I should confess that I deviated from the plans slightly. I cracked the outer lip of the cap rail that is supposed to overhang the hull so I cut the overhang off. Then I realized that the rubbing rail might look odd so I didn't put that on either. I may do something later when I figure out what to do for oars. In any case this will sit for a while as the Admiral and I set off for Okanagan wine country this morning. When I get back it's on to the Brazerra. Cheers, Ian
-
Thanks for sharing Don. The fleet is growing fast. By the way I like the spread. I can see why it takes so much of your time. Best, Ian
- 62 replies
-
- 2
-
-
- batelina
- marisstella
- (and 1 more)
-
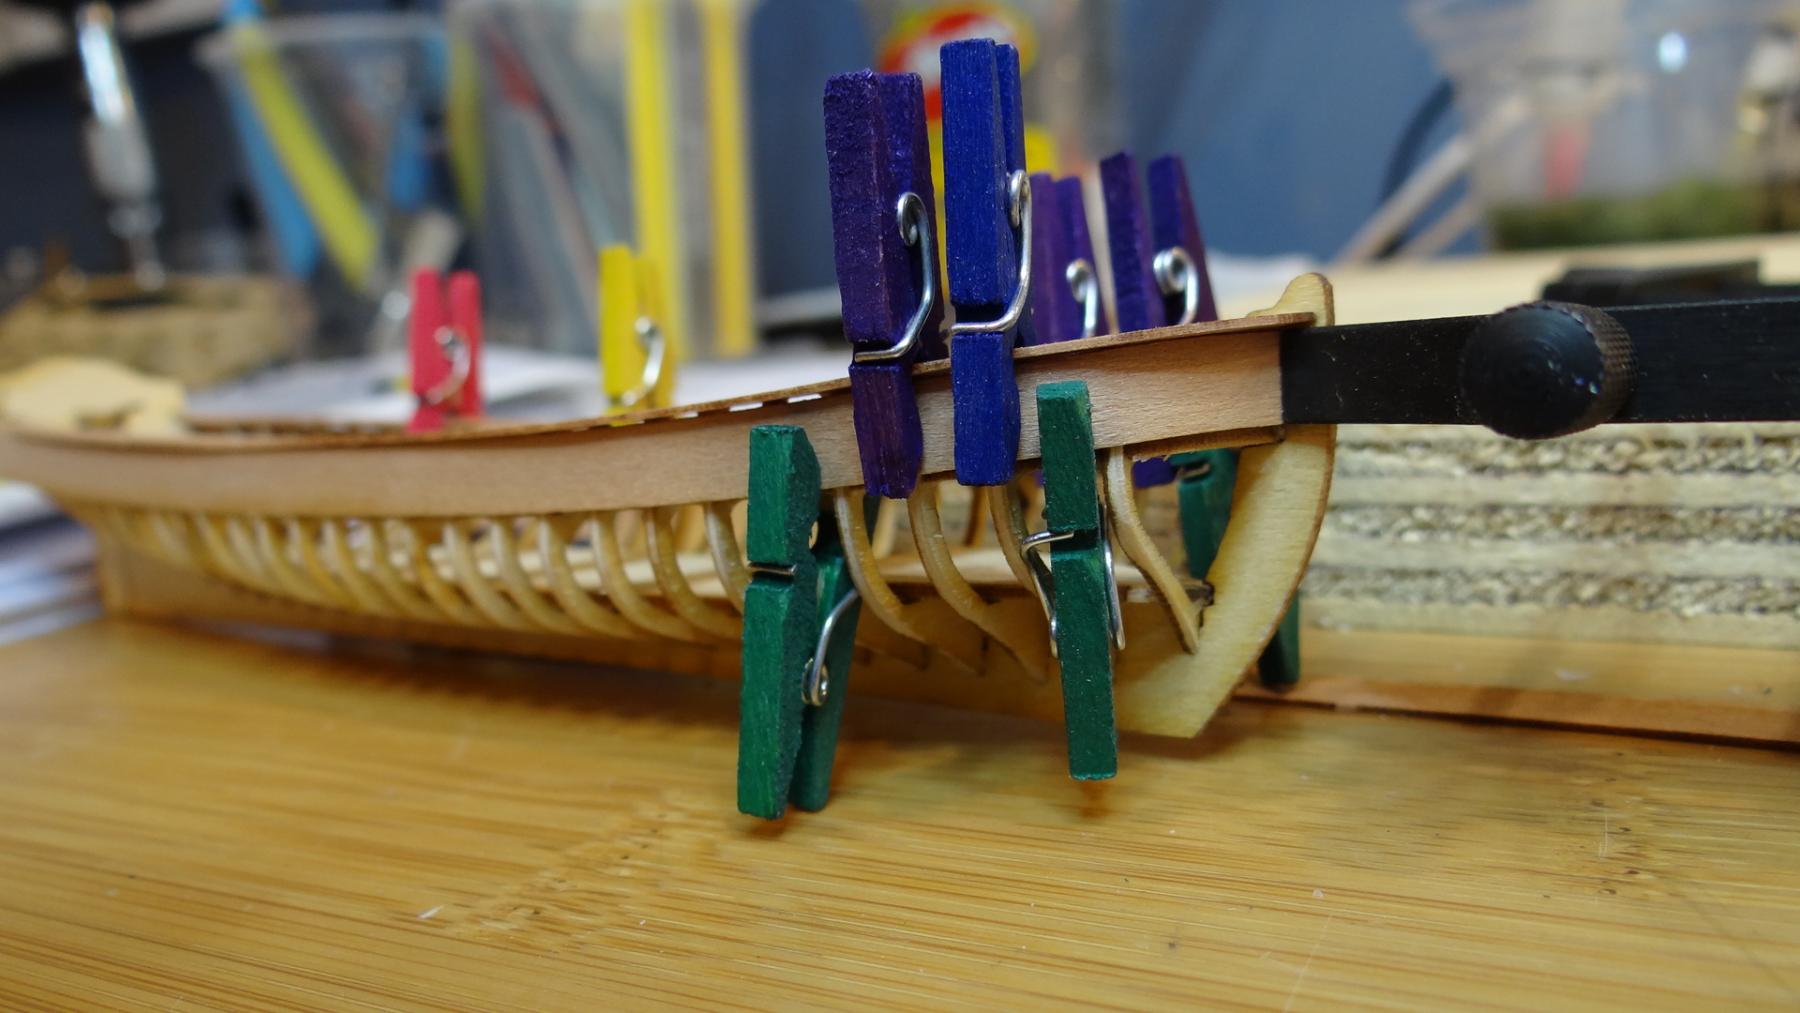
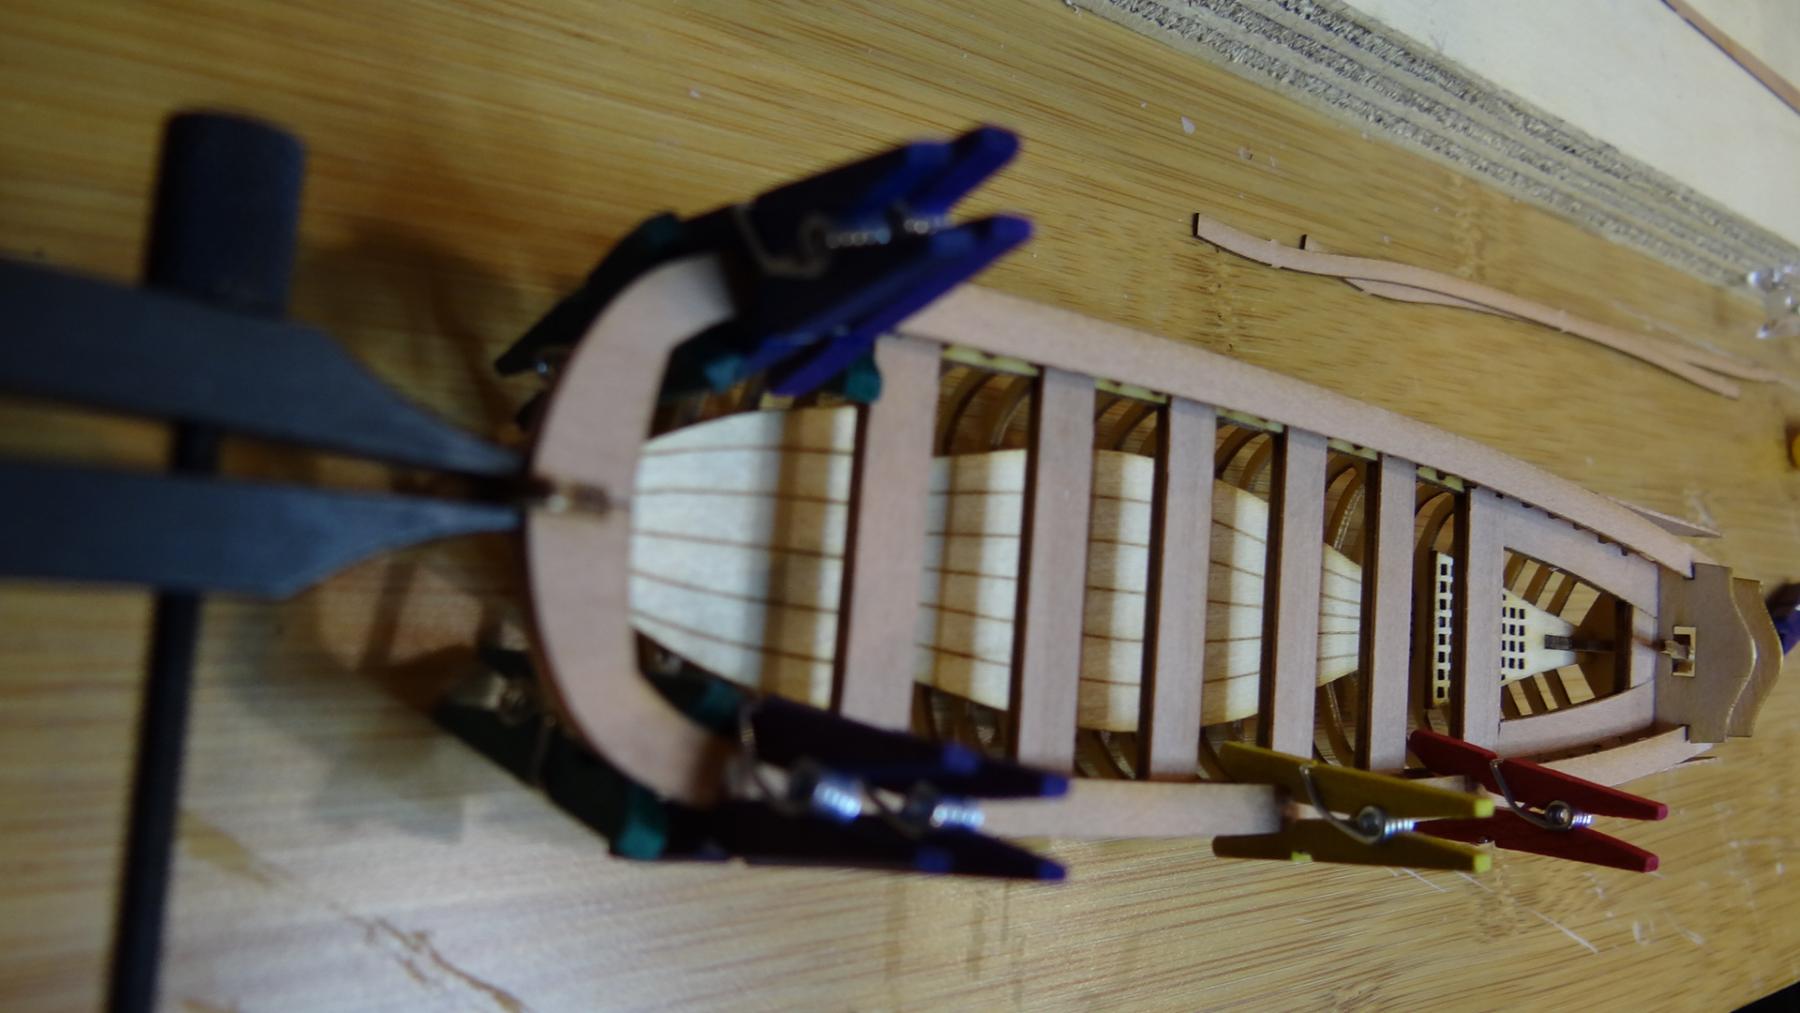
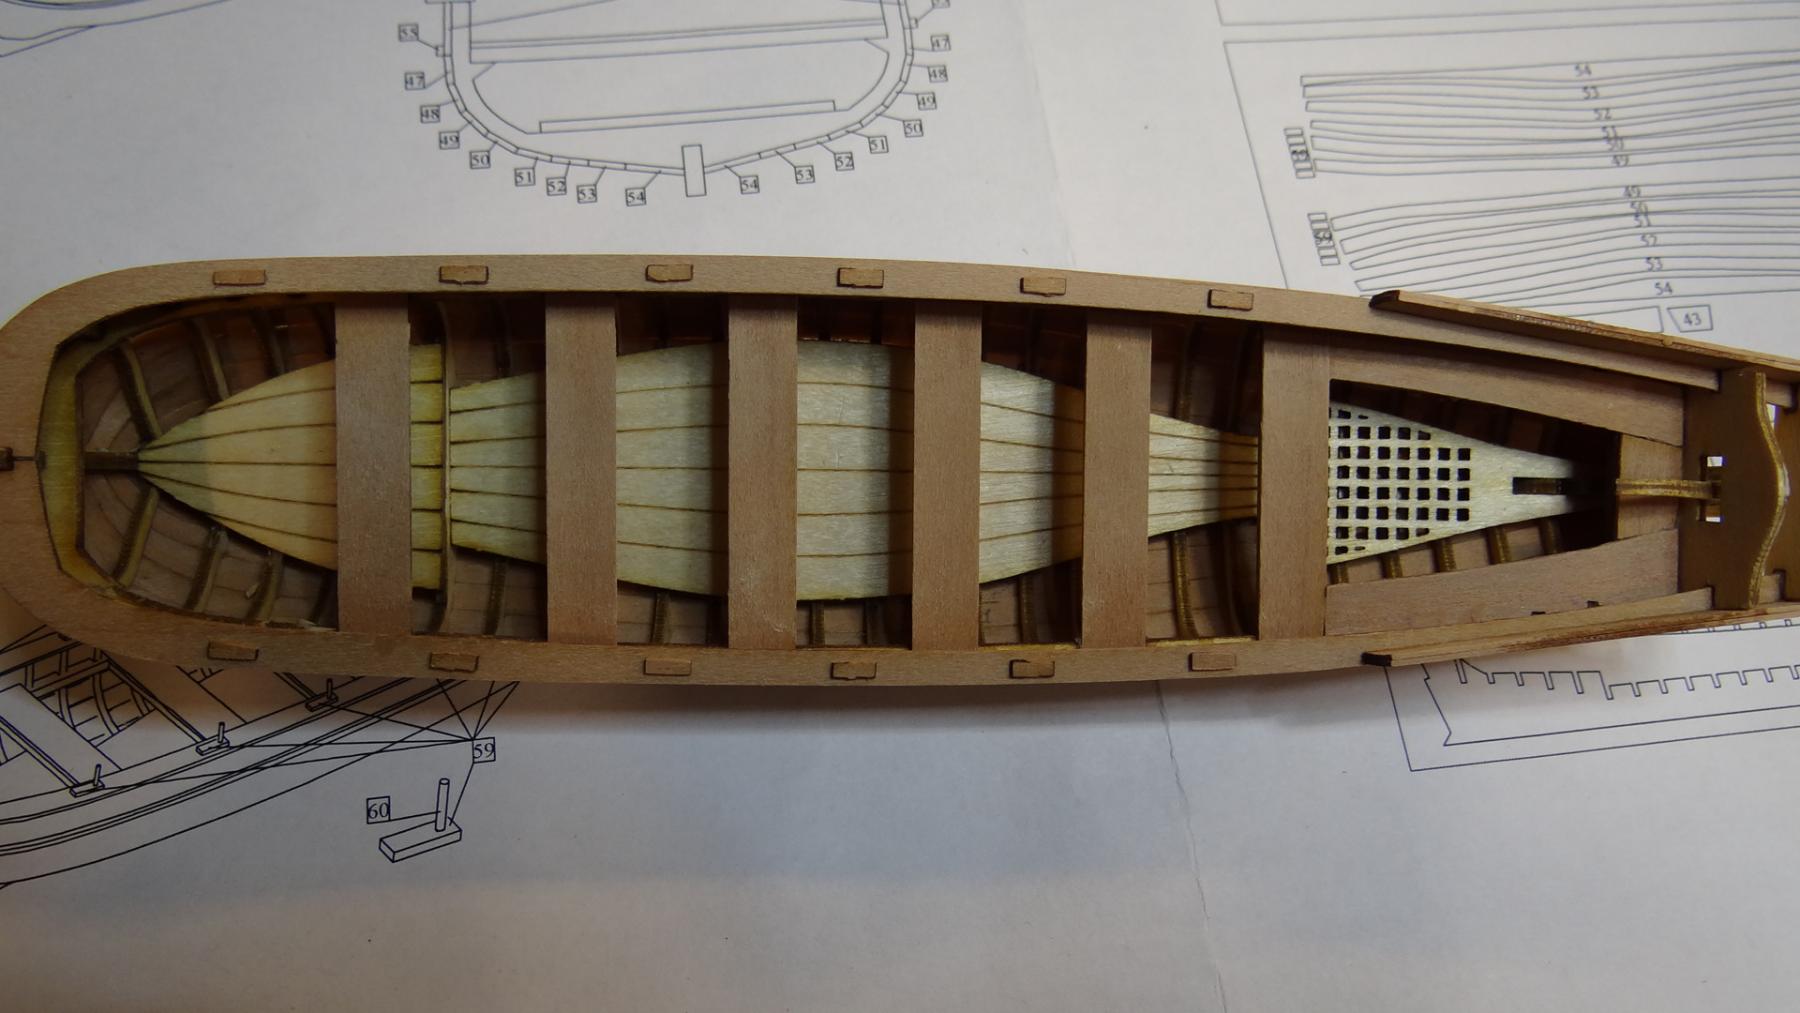
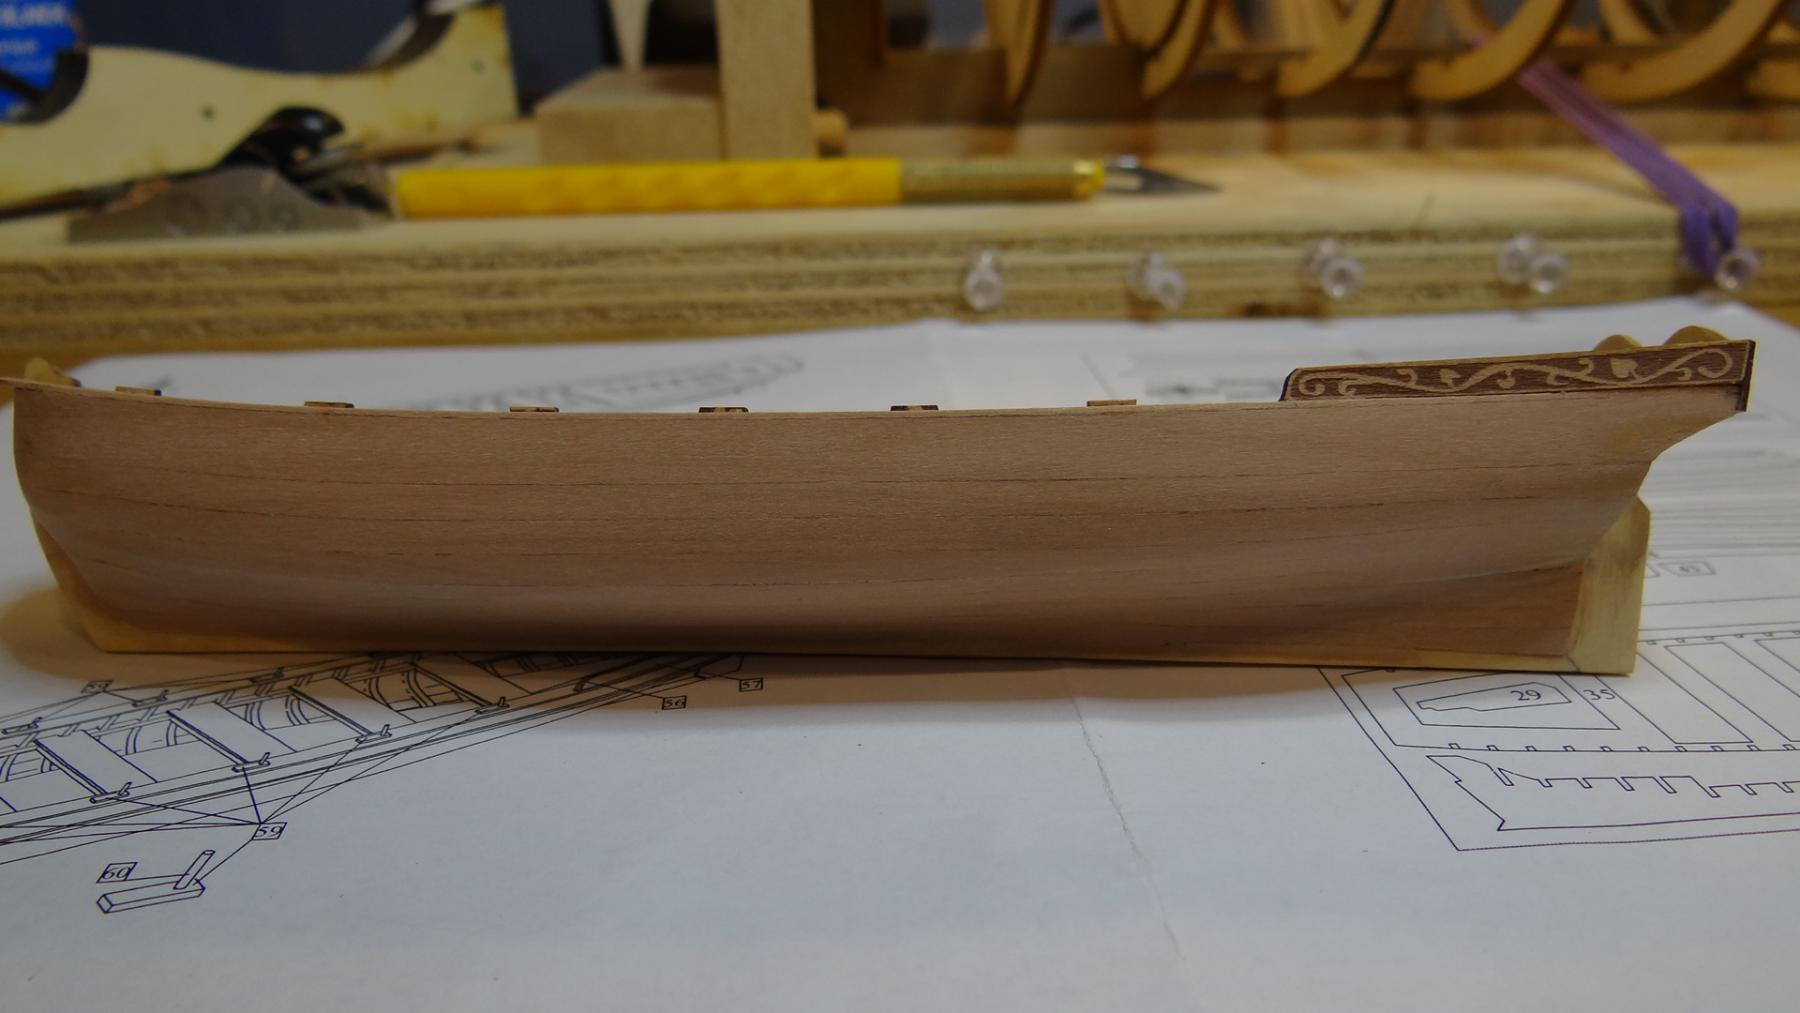
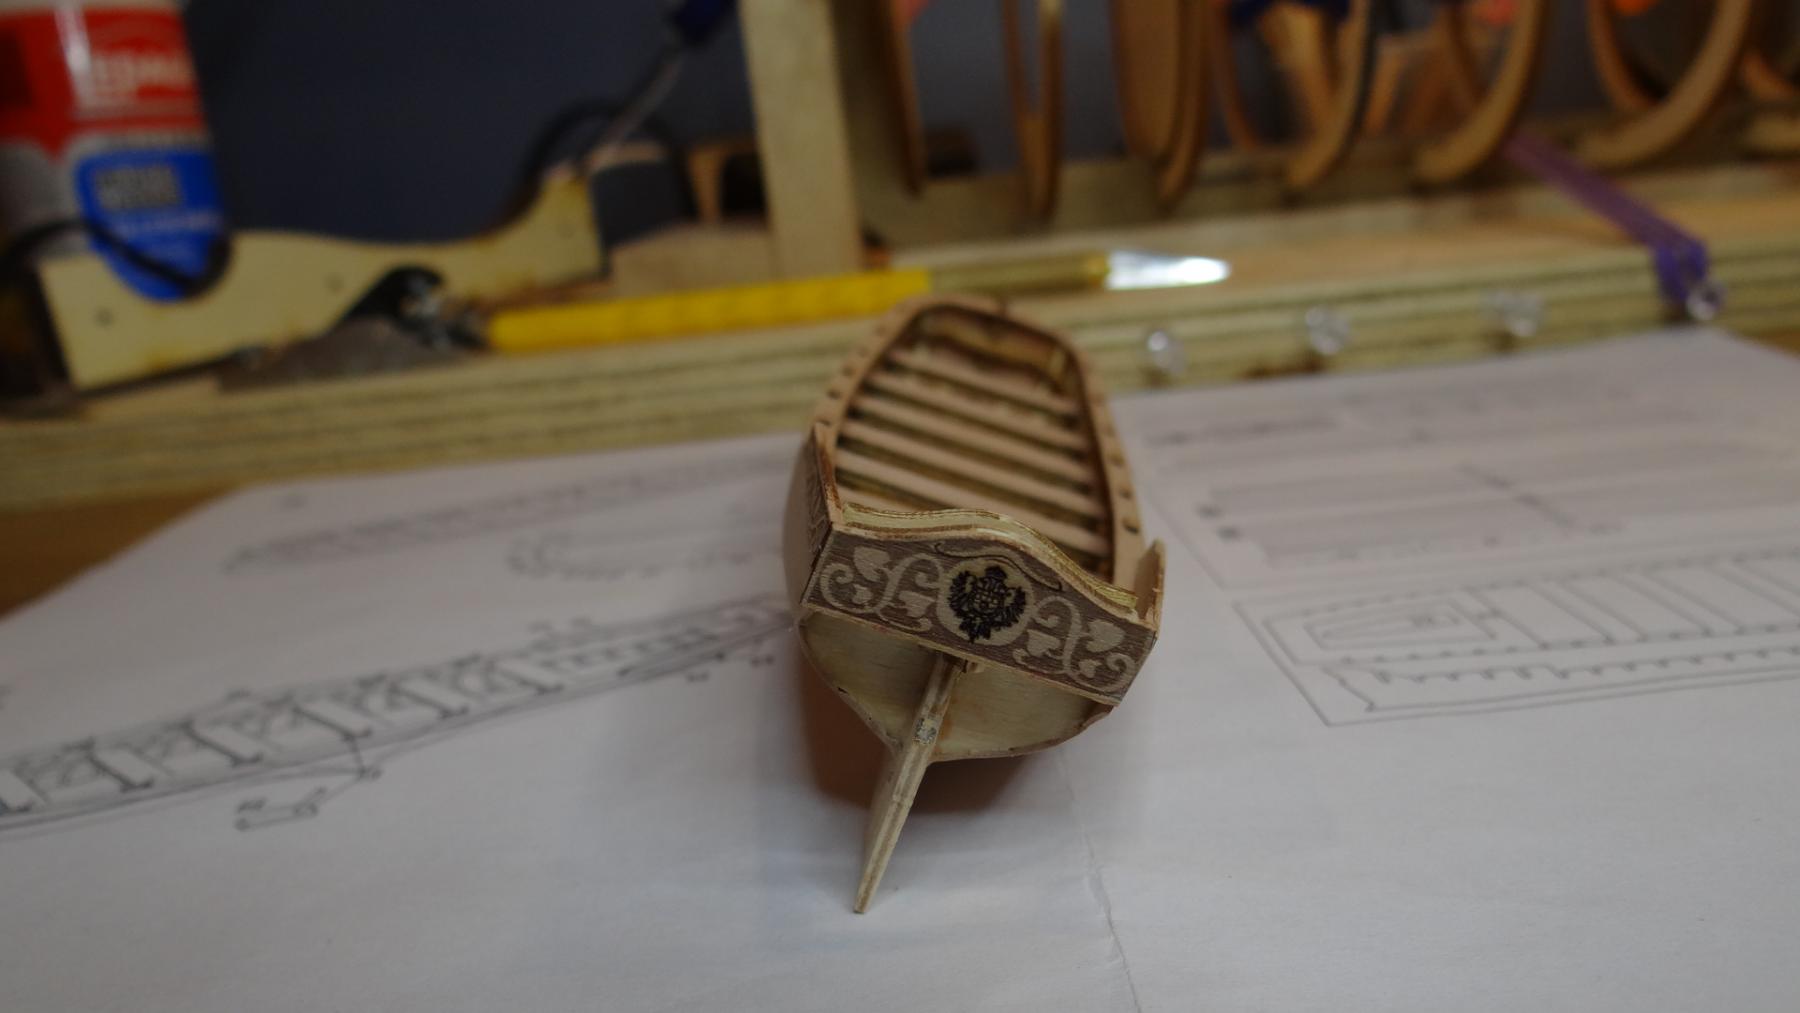
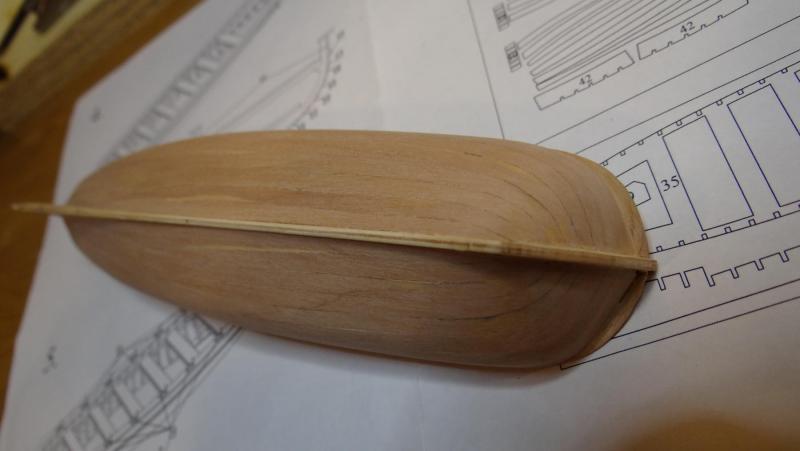
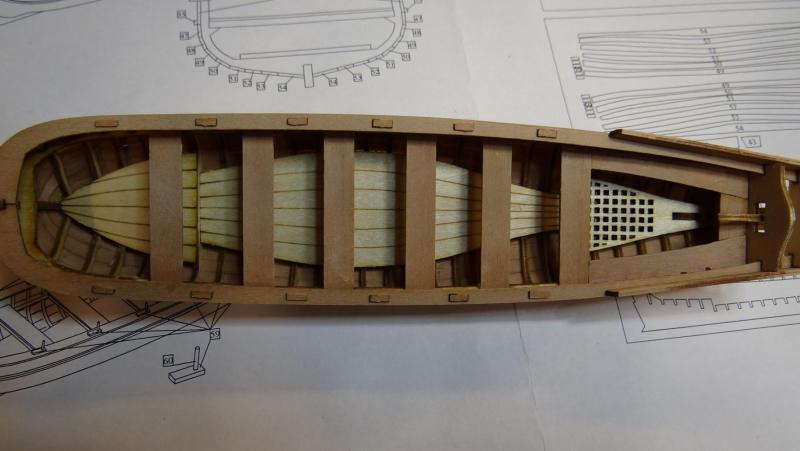
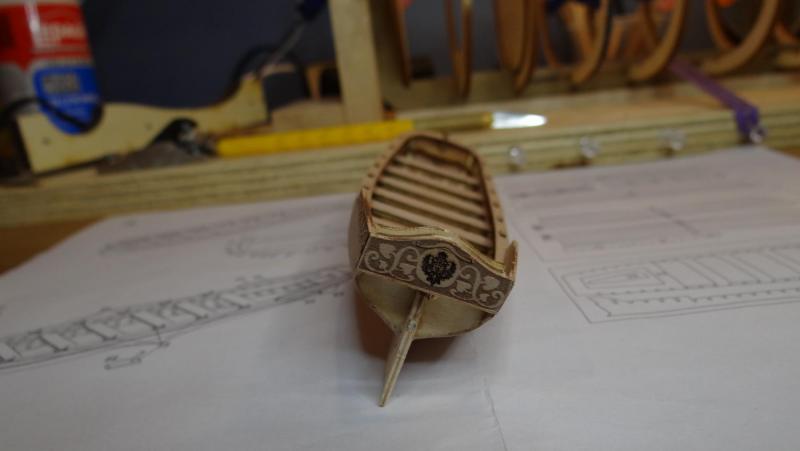
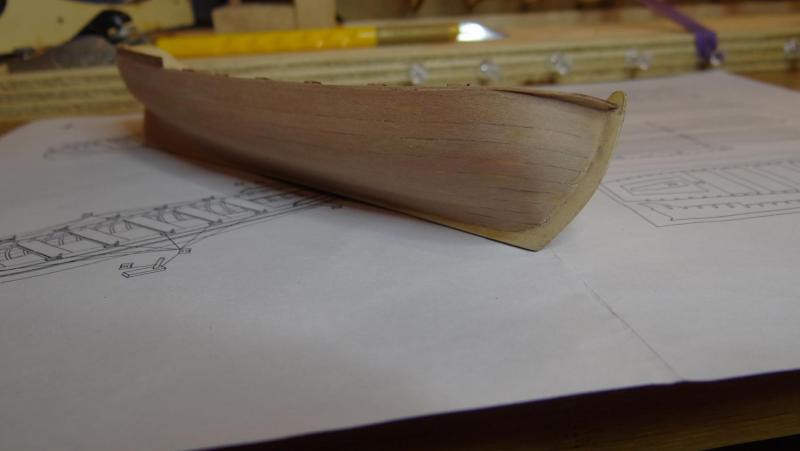
Good Day Shipmates, This is my one post build log of Daniel Dusek's Ship's Boat. This kit costs 5 Euros and is an incredibly worthwhile, fun build that takes somewhere in the vicinity of 20 to 30 hours to complete. I will hold off painting it until I decide which ship I decide to pair it with. Best, Ian


- 4 replies
-
- 7
-
-
- ships boat
- dusek
- (and 1 more)
-
Beautiful boat, fantastic job Don. It's hard to keep up with you! Ian
- 62 replies
-
- 1
-
-
- batelina
- marisstella
- (and 1 more)