Seventynet
-
Posts
797 -
Joined
-
Last visited
Content Type
Profiles
Forums
Gallery
Events
Everything posted by Seventynet
-
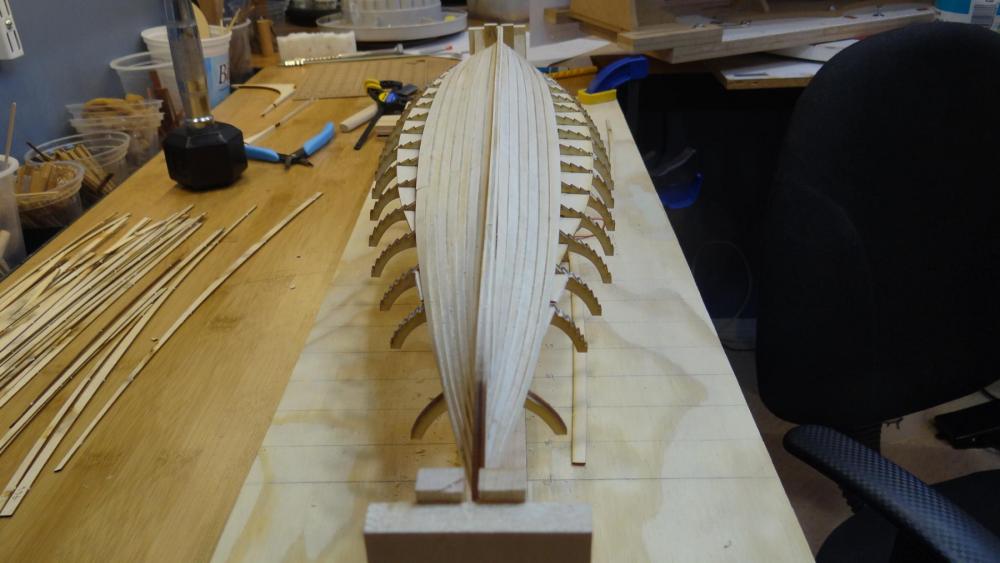
 Thanks Don. It's 61 cm (24 inches) long and 14 cm (5.5 inches) at the beam. You haven't posted in a while, you must be working up a storm. Regards, Ian
 -
Hi Bob, thanks a lot! I think I've done a good job of hiding the imperfections. I only really figured it out after I was more than half way done and then it was compromise the rest of the way. I would really like to do this one over but in the end I hope I can satisfy myself after lots of sanding and filler. We'll see. By the way I'm really enjoying your gun deck section. Regards, Ian
-
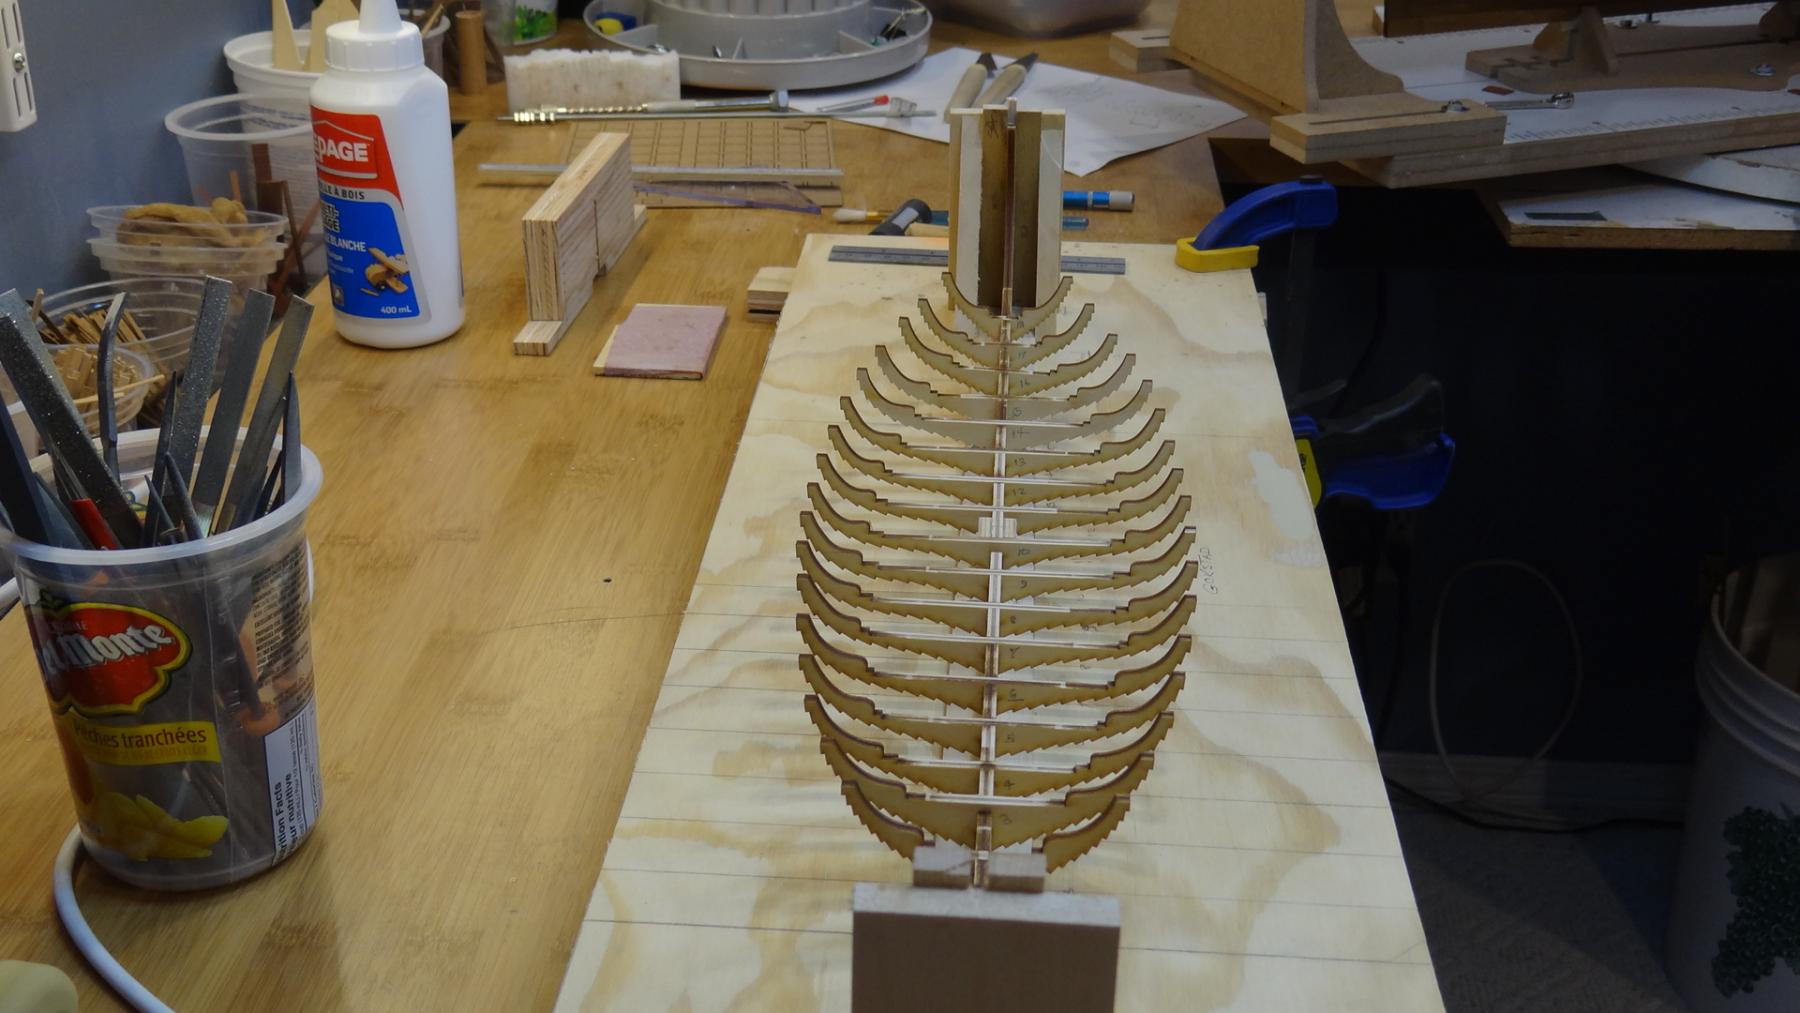
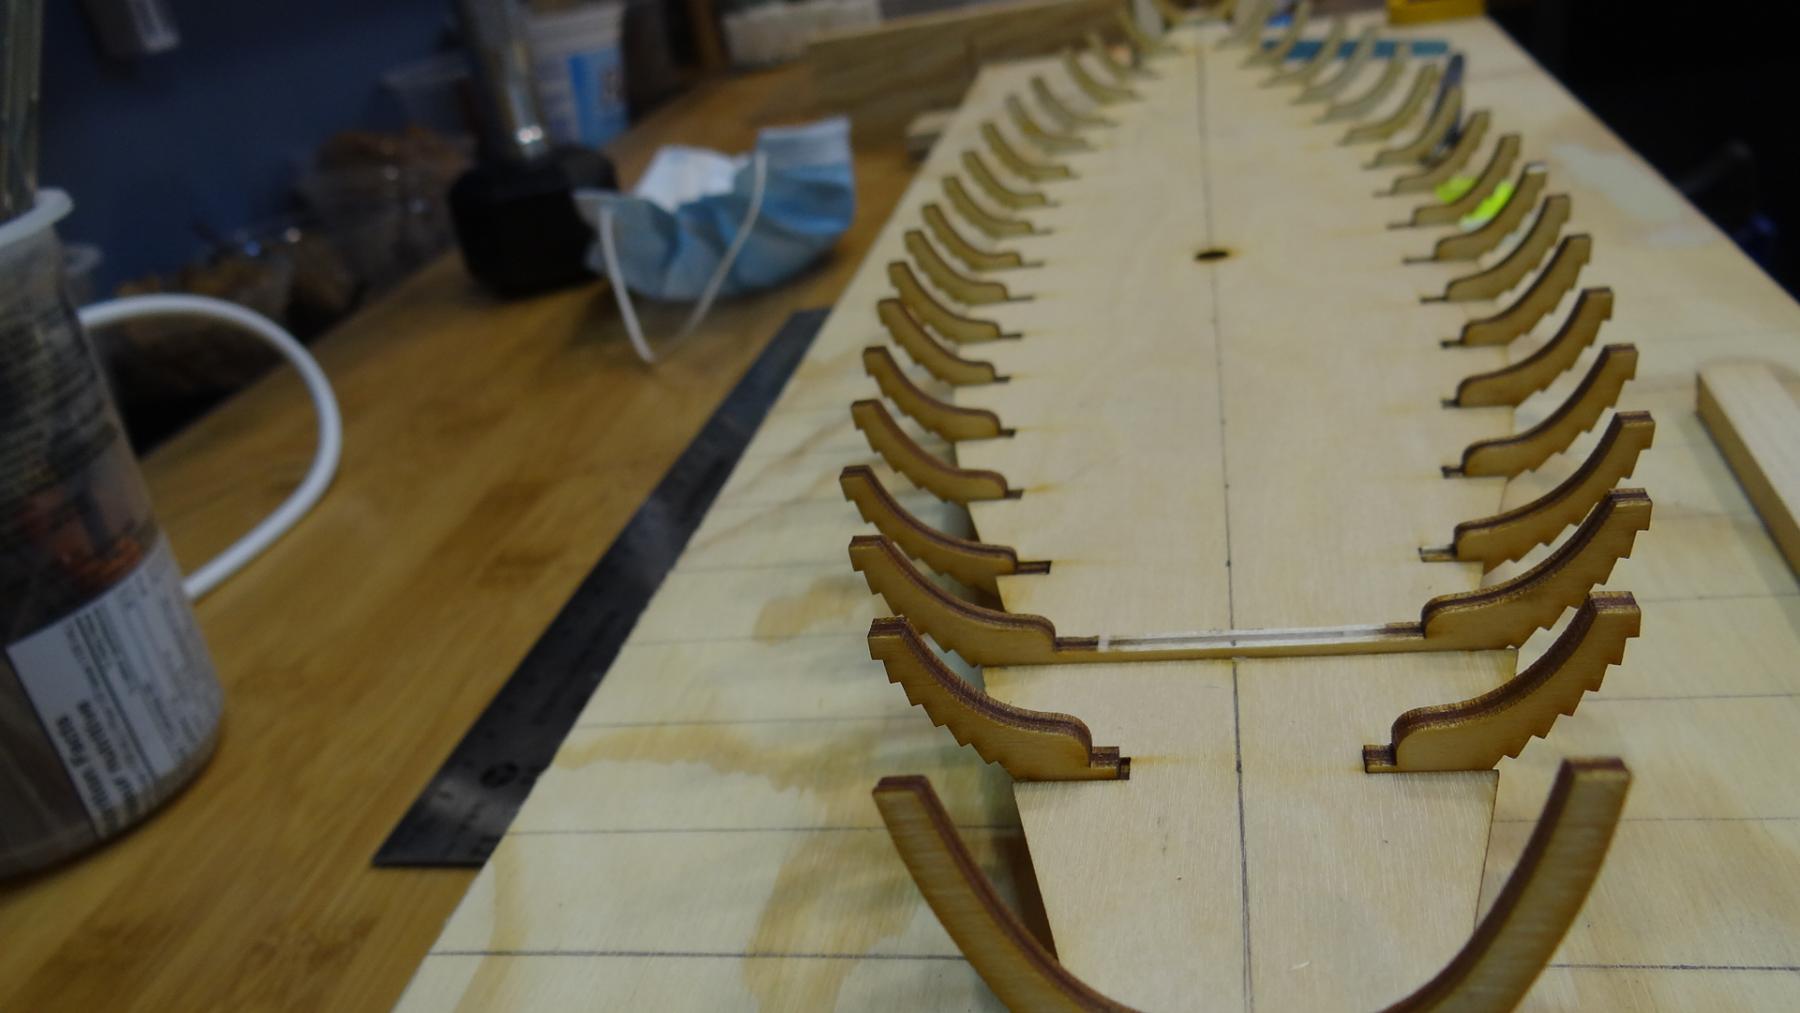
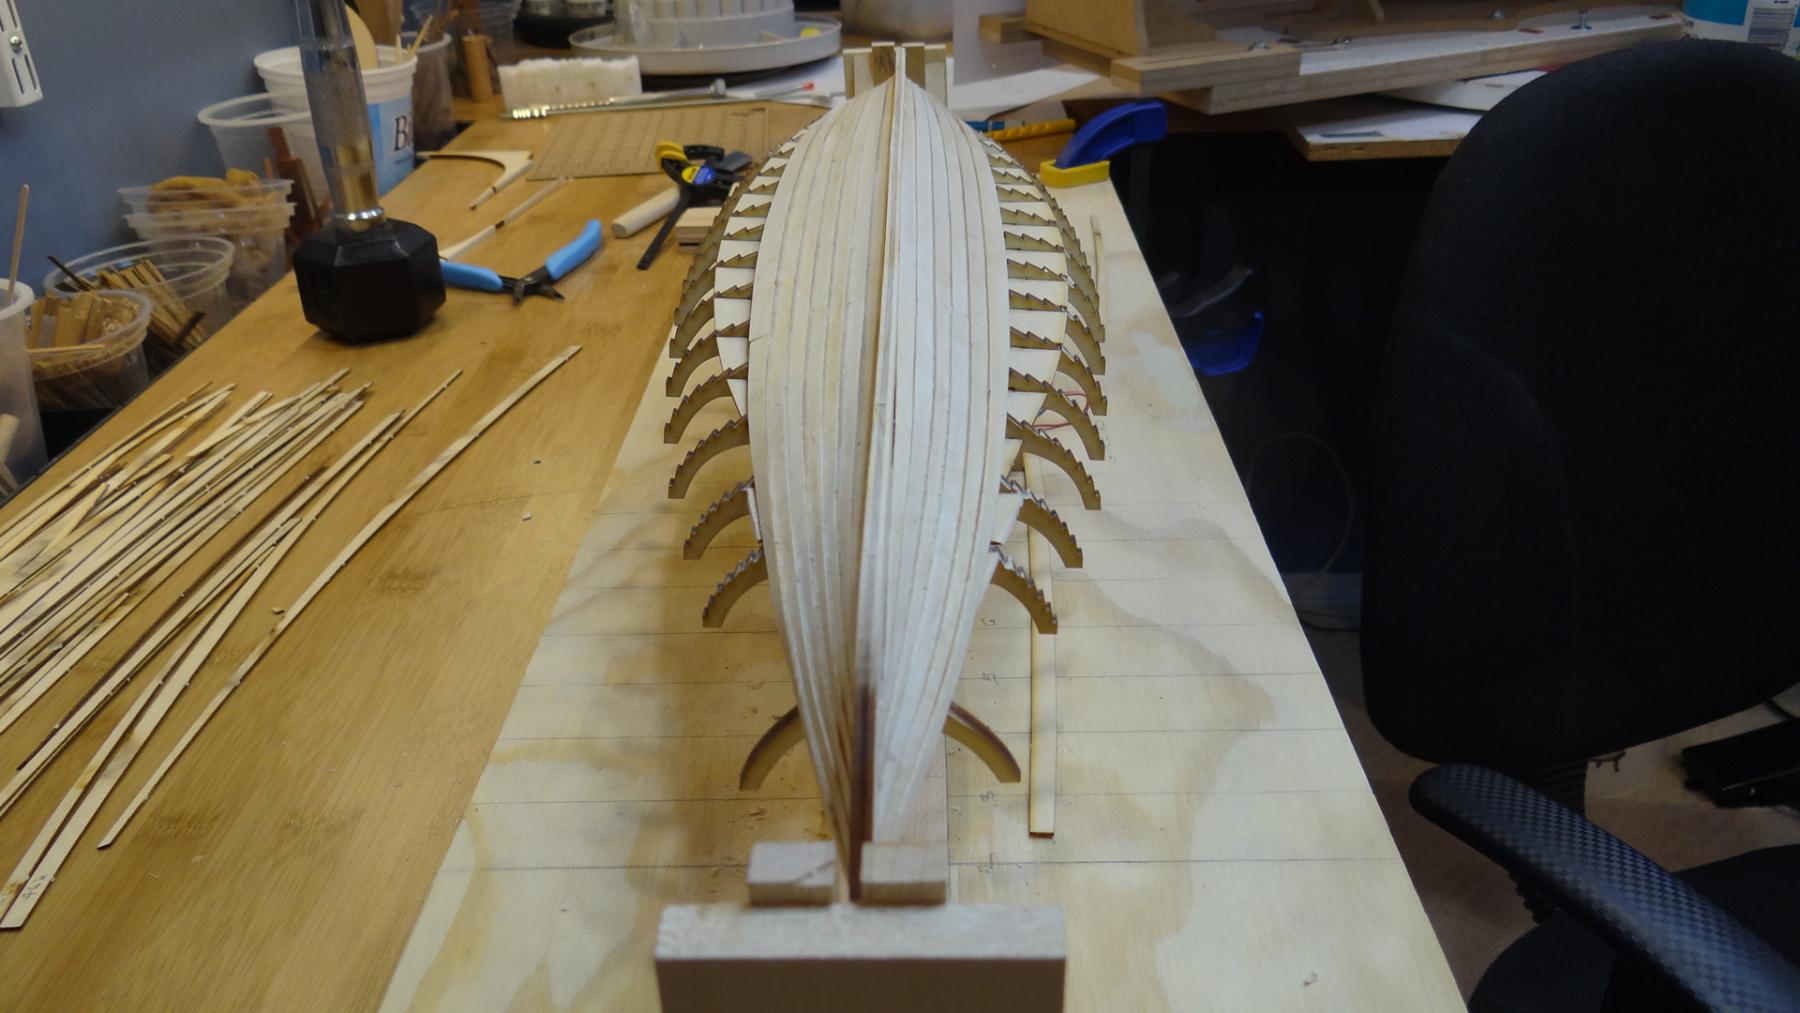
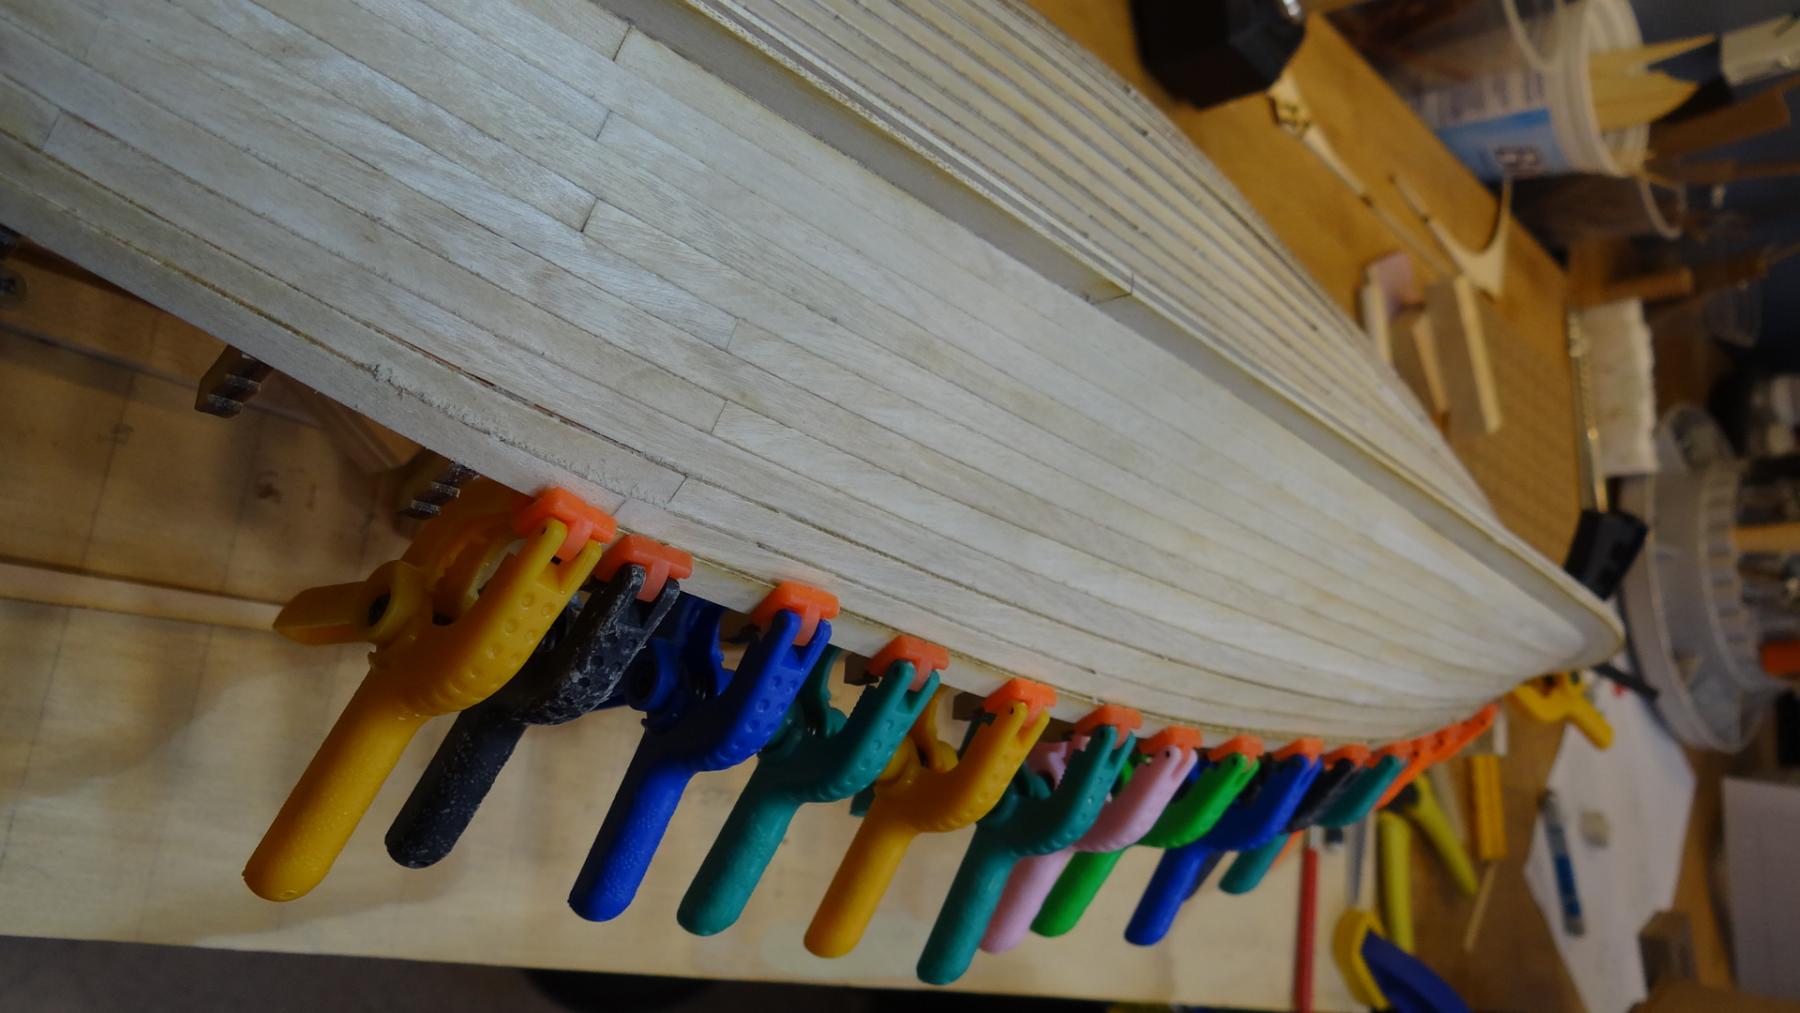
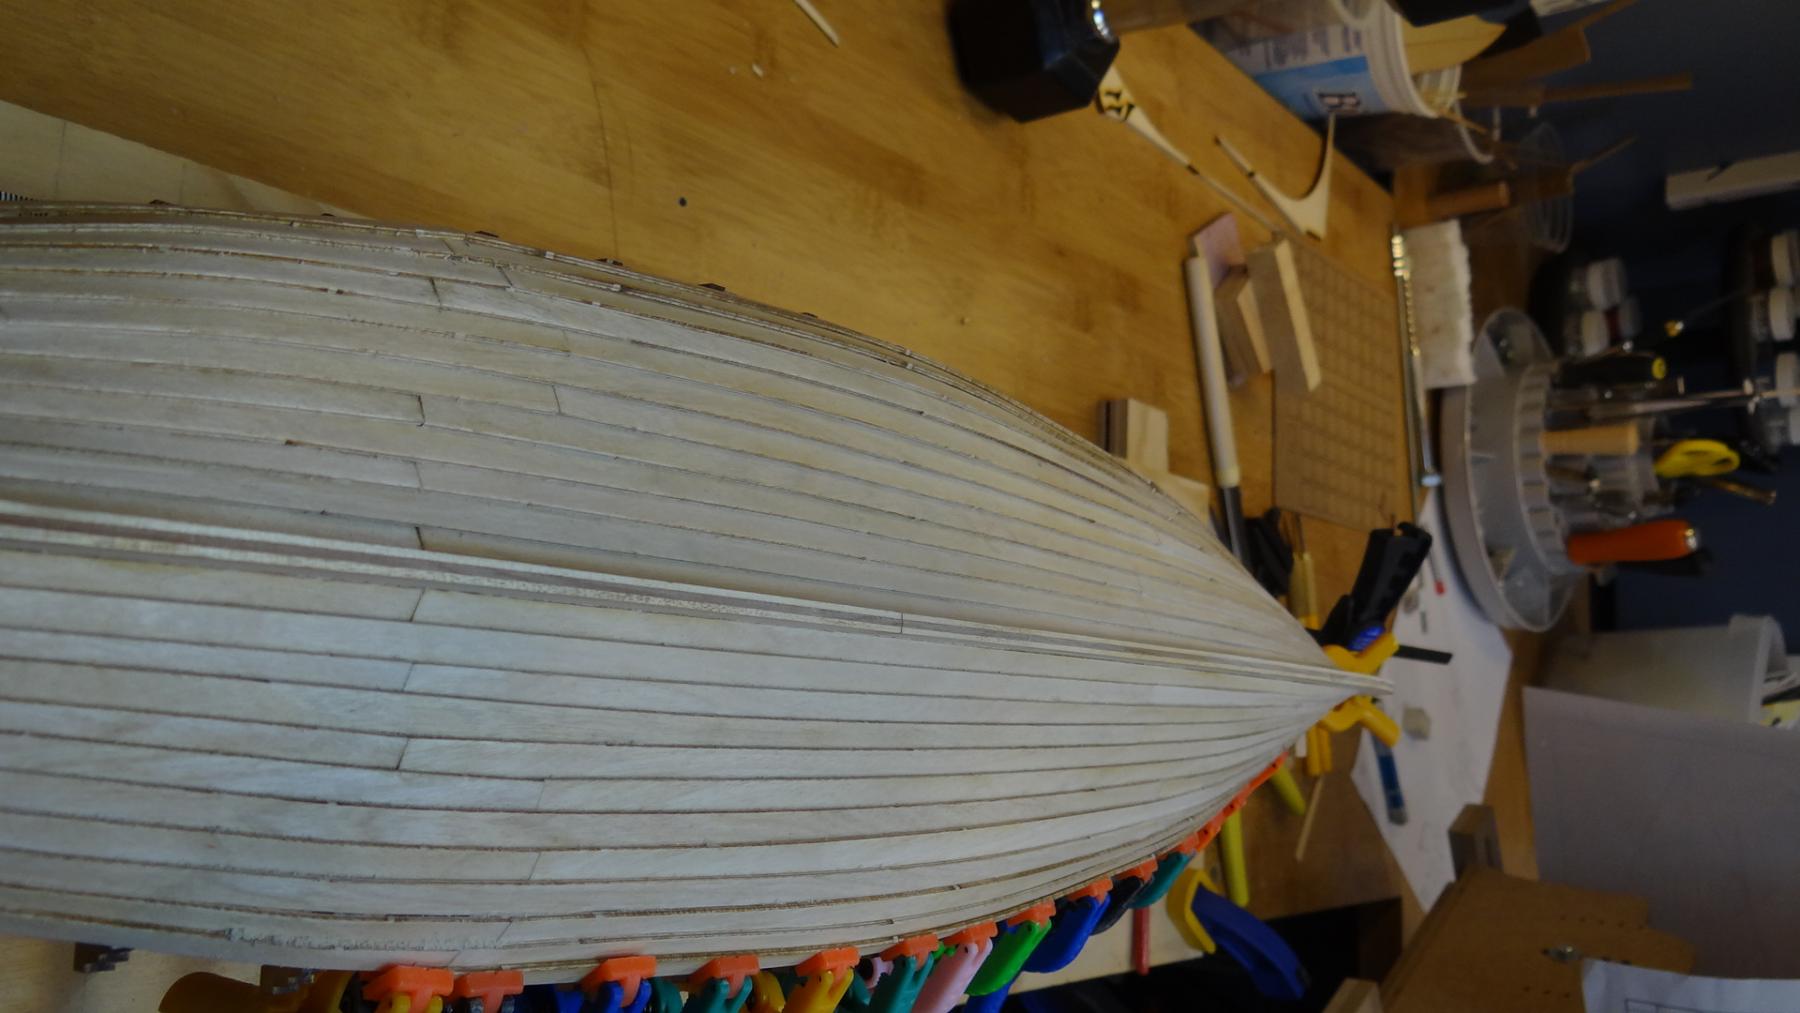
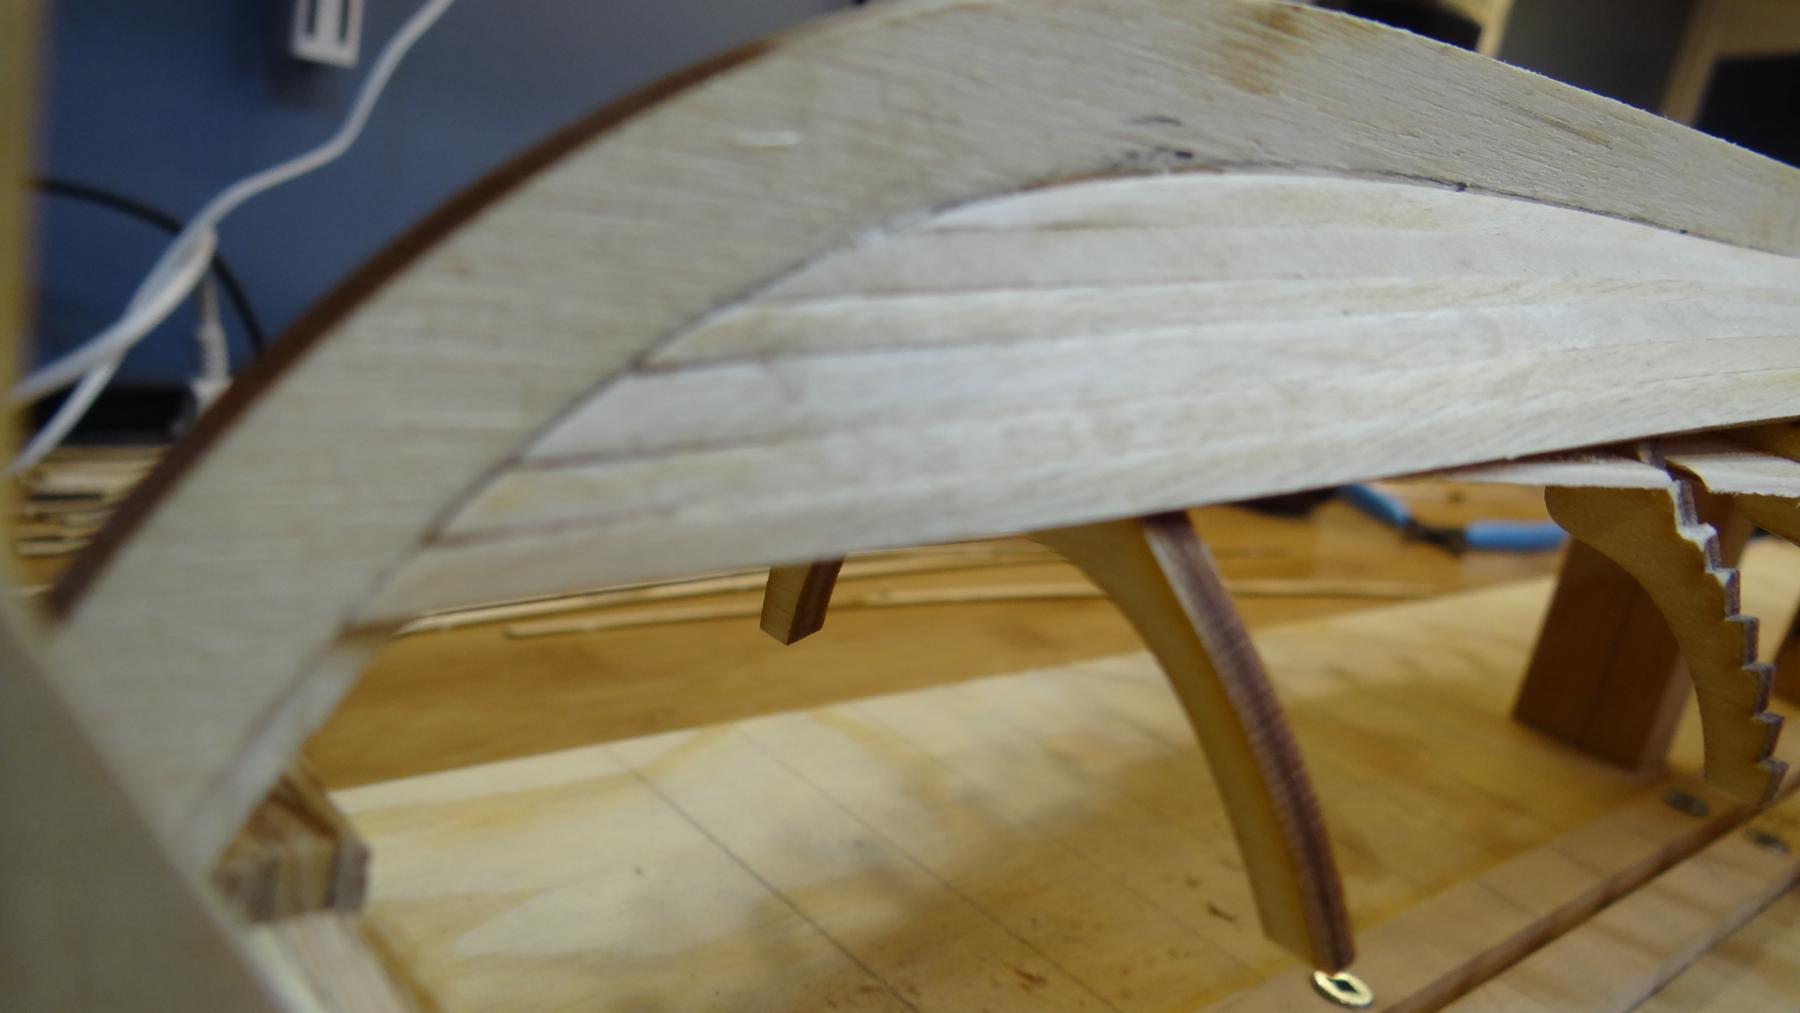
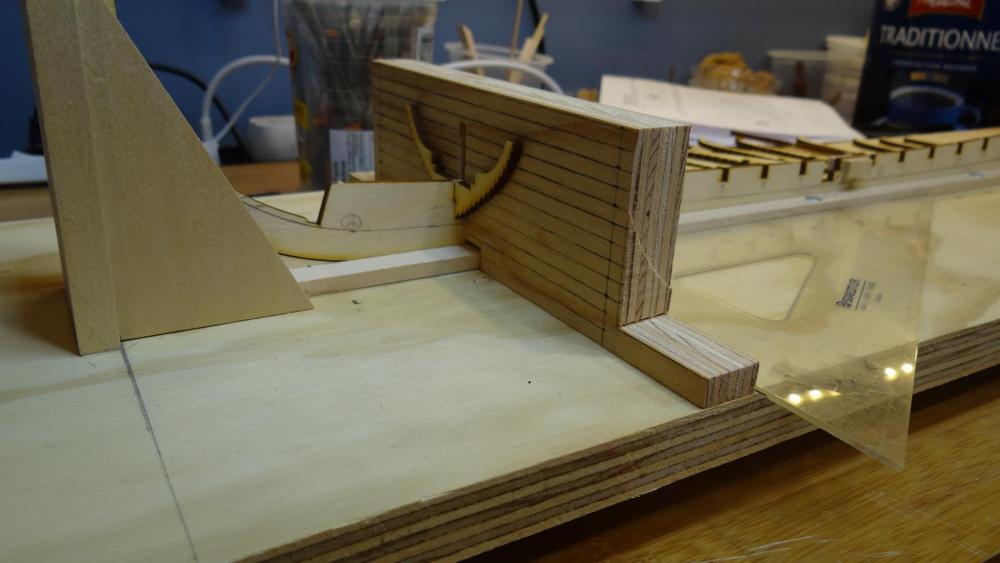
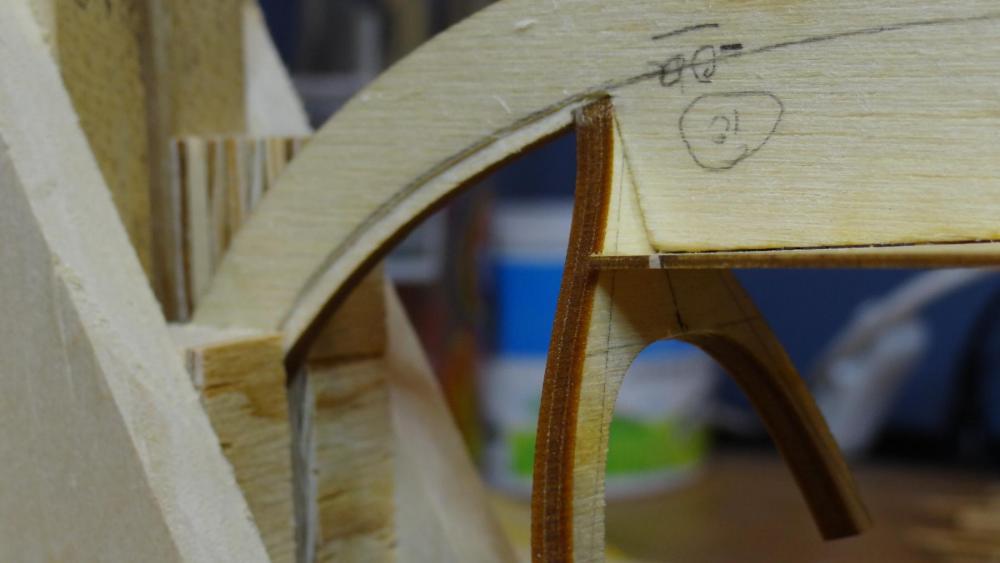
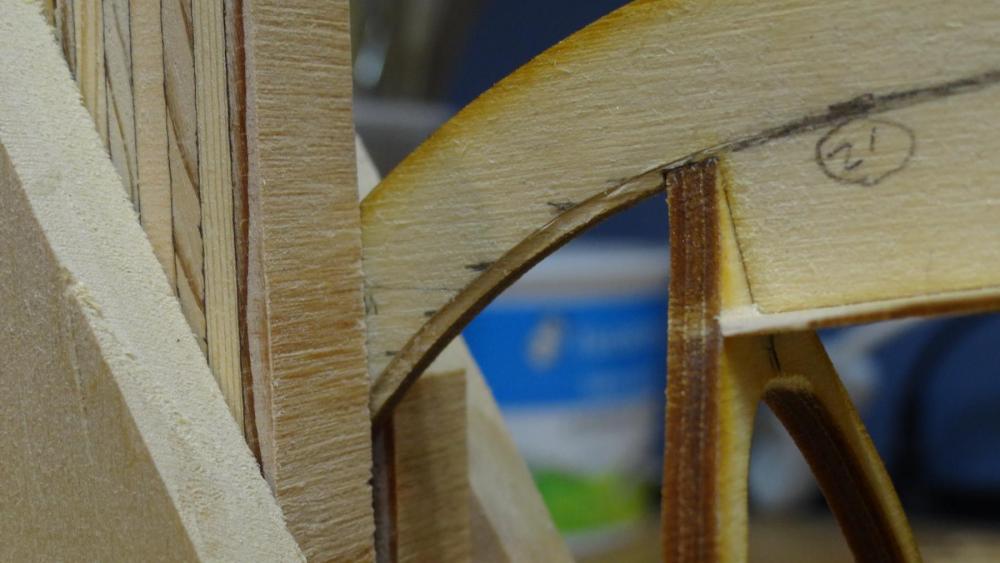
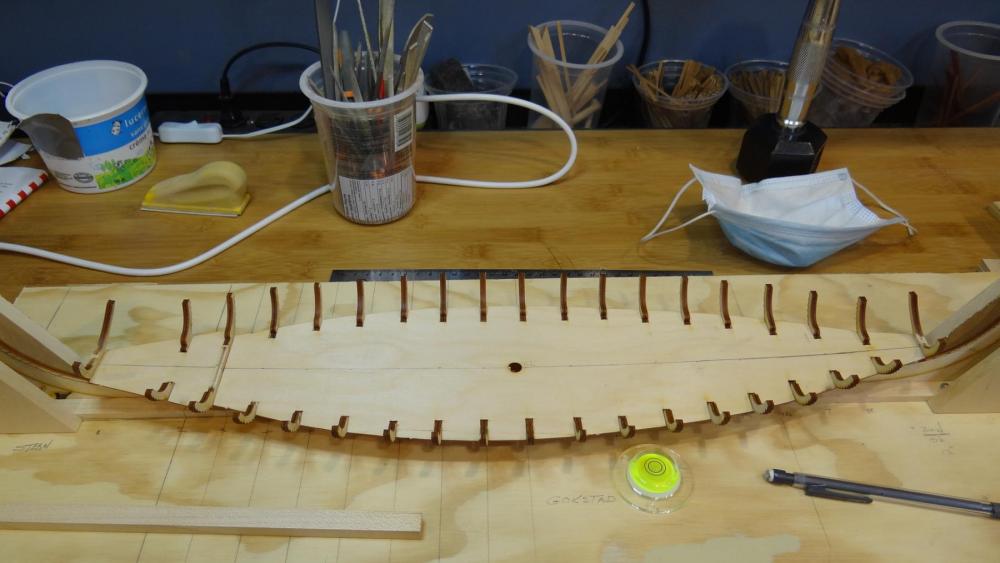
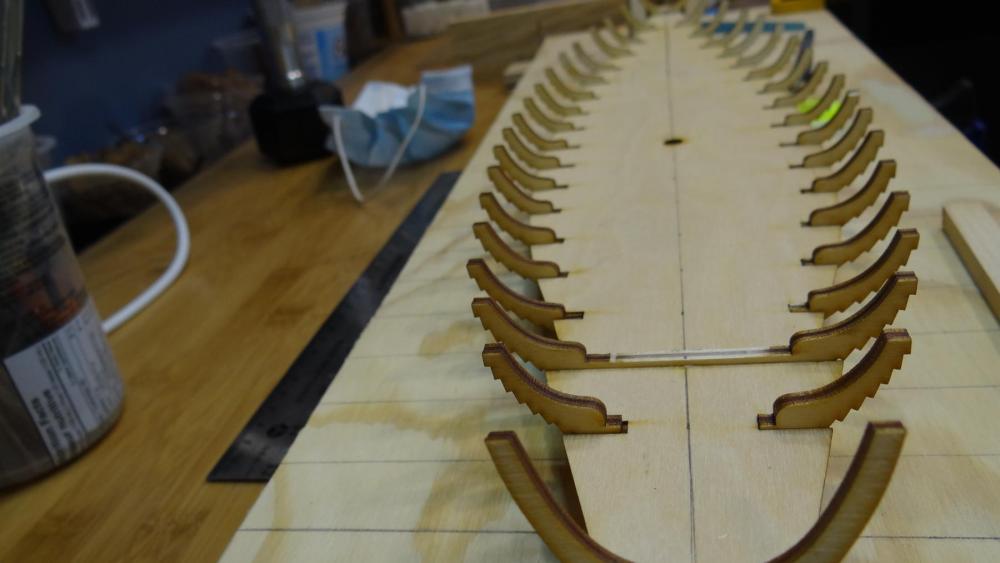
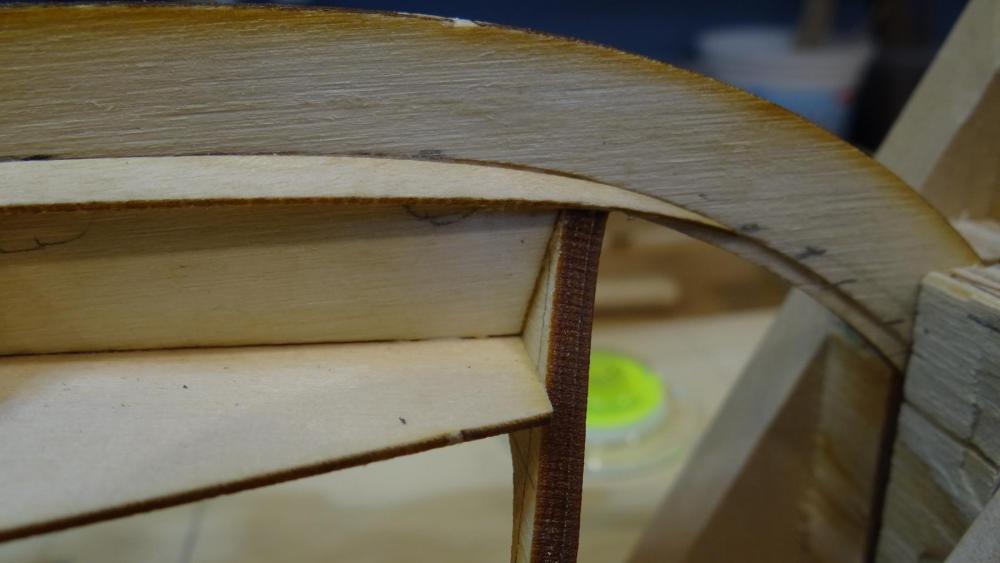
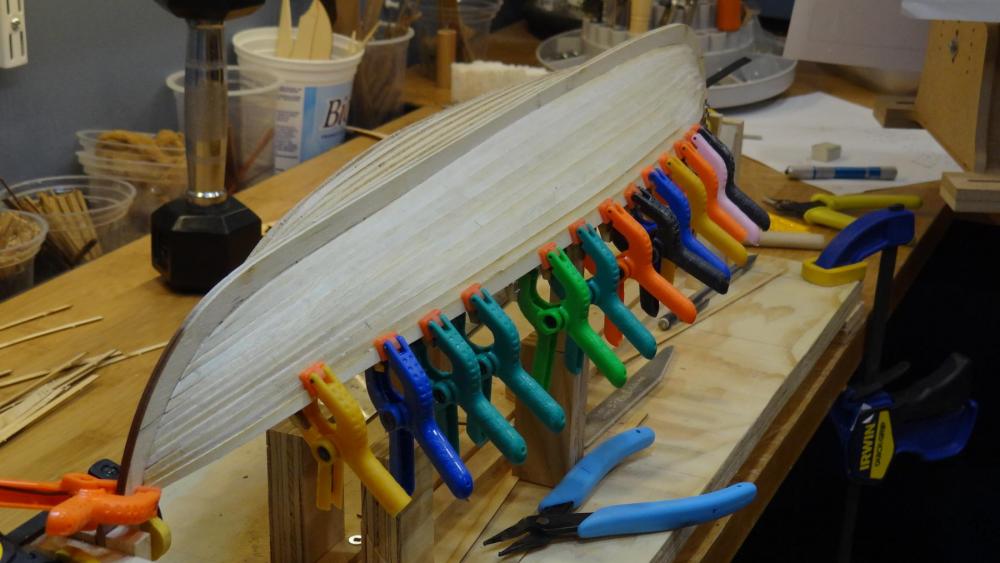
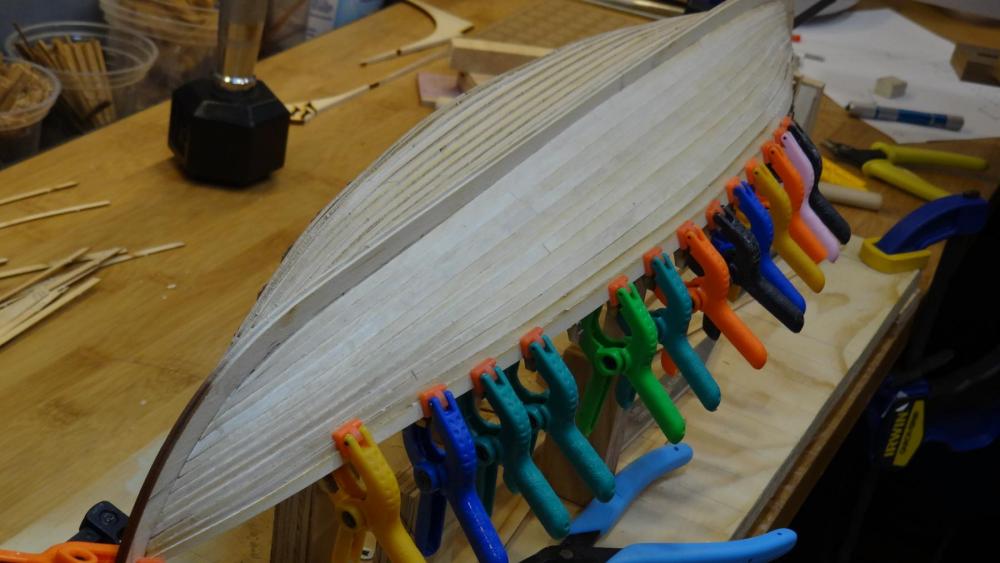
Greetings fellow Shipmates, This is my third kit; I have only finished one so far so it is fair to say I am a novice. I struggled as to whether I would start a build log for this nice little ship because the log that jack.aubrey has set up for this kit is exquisite - I also thought that all of my questions would be answered. However, I have learned some things that others might find useful after my stumblings. I won't do the kit contents review because jack has already covered that. I will bring you up to date with where I am at this point and leave a few learnings for others that may follow. The first thing I will say is that I feel Jack was right to take the approach he did with creating a build board and frame squaring device and carefully fitting and gluing all of the frames ahead of fitting the deck. The instructions suggest fitting the keel, frames and deck and then gluing. I do not understand how you could get the precise fitting that is required for this kit by taking this approach. I copied jack's approach with some modifications. After I squared and glued all frames I fitted and glued in the deck. If I were to do it again I don't think I would have installed the deck at this stage but I was after a rigid framework. Probably not a big deal. I spent quite a bit of time measuring up the ship dimensions from the plans. From that you will notice that the bow is 5 mm higher than the stern and that is why it is critically important to mark all of the planks before they are removed with the correct orientation (marked with an arrow on the boards). also be careful to note which is the bow and which is the stern - it is not so obvious as you may think. It is also very important to add tick marks to the stem and stern post to guide the planks. You need to decide how to end the planks at the bow and stern. I cut a rabet and ended the planks so that they were flush and not clinker for the last centimeter or so. I paid for that approach by not realizing that this would cause the bow and stern planks to creep up higher than planned and screw-up the fit of the otherwise perfectly pre-spiled planks. I figured this out after I half completed the planking and compensated by tapering the ends beyond what one would otherwise have to do. If I had taken my own advice I would have figured this out right away by watching the tick marks. In any case more guidance for this aspect would be very welcome. I did not do a proper job of each of the things I mentioned above and I paid for it. I have no reason to think that this kit is not produced with a very high level of precision and that if you pay close attention to squaring and getting the dimensions right, everything will fit like a glove. I have not shown these screw-ups as prominently as I could so if anyone wants the dirty detailed pictures just let me know. Now that much of the hull is planked I am really seeing the beauty of this ship. Thank you for looking in - I would appreciate any and all comments. Thanks, Ian Modified frame squarer (after jack): Frames assembled and glued: Rabets and limited plank ticks (should have used these everywhere): The rest:


- 25 replies
-
- 11
-

-
Hi Jack, I just want to say what a beautiful job you are doing on the Gokstad. I have been building the same kit for the last week and I find I am constantly turning to your log to see how you've done things. So I really appreciate your step by step details. I hope you also show the rest of your plexiglass showcase construction as I have a few I need to build. One area that slows me down is how to finish the planks at the bow and stern. When you look at the reconstructed real ship it is evident that they carried the clinker plank overlap right to the ends. I think that's how the clinker system is supposed to work. So far (first 4 planks including the garboard) I am ending the overlap a few centimeters before terminating the planks so that they are edge to edge as they seat into a rabet that I cut. The way the final ribs are cut doesn't seem to invite the planks overlapping at the ends. Anyway beautiful job! Regards, Ian
- 170 replies
-
- 1
-
-
- gokstad
- dusek ship kits
- (and 1 more)
-
Beautiful precise work Heinz. You're coming along nicely. Regards, Ian
-
Forty-five mm sounds totally out of the question so you've answered my question right there. By the way I don't see anything wrong with the way you've done it - it looks really good. I just remember going through this with my Victory but I don't think that has nearly the bluff bow of the Endeavour. Ian
- 653 replies
-
- 5
-
-
- trabakul
- marisstella
- (and 1 more)
-
Great job Don and thanks for the step-by-step pictures. Love the wood! Surely you can't paint that? Just for my future reference when I start my Brazzera, did you reject the idea of putting the stealers further up the stem so that you might get a more uniform horizontal run of the strakes? One disadvantage of doing what I'm asking of course would likely be more spiling. Regards, Ian
- 653 replies
-
- 6
-
-
- trabakul
- marisstella
- (and 1 more)
-
Outstanding work and a real pleasure to behold. Ian
-
Thank you very much Marcus. I would not have even known about this kit without seeing yours, so I am very greatful to you. I found the line supplied with the kit to be very difficult to work with notwithstanding this being the first time I have done any rigging. Soaking it in a 50% PVA mix did not work well for me. I will re-rig the model when I get some new line. A proper set of sails will look beautiful on your boat. Best Regards, Ian
-
Good to see you back at it. Your paint job looks very good to me Marcus. Best Regards, Ian
- 165 replies
-
- 5
-
-
- cape cod catboat
- Finished
- (and 1 more)
-
Wonderful job cathead. It looks like it is gently heeling to port on a smooth broad reach. Best, Ian
- 64 replies
-
- 4
-
-
- 18th century longboat
- model shipways
- (and 1 more)
-
Hi Heinz, Thanks for looking in and giving me your usual honest and I might say appropriate comments. They are much appreciated. I have the same concern but, aside from the teak for the upper counter which I am not that worried about contrasting (it is very close to the hull planking colour), I wanted to use the walnut to match the walnut I used for the wales. I will first have to put poly on the walnut to see what it looks like. Now I know I've been all over the place on this and also subject to your opinion on making the wales planking fit too tightly together, but I am now considering painting the wales black, in which case the lower counter would also be painted black. If I went that way I'd have to see whether the upper counter would also have to be painted. Anyway your concern is noted and it will be important to how I move forward. Best, Ian
- 191 replies
-
- 3
-
-
- victory
- caldercraft
- (and 1 more)
-
Hi Zoltan, I just used PVA. I am not sure I detected a waxy character but in any case I spiled the teak planks so that should, hopefully will, mitigate any internal stress that might otherwise give the glue a hard time. Wow you learn something new everyday! Ian
- 191 replies
-
- 4
-
-
- victory
- caldercraft
- (and 1 more)
-
Hi Mike, thanks and good advice. I will try that approach. Don, I've never worked with teak before either and I'm not sure wood that old can be representative of the real thing. This wood is very open grained, nice to sand and somewhat soft. Ian
- 191 replies
-
- 3
-
-
- victory
- caldercraft
- (and 1 more)
-
Don I can tell that's going to be a beautiful hull. A few nicely planned stealers adds interest as Dave says. Gee you sure know how to motor along. Ian
- 653 replies
-
- 9
-
-
- trabakul
- marisstella
- (and 1 more)
-
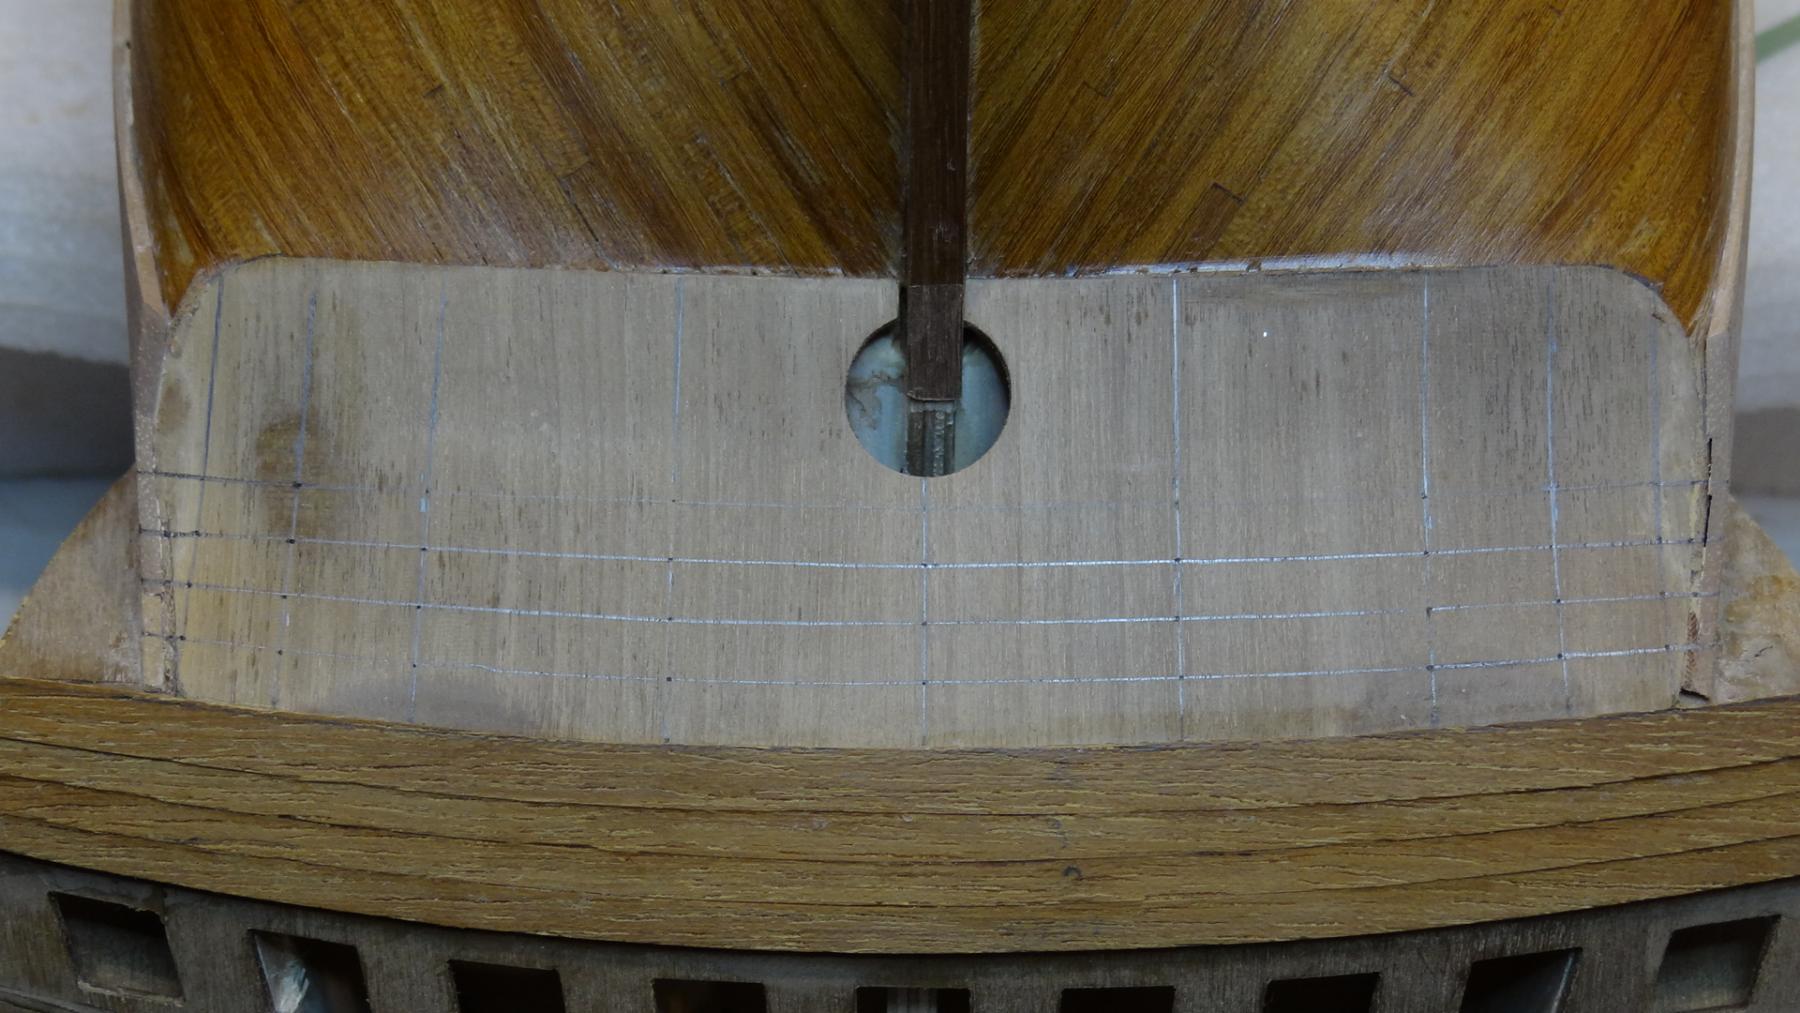
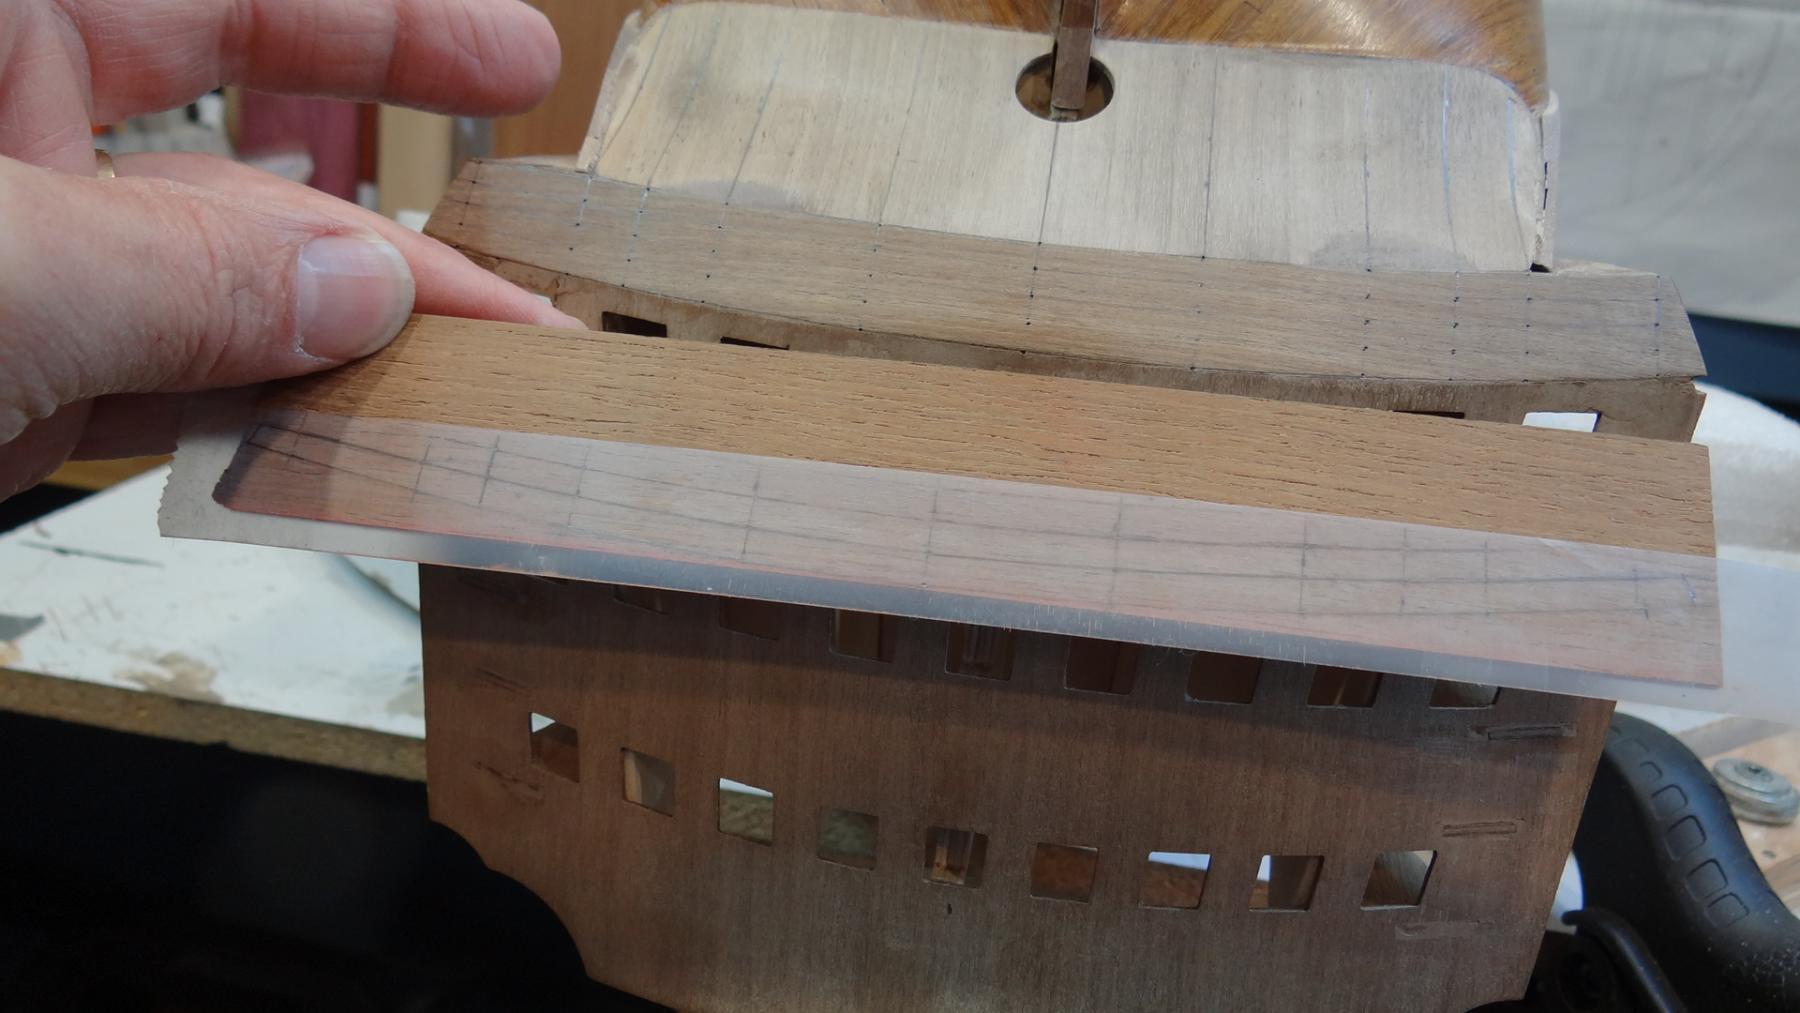
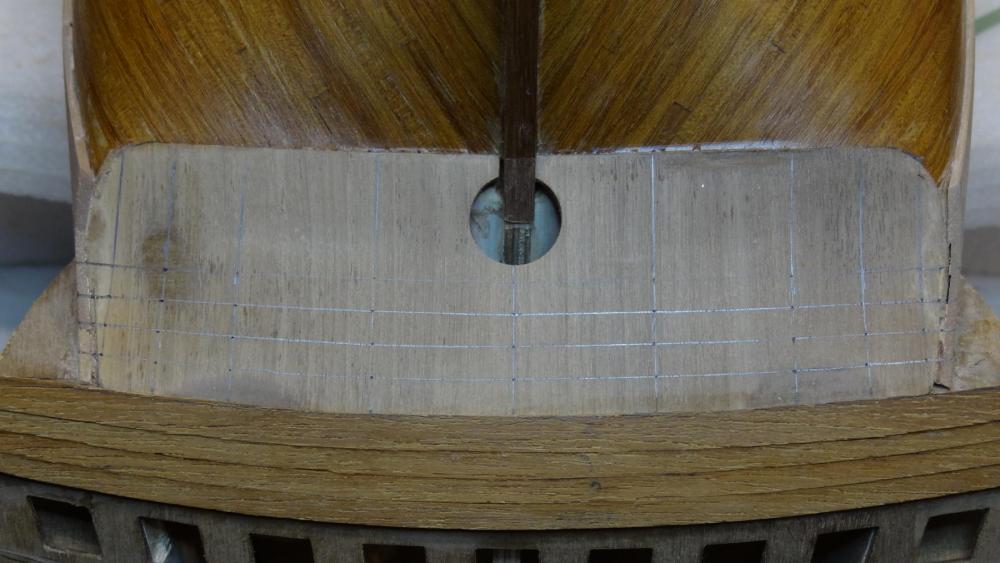
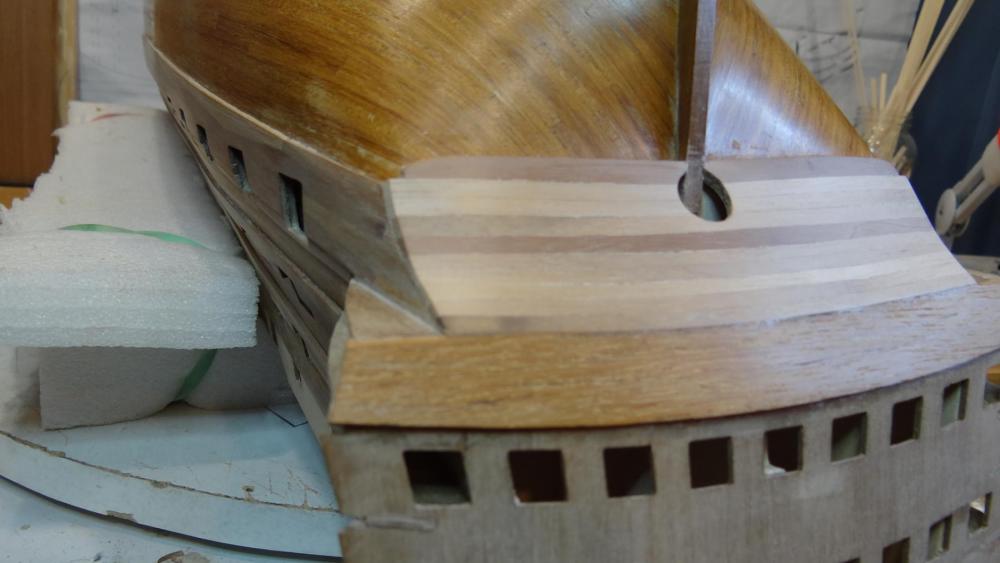
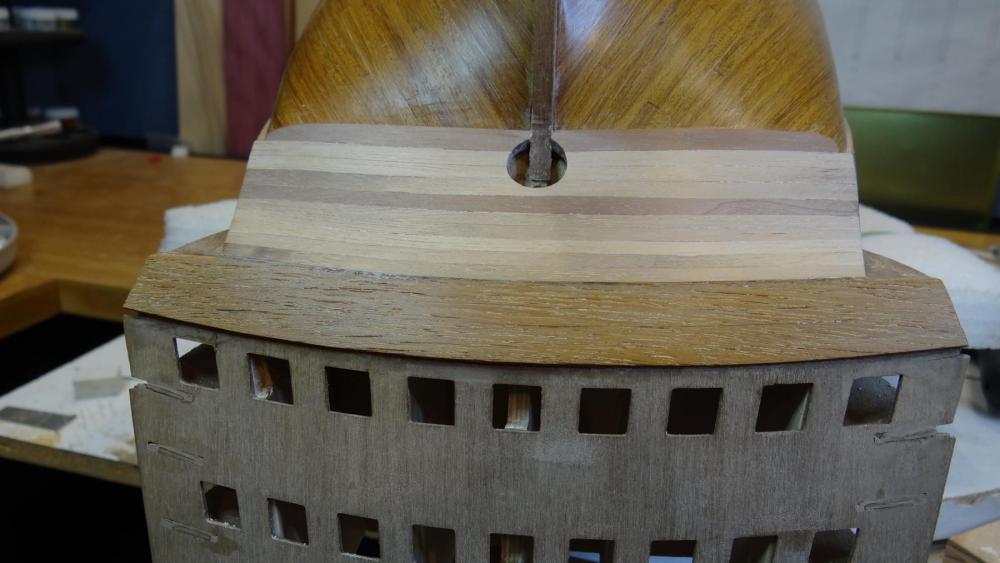
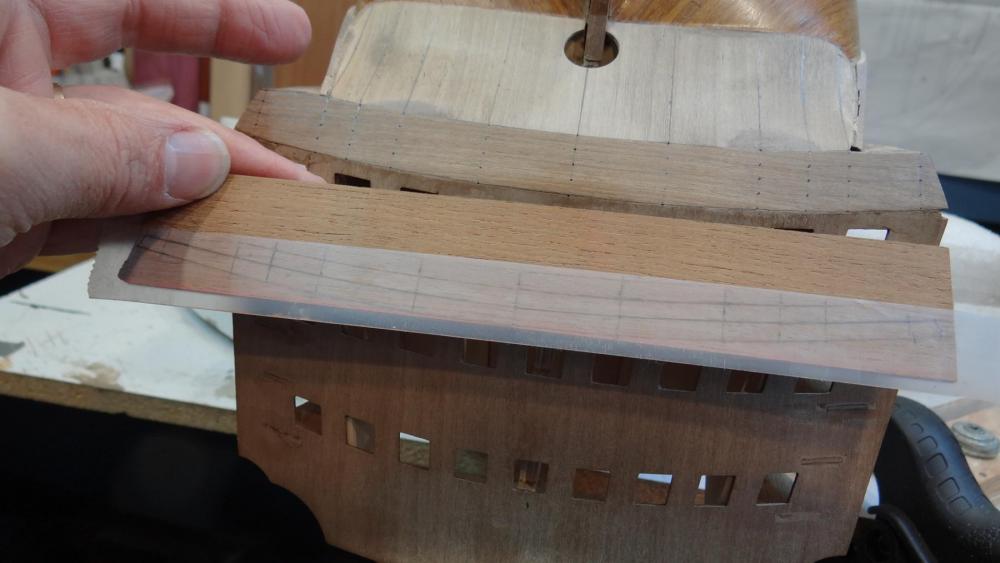
Good day shipmates, Thank you again Mike, Heinz, Bob, slow2cool and others for your comments and likes. Very much appreciated. As promised here is my first minor, but important update in months. I had mentioned earlier that I was going to plank the counters. I planked the upper counter with a piece of wood, teak I think although I may be called on that, from the real Victory, courtesy of Rob (Robipod). This is the same area that the Victory lettering will eventually go. I planked the lower counter with my supply of walnut. I spiled the teak planks and bent the walnut - only because I didn't want to take the chance of the teak cracking during a bend. I used proportional dividers to delineate 4 planks on the upper counter. I then transferred the pencil marks from the upper counter to a piece of tape and then onto the piece of teak. The pencil marks lifted off easily. Then I cut the planks using this guide. After fitting the upper counter I drafted my plank layout onto the lower counter and simply transferred the dimensions to straight planks. I steam bent most planks, clamped and let them dry in place then glued and clamped. Poly will reduce the contrast between the hull planking and the lower counter. Best, Ian
- 191 replies
-
- 15
-
-
- victory
- caldercraft
- (and 1 more)
-
You are doing a very neat planking job. This is going to be a beautiful ship. Best, Ian
-
Don, you pay high praise indeed by going back to MarisStella. I am therefore drawn to look pretty seriously at their kits myself. I may PM you about some details. But first I have an order from one of my daughters for a Viking ship. Unless you or others have a recommendation I am looking at Dusek... I will follow this one with interest! Ian
-
Hi Mike, I will post a minor update in a day or two. It's been a slow restart but things are accelerating a bit now. Thanks for the shove! Ian
- 191 replies
-
- 2
-
-
- victory
- caldercraft
- (and 1 more)
-
It's a pleasure to watch this unfold. Thanks for sharing. Best, Ian
-
Hi Heinz, Thanks for looking in but sorry no meaningful progress to share yet. You have made amazing progress on your Vic and I hope to see more soon. Ian
- 191 replies
-
- 2
-
-
- victory
- caldercraft
- (and 1 more)
-
Hi Trev, Welcome to MSW! I'll let you in on a secret. I have no real skill except patience. Take your time, read up on stuff in this amazing forum and check out the Victory builds. If there is anything I can tell you about how I did things don't hesitate to ask. Best, Ian
- 191 replies
-
- 2
-
-
- victory
- caldercraft
- (and 1 more)