Seventynet
-
Posts
797 -
Joined
-
Last visited
Content Type
Profiles
Forums
Gallery
Events
Everything posted by Seventynet
-

Viking Ship - Draken Harald Harfagre
Seventynet replied to Jack12477's topic in Nautical/Naval History
Awesome. Any idea what they used for ballast? Pig iron in the bilge? -
Viking Ship - Draken Harald Harfagre
Seventynet replied to Jack12477's topic in Nautical/Naval History
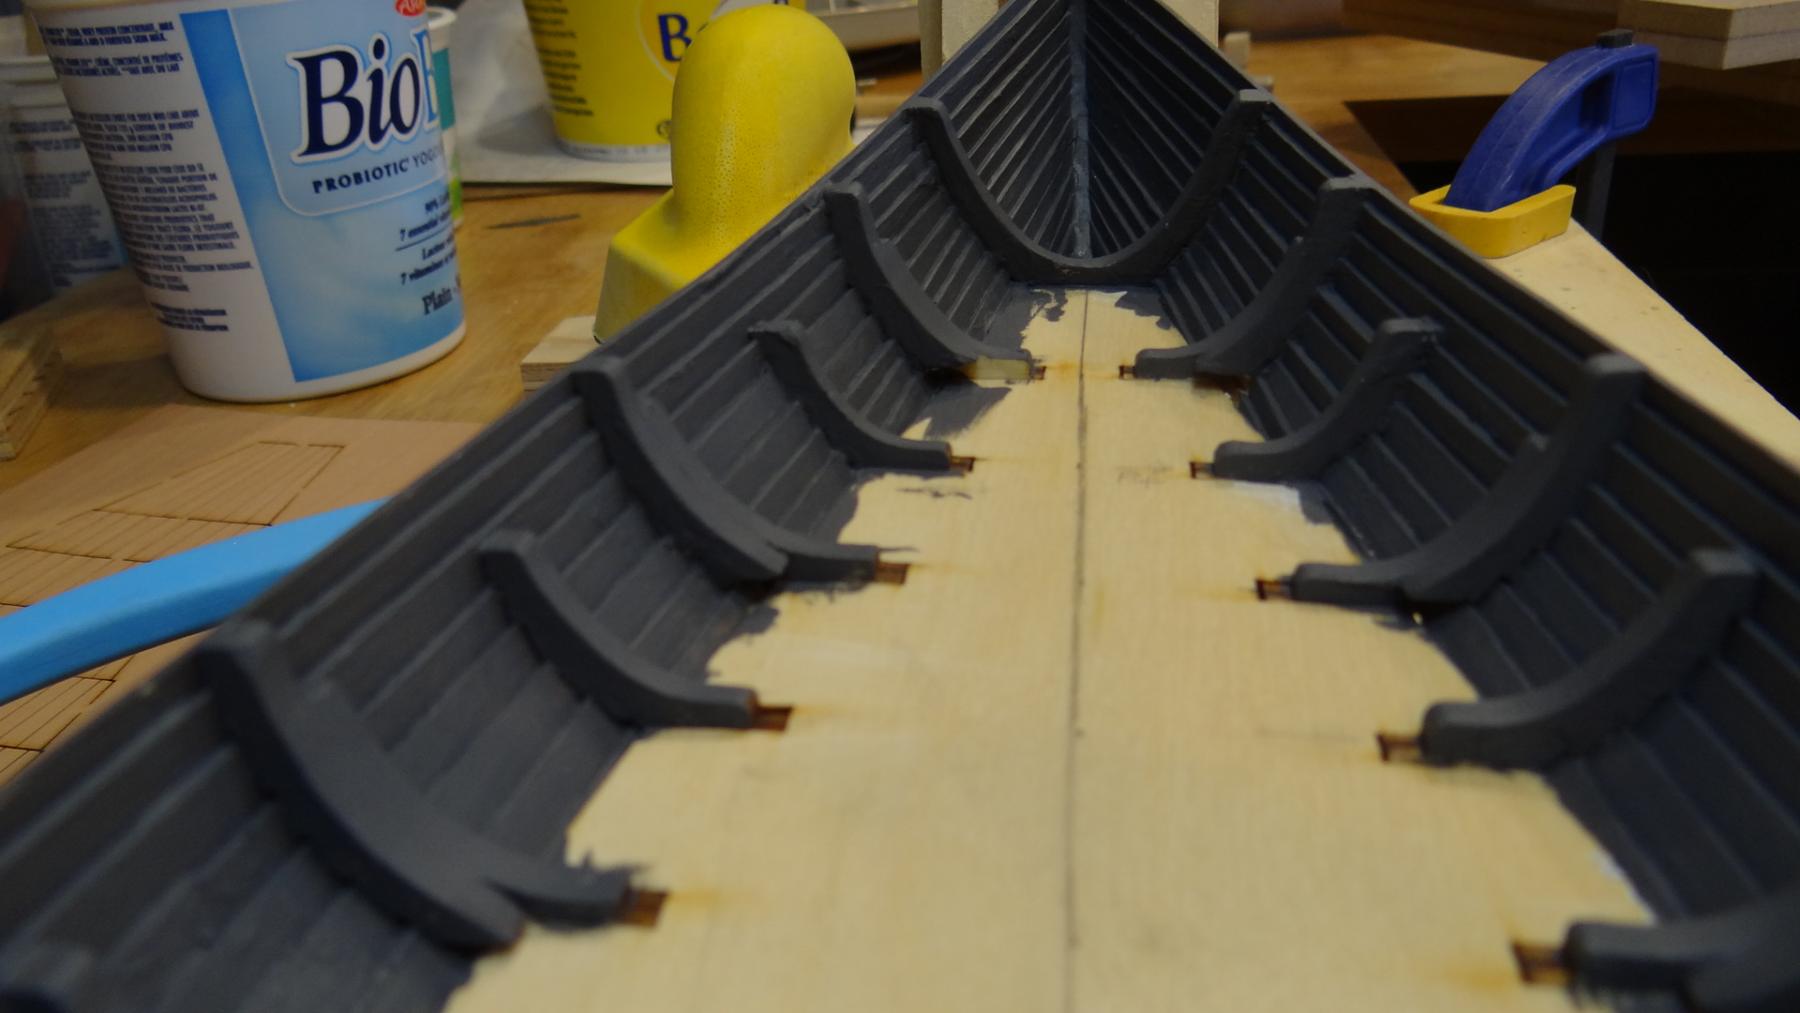
Thanks for this Jack. After building the Gokstad I have a healthy respect for the craftsmanship that was employed to build these ships. Just look at how the clinkered strakes join the stern post. I envy your being able to see this in person. Regards, Ian -
That looks very cool Don. I really like the cherry for a change. Did you mill it yourself? And what the heck is that black stuff on the paint stick? Regards, Ian
- 62 replies
-
- 1
-

-
- batelina
- marisstella
- (and 1 more)
-
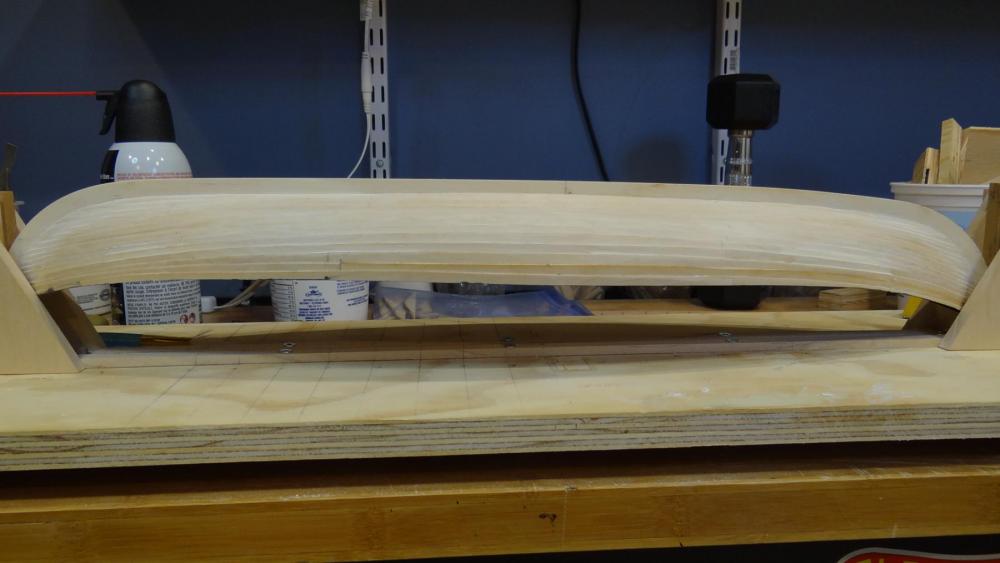
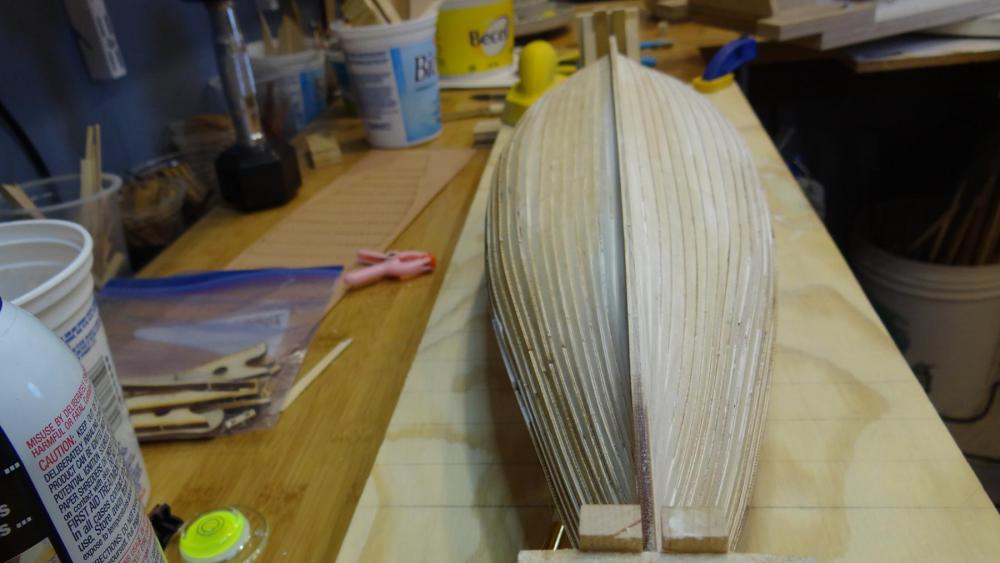
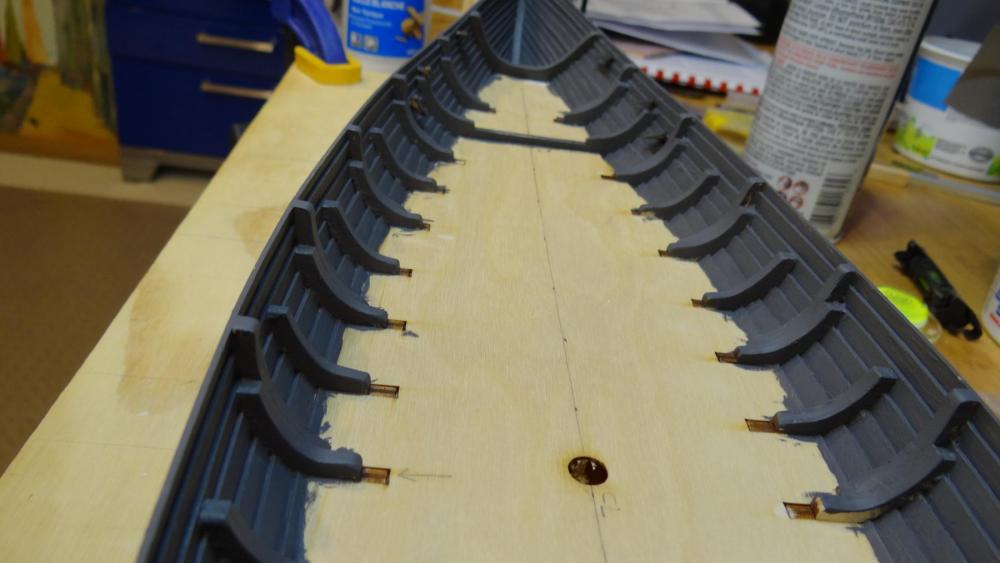
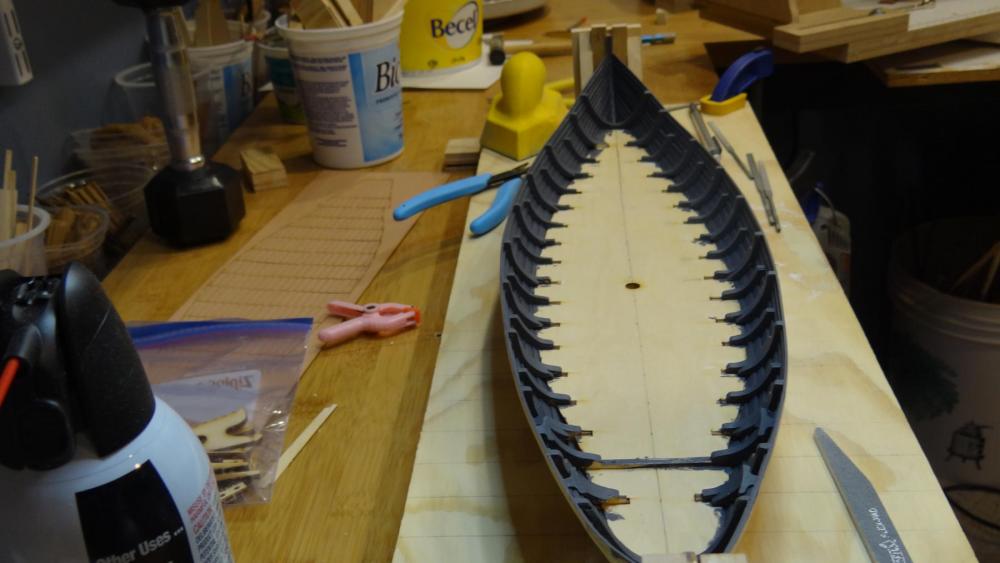
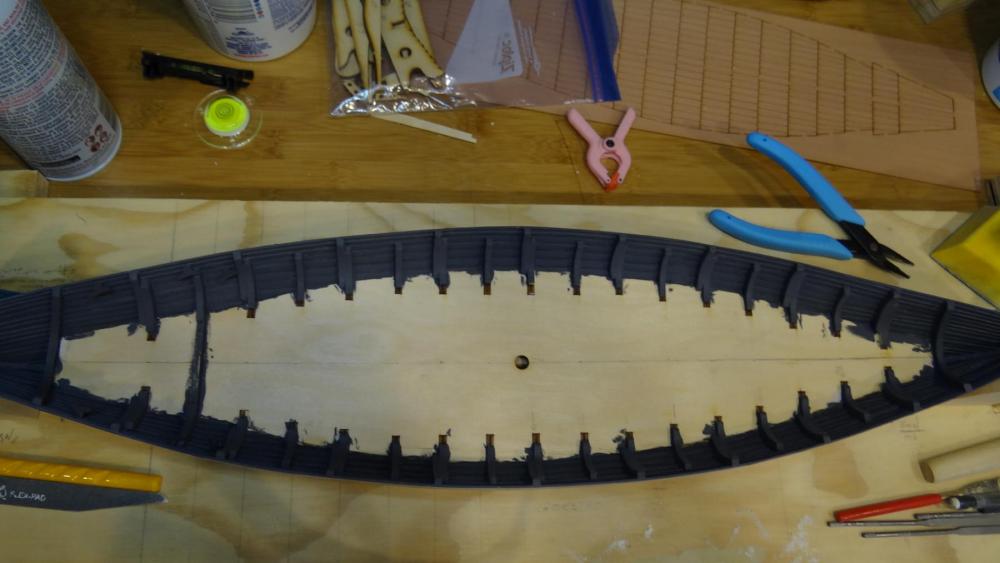
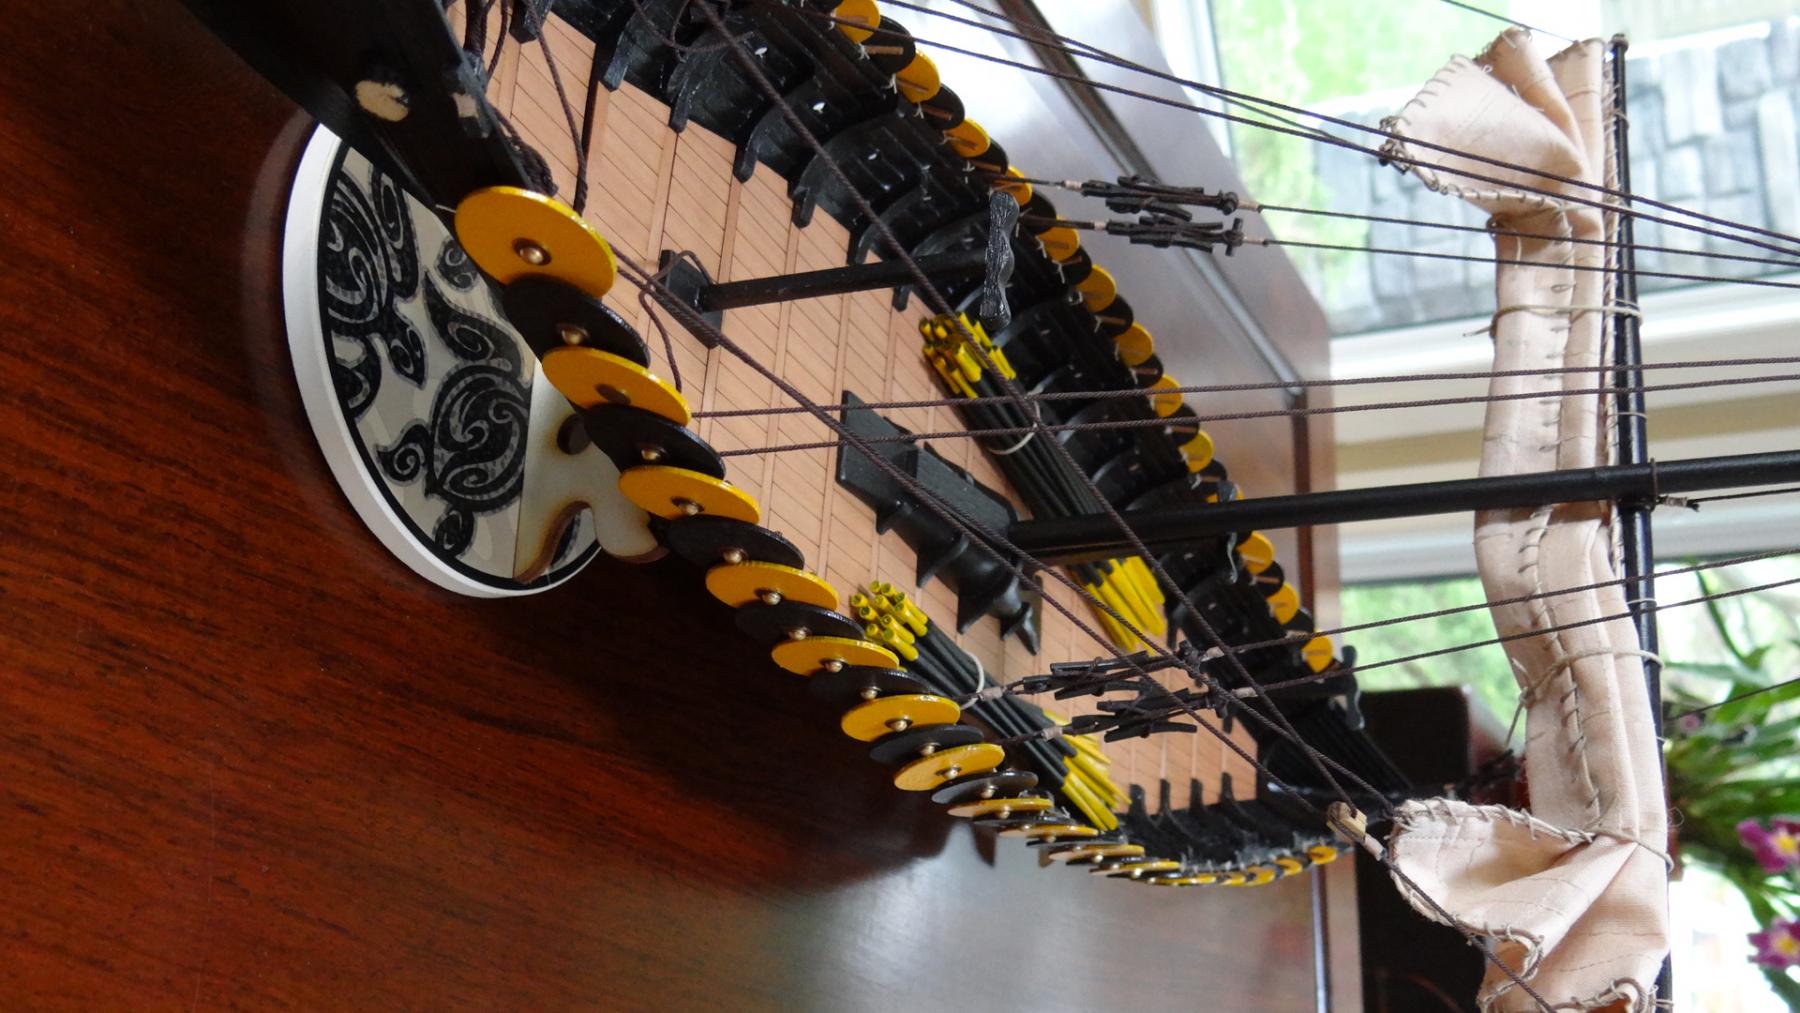
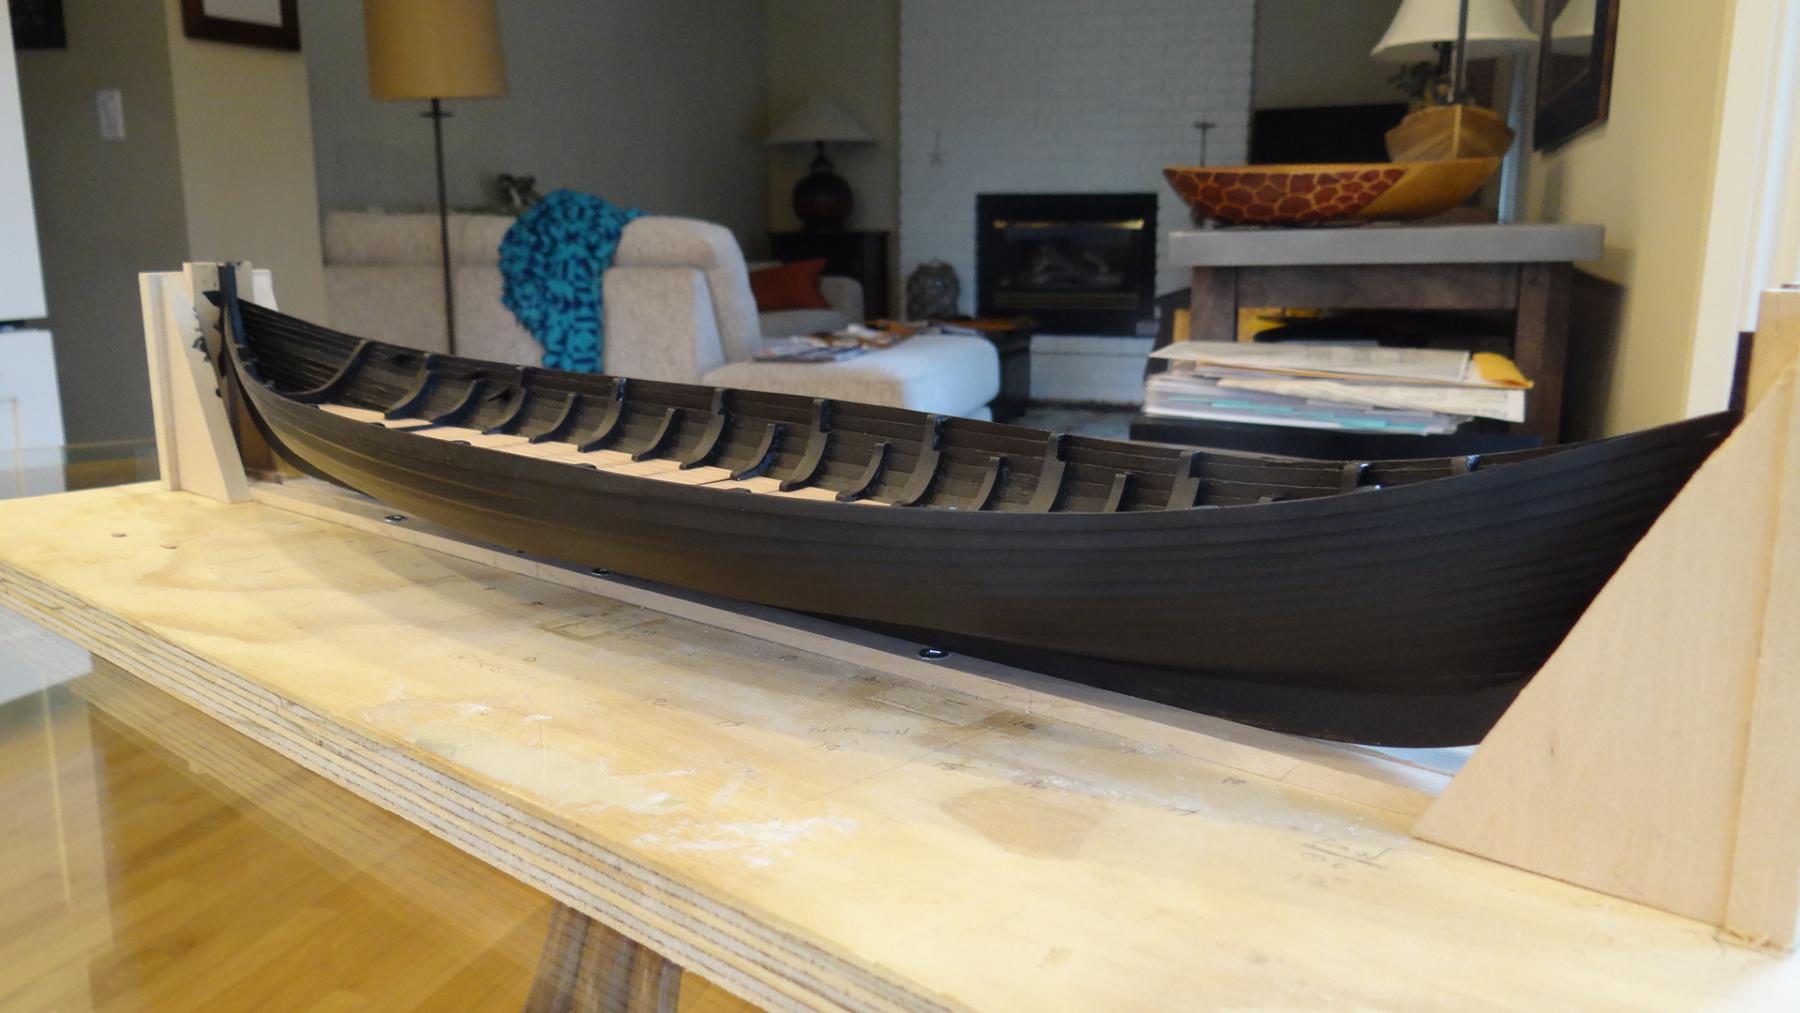
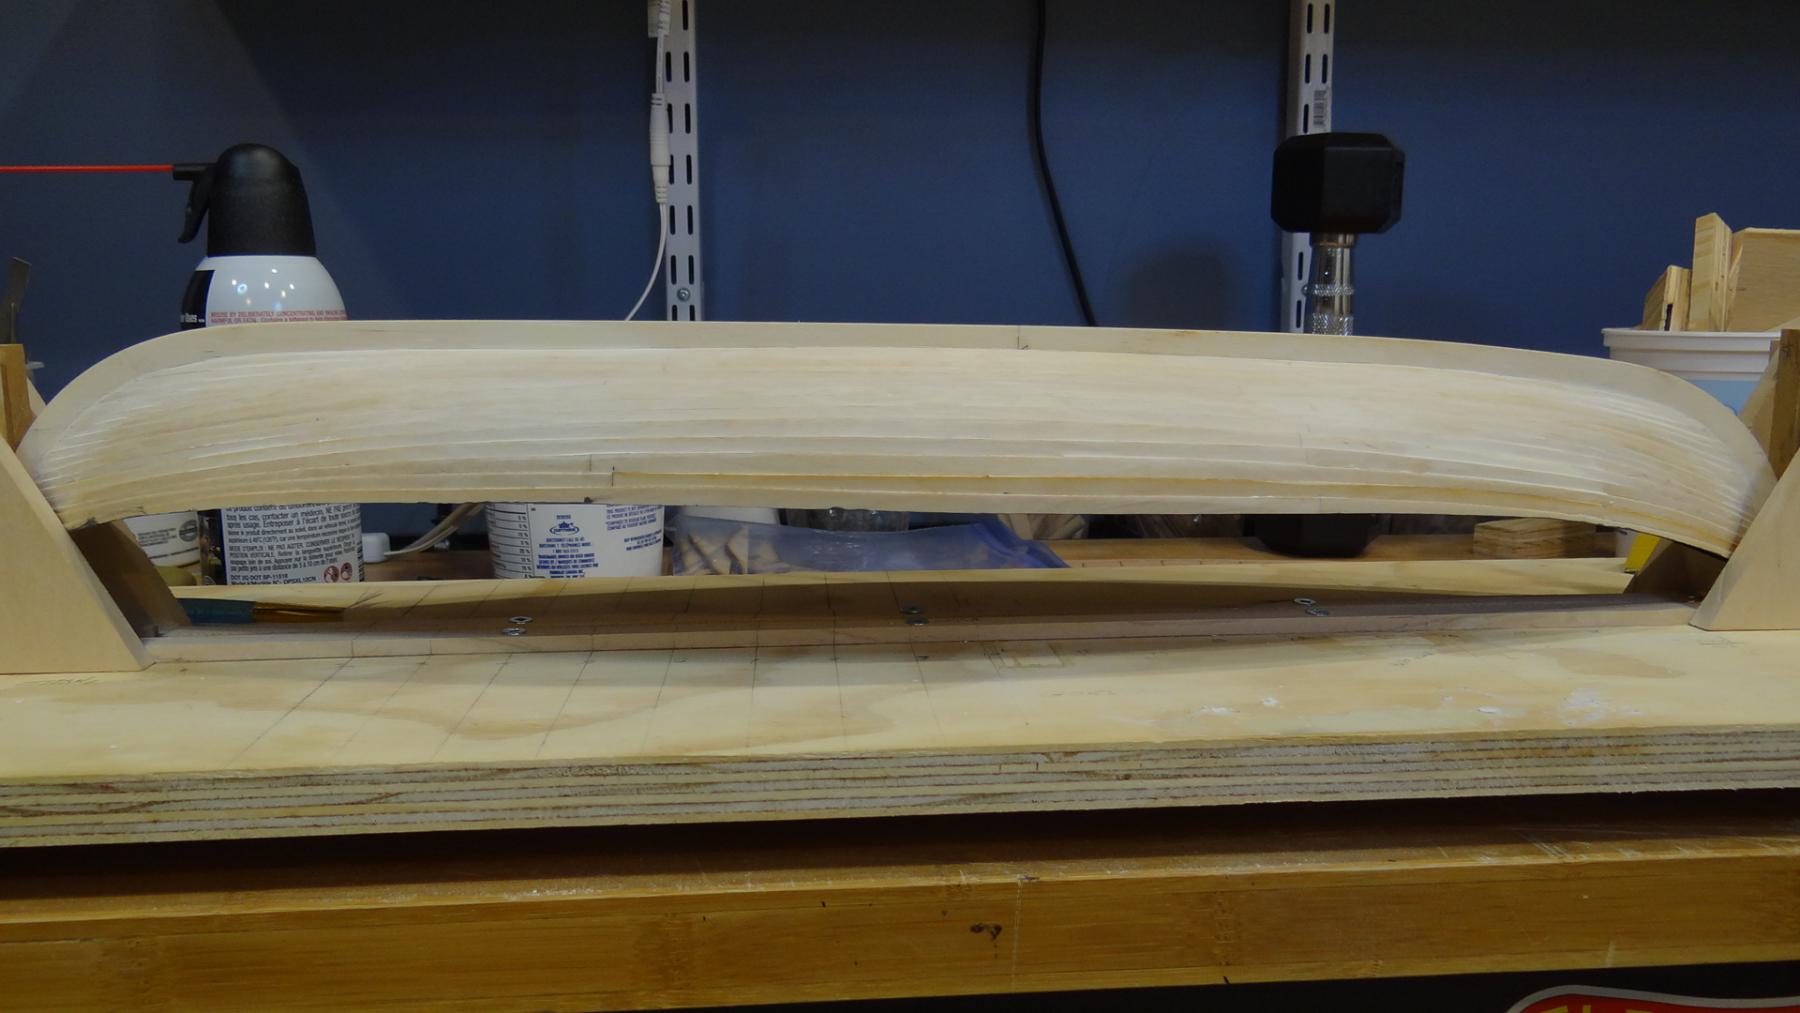
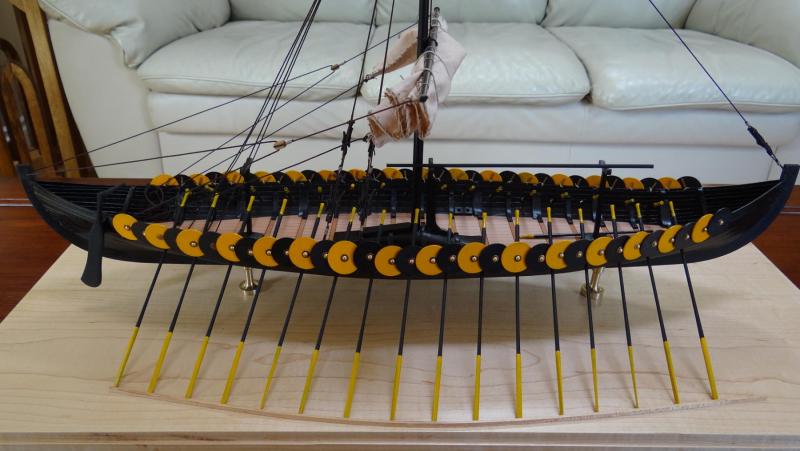
Thanks for all of the comments and likes although overly generous I am sure. I am going to call this one finished (and I'll change the title if I can ever figure out how). I offer a few comments (from a novice - 3rd start, 2nd finish - so take them as you will): First off I thank Jack. Aubrey for his amazing build from which I referred to dozens of times and copied ideas more than once. Second, I know I have mentioned it before but the hull planking is challenging and depends on getting the frames square and in absolute perfect alignment. I still cannot see how you would achieve this needed alignment by attaching the deck floor before you glue the frames - as the instructions suggest. You can see what Jack did and what I did - it still wasn't perfect in my case. Errors will propagate as you move from keel down and especially from stem and stern. Carefully line out where each plank will lie on the stem and stern - as the instructions indicate. Figure out how to end the clinker planking at the stem and stern - it remains a mystery to me. The shields were a real chore to paint and attaching the bosses was a lesson in frustration. Choose the right paint and the right glue to do this - I don't think I did. I would do this kit again but I would try to twist Daniel's arm to see if he would cut the hull planks out of some nice, non-plywood species - I'd pay for it. The kit was of very good quality in my opinion. Best, Ian


-
Thanks a lot Joe and Don. It was interesting and fun to build. There is no end to how good a job one can do on the planking. I am sure even a hardened shipwright wouldn't take it for granted. Best, Ian
-
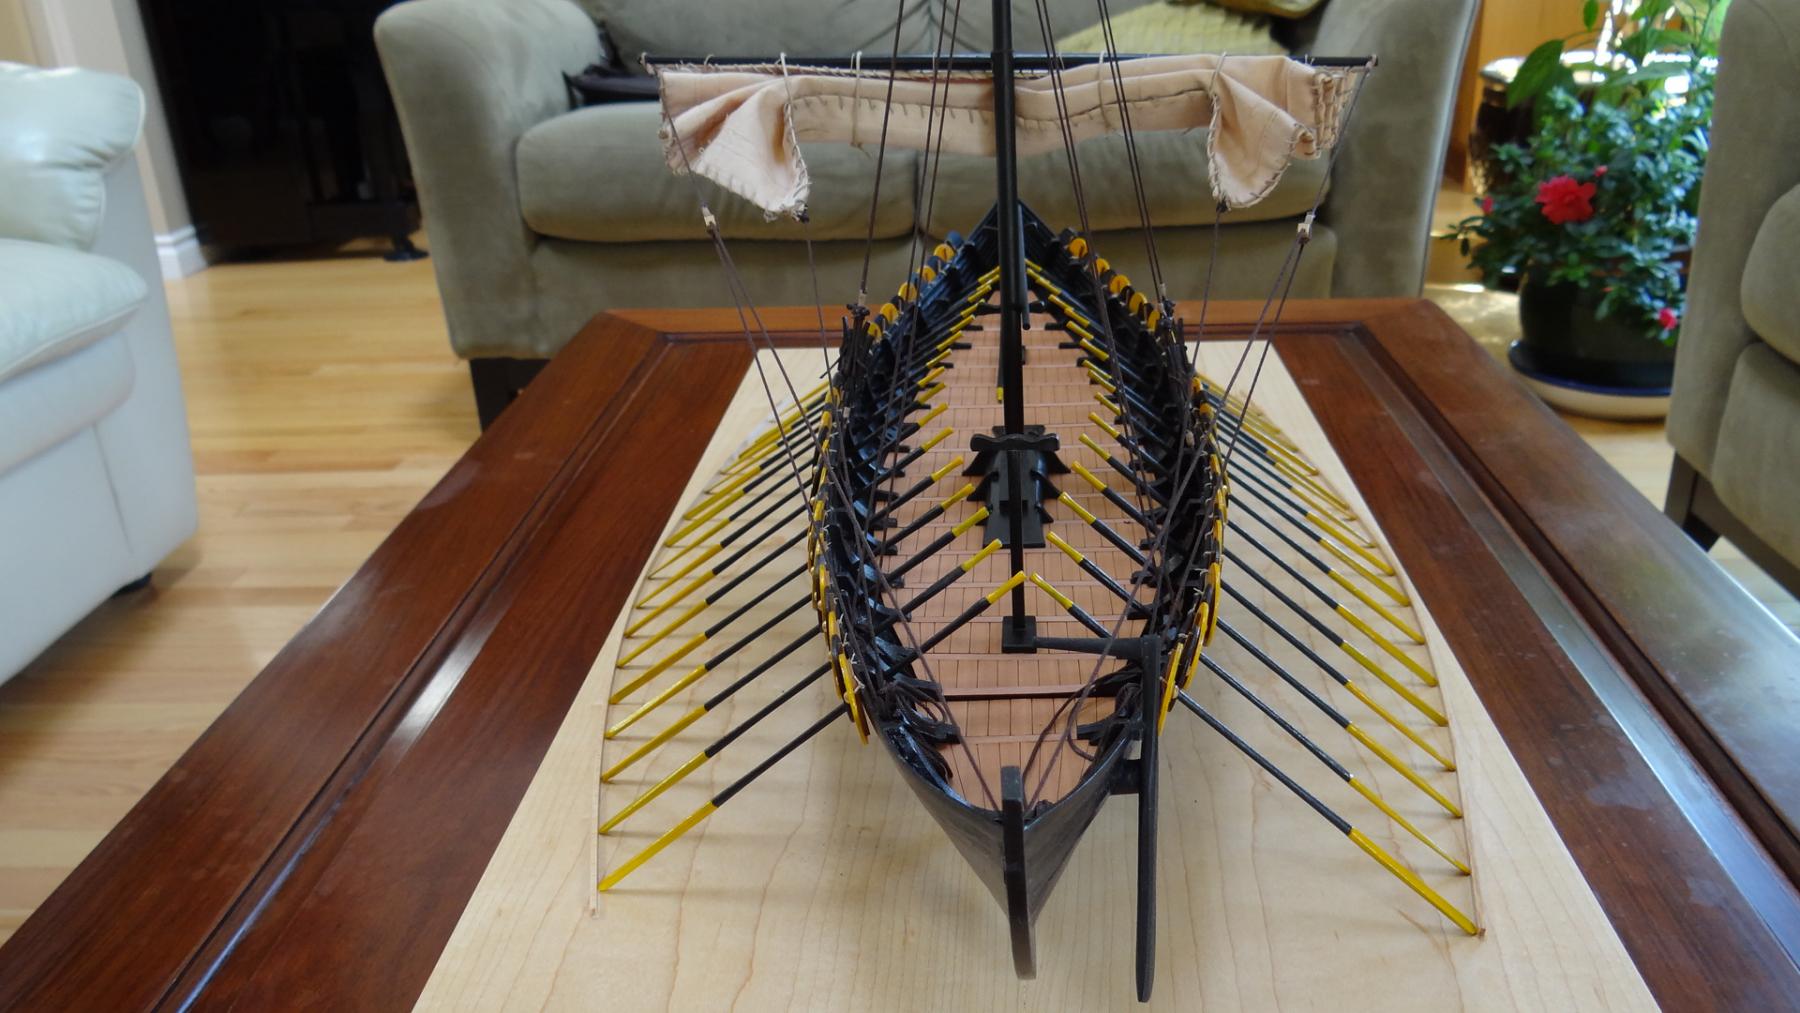
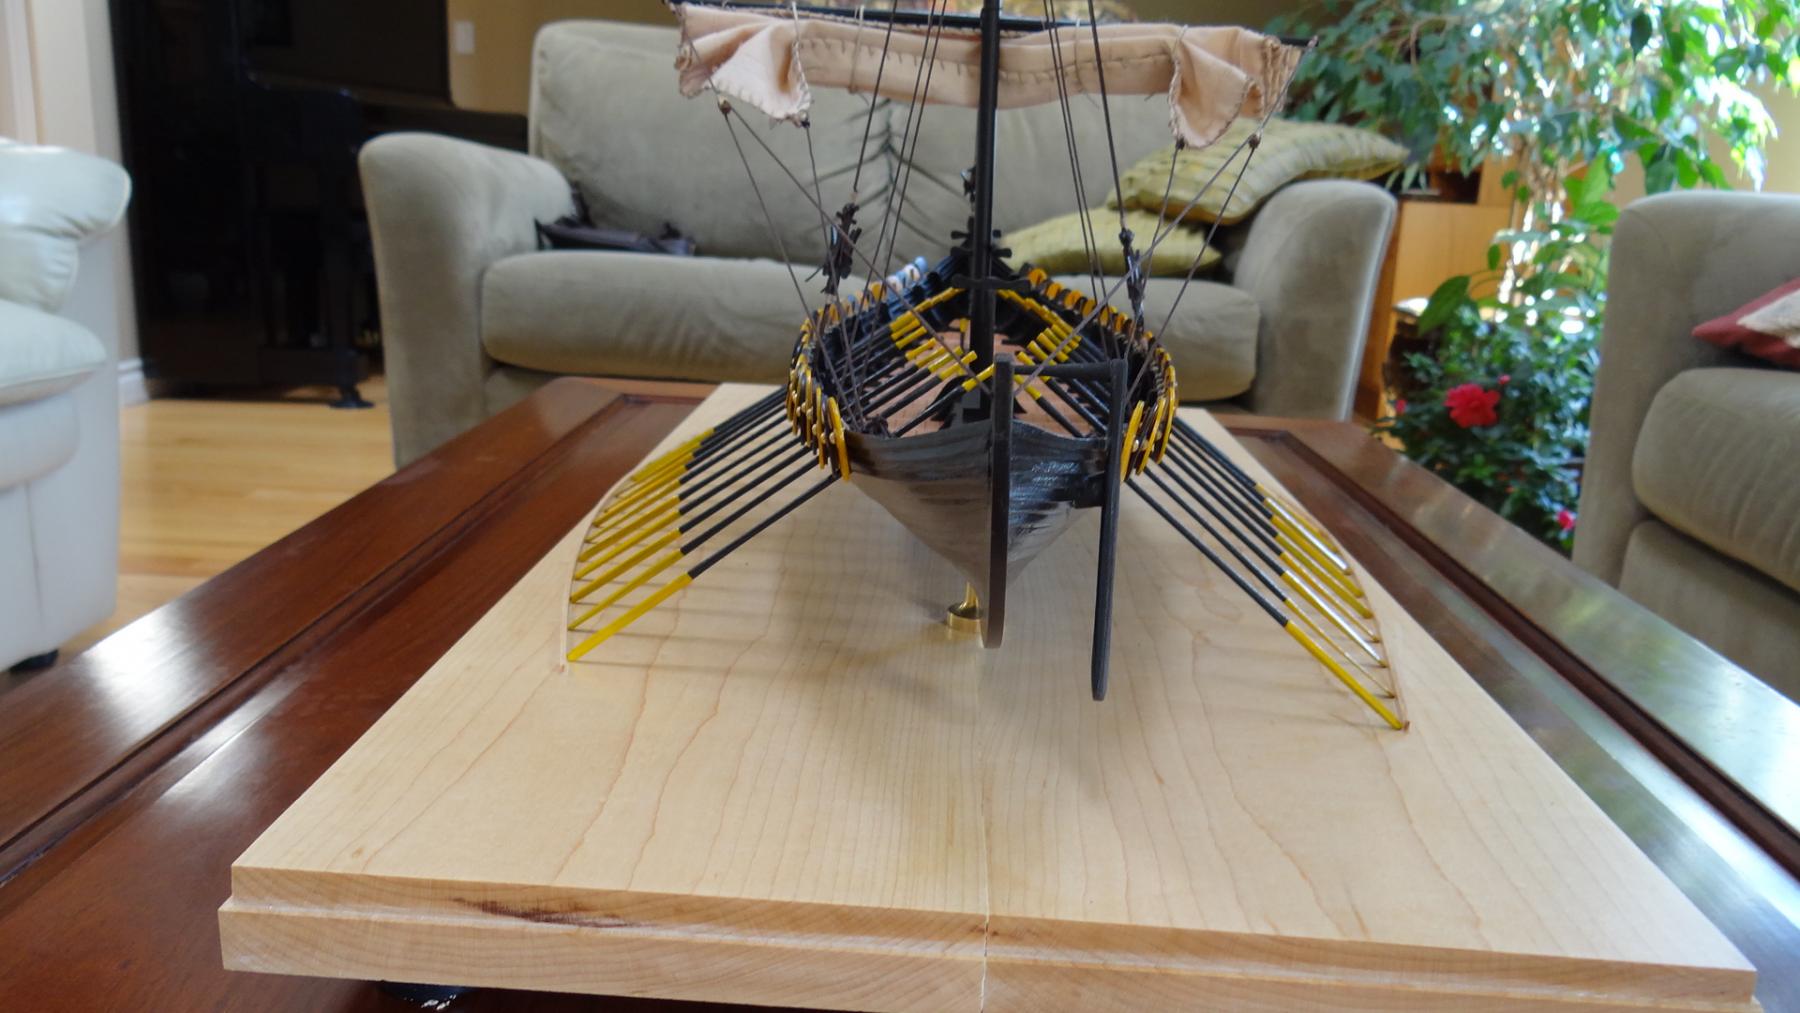
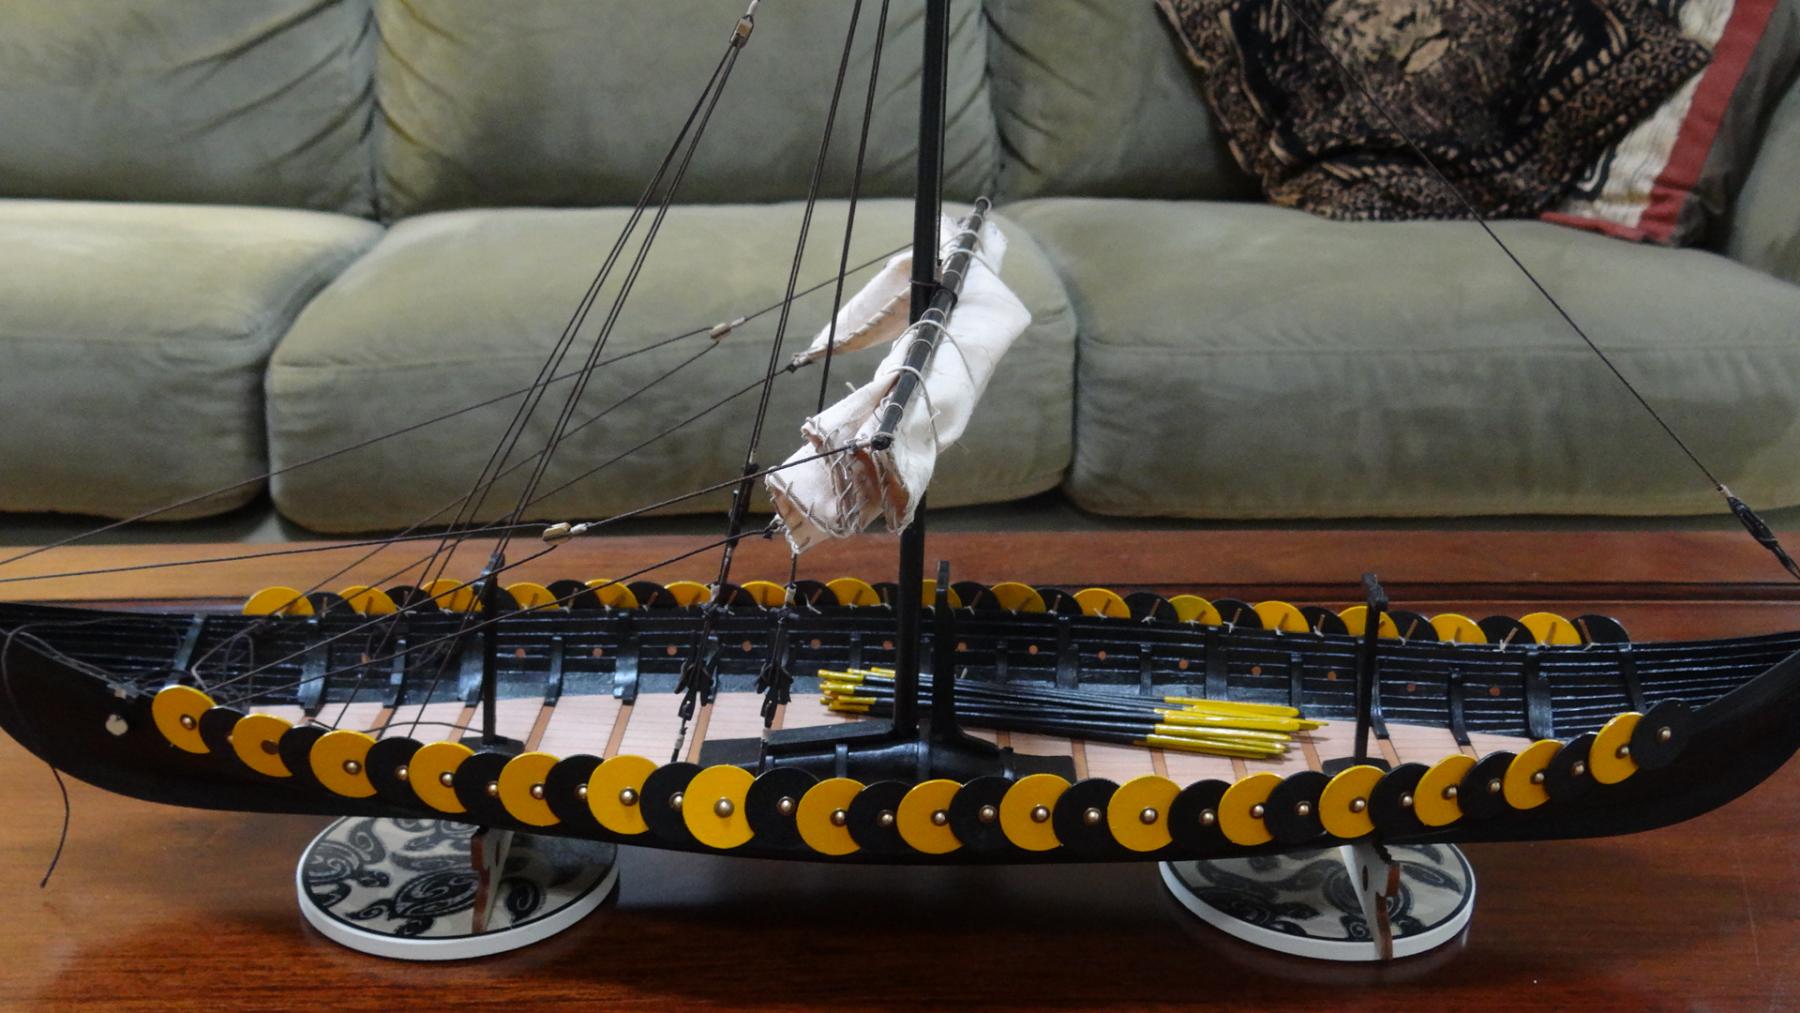
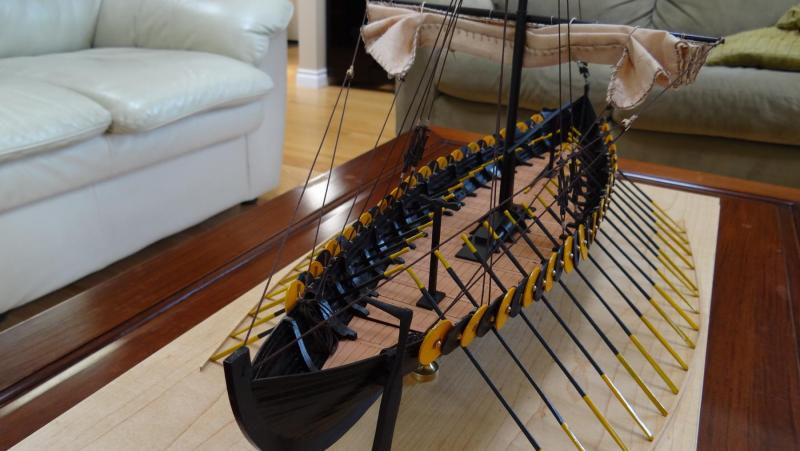
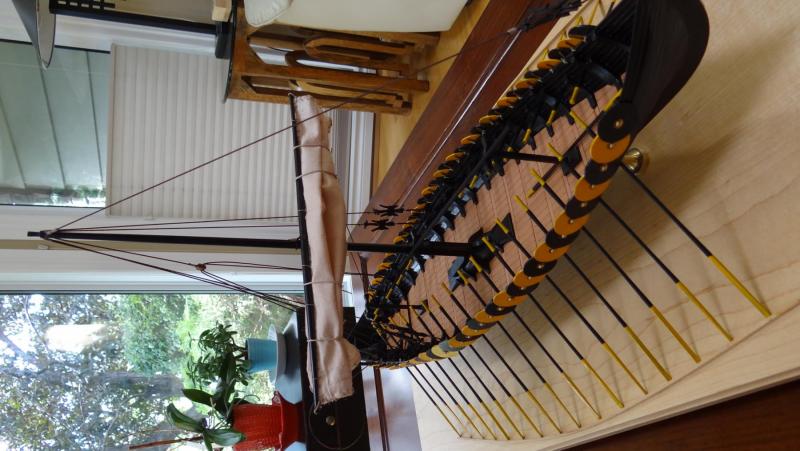
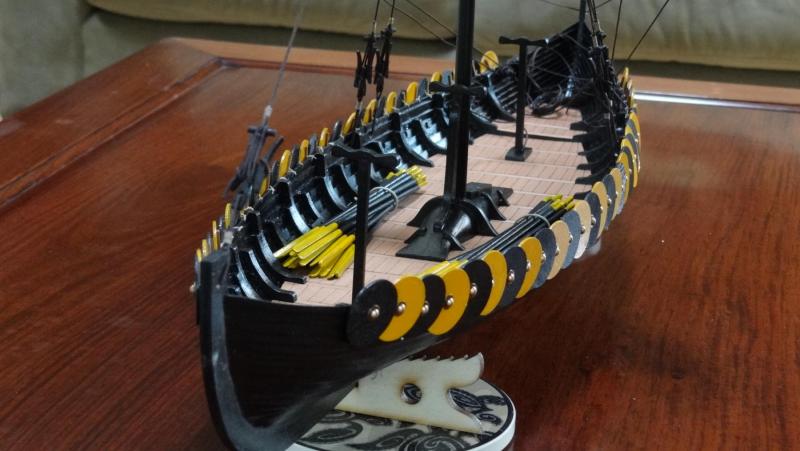
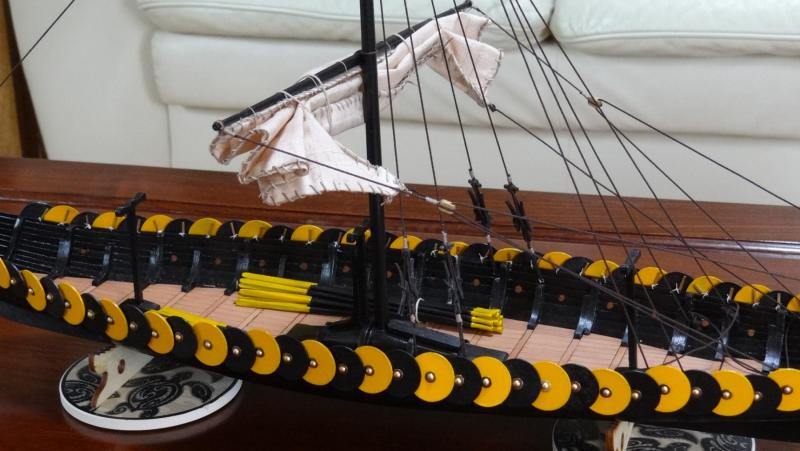
Thanks for following and for all of your likes everyone. Much appreciated. I still need to do a little bit of line "training", affix the rudder once I land on a stand, but here she is. The sail was dyed with tea, rigging was line from Chuck (although the kit line was fine - I just wanted something darker). I think she looks like business. I certainly wouldn't want to be tending my garden with that thing sliding down my coast. Best, Ian


-
Thank you guys. That's what I love about this forum - gentle, polite persuasion to get back on track - amongst all the other benefits too countless to mention. Listen, there is no scenario that involves giving up on the Victory. I love that ship. My view of things has changed though. I have really enjoyed building these smaller projects like the Cat Boat and the Gokstad and they help improve my skills. Now that I have family members clamoring for a ship of their own the motivation to build these smaller craft has increased and the pause has become longer for the Victory. Best, Ian
- 191 replies
-
- 3
-
-
- victory
- caldercraft
- (and 1 more)
-
Thank you for saying so Al and for reminding me of how long I have forsaken my Victory. Best, Ian
- 191 replies
-
- 4
-
-
- victory
- caldercraft
- (and 1 more)
-
Lovely job Bender and a pleasure to follow. Regards, Ian
-
Looking really nice Marcus! What a simple solution for mast hoops. I'll definitely keep that in mind. Regards, Ian
- 165 replies
-
- 4
-
-
- cape cod catboat
- Finished
- (and 1 more)
-
Just catching up on your build. Deck looks great! Regards, Ian
- 701 replies
-
- 4
-
-
- phantom
- model shipways
- (and 1 more)
-
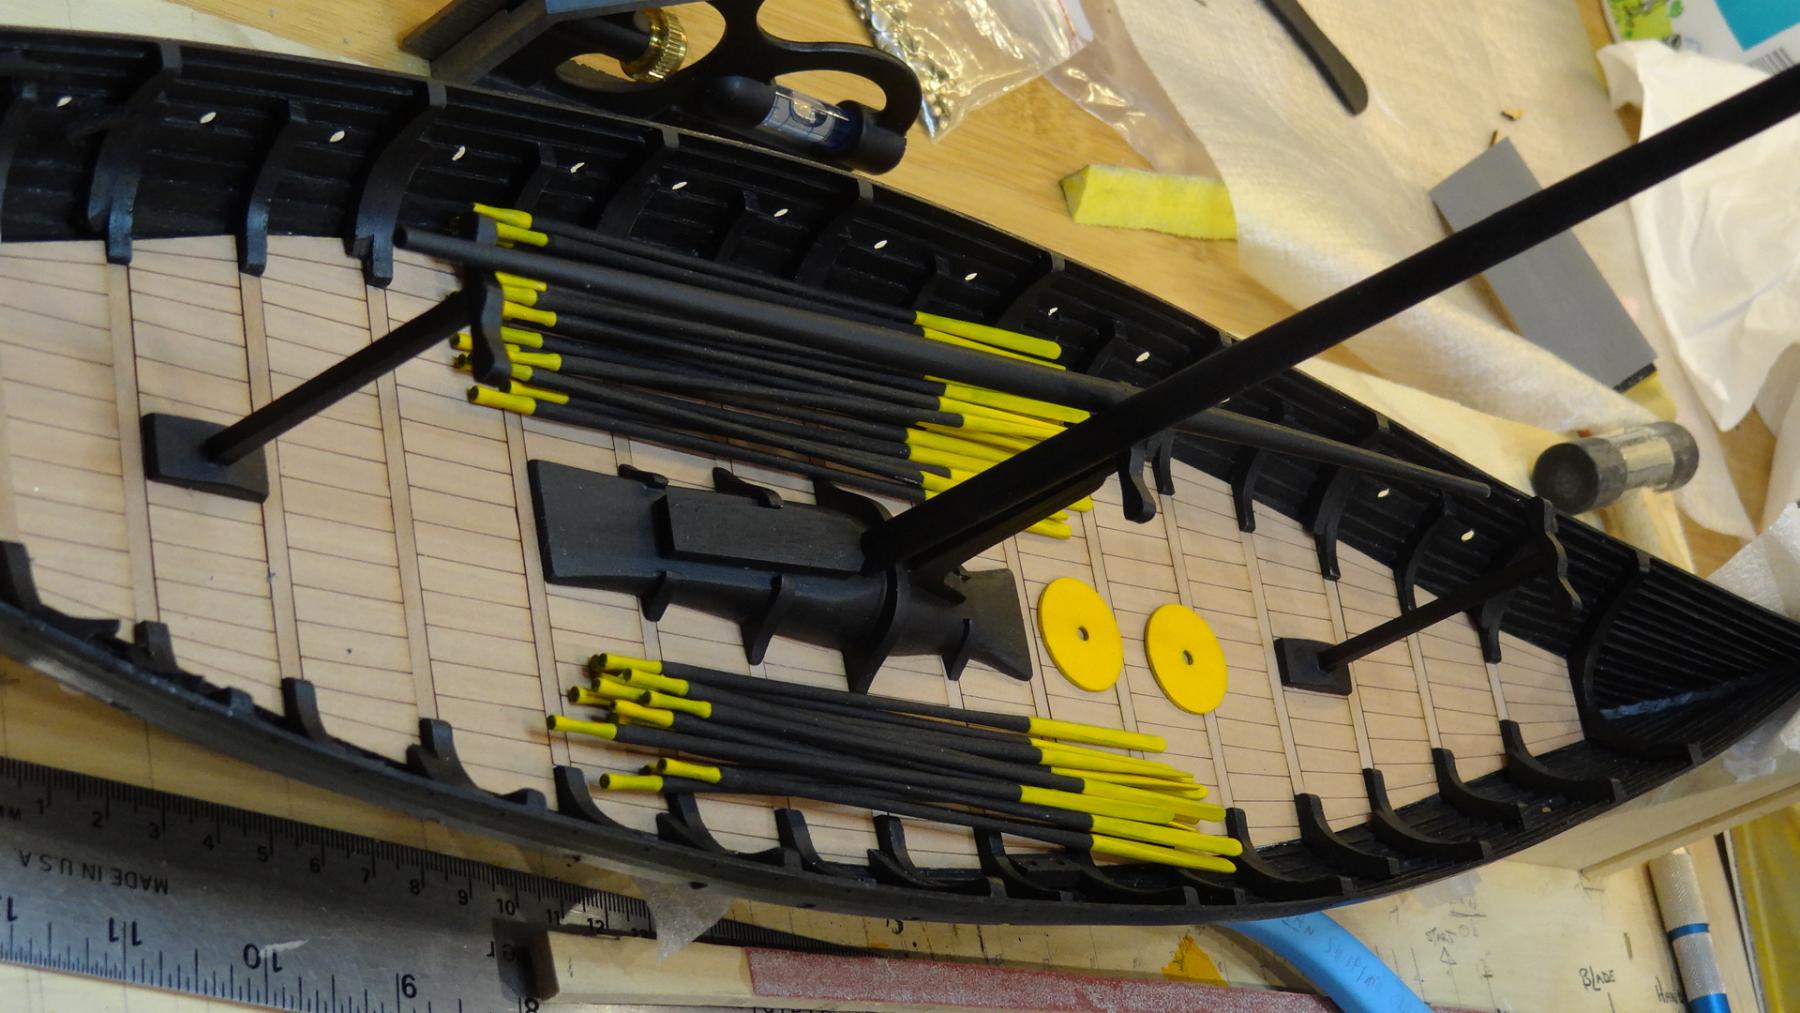
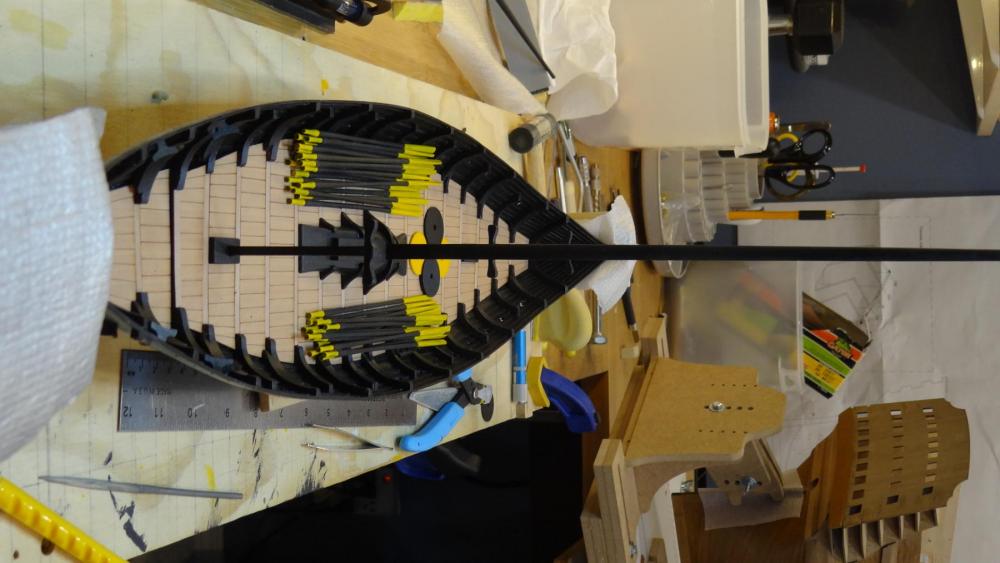
Greetings all, Just a quick update as I close in on completing my Gokstad. A word to those that may follow, you might want to start your sheilds (64) and oars (32) earlier on in your build or you will likely be like me - trapped in an endless effort to get them finished. Tomorrow I add the poly to the interior and after a few coats I will start on the rigging. The shields still need the bosses and handgrips. The admiral was kind enough to stitch the sail. Ian


-
That's a nice solution for the oars Jack. I may copy that if you haven't patented it yet . Regards, Ian
- 170 replies
-
- 3
-
-
- gokstad
- dusek ship kits
- (and 1 more)
-
The Brazerra is a beautiful ship and I look forward to resuming my build in the next 2 weeks. I will get a build log up at that time. I've got the keel, stem and stern post and bulkheads assembled but have been on pause while I complete my Gokstad which is almost done. The materials are outstanding, the sails already stitched. However, if you had the lanteen rig available I would have gone for that in a heartbeat although I can see that it would be a less representative version. Regards, Ian
-
Beautiful work indeed! Thanks for showing me the way. Ian
- 170 replies
-
- 2
-
-
- gokstad
- dusek ship kits
- (and 1 more)
-
Thanks for the info on the Brazzera Zoran. That island looks like paradise! Regards, Ian
-
Thanks for encouraging me Don, Bob, Joe and Zoltan, for I surely need it! It is amazing what a picture picks up that I would otherwise miss. A little bit more deck work will solve that problem. Ian
-
I'm loving the detail Heinz, beautiful work. And that's no small update! Regards, Ian
-
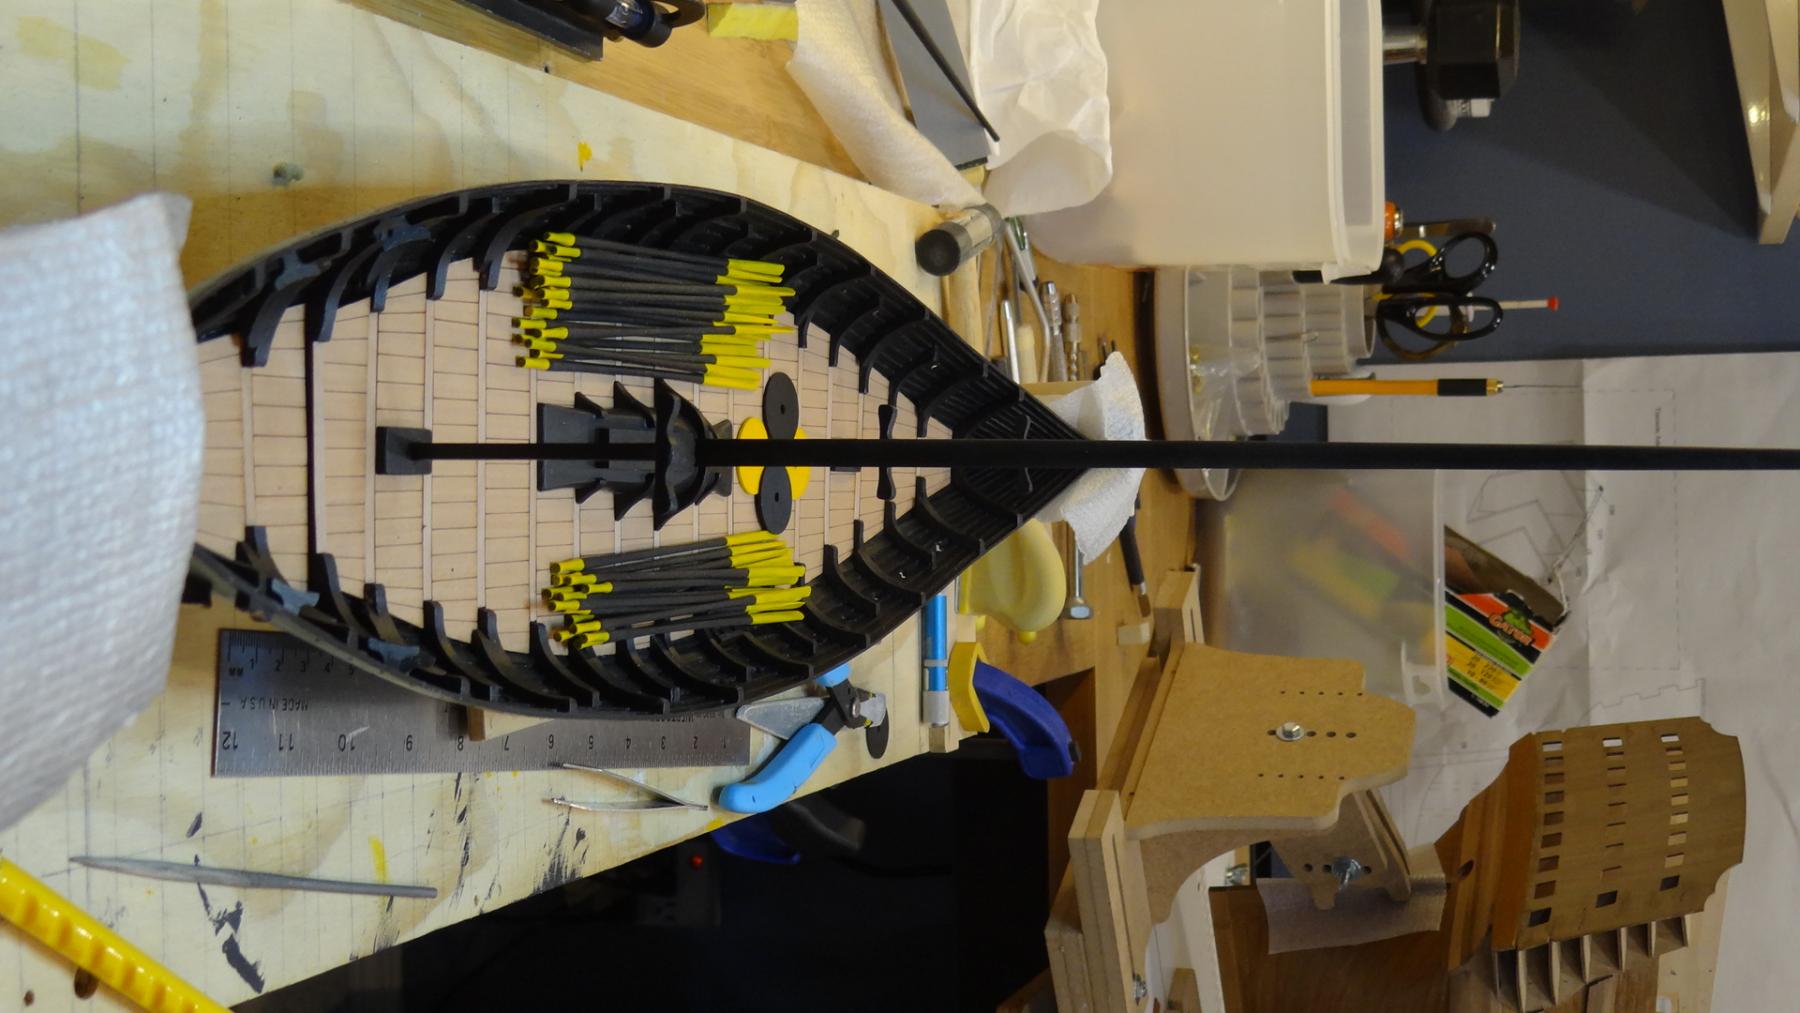
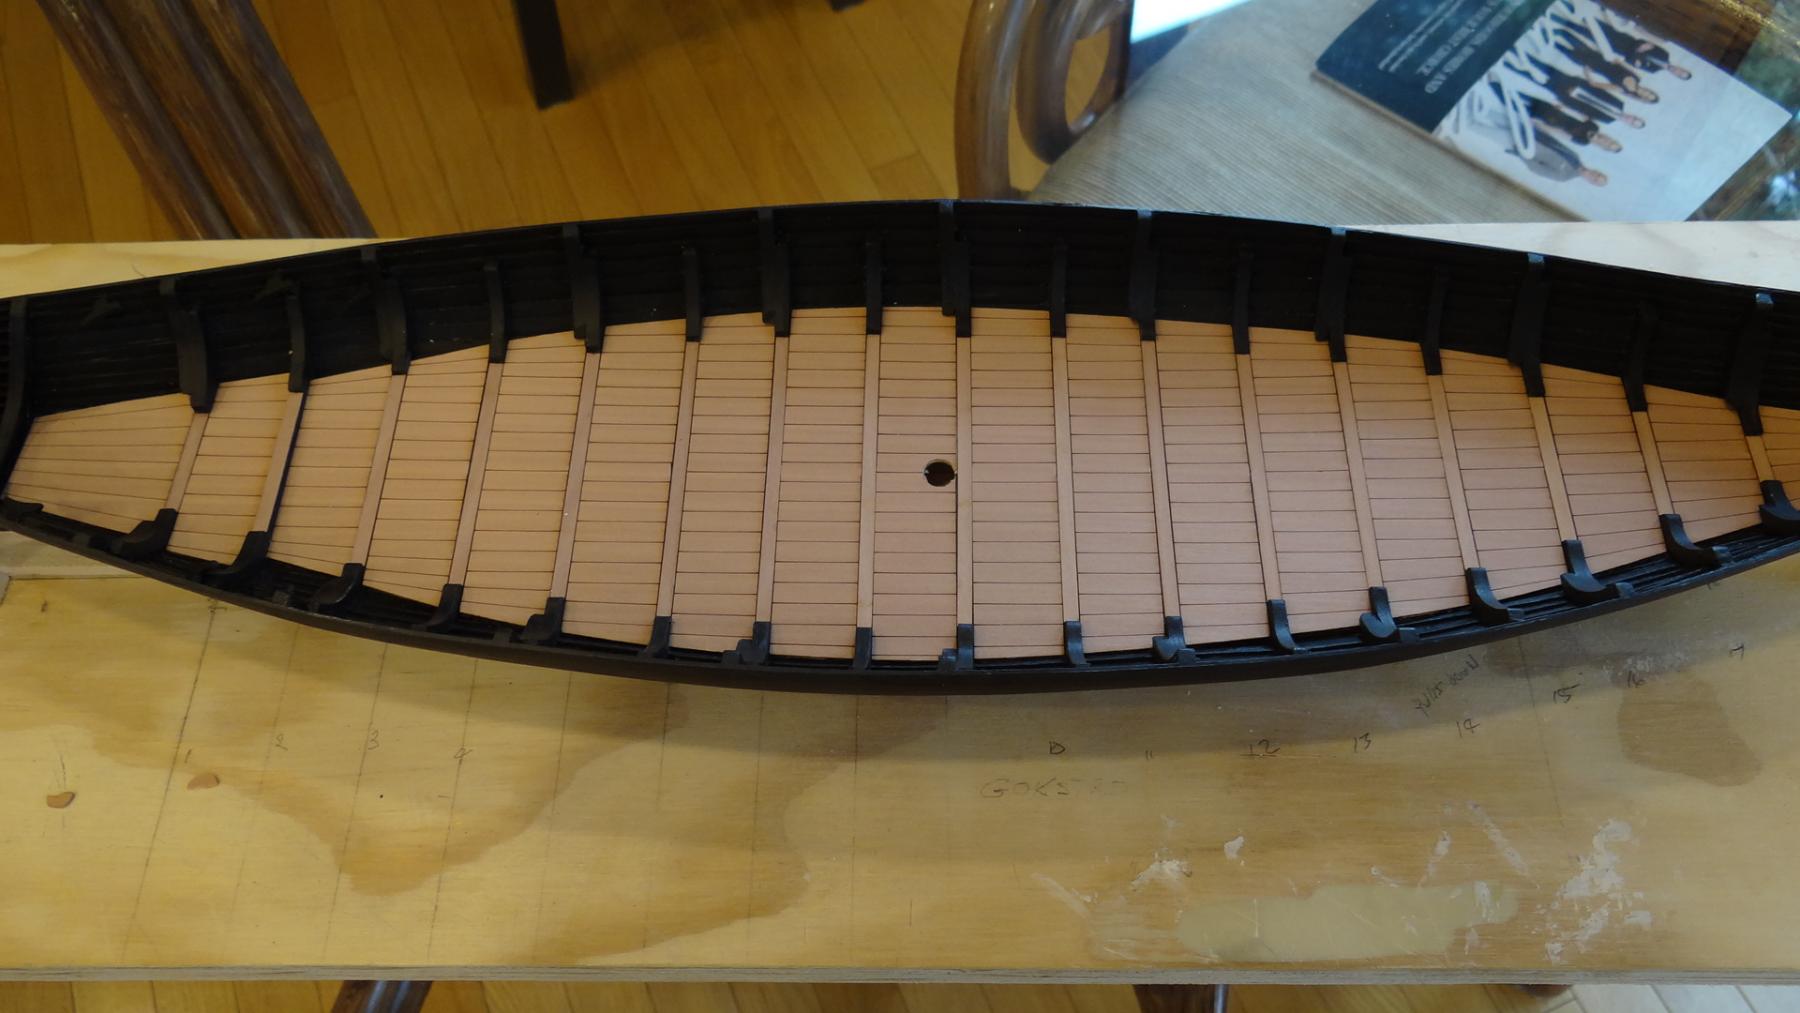
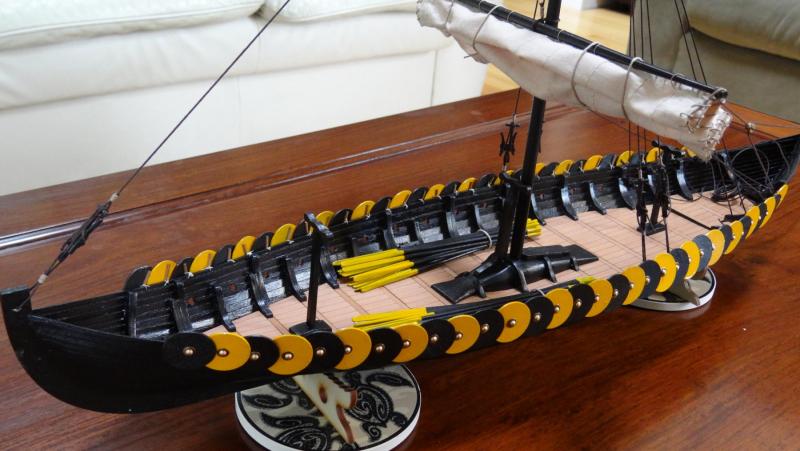
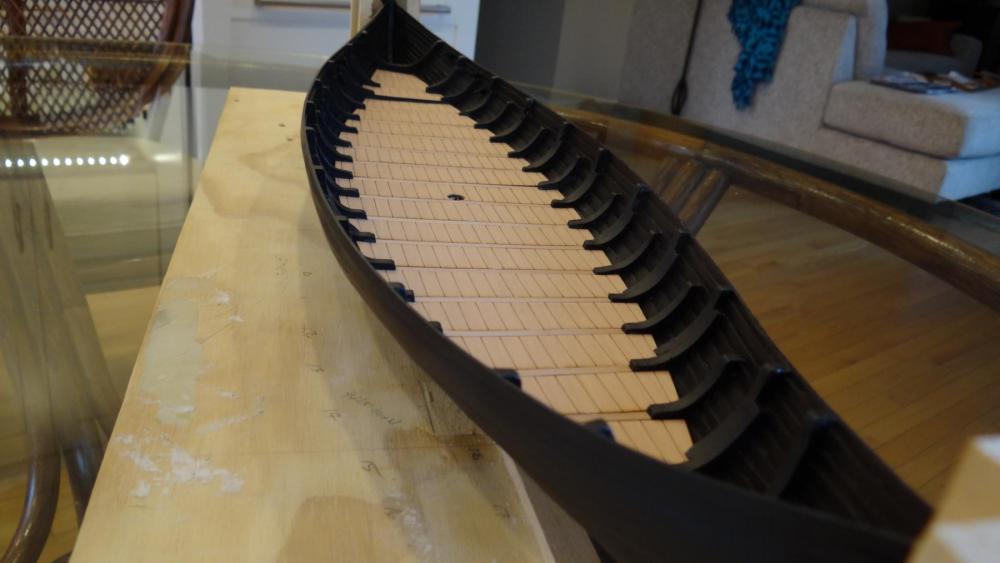
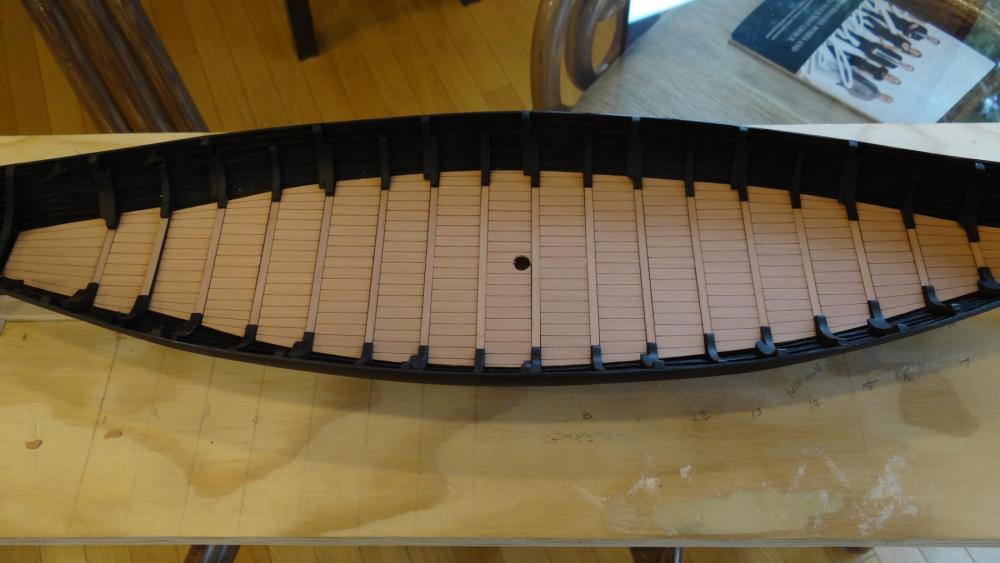
Thanks Don and everyone for following and for the likes. Much appreciated. The hull has been painted with a matt black acrylic and the pear wood deck is installed. It's starting to look like an evil Viking ship. . Best, Ian


-
Don I love that natural, rich hue. It makes me want to get at my Trabaccolo. Ian
- 653 replies
-
- 5
-
-
- trabakul
- marisstella
- (and 1 more)
-
Very nice Don. Ian
-
Beautiful inspirational work. Thanks for sharing Gaetan. Regards, Ian
- 728 replies
-
- 4
-
-
- le fleuron
- 64 gun
- (and 1 more)
-
Thanks very much Steven. That is a very interesting find and to me at least demonstrates the superb craftsmanship those shiprights possessed. Although I wish I had done more research before I started this build I don't think I would have attempted to duplicate that stem/stern approach, at least at this scale. Regards, Ian
-
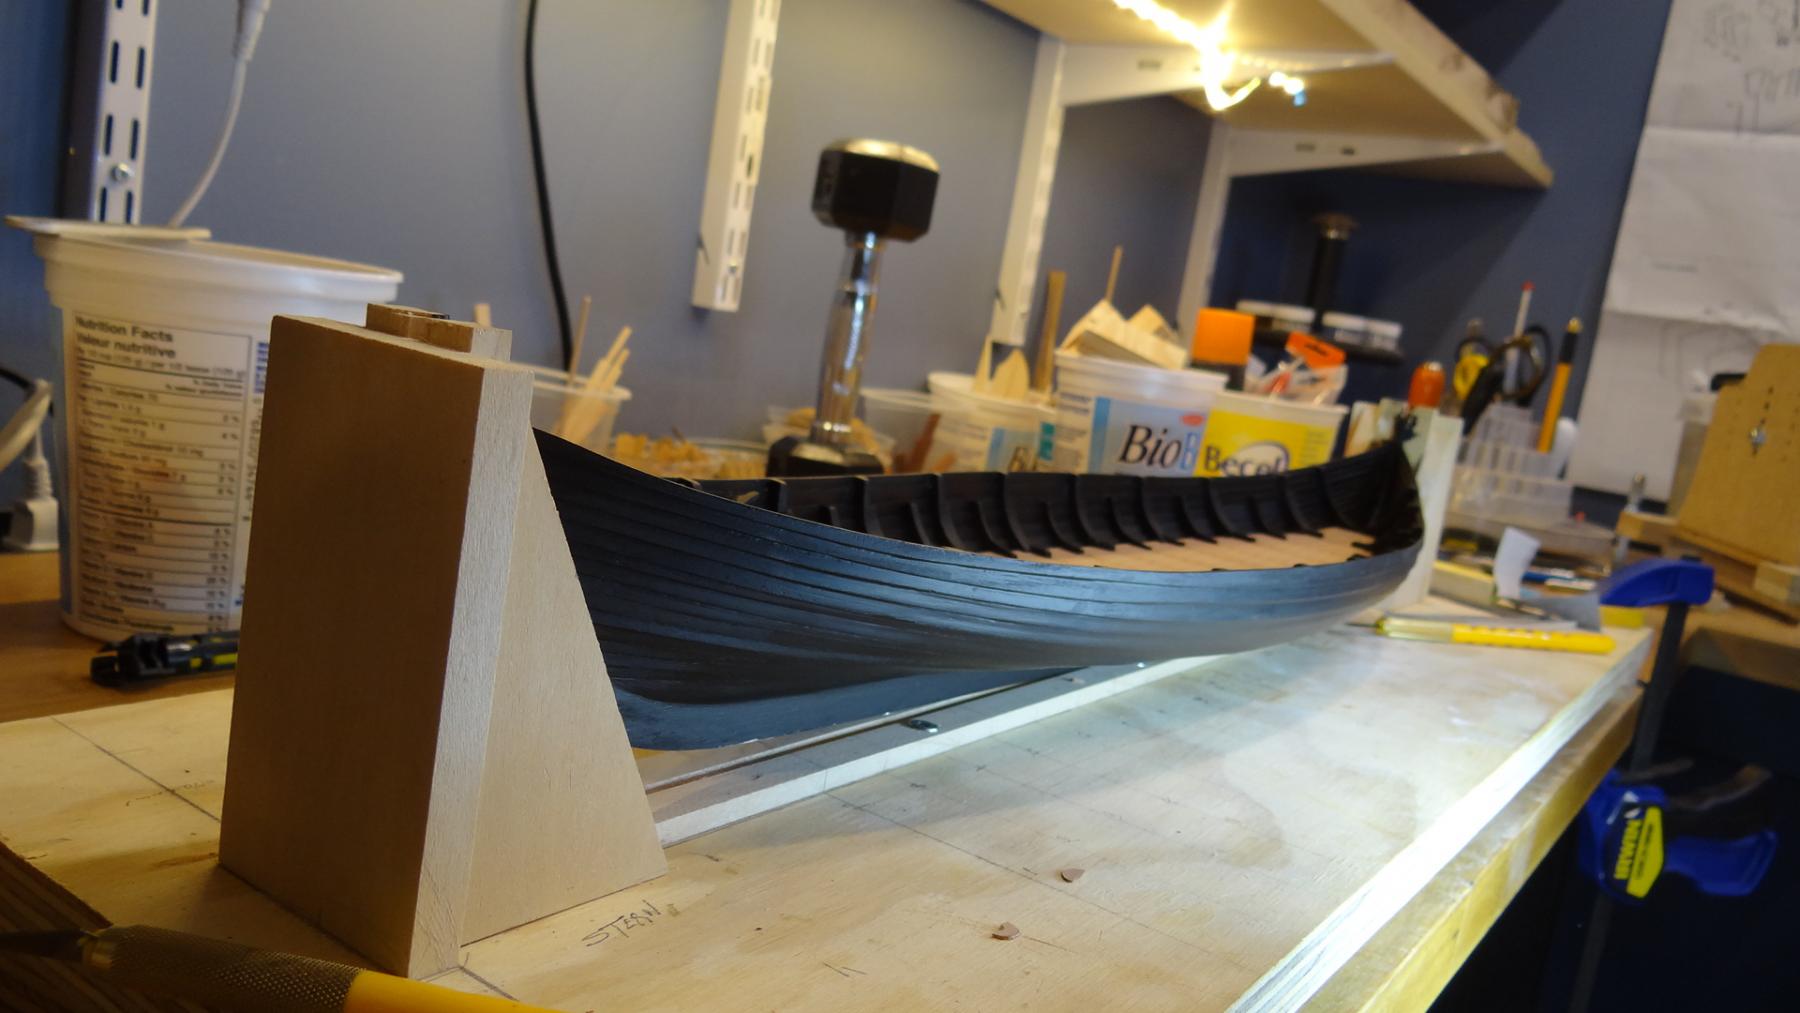
Thanks Zoltan and thanks for the likes everyone. I am moving at the pace of a snail but am honestly enjoying this build. I just finished painting the inside and am getting ready to lay the deck down. I am going to paint everything except the deck black. Ian