Seventynet
-
Posts
797 -
Joined
-
Last visited
Content Type
Profiles
Forums
Gallery
Events
Everything posted by Seventynet
-
 Don, lovely work as usual. I really echo your words to John about the MarisStella kits, the quality is a step above other kits for sure. I've been enjoying your Saskatchewan weather just north of Lloyd for a week. It just doesn't get any better than this, except maybe for the mosquitoes😬. Anyway please give us good pictures of the rigging when you get going on that. ian
- 653 replies
-
- 3
-

-
- trabakul
- marisstella
- (and 1 more)
-
Thanks Don. I look forward to your next rigging post...must be coming up soon? I can see the light at the end of this tunnel. I'm really going to push myself to get this finished by the end of August. Ian
- 107 replies
-
- 1
-
-
- brazzera
- marisstella
- (and 1 more)
-
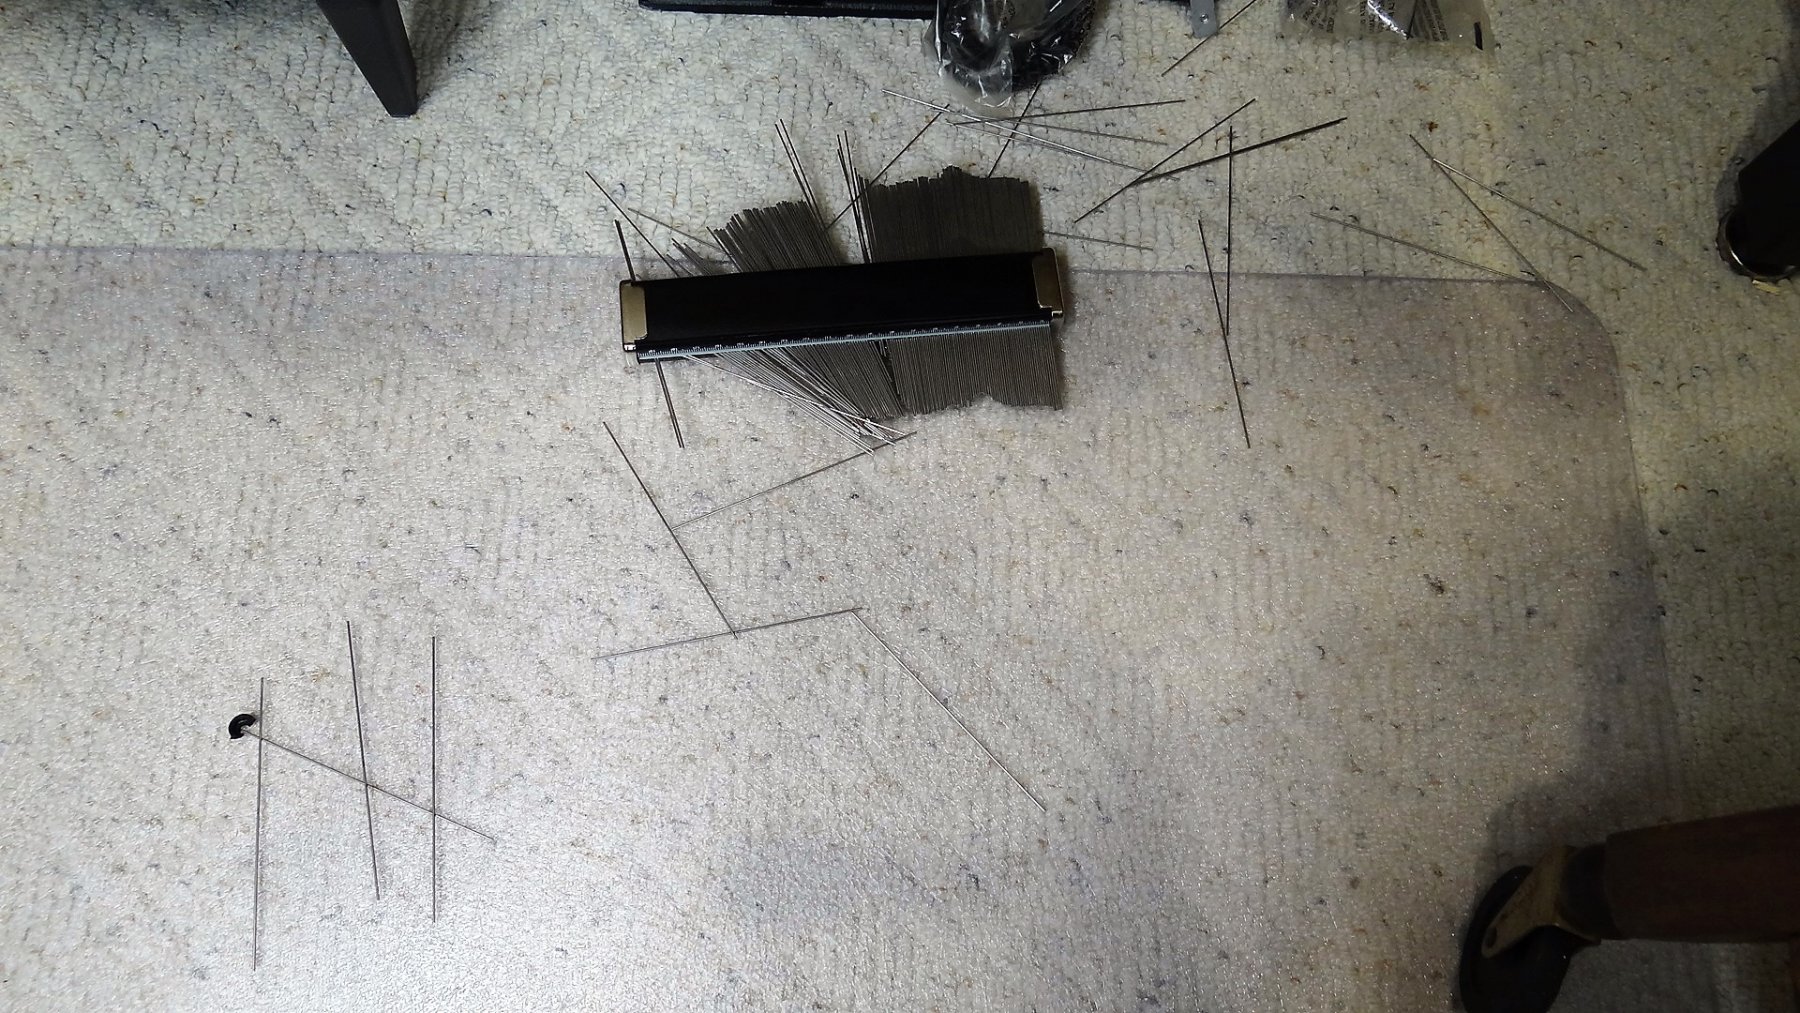
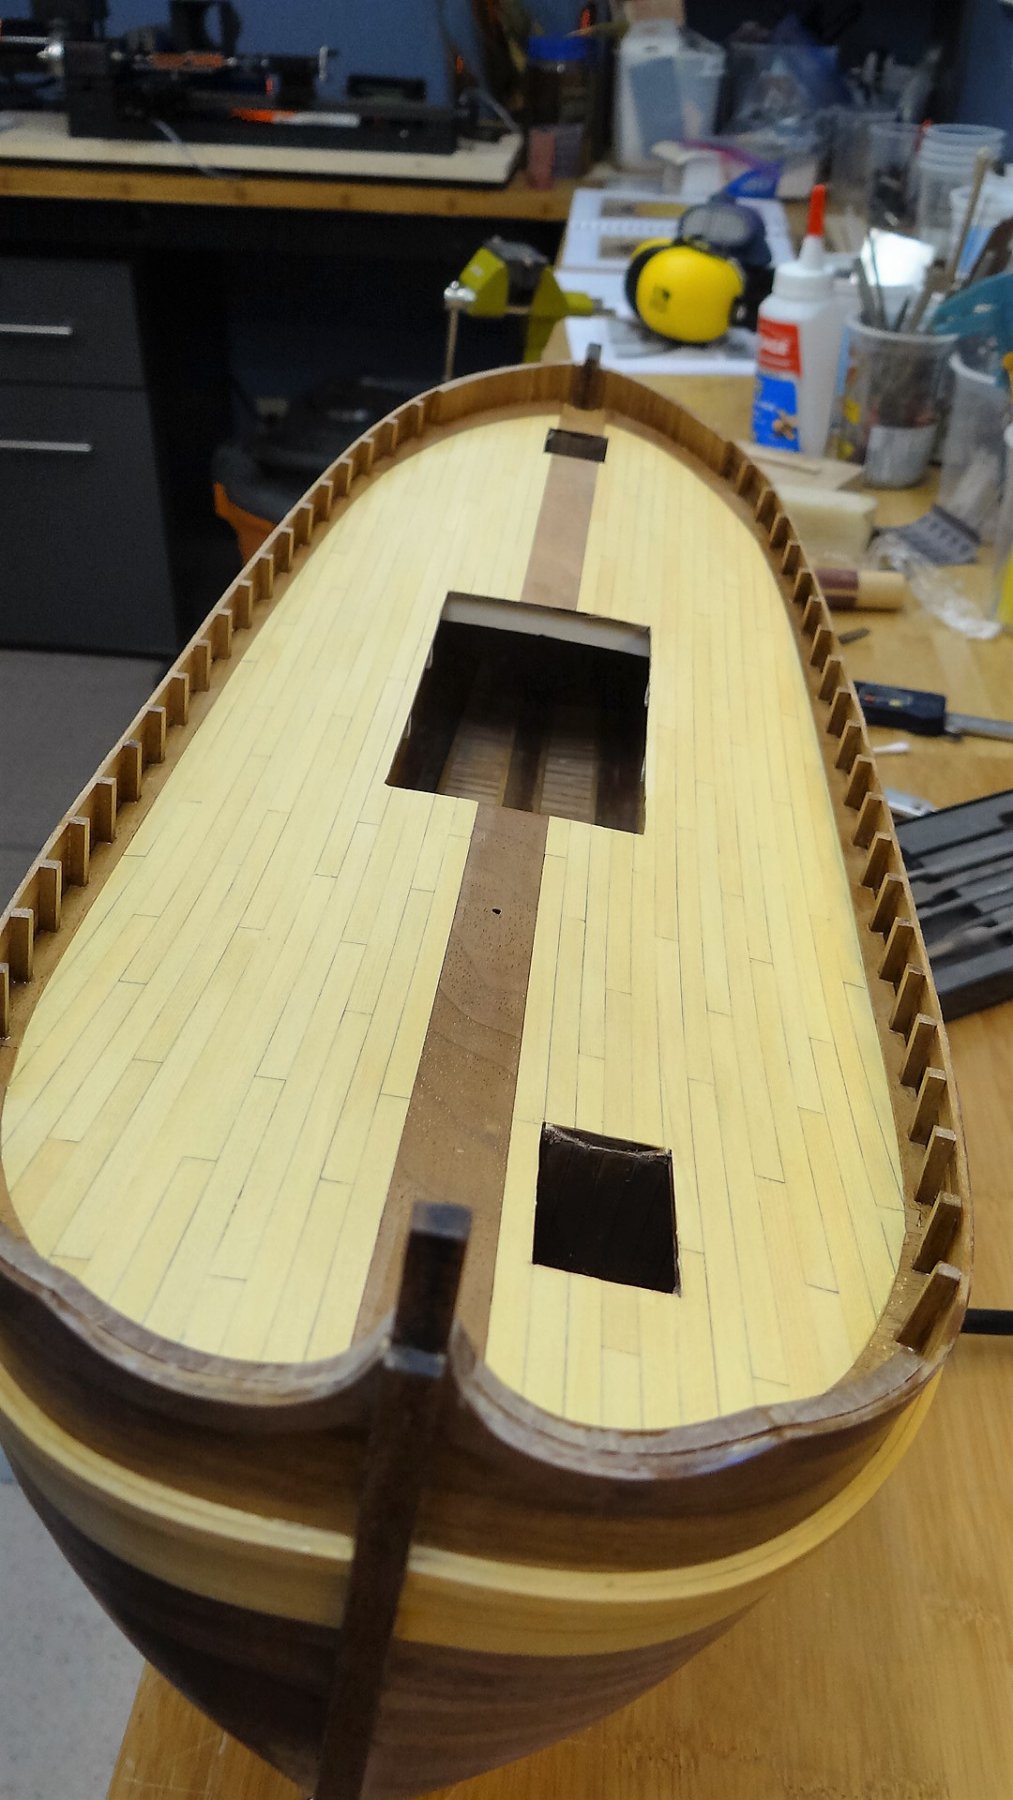
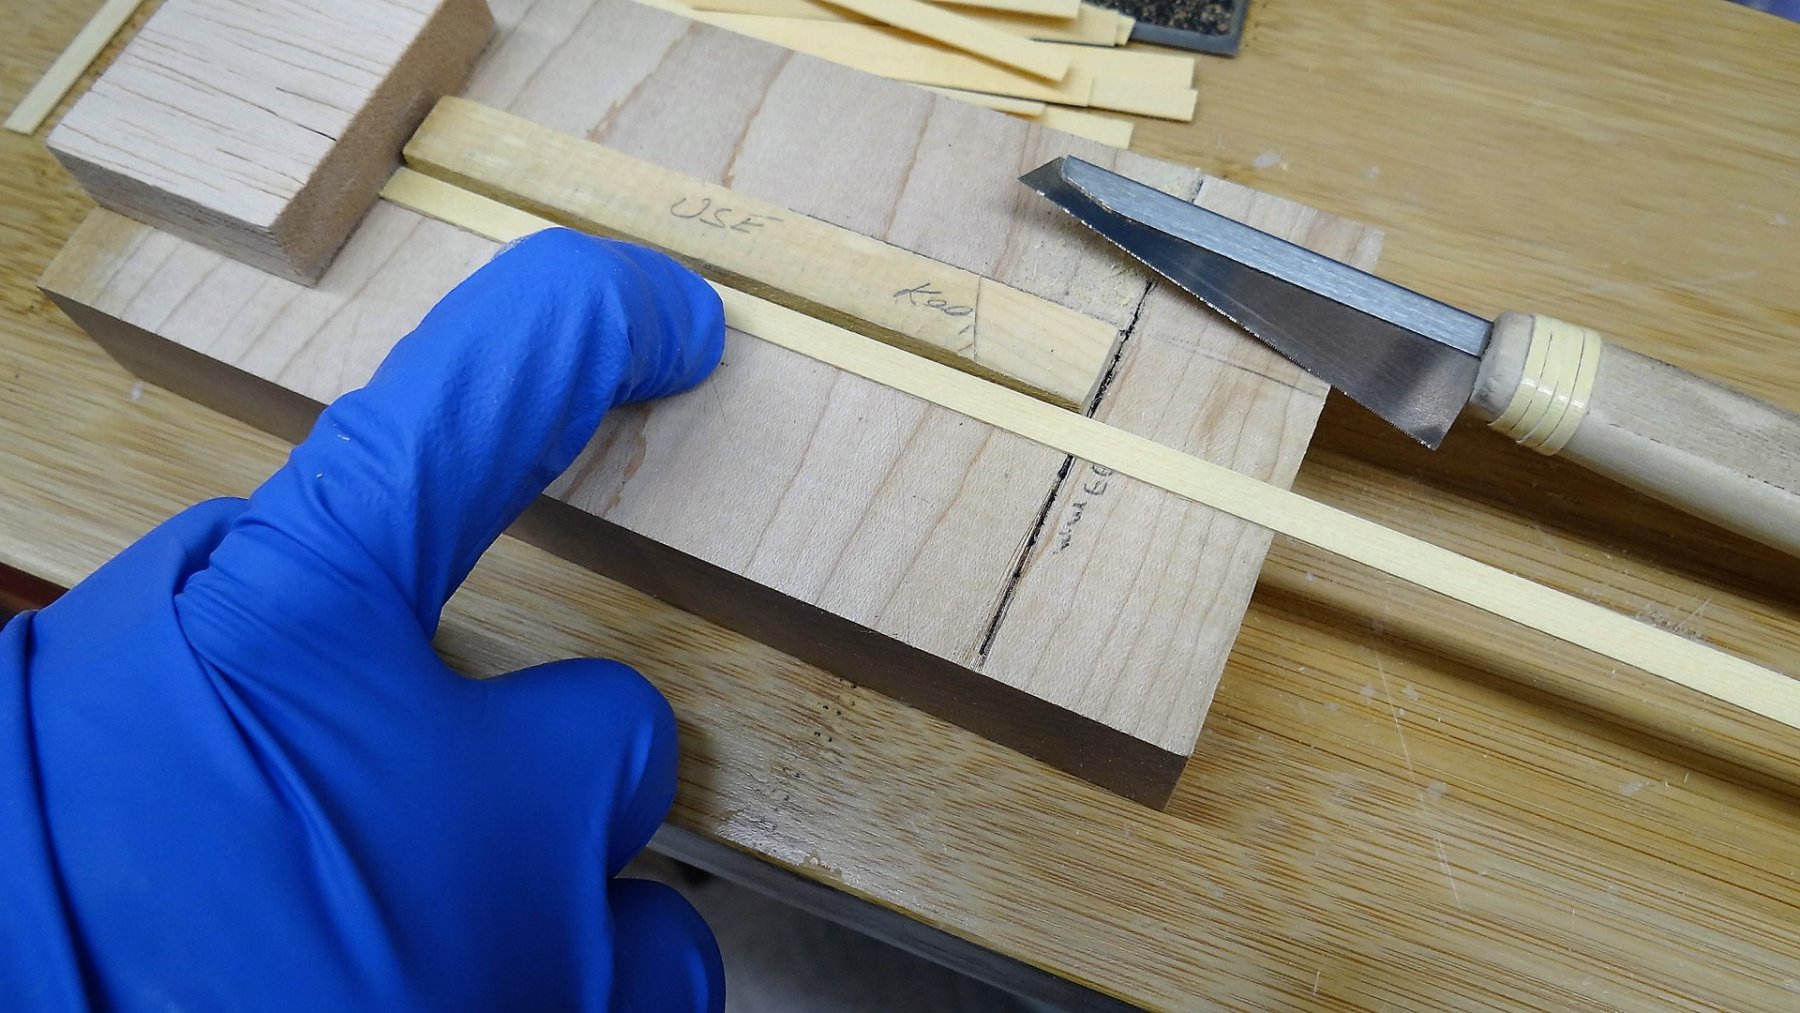
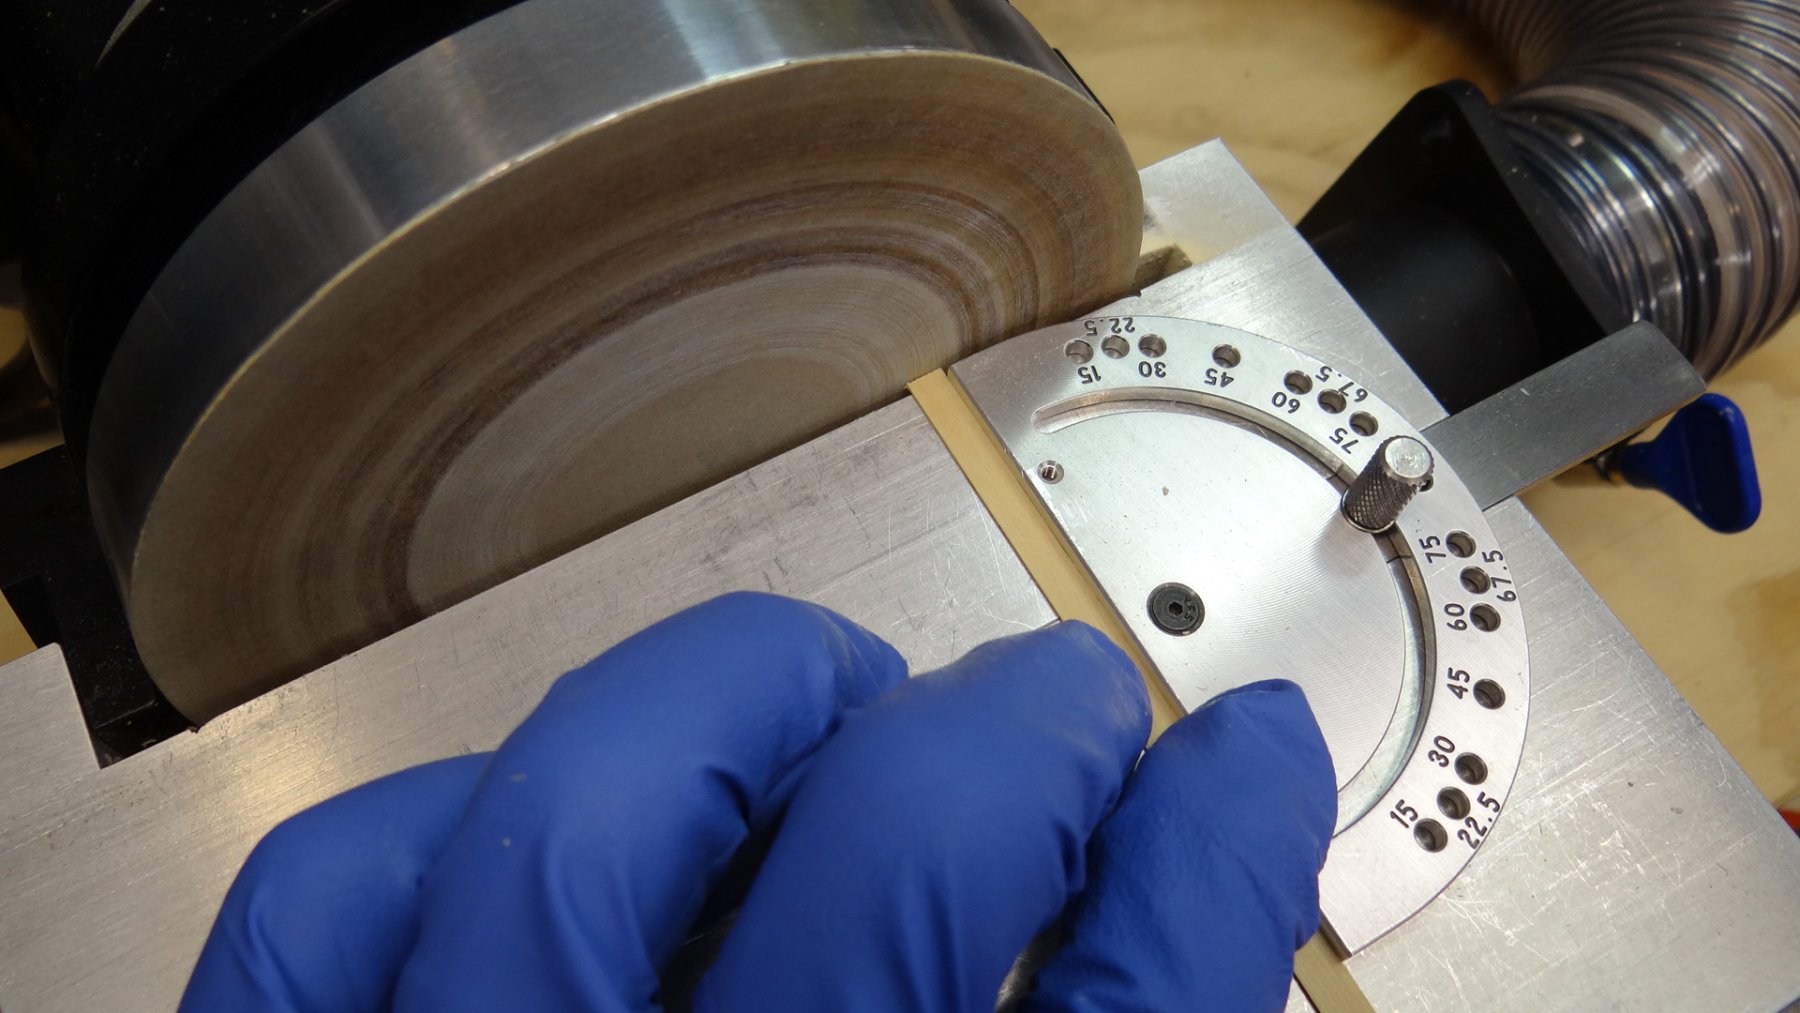
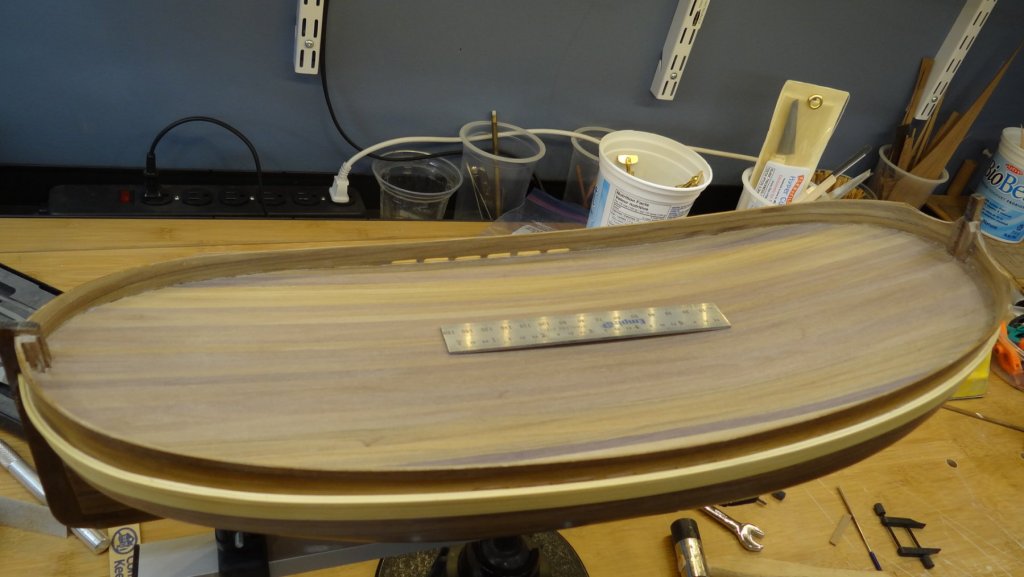
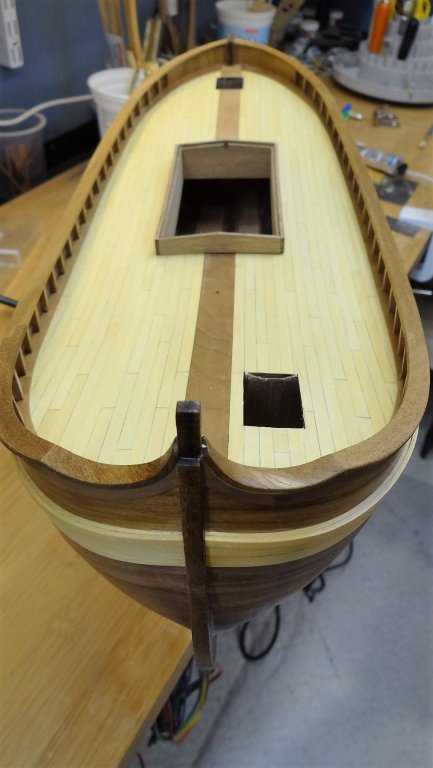
Good day Shipmates, I thought I'd post my current progress as I will be away for a while. So, since last time I have double planked the deck, installed the deck rail, the timbers, the hand rail and the main hatch (not glued in place). First layer of walnut planking. The 1.5 mm thick planks are continuous. They need to be sanded down by 0.5 mm. It becomes obvious here how important it is to get the bottom of the scuppers location right. This is what happened when I accidentally dropped my feeler gauge (I'm forgetting the right name for it). I've had a good year's use out of it so the tears were brief. Maybe the metal rods will come in handy. Here is the second layer of yellow cedar decking completed; deck rails installed, hatches and entranceway holes and timbers glued in place. The approach I used for the final 0.5 mm yellow cedar deck planks was to cut them with a jig, square them with the Byrne's disc sander, and pencil the edges (not shown). I was not happy with the pencil approach so I will look for a different approach next time. If you're wondering about the rubber gloves...they gave me a better grip of these thin pieces. The deck rail (the walnut on the periphery of the deck) is challenging to glue down because the 0.5 mm pieces immediately curl up upon gluing. The king plank is supposed to sit proud of the decking . The cap rail bow pieces were fiendishly difficult to bend but I got there eventually . Thanks for looking in. Best Regards, Ian


- 107 replies
-
- 7
-
-
- brazzera
- marisstella
- (and 1 more)
-
Drakar by cabrapente - FINISHED
Seventynet replied to cabrapente's topic in - Subjects built Up to and including 1500 AD
Nice. Sure looks similar to the Gokstad I built from a Dusek kit. I love the dragon head and tail. Dang I wish I could carve. Ian -
Thank you Chuck. It is a beautiful build and a real inspiration to me. best, Ian
- 1,051 replies
-
- 5
-
-
- cheerful
- Syren Ship Model Company
- (and 1 more)
-
I really like your deck work. I am going to try that nibbing some day. best, ian
-
Nice work Don. Beautiful actually. I love the outdoor lighting effect on the wood. Ian
- 653 replies
-
- 6
-
-
- trabakul
- marisstella
- (and 1 more)
-
It doesn't look like the DRO will be too difficult to install. Ian
-
Thanks a lot for the kind words Don and others for the likes. One thing that MarisStella could do to improve on the kit in my opinion is offer the same walnut stock in wide enough strips to allow spiling - as an add-on option. Sure you can do as I did and mill your own, in no small way from your stock and efforts Don , but the variation in wood is tremendous. Perhaps my readiness to spile is overdone, especially with the hull planking but I'd do the same thing again if I was to do it over. However, I don`t know how anyone could argue with me when it comes to the 0.5mm wale strips. If you're looking in Zoran, this is not meant as a criticism, rather as a possible way of improving the kit. I know you probably shuddered at the approach I took on one particular area of my hull . I'll leave it for others to discover . Best, Ian
-
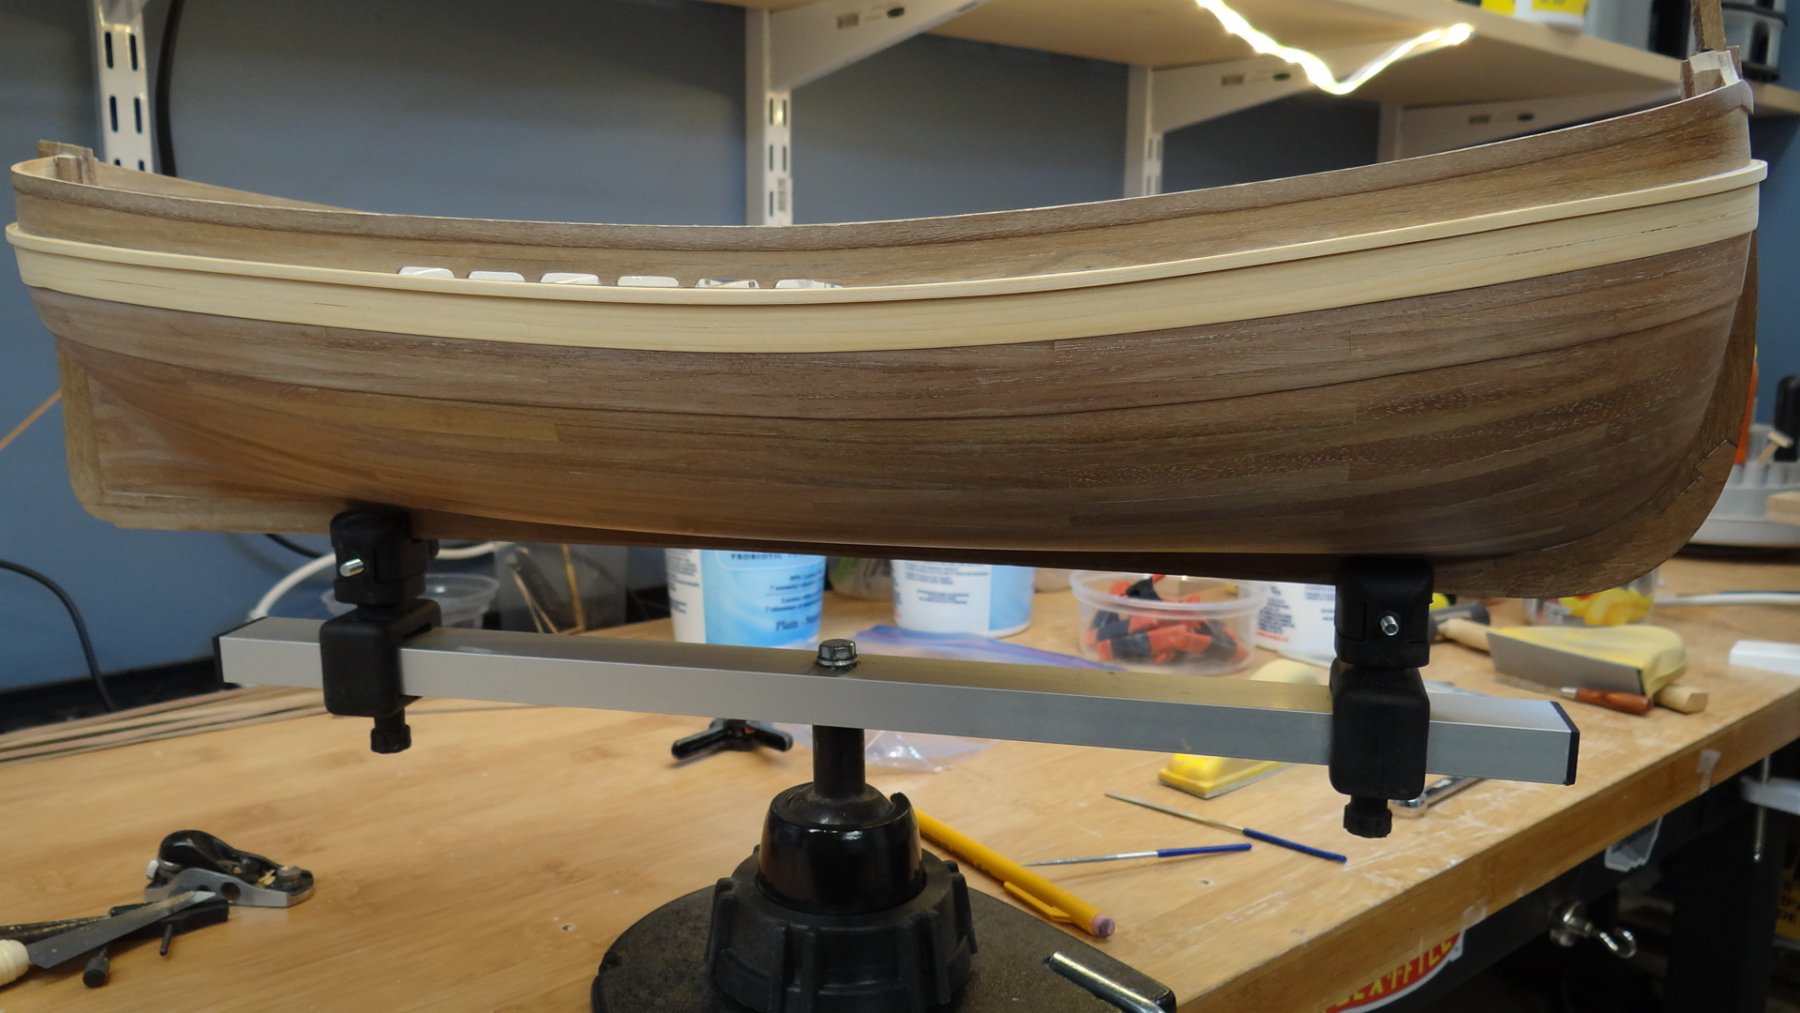
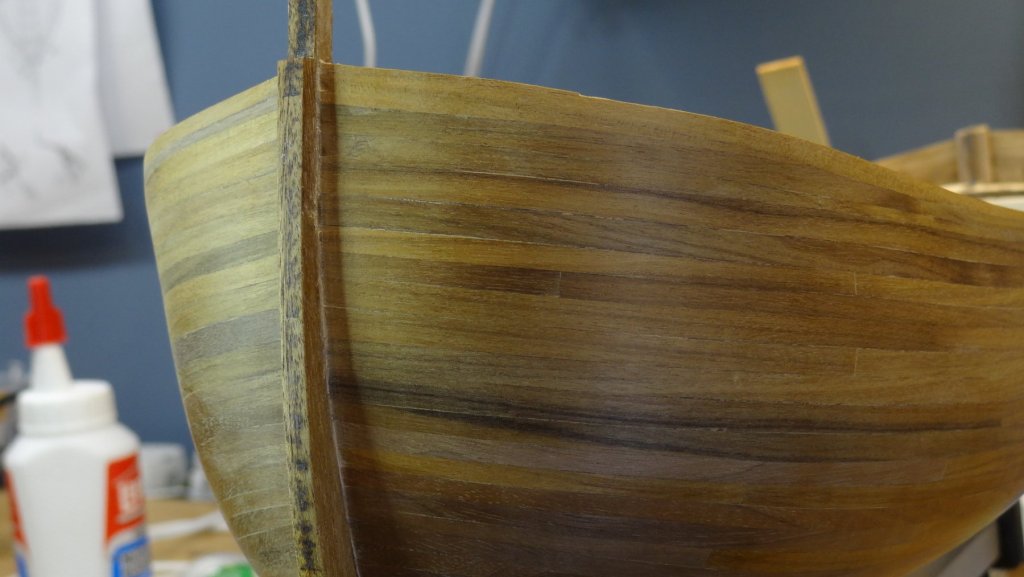
Thanks for the likes and looking in everyone. While the progress may not seem like much, in fact it isn`t much , it marks a milestone for me. Aside from a coat or two of poly I am on to the deck. I will decide on a paint scheme later. I will mention that I don`t know how the heck anyone can edge bend 5 mm by 0.5 mm walnut the way it needs to be bent to form those lower wales. Obviously people do it but it is beyond me. I put many hours in trying. I gave up and milled my own stock and spiled it. The light wood is yellow cedar (edge bent). It bends well and sands better than basswood - but it isn`t much harder, so beware if you`ve been using walnut, this stuff is much softer and clamp marks will show up very easily.


- 107 replies
-
- 9
-
-
- brazzera
- marisstella
- (and 1 more)
-
That serving machine is definitely a cool looking unit. I look forward to seeing more of what I'm missing! Ian
- 653 replies
-
- 4
-
-
- trabakul
- marisstella
- (and 1 more)
-
Beautiful work as usual Don. Showing these steps is invaluable to me. I find myself continually going back to your build to see how you did one thing or another. My backyard looks like yours right now.😱
- 653 replies
-
- 6
-
-
- trabakul
- marisstella
- (and 1 more)
-
Remarkable work Heinz, as good as I've seen anywhere. Ian
-
Absolutely lovely job Robert. A pleasure to follow. Best, Ian
- 527 replies
-
- 2
-
-
- caldercraft
- victory
- (and 1 more)
-
Keith I just have to say that your work is absolutely stunning and an inspiration to me. Wow! Ian
-
Nice technique Michael! Looking very nice. Ian
-
Looking good Rob! Eventually is the key word.
-
Well what do you know, it looks like a Sherline 4410 with DRO. I ought to look around more often...
- 107 replies
-
- 2
-
-
- brazzera
- marisstella
- (and 1 more)
-
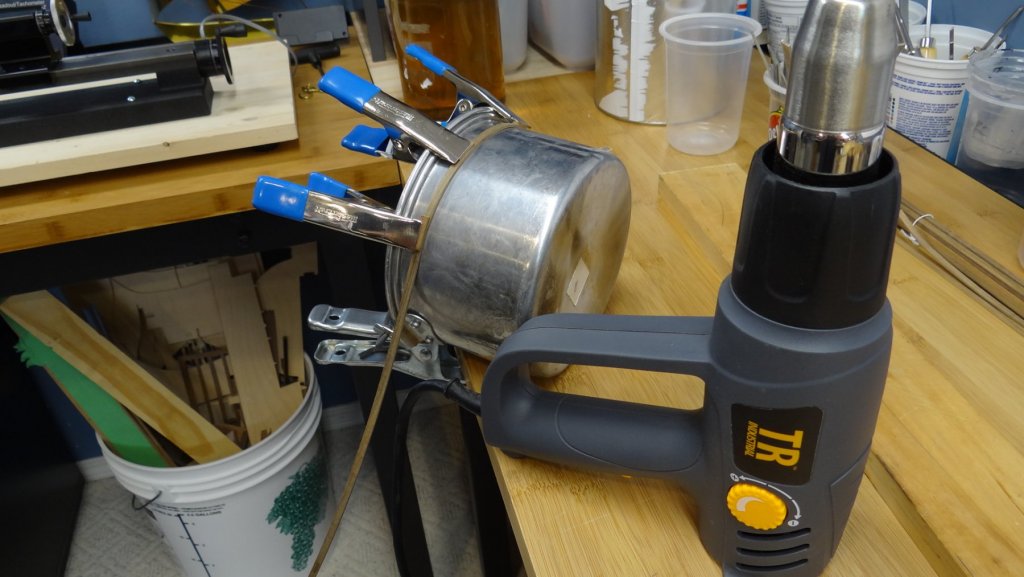
Thanks Zoltan. I can't overstress how effective this simple plank bender is. I imagine a hair dryer would work just as well but the heat gun works perfectly. Best, Ian
- 107 replies
-
- 1
-
-
- brazzera
- marisstella
- (and 1 more)
-
Hi Don, thanks for looking in and the words of encouragement! I'm lucky you are breaking the trail with Trabaccolo. I think I spend more time figuring out how to do something than actually doing it. As you've pointed out, frustration is good; it leads to more tool purchases! Ian
- 107 replies
-
- 1
-
-
- brazzera
- marisstella
- (and 1 more)
-
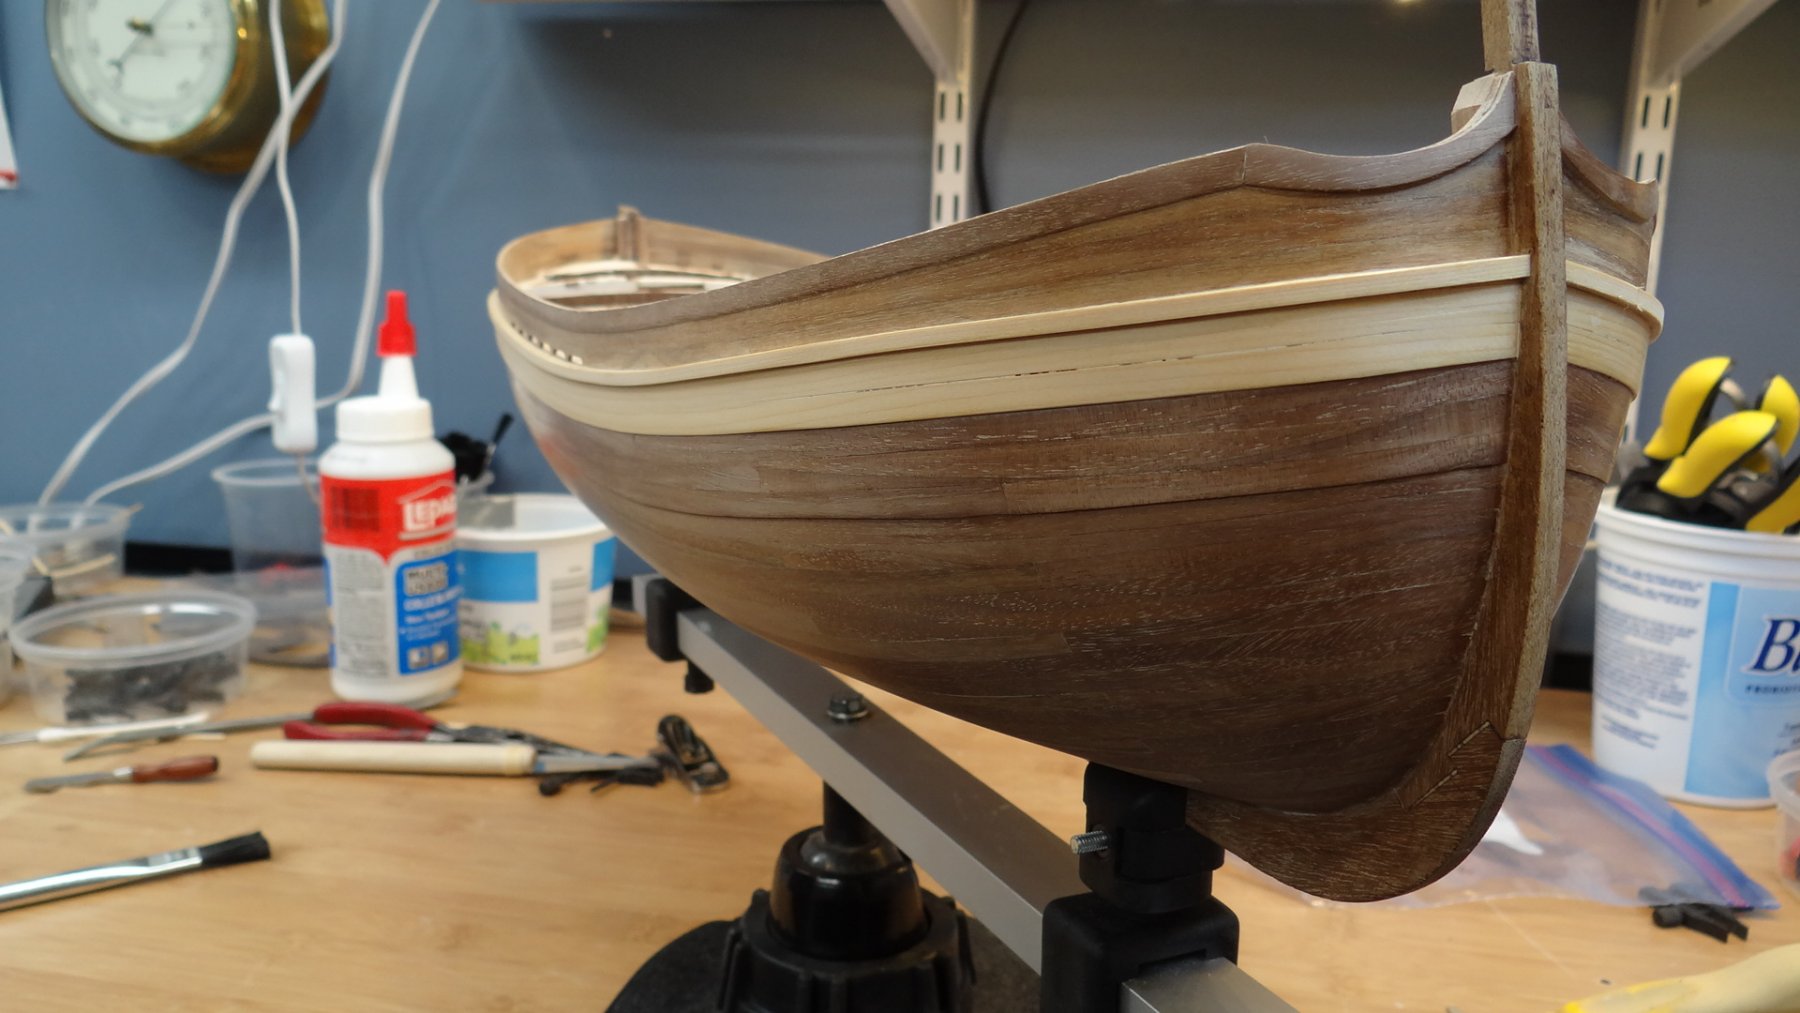
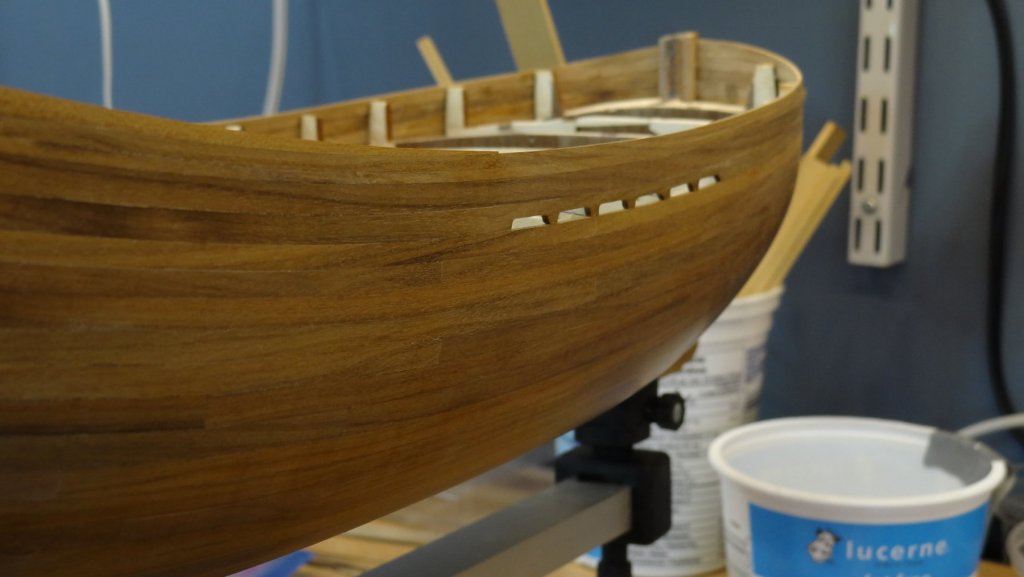
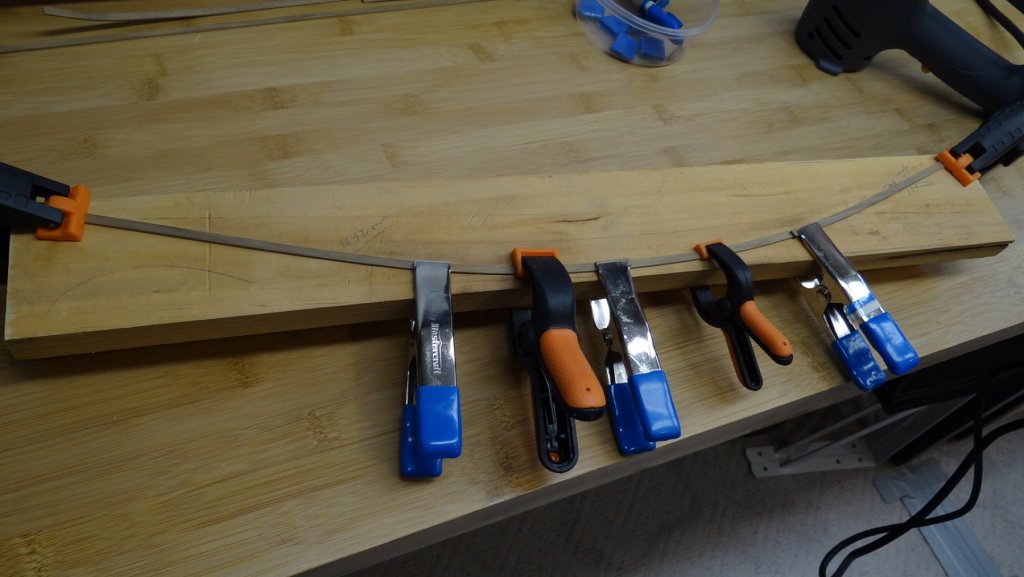
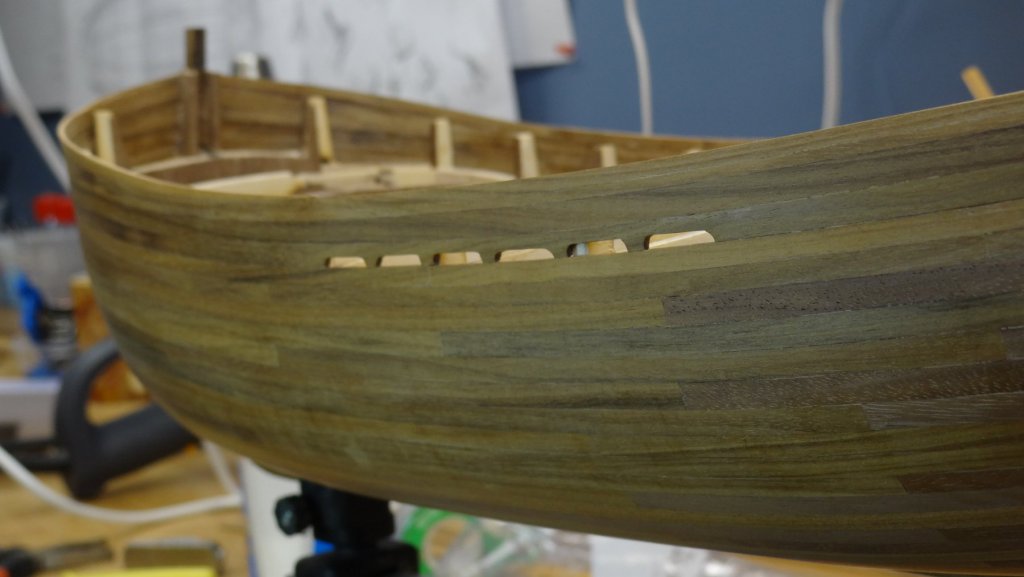
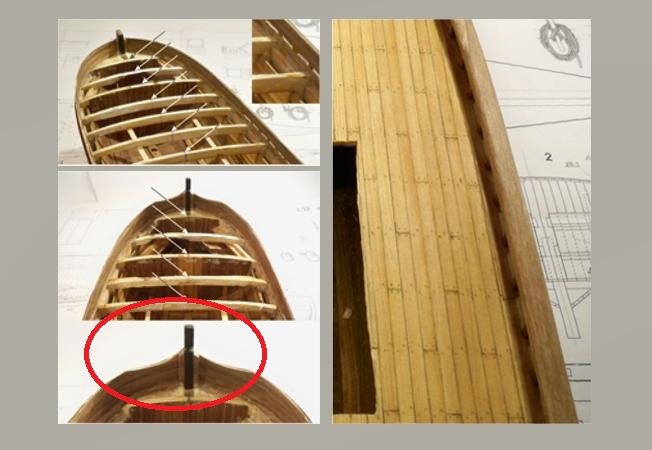
Ok Folks here we go with a small update. I've installed the scupper strakes and the rest of the planks to the gunwale. I used a 1mm mill bit attached to my dremel to cut the scuppers before I installed them. I also pre-bent the strakes before I cut the scuppers because I was afraid that they would break if I edge bent them afterwards. The top planks need to be sanded down to approximately the top of the bulkheads and then a 5.0 * 0.5 mm sheer strip needs to be fitted along the top from stern to bow where it joins up with that unique shape at the bow (see the circled picture below). No dimensions are presented in the plans so I think I'm supposed to consider it a personal touch. This boat is beautiful and in spite of its challenges I love it. The hull has been lightly sanded but needs a bit more before I add the rubbing strip and numerous wales. The most challenging thing I have found so far on this build is working with 5.0 * 1.7 mm planks. Edge bending this dimension is not easy. All strakes above the scupper were edge bent without too much damage. Virtually all planks under the first 4 beneath the scupper planks are spiled. I did discover a highly sophisticated bending technology that I will now share with you. It consists of an aluminum camping pot, clamps and a heat gun. I clamp one end of a previously soaked plank to the pot, fire up the heat gun and walk it down the plank while pushing the plank down - then clamp the end. Works flawlessly. The biggest advantage is the heat gets applied equally on both sides of the plank with the pot transferring the heat to the underside of the plank. Different diameter tin cans are currently being hoarded. Anyway a few pictures.
- 107 replies
-
- 8
-
-
- brazzera
- marisstella
- (and 1 more)
-
Simulated wipe on poly
Seventynet replied to Slowhand's topic in Painting, finishing and weathering products and techniques
So 50:50 mineral oil to oil based satin WOP will give you matte? I can't promise I won't do something idiotic but I have oil and water based stuff figured out. 👌 I prefer oil based and have used both. Thanks Spyglass. ian -
Simulated wipe on poly
Seventynet replied to Slowhand's topic in Painting, finishing and weathering products and techniques
Thanks for looking that up. Good luck with your fine build. Ian -
Simulated wipe on poly
Seventynet replied to Slowhand's topic in Painting, finishing and weathering products and techniques
Beautiful job on the hull Slowhand! Can you send me a link or a reference to the wipe on matte poly urethane that you mentioned? I have looked in vain many times in the past for a wipe on poly that's actually matte and not just satin. Thanks, Ian