HOLIDAY DONATION DRIVE - SUPPORT MSW - DO YOUR PART TO KEEP THIS GREAT FORUM GOING! (Only 72 donations so far out of 49,000 members - Can we at least get 100? C'mon guys!)
×


Seventynet
-
Posts
797 -
Joined
-
Last visited
Content Type
Profiles
Forums
Gallery
Events
Everything posted by Seventynet
-
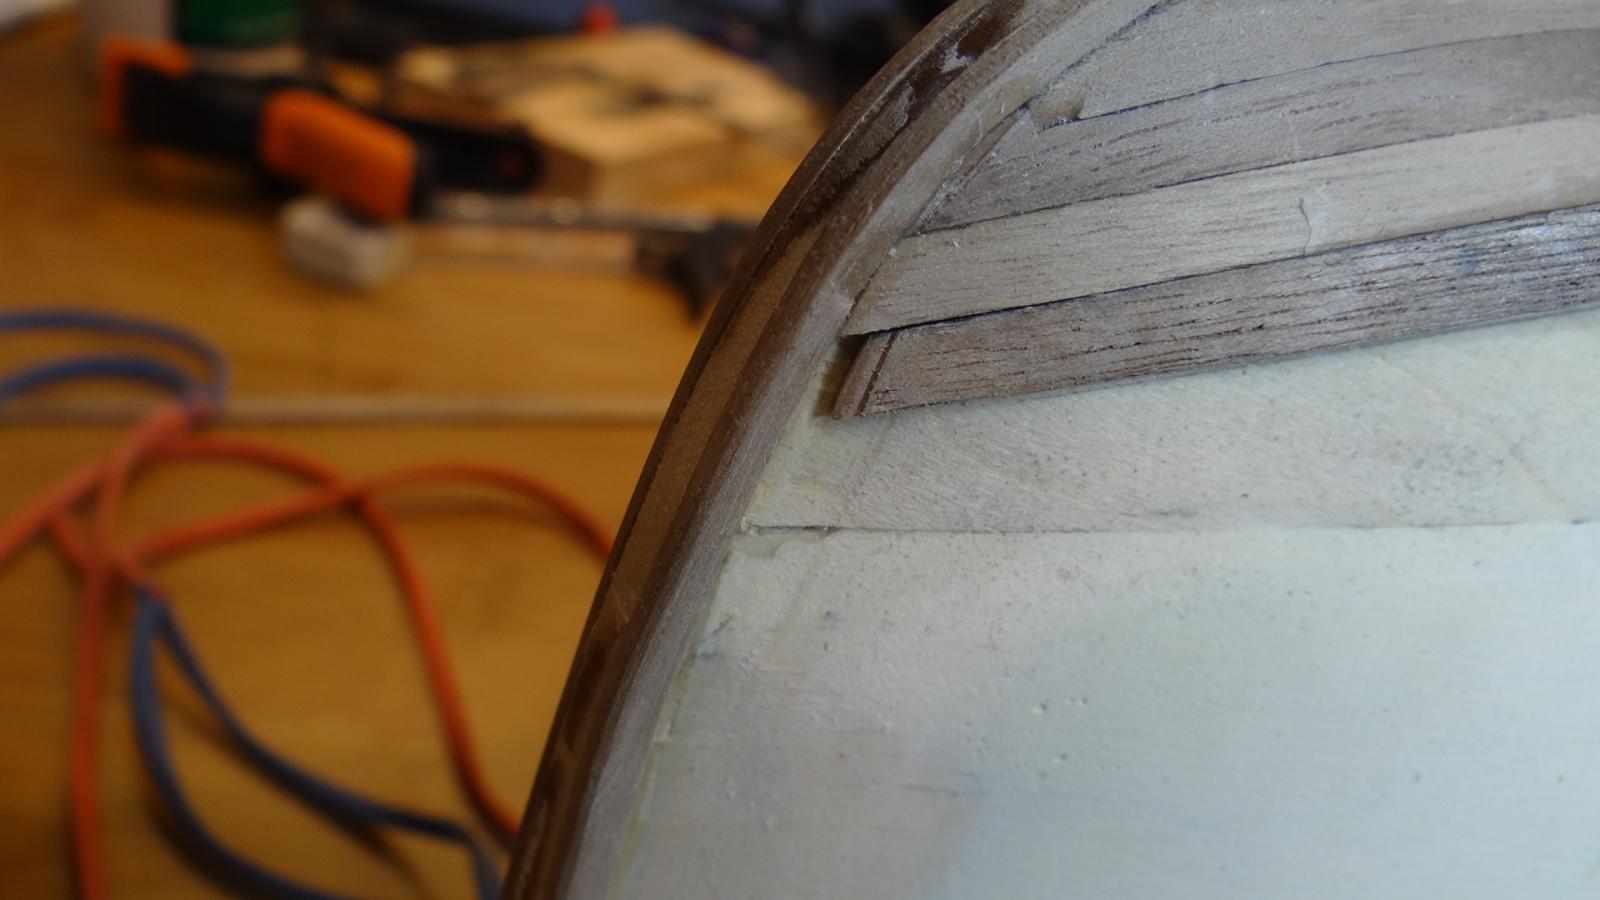
 Never mind you'd never know the difference. Just so you know I finally took my first step towards caulking deck planks on my catboat. But it is not a technique that would work in most instances. I will be starting back on my Victory in the next few days now that I have the material I've been waiting for. Ian
 -
Fantastic Heinz, I've been waiting for your update with rapt anticipation - and I am not disappointed! Did you actually make those camber beams out of two pieces and join them with scarph joints? They look fabulous. Those cannons look like they are ready to do business! Best, Ian
-
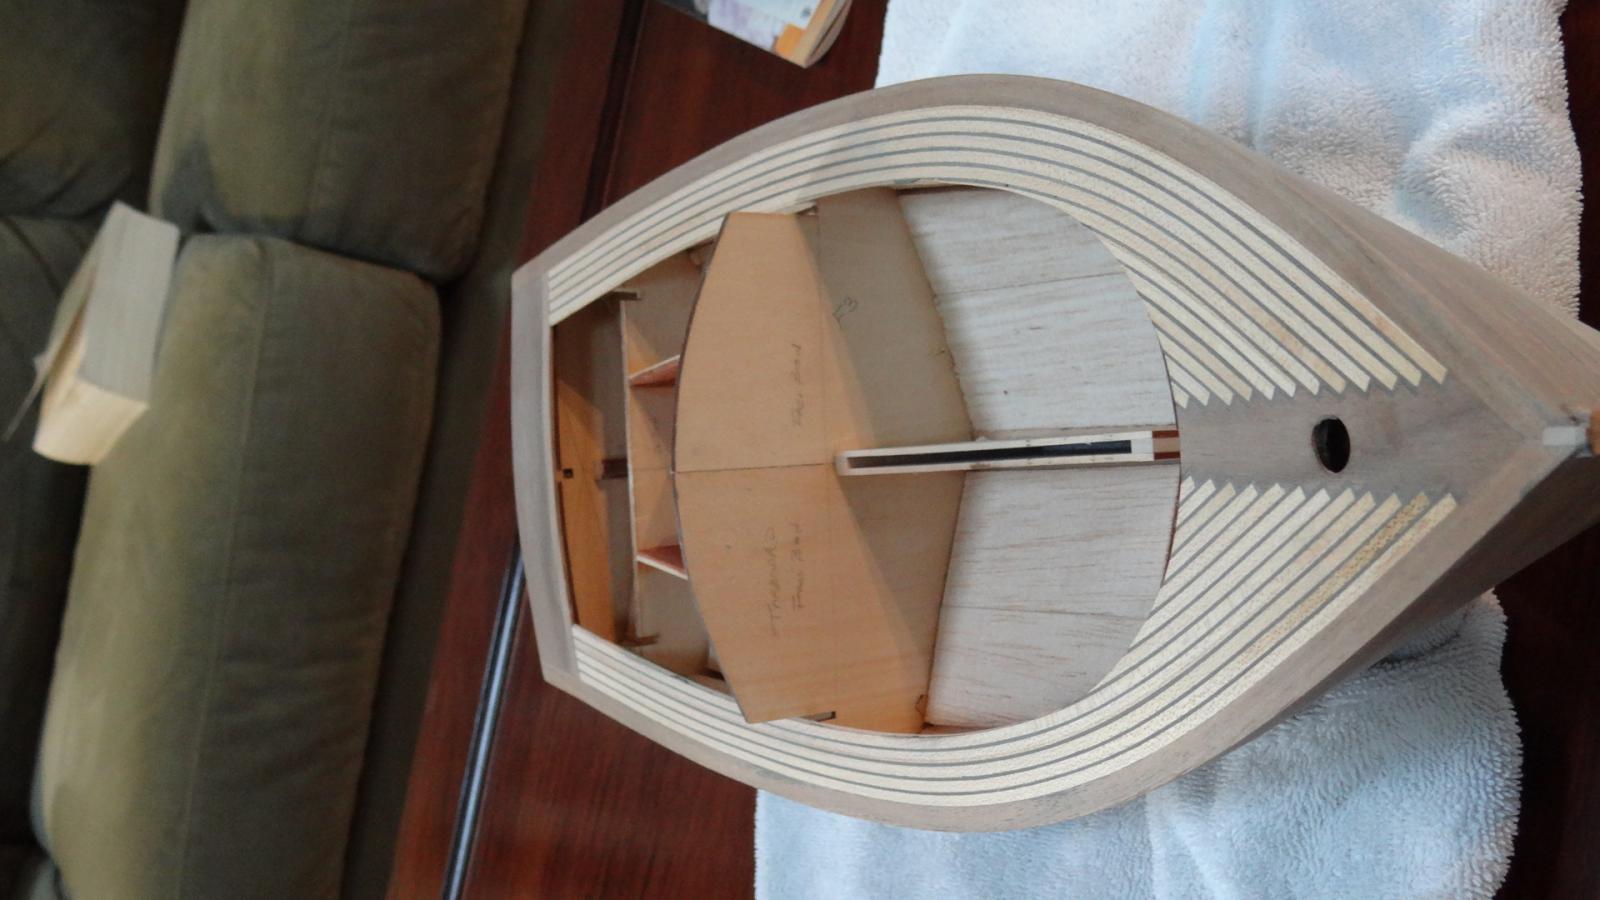
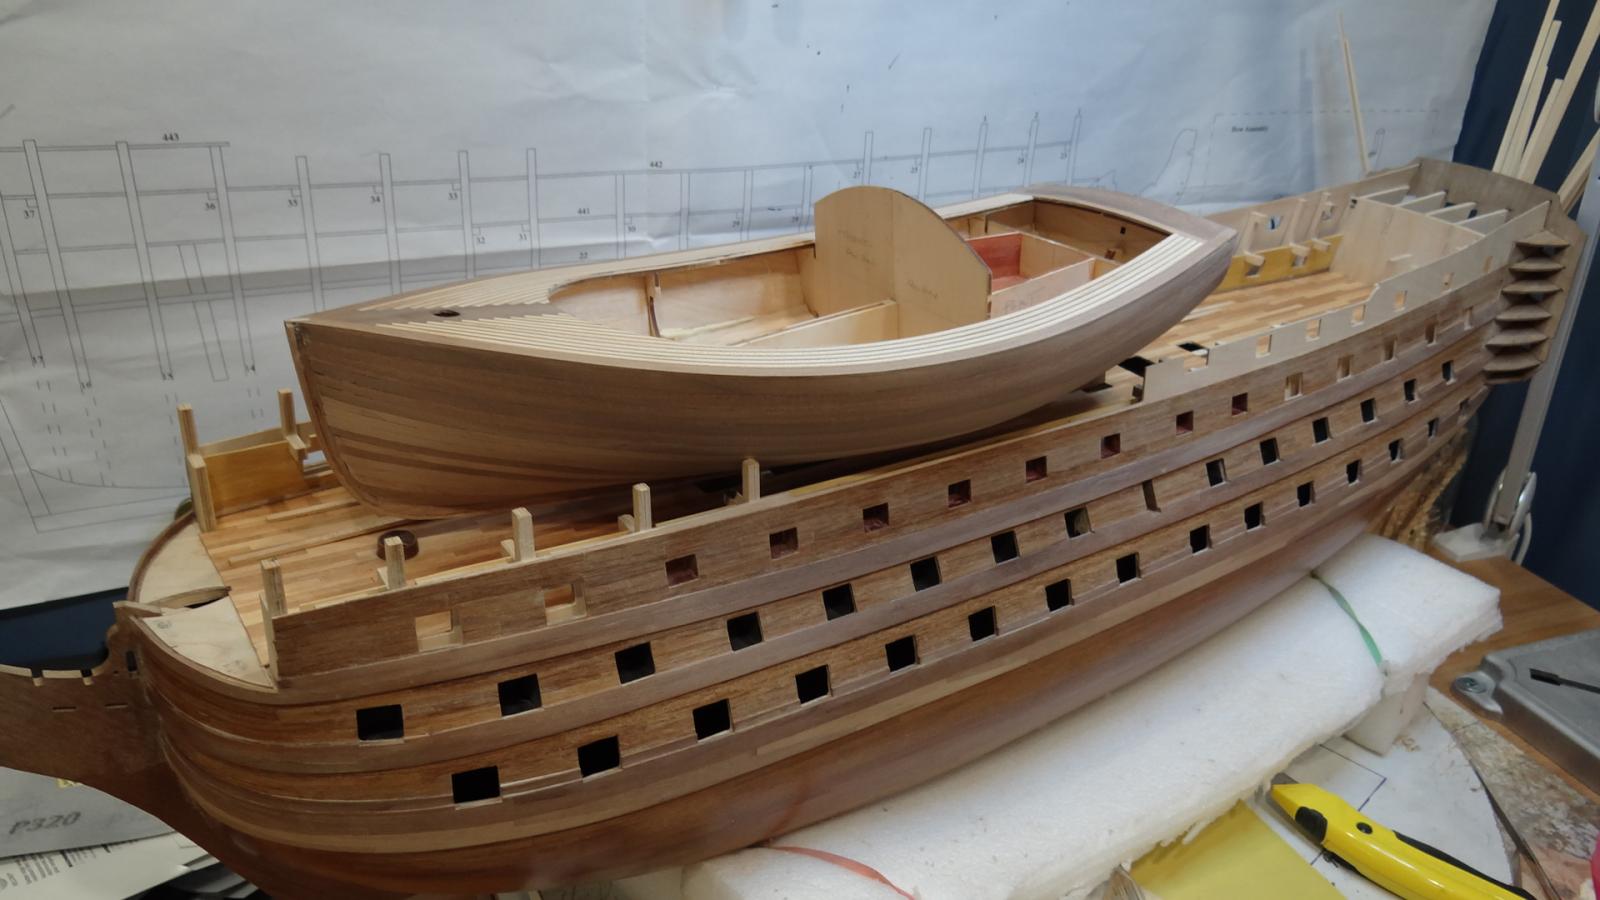
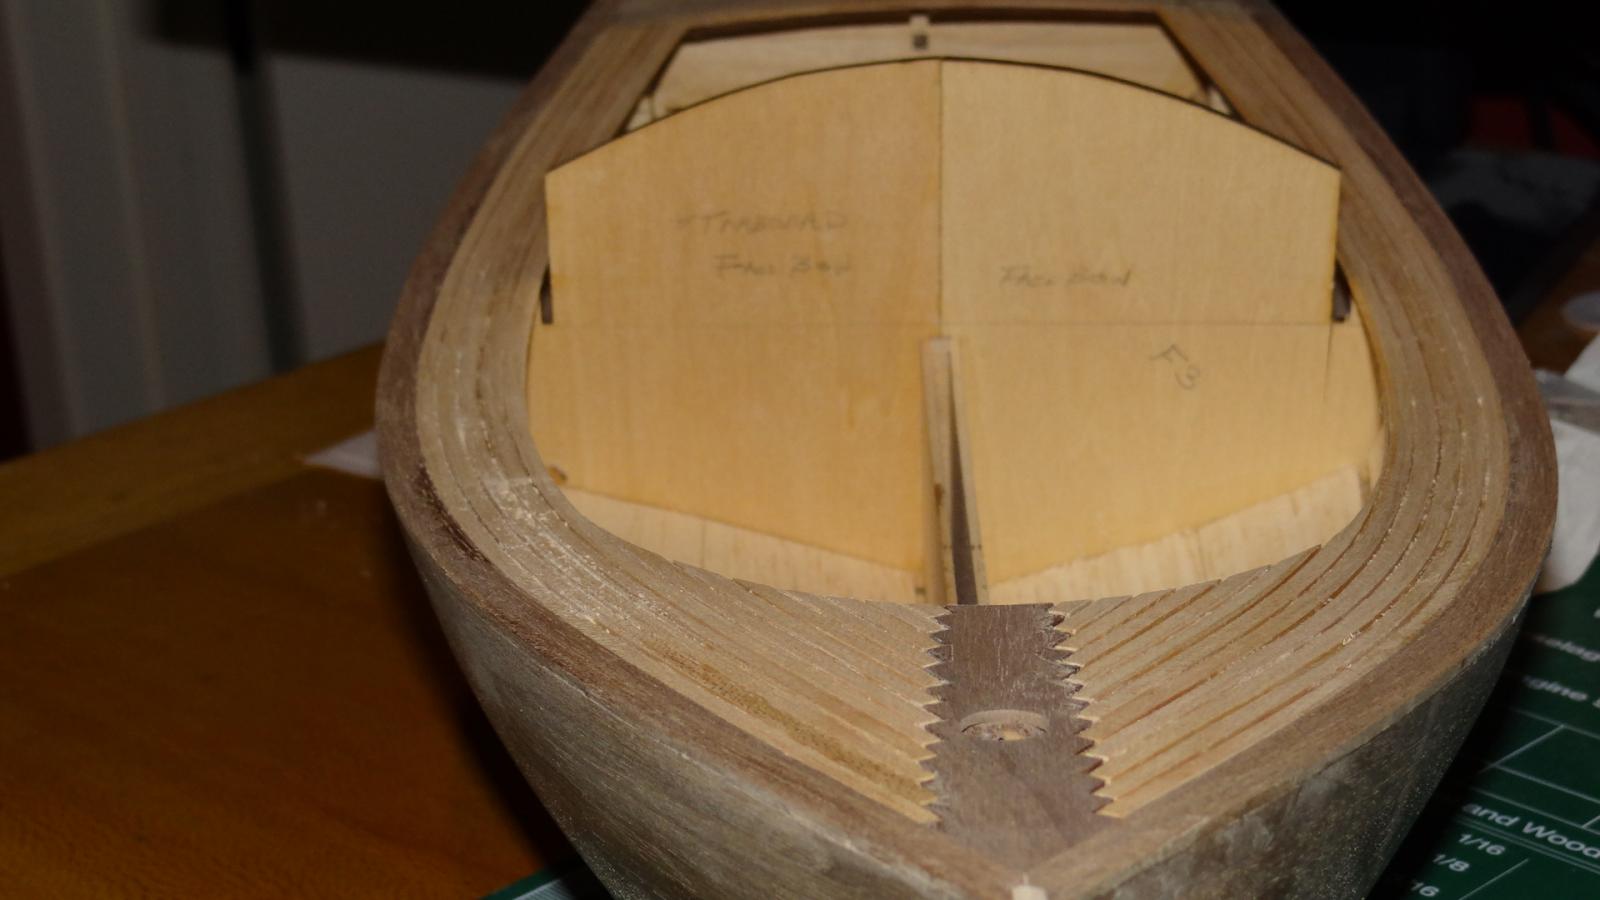
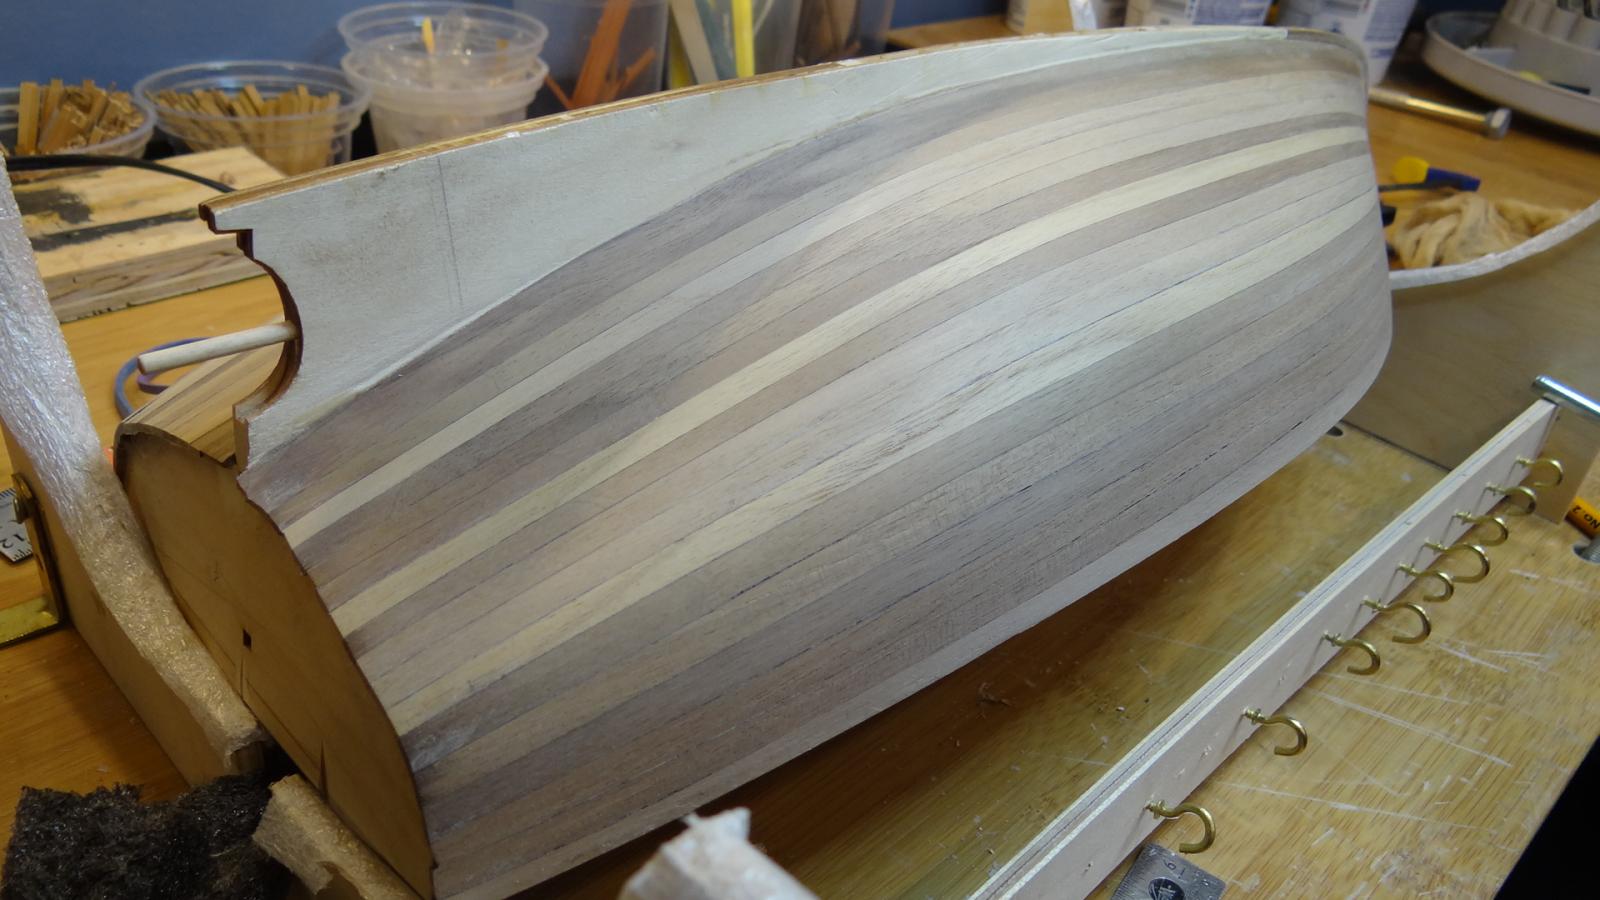
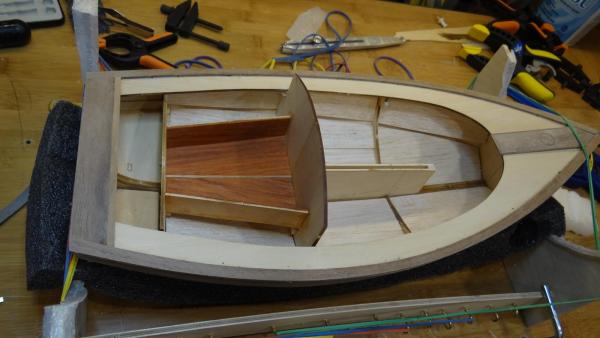
Greetings again, Did I mention how much I love the lines of this catboat? A credit to Bluejacket for making this kit available. Now the first question I had was would this work as a launch for the Victory? A little too big I guess. I've applied and cleaned up the grouting (1 part ebony to 4 parts walnut Elmer's wood filler). I plan to apply a waterbased clear satin poly by Minwax which seems to work on my test piece. Thanks for following everyone. Best, Ian

- 86 replies
-
- 13
-

-
Thank you for the praise Brian, Don, Bob and Nigel. You have no idea how influential your own builds have been to my projects. Michael if it wasn't for your Herreshoff's king plank example my boat would be without this little experiment, which I thoroughly enjoyed doing. I might also say how much I liked working with maple for the first time. It does not seem to crack or check nearly as much as the walnut. Anyway with luck I'll be showing you how the filler worked out today. Best, Ian
-
This is a nifty looking build Brian. I'm pulling up a chair. Ian
-
Hi Folks, I am nearing the end of this operation and am quite pleased with the results. The next step is to caulk the slots. I think I will use a combo of walnut and ebony wood filler then cover with poly. I'm not sure how the poly will like the filler so I'll have to do some experimenting. Other suggestions are more than welcome. Best, Ian

- 86 replies
-
- 11
-
-
Thanks a lot Brian. Sorry to misinterpret your note. As you can appreciate when you are using defined lengths for your planking pattern things get tricky around gunports where the plank wants to end say 1mm before the edge of a gunport or things get wasteful when a plank crosses the majority of a gunport opening. Just looking for some wisdom that magically eliminates the problem - like ignoring the pattern. Best, Ian
- 79 replies
-
- 5
-
-
- lady nelson
- amati
- (and 2 more)
-
Dave sorry for hijacking your log for a moment but Brian has said something that I would like more information on. Brian this is something I have wondered about and even though I tried to carry through the 4 butt shift planking pattern from the hull when I got to my gunports on my Victory I didn't do this perfectly so I was always left wondering what the norm is. You seem to be saying that the pattern isn't repeated once you get in amongst the gunports - but I am not positive I am interpreting your advice accurately. Can you explain a little more? Dave I will delete this post once Brian weighs in if you want me to. By the way, wonderful work you are doing. Thanks, Ian
- 79 replies
-
- 4
-
-
- lady nelson
- amati
- (and 2 more)
-
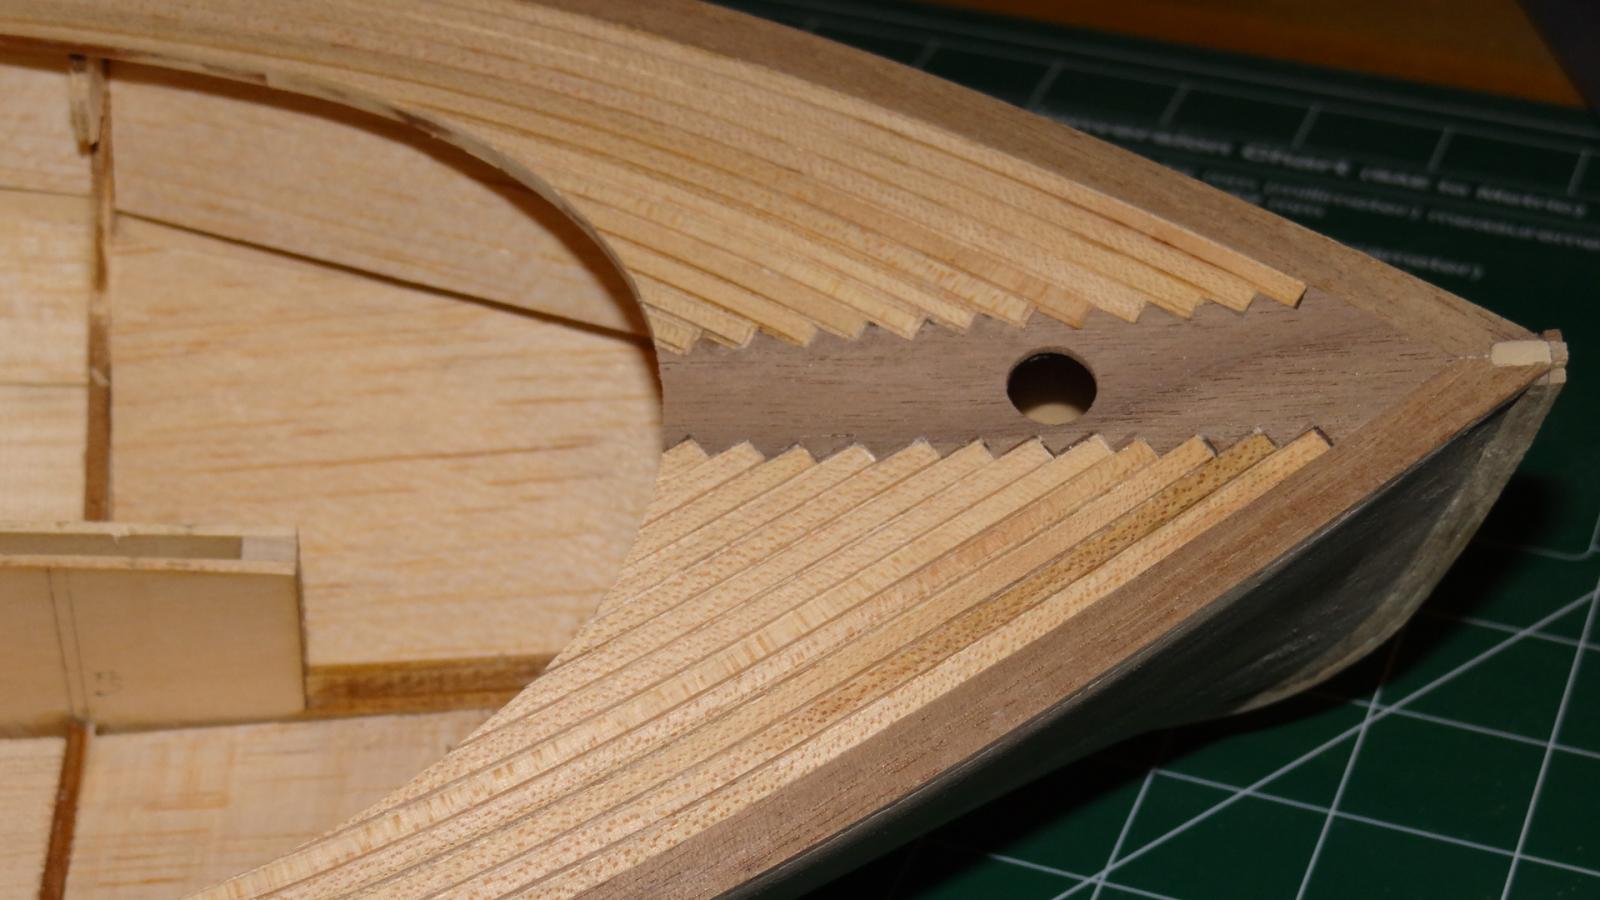
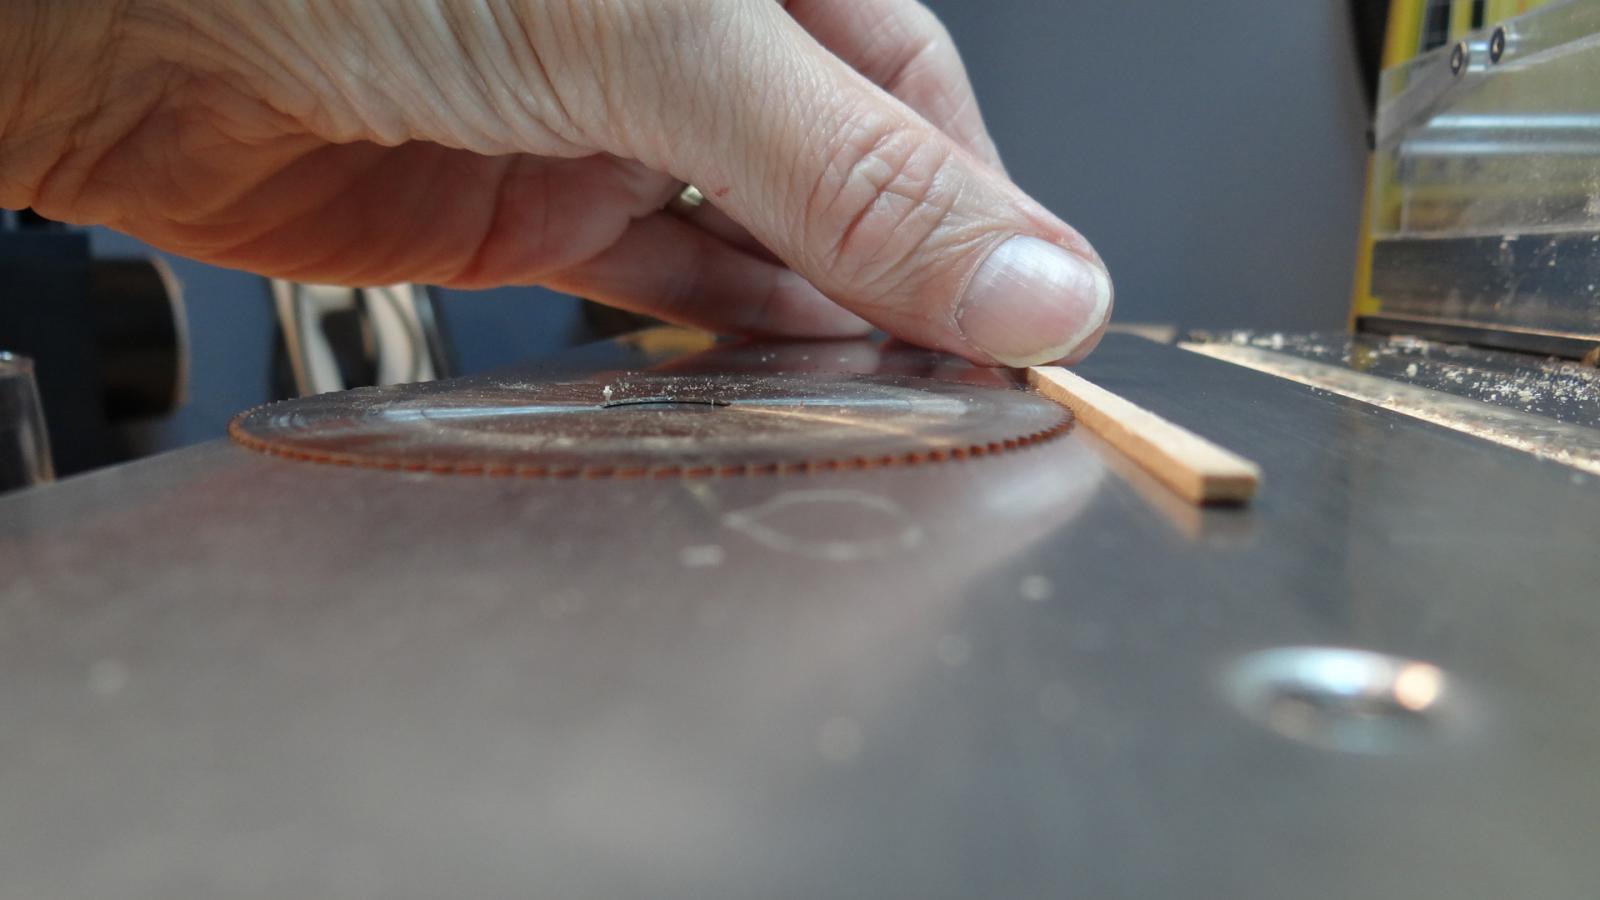
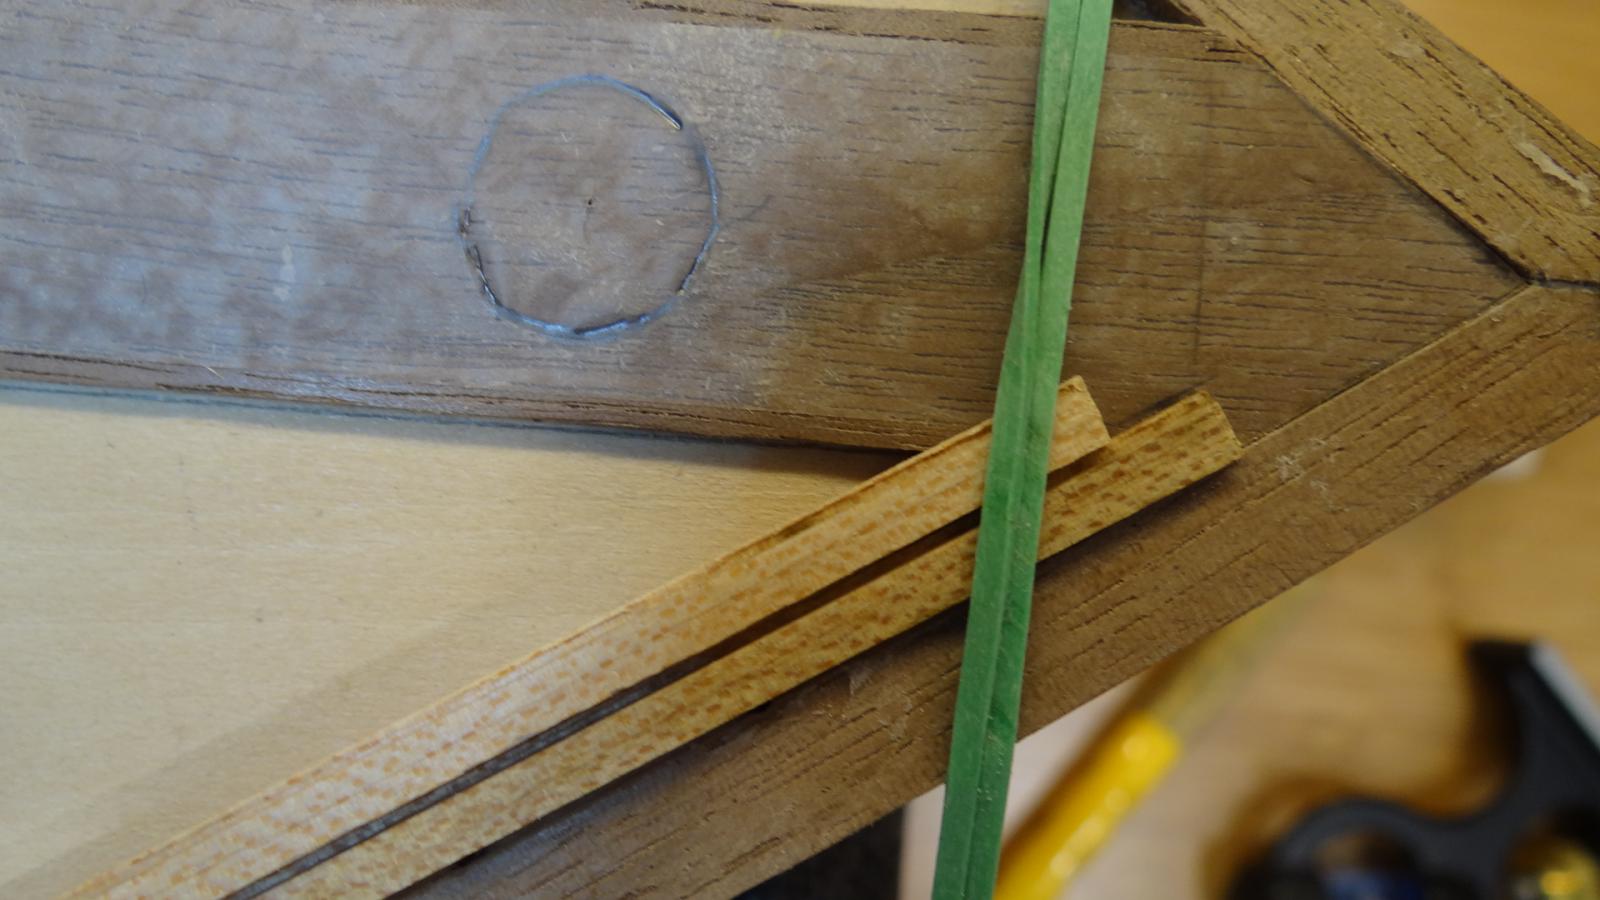
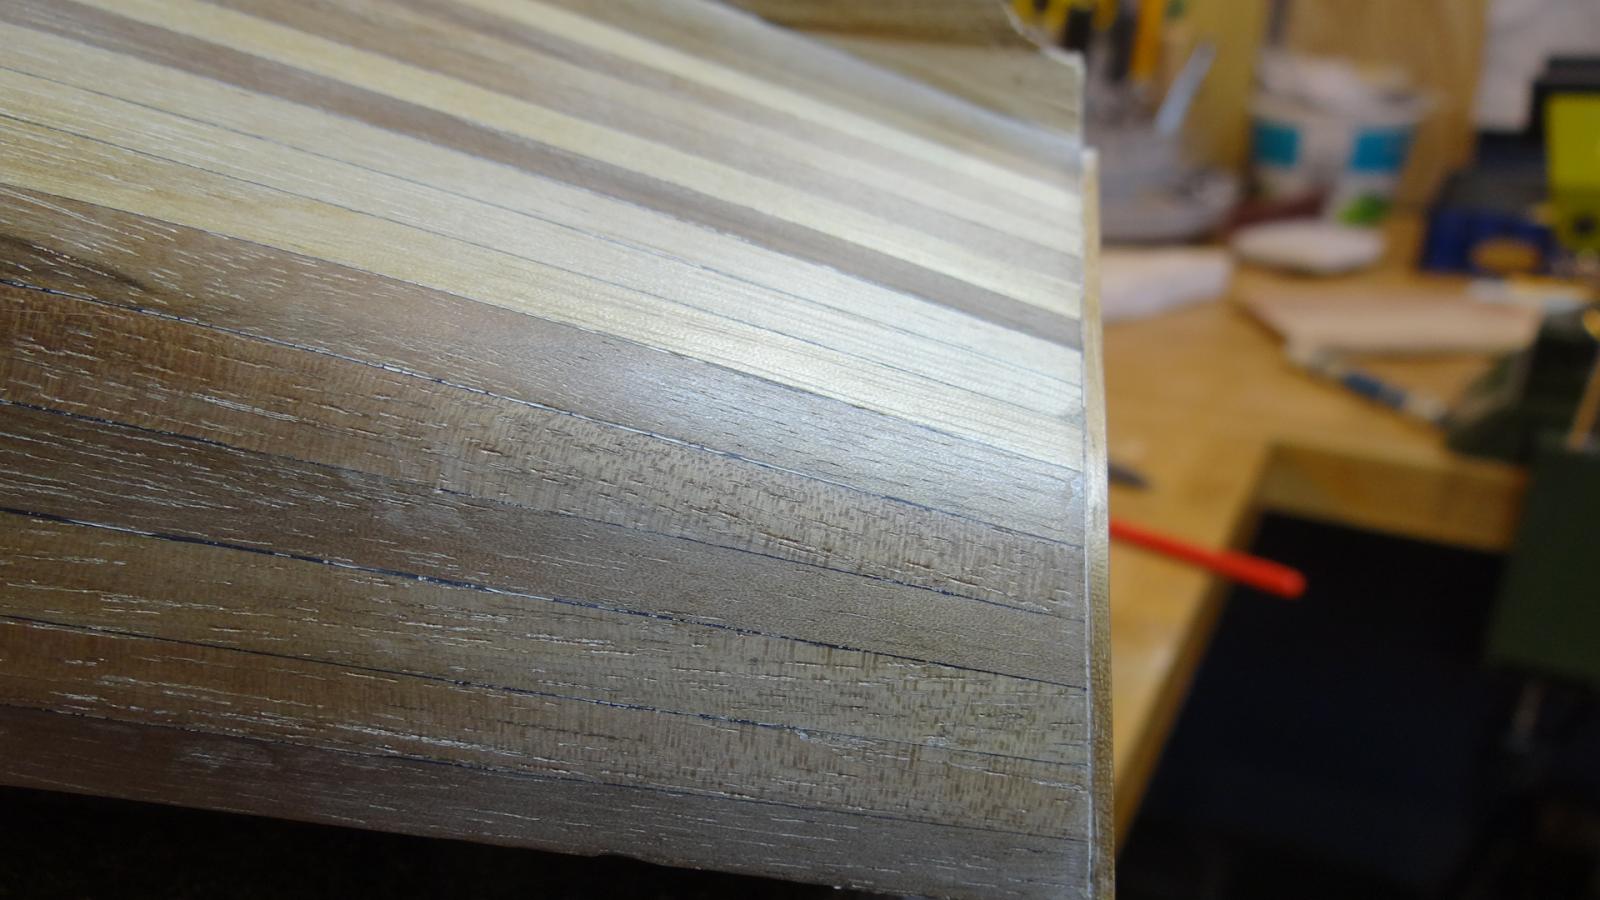
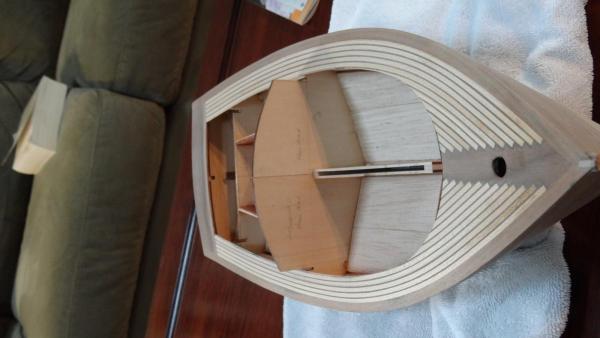
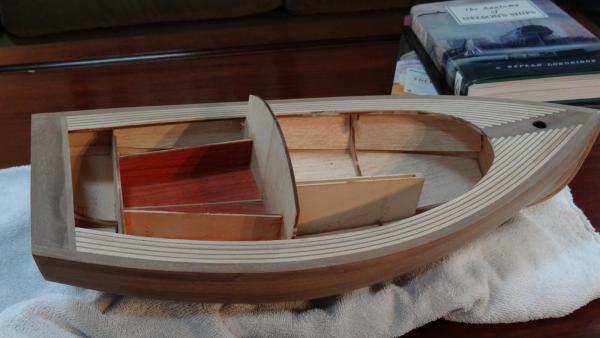
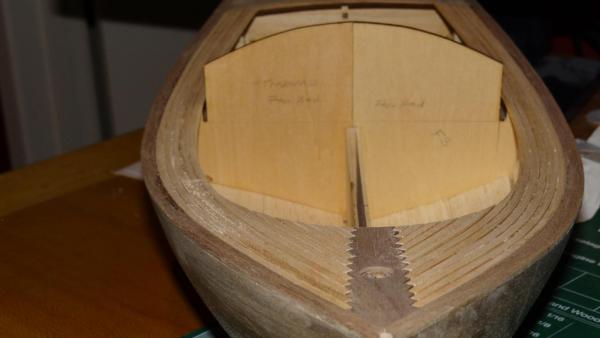
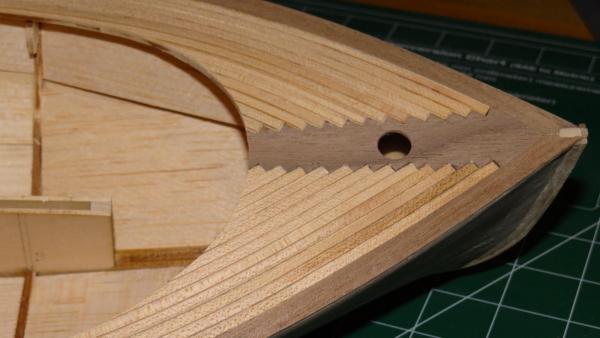
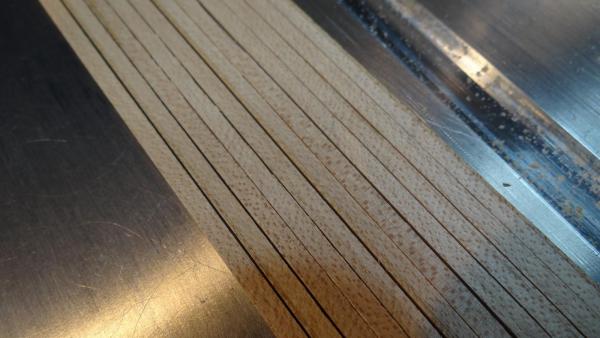
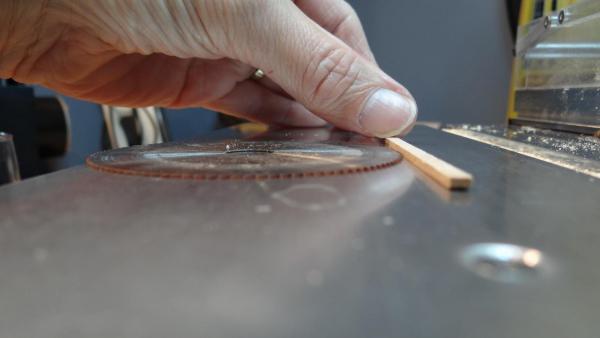
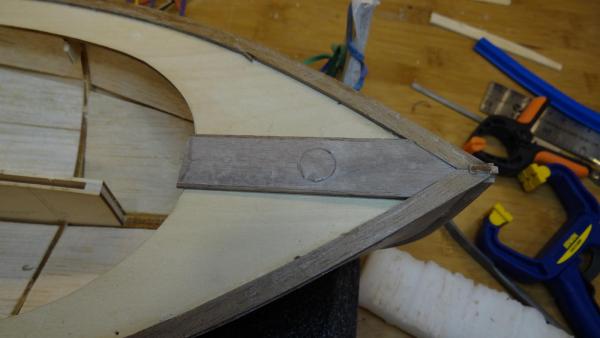
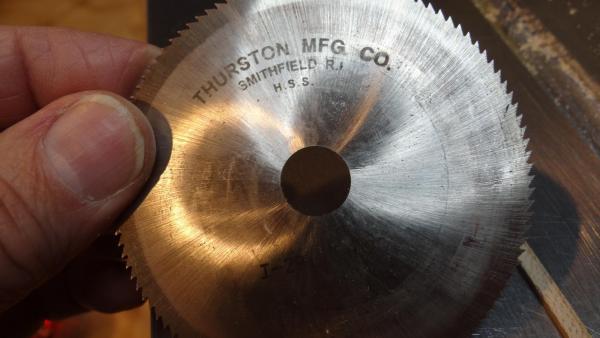
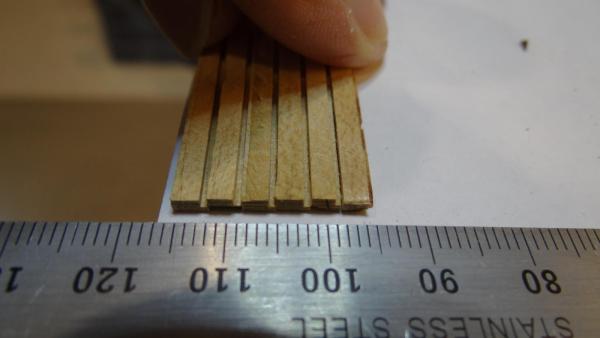
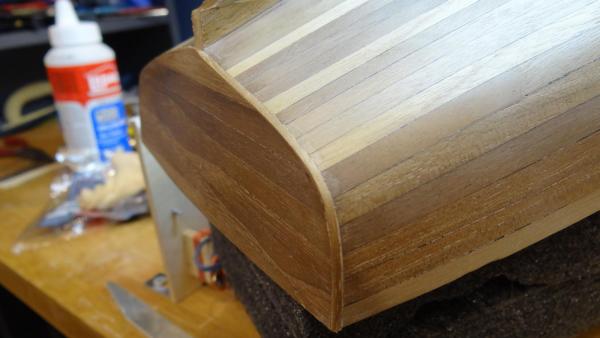
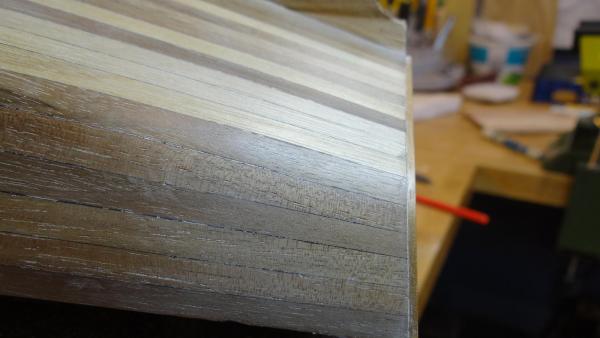
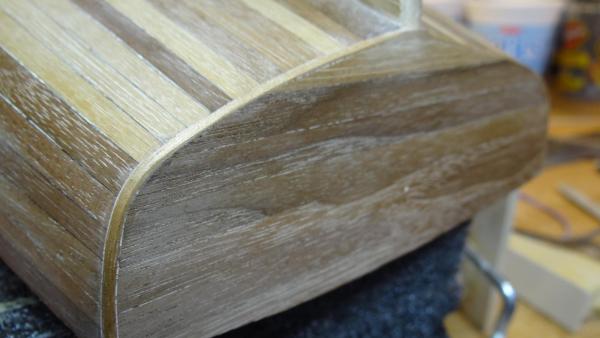
Here we go with a minor update but I feel that I have put in quite a bit of work without much progress being shown. I guess it just goes like that sometimes. A few pictures to share: Deck Sheer Planks and King Plank: To follow Michael Mott's king plank approach I milled some 7mm walnut strips, soaked and bent (in a jig), and repeated endlessly. That stuff could be used for long bows - it just does not want to edge bend. But I finally defeated the stubborn planks and glued them on. No finishing at this stage. Next was to dry fit the king plank. Tape left in place to mark the mast hole. I won't glue it until I finish fitting and shaping all the deck planks to it. Stern Decking: I figure I would border the stern with walnut - for no reason other than it seemed like a good idea: Milling deck planks and cutting rebate: I decided to contrast the walnut with maple. I cut up an old butcher board. I cut the strips 3.6mm wide to fit 5 planks amidships. I cut the wood so that the end grain is on top with the notion that it will bend easier that way. The wood looks pretty speckled but it will do I think. The part I am most happy with was the solution for cutting the rebate on the inboard of each deck plank to accommodate the calking. I installed my slitting blade on the Byrnes saw and adjusted the height and fence gap to suit. It worked a charm, so far. One plank looks like the rebate faces the adjacent rebate but that's just poor optics - in fact it is a remnant of the laminated butcher block LOL. Getting the planks ready: The one picture I have shows two planks ready to bend, which I think I'll try to do inplace first. I am not savvy about exactly how the ends should butt the king plank as I know Michael's had some slightly different angles, so I am a bit hesitant. If anyone has any advice I'd certainly be appreciative.

-
Looking really good indeed Elijah. Keep the pictures coming! Best, Ian
- 701 replies
-
- 3
-
-
- phantom
- model shipways
- (and 1 more)
-
Thanks for the encouragement Don, Gerty and Elijah and others for pressing the like button, I really appreciate it. I am currently working on bending deck planks. I may regret it but I am trying to rig up a notched king plank to accept deck planks like Michael Mott's Herreshoff Buzzards Bay build. My standards are not as high as Michael's but I think something even close would really give this model some cachet. Ian
-
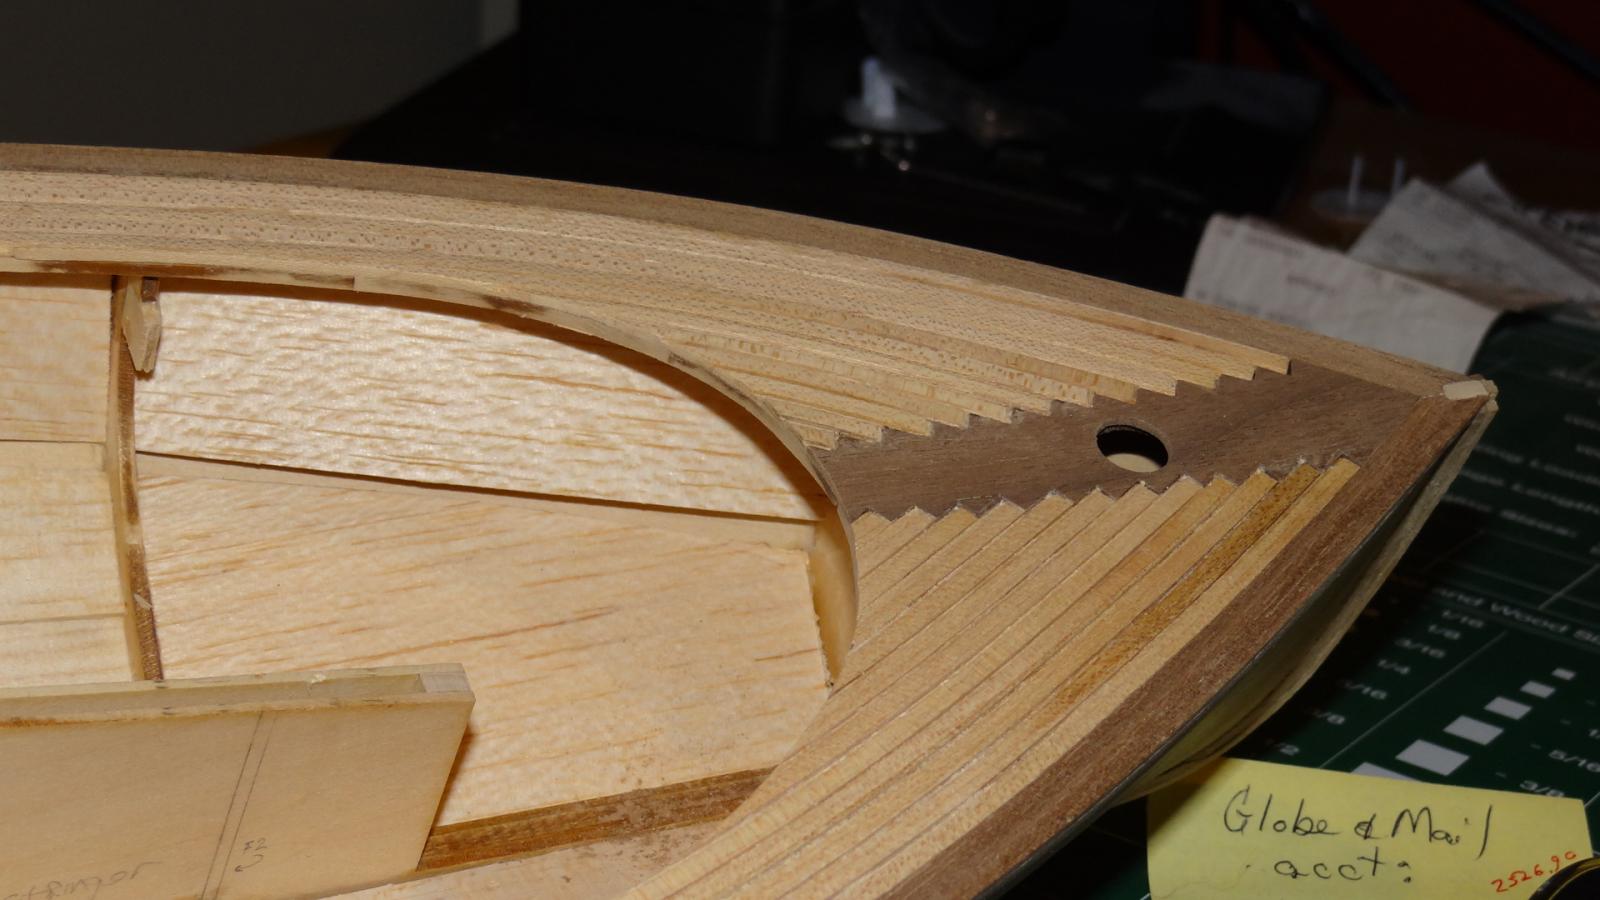
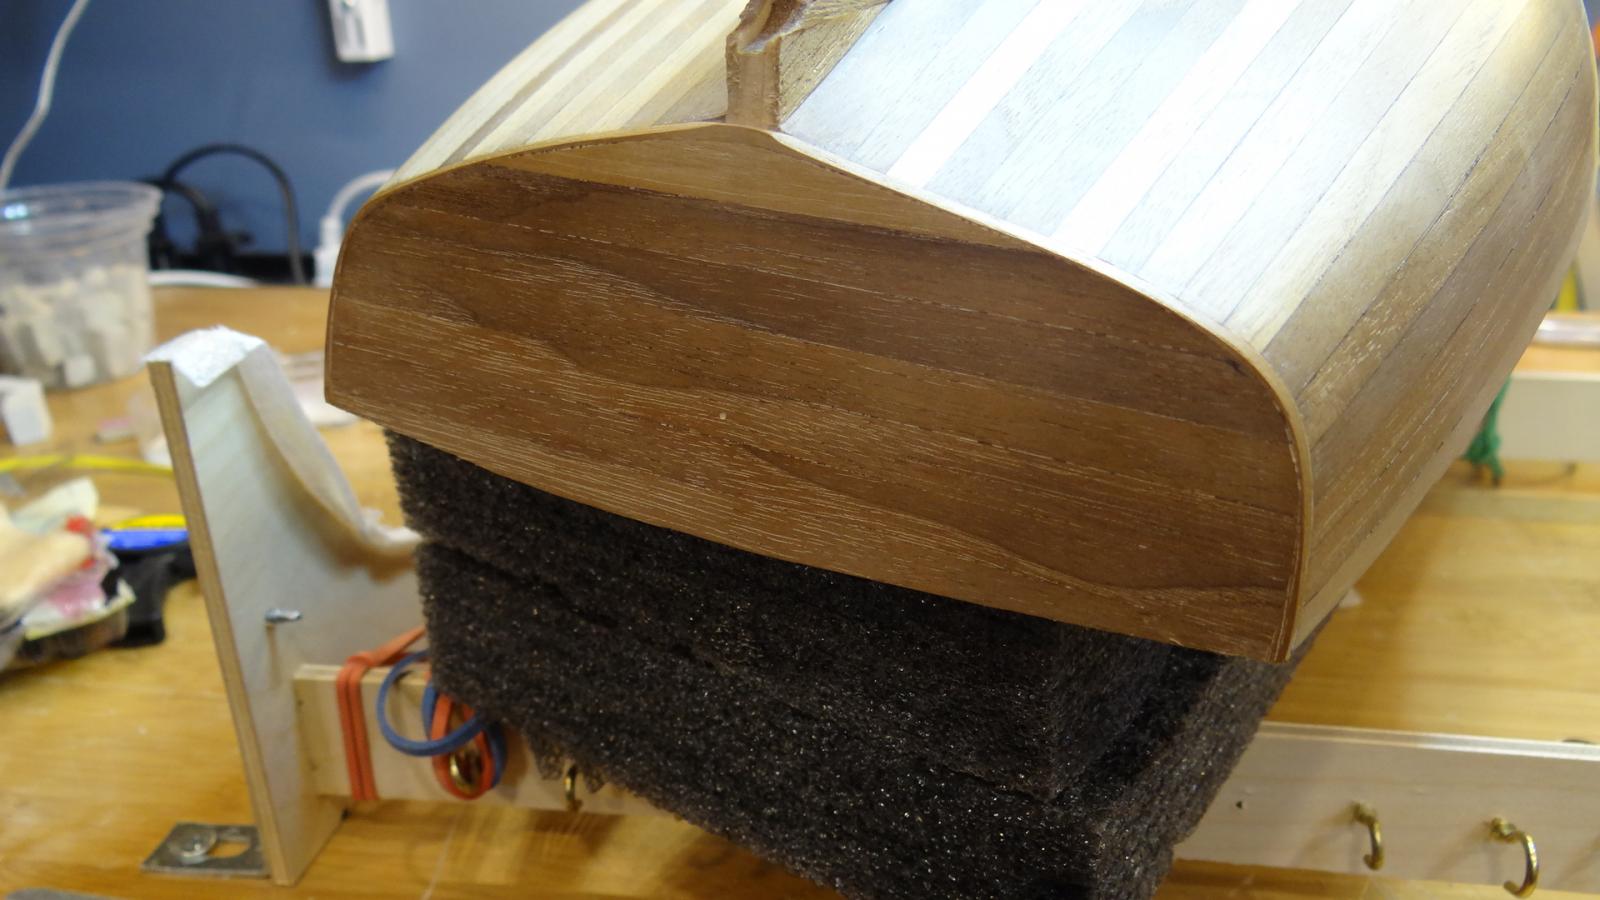
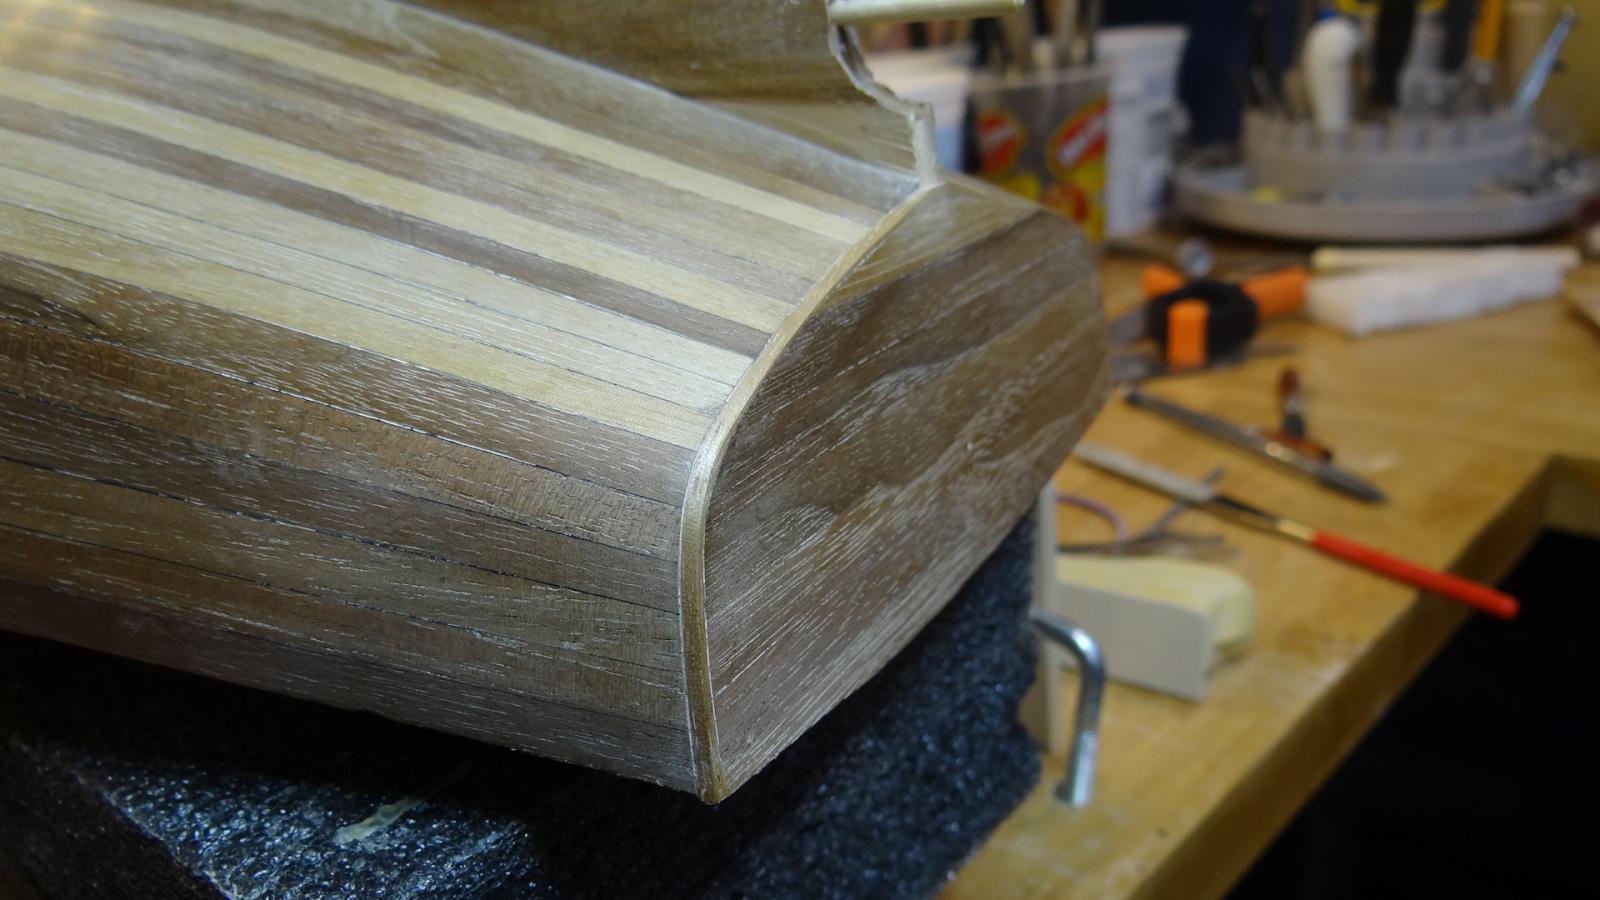
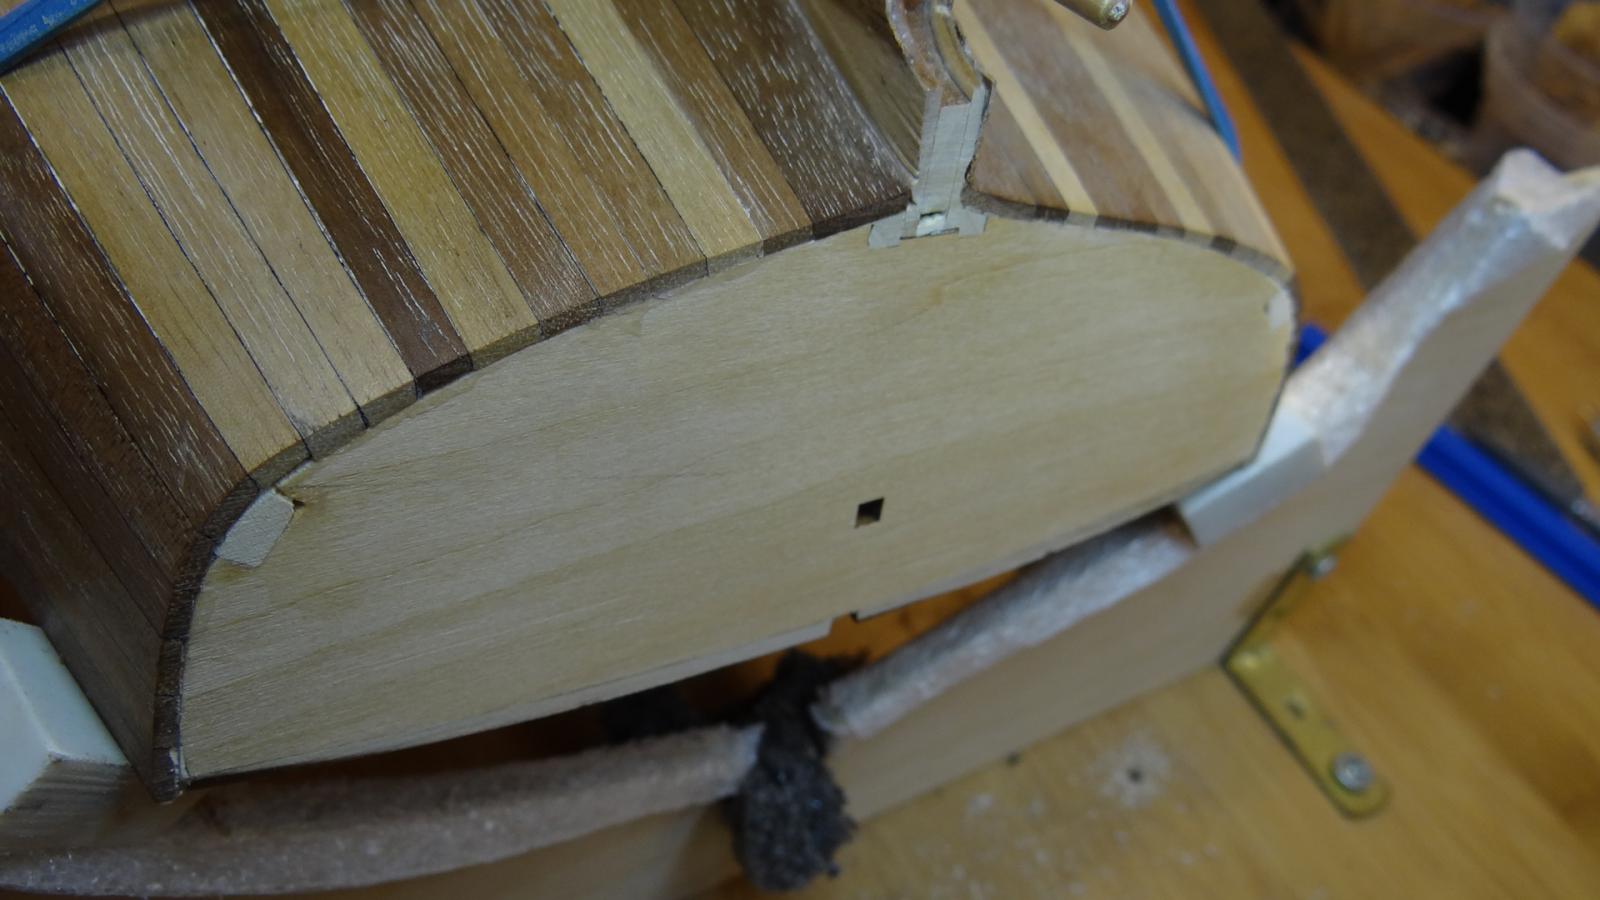
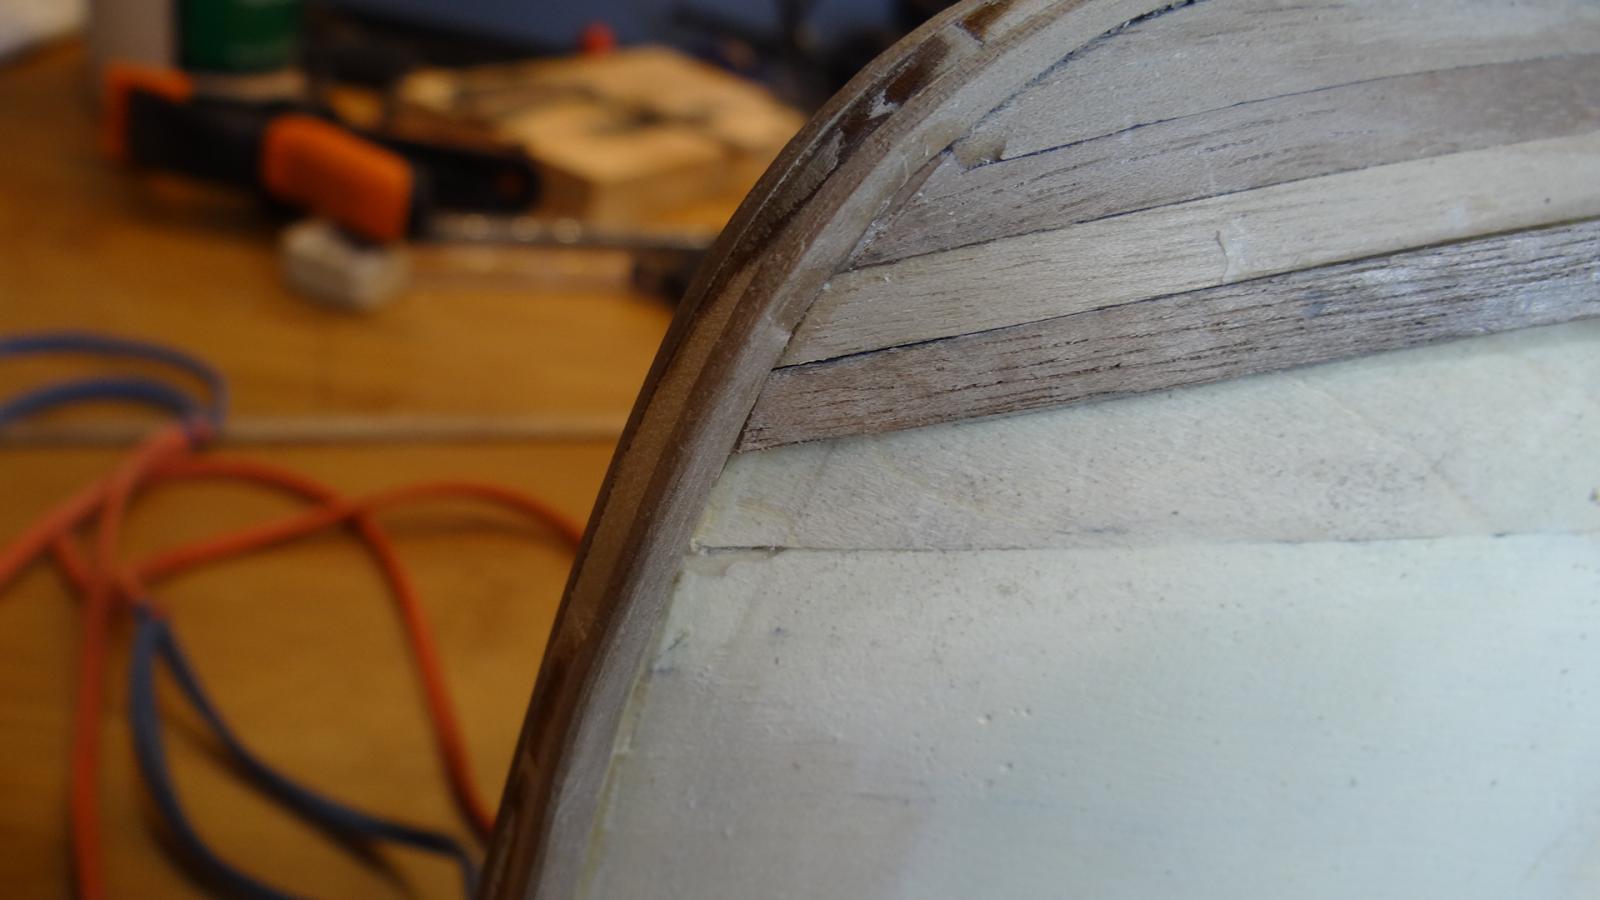
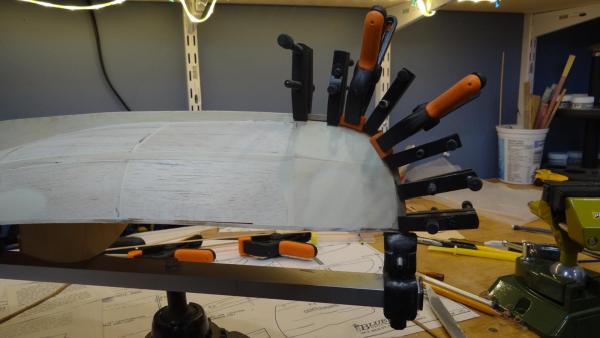
Ok transom installed. Thanks again for the vision Don. With the dimensions the wrap around piece ended up paper thin from the transom view, so no treenails for this baby. In any case I'm happy with the result. Ian


- 86 replies
-
- 12
-
-
Thanks Don. Next time I need to think ahead, it would have been so much easier. LOL. Ian
-
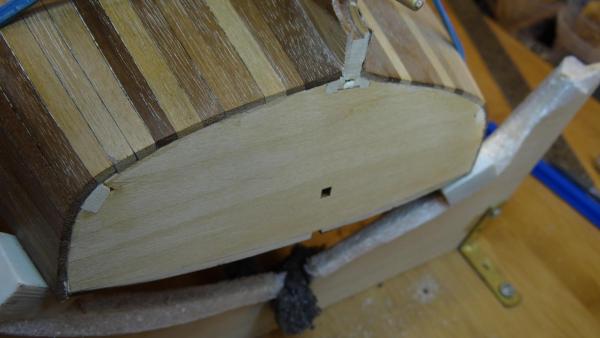
Thanks Don, if I understand you correctly that seems like the way to go. I am wondering about a slight variation to your idea that might take less skill and precision. Would it be better to plank the transom first to just proud of the underside of the hull planks, file off excess to be exactly flush with the bottom of the hull planks, then edge bend a strip around the whole deal? Same thing I guess just the other way around. I like the treenails idea too. Best, Ian
-
Advice appreciated: I stupidly did not think of planking or covering my transom before I planked. My question is how should I finish it now that the end of my planks look like they must be covered by my transom planking? Can I have the transom cover edges flush with the hull planks? Or is that a big no no? Anyone have some ideas for me? Thanks in anticipation. Ian
-
Very, very nice Druxey. Such an interesting build and superb craftsmanship. Best, Ian
- 641 replies
-
- 4
-
-
- greenwich hospital
- barge
- (and 1 more)
-
I remember asking the tech guy what they were made of because your fingers get quite a black residue on them. They are made of a tin/lead mixture. Two of the 10 I bought broke very easily between the screw and shank and the shanks are very hard on old fingers - try to find some rubber tubing that will fit tightly around the shank and you will be much better off. Someone on this forum made his own and they looked very good if you were game. Best, Ian
-
Hi Don, lovely work as usual and a pleasure to follow. This ship looks super interesting to build and the materials look first rate. I'm getting that needy feeling again... Best, Ian
- 653 replies
-
- 7
-
-
- trabakul
- marisstella
- (and 1 more)
-
Thanks so much for the compliment Elijah and hexnut and Black Viking for the likes. I sure hope that I can mute the colour of the contrasting planks. That's the major problem with walnut. Otherwise I have found it very good to work with. Best, Ian Post Edit: I have abandoned the attempt to either stain or bleach the walnut on direct orders from the Admiral. After all the boat is being done for her.
-
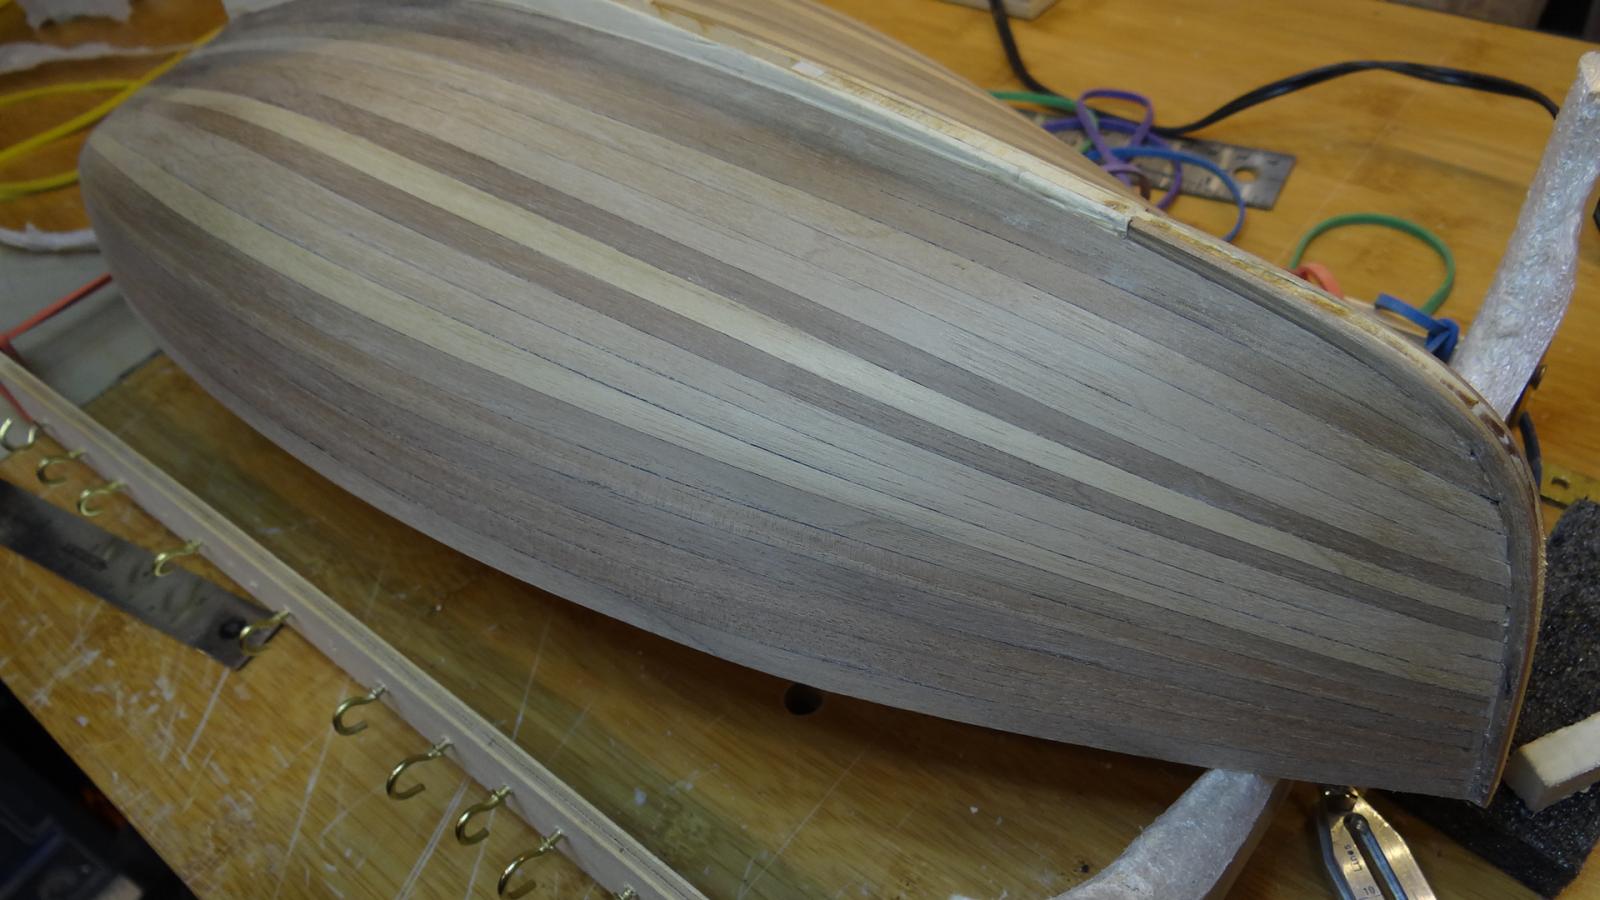
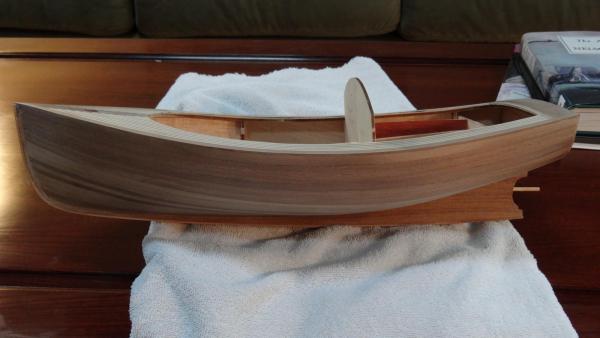
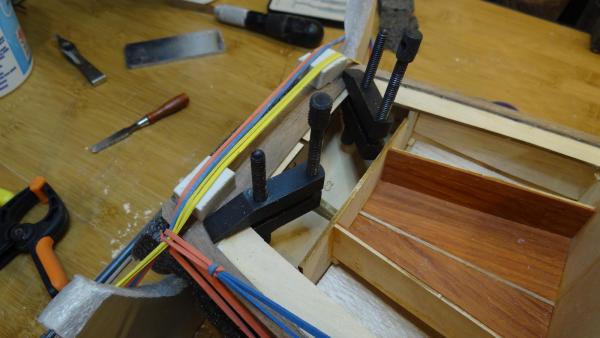
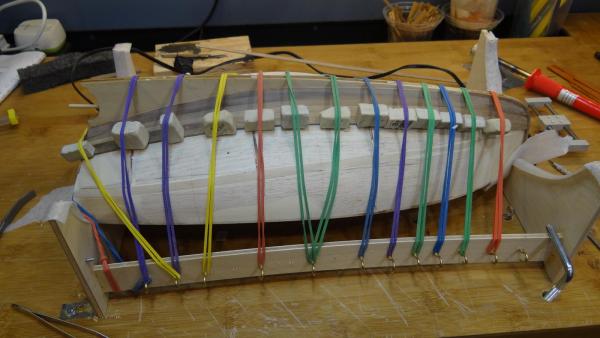
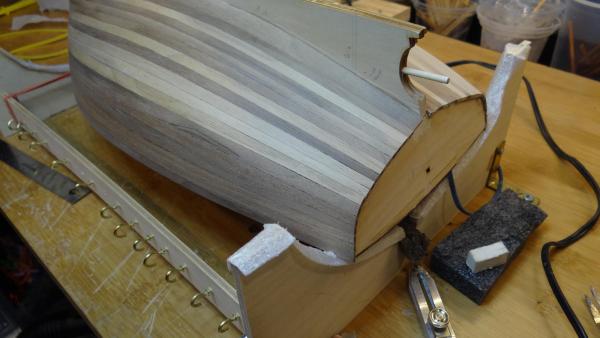
Hi folks, I've finally finished the hull planking on the cat. I should mention that I used the reference for the build of the real life cat that Michael Mott provided (http://www.woodboatbuilder.com/pages/maid-planking.html) to determine the lie and number of planks to use. That is one sweet boat. My biggest challenge was figuring out a solid clamping system, something I wasn't entirely successful with. The pictures are after a coarse sand. I am going to buy some walnut stain to try to mute the contrast between the planks. Clamping system: I added thin cheeks to the stem so that I could make a rabbet for the planks. I used a notch system on the planks so that they would fit into the rather narrow rabbet. Worked ok. Planking completed: Best, Ian


- 86 replies
-
- 15
-
-
Sorry to hear about the tragic outcome Bob. I'm sure there will be a beautiful replacement coming up. Best, Ian
-
Hi Mark, That looks fabulous. I should mention that I have gun port envy. Yours are so precise looking. Mine... well they need a lot of work. Best, Ian
- 652 replies
-
- 2
-
-
- royal william
- euromodel
- (and 1 more)
-
Good Day Shipmates: This is kind of a nothing post and I apologize for that. I should be posting in the next day or two with my completed hull. The reason for the post is that I posed a question of Marcus and then, I think, answered my own question. Rather than mess up Marcus' log I'll provide my rationale here and invite anyone to correct me. The issue surrounds the sheer plank. I've worked from the keel up so it is my last plank to lay. I started thinking, actually the admiral asked the question, would I extend the sheer plank 1/8 inch above the hull to provide a backing for the deck planking which will sit on top of a basswood deck? The plans show a thin strip as the edge which I assume butts the deck planking. Since I'm planking with walnut I thought why not just extend the sheer plank and use it to butt the deck planking as the admiral hinted. In pondering this I realized there is probably a shipbuilding taboo against doing this. I could see how such an arrangement could allow water to channel to the inside of the hull. Better to seal off the hull under the deck? Anyway that's a guess. The more practical reason is that my deck is not flat - it has some humps that I'm going to want to sand out and I don't want to hinder that by having the sheer plank sticking out. So there you have it. Sorry for the ramble. Best, Ian
-
Hi Marcus, I'm still way behind you but finishing up the hull planking. I was just wondering what you thought of the idea of running the sheer plank 1/8 inch above the deck to provide a back for the deck planks? The plans simply show a strip laid against the top of the sheer plank - it is probably mahogany and likely why they do it that way but I'm thinking that extending my walnut plank up would be structurally better. Anyway, just musing and I miss your updates of late. Edit: I've answered my own question. Rather than mess your log up Marcus I'll post in mine. Let me know if you want me to remove this post. Best, Ian
- 165 replies
-
- 4
-
-
- cape cod catboat
- Finished
- (and 1 more)
-
Yikes, they want $175 used from Amazon here in Canada. Sounds very good though. Thanks for the reference. Ian