Chuck
-
Posts
9,006 -
Joined
-
Last visited
Content Type
Profiles
Forums
Gallery
Events
Everything posted by Chuck
-
 Im not sure…i will check though. Its a ton of work to set up. Let me see what the guys think about it as well…meaning the mods and admin.
 -
Beautiful start and I follow along.
-
Nicely done. That does look sweet!!
-
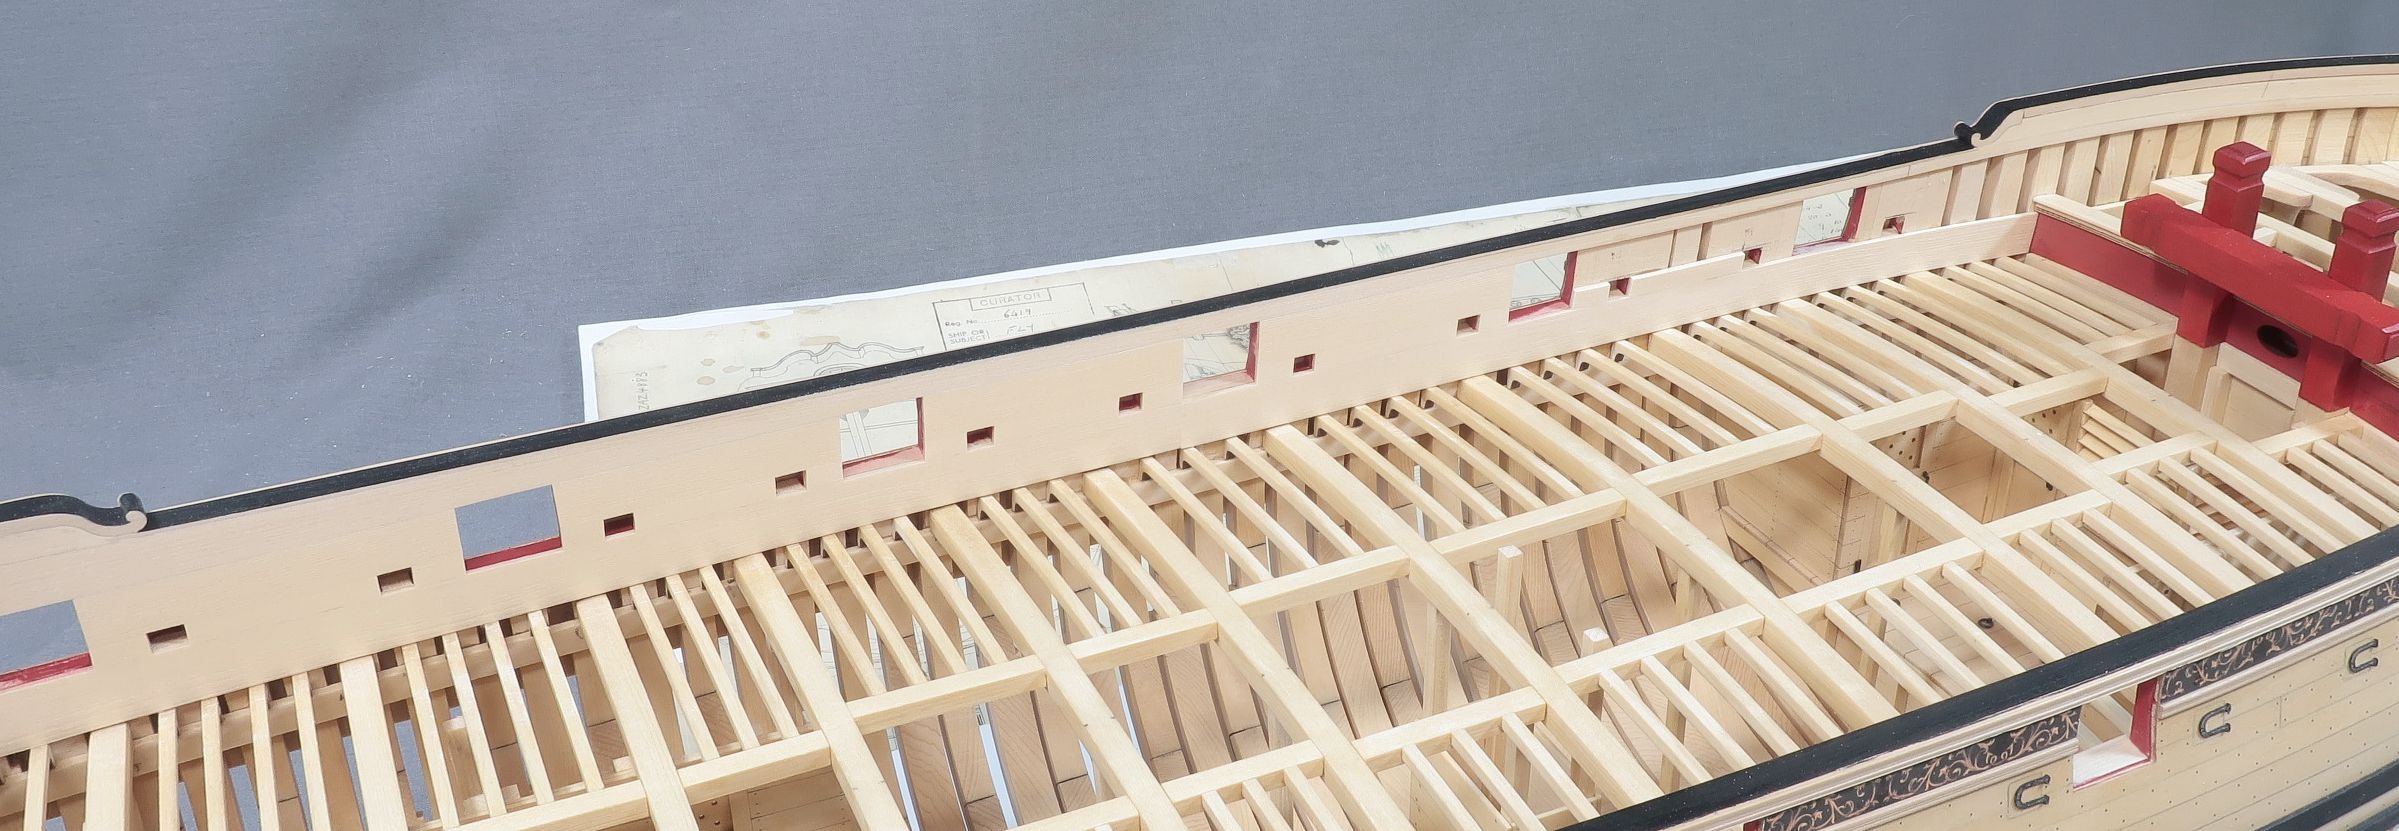
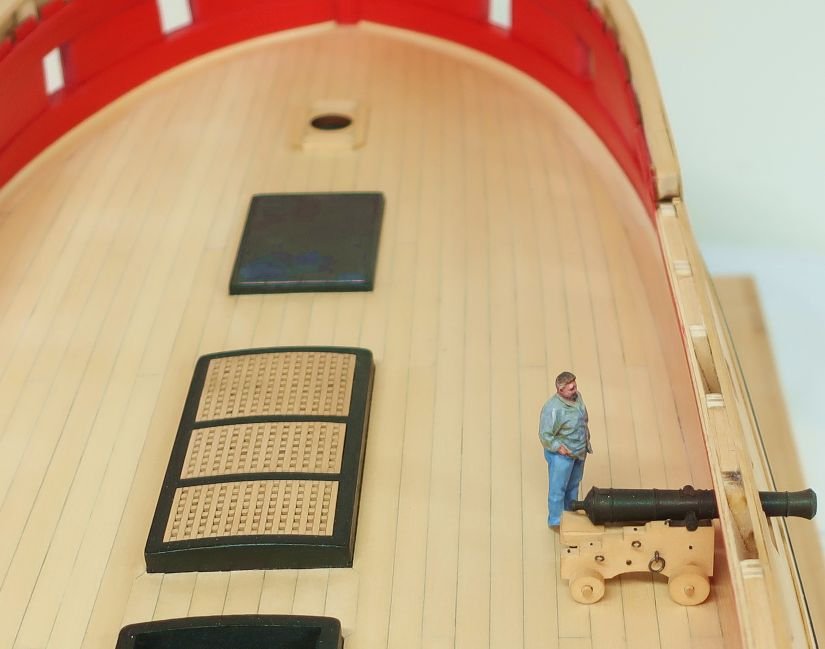
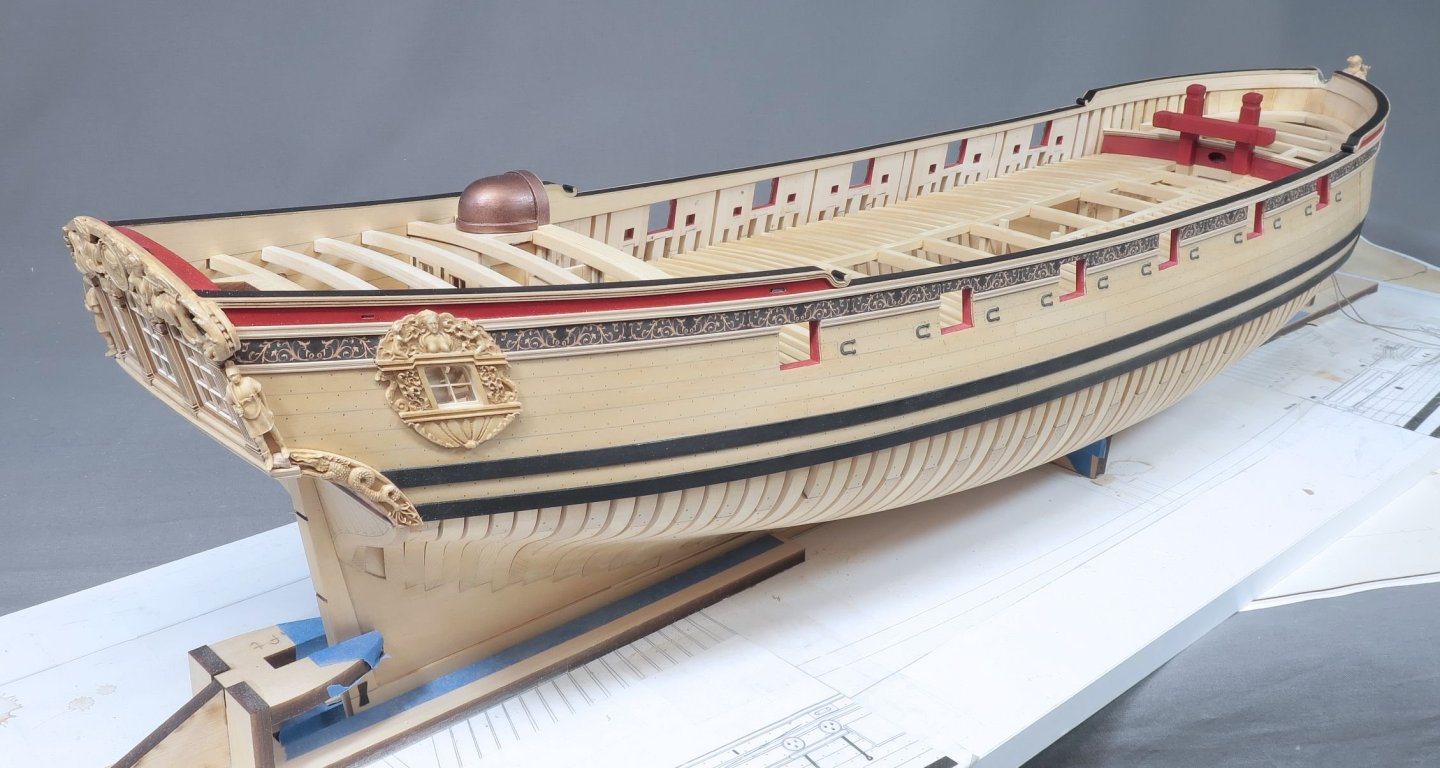
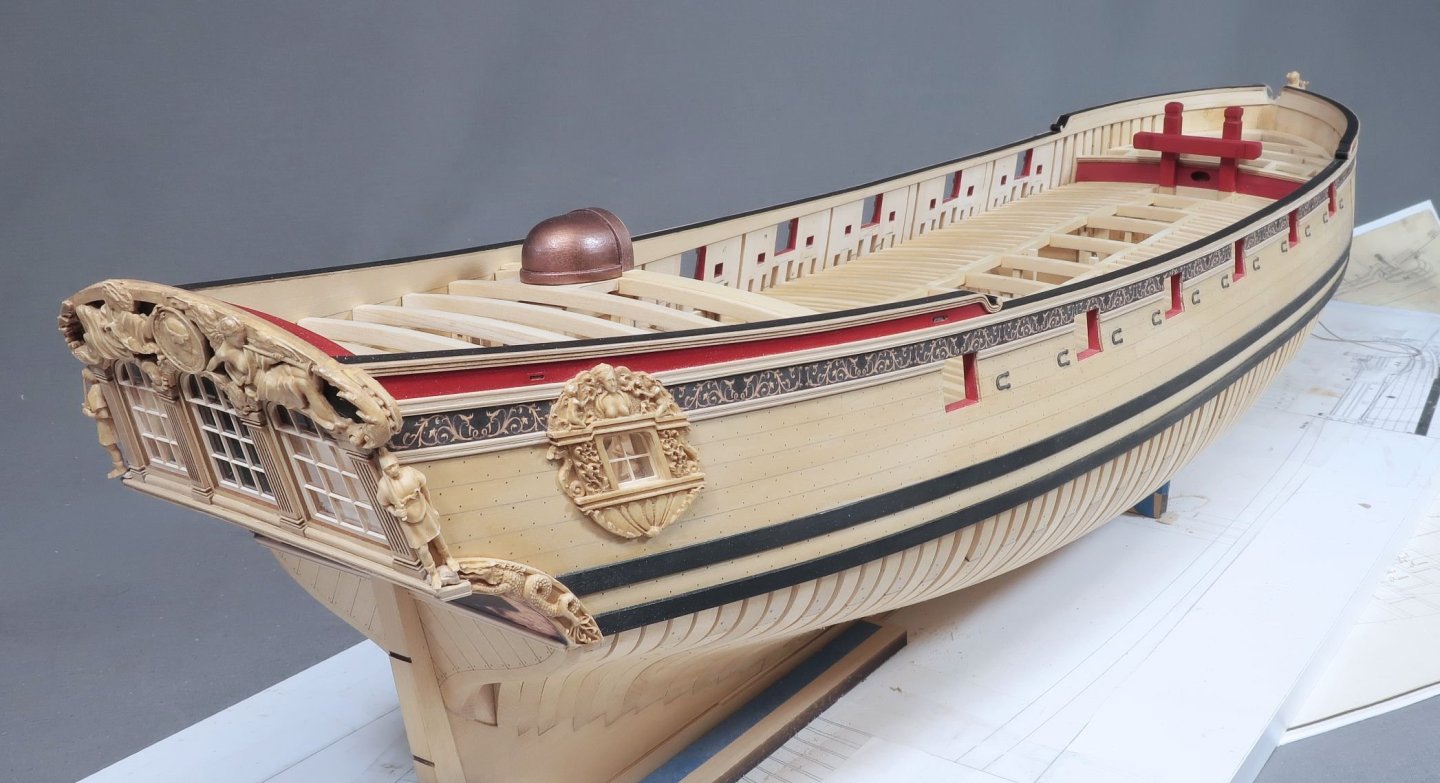
Just a small update... I was eager to get started with the planking of the bulwarks. There is no trick for this. Its just a grind of cutting and shaping planks to fit between the ports. Its a slow process and you must be very neat and keep the cuts around the ports straight etc. The planking is all 3/64" thick. Just as I did with the Winnie, the two strakes below the the ports (the spirketting) were added first. The spirketting is normally thicker than the planks above it and stands proud. I have always accomplished this by planking the spirketting in two layers. It still amazes me how few kit mfgs even show this feature. You dont have to do it this way if you dont want to. You could just use 1/16" or even 5/64" thick planking and do it one layer. Its up to you. I will add the second layer of spirketting once the entire side has been planked. I will use a .025" thick second layer. Having said this...some notes are in order. The top of the spirketting is lined up perfectly flush with the bottom of the gun ports and sweep ports. This is great if you happened to get lucky and they all line up perfectly. I dont care who is making the model, this is pretty impossible to do. Even the most skilled builders will need to tweak the bottom sills of each port so they line up perfectly with the top edge of spirketting. This will become very apparent after you run your planking strip down the inboard bulwarks. I was very lucky in that most of the ports only needed some minor tweaking. Some were just a hair too high. Less than 1/64". So I used a sharp chisel to make the ports sits flush along the top of the spirketting. you can see that in the photo below. The ports will need a lot of paint touch up which was expected. Whatever you do, do not notch out your spirketting to accommodate a port. Try and keep the top edge of the spirketting a nice continuous run without notching it. Should one of your ports sit too low...I recommend instead that you add a sliver of wood on top of the port sill to raise it up in line with the spirketting. I hope that makes sense. See below...notice how I did not use any pencil to simulate the seams between each strake. In fact, just the opposite. I am painting the bulwarks red so this allowed me to take a small shortcut. You may want to consider it as well. I dont want any seams to show at all. In fact I didnt even have to use two individual strakes for the spirketting. If you look towards the fcastle bulwark planking you can see the area I havent planked yet. I used one wide strip of 3/64" thick cedar instead of using two narrower strakes as is typical. I believe it was around 1/2" wide. Probably slightly wider on the aft portion. Then because we know the sweep ports are 3/16" high, a 3/16" strip was used next and cut between the ports and sweeps. I was careful to be very neat with these cuts. Finally the remaining planking above the sweep ports would normally consist of two more strakes. Because I am painting the bulwarks, I once again used ONE wider strip of 3/64" thick cedar so I could quickly fill in those areas in one pass. It should paint up very nicely. This reduced the number of neatly cut ends to all those strakes between the ports. There are fewer seams to keep neat as well. The photo almost looks like a solid hull because there are few seams showing between strakes. Now if you are NOT going to paint the bulwarks red....this means you will have to use individual narrow strakes. It will take many more cuts and trial fittings...repeat and repeat again. That is your choice. I will take more pics after the second layer of spirketting is added and after the bulwarks are painted red. The bow area will be planked with narrower strakes just as they should be. It will be easier to bend those. But once the bulwarks are painted red nobody will be able to tell how many strakes you actually used. So you must make a decision ...to paint or not to paint. Essentially you can plank what's remaining of the bulwarks with just three rows cedar strips. The wood package comes with your typical 3/16", 7/32", 1/4" and 9/32" wide planking strips that are narrow, so you will need to buy some 3/64" sheets should you want to plank your bulwarks like I have done here. Then you can cut some 1/2" wide strips instead. But only if you will be painting the bulwarks red.

-
nope...You are good. I changed that part of the deadwood later on after I built it. The current plans are correct which match your parts which are also correct. It just made sense to change it after I built it the first time and makes building that area easier for all of you. My model and log will sometimes be slightly different as improvements are made after the fact....so just follow the plans and instructions and you will be fine. It will make adding the wing transom and creating the square tuck much easier.
-
It was so great to see everyone at the New London show yesterday. There were some fantastic models on display. I hope everyone has a safe trip back to their workshops. And talking about a safe journey back to the workshop. Many of you may recall that 4 and maybe even 5 years ago, Someone swiped my mini-me off the Winnie model under construction at the show. I am happy to report that after several years as hostage…and with no ransom paid, someone anonymously released mini-me and placed him in the depths of the speedwell model at this years show. I was happy to find him below deck upon my return to the shop. No harm was apparent on “mini-me” and he is in good health. Thank you goes out to person for having a change of heart and I am sure that both of you will sleep a bit more soundly this evening!! Since I have lost 30 pounds this year so far...mini-me will now undertake the same dietary and exercise regime that I am now unfortunately tolerating. You cant make this stuff up!!!
-
It all works fine here...seems like something on your end. Possibly the size of your images or maybe the format...type of image. Save as a jpg and make them smaller and try again. Try another browser as well.
-
no worries....they are on the way.
-
You should have 3 strips that are 5/16" x 3/32"
-
Indeed it is...it was supplied as stripwood in the first chapter.
-
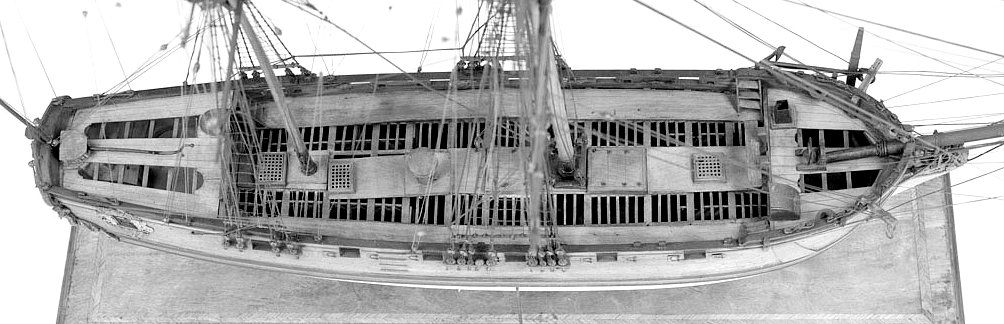
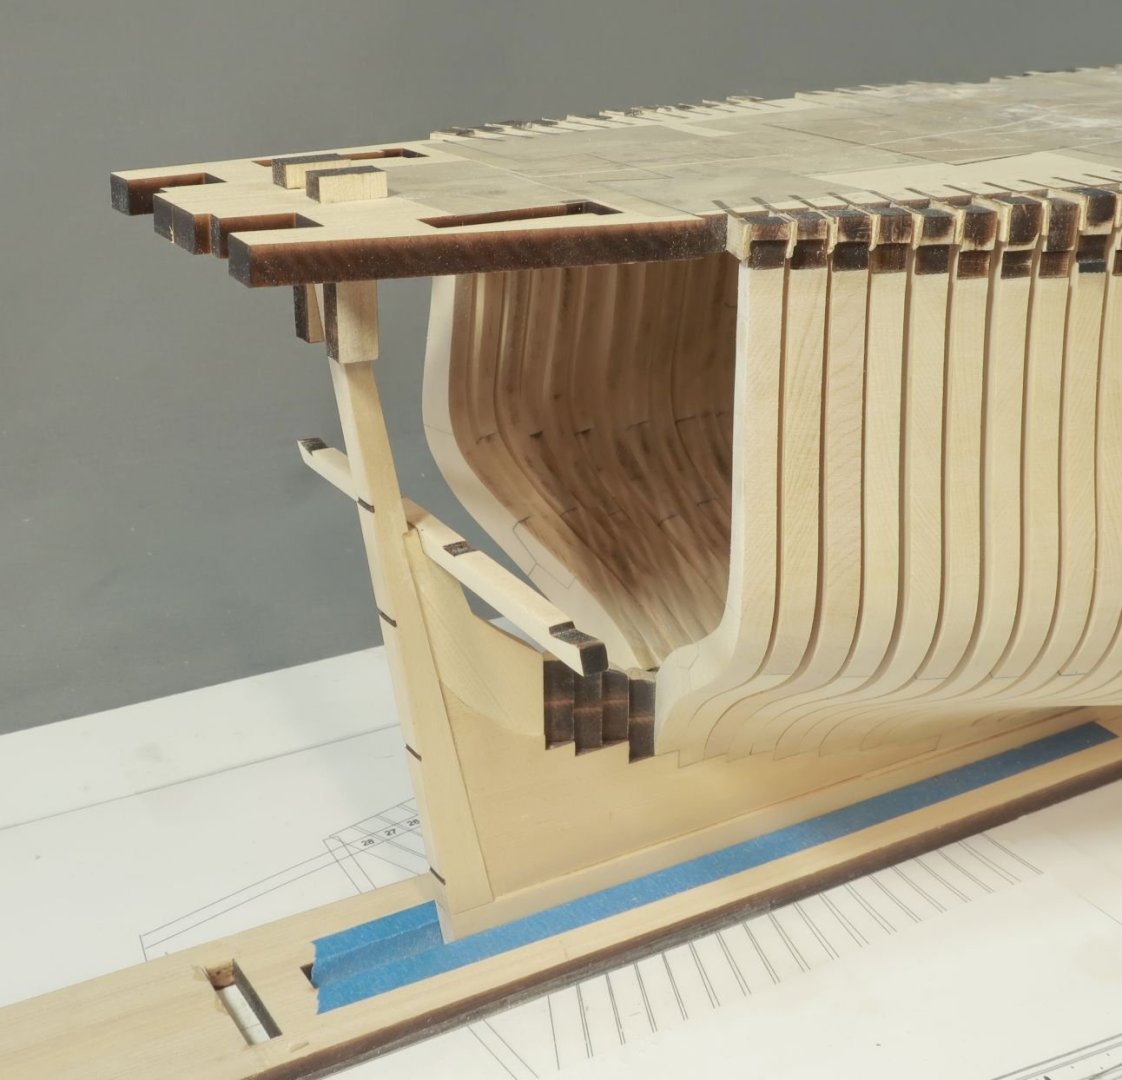
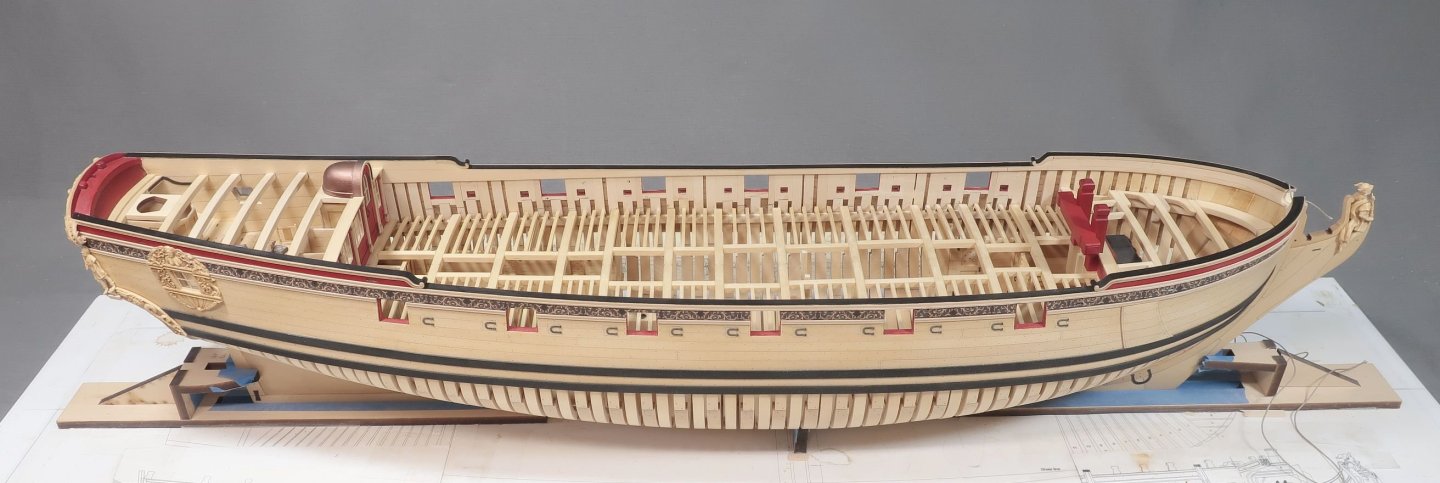
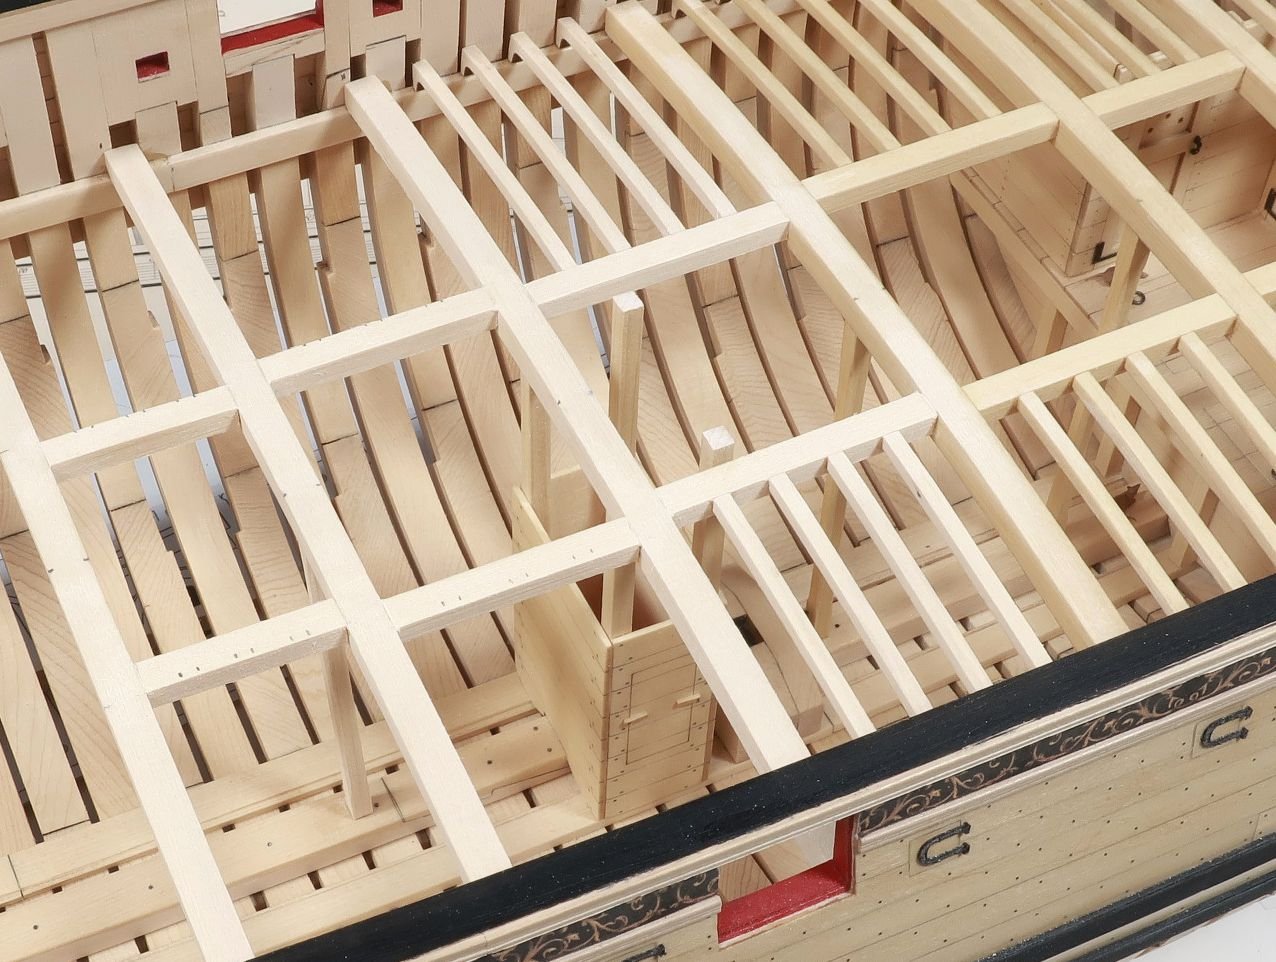
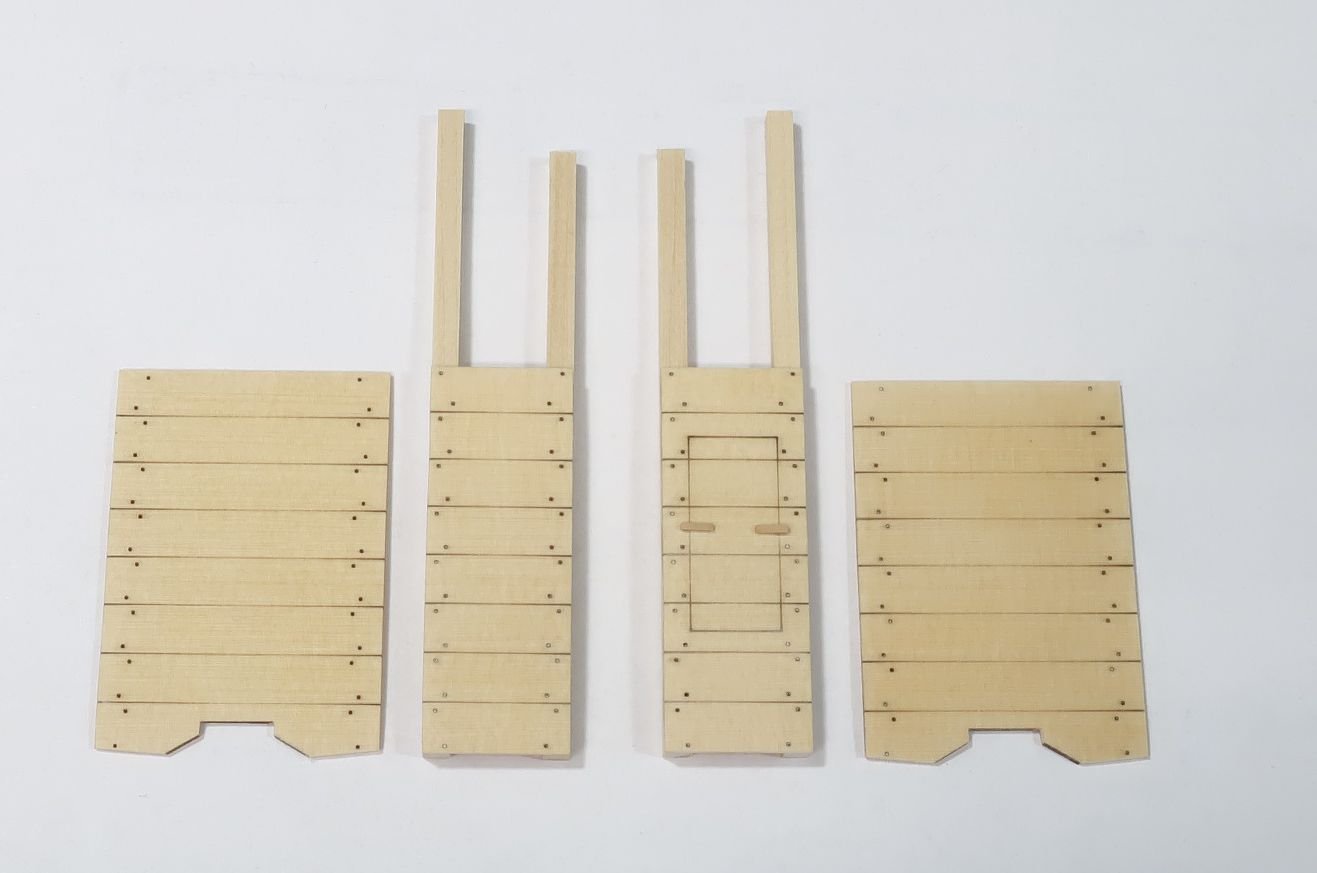
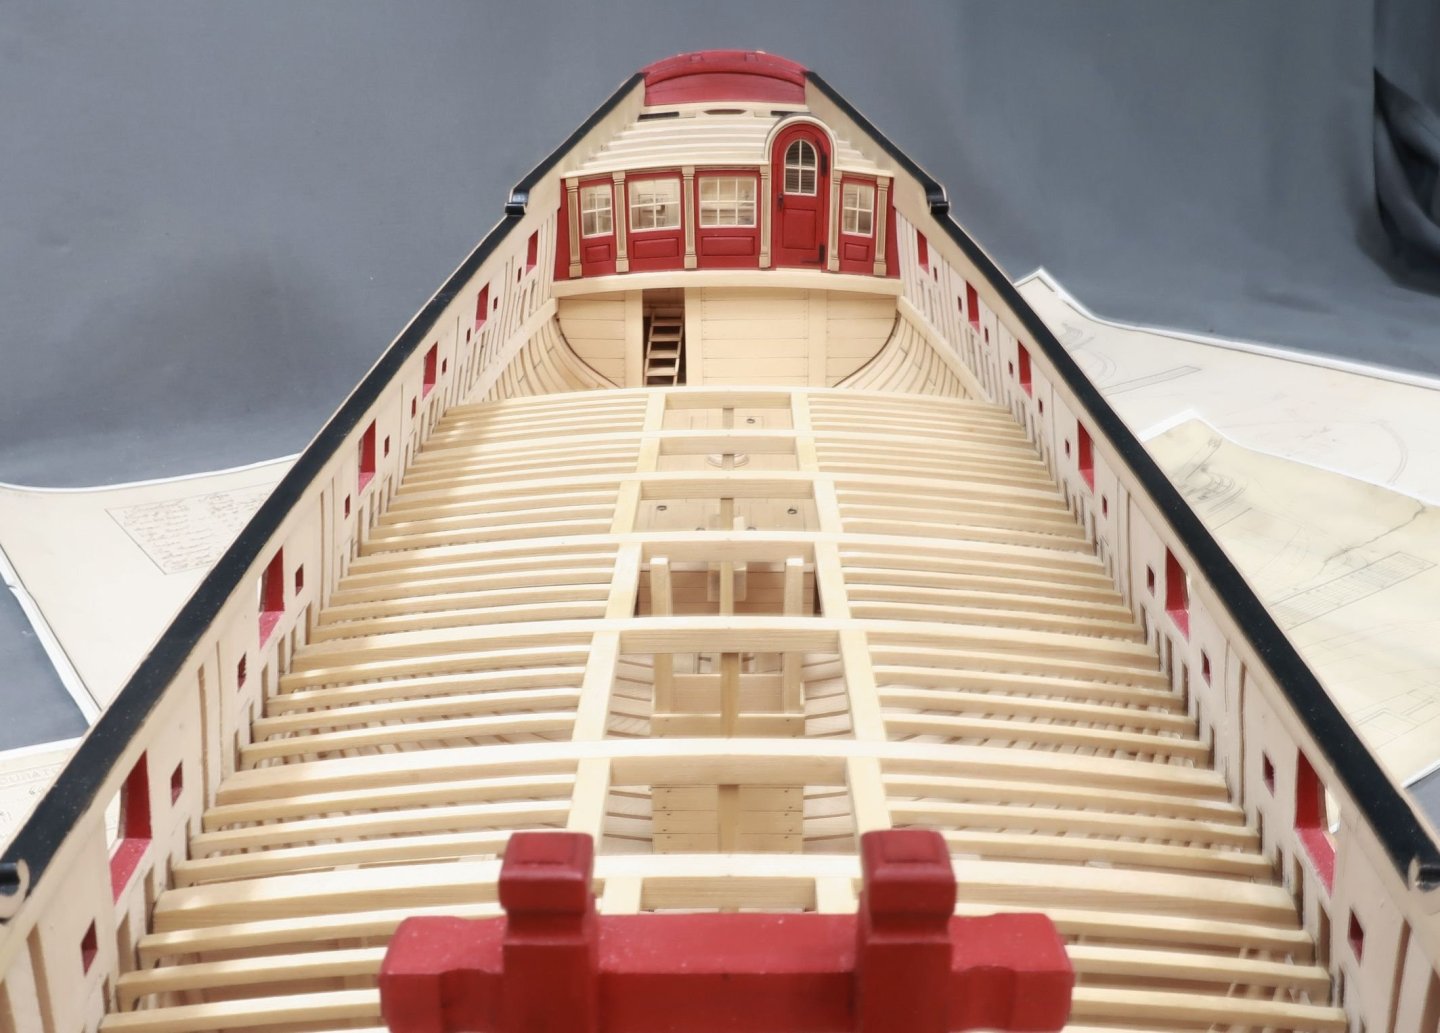
The knees wont be seen so they will be omitted. Its easy enough for folks to add should they want to. Thats a benefit of having Davids book while building the kit. But it will really complicate and make adding all of those ledges take forever. And all for something that will never be seen. I think most folks will be relieved not to make them. the contemporary model doesnt have them either. My guess is for the very same reason. It also reduces the cost and time to manufacture the kit quite a bit. I did add them on the fcastle however because the ends of the knees will be slightly visible in the open area left unplanked. So once the gun deck is planked…the casual viewer will actually assume you did add all of those knees for the entire model. LOL I will take a picture with the planking templates in position. You will see what I am talking about pretty clearly. The same is true of all the ledges down the center line. They will not be seen either. The contemporary model also omits these..whats the point really.
-
Looking excellent…its a close fit. Those are very tough to make. Well done.
-
Thank you guys...it will be at least a week before I can do more on the model.
-
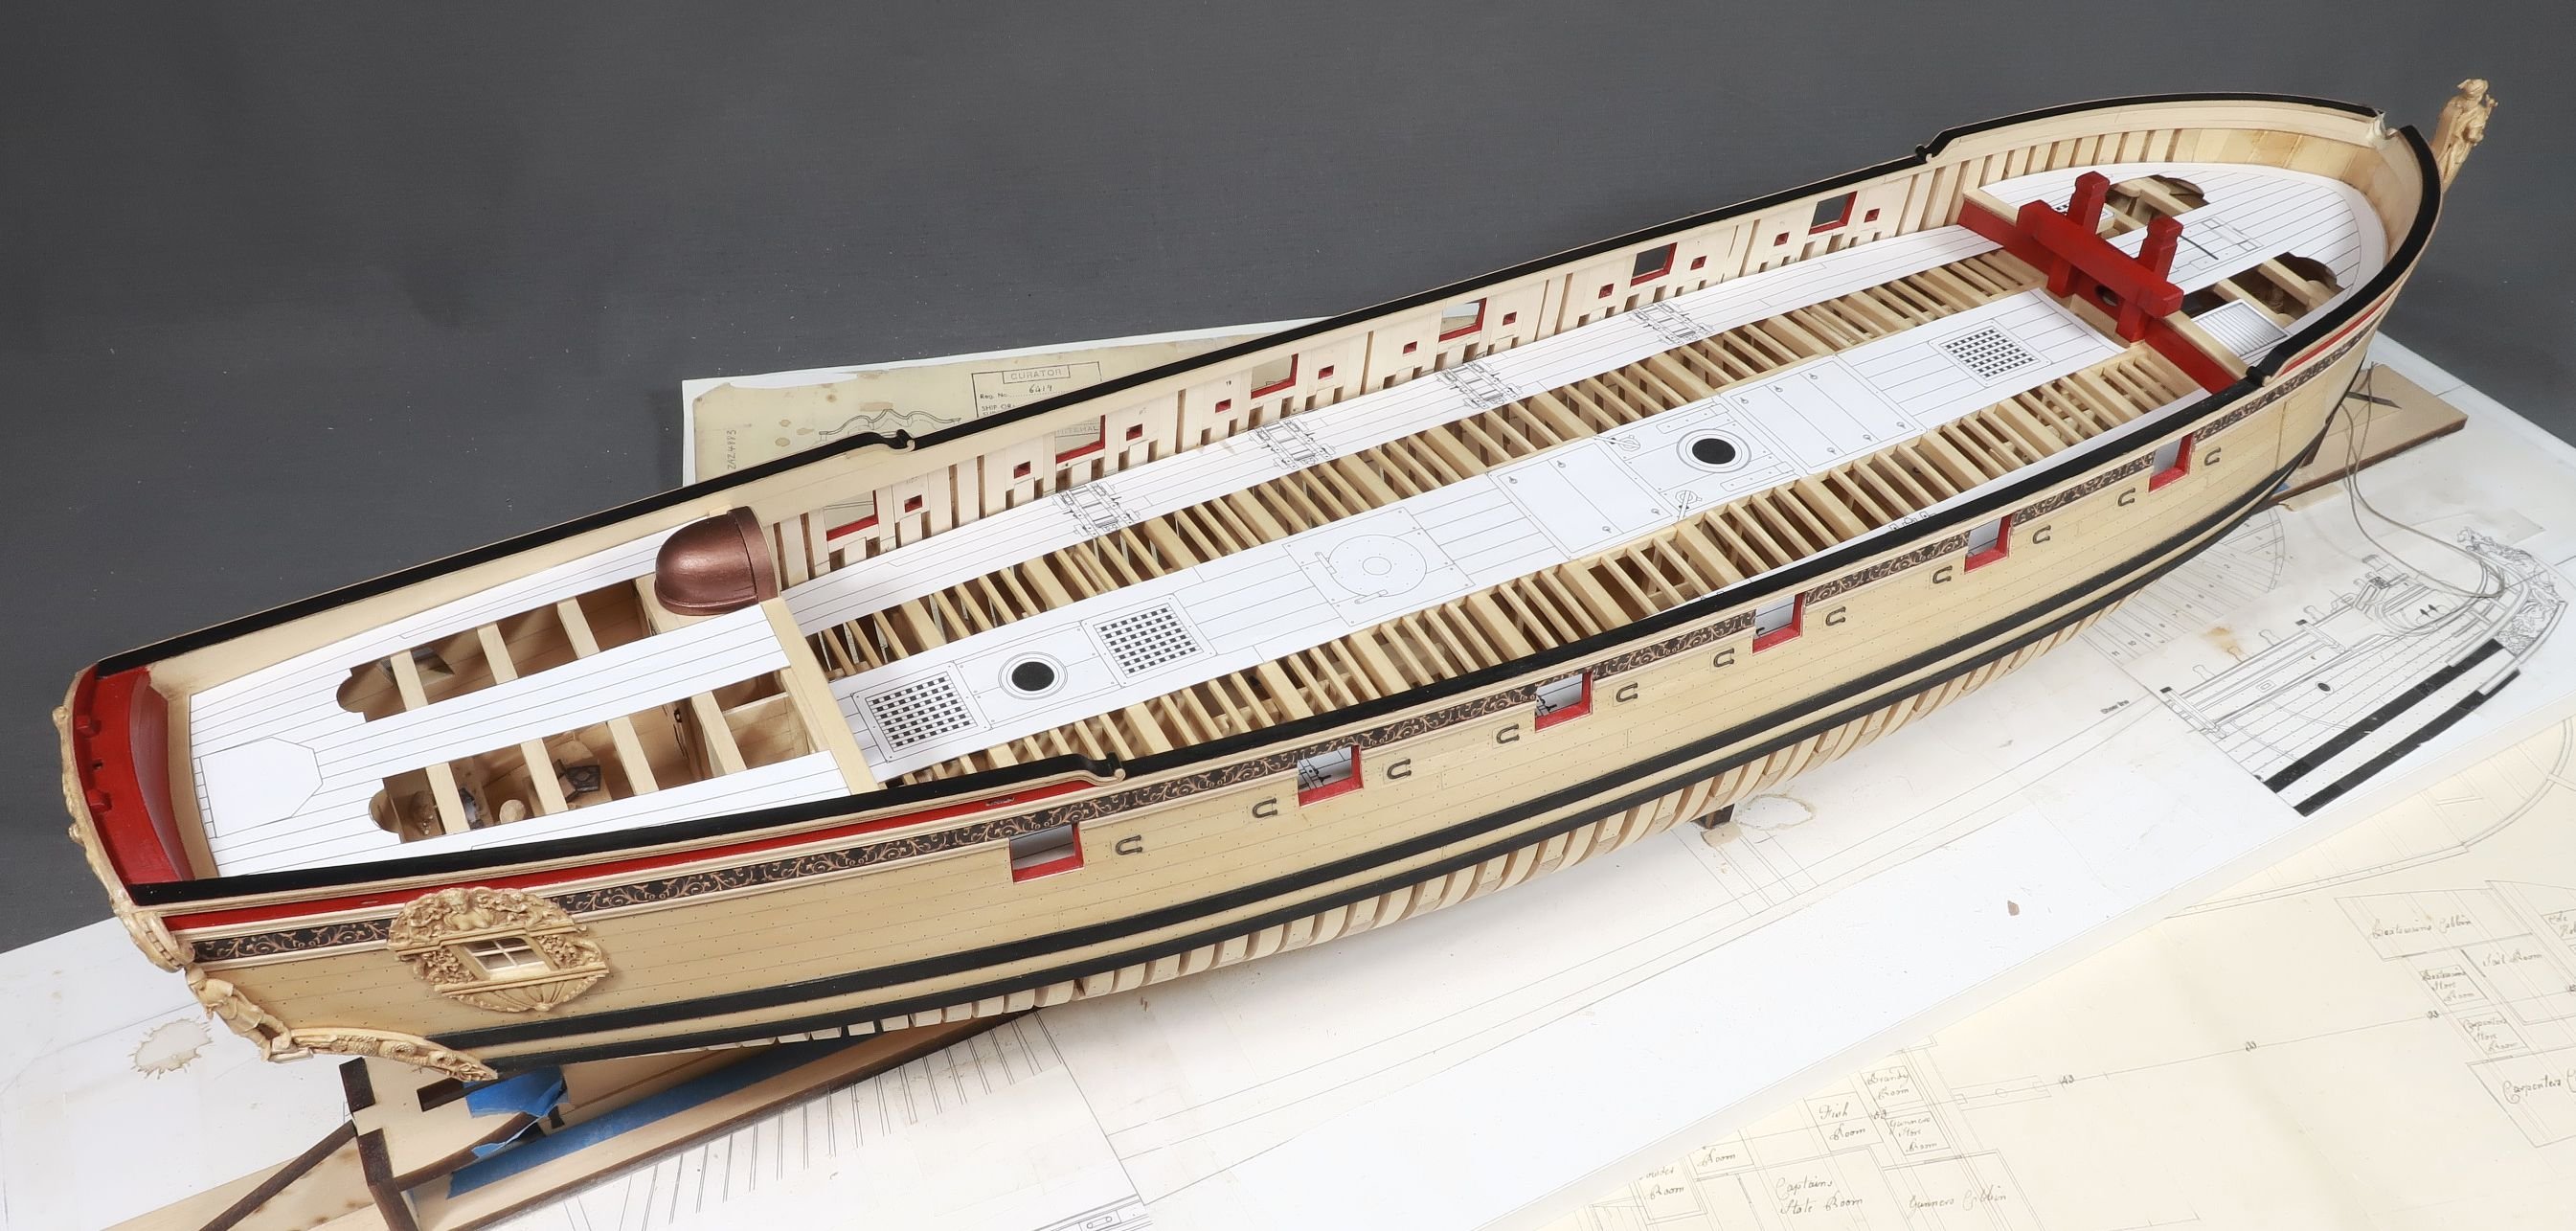
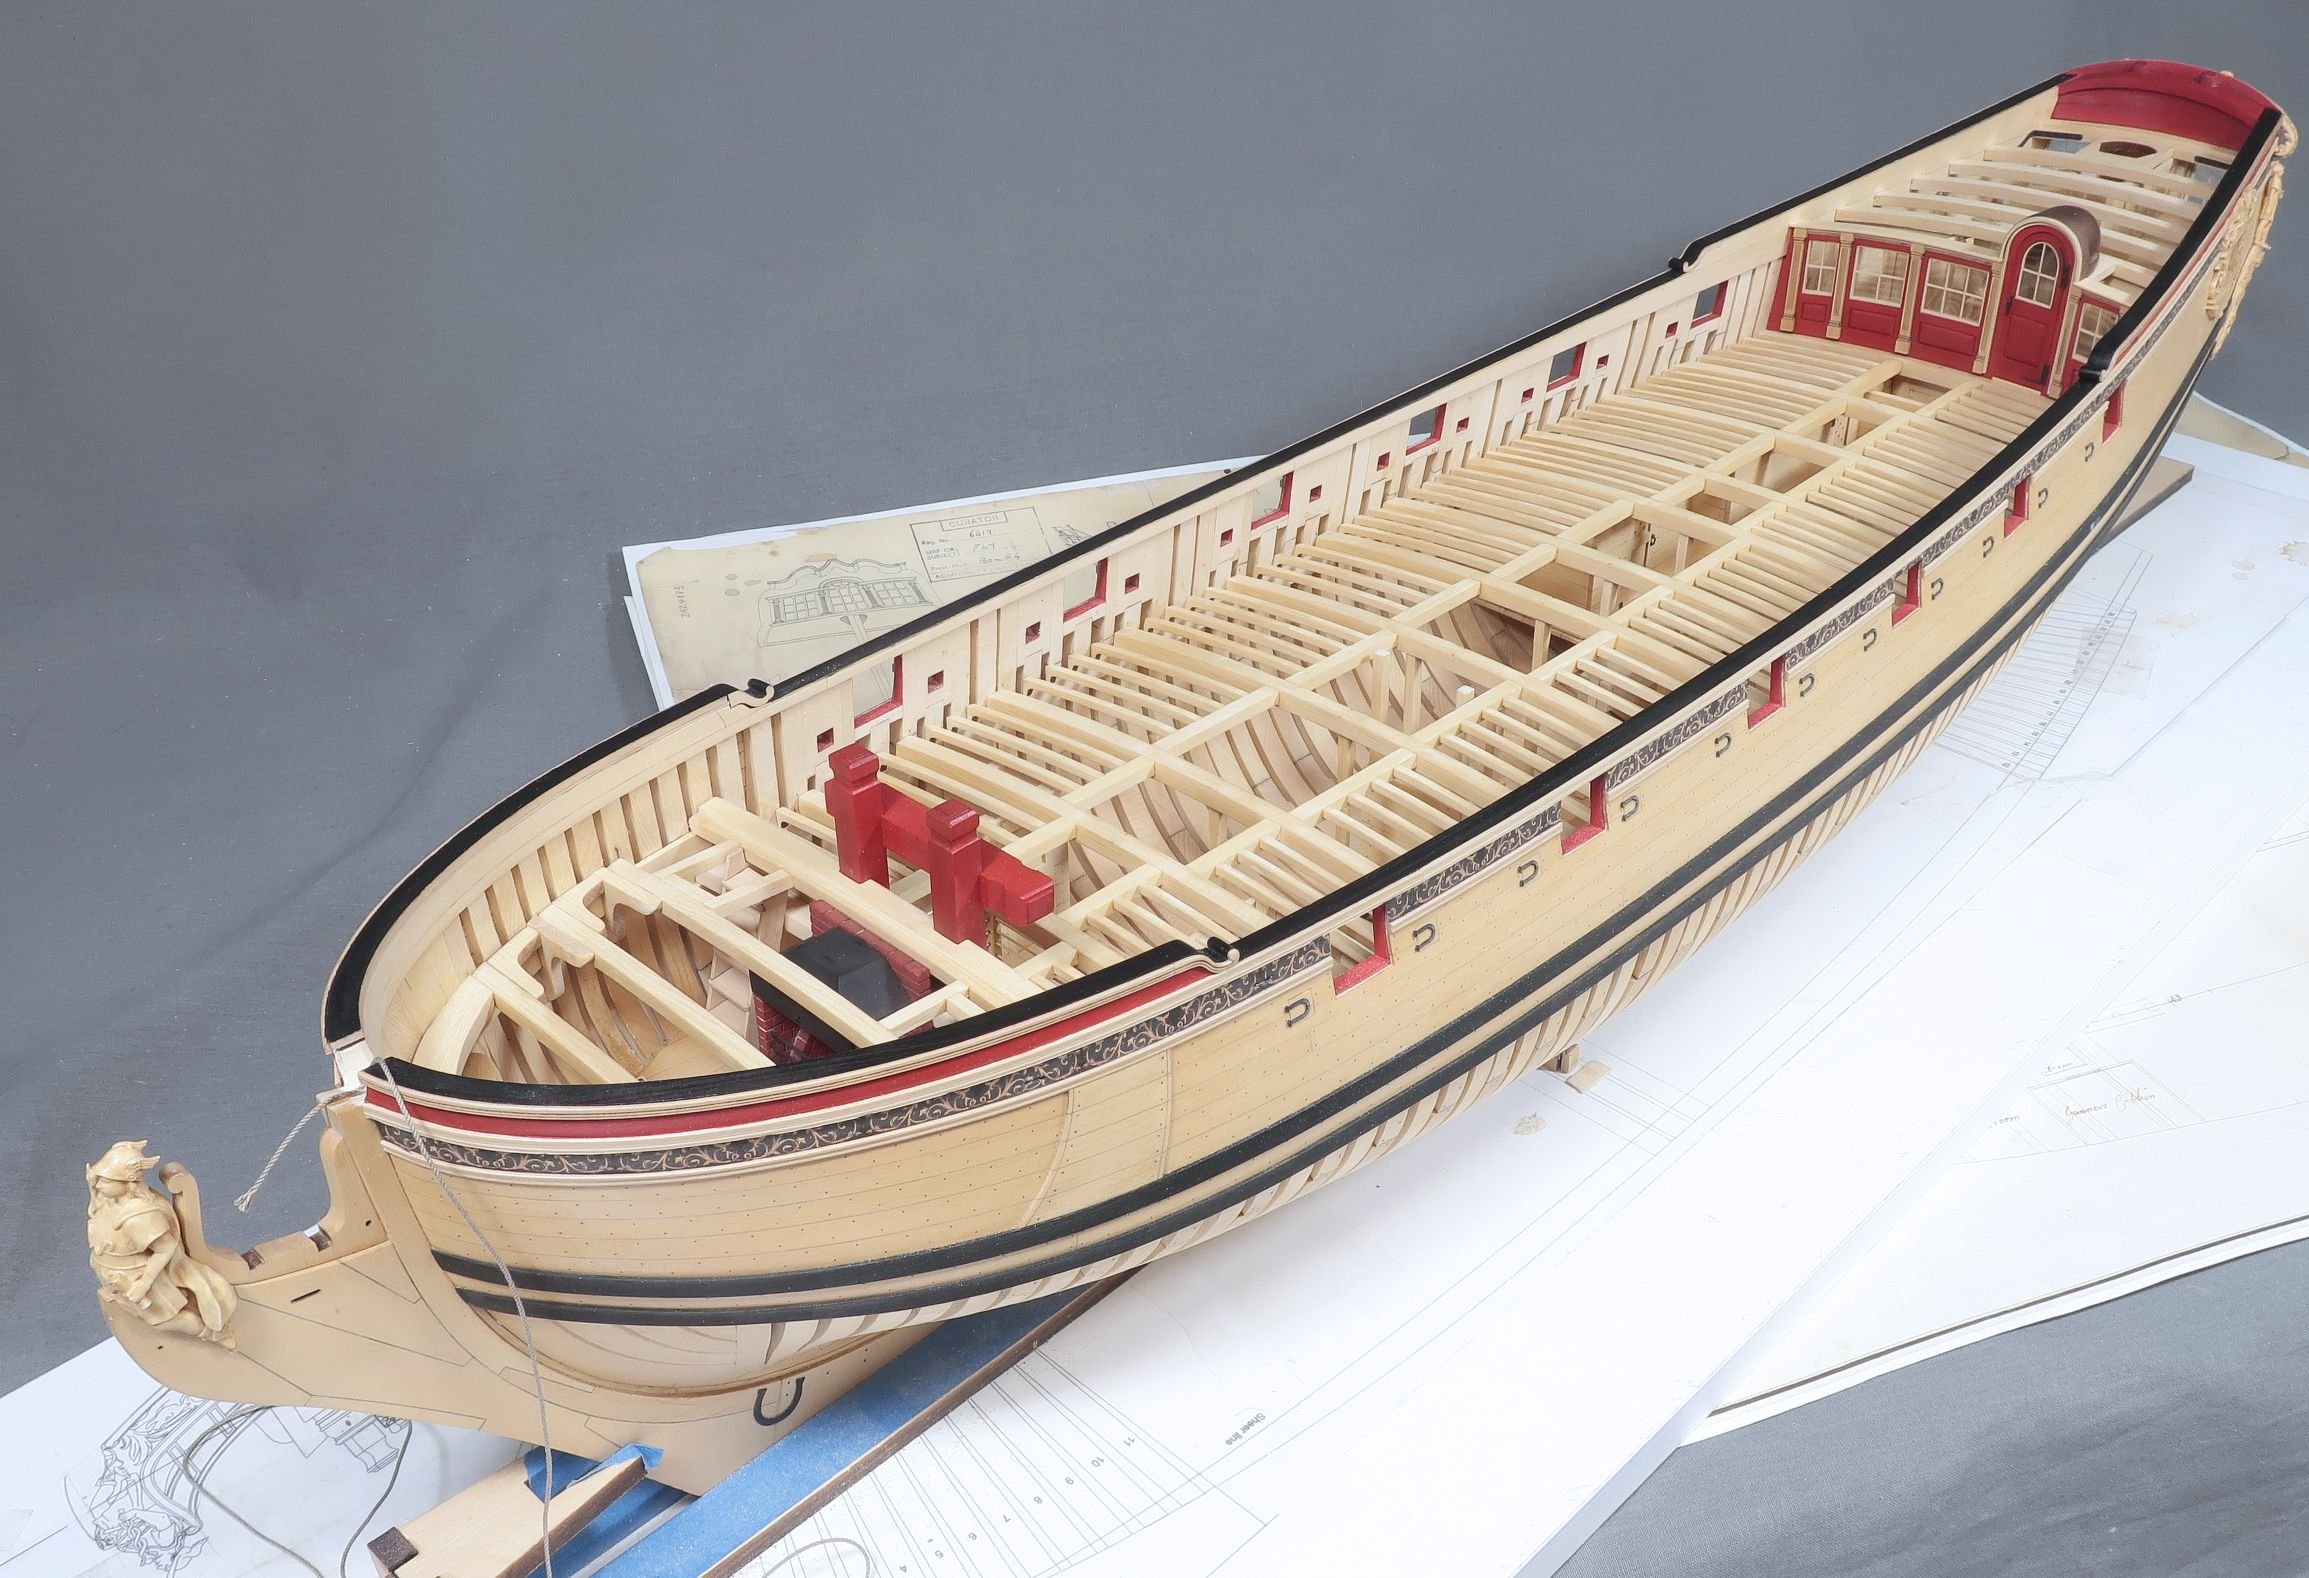
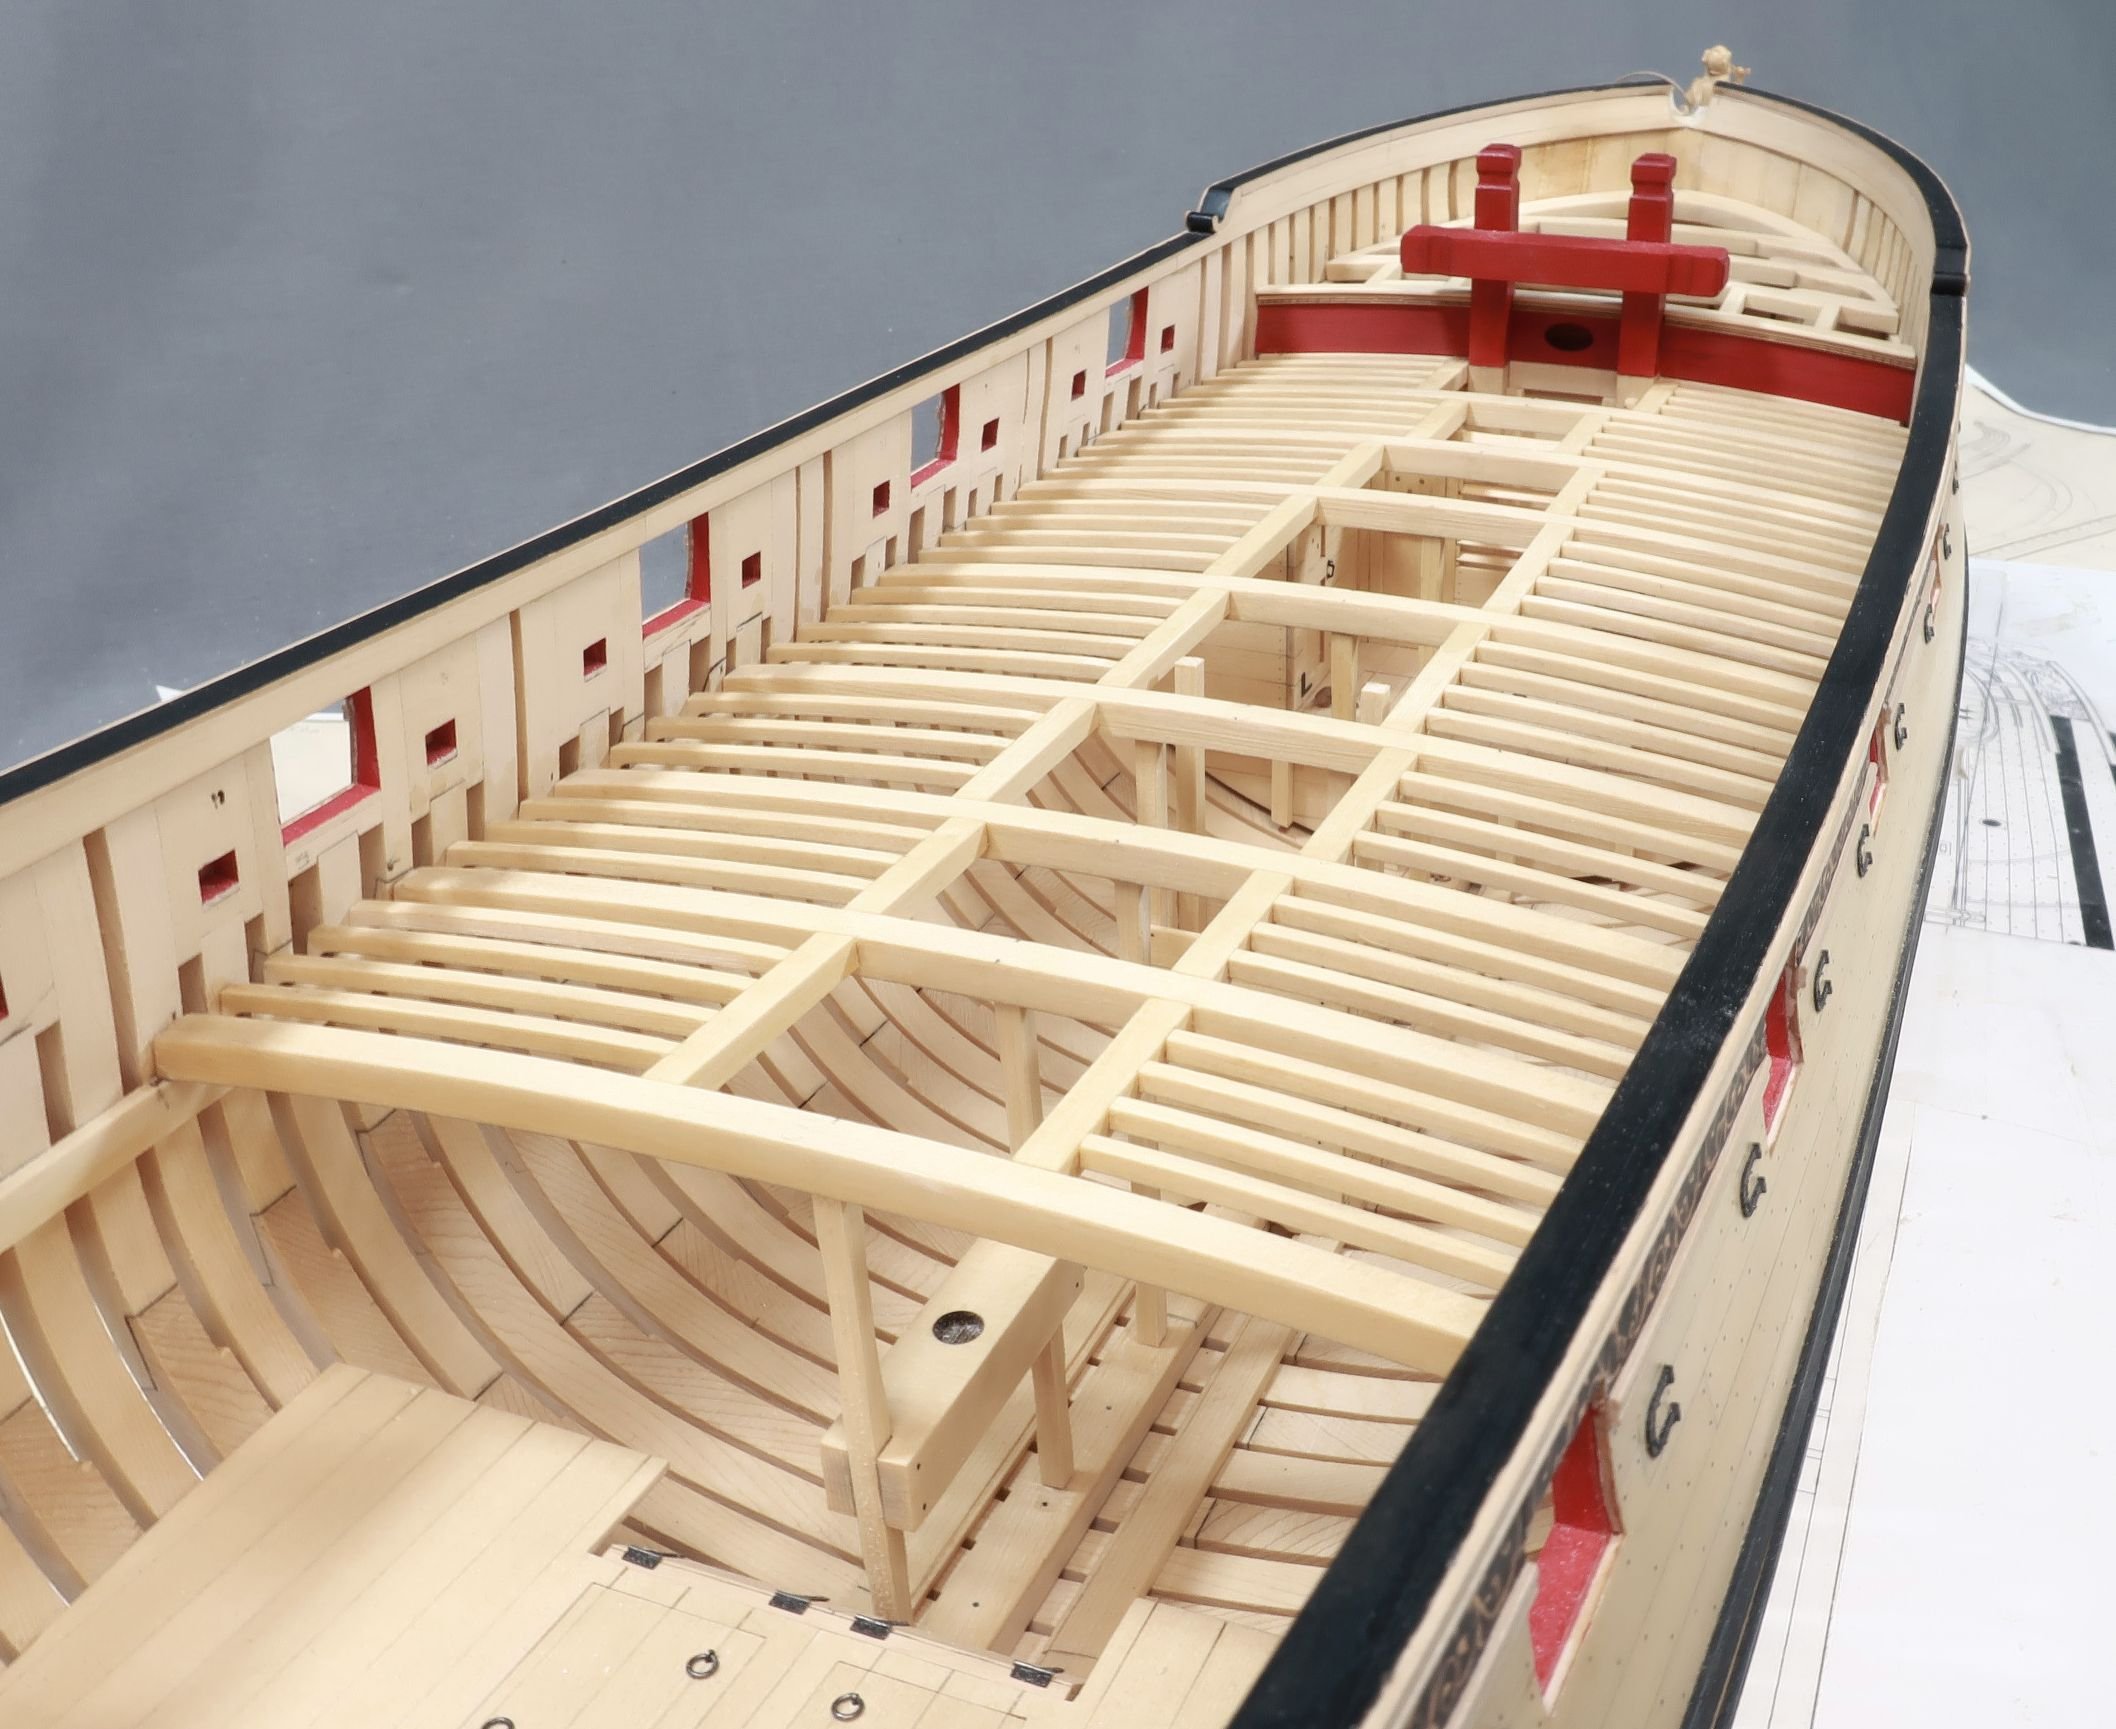
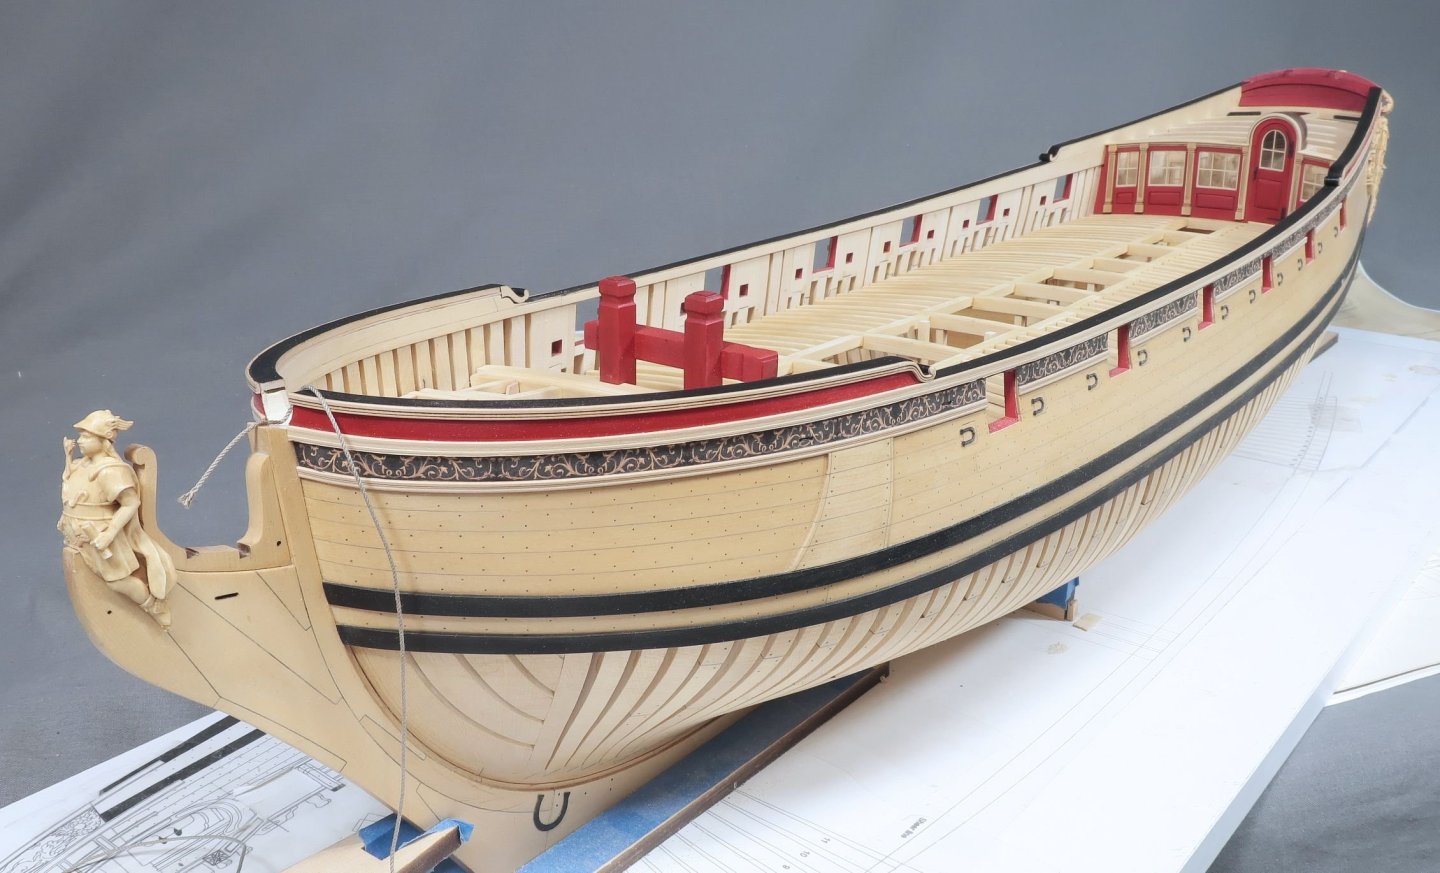
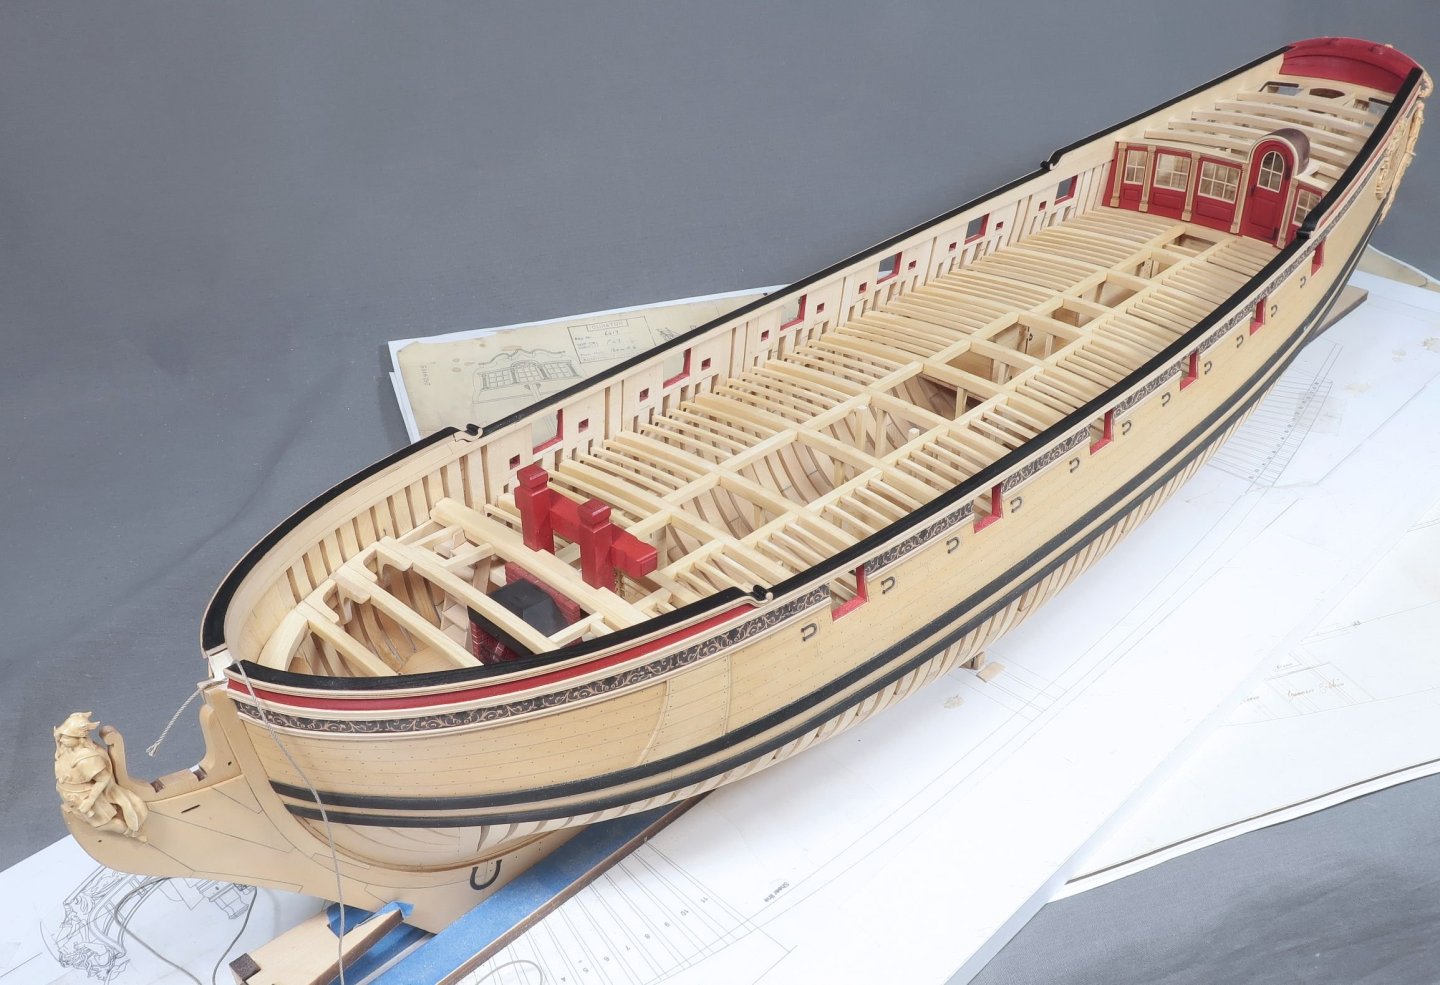
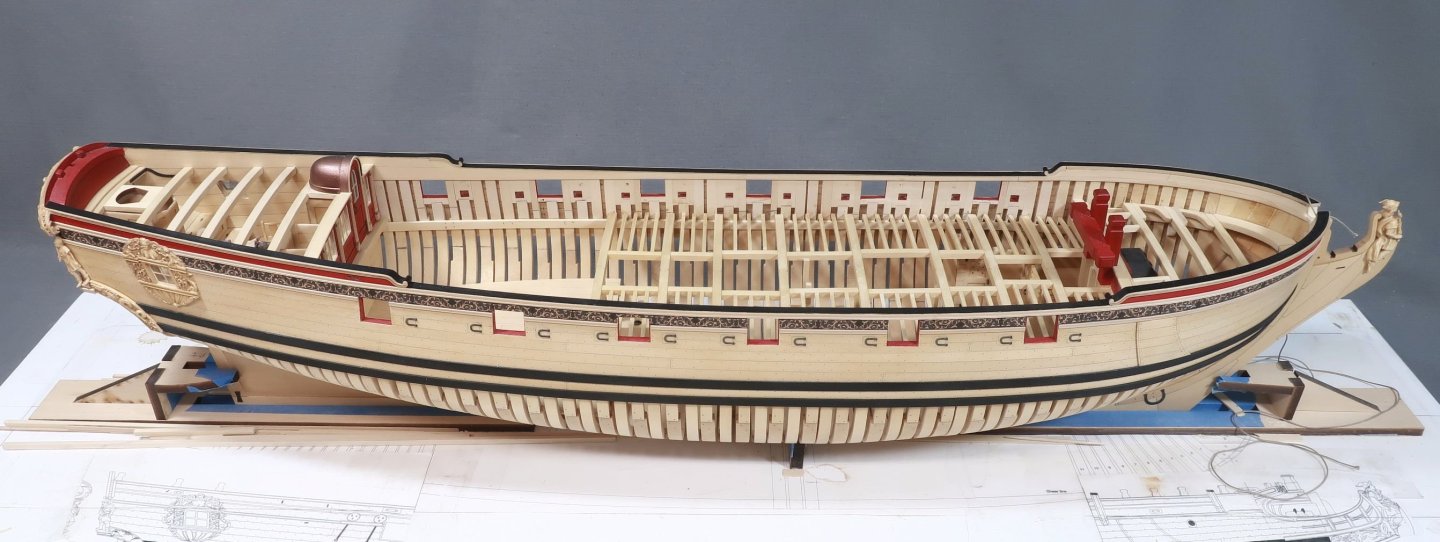
I have reached another small milestone. All of the below deck fittings and cabins are completed. The gun deck is fully framed as well. Next up I will start planking the inboard bulwarks. That should make a huge difference. I hope to see many of you this weekend at the New London show. It should be a very enjoyable weekend. I am looking forward to it. Chuck


-
Thanks guys…. Yes I have mailed a few. It depends on the country. Some countries wont allow first class mail or the cheapest option and only allow priority mail. It weighs about 9 pounds give or take. I just shipped one to Italy for $99 US shipping. I sent others which were around $85 So far the most expensive was $149 but I charge $99 usually so I take the hit if its more. So probably around $99
-
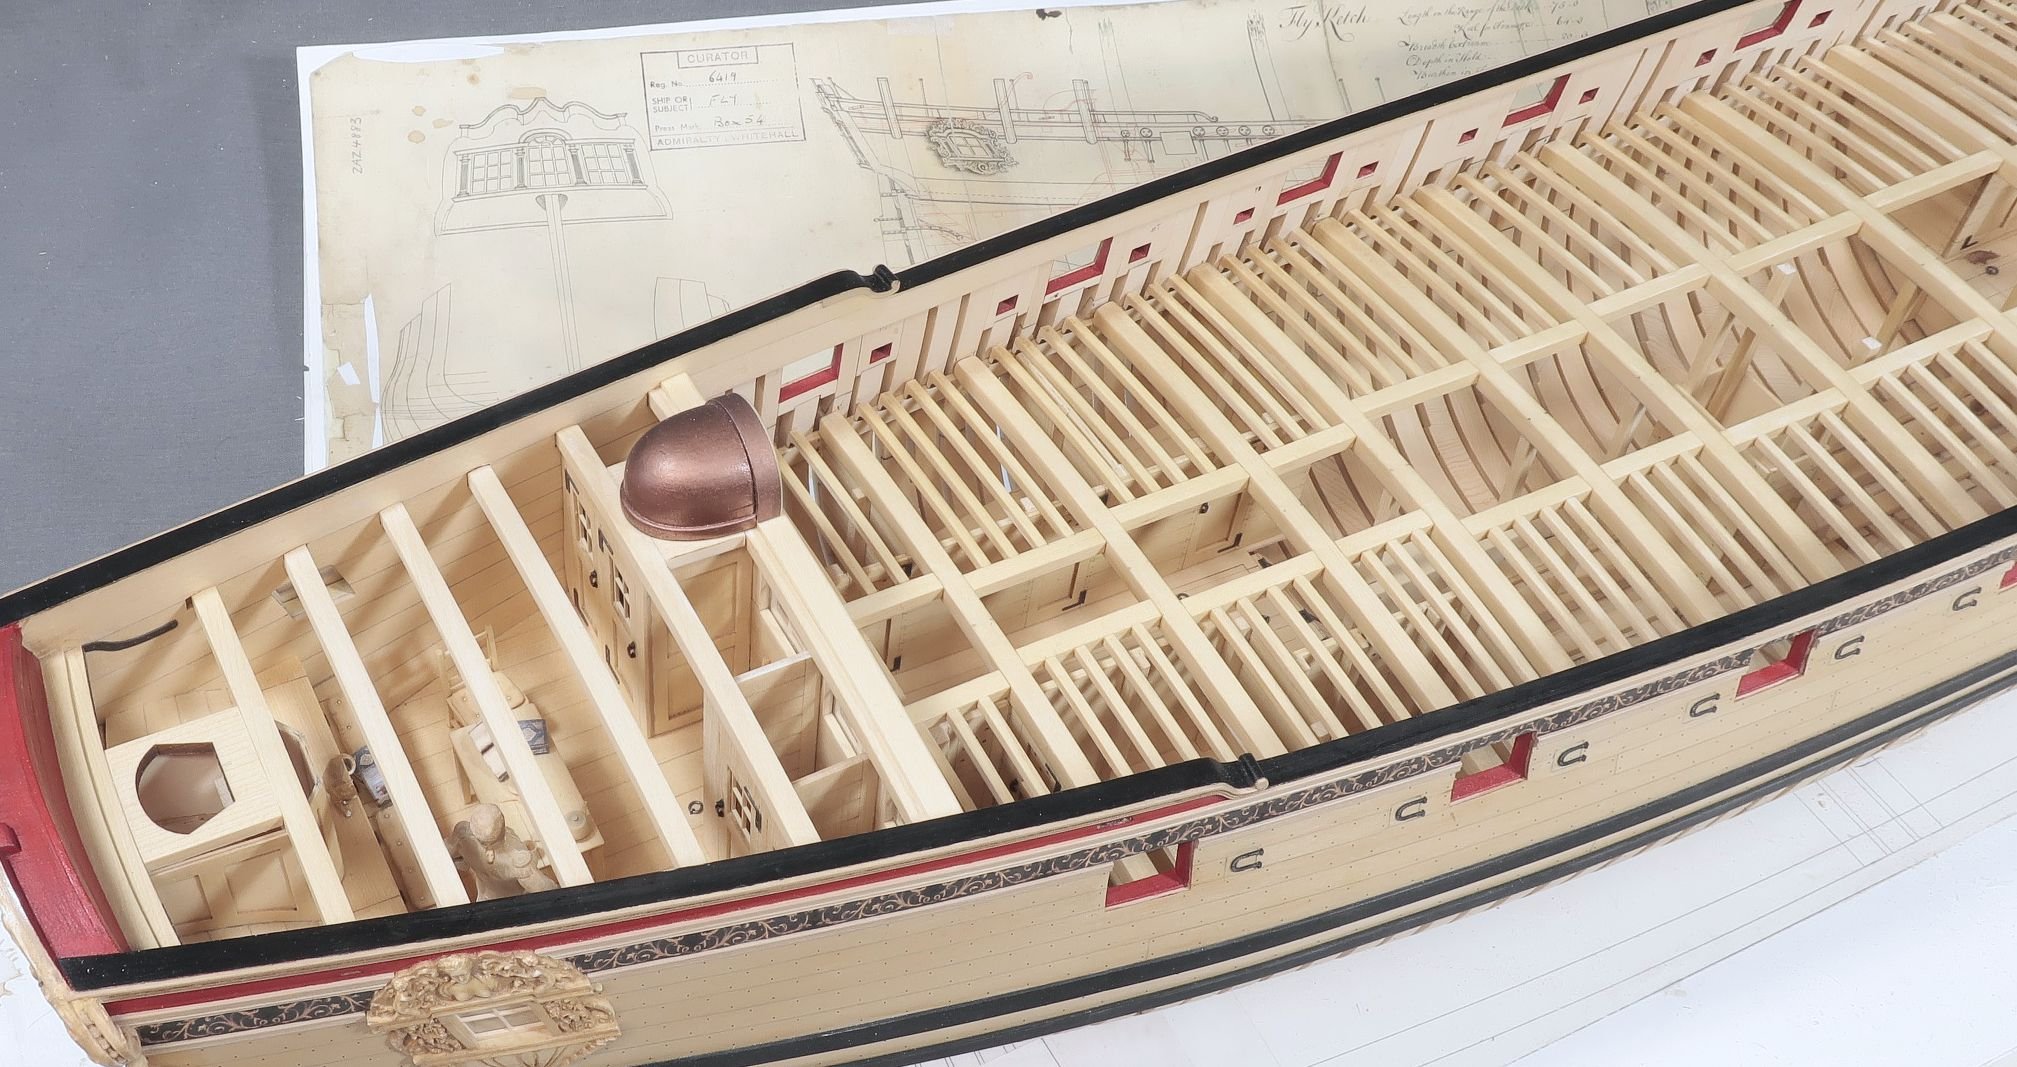
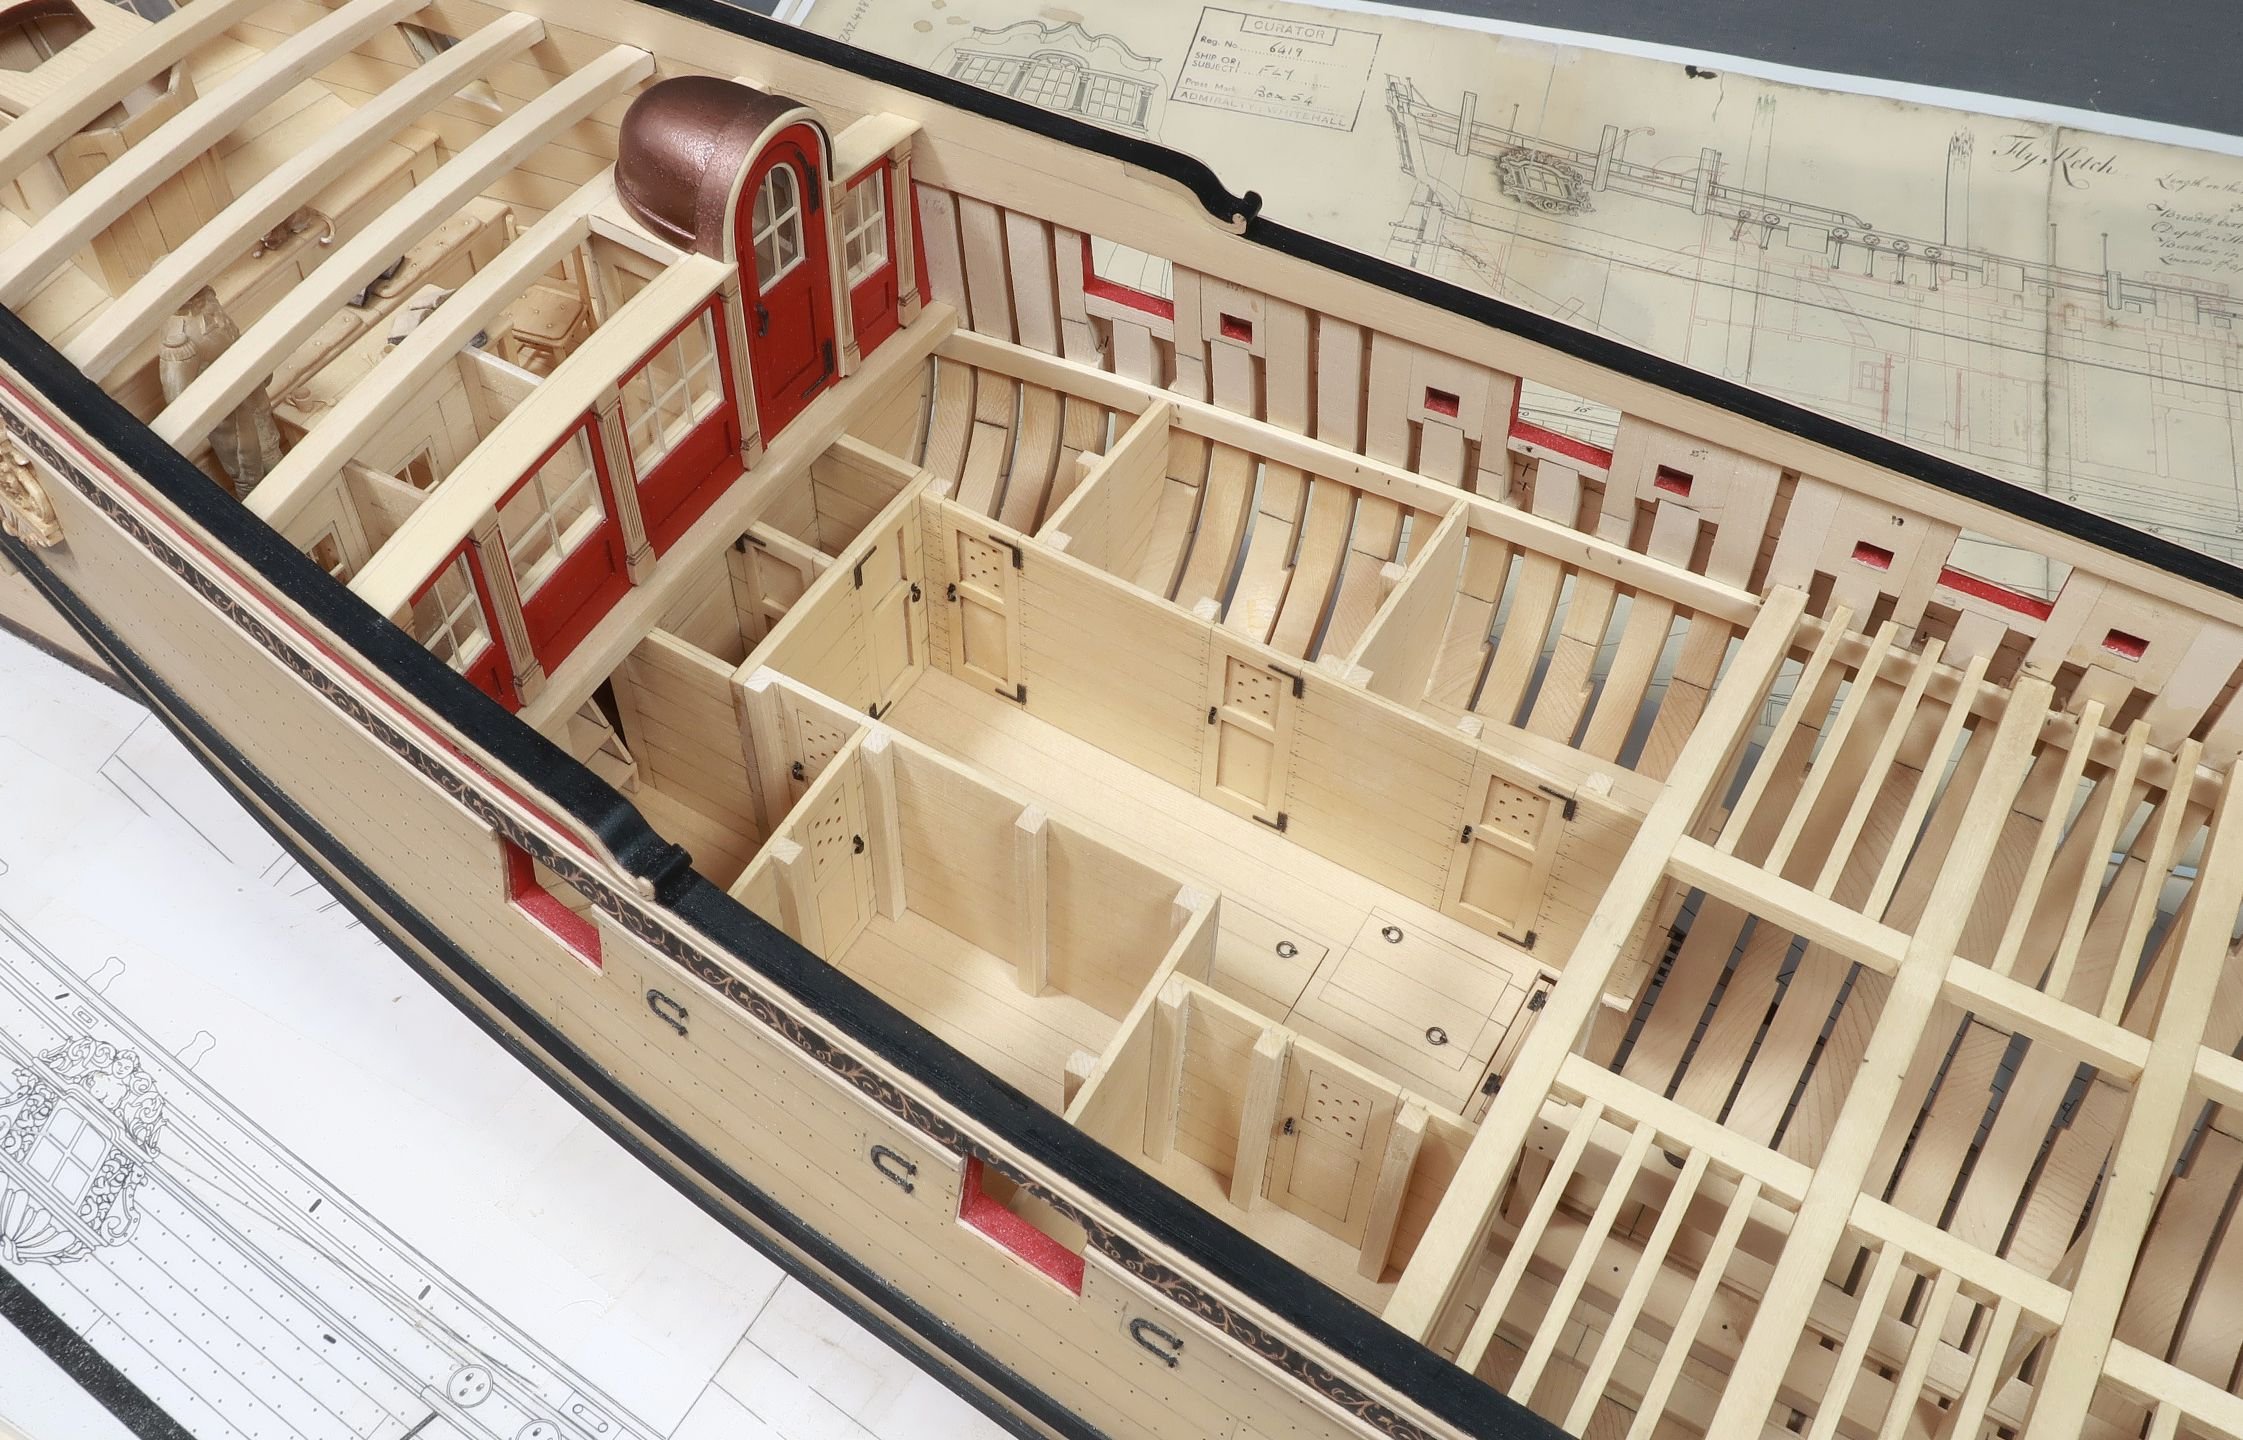
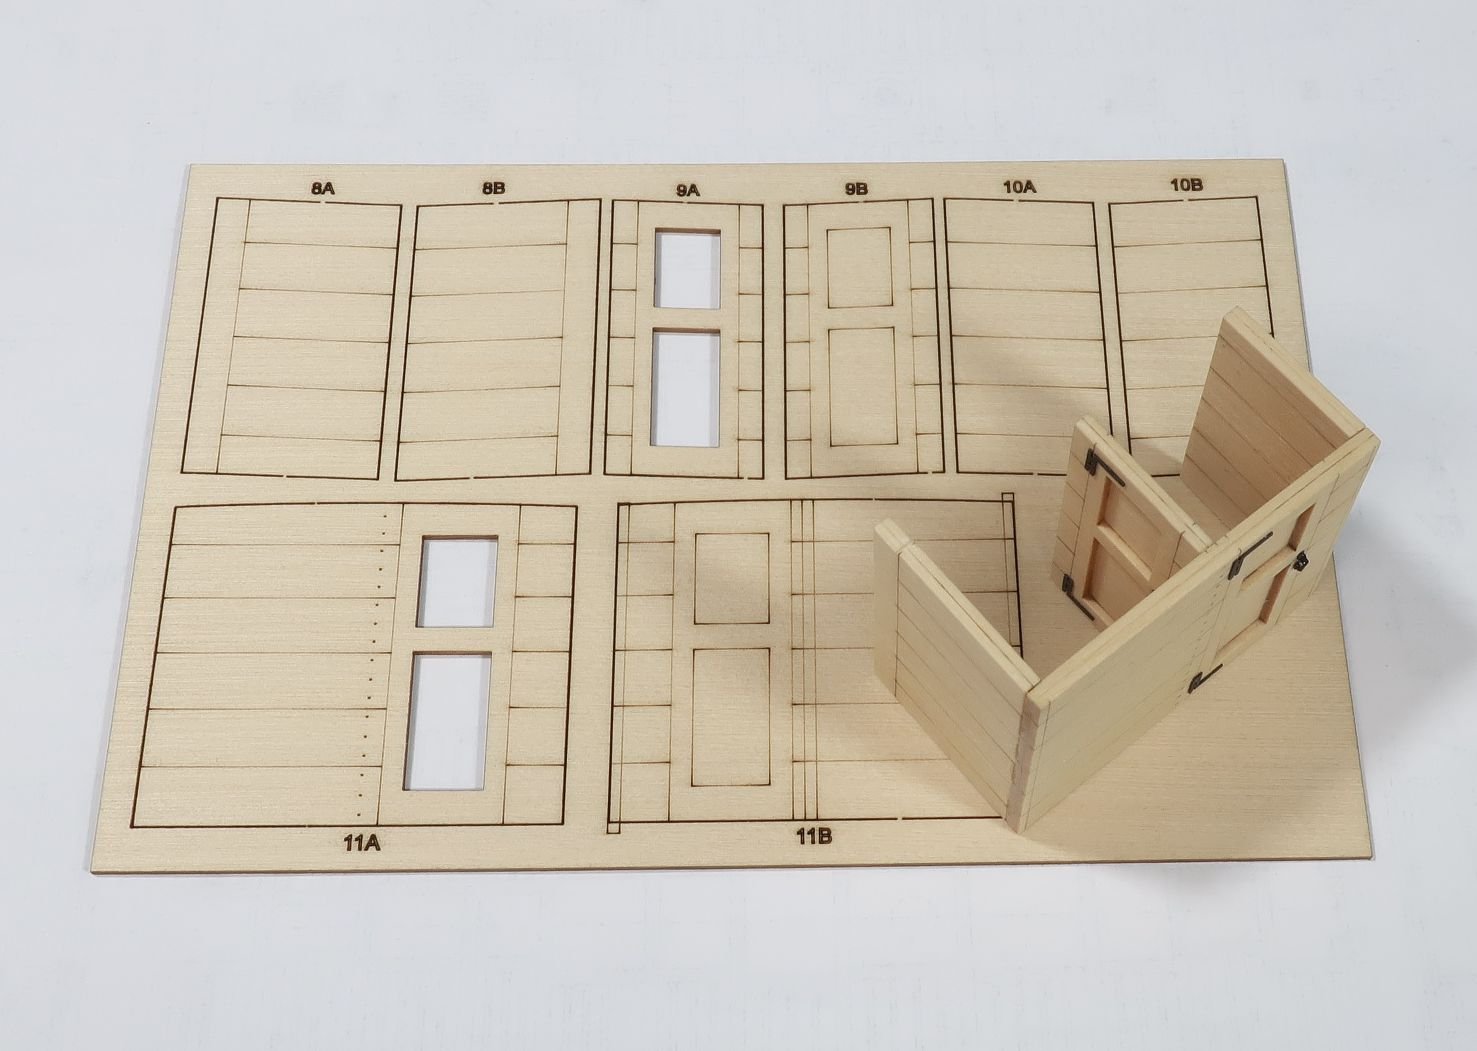
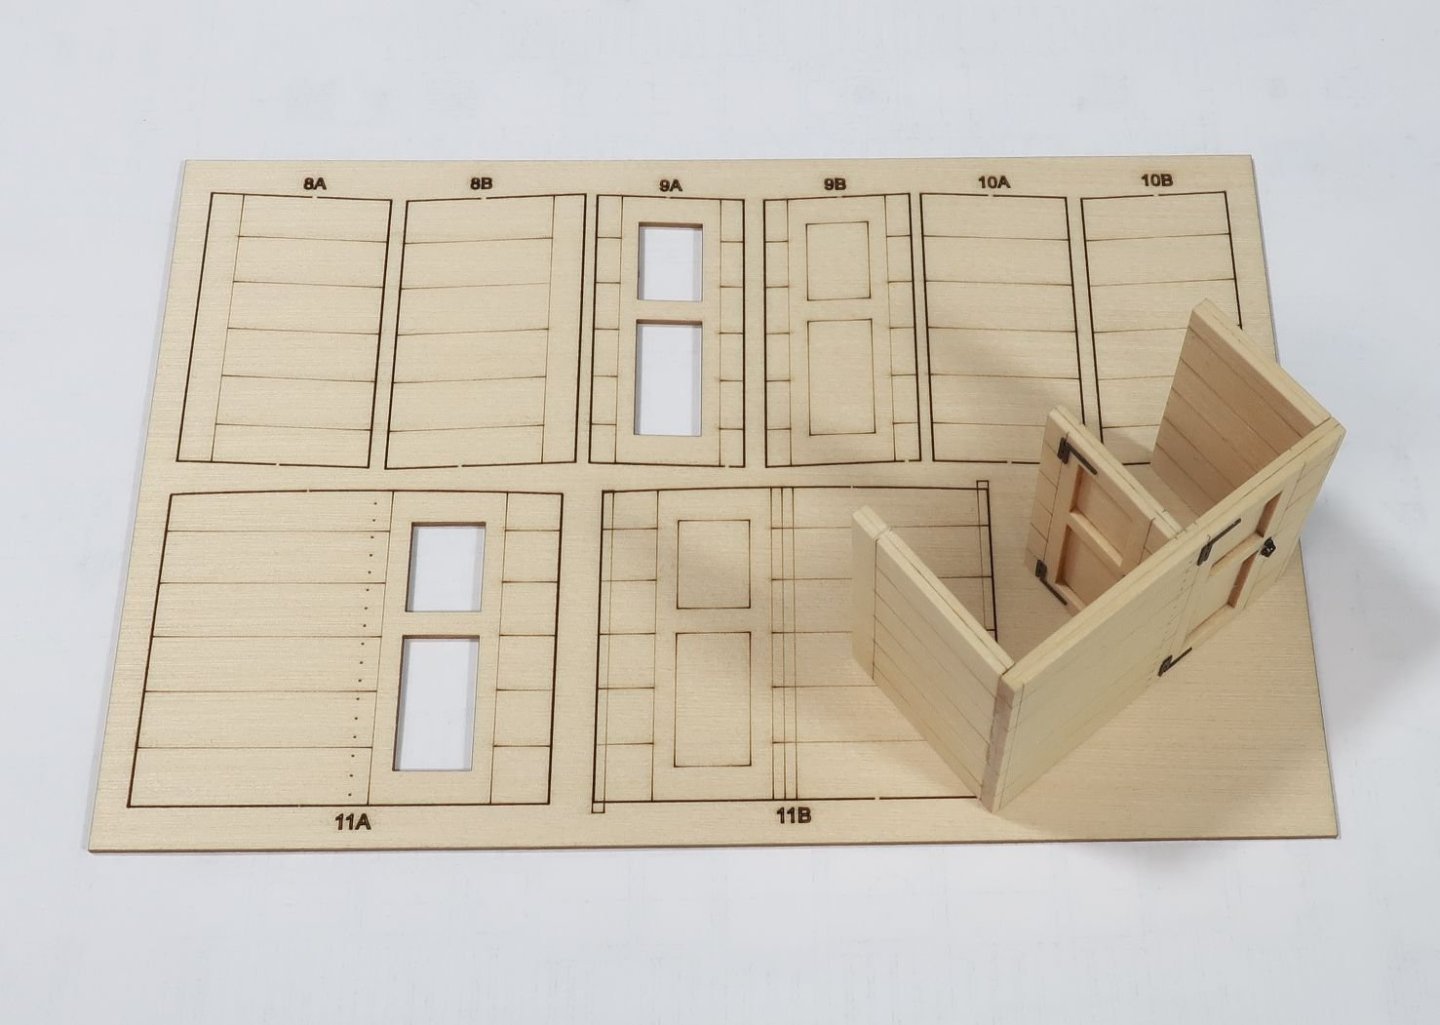
Thank You... The cabins on the aft lower platform are completed. No detailed explanation since they are built exactly like the others. Each partition wall is built up with two layers glued together. Then they are detailed with hinges and door handles as required along with any upright timbers 1/8" x 1/8" strips. Their heights and widths are adjusted to fit under the deck beams etc. Finally they are assembled and glued into position. Here is the tiny powder and filling rooms completed. These walls are slightly thicker than the other cabins as was normally the case. An extra laser cut sheet of parts shows how all the cabins are prepared for you. They are all numbered and shown on the plans. I built them in the order that they are numbered. All of the cabins completed. Next up is to complete the remaining deck beams carlings and ledges.


-
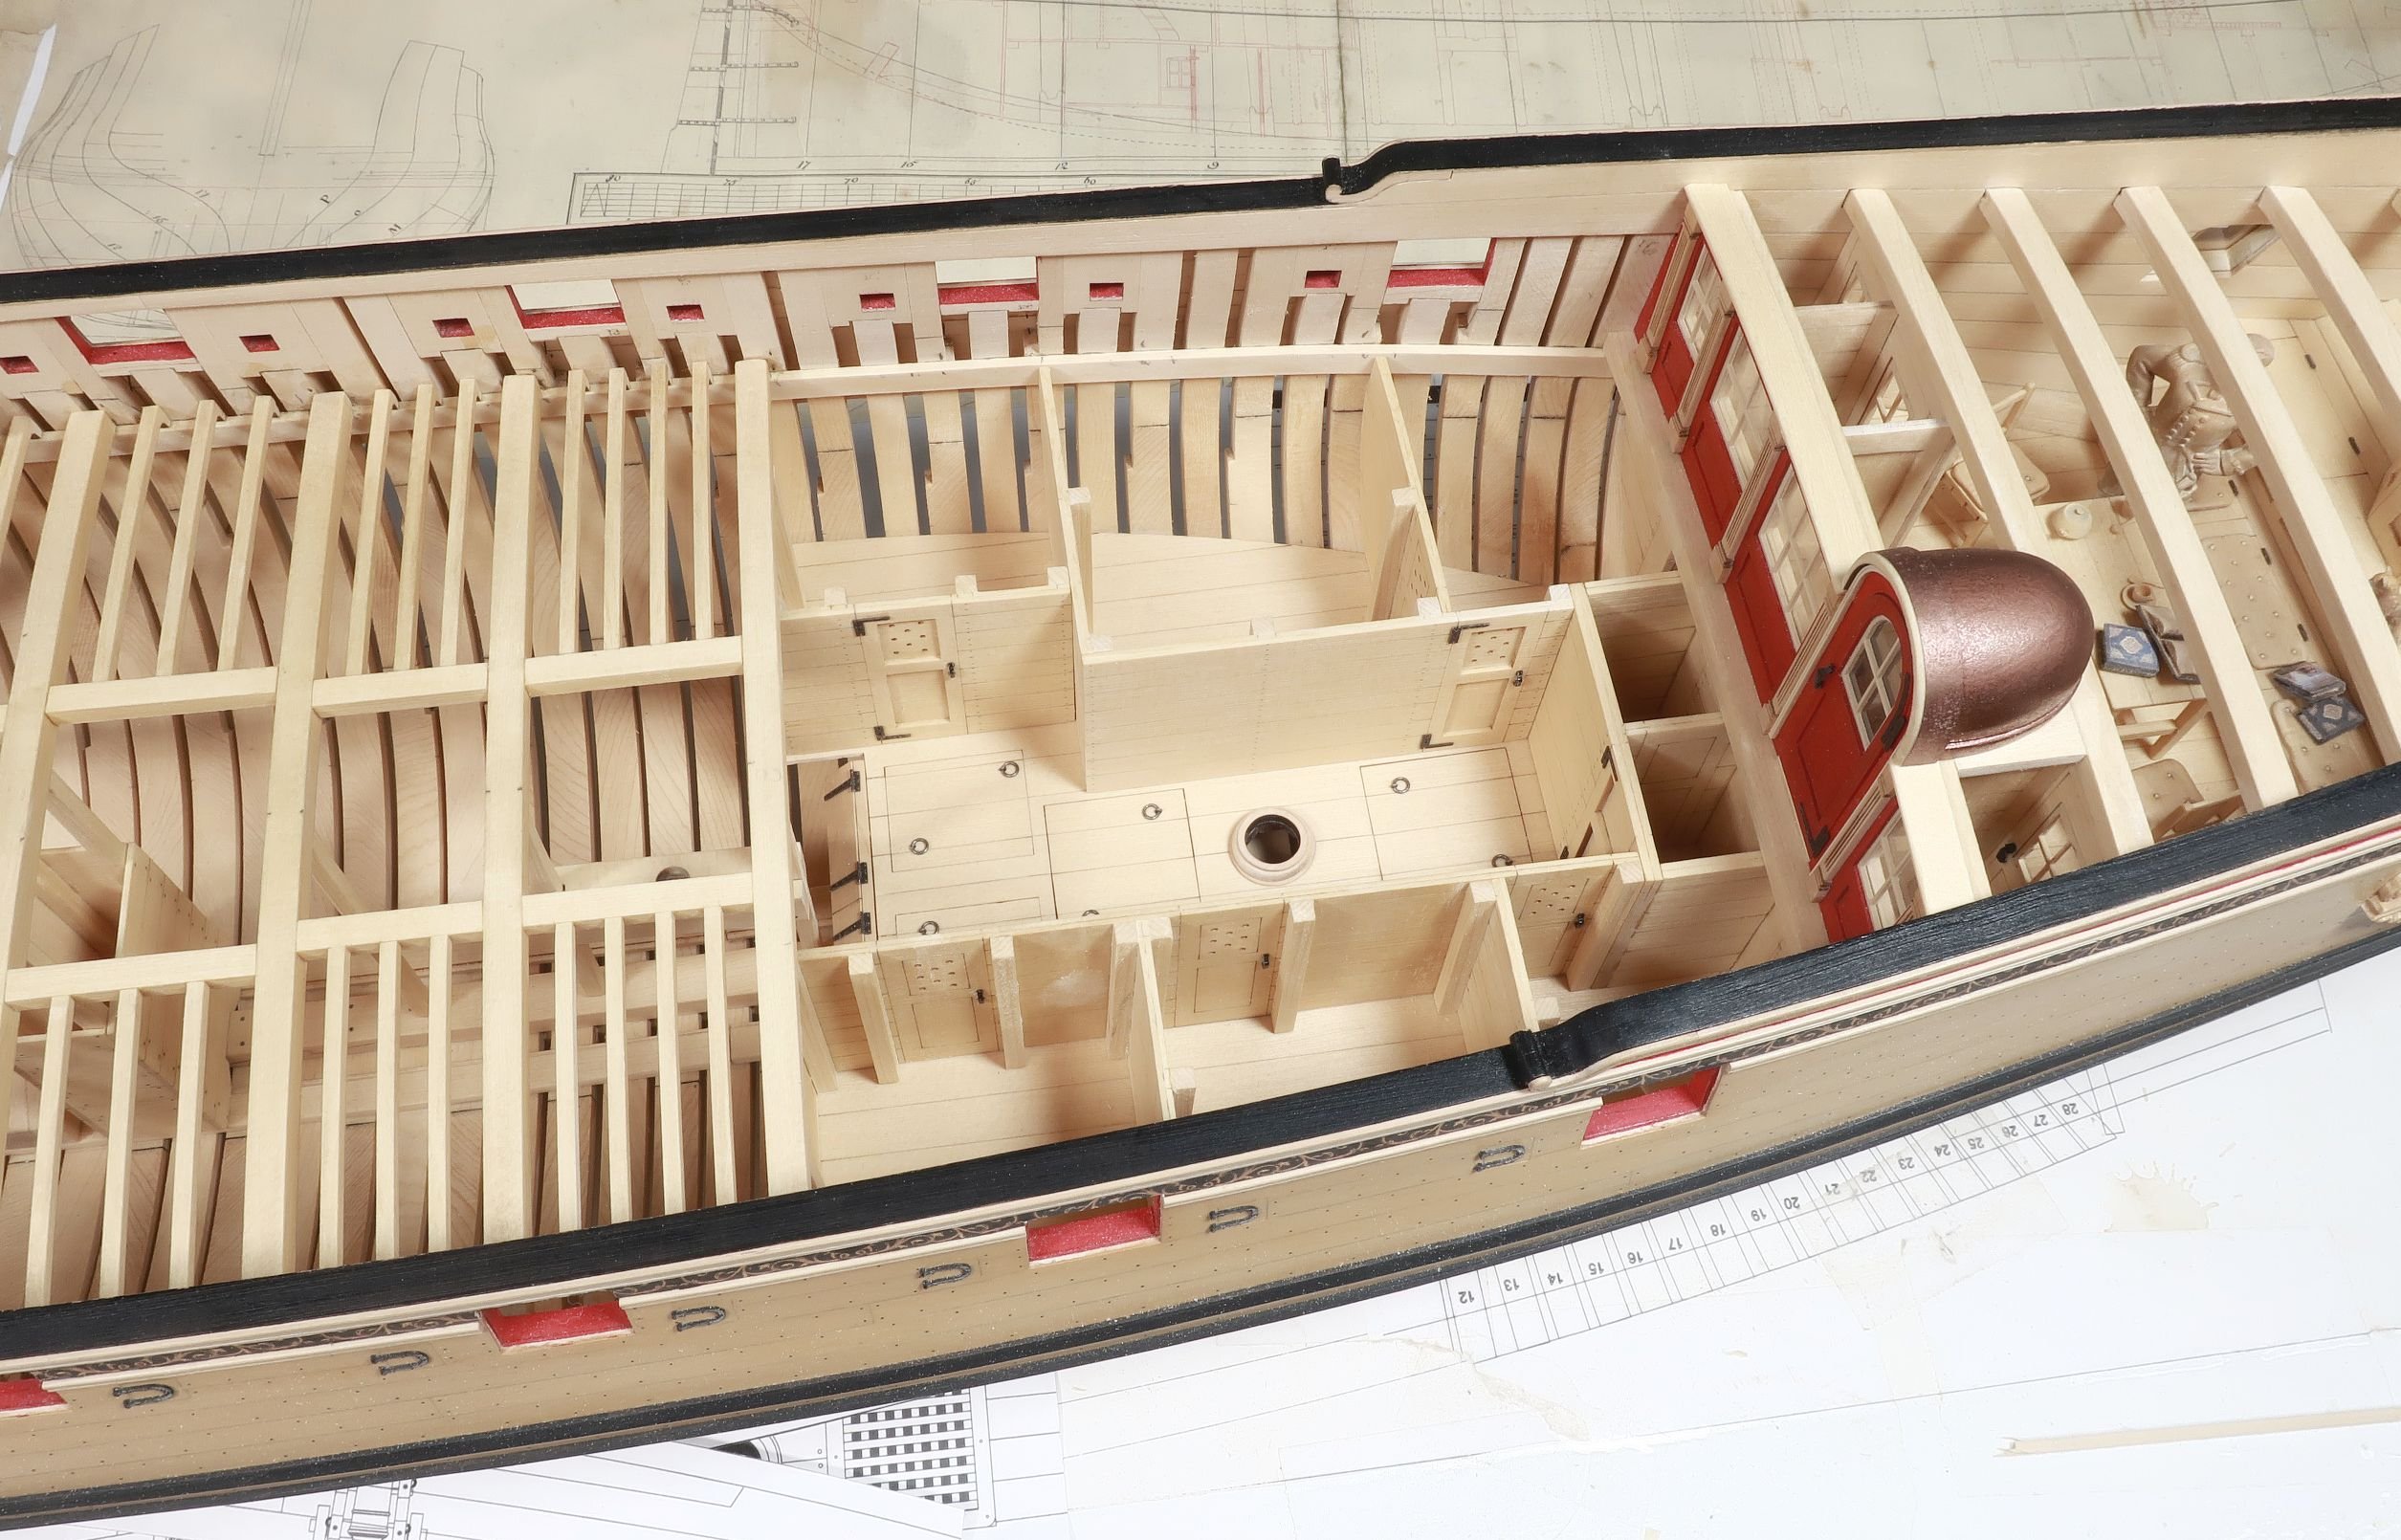
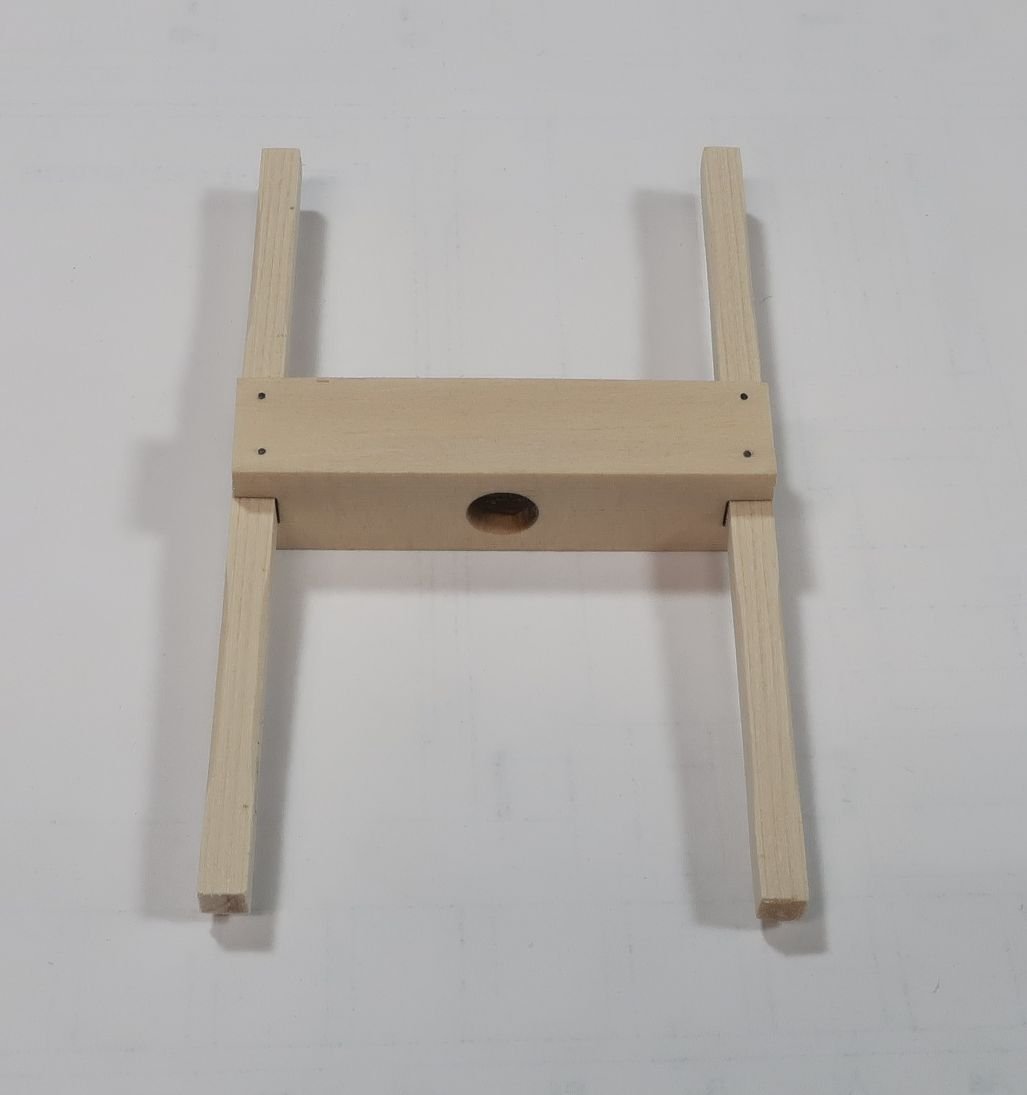
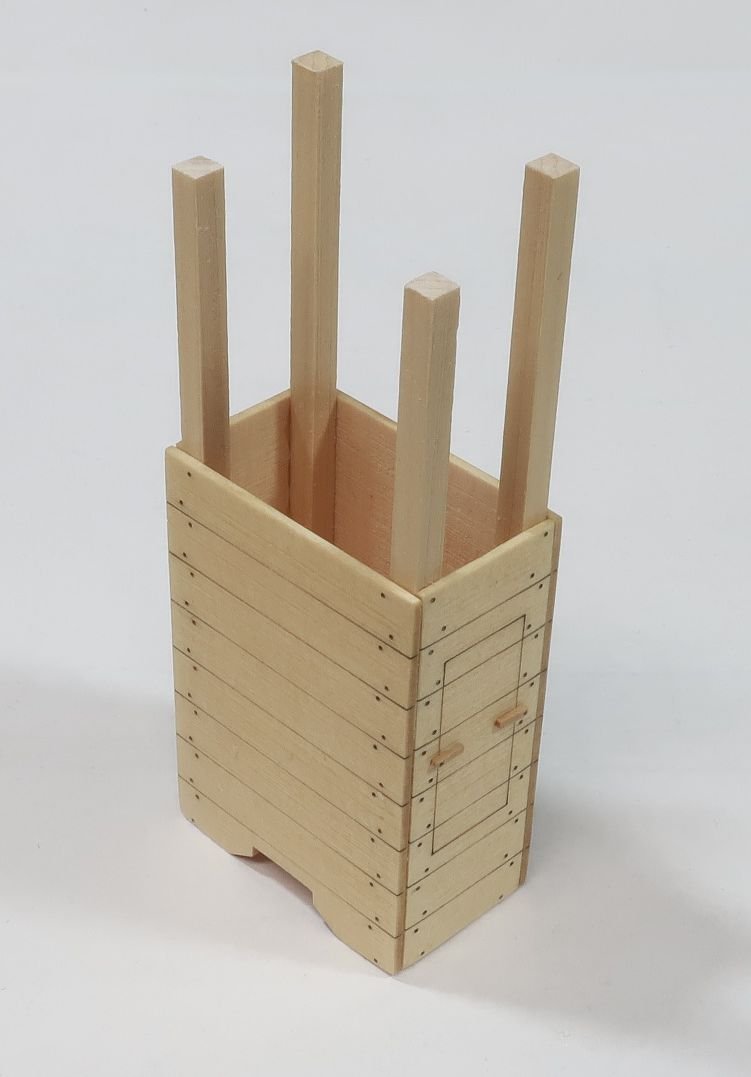
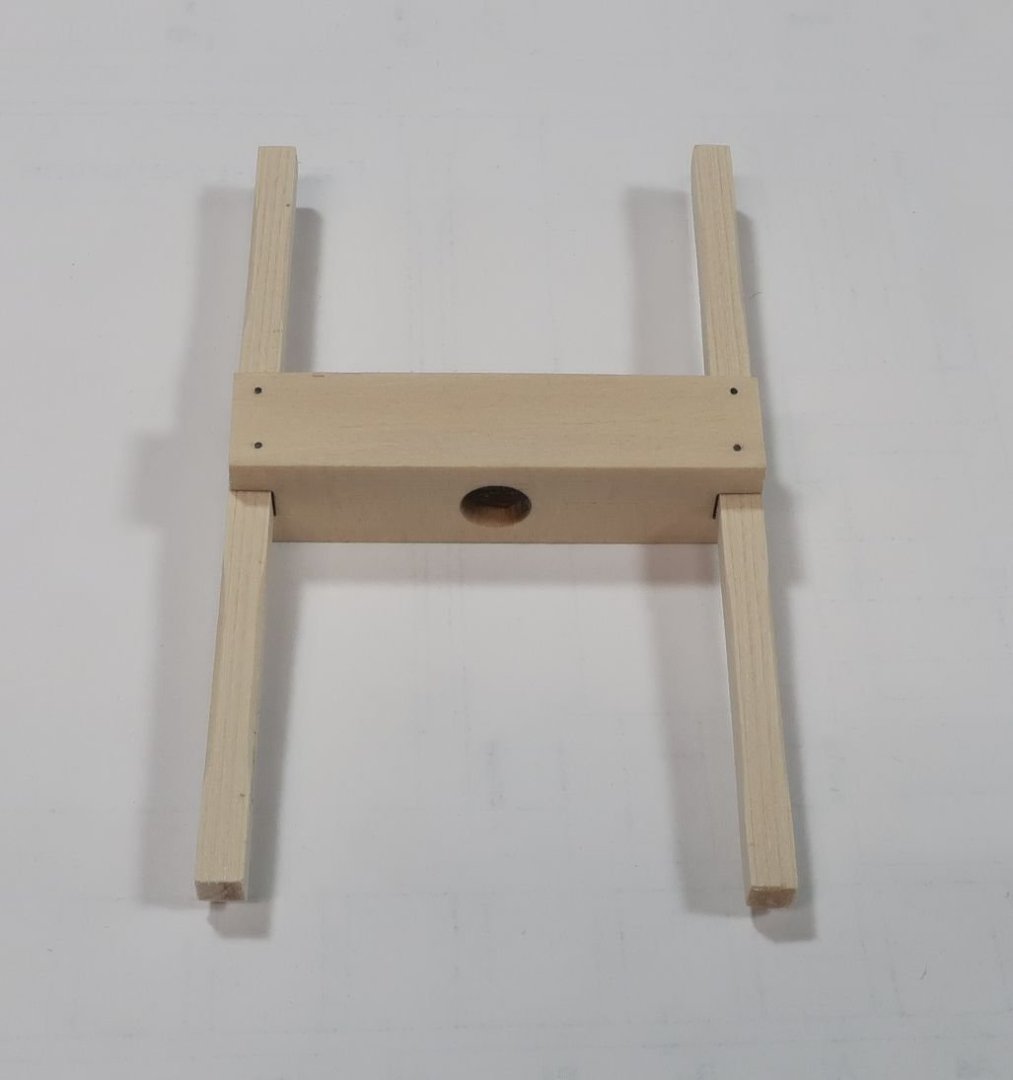
Thank you for saying... I am trying to set aside time regularly to make a little progress. Continuing with the center line fittings below deck, the WELL was next up. This is a relatively simple structure. The four sides are laser cut and etched. You need to do just a few things before you glue up the four sides. First...make sure the fore and aft sides sit nicely on the keel. Once you adjust them as needed, you can cut the four upright columns to length. How do you determine the length of these. The two aft columns are shorter. These are simply cut to fit under the next deck beam. No big deal. The two columns on the fore side of the well are different and taller. These two columns are cut so the tops are flush with the TOP of the gun deck beams or carlings. You will have an opportunity to sand these shorter so dont over sand them initially. Assembling the well is straight forward after you glue the columns to the port starboard sides of the well ahead of time as shown above. You can also use some scrap tiny strips of wood to make the toggle handles for the access door. Then just glue them on. They are clearly shown on the plans. With the four sides glued up and square...test it on your model. After any minor tweaks you can glue it position permanently. Then the next few gun deck beams, carlings and ledges were taken care of. Eventually you will get to the beams where the capstan step needs to be built along the center line. So you will need to stop and assemble the capstan step. I glued those appropriate deck beams in position so I had a reference point to test fit the step periodically. The step is also laser cut for you and has a recessed circle in the center. This will accept the heel of the capstan drum...eventually. The step is bolted to two columns that are set on top of keel. These two columns are 1/8" x 1/8" strips just like the other support columns under the beams. Hopefully you havent forgotten to add any up until now. They are all shown on the plans. You must cut the two columns to fit under their respective gun deck beams. Now you have to determine where along those beams the capstan step will be placed. You can use the plans of course but it is doubtful it will match your model perfectly. Mine didnt. So just understand that the capstan step is slightly higher the lower aft platform and it is level. Because you know this you can mark the columns for the height of the capstan step with the columns "snug" fit temporarily in position. When I was comfortable that I had the proper height worked out, I was ready to glue it in position. But first I had to add the simulated bolts on the capstan step. I used 25 lb black fishing line to simulate these. And yes the photo shows the step upside down so you can see the hole for the drum. But rest assured it will be glued in position right-side up!! The capstan step in position...and the carlings added afterwards. And some other views...of the gun deck up to this point with the ledges completed. Almost to the other side of the gun deck. But next up are all of the cabins on the aft lower platform. Onward and upward as they say!!


-
Really nice work on the model. You have a nice clean model there. Well done.
-
Really nice work Rusty.
-
Looking nice and clean