Chuck
-
Posts
9,390 -
Joined
-
Last visited
Content Type
Profiles
Forums
Gallery
Events
Everything posted by Chuck
-
 Voyage of The Slave Ship: J.M.W. Turner’s Masterpiece in Historical Context By Stephen J. May Jefferson, North Carolina: McFarland & Co., 2014 6” x 9”, softcover, vii + 206 pages Illustrations, notes, bibliography, index. $45.00 ISBN: 9780786479894 In the preface and introduction of The Voyage of The Slave Ship: J.M.W. Turner’s Masterpiece in Historical Context, Stephen J. May declares his intent to evaluate the background, history, previous reviews and his own opinion of Turner’s painting The Slave Ship. In the following chapters, he does just that, exceeding expectations with a copious amount of detail. He immediately catches the reader in the preface and deftly guides them through the first few chapters with a colorful historical background, setting the scene for the introduction of the painting, Turner, and the major players involved in the fate of the painting. May goes on to chronical the life of Turner and the painting. In the evaluation of the creation of the painting, he makes strong, declared postulations based on historical connections between those involved in the abolition movement and Turner. This gives a district life to the painting that would otherwise be missing. However, at times, May makes certain declarative statements without clear evidence or a disclaimer, such as his belief that The Slave Ship portrayed the savage acts aboard the slaver Zong, due to the extensive news coverage of the trail and, therefore, Turner’s enviable knowledge of the tale. Yet, May did not provide any hard evidence that Turner was absolutely aware of the incident or that he was directly influenced by it. While this is a fair conclusion given the facts, it is not certain. The discussion of the composition of the painting is sprinkled throughout the book, there is no one chapter dedicated to the content, brushwork or technique. Nor is there any discussion of the painting from a technical standpoint. This does not detract from the book, as May’s intent is not a simple discussion of the artistic qualities of the painting. Rather than throwing around confusing artistic terms, May choses to focus on the painting as a whole, such as how a laymen would see it, making the painting a more accessible experience for the reader. May does an exceedingly thorough job of explaining and examining everyone who had any influence on the fate of the paining; some might argue too thorough of an examination in some cases. Occasionally, he provides such an intense level of information about an individual other than Turner it begins to pass from supporting dialog into unneeded information, leaving the reader slightly confused about how the additional biographical facts connect to Turner or the painting. Some trimming of this excess may help streamline the points and connections May is trying to make. However, in many of the examples, the author’s digressions, as lengthy as they are, circle back around to make a point about the painting or Turner, such as in the case of his discussion of the sublime; which at first seems like an over explained idea, but then consistently reemerges throughout the examination of the life and players of the painting. Although at times May can delve a little too in-depth for the average reader, overall, he provides an accessible evaluation of the history and life of J.M.W. Turner’s The Slave Ship and those men directly connected to it, that even the most historically or artistically challenged reader can relate to, enjoy, and understand. Michele Panico East Carolina University
- 1 reply
-
- 2
-

-
Cutter Cheerful 1806 by Maury S - 1:48 - POB
Chuck replied to Maury S's topic in - Build logs for subjects built 1801 - 1850
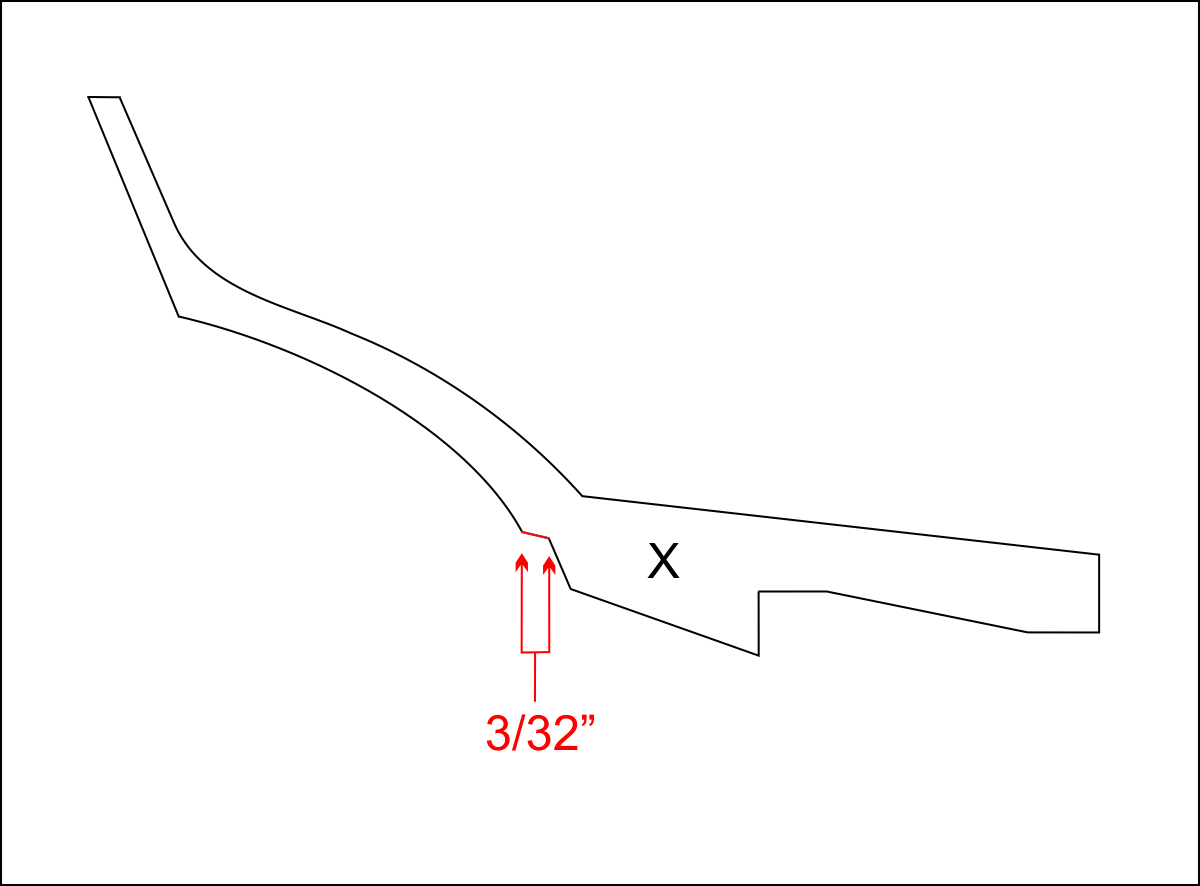
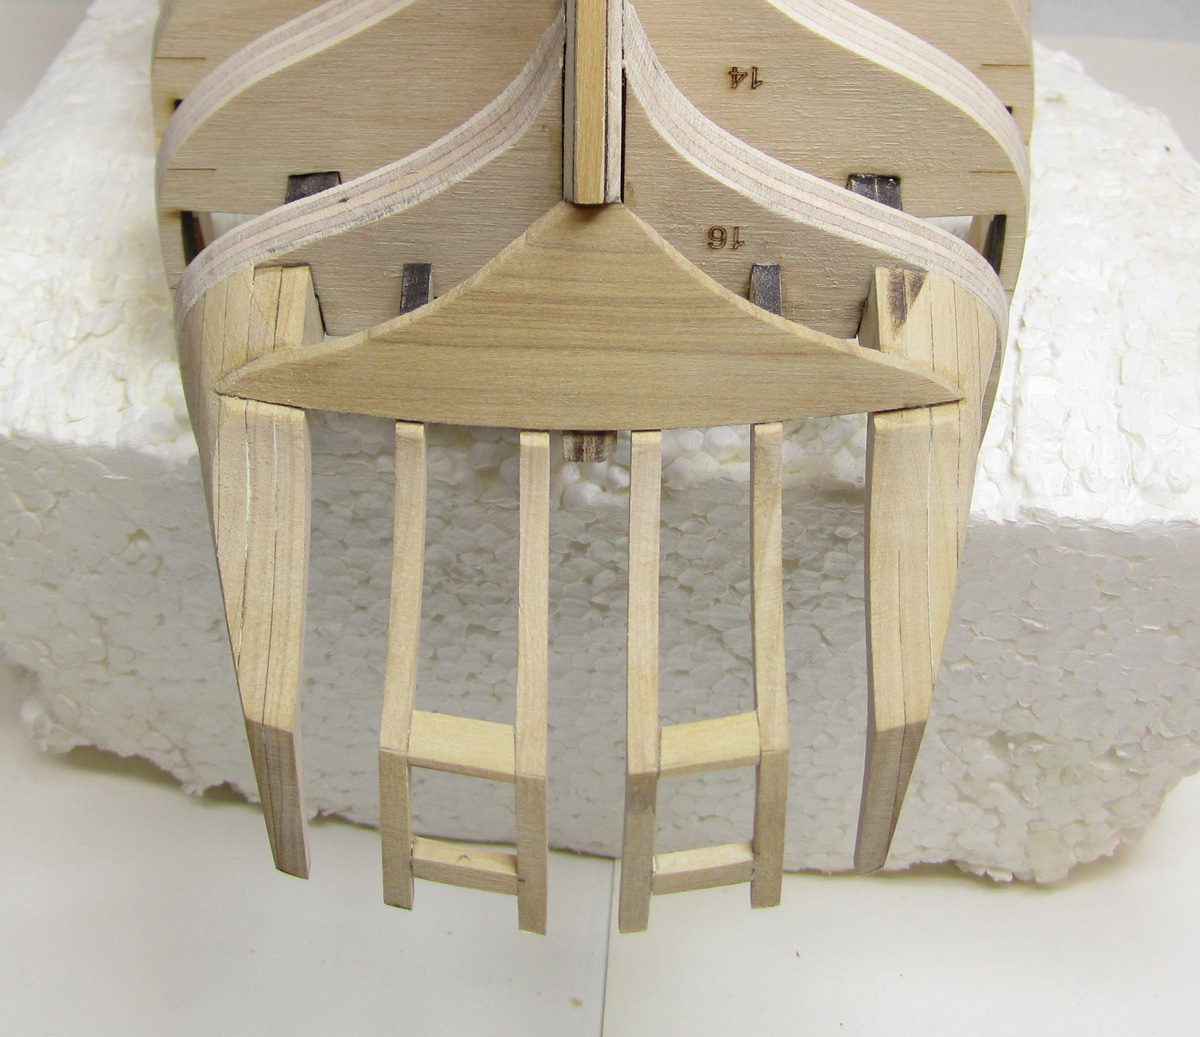
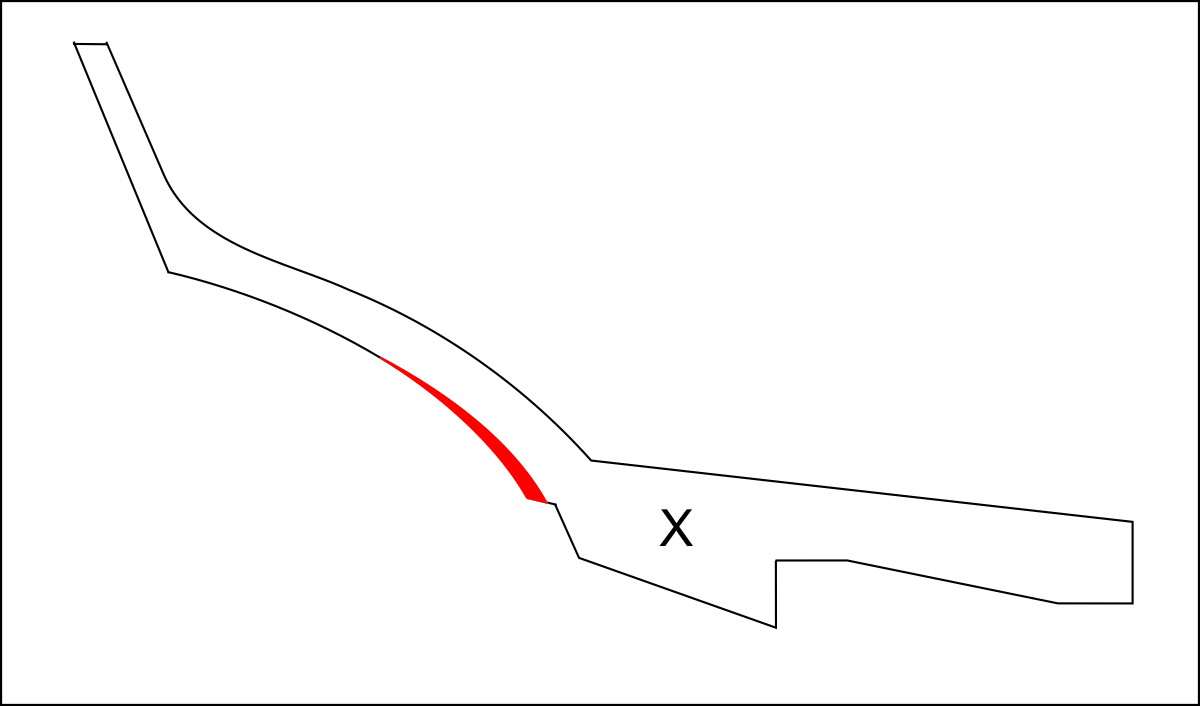
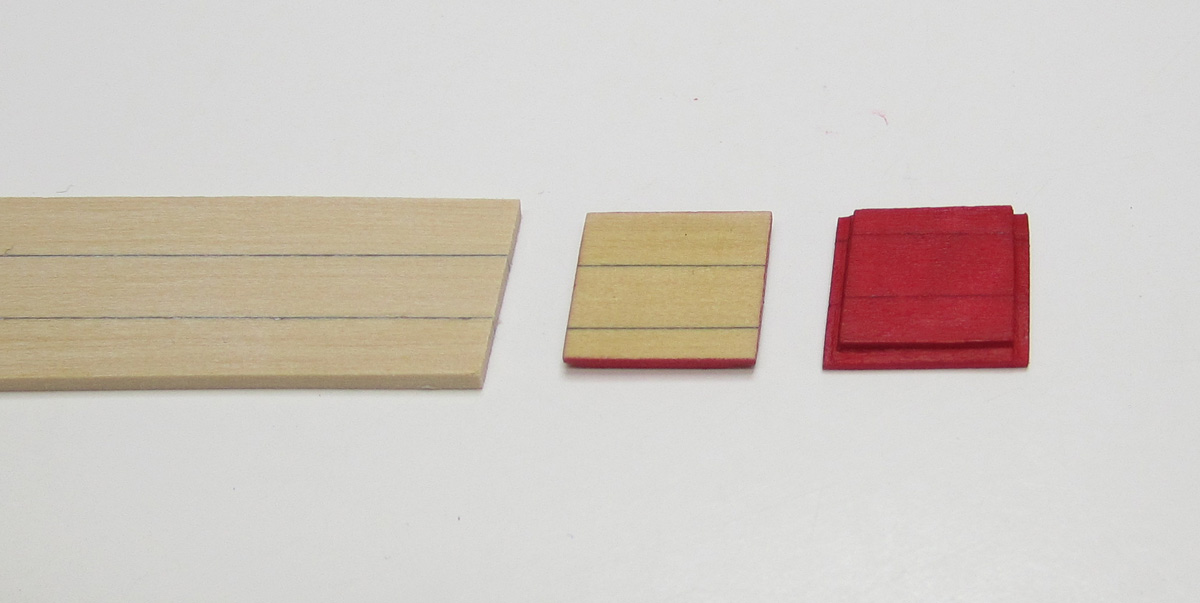
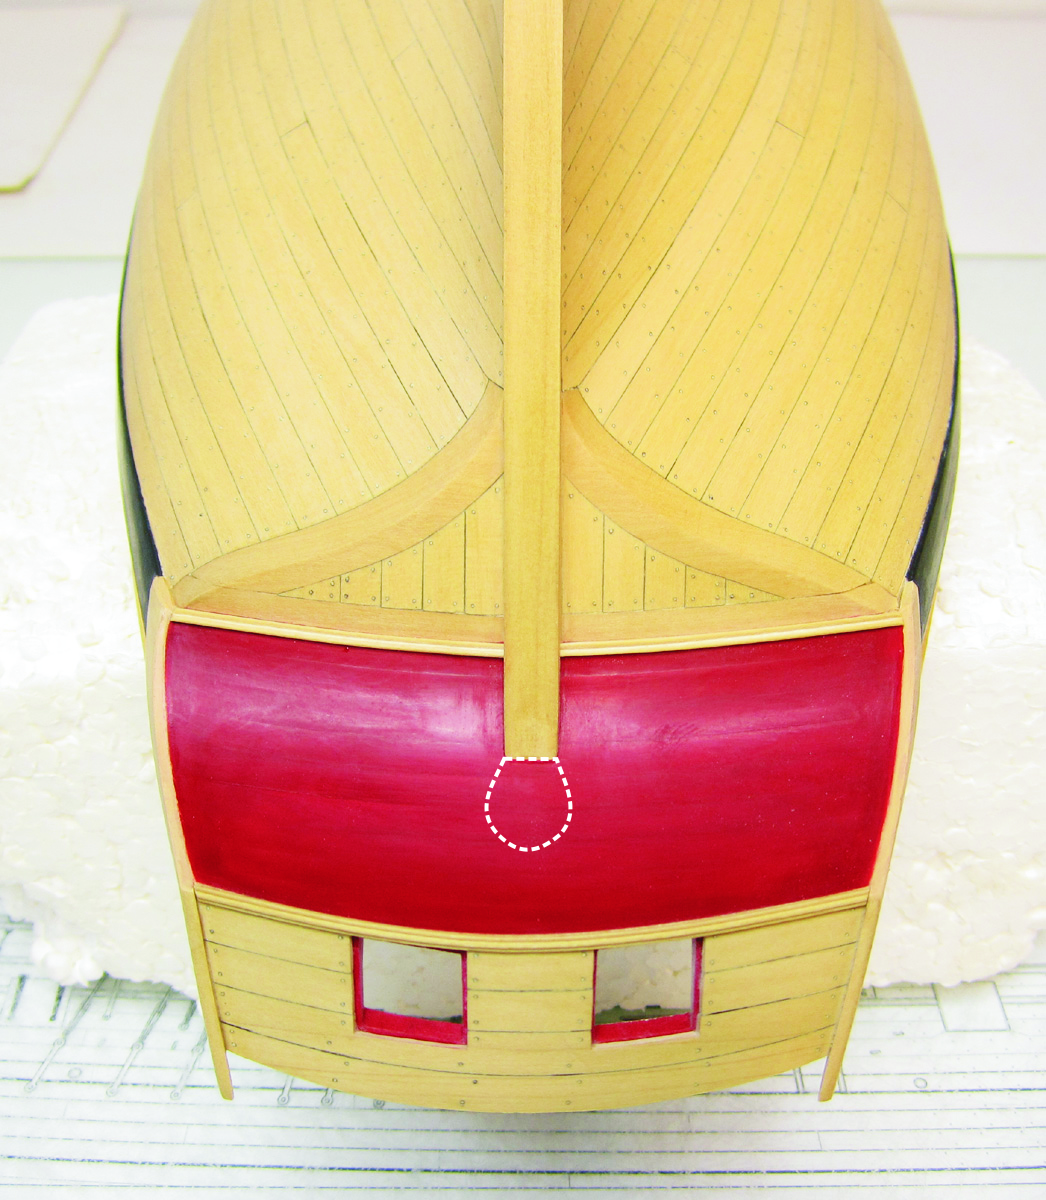
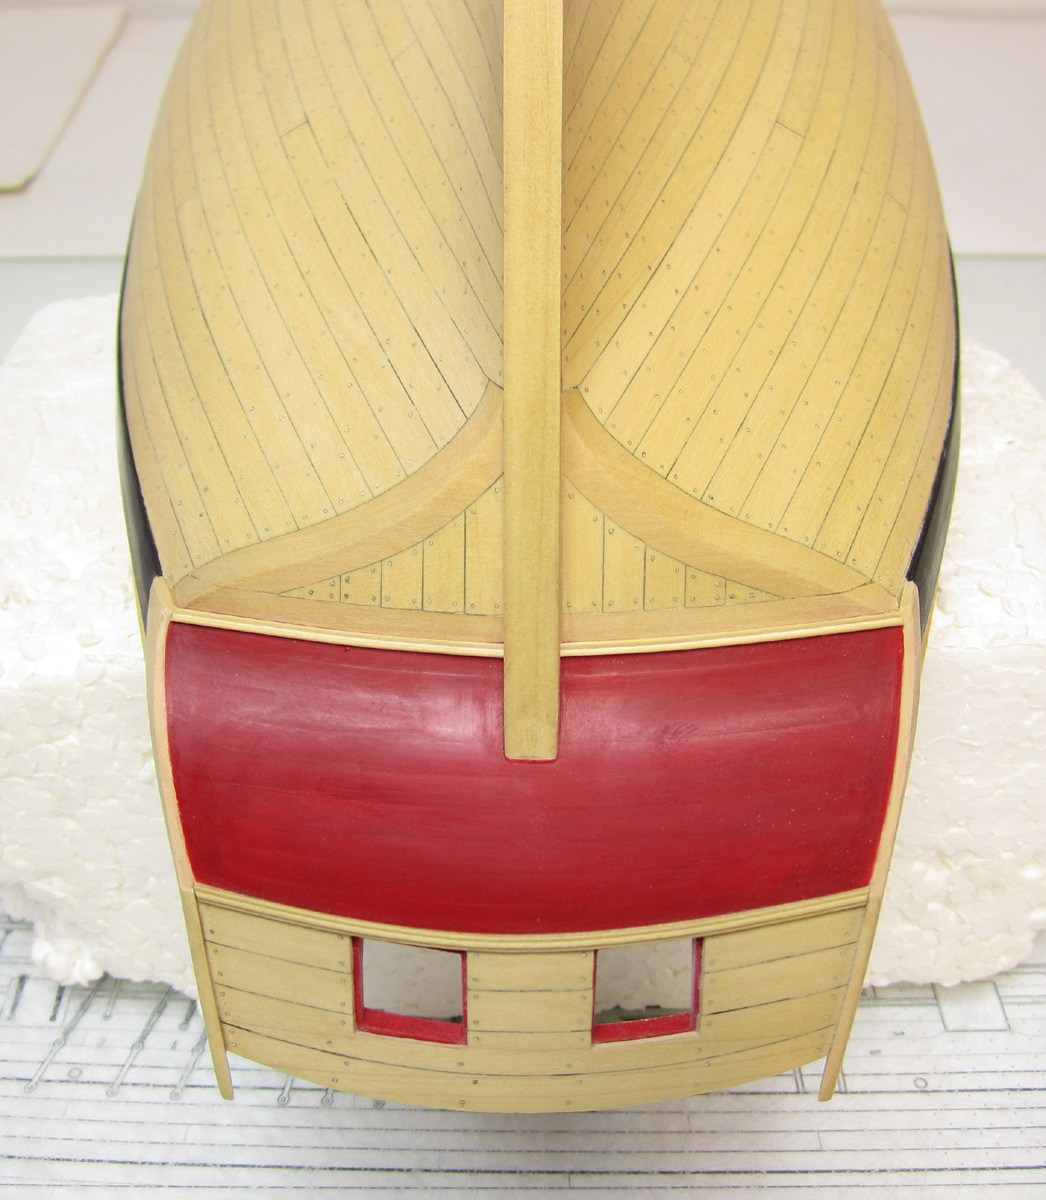
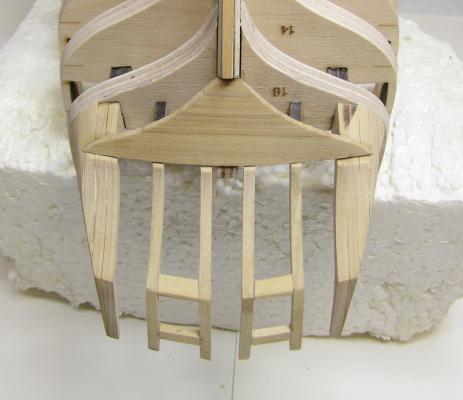
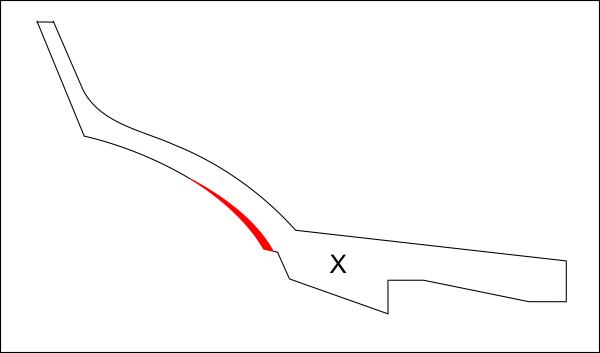
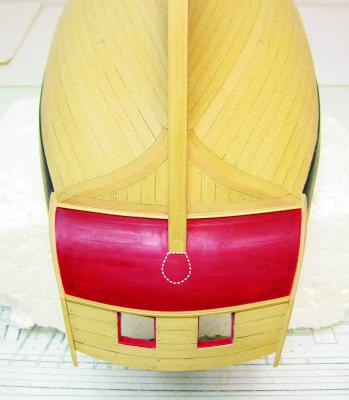
Maury....look at how much of a lip/ledge remains at each stern frame after installing the 1/32' thick square tuck piece. You can see how much more of a lip on each stern frame there is in comparison to yours below. It looks as though the notches in your stern frames weren't deep enough. That notch should have been 3/32' long. See the line in red below. After putting a 1/32" thick sheet for the square tuck you should have a ledge remaining of about 1/16". A little less is ok. Its hard to tell in your photos but if this is not the case you need to remove that square tuck 1/32" sheet and make your notches deeper. OR build up your frames if they were just sanded down too much on the bottom of the counter. Other than that it looks great. I would recommend just building it up as it looks like over sanding. See below in red.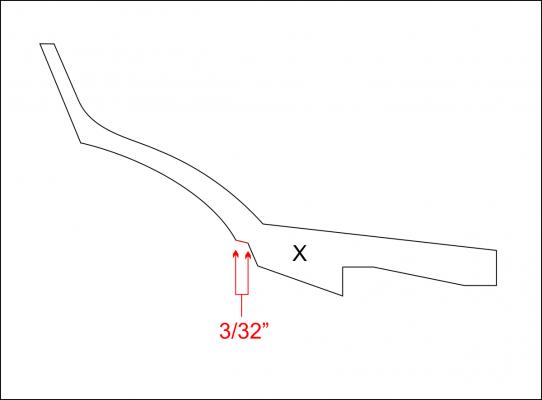
-
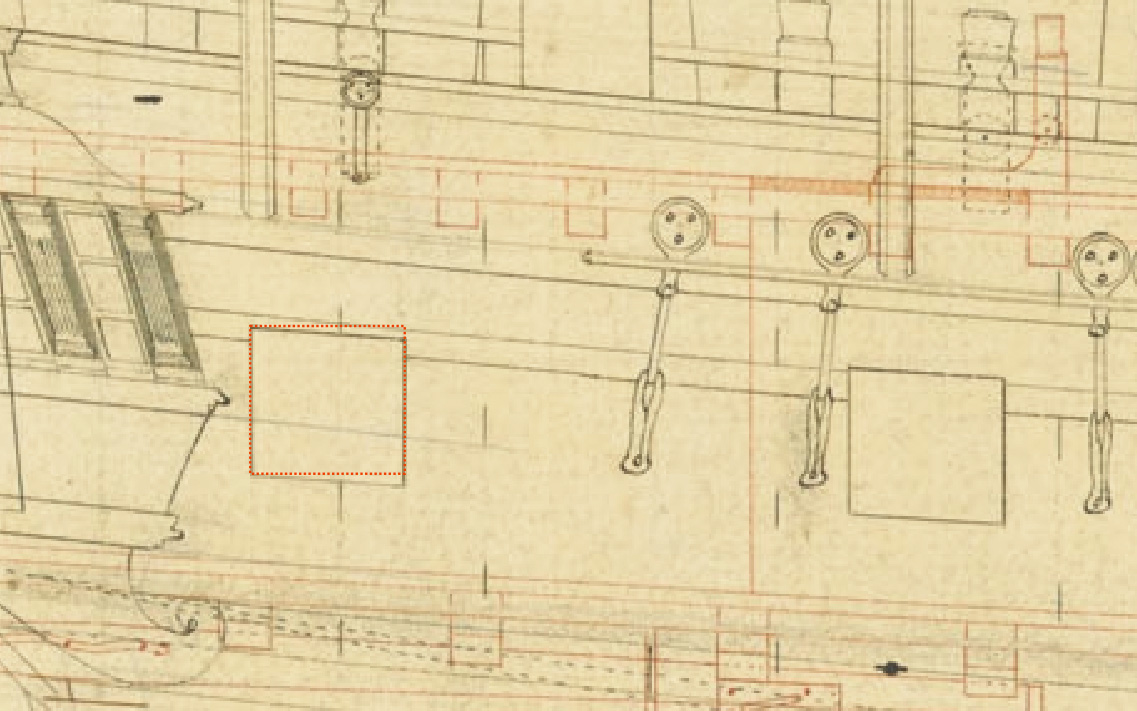
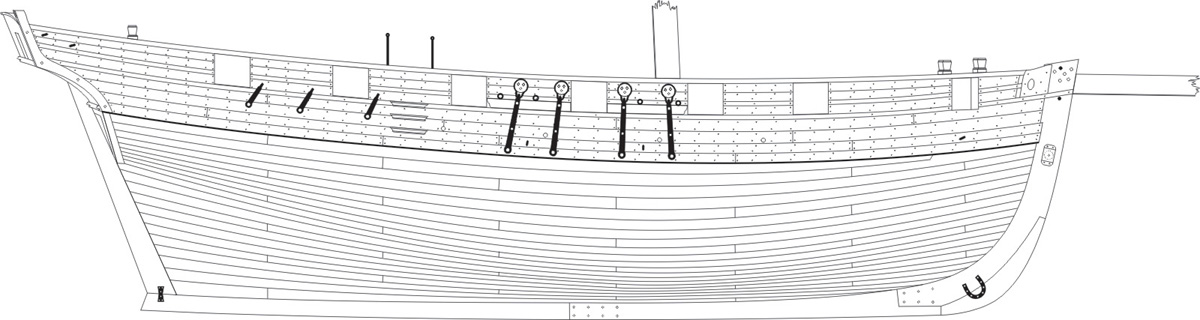
Correct!!! Bottom of ports follow the run of the deck. Sides are vertical and straight with teh frames. Port lids will be the same. Typical mistake seen on kits. Not all ports are completely square at all. Take a look at this original draft. The red dashed square is at right angles. Note how the port is not. It follows the deck.

- 1,048 replies
-
- 21
-
-
- cheerful
- Syren Ship Model Company
- (and 1 more)
-
Yes....Just name and post your log. Then hit reply to post a new update. Anyone working on the model can post these updates in the same log. But it will be seen as a reply. But because its in the same one log it should be fine. The way its working now is the way it is supposed to work. Unfortunately you will have multiple people or members contributing. Unless of course you give everyone the username and password of one individual member and all of you use it when posting updates.
-
Therte was a ring bolt inside and a line was tied to it. This line was secured around a cleat inboard.
- 1,048 replies
-
- 3
-
-
- cheerful
- Syren Ship Model Company
- (and 1 more)
-
Please everyone send me a PM rather than use my log for sales stuff please. Or the traders and dealers section. I can certainly make them but this is probably the correct size as this is a small cutter. Scale is relative to the ship so you will need to give me measurements to be sure. Hiegth and width. Chuck
- 1,048 replies
-
- 2
-
-
- cheerful
- Syren Ship Model Company
- (and 1 more)
-
I would love to offer these hinges to folks but my issue is I wouldnt know how wide to make the straps and how long to make the straps for each individual model. I would have no problem cutting these for anyone as a custom order but first we must talk via PM so I am sure that I have created them the correct size and shape. For example, depending on the type of vessel and the period they could be drawn with many differnt contours. Some narrow towards the bottom and then have a fancy diamond shape. Some have a circular bottom. Others are plain and straight like on cheerful. I will make a post in the traders and dealers section with the criteria I would need to laser cut them correctly for folks rather than just making a bunch of generic hinges and guessing at the lengths and shape and widths. See this link.... http://modelshipworld.com/index.php/topic/10138-custom-laser-cut-gunport-hinges-from-syren-ship-model-company/ Chuck
- 1,048 replies
-
- 3
-
-
- cheerful
- Syren Ship Model Company
- (and 1 more)
-
Cutter Cheerful 1806 by Maury S - 1:48 - POB
Chuck replied to Maury S's topic in - Build logs for subjects built 1801 - 1850
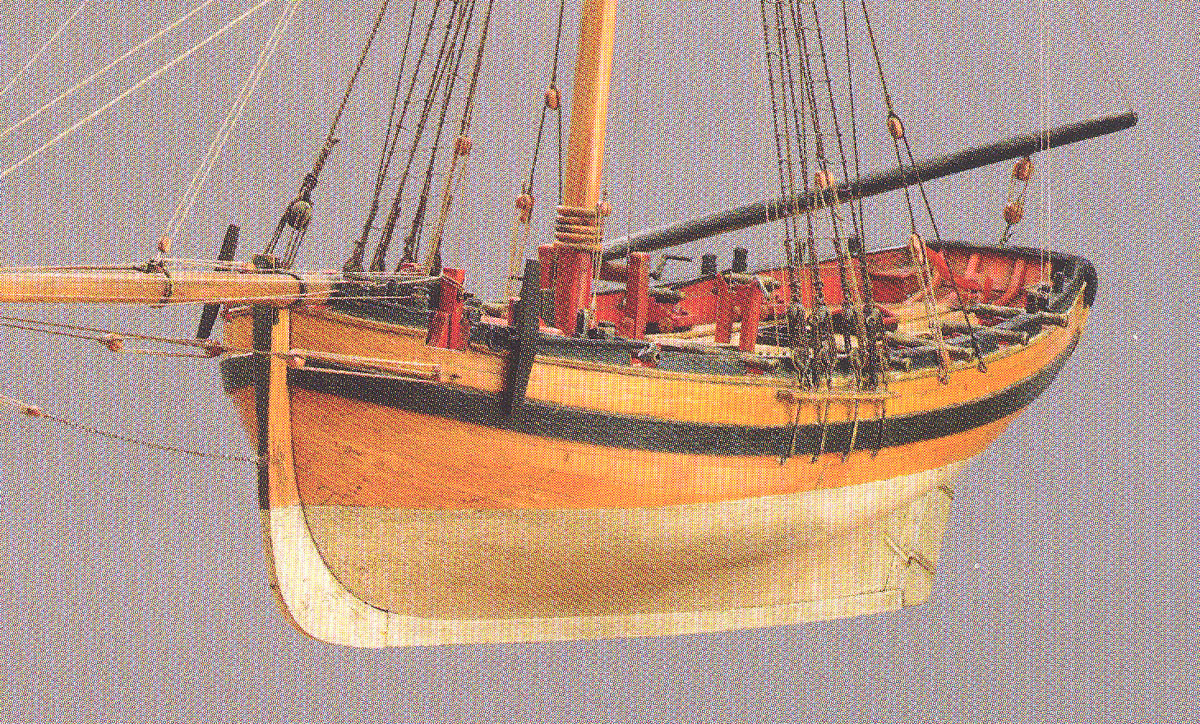
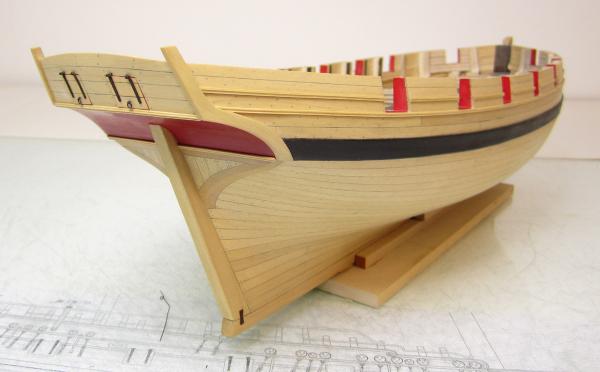
Inboard wont be planked so I wouldnt permanently add any blocks between the stern frames. You only want to see the frames when its all done. You can see that the stern is lightly planked and framed on this contemporary model of Surly. Also note that it is not plated but instead painted white with tallow. Hence the confusion about whether these small cutters were ever copper plated. Chuck
-
Echo by dvm27 - Cross Section
Chuck replied to dvm27's topic in - Build logs for subjects built 1751 - 1800
Thats looking really great Greg. Wonderful work!!! -
Old ships transporting horses and wagons???
Chuck replied to NAZGÛL's topic in Nautical/Naval History
Like this- 7 replies
-
- 11
-
-
Ian, is this what you were looking for? Let me know.

- 1,048 replies
-
- 15
-
-
- cheerful
- Syren Ship Model Company
- (and 1 more)
-
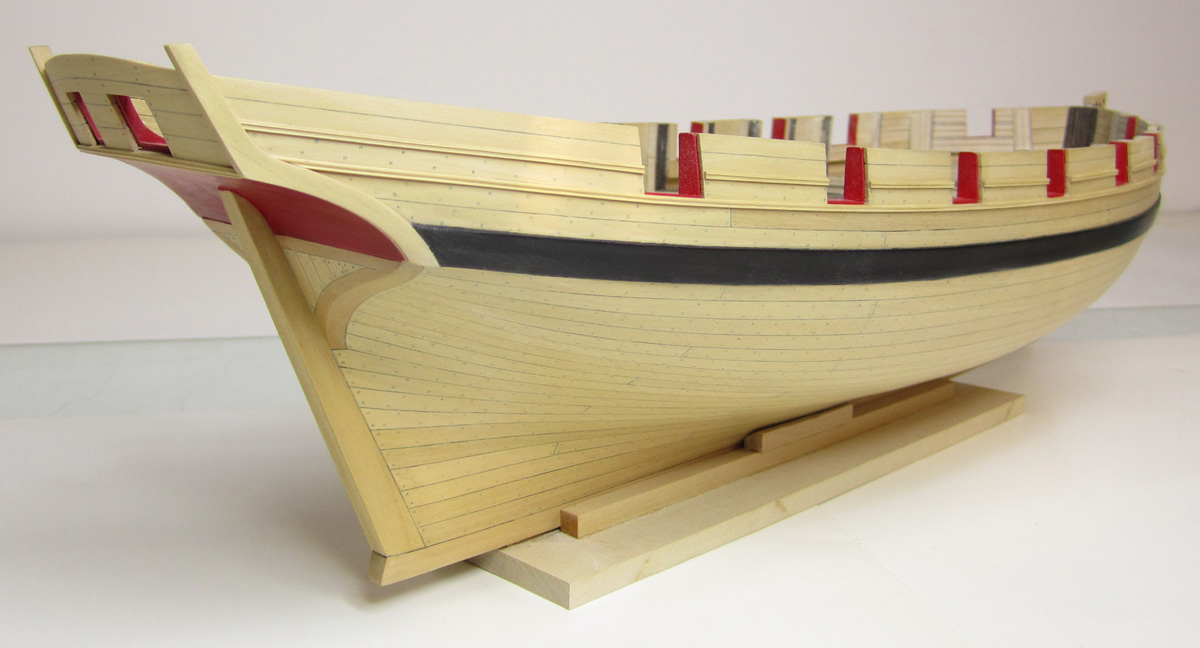
And to show how the port lids fit when installed. The blank lids without hinges were positioned first and while they were in....I glued the hinges in without there little pins. It was easier to line up the hinges visually that way. At least for me. They are actually working hinges as you can see. I am pleased with how well the laser board worked for this application. That is one less element I need to rely on photoetch for in the future. Chuck
- 1,048 replies
-
- 30
-
-
- cheerful
- Syren Ship Model Company
- (and 1 more)
-
Yes these will eventually be made available. I will include a small length of tubing in each package. The tubes are from albion. They are an english tube company and hobby shop. But an American distributor is right here. They are a fantastic company and the products as far as brass tube and rod etc is concerned. You will not fine better. http://store.spruebrothers.com/SearchResults.asp?searching=Y&sort=7&search=albion&show=100&page=1&brand=Albion%20Alloys and a video on how to cut the micro tube can be found here http://www.albionhobbies.com/precision-metals
- 1,048 replies
-
- 5
-
-
- cheerful
- Syren Ship Model Company
- (and 1 more)
-
I use Corel draw...Its the standard although any Cad program will work.
-
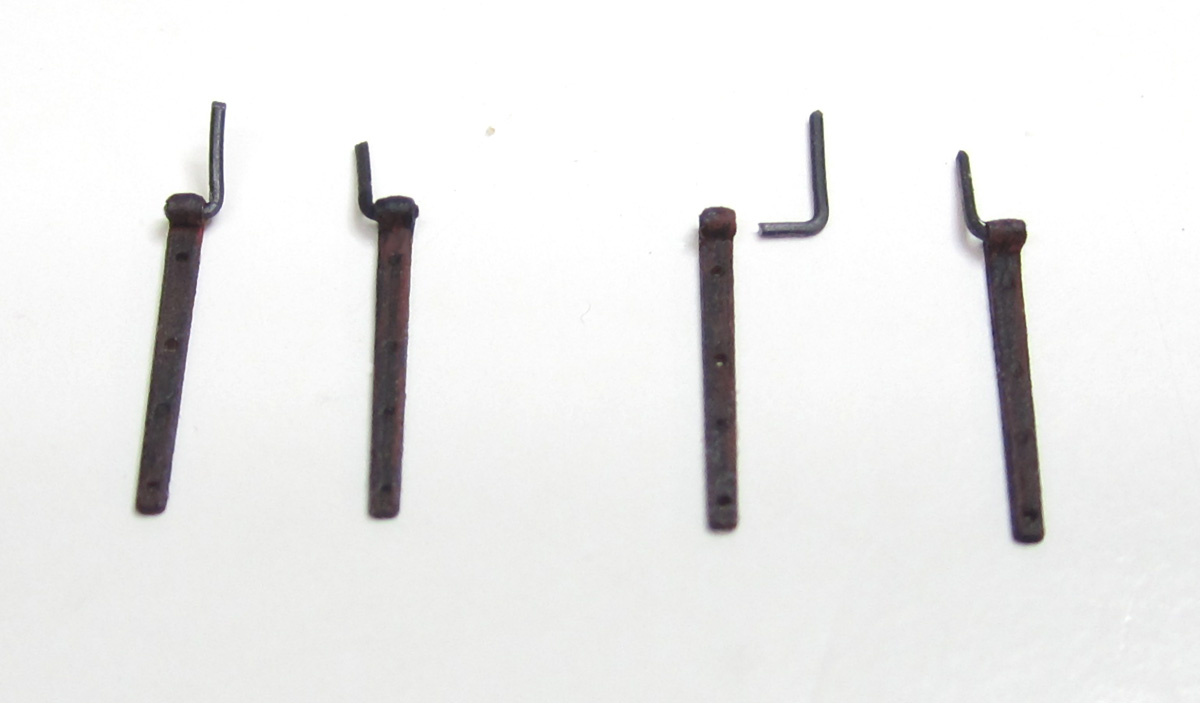
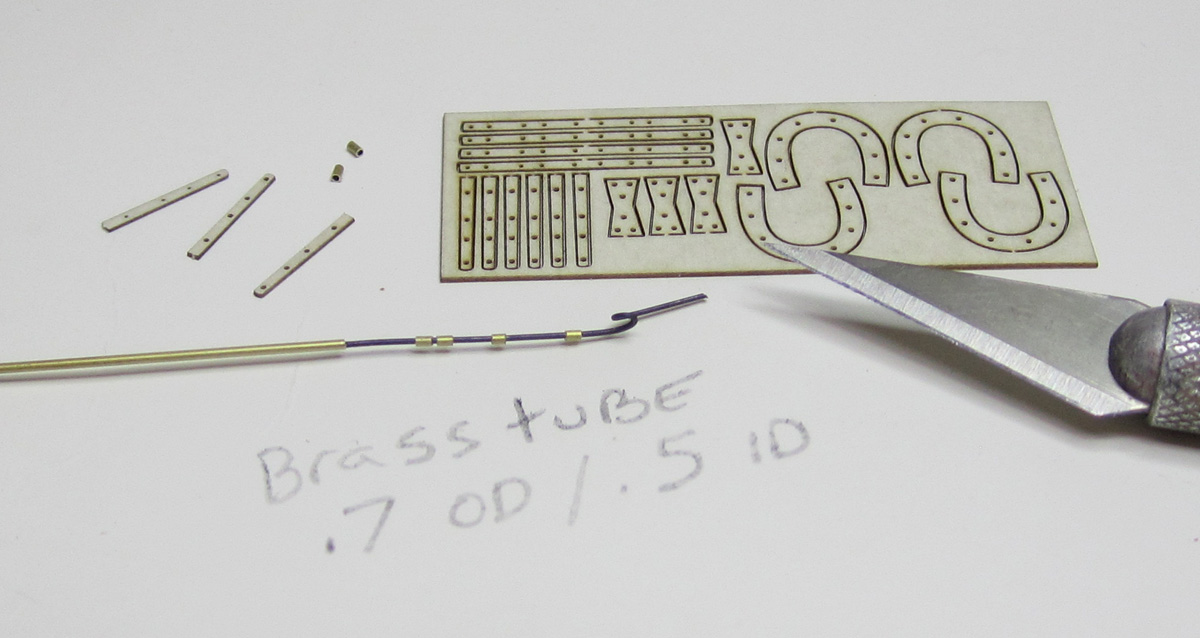
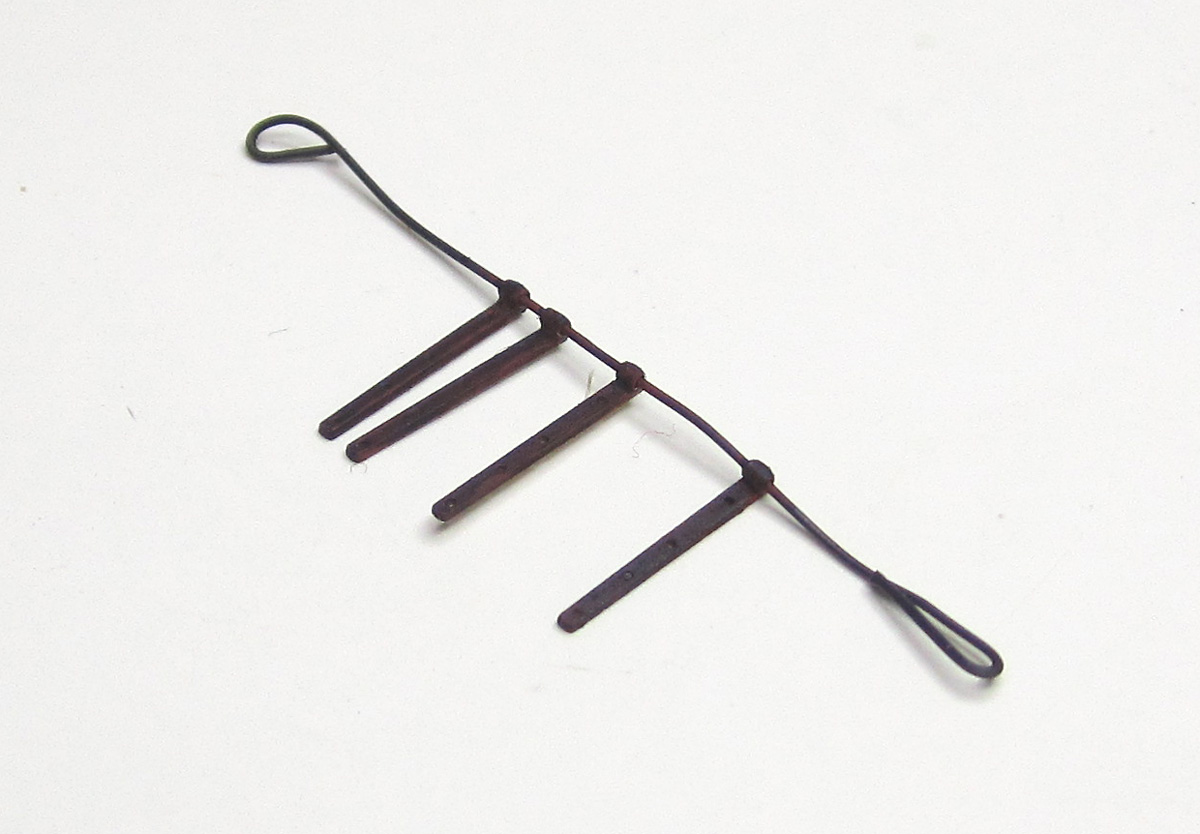
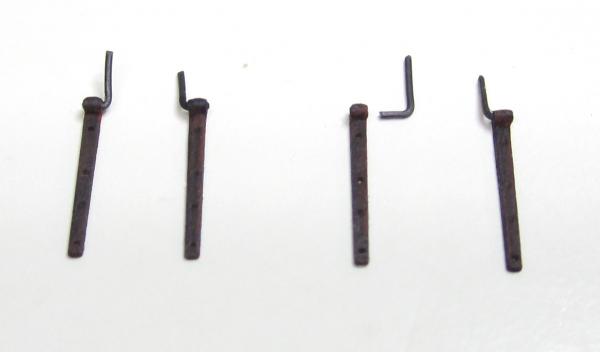
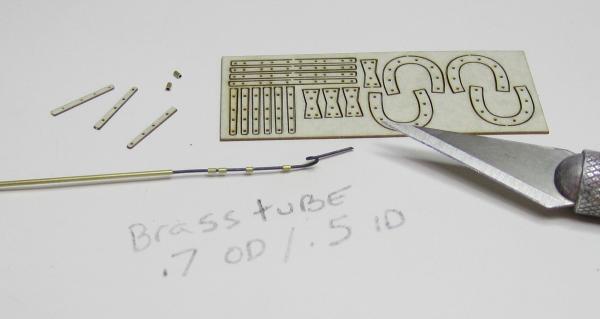
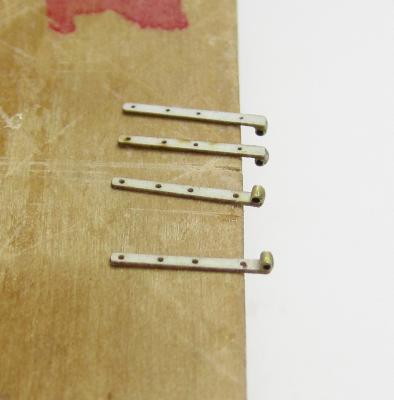
Working on the port lid hinges. Same material for the straps. The hinge part is made using a micro brass tube that is .7 mm O.D. and .5 mm I.D. To cut these you must take care. You just cant use a nippers because it will crush the tubing. So as shown below, you insert a piece of 28 gauge wire in the tube. Then take a sharp #11 blade and just roll it over the tube and it cuts a nice crisp piece perfectly. Be sure to bend the wire on the end and it will actually catch these little suckers. They are cut as long as the hinge straps are wide. Thats microscopic. Then you use CA to glue these tube sections onto the ends of the laser cut laserboard hinge straps. Its easiest to do this with the straps hanging over the edge of a block of wood. You can hold the strap with your finger while just the end hangs over the block. Dont be shy with the CA. Use a light drop on the end to secure it. Then add two more drops as successive coats after each dries. Turn it upside down with just the tube hanging over the block and you can sand the hinge strap into the tube so it wont be seen after painting. Holding the strap under your finger prevents the strap from bending. Its not as strong as brass. Once its glued to the port lid it wont matter. It will be plenty strong as only the tiniest portion will stick out above the top edge of the port lid. To small to bend. To paint them. place them on the wire so you can paint without having to hold them. Then ....small "L" brackets are made from 28 gauge wire which will create the hinge pin and secure the lid into the hull. Thats it!!! These will be used for the stern port lids. Chuck

- 1,048 replies
-
- 35
-
-
- cheerful
- Syren Ship Model Company
- (and 1 more)
-
Its like paying a ton of money right now for a hobby 3d printer. It would pretty much be a waste a money. This is usually used for the scrap booking hobby and is best for cutting paper and cardboard. Try cutting anything like basswood over 1/16" thick and you will run into problems. You would likely to cut through 1/16" boxwood at all. This is the same model often seen on EBAY and its made in china. Its not a good machine at all. In fact I think its dangerous. I have read horror stories about these cheap Chinese machines. Best to double the price and go for a 60 watt machine by a reputable maker. Its not a good machine at all. You could actually buy that same machine on ebay or through other sources for half that price. That is a rip-off if I ever saw one. See this http://www.ebay.com/itm/40W-CO2-Laser-Cutter-Engraver-Cutting-Machine-Support-Corel-Draw-W-Air-Assist-/201117615871?pt=LH_DefaultDomain_0&hash=item2ed38b46ff Its just a waste of money. I paid about $5500 give or take for my 60 watt laser and it can cut through quarter inch ply in one pass on 60% power. This $$ includes the laser cutter ....putting in a good exhaust system, and a dedicated electric line. Better focus lens and longer life laser tube. Larger cutting area. The machine is well built and I have never had any issues with it. The exhause is super important. I would never cut Styrene with it as listed on the MM site either. That stuff melts and the fumes are bad. My advice...stay far far away!!! Have a look \https://www.bosslaser.com/laser-machinery/entry-level-co2-lasers/boss-ls-1415-122-detail Chuck
-
Maury, Thanks, but ....No, not at all. Whats the point of that? In reality they were let into the keel by about half their thickness. At least according to Lavery and Goodwin. Its a detail that wont be seen at all and its a difficult task. These are just glued right on. They would still stand proud of the surface of the keel and stern post. Goodwin states that the fish plates and horse shoe plates were about 1" thick and let into the wood by 1/2". They were fastened with copper bolts from one side through to the other. What did they do later when hull's were plated? There is no real source as to how it was done. It makes sense that they would simply let them into the wood by the full thickness. But I have never found any hard and fast source about it. They werent let in completely on the Victory and she was plated. But I would like to add two points. Just so folks know where my head is at with such minutia. I get asked a lot about some of these details and this is actually one of them. I have no record that Cheerful was actually plated anyway to add another complication. I imagine at this time most ships were but I am not sure if it was reserved for larger vessels only. I have never seen a period cutter model plated and havent read that in general they were not, saying that I would not have plated this model anyway. In addition, that is such a small detail that I am not real worried about it either way. When I weigh the pro's and con's..even the best model builders have trouble doing this. I have seen some attempts by the best and it still looks sloppy to me. I applaud them trying but in reality dont understand why they would even try. I would rather bend a bit on the accuracy here if its actually the case and opt for a cleaner crisp look. Something that was regularly done by contemporary ship modelers. Not every detail has to be executed. Just my thoughts as I look for another excuse not to make any more rope today. So please excuse the longer response as I procrastinate a bit more. Sometimes I laugh softly to myself when I see the level of detail some builders insist on trying to put on their models. Just my opinion. Having said that. I made the mistake of adding up the number of treenails on this hull. Its about 6500. I drilled 6500 holes. So although I am a bit crazy as most non-modellers tell me, I think there are even a few others that have gone a bit further off the deep end. I am not there yet. So Maury..... long story short. Thats a ride on the crazy train I am not willing to take just yet. But knock yourself out and give it a try. Chuck
- 1,048 replies
-
- 15
-
-
- cheerful
- Syren Ship Model Company
- (and 1 more)
-
Wow...you made it home pretty quick. It was a pleasure to meet you in person Mike. Thanks for the kind words.
- 1,048 replies
-
- 3
-
-
- cheerful
- Syren Ship Model Company
- (and 1 more)
-
You are referring to the rudder port?.......No special technique really. I will just drill a pilot hole as large as my preferred needle file. Then I will slowly enlarge it to shape. Its interseting to note that the stern post should have extended through the counter as well. I designed it so another small piece will be glued inboard to fake it. No one will ever know. In fact it will look like you have the tightest planking joints around the stern post to allow it to pass through so nicely. Chuck
- 1,048 replies
-
- 11
-
-
- cheerful
- Syren Ship Model Company
- (and 1 more)
-
Yes indeed!! This will be used for the port lid hinges as well. I may add them this week just to see how they work. But it will be a while before I add them to the store. I want to include a few other elements like the gudgeons and pintles. Thats a little ways off yet. Sort of a metal-works package. Most of it anyway. But there will be some brass used where extra strength is needed. That wont be included with this. Chuck
- 1,048 replies
-
- 5
-
-
- cheerful
- Syren Ship Model Company
- (and 1 more)
-
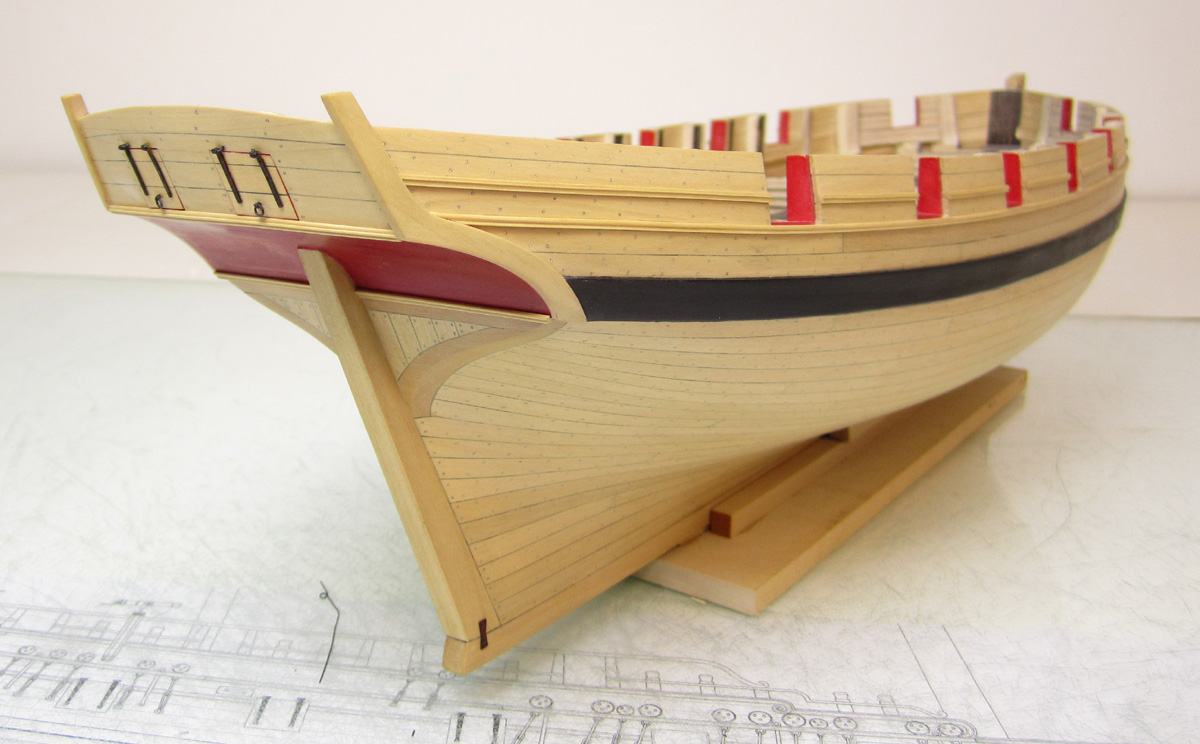
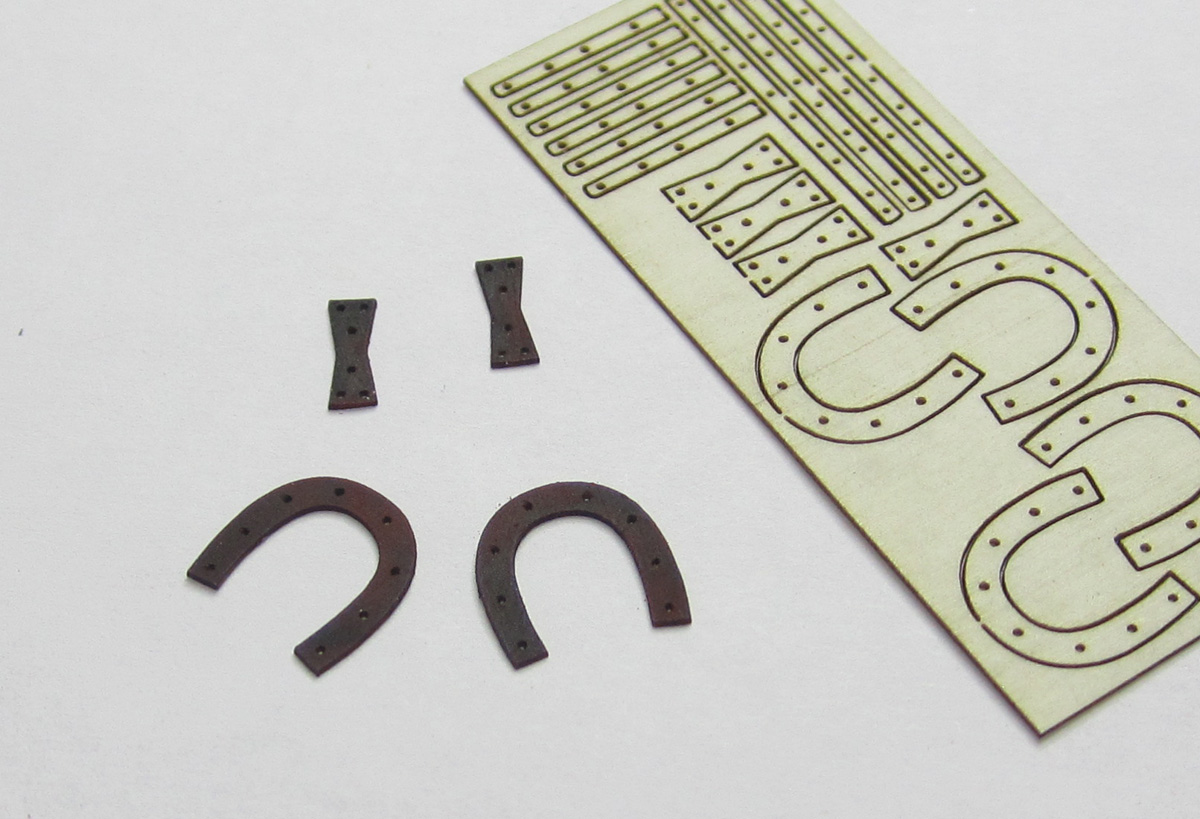
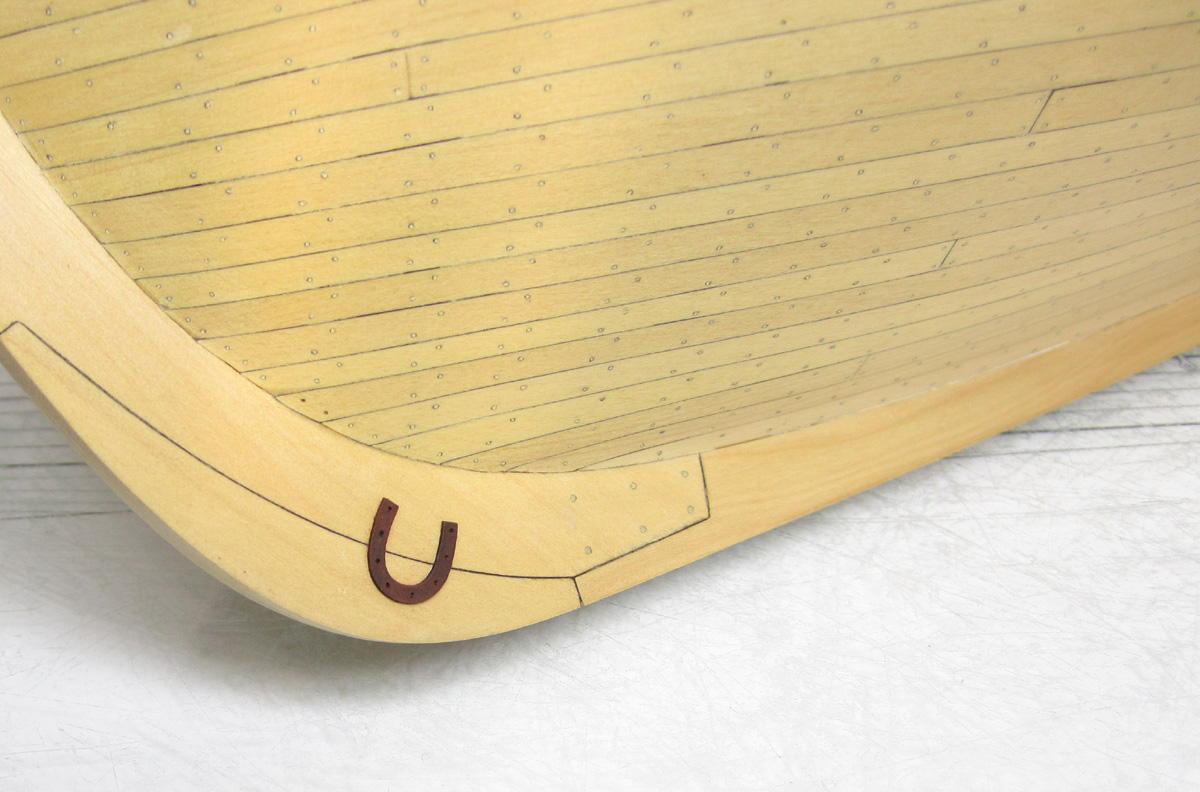
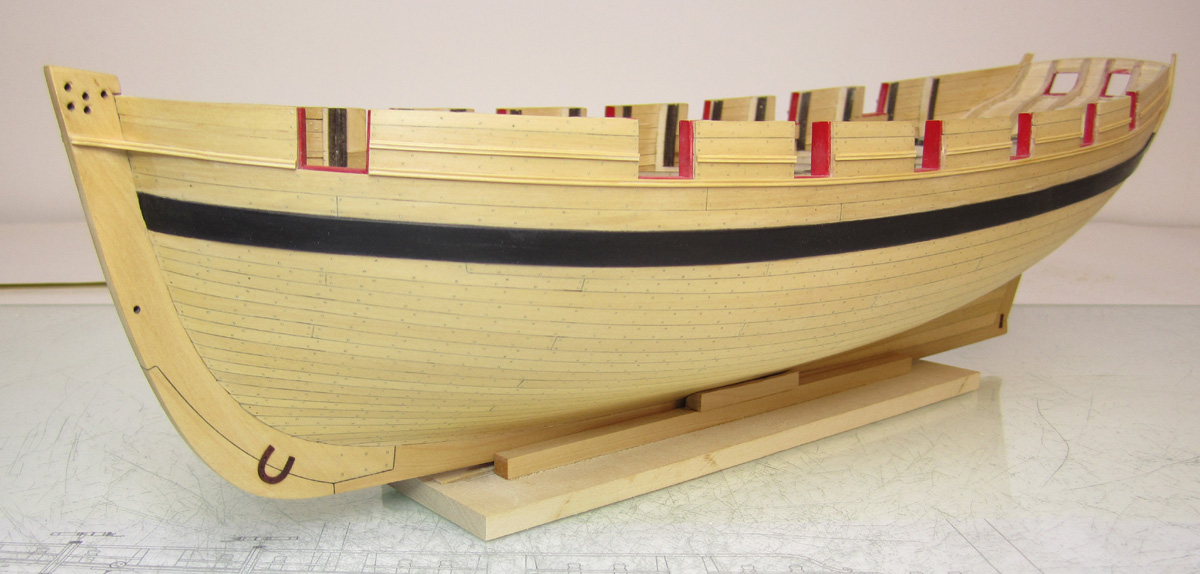
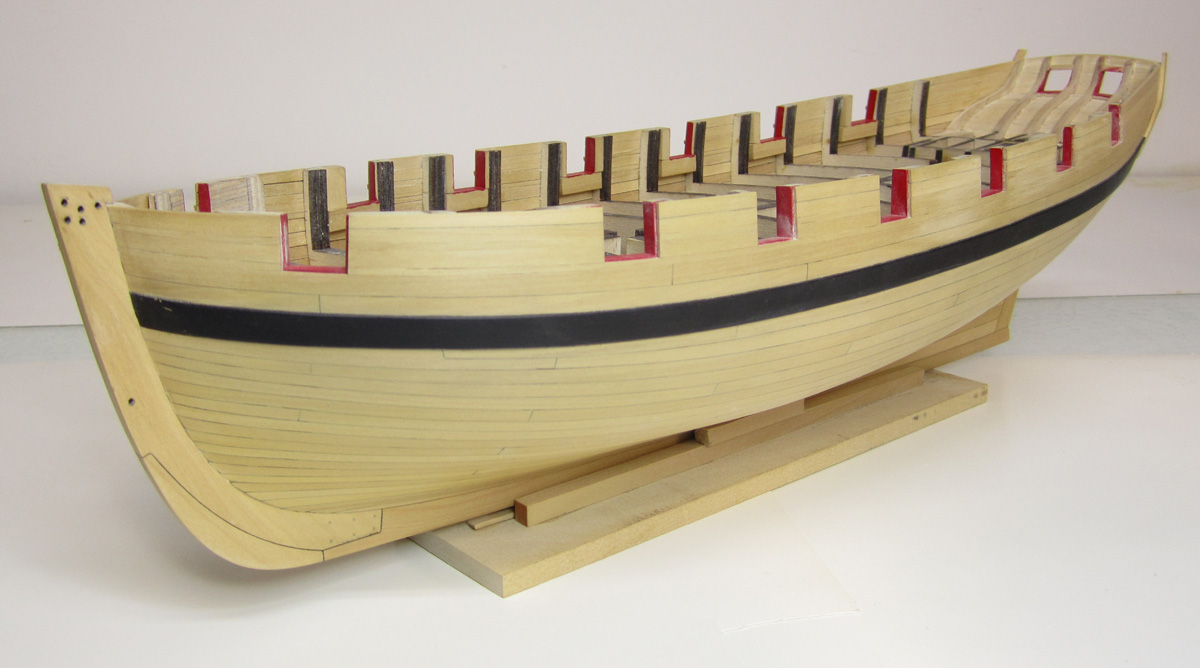
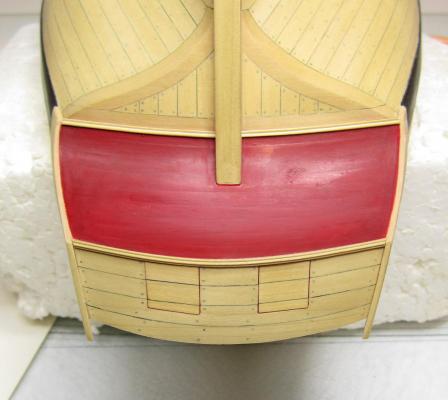
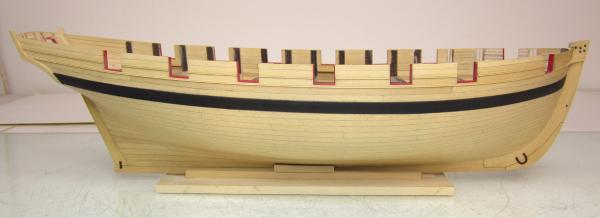
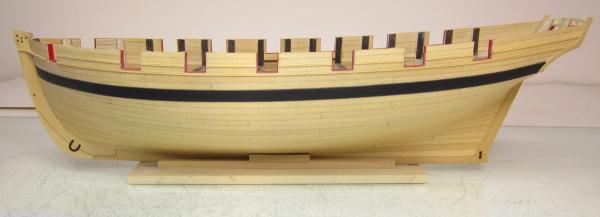
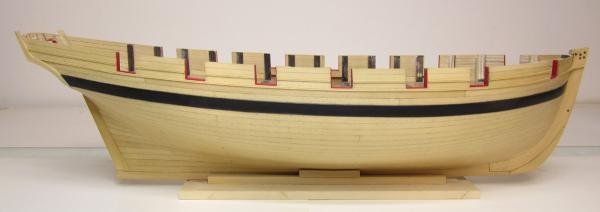
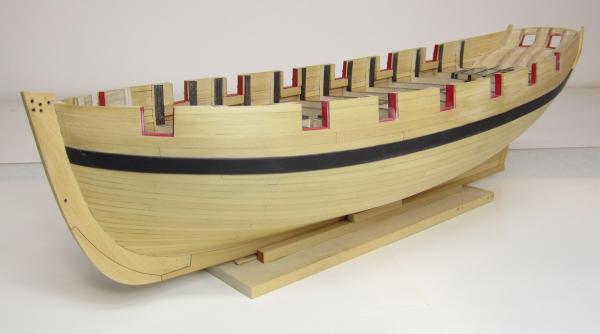
The port side is done and treenailed. I also made the horse shoe plates for the stem and keel plate at the stern. These were laser cut from laserboard. I painted and glued them on. They have little holes cut through them as you can see. The beauty of that is after gluing them with yellow glue and placing them on the model....a little bit of glue seeps through the holes and forms a nail head. But if you dont want to do that, you can drill through the holes with a #78 bit and insert some 28 gauge wire as bolt heads. ....Or just leave it as is. I will be drilling and inserting the wire as bolt heads later on. Also all of the fancy molding is in position that I want to add at this point. Now its time to thin down the bulwarks inboard. FUN ....FUN!!! Chuck


- 1,048 replies
-
- 39
-
-
- cheerful
- Syren Ship Model Company
- (and 1 more)
-
For those of you who have never seen a complete issue of the Journal.....and if you are considering joining as a full member of the NRG; Click Here to go to the page that talks about the Journal. You will get four issues per year with your full membership. At the bottom of the page I have provided a link so that you can download an entire issue to check it out. See what you are missing!!!
-
Constellation hammock cranes and color scheme.
Chuck replied to Jparsley's topic in Nautical/Naval History
Im moving this topic...be sure to read "how to start a build log" . Since this doesnt constitute a build log I will change the the title to name it properly and move it to the nautical research forum. Be sure to post in the appropriate forums and read the pinned topics for any and all info on what each forum is about. This is really important when posting on the site. Thanks Chuck ADMIN -
John That is looking lovely. Wonderful planking job.
- 745 replies
-
- 3
-
-
- francis pritt
- mission ship
- (and 1 more)
-
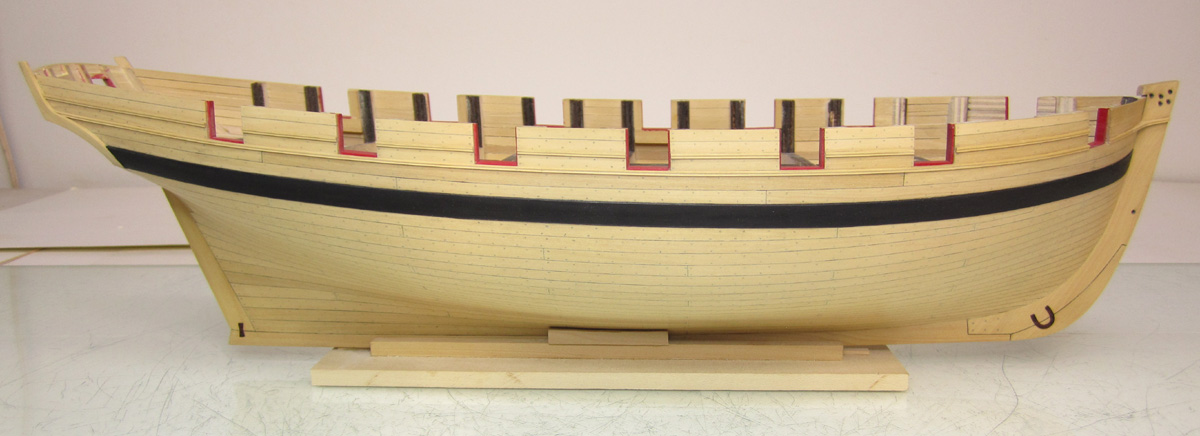
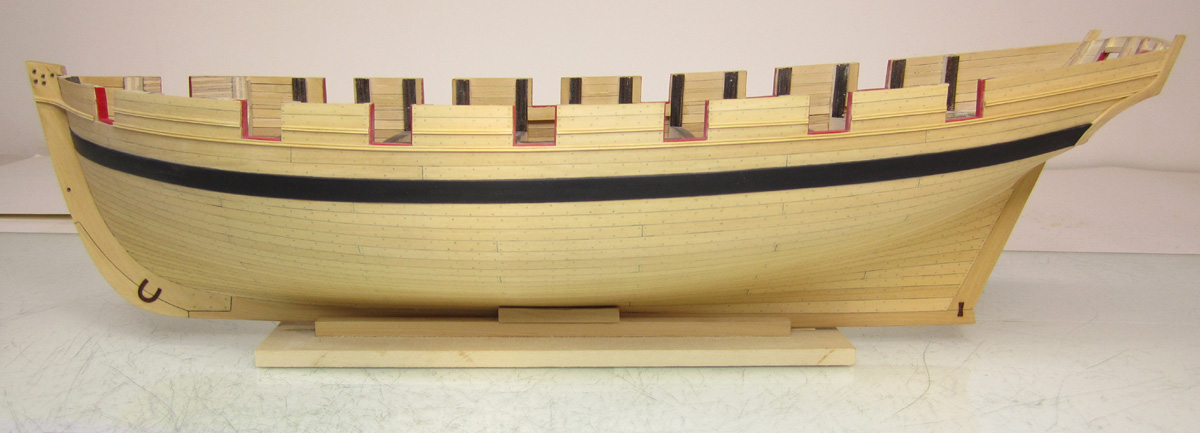
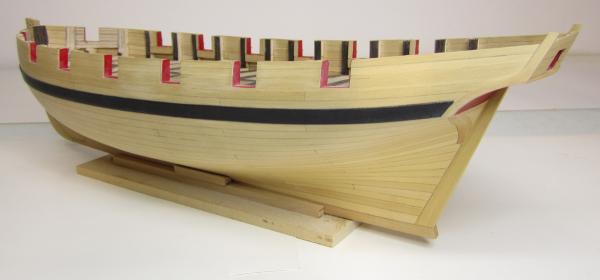
Just finished planking the port side. I added the stern post. Now to treenail the port side and add the molding... It feels good to have it all planked. It will feel even better when the treenailing is done. I was getting tired of seeing the hull without its stern post. I think it really makes a difference at this point. At least from the starboard side.


- 1,048 replies
-
- 44
-
-
- cheerful
- Syren Ship Model Company
- (and 1 more)